
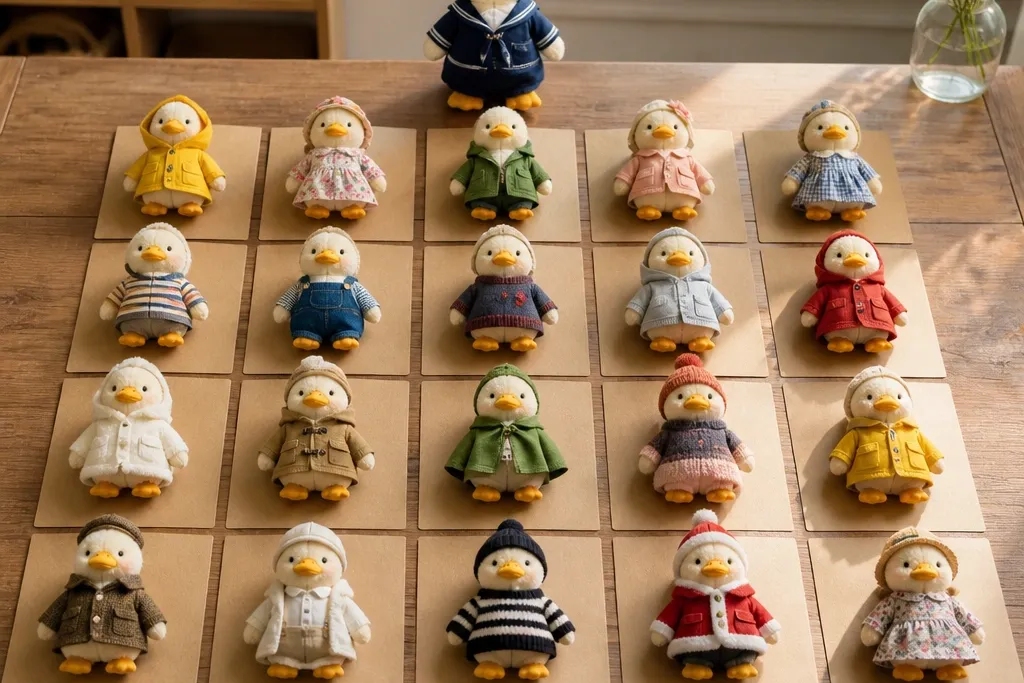
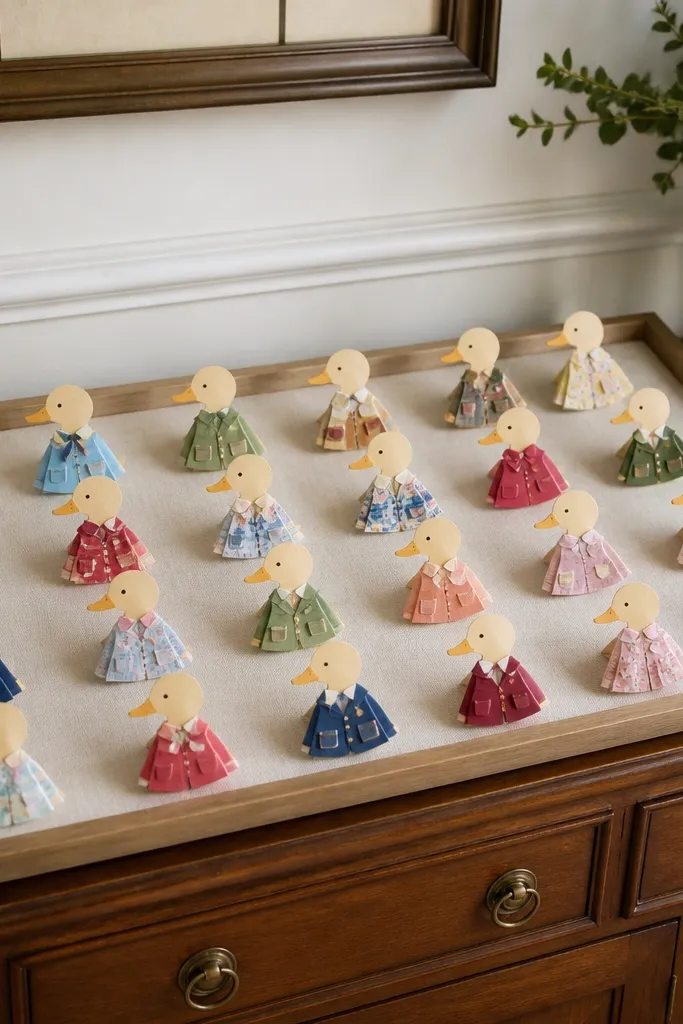
1. Crisp Navy Sailor Jacket
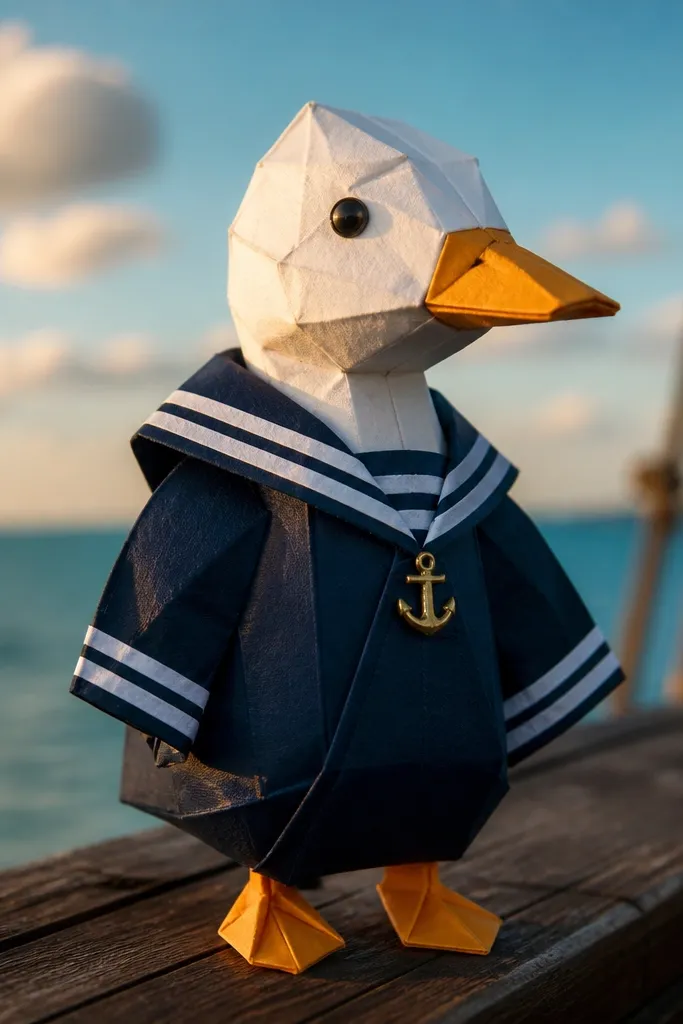
Cut a jacket front and back from navy cardstock using your duck’s torso width as the maximum — leave 2-3 mm clearance at the sides so it doesn’t buckle. Score the center seam and fold the front edges inward, then glue the shoulders first so the collar forms a clean V. Add two white stripe bands across the sleeves and chest using strips cut 6-8 mm wide. Finish with a small anchor badge from white paper layered over a navy circle. Attach by taping the inside back seam to the duck’s upper body so the bottom hem stays free.
This sailor jacket is the kind of outfit that makes a paper duck look styled instead of dressed. The navy base gives you instant contrast, and the white stripes create the “fabric” illusion because they sit on a crisp fold line. Add a tiny anchor badge so the design reads even when the duck is small in frame. It works year-round because you can swap the accessories — keep the jacket, change the hat or collar scarf. Build it with thick cardstock so the collar holds its shape when you tilt the duck for photos.
Skip thisDon’t glue stripes directly over a sloppy seam — misalignment shows immediately in close photos.
Editor's notePress the folds under a ruler for 30 seconds before gluing; it keeps stripes straight.
2. Sun-Ready Yellow Crochet-Style Dress
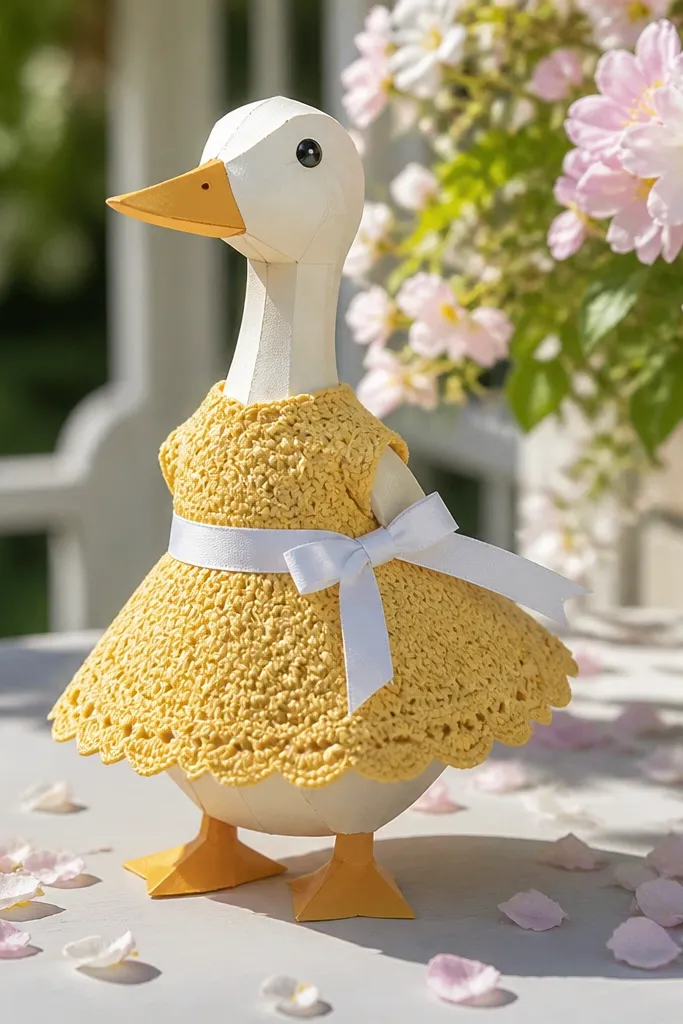
Cut a dress front and back from yellow cardstock, slightly flared at the bottom so the hem doesn’t look like a rectangle. Create the crochet effect by cutting scallop strips — about 8-10 mm tall — and gluing them in rows along the skirt edge and bodice. Add a belt by cutting a 6 mm wide strip of white paper, then glue it around the waist and fold the ends to look like ribbon tails. For sleeves, use short cap sleeves from the same yellow cardstock and glue only the top edge to avoid bulk. Attach by placing double-sided tape at the back waist seam so the skirt hangs straight.
A crochet-style dress is an easy way to make paper look textured without expensive supplies. Yellow reads bright in summer photos, and the scalloped hem gives you that handmade charm people expect from paper crafts. A white ribbon belt makes the waist line obvious, which helps the outfit feel intentional rather than like a flat paper sheet. This one also works in spring and early fall when you pair it with a warmer accessory like a cardigan or scarf. Use a patterned paper that has tiny dots or a lace-like print so the surface already looks “knit.”
Skip thisSkip floppy paper for the dress base; it collapses and the skirt won’t read as a dress.
Editor's noteUse a craft knife for scallops; scissors make wobbly edges that look cheap fast.
3. Cozy Olive Parka With Faux Zipper
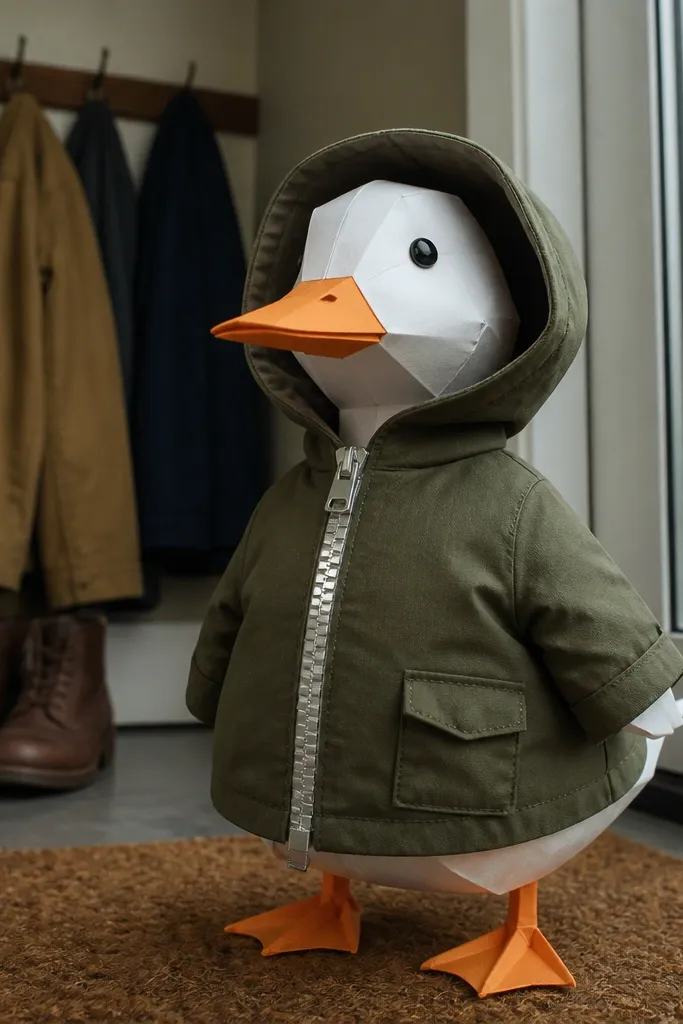
Cut a parka body from olive cardstock with a hood attached to the back piece. The hood should be wide enough to curve around the duck’s head — aim for 1-1.5 cm extra width beyond the head silhouette. Score and fold the hood edges inward, then glue only the inside seam so it stays hollow. Draw or tape a gold paper strip down the center to mimic a zipper track, then add two tiny “zipper teeth” dashes cut from thin black paper. Make pocket flaps by cutting two small rectangles with rounded corners and gluing them above the front hem. Attach with tape inside the back hood seam and under the front hem so the zipper line stays visible.
If you want one outfit that looks right in cold months and still feels stylish, this olive parka nails it. The hood frames the duck’s head, and the faux zipper line gives a crisp focal point. Olive also photographs better than bright greens because it doesn’t blow out in sunlight. Add a small pocket flap so the parka looks like a real garment, not a costume sheet. This design is forgiving for paper — thick cardstock makes it hold its shape even if your folds aren’t perfect.
Skip thisDon’t overbuild pockets; thick layers make the front warp and the hood won’t sit right.
Editor's noteUse a fine-tip black marker to draw zipper teeth; it looks cleaner than tiny cutouts.
4. Classic Red Trench With Paper Belt
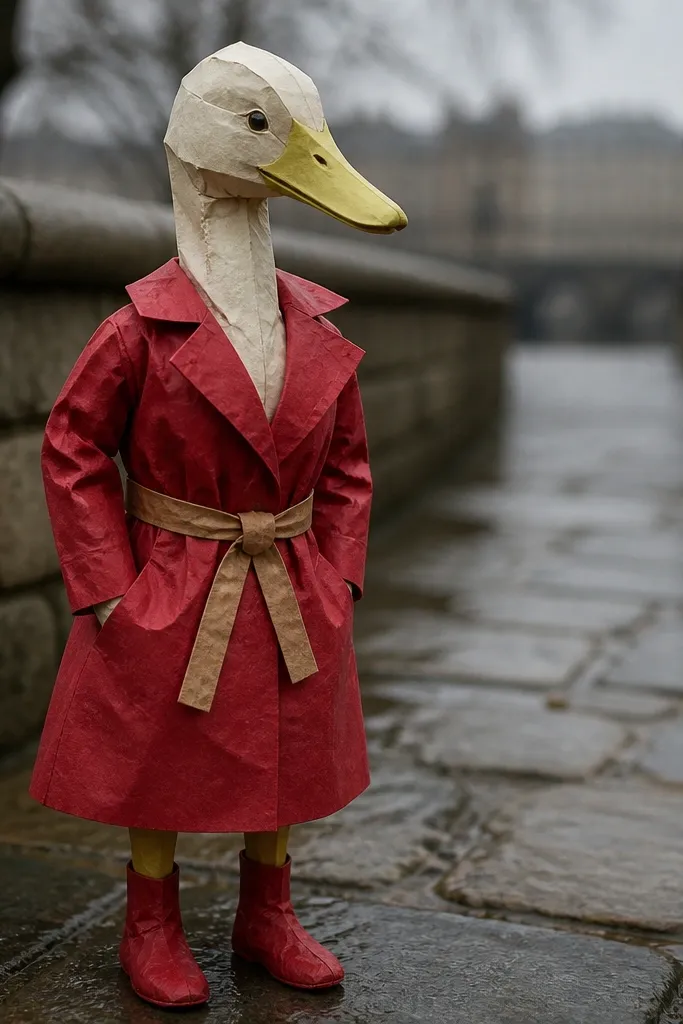
Cut a trench coat front with lapels by tracing a shallow V opening at the center. Use red cardstock and fold the lapel edges inward along a scored line for a sharp border. Add a tan belt strip about 8-10 mm wide; glue it at the back, then wrap it around the duck’s waist and finish with a small buckle made from a 5 mm square of tan paper. For the sleeves, cut simple tube shapes from red paper and glue the seam only on the underside so the sleeve edge stays flat. Attach at two points: back waist seam with tape and the collar underside with a small dot of glue.
A trench coat silhouette instantly reads “grown-up” even in miniature. Red gives you that strong seasonal punch for fall and winter, while the tan belt adds structure and breaks up the color. Lapels create a clean V shape around the neck area, which is what makes paper outfits look designed instead of random. The belt also gives you a practical attachment point for swapping — you can keep the coat, change the belt color for different moods. Build this one with solid cardstock so the lapels don’t curl.
Skip thisAvoid stretchy glue; it warps the lapel angle and the coat stops looking like a trench.
Editor's noteLightly sand the belt fold line with fine sandpaper so it wraps smoothly without cracking.
5. Pastel Floral Sundress
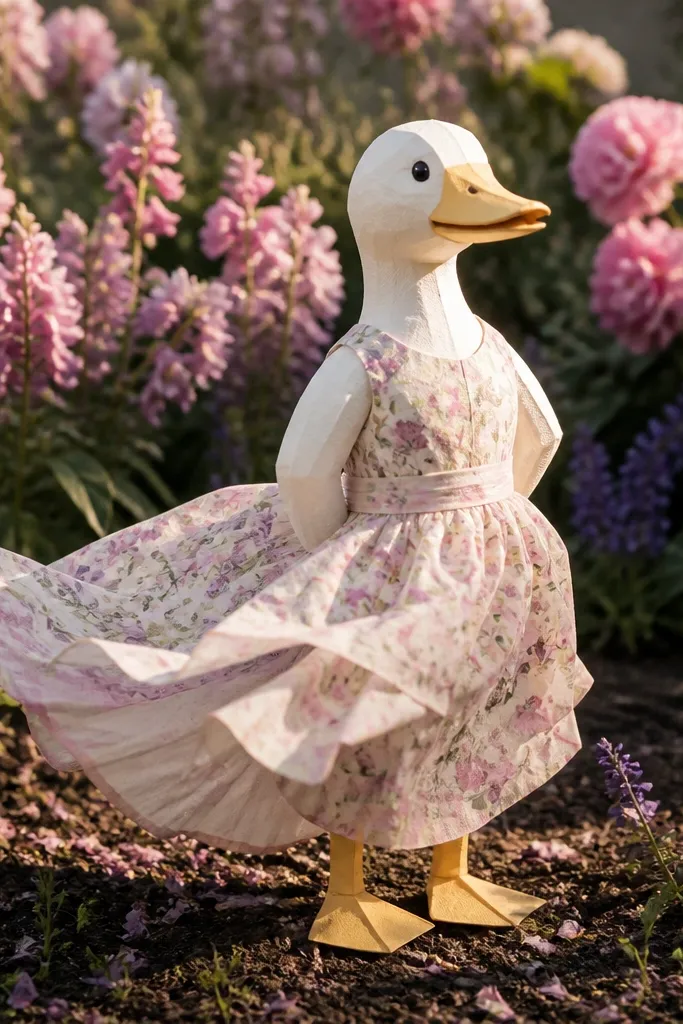
This sundress is your spring and summer workhorse because it’s all about color and movement. Pastel florals look soft in daylight, and the gathered skirt effect makes the paper duck feel like it’s wearing fabric instead of a flat shape. Keep the bodice simple and let the skirt do the talking — that’s the trick. Add tiny straps so the outfit reads as clothing, not a decoration. If you want the set to feel cohesive, choose florals that share one dominant color across several outfits.
Cut a bodice from solid pastel cardstock and add two narrow shoulder straps from matching cardstock. For the skirt, cut a semi-circle from floral patterned paper and gather it by making short relief cuts along the top edge, then folding those tabs inward. Glue the gathered tabs to the bodice top so the skirt sits fuller. Add a thin ribbon tie at the back by gluing one ribbon end inside and one end outside, then folding it into a neat knot. Attach the outfit by taping the bodice back seam to the duck and leaving the skirt free to curve.
Use a glue stick for the skirt tabs; it prevents paper warping compared to liquid glue.
Don’t make the skirt too wide; it will snag on the photo background and blur the silhouette.
6. Black Turtleneck and Skinny Scarf
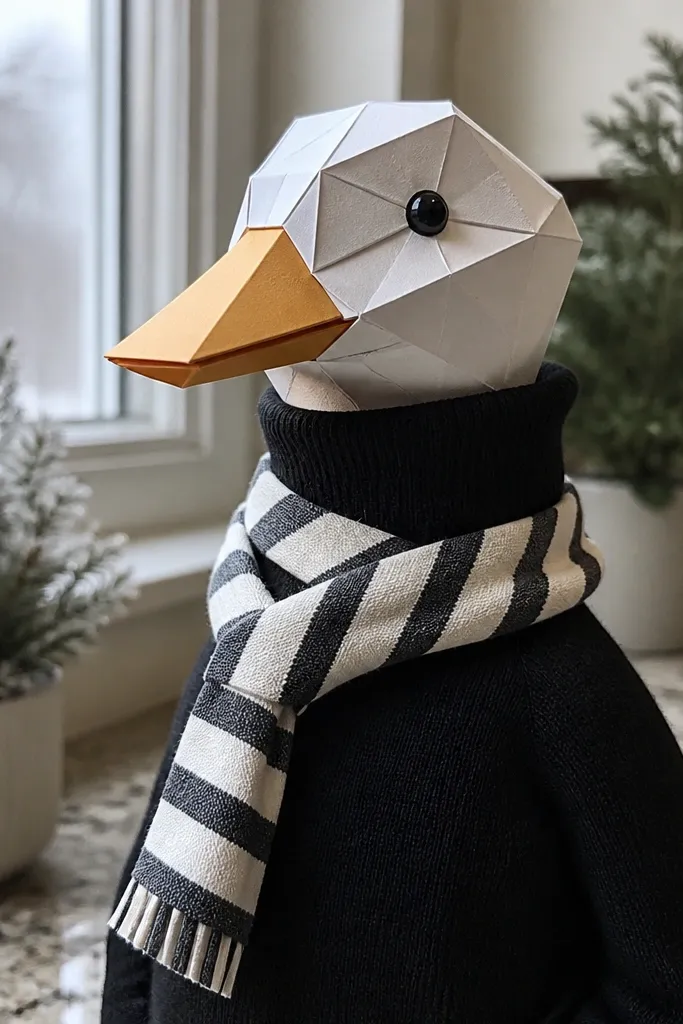
This is the cleanest “winter style” option because it uses contrast, not bulk. A black turtleneck frames the duck’s neck area and makes the duck look cozy without covering the body shape. The skinny scarf adds a diagonal line through the outfit, which looks great in photos because it breaks up the solid color. Choose a patterned scarf paper with tiny checks or micro-dots so it reads as fabric texture. This outfit also pairs well with almost any hat or outerwear if you want to build a layered look.
Cut a turtleneck from black cardstock: a U-shaped neck opening with a folded collar band. Score along the collar edge and fold inward so it stands up slightly. Cut a scarf strip about 4-6 mm wide and 6-8 cm long, then wrap it around the neck and glue only the ends. For the scarf knot, fold one end over itself and glue a small knot patch behind it. Attach by taping the turtleneck back seam to the duck’s upper body, keeping the collar open enough to avoid bulk.
Use double-sided tape for the scarf ends so you can adjust the diagonal before it sticks.
Skip thick scarf paper; a bulky scarf hides the duck’s neck silhouette.
7. White Button-Up With Tiny Navy Checks
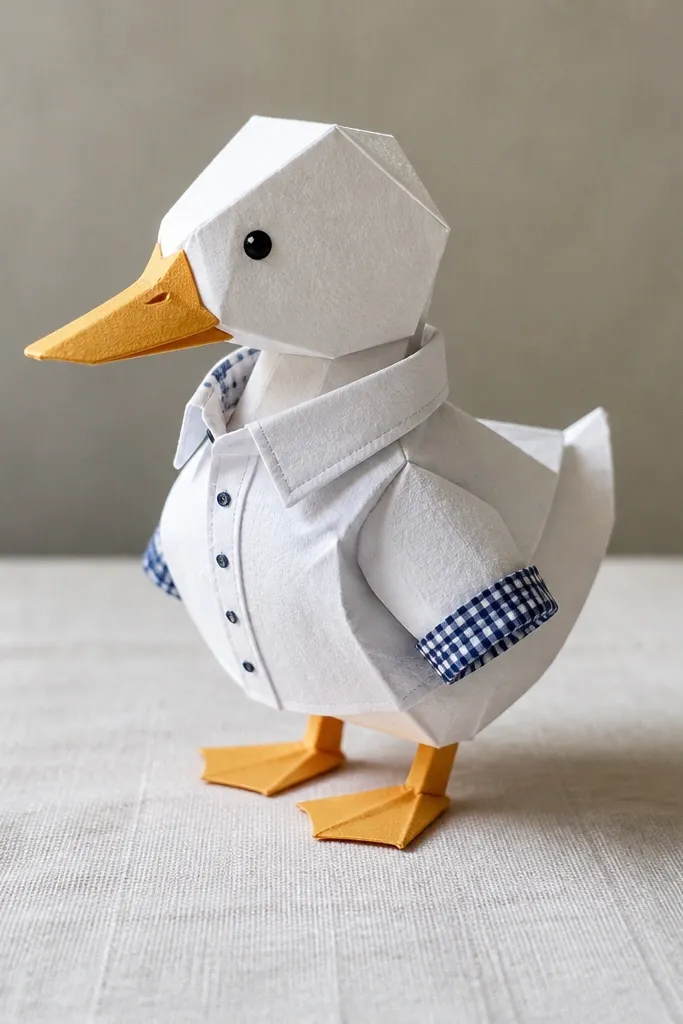
Cut a shirt front and back from white cardstock with a simple collar flap at the top. Add cuffs by cutting two small rectangles from navy check paper and gluing them at the sleeve ends. Create buttons by punching or cutting small navy circles and placing them down the center seam. For sleeves, fold thin strips into tubes and glue the seam underneath so the outer edge stays flat. Attach the shirt by taping the back seam to the duck and placing a tiny dot of glue at the collar underside to keep it from flopping.
A button-up shirt is a reliable “everyday” outfit look that makes your paper duck feel dressed for a clean photo. White cardstock gives you bright contrast, and navy check cuffs add detail without overwhelming the frame. The tiny button dots are small, but they make the outfit read as a shirt instantly. This one works year-round because you can swap the collar accessory: bow tie in spring, scarf in winter, or a vest in fall. Keep the shirt edges sharp with cardstock — soft edges look messy.
Skip thisDon’t add too many buttons; five to seven looks right at this scale.
Editor's noteUse a straightedge to draw the button placement line before gluing circles.
8. Denim Overalls With Contrast Stitching
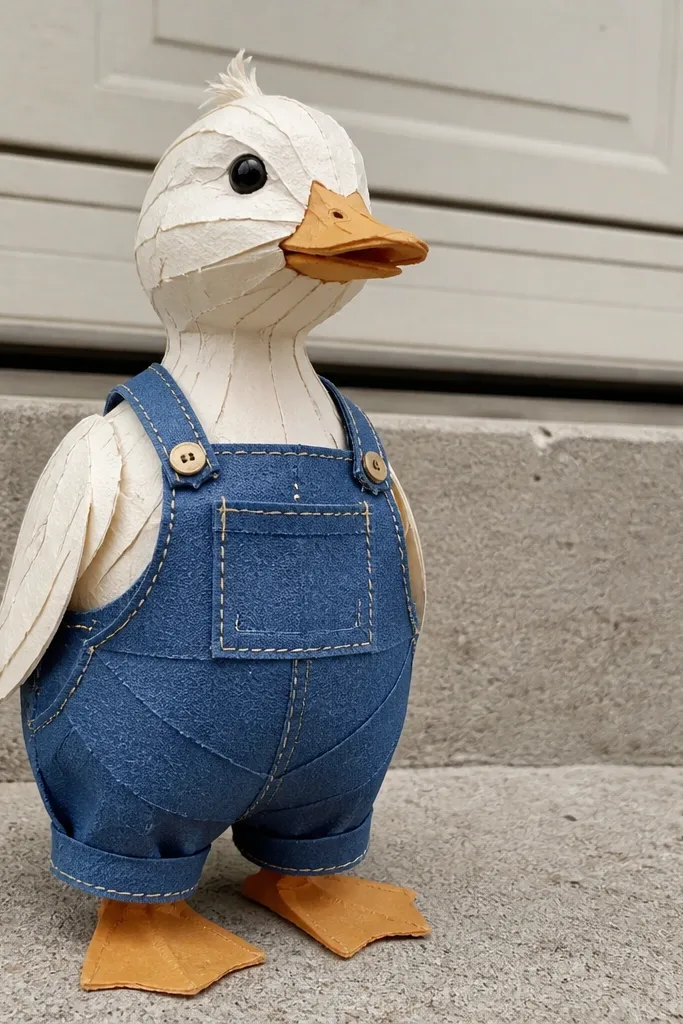
Cut a front bib from medium denim-blue cardstock shaped like a rounded rectangle with two strap openings at the top. Add two strap strips and fold the ends to glue behind the duck’s upper body. Make the legs by cutting two short rectangle panels and adding a slight taper at the bottom; glue them to the bib edges so they hang straight. Add contrast stitching by drawing parallel white lines along the bib seams and using small white paper dots for rivets. Attach by taping the inside bib back to the duck and securing strap ends behind the wings.
Overalls look great on paper because the bib shape frames the duck’s body and the straps create strong vertical lines. Denim blue is also forgiving — it hides minor paper seams better than light colors. Contrast stitching is what makes it look real; it’s a visual trick that makes paper edges look like thread. Add a pocket flap so the outfit has a focal point on the front. This is a year-round outfit because it reads casual in summer and cozy in winter when paired with a scarf or sweater layer.
Skip thisAvoid super-dark blue paper; it absorbs light and makes the seams disappear in photos.
Editor's noteIf you want cleaner “stitch” lines, use a white gel pen instead of cutting thread-like strips.
9. Brown Leather-Look Vest and Bow Tie
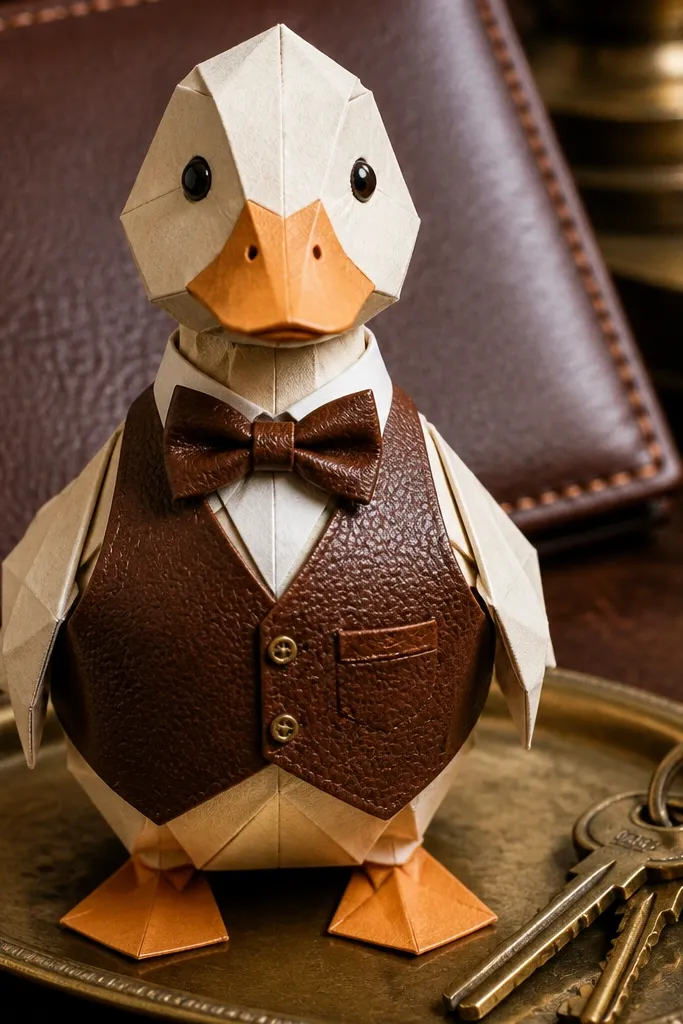
Cut a vest front from brown textured paper or brown cardstock with a subtle grain. Add lapels by cutting two small angled flaps and folding them inward along scored lines. Create the chest pocket from a lighter brown rectangle with rounded corners, then glue it slightly off-center toward the left. Make a bow tie from black cardstock: cut two mirrored triangles with a center notch, then add a small center band. Attach the vest by taping the back seam to the duck and gluing lapel edges lightly so they sit flat.
A vest makes paper outfits look instantly layered and more expensive-looking. Brown with a leather-look texture paper gives you realistic depth, and the bow tie adds a sharp, graphic shape that photographs well. The chest pocket is small, but it gives the outfit structure — it breaks up the front and makes the duck look like it’s dressed for a dinner table. This outfit works year-round because it’s the kind of neutral that pairs with bright seasonal accessories. Keep the vest edges crisp so the bow tie doesn’t float on a droopy front.
Skip thisDon’t glue the bow tie directly on textured paper with lumps; smooth the surface first with a light press.
Editor's noteUse thin black paper for the bow tie; it holds shape without bulk.
10. Mint Cardigan Sweater Wrap
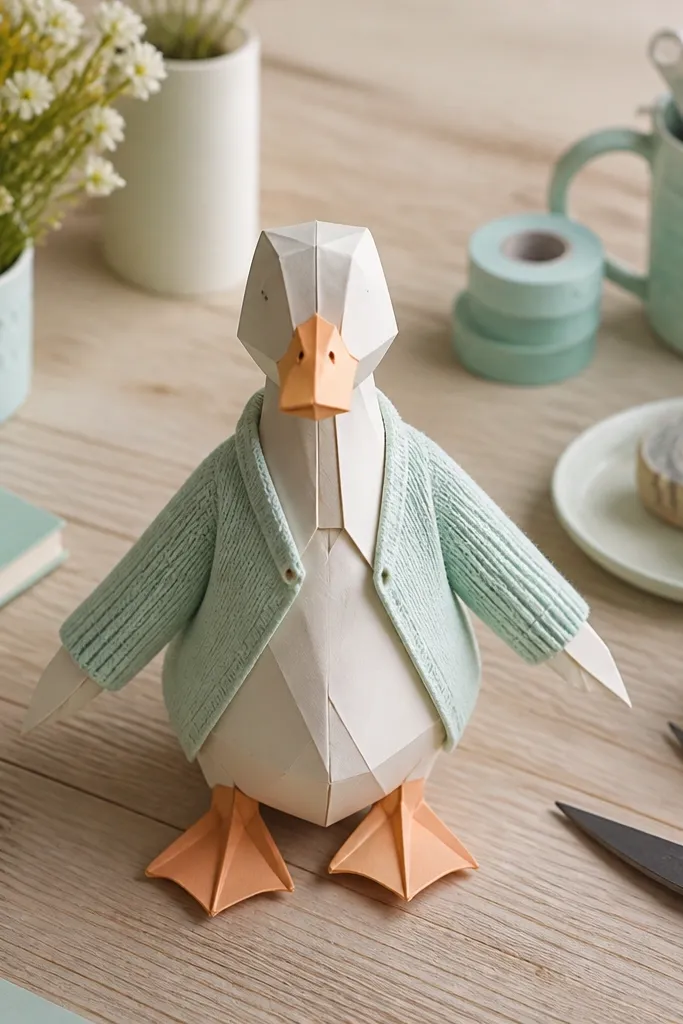
Cut a cardigan front piece from mint cardstock with an open center and two long front panels. Fold the front edges inward slightly so they look finished, then score a line 5-7 mm from the bottom edge for a hem fold. Create ribbed cuffs by cutting two narrow strips (about 6 mm) from a darker mint paper or patterned paper and gluing them around the sleeve edges. For sleeves, fold small rectangles into tubes and glue only the underside seam. Attach by placing tape along the back upper seam and letting the front panels fall naturally open.
Cardigans are the easiest way to make a paper duck feel transitional between seasons. Mint feels fresh in spring and summer, while the same shape can look cozy in fall with a darker scarf. The open front is where the look becomes photogenic — you get a clear negative space that outlines the duck’s body. Ribbed cuffs also add realism because they create repeating lines. This outfit is worth making because it’s fast and it makes your duck look like it has a wardrobe, not one costume.
Skip thisAvoid thick glue blobs at the front edges; they show as bumps on camera.
Editor's noteAdd a single button detail using a tiny circle — one button is enough for the illusion.
11. Magenta Evening Dress With Paper Pleats
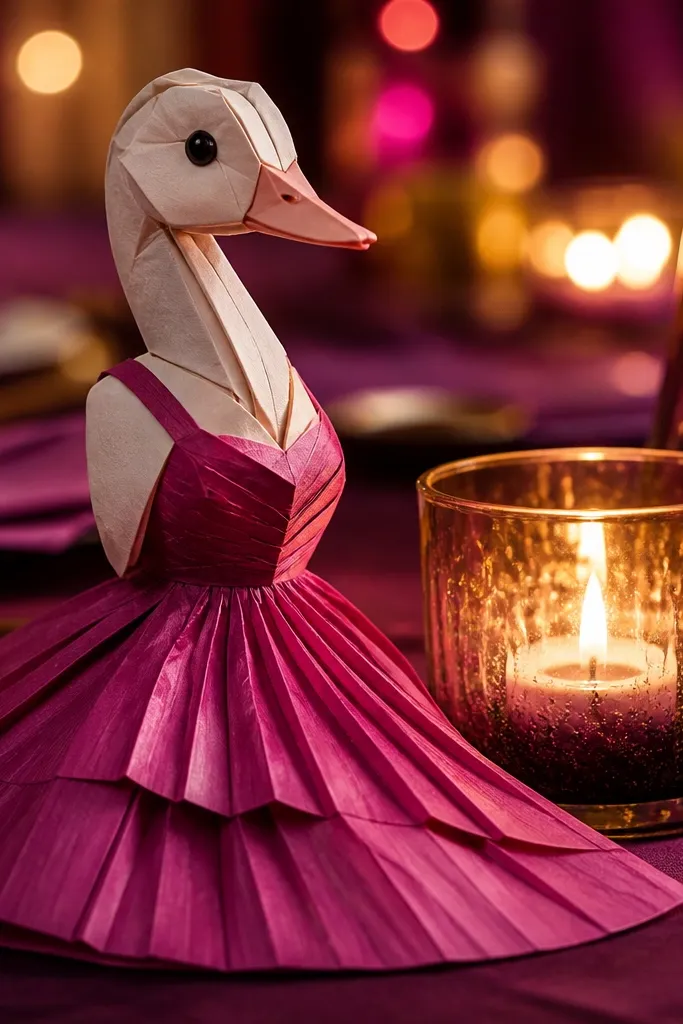
Cut a bodice from magenta cardstock with a straight neckline and two thin straps. For the skirt, cut a strip panel that wraps around the duck’s body, then create pleats by folding accordion-style along the width — about 4-5 mm per pleat. Glue the pleated strip to the bodice bottom edge, then trim the outer edges to a smooth curve. Add a small back seam reinforcement by gluing a thin paper strip inside. Attach with tape at the back bodice seam so the pleats hang outward instead of collapsing inward.
This is your “dress-up” outfit for party photos. Magenta pops hard against neutral backgrounds, and pleats give the skirt dimension even though it’s paper. Shoulder straps keep the bodice readable at small scale, and the pleat pattern makes the outfit look like it’s moving. This dress works year-round because it’s not tied to weather — it’s tied to mood. If you keep your pleat spacing consistent, the outfit looks polished instead of craft-random.
Skip thisDon’t use very stiff cardstock for pleats; it fights the folds and the skirt looks jagged.
Editor's notePress the pleats under a book for 10 minutes; it makes the fold lines crisp and even.
12. Gray Hoodie With Kangaroo Pocket
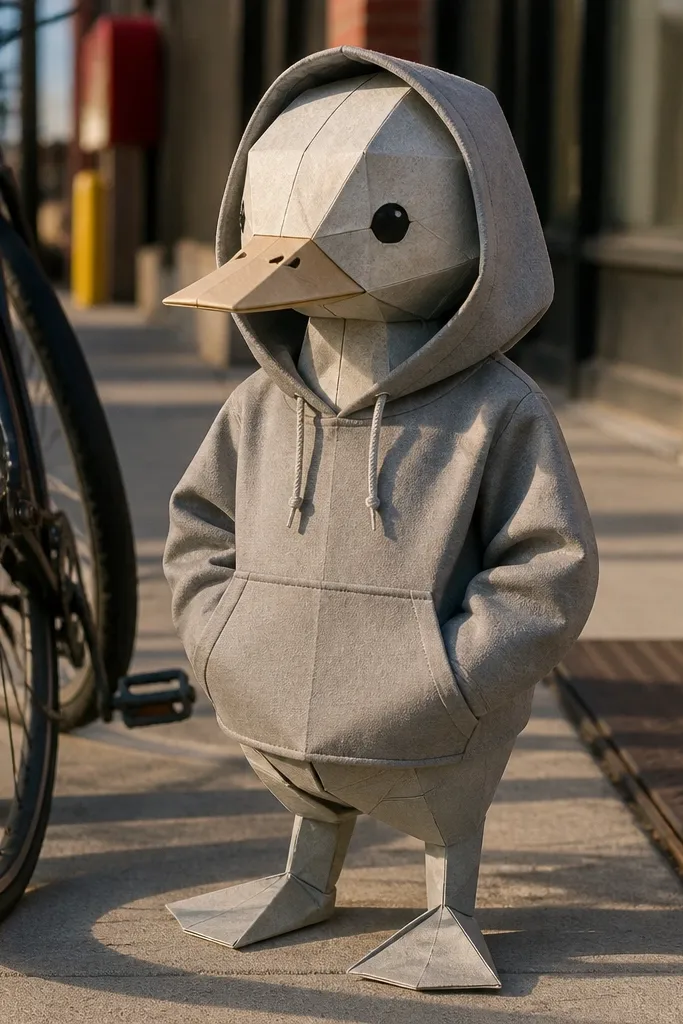
A hoodie is one of the most photogenic casual looks because the hood frames the face area and the pocket adds a big, readable shape. Gray is a smart base: it makes your duck look calm and it pairs with almost any color accent. The kangaroo pocket is also a practical construction detail — you can tape the pocket behind the duck to hide attachment points. This outfit works year-round because it reads cozy in winter and street-style in spring.
Cut the hoodie body from gray cardstock with an attached hood on the back. The hood should have two rounded corners that sit above the head line; score the hood base so it curves. Cut a kangaroo pocket from a lighter gray paper and glue it to the front lower area, leaving the top edge slightly open for depth. Add drawstrings by gluing two thin black paper strips down from the hood opening. Attach by taping the inside back seam and using a small piece of tape under the pocket top edge to secure it without showing.
Use a slightly lighter pocket shade; it gives depth even on flat paper.
Don’t glue the hood edges directly to the duck’s head — it blocks the silhouette.
13. Terracotta Wrap Skirt and Belt
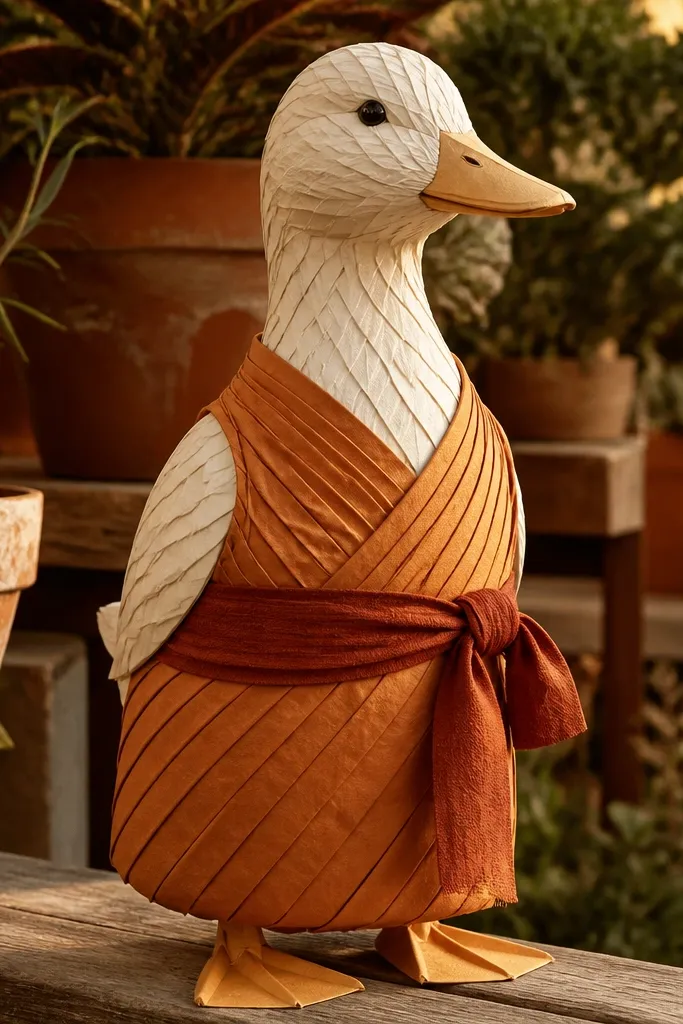
Cut a wrap skirt from terracotta cardstock as two panels: a main panel and an overlap panel. The main panel should be longer and slightly wider; the overlap panel should cover part of it when wrapped. Add a diagonal belt sash by cutting a thin strip and gluing it across the front overlap area. Attach by taping the back edge of the main panel to the duck’s lower body, then wrapping the overlap panel around and securing its back edge with a small tape dot. Finish by trimming the skirt edges into a gentle curve so it reads like a hem.
A wrap skirt looks fancy because it creates diagonal lines, and diagonal lines read as “fabric” in small paper outfits. Terracotta is warm and flattering in photos, especially in fall light, but it still works in summer with a light top. The belt sash gives you a strong focal point and also helps hide how you attach the skirt. Keep the wrap overlap clear — that overlap is the whole trick for the look. This outfit is a great way to add fashion variety without building a full coat or dress structure.
Skip thisAvoid a straight hem line; it makes the skirt look like a sticker.
Editor's noteBefore gluing, hold the skirt on the duck and mark the overlap with a pencil so the diagonal lands where it should.
14. Ivory Winter Scarf With Fringe Ends
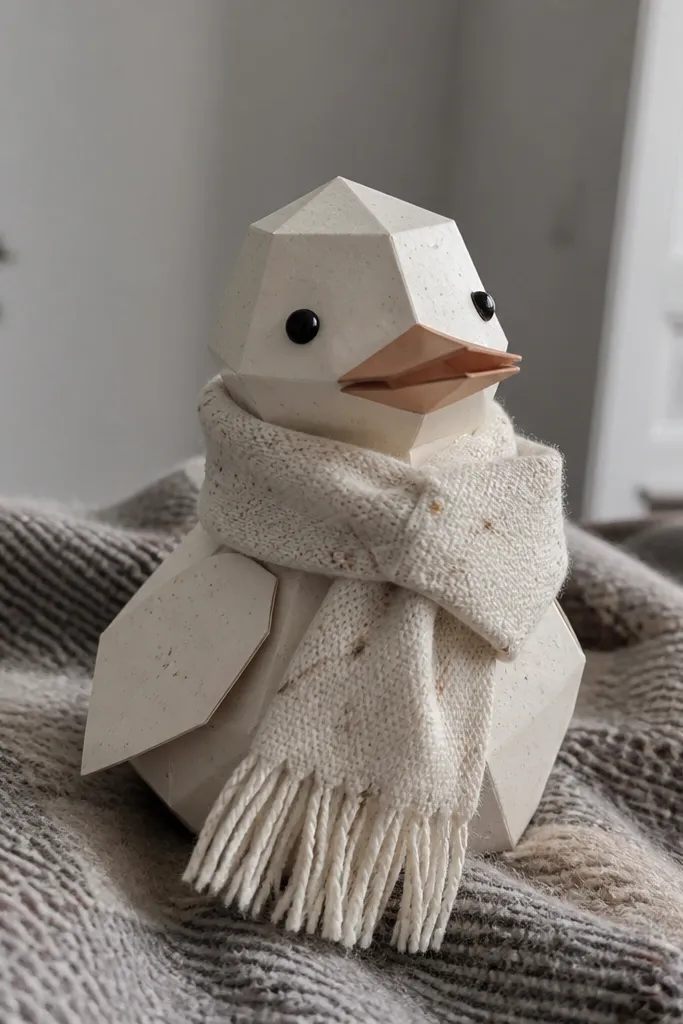
Cut a long ivory strip about 1 cm wide and long enough to wrap twice around the duck’s neck. Create fringe by cutting small slits along one long edge — about 2 mm deep, spaced 3-4 mm apart. Wrap the scarf around the neck, glue the back contact point, and then tuck the fringed edge so the fringe hangs forward. Add a small knot by folding a tiny triangle of ivory paper and gluing it under the front wrap. Attach with a tiny tape dot behind the neck so it stays centered for photos.
This is the simplest outfit upgrade in the entire list. A wrapped scarf changes the whole vibe because it adds a big color shape near the head, where people look first. Ivory looks expensive with paper, especially if you add a subtle texture like lightly speckled cardstock. Fringe ends make it feel real, and they add a photogenic edge that catches light. Use this when you want year-round outfits but don’t want to rebuild full garments. Pair it with any base outfit that has a visible neck or collar.
Skip thisDon’t soak paper with glue; it ripples and the scarf looks wrinkled in bad ways.
Editor's noteUse a ruler to keep fringe slits even; uneven fringe looks messy fast.
15. Forest Green Cape With Gold Clasps
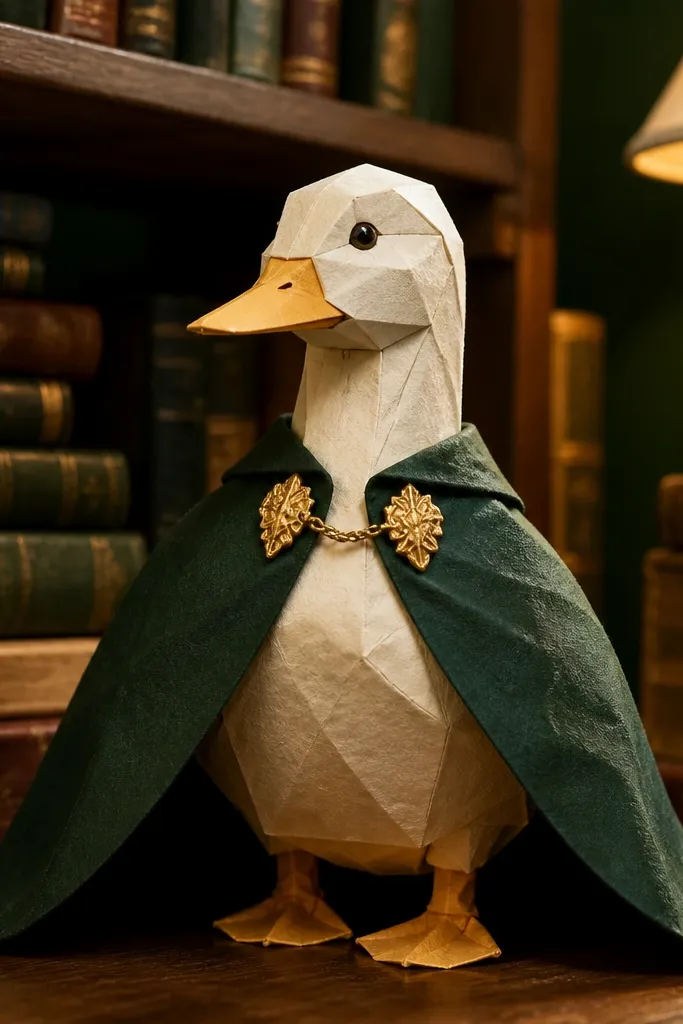
Cut a cape from forest green cardstock as a half-circle with a neck notch cut out. Make the neck notch just large enough to fit over the duck’s upper body without forcing it. Score a small fold line around the neck opening so the cape sits flat against the top. Create gold clasps by cutting two tiny gold circles or rectangles and gluing them near the neck notch edges. Attach by taping the inside neck fold to the duck’s upper body and leaving the cape edges hanging freely.
A cape is the fastest way to make your paper duck look like it belongs in a storybook, without going full cartoon. Forest green gives you depth, and gold clasps add a metallic focal point that reads clearly even at small scale. The cape shape also makes attachment easier because you can glue behind the duck’s body while keeping the cape edges free. This outfit works year-round because it’s not season-specific — it’s dramatic. If you want your 20-outfit set to feel like a real wardrobe, include one cape.
Skip thisAvoid very thin paper for the cape; it flops and the silhouette disappears.
Editor's noteSlightly curve the cape edge by bending it over a pencil before attaching.
16. Summer White Shirt and Red Shorts
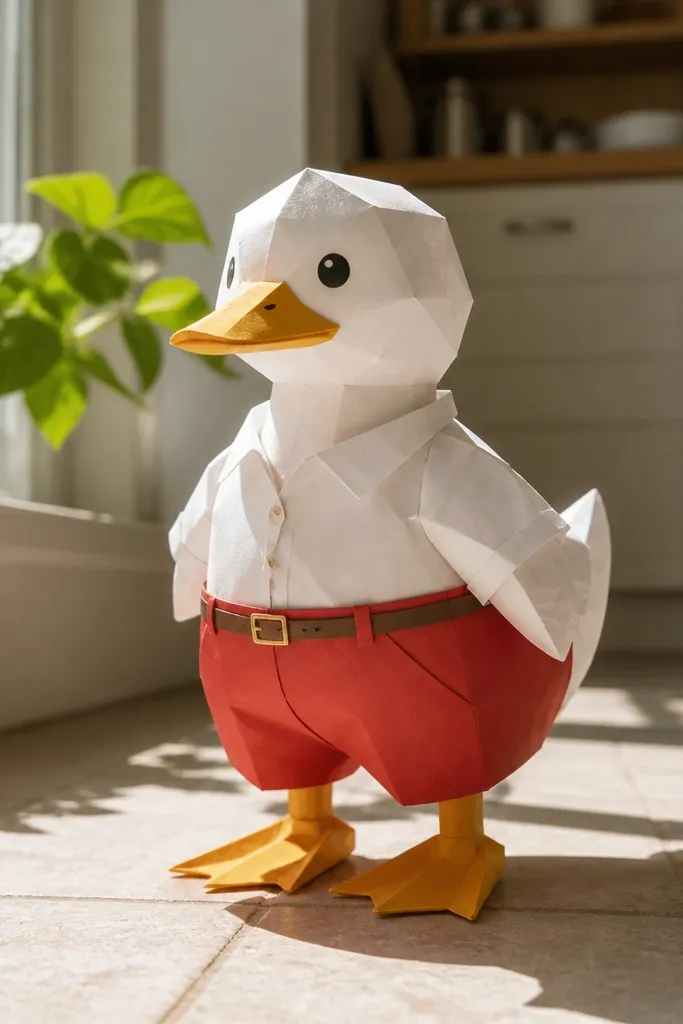
This is your clean summer set because it uses classic color blocking: bright white top, strong red shorts. The outfit looks crisp in daylight and reads clearly even in busy backgrounds because each piece has a distinct color edge. Add a small belt line so the shorts don’t look like a sticker band. This also helps your year-round goal — it’s a simple base you can remix with a different top color for other seasons. Build it with smooth cardstock so the shirt looks flat and tidy.
Cut a white shirt with a short collar and short sleeves from white cardstock. Make the shirt hem by folding a 5 mm edge under and gluing it so it looks finished. Cut red shorts as two leg panels with a center waistband tab; glue the waistband onto the duck’s lower body. Add a belt line by cutting a thin strip of tan paper and placing it across the waistband front. Attach the shirt at the back seam and keep the shorts separate so you can swap one piece later.
Use a matte white paper; glossy white reflects harshly and washes out details in photos.
Don’t make the shorts too tall; they block the duck’s leg pose and ruin the silhouette.
17. Autumn Plaid Button Dress
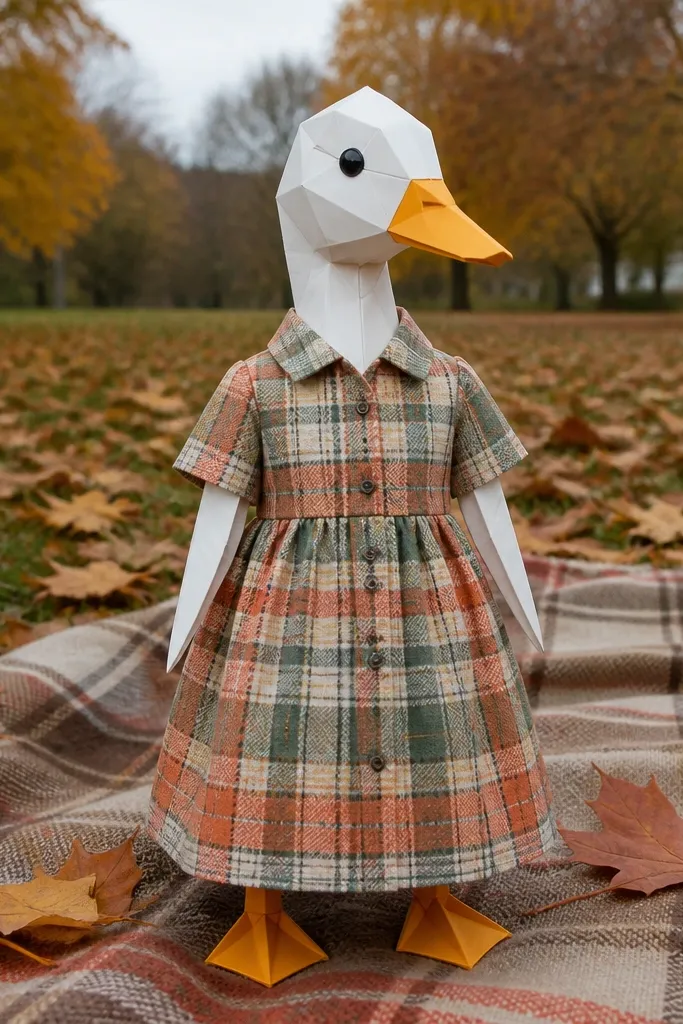
Plaid reads fall instantly because it has built-in structure. This button dress gives you a vertical line down the center, which makes the duck look longer and more “dressed.” Short sleeves keep it manageable and photogenic, and the button dots add that tiny, satisfying detail. Use a plaid paper where the lines are crisp; blurry plaid prints look muddy on camera. This outfit works year-round when you switch the plaid color — but this version is specifically autumn-friendly.
Cut a plaid dress bodice and skirt in one piece from plaid paper backed with cardstock so it stays stiff. Add short sleeves by cutting two small rectangles and rounding the bottom edge. Create the center button line using a thin strip of dark brown or black paper, then glue small round dots on top. Fold the dress at the waist line by scoring and creasing; add a short hem fold so the bottom edge looks clean. Attach by taping the back waist seam to the duck and letting the skirt flare slightly outward.
Back the plaid with plain cardstock if your plaid paper is thin; it keeps the pattern from warping.
Avoid stretchy tape at the waist; it makes the plaid bow or twist.
18. Monochrome Halloween Witch Hat
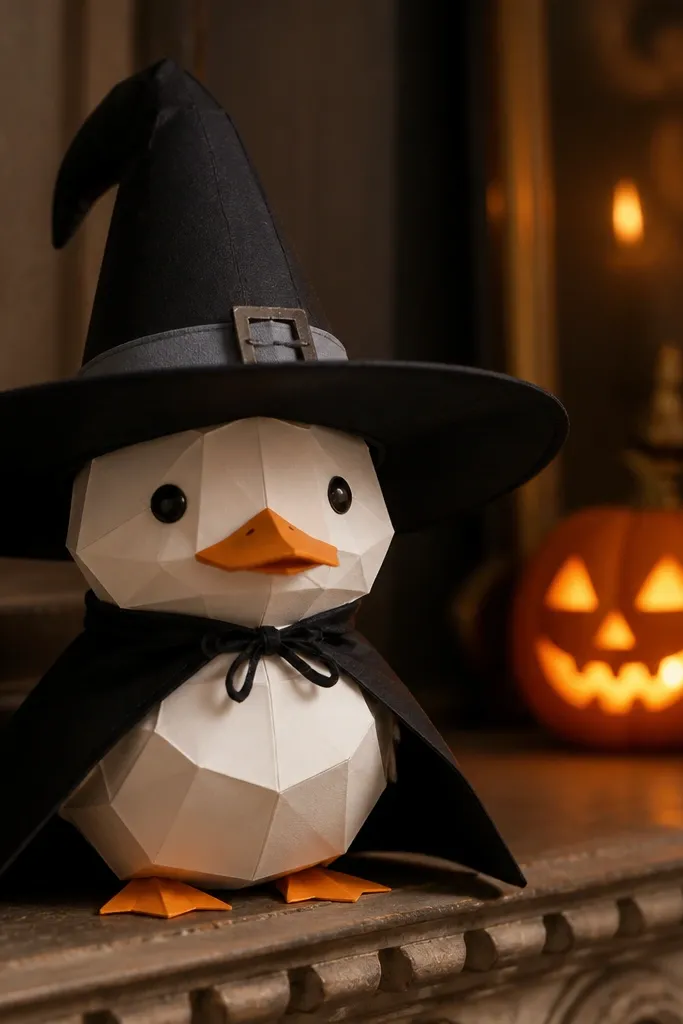
Cut a cone from black cardstock for the hat body, with the tip slightly flattened for stability. Cut a wide brim circle and trim a notch so it fits around the duck’s head area. Glue the brim to the cone and reinforce the inside with a small strip of black cardstock. Add a band by wrapping a gray strip around the base and gluing it flat. Make a buckle from a tiny black rectangle with a gray dot in the center. Place the hat on the duck and secure with a small piece of tape under the brim.
A witch hat is a high-impact outfit piece because it changes the duck’s face silhouette instantly. Monochrome keeps it stylish instead of childish, and the gray band adds a realistic “hat band” detail. The tiny buckle gives you a focal point for close photos. This works year-round because a hat and a band can pair with any coat or dress you already have — you’re swapping the statement piece, not rebuilding the whole outfit. Make it sturdy so it doesn’t crumple when you store it.
Skip thisDon’t use thin paper for the cone; it collapses and the hat looks bent.
Editor's noteFlatten the cone tip with a quick press under a book so it stays stable on the duck.
19. Silver Party Dress Bodice and Tulle Skirt
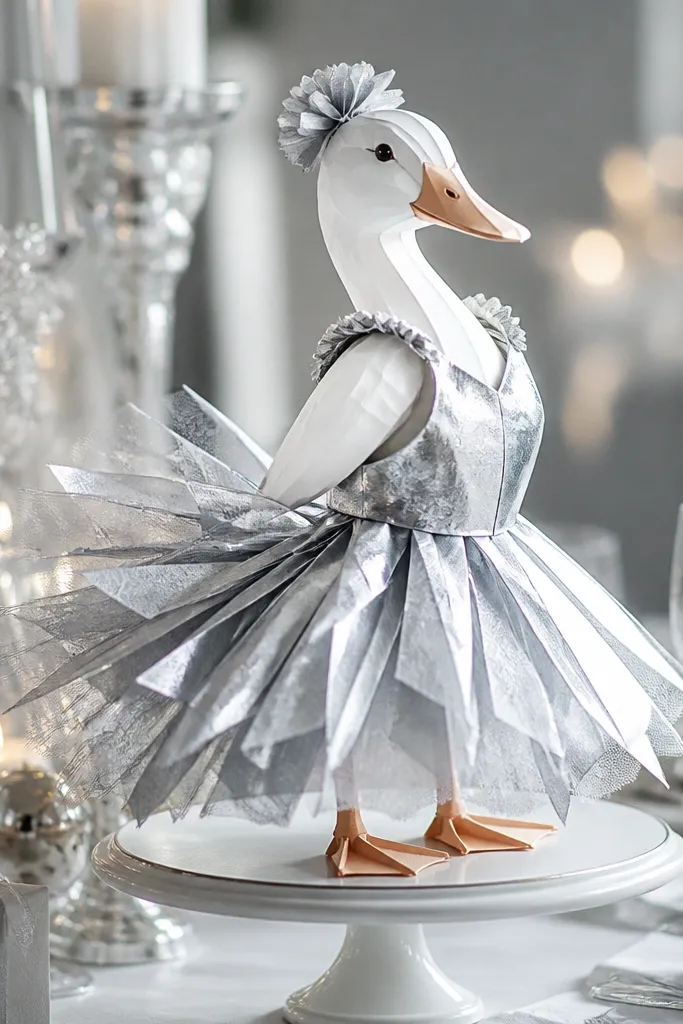
This outfit looks like a party version of a tutu without needing actual tulle. Silver cardstock for the bodice catches light, and layered pale gray paper strips create a tulle effect with real movement. The layered skirt also hides small attachment bumps, which helps your final look look clean. Keep the bodice simple so the skirt layers do the visual work. This is a year-round pick for any holiday moment because it reads “celebration” even in basic lighting.
Cut a silver bodice from cardstock with a straight neckline and small arm openings. For the skirt, cut multiple thin strips of pale gray paper, each about 1 cm wide and 6-7 cm long. Fold each strip in half to create a loop and glue the loop base to the bottom edge of the bodice, alternating directions for a fuller look. Add a tiny waist band from a darker gray strip to separate bodice from skirt. Attach by taping the back bodice seam to the duck and letting the loops fan outward.
Space the skirt loops about 5-7 mm apart so you get coverage without bulky clumps.
Don’t drown the loops in glue; use a thin line at the base or they’ll stick together.
20. Teal Windbreaker With Reflective Tape Lines
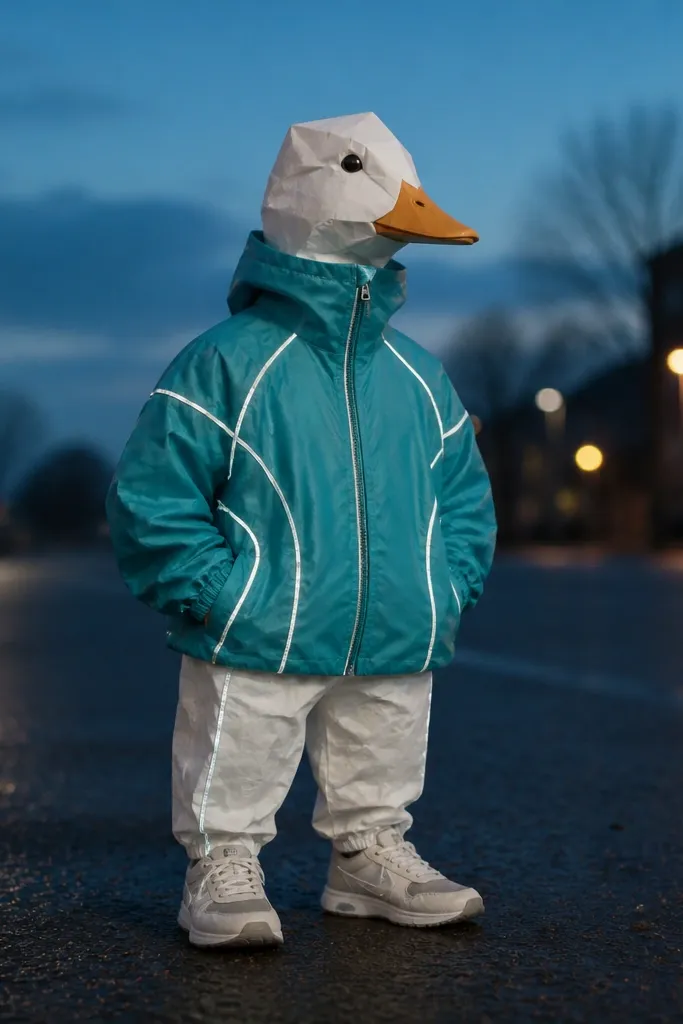
Cut a windbreaker front and back from teal cardstock with a center overlap for the zipper area. Add a silver tape strip down the center and two diagonal reflective stripes on each side panel. For the zipper, glue a thin black paper strip and add small silver dashes along it. Create sleeves by folding thin teal rectangles into tubes and gluing the seam underneath. Attach by taping the inside back seam to the duck and securing the front overlap with a small strip of double-sided tape so it stays closed for photos.
Windbreakers look modern, and paper versions look sharp when you treat them like color-blocked shells. Teal is bold without being harsh, and silver reflective tape lines add that sporty detail that reads instantly. A zipper line gives you a strong vertical reference, making the outfit look structured. This works year-round because it’s a transitional layer — pair it with a scarf in winter or a sundress in summer. If you want the set to feel like a real closet, this one adds a sporty category.
Skip thisAvoid fully rounded edges on the panels; sharp corners make paper windbreakers look more “shell-like.”
Editor's noteUse foil-backed paper for the silver lines; it reflects light better than matte craft foam.



