
1. Offset-Feather Body Duck with 1-2 mm Wing Layers
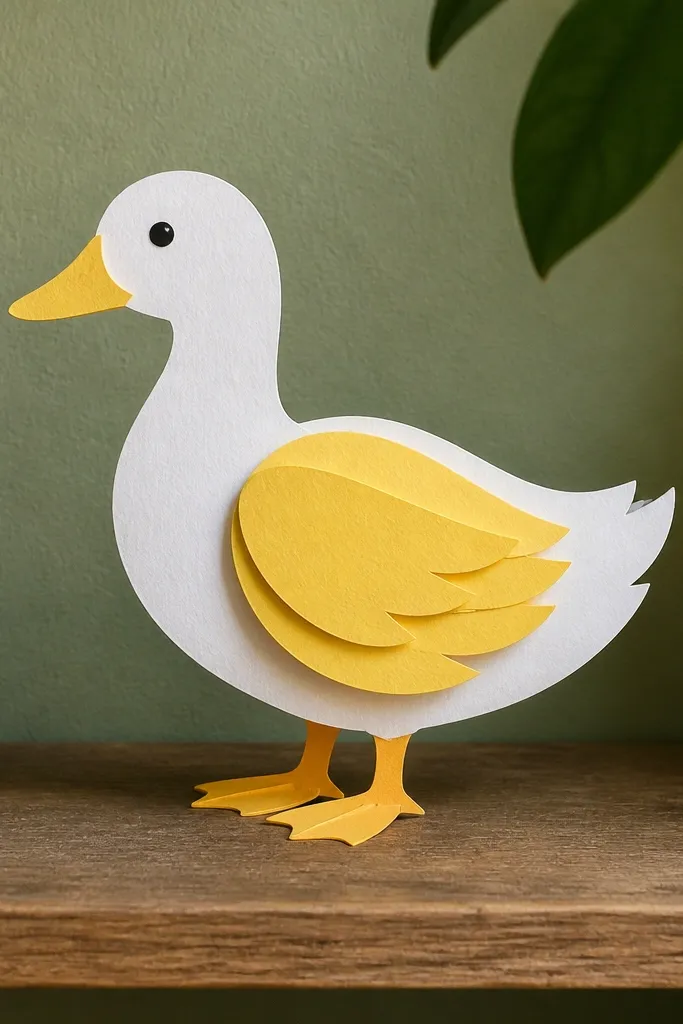
This one looks clean because the feathers don’t sit like flat stickers. You build a simple duck outline, then add wing layers that are cut the same shape but pasted slightly offset. That tiny gap creates depth in photos and makes the wing look like it has volume instead of paper-thin flatness. Use bright yellow cardstock and a second paper for the feather edges (sunny orange or pale cream) so the contrast reads instantly. Skill level is beginner-friendly, and you can finish it in about an hour with a careful fold and tidy trimming.
Start by cutting a duck body template from 200 gsm yellow cardstock. Fold the body along the center so it stands slightly open, then glue a thin strip inside as a brace. Cut 3 wing feather shapes from orange paper and one matching set from cream paper; keep each layer identical. Paste the cream feathers first, then orange feathers on top, each time shifting the top layer 1-2 mm to the side. Finish by trimming the perimeter so the wing edge is smooth and sealing the surface with matte spray or clear matte medium.
Editor's noteUse a metal ruler and a craft knife for the wing layers — paper scissors leave jagged edges that show in close-ups.
Skip thisDon’t glue layers directly on top of each other; it kills the depth that makes it look designed.
2. Duck Pop-Up Card with a Stiff Spine Head
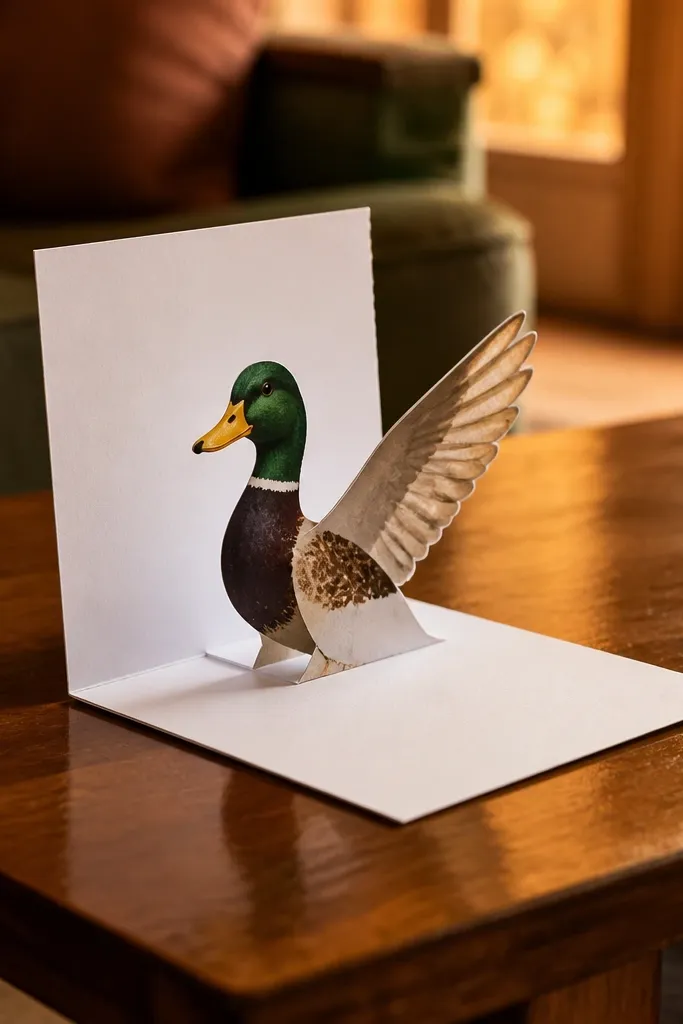
Pop-up ducks look amazing in photos because the silhouette changes from flat to dimensional when the card opens. The key is stiffness where it matters: the head and the top wing need a rigid spine so they don’t droop. Build it as a small, centered pop-up, not a big complicated mechanism; the photo stays readable and the duck stays crisp. Choose a two-tone paper scheme — matte yellow for the body and slightly darker yellow for the wing — so the folded areas show contrast. This is a solid weekend project if you like card making and want a “wow” shot without engineering.
Fold an A5 card base from 200 gsm cardstock, then measure the pop-up panel so it opens flat without rubbing. Cut a narrow spine strip from cardstock and glue it to the inside fold so it acts like a hinge brace. Build the duck head and wing as separate cutouts; attach them to the spine with a short paper tab so they rise straight up. Test the fold once before final glue — close the card gently and check that the duck clears the front. Seal the cut edges lightly with matte medium to prevent scuffs.
Editor's noteScore all folds with a bone folder so the crease stays sharp after repeated opening.
Skip thisDon’t rely on thin printer paper for the spine; the pop-up will slump and look unfinished.
3. Walnut-Color Duck with Rolled Paper Core Belly
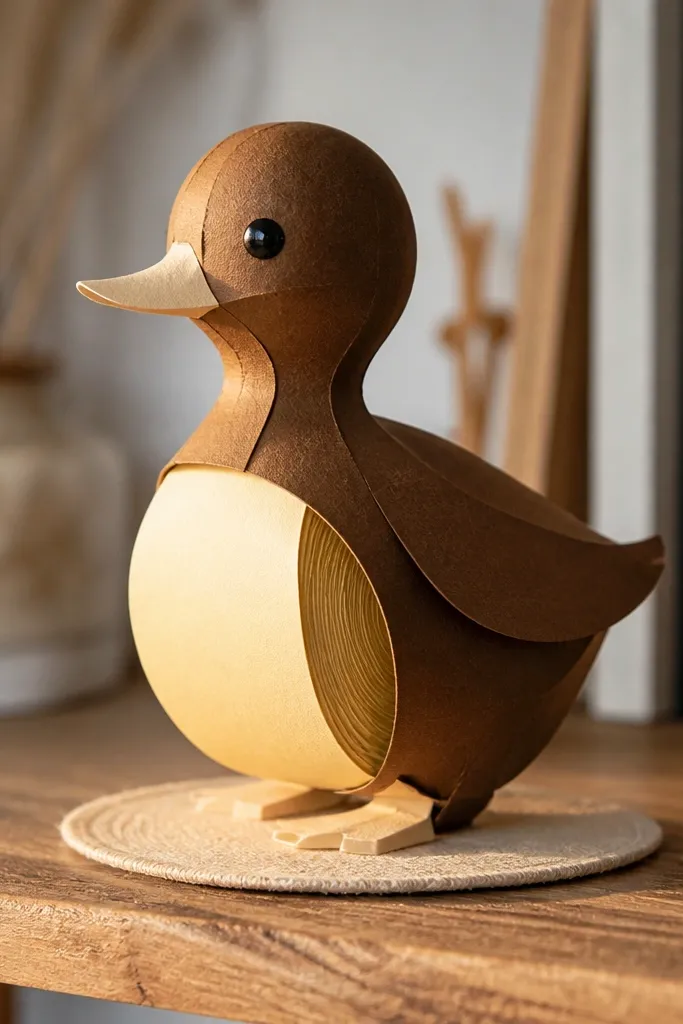
A rolled core makes the belly look round in a way flat folding can’t. This project uses walnut-brown paper for a cozy, modern look, then adds a warm cream belly panel so the form reads clearly. The body is a soft curve, but the duck still stands because the core gives it structure. It’s a great choice for shelf decor or desk accents because it photographs well from the side. You’ll spend most of your time rolling and aligning, not cutting hundreds of pieces.
Roll a strip of cardstock into a tight tube for the belly core and glue the seam. Cut the duck outer body as a wrap panel with a shaped belly curve; test-fit it over the tube before gluing. Glue the wrap panel around the core, then add a head piece that attaches with a small tab so it stays angled. Create a tiny base tab from cardstock and glue it so the duck sits without rocking. Finish by adding a simple beak and eye with a sharp black marker, then seal with matte spray.
Lightly sand the seam on the wrap panel edges so the belly looks smooth instead of lumpy.
Don’t skip a base tab; a core alone won’t stop wobbling on flat surfaces.
4. Crisp Cut-Out Duck Silhouette Wall Art
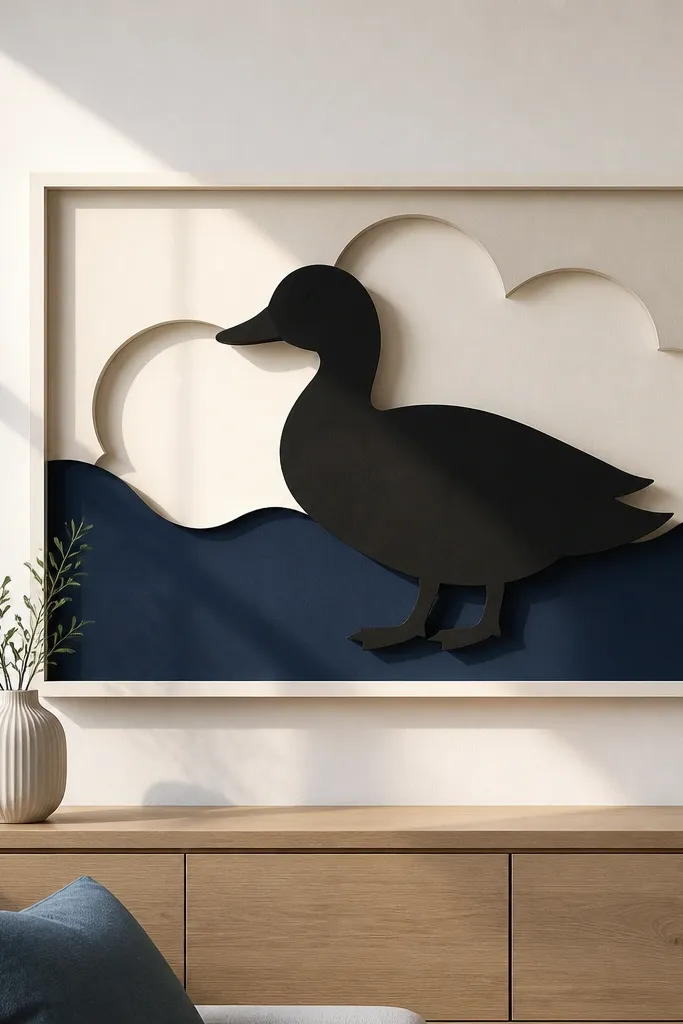
Silhouette wall art looks premium because the whole impact is edge quality and contrast. This is a two-layer build: a bold background cut and a smaller duck cut layered on top. Keep the duck simple — clean curves, no tiny feather details — so the silhouette reads from across the room and in photos. Use matte black paper or dark charcoal for the main shape and bright yellow for the accent layer. This is one of the quickest projects in the list, but it demands careful cutting.
Choose a background sheet (dark) and cut a large duck silhouette using a craft knife and cutting mat. Cut a second duck silhouette from yellow paper, slightly smaller so you see a clear border. Layer the yellow on top and glue with a thin line — avoid glue near the outer edge. Add a simple beak triangle and a white eye dot, both cut from small scraps. Hang it with picture tabs so the paper sits flat without ripples.
Use a fresh blade and cut in one direction for smoother edges that show cleanly on camera.
Don’t use fuzzy glue dots; any squeeze-out shows as gray lumps along the silhouette edge.
5. Origami-Style Duck with Patterned Wing Wrap
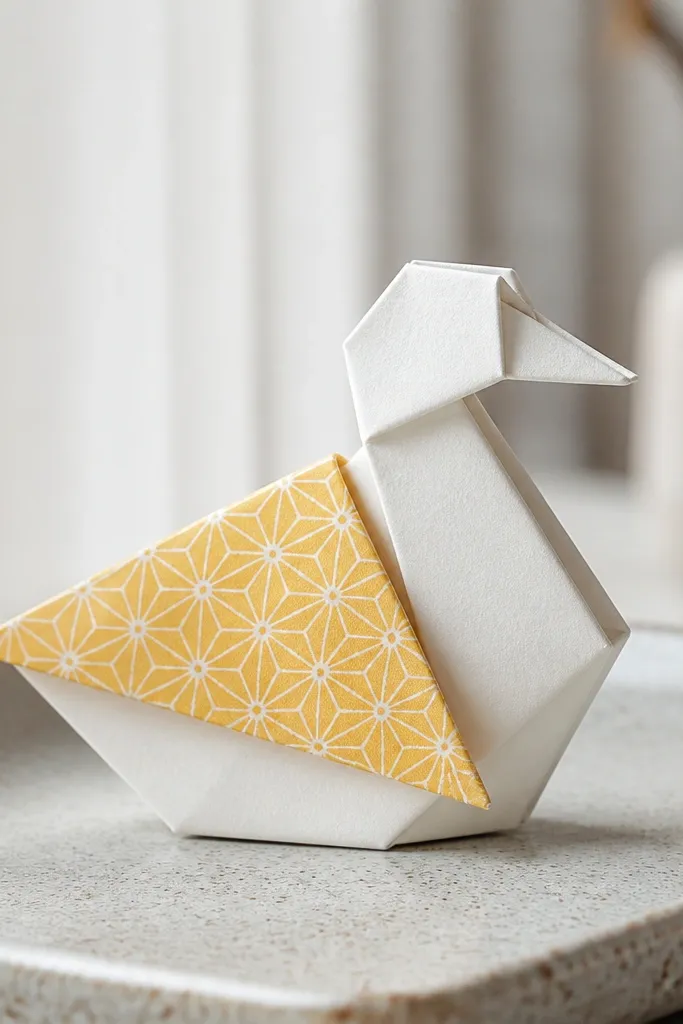
This idea looks “designed” because the wing uses a patterned wrap that frames the body. Even if you’re not doing full classic origami, you can get that crisp look by using fold lines and a tight wing wrap. The pattern makes the folds look intentional, not accidental. Use a patterned paper for the wing panel, like subtle polka or diagonal stripes, and plain yellow for the body so it doesn’t get busy. This project suits people who like geometric structure and clean creases.
Cut the body as a folded wedge from plain yellow cardstock; score and fold along the center to create a strong crease. Make a wing wrap panel from patterned paper with straight edges that match the wing outline. Wrap the wing panel around the body edge and glue only at the underside so the top stays crisp. Fold the head tab down and crease it firmly with a bone folder. Add a beak cut from orange paper and a small black eye dot, then burnish all folds.
Burnish each fold twice, first with the bone folder and then with your fingernail for a sharper line.
Don’t glue over the top fold line; it ruins the crease and makes the wing look soft.
6. Watercolor-Dipped Duck with Matte Seal Finish
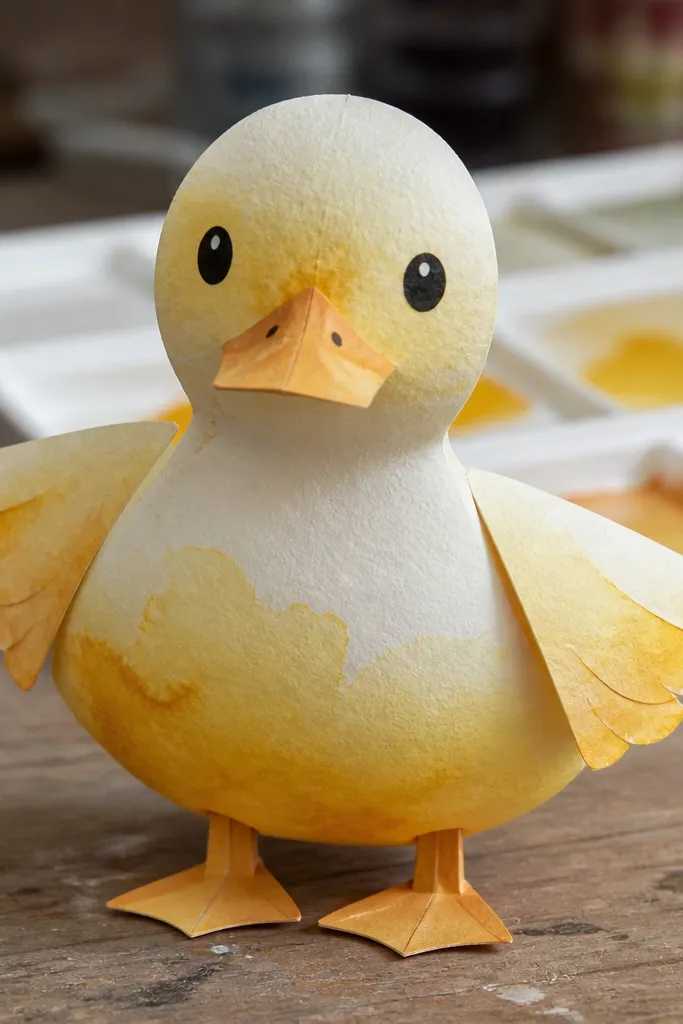
This duck looks photogenic because the color transitions look like paint, not marker scribbles. You start with a simple paper duck shape, then add controlled watercolor washes to the body and wing edges. The trick is to keep the washes light and let the paper texture show, then seal it so the surface doesn’t get shiny or streaky. Use matte finishing spray so photos don’t pick up glare. This suits intermediate crafters who want a more artsy look without complex assembly.
Cut a basic duck body, wings, and head from thick 200 gsm paper. Wet only the wing and belly areas lightly with clean water using a small brush, then apply diluted yellow and pale orange watercolor. Let it dry completely before assembling so the paper doesn’t warp. Assemble the duck with a thin glue stick, then add a beak and eye once the watercolor is dry. Seal with matte medium or matte spray in light coats.
Use diluted paint and build color in 2-3 thin layers; heavy paint warps paper fast.
Don’t assemble while watercolor is still damp; glue will soak in and create dark blotches.
7. Feather Fan Duck using Paper Fringe Wings
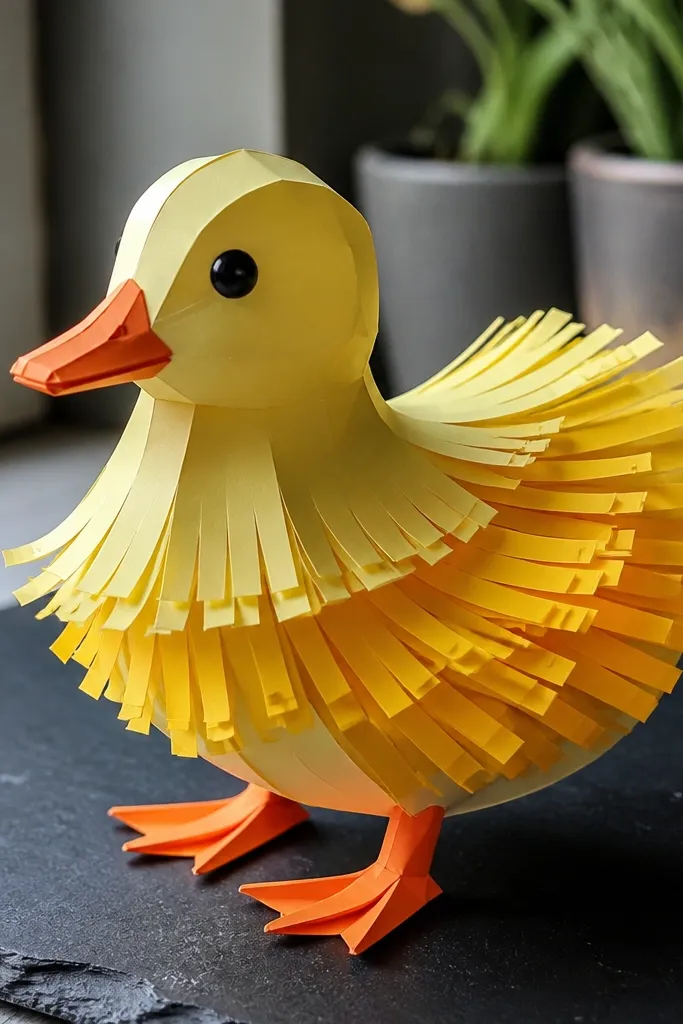
Fringe wings photograph like real feathers because they catch light and create texture. You cut wing strips, fringe the edges, then fan them out around the body. The result is a duck that looks fluffy without using felt or fabric. Choose a gradient paper — pale yellow to golden yellow — so the wing looks dimensional. This is a fun craft for decorators because it adds motion and shadow even when the duck is still.
Cut a body shape from yellow cardstock and create a wing base tab inside the body. Cut a separate wing fan piece from gradient yellow paper and fringe one edge with consistent spacing (about 3-4 mm). Roll the wing fan slightly into a curved shape and glue the unfringed edge to the wing base tab. Add a second smaller fan for the inner wing if you want extra depth. Finish by trimming the fringe tips evenly and adding beak and eye details.
Editor's noteUse a ruler to keep fringe spacing consistent; uneven cuts look messy in close-ups.
Skip thisDon’t glue the fringed edge flat; it kills the fan shape and makes the wing look like a paper mat.
8. 3D Paper Duck Lantern with Open Belly Cutouts
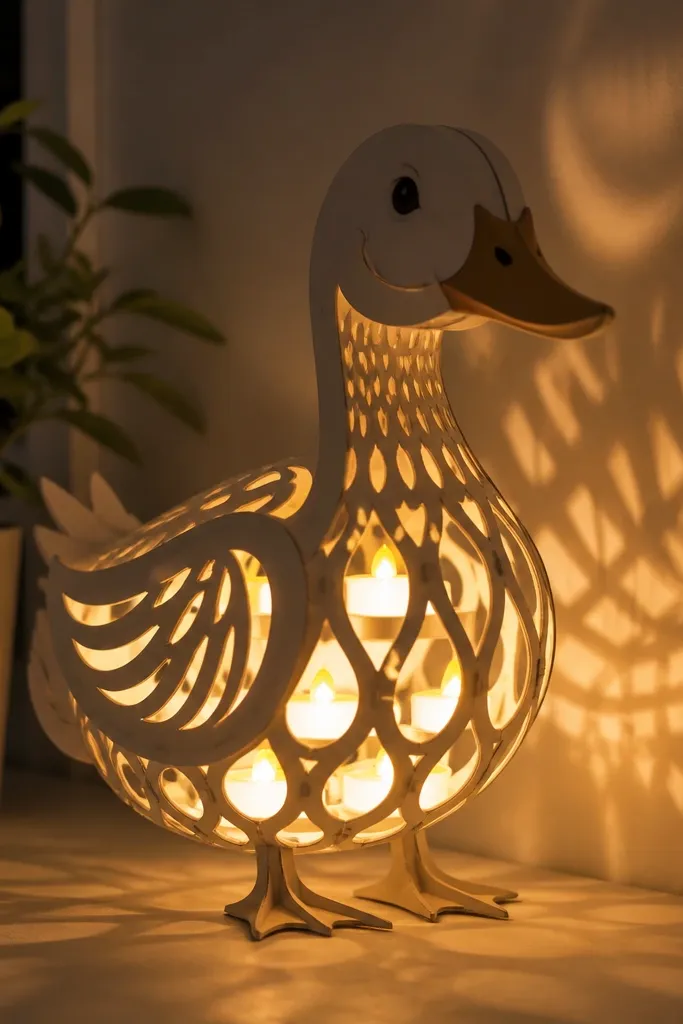
If you want a duck that looks incredible in photos at night, this is it. The lantern effect comes from cutouts that let light spill through the belly and wing areas. This project uses a simple paper lantern frame with a duck wrap, so the duck stays shaped even when lit. Pick warm white LED tea lights or a small battery candle so the light is steady and safe. It’s a little more involved, but the glow makes every build worth it.
Create a lantern base from folded cardstock into a box shape, leaving an opening on one side for inserting the light. Cut a duck wrap panel with strategically placed cutouts (belly dots and a wing curve) and glue it around the lantern. Reinforce the cutout edges with a thin strip of cardstock so it doesn’t tear. Insert the battery light and test fit before sealing the last seam. Add a head and beak as separate pieces so the top stays crisp.
Editor's noteKeep cutout edges at least 5 mm away from folds so the lantern doesn’t weaken over time.
Skip thisDon’t use real candles; paper lanterns need battery lights for safety.
9. Paper Duck Bookmark with Layered Wing Cut Tabs
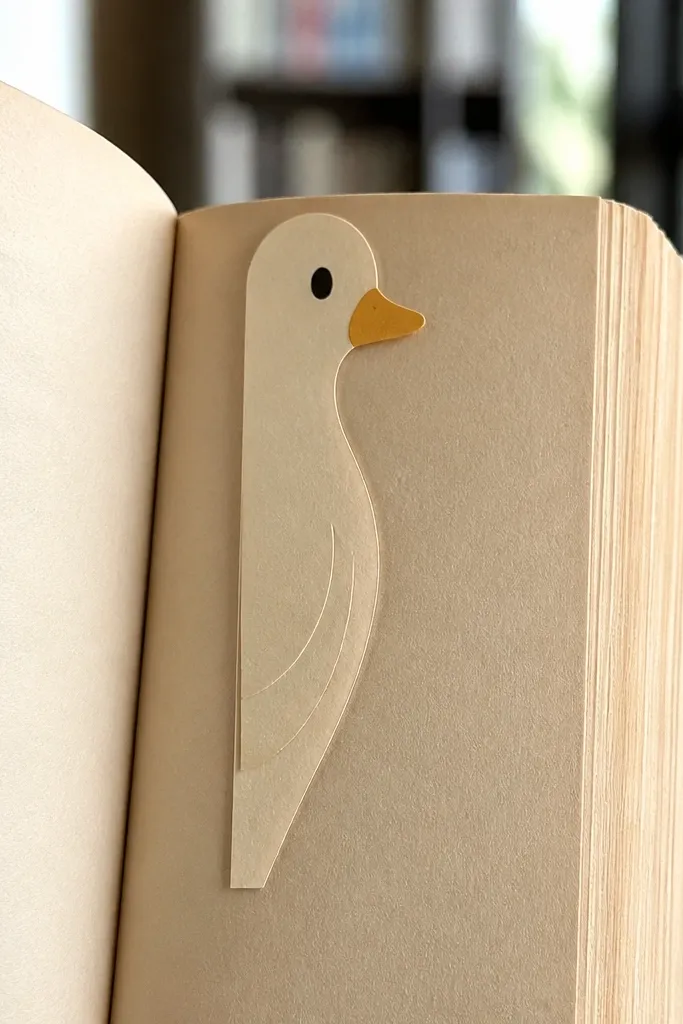
Bookmarks get photographed because they’re flat and graphic, but most paper ducks look chunky because the edges aren’t planned. This bookmark keeps everything thin by using layered wing tabs that fold and lock into place. It looks neat on a desk and on open books, plus it’s practical. Use cardstock for the bookmark spine so it doesn’t bend, and use a coordinating patterned paper for the wing tab so the duck pops visually. This is a quick build that still looks like a “real product,” not a school craft.
Cut a bookmark base strip from 220 gsm cardstock and add a tapered duck head at the top. Cut wing pieces as thin layers with tabs that slide behind the bookmark base. Glue the tabs only on the inside of the base so the outer surface stays smooth. Add a simple body outline panel to hide any tab edges. Finish with a beak triangle and eye dot, then round the bottom corners with scissors.
Cut the tab notches with a craft knife so they fit tight; loose tabs create gaps you’ll see in photos.
Don’t glue wing layers on the same plane; the bookmark gets too thick and looks sloppy.
10. Quilt-Block Style Duck with Patchwork Squares
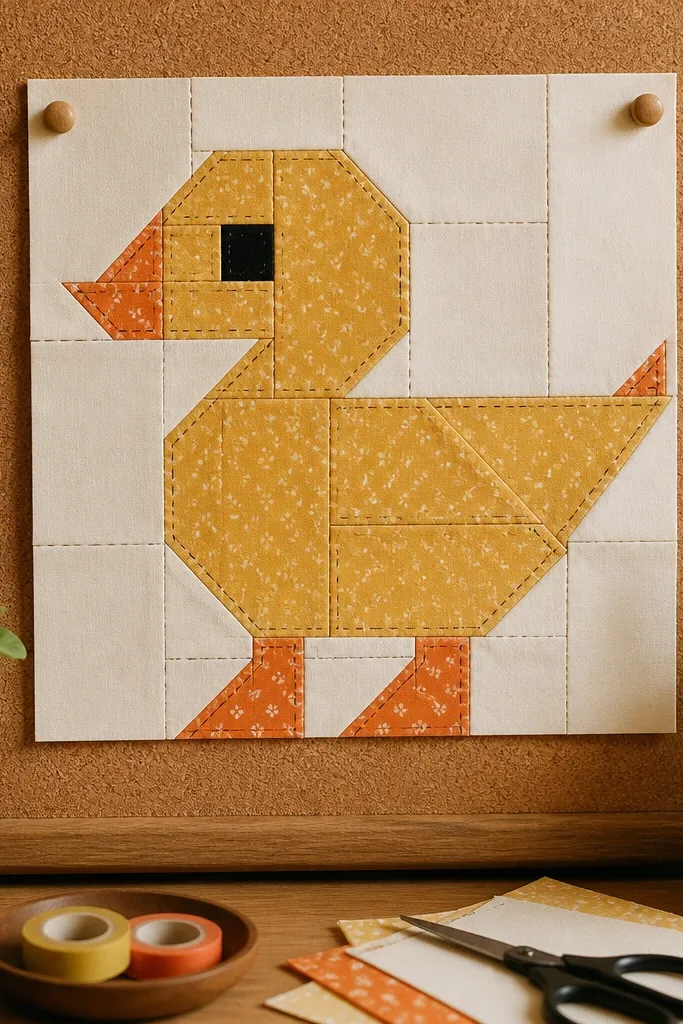
Patchwork ducks photograph like modern fabric art, even though it’s paper. You build the duck from small squares and rectangles, then draw “stitch lines” with a fine pen. The look is all about tight alignment and consistent seam spacing, so it reads like a quilt block. Use 4-6 paper tones: mustard, cream, light orange, and a tiny bit of brown for shadow. This project takes longer than a simple cutout, but it’s worth it because it looks intentional up close.
Draw a duck outline on paper and grid it into 1 cm squares (or 0.75 cm if you want it finer). Cut patch pieces to fit each grid cell and glue them in rows so the edges stay straight. Once the duck is fully assembled, use a ruler to draw stitch lines between cells with a 0.3 mm fineliner. Add a beak and eye on top, keeping them simple so they don’t steal attention from the patchwork. Mount it on a contrasting background card for clean photo edges.
Editor's noteUse the same pen pressure for every stitch line; uneven lines make the patchwork look crooked.
Skip thisDon’t use random paper sizes; mismatched cell sizes ruin the quilt illusion.
11. Paper Duck Mobile with Balanced Wing Angles
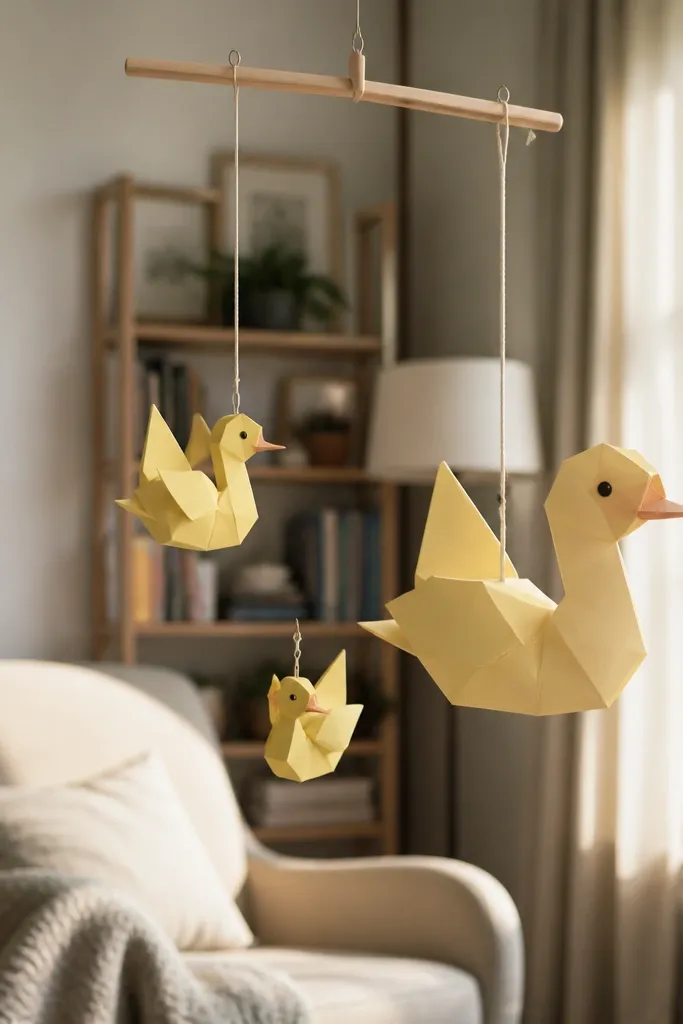
Mobiles look great in video and photos because the ducks move and cast soft shadows. The trick is balance: wings need angled symmetry so the duck doesn’t twist to one side. Build two or three ducks at different sizes and hang them from a simple crossbar. Use matte paper so the light doesn’t glare, and pick a color palette that looks good when it swings — yellow plus one accent shade. This is a fun decor project for kids rooms or craft corners.
Cut 3 duck bodies from cardstock in two sizes and add a small hole or eyelet near the top. Build a crossbar from a thin wooden dowel or sturdy cardstock strip and attach strings of equal length for the top attachment points. Make the wing angle consistent by folding wing tabs at the same degree and gluing them before assembly. Tie the strings so the ducks sit level when the mobile hangs still. Finish by testing in a quiet spot and adjusting string length until the mobile hangs evenly.
Editor's noteUse clear fishing line for the strings so the photo focuses on the ducks, not the cords.
Skip thisDon’t hang a mobile from one string only; uneven lengths make the ducks rotate and look messy.
12. Accordion-Belly Duck with Clean Pleat Lines
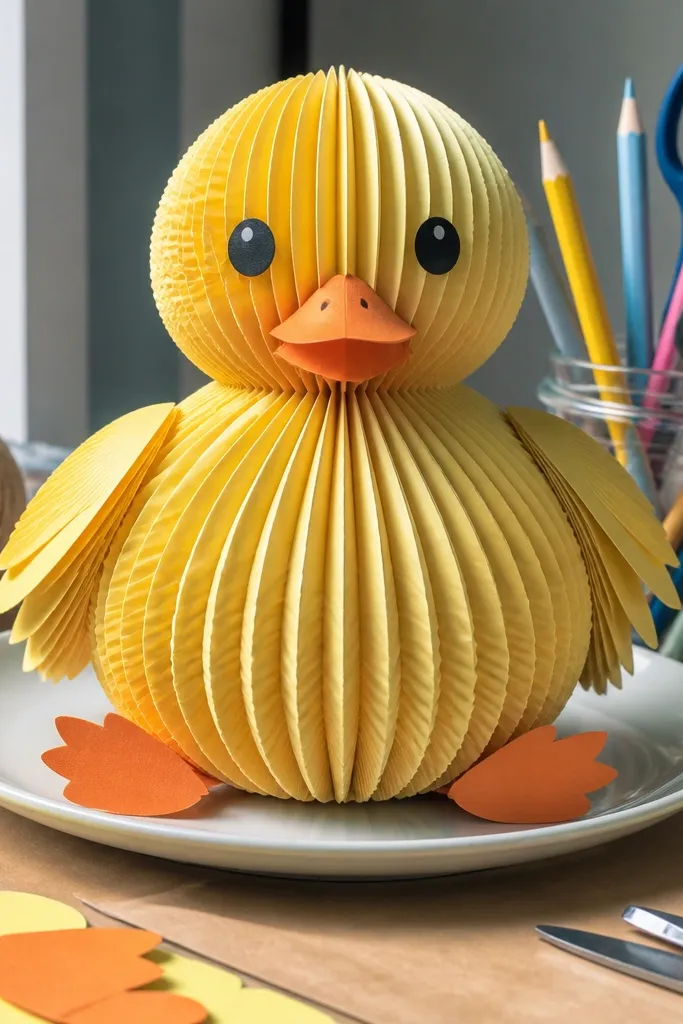
Accordion folds give you instant 3D volume, and photos love the repeating lines. This duck uses accordion pleats for the belly so the shape looks rounded from the front and side. Keep the pleats tight and evenly spaced so it reads as intentional structure. It’s also a great way to hide small imperfections because the pleats create a visual rhythm. Choose a solid color paper to avoid busy visuals that fight the pleats.
Cut an accordion strip from cardstock, about 2 cm wide, and score evenly spaced pleats (3-4 mm spacing). Fold into the accordion shape and glue the ends to form a curved belly. Cut duck head and wing pieces and attach them to the accordion belly with small tabs. Add a backing panel to hide tab edges and keep the front clean. Press under a book for 10 minutes so the pleats set before you add finishing details.
Use a scoring tool and measure spacing with a ruler; pleats that drift look sloppy fast.
Don’t glue pleat edges directly to thin paper; the accordion will warp and lose its curve.
13. Paper Duck Diorama on a Folded Water Base
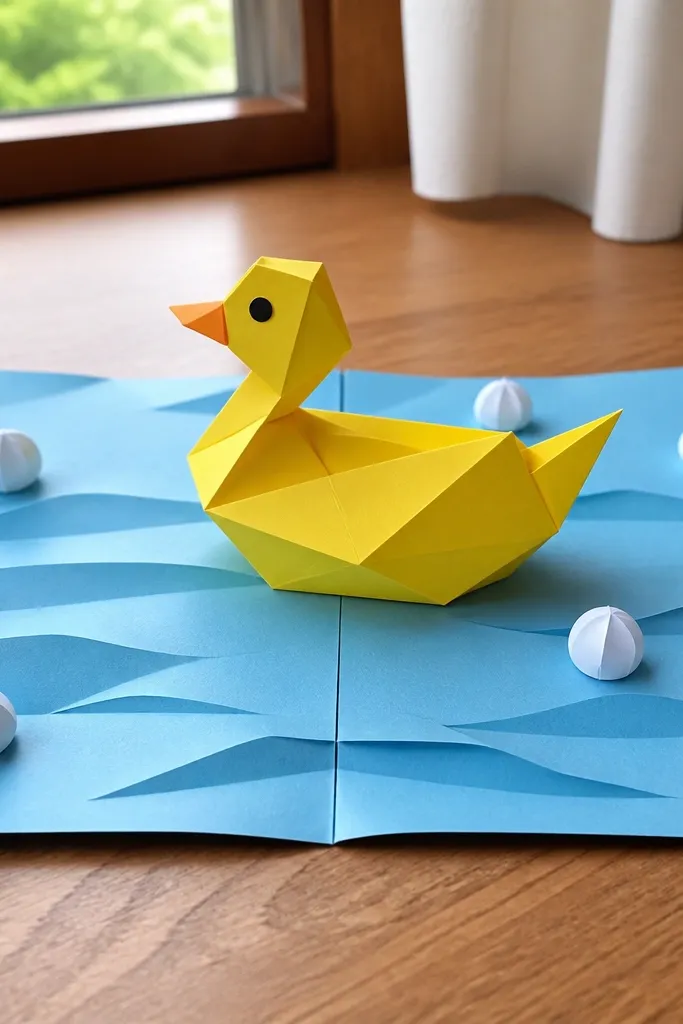
Dioramas look expensive because you’re building a scene, not a single object. This one uses a folded “water” base with ripple lines behind the duck so the silhouette stays readable. It’s a simple paper technique that gives depth without heavy 3D printing. Use light blue cardstock for the water and add a few white paper ripples to catch highlights. Place the duck slightly off-center so the composition feels like a real moment, not a centered craft sticker.
Cut a water base from light blue cardstock and fold it into a shallow tray shape. Score ripple lines across the back panel with a ruler so they show as texture in photos. Glue a flat duck cutout or a standing duck onto a small platform on the front of the tray. Add 2-3 white ripple strips and curve them slightly so they look like they’re moving. Finish with a clear matte seal so the white ripples don’t scuff.
Editor's noteUse a darker blue for the tray underside; it adds contrast that makes the duck pop in pictures.
Skip thisDon’t place the duck flat on the base; you need a small platform so the silhouette separates from the water.
14. Geometric Duck with Angled Beak and Triangular Wings
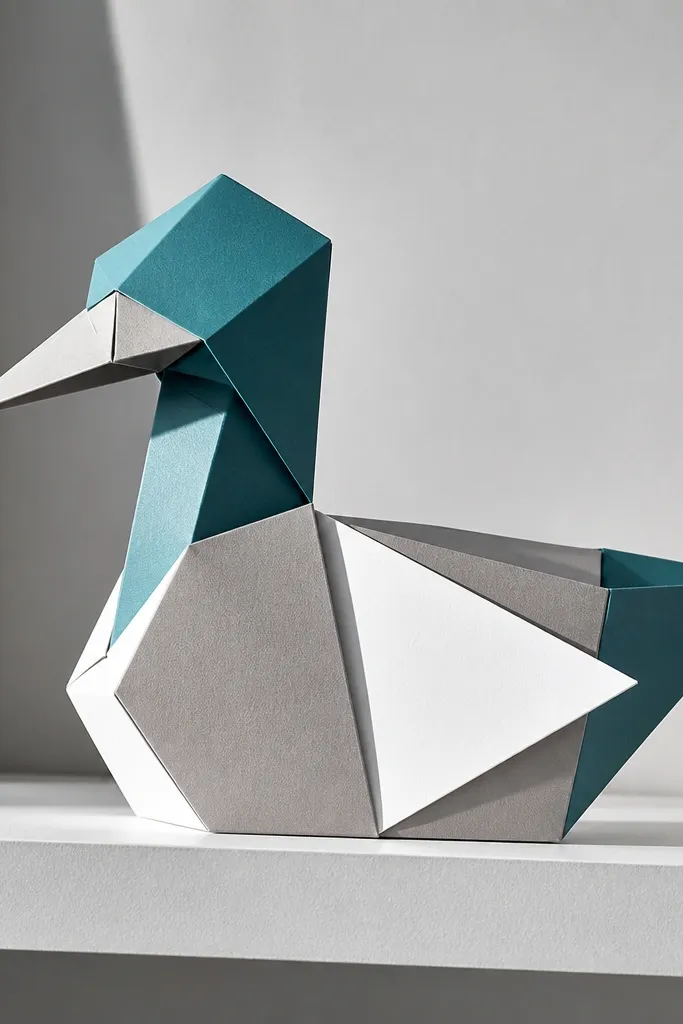
Geometric ducks look modern and graphic because every line is straight and every angle reads clearly. This project uses triangular wing panels and a sharply angled beak to keep the design crisp. It’s perfect if you like clean aesthetics and want your paper duck to look like decor, not a kids craft. Use 3 paper colors max: yellow for the main body, white or cream for highlights, and orange for the beak. The result photographs well even when the background is busy because the shapes are bold.
Cut the body from yellow cardstock as a simple rounded shape with straight sides where the wings attach. Cut two triangular wing panels from cream and orange paper and glue them so the triangles meet at a clear edge line. Build the beak as a single angled triangle and add a tiny black eye dot. Add a small tail triangle for balance at the back. Mount the duck on a solid background sheet so the edges don’t blend into the room.
Editor's noteKeep all triangles the same height and align their tips; geometry looks intentional when proportions match.
Skip thisDon’t add tiny feather cutouts; they turn the design busy and reduce the clean geometric look.
15. Paper Duck Treat Box with Tuck-Top and Tight Seams
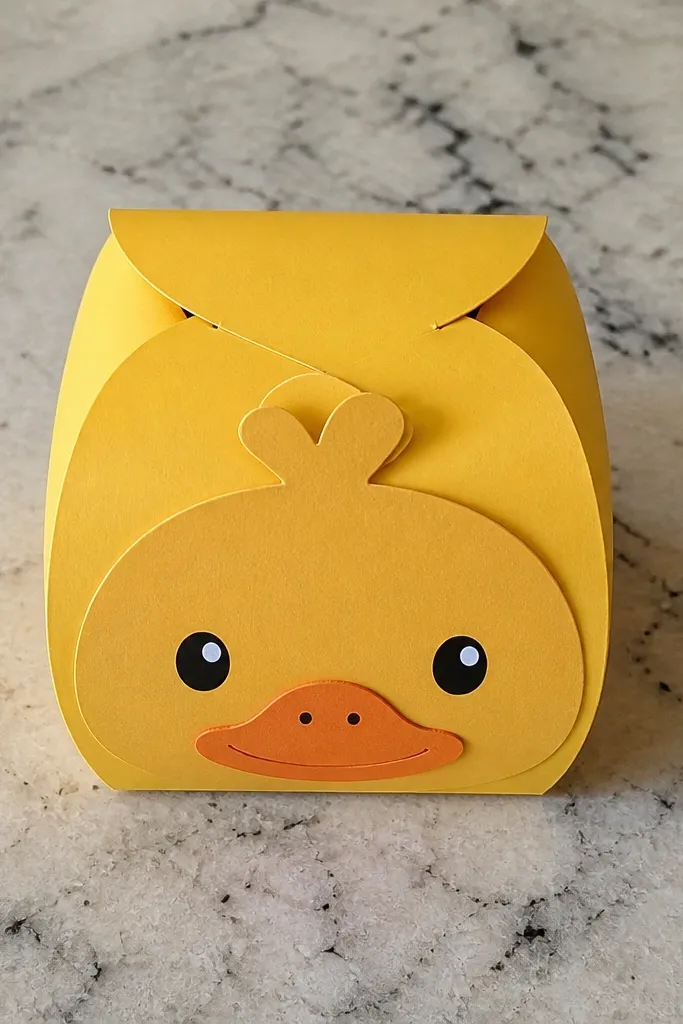
Treat boxes are one of the most photogenic paper duck formats because they look like packaging. This version uses a tuck-top lid and a duck face panel, so it reads clearly even from above. The duck shape is built into the box corners, which keeps everything sturdy and makes the lid close cleanly. Use 220 gsm cardstock so the box doesn’t sag, and pick a matte paper so the seams don’t glare. It’s a practical gift you can fill with candy or small notes.
Cut box panels based on a simple foldable box template sized to your treats, then assemble the base with strong adhesive. Create a tuck-top lid by cutting a front flap and two side flaps that overlap. Make a duck face panel with beak, eye, and cheek patches from contrasting paper and glue it centered on the front. Add small wing shapes to the sides as decorative folds. Press the box under a flat weight for 15 minutes so the seams stay crisp.
Use a glue stick for most seams and reserve hot glue only for reinforcing corners.
Don’t use thin paper for the lid; it will bow and the tuck-top won’t close neatly.
16. Layered Paper Duck Wreath Mini with Spaced Foam Rings
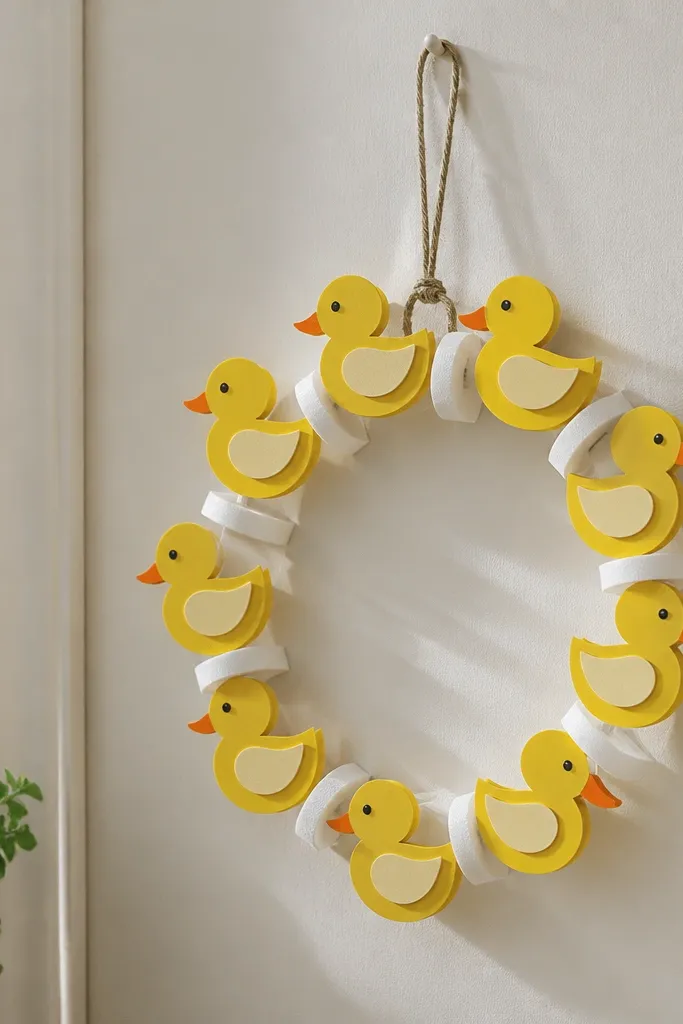
A mini wreath looks adorable and photogenic because it has repetition and a clear shape. This version uses small foam rings or stacked cardstock spacers under each duck so the ducks don’t flatten into one blob. You get shadow between ducks, which makes the whole wreath look dimensional in daylight. Use a ring base from thick cardboard, then add ducks evenly around like a clock face. This suits decor makers who want a statement piece without stitching or fabric.
Cut a thick cardboard ring base and cover it with craft paper so the edges look neat. Make 6-10 small ducks in a consistent style; keep their sizes within 10% of each other. Attach each duck using foam dots or stacked cardstock strips so you have a visible gap. Space them evenly around the ring and check symmetry before gluing the last one. Add a simple bow or leaf accents using one accent color so the wreath doesn’t look chaotic.
Editor's noteDry-fit every duck around the ring first; spacing mistakes are hard to fix after glue sets.
Skip thisDon’t glue ducks directly to the ring; flat mounting makes the wreath look like a sticker sheet.
17. Paper Duck Photo Prop with Rounded Base and Shadow Gap
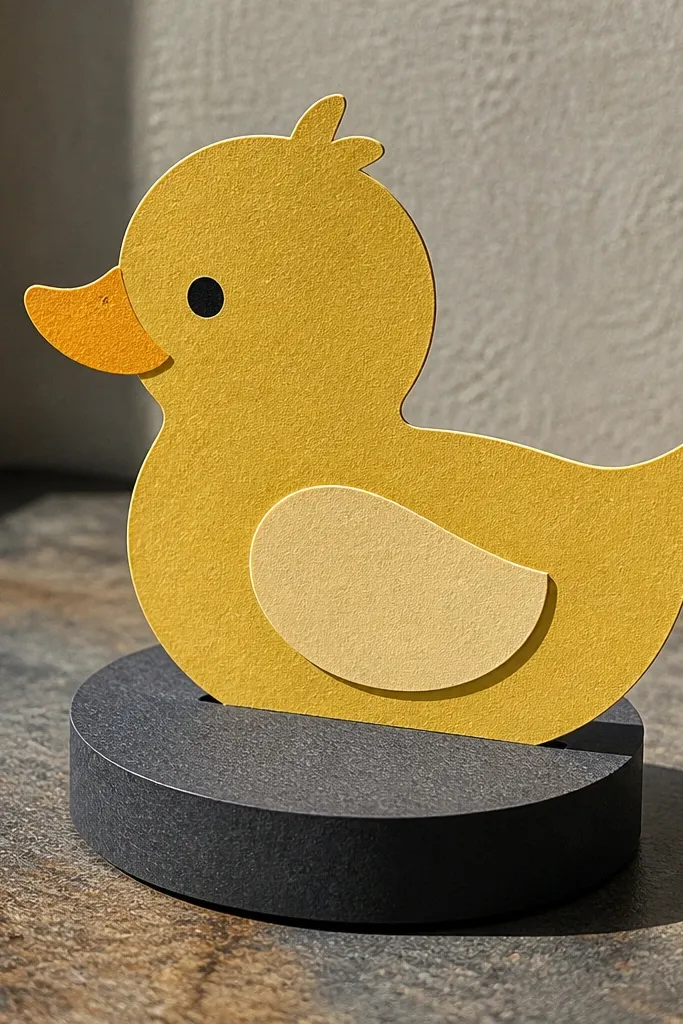
Photo props need one thing: separation. This duck is designed with a rounded base and a small shadow gap between the duck and the base so it stands out even against textured backgrounds. It looks good on tables, on shelves, and in flat-lay photos because the silhouette is stable and clean. Use cardstock for the base and a slightly thinner layer for the duck body so you can fold it without cracking. The end result reads as decor, not a flat craft.
Cut a rounded base from thick cardstock and score a small tab at the center for attaching the duck. Cut the duck body and head from 200 gsm paper and fold along the center for a slight stand angle. Glue the duck tab to the base tab and add a second brace strip underneath to prevent wobble. Add beak and eye details, then trim the underside so the duck sits flush. Seal with matte spray to keep edges from looking fuzzy.
Editor's noteLeave a 2-3 mm gap under the duck where it meets the base to create that clean shadow separation.
Skip thisDon’t over-glue the underside; glue squeeze-out fills the gap and makes the prop look flat.
18. Paper Duck Confetti Garlands with Feather-Tip Cutting
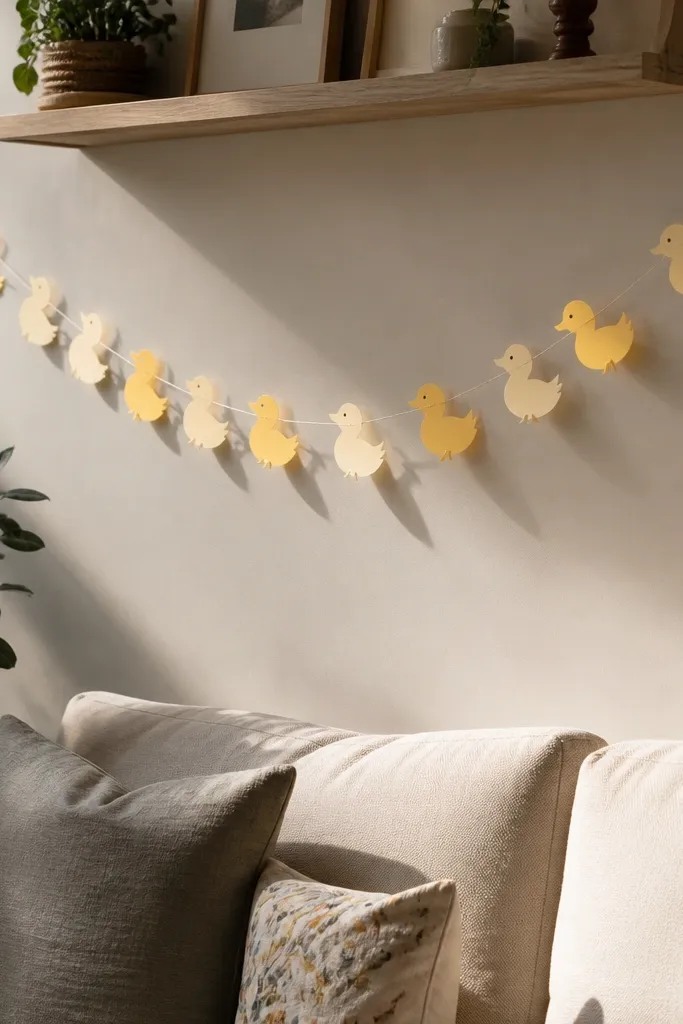
Confetti-style garlands look lively and cute because they create texture across a wall or banner. The key to keeping it photogenic is controlling size and making the feather tips look intentional, not ragged. This uses tiny ducks spaced on string, with small tail feathers cut into a slightly tapered shape. Use two coordinated paper tones so the garland doesn’t look random. This is a good choice for parties, but it also works as a craft-room decoration.
Cut a batch of small duck bodies and tails from cardstock; keep them consistent at about 4 cm tall for easy spacing. Cut tail feathers with a tapered tip and fringe the edge with very small snips (2-3 mm). Poke a hole near the top of each duck and thread onto string with a knot or tape stopper. Arrange spacing so ducks aren’t too close; aim for 3-4 cm between each one. Seal the paper lightly with matte spray to reduce scuffs from handling.
Pre-plan the color order on the table before threading so the garland has a rhythm in photos.
Don’t mix paper weights; thin and thick ducks sag differently and the garland looks uneven.
19. Minimal Black-and-White Duck with One Neon Accent
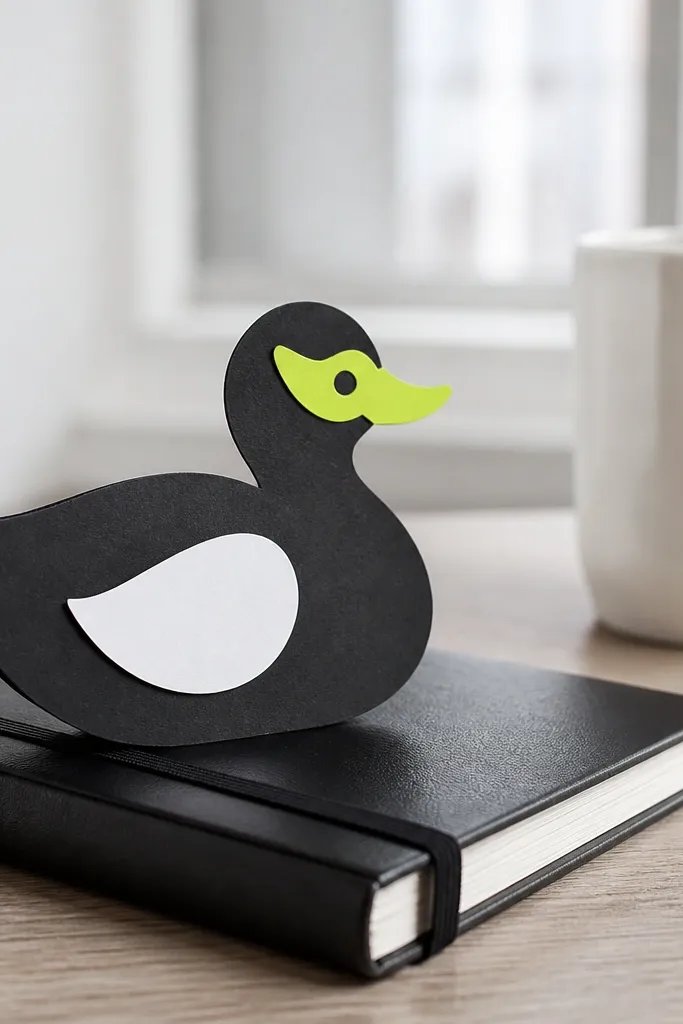
Minimal ducks photograph like graphic posters. You build the duck in black and white, then add one neon accent color for the beak or eye patch. This makes the duck pop in almost any room because there’s no competing pattern. The design works best with clean cutouts and a matte finish, so the neon doesn’t glare. It’s a strong pick if your decor is already colorful and you want the duck to look sharp, not busy.
Cut the main duck body in matte black cardstock and a smaller highlight panel in off-white paper. Glue them so the off-white peeks through at the wing and belly edges. Cut the beak from neon orange or neon yellow cardstock and attach it with a thin glue line. Add an eye using a white gel pen dot over black paper for contrast. Mount the duck on a solid background and keep the edges crisp by trimming after assembly.
Editor's noteUse matte black paper, not glossy; glossy reflects light and makes edges look uneven.
Skip thisDon’t add multiple accent colors; the minimal look collapses when you add more than one pop.
20. Paper Duck with Stitched Look Using Dotted Border Tape
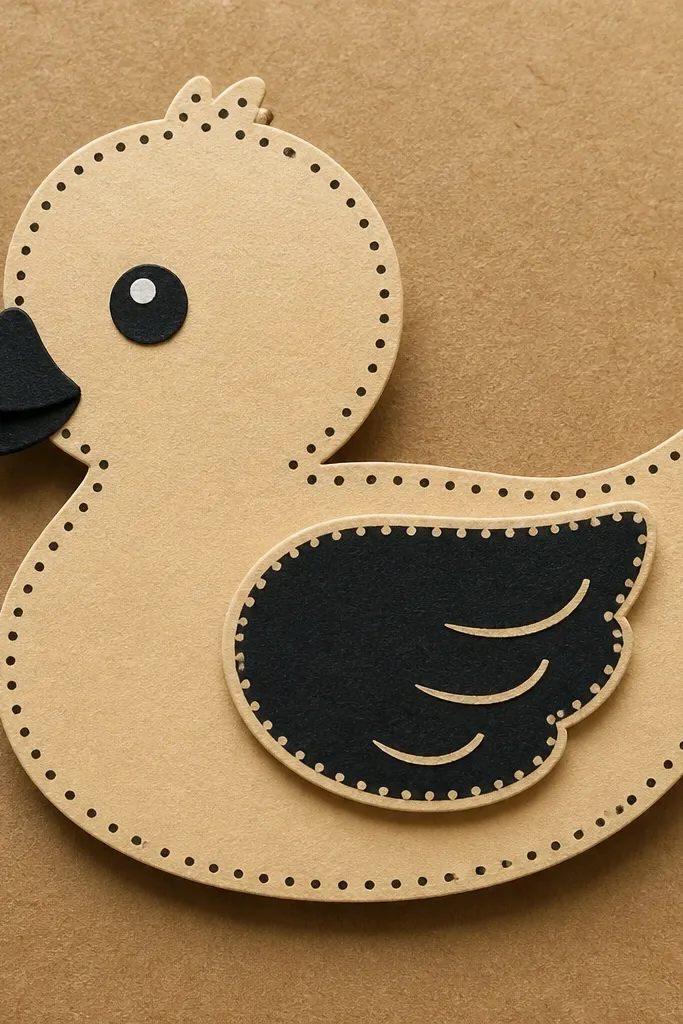
This duck looks handmade in a good way because it has a stitched border effect, not because it has extra pieces. You create a stitched outline around the duck and around the wing panel using a dotted line technique. It reads like fabric quilting, but it’s paper. Use a dotted border tape if you have it, or draw dots with a fine marker for control. The best part is that it hides small edge imperfections since the dots guide the eye.
Cut a duck body and a wing panel from two contrasting cardstock colors. Glue the wing panel slightly offset so it looks layered, then draw a dotted border around the duck outline using a ruler and a 0.3 mm fineliner. Add a dotted “seam” line between wing and body, keeping it straight. If you want faster results, apply dotted border tape along the edges and trim excess. Finish by sealing with matte medium so the ink stays crisp and doesn’t smear.
Editor's notePractice your dot spacing on scrap first; consistent dot size makes the stitched look believable.
Skip thisDon’t freehand the dotted border; wobbly lines make the whole duck look rushed.



