
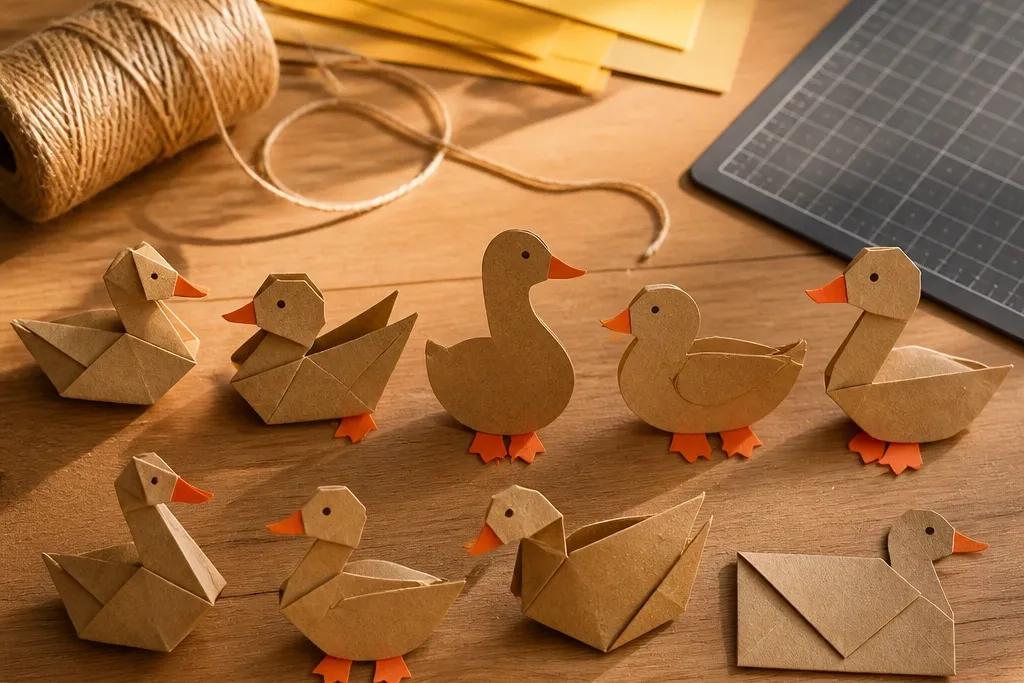
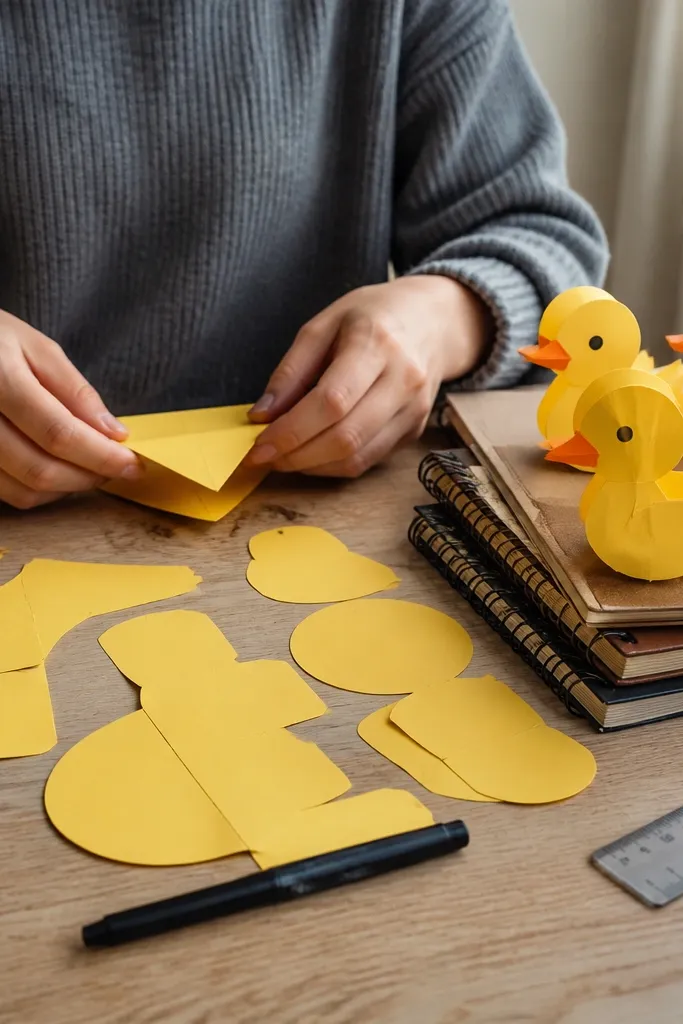
1. Classic Folded-Body Duck with Orange Feet
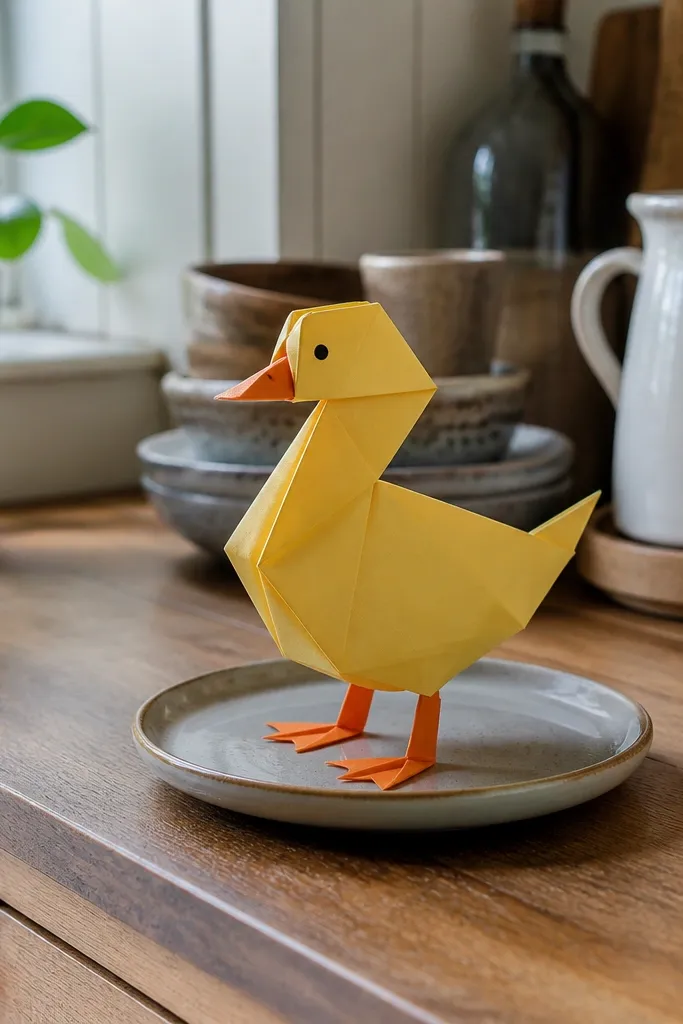
This is the duck you make when you want a cute, readable shape with minimal fuss. The folded body gives you smooth curves without needing fancy sculpting, and the orange feet add a bright focal point that pops in photos. Use medium cardstock so the fold holds its angle, especially at the belly crease. The beak is a simple triangle so it looks sharp even if your cutting is not perfect. It fits desks, gift tags, and small display stands because it looks finished from the front.
Start with a 6x6 inch yellow cardstock square. Fold it into a simple boat shape, then crease the bottom to form a belly; glue the side edges to lock the curve. Cut two small orange triangles for feet, then glue them slightly under the belly edge. Add a tiny beak from a 1-inch orange triangle and two dot eyes made with a black marker.
Score the fold lines lightly with an empty ballpoint pen so your crease is crisp.
Don’t use thin printer paper — it curls at the belly fold and the duck looks lopsided.
2. Layered Silhouette Duck on Kraft Background
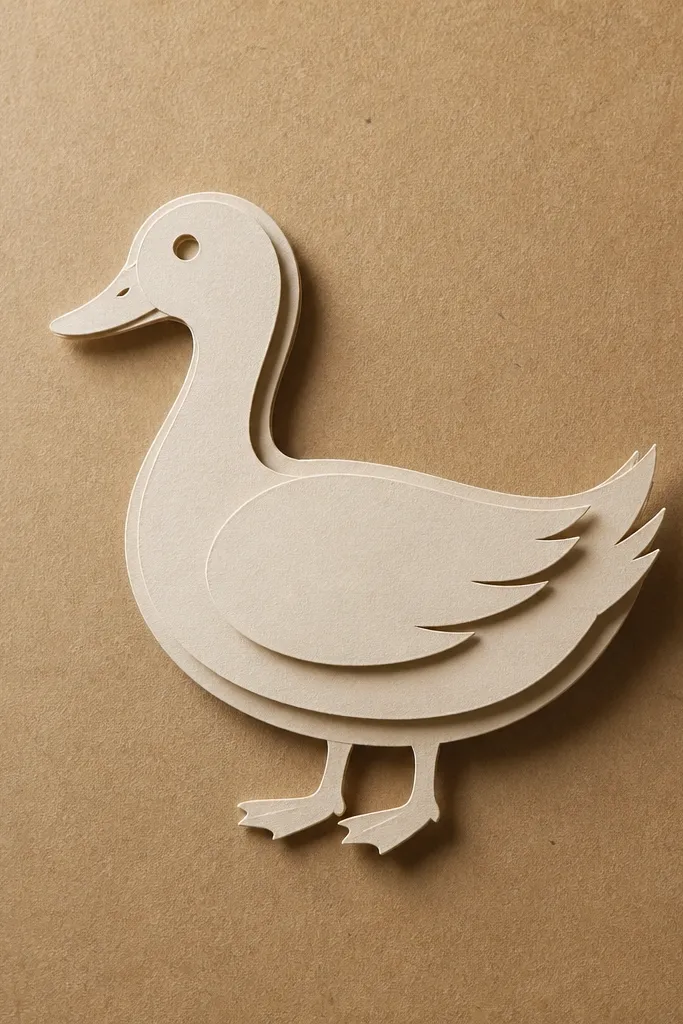
Layered silhouette ducks look “designed” even when you’re building from simple shapes. The secret is stacking 2-3 cut layers so the duck has depth, not just a flat outline. A kraft background makes the cream layers look warm and photo-friendly, and it hides minor edge imperfections. This project is great for beginners because you can trace shapes and cut carefully once per layer. The result reads clearly from across a room, which matters if you want it to look good in a cluttered shelf photo.
Trace a duck outline onto cream cardstock, then cut 2 more versions in brown and a lighter cream. Glue the brown layer slightly offset behind the cream to create a shadow edge. Add a final top cream layer centered on the body so the silhouette looks clean. Finish by adding a small orange paper beak and a tiny wing cut from a contrasting scrap.
Use a craft knife for the outline layers and a ruler for straight edges; it keeps the silhouette crisp.
Avoid stacking all layers perfectly aligned — the offset shadow is what makes it look intentional.
3. Washi-Tape Feather Duck Bookmark
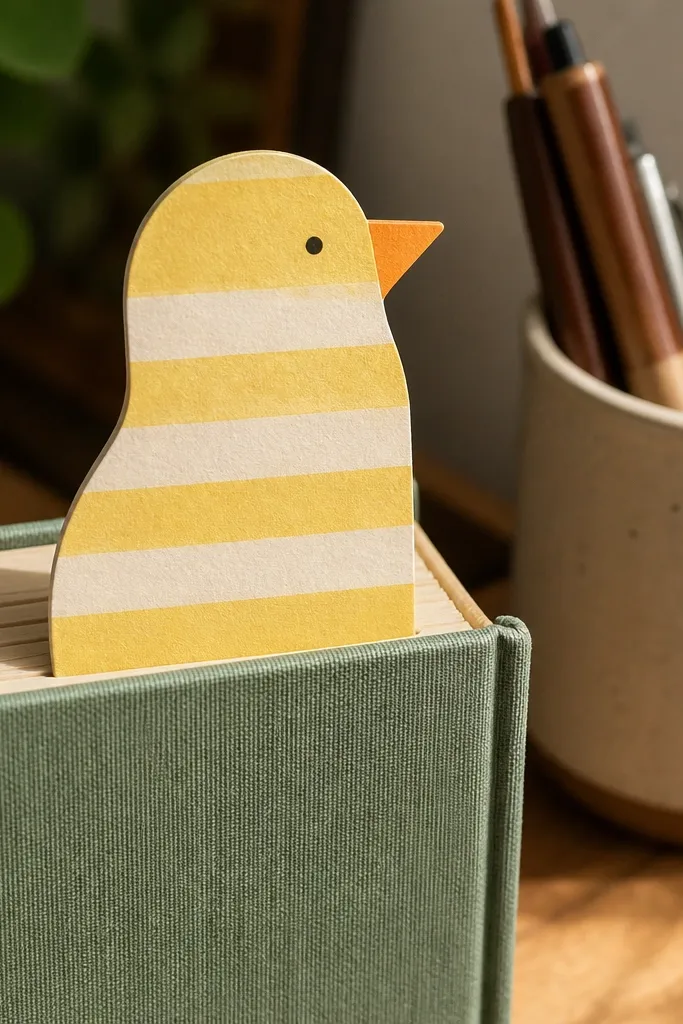
This duck is practical and photogenic because it’s flat, bold, and has a repeating feather pattern. Washi tape gives you texture without complicated cutting, and it’s forgiving if your lines aren’t perfectly straight. The bookmark shape also makes display easy — it stands out on a book spine and looks cute in desk shots. Use two or three tape colors only, so the duck doesn’t look busy. This is a great beginner project when you want something fast that still looks neat.
Cut a bookmark base from cardstock: 2 inches wide by 6 inches tall, with a rounded top like a duck head. Cut the wing area as a simple oval from yellow paper and glue it in the middle. Add feather lines by laying short washi tape strips diagonally across the wing and body, overlapping slightly. Finish with a beak made from a small folded triangle and eyes drawn with a black marker.
Seal the washi tape edges with a thin coat of clear glue stick on top so it doesn’t lift.
Skip glitter tape for your first one — it sheds and gets messy on the bookmark.
4. Paper Duck Pop-Up Card with Side Tabs
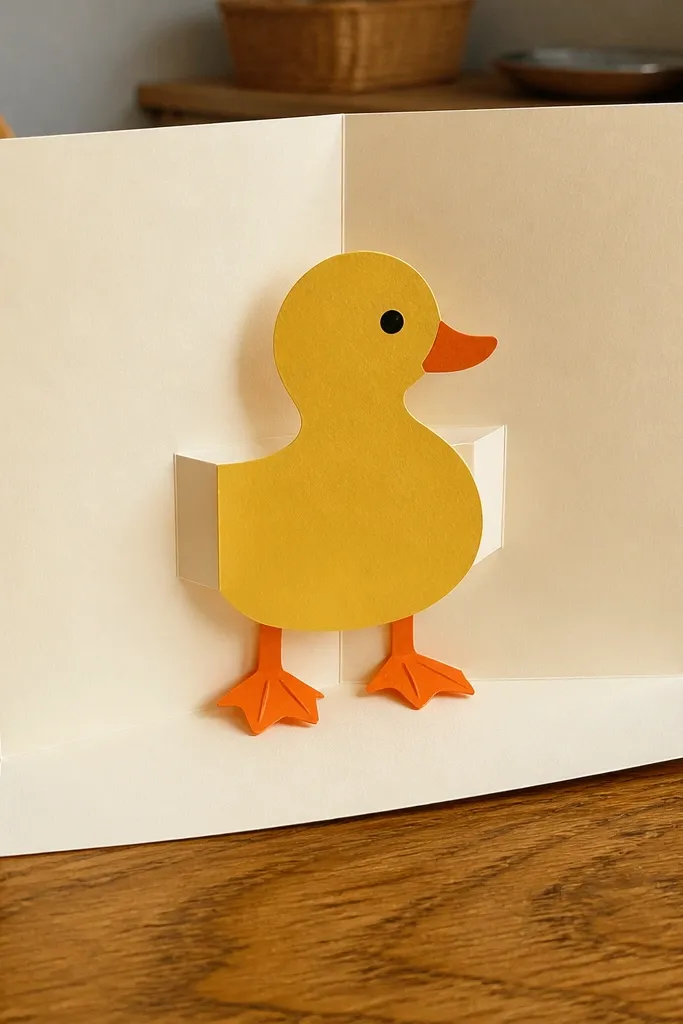
Pop-up cards look impressive because the duck has movement, but you don’t need advanced paper engineering. The side-tab method is beginner-friendly: you fold two tabs inside the card and the duck stands up when opened. The orange feet act like a visual anchor, so the duck looks centered even if your card folds are slightly off. Use thick cardstock for the card base so the mechanism stays crisp. This is a great choice if you want a project that looks like a store-bought card in photos.
Fold a 5x7 inch card base from thick cardstock. Cut a duck body shape from yellow cardstock and glue a small orange feet strip to the bottom. Create two side tabs inside the card: cut two 1-inch wide strips and fold them toward the center. Glue the duck to the tabs so it stands upright, then add a beak and eyes after assembly.
Dry-fit the opening angle before gluing the duck tabs — you want it to sit flat when the card closes.
Don’t glue the duck to the paper fold itself — it will tear or catch when you open the card.
5. Quilled Paper Duck with Big Dot Eyes
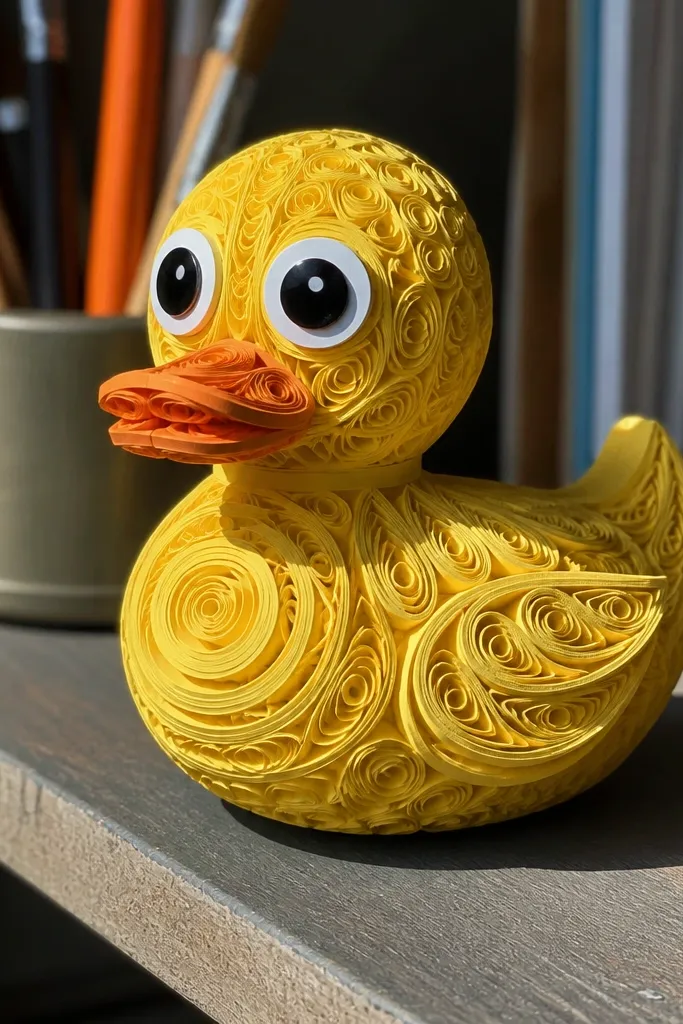
Quilling can look fancy, but this version stays beginner-friendly by using larger coils and fewer shapes. Big dot eyes make the duck read instantly, and thick quilling strips keep the coils sturdy. You get a textured, slightly bumpy surface that photographs really well under side light. Use a tight coil for the head and looser coils for the body, so you get depth without hundreds of tiny pieces. This is a solid pick if you like crafting but want a clear plan.
Editor's noteUse a glue pen for quilling — it controls wet glue so your paper strips don’t warp.
Cut quilling strips about 1/4-inch wide in yellow, cream, and orange. Roll a tight coil for the head and a medium coil for the body, then glue the coils down to a paper base. Create the wing from a flatter coil shape by pinching one side; glue it to the body. Finish with a folded orange beak and two thick black dot eyes drawn with a marker.
Skip thisAvoid tiny coils at first; they look delicate but they’re harder to place and they pop off.
6. Accordion-Belly Duck Ornament
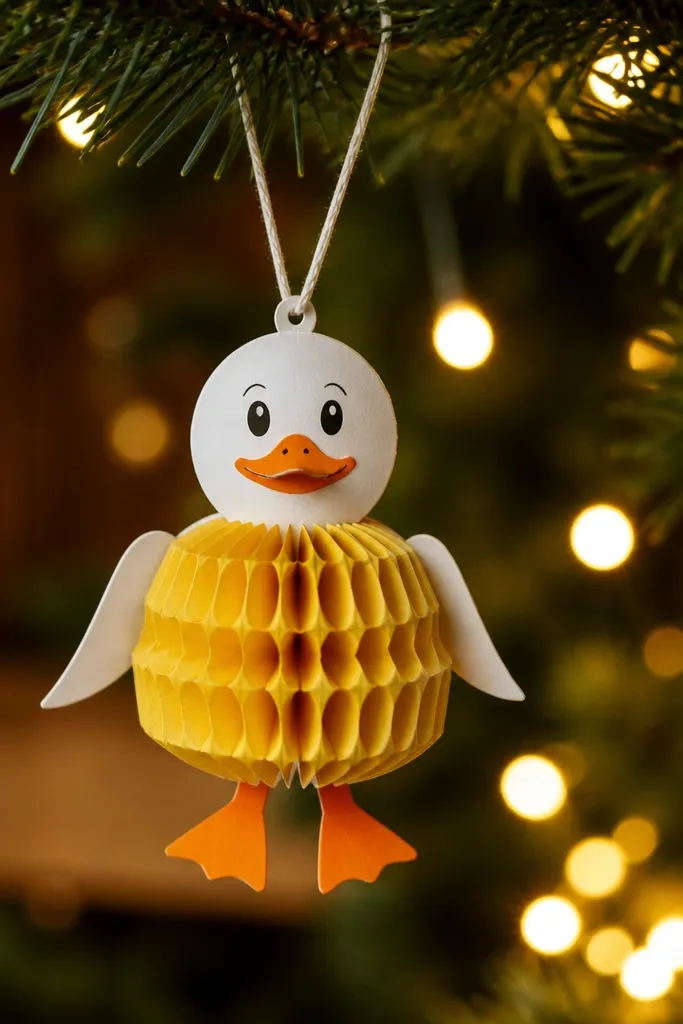
This duck looks 3D without needing foam or sculpting. The accordion belly creates a bouncy shape that catches light and gives you that “handmade ornament” vibe. It’s perfect for holiday trees, party garlands, or a spring wreath. The hanging loop is simple and makes the project feel complete even when it’s small. Pick two complementary yellows and one contrasting orange for feet so it looks intentional.
Editor's noteBurnish each fold with your fingernail so the pleats stay sharp and the ornament looks clean.
Cut a 2x9 inch strip of yellow cardstock and fold it into an accordion pleat. Glue the ends together to form a small fan belly, then add a rounded head from a separate cut circle. Attach orange feet using two short folded tabs on the bottom. Create a hanging loop from thin string or paper strip and glue it to the top before sealing the head.
Skip thisDon’t overfill with glue inside the pleats — it stiffens the accordion and kills the shape.
7. Paper Duck on a Stick for Cake Pops and Photos
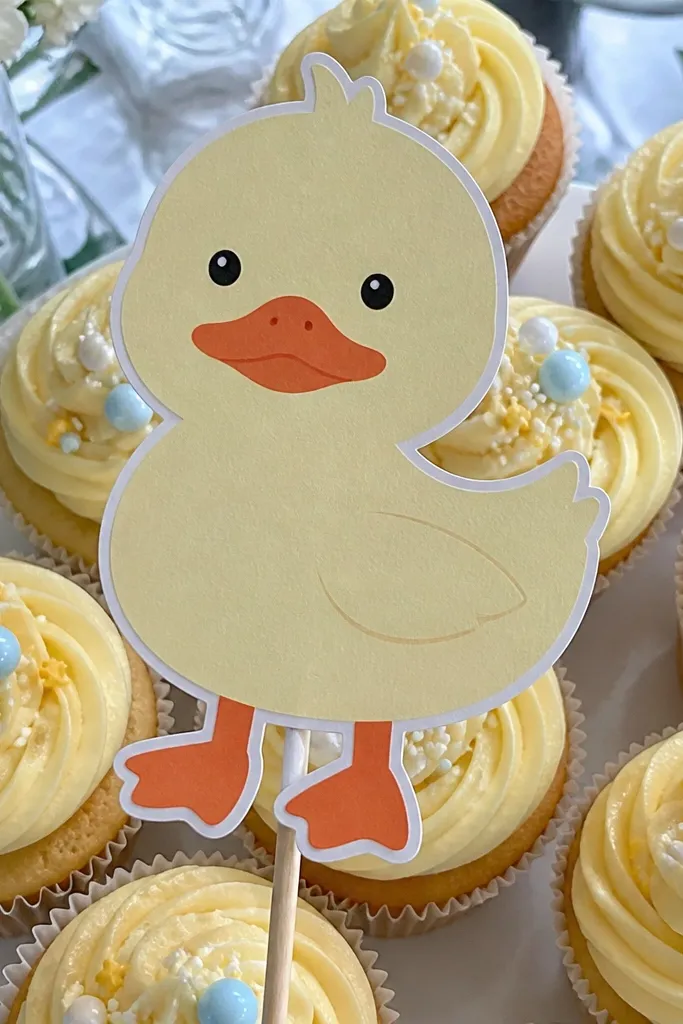
This is a photo-friendly duck prop that’s easy to mass-make. The duck is basically a sturdy cutout on a stick, so there’s no complicated assembly and you get a consistent look. It’s perfect for birthday tables, cupcakes, or a craft party where you want quick wins. Use thick cardstock for the face and a laminated or sealed surface if it will touch food display areas. The bright orange beak and feet make it instantly recognizable.
Editor's noteSeal the finished front with a thin layer of matte glue or clear tape so it doesn’t scuff.
Cut two duck face shapes from yellow cardstock, one slightly offset for a shadow layer. Glue them back-to-back around a wooden skewer, leaving the bottom edge flat. Add orange beak and feet pieces as separate cut shapes, then glue on dot eyes. If you want a more 3D look, fold the beak slightly before gluing to create a tiny lift.
Skip thisSkip thin toothpicks — they bend and the duck face droops in photos.
8. Book-Page Duck with Painted Beak
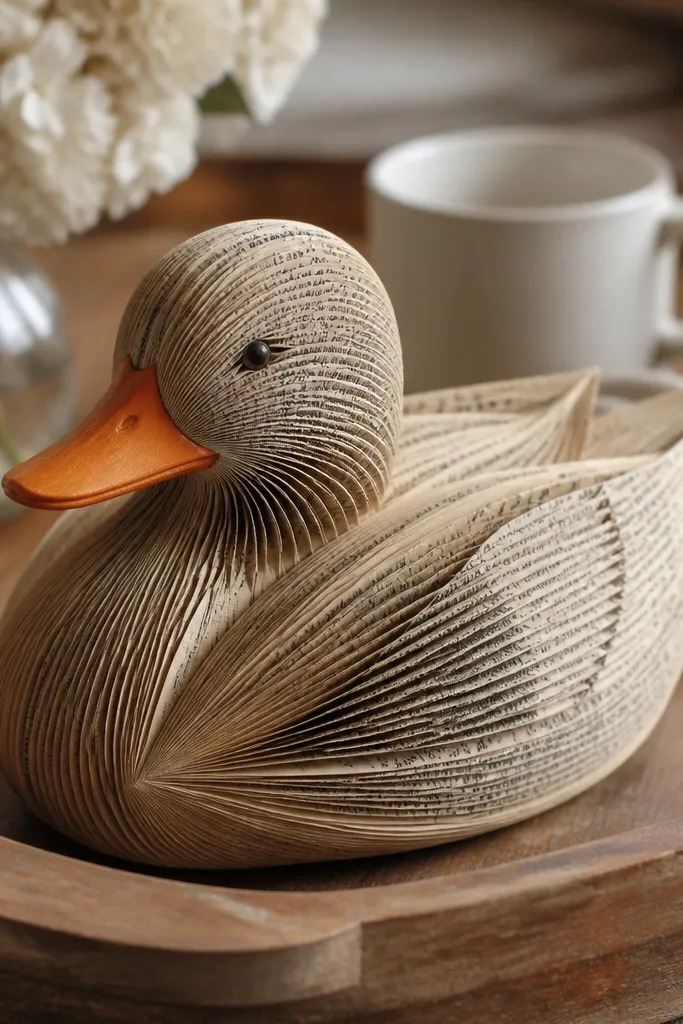
Book-page ducks look artsy and warm, and the paper texture shows through the folds. The trick is to keep the body simple so the pages don’t turn into a messy collage. A painted beak gives you a clean focal point, and the dark printed text on the background pages adds depth. This works well for vintage-style decor and shelf styling because it looks like something you found in a shop. For beginners, it’s forgiving because the paper texture hides small cutting mistakes.
Editor's noteUse a glue stick first for the paper layers, then reinforce with a tiny bit of liquid glue at stress points.
Tear book pages into strips and crumple lightly, then flatten into an oval body. Glue the strips onto a cardstock base in overlapping layers so the duck shape holds. Add a head ball by layering torn strips, then connect to the body with a small glue dot. Paint a small beak using orange craft paint and add two eyes with a black marker.
Skip thisDon’t use too much paint on the whole duck — it muddies the paper texture.
9. Paper Duck Shadow Box on a 4x6 Frame
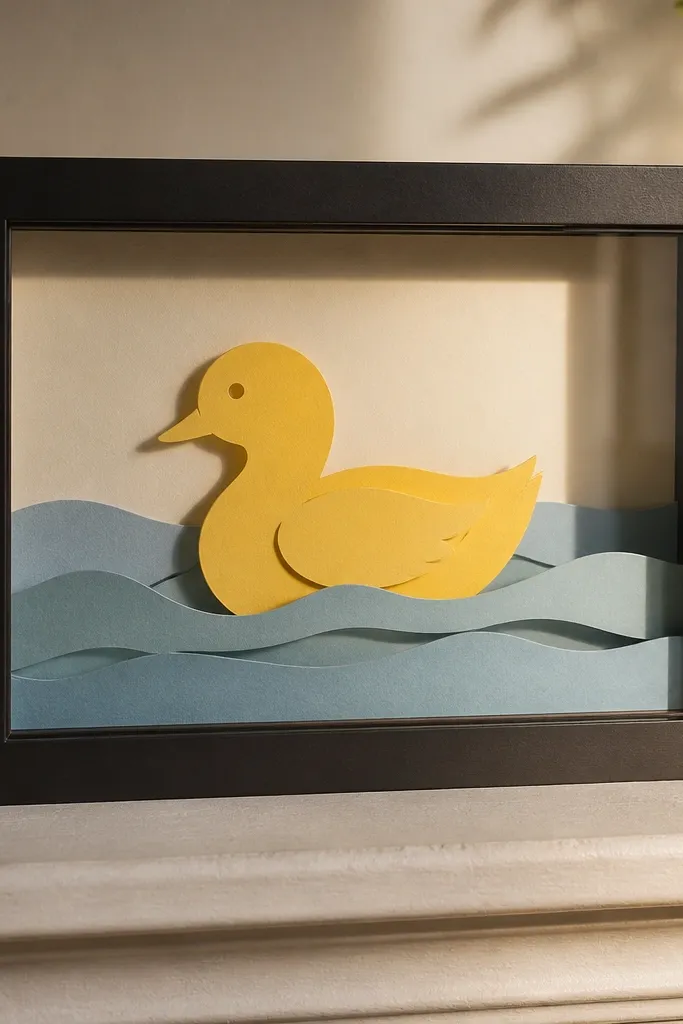
A shadow box makes even a simple duck look like decor. The depth comes from layers: duck in front, water lines behind, and a subtle base card under it. This is beginner-friendly because each layer is flat cut paper, not 3D sculpture. Choose water lines in light blue and keep the duck colors limited so the composition reads instantly. It’s great for entryways, shelves, and gift decor.
Use a 4x6 inch shadow box frame with a backing card. Cut a duck silhouette from yellow cardstock and a wing from a contrasting tone; glue them near the center. Create water behind the duck using thin strips of light blue paper, angled slightly and spaced 1/4 inch apart. Add a small orange beak and dot eyes, then glue everything to the backing so it sits 1/2 inch above the bottom.
Use foam tape for the duck layer so it casts a tiny shadow inside the box.
Avoid cluttering the back with too many water lines; 6-10 lines is enough.
10. Minimal Line-Duck with Marker Outline and Color Fill
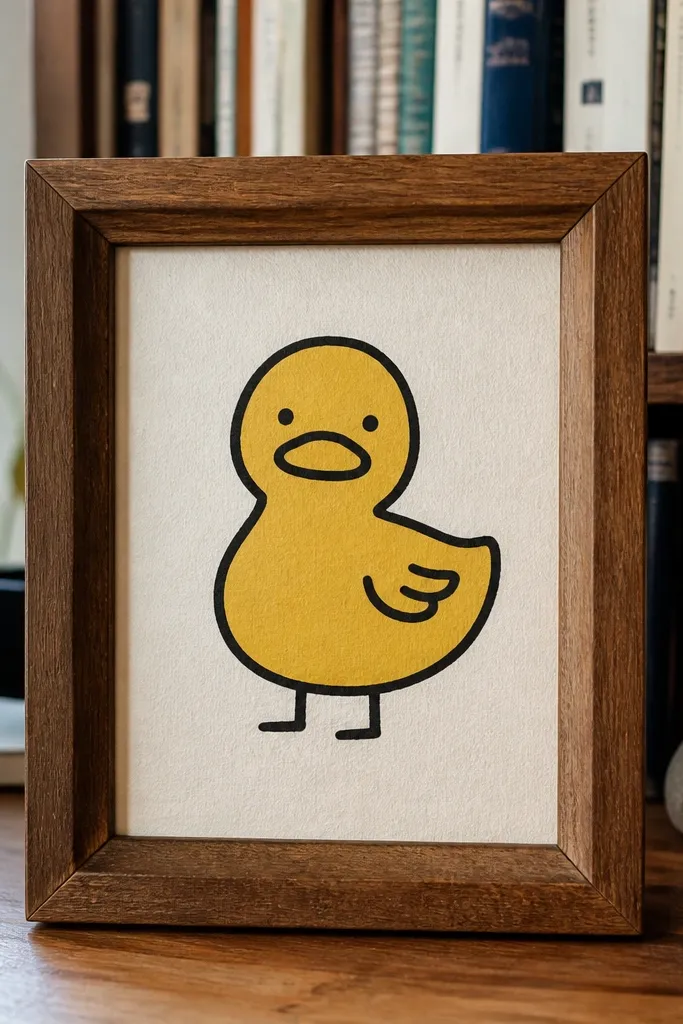
If you want an aesthetic duck that looks clean and modern, this is the one. It’s basically a graphic duck: black marker outline, flat color fill, and a few small details like wing marks. The simplicity makes it look good even if your cutting is slow, because you’re focusing on drawing accuracy. This is also a great way to use leftover paper scraps as “color swatches.” It fits wall art, card fronts, and scrapbook pages.
Draw a duck outline on white cardstock using a pencil first, then ink over it with a thick black marker. Fill the body with yellow marker or paint, keeping the edges inside the outline. Add a wing patch using a slightly darker yellow or light brown, then draw small feather lines with a lighter pen. Finish with an orange beak triangle and two dot eyes.
Let marker ink dry between layers; smudges show up fast on duck cheeks.
Don’t over-detail the feathers — 3-5 lines on the wing is enough.
11. 3D Paper Duck Cupcake Topper with Rolled Feet
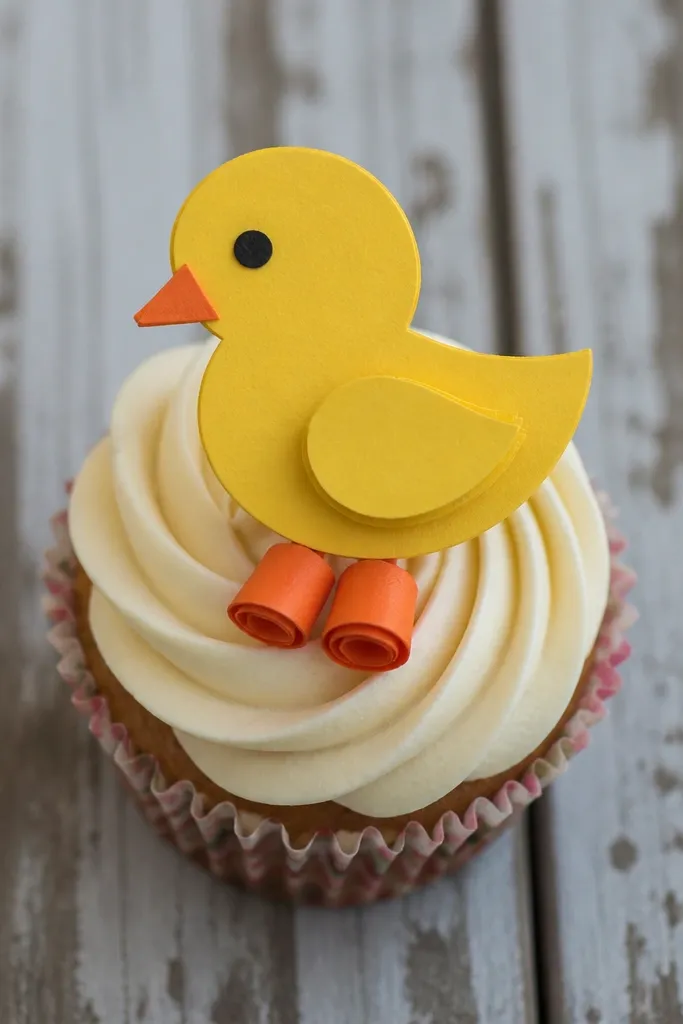
This topper looks dimensional because the feet are rolled and the body is layered. It’s beginner-friendly because you’re only doing two small shaping steps: rolling two strips for feet and gluing a layered body. The layered wing gives that “real duck” feel without complicated feather work. It’s perfect for parties and it photographs well against frosting because the duck stands up. Keep the colors bold — yellow body, orange feet, simple black dots for eyes.
Editor's noteRoll the feet around a toothpick so the tube shape is consistent.
Cut a front duck body and a back body from yellow cardstock. Roll two 1/2-inch orange paper strips into tiny tubes and glue them to the bottom edge of the front body. Glue the back body behind the front, sandwiching the feet between layers. Add a wing layer and beak, then stick the topper onto a short skewer or thick cardstock base.
Skip thisDon’t attach the feet too high; the topper should look like it’s standing, not floating.
12. Paper Duck with Folded Wing Tabs (Super Clean 3D)
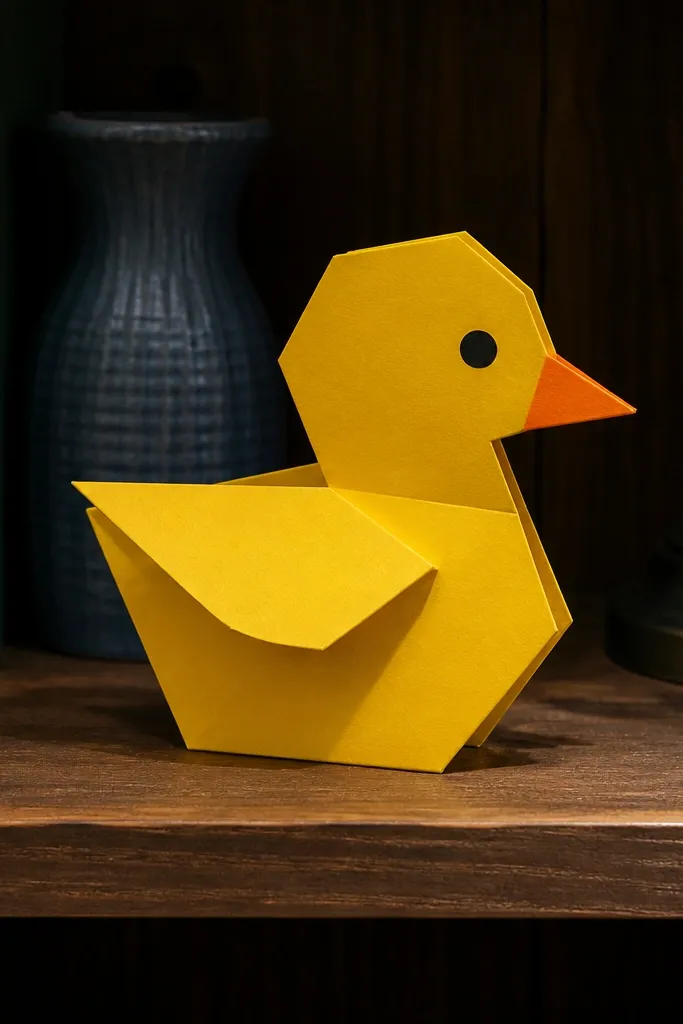
This design uses wing tabs so the wing lifts without needing foam or complicated layering. It looks crisp because the tab edges are hidden under the wing, and the body stays flat for easy assembly. The result has that satisfying 3D effect in a small space, which makes it great for shelf decor and greeting cards. Beginners like it because you only fold a couple tabs and everything locks in place. It’s also easy to scale up or down.
Cut a duck body from yellow cardstock with a slit at the wing area. Create a wing piece from a contrasting paper and add two small folded tabs on its bottom edge. Slide the tabs through the body slits and glue the tabs on the inside so the wing lifts at an angle. Add orange feet and a folded beak, then glue the face elements on top.
Use a metal ruler to cut straight slits — uneven slits make the wing sit crooked.
Don’t glue the wing tabs on top of the body — you want the tab hidden inside.
13. Duck Family Trio from One Sheet Template
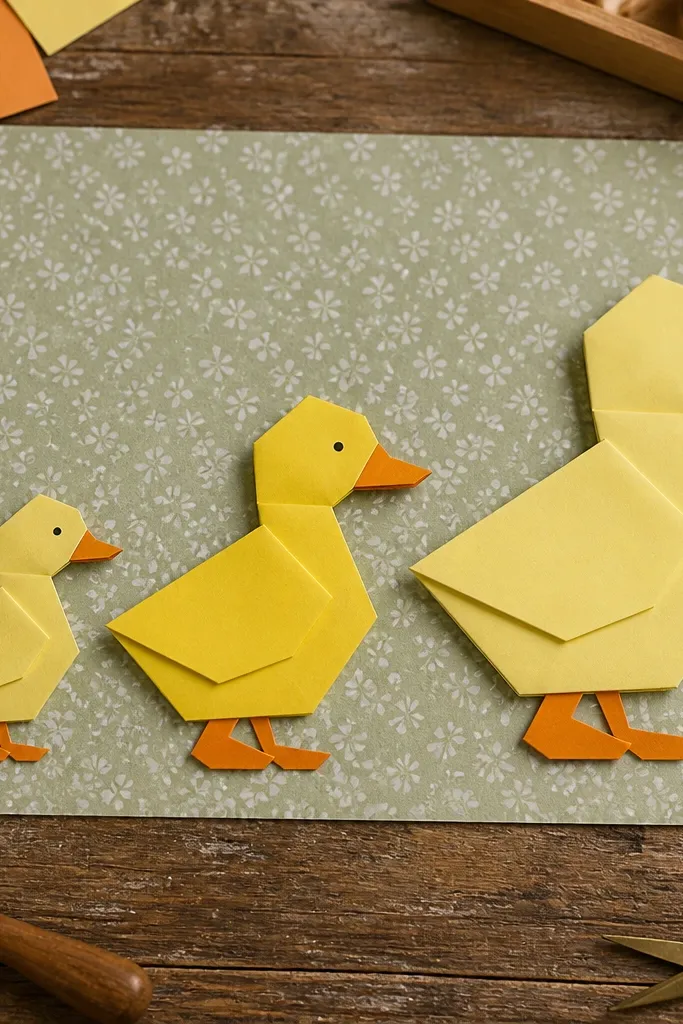
Making a set looks better than one duck because the sizes create a composition. This project is beginner-friendly because you cut from one sheet and keep proportions consistent. The “family” format also hides small imperfections: if one duck is slightly off, the set still looks intentional. Use three color shades and add the same eye style across all of them for a unified look. It’s great for a desk display, party place cards, or a mini garland.
Draw or print a duck template in three sizes on cardstock: small 3 inches, medium 4 inches, large 5 inches tall. Cut each duck body and wing using the same template so they match. Assemble each duck with a simple fold line at the belly and glue the wing in place. Finish all three with the same beak style and dot eyes, then arrange them together on a small base card.
Keep the beak size identical across ducks — it makes the trio look like a set, not random crafts.
Don’t mix too many eye styles; matching eyes is what keeps it cohesive.
14. Paper Duck Confetti Jar Label with Mini Duck
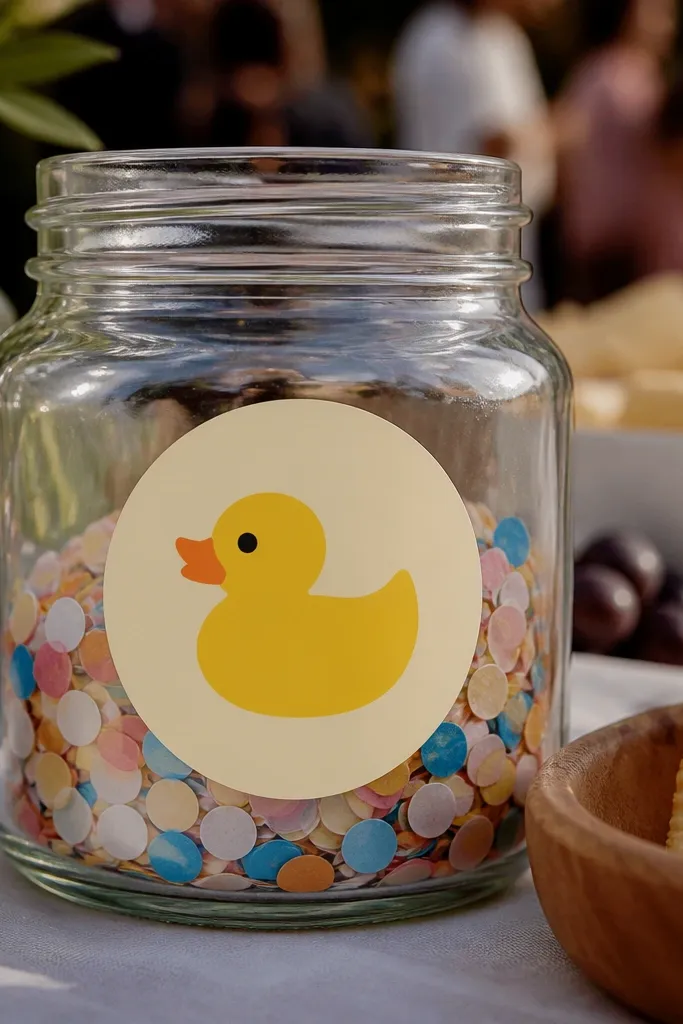
This is a decor craft with a clean, party-ready look. A mini duck label makes a plain jar look intentional, and you get a photogenic focal point for snack tables. The mini duck is beginner-friendly because it uses simplified shapes and small cut pieces. Keep the label background solid and let the duck colors carry the personality. It’s also a great way to use scrap paper because the duck is small.
Cut a label shape from cardstock, about 3x5 inches, with a rounded top. Glue a mini duck cutout in the center, then add a tiny wing and folded orange beak. Write the jar name with a black marker, leaving space under the duck for readability. Add a small hole punch at the top corners and tie with twine or ribbon.
Use a black marker for text, not gray — it reads better in photos.
Don’t crowd the label with extra icons; one duck is enough.
15. Duck Face Masking-Tape Art (No Cutting Skills Needed)
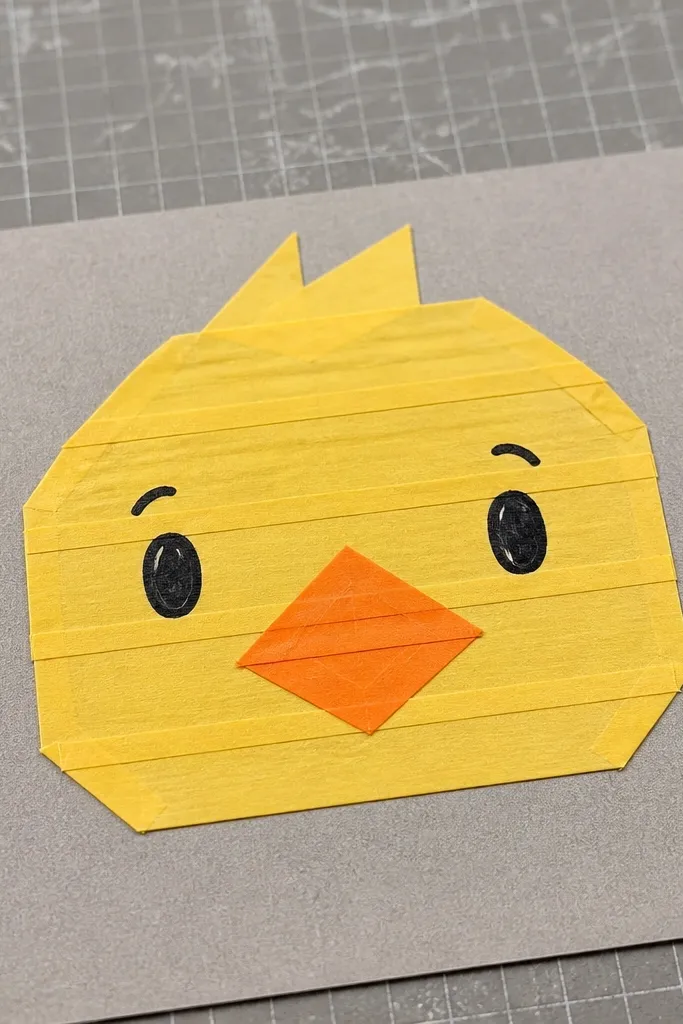
This is an aesthetic duck that looks sharp because tape creates crisp borders. You get a clean graphic look without needing perfect scissors work. It’s also great for beginners because you can correct mistakes by pulling tape and repainting. Use yellow paint for the body area and a small orange triangle for the beak shape. The finished piece is perfect as wall art, a card front, or a framed craft for a kid-friendly corner.
Editor's notePeel tape while paint is slightly tacky for the cleanest edge.
Tape off a duck face outline on white cardstock using masking tape, pressing edges firmly. Paint the body area yellow, then let it dry fully. Carefully peel the tape and fill the beak with orange marker or paint. Add dot eyes with a black marker and reinforce the outline with a thicker pen.
Skip thisDon’t rush the paint dry time — you’ll smear the edges when you remove tape.
16. Paper Duck with Rolled Paper Feathers Tail
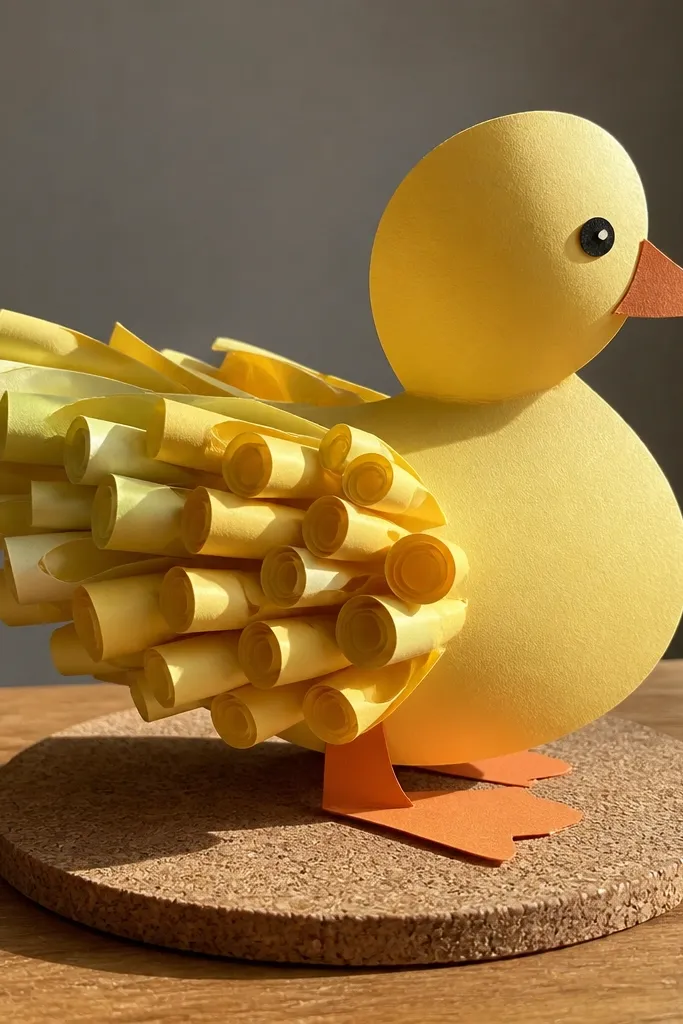
Rolled paper feathers make this duck look handcrafted and textured without being too fussy. The feather tail adds motion and gives the project a clear “wow” detail that reads in photos. You only roll a small number of strips, so it stays beginner-friendly. Use two yellow shades so the tail looks layered, not flat. This duck works well as a desk decoration because the tail catches light when you tilt it.
Editor's noteCut strip lengths the same and you’ll get a uniform feather look fast.
Cut 6-10 thin paper strips, about 1/8 to 1/4 inch wide, in yellow shades. Roll each strip loosely around a pencil and glue the ends to keep the roll in place. Build a simple duck body from cardstock and glue the rolled strips as a tail on the back edge. Add wing and beak, then attach dot eyes and a small belly highlight strip.
Skip thisSkip super-small strips — they tangle and make the tail messy.
17. Origami-Style Duck Bookmark with Pocket
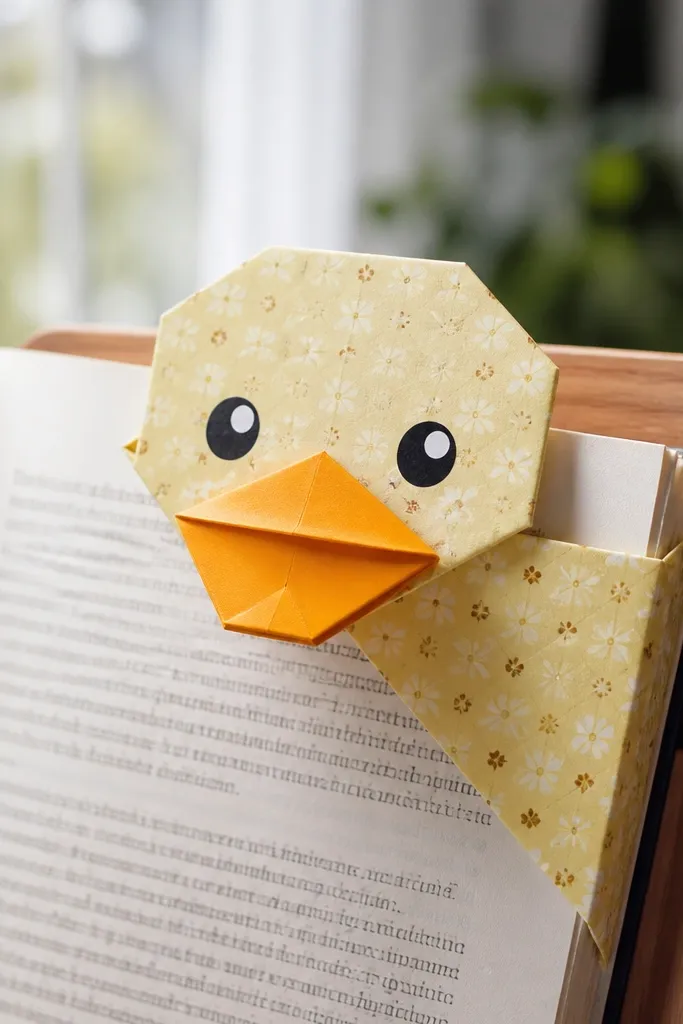
This bookmark has a clean origami vibe but uses simple folding you can learn quickly. The pocket design keeps it from slipping, so it looks practical and neat in real use. It’s also photogenic because the duck head and beak are sharp and symmetrical. Choose a single patterned paper for the body to make it look intentional even if your folds aren’t perfect. Great for beginners who want a functional craft that still looks cute.
Editor's noteUse thicker cardstock for the pocket so it holds page corners without sagging.
Cut a bookmark base from cardstock, 2.5 inches wide by 7 inches tall. Fold a small pocket at one end by bending a 2-inch flap backward and gluing the sides. Shape the top into a duck head by folding corners toward the center and creasing firmly. Add a beak triangle and dot eyes, then test the pocket fit on a book page.
Skip thisDon’t skip the crease pressure — weak creases make the head fold look mushy.
18. Duck Egg Surprise with Paper Duck Inside
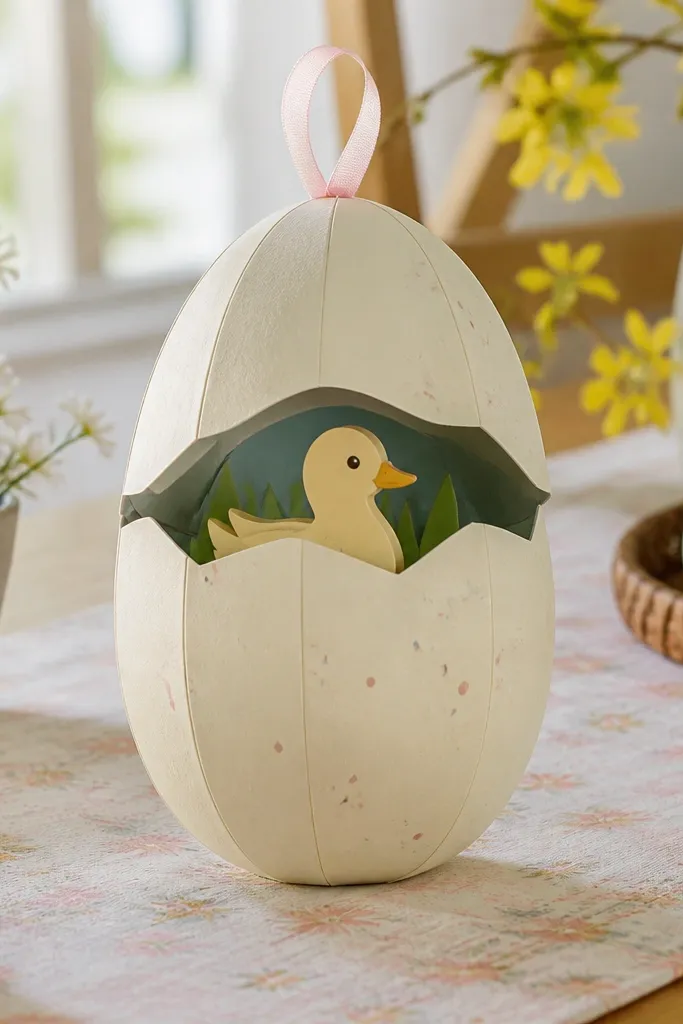
This one looks like a gift and it’s extremely satisfying because the duck is hidden until you open the egg. The egg shape is easier than it sounds when you use a pre-scored oval template and a simple opening seam. The inner duck is small and simple, so you don’t need advanced paper cutting. It’s great for Easter decor, party favors, or a cute desk surprise. The egg also gives you a clean rounded silhouette that photographs well.
Cut two matching egg halves from thick cardstock using a simple oval template, then score along the fold line on both. Glue them together around the edge, leaving a small opening gap at the top seam. Make a tiny duck body and glue it to the inside so it sits upright when the egg opens. Add a small paper strip handle or tab so the egg opens cleanly.
Use a thin layer of glue on the seam so the egg can open without sticking.
Don’t make the egg seam too bulky — it will show and ruin the smooth shape.
19. Paper Duck with Fabric-Like Felt Wing (No Sewing)
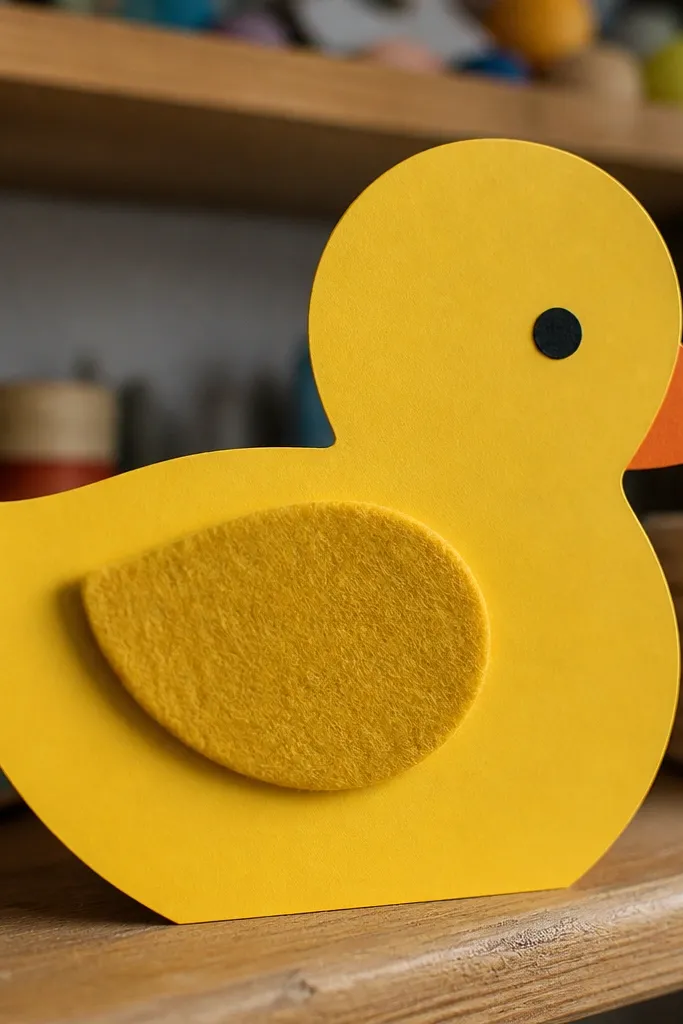
You get the soft, cozy look of felt without sewing, which makes the duck feel more premium. The wing patch is the star because it adds texture contrast against the paper body. This is beginner-friendly because attaching felt-like pieces is just cutting and gluing. Use a simple yellow paper body and reserve the felt patch for one wing. It’s great for kids' crafts and for decor that looks warm in daylight.
Cut a yellow duck body from cardstock and add dot eyes and a beak with a marker. Cut a wing patch from felt or felt-like craft fabric, about 2 inches long with rounded edges. Glue the felt wing onto the paper body, then add a small paper feather line on top using a lighter marker. Finish by adding orange feet made from folded paper triangles.
If your felt sheds, seal cut edges with a tiny dab of clear glue.
Avoid using thick hot glue blobs — they create bumps that look messy up close.
20. Paper Duck Mobile with 3 Hanging Ducks
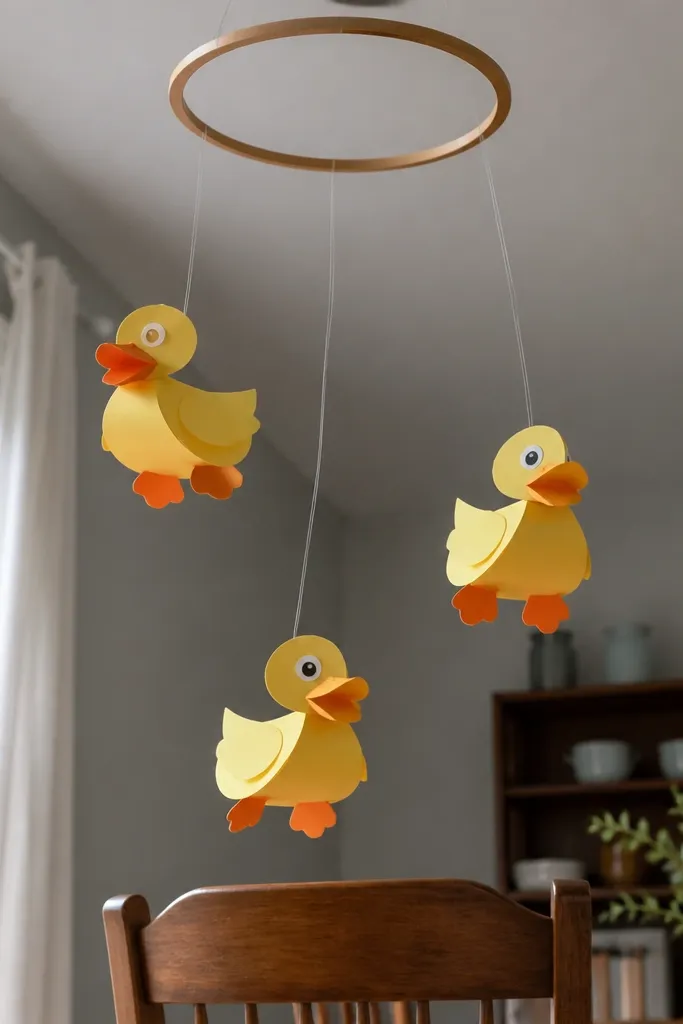
A mobile makes paper ducks look like decor instead of crafts. Hanging ducks are photogenic from multiple angles, and the movement helps the colors look alive. This setup is beginner-friendly because each duck is a simple cut-and-fold shape, and the assembly is just stringing. Use one hoop and three strings of different lengths so the ducks sit at pleasing heights. Great for nurseries, party corners, or a craft room display.
Cut three simple duck shapes from cardstock, each about 3, 4, and 5 inches tall. Punch a hole at the top of each duck and thread with string at lengths that create a triangle spacing. Attach the string ends to a small embroidery hoop and tie knots securely. Add a small loop at the top of the hoop for hanging, then reinforce any loose edges with clear tape.
Use fishing line for the strings — it disappears in photos and makes the ducks look like they float.
Don’t hang ducks at equal lengths — it looks flat and boring.
21. Watercolor-Style Paper Duck with Bleed Edges
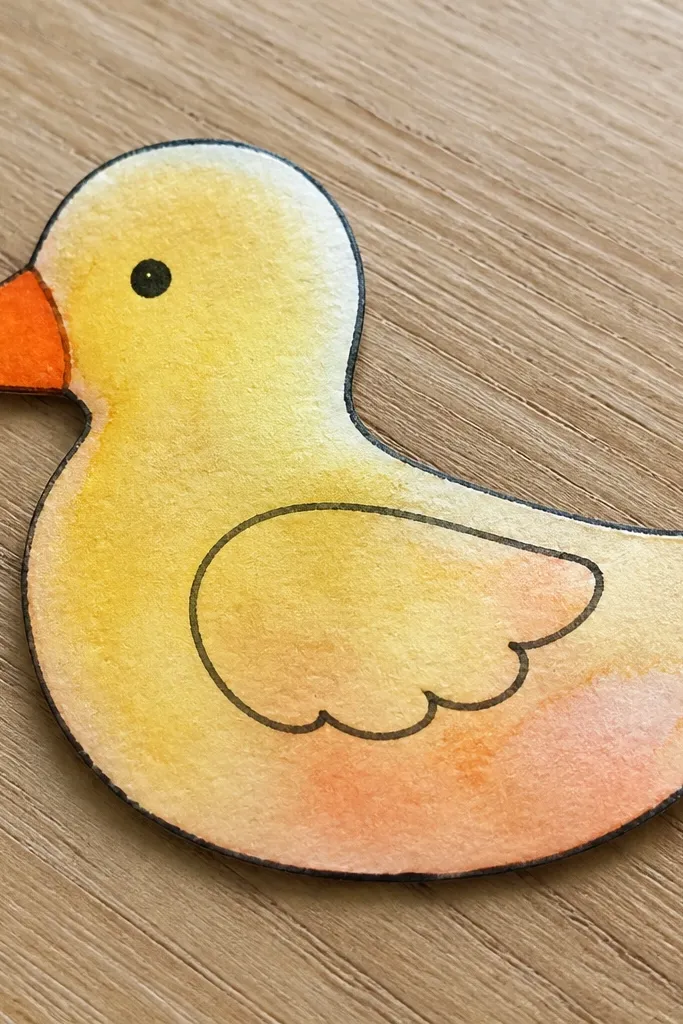
This duck looks like watercolor art but uses paper cutouts that make it easier for beginners. The aesthetic comes from blending ink or watercolor on the paper before you cut, so edges look soft and dreamy. When you pair that soft wash with a crisp black marker outline, you get a clean, modern look. This works well for wall art and scrapbooking pages because the duck feels hand-painted without needing perfect brushwork. Use thicker paper so the wash doesn’t warp the shape.
Editor's noteCut after the wash dries — cutting damp paper stretches and changes the silhouette shape.
Wet a scrap of watercolor paper lightly and blend yellow and a tiny bit of orange at one side, then blot with a paper towel. Let it dry until it’s just slightly damp, then trace and cut a duck silhouette. Outline the duck with a black marker, then add a folded orange beak and dot eyes. Mount it on a solid white or kraft background for contrast.
Skip thisDon’t skip a solid background — the wash edges lose their effect on busy paper.
22. Paper Duck Place Card with Clip Stand
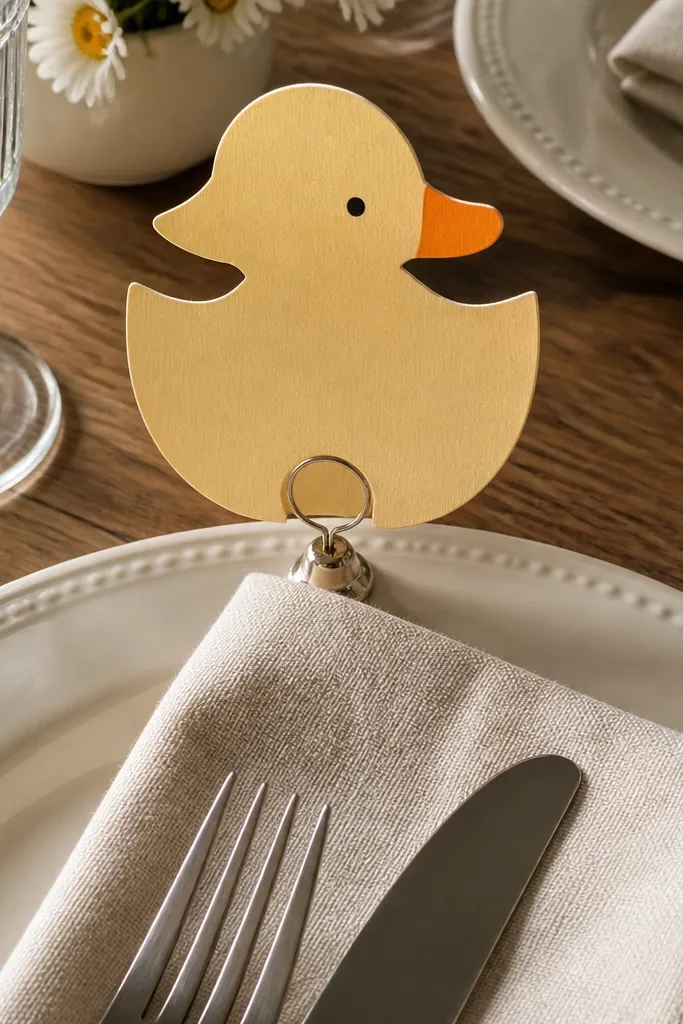
Place cards should look cute and easy to set down, and this duck does both. The clip stand keeps the card upright without needing a complicated fold, which means beginners get a stable final look. The duck face sits at the top so it’s visible across a table photo. Use a limited palette and a clean font so the card looks polished. It’s a practical project that also photographs well.
Editor's noteUse a matte cardstock so ink doesn’t glare in overhead lighting.
Cut a 4x6 inch cardstock card and round the top into a duck head shape. Make a simple duck face layer in yellow, then glue it to the card front. Punch a hole at the bottom and use a mini binder clip to create a stand by attaching the clip behind the card. Add the guest name with a black marker and finish with a beak and eyes.
Skip thisAvoid glossy paper for the clip area — it makes the clip slide and the card leans.
23. Paper Duck Wind-Up Look with Split Back Legs
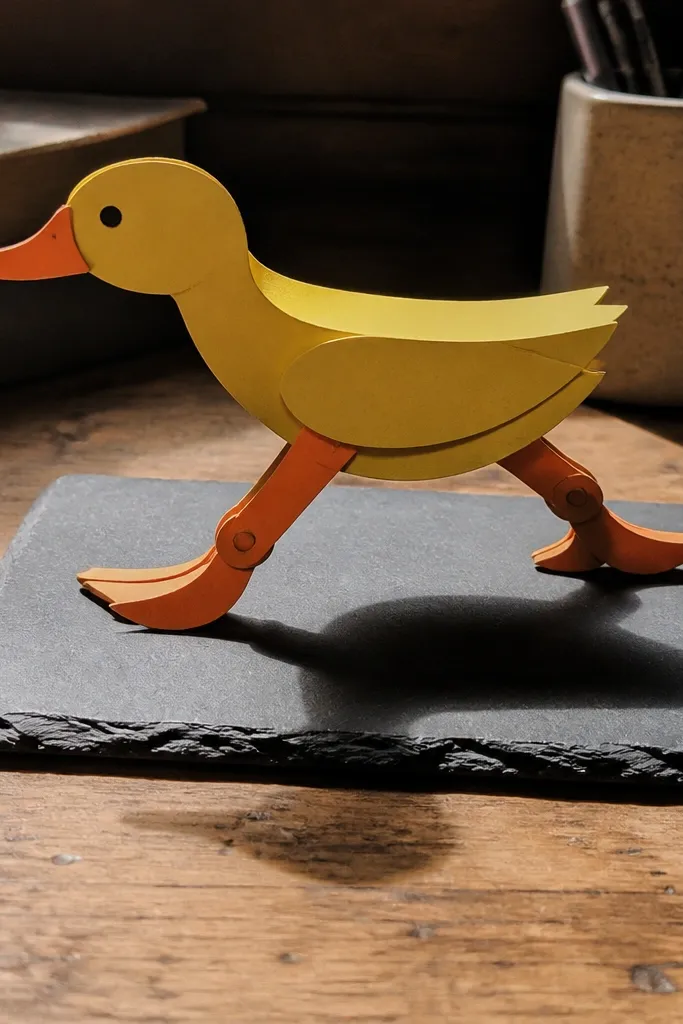
This duck has a playful, mechanical look because the back legs are split and layered. It’s photogenic because the legs create shadow lines and add motion even when it’s stationary. Beginners can handle it because it’s mostly straight cuts and simple layering. Use two tones for the legs and a bright orange beak so the face stands out. It works well on a desk because it looks like a tiny character.
Cut a duck body from yellow cardstock and a second body layer for thickness. Cut two leg strips from orange paper, then split each strip at the bottom end to create a forked foot. Glue the legs to the back of the body layer so they extend slightly past the belly. Attach the second body layer behind to hide the leg glue, then add wing, beak, and dot eyes.
Angle the legs slightly backward so the duck looks like it’s “ready to move.”
Don’t glue legs flat against the body — you want a slight lift for shadow depth.
24. Paper Duck with 1-Piece Spiral Body (Easy 3D)
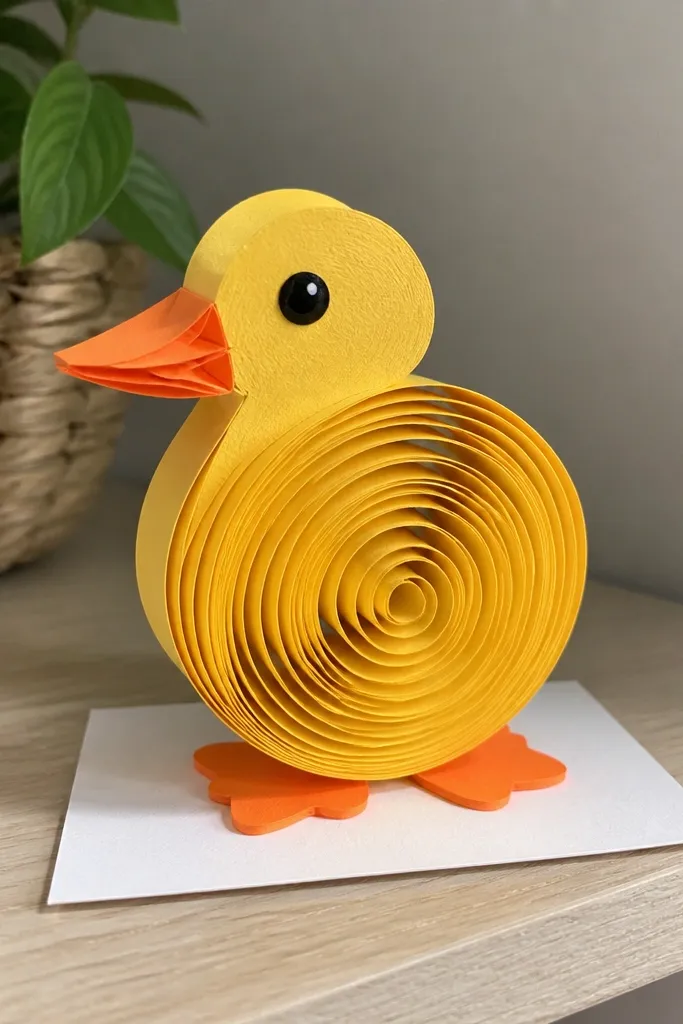
A spiral body is one of the easiest ways to get real 3D without sculpting. The spiral creates natural depth and makes the duck look fuller than a flat cutout. This project is beginner-friendly because you only need one continuous strip and a steady glue line. The look is clean and modern when you use a solid yellow cardstock and keep the details minimal. It’s great for centerpieces because it stands out even if you only make one duck.
Editor's noteMark the strip every 1 inch before rolling so you keep the spiral thickness consistent.
Cut a long strip of yellow cardstock, about 1 inch wide and 18-22 inches long. Roll it into a tight spiral, then glue the end so it holds shape. Flatten one side slightly so it sits upright like a duck body, and attach a head circle on the top. Add orange beak and small wing cutouts, then glue two dot eyes.
Skip thisAvoid over-loose spirals — they collapse and the duck looks like a flat coil.
25. Paper Duck Feather Fan Side View
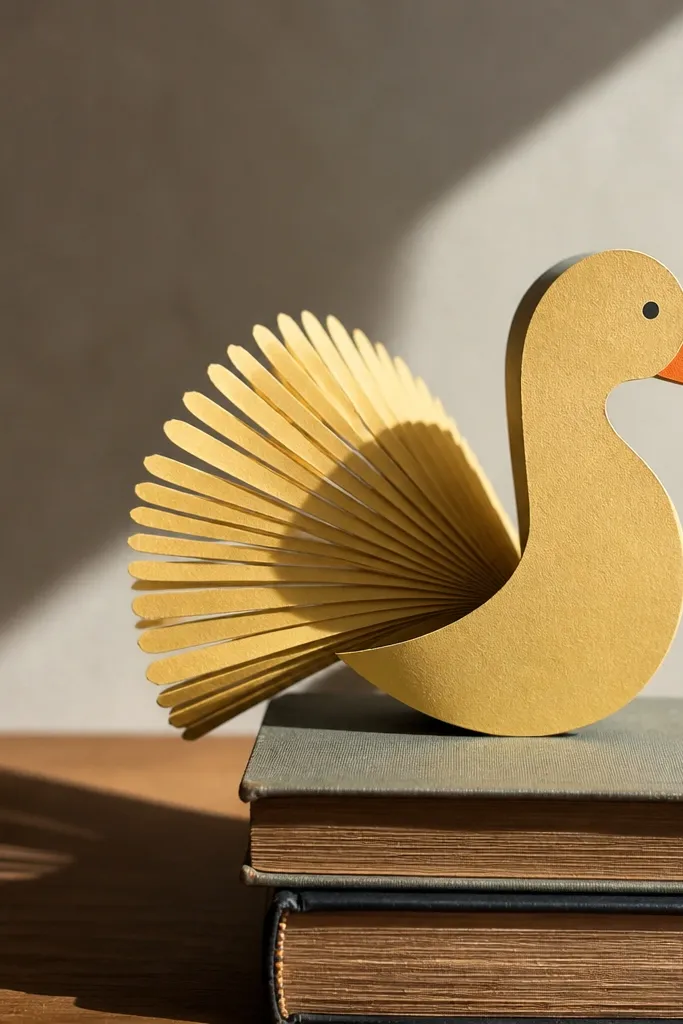
Side-view ducks look stylized and graphic, and the feather fan makes it extra photogenic. The fan lines create a strong shape that reads in photos, especially with a single light source. Beginners like it because the body is a simple side silhouette, and the feathers are just repeated strips. Use one color for the fan and a contrasting color for the wing so the design has structure. This is a great decor piece on a wall or shelf because it’s visually interesting from the side.
Cut a side-profile duck body from cardstock and glue it to a base card. Cut 8-12 thin feather strips, then fold each strip in half and glue along the center to form a fan. Place the fan behind the duck so it sticks out at a slight angle. Add beak and eye, then glue a small wing patch on the body.
Trim feather strip ends at a gentle angle so the fan looks like feathers, not straight paper fins.
Don’t glue the fan too wide — a tight fan looks intentional.
26. Paper Duck Bento Box Diorama
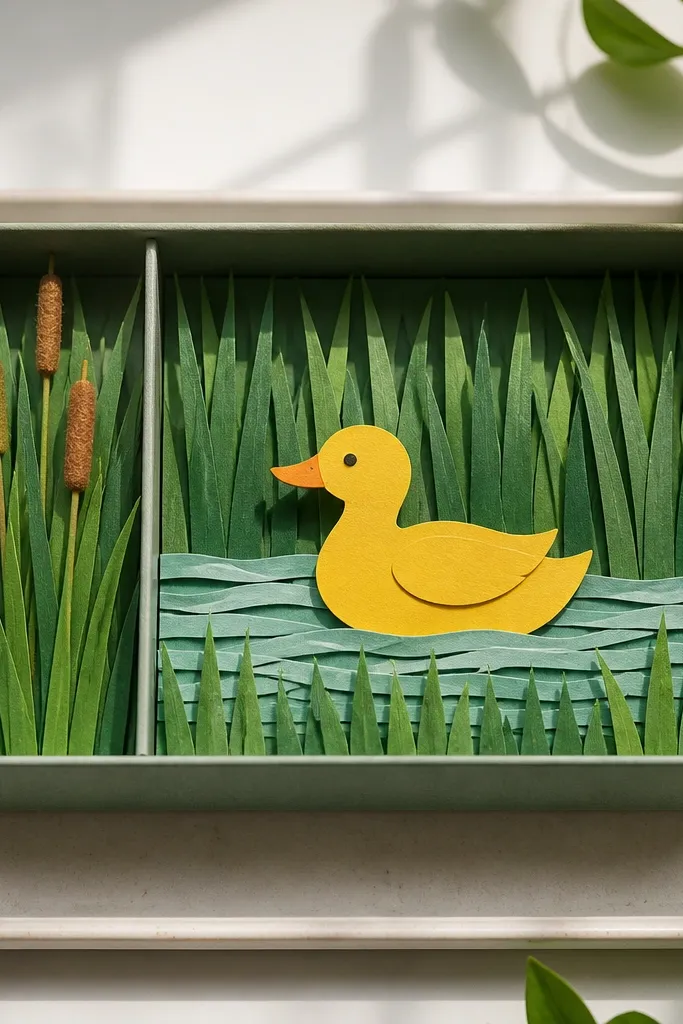
Dioramas look like tiny worlds, and this one stays beginner-friendly by using simple shapes: box, grass strips, and a duck silhouette. The bento format makes it easy to style and photograph because the “scene” is contained. It’s also a smart way to use scraps since you need only small paper pieces for grass, water, and the duck. Keep the palette tight: yellow duck, green grass, and a soft background. This is a fun project for shelf decor that doesn’t require a lot of tools.
Editor's noteUse matte paper for grass so it doesn’t glare under light.
Cut a small box base from thicker cardstock and create a lid frame or just a shallow tray. Cut green grass strips about 1 inch tall and glue them to the bottom in a corner. Add a duck silhouette made from yellow cardstock, then glue it on top of the grass. Create a tiny water patch from blue paper and glue it beside the duck, then add a beak and eyes.
Skip thisAvoid over-layering tiny details — one grass corner and one water patch is enough.
27. Paper Duck with Patterned Egg Belly (Dotted Paper)
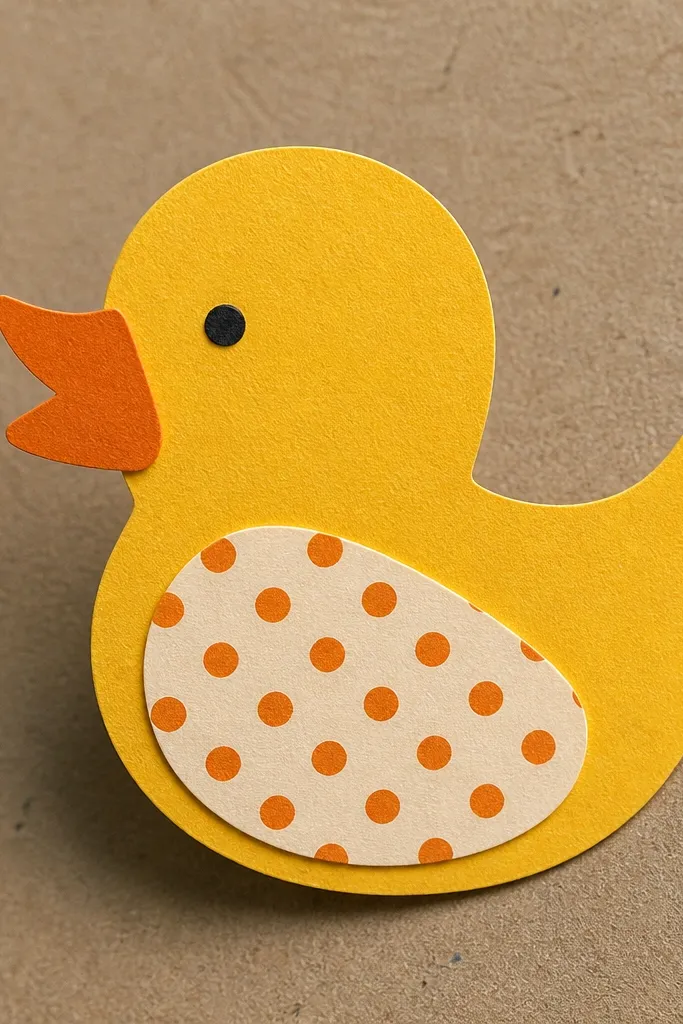
Patterned paper makes ducks look instantly cute, and dots are the easiest pattern to read at small sizes. This design focuses on a patterned belly so you get a strong look without complicated feather work. It’s beginner-friendly because the body is a simple oval cut and the belly is a separate patterned piece. Use orange beak and simple black dot eyes so the pattern doesn’t compete with the face. It’s great for cards and small framed crafts.
Editor's noteUse a 1/8 inch border so the dotted belly edges look crisp instead of pasted-on.
Cut a duck body from solid yellow cardstock. Cut a belly oval from dotted paper and glue it centered on the body, leaving a 1/8 inch border around the edges. Add a wing patch in plain yellow or cream and glue it slightly behind the belly. Finish with an orange beak triangle and two dot eyes, then add orange feet strips under the body.
Skip thisDon’t use too many patterns — dots plus stripes makes the duck look noisy.
28. Paper Duck Corner Bookmark with Beak Clip Detail
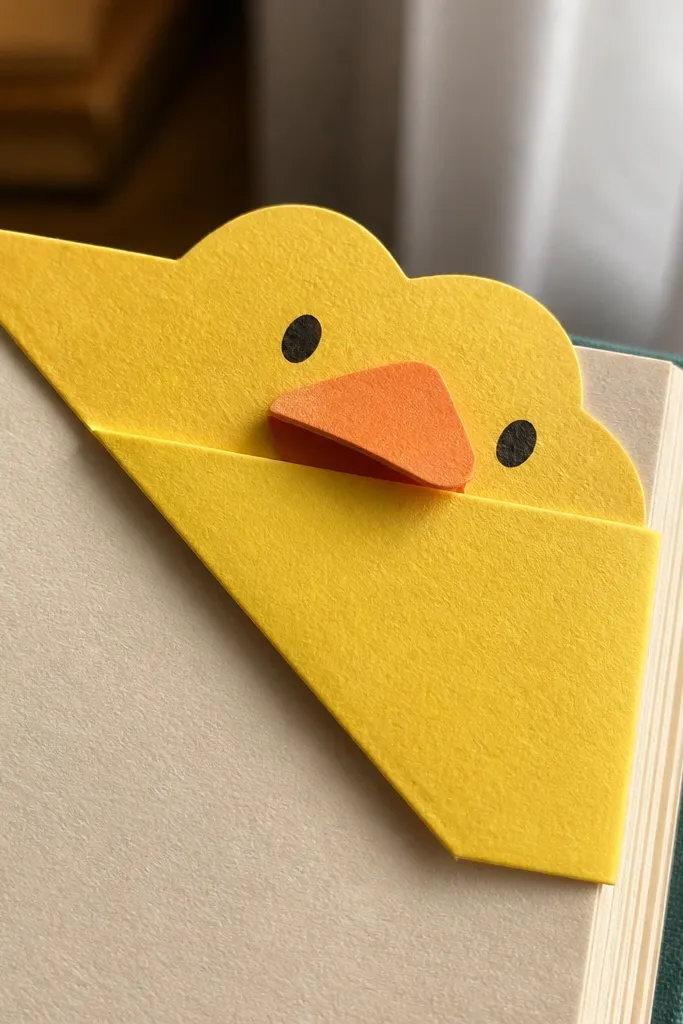
Corner bookmarks stay put and look tidy, and adding a beak tab makes the design feel playful. This is beginner-friendly because it’s mostly paper folding and one crisp triangle for the beak. The corner pocket also makes it easy to use right away, which helps your finished project feel practical. Choose yellow cardstock plus a contrasting orange beak for high visibility. It looks good on bookshelves too because it’s compact.
Editor's noteUse a bone folder or the edge of a ruler to sharpen the diagonal fold for a clean pocket.
Cut a square of cardstock about 4x4 inches. Fold it diagonally to form a corner pocket, then trim the top edge into a duck head shape. Cut a small orange beak triangle and glue it at the center of the head. Draw eyes with a black marker and reinforce the pocket fold with a thin strip of tape if your cardstock is stiff.
Skip thisDon’t make the pocket too tight — it should slide onto a page corner without bending.
29. Paper Duck with 2-Color Rolled Paper Neck and Head
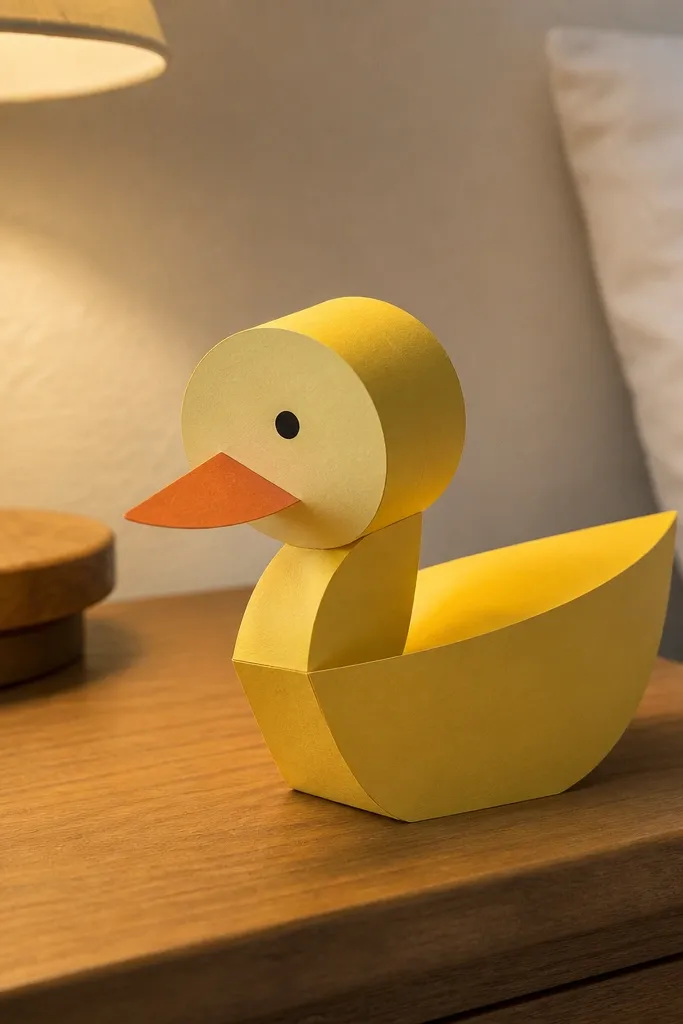
Rolled paper for the neck and head creates a smooth, rounded look that feels more 3D than flat crafts. Using two colors makes the head look like it has shading, which is what makes it look “finished.” This project is beginner-friendly because you’re rolling strips, not building complex parts. The body stays simple, and the face gets the most attention. It’s great for wall decor because the rounded head catches light.
Editor's noteUse different strip widths for head and neck (head slightly wider) so the proportions look right.
Cut a body from yellow cardstock in a simple duck outline. Roll a cream strip into a tight coil for the head and roll a shorter yellow strip for the neck, then glue them together. Attach the head to the body with glue so the neck curves slightly forward. Add an orange beak triangle and dot eyes, then glue a small wing patch to the side.
Skip thisAvoid loose coils — they collapse and make the head look flat.
30. Paper Duck with Cut-Paper Feather Border Frame
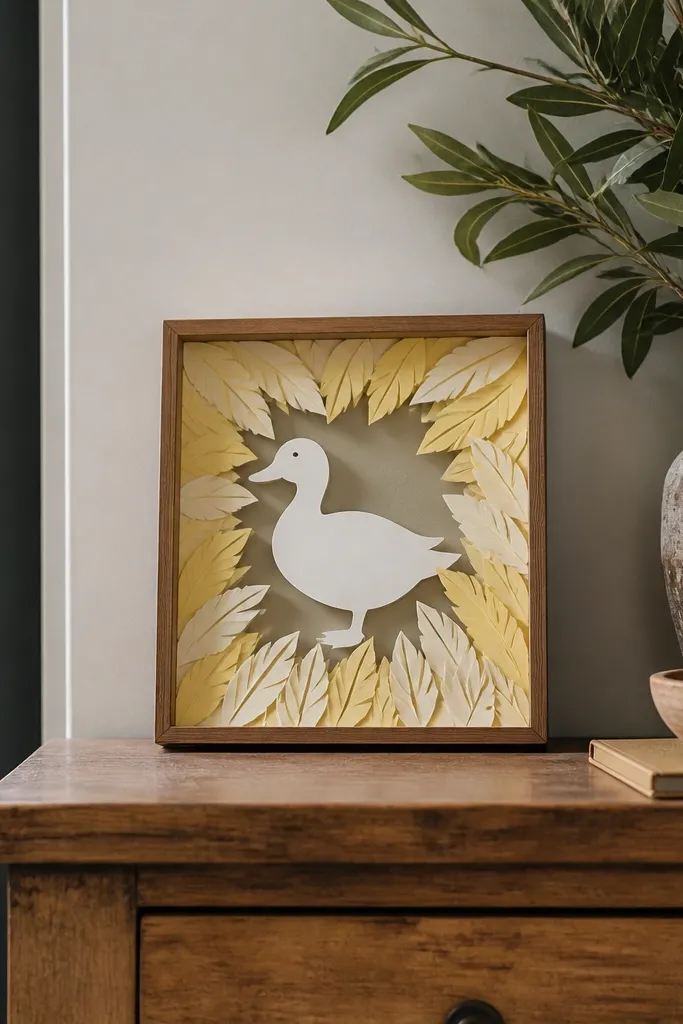
This duck looks like a mini art print because you frame it with a feather border. The border is the main design — it makes the duck feel like part of a composition, not a random cutout. Beginners can do it because the border uses repeated leaf-like shapes you cut once and trace. Choose a clean color palette: yellow duck, cream feathers, and a single accent orange. It’s great for greeting cards or framed wall pieces.
Cut a rectangular card base and glue a duck silhouette in the center. Create a feather border by cutting 12-20 small feather shapes from cream paper and tracing the same template each time. Glue feathers around the edges, overlapping slightly so the border reads as a pattern. Add a beak and eyes on the duck, then outline the duck with a thin black marker for contrast.
Use a pencil to map the border spacing first — it keeps the pattern even.
Don’t glue feathers directly on the duck area; keep the duck face clean and readable.



