
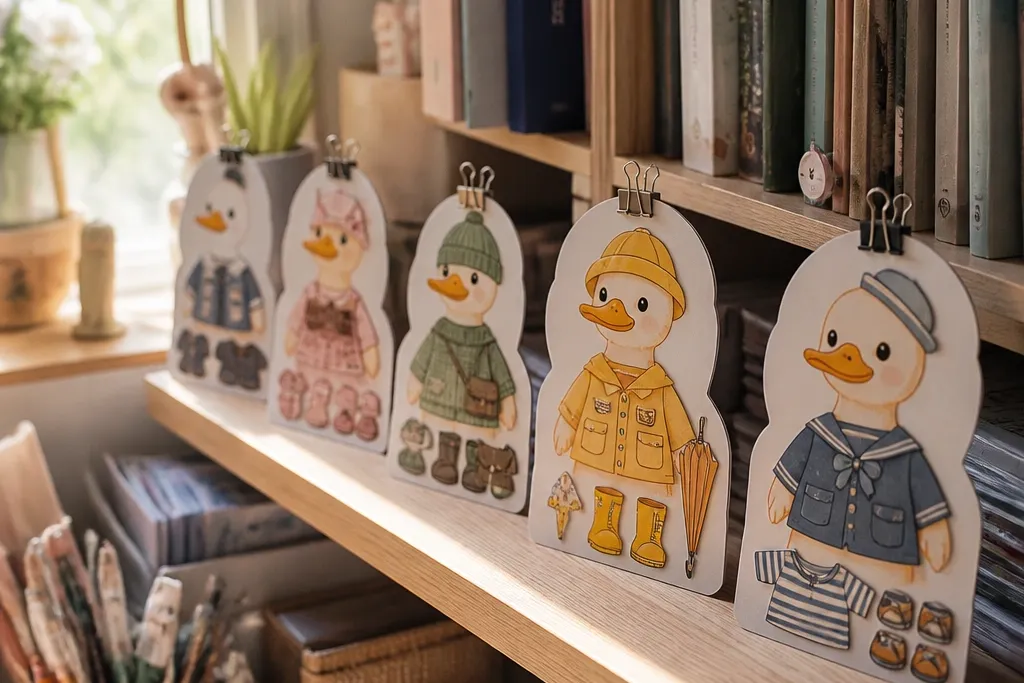
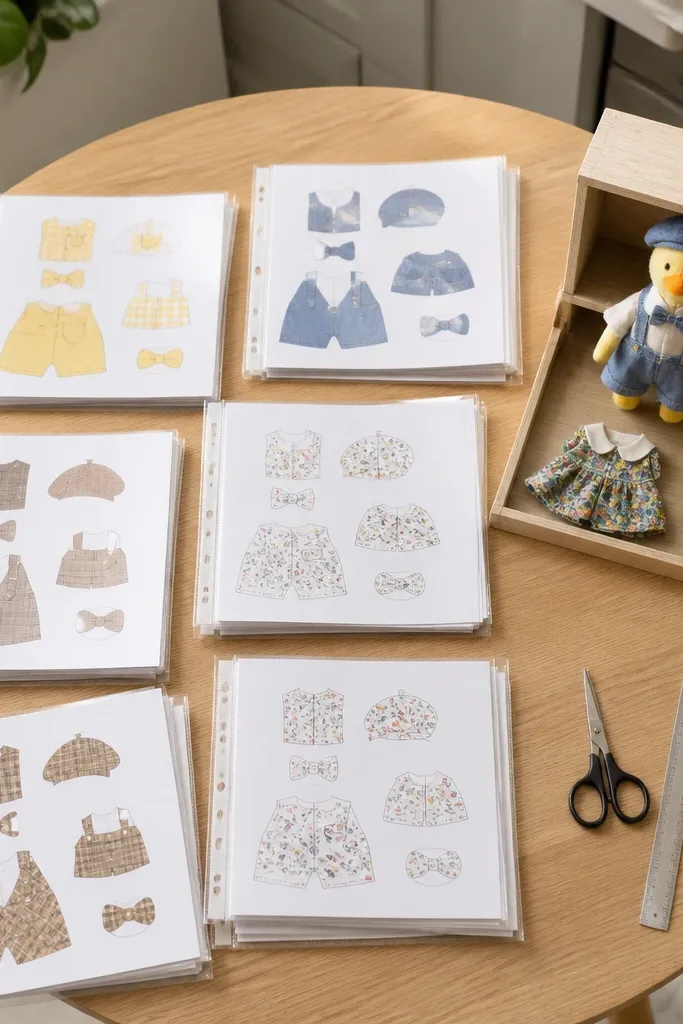
1. Cream Knit Sweater With Navy Cuff Stripes
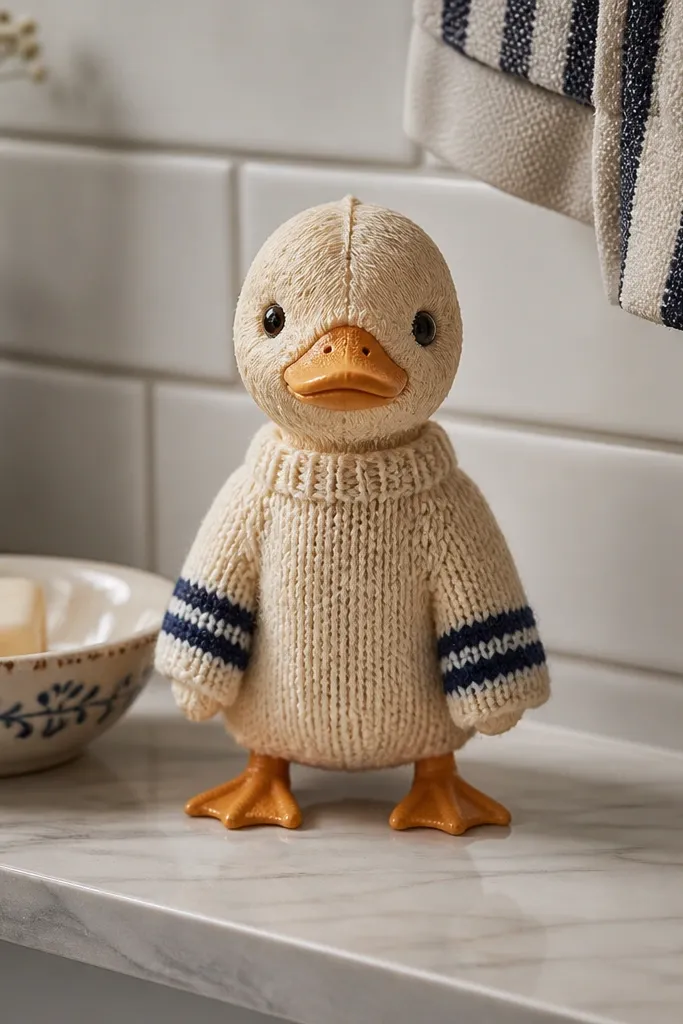
This look is all about contrast that reads at small scale. The cream knit body gives a soft, cozy base, while navy cuff stripes create a clear horizontal landmark that makes the outfit feel finished even from a distance. Cut the sweater as one main piece, then add the cuff stripe layer so you get that “knitwear” vibe without tiny micro-details. It’s a great option for desks, bathroom shelves, and any display where you want calm colors that still look styled.
Start by printing the sweater base on 130-160 gsm cardstock. Cut the main sweater shape, then cut the navy cuff stripe pieces from 80-100 gsm paper and align them exactly where the cuff edge meets the body. Glue the cuffs using small tabs or a thin line of glue along the stripe’s underside, then press with a ruler edge so the stripe stays flat. Finish by trimming any stray fibers with a craft knife for crisp edges.
If your printer ink looks light, print a second copy and use the darker one for the cuffs.
Don’t glue the cuffs over the sweater’s folded edge — it makes the stripe buckle.
2. Charcoal Denim Jacket With Orange Topstitch Lines
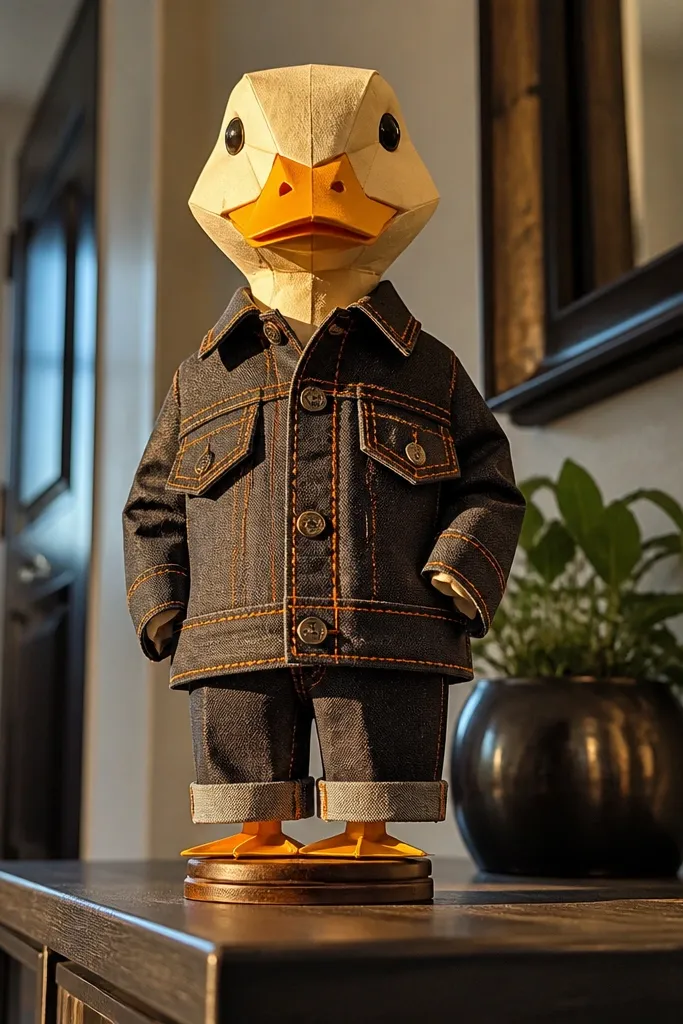
Denim looks good in miniature because the pattern is bold and directional. A charcoal jacket gives you the classic foundation, and orange topstitch lines create that “real garment” feel without needing hardware like buttons. This outfit also works well for small spaces because the jacket shape frames the duck, making the display look intentional rather than scattered. Choose this when you want a look that feels modern and slightly rugged.
Print the denim jacket template on 150 gsm cardstock for structure. Cut out the jacket body and the topstitch overlay lines on lighter paper so they flex slightly. Apply glue only to the stitch overlay’s back edges (not the entire surface) so the jacket stays flat. Press and let it dry under a book for 10-15 minutes, then trim the collar and hem edges with a sharp blade.
Use a gel glue or thin glue stick — messy glue will blur the stitch lines.
Skip thick glue blobs near the collar; they show through on the edges.
3. Black Leather Look Jacket With Silver Zipper Panel
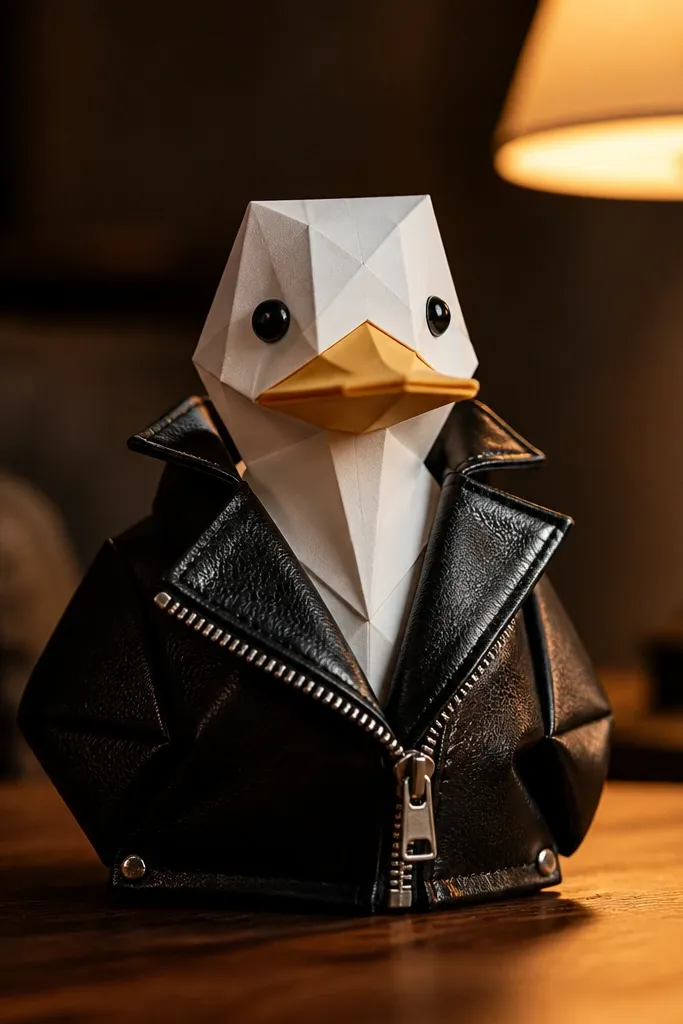
This is the “night mode” outfit. The black base reads sleek, and the silver zipper panel gives one high-contrast focal point that makes the whole piece pop in photos. The trick is to keep the jacket edges crisp and slightly angular so it looks like a mini biker jacket rather than a generic coat. In tight spaces, this silhouette stands out fast, especially against light shelves or white walls.
Print the jacket base on 160 gsm cardstock and cut it cleanly with a craft knife for sharp corners. Print the zipper panel on white or light silver paper and cut it as a single strip so it stays straight. Glue the zipper panel onto the jacket with a thin line along its top and sides, then add a small strip at the lower edge to prevent lifting. Let dry flat, then run a ruler lightly along edges to sharpen the fold lines.
If your silver paper sheds, spray the zipper panel with matte seal before gluing.
Don’t round the corners with dull scissors; the jacket loses its sharp look.
4. Pastel Rainbow Hoodie With White Pocket
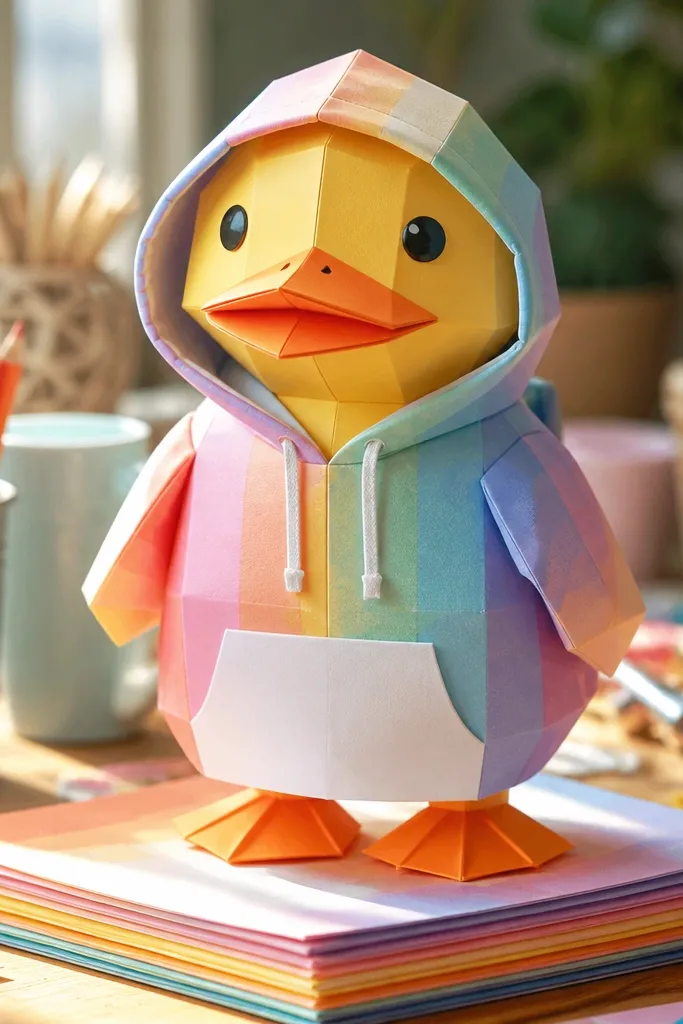
A rainbow hoodie makes small-space decor feel playful without taking up more room. The pastel palette reads soft and friendly, and the white pocket adds a clean rectangle that anchors the design. This is one of the easiest looks to make look “finished” because the pocket instantly communicates the front of the hoodie. Put it on a desk corner, near books, or on a narrow shelf to add color without clutter.
Print the hoodie body base on 130 gsm cardstock. Cut the hoodie, then cut the rainbow stripe layer and the pocket from 80-100 gsm paper. Glue the rainbow stripes first, then glue the pocket last so the pocket sits on top and hides any edge gaps. Press flat with a book and trim the pocket edges if they overhang.
Use a ruler to align stripes so the rainbow looks even, not drifting.
Avoid layering the pocket before the rainbow — it hides alignment errors.
5. Sage Polo Shirt With Tiny White Button Dot
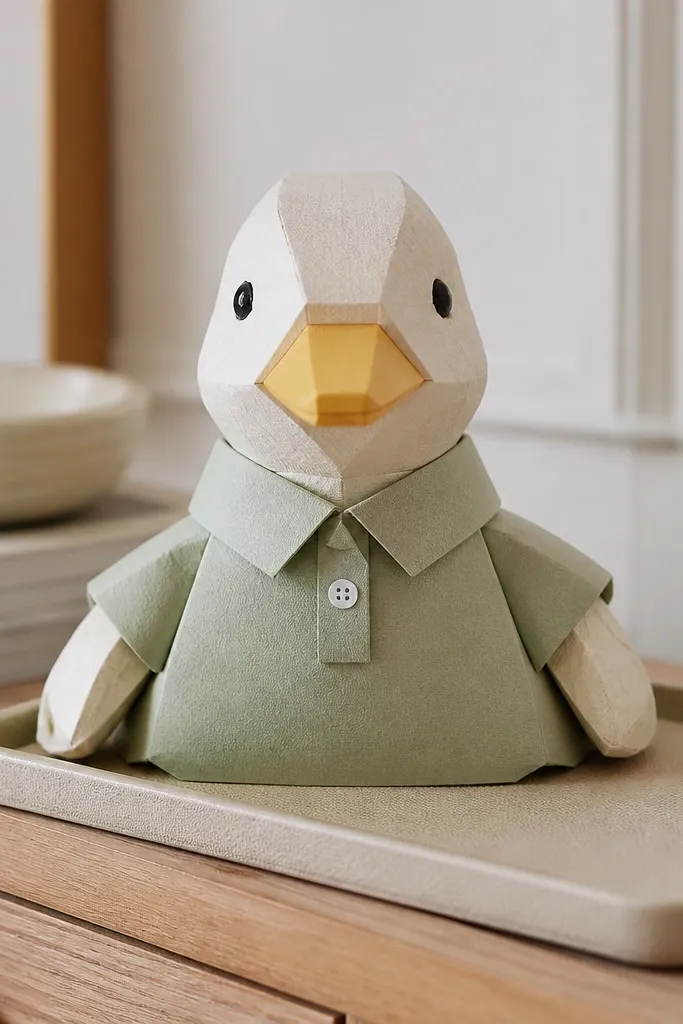
Print the polo base on 140-160 gsm cardstock so the collar holds its shape. Cut the collar and shirt body, then cut the small button dot on white paper. Glue the button dot only at its center or with a small tab so it doesn’t warp the shirt front. Seal lightly with matte spray after everything is dry.
A polo is clean, structured, and it reads well at miniature size. The sage green is calm and slightly retro, and the tiny white button dot gives the outfit a “real clothing” center point. You’re also getting a collar shape that frames the duck face area, which makes the whole display look more styled. This look works best on neutral backgrounds like beige, white, or light wood.
Skip thisDon’t use glossy paper for the shirt — it reflects and washes out the sage.
Editor's noteTrace the collar fold line lightly with a dull knife so it bends cleanly.
6. Maroon Maxi Skirt With Pleated Hem Band
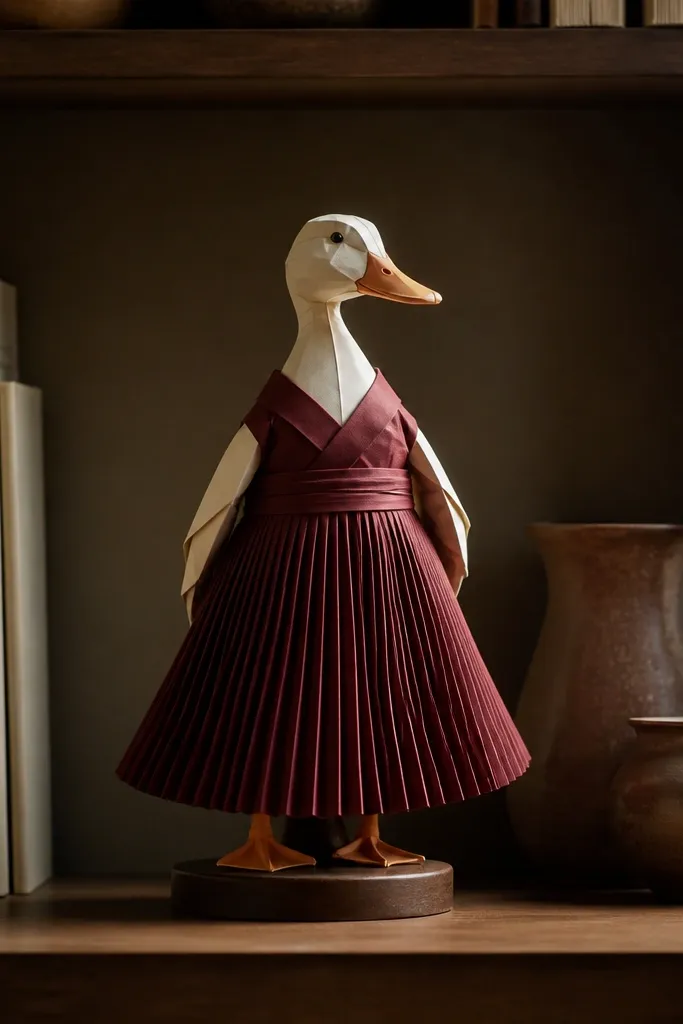
Print the skirt base on 150 gsm cardstock for a smooth drape. Cut the skirt and then cut the pleated hem band from 80-100 gsm paper. Glue the hem band along the skirt’s bottom edge with a thin line, starting at the center and working outward to avoid bubbles. Fold any pleat lines gently before gluing so the texture stays visible.
A skirt silhouette is one of the best ways to make paper clothes look elegant without extra pieces. The maroon color gives depth, and the pleated hem band creates movement even when the duck is still. This project makes your small-space display feel more like a fashion figure than a craft cutout. It also photographs well because the hem band gives a clear horizontal texture line.
Skip thisSkip full-surface glue on the pleated band; it flattens the texture.
Editor's noteUse a bone folder or the back of a spoon to crease the pleat lines cleanly.
7. Denim Skirt Over White Tights Look
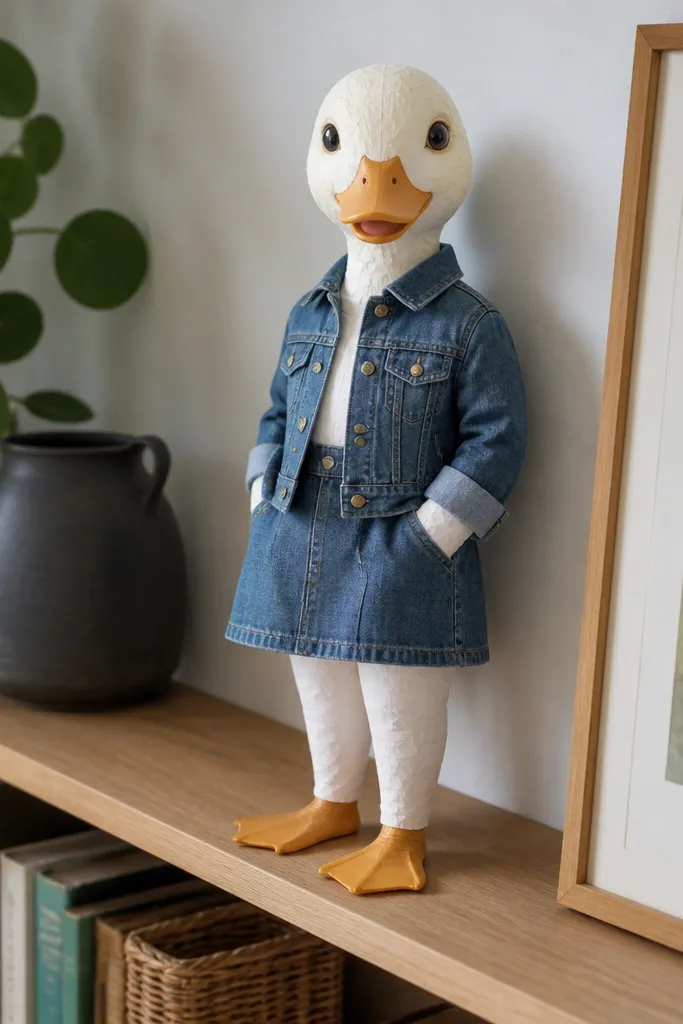
Print the tights layer on white 80-100 gsm paper and cut it to match the opening area beneath the skirt. Print the denim skirt on 130-150 gsm cardstock and cut the skirt shape. Glue the tights first, align the skirt so the tights edges show evenly, then glue the skirt over the top. Press edges with a ruler and trim any overhang at the tights boundary.
This outfit creates depth using contrast layers. The denim skirt gives a strong color block, and the white tights peek through so it looks like the duck is actually wearing something layered. It’s a smart choice when you want a “complete outfit” feel without adding too many tiny details. In small spaces, the tights peek makes the figure read clearly instead of blending into a single silhouette.
Skip thisDon’t let the skirt cover all tights — the layered look disappears.
Editor's noteDry-fit the skirt before gluing by holding it in place for 10 seconds.
8. Navy Sailor Dress With Red Collar Trim
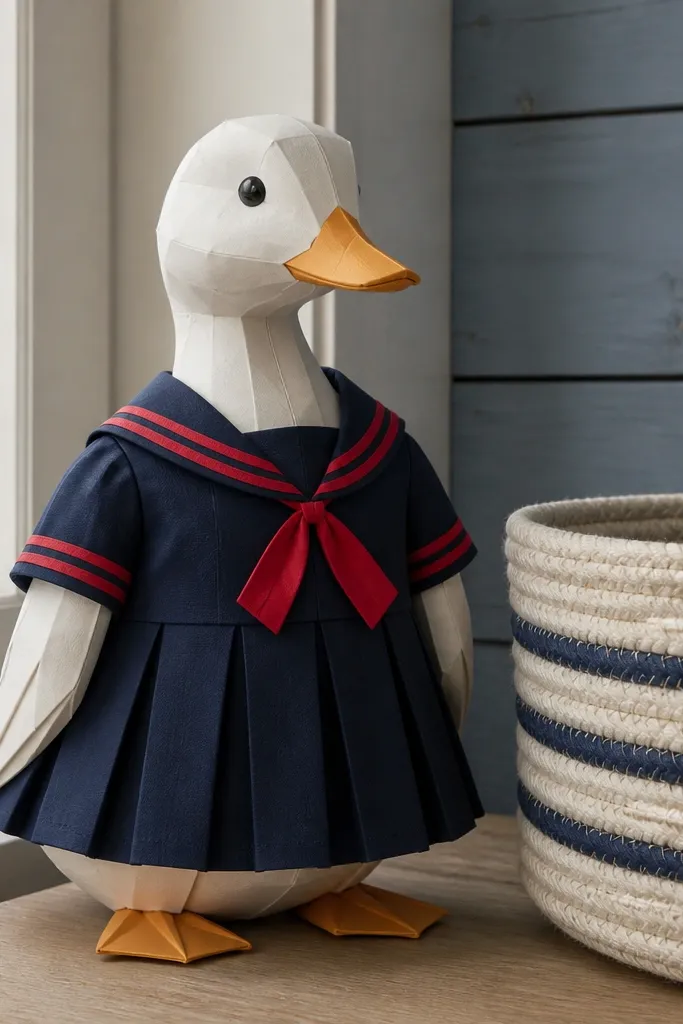
Sailor style is graphic and instantly recognizable, which helps in miniature decor. Navy gives the main body, and red collar trim creates a sharp, photo-friendly focal point. The dress shape makes it feel “complete” even with only a couple of layers. If your space has lots of neutral decor, this one adds a clean nautical pop without needing bright neon colors.
Print the dress base on 150 gsm cardstock and cut it out carefully. Cut the collar trim layer in red on lighter paper so it stays crisp when glued. Glue the collar trim last, aligning it symmetrically on both sides of the center seam. Finish by sealing with matte spray to reduce edge lifting.
Use a glue stick for the collar trim — it spreads thin and avoids visible glue lines.
Avoid crooked trim; even a 2-3 mm shift makes it look sloppy in photos.
9. Yellow Sun Dress With Green Waistband
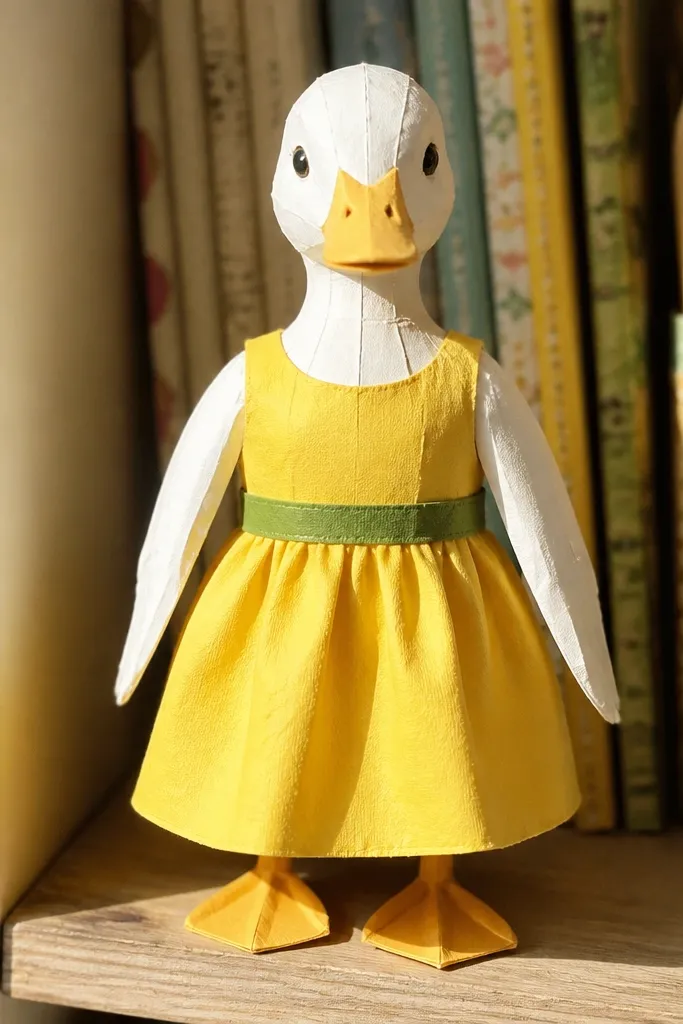
This is a high-energy summer look that still works in tiny spaces because it uses bold blocks of color. The yellow skirt area reads bright, while the green waistband gives a crisp line that helps the outfit stay structured. It’s also easy to make photogenic because the color contrast creates a clear top-to-bottom gradient. Place it against a white shelf for maximum pop.
Print the dress base on 140-160 gsm cardstock. Cut the waistband piece on green paper and the dress skirt on the yellow template. Glue the waistband first around the dress center, then glue any skirt panel overlays on top so the waistband stays visible. Press under a flat weight while it dries.
Cut the waistband slightly larger and trim after gluing so it sits perfectly centered.
Don’t use translucent green paper; it mutes the waistband color.
10. White Button-Up Shirt With Light Blue Roll Sleeves
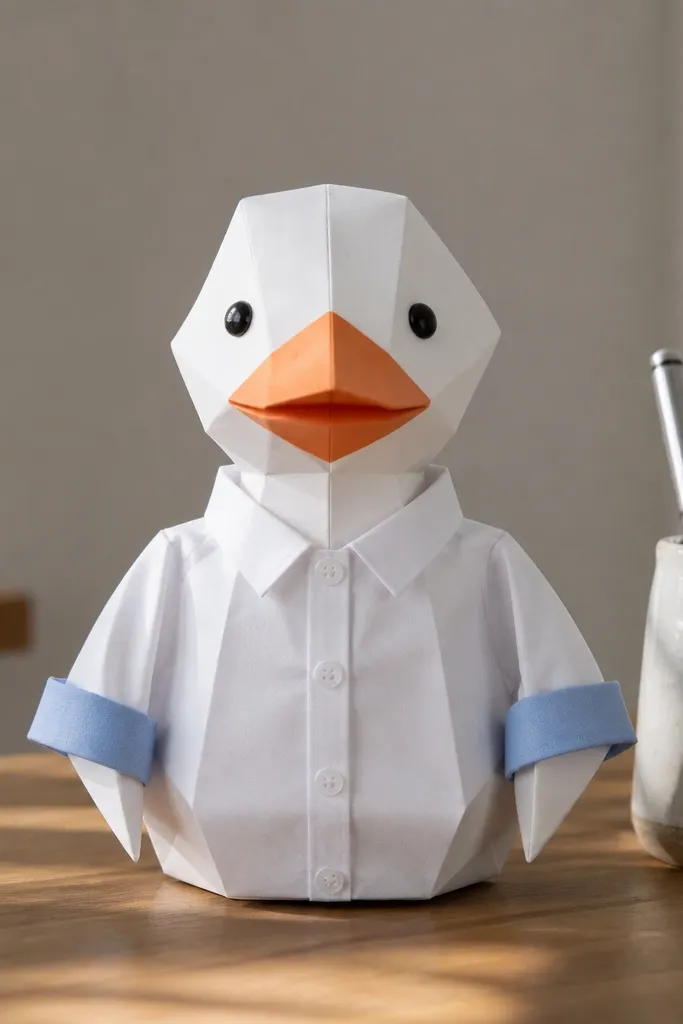
Print the shirt base on 160 gsm cardstock for structure around the collar. Cut the sleeves and the sleeve rolls on 80-100 gsm paper. Glue the roll sleeves to the sleeve area first, then glue the full sleeve pieces onto the shirt body. Use a craft knife to clean any glue ridges before sealing.
This look is clean, modern, and it reads like a real outfit because of the rolled sleeves. White keeps it bright and airy, and the light blue roll sleeves add a gentle pop without overwhelming the display. The button-up shape also gives strong vertical lines, which helps in small spaces where clutter can blur everything. It’s a good pick if your decor already has patterns and you want one crisp piece to balance it.
Skip thisSkip heavy paper for the sleeve rolls — it makes them stick out unevenly.
Editor's noteScore fold lines lightly with a dull blade so the roll looks natural instead of creased flat.
11. Black Tulle Skirt With Soft Pink Underlayer
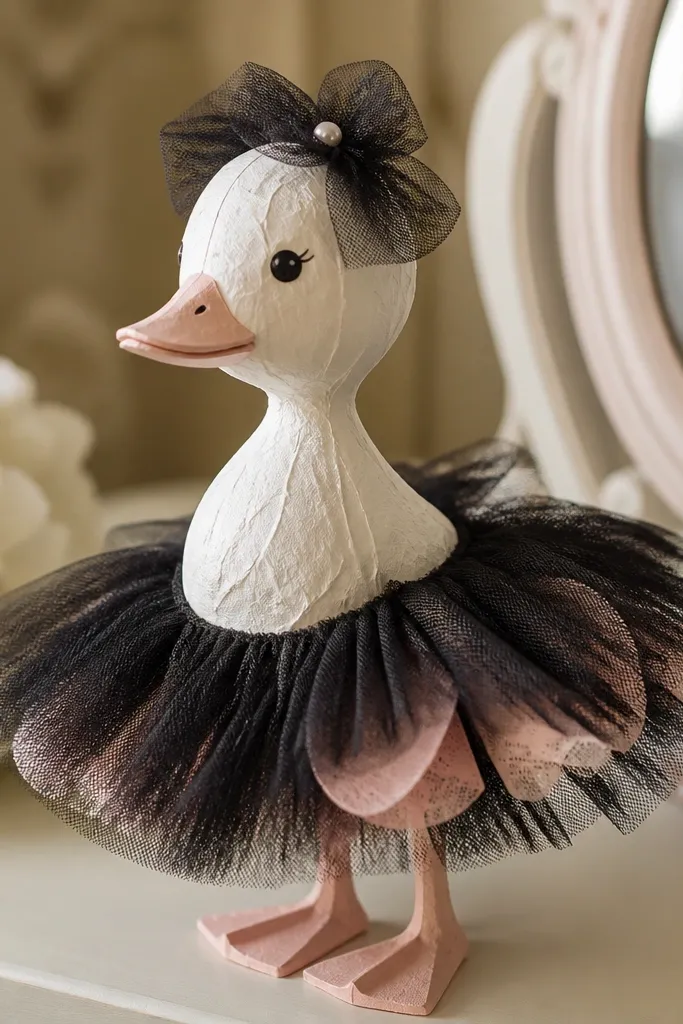
Tulle looks great in paper because you can fake the layered translucence with color underlayers. The black top layer gives drama, while the soft pink underlayer peeks through to create a gentle blush effect. This is a strong choice for aesthetic displays because the skirt has visual depth without needing tiny decorations. It looks especially good on light backgrounds where the pink glow can show through.
Print the underlayer on soft pink 80-100 gsm paper and cut it to match the opening under the tulle. Print the tulle skirt layer on black 110-130 gsm paper and cut the outer silhouette. Glue the underlayer first, then glue the tulle layer on top with the edges aligned so the pink remains visible. Let it dry flat and trim any uneven edges with a sharp blade.
If your black paper is too opaque, use a slightly lighter black or add a thin layer of translucent film behind the tulle.
Don’t fully glue the tulle edges down — leave a tiny lift so the underlayer peek looks intentional.
12. Olive Cargo Pants With Tan Belt Loop Detail
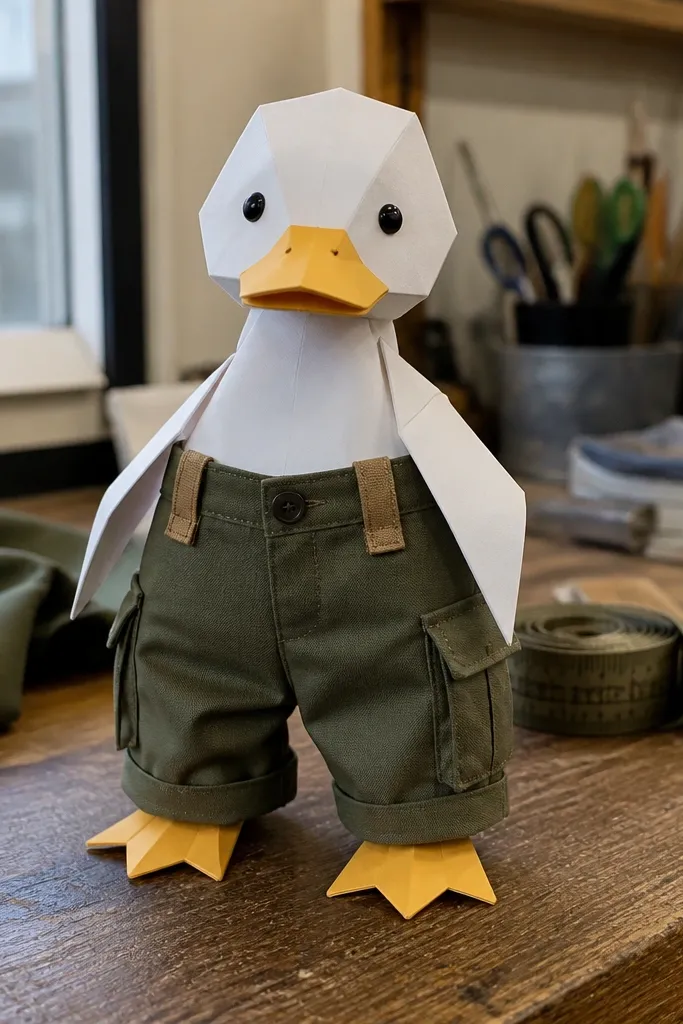
Cargo pants are photogenic because they have built-in structure — pockets, seams, and belt loops. Olive gives a grounded, outdoorsy look, and tan belt loop detail makes the waistband area visually interesting. This outfit is great for small-space decor because it reads like a full bottom half even if you keep the top plain. It also matches lots of backgrounds, from wood shelves to neutral wall art.
Print the cargo pants base on 150 gsm cardstock and cut out the leg shape. Cut the belt loop and pocket detail pieces on tan 80-100 gsm paper. Glue belt loops first along the waistband area, then glue pocket details last so the layers don’t stack too thick. Press flat and let dry under weight to keep the legs straight.
Use a fine-tip glue applicator so pocket edges don’t get rounded.
Avoid thick cardstock for pocket overlays — it makes the pocket look bulky and crooked.
13. Teal Wrap Top With Coral Tie Bow
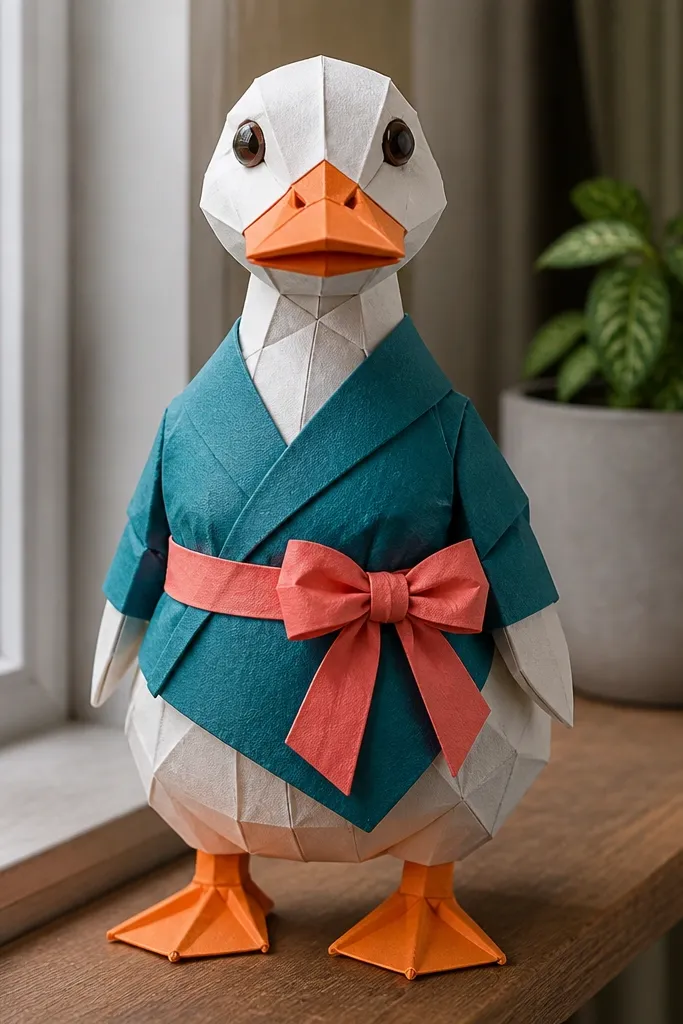
Print the wrap top base on 140-160 gsm cardstock and cut the main torso shape. Cut the tie bow pieces from coral paper, then fold along any bow crease lines before gluing. Glue the tie bow at the center overlap point, then glue the wrap edges so the diagonal line stays sharp. Finish by pressing under a flat object until the glue sets.
Wrap tops look flattering even in miniature because the diagonal lines create motion. Teal is a clean, modern color, and the coral tie bow gives a bright “center” that pulls the eye. This is a strong aesthetic choice for small spaces because the diagonal wrap line breaks up flat wall backgrounds. Keep the bow crisp and you’ll get a high-end look without extra parts.
Skip thisDon’t glue the bow all the way down; it flattens the shape.
Editor's noteUse double-sided tape for the bow center so it stays raised and doesn’t soak the paper.
14. Pink Floral Blouse With White Peter Pan Collar
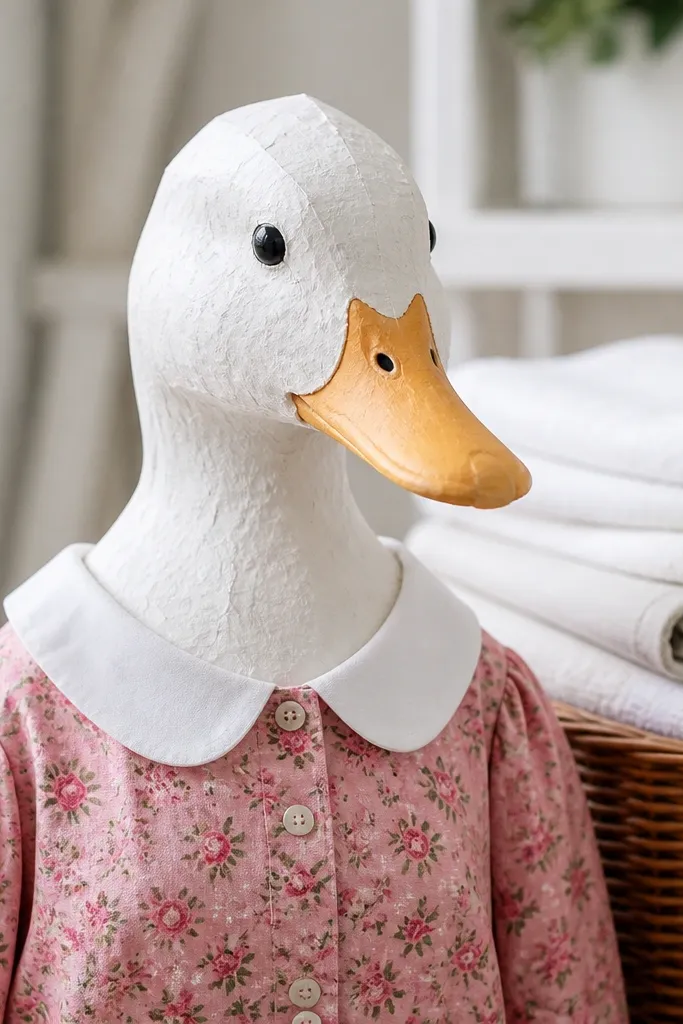
This is the sweet, photo-friendly option. The pink floral pattern gives visual interest, but the white Peter Pan collar is what makes it look styled instead of busy. The collar creates a clean frame around the top area, which reads well when the rest of your shelf has multiple objects. It fits small spaces because it adds charm without taking up vertical height.
Print the floral blouse base on 130-150 gsm cardstock. Cut the blouse and the collar separately so you can place the collar precisely. Glue the collar last and align it symmetrically; press gently along the collar edge with a ruler. Seal with matte spray after everything dries so the colors stay crisp.
If your floral print looks faded, print at the highest quality setting for stronger color contrast.
Avoid gluing near the collar edge with too much glue — it will ripple the paper.
15. Royal Blue Hoodie With White Drawstring Ends
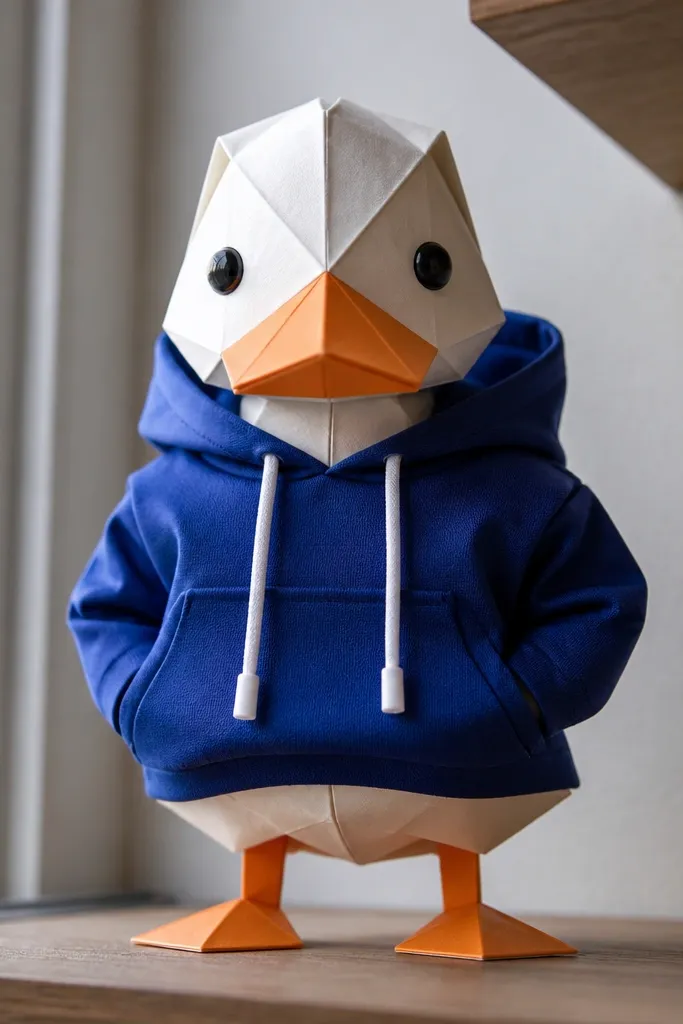
Print the hoodie base on 150 gsm cardstock and cut out the hood and body. Cut the drawstring pieces on white paper and glue them into the hood channel openings. Add the ends last so they stay visible and not covered by folds. Press flat and trim any string tabs so they don’t show beyond the hood edge.
A hoodie is a fast way to make a mini outfit look realistic because it has recognizable parts. Royal blue is bold enough to stand out in tiny displays, and white drawstring ends add a small detail that makes the piece feel designed. This look also works for small spaces because the hoodie silhouette is chunky and holds shape, even if the duck figure is crowded nearby. It’s a good pick when you want a clean, sporty vibe.
Skip thisSkip thick paper for the drawstrings; it makes them look like ropes instead of strings.
Editor's noteUse a toothpick to place glue precisely inside the drawstring channel.
16. Striped Breton Top With Red Side Buttons
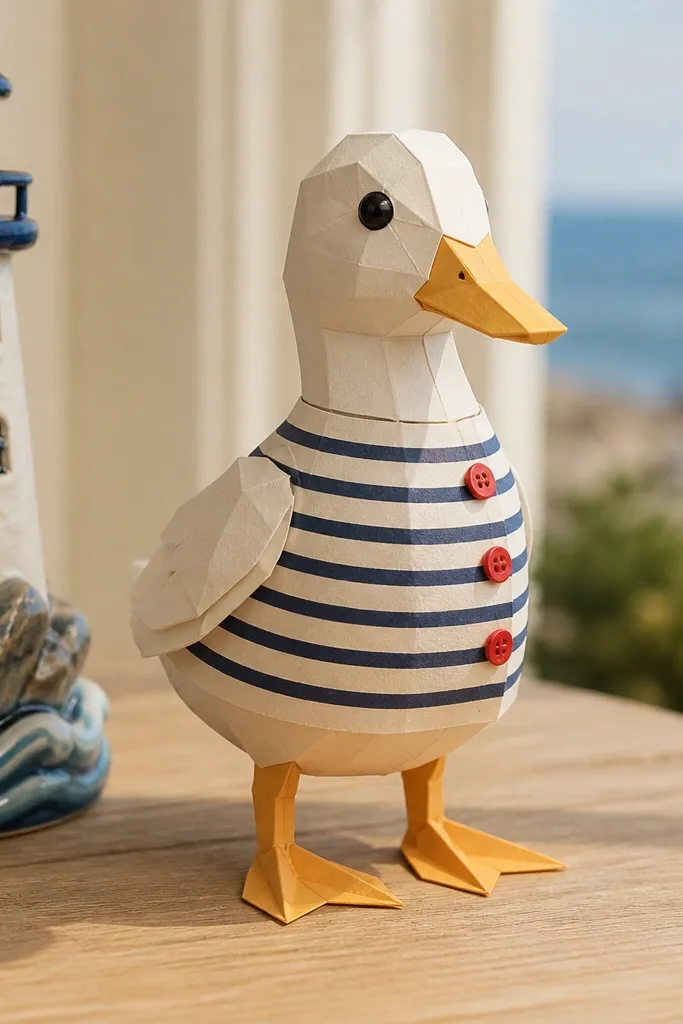
Print the striped top on 140-160 gsm cardstock so the stripes stay crisp. Cut the main top piece and then cut the red button dots or small button shapes separately. Glue the button pieces last, placing them exactly where the template indicates so the symmetry stays tight. Let dry flat, then check edges under bright light and trim any uneven stripe alignment.
Breton stripes are graphic and easy to read at miniature size. Cream-and-navy stripes give a classic look, and red side buttons add a punchy detail that makes the top feel complete. This outfit is great for small-space decor because stripes create structure, reducing the “floating sticker” vibe that flat paper can have. It also pairs well with neutral shelves and coastal-themed corners.
Skip thisDon’t hide button dots under folds; they need to sit on the front surface.
Editor's noteIf your stripes look slightly misaligned after printing, align the paper in the printer using the template’s margin guides.
17. Tan Trench Coat With Matching Belt Tab
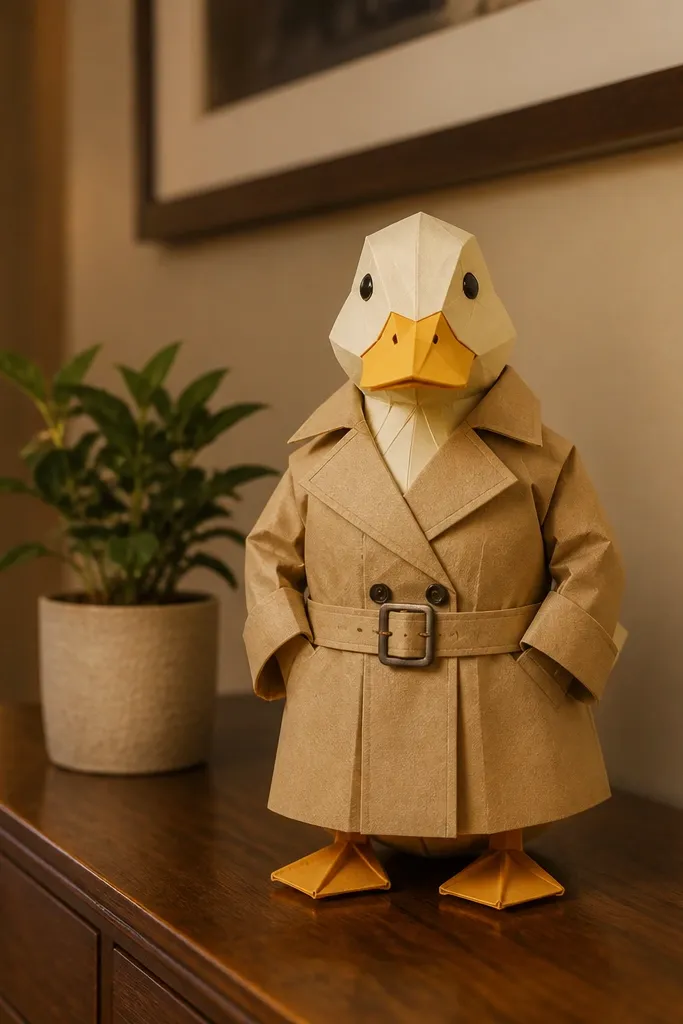
A trench coat is made for miniature styling because the belt defines the waist and makes the silhouette look expensive. Tan is warm and forgiving, and the matching belt tab gives a clean horizontal line that reads instantly. This is a strong pick for small shelves because it gives a tall, structured shape without needing extra decor. Photograph it against a dark book or black shelf liner for instant contrast.
Print the trench coat base on 160 gsm cardstock and cut the coat shape cleanly. Print the belt tab and any lapel accents on tan paper and cut them separately. Glue the belt tab at the waist area first, then glue the lapel or collar pieces so the belt remains centered. Press under a flat weight until fully dry, then carefully trim belt edges to remove glue squeeze-out.
Use a matte finish paper for the coat so the edges look sharp instead of shiny.
Avoid over-gluing the lapels; it makes the coat look warped.
18. White T-Shirt With Lime Graphic Circle
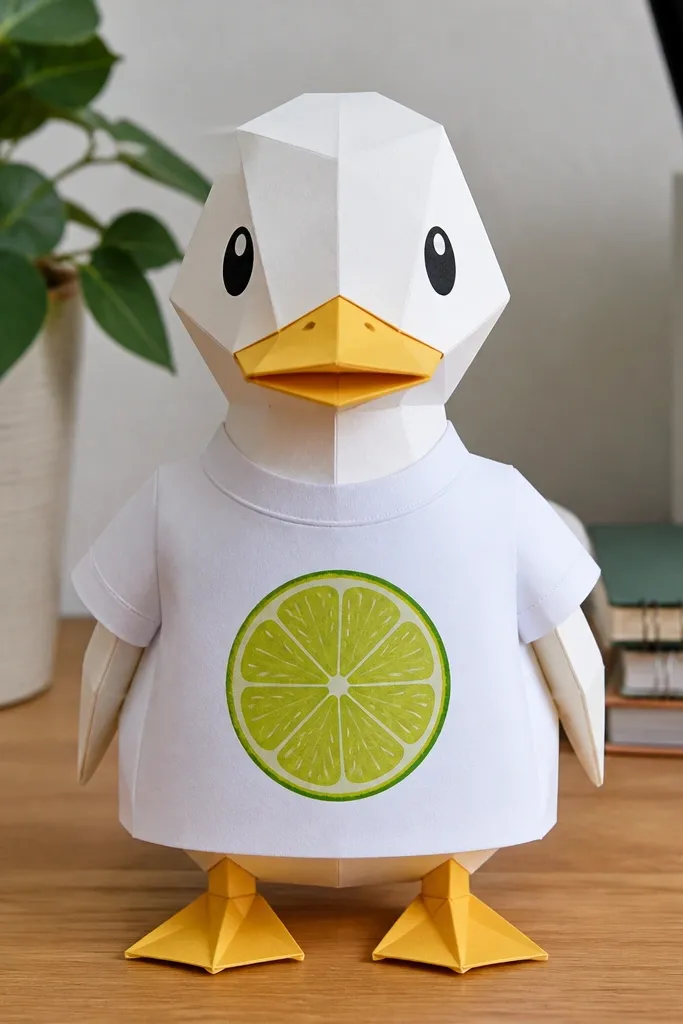
This is the “graphic tee” approach for paper duck clothes. The white base keeps everything clean, and the lime graphic circle adds a single bold focal point that’s easy to read. It’s great when you want decor that looks modern and playful without adding lots of tiny parts. In small spaces, one graphic element beats multiple small embellishments because it keeps the composition tidy.
Print the t-shirt base on 150 gsm cardstock and cut it out. Cut the lime circle graphic from 80-100 gsm paper and test placement by holding it in position for a second. Glue the circle using a thin line around the back edge so it doesn’t bleed through. Finish by sealing with matte spray if you want the lime to resist smudging.
Use a craft knife to cut the circle cleanly; scissors leave a wobble edge that shows in photos.
Don’t center the circle too low; keep it in the upper chest zone as the template shows.
19. Burgundy Wrap Skirt With Side Slit Line
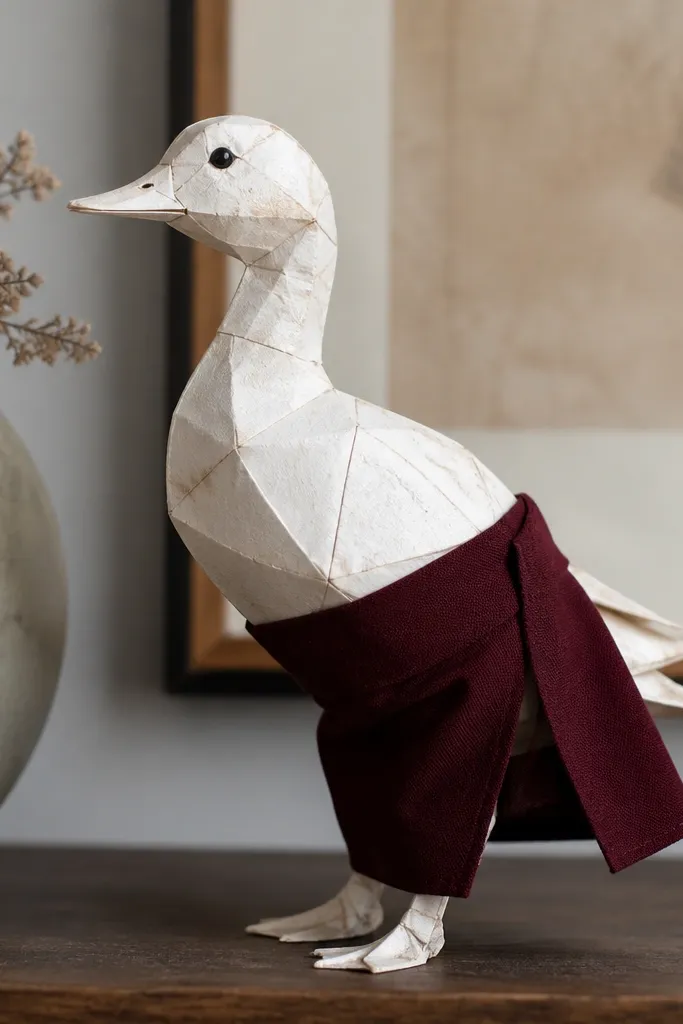
A wrap skirt adds motion through a single diagonal overlap. Burgundy is deep and looks classy even in miniature, and the side slit line gives a realistic garment feel. This outfit looks good in small spaces because the diagonal overlap gives depth without needing extra layers. It’s a solid choice for shelves where you want one statement piece that doesn’t take over the whole surface.
Print the wrap skirt base on 150 gsm cardstock and cut the silhouette. Cut the side slit overlay line from a slightly darker or matching burgundy paper depending on your template. Glue the overlap edges first so the wrap sits correctly, then add the slit line last as the finishing detail. Press flat and let it dry fully before styling.
If the wrap overlap looks uneven, adjust the overlap by 1 mm before gluing — tiny shifts matter.
Avoid thick glue at the overlap seam; it makes the wrap look swollen.
20. Sky Blue Overalls With Brass Buckle Squares
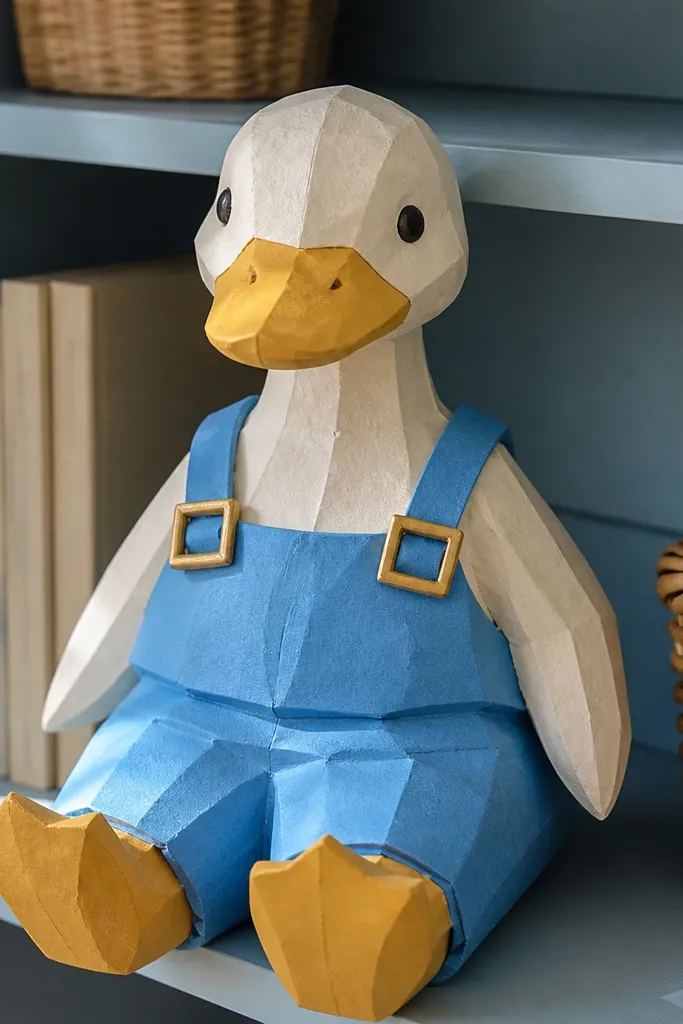
Overalls are one of the most photogenic paper outfits because they have strong blocks: straps, bib, and legs. Sky blue keeps it bright and clean, and brass buckle squares add a warm metallic feel without real hardware. This look also helps with small-space styling because the bib creates a clear top shape that balances the lower legs. Put it near wood tones or cream backgrounds for the warm-cool contrast.
Print the overall base on 150 gsm cardstock and cut the bib and straps. Print the buckle squares on gold or brass-toned paper and cut them as separate pieces. Glue the straps and bib first, then glue the buckle squares last so they stay centered and crisp. Press under a book for 10-15 minutes, then trim any strap edges that extend beyond the bib outline.
Use a glue stick on the bib — it stays thin and keeps paper edges tidy.
Skip layering buckles under straps; it hides the detail.
21. Black Leggings With Neon Pink Stripe Side
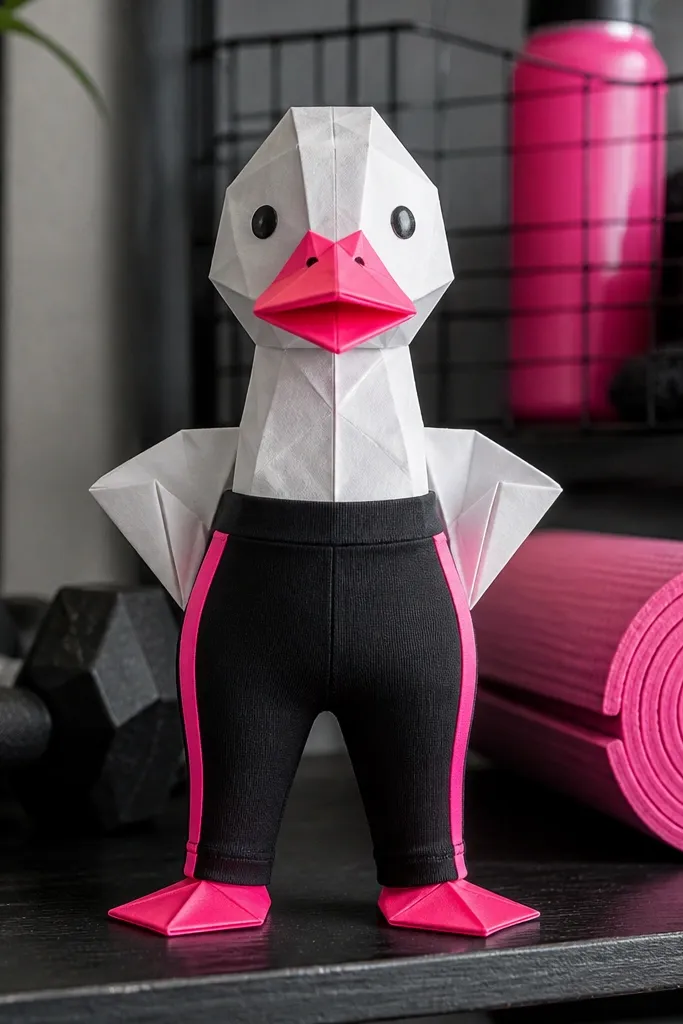
This is a sporty, high-contrast outfit that looks dramatic even when the piece is small. Black leggings keep the base clean, and a neon pink side stripe creates a sharp vertical line that pulls the eye. It’s a smart pick for small spaces because the stripe adds energy without cluttering the whole shape. Photograph it against a neutral wall or a light notebook to make the neon pop.
Print the leggings base on 160 gsm cardstock for a smooth, firm edge. Cut the neon stripe on lighter paper and keep it as a single long strip for straight alignment. Glue the stripe along the side seam line, then glue any small seam overlays if your template includes them. Press flat and let dry, then check straightness from the side — trim if the stripe has drifted.
Use a straightedge to align the stripe; 1 mm off looks crooked fast.
Don’t stretch the stripe while gluing; it will curve and look sloppy.
22. Seafoam Dress With White Lace-Edge Hem
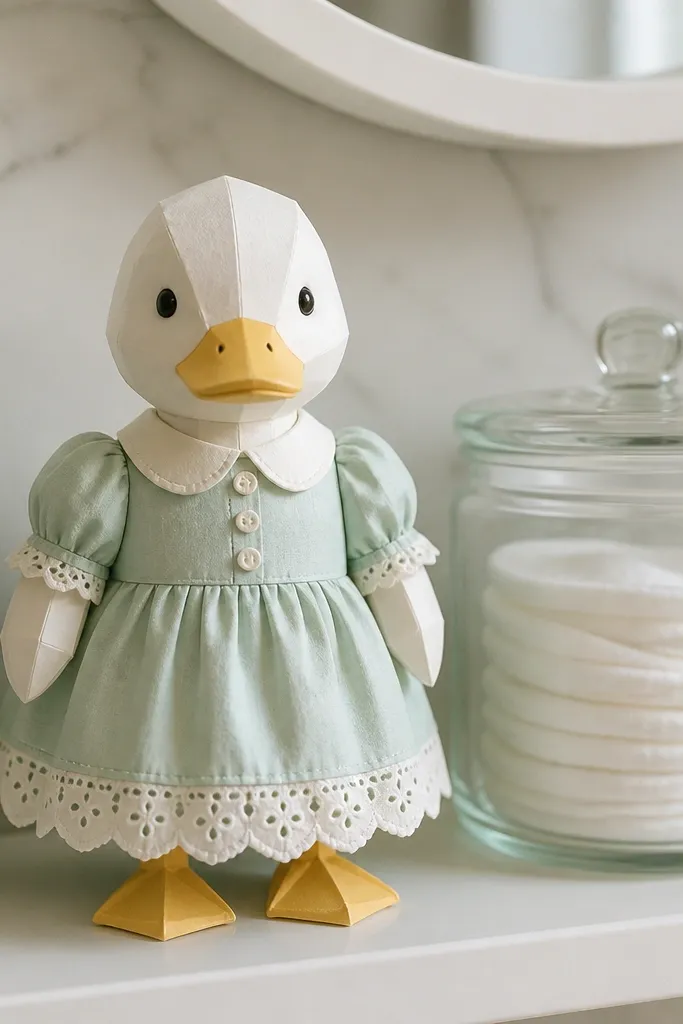
Lace-edge hems look delicate even in paper, and that contrast makes this dress feel special. Seafoam gives a soft, airy color, and the white lace edge creates a textured border that looks good in close shots and wide shots. This works in small spaces because the hem detail adds interest at the bottom without adding height. It’s a great choice for shelves with a lot of hard lines, like books and frames.
Print the seafoam dress base on 140-160 gsm cardstock. Cut the lace-edge hem piece from white 80-100 gsm paper and fold along any scallop lines if included. Glue the hem piece last, aligning it carefully so the scallops are even across the width. Press and dry flat, then lightly trim any scallops that overlap the dress edge.
If your lace edge curls, lightly crease it the opposite direction before gluing.
Don’t use glossy white paper for lace; it reflects and loses the delicate look.
23. Gray Hoodie Dress With Black Ribbed Waistband
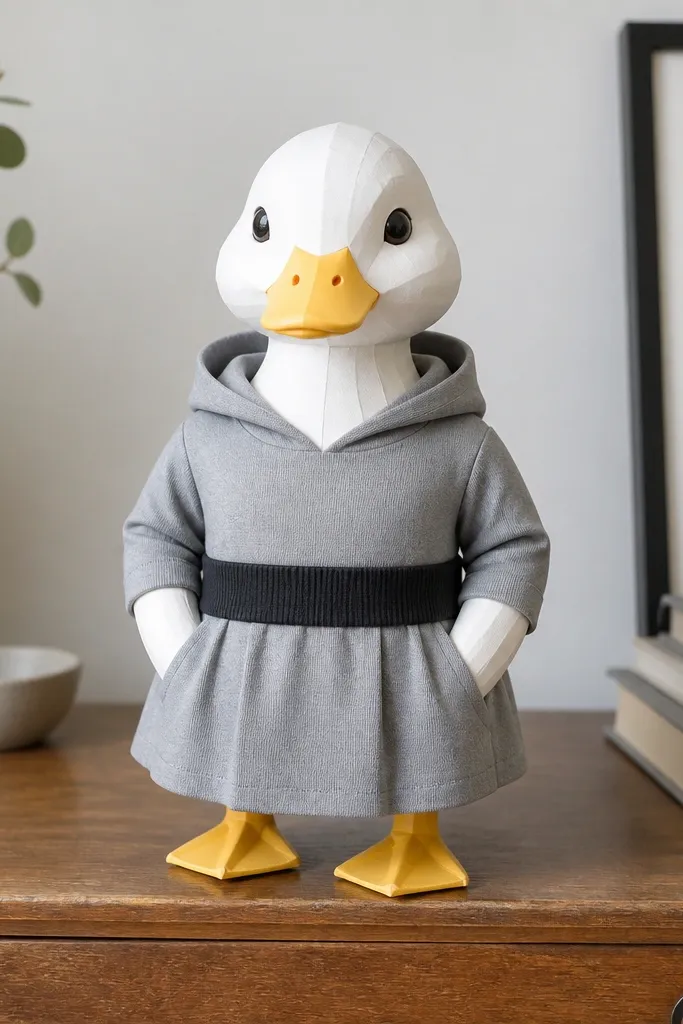
Print the hoodie dress base on 150 gsm cardstock and cut the hood and torso shape. Cut the ribbed waistband on black paper and score any rib lines if your template includes them. Glue the waistband around the waist area first, then glue the hood details last so nothing shifts. Press under a flat surface until fully dry, then trim edges for a clean silhouette.
A hoodie dress is a one-piece outfit that still looks styled. The gray base is neutral and easy to match, and the black ribbed waistband gives texture and a defined waist line. This look is photogenic because the ribbing creates a subtle pattern that catches light without needing extra accessories. It’s a good pick for small spaces where you want one figure-like shape that doesn’t compete with other decor.
Skip thisAvoid gluing the waistband over folds — it will create a thick bump.
Editor's noteUse matte black paper for ribbing so the texture reads without glare.
24. White Skirt With Navy Sailor Bow Belt
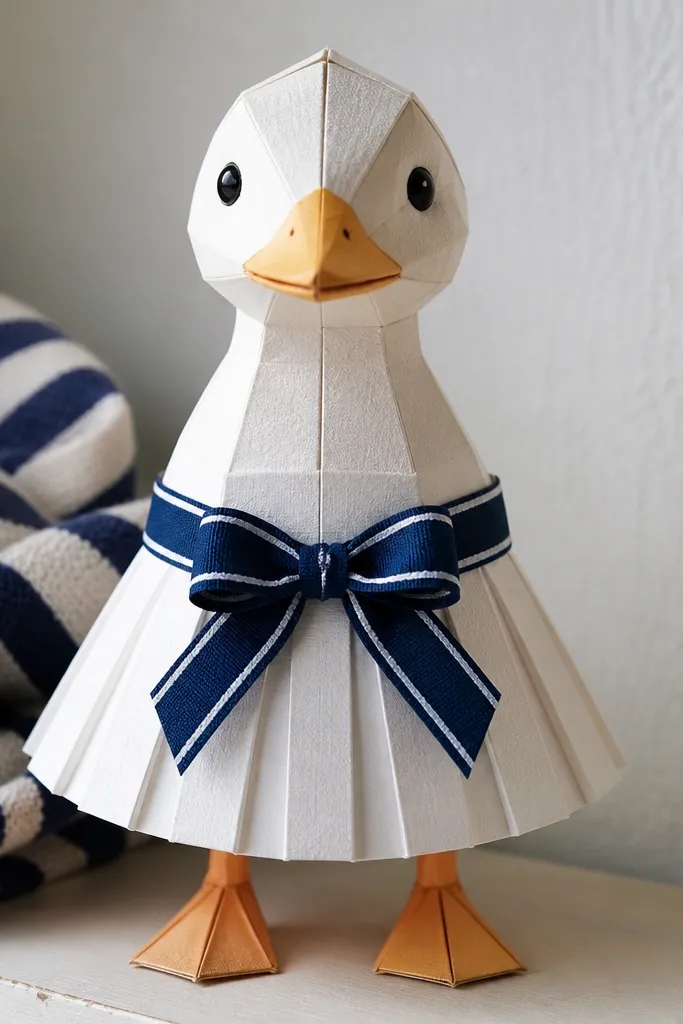
Print the skirt base on 150 gsm cardstock and cut the skirt outline. Cut the navy bow belt pieces on 80-100 gsm paper, fold along the bow crease lines, then glue the bow center first. Glue the belt band around the waist area, then attach the bow on top so it sits slightly raised. Press flat until dry and trim any glue strings along the belt edge.
This outfit is built around one clean accessory: the sailor bow belt. The white skirt stays bright, and the navy bow gives a crisp, symmetrical focal point at the waist. It’s one of the best small-space looks because it adds a clear “character” without requiring a bunch of separate details. Use it on a shelf with other nautical elements or just against a plain background for maximum readability.
Skip thisDon’t glue the bow directly to the skirt edge; leave a small gap so it looks like a belt.
Editor's noteMake the bow slightly raised with a tiny foam dot or thin tape if you want extra dimension.
25. Olive Bomber Jacket With Black Collar
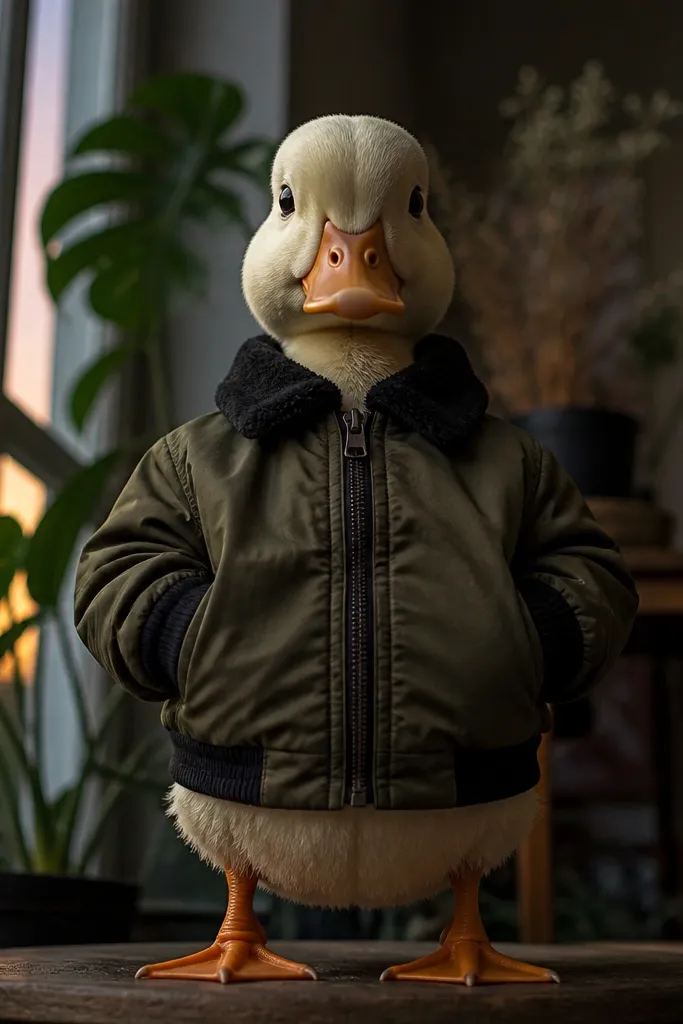
Print the bomber jacket body on 150 gsm cardstock and cut out the main shape. Cut the black collar and cuff pieces on 110-130 gsm paper so they hold their edges. Glue the collar first, then glue cuffs last so the framing stays even. Press under weight and check the symmetry from the front before moving on.
Bomber jackets look great in miniature because they have a snug collar and cuff shape that frames the duck. Olive keeps it grounded, and black collar plus cuff accents add contrast and structure. This is a strong choice for small-space decor because the silhouette feels “fashion figure” instead of flat paper. It also pairs well with both warm and cool shelf backgrounds.
Skip thisAvoid thick paper for the collar; it lifts the jacket edge and looks uneven.
Editor's noteUse a craft knife for the collar curve; scissors make it wobble at this size.
26. Teal Striped Scarf Wrap Top
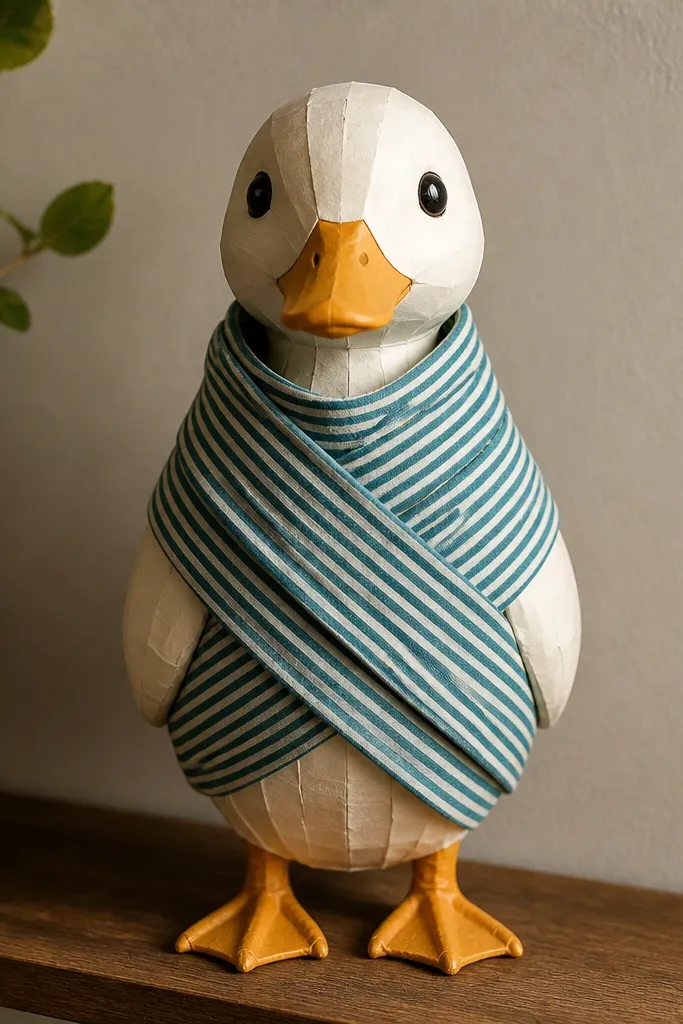
This look uses a scarf-style overlay to create movement. Teal stripes add visual rhythm, and the wrap overlay gives depth through overlapping layers. It’s photogenic in small spaces because the diagonal scarf line breaks up the background and gives the outfit a “styled” diagonal composition. This is a good option if you want something more interesting than a plain top but still easy to cut.
Print the wrap top base on 140-160 gsm cardstock and cut the main torso. Print or cut the scarf overlay stripes on lighter paper and cut them as one long piece if your template allows. Glue the overlay onto the base first, then add any small edge tabs so the overlap stays flat. Press under a book and trim the overlap edges cleanly.
Align stripes before gluing by dry-fitting the overlay on the base for 20 seconds.
Don’t glue the overlay across the entire area; leave edges slightly lifted to show layering.
27. Marigold Cardigan With Cream Button Placket
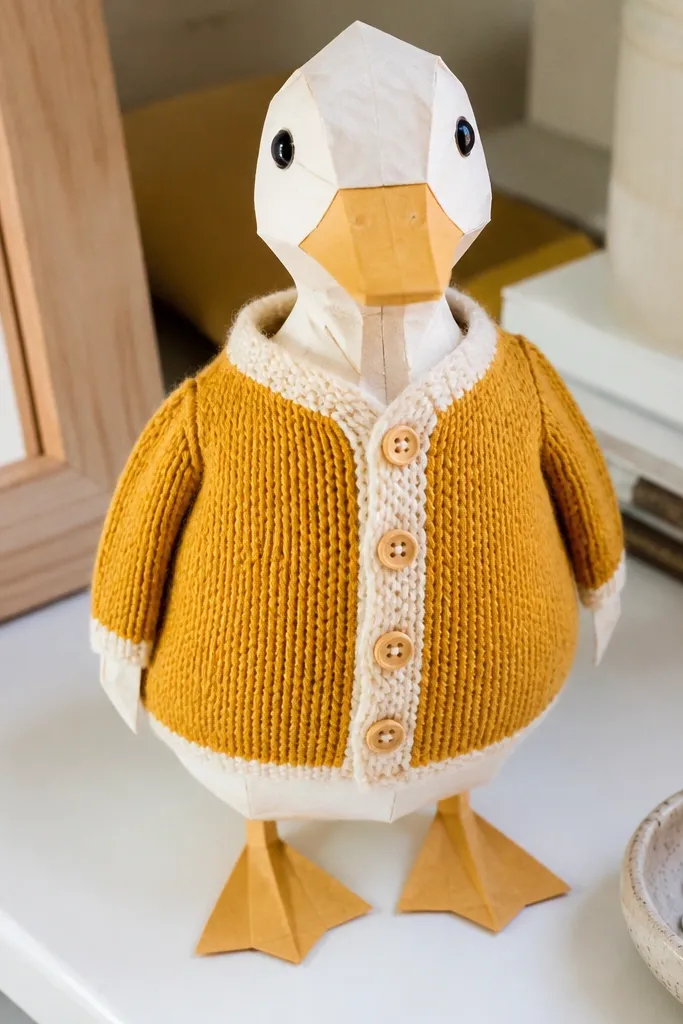
Cardigans look cozy and styled because of the button placket line. Marigold gives warm color that looks great on white shelves, and the cream button placket adds a clean vertical detail. This outfit is also easy to photograph because the placket creates a strong center line. In small spaces, it reads as a complete top-and-front piece without needing extra accessories.
Print the cardigan base on 150 gsm cardstock and cut the body with the front opening. Cut the cream button placket strip on 80-100 gsm paper. Glue the placket along the opening edge, then add button dots if your template includes them. Press flat and let dry, then trim any glue seep at the edges with a craft knife.
Use a thin glue line along the placket back — thick glue will warp the front opening.
Skip glossy cream paper; it makes the placket reflect and lose definition.
28. Navy Shorts Set With White Stripe Side
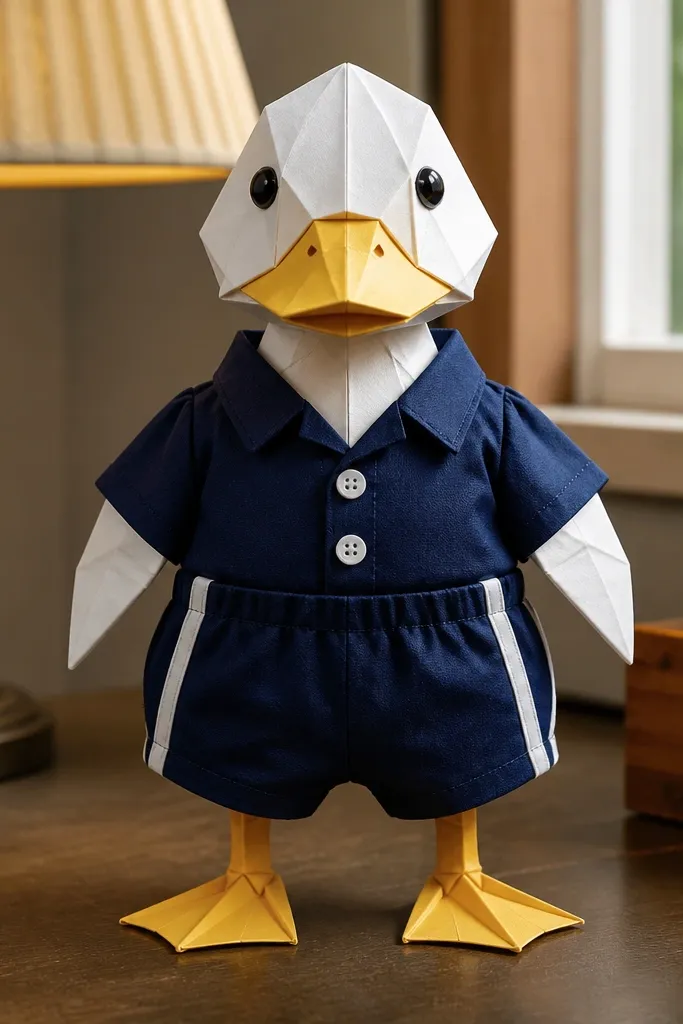
A shorts set is perfect for small-space displays because it creates a shorter, cleaner silhouette. Navy stays crisp, and the white stripe side gives a vertical line that makes the outfit look intentional. This is a good choice when the duck display sits on a desk or table where taller outfits crowd the space. It also photographs well because the stripe gives an easy focal line.
Print the shorts base on 150 gsm cardstock and cut the leg shapes. Cut the white stripe on 80-100 gsm paper as a single narrow strip. Glue the stripe to the side seam line, then glue any waistband or pocket overlays according to the template. Press flat and let dry fully before styling.
If your stripe looks wavy, trim both ends square and re-glue with less glue at the center.
Avoid placing the stripe too close to the edge; it will look like it’s slipping off.
29. Red Peacoat With Black Lapel Checks
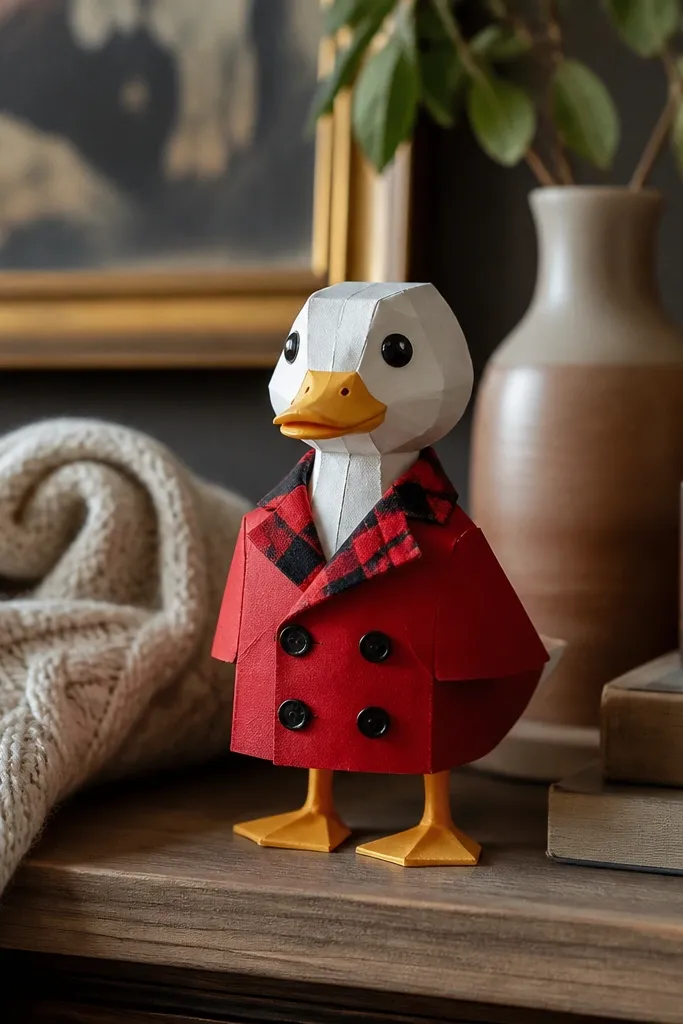
Peacoats are instantly readable because of the lapels. A red body gives bold color, and black checkered lapels add a pattern that looks crisp even when small. This outfit works in tiny spaces because the lapel area creates a clear shape at the top, which balances the rest of the display. Choose it when you want a dramatic statement that still looks clean, not busy.
Print the peacoat base on 160 gsm cardstock for crisp lapel structure. Cut the black checkered lapel overlay pieces on 110-130 gsm paper and keep them separate for left and right symmetry. Glue the lapels onto the coat body first, then glue any collar layers on top last. Press flat and trim edges so the check pattern lines up cleanly along the lapel seam.
Use matte red paper so the lapel checks stay high-contrast without glare.
Don’t glue check overlays directly onto glossy paper; it makes edges look shiny and messy.
30. Light Blue Button Dress With White Collar Tips
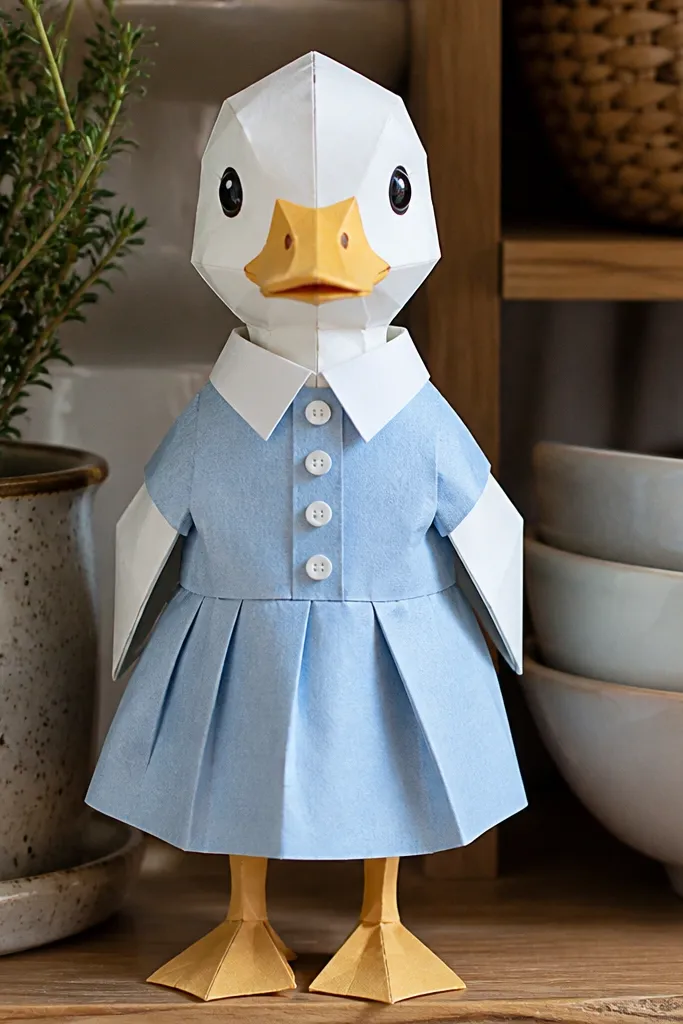
Print the dress base on 140-160 gsm cardstock and cut the body outline. Cut the collar tip pieces on white paper and glue them at the collar ends so the points are symmetrical. Add any button dots last and lightly score fold lines so the collar stays flat. Seal with matte spray after drying.
This is a soft, classic dress look that still has crisp structure. Light blue reads airy, and white collar tips create sharp points that define the neck area. It’s a strong small-space choice because the outfit has clear top geometry and a simple color body, so it doesn’t blend into the background. Put it on a shelf with neutral decor and it will look tidy and styled.
Skip thisAvoid placing collar tips too far inward; the collar will look narrow and off-balance.
Editor's noteIf your collar tips curl, flatten them under a book for 5 minutes before gluing.



