
1. French Bistro Doll Set with Layered Aprons
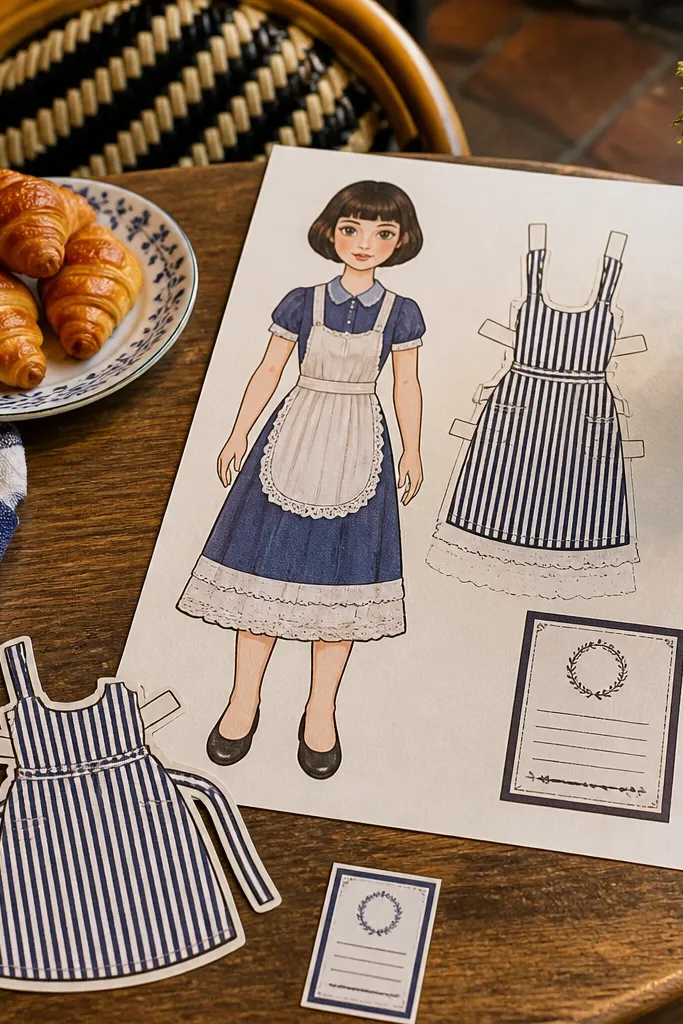
This set is a reprint-friendly choice because the outfits are built from repeatable layers: a base dress, then an apron layer, then small accessory pieces like a menu card. The look stays coherent even when you swap aprons, so you get multiple “moods” without changing the doll’s proportions. For aesthetics, the striped fabric bands and the apron shape draw the eye straight to the center, which reads well in photos and on a desk display. Build it on matte cardstock so the printed stripes don’t gloss up and smear when you handle the doll repeatedly. Time is moderate because you’re cutting fewer tiny pieces than a lace-heavy design.
Start by printing the doll body, the base outfit, and the apron layers on 110-160 gsm matte cardstock. Cut the body first, then assemble the base outfit pieces using a thin glue stick on the tabs or printed connectors. Next, add the apron layer last so it sits flat over the dress and hides any slight alignment differences from your cuts. Finish by trimming around the menu card and gluing it to the hand or holding position if the template includes that slot.
Use a craft knife with a fresh blade for the apron straps so the curves stay smooth.
Don’t print on glossy paper — stripes can look blotchy and edges glare in photos.
2. Garden Cottage Doll with Removable Flower Wreath Hair
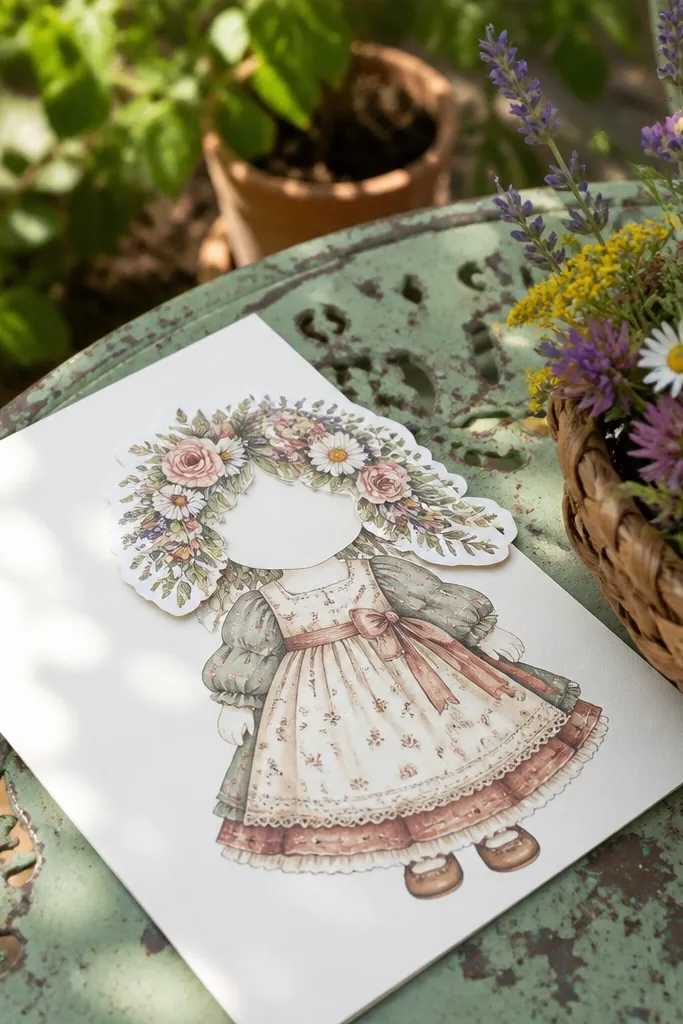
This is the kind of template you reprint because it’s designed for swaps. The hair wreath is a separate piece, so you can change the accessory without redrawing the face or head shape. The cottage dress has a clear silhouette — bodice, skirt, and sleeves — which stays attractive even after multiple reprints on slightly different paper. The floral wreath is the photogenic star: it frames the face and adds color contrast, which makes the doll look “finished” even when you only swap one accessory. It suits shelves, bulletin-style decor, and gift tags where you want a clear subject in the frame.
Print the doll head and body components on heavier cardstock (140-160 gsm for the head). Cut the wreath and the hair base, then glue the hair base to the head first. Fit the wreath on top using small tabs so it covers the seam — glue only the wreath tabs, not the whole piece, so it stays clean. Finally, cut and attach the dress layers, then check that the head angle doesn’t tilt the wreath when you stand it.
If the wreath piece warps, press it under a book for 10 minutes before gluing.
Avoid gluing the wreath edge-to-edge; that makes it hard to swap in future reprints.
3. Retro Roller Skate Doll with Swapable Skirt Lengths
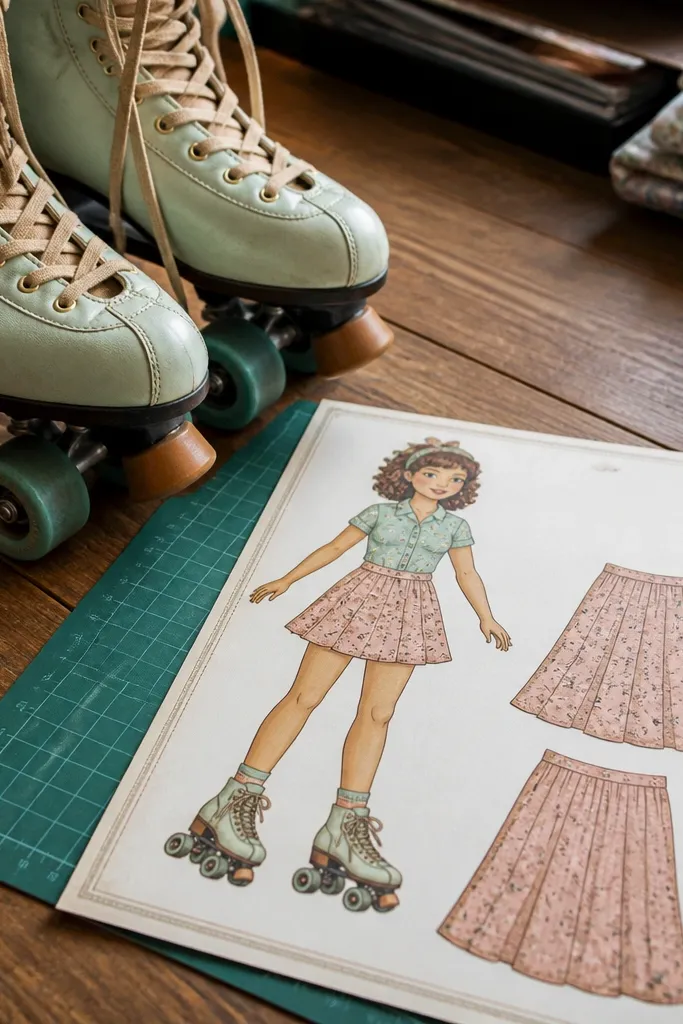
Print the doll base and the two skirt options on 110-130 gsm cardstock. Cut the doll base body and glue it flat so the waist stays aligned for skirt attachment. Attach the skirt layer using the printed connector tabs; keep the skirt edges free so they don’t crease. Cut and assemble the skates separately, then glue them only at the contact points so the doll doesn’t buckle when you pick it up.
Swapable skirt lengths are exactly what you want for repeated printing. The doll stays the same, while the skirt changes the vibe — short skirt for motion, longer skirt for a calmer look. That gives you more “outfits” per print without making your cutting sessions heavier. The roller skate elements add strong shapes that read well against a simple background, so the doll looks styled even when the photo is just on a plain tabletop. I like this template for teens and adults who want decor that feels playful but not childish.
Skip thisDon’t glue skates all the way around; that creates bulky thickness and warps the stand.
Editor's noteScore fold lines lightly with a bone folder so skirt tabs sit flat instead of popping up.
4. Modern Office Doll with Three Tie Options
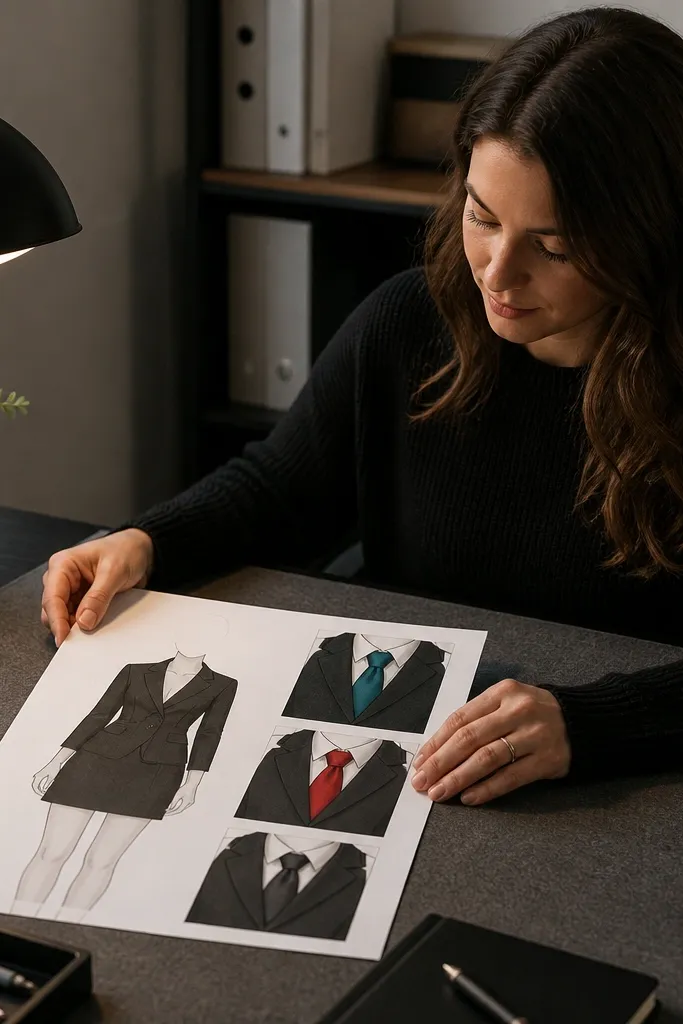
This template is built for repeat printing because the outfit is modular but the silhouette stays sharp. A blazer reads “adult” in decor, and the tie swap gives you quick variety without messing with the rest of the outfit. The best part is the clean color blocking: blazer, shirt, tie, then optional pocket square. When you reprint, the tie pieces are the first thing you’ll want to swap, so the set stays interesting longer than single-scene dolls. It also looks great in a frame or on a desk organizer because the shapes are tidy and not overly busy.
Print the doll base (head, arms, blazer) and the tie pieces on 120-160 gsm cardstock. Cut the blazer first and assemble the shirt layer so the tie sits on a flat surface. Glue only the tie tabs to the shirt area, keeping the knot area aligned with the collar guides. Finish by attaching the pocket square piece if included, then test the doll on a flat surface to ensure it stands without tipping.
Use a ruler to line up tie tops with the collar seam so the knot doesn’t drift between reprints.
Skip thick glue blobs; they create uneven edges around the collar and ruin the crisp look.
5. Mermaid Nightstand Doll with Sliding Tail Scale Layers
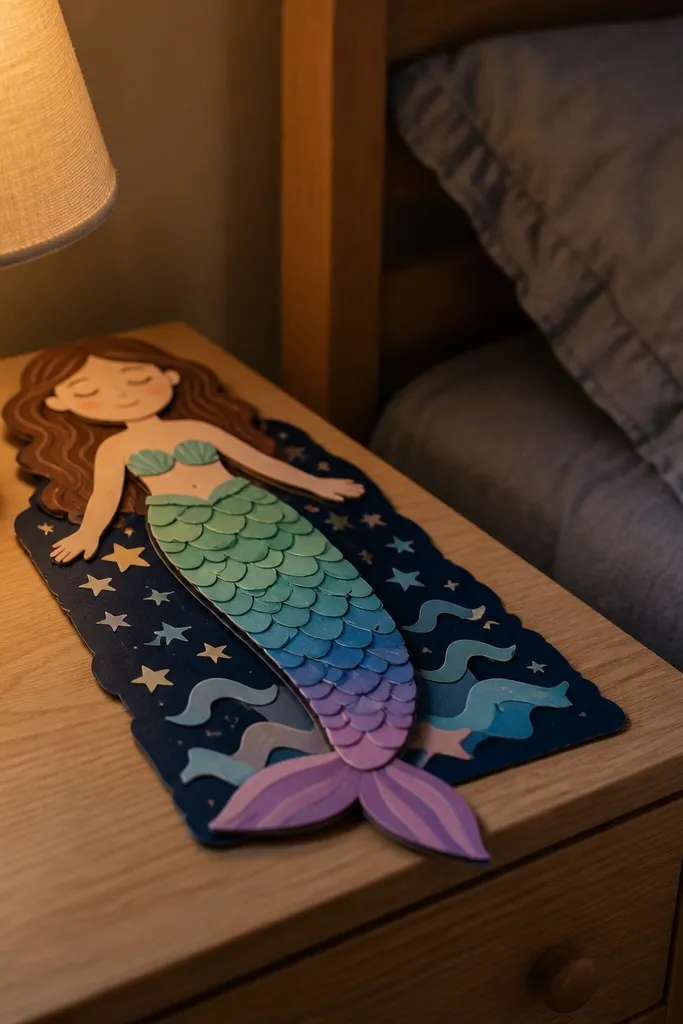
This one earns reprints because the tail has a layered scale effect that changes how the doll looks depending on how you position the pieces. Sliding layers create a subtle shimmer effect even on matte paper because different scale bands show through at different angles. The template typically includes star or wave background pieces that help it feel like a finished scene, not just a figure. It’s more work than a plain dress doll, but the payoff is a dramatic look you can photograph from multiple angles. Great for nightstand decor, bedroom shelves, and gift sets where you want a “wow” subject.
Print the doll body and tail layers on 140-160 gsm cardstock for stiffness. Cut the tail scale bands carefully, then assemble the base tail first. Add the upper scale layer so it can slide or sit slightly offset — glue only the anchor points, not the entire surface. Attach the arms and top outfit layer last, then place the star/wave pieces behind the doll if the template includes a background insert.
Use double-sided tape on anchor tabs so the sliding layer stays smooth instead of crunchy with glue edges.
Don’t glue the entire sliding layer down — it kills the layered effect and makes reprints feel pointless.
6. Space Explorer Doll with Removable Helmet Visor
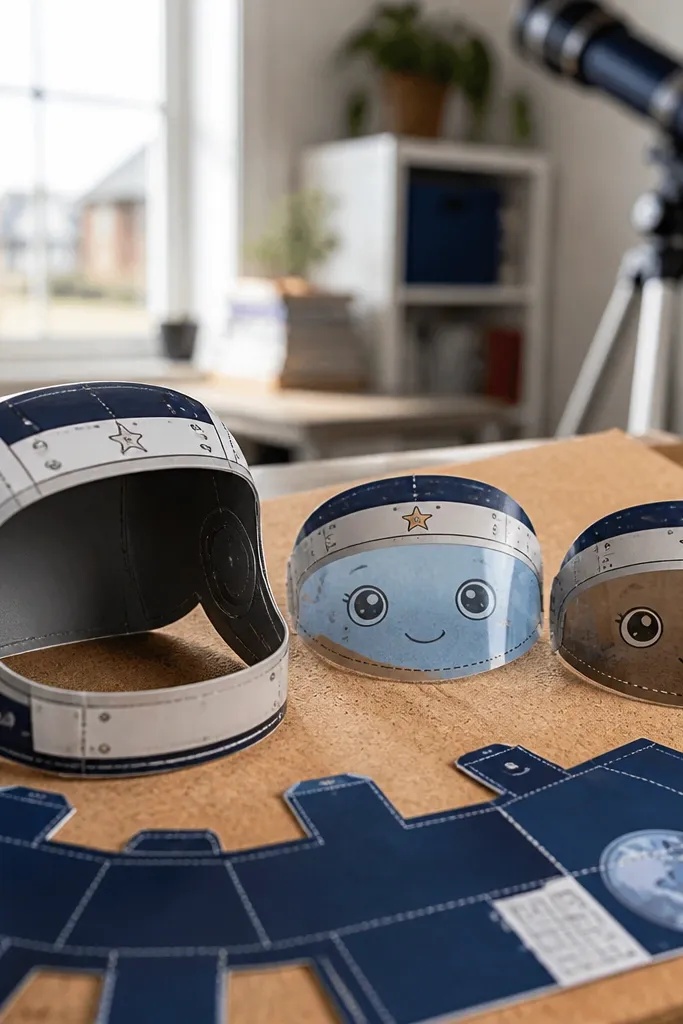
Print the suit base and helmet parts on 120-160 gsm cardstock. Cut the helmet and visor separately, then glue the helmet ring to the head area first. Attach the visor using only the hinge or tab points so it sits over the face without curling. Finish by assembling the suit torso layers and then gluing the gloves or arm pieces last so the proportions stay tidy.
A removable visor is a simple trick that makes the template feel interactive and worth reprinting. You get one base space suit silhouette, then you swap the visor expression or color to match different scenes. The helmet shape also frames the face, so even small details like the eyes and mouth read clearly. For aesthetics, space themes usually have bold shapes, clean lines, and high contrast — that translates well to printed paper decor. This is a strong pick if you want a doll that looks good in a shadow box or on a desk with a small backdrop.
Skip thisDon’t use water-based glue on thin visor pieces; it can warp the printed plastic-like look.
Editor's noteIf the visor curls, press it between two cardstock sheets for 5-8 minutes before attaching.
7. Autumn Market Doll with Stacked Produce Bags
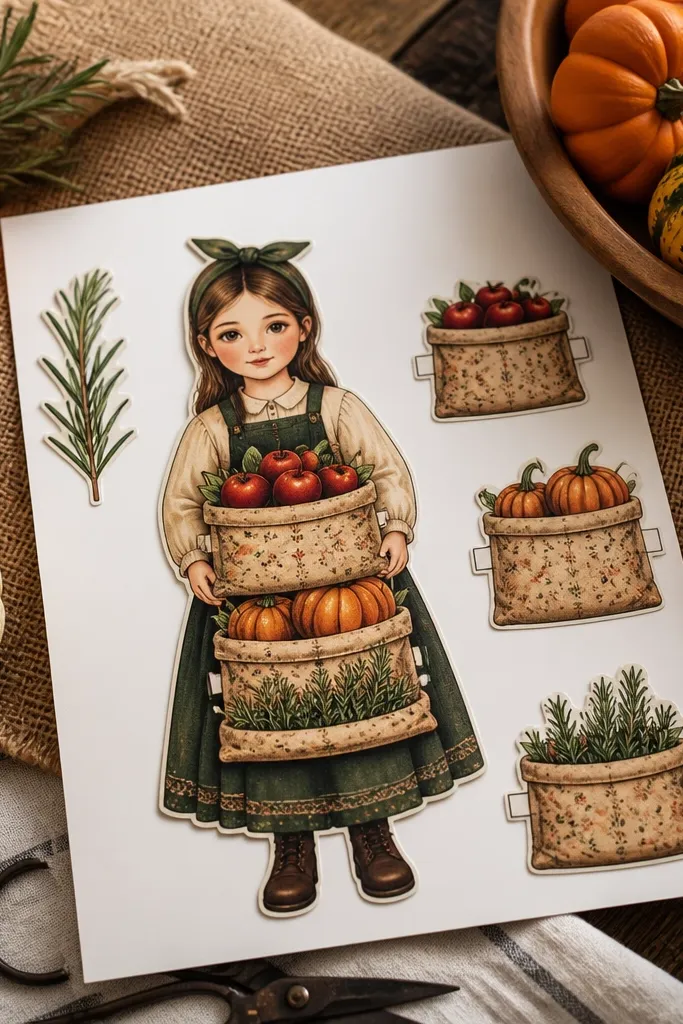
Stacked produce bags give you instant “themed decor” without repainting anything. The template typically uses multiple bag layers or separate items like apples, pumpkins, and herbs, which means you can mix combinations by reprinting only the accessory sheet. The doll’s outfit anchors the color palette, while the produce pieces add texture through shape variety. It’s photogenic because the bags create depth — they sit in front of the torso and catch light at the paper edges. This set fits kitchen shelves, entryway decor, and seasonal rotations.
Print the doll and the produce accessory sheet on 110-140 gsm cardstock. Cut the doll outfit base and assemble the torso layers first, then attach the hands/arm placement pieces. Build the produce bag stack by gluing the back bag layer first, then the middle, then the front — keep glue only on the fold tabs. Add small items like herbs or apples last, then check that the stack doesn’t overlap the doll’s face or torso awkwardly.
Use a thin foam dot for one bag layer if you want extra depth in photos.
Avoid gluing every item flat; too much flat stacking makes it look like a paper pile instead of a carried load.
8. Ballet Studio Doll with Two Leotard Colorways
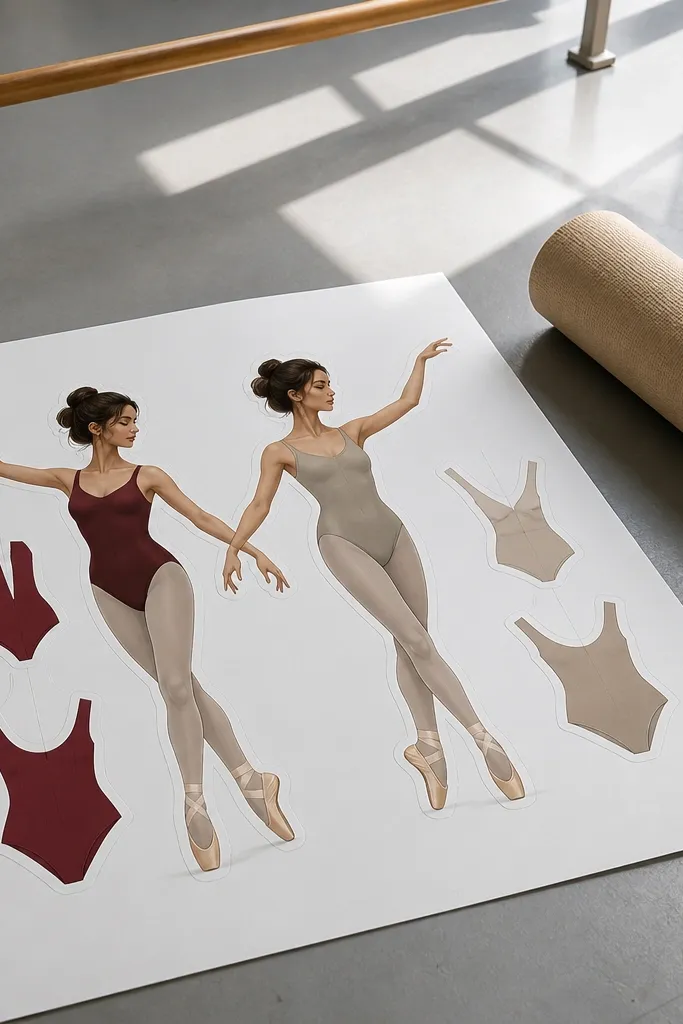
This template is a reprint machine because it separates the leotard from the rest of the studio look. You get the same graceful pose, same tutu or skirt silhouette, and then you swap colorways to match your room decor. The ballet setting pieces, like a bar or floor line, help the doll read as “studio” even when it’s small. For aesthetics, the pose creates clean negative space, and that makes the paper edges show nicely under normal indoor light. It’s a good pick if you want a calm, pretty display that still looks intentional.
Print the doll pose base and the two leotard options on 120-160 gsm cardstock. Cut the pose base first and glue the arms and torso pieces together so the stance stays crisp. Choose one leotard colorway and glue it to the torso using alignment tabs. Add the skirt and ribbon layers last, then attach any studio background strips behind the doll if included.
Use matte spray on the background strips only; it keeps them from reflecting while the doll stays readable.
Don’t cut out the entire background behind the doll — leave a margin so the display looks cleaner.
9. Cozy Library Doll with Bookmark and Book Spine Swaps
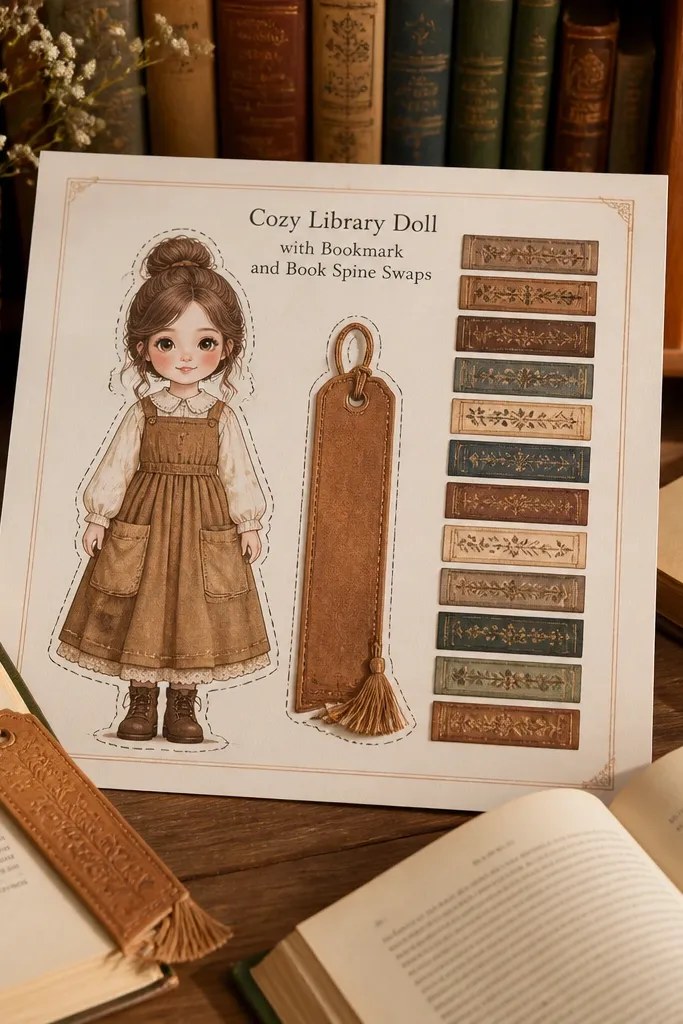
Book spine swaps make this template worth printing again because the “story” changes without changing the doll. The bookmark piece is usually a separate layer, and it’s the easiest item to swap when you want a new look. The dress and pose keep everything consistent, which means the doll remains photogenic even when you change only one accessory. This works well for decor that sits on a bookshelf edge or a desk organizer because the vertical book spines add structure. It’s also a smart choice for gift sets since you can tailor the spines to a person’s favorite genre.
Print the doll base and the book spine strip sheet on 120-160 gsm cardstock. Cut the doll and assemble the torso and hands first, then attach the bookmark to the holding hand slot. Assemble one book by gluing spine layers back-to-front, then slide it into the hand or place it against the body if the template allows that. Finish by sealing the bookmark and spines lightly with matte spray after assembly so the text stays crisp.
Trim one spine edge straighter than the rest; it makes the stack look intentional in photos.
Skip glossy paper for book text; it creates glare that kills readability in pictures.
10. Floral Pattern Doll with Mix-and-Match Sleeve Bands
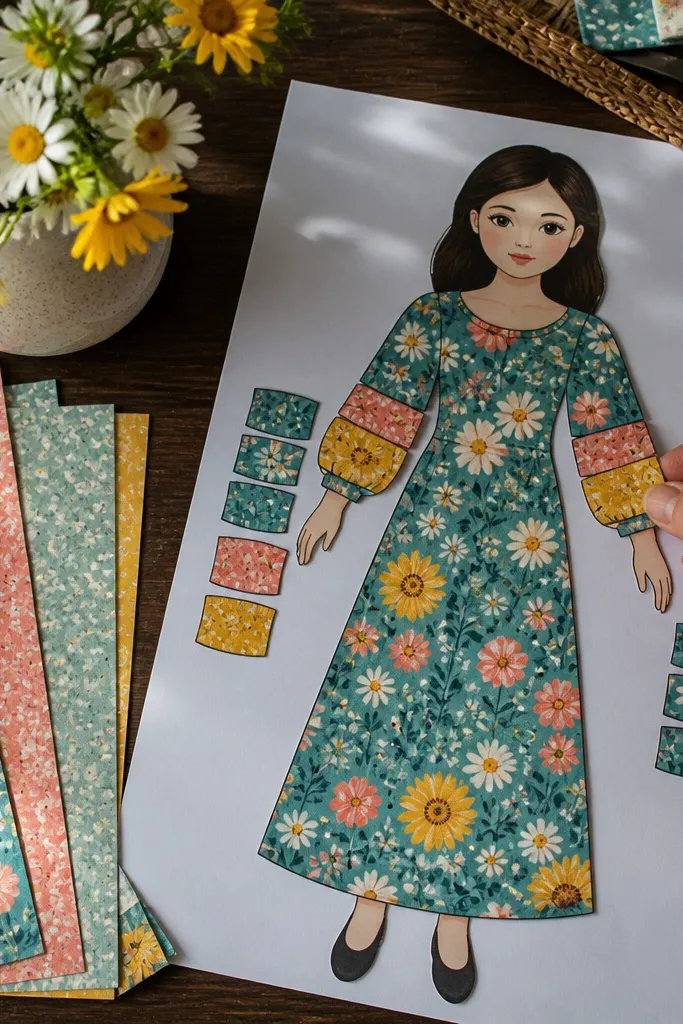
Print the dress base and the sleeve band options on 110-140 gsm cardstock. Cut the dress base first and glue the skirt and bodice layers together so the sleeve area is flat. Choose one sleeve band set, then glue each sleeve band to the arm guide points. Attach the arms to the torso after sleeves are set, so alignment stays consistent between reprints.
Mix-and-match sleeves are the kind of swap that keeps a template fun after repeated printing. The base dress stays consistent, while separate sleeve bands change the overall color story in seconds. Floral patterns are visually rich, and when they’re drawn in clean blocks with consistent line weight, they print sharply and cut easily. This set is great for people who want a cohesive aesthetic but don’t want to commit to one single outfit design forever. It also looks good in a hanging display because sleeves create shape even when the doll is viewed from the side.
Skip thisAvoid thick glue on sleeve seams; it makes the sleeve edge look lumpy in close-up photos.
Editor's noteUse a light tack glue for sleeve bands, then press flat with a cutting mat for 30 seconds.
11. Monochrome Street Style Doll with Two Jacket Textures
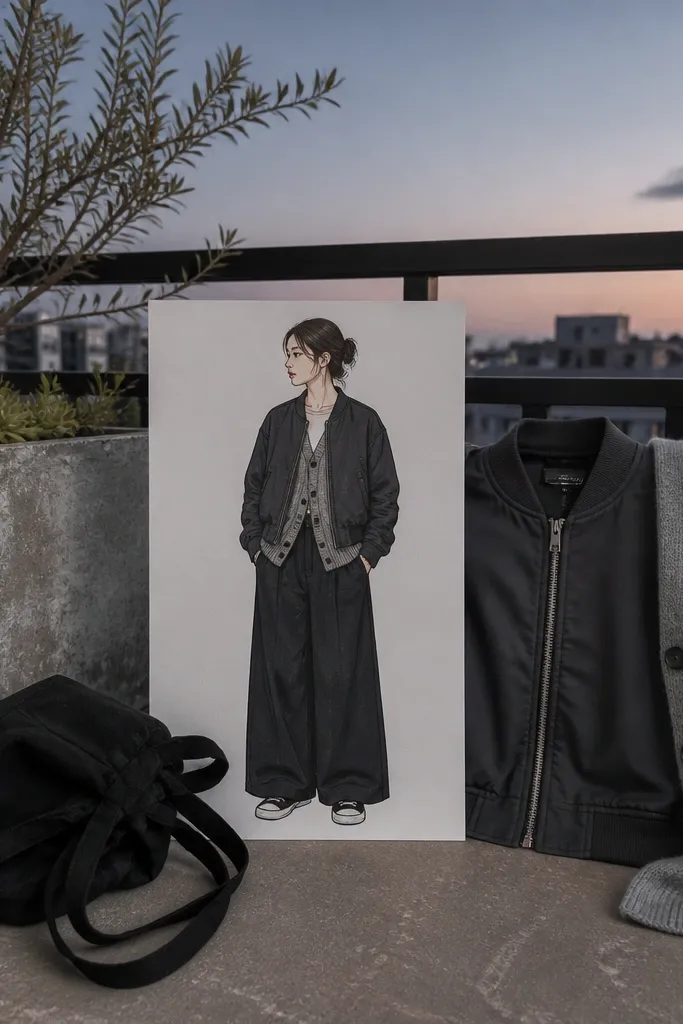
Print the doll base and both jacket options on 140-160 gsm cardstock for crisp edges. Cut the base torso and arms, then glue the shirt layer under where the jacket will sit. Attach one jacket by gluing the inner tabs at the shoulders and sides only, so the jacket front lies flat. If the template includes zipper lines, don’t over-glue over those details; keep glue away from printed highlight areas.
Monochrome street style is one of the easiest aesthetics to reprint without losing the look. When you have two jacket textures — like a matte bomber vs a knit cardigan — the doll still reads “styled” even if you’re only swapping one piece. The clean palette also makes it forgiving if your printer ink coverage varies slightly between print runs. This template is photogenic because jackets usually have strong geometry: cuffs, zippers, and collar lines that hold their shape when cut. It suits minimal shelves, black-and-white photo backdrops, and decor that doesn’t need bright color to look intentional.
Skip thisDon’t use super thin paper for jackets — it curls at cuffs and ruins the clean silhouette.
Editor's noteIf your printer smears blacks, let prints dry 10 minutes flat before cutting.
12. Summer Picnic Doll with Separate Basket and Blanket Layers
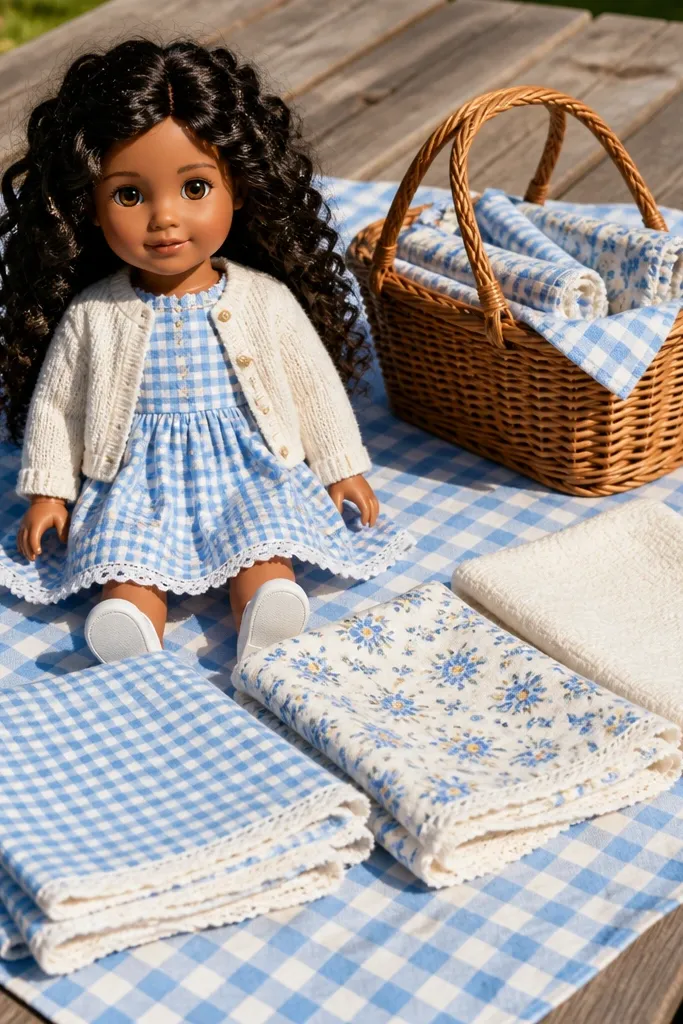
Print the blanket base, blanket pattern overlay, and the basket pieces on 110-140 gsm cardstock. Cut the blanket base first and glue it flat to your display backing if the template includes one. Add the pattern overlay last, aligning edges to the printed borders. Assemble the doll outfit and attach the basket piece using side tabs so it sits in front of the blanket without covering the doll’s face.
This set is worth reprinting because the “scene” is modular. You can swap the blanket pattern layer or keep the doll the same while changing the basket accessories. The blanket layers create a wide base that makes the doll look grounded in photos, not like it’s floating on a plain page. Woven basket shapes are also easy to cut if the template uses bold outlines and spaced weave lines. It fits seasonal decor rotation, party table centerpiece crafts, and framed prints where you want a clear composition.
Skip thisAvoid gluing the basket directly on top of the doll’s hands; it makes the pose look cramped.
Editor's noteUse a craft knife to cut blanket fringe cleanly; scissors often distort the fringe into uneven lengths.
13. Winter Coat Doll with Removable Scarf Tails
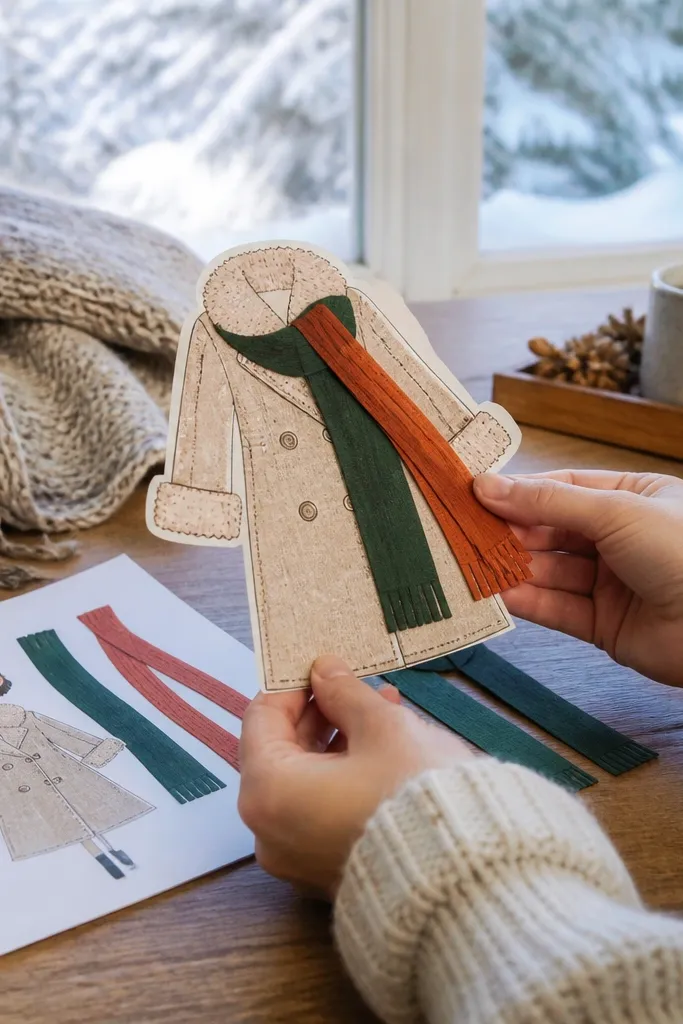
Print the coat base and both scarf options on 140-160 gsm cardstock so the coat doesn’t flop. Cut the coat and assemble it first, then glue the scarf attachment points to the neck area. Choose one scarf tail set, then glue only the base tabs to the coat so the tails hang naturally. Finish by trimming around pocket details and sealing lightly if you used lighter paper.
A removable scarf is a fast way to get multiple “reprints” out of one template without changing the whole outfit. Winter coats look good in paper because the structure holds — collar, pockets, and cuffs give you strong shapes. The scarf tails add motion and contrast, especially if you have a lighter and darker version. This template is great for people who want consistent results from print to print because scarf pieces are separate, so you don’t disturb the coat alignment. It also works well for seasonal decor — you can keep the coat as the stable piece and swap scarves as the only change.
Skip thisDon’t glue scarf tails across the whole back of the coat; you’ll lose the drape effect.
Editor's noteBefore sealing, run a bone folder along the scarf fold tabs so the tails hang without creasing.
14. Kids Party Doll with Balloons and Confetti Pieces
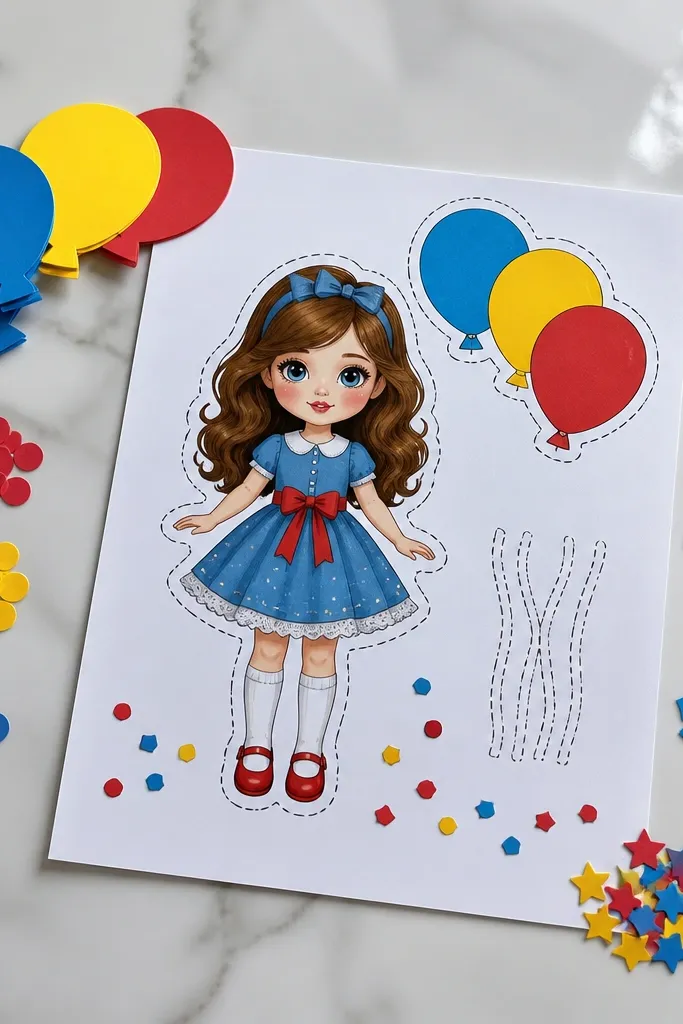
Print the doll base and party accessory sheet on 110-140 gsm cardstock. Cut the doll and assemble the torso and head first, then attach the hands to hold balloon tabs if the template has that option. Assemble balloons by stacking layers back-to-front, then glue the strings to the balloon anchor points. Add confetti pieces last — use tiny dots of glue so the confetti stays dimensional instead of flat.
If your goal is to print again and again, party templates work because accessories do the heavy lifting. Balloons and confetti pieces create a bright, photogenic look even when the doll outfit is simple. The template usually includes separate balloon layers and string lines, so you can swap colors without reprinting the whole doll. It’s a good option for quick craft sessions because the pieces are chunky and easy to cut. Display-wise, it’s great for birthday decor, classroom bulletin boards, and small framed crafts where you want color pop.
Skip thisAvoid thick glue on confetti; it smears and looks heavy in photos.
Editor's noteCut balloon strings with a sharp blade and a slow hand; jagged strings look messy faster than any other detail.
15. Art Gallery Doll with Frame-Ready Background Insert
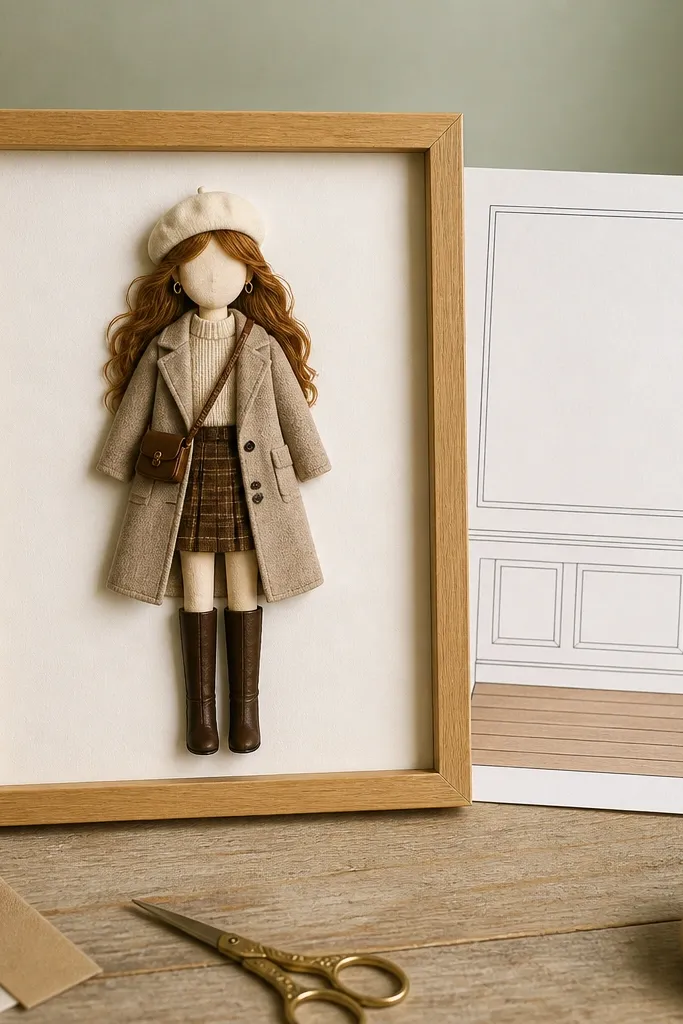
This template is built for display, which is why it keeps getting reprinted. The background insert gives you a ready-made composition — frame lines, wall cues, or a simple art label — so the doll looks finished even without extra props. The doll outfit pieces are usually clean and centered so the whole design photographs well. You can reprint just the doll outfits while keeping the same background insert, which saves paper and keeps your display consistent. It’s a strong choice if you want “aesthetic shelf decor” instead of a toy you store in a drawer.
Print the background insert on 160-200 gsm cardstock if you’re framing it, and print the doll pieces on 120-160 gsm. Cut the background insert first and fold along any guide lines for an easy stand or back panel. Assemble the doll body and attach the outfit layers so the doll sits centered in the frame opening. Finally, glue the doll to the background insert using two small contact points so it stays stable and doesn’t warp.
If you’re going frame-ready, leave a 3-5 mm border around the insert edges so it sits cleanly behind glass or plastic sleeves.
Don’t cut the background insert too close to the frame lines; it makes the composition look off after reprints.



