
1. Scandi Cozy Corner House With Layered Window Seat
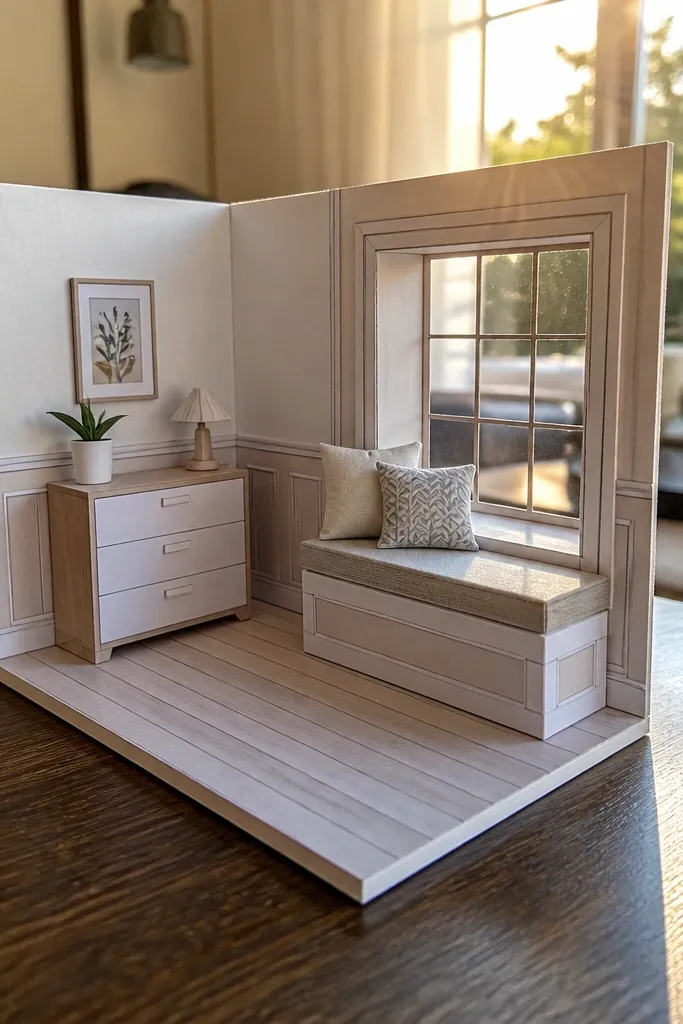
This template gives you a corner room layout where the window seat sits in front of the window wall, so the scene instantly reads as a “cozy playroom” instead of a generic dollhouse. The walls are split into trim sections, which makes it easy to layer on top of a plain base and keep the lines clean. Furniture pieces are scaled to the window opening so curtains and the seat don’t look pasted on. It’s a friendly build if you like light neutrals, and it looks great in photos because the corner framing pulls the eye inward.
Print the wall and floor base pages on 200 gsm cardstock. Cut out the window opening, then glue the window frame panel behind it so the opening stays crisp. Add the seat layer with foam tape under the seat top, then attach a curtain strip to the inside edges of the window frame. Finally, place the tiny table and book stack so they sit centered under the seat backrest.
Cut window openings with a fresh craft knife blade and a metal ruler so the edges stay straight.
Don’t glue furniture directly to the flat wall — you’ll lose the depth that makes it look cozy.
2. Warm Cottage Kitchen Playroom With Apron Drawer Fronts
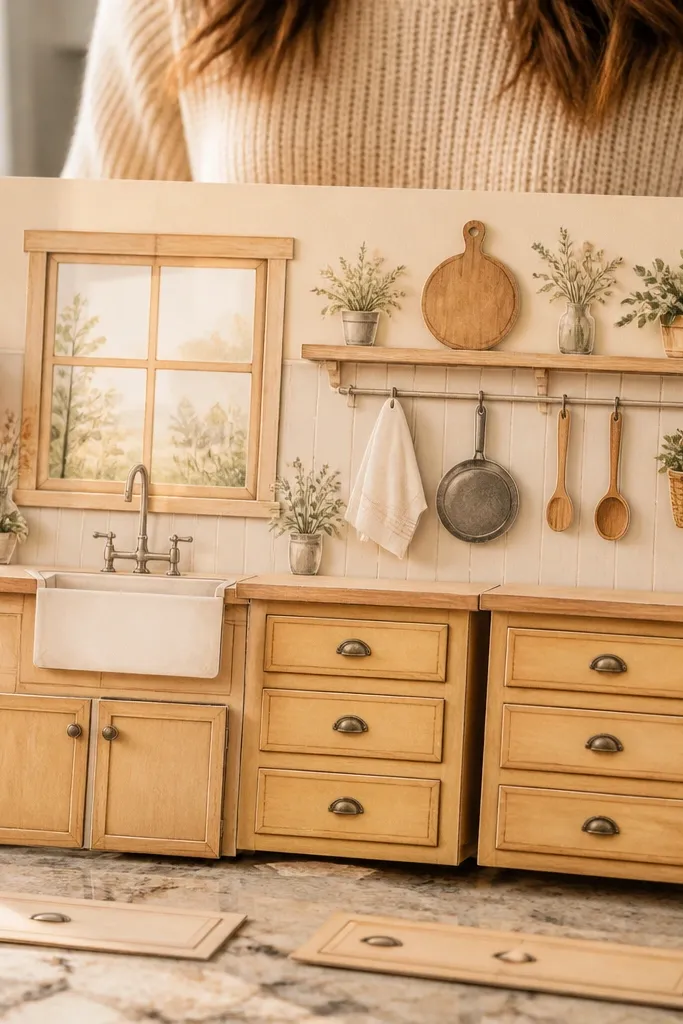
This is a playroom template that treats the kitchen wall like a story backdrop — drawers, hooks, and a small counter create instant visual interest. The drawer fronts are separate pieces, so you can layer handles and keep the “cottage” look without painting. It’s ideal for kids' play scenes because it gives you lots of interactive spots for pretend snacks, cups, and tiny tools. In photos, the repetitive lines of drawers and hooks read as charming and orderly, which makes the whole scene feel lived-in.
Print the kitchen wall panel and the separate drawer-front pages at 180-200 gsm. Cut the drawer openings from the wall panel, then align each drawer-front piece over its opening and glue only the top edge first. Add the handle tab last so you can adjust alignment before it fully sets. Assemble the counter base on a thicker sheet, then attach the hooks along the top trim line using a ruler to keep spacing even.
Use a bone folder to crease tiny fold tabs so the drawer fronts sit flat instead of buckling.
Avoid gluing all drawer fronts at once — one misalignment will throw off the whole row.
3. Tiny Reading Nook House With Bookshelf That Stays Upright
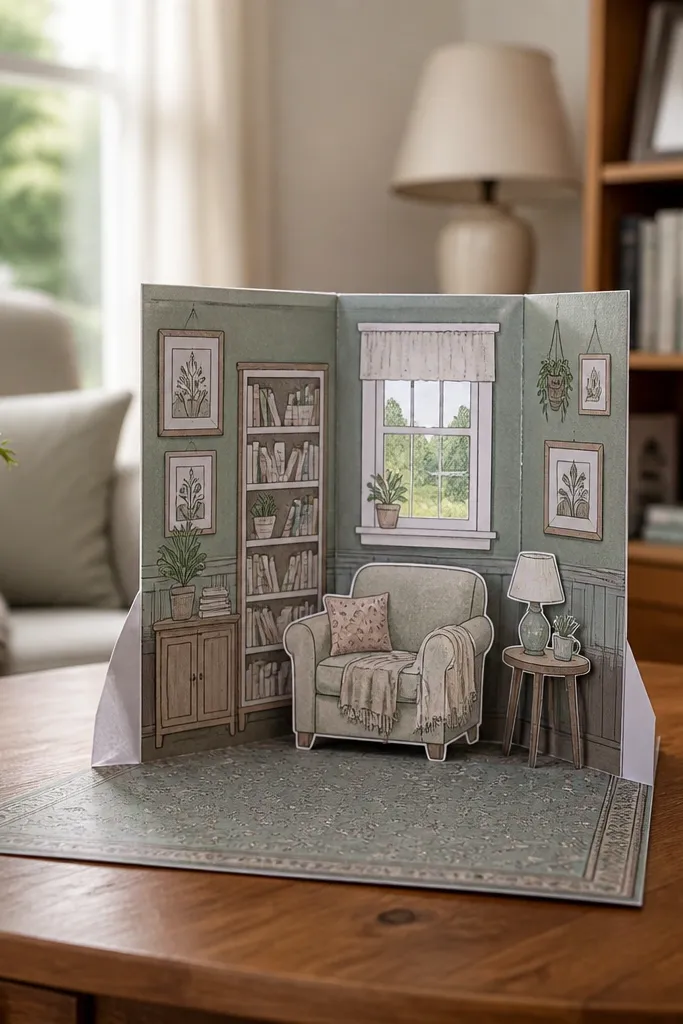
This template is built for a reading corner because it includes a bookshelf piece with support folds, so it stands straight even though it’s paper-thin. The nook wall has a consistent trim height, which makes the shelf look designed rather than random. You get a rug panel with a subtle pattern that helps the whole room look warm instead of empty. If you want a cozy playroom that photographs well from the front, this layout naturally frames the books and chair.
Print the back wall and the bookshelf parts on 200 gsm cardstock. Score and fold the bookshelf side supports first, then glue the shelf backing to lock the vertical structure. Cut the rug panel and glue it to the floor base, keeping the edges flush with the room outline. Add the chair and a small lamp piece using foam tape under the lamp base for a gentle lift.
Dry-fit the bookshelf inside the room before gluing to confirm the top clears the trim.
Don’t skip scoring — uncreased supports collapse and the shelf loses its “upright” look.
4. Pastel Bedroom With Built-In Dream Cloud Backdrop
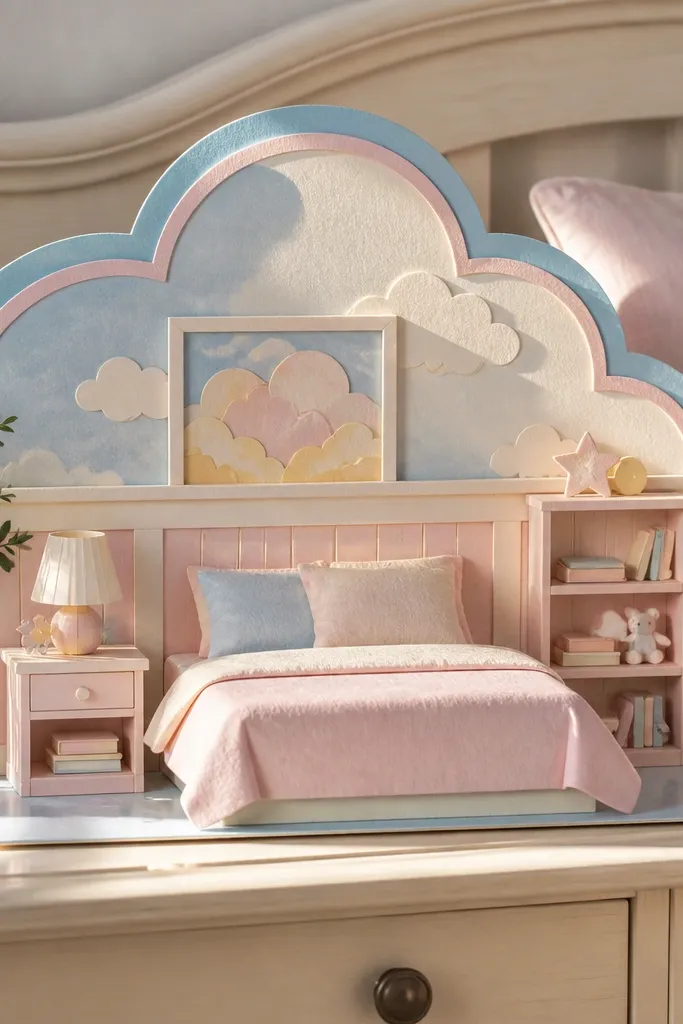
This one makes coziness feel soft and playful because the template includes a cloud-shaped backdrop behind the bed area. The bed wall is separated into a main panel and a trim layer, so you can add the cloud without warping the whole sheet. It’s a great choice if you want your paper doll house to look like a themed room, not just furniture placed in a box. The cloud panel also creates a natural “photo focal point,” which is exactly what you want for a cozy playroom.
Editor's noteUse a craft knife for the cloud edges, then lightly rub the edge with sandpaper to remove paper fuzz.
Print the room base and the cloud backdrop on 180-200 gsm cardstock. Cut the cloud panel carefully, then glue it to the back wall using a thin line of glue so it doesn’t ooze. Assemble the bed frame on a single layer first, then add the bedding pieces on top as separate cutouts. Finish by placing a tiny hanging mobile piece along the top trim so it lines up with the cloud center.
Skip thisAvoid heavy glue near the cloud edges — it makes the shape ripple.
5. Vintage Toy Room With Wallpaper Strips and Trim Borders
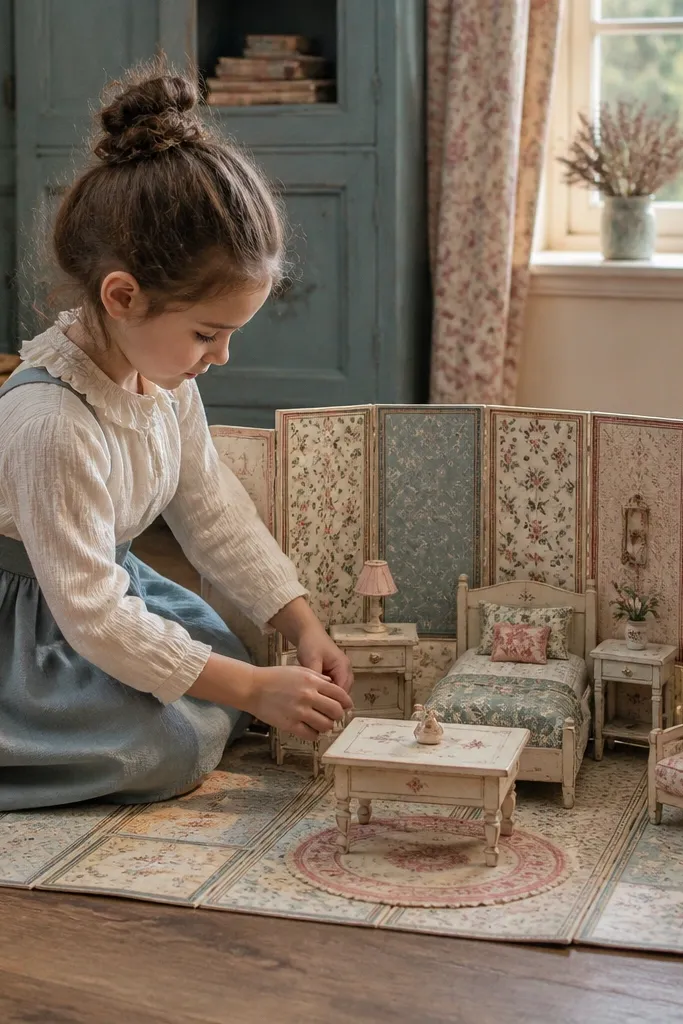
This template looks “collected” because it uses wallpaper strips framed by trim borders, so the room has visual rhythm. You get multiple wall panels you can stagger, which prevents the flat wallpaper look that happens when people print one big background. Furniture pieces match the border style, so the whole thing looks coordinated. It’s perfect if you want a cozy playroom theme with vintage charm without painting — just cut, layer, and align.
Print the wall strip panels and trim borders separately on 160-180 gsm paper. Cut the strips and glue them to the wall base in staggered heights, leaving a small gap where trim will cover seams. Apply trim borders last, pressing along the ruler edge so they stay straight. Build the toy storage unit by folding the side panels and gluing the front frame to lock the corners.
Press seams with a scrap piece of cardboard for 30 seconds — it sets the bond fast.
Don’t glue wallpaper strips directly on top of each other — you’ll get bulky overlaps.
6. Monochrome Cozy Playroom With Soft Gray Rug and Contrast Frames
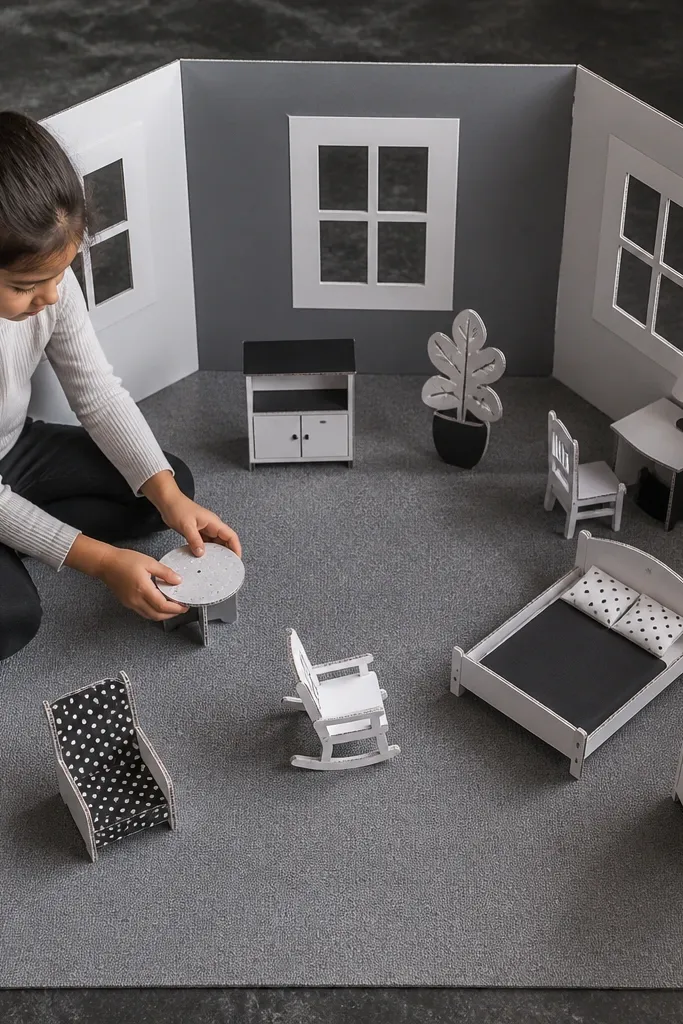
Cozy doesn’t have to mean bright. This template uses a monochrome palette with contrast frames, so it photographs clean and looks modern while still feeling warm. The rug panel is sized to anchor the room, and the window frame pieces add structure. Because the design relies on contrast rather than color variety, it’s forgiving if your printer ink is slightly off. It’s also a good choice if you want a more grown-up cozy playroom look for older kids.
Editor's noteIf your black looks blotchy, print at higher quality and let it dry 10 minutes before cutting.
Print on matte cardstock to keep gray tones even. Cut the rug and glue it to the floor base first, then build the wall panels around it so the rug edges stay hidden. Assemble window and door frames separately, then insert them into the openings and glue from behind. Add the small table and chair pieces using foam tape only under the legs so the seats stay flat.
Skip thisAvoid glossy paper — it makes gray look cold and highlights printer streaks.
7. Autumn Cozy Playroom With Pumpkin Garland Mantel
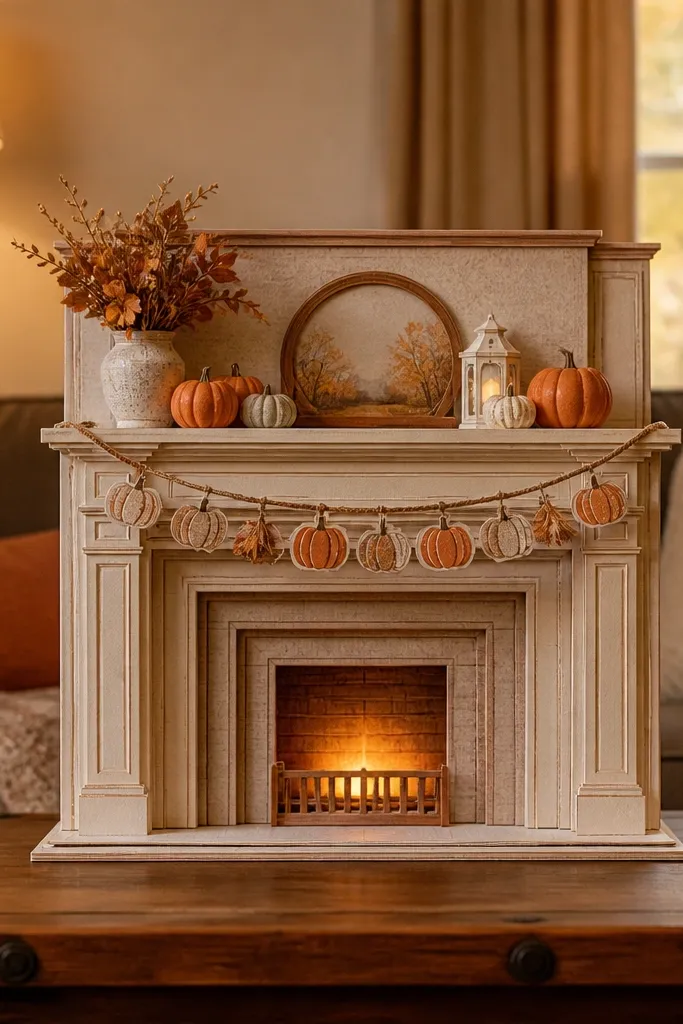
This template makes the room feel cozy because it centers a mantel with a pumpkin garland, then builds everything else around that warmth. The fireplace area has a layered opening, so it looks like a real focal point instead of a flat drawing. The mantel shelf includes tiny decor pieces that stack well and don’t hide the background. If you want your paper doll house to look like a seasonal cozy playroom, this is the strongest visual hook.
Print the fireplace wall and mantel layers on 200 gsm cardstock. Cut the fireplace opening, glue the inner fire panel behind it, then attach the mantel shelf on top. Assemble the pumpkin garland as a strip and glue it along the mantel line, checking the center alignment. Place a small armchair and a rug in front of the fireplace so the composition reads as a “listening to stories” corner.
Use a ruler to measure the garland center mark before gluing, so the pumpkins don’t drift left or right.
Don’t overbuild the fireplace layers — too many thicknesses can warp the wall.
8. Rainbow Soft Playroom With Arched Doorway Frames
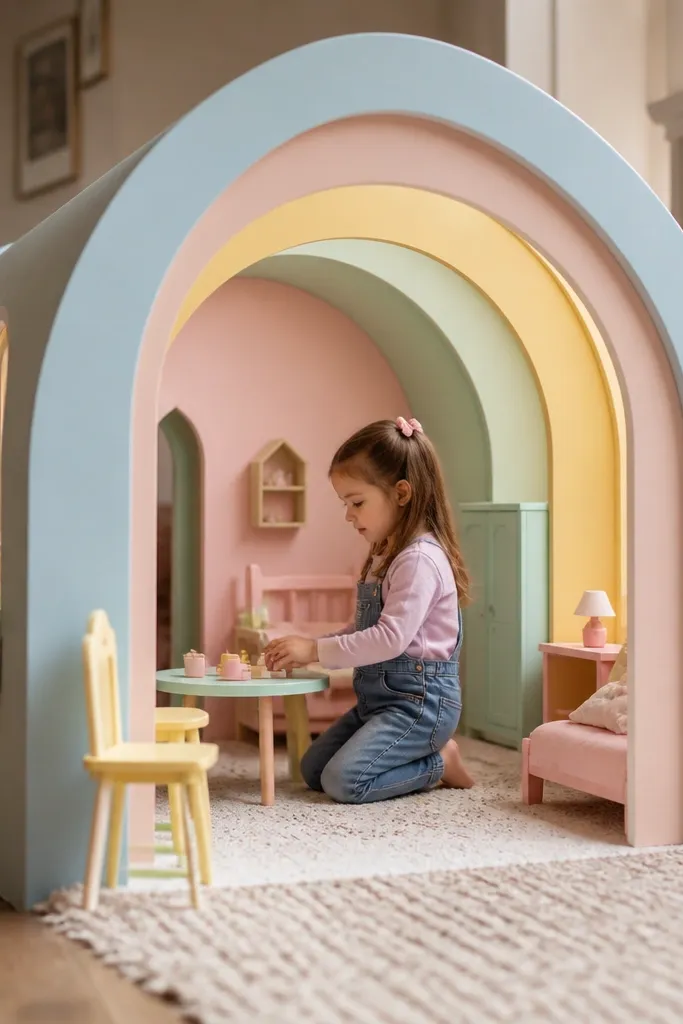
This template is made for bright cozy without looking childish. The arched doorway frames add a gentle curve to the room, and the furniture uses soft color blocks that look clean when cut. The walls are segmented, so you can layer one color band at a time for a polished look. It’s a good option if your kids like playful themes but you still want the room to look organized in photos.
Editor's noteColor-match your ink settings to avoid banding; print one test strip first if your printer is known for uneven gradients.
Print wall panels and doorway frame pieces on 180-200 gsm. Cut the door openings, then glue the arched frame behind the opening so the curve stays crisp. Build the floor base, then position the furniture after you’ve attached the doorway frame to avoid scale mismatch. Add the accessory pieces — small stools and wall hooks — last, using foam tape so the bright accents pop.
Skip thisDon’t stretch color bands — pulling paper during cutting makes the arches wobble.
9. Tiny Studio Playroom With Pegboard Wall and Hanging Bins
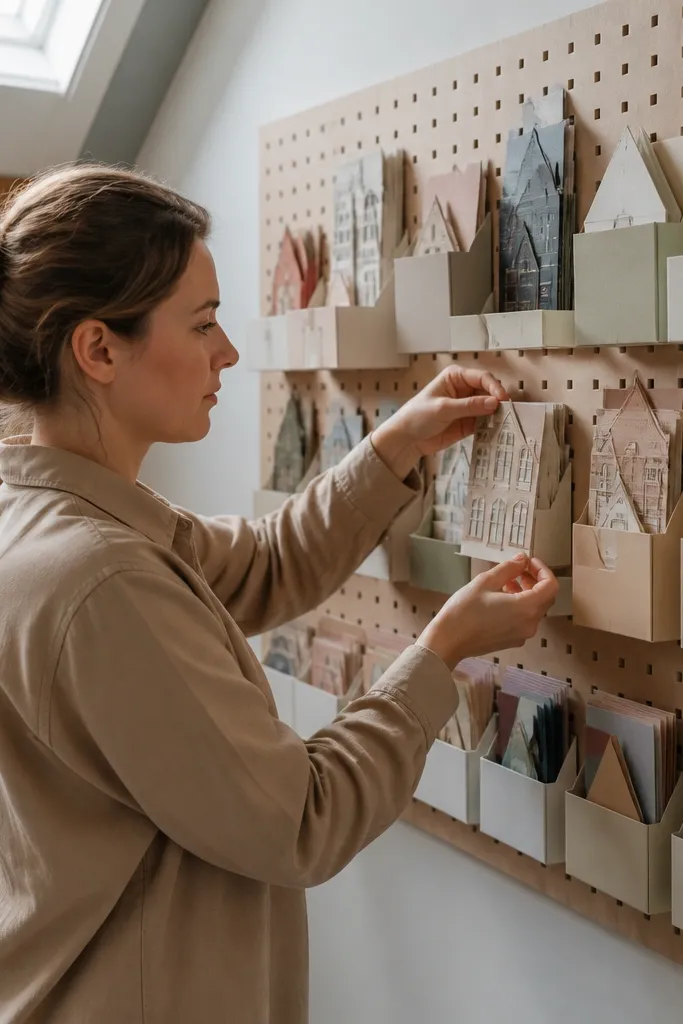
A pegboard wall makes a playroom feel real because it gives you a grid for organizing pretend items. This template includes pegboard holes and hanging bin pieces that layer nicely, so your scene looks tidy instead of cluttered. The bins are designed for easy attachment, which means you can swap them around without rebuilding the wall. It’s also photogenic because the peg grid creates texture under overhead light.
Print the pegboard wall and bin pieces on 200 gsm cardstock for stiffness. Cut the pegboard holes lightly and glue the wall to the room backing first. Attach the bin backs to the wall using two small glue dots so the bins hang straight. Add a small desk or easel at the bottom edge and keep it centered under the pegboard for a balanced look.
Mark the bin positions with a faint pencil dot before gluing so spacing stays even.
Avoid thick glue — it fills pegboard holes and ruins the clean grid texture.
10. Cozy Bathroom Playroom With Towel Rack and Bubble Window
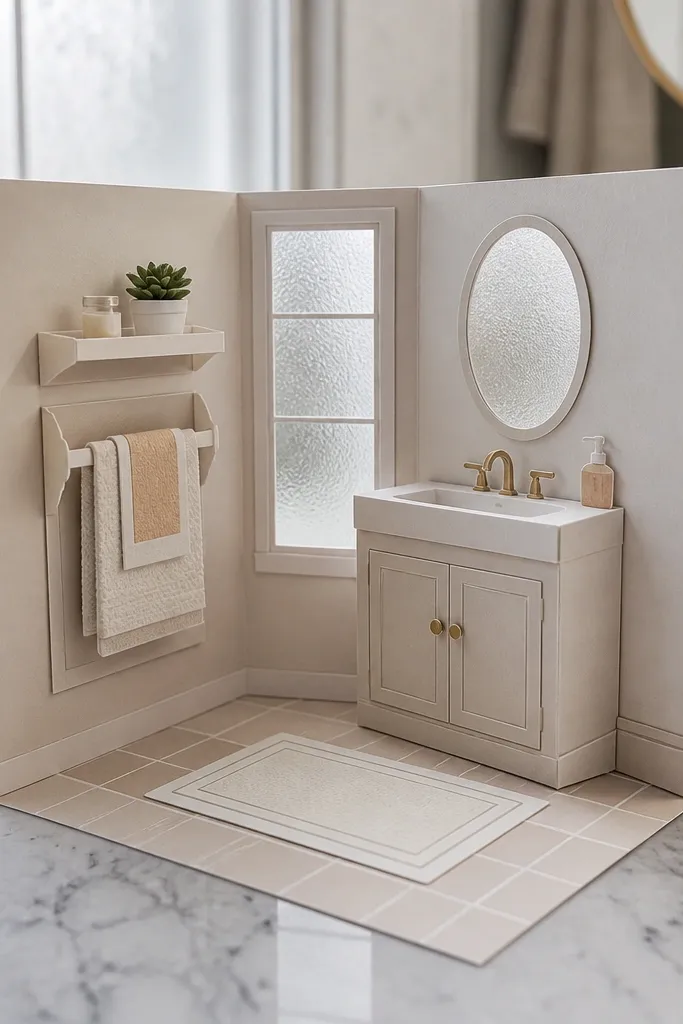
This template turns a bathroom into a cozy playroom by focusing on small details: towel rack, sink panel, and a window with a bubbly texture. The towel rack pieces are layered and easy to align, so the scene looks intentional. It’s great for kids' pretend play because the layout supports tiny “routine” stories — brush, wash, towel, bedtime. In photos, the bubble window adds texture that reads well even in small shots.
Editor's noteUse a glue stick for the sink panel — it spreads thin and avoids glue lines.
Print the bathroom wall base and the window texture panel on 180-200 gsm cardstock. Cut out the window opening and glue the bubble panel behind it. Assemble the sink and towel rack as separate pieces, then attach to the wall after the window is set. Finish by adding a small bath mat rug on the floor base so the bottom edge looks finished.
Skip thisDon’t glue the towel rack before the window — it’s harder to align everything afterward.
11. Navy and Blush Playroom With Shelf Ladder and Curtain Rod
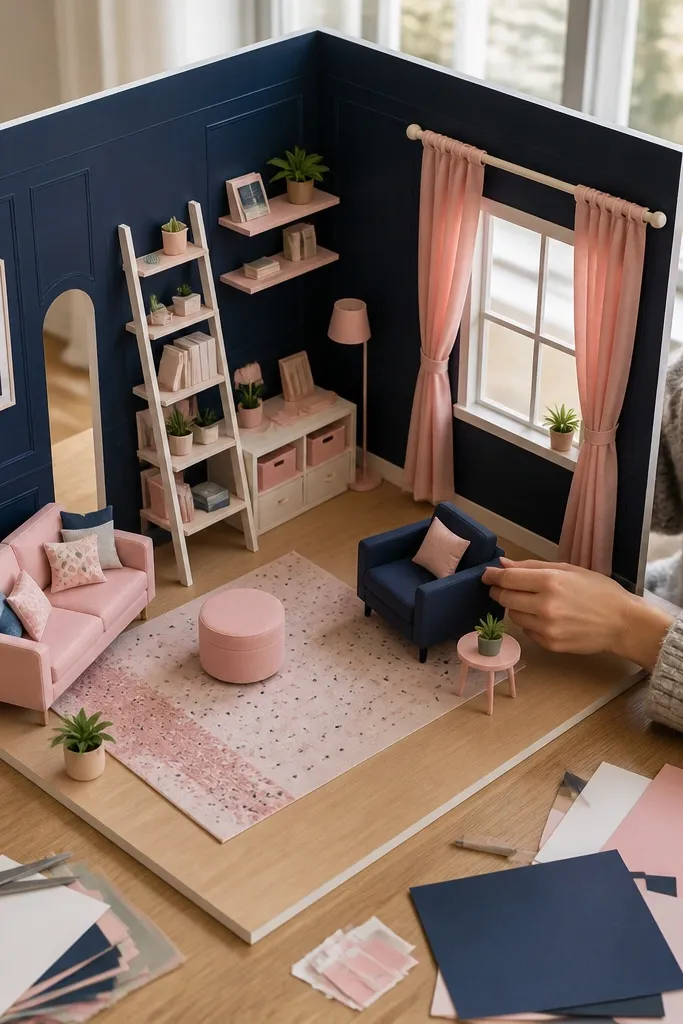
This is a high-contrast, cozy-looking template because the navy walls make the blush curtain and shelf accents pop. The ladder shelf is built with fold lines, so it stays rigid and doesn’t collapse when you lift it. Curtain rod pieces add a sense of softness and create a frame around the window. If you like a fashion-forward cozy playroom look, this one reads sophisticated while still being handmade.
Print navy wall panels and blush curtain pieces on 200 gsm cardstock. Assemble the ladder shelf by folding side rails first, then gluing the steps between them. Attach the shelf to the wall base using foam tape under the side rails. Add the curtain rod and curtains last, clipping or gluing the curtain strips to the rod so they hang evenly.
Cut curtain strips with slightly rounded corners — sharp corners look stiff on paper.
Avoid over-thick foam tape under the shelf — it can tilt the ladder and break the illusion.
12. Cozy Nursery Playroom With Mobile Canopy and Star Border
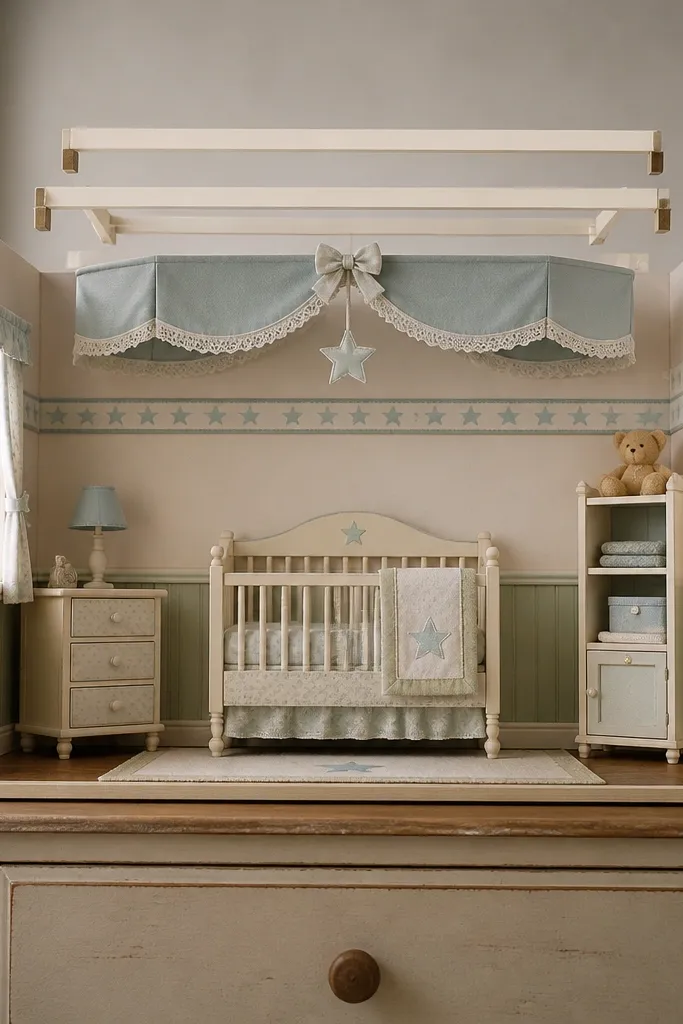
This template gives you a nursery-style cozy playroom layout with a canopy frame and star border wallpaper. The star border is separated into manageable strips, so you can keep the pattern straight even if your printer shifts slightly. The mobile canopy pieces add a gentle “floating” look when layered with thin foam tape. It’s a strong pick if you want a calming, bedtime vibe with lots of photo-friendly angles.
Print the star border strips and the canopy frame on 180-200 gsm cardstock. Glue the star strips to the wall base first, then cover seams with the frame trim pieces. Assemble the mobile canopy by folding the support arms and gluing them to the top frame. Attach the canopy above the bed area and add the hanging star pieces using a light glue dot at each attachment point.
If your stars look jagged, slow down the cutting pass and use a new blade for clean edges.
Don’t glue hanging star pieces too close to the canopy — they need space to show the drop.
13. Cozy Corner Desk Playroom With Floating Wall Shelves
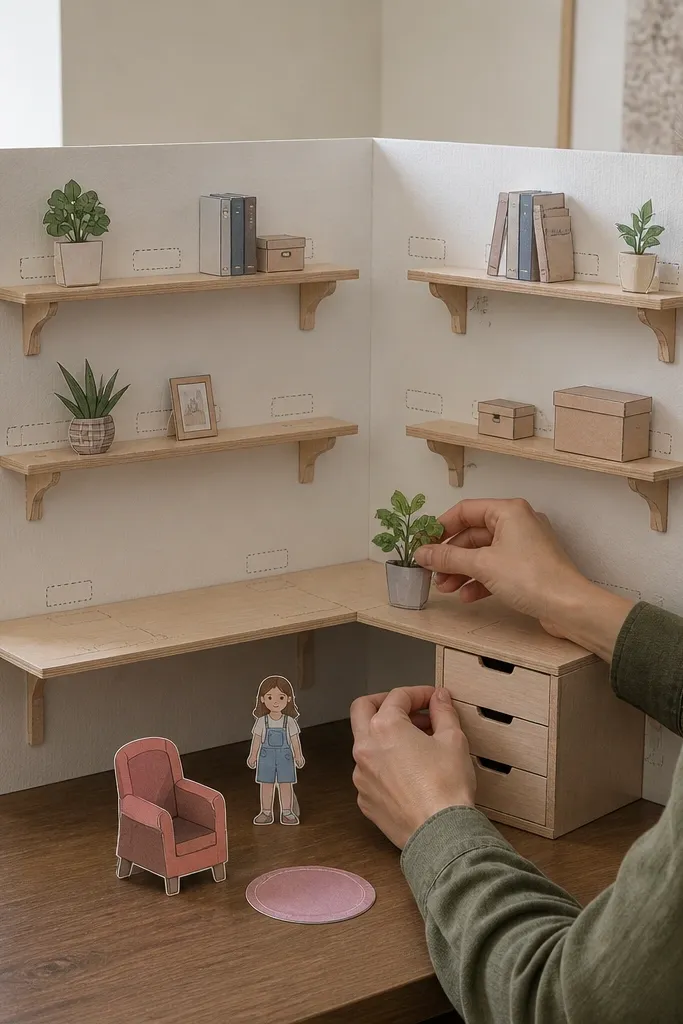
A corner desk setup is cozy and practical because it creates a work-and-play zone. This template includes floating shelves with separate shelf supports, so the shelves look like they’re mounted rather than stuck on. The desk panel has pre-sized accessory spots, which keeps everything aligned and tidy. For photos, the corner layout creates depth — the desk pulls forward while the shelves sit back.
Print the corner wall panels and shelf support pieces on 200 gsm cardstock. Cut out the shelf backing openings, then glue the support tabs inside the wall. Attach the shelf tops to the supports with foam tape for a slight lift. Build the desk base on the floor area, then place the tiny stationery pieces into the marked spots before you glue the desk top down.
Use a thin craft knife to notch shelf support tabs so they slide into place cleanly.
Avoid stacking multiple foam layers under the desk — it makes the room base unstable.
14. Pastel Townhouse Playroom With Double-Height Window Wall
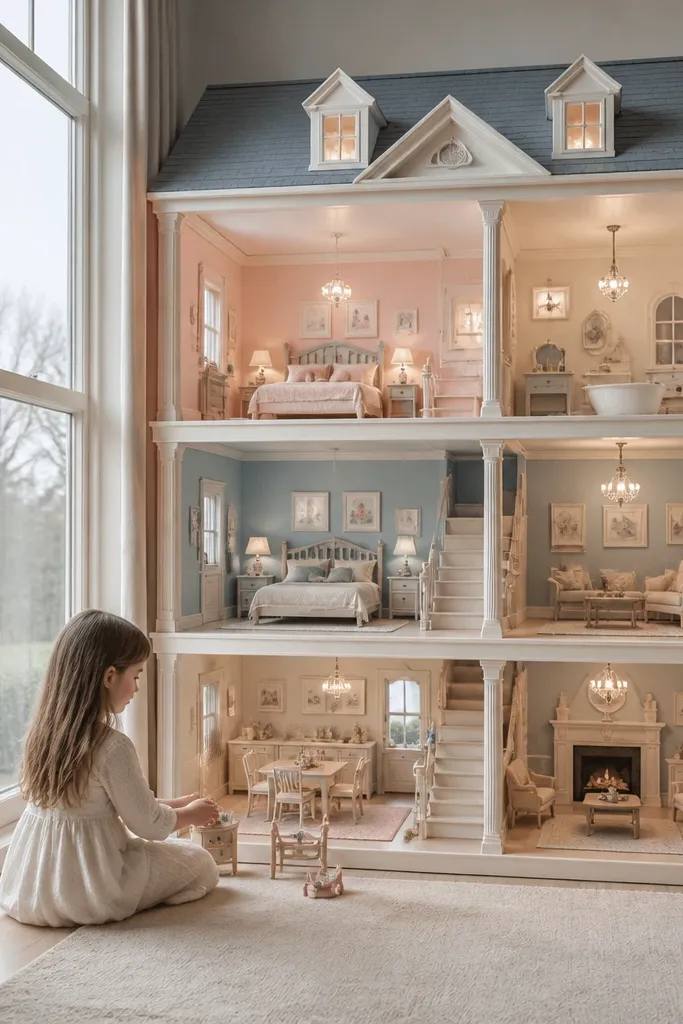
Double-height windows make a paper doll house look bigger, which is why this template hits the cozy playroom goal so well. The window wall is built in two stacked sections, and the trim lines align so it doesn’t look crooked. You get a clear interior depth because the window frame layer sits in front of the wall panel. It’s a great option if you want a “roomy” look without actually building a larger base.
Print the window wall sections and the frame layer on 180-200 gsm cardstock. Cut each window opening cleanly, then glue the frame layer behind the openings so it sits flush. Assemble the floor and back wall, then attach the bottom window section first before placing the top section. Add curtains as separate strips that overlap the frame edges, then place a small play mat in front of the lower window.
Dry-fit the two window sections together before gluing to confirm the trim lines match.
Don’t glue the frame layer directly onto the front; it will smear if you misalign.
15. Earth-Tone Cozy Playroom With Woven Basket Storage
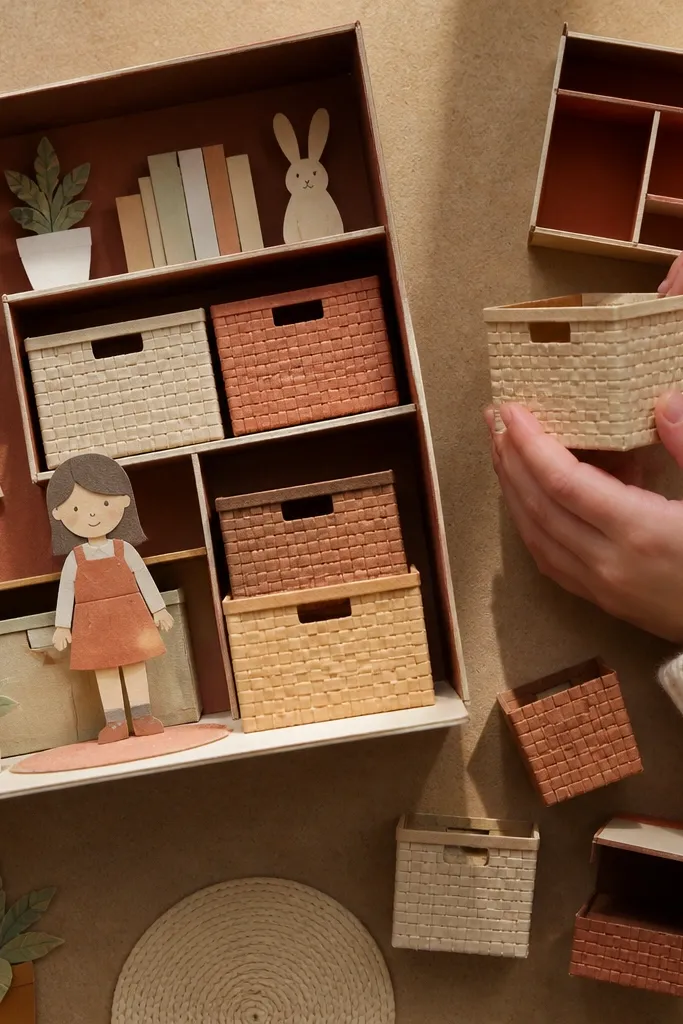
This template leans into cozy texture with woven-style basket storage pieces and muted earth tones. The baskets are separated from the shelf backing, so you can layer them with foam tape for a “woven depth” effect. The room uses warm browns and sand shades that look soft in natural light and don’t overwhelm photos. If you’re building a calm cozy playroom with lots of storage, this design keeps the scene tidy.
Print the basket pieces and shelf backing on 200 gsm cardstock. Assemble each basket by folding the side strips and gluing the ends, then slide or glue it onto the shelf backing. Glue the shelf unit to the wall base, centering it above the floor mat. Finish by adding small toy blocks and a tiny rug panel that matches the basket tone.
Use a glue stick for basket strips — it helps prevent stiff, shiny glue spots.
Avoid thick glue at basket seams — it makes the weave lines disappear.
16. Jungle Cozy Playroom With Leafy Wall Panels and Hammock Corner
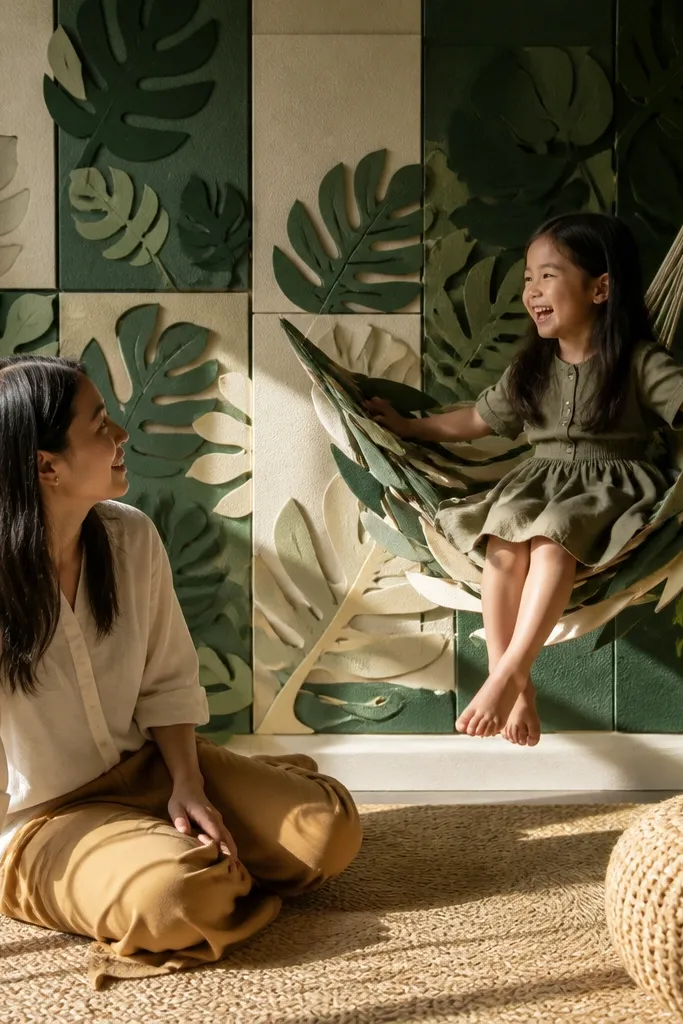
This template makes a cozy playroom feel adventurous by using leafy wall panels and a hammock-style corner. The leaf panels are modular, so you can stagger them like real wallpaper and avoid repeating patterns that scream “printout.” The hammock piece hangs forward, giving you a strong visual layer even in a small room. It’s a good choice if you want a cozy playroom that still looks lively and photo-ready.
Editor's notePress the leaf seams with a dry cloth to remove any curled edges before assembly.
Print the leaf wall panels and the hammock pieces on 180-200 gsm cardstock. Cut and glue the leaf panels in overlapping strips so seams land under trim. Assemble hammock supports with fold tabs, then glue the hammock fabric panel between supports. Add a small side table and floor mat so the hammock corner looks like a reading or resting spot.
Skip thisDon’t align every leaf panel perfectly — slight offsets make it look real.
17. Cozy Laundry Nook Playroom With Folded Towel Stack
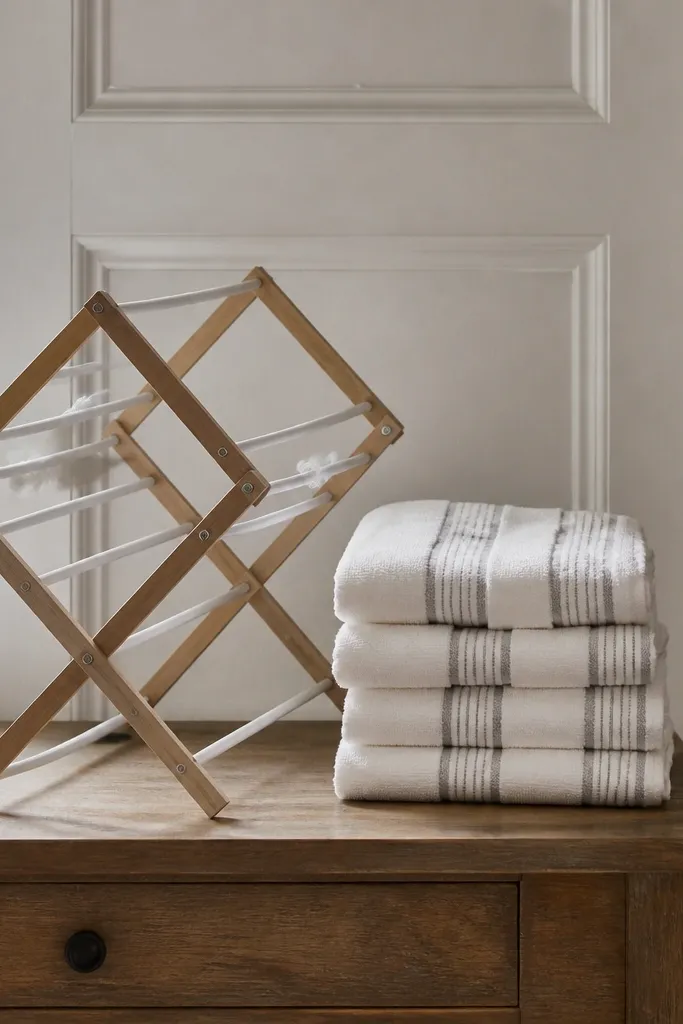
Laundry nooks are underrated for paper doll houses because they bring order and tiny props. This template includes a drying rack and a folded towel stack that looks crisp instead of messy. The wall has a simple trim frame, so the props stand out and the room stays readable. It also photographs well because the towel stack creates a clear shape pyramid that fills the lower third of the scene.
Editor's noteFold towels along the printed fold lines with a ruler for sharper creases.
Print the laundry wall base, drying rack, and towel stack pieces on 200 gsm cardstock. Fold the drying rack supports along the score lines and glue the rack frame together. Attach the rack to the wall inside the trim frame, then glue the towel stack on a shelf ledge below. Add a small hamper bin and a floor mat to hide any base seams.
Skip thisAvoid gluing towels flat in a blob — layer them as separate folds so the stack reads as stacked.
18. Classic Toy Room With Windowed Hutch Cabinet
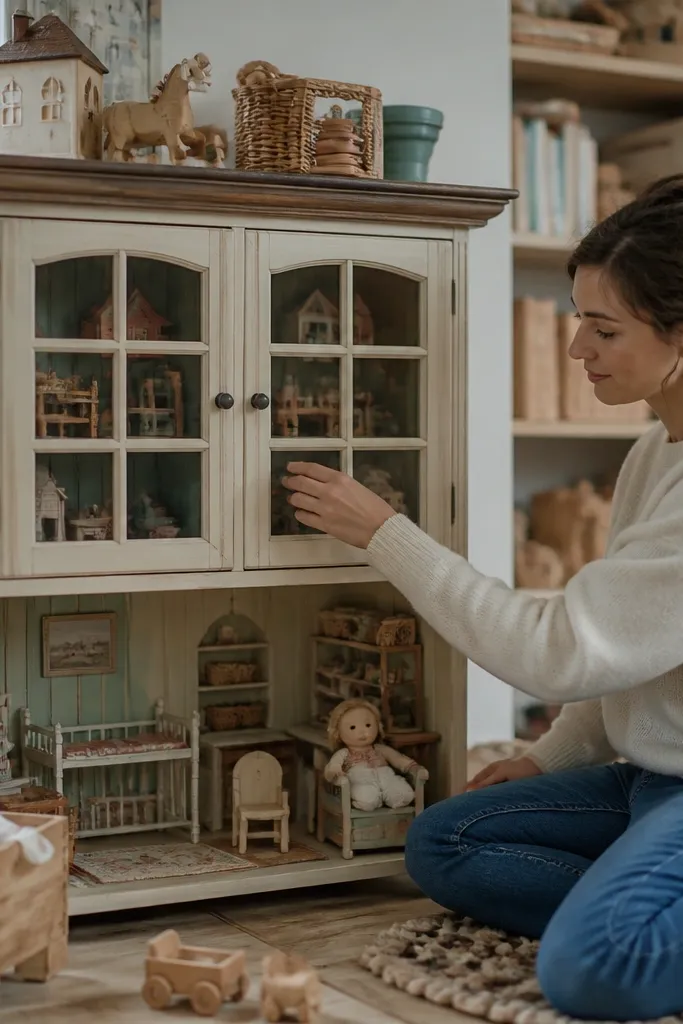
A hutch cabinet makes a paper doll house feel like it has storage and personality. This template includes cabinet doors with window panes, so you can show tiny toys behind them and instantly create depth. The cabinet has clean vertical trim lines, which helps the scene look tidy even if you swap furniture pieces later. It’s a strong pick for a cozy playroom because it creates a “display shelf” area that makes everything look curated without overdoing it.
Print the cabinet body and door panels on 200 gsm cardstock. Cut the door openings and glue window pane inserts behind the door frames. Fold the cabinet side panels and glue the back panel in place, then attach the doors using tiny tabs so they line up. Place the cabinet against the wall and add a few toy pieces behind the window panes before sealing everything.
Use a thin strip of clear tape on the door hinge tabs if they keep popping open.
Don’t skip backing the window panes — unbacked openings look like empty holes.
19. Cozy Playroom With Fireplace Hearth and Stocking Shelf
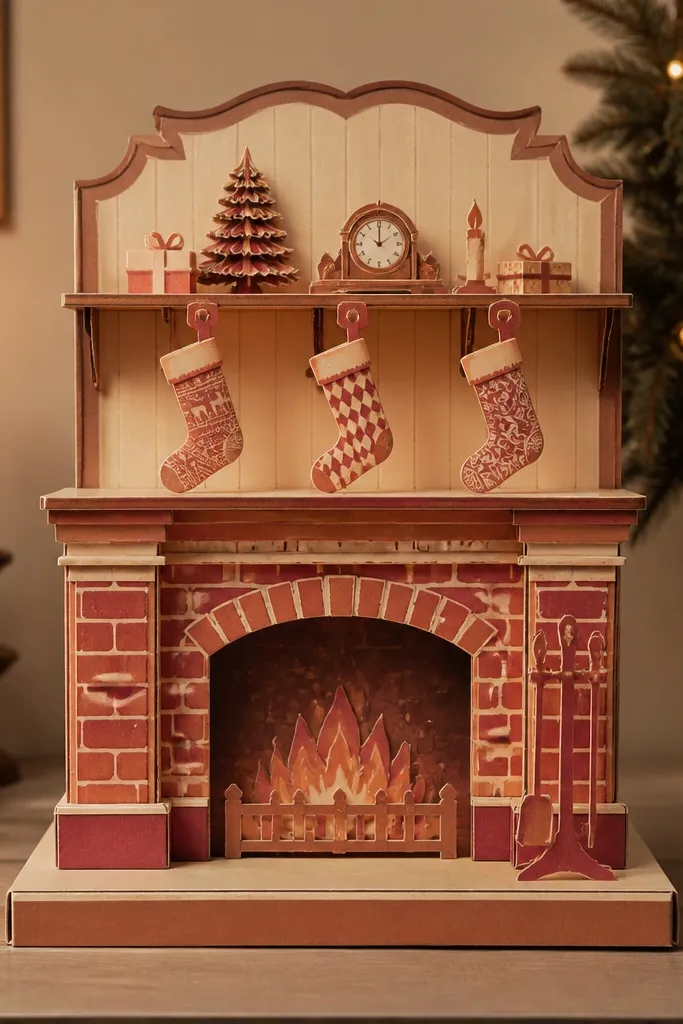
This template focuses on a fireplace hearth plus a stocking shelf, which gives you an instantly cozy theme without requiring lots of extra props. The hearth area has a layered panel so it reads as a solid base, and the stocking shelf adds vertical detail. It’s photo-friendly because the fireplace creates a warm visual center, and the rug panel grounds the lower area. Choose this if you want your paper doll house to look cozy in one shot, not only from certain angles.
Editor's noteUse matte spray only on the fireplace background, not on the moving stocking pieces.
Print the fireplace wall, hearth layers, and stocking shelf on 180-200 gsm cardstock. Cut the hearth opening area, glue the inner panel behind, then attach the outer hearth frame. Assemble the stocking shelf by folding its supports and gluing it level across the fireplace top edge. Add a small rug in front, then place stockings and a tiny log pile onto the hearth.
Skip thisAvoid bending the hearth layers — crease marks show and make the fireplace look cheap.
20. Seaside Cozy Playroom With Shell Wall Panel and Net Storage
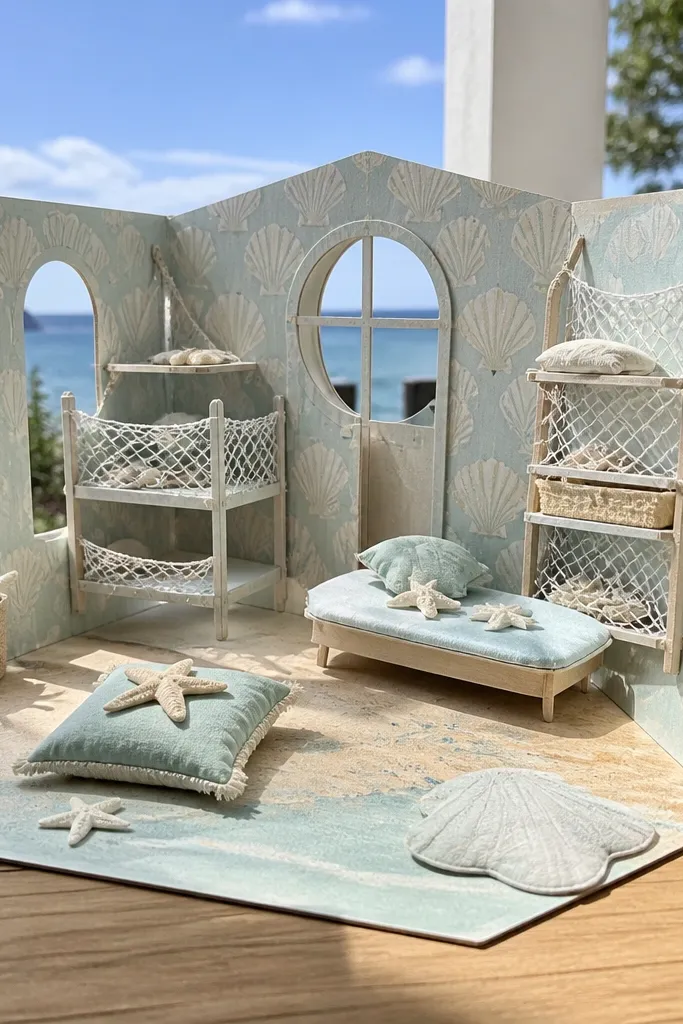
A seaside theme can still feel cozy when the palette is soft and the textures are layered. This template uses a shell wall panel and net storage pieces that create a gentle, airy look. The net storage adds a light open structure, so the room doesn’t feel heavy even with lots of props. It’s a good pick for a cozy playroom because the design uses clear focal points — shell panel, storage net, and a small floor mat — that keep photos clean.
Editor's noteIf your net lines look fuzzy, print at higher quality and keep the cardstock flat while drying.
Print the shell panel and net storage components on 180-200 gsm cardstock. Cut the shell panel edges and glue it to the back wall, then add the trim border pieces to hide seams. Assemble the net storage by folding side supports and attaching the net panel as the outer layer. Place the storage unit near the floor mat and add a small chair angled toward the shell panel.
Skip thisDon’t overfill the net storage — leave negative space so the texture reads.
21. Jewel-Tone Cozy Playroom With Velvet-Look Rug and Gallery Wall
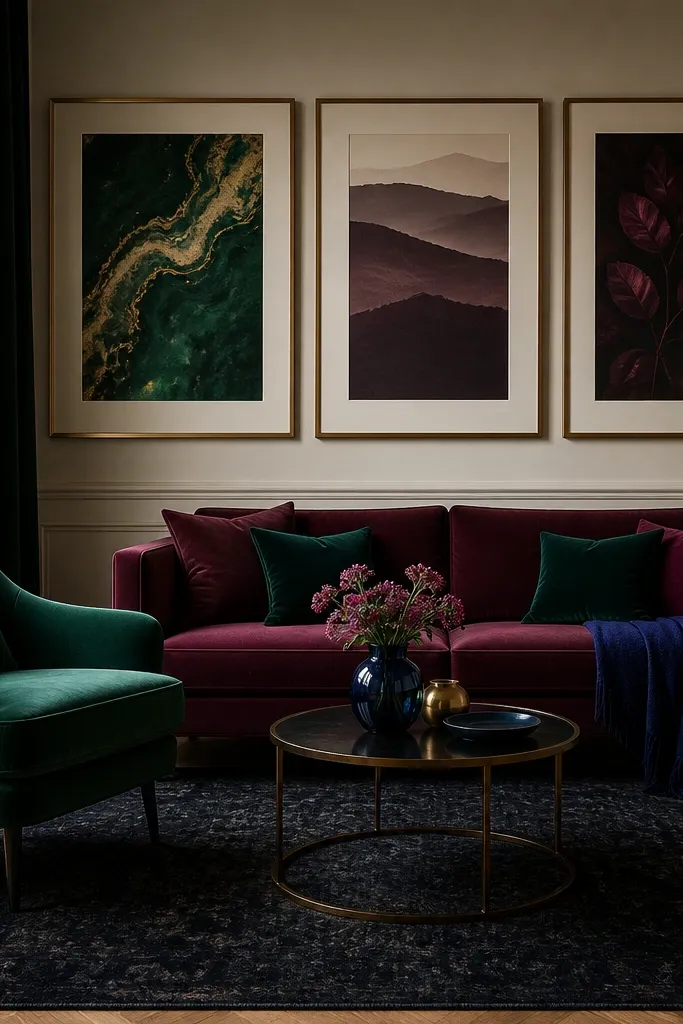
This template creates cozy through color depth: jewel tones, a dark rug panel, and framed “gallery” prints. The frames are separate pieces, so you get clean borders and sharp corners instead of blurry edges. The rug sits on the floor base with a layered edge, which makes it feel plush in photos. If you want a cozy playroom that looks more grown-up and styled, this design is the one that delivers.
Editor's noteKeep the frames consistent: glue them in a straight grid using a ruler so the wall looks intentional.
Print the rug panel and gallery wall prints on 200 gsm cardstock. Cut and glue the rug to the floor base first, then assemble the gallery frame grid on the back wall. Attach frames with foam tape under the frame backing so they look raised. Place a small play table in front of the rug and add a couple of framed prints on the wall to balance the composition.
Skip thisAvoid glossy ink on dark backgrounds — it creates glare and kills the velvet effect.
22. Warm Minimal Cozy Playroom With Clean Line Wall and Single Accent Shelf
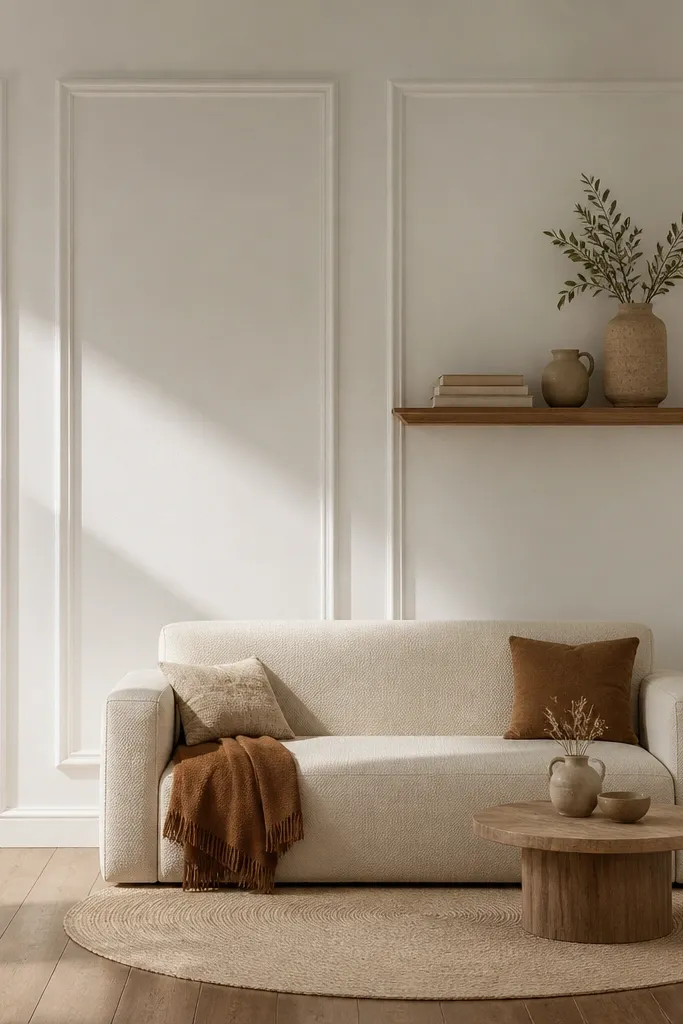
If your paper doll houses always end up looking cluttered, this template is your fix. It uses a clean wall design with one accent shelf, so every piece you add looks intentional. The shelf is sized to hold just enough items — a plant, a book stack, a small box — so the room stays cozy without looking overworked. It’s also easier to build because there are fewer moving layers, and the final look still photographs beautifully because the negative space is part of the design.
Editor's noteUse thin paper shims instead of foam tape for tiny lifts — they’re less bulky and keep lines crisp.
Print the wall panels and floor base on 200 gsm cardstock. Glue the base floor first, then attach the wall panels so corners align cleanly. Assemble the single shelf with fold tabs and mount it at a consistent height on the accent wall. Add only 3-4 furniture pieces and one accessory cluster to keep the composition balanced.
Skip thisDon’t add extra furniture to fill empty space — minimal designs look best with restraint.
23. Cozy Playroom With Fold-Out Wall Curtains and Hidden Storage Slots
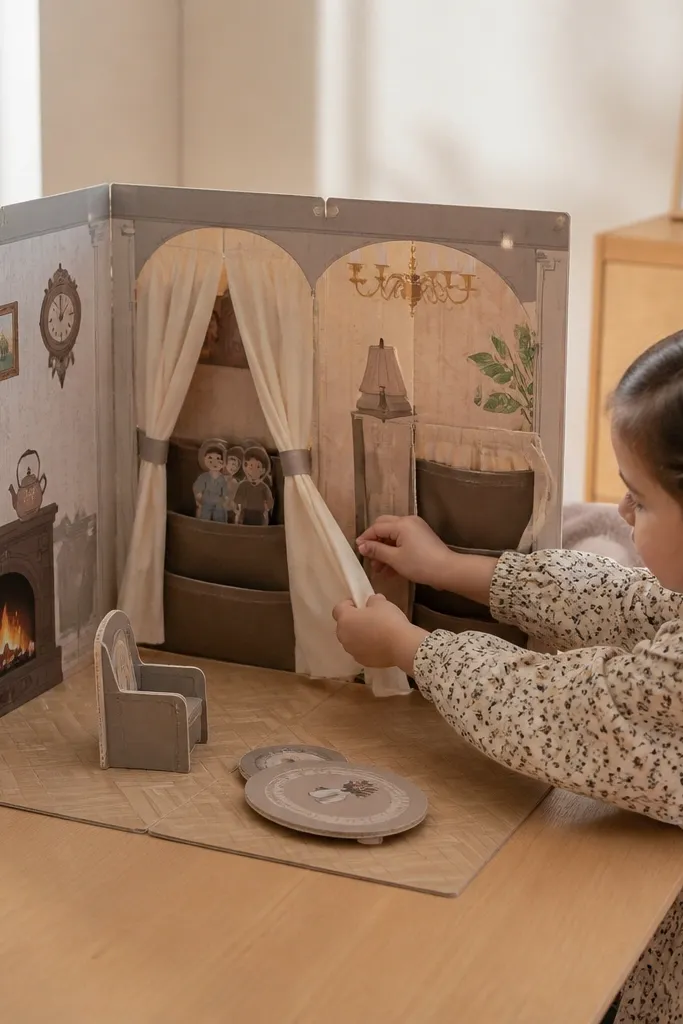
This template feels interactive because curtains fold out and reveal space behind them. Hidden storage slots make the room look clever, not messy — you place small items behind the curtain panel and pull the curtain forward for photos. It’s a great choice if you want your paper doll house to feel like a toy, not just a display. The curtain folds also add movement, which makes even simple furniture look more dynamic.
Print the curtain panels and the wall base on 180-200 gsm cardstock. Score the curtain fold line with a ruler, then glue the curtain backing to the wall slot edges without covering the fold. Assemble the hidden storage slot pieces and glue them behind the wall panel openings. Finally, test the curtain fold before fully sealing the wall so it opens flat and doesn’t snag on furniture.
Use a lighter glue near fold lines — too much glue makes paper stiff and the curtain won’t swing smoothly.
Avoid gluing across the fold line — it turns a curtain into a permanent flap.
24. Sunbeam Gallery Playroom With Window-Frame Photo Cards
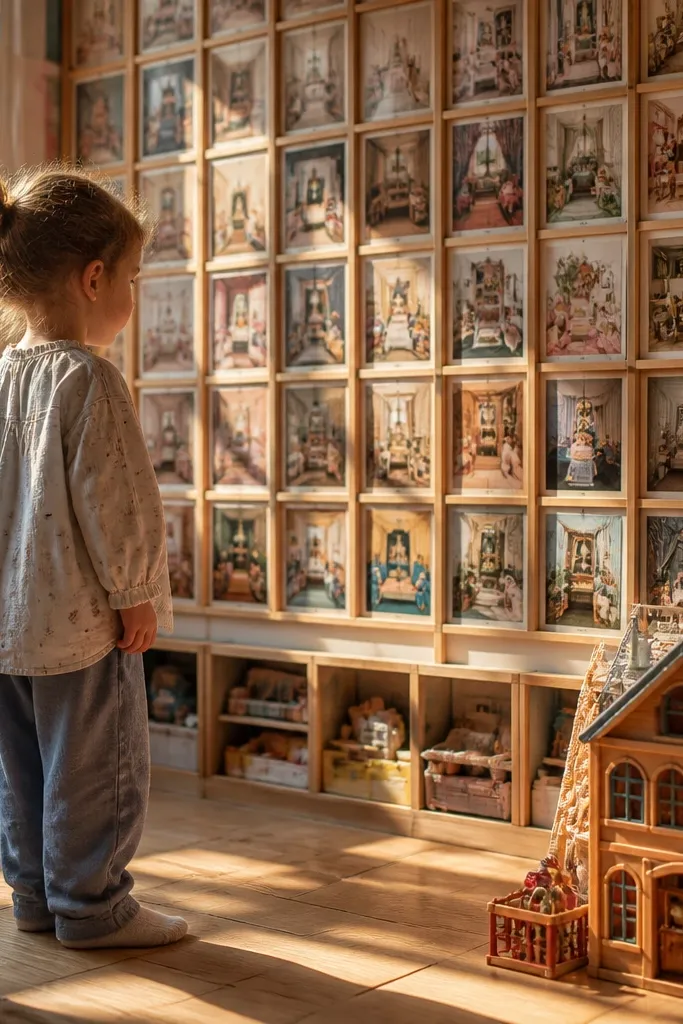
This template makes a cozy playroom feel curated without needing real furniture. The walls use a repeated window-frame grid, but each frame holds a different “photo card” cutout so the room looks busy and warm from every angle. It’s a strong choice for a paper doll house templates cozy playroom because the visual rhythm gives kids something to move around while keeping the room tidy. You get that sunlit look by using layered backing paper and a soft yellow “glass” panel behind each frame. Skill level is easy, and most people finish in an evening because it’s mostly cutting, layering, and gluing flat pieces. It suits small play spaces, shelves, and tabletop displays where you want the room to look finished even with minimal accessories.
Editor's noteUse a bone folder on every folded or layered edge before gluing. It sharpens corners and makes the window grid look crisp.
Cut a main wall backing to your house width and height, then mark a 3-by-2 grid of window frames with 1.5 cm spacing between them. Make each frame from cardstock strips that are 6 mm wide, and cut “glass” inserts from translucent vellum or thin baking parchment sized about 2 mm smaller than the frame opening. For the photo cards, cut 6 rectangles from patterned paper (about 4 cm by 5 cm), then add a 5 mm border mat from cream cardstock behind each one. Glue the glass behind the opening, then glue the photo cards centered on top so they look like they’re behind the window. Add a thin 1 cm baseboard strip along the bottom edge and a ceiling trim strip at the top, both in the same cream cardstock. Dry-press under a book for 10 minutes so the layers stay flat.
Skip thisDon’t glue the glass insert directly to the wall — leave it slightly floating so it catches light and doesn’t wrinkle.
25. Cozy Loft Playroom With Ladder Slot and Hanging Swing Bed
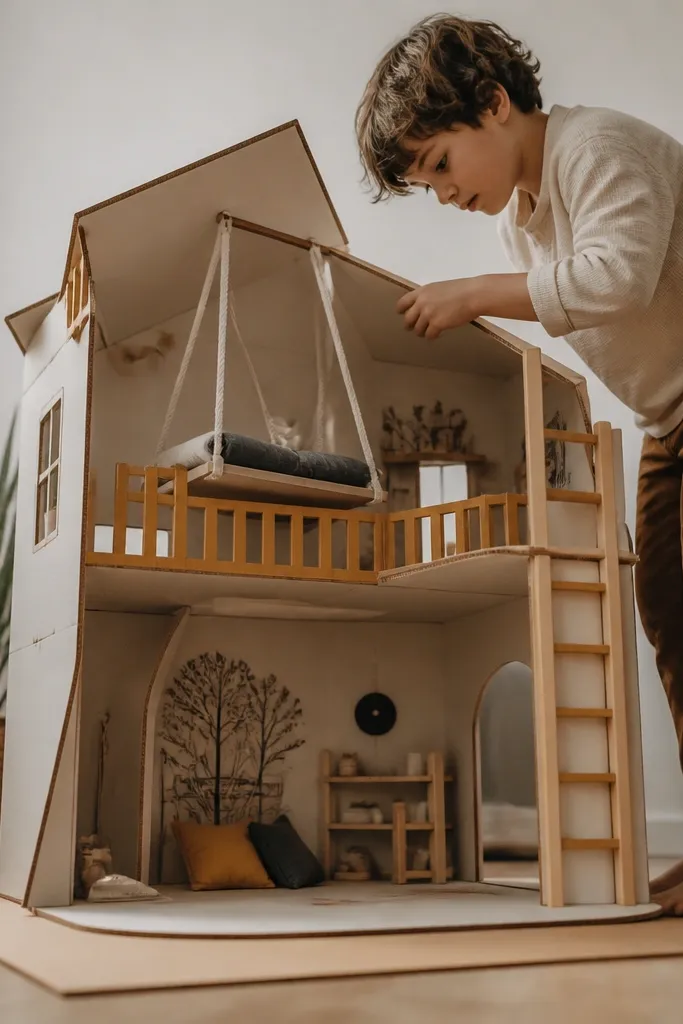
This one adds motion and a true “cozy loft” vibe to your paper doll house templates cozy playroom. The design uses a raised loft platform with a ladder slot so dolls can climb, and a hanging swing bed that sways visually when you adjust the cutout tabs. It looks photogenic because the ladder and bed create strong vertical lines, while the loft under-layer adds depth. You also get a functional build: the ladder slot keeps the doll positioned, and the bed hangs from two sturdy paper loops so it doesn’t sag. It’s a medium-easy project that takes about 2-3 hours because you’re cutting a few structural parts and assembling tabs. This fits best for dollhouse corners, wall displays, or any playroom theme where you want “space-saving” without making it look cluttered.
Start with a base room panel and cut a loft platform from 3 mm cardstock sized to leave a 2.5 cm gap from each side wall. Cut two ladder side rails from 1.5 cm strips and add 6 evenly spaced rungs using 4 mm wide tabs, then glue the rails so a 1 cm ladder opening remains centered. Create the ladder slot in the front wall by cutting a vertical opening 1.2 cm wide and 6 cm tall, then back it with a thin cardstock reinforcement strip so it doesn’t tear. Build the swing bed from a bed base rectangle (about 6 cm by 3.5 cm) and two loop supports made from folded paper strips; punch two small holes in the bed base corners. Thread the loops through the loft underside and glue them from the back so the bed hangs centered with a 1 cm clearance. Finish with a ladder “handrail” strip and a small rail along the loft edge so dolls don’t slip off during play.
Cut the loft platform from thicker cardstock than the walls (3 mm vs 1 mm). The extra stiffness keeps the bed loops from pulling the loft down.
Don’t make the ladder slot wider than 1.2 cm — wide slots make the doll look like it’s floating.



