
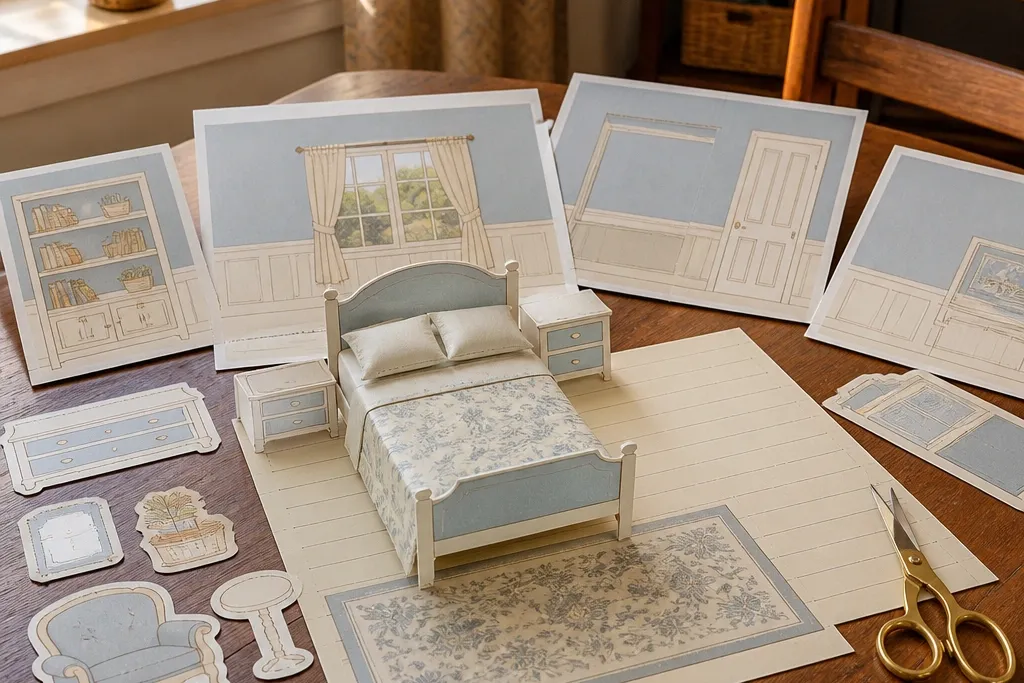
1. Powder Blue Canopy Bed With Sheer Curtain Panels
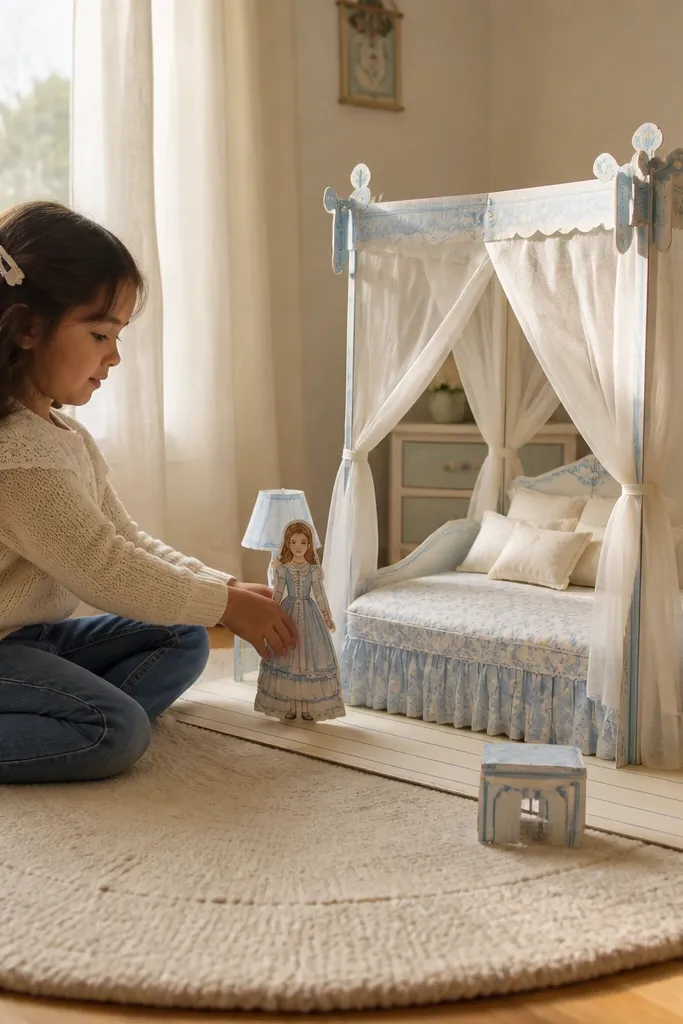
First, print the template on 160-200 gsm paper so the curtains hold their curve when you fold them. Then cut the curtain panels and fold along the provided lines, using a bone folder for sharp creases. Finally, layer the bed frame, then slide the curtain panels behind the canopy so they overlap the bed by about 5-8 mm; place the rug last so it anchors the scene.
This template style is dreamy because the canopy creates instant shape and the curtains add vertical movement. The powder blue walls and pale cream floor keep the whole bedroom airy, and the sheer curtain panels let light areas show through so the room doesn’t look heavy. You get a clear focal point — the bed — and everything else can stay simpler, like a small dresser or wall frame. It’s best for readers who want a “storybook” vibe without building complicated furniture.
Skip thisDon’t cut tiny curtain fringes unless your paper is thick enough to prevent fraying.
Editor's noteIf your curtains curl the wrong way, lightly mist the back side with water on a cloth brush, then press flat under a book for 10 minutes.
2. Warm Gray Studio Bedroom With Floating Shelves
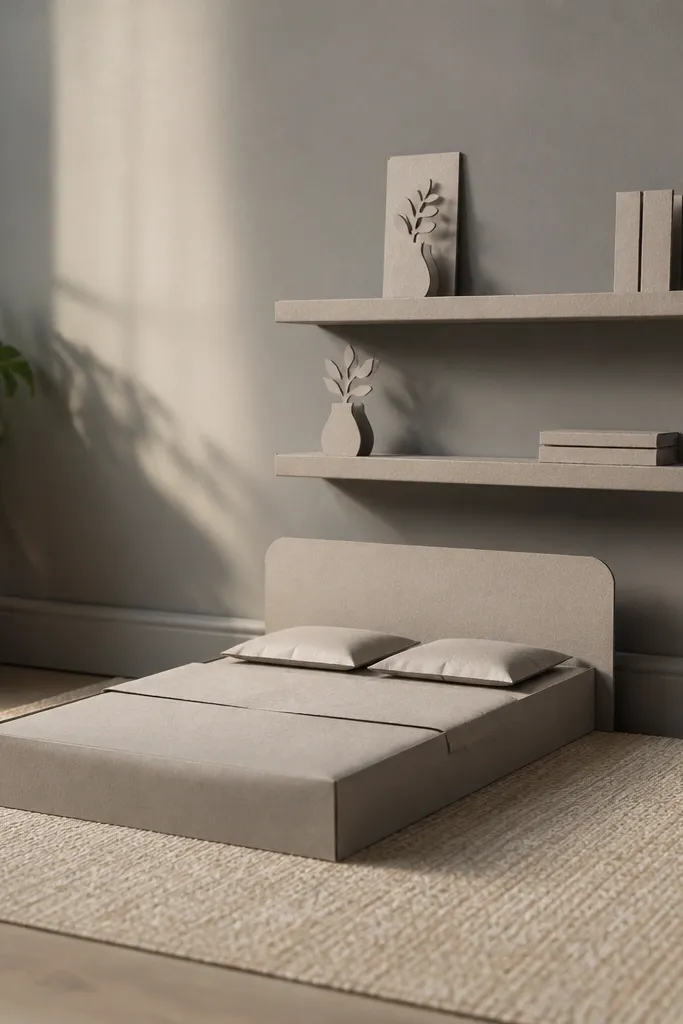
Start by printing wall and floor layers on slightly heavier paper (around 200 gsm) so the shelves don’t bend. Next, cut the shelf backings and fold the shelf supports upward along the printed fold marks; keep the fold angle consistent across all supports. Then attach the shelves to the wall layer first, and add the bed and rug after so you can tuck the rug under the shelf line for a cleaner overlap.
This one looks dreamy because it’s calm. Warm gray walls plus a minimal bed silhouette make the room feel clean and airy, and floating shelves add design without crowding the floor. The trick is that the shelves break up the wall in neat horizontal lines, so your paper doll bedroom reads as intentional even when you only add a few accessories. It suits people who want modern-cozy instead of overly cute.
Skip thisSkip glue on the visible shelf edges; it stains lighter paper and ruins the “floating” look.
Editor's noteUse a ruler to align shelves — even a 2-3 mm drift shows up immediately in flat layouts.
3. Blush Pink Bedroom With Ruffled Duvet and Matching Lamp Shade
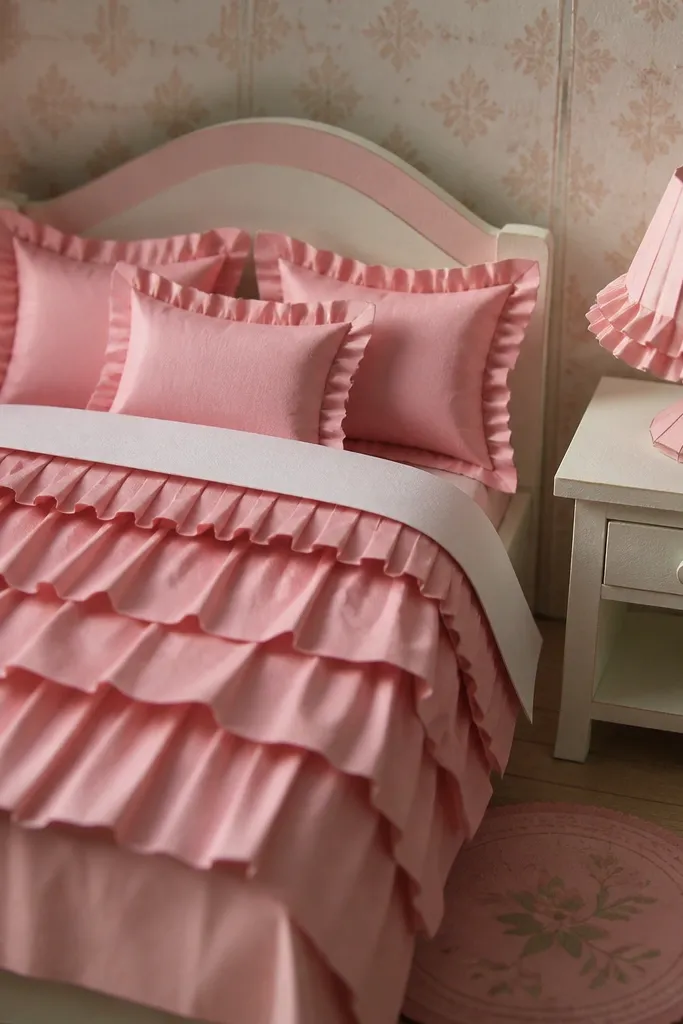
First, print the duvet and lamp shade on 180-200 gsm paper for clean ruffles. Then cut the duvet ruffle strips and fold them back and forth along the ruffle lines so they form soft waves. Finally, build in this order: bed base, duvet ruffle layer, dresser, lamp shade, then pillows on top; keep the lamp shade centered so it frames the bed.
Dreamy comes from repetition here. Blush pink appears on both the duvet and the lamp shade, so the room feels cohesive instead of random. The ruffled duvet adds texture — even on paper — because the folds create highlights and shadows. This template works well for readers who want a “girly cozy” bedroom that still looks tidy and photogenic.
Skip thisDon’t stack the pillows too high; three bulky layers make the bed look lumpy.
Editor's noteIf ruffles look flat, score the fold lines lightly with the back of a craft knife before you fold.
4. Mint and Cream Nursery With Stars and a Window Seat
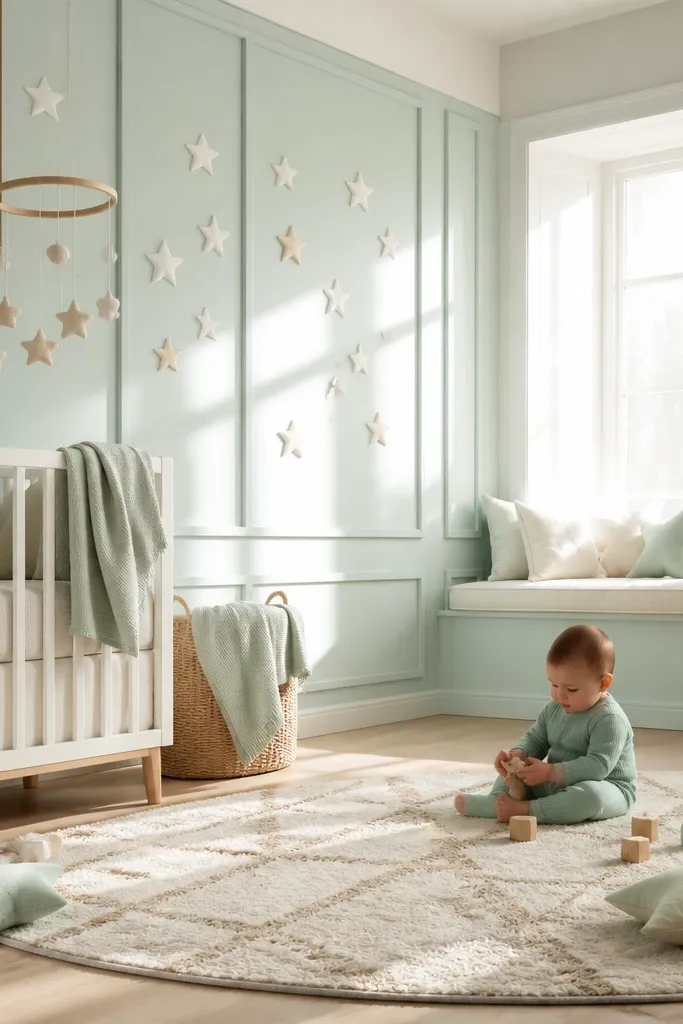
Start by printing the wall layer and cutting out the star shapes only if you want a subtle “peek-through” effect; otherwise keep stars printed. Then cut the window seat base and fold the seat back panel so it stands at a slight angle (about 20-30 degrees). Finish by layering: wall first, then window seat, then bed, and place a small rug under the window seat to connect the furniture lines.
This template is dreamy because it mixes a soft mint palette with gentle star accents. The window seat gives you a second focal point besides the bed, and it also makes the scene feel lived-in without adding lots of clutter. Stars work best as small, scattered shapes, so the room stays light and not busy. Great for readers who want a calm, airy “nursery” look that still feels special.
Skip thisDon’t use super thin paper for the seat; it will sag under its own weight.
Editor's noteFor a cleaner window, glue only the bottom and side edges so the window opening stays crisp.
5. Ivory Boho Bedroom With Fringe Rug and Macrame Wall Art
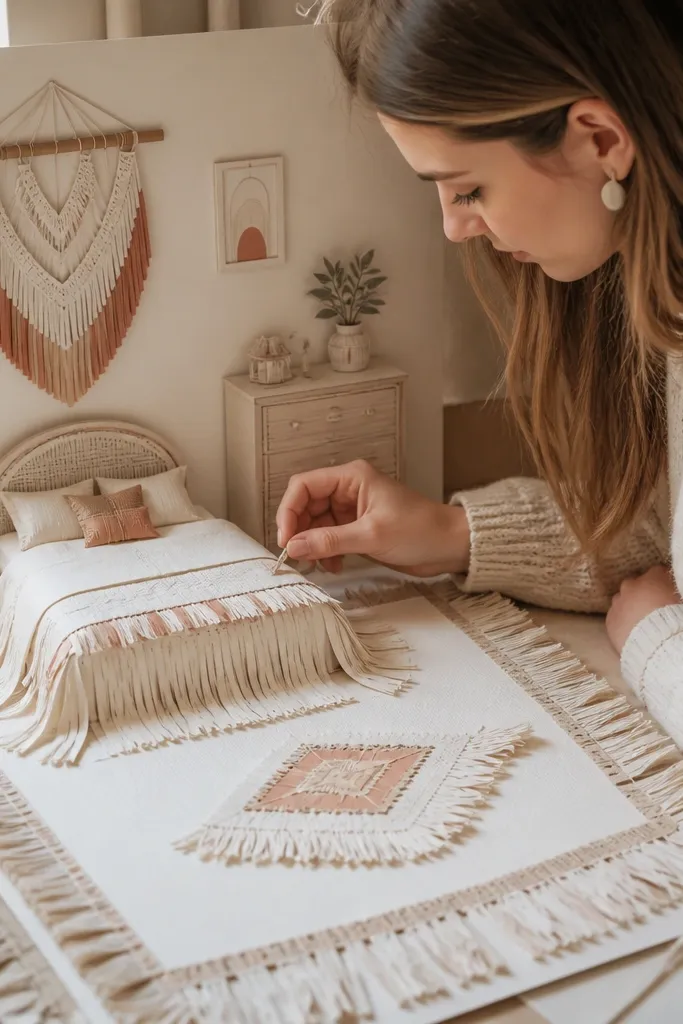
First, print the fringe rug on heavier paper and cut the fringe lines with a sharp blade for straight edges. Then fold the fringe strips slightly backward so the strands catch light instead of lying flat. Finally, attach macrame wall art behind the bed line so the wall doesn’t look empty; place the rug last and overlap it over the floor panel by a few millimeters.
Boho can look messy fast, but this template stays dreamy by keeping the palette tight: ivory, sand, and one muted accent like terracotta. Fringe adds motion and texture, and macrame-style wall art gives you a “handmade” feel without needing tiny craft knots. The rug fringe also creates a visual border for the whole scene, which makes the room look complete even if you add only a few items.
Skip thisAvoid glue on the fringe tips; it makes them stiff and looks uneven.
Editor's noteUse a cutting mat and replace the blade often — dull blades crush fringe and ruin the airy look.
6. Tangerine Sunset Bedroom With Gradient Wallpaper and Sunset Mirror
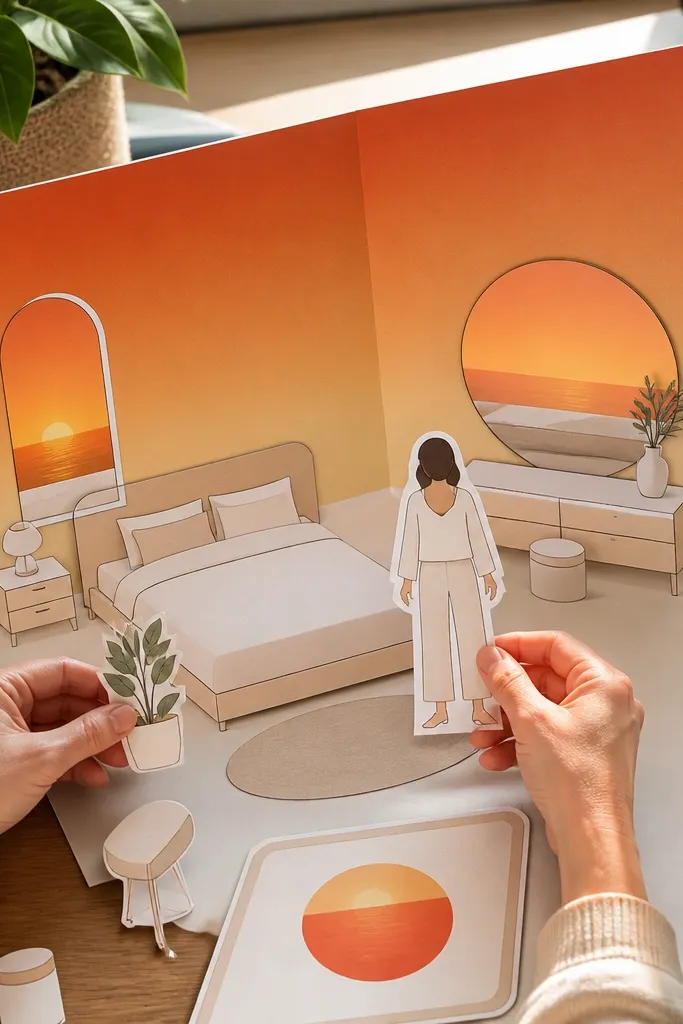
This is dreamy because the background does the heavy lifting. A gradient wallpaper with soft tangerine-to-cream tones creates a “sunset” glow, and the mirror shape adds depth even in paper form. You keep the furniture fairly simple so the gradient remains the star. If your goal is photogenic pages with minimal assembly, this template style is a strong pick.
Print the gradient wall on 200 gsm paper so the color banding looks smooth. Then cut the mirror outline and fold the mirror backing slightly so it sits forward; if there’s a mirror highlight layer, attach it last. Build in order: wall background, mirror, bed base, then add the rug and one accent pillow that matches the gradient’s brightest shade.
To avoid streaks, let ink fully dry before folding any piece with gradients.
Don’t place too many dark accessories; they crush the soft glow.
7. Sage Green Bedroom With Thick Quilt Panel and Window Curtain Loop
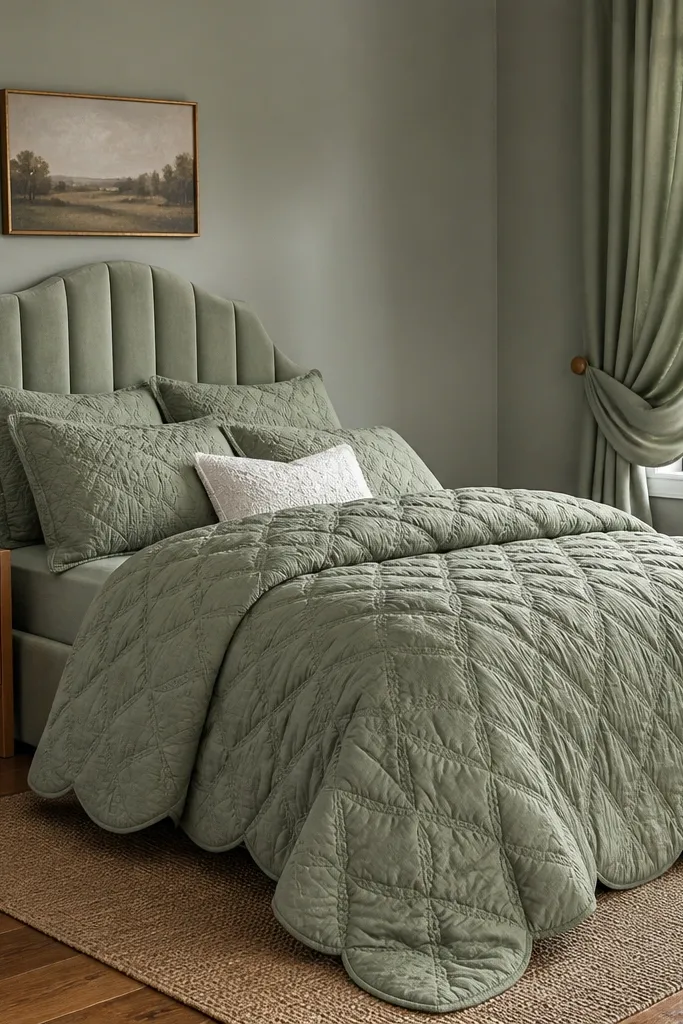
First, cut the quilt panel pieces and fold along the quilt seams so the quilt looks puffed rather than flat. Next, assemble the window curtain loop by attaching the loop backing behind the curtain so it holds its arc. Finally, glue the quilt panel onto the bed base, add the bed to the floor layer, then attach curtains so they overlap the window edge by a few millimeters.
Sage green looks dreamy because it reads calm and natural. The thick quilt panel adds dimension through layered shapes, and the window curtain loop gives you a clean, decorative curve. This template is ideal if you want a bedroom that feels cozy but not overly cute, with textures that show up even when photographed. The bed is the centerpiece, and the curtain loop makes the scene feel balanced.
Skip thisDon’t overfold quilt seams; too many sharp bends make the quilt look wrinkled.
Editor's noteUse double-sided tape for quilt layers; it keeps edges crisp and reduces glue bumps.
8. Night Sky Bedroom With Constellation Wall and Celestial Mobile
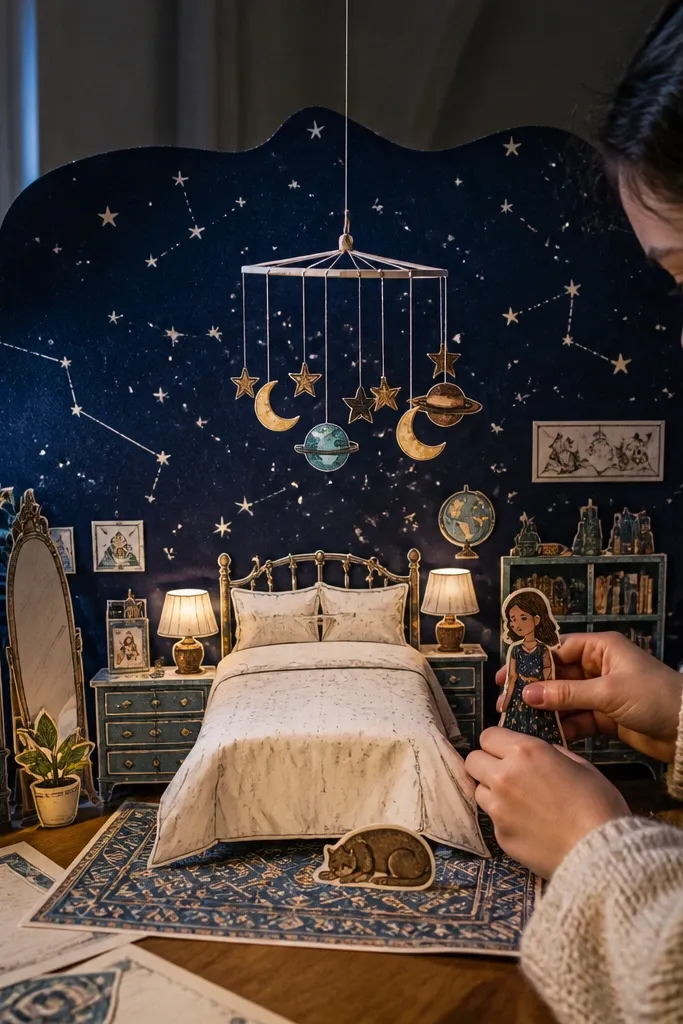
Print the night-sky wall on thick paper and avoid heavy smudging by letting it dry fully. Cut the constellation overlays and glue them slightly offset so they cast a faint layered look. For the mobile, fold the mobile arms and attach the hanging piece with a small tab behind the ceiling line; if there’s a string, use thin thread to keep it straight.
Night-sky templates are dreamy because the contrast makes every shape pop. A constellation wall gives you depth, and a celestial mobile adds a “floating” element that reads well in photos. The key is keeping the furniture lighter, like pale wood tones or cream sheets, so the room doesn’t feel like a dark blob. This works best for readers who want a dramatic, magical look with clear focal points.
Skip thisDon’t make the furniture too dark; keep bed and rug light so the night sky stays readable.
Editor's noteUse a white gel pen to add a few tiny dots on the mobile arms for extra sparkle.
9. Cottage White Bedroom With Rose Garland Headboard
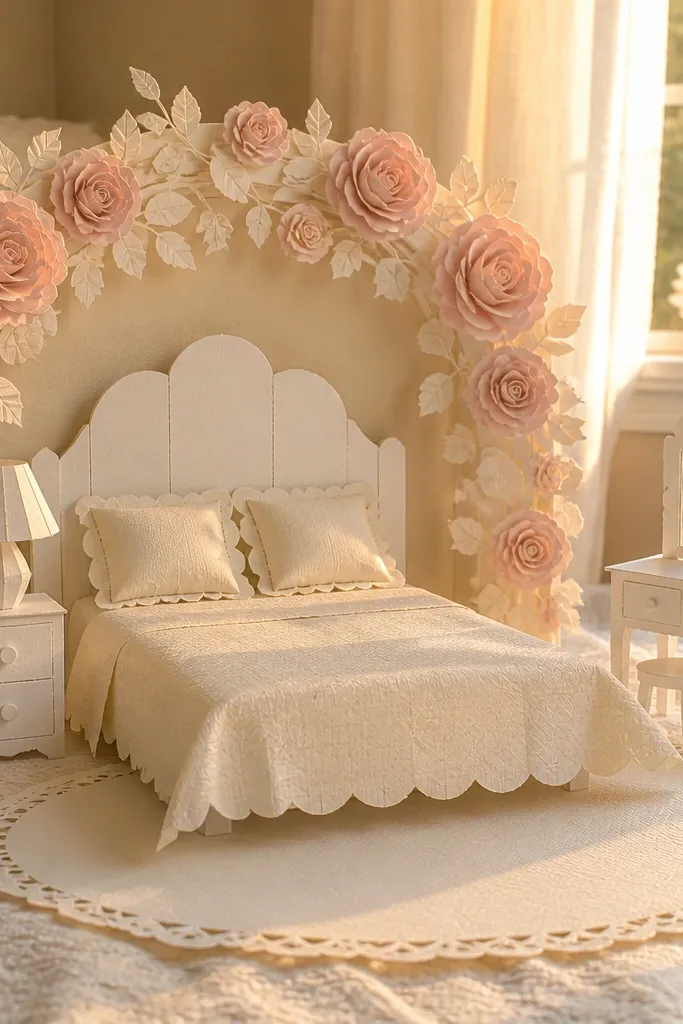
Start by printing the rose garland layer on slightly heavier paper to prevent curling at the ends. Cut the garland carefully and fold it along any guide lines so it arches gently. Then assemble the bed headboard first, attach the garland layer on top, and place the bed onto the floor panel; add a small side table or dresser last so it doesn’t compete with the garland.
This template looks dreamy because it turns the headboard into decoration. White walls and a rose garland headboard create a romantic frame, and the rest of the room can stay simple without losing charm. The rose garland also gives you a clear top line that anchors the whole layout. It suits anyone who wants a soft cottage aesthetic that photographs well from a slight angle.
Skip thisAvoid thick glue under the garland; it flattens the arch and shows bumps.
Editor's noteIf the garland ends curl, press them under a flat weight for 5-10 minutes before gluing.
10. Sunlit Yellow Bedroom With Curved Window Arch and Checker Rug
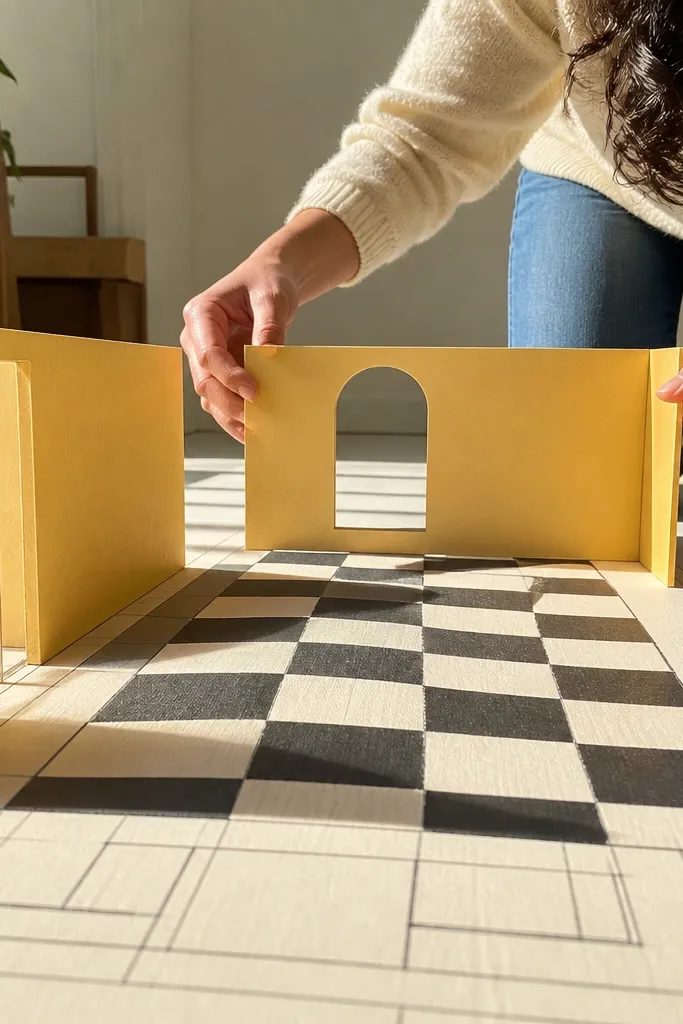
Yellow bedrooms can look cheerful or cheap. This template stays dreamy by using warm, sunlit yellow in a controlled area and pairing it with a clean curved window arch. The checker rug adds structure and gives the floor a strong pattern that reads clearly in photos. You end up with a room that looks bright, styled, and intentional without needing lots of tiny decor.
Print the window arch and walls on 180-200 gsm paper so the arch keeps its curve. Cut the arch frame and fold along the inner lines to create a shallow depth pocket for the window layer. Then build the rug as the foreground anchor: assemble rug layers, fold the edges slightly to create a subtle lift, and glue it so it overlaps the bed base by a small amount.
Use a white pencil to lightly shade under the rug folds so the pattern pops in low light photos.
Don’t center the rug perfectly if the template has a perspective cue; follow the printed floor guide lines.
11. Royal Lavender Bedroom With Layered Quilt Squares
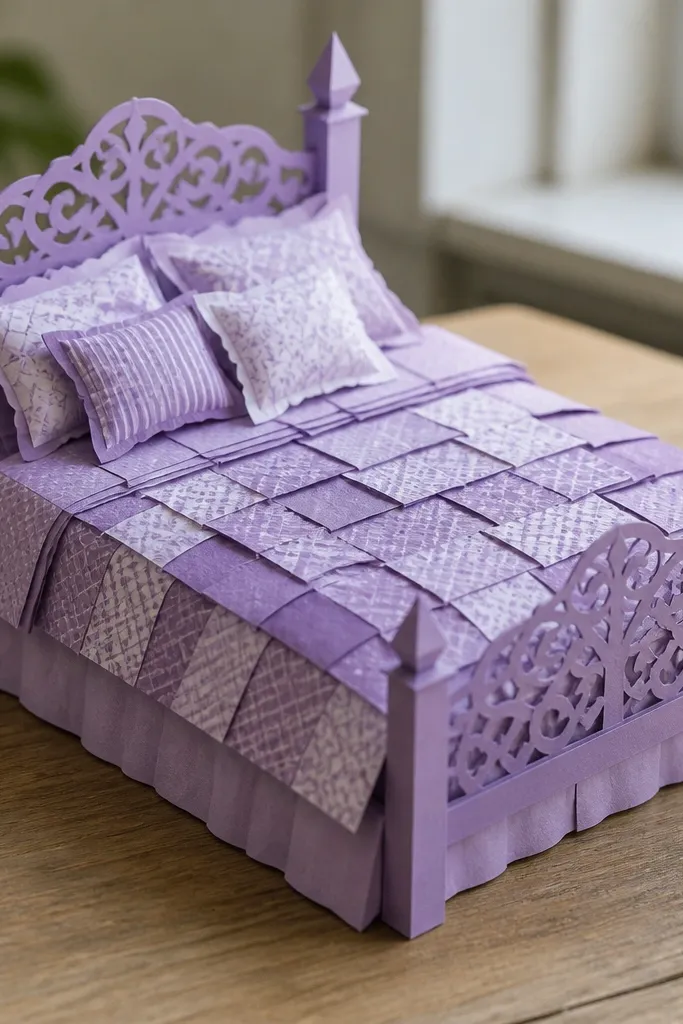
Print the quilt square layers on 160-200 gsm paper depending on how crisp you want the edges. Cut each square panel and fold along any seam lines so the squares stack with a raised effect. Attach the quilt layers to the bed base from back to front, aligning square corners to the printed grid; finish by adding pillows last so they frame the quilt without covering it.
Lavender is dreamy when it’s used with structure. This template has layered quilt squares that create a patchwork look, so the bed has texture even if you skip extra accessories. The color palette stays cohesive because the same lavender tone appears in the quilt and pillows. It’s a great pick for readers who want a photogenic bed close-up and a tidy room that still feels crafted.
Skip thisAvoid gluing the entire quilt panel flat; you want depth, so only glue the square edges and tabs.
Editor's noteDry-fit the quilt layers before gluing so you can correct any off-by-1 mm alignment while it’s still easy.
12. Teal and Coral Coastal Bedroom With Shell Nightstand
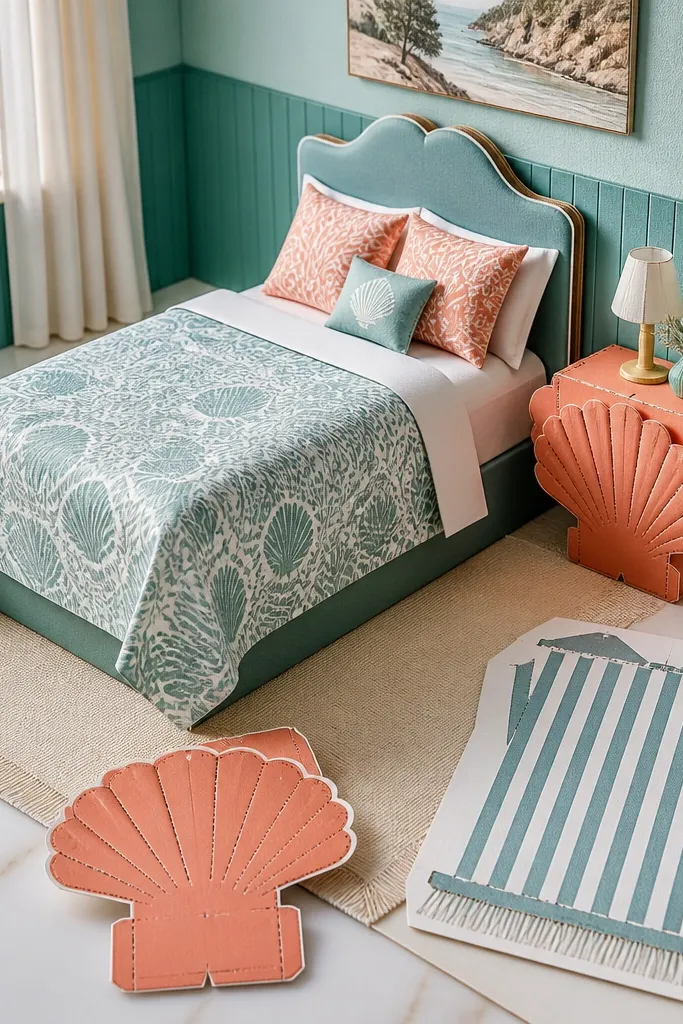
Print the striped throw and shell nightstand on 180-200 gsm paper so the stripes stay crisp. Cut the shell nightstand and fold any back supports so it stands upright at a slight angle, about 10-15 degrees. Assemble the bed first, then tuck the striped throw over the bed edge; place the nightstand near the bed corner and glue a small rug strip underneath to connect the floor layer.
Coastal styles look dreamy when they mix one bold color with a soft neutral. Teal walls plus coral accents feel fresh, and the shell nightstand adds a recognizable shape that reads instantly in a photo. The striped throw adds a rhythmic pattern that keeps the room from looking flat. This template is best for readers who want color without chaos, and a bedroom scene that feels playful but controlled.
Skip thisDon’t add extra tiny shells all over the room; one shell shape is enough to sell the theme.
Editor's noteIf stripes look jagged after printing, slow down your printer settings and reprint only the throw piece.
13. Monochrome Black and Cream Bedroom With Minimal Frame Art
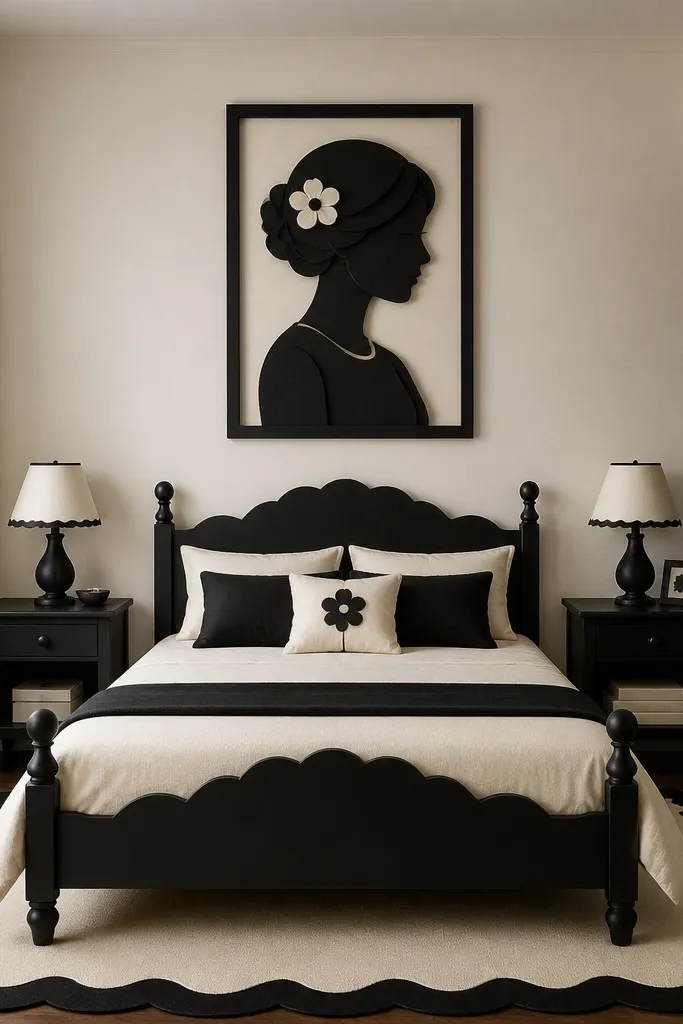
Print on cream paper if you can, otherwise use white and choose warm gray tones for shadows. Cut the frame art and fold the frame backing so the art sits slightly forward. Then build the room in layers: floor first, bed second, wall art third, and rug last; overlap the rug under the bed by a few millimeters for a grounded look.
Dreamy isn’t always pastel. Monochrome black and cream looks dreamy because it’s high-contrast and clean, which makes paper edges and folds look intentional. A minimal framed art piece gives the wall a focal point, and the bed and rug keep their shapes crisp. This template works for readers who want a more grown-up, modern look that still feels soft because the colors are warm, not harsh.
Skip thisAvoid bright pure white paper with black ink — it can look too stark and flatten the “dreamy” softness.
Editor's noteUse a dark gray pencil to lightly shade fold lines so folds read as structure, not just creases.
14. Rose-Gold Glam Bedroom With Mirrored Vanity and Soft Pink Drapes

Print the vanity and mirror layers on heavier paper so the mirror frame doesn’t warp. Cut the mirror overlay and fold a small backing tab behind it, then glue it so it sits forward from the vanity. Assemble drapes by folding their guide lines and attaching them behind the bed line; finish with the vanity last so it frames the scene without covering the bed.
This template is dreamy because it adds shine without going full disco. Rose-gold accents on a vanity mirror and soft pink drapes create a “glam but gentle” look that photographs beautifully. The mirror shape adds depth, and the drapes bring movement through layered fabric-like folds. It suits readers who want a bedroom that looks like a styled set — pretty, not messy.
Skip thisDon’t flood the vanity with glue; mirror edges show glue smears immediately.
Editor's noteFor the mirror shine, use a metallic gel pen on the mirror highlight area after assembly.
15. Scandi White Bedroom With Curved Bed Frame and Woven Floor Mat
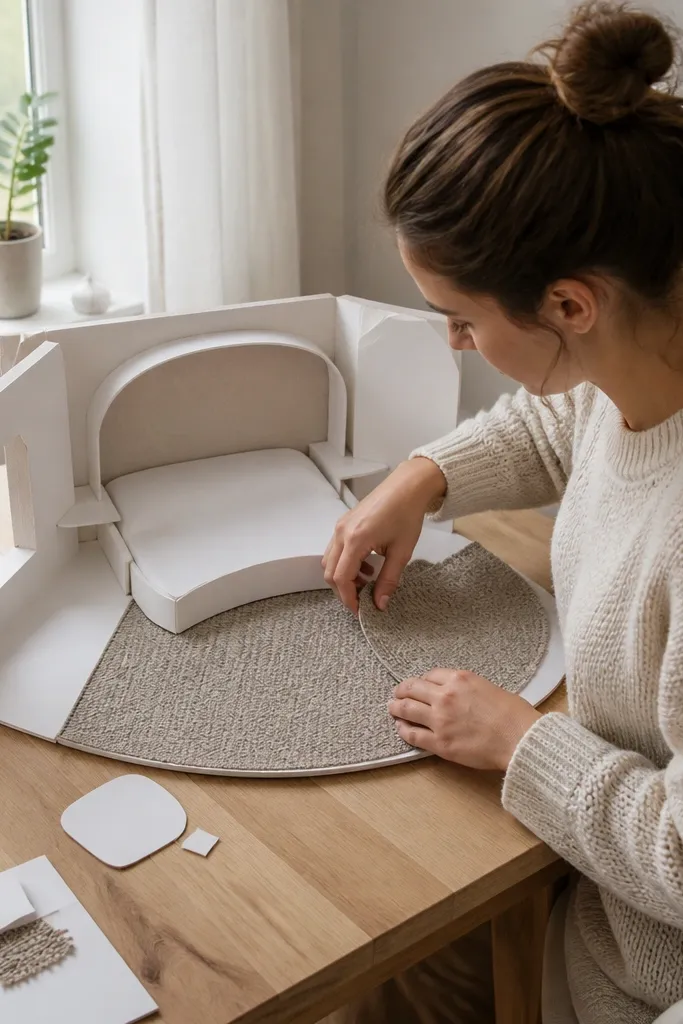
Print on 160-180 gsm paper for easy folding, but keep the floor mat on the heavier end for texture. Cut and fold the curved bed frame along the scored lines so it forms a smooth arc instead of a flat bend. Then assemble the floor mat first and glue it down, add the bed second, and finally place one small wall decor piece above the bed for balance.
Scandi bedrooms look dreamy because they’re built around one strong shape and lots of breathing room. A curved bed frame gives softness, while a woven floor mat adds texture that reads like actual material. White-on-warm-gray keeps the room calm, and the template often includes fewer tiny items, which makes assembly faster and cleaner. This is a solid choice if you want a bedroom that looks like design decor, not craft clutter.
Skip thisAvoid adding multiple wall decorations; one piece keeps the Scandi look clean.
Editor's noteUse a light gray marker to shade under the bed arc; it makes the curve look dimensional.



