

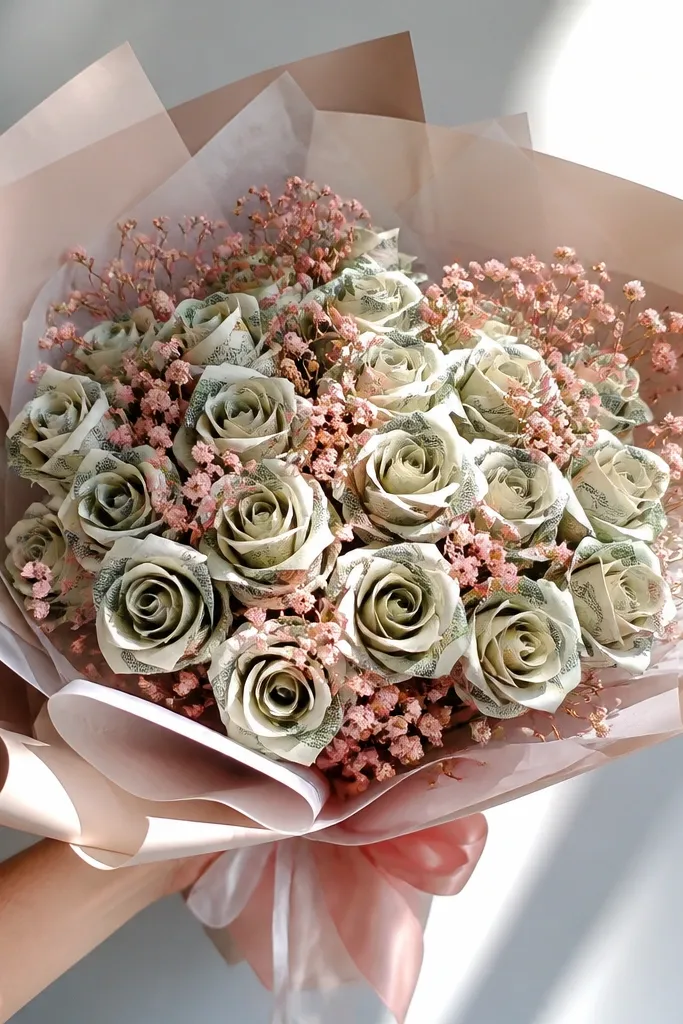
1. Wrapped Bill Spiral Rose Bouquet
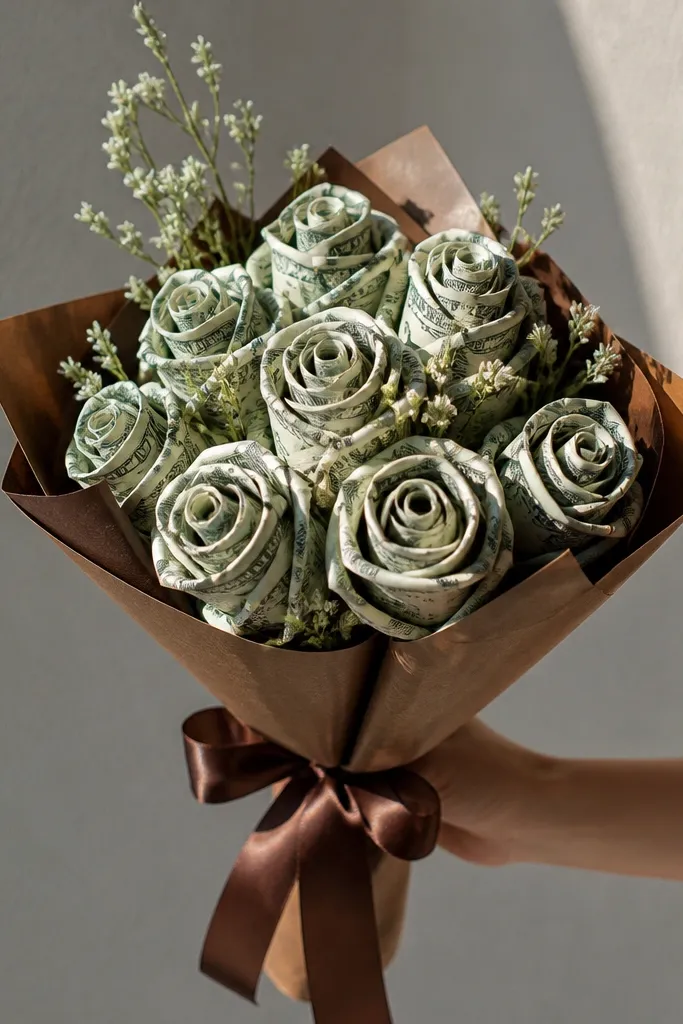
This one looks like a rose rose, not like a bill stuck to a stick. The secret is wrapping the bill around a spiral center so the money forms petal-like curves instead of flat rectangles. The bouquet reads clean because each rose has the same height and the same spiral tightness. It’s a great option for birthdays and thank-yous because it feels intentional and still gives the recipient something usable right away. Build it in a compact arrangement so the spirals stay visible in photos.
Start by cutting a 2 inch wide strip from cardstock and rolling it into a tight cone for each rose center. Spiral a bill strip around the cone, overlapping slightly, and keep the overlap consistent so the petals look even. Secure with a tiny dot of hot glue only at the back edge of each overlap, then wrap the base with green floral tape. Finish by tying a 1/4 inch ribbon around the stem where it meets the rose and repeat until you have 8-12 roses for a small bouquet.
Editor's notePre-crease the bill strip by bending it gently before wrapping; it makes smoother petal curves.
Skip thisDon’t glue the front face of the bill — it kills the crisp look.
2. Clear Pocket Petal Money Roses
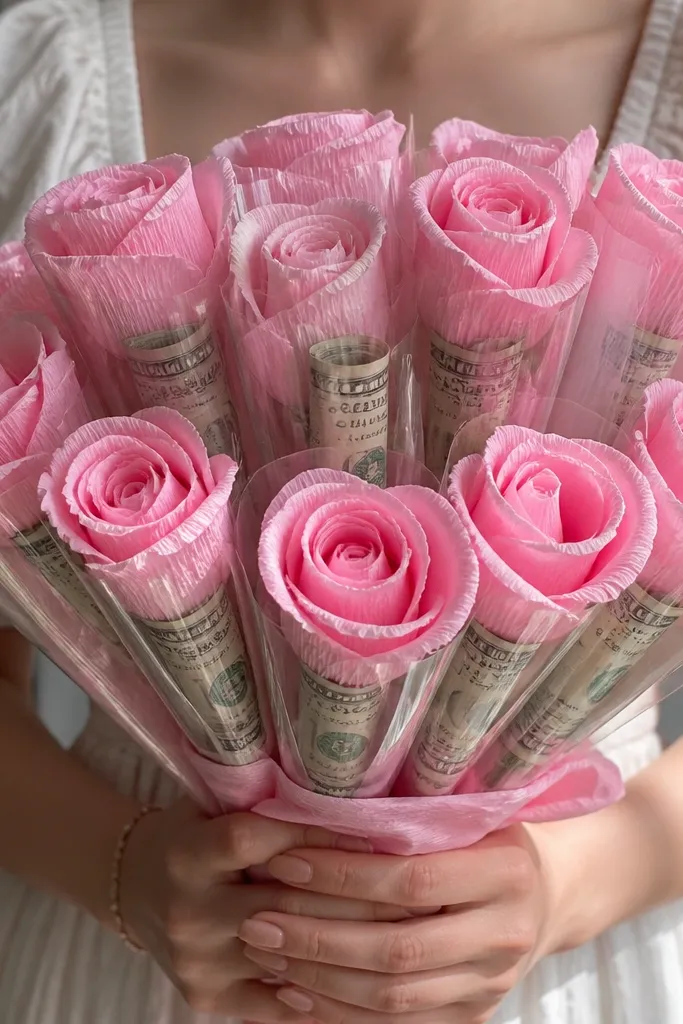
If you want your money rose bouquet ideas to look “expensive” in photos, this is the move. You get soft petals (crepe or paper) with a clear pocket behind them where the folded bills sit. The bills stay visible but protected, so nothing drops out mid-event. This style also makes the gift feel interactive because the recipient can open one rose pocket to pull cash without destroying the bouquet. It’s ideal for events where people pass the bouquet around.
Cut crepe petals into 5 sizes, from small teardrops to larger rounded petals. Make a small backing shape from cardstock and glue a clear vinyl pocket behind the center area using double-sided tape on the edges only. Fold each bill into thirds, slide it into the pocket, then layer the petals over the pocket opening. Glue the petal bases to the backing, attach the backing to a green floral wire stem, and wrap with floral tape. Arrange 10-15 roses tightly so pocket highlights show from the front.
Editor's noteUse vinyl pocket material from craft supply rolls; it stays clear and doesn’t wrinkle as easily as plastic sheets.
Skip thisAvoid thick pockets that push petals outward and make roses look swollen.
3. Crepe Rose Money Insert Bouquet
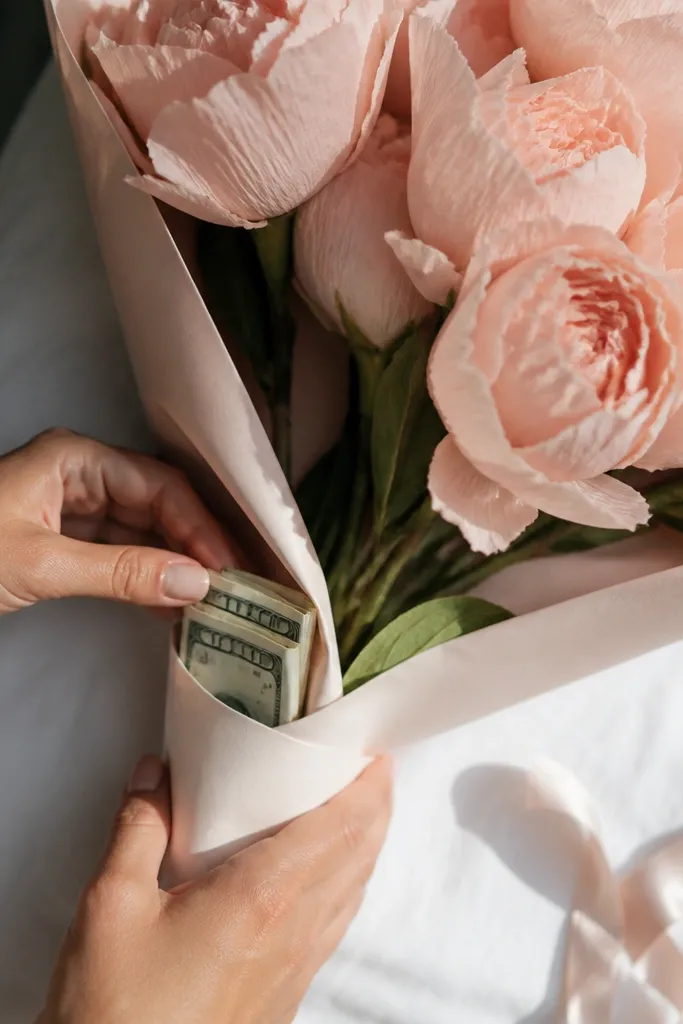
This is a clean, gift-ready look where the rose looks like a real flower first, and the money is a surprise inside. Crepe petals drape and catch light, so the bouquet looks soft and romantic on camera. The money insert is hidden at the base, so your rose stays photogenic from every angle. It also avoids the “bill tower” look that can happen when money is visible too much. Use this when you want the bouquet to feel like a flower arrangement, not a craft project.
Cut crepe petals and assemble each rose around a foam or cardboard center using floral wire. Before closing the base, glue a small paper sleeve inside the bottom of the rose head where the stem meets the petals. Fold bills into a slim rectangle, slide them into the sleeve, then close the base with a final layer of petals. Wrap the stem with floral tape and secure the sleeve opening with a strip of thin tape under the petals. Bundle roses into a bouquet of 12 using a ribbon tie at the stems and another tie around the wrap.
Editor's noteSeal the crepe petal edges with a tiny swipe of matte medium so they don’t fray when handled.
Skip thisDon’t overfill the sleeve; bulging makes the rose base look messy.
4. Origami Bill Lotus Roses on Stems

This one is visually striking because the folds create a geometric petal pattern. It reads as a rose from a distance, but up close you see the bill structure, which looks sharp and intentional. The recipient gets cash in a way that feels like a keepsake without turning it into a glued-on decoration. It’s best for people who like clean, modern aesthetics. This is also one of the money rose bouquet ideas that looks great even if you’re making fewer roses.
Fold each bill into a square first by trimming off any extra edges only if you’re using play money or exact-size bills. Use a simple lotus pattern: fold corners in layers to form pointed petals, then pinch each fold to define edges. Attach the folded flower to the top of a floral wire stem using a small circle of cardstock glued to the back. Wrap the base with floral tape to hide the attachment point. Arrange 9-11 lotus roses in a tight cluster with filler greenery.
Editor's notePress folds with a bone folder so the creases stay crisp and photo-friendly.
Skip thisAvoid cheap bills with soft ink; they crease unevenly and look sloppy.
5. Coffee Filter Money Rose Bouquet
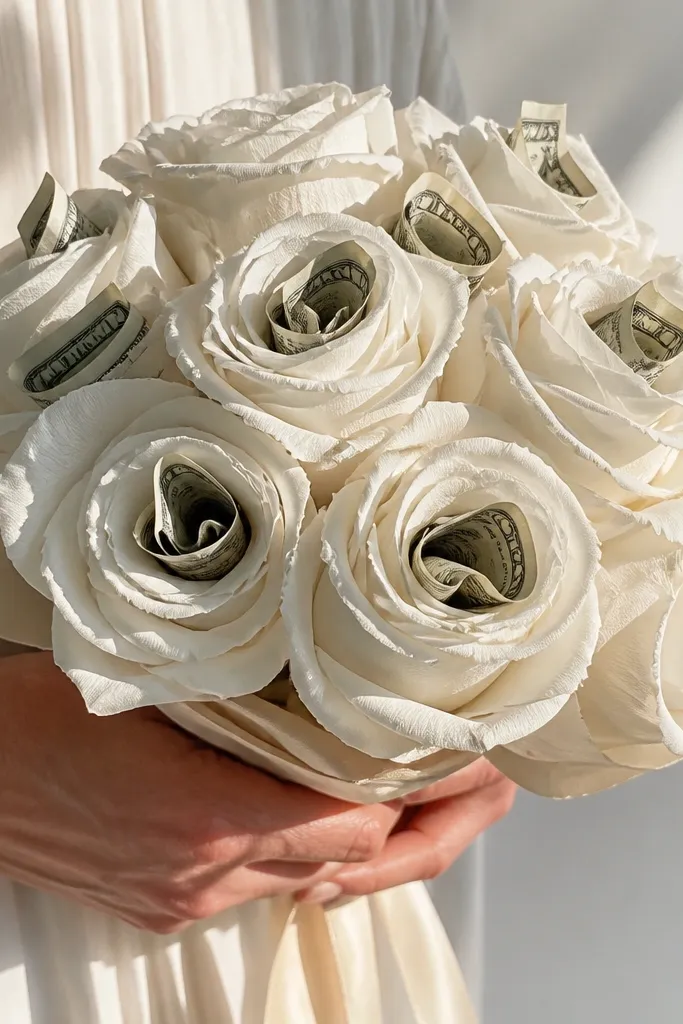
Coffee filters give you airy, cloud-like petals that look gorgeous in natural light. The money sits in the center, so the rose looks full and soft while still delivering the cash. This is a strong option when you want a budget-friendly build that still photographs well. The petals also hide minor construction imperfections because they’re textured. It’s a great choice for anniversaries and casual celebrations where you want something pretty without complexity.
Cut coffee filters into petal strips and fringe the edges slightly for texture. Roll a small cone from cardstock and glue it into the center. Fold bills into a tight rectangle and slide them into a slit at the top of the cone, then glue the slit edges behind the bill. Layer coffee filter petals around the cone, gluing only at the base. Wrap stems in floral tape and group 10-14 roses with a light neutral ribbon.
Spritz the coffee filter petals with diluted acrylic paint for a pastel tint before assembly.
Don’t soak the filters; too much moisture makes them tear and curl unevenly.
6. Bill Rose Head with Fabric Petals
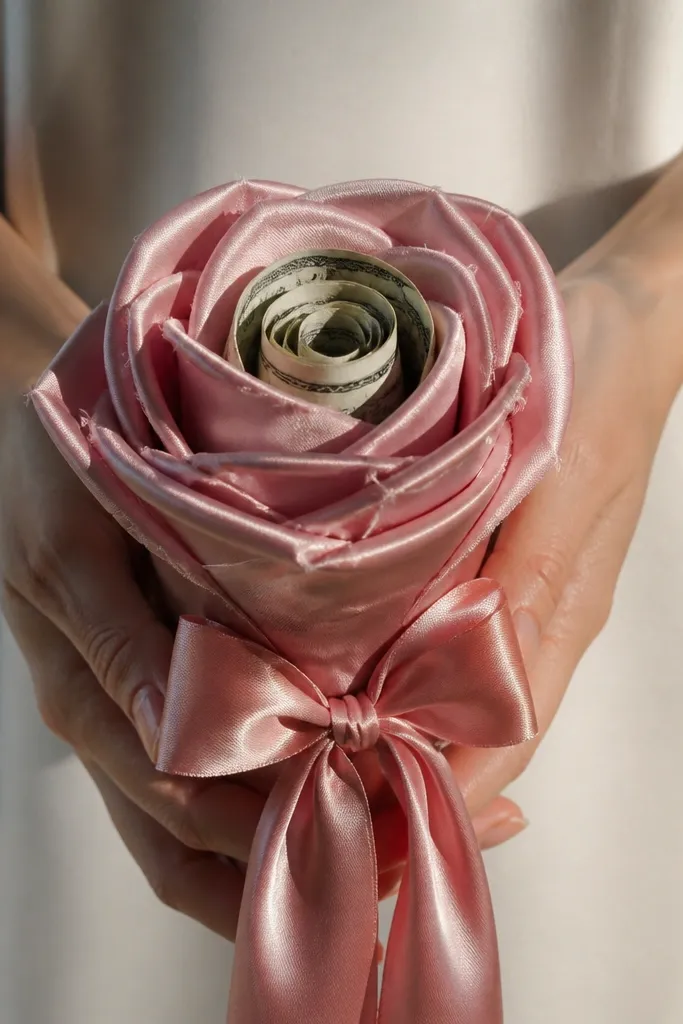
This is a high-impact look because fabric petals look expensive and move nicely in photos. The money is the center, wrapped around a small core so it looks like the rose’s heart. The bouquet feels gift-like even without visible cash everywhere. It’s also durable: fabric hides wrinkles and keeps the rose shape. Use it for weddings, engagements, or anyone who likes soft textures.
Cut small petal shapes from thin fabric like satin or cotton, and lightly gather the base with thread so the petals curve. Make a core from craft foam or rolled paper and wrap a folded bill around it like a central bud. Stitch or hot-glue the first fabric petal around the core, then overlap more petals. Attach the finished head to a floral wire stem with a fabric-covered glue dot. Wrap the stem with ribbon and add a bow at the bouquet tie point.
Editor's noteUse a needle and thread for the first two petals; it makes the rose sturdier than glue alone.
Skip thisAvoid bulky fabric; thick petals make the rose head look heavy and uneven.
7. Dollar Bill Rose Centerpiece in a Box Frame
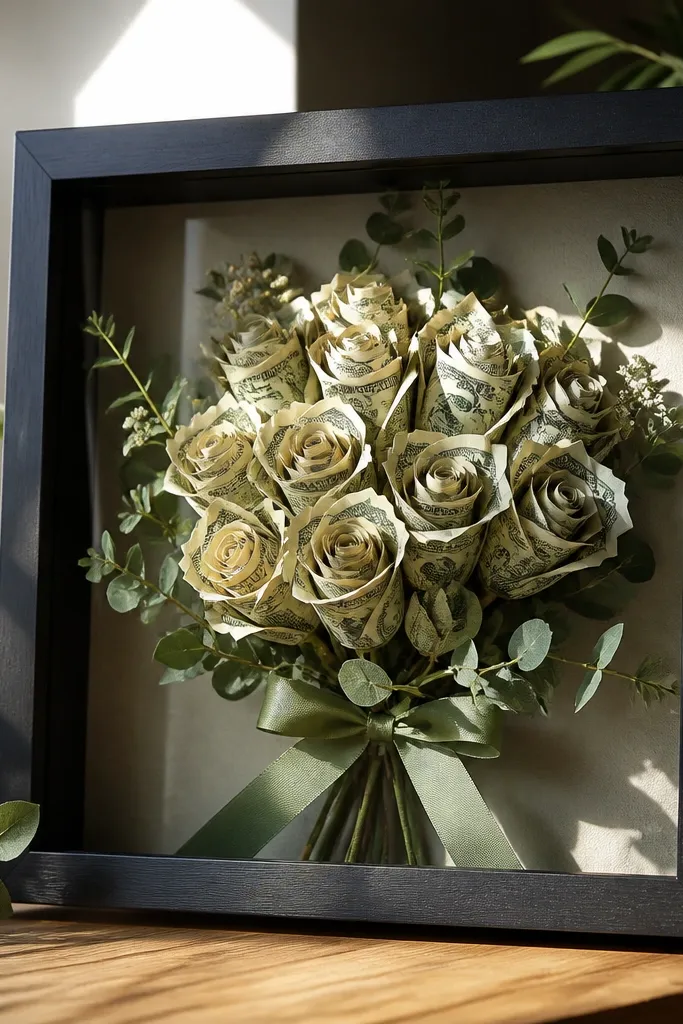
Some money rose bouquet ideas look great only when held. This one looks good when displayed — in a frame, on a shelf, or on a mantel. You build roses and then mount the stems so the bouquet stays upright forever. The bills are secured inside the rose heads, so nothing sags. It also gives a “decor” feel without losing the cash gift. This is perfect for people who don’t want a bouquet that wilts or gets thrown into a corner.
Build a shallow shadow box or craft frame with a foam insert so stems can be pinned. Create your roses with secured bill centers and attach each rose head to a short floral wire stem. Cut the foam to fit inside the frame, then pin or glue stems into place at a slight outward angle. Add greenery behind the roses using faux leaves so the frame looks full. Finish by adding a ribbon across the bottom edge of the frame and keep bills fully tucked within rose heads.
Editor's noteUse short stems (3-5 inches) so the rose heads sit in the front of the frame instead of sinking into the foam.
Skip thisSkip long stems; they wobble and make the layout look messy.
8. Twist-Tie Bill Rose Buds with Mini Filler Flowers

This is for people who want a bouquet that looks airy and styled, not bulky. Twist-tie buds keep the money secure while you make small roses that cluster naturally. You get a “garden” look because you can mix in tiny faux flowers without fighting the cash. It’s also faster than building full large roses — useful when you need a lot of blooms for a big wow shot. The money stays wrapped in a tight bud, so it’s easy to gift.
Cut bills into narrow strips and twist each strip around a toothpick or thin dowel to form a tight bud shape. Secure the back with a small twist tie or a tiny strip of floral tape at the base. Build mini crepe petals around the bud using 3-5 petals per bloom, gluing only at the bottom. Attach each bud to a short stem and wrap with floral tape. Arrange 15-25 buds in a bouquet wrap, adding small filler flowers around the gaps to make it look intentional.
Editor's noteKeep bud sizes consistent by using the same toothpick diameter for every rose.
Skip thisDon’t make buds too loose; loose twists look like folded bills, not roses.
9. Matte Black Rose with Gold Foil Money Strip
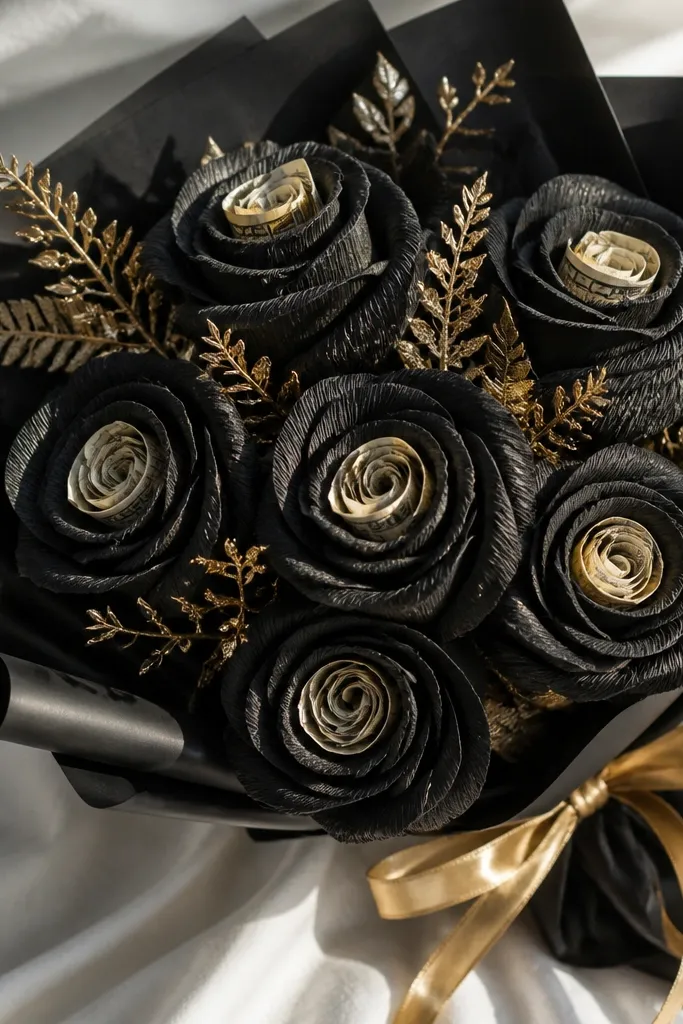
This is the “night out” version of money rose bouquet ideas. The contrast between matte black petals and a gold-toned money strip creates a photo that looks like a stylized gift box, not a craft. You don’t need to show a lot of cash either — one gold strip in the center reads as luxury. It also hides imperfections because dark petals cover uneven edges. Use it for birthdays, anniversaries, and anyone who likes black-and-gold decor.
Make crepe roses using black crepe, with slightly larger outer petals to create depth. Fold a gold-toned bill strip or a metallic money-style paper strip into a tight ribbon and glue it into the center of the rose head. Wrap the rose base with black floral tape, then add a thin line of gold ribbon at the stem. Bundle roses in a tight bouquet with black and gold filler greenery. Keep the ribbon around the bouquet stems narrow (1/4 inch) so it looks sharp in photos.
Editor's noteUse matte black paint on the back of the rose petals if edges show — it prevents shine under flash.
Skip thisAvoid glossy black paper; it reflects light and makes petals look cheap in photos.
10. Monochrome Blush Rose Buds with Hidden Bill Tabs

This style is subtle, neat, and very photogenic. The blush buds look like soft flowers first, while the bills are tucked into a small tab pocket at the base so the bouquet stays tidy. It’s a smart choice when the recipient hates bulky gifts or you’re giving cash in a “pretty” way without a visible pile of money. The monochrome look also makes your bouquet look cohesive even if each rose has a slightly different petal shape. Great for baby showers, birthdays, and polite thank-yous.
Cut blush crepe into small bud petals and assemble each rose around a tiny cardboard core. Make a narrow tab pocket from cardstock and tape it inside the bottom of the rose head where petals meet the stem. Fold bills into flat tabs that slide into the pocket, then close the pocket with a strip of tape that stays hidden under petals. Attach the rose head to a floral wire stem and wrap. Arrange 18-24 buds in a bouquet wrap, keeping stems tight so the blush color reads as one mass.
Editor's noteUse double-sided tape for the pocket so you avoid glue strings under the petals.
Skip thisDon’t leave the pocket open; bills will slip out when the bouquet is carried.
11. Origami Rose Money Bouquet with Front-Facing Petals

This is a photogenic approach because the petals face outward and frame the center. The cash becomes the rose itself, so you don’t have to hide anything. If you build them evenly, you get a bouquet that looks like a styled wall of roses. It’s also a good option when you want a gift that feels like a puzzle — the recipient can unfold or keep it folded. Use this for modern decor lovers and for events where you want a “wow” look at the table.
Use single bills and fold into a rose shape with outward petals. Keep the folds tight and mirrored so each petal points the same direction. Attach each finished origami rose to a floral wire stem with a small cardstock circle glued behind the rose base. Wrap the stem with floral tape to hide the glue point. Arrange 11-13 roses in a fan shape so each rose faces the camera side.
Editor's noteMake a quick paper template of the rose base circle so attachments line up across the bouquet.
Skip thisSkip loose folding; soft origami looks like accidental paper, not a rose.
12. Mini Money Rose Garland Bouquet Wrap
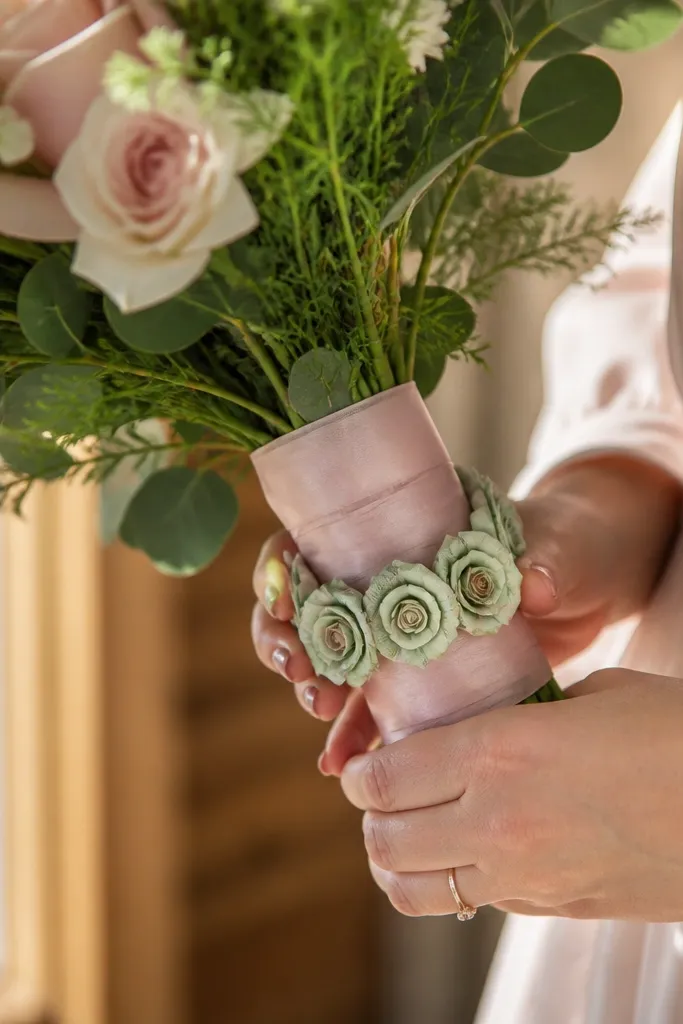
This idea makes your bouquet look styled from the outside, not just in the center. You create many tiny money roses and attach them along a garland strip that wraps around the bouquet stems. The result is a “wrapped gift” look that photographs well because every angle shows detail. It also makes the money gift feel bigger without needing giant roses. Great for graduation, weddings (as a reception table prop), and any event where you want a playful, decorative vibe.
Build small roses using folded-bill centers on short stems (1.5-2 inches of stem shows). Create a flexible garland strip from floral wire covered in tape, then hot-glue mini roses at 1 inch spacing along the wire. Attach the garland to the main bouquet stems with twist ties so it can’t slide. Wrap the whole bundle with ribbon, then add a bow that covers the tie points. Keep the color palette tight so the mini roses read as one cohesive pattern.
Editor's noteUse a ribbon that matches the rose color — it blends the garland into the bouquet wrap.
Skip thisDon’t attach mini roses too close; clusters hide petals and look messy.
13. Greenery-Front Money Rose Bouquet with Bottle Vase
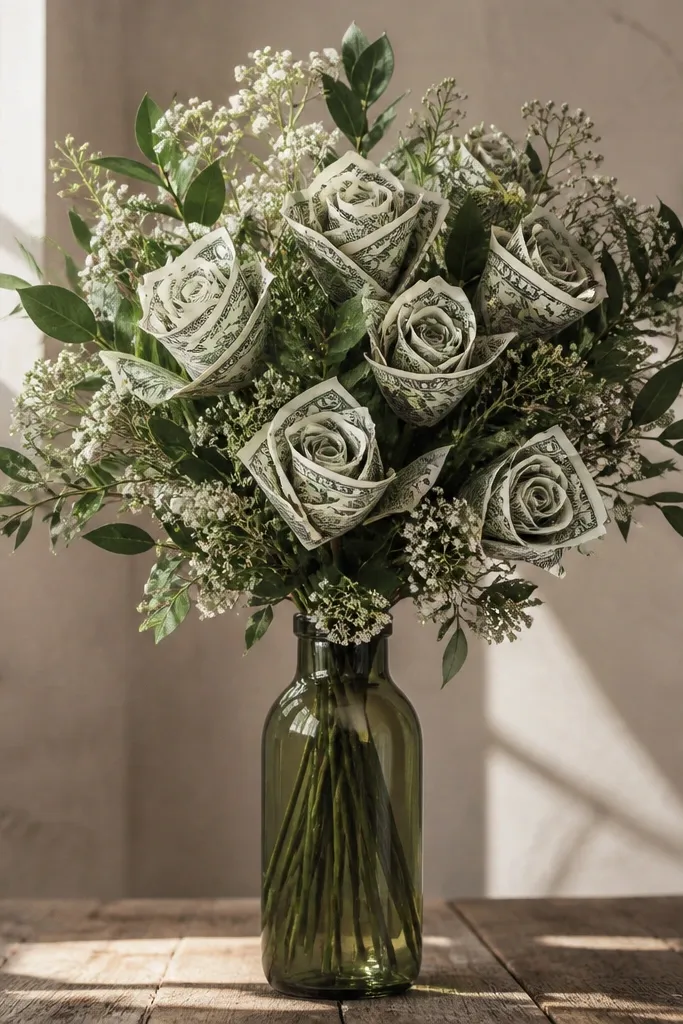
If you want money rose bouquet ideas that look like real decor, frame the roses with greenery and let the money be the focal center. This build uses a bottle vase to keep stems upright and gives you that clean vertical photo composition. The money roses sit behind a front layer of faux leaves so the bouquet looks full even with fewer roses. It also makes the cash feel intentional because it’s centered in the arrangement, not floating around. Perfect for dinner tables and gift tables where you want height.
Choose a tall clear or dark bottle vase and cut foam or use a tight floral frog insert. Assemble 8-12 crepe or paper money roses with secured bill centers, then insert stems into the foam. Layer faux greenery in front of the roses so you see leaves first and roses second. Use ribbon or twine around the bottle neck to unify the look. Keep roses at 2-3 different heights so the bouquet has depth in photos.
Editor's noteUse floral foam wrapped in plastic inside the vase to reduce mess and keep stems from wobbling.
Skip thisAvoid stuffing too many stems at one height; it flattens the bouquet visually.
14. Layered Satin Ribbon Money Rose Bouquet
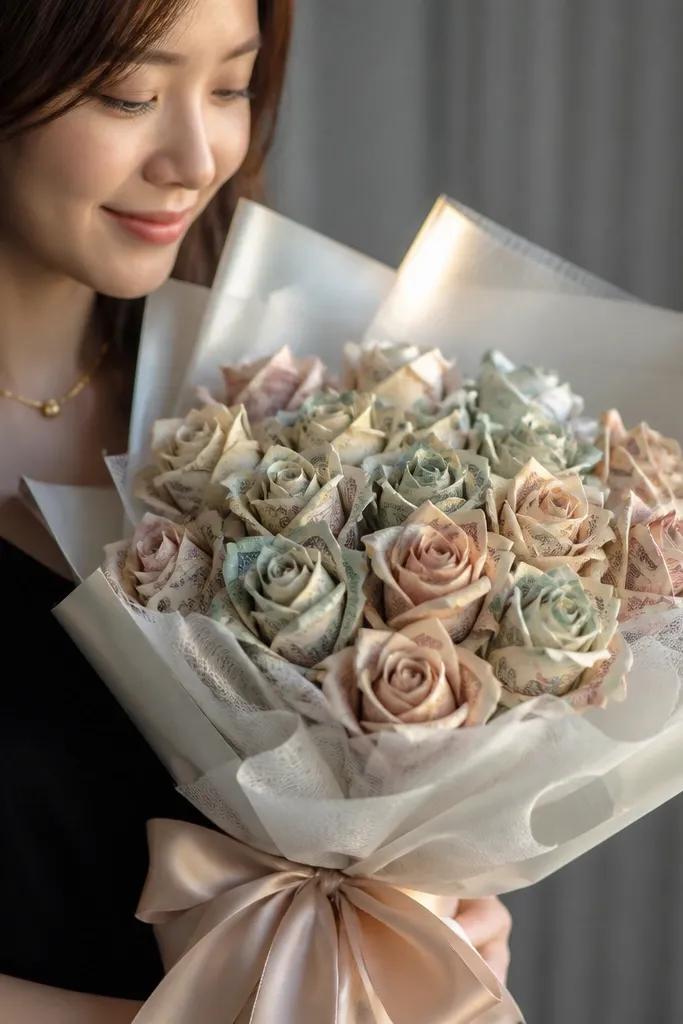
This is the bouquet look that screams “gift” without needing a fancy box. Layered satin ribbon gives you photo shine and crisp edges, while the money rose heads stay the same shape. The ribbons also help hide stem bases and glue marks. It’s a great pick when you’re using handmade roses that you want to look more polished. Keep the palette tight — one satin color and one rose color. This style is especially good for weddings and engagement parties where the decor is already ribbon-heavy.
Make money roses with either folded-bill centers or clear-pocket bills. Wrap each rose stem base with satin ribbon, then glue the ribbon tail to the back so it doesn’t show glue strings. Bundle roses and place them in a bouquet wrap of tissue or kraft paper around the stems. Tie a wide ribbon band around the center of the wrap and add a second thinner ribbon band below it. Finish with a small ribbon rosette at the tie point so the bouquet looks intentional from every angle.
Editor's noteUse fabric glue on ribbon ends and let it cure flat; it prevents puckering under the bow.
Skip thisDon’t use too many ribbon widths; it turns the bouquet into clutter.
15. Watercolor Ombre Money Rose Bouquet
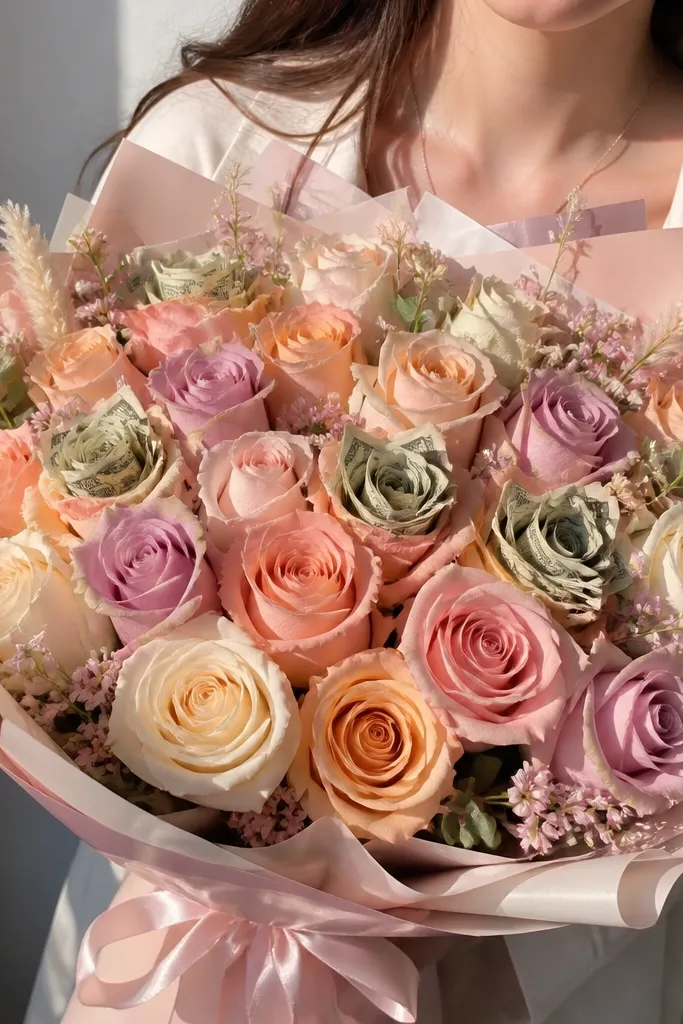
This is one of the prettiest money rose bouquet ideas because color does the heavy lifting. Ombre petals create depth and make every rose look different while still cohesive. The money center stays crisp, so you get contrast instead of a muddy blend. Use this for baby showers, birthdays, and spring celebrations. The bouquet photographs beautifully against light backgrounds because the petals glow and the cash center pops.
Create crepe petals and pre-dye them with watercolor or diluted acrylic: start with light at the top and deepen at the base. Let petals dry fully before assembling so they don’t stick together. Build each money rose with a simple center core and tuck a folded bill into a slit, then glue the petals around it. Insert stems into a bouquet wrap and add filler greenery to balance the pastel tones. Add a final spritz of matte fixative to reduce crepe fuzz on camera.
Mix dye in a separate cup and test on one scrap petal; ombre looks best when the gradient is smooth, not patchy.
Avoid heavy dye soaking; it weakens crepe and makes petals tear.
16. Brown Kraft Rose Bouquet with Visible Bill Edges

This one looks handmade in a good way — warm, rustic, and very photogenic. Kraft paper petals give a matte texture that makes money edges stand out without needing extra sparkle. The bills are partially visible at the center so the gift reads clearly. It’s a smart pick for farmhouse decor, winter birthdays, and “cozy” color palettes. Keep the bouquet small and tight so the craft texture shows instead of blending into a big mess.
Cut kraft paper petals and shape them with a slightly rounded back using a spoon handle. Roll a thin cardstock cone for each center and slide a folded bill into a slit at the top so the bill edge faces forward. Glue petals around the cone, making sure each petal overlaps the previous one by about half. Wrap stems with jute twine first, then add green floral tape over the top to keep it neat. Tie the bouquet with twine and add a small tag for the final look.
Editor's noteUse a craft knife to slit the center; torn slits make the bill look crooked.
Skip thisSkip glossy tape; shine ruins the kraft texture.
17. Mini Money Rose Tree Bouquet for a Shelf Display
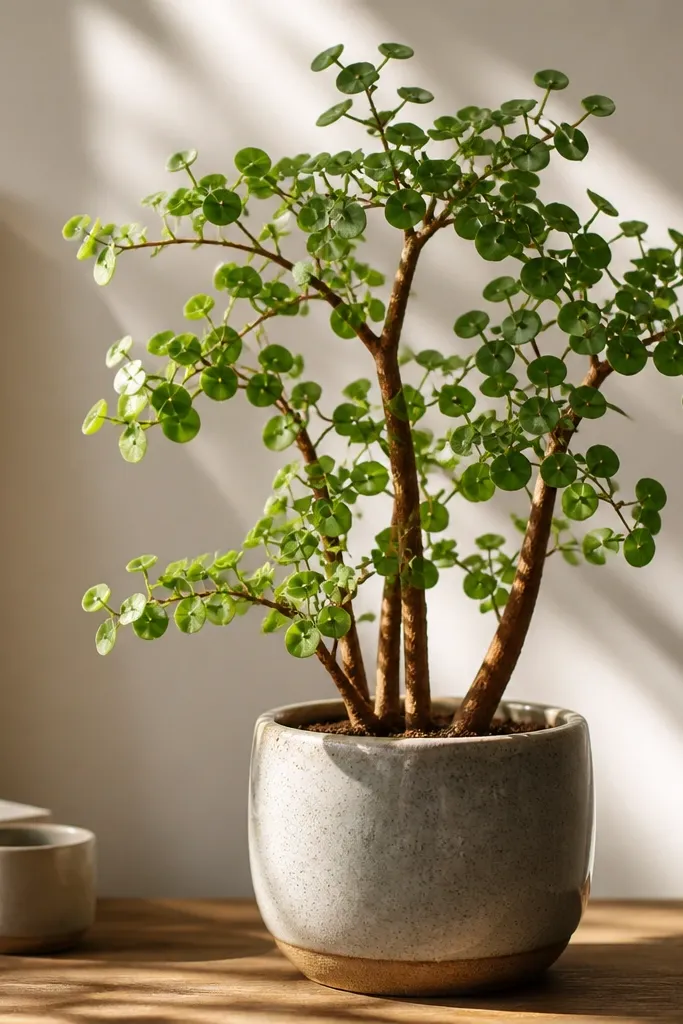
This is a different silhouette than a traditional bouquet, and that makes it pop in photos. You build a small “rose tree” with clustered money roses branching out from a central trunk. The cash is secured inside each rose head, so the structure stays stable while you move it. It’s a great choice for people who want a decorative gift that can live on a shelf. If you’re tired of bouquets that look the same, this shape is the fix.
Build a trunk from a dowel and wrap it with twine or brown paper. Create 3-5 branch arms from floral wire and attach to the trunk with hot glue. Make 6-10 money roses and short-stem them so the heads sit near the branch tips. Glue rose heads onto the branch ends, then add small filler greenery between clusters. Place the trunk into a small pot with foam or plaster, then cover the top with moss or kraft shreds.
Keep rose heads at the same distance from the trunk so the tree looks balanced from one side.
Don’t overstuff every branch; empty space makes the shape readable.
18. Ribbon-Wrapped Stem Money Rose Lollipop Bouquet

This style looks playful and clean, like a bouquet made for gifting candy and cash together. Each rose sits on a short stem wrapped like a lollipop, which keeps the arrangement sturdy for hand-to-hand passing. The money is inside the rose head, so it doesn’t flop around. It’s perfect for teens, coworkers, and anyone who likes cute decor. In photos, the short stems keep the roses front-facing and easy to count.
Make money rose heads with secured folded bills inside a slit or clear pocket. Use short floral sticks and wrap the stick with ribbon in tight spirals, gluing the ribbon ends at the top and bottom. Attach the rose head over the stick top with glue at the base only. Tie small bows at different rose stems so the bouquet looks finished, not sparse. Arrange 10-16 roses and wrap the stems together with kraft paper and ribbon.
Use narrow ribbon (1/4 inch) for the stem wrap; wide ribbon can bunch and look uneven.
Avoid long stems; they make the bouquet look top-heavy and unstable.
19. Satin Bow Money Rose Bouquet with Rolled Bill Petals
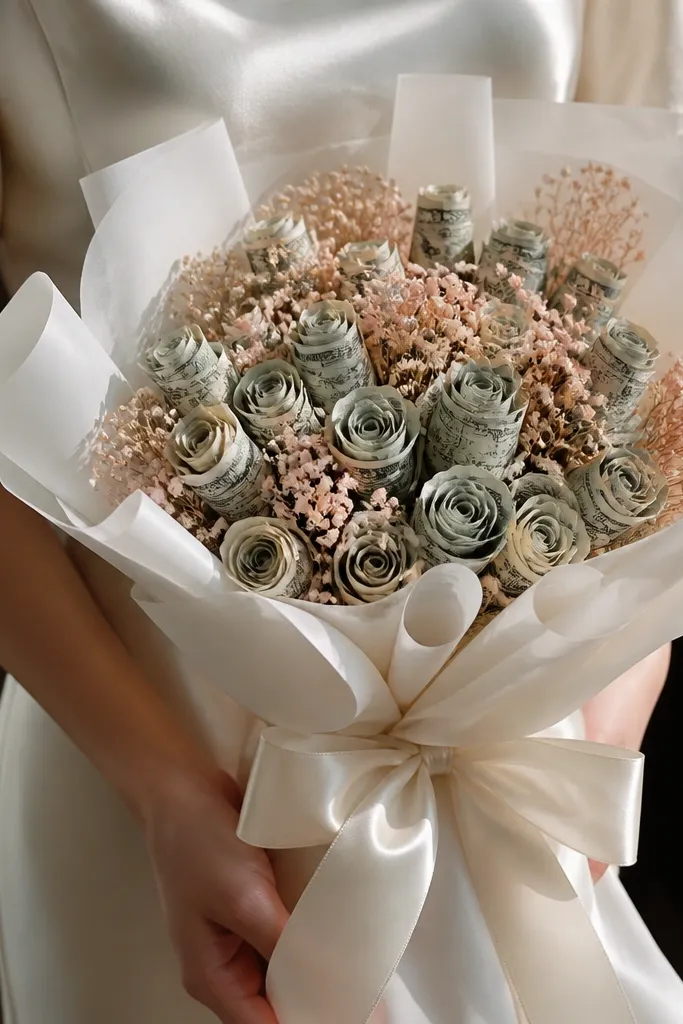
This one looks like a gift-store bouquet because the roses look soft and dimensional, not flat. The rolled bill petals catch light along their edges, so the money reads as texture, not clutter. You get a clean, “wedding guest” vibe with a satin bow wrap that hides the mechanics. It fixes the usual problem where money roses look handmade from the sides — the bow and petal roll pattern cover the gaps. This is beginner-friendly if you can make tight paper rolls; plan about 60-90 minutes for a small bouquet. It suits birthdays, bridal showers, and anyone who wants money to feel romantic instead of obvious.
Cut 10-12 strips of bill paper per rose, each about 1.25 in wide and 6.5 in long (tear the strip edges for a gentler, less “machine” look). Roll each strip around a 1/4 in dowel or a chopstick, then slide off and pinch one end with tweezers to form a petal curl. Stack 6-8 rolled petals around a rolled bill center (a tight spiral) and secure with a thin wire wrap at the base, then add 2 more petals to fill the “holes.” Repeat until you have 5 roses, then tie them to 5 stems using green floral tape and a short length of floral wire for stability. Wrap the stems with white satin ribbon, add a big satin bow at the front, and finish with a small circle of faux silk leaves tucked behind the bow so the back looks finished too.
Editor's noteUse a hot glue dot only at the center of the rolled petals, then let the rest rely on wire/tape — it keeps the petals from going stiff and shiny.
Skip thisDon’t glue the entire petal length; it flattens the roll and kills the soft edge shine.
20. Clear Acrylic Money Rose Bouquet in a Cube Stand
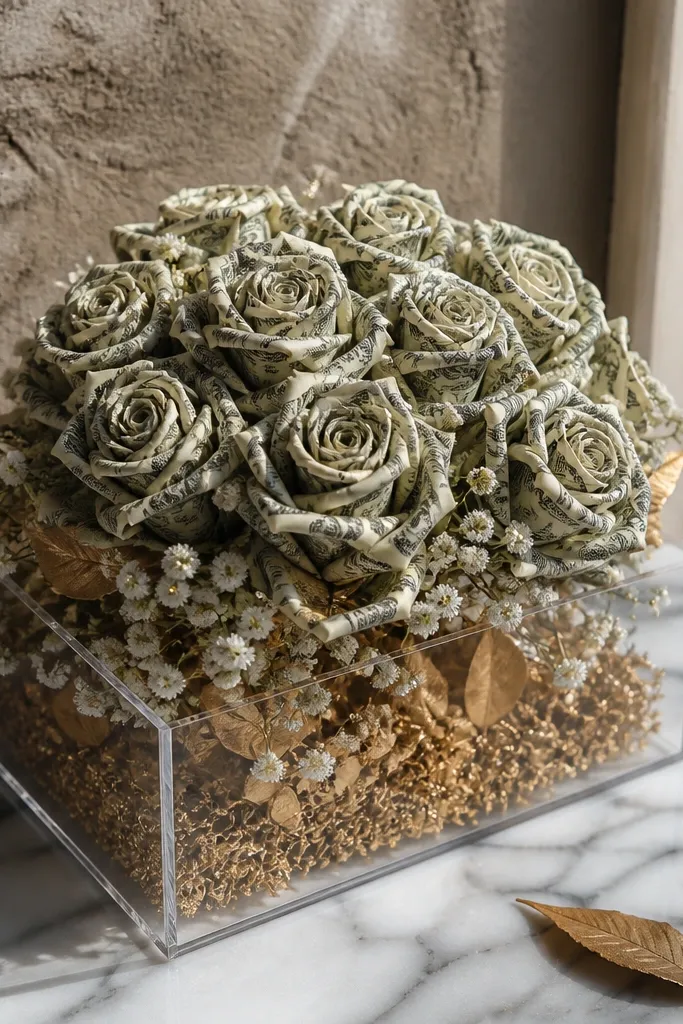
If you want your money rose bouquet to look expensive and “displayed,” put it in a clear acrylic cube stand. The acrylic walls hide messy tape and stem ends, and they make the roses look like they’re floating. Money roses can look too busy when they’re all bunched together, so this layout gives breathing room — one rose per corner plus a few filler sprigs. It also fixes the side-view problem because people see the roses through glass, not the construction. This build is mid-level because you need clean measurements and careful assembly, but it still takes about 1.5-2 hours. It’s perfect for office desks, mantel displays, and anyone who likes a modern look without wrapping paper.
Buy a small clear acrylic cube display (about 4 in x 4 in x 4 in) with open top access, or use acrylic sheets cut to 4.5 in sides and assemble with acrylic-safe adhesive. Create 4 mini money roses by making petals from bill strips about 1 in wide and 5.5 in long, then roll and pinch into teardrops like tiny petals. Secure each mini rose on a 6 in floral wire stem using a tight wire wrap and a dab of hot glue only at the base. Add a thin layer of gold filler grass or metallic mesh at the bottom of the cube so the stems don’t show bare wire. Insert the stems one at a time, adjust spacing so the rose heads sit near the top edge, then fix each stem with a small piece of double-sided tape to the acrylic bottom.
Editor's noteWipe acrylic with isopropyl alcohol on a lint-free cloth before assembly — fingerprints ruin the “glass display” look fast.
Skip thisDon’t use regular craft glue on acrylic; it fogs or weakens the bond and makes the cube look cloudy.



