
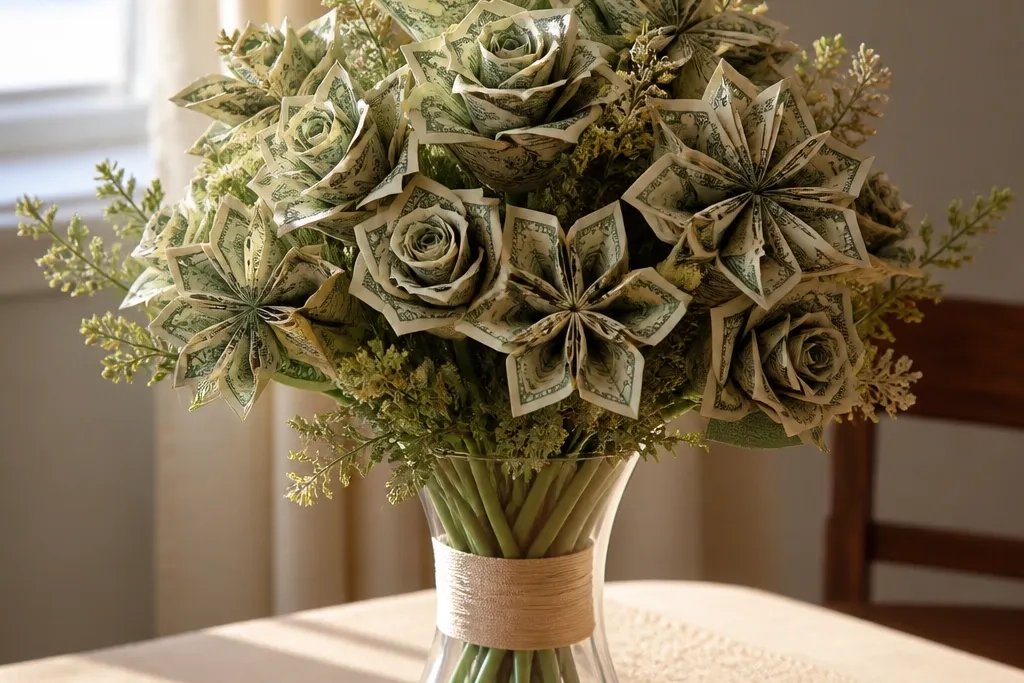
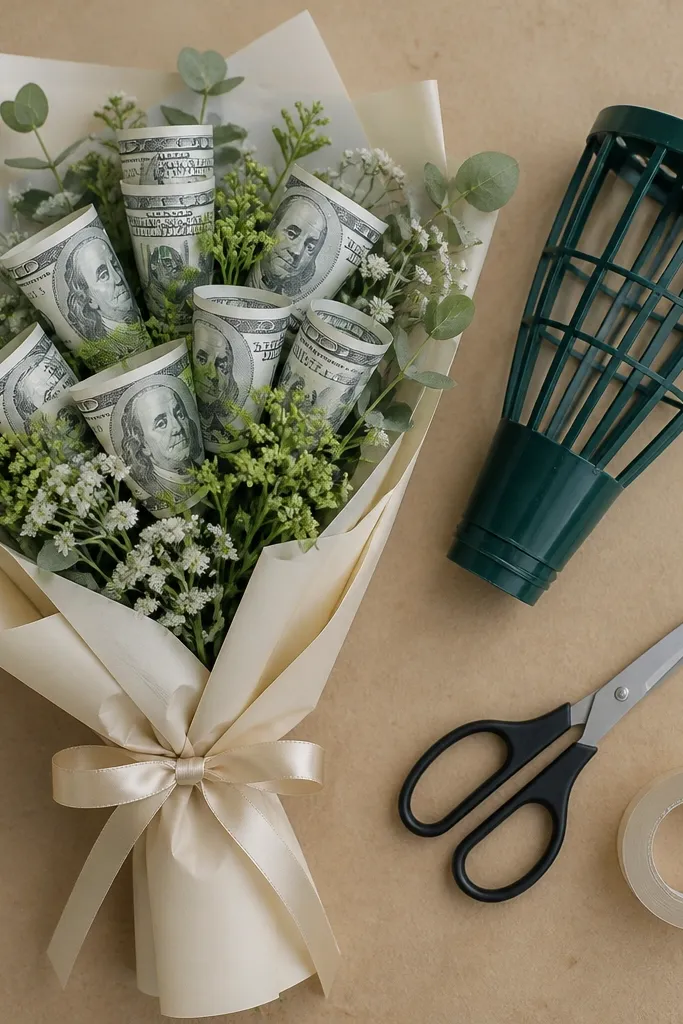
1. Classic Rose Petals With a Rolled Bill Center
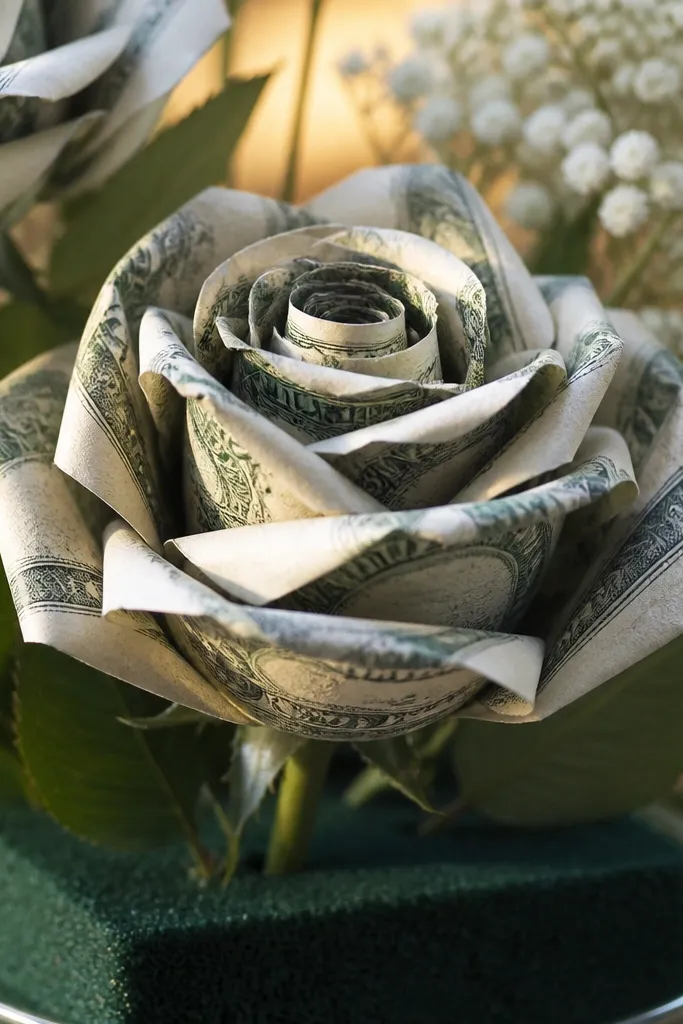
This is the look that reads as a real rose in under a second. You’re making a tight center from a rolled bill, then wrapping petal “bands” around it so the outer layers fan slightly. The rose works because the center is compressed and the petals are curved with the fold, so it has depth instead of looking flat. It’s also forgiving: if one petal is a little uneven, the rose silhouette still holds. Plan for about 45-70 minutes for a small 6-petal bloom, depending on how clean your folds are.
Start by rolling one bill into a tight tube for the center. Secure the roll with a small strip of double-sided tape on the seam, then tuck the loose end under the roll so it disappears. Cut or tear 6 narrow “petal strips” from remaining bills by folding the bill in half and slicing along the fold for consistent widths. Wrap each petal strip around the center, overlapping the previous one by about one-third, and tape the back seam down to your wire stem. Finish by adding two small leaf wraps on the stem using green craft wire wrapped in tissue or ribbon.
Before taping, press each fold line with a ruler edge so the petal edge looks crisp in photos.
Don’t tape the petal seam on the front side — it catches light and ruins the flower shape.
2. Daisy Burst Using Pinched Bill Petals
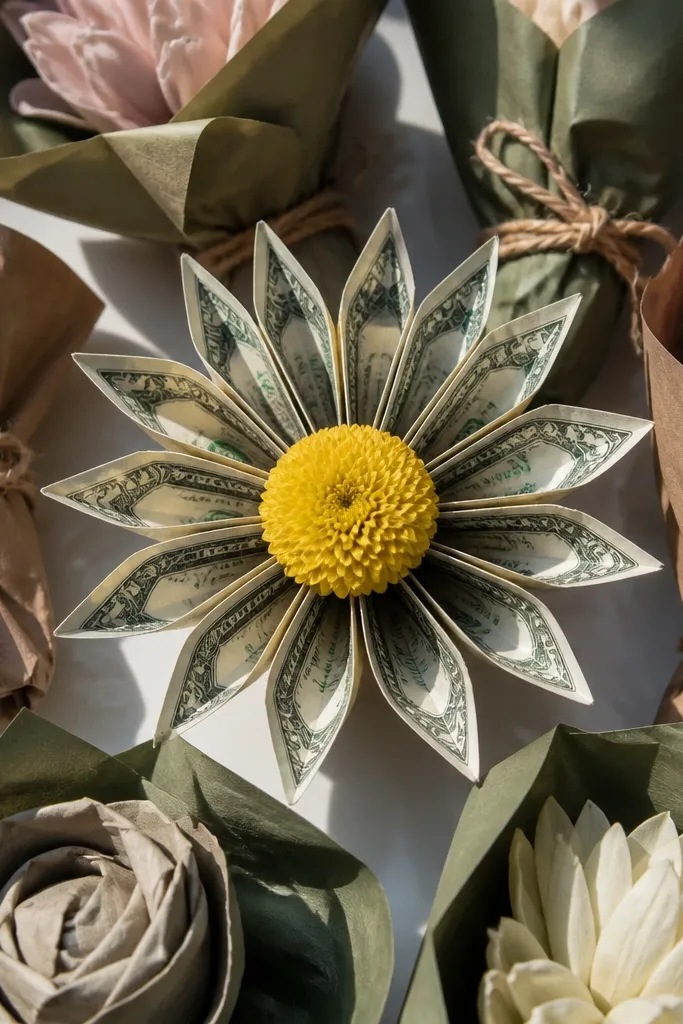
A daisy is the easiest way to make money look like a flower instead of craft paper. The secret is the pinched petal: you fold each petal into a soft V so it stands away from the center. When you repeat that 12-18 times, the bloom becomes a clean burst that photographs well from above. Use this when you want a playful bouquet that doesn’t require delicate curling. It also hides minor tape marks because the petals overlap heavily.
Editor's noteLay petals on the table in a circle first, then glue one at a time — your spacing will look intentional.
Cut 12-18 identical petal pieces by folding a bill into a long strip, then cutting it into equal rectangles. For each piece, pinch the middle so it forms a shallow V, then tape the back seam to hold the pinch. Build a cardboard or foam circle base for the flower head, about 2.5-3 inches wide, and mark a ring for petal placement. Glue each pinched petal around the circle with the point facing outward, leaving the center open. Finish the center by folding a small bill square into a tight roll and gluing it in the middle, then wrap a narrow yellow ribbon around the center edge.
Skip thisDon’t make all petals the same length if your base circle is small; they’ll collide and look lumpy.
3. Sunflower With Layered Bill Spirals
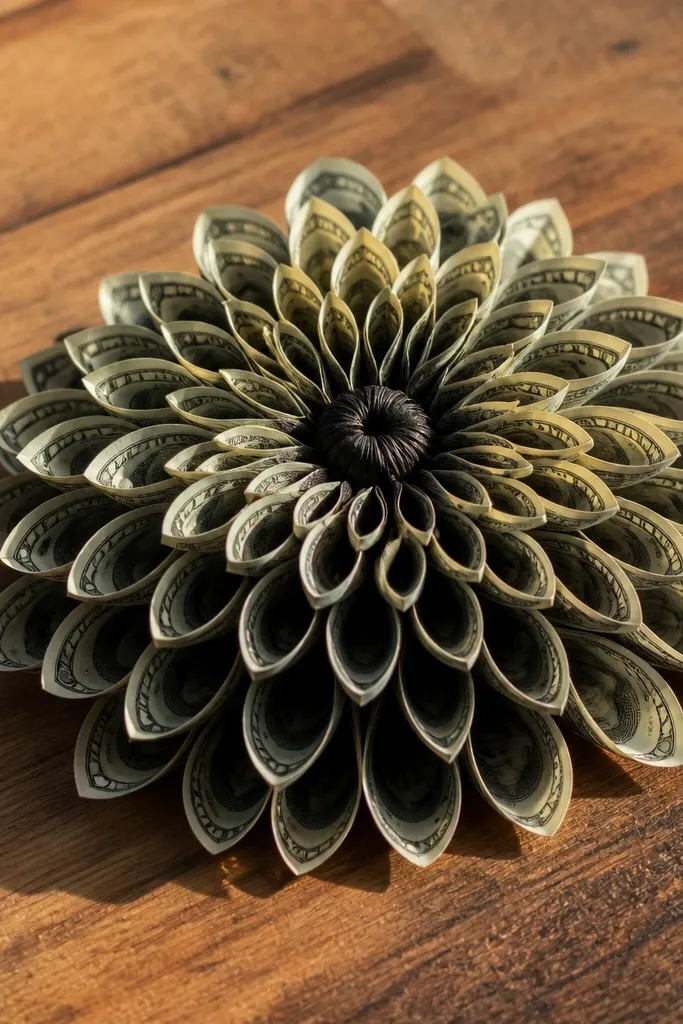
Sunflower money flowers look bold and graphic, which is exactly what you want for a money bouquet. Instead of individual petals, you build petals from spirals — each spiral creates a repeating curve that reads as a sunflower’s layered face. The dark center is a wrapped knot that hides the bill ends and makes the bloom look grounded. This one is best for bigger bouquets where you want one “hero flower.” Expect 60-90 minutes for one large head.
Editor's noteUse a toothpick to press glue into spiral seams so you don’t create visible glue blobs.
Roll strips of bill into tight spirals about 1 inch across and secure each spiral with a tiny dab of hot glue at the outer edge. Build the flower head on a foam circle 3.5-4 inches wide, starting with larger spirals around the perimeter. Work inward with slightly smaller spirals so the layers step down toward the center. For the center, fold a short bill length into a tight accordion, then roll it into a ball and glue it down. Add a thin wrap of brown ribbon or paper strip around the center knot to hide glue spots and give the “seed” ring.
Skip thisDon’t use overly thick glue on the outer spirals — it stiffens the spiral and makes it look pasted on.
4. Tulip Wraps Using Flat Bill Petals

Tulips look clean and modern, and flat bill petals are the fastest way to get that look. You’re making two or three petal layers that overlap like a real tulip bud. Flat petals work because they keep the bill face visible and smooth, so the flower looks crisp in close-up photos. This is a good choice for a bouquet where you want lots of blooms without spending hours per flower. Plan about 30-50 minutes per tulip.
Editor's notePress the petal crease hard with a ruler before wrapping so the tulip opening looks intentional.
Cut 3-6 petal pieces from bills by folding the bill lengthwise and trimming into equal widths, roughly 1-1.5 inches. Fold each petal piece in half lengthwise to create a sharp center crease. Wrap the folded petal around a small wire bud base, taping the back seam so the front stays smooth. Overlap petals so the edges form a tulip “cup” shape — keep the top slightly open. Finish by wrapping the stem in green ribbon or paper and adding one leaf with a wire arm.
Skip thisDon’t let the petal overlap unevenly at the top; it turns into a lopsided bud.
5. Baby's Breath Style With Tiny Bill Loops
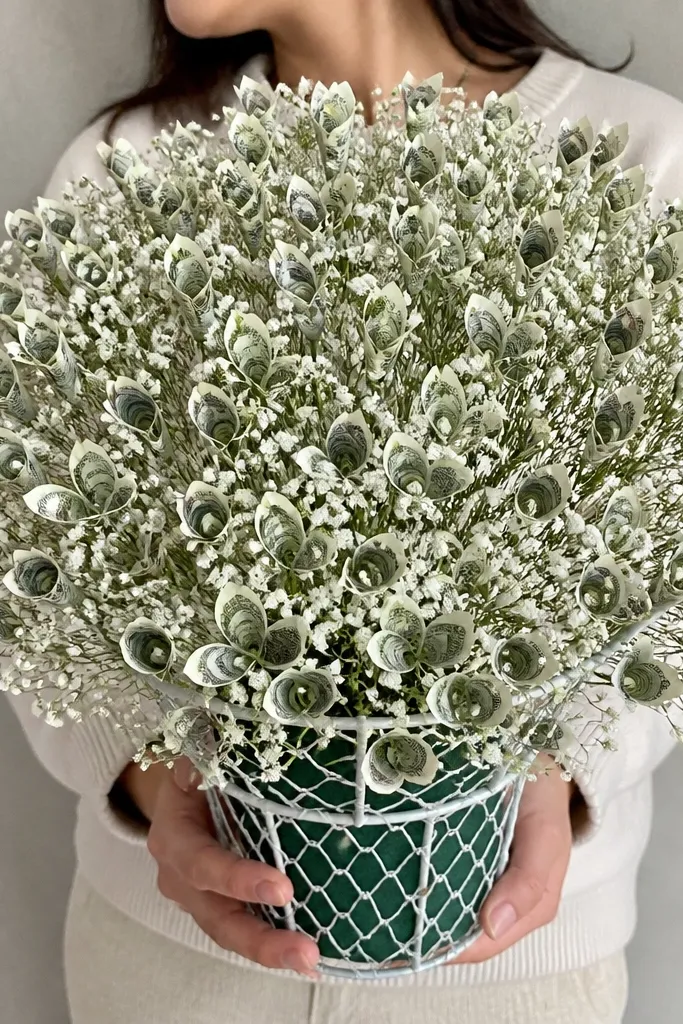
Baby’s breath style money flowers look airy and romantic without needing ultra-fine paper. You’re making dozens of tiny loop blossoms that look like little white specks from a distance. The look works because each loop is lightweight and you cluster them densely around the bouquet base. This is perfect for filling gaps between larger flowers. Build time is longer because you make many pieces, but each one is quick once your loop size is consistent.
Editor's noteUse the same strip width for every loop so your bouquet reads uniform instead of random.
Cut bill strips into small segments about 1 inch wide. Fold each segment into a small loop and tape the seam, leaving a little “petal” fold on the front edge. Thread each loop onto a thin floral wire stem and twist the wire below the loop to lock it. Make 20-40 loops for one bouquet filler cluster. Group them by twisting multiple thin stems together and wrap the bundle with florist tape.
Skip thisDon’t use thick wire for tiny loops; it makes each blossom heavy and droopy.
6. Orchid Look With Skewed Petal Layers

Orchids are photogenic because the petals don’t sit in a perfect circle. You’re building asymmetry on purpose: one top petal, two side petals, then a smaller “lip” center. This makes the flower look like a real orchid silhouette rather than a generic bloom. It also helps hide tape seams because the petals are angled. This one is ideal for a bouquet that needs variety — orchids add personality without changing your materials much.
Create 3 main petal pieces by folding and trimming bill strips into slightly different widths, about 1.5 inches for the top petal and 1.25 inches for the sides. Tape each petal into a soft curve around a wire base so the edges lift. Glue the top petal at a steeper angle than the two side petals so the silhouette leans. Add the lip center by rolling a small bill strip into a flat oval and gluing it under the petals. Finish by adding two tiny “ear” folds on the sides with tape so the orchid reads from the front.
Angle the top petal about 20-30 degrees higher than the sides for instant orchid shape.
Don’t center every petal at the same height; the flower will look like a daisy.
7. Peony With Puffy Folded Petal Fans
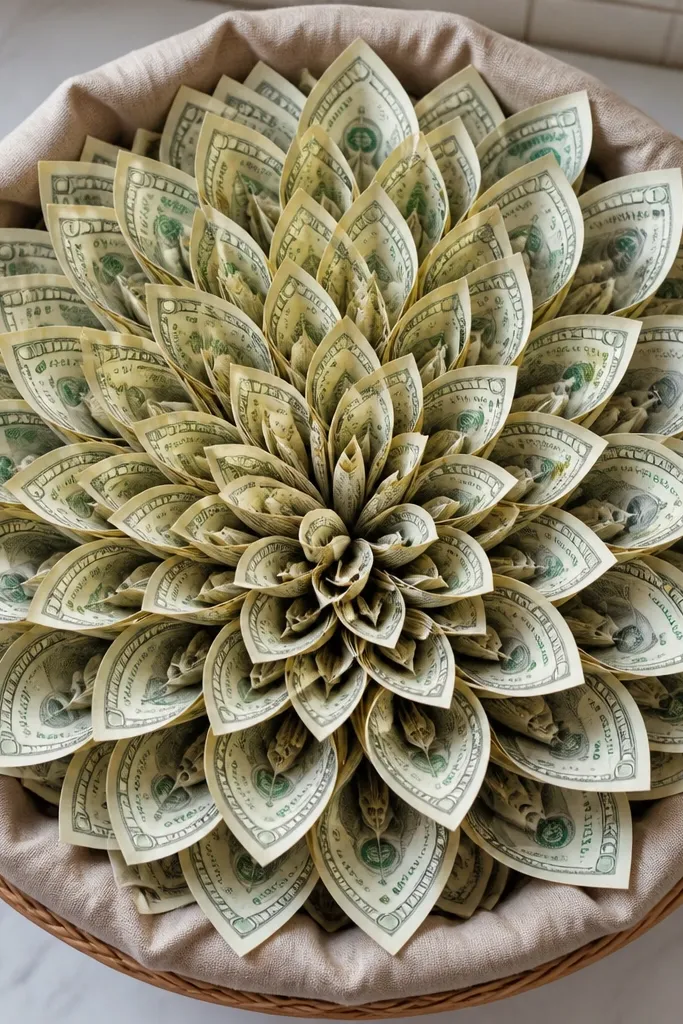
Peonies look expensive because they’re fluffy and layered. You’ll build fluff using folded fans made from bill strips, then stack them in overlapping rows. The bill face gives a crisp, graphic texture while the fan folds create volume. This is great for a money bouquet that needs a big statement bloom. It takes time, but the method is repeatable and you can scale it up or down.
Cut bill strips into rectangles about 1 inch wide and 3-4 inches long. Accordion-fold each rectangle into a fan, then secure the folded back with a small strip of tape. Build a foam or cardboard base circle and glue fans in rows, starting with the outermost ring. Each new row should overlap the row below by about half the fan depth. For the center, roll a short bill into a tight coil and glue it in, then add a small ribbon band to hide the coil seam.
Use a consistent fan depth (same number of accordion folds) so the flower looks even, not ragged.
Don’t glue fans flat to the base; lift the glued edge slightly so the flower has air.
8. Crocus Style With Long Curled Petals
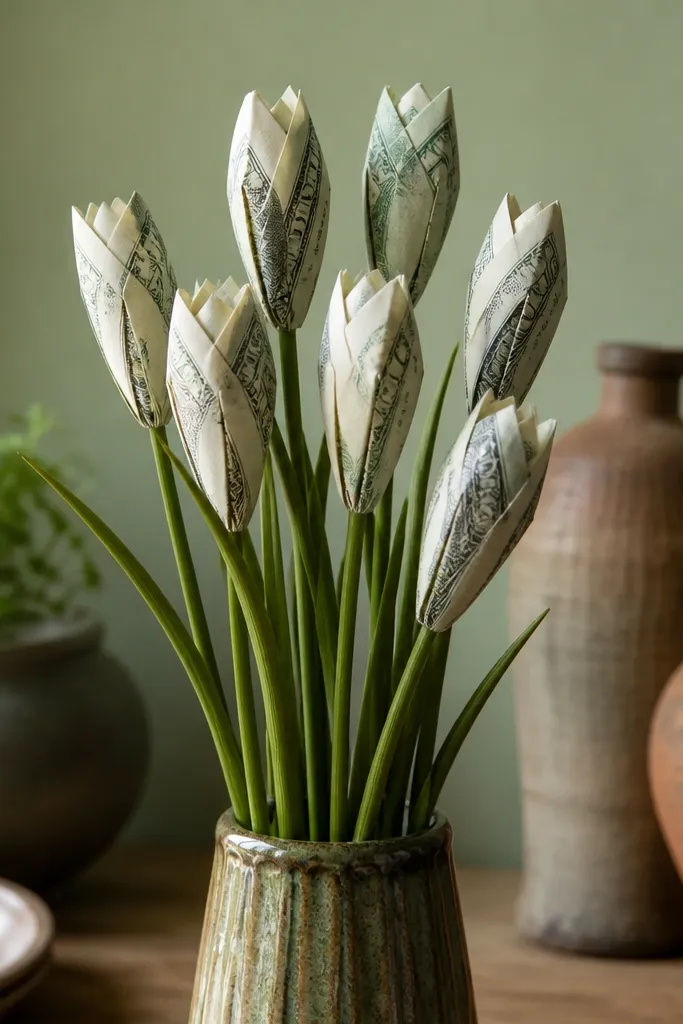
Crocus flowers look delicate and tall, which makes the bouquet look taller and more elegant in photos. You create that look with long, curled petals that taper at the top. This style works best when you have a bouquet holder or vase where you can keep stems upright. It also hides imperfections because the curl direction creates a natural flow. Build time is moderate, but the shape reads clearly.
Cut 6-8 long petal strips from a bill by folding lengthwise and trimming to about 0.75-1 inch wide. Pinch one end of each strip and curl it around a pencil to create a tube-like curve, then tape the back seam. Glue petals to a wire stem base so they lean outward like a cup. Build the center by rolling a small strip into a tight cylinder and taping it closed, then glue it into the petal opening. Wrap the stem with green ribbon and add a narrow leaf strip angled to one side.
Curl petals the same direction before gluing — it prevents the bouquet from looking chaotic.
Don’t make the center too thick; it will push petals apart and ruin the crocus cup.
9. Lily With Layered Folded Triangles

Lily petals have a sharp shape and a clean look, and bill triangles make that possible. You’re folding bill pieces into triangles, then layering them so the edges point out like lily petals. The result is a crisp, symmetrical flower that stands up well in bouquet arrangements. This is a good pick when you want a “clean” aesthetic rather than a fluffy one. It’s also friendly for beginners because triangles are easier to measure than curved petals.
Cut 6-8 triangle petals by trimming bill strips into rectangles, then folding each rectangle into a triangle shape with a sharp crease. Tape the back seam so each triangle holds its point. Glue the first ring of triangles around a wire stem base with points facing outward. Add a second ring slightly offset so the top edges overlap for depth. For the center, fold a small bill rectangle into a tight roll and glue it in, then wrap a thin ribbon strip around the base of the center to cover any tape.
Mark your triangle widths with a ruler once, then cut a stack — speed matters with lily layers.
Don’t skip offset layering; flat triangles stacked in one level look like a starburst.
10. Cherry Blossom With Twisted Petal Rings
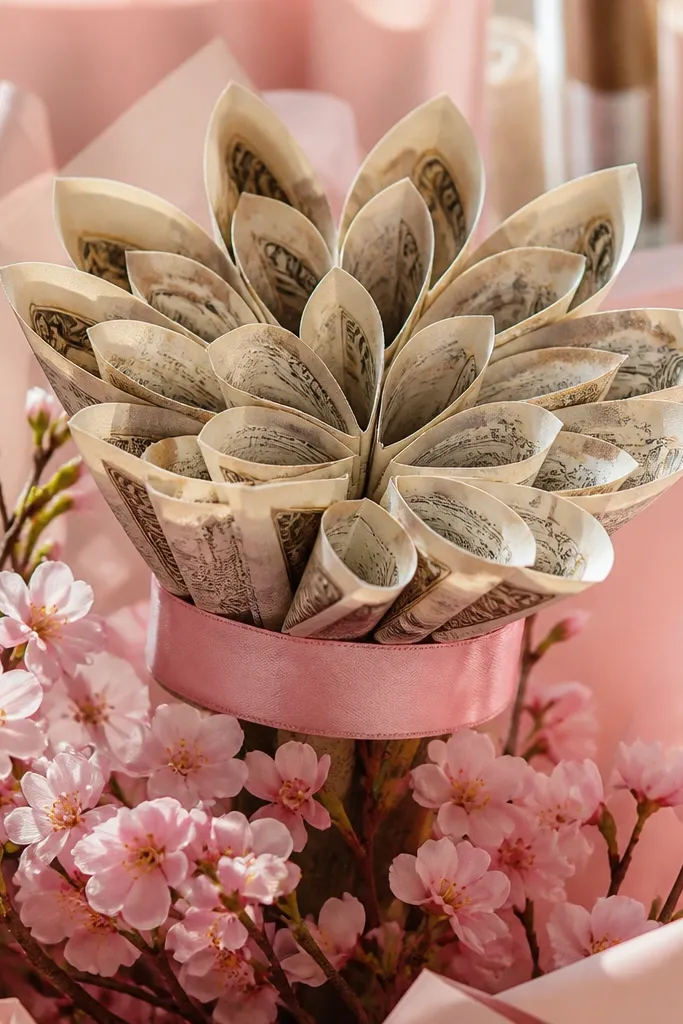
Cherry blossoms look light and delicate, and you get that with twisted rings. Each petal is a small loop that twists slightly so it catches light like a curved petal surface. The overall bloom reads as soft pink when you add a pink ribbon band around the bill petals. This style is great for spring-themed bouquets and for adding color without changing your bill method. It also looks good in a cluster because the loops create texture.
Editor's noteTwist loops before gluing — once they’re glued flat, you can’t fix the shape.
Cut 10-14 small bill loops by folding short bill strips into circles and taping the seam. Twist each loop once by pinching and rotating before you glue it, so it isn’t perfectly round. Glue the loops to a small circle base in a ring, then add a second ring with smaller loops if you want extra fullness. For the center, roll a tiny strip into a ball and glue it into the middle. Wrap the base of the flower with pink ribbon and add two tiny wire buds or leaf accents.
11. Monetary Hydrangea With Clustered Bill Squares
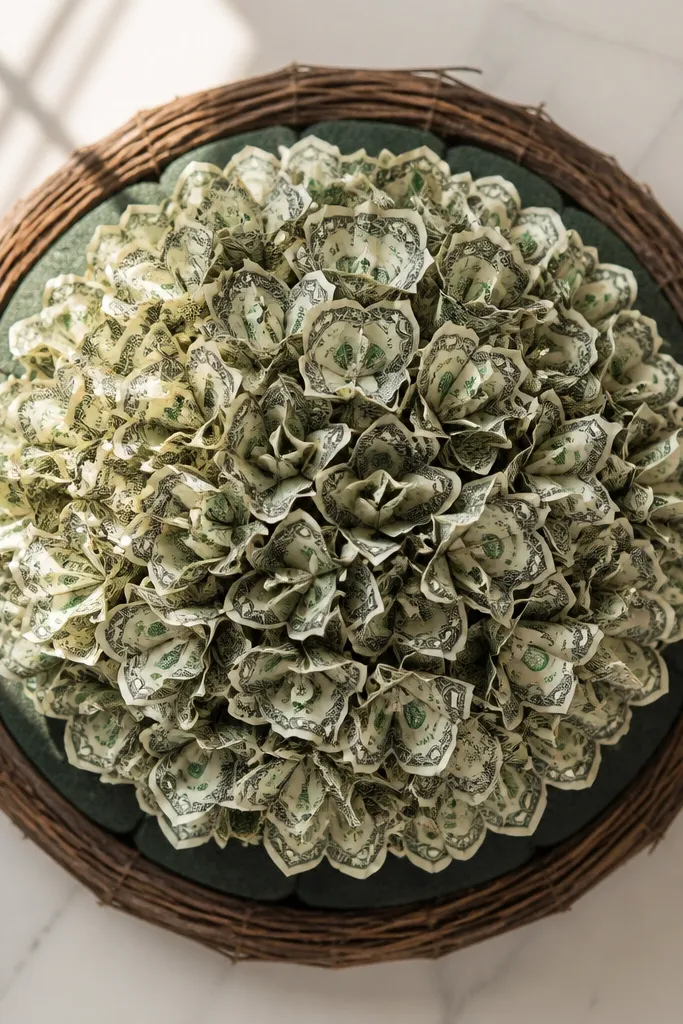
Hydrangea style looks like a dense bouquet fluff ball, and bill squares create that “many little blossoms” effect. Instead of one bloom shape, you build a cluster where dozens of tiny pieces fill the head. This hides small mistakes because the density makes the flower look intentional. It also photographs well from the front because the head is rounded. Pick this if you want your bouquet to look full even with fewer larger flowers.
Editor's noteUse a foam sphere for speed; a flat base makes spacing harder and the head looks lopsided.
Cut bill squares into small pieces about 1 inch wide. Fold each square into a small pyramid by bringing corners together and taping the back. Glue pyramids onto a foam sphere or foam dome starting at the bottom and working upward. Make sure each pyramid points outward slightly so the texture pops. Finish the top with a few extra pieces and wrap the stem base with florist tape, then add a ribbon tie around the hydrangea head.
Skip thisDon’t glue squares in random directions — you want outward points for the hydrangea texture.
12. Anemone With a Bow-Knot Center and Petal Wraps
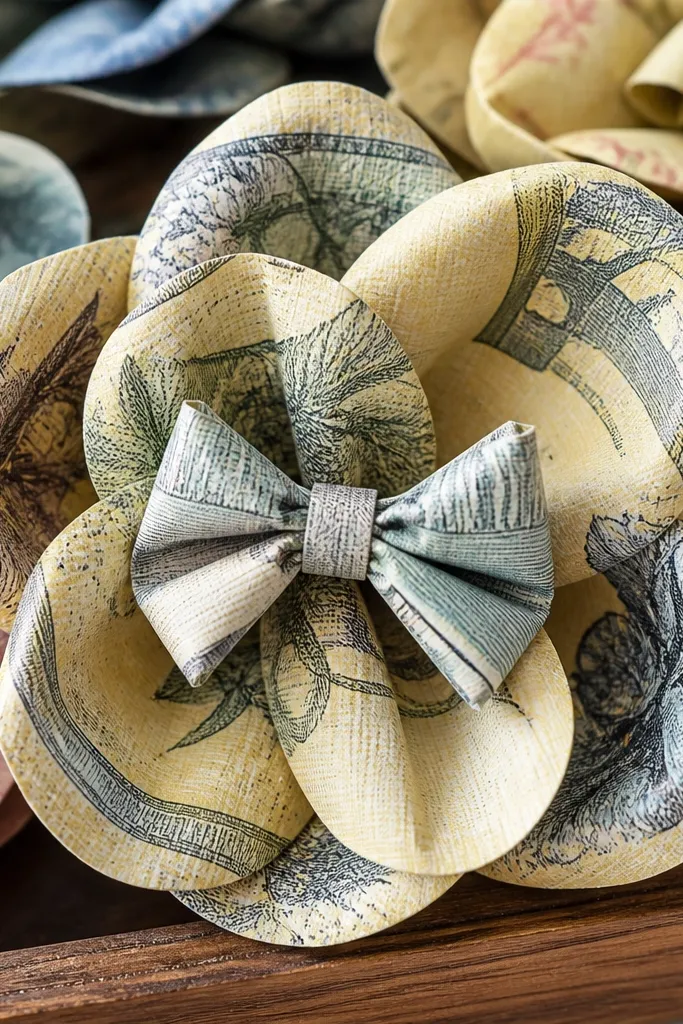
Anemones look striking because the center is bold. You’ll build a knot center from a folded bill strip, then add fewer petals that wrap around it. Fewer petals makes the flower easier to assemble and helps the center stay the focal point in photos. This works well for a bouquet where you want contrast between simple petals and a dramatic middle. It’s also a great way to use smaller bill pieces.
Editor's noteMake the knot center first and build petals around its size so everything matches.
Fold a bill strip into a narrow band and wrap it around itself into a tight knot shape at the flower center. Secure with tape on the back and glue the knot to a wire stem base. Cut 8-10 petal pieces by trimming bill strips into rectangles, then fold each rectangle into a sleeve around the wire base. Tape each sleeve at the back so the front stays smooth and slightly curved. Glue the petals evenly around the knot and finish by tying a thin ribbon band around the knot base to hide seams.
Skip thisDon’t spread petals too wide — anemones lose their look when the petals flatten.
13. Garden Rose Bud With a Wrapped Stem Spiral
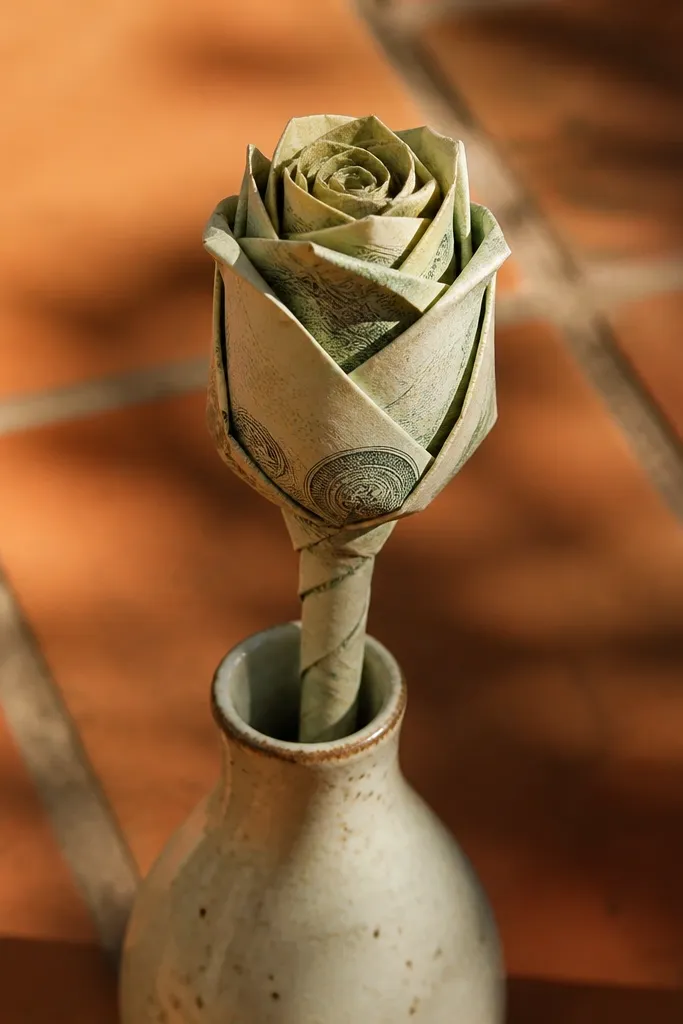
Rose buds are the secret weapon for money bouquets because they fill space like flowers without taking over. This style uses a tight spiral wrap on a short stem so the bud stays compact. The bud reads as a “closed rose” because the outer wrap layers are smaller and tighter. It also helps beginners because you only need a few petals. Keep a few buds in the bouquet for a layered, real-garden look.
Editor's noteUse shorter wire for buds so the bouquet doesn’t flop under the weight of full blooms.
Cut a short wire stem and twist a tiny loop at the top to anchor the bud. Roll a bill into a small tube and tape the seam closed. Wrap 3-5 smaller petal bands around the tube, each band overlapping the previous band by about half its width. Tape the back seams down to the wire so the bud stays tight. Add one leaf by wrapping green ribbon around a wire leaf shape and gluing it near the base.
Skip thisDon’t make bud petals too long; they’ll open and look like a full rose.
14. Starflower With Five Point Petals and Hidden Seams
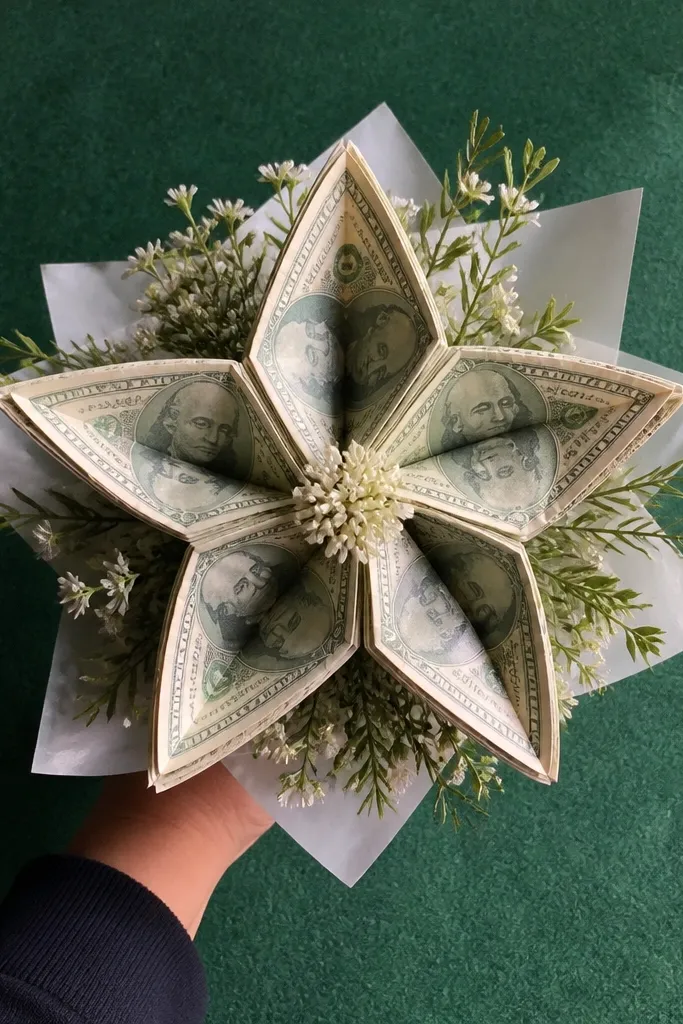
Starflower money bouquets look graphic and modern. You build a star shape by making five pointed petals and keeping the center clean. The look is strong in photos because five points create a clear silhouette even if the bouquet is moving. This style is also efficient: you make fewer pieces per bloom and each piece is easy to repeat. It’s a good choice when you want variety but still want consistent results.
Cut five identical bill petal pieces by folding a bill strip into a point shape and trimming to match. Tape each piece so the seam sits on the back side, then press the point crease with a ruler. Glue each petal to a small circular base or directly to a wire stem top, making sure all points meet the center. Build the center using a small ribbon-wrapped bill roll that covers any seam ends. Finish by wrapping a thin ribbon around the base of the flower head to keep the center neat.
Use a circle base the size of a quarter — it helps keep the five points evenly spaced.
Don’t let petal seams land on the front; they show as shiny lines.
15. Glam Dahlia With Metallic Bill Bands
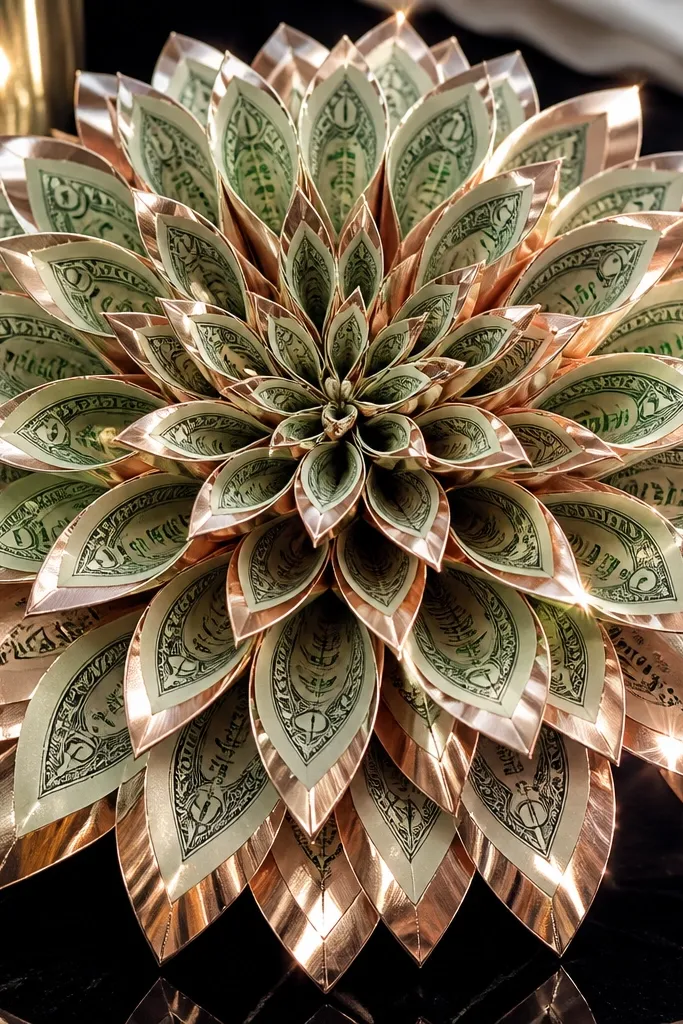
Dahlias look complex, but you can fake the complexity with repeated bands. This version uses metallic ribbon accents so the bill texture reads as glam in photos. You build layered petals in concentric rings, each ring slightly different in width for a spiral feel. The result is a flower that looks like it has lots of depth without you making hundreds of tiny pieces. It works best as one or two standout blooms in the bouquet.
Cut bill petal strips into 1 inch and 0.75 inch widths for two ring sizes. Fold each strip into a curved band by taping the back seam and pressing the curve with your fingers over a pencil. Glue the largest bands in a ring on a foam circle, then add smaller bands in the next ring. Repeat for 3-4 rings, keeping overlaps consistent. Add a center roll made from a small bill strip and wrap the center with metallic ribbon to hide the seam.
Pick one metallic color and stick to it across the bouquet so the photos look cohesive.
Don’t mix petal widths too randomly; the dahlia spiral needs ring consistency.
16. Paper-Quilt Look With Two-Tone Bill Panels
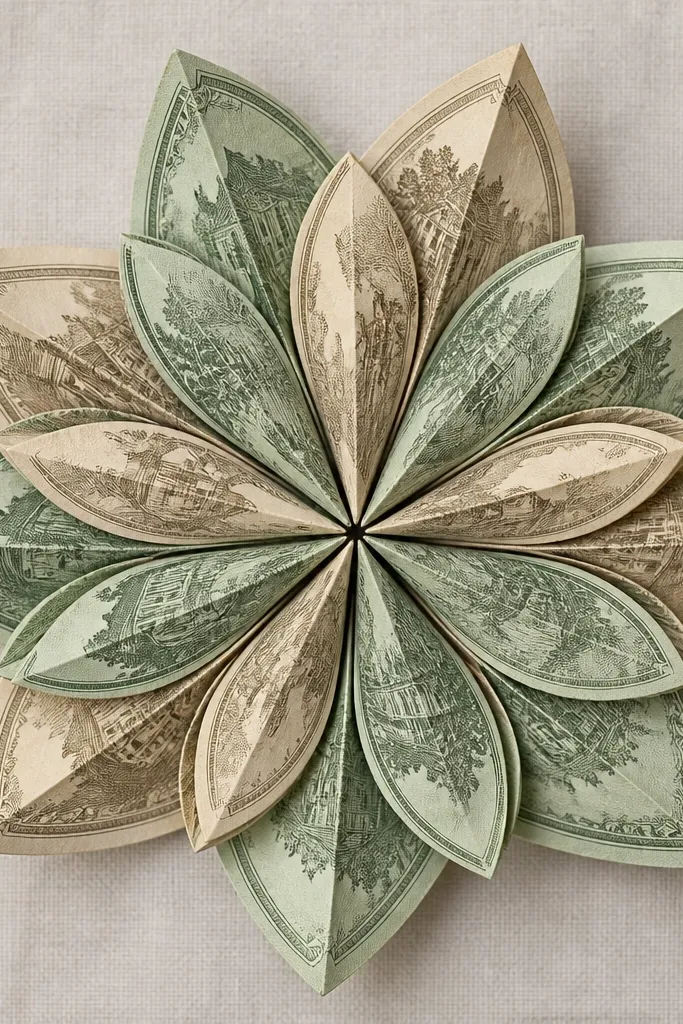
Two-tone money flowers look handmade and intentional. You’re using one bill as the main petal and a second color bill as an accent strip, then alternating panels so it looks like a quilt. The trick is keeping panel widths identical so the pattern reads clean in close-up. This style is great if you want the bouquet to photograph like a craft project, not a pile of folded money. It takes a little more planning, but the look is worth it.
Editor's noteUse pencil marks on the foam base to keep the accent strip alignment consistent across petals.
Choose two denominations and cut matching petal panels: for each petal, you’ll need one main-color strip and one accent-color strip. Fold each strip lengthwise, then tape them together along the back seam so the front shows alternating edges. Create 8-12 petals and glue them around a foam circle base, keeping the alternating pattern aligned by marking the base with light pencil lines. Make the center using a small rolled bill panel and cover it with a ribbon band so it looks intentional. Wrap the stem with ribbon that matches the accent color.
Skip thisDon’t freehand panel widths; the pattern breaks when one petal is wider.
17. Cash Peony Pinwheel With Back-Folded Petals
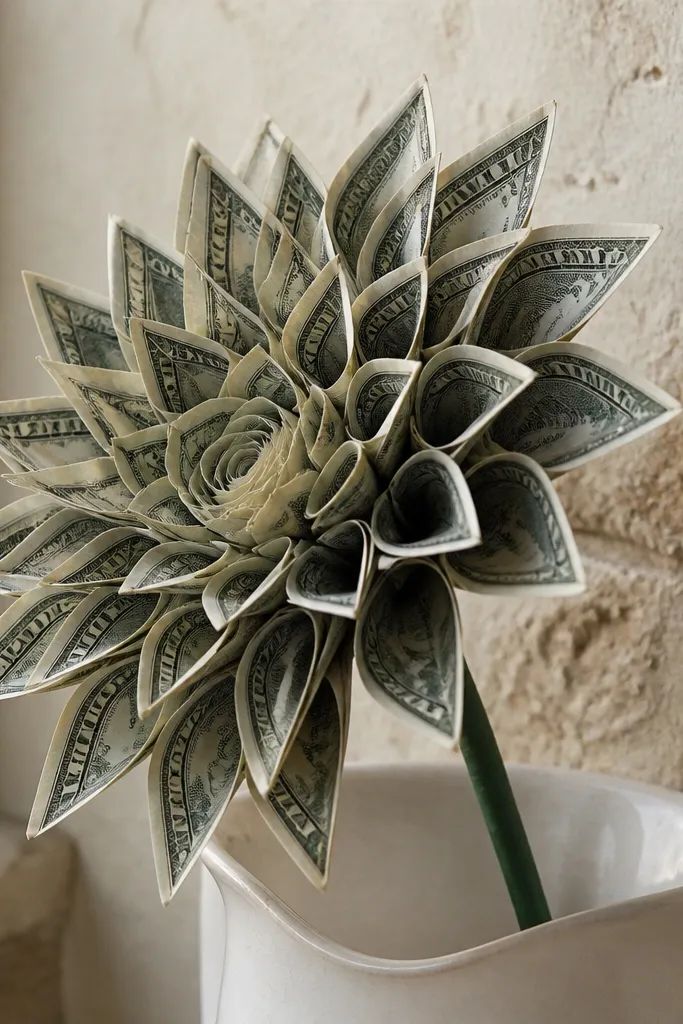
This peony variation looks like a pinwheel because the petals hinge slightly at the back. You fold each petal so it stands away from the center, then you stack them in a spiral. The look is bright and structured, not fluffy. It’s a strong pick for a bouquet where you want a flower that looks good even from the side. Build time is similar to other peonies, but the folding method makes spacing easier.
Editor's noteRotate your rings by the same angle each time — a consistent rotation makes the pinwheel effect pop.
Cut bill rectangles into petal pieces about 1 inch wide and 3 inches long. Fold each rectangle in half, then fold it again back so the back edge forms a hinge line. Tape the back seam only, leaving the front edge free so it arcs outward. Glue the first ring of petals around a foam base, then add a second ring with petals rotated by about 30-45 degrees. Add a small rolled center and cover it with a ribbon strip to hide the hinge knot at the center.
Skip thisDon’t glue the front edge down; pinwheel petals lose lift when the arc is flattened.
18. Mini Rose Bouquet Buds in a Wire Spiral Handle
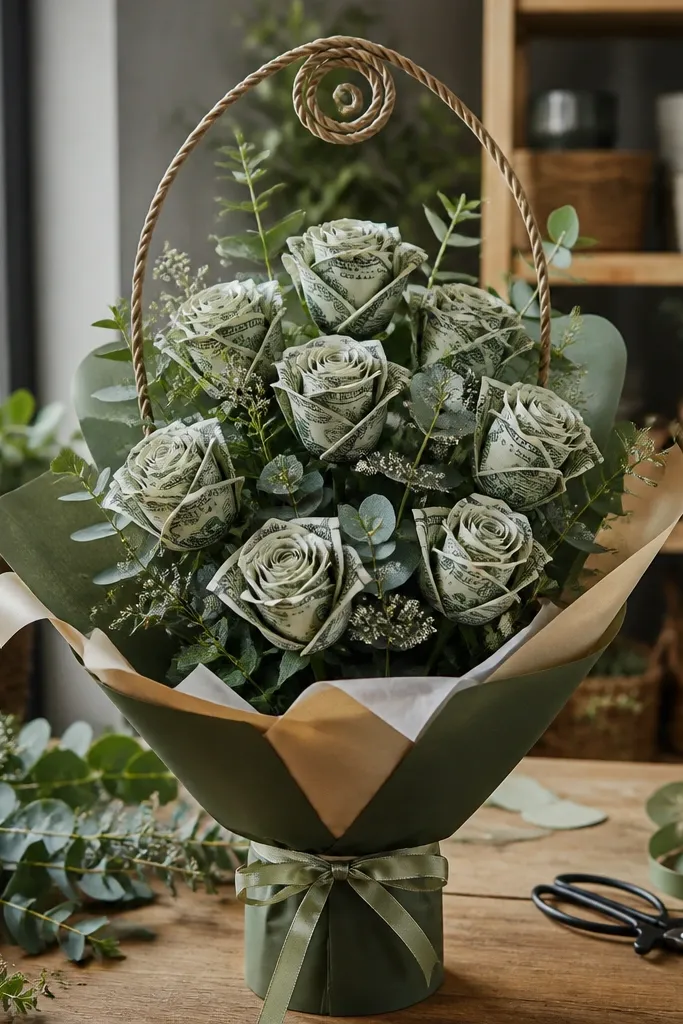
This is a bouquet structure trick, and it makes every flower look better. Instead of attaching blooms to a flat bundle, you wrap stems around a wire spiral handle so each bud sits at a different height. That gives you a full, photo-ready silhouette without needing huge blooms. Pair it with mini rose buds or tulip wraps for a cohesive look. It’s also easier to transport because the wire frame keeps everything from sliding.
Cut a thick craft wire into a handle length and twist a spiral at one end to anchor stems. Bundle 6-10 stems and wrap them to the spiral using florist tape, starting from the bottom and working upward. Add one bloom at a time, rotating the bouquet as you tape so each bloom faces outward. Tie a ribbon around the handle and trim the stem ends so they’re even. Finish by adding small filler loops or leaf wraps at gaps so the silhouette looks intentional.
Keep your stem lengths varied by 1-2 inches — that height variation makes the bouquet look designed, not random.
Don’t tape blooms directly on top of each other; build around the spiral so each head has space.
19. Money Calla Lily With Wrapped Cone Petals
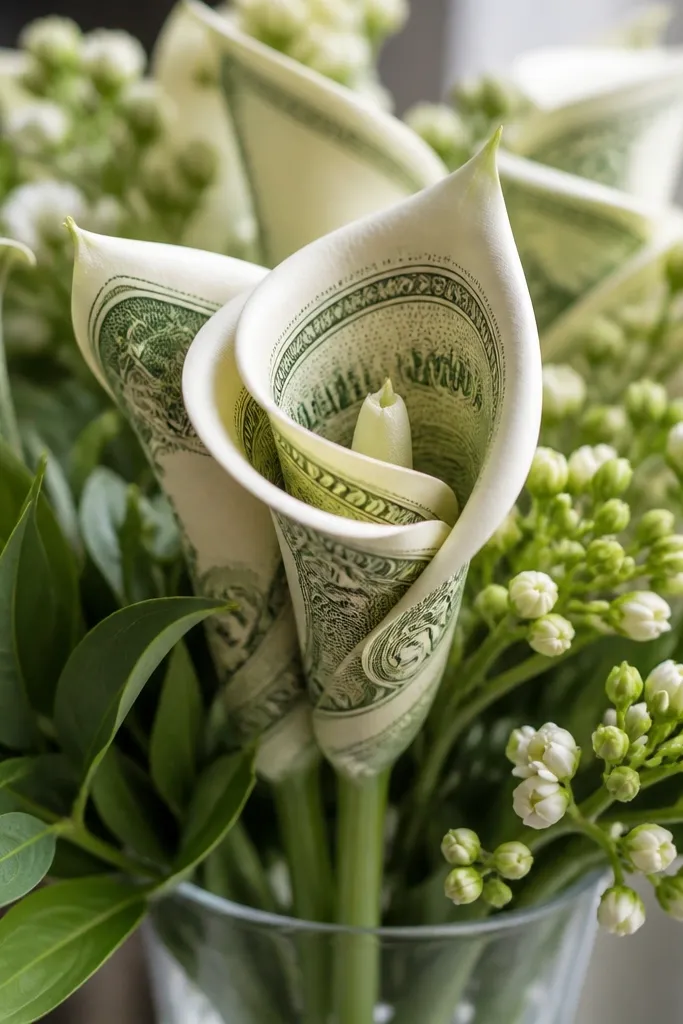
Calla lilies have a single smooth cone and a curved center, so they look polished fast. You’ll wrap bill pieces into a cone petal, then add a separate center curl that frames it. The cone hides tape seams because the seam lands on the back edge. This style is great for a modern bouquet where you want fewer, more sculptural flowers. It also looks good in monochrome color palettes.
Editor's noteUse a pencil as your cone mold — the smooth curve makes the flower look store-bought.
Cut a bill strip about 1.25 inches wide and 6 inches long. Roll it into a cone around a pencil and tape the seam so the front stays smooth. Glue the cone to a wire stem top and pinch the bottom so it sits tight. For the center, roll a smaller strip into a tight curl and glue it inside the cone opening. Wrap the stem with ribbon and add a single leaf strip that curves outward.
Skip thisDon’t make the cone too wide; a wide cone flattens the calla silhouette.
20. Peach Blossom Money Flower With Pleated Bill Fan Petals
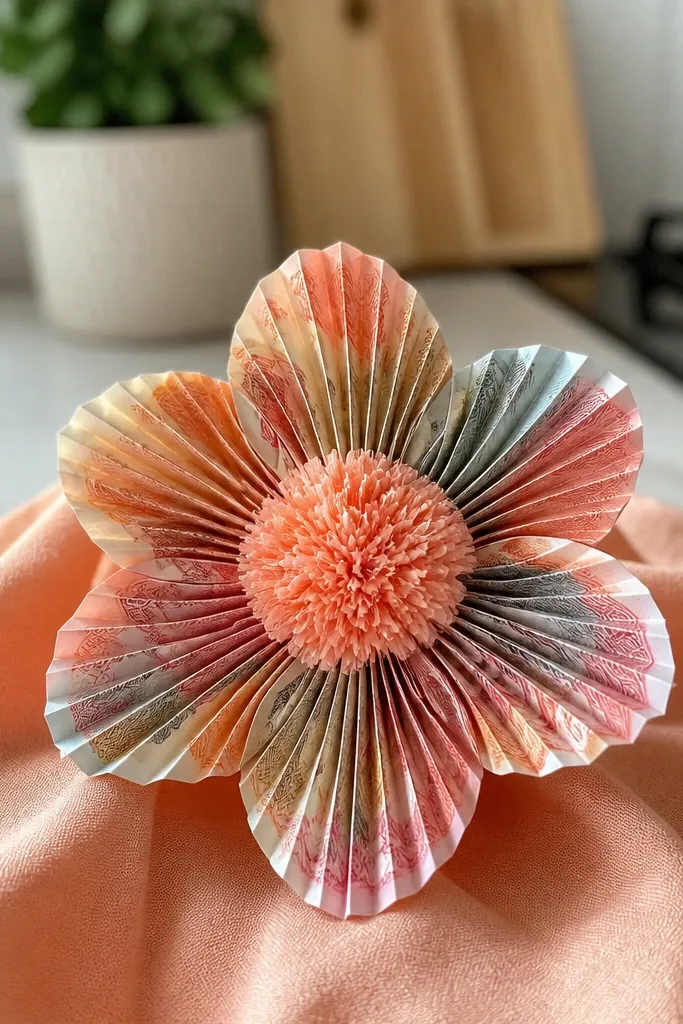
This one looks like a peach blossom because the petals are pleated and fanned, not rolled. Each bill piece has a crisp accordion edge, so the flower reads full and dimensional even from a distance. You get a soft, airy look with a clean center that holds shape while you wrap and tie the bouquet. It’s a great pick if you want something that feels light and romantic but still looks “money flower” sharp. Plan on about 25 to 35 minutes for one bloom after you’ve cut your bill strips, and it fits bouquets for spring tables, birthdays, and graduation centerpieces.
Cut 10 to 12 bill petals from 1 dollar bills or small denominations: cut strips about 2.5 cm wide by 9 cm long, then trim each strip into a teardrop-ish top by rounding one end. Pleat each strip by folding back-and-forth accordion-style every 6 to 7 mm, then pinch the bottom edge so it holds like a fan. For the center, use a 2 cm circle of cardstock with a small coin or button glued on top, then glue the pleated fans around it in a ring, slightly overlapping. To wrap for a bouquet, thread a thin floral wire through the back of the cardstock center, twist tight, then cover with green floral tape before attaching to your bouquet stems. Finish by misting very lightly with matte craft sealant from 20 to 25 cm away so the pleats don’t warp.
Use a bone folder or the back of a butter knife to sharpen each accordion fold — the petals look twice as crisp. Cut all petal strips the same width with a ruler so the ring stays even.
Don’t glue the pleats flat to the center — leave the top half free so the fan shape shows.



