

1. Rolled-Bill Rose Bouquet in Black Tissue Wrap
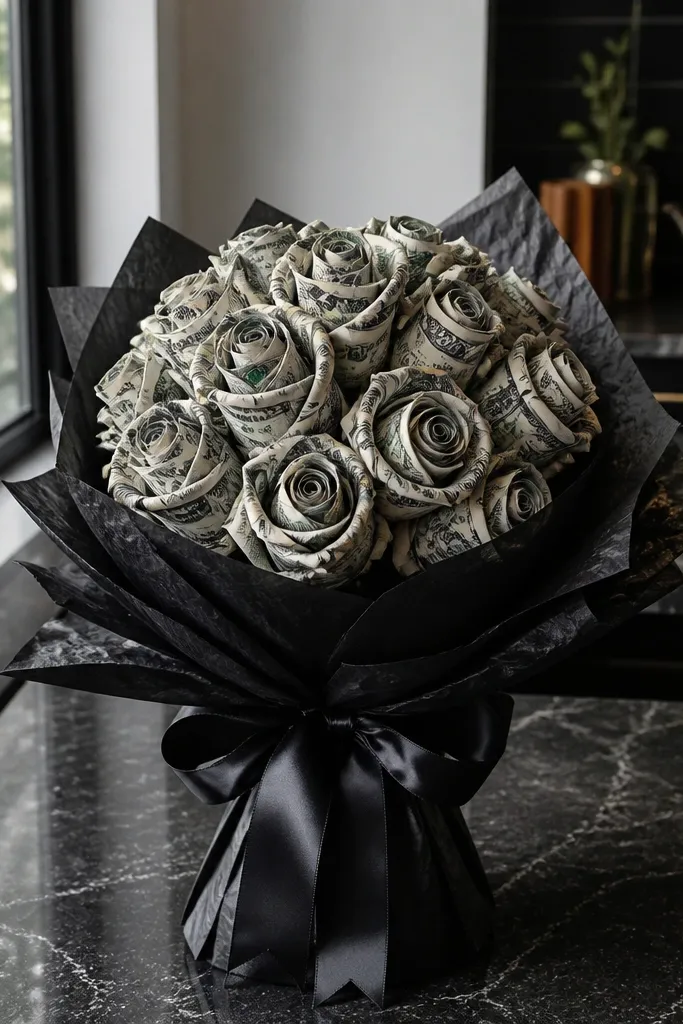
This one looks like actual roses because the petals are built from tight, rolled bill segments around a center bud. The money stays rounded instead of flat, so the bloom has depth and shadows — exactly what reads “stunning” in photos. Black tissue and a satin ribbon make the bills look intentional, not random. It’s also forgiving: if a bill corner isn’t perfect, the roll hides it. Build time is reasonable for a full bouquet because each rose uses the same repeatable roll size.
Start by pressing your bills flat, then cut small rolled petals by rolling a bill strip around a toothpick or thin dowel. Make a center bud from one tighter roll, then wrap 6-8 rolled petals around it and secure with a tiny dot of hot glue. Attach each rose to a floral wire stem, then fill a foam bouquet holder with stems at a consistent angle. Finally, wrap the holder in black tissue, add a wide satin ribbon around the middle, and finish with a small bow on the front.
Cut bill strips with a paper cutter so your petals match in width — the roses will look uniform fast.
Don’t glue the money directly to foam without a stem — it can crack and shift when you move the bouquet.
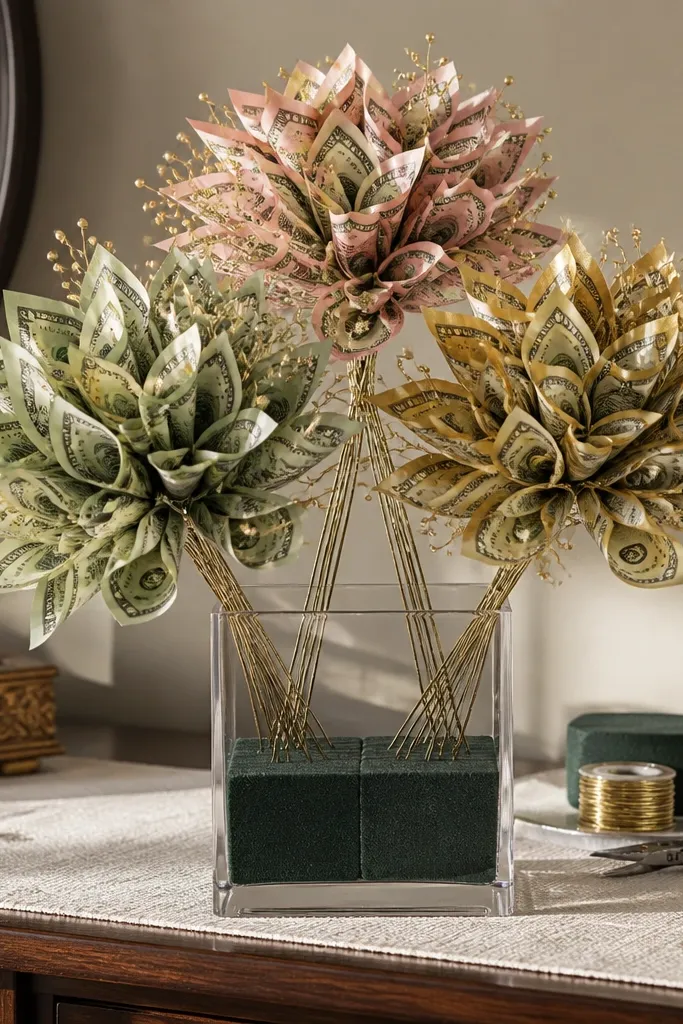
2. Money Dahlia Fans with Gold Mesh Background

A dahlia style works because it’s all about layered repeats, and fan folds are perfect for that. Each bill becomes a petal fan, and stacking multiple layers creates a full, round bloom that looks ornate without extra decoration. Gold mesh behind the blooms gives you the “glam photos” effect — it frames the money and softens harsh edges. This is a great pick for birthdays or graduation gifts because it looks celebratory even with simple bill colors. Expect a bit more time than a rose because you’re layering fans, but the result is very photogenic.
Create a circular base by cutting a foam ring about 4-5 inches wide, then mark 8-10 petal positions around the ring. Fan-fold each bill strip (small accordion folds), glue the folded edge at the back, and press it onto one marked position. Build 2 layers: an inner layer with shorter fans and an outer layer with slightly longer fans. Add a third layer if you want extra fullness. Finish by inserting stems into a foam holder wrapped with gold mesh and tucking faux greenery between blooms.
Use wire-edged mesh if you have it — it holds the shape behind the flowers instead of collapsing flat.
Skip overstuffing fans in one spot — uneven spacing makes the dahlia look lopsided.
3. Origami-Style Money Lotus with Clear Center Dot
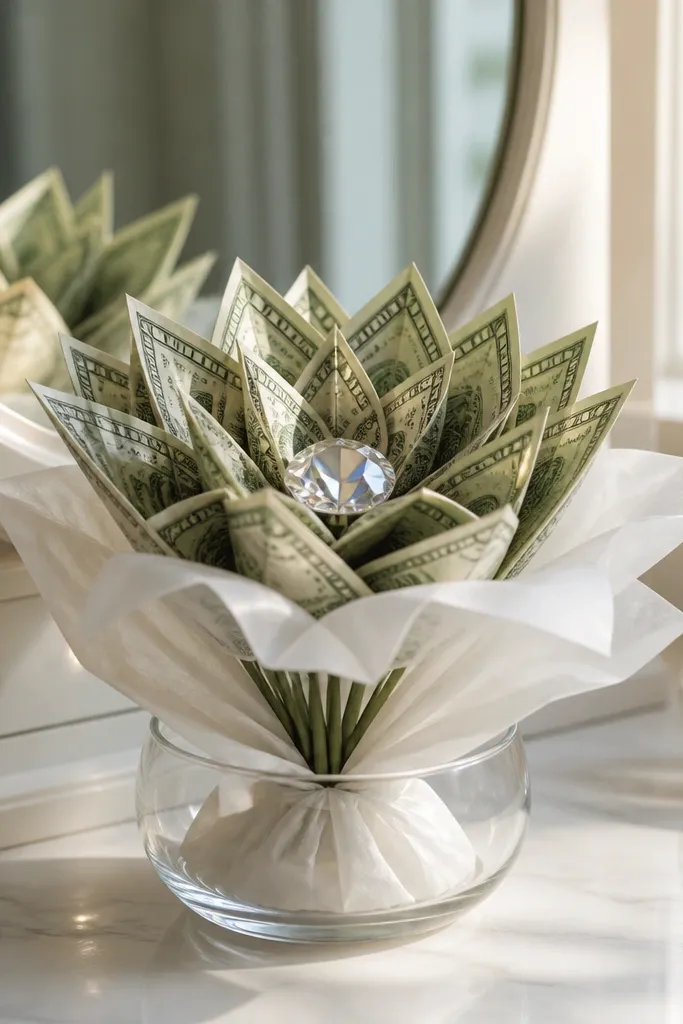
Lotus blooms look clean and modern because the petals taper and point outward. This style uses folded money petals that create crisp angles, so the flower reads as “designed,” not “wrapped.” The clear center dot (acrylic gem or small resin circle) catches light and makes the whole bouquet look polished. It’s a strong choice if you want a minimalist bouquet with a luxe focal point. Skill level is moderate because folds need accuracy, but the look is worth it for the photos.
Press and flatten bills, then cut them into petal squares or rectangles about 2.5-3 inches wide depending on your desired bloom size. Fold each piece into a sharp petal shape (fold corners toward the center, then crease hard) and glue only the bottom flap. Arrange 8-12 petals around a small circular base made from foam or thick cardstock, then secure with hot glue. Build 3-5 lotus flowers and insert them into a bouquet holder with greenery framing the edges.
Use a bone folder or the back of a spoon to sharpen creases — money folds look sharper with crisp creases.
Don’t use liquid glue on folds — it warps the paper and blurs the edges.
4. No-Fold Money Peony Using Coin-Stack Centers
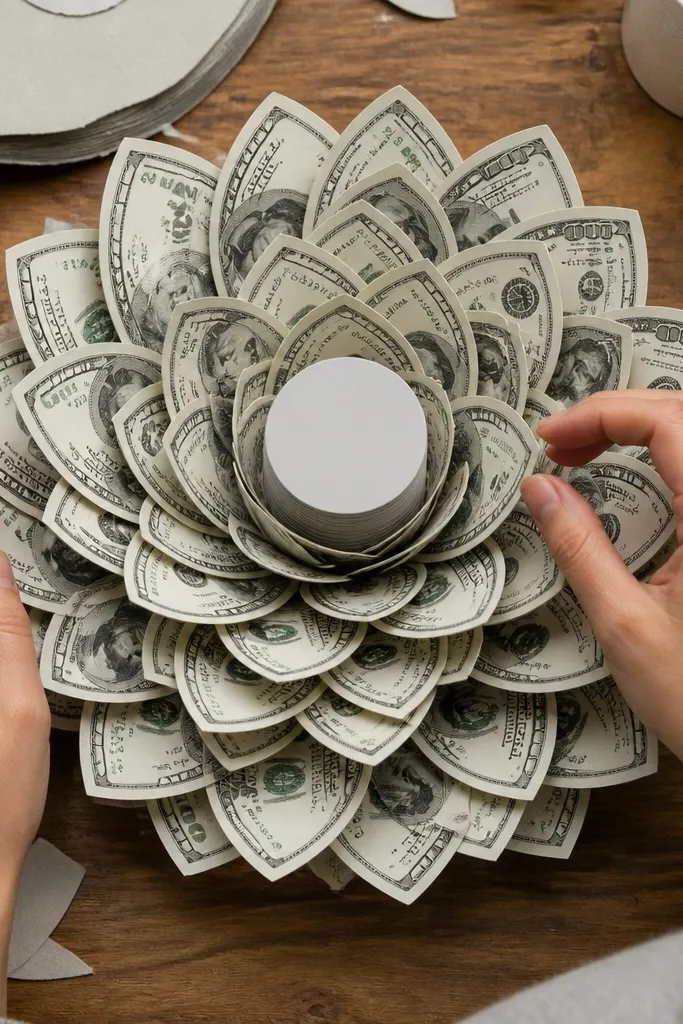
Cut bill shapes into petal ovals, about 2.5 inches long for the inner layer and 3-3.5 inches for the outer layer. Round the edges slightly with scissors for a soft peony look, then glue each petal to a circular base. Make the center by stacking 3-4 cardstock circles, gluing them into a raised “stack,” and wrap the top circle with a small money circle or a tiny bill strip. Layer the petals around the center, then attach to wire stems. Place flowers into a bouquet holder and add a soft mesh layer for volume.
Peonies look plush, and you can fake that fullness with overlapping money petals that don’t require heavy folding. This idea uses petal shapes cut from bills and layered around a thick center built like a coin stack (stacked circles of cardstock). The money stays smooth and flat, so the bouquet looks neat rather than wrinkled. It’s a great choice if you hate fiddly folds but still want a big, lush bloom. Time is moderate because cutting and layering takes focus.
Skip thisDon’t glue all petals flat — add a tiny lift at the outer base so the bloom looks dimensional.
Editor's noteLightly mist the petals with fabric starch (very light) to reduce crumpling and help them stay smooth.
5. Money Hydrangea Clusters in a Clear Vase Wrap
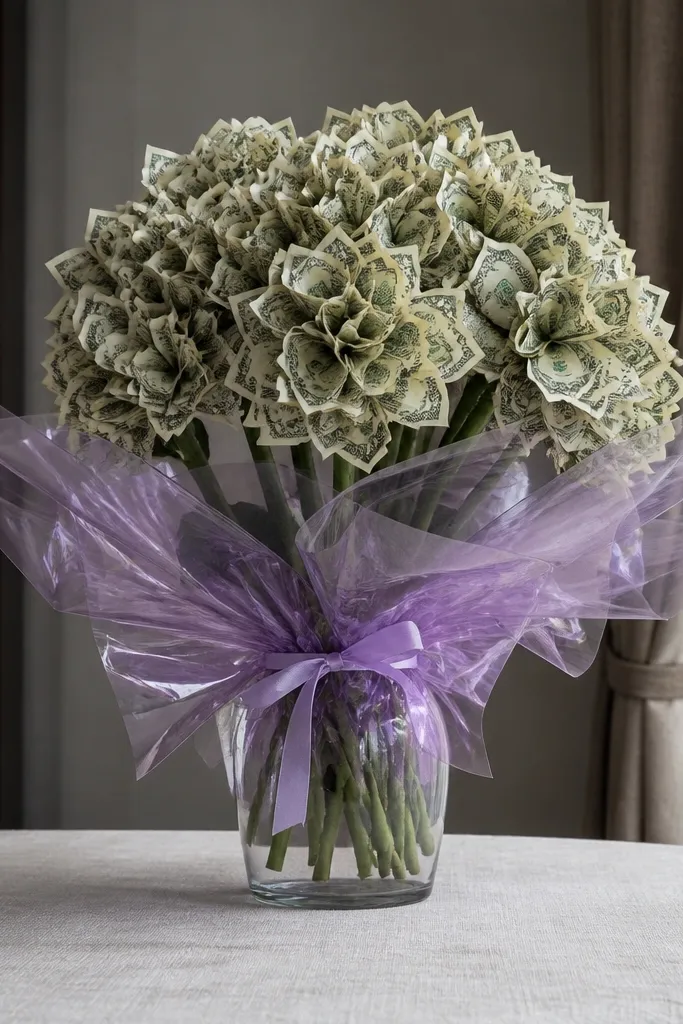
Cut bills into small squares or circles about 1-1.5 inches, then shape each piece with gentle folds so it forms a little bud. Glue 6-10 buds around a short wire stem tip to make one hydrangea cluster. Repeat to make 6-9 clusters total. Arrange them in a clear vase or a clear plastic bottle wrapped with ribbon, then add faux greenery around the clusters to hide the stem bases. Finish with a bow at the front and a tight ribbon band near the vase top.
Hydrangeas look stunning because they’re made of lots of tiny blooms, not one perfect flower. This cluster style gives you a fuller look with less perfection pressure on any single petal. Build small bill “blossoms,” group them on a short stem, and then fill the bouquet like a cloud. A clear vase wrap makes the whole thing feel gift-ready and photo-friendly because you can see the structure. This is ideal for table centerpieces and “wow” gifts without a huge bouquet size.
Skip thisDon’t leave empty gaps between clusters — the hydrangea effect depends on dense spacing.
Editor's noteUse matte ribbon instead of shiny for hydrangeas — it looks softer against the bill textures.
6. Dollar-Bill Butterfly Money Flowers
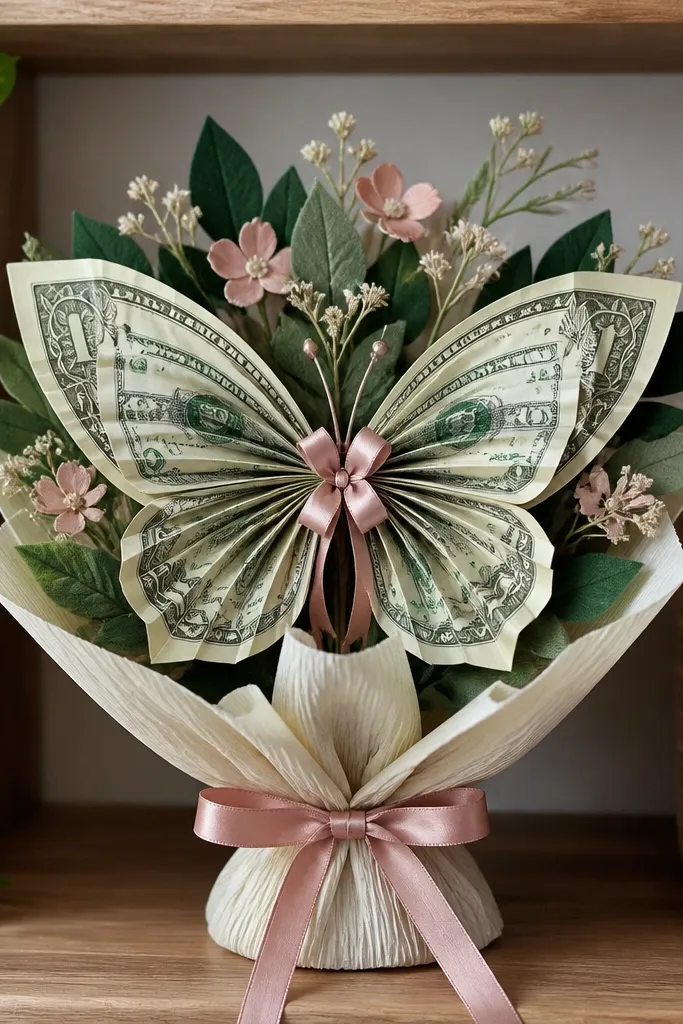
Cut two wing shapes from bills for each bloom, about 3.5 inches wide, and round the top corners. Glue the wings back-to-back around a small center circle made from cardstock, then wrap a thin wire around the back to attach to a stem. Curl the outer wing edges slightly with scissors so they curve outward. Make 5-7 butterflies and place them into a bouquet holder with greenery. Wrap the bouquet in sheer ribbon or organza to keep the wings visible.
This is a money bouquet idea that reads playful and artistic, not basic. The “flower” is built as a butterfly wing pattern using two layered money shapes, giving you symmetrical wings and a crisp silhouette. Add a small curled ribbon accent at the center so it looks like a decorative butterfly sitting on floral stems. It’s a strong choice for kids' parties, engagement surprises, or any gift where you want cute with impact. The look photographs well because the wings create clear edges and contrast.
Skip thisDon’t make wings too thin — thin bill shapes tear when you curl them.
Editor's noteUse double-sided tape on the back of the center circle — it speeds up assembly and keeps edges clean.
7. Money Calla Lilies with Tucked Bill Petals
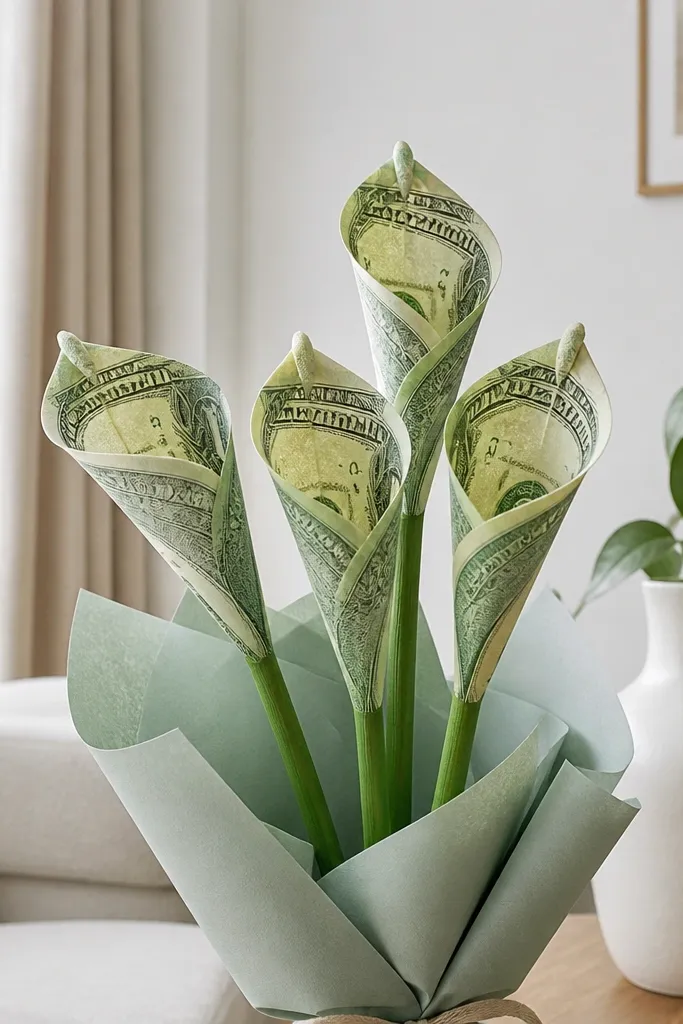
Cut bill strips into long rectangles about 2.5 inches wide and 6 inches long, then roll each rectangle into a tube shape around a thin dowel. Glue the seam at the back only, then tuck the top edge slightly so it points. Create a faux “spadix” center by rolling a narrow strip of cardstock and adding a tiny piece of gold paper or foil. Attach the calla petal tube to a floral wire stem using hot glue at the base. Arrange 7-9 callas in a bouquet holder and add greenery for a tall, clean look.
Calla lilies look sleek, which makes them perfect if you want a money bouquet that doesn’t look like a craft project. This method uses a long, smooth bill petal rolled into a tube shape with a tucked tip, giving you that classic calla silhouette. The contrast between the smooth bill and the crisp green stem makes the bouquet look high-end. It’s also easier than roses because each calla uses fewer pieces. If you want something classy for weddings or anniversaries, this is the style.
Skip thisDon’t cover the whole stem with glue — you want the base neat and the stems flexible.
Editor's noteAngle the calla stems slightly outward — straight stems look stiff in photos.
8. Accordion Money Gerbera with Bright Ribbon Ring
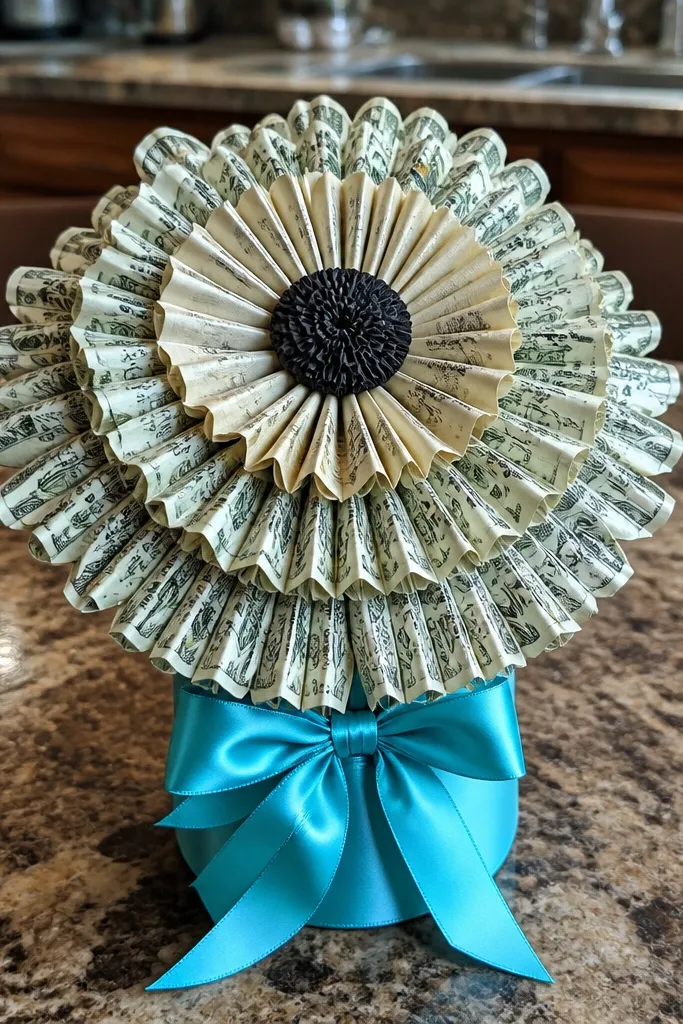
Gerbera daisies are bold, round, and easy to read in photos. The accordion-fold money petals create a textured ring that looks like real daisy petals. Add a bright ribbon band around the bouquet holder so the money color pops instead of blending into the wrapping. This is a good choice when you want the bouquet to look playful and cheerful, not formal. Assembly is fast once you repeat the accordion fold size.
Cut bills into strips about 1.25-1.5 inches wide, then accordion-fold each strip into a fan. Glue the folded edge to a circular base (foam or cardstock) and repeat around the circle until you reach a full ring. Make a center using a small rolled bill or a circle of gold paper for a daisy center. Attach the bloom to a wire stem. Arrange in a bouquet holder wrapped with ribbon, then tuck in faux greenery.
Use uniform strip width — petal thickness is what makes gerberas look “real.”
Don’t leave the accordion folds uneven — it creates a lumpy ring that reads sloppy.
9. Money Rose Buds in Kraft Paper Wrap
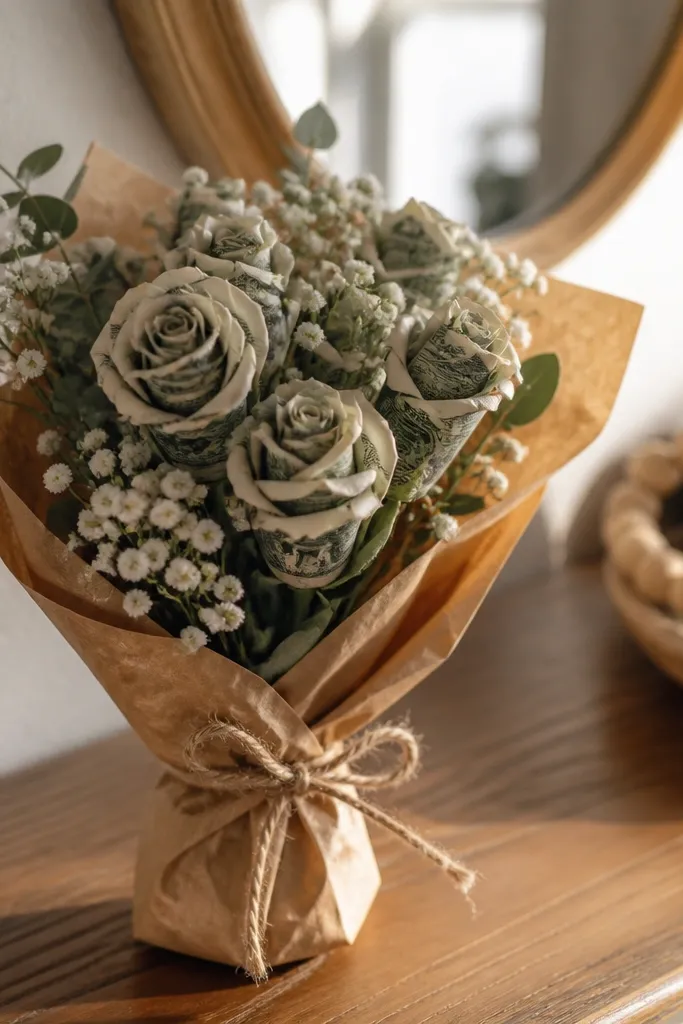
If you want money flower bouquet ideas that look classy without being flashy, small rose buds in kraft paper do the trick. Buds are naturally tighter shapes, so minor imperfections in folds don’t show as much. Kraft paper adds warmth and makes the money look like part of the styling. This is also a good option if you don’t have enough bills for full large blooms. The final look is minimalist, but still full thanks to layered buds.
Make 10-15 small rose buds by rolling short bill strips around a tiny center roll. Glue the back seam and keep each bud about 1.5-2 inches wide. Bundle 3-5 buds per stem cluster for a thicker look, then attach clusters to wire stems. Place clusters into a foam holder and wrap the outside in kraft paper, folding it like a gift. Tie with twine and add one small ribbon strip across the front for contrast.
Stick to one bud size — mixed bud sizes look intentional only if you keep a clear size range.
Don’t use shiny ribbon with kraft paper — it looks mismatched and cheap.
10. Bill-Envelope Tulips with Fabric-Felt Leaves
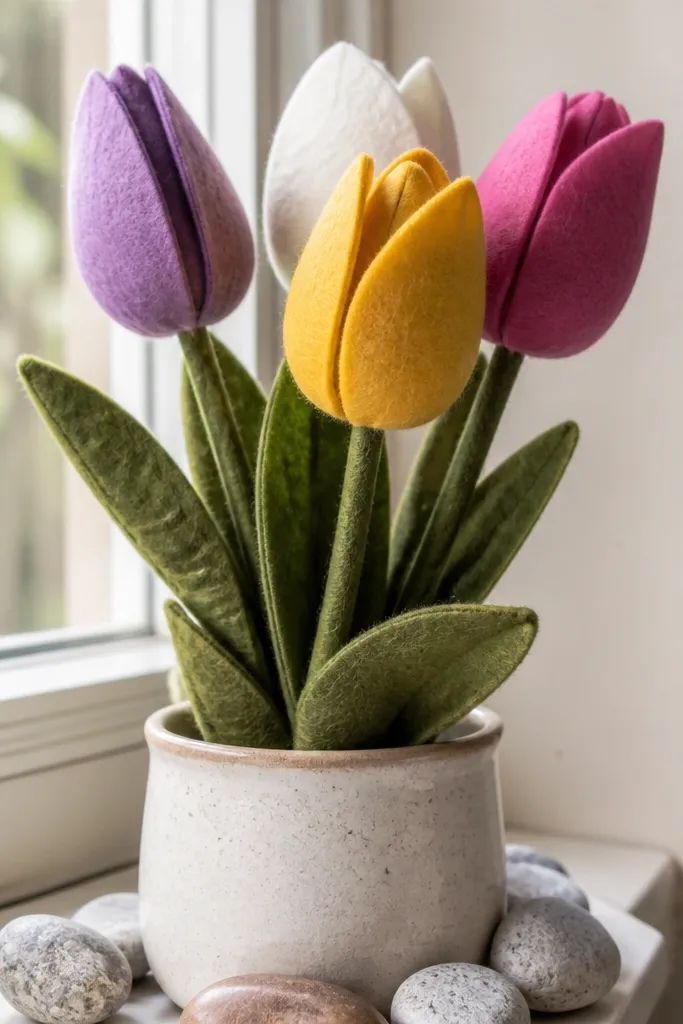
Fold each bill into a tulip petal envelope by creating two angled folds and gluing only the side edges to form a cup. Make one tulip by pairing two petal envelopes and securing them around a small foam or cardstock base. Add a short wire stem and glue the base into place. Cut felt leaves shaped like narrow tulip leaves, then attach to the stem with hot glue. Arrange 9-11 tulips in a foam holder and wrap with ribbon at the center.
Tulips are photogenic because their shape is simple and their silhouette is clean. This version uses bill-envelope petals — basically two folded bill flaps that meet at the top like a tulip cup. Add felt leaves because they look soft and realistic next to paper money. The felt also hides foam gaps and makes the bouquet look finished. It’s a great intermediate project if you want a crisp, modern bouquet that still feels handmade.
Skip thisDon’t make the tulip cup too wide — wide cups look flat and lose the tulip silhouette.
Editor's noteUse thick felt (at least 1.5mm) so the leaves don’t flop in photos.
11. Money Orchid Spray with Realistic Curves
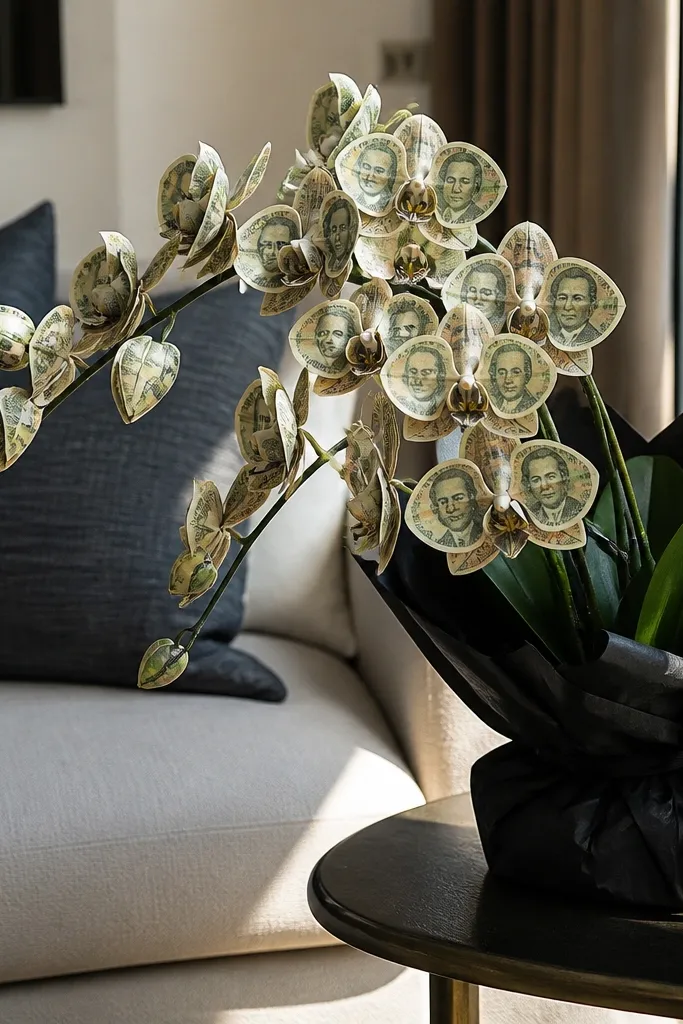
Orchids look expensive because they have a distinct, layered petal structure. This spray style uses layered bill petals to create that orchid look, with curved stems so the flowers hang naturally. The result is a bouquet that reads “arrangement” instead of “paper flowers.” It’s also a good way to stretch limited bills: orchids use fewer petals per bloom than roses. If you want a gift that feels elegant without going full wedding-style, this is a strong pick.
Cut bill petals into orchid shapes: two larger side petals, one top petal, and one smaller center lip. Glue petals onto a small foam base, starting with the center lip, then add the top and side petals. Bend the floral wire stem into a gentle S curve before attaching petals so the flower sits at an angle. Make 3-5 orchid blooms and cluster them on one spray by wiring stems together. Insert the spray into a bouquet holder and add thin greenery strands to fill gaps.
Use a pencil to pre-bend wire — it keeps curves smooth instead of kinked.
Don’t glue all petals at the exact same height — orchids look real when layers sit slightly offset.
12. Mini Money Bouquet in a Stemless Box Frame
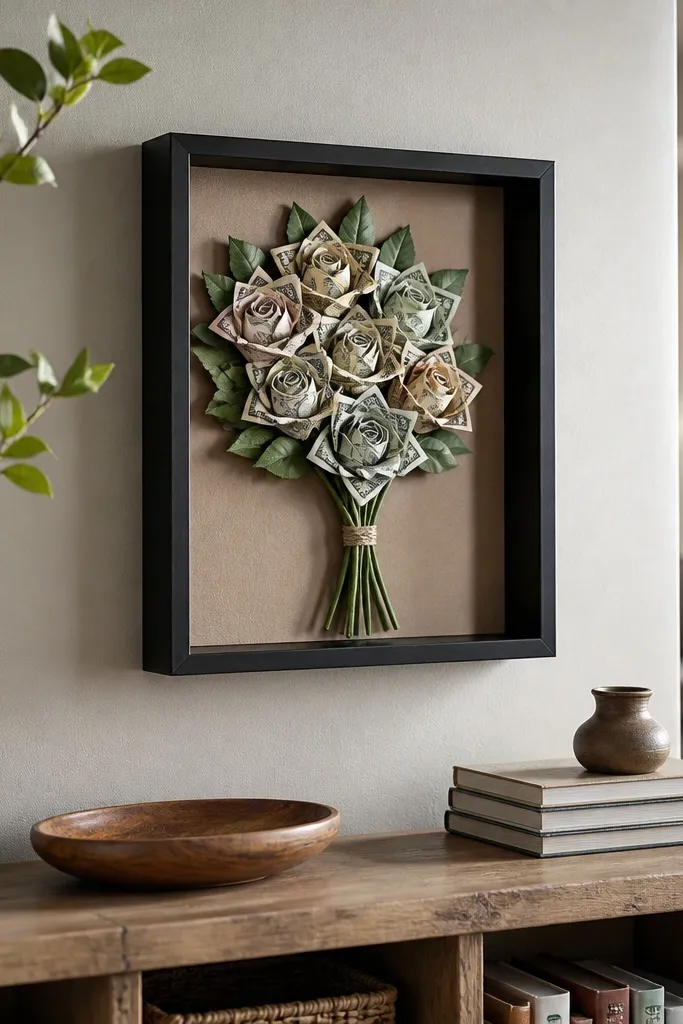
This is a money bouquet idea that photographs like wall decor. You build the flowers on a flat foam panel inside a box frame, so there’s no stem messy business and no drooping. The money flowers stay perfectly aligned because everything is mounted. It’s also easier to package and ship than a tall bouquet. Use this for thank-yous, small birthday gifts, or when you want the money to look like part of a design piece.
Choose a shadow box or flat frame with glass or acrylic front. Cut a foam panel to fit inside and glue it down. Build 6-10 flowers on wire pins or directly gluing stems into the foam, then arrange them on the foam panel with consistent spacing. Add faux greenery strips along the edges to frame the flowers. Wrap the outside with a ribbon band and tie a bow on the front.
Use a matte clear spray on the finished bouquet panel so the money doesn’t glare under flash.
Don’t pack flowers too tightly — you need a little negative space so each bloom is readable.
13. Sunflower Money Bouquet with Black Center Medallion
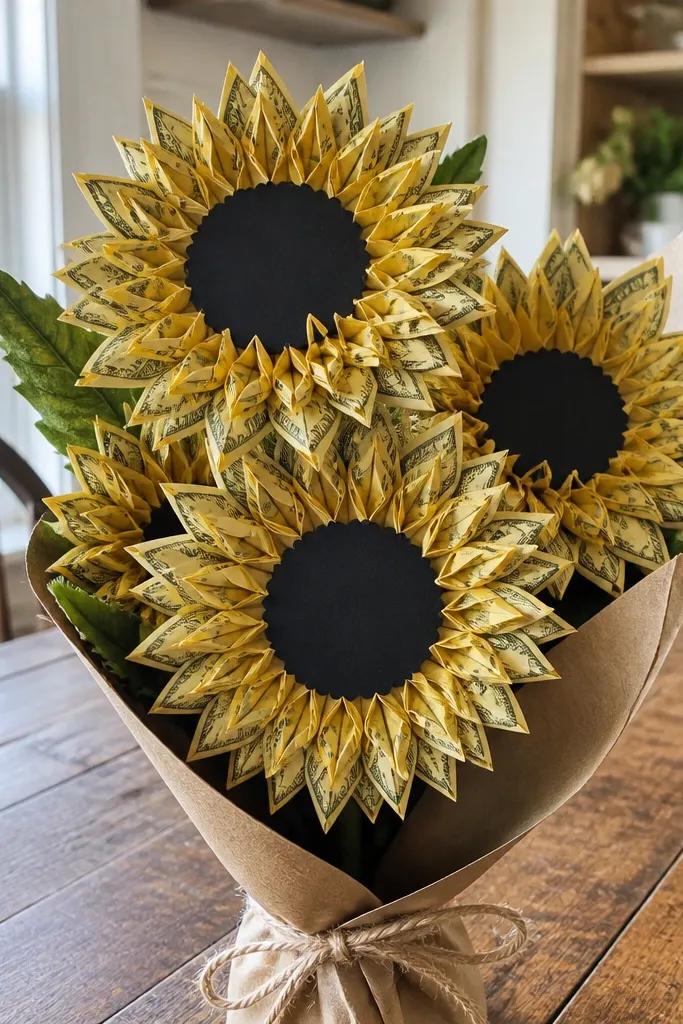
Cut bill petals into teardrop shapes about 2-2.5 inches long. Layer petals around a dark circular center made from painted cardstock or black foam, gluing from the inside outward. Make 3 rings of petals for a full sunflower look. Attach the sunflower to a wire stem and repeat for 5-7 flowers. Arrange in a bouquet holder wrapped with yellow or tan fabric ribbon, then add green leaves at the base.
Sunflowers are a cheat code for “stunning” because the shape is instantly recognizable. This design uses bill petals cut into teardrops, layered in concentric rings, with a dark center medallion for contrast. The dark center makes the money petals look brighter and more intentional, even if your bills are plain. This works well for fall gifts, birthdays, and anyone who likes bold, sunny décor. It’s moderate effort but straightforward and very photogenic.
Skip thisDon’t glue petals in a perfect grid — sunflowers look better when spacing is slightly irregular.
Editor's notePaint the center circle matte black — shiny centers look plasticky next to paper money.
14. Money Hydrangea in a Dome Cloche for Table Photos
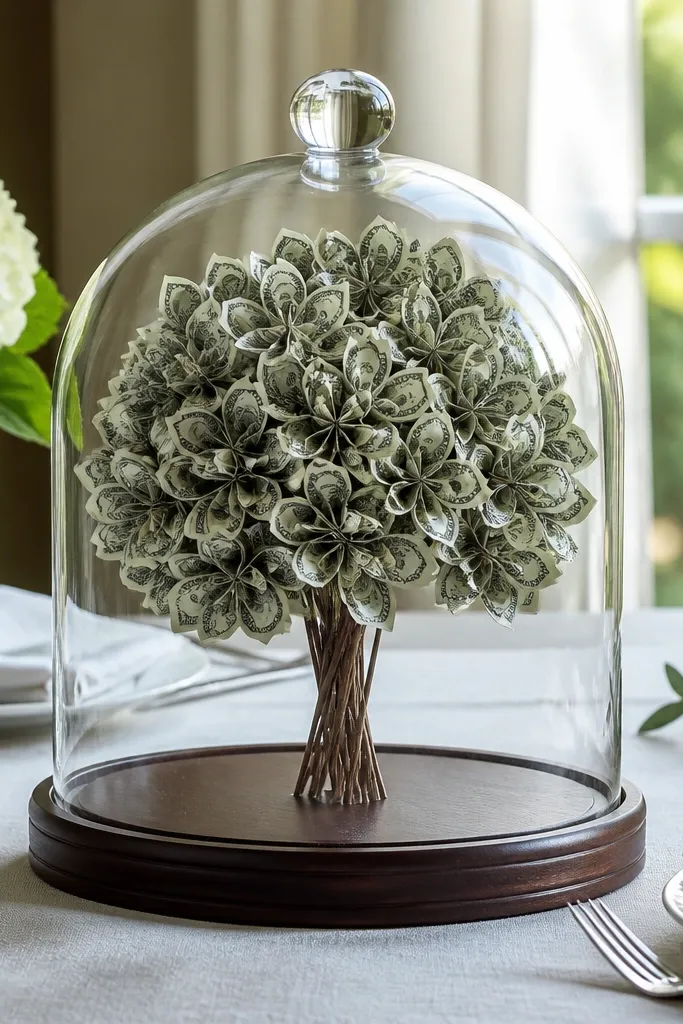
A cloche dome makes the bouquet feel like a centerpiece and controls the lighting in photos. This money flower bouquet idea uses a hydrangea-like cluster so the top looks full and the money reads as soft petals. The cloche also hides messy stem bases, so you can keep construction simple and still get a clean final image. It’s great for dinner tables, engagement dinners, and gift sets where you want a “wow” moment without a giant bouquet. Build time is moderate because you’re making many small clusters.
Build 10-15 small bill clusters by shaping tiny bill segments into buds and gluing 6-8 per cluster onto short wired stems. Arrange clusters into a foam dome base (or a foam block cut to fit under your cloche). Wire or glue the stems into the foam base so the cluster fills the center outward. Add faux greenery around the bottom edge and wrap the base with ribbon. Place under a clear cloche and tie a bow at the base for a finished look.
Use a matte ribbon on the cloche base so it doesn’t reflect and wash out the money.
Don’t build too tall under the cloche — flowers should sit below the dome curve to avoid flattening.
15. Money Peony with Organza Petal Veil
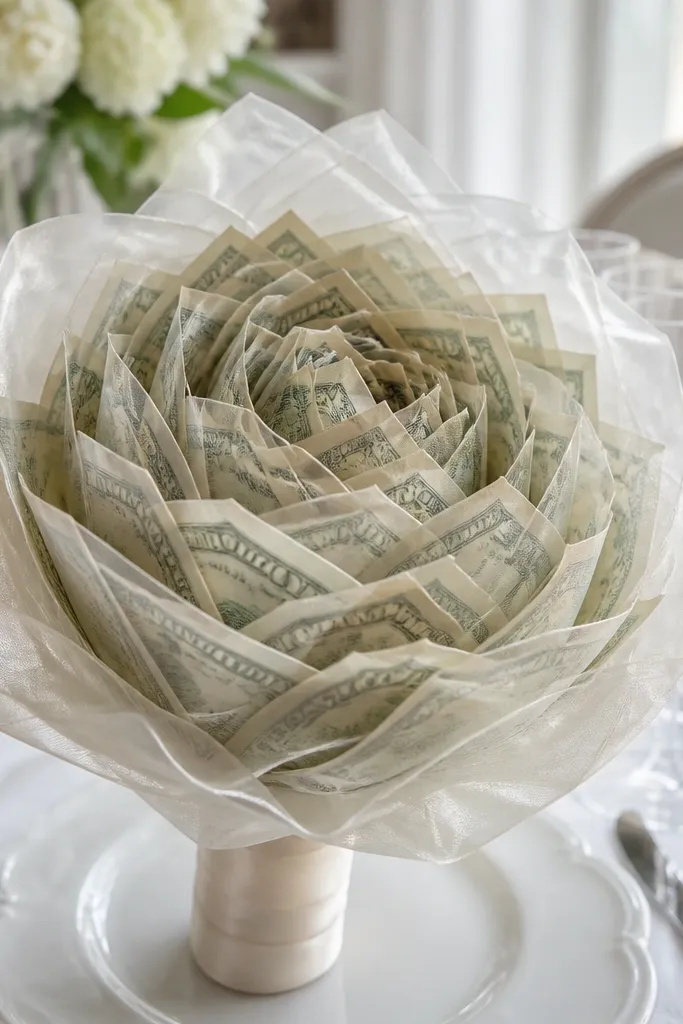
This style makes money look soft and couture. You build a peony with layered bill petals, then add a thin organza veil around the outer layer so the bouquet has movement and a gentle glow. The organza also hides minor gaps between petals, so the bloom looks fuller than your bill count suggests. It’s ideal for wedding guest gifts, bridal showers, or any “pretty” theme where you want the money to look like part of the floral design. The look is airy but still structured.
Make a peony base by cutting layered petal shapes from bills and gluing them in 3 rings around a cardstock circle. Keep inner petals smaller by about 1 inch in length. Cut organza circles and fringe the edges slightly, then glue them behind the outer bill petals as a soft veil layer. Attach the bloom to a stem and repeat for 3-5 peonies total. Arrange in a bouquet holder with greenery and wrap in sheer fabric so the organza effect shows.
Use organza in a color close to your ribbon, not white — it photographs cleaner against bill paper.
Don’t glue organza directly over bill seams — it wrinkles and can snag when you move the bouquet.
16. Money Rose with Ribbon-Edge Petals
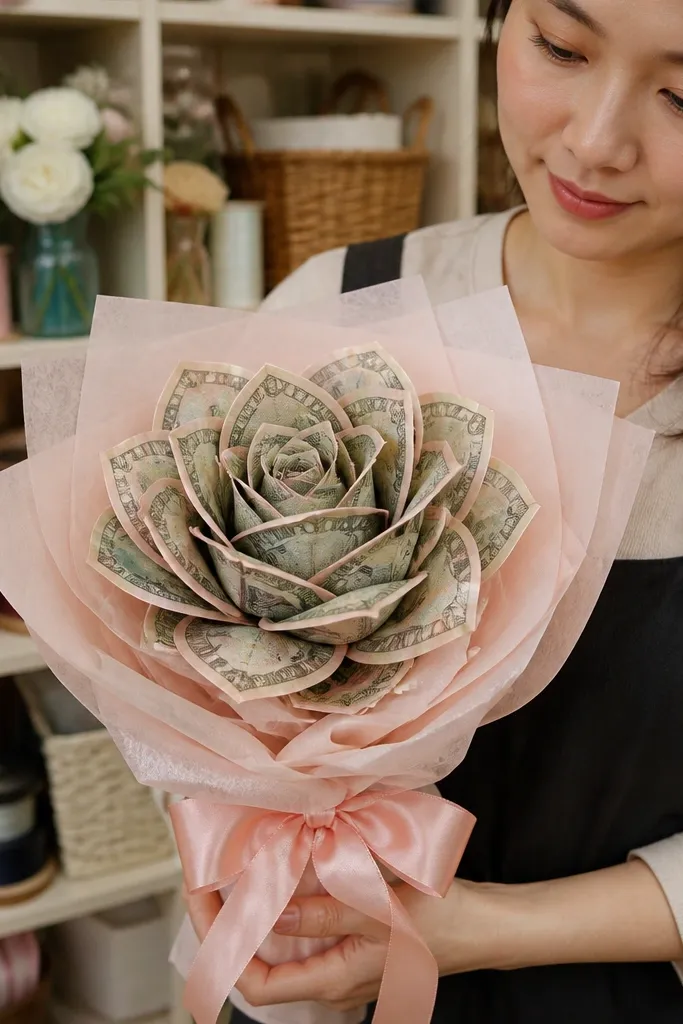
Cut bill petals into rounded shapes and press them flat. Glue a thin strip of satin ribbon along the petal edge, then fold or roll the petal slightly to create a rose curve. Build the center with one tight rolled petal, then wrap 6-9 ribbon-edged petals around it and secure with hot glue at the back. Attach to wire stems. Arrange 6-8 roses in a bouquet holder, then wrap with neutral paper and a wide satin bow.
Ribbon-edge petals make the money look like it’s been trimmed, not folded. This is a strong aesthetic move because it adds a clean border that frames the bill texture. The rose shape stays readable, and the ribbon gives you that “boutique bouquet” finish. It’s also a good way to hide any uneven bill cuts since the ribbon edge covers micro-frays. This style looks especially good with satin ribbon and a neutral wrapping paper.
Skip thisDon’t use fraying ribbon — loose threads snag and show up in close photos.
Editor's noteUse narrow ribbon about 1/4 inch wide so it looks like a trim, not a thick border.
17. Money Succulent Bouquet with Rolled Petal "Leaves"
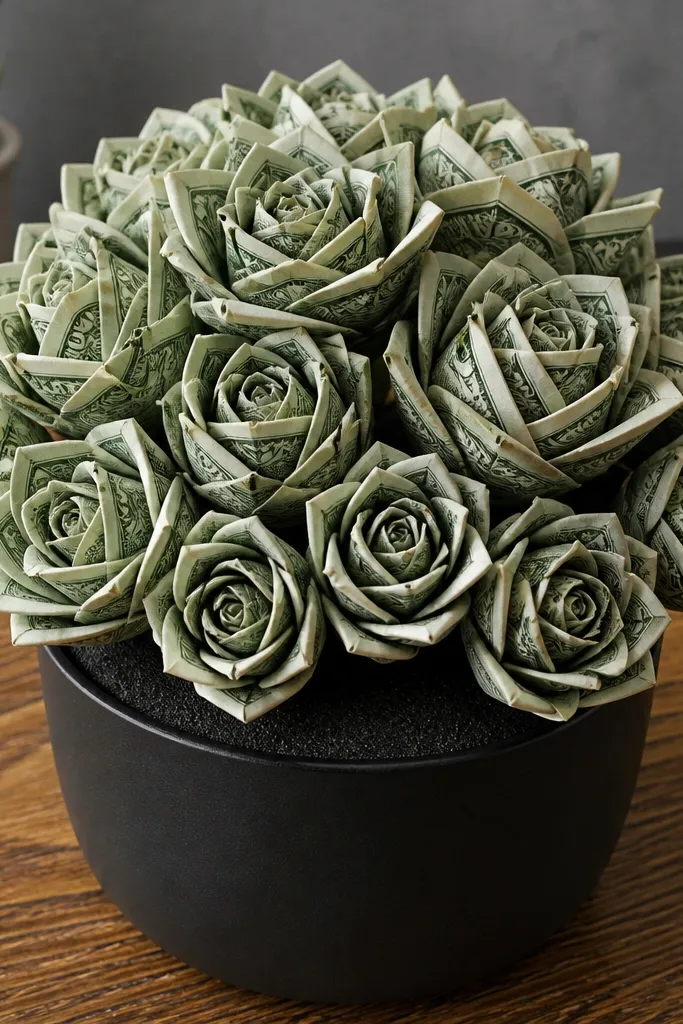
Succulents look modern and graphic, which makes them perfect for aesthetic money bouquets. This idea builds tight rosette shapes from rolled bill leaves, so the bouquet looks like a plant arrangement instead of a flower bouquet. It’s also easier to keep neat because succulents are compact — fewer stems, fewer droop issues. Choose neutral wrapping like linen paper or kraft with jute twine for a clean, modern vibe. Great for home décor gifts and housewarming money gifts.
Cut bill strips into small leaf shapes and roll each strip into a tight cone, gluing only the back seam. Build one succulent rosette by placing leaves in a spiral on a small foam circle, gluing each leaf at its base. Make 5-7 rosettes and attach to short wire stems. Arrange into a foam bouquet holder, then fill gaps with faux succulents greenery or extra rolled leaf clusters. Wrap the holder in neutral paper and tie with twine.
Keep rosette sizes within 1 inch of each other — it looks intentional, not random.
Don’t over-glue the bases — too much glue makes the rosettes heavy and misshapen.
18. Money Lily-of-the-Valley Clusters with Tiny Bells
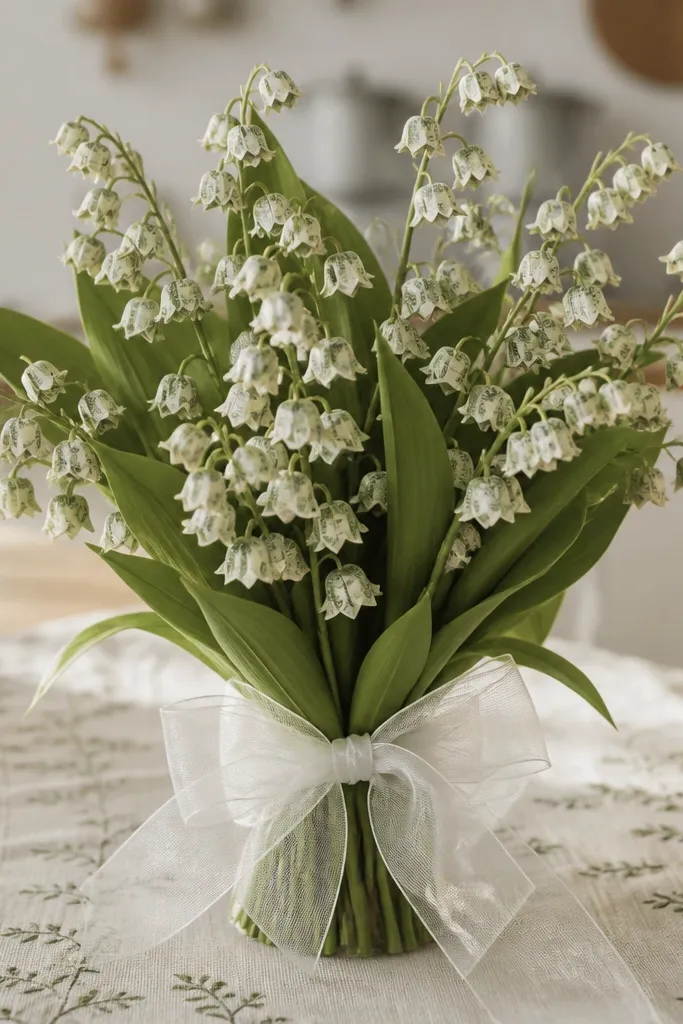
Cut bill pieces into small squares, then fold them into bell shapes by bringing corners together and gluing the seam. Add a small cardstock dot at the top for a “bell opening” look. Wire each bell to a thin floral wire stem and cluster 10-14 bells along one stem segment. Make 3-4 stems total, then insert into a bouquet holder with greenery. Wrap the holder with white ribbon and add a sheer layer to soften the money texture.
This style is delicate-looking and photo-friendly because each tiny bloom creates a pattern. Lily-of-the-valley money flowers are made as small bell shapes, then clustered along a thin stem for that cascading look. Add a white ribbon or sheer organza around the bouquet holder for a soft, airy finish. It’s a great choice if you want something elegant but you don’t want big bulky roses. Build time is longer because you’re making many tiny bells, but the look is worth it.
Skip thisDon’t make bells too large — they lose the delicate pattern and look like random paper shapes.
Editor's noteUse thin wire (gauge 20-22) so the cluster droops naturally instead of standing stiff.
19. Money Carnation with Puffy Folded Petals
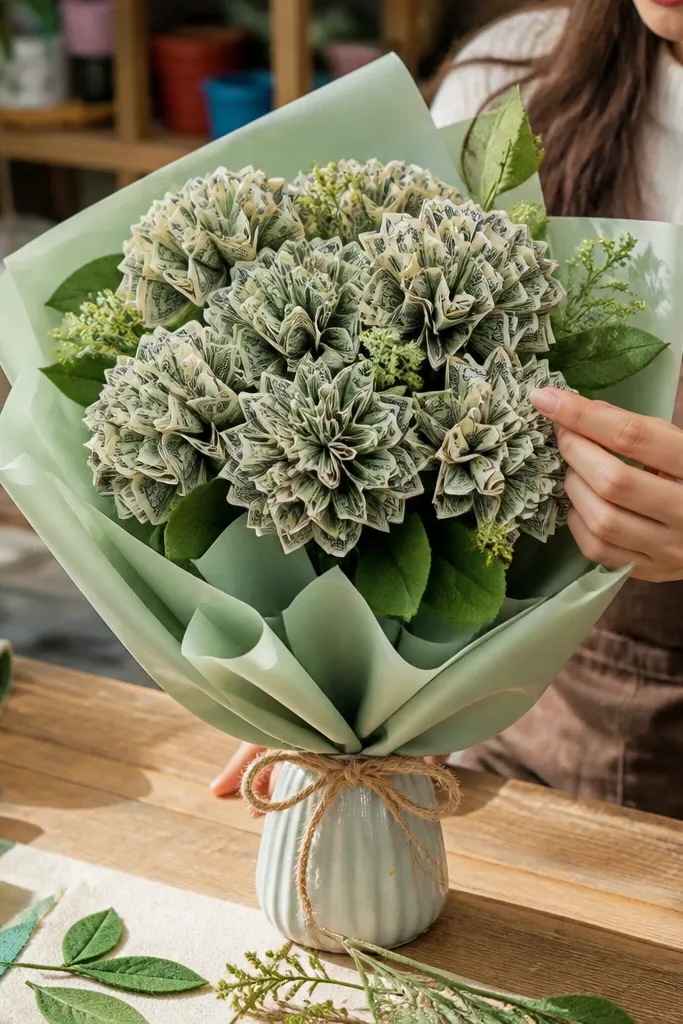
Cut bills into petal strips about 1-1.25 inches wide. Accordion-fold each strip lightly, then pinch the center so it puffs. Glue the back edge to a circular foam base, then repeat until the base is covered. Build 3 layers for fullness and attach to wire stems. Arrange 7-9 carnations in a bouquet holder with pastel ribbon and a small amount of greenery.
Carnations look full and soft, and you can copy that with puffy folded petals. This idea uses multiple small folds per petal to create volume, then layers them into a compact bloom. The result is a money bouquet that looks lush without needing heavy materials. It’s good for spring gifts and anyone who wants a cozy, handmade aesthetic. The build is moderate because you’re repeating a fold pattern, but each petal is small.
Skip thisDon’t glue petals only at the very tip — the bloom will separate as you handle it.
Editor's notePress each strip flat before folding — it keeps the folds crisp and the petal shape consistent.
20. Money "Peel and Stick" Petal Bouquet on Foam Ring
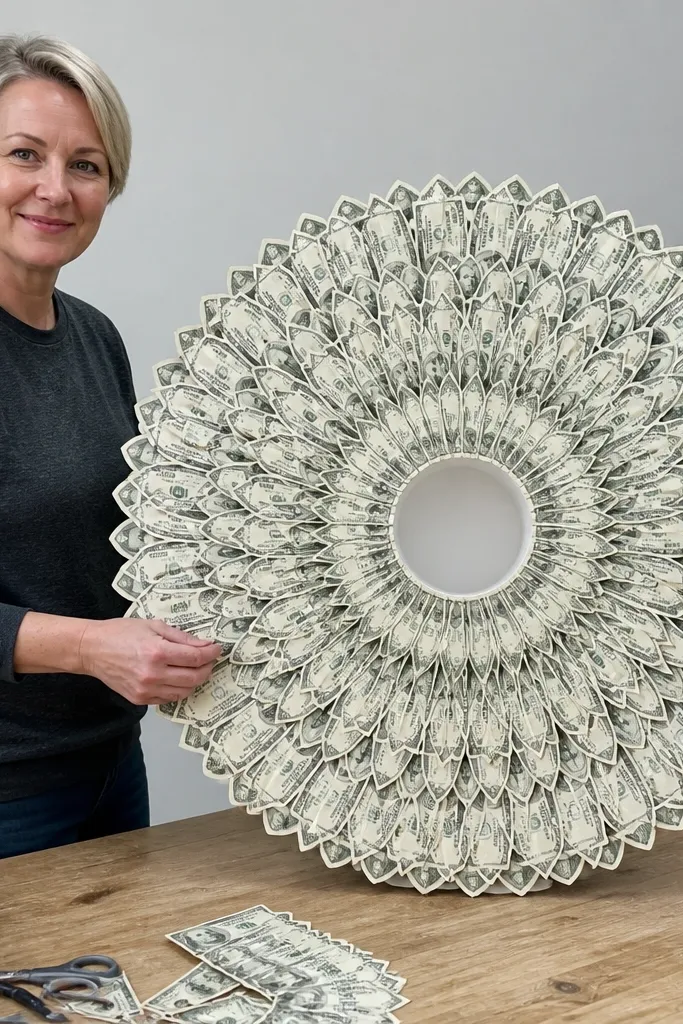
Cut a foam ring to about 6 inches wide and 2 inches thick. Trace petal shapes onto pressed bills and cut them out, keeping all petals the same size. Apply glue dots or double-sided adhesive to the back of each petal and press them onto the foam ring in concentric rows. Attach the ring to a wire stem or mount it on a bouquet holder base. Add a center circle made from cardstock and wrap the bouquet holder with ribbon.
This one is about speed and clean edges. You cut petal shapes from bills, then attach them to a foam ring using double-sided adhesive or glue dots. The money stays flat and you get a repeating petal pattern that looks designed, not improvised. It’s a great choice when you want a big visual impact without lots of tiny folds. The foam ring keeps the bloom shape round and steady.
Skip thisDon’t use regular school glue for this build — it makes paper buckle and messes up alignment.
Editor's noteUse a ruler and mark petal placement points on the foam ring — it keeps the pattern even.
21. Money Flower Bouquet Ideas for Weddings with White Organza Wrap
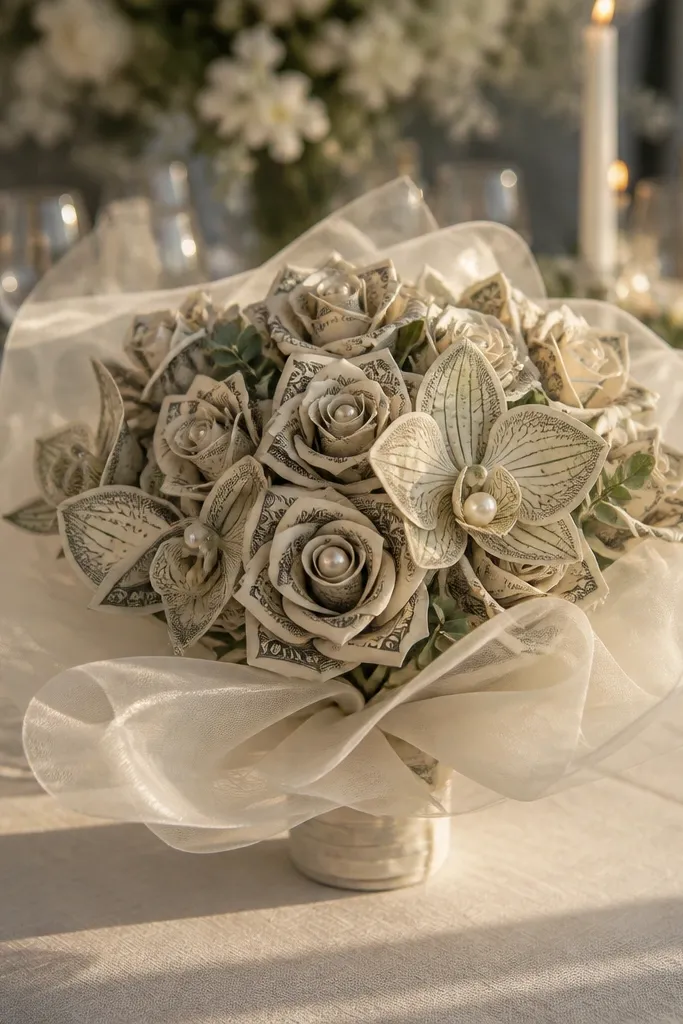
Build 4-6 main flowers using one method (choose roses or orchids), then keep the stem lengths even. Insert into a foam holder and add only thin greenery so the organza wrap can drape smoothly. Wrap the holder with white organza, pulling it tight at the base and letting it fall in soft folds. Add small pearl beads or rhinestone dots to the centers of each bloom. Tie with satin ribbon and trim any organza ends with sharp scissors.
This is the wedding-friendly version that looks like soft bridal décor. You build a small set of statement blooms (roses or orchids) and then wrap the whole bouquet in white organza so the money looks gentle instead of bold. Pearl-like center accents turn the focal points into “jewelry flowers,” which reads upscale in photos. Keep the bouquet tight and add minimal greenery so it looks intentional. This style is best for photos where the bouquet is close to faces — it stays elegant rather than flashy.
Skip thisDon’t mix too many flower types — close-up bridal photos show every mismatch.
Editor's noteUse organza with a slight stiff edge — it holds drape without looking wrinkled.
22. Money Flower Bouquet Ideas with Ombre Tissue Background

Cut tissue paper into layered panels, starting with darker at the bottom and lighter at the top, then fold each panel accordion-style. Wrap these panels around the bouquet holder so they form a fan behind the flowers. Secure with double-sided tape at the back and keep the front edge free for a clean silhouette. Build your money flowers using a consistent method and insert them into the foam holder. Finish by adding ribbon ties at the sides so the tissue background stays shaped.
The money flowers are only half the look. An ombre tissue background makes the entire bouquet image feel styled, like a party photo backdrop. Choose a tissue gradient that matches the wrap ribbon, then let the money flowers sit slightly forward so they pop. This is a smart aesthetic move for birthdays and celebrations because it creates color without adding heavy décor. It also hides construction lines and foam edges behind the tissue layers.
Skip thisDon’t cover the front stems with tissue — the bouquet needs clear flower silhouettes.
Editor's noteUse 2-3 tissue layers only — too many layers look bulky and flatten in photos.
23. Budget-Friendly Money Daisy Bouquet with Mini Stem Bundles
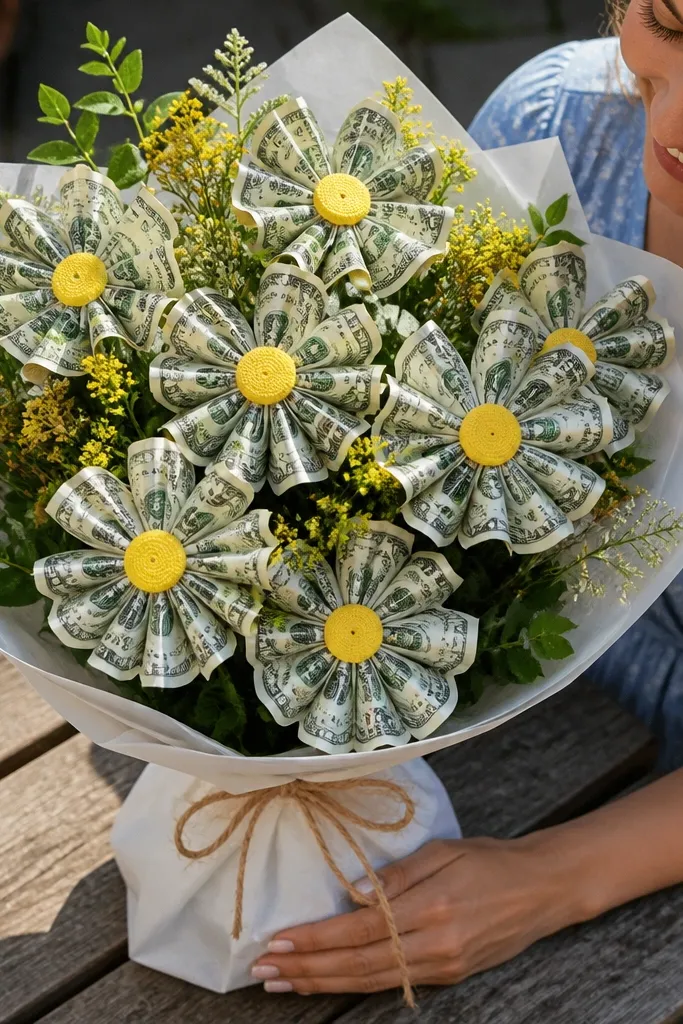
If you want money flower bouquet ideas that look good without burning through bills, daisies are the answer. Each daisy uses a limited number of petal pieces, and the center can be made from a small cardstock disc. Mini stem bundles let you create fullness even with fewer blooms. The look stays bright and clean because daisies are simple shapes with clear edges. This is also beginner-friendly because the steps are straightforward and repeatable.
Cut bill petals into daisy shapes about 2 inches long and 1 inch wide, then round the tips. Glue petals around a cardstock center circle, using 10-12 petals per daisy. Attach each daisy to a short wire stem. Bundle 3-4 daisies per stem group by wiring stems together, then insert bundles into a foam holder. Wrap with simple ribbon and add a small amount of faux greenery to fill gaps.
Make the center medallion matte (paint or felt) so the money petals look crisp in daylight.
Don’t use too much greenery — it can cover the daisies and make the bouquet look sparse.
24. Money Rose Bouquet with Transparent Ribbon Streamers
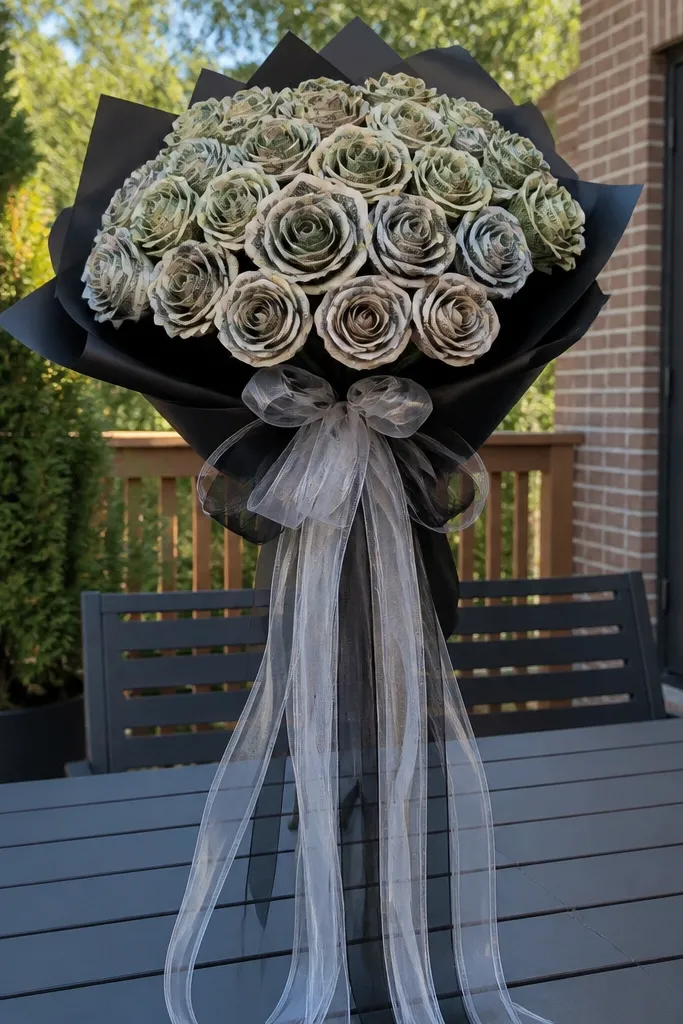
Transparent ribbon streamers add motion and a “photo-ready” finish. You build classic money roses, then hang clear ribbon strips so the bouquet has vertical lines that make it look taller and more styled. The streamers also hide any uneven foam edge because they cover the base area. This is a great option for gifts where you want a little drama without adding bulky décor. It looks especially good under indoor lighting where the ribbon catches highlights.
Build 6-8 money roses using your preferred rose method, then insert into a foam holder. Wrap the holder with tissue or plain paper so you have a clean base layer. Tie a ribbon band around the middle and attach clear ribbon streamers by knotting them in groups of 3-4 strips. Insert the ends into the foam so they stay upright and fall evenly. Add a bow and trim streamer lengths so they hit around the same height.
Cut streamer lengths with a sharp blade and keep them grouped by size — uneven lengths look messy fast.
Don’t let streamers cover the flower faces — the bouquet needs clear front silhouettes.
25. Money Flower Bouquet Ideas with Black-and-White Checker Wrap
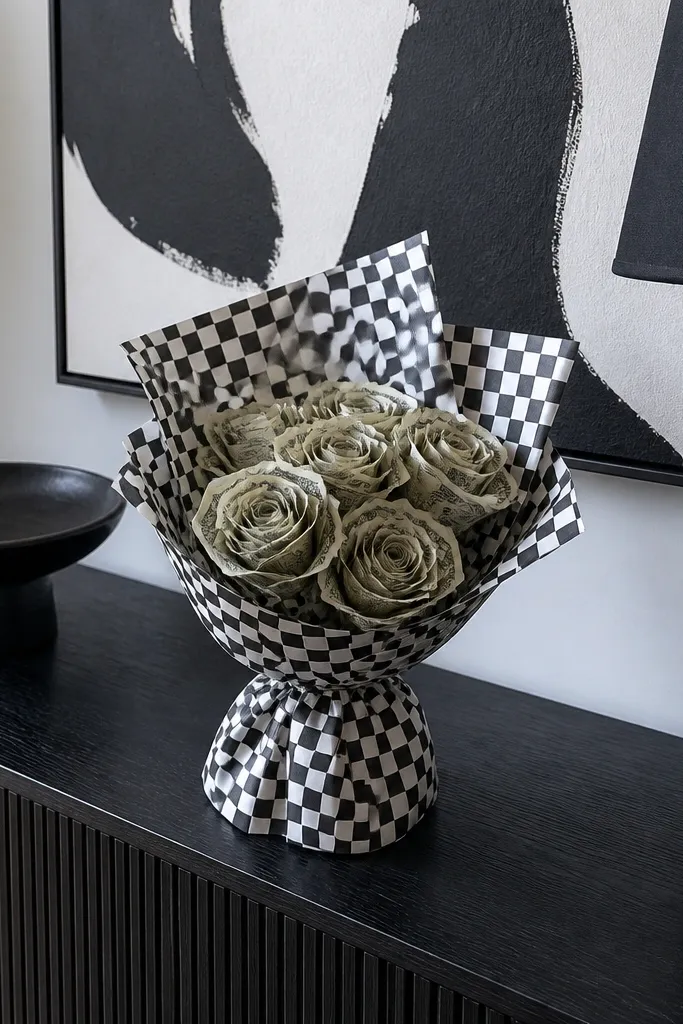
Checker wrap makes money flowers look designed because it turns the background into a pattern. This is a strong look for modern birthdays and “serious but fun” gifts. Use black-and-white wrap so the bill colors stay readable and the bouquet doesn’t blend into plain kraft. The pattern also hides small imperfections around the base because the wrap is busy in a good way. Pair with 5-7 statement blooms and keep greenery minimal for a clean graphic look.
Wrap the foam holder with black-and-white checker craft paper, smoothing it flat and taping the back seam. Add a thin black ribbon band around the middle to anchor the wrap. Build and insert 5-7 money flowers using one consistent method (rose or orchid works best) so the bouquet looks cohesive. Add a few faux greenery sprigs near the edges only, then finish with a bow that matches the black ribbon. Trim any paper edges so they don’t show messy folds.
Use matte checker paper — shiny paper reflects and can wash out bills in photos.
Don’t add too many different flower types — the graphic wrap already provides visual complexity.



