
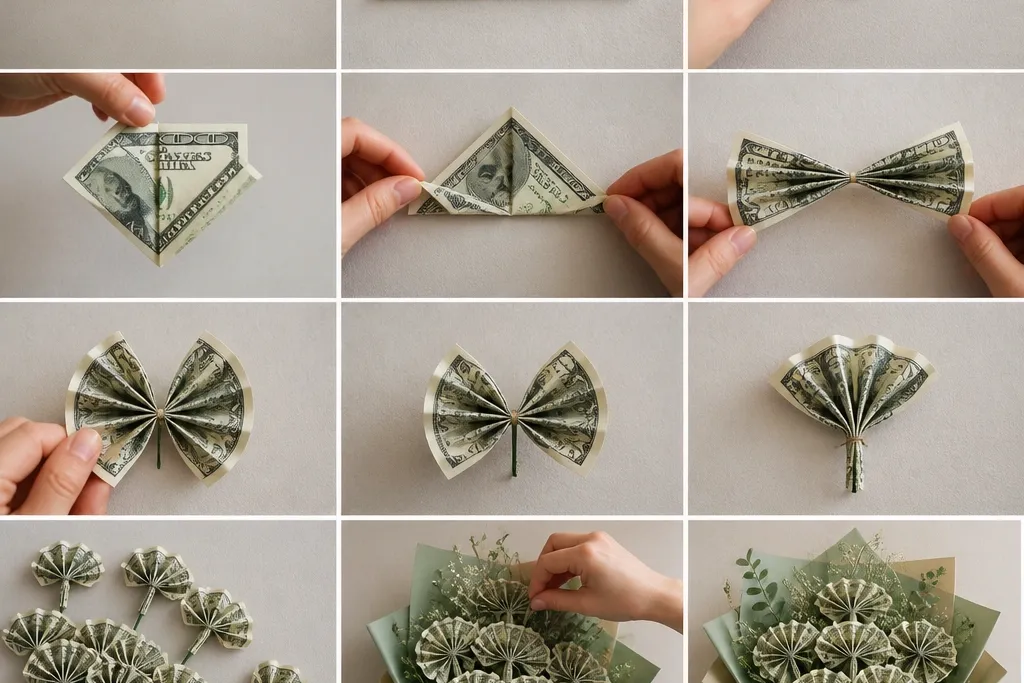
1. Classic Fan Petals With Center Pin
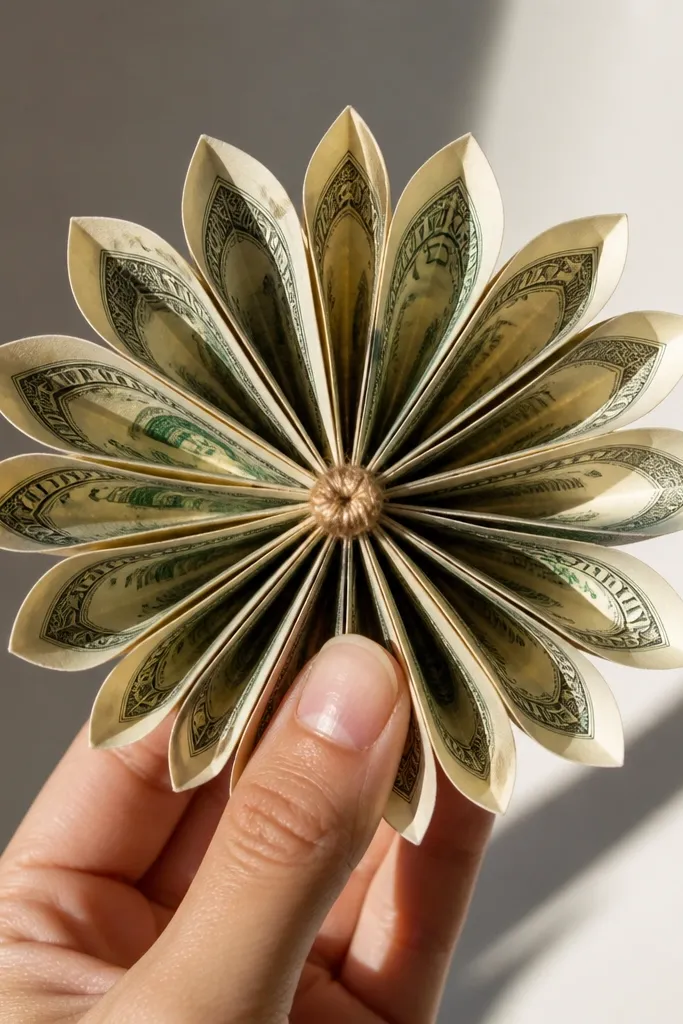
This fold pattern gives you that “flower” look fast. The fan shape creates multiple visible bill edges, so your bouquet looks full even if you use fewer bills. It’s also forgiving when your stems aren’t perfectly straight because the fan hides small height differences. Use this when you want a traditional money bouquet that photographs well from the front. It works best with crisp bills and clean creases, because the fan edges are what sell the aesthetic.
Start by flattening your bills and marking a center line with a light crease. Fold each bill into a narrow accordion fan from one side toward the center, keeping the fold width around 1/3 inch. Bring the two outer fan edges together at the center and pinch tightly. Then pierce a small hole through the pinched center and thread a thin florist wire or craft pin to hold the shape. Finish by bending the wired base into a slight curve so each petal fan faces outward.
Use a paper scoring tool or the edge of a plastic gift card to press folds harder than your fingernail.
Don’t skip the center pinch — without it, the fan opens and your flower looks like it’s unraveling.
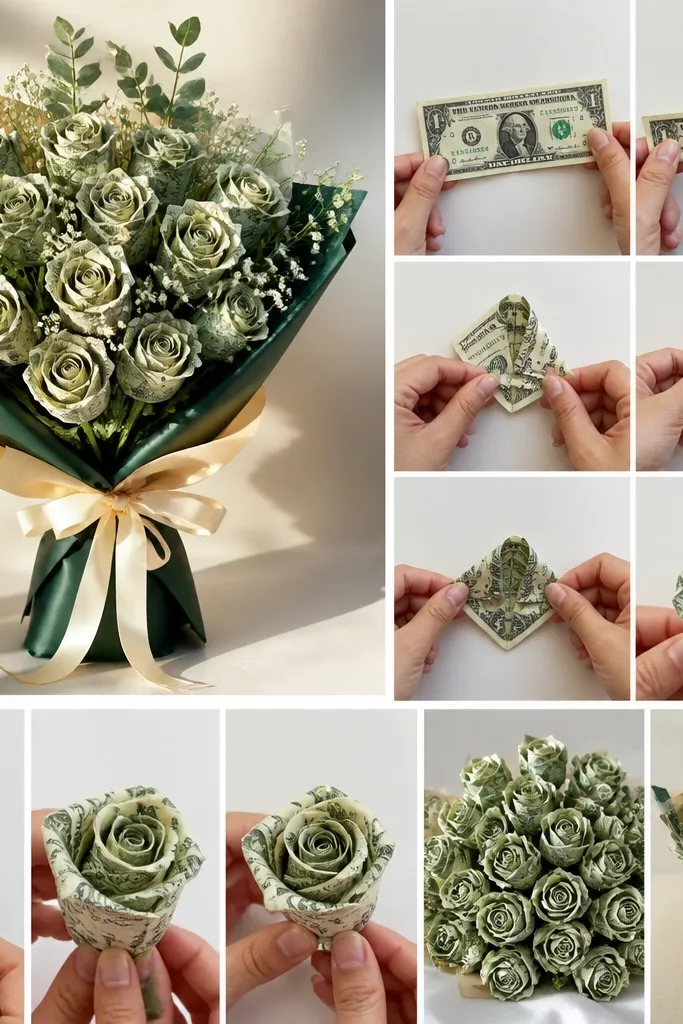
2. Tri-Fold Rose Bud (Tuck and Turn)

This is the cleanest option when you want a tighter, more premium-looking bouquet. The rose bud shape reads like real petals because each layer tucks into the next. It also keeps the paper edges protected, so the bouquet stays neat even if it’s bumped during wrapping or transport. Choose this fold if your bouquet will be viewed up close, like on a tabletop or gift table. It also pairs well with a darker ribbon because the bud shape creates strong highlights.
Fold a bill into thirds lengthwise, then press hard along the two fold lines. Turn the folded bill so the creased edge faces you, then fold one third inward to form the first bud layer. Tuck the next third over it, then tuck the final third underneath so the layers lock. Pinch the bottom tightly and twist a small wire stem into the pinch point. Wrap the base with thin floral tape to hide the wire and keep the bud from rotating.
Editor's noteIf you want sharper “petal” edges, crease with parchment + low heat for 3-5 quick passes before you fold.
Skip thisAvoid making the bud too wide — a bulky bud forces uneven spacing when you anchor it in foam.
3. Side-Loop Petal With Ribbon-Like Edge

This fold creates a ribbon-like edge that looks extra pretty under bright light. The side loop gives you a gentle curve instead of a flat fan, which is great if your bouquet has lots of stems and you want motion in the photo. It’s also easier to keep consistent than complex origami because the loop is defined by two anchor creases. Use it for bouquets meant to look airy rather than packed. It’s a strong choice when you plan to add a satin bow at the top.
Fold the bill in half lengthwise, then press the crease firmly. Fold one short end inward by about 1 inch to create an anchor flap. Roll the remaining section into a loop shape and press the loop flat where it overlaps the anchor flap. Slide a thin strip of double-sided tape on the overlap area to hold the loop. Attach the loop to a wire stem at the bottom overlap using a small wrap of tape, then bend the stem so the loop faces up.
Use a ruler to measure the 1-inch flap so every petal loop matches.
Don’t rely on tape only at the very edge — overlap needs surface area or the loop will loosen.
4. Butterfly Bill Fold (Two Wings, One Body)
If you want something a little different, this is a photogenic “butterfly” bill piece that makes your bouquet look playful. The two wings frame the center and create a clear silhouette in photos. It also helps you space pieces without them crushing each other, since the wings naturally separate. This fold is best for gift bouquets with extra decor like mini hearts, pearls, or small ribbon loops. It reads well even if you’re not using an enormous number of bills.
Fold the bill in half lengthwise and press. Create two wing folds by folding each side toward the center line, stopping about 1/2 inch before the center. Flip the piece and fold the bottom up slightly to form a small body base. Pinch the center and secure with a tiny stitch of thread or a small craft pin. Attach to a wire stem through the body pinch point, then shape the wings slightly outward for symmetry.
Lightly spray your pinched center with a tiny dab of craft glue on the inside only, then let it dry before attaching to the stem.
Avoid trimming the bill edges — you need full edges for the wing silhouette.
5. Accordion Stripe Flower (Multiple Crisp Folds)

This fold makes the money look like it has texture, which is what makes it pop in pictures. The accordion stripes create a striped petal effect that looks bold against ribbon and greenery. It’s also a great way to use slightly imperfect bills because the multiple folds hide minor edge wear. Choose this when you want a high-contrast look and you’re adding dark ribbon or contrasting wrapping paper. It takes a little more time per bill, but the payoff is a very “designed” bouquet.
Press the bill flat, then fold it into accordion pleats with a 1/4 inch width. Keep each pleat the same direction so the stripes line up. Once you reach the end, fold the accordion in half to form a compact fan. Pinch the fold center and secure with a dot of hot glue or a strip of tape. Attach to your stem at the pinched center, then spread the stripes into a flower shape.
Editor's noteUse two fingers to hold the pleat width while you fold — it’s faster and more consistent than measuring every fold.
Skip thisDon’t make the pleats wider than 1/3 inch or the flower looks floppy.
6. Envelope-Style Bill Petal (Flat Back, Sharp Front)
This one is for clean, structured bouquets. The flat back lets you press petals against foam or a wrapped base without gaps, and the pointed front looks like a petal tip in close-ups. It gives a tidy, layered look that doesn’t sag. You should pick this when your bouquet is tight and you want each piece to sit flush. It’s also excellent for adding a top rosette because the flat back stacks neatly.
Fold the bill in half lengthwise and press. Then fold both long edges inward toward the center until they meet at the crease, forming a narrow strip. Fold the strip into a triangle by bringing the top corner down to meet the bottom edge, then tuck the triangle point under the flap. Secure with a small piece of tape on the inside. Attach to the stem by poking a hole through the flat back area, then glue the back to a wire or skewer for stability.
Editor's noteHold the triangle point down with a binder clip for 60 seconds while the glue sets.
Skip thisAvoid attaching through the pointed tip — it will bend and your petal loses its shape.
7. Origami-Style Triangle Fold for Spiky Blooms

If you want your bouquet to look bold and modern, triangle folds create a spiky bloom effect. The points catch light and make the bouquet look more dimensional than flat fans. This is a strong choice for winter-themed gifts because the sharp edges read like stylized snowflakes. It also works when you’re using a smaller bouquet stand since triangle petals fill space without needing extra volume. The tradeoff is that you need consistent triangle sizing for a clean look.
Fold the bill in half, then fold one side down to create a right triangle. Flip the triangle and repeat on the other side so you get a compact triangular wedge. Fold the bottom edge up to lock the shape, then secure with a small strip of tape. Thread a wire stem through a small hole at the locked bottom edge, then twist the wire to hold tension. Arrange triangles in a circle so points face outward and the base sits flat against foam.
Editor's noteMake a paper template wedge from scrap and use it to check triangle width before folding the whole stack.
Skip thisDon’t leave the bottom flap loose — triangles collapse if the lock fold isn’t taped.
8. Rolled Bill Spiral Bud (Tight Coil)

Spiral buds look like real rose centers, especially if you add a small pearl bead in the middle. This fold is also great for covering messy stem bases because you can wrap the stem into the center coil. It’s best for bouquets with a “statement center” at the top. The coil creates a natural highlight line as it curves, which looks great under flash photography. If you want a bouquet that looks designed, not craft-store random, this is one of the best folds.
Fold the bill lengthwise into a flat strip about 1 inch wide after pressing. Roll the strip tightly from one short end toward the other, keeping the roll diameter consistent. When you reach the end, tuck the final edge under the first loop and secure with a tiny dot of glue. Insert the stem wire into the bottom of the coil and glue the bottom edge to the stem. Wrap floral tape around the base until the coil holds without gaps.
Editor's noteCoil on a smooth dowel or the handle of a pen for a consistent diameter.
Skip thisAvoid loose rolling — a sloppy coil makes the bud look flat in photos.
9. Two-Tone Layered Petal Using Half-Bill Technique

This is how you get a layered, high-end look without needing a ton of bills. By using half-bills as inner and outer petals, you create depth that reads immediately in photos. The outer layer frames the inner layer, so even if your inner folds are slightly different, the bouquet still looks intentional. It’s ideal for money bouquets where you’re using a ribbon wrap around the handle and want the petals to look like they have dimension. This fold is also a smart way to use bills with slight wrinkles because the layering hides imperfections.
Cut or fold each bill so you have a consistent half width, then press flat. Create a fan fold on the outer half using 1/3 inch pleats, then pinch the center. Make a tighter fan fold on the inner half using 1/4 inch pleats and pinch the center. Glue or tape the inner fan onto the center of the outer fan. Attach both layers to the stem through the pinched center and reinforce with a small tape wrap at the base.
Editor's noteIf you’re not cutting bills, fold to the same effective half width by creasing and trimming only the excess edge later with a ruler guide.
Skip thisAvoid mixing pleat widths between inner and outer layers — that’s what makes the “two-tone” look messy instead of layered.
10. Sailboat Fold for Floating Petals

This fold gives you a floating petal look, with a curved silhouette that looks airy in bouquets. The pointed top creates a strong vertical line, while the base stays flatter for anchoring. It’s a good pick if your bouquet has lots of ribbon curls or greenery and you want the money pieces to look like they’re lifting. The sailboat shape also helps keep spacing because it naturally separates each petal. Use this for gift bouquets meant to look light, not tightly packed.
Fold the bill in half lengthwise and press. Bring one long edge toward the center and crease, then repeat with the other edge to make a narrow ridge. Fold the top point down to create the sail peak, then tuck the bottom ridge under the sail base. Secure with a small strip of tape on the inside. Attach to a stem by poking a hole through the bottom ridge and threading wire, then bend the stem so the sail faces outward.
Editor's noteUse floral tape at the bottom ridge, not on the sail face, so the front stays crisp.
Skip thisAvoid taping across the sail peak — it flattens the shape and kills the “floating” look.
11. Folded Ribbon Bow Petals (Bill Bow Center)

This is a decorative fold that makes your bouquet look like it has an actual bow structure. The bill bow center gives a focal point, while the surrounding petals can be any fold from this list. It’s the best choice when you want the bouquet to look gift-ready from across the room. The bow center also helps hide your wiring and glue spots, since you can place it exactly where stems converge. Pick this if you’re wrapping a handle or adding a satin ribbon tie.
Fold a bill into a narrow strip, then fold it into a loop and pinch the middle tightly. Make a second matching loop from the same strip and pinch the center so both loops face outward. Secure the pinched center with tape or a tiny glue dot. For the bow look, fold the bottom edge behind the loops and tape it down so it sits flat. Attach the bow center to your bouquet by gluing or wiring it over the stem bundle, then arrange petals around it to hide the base.
Editor's notePress the loops flat for 10 seconds under a heavy book with parchment between paper layers.
Skip thisAvoid oversized loops — big bow centers overwhelm the petals and make the bouquet look top-heavy.
12. Accordion Spiral Pinwheel Petal
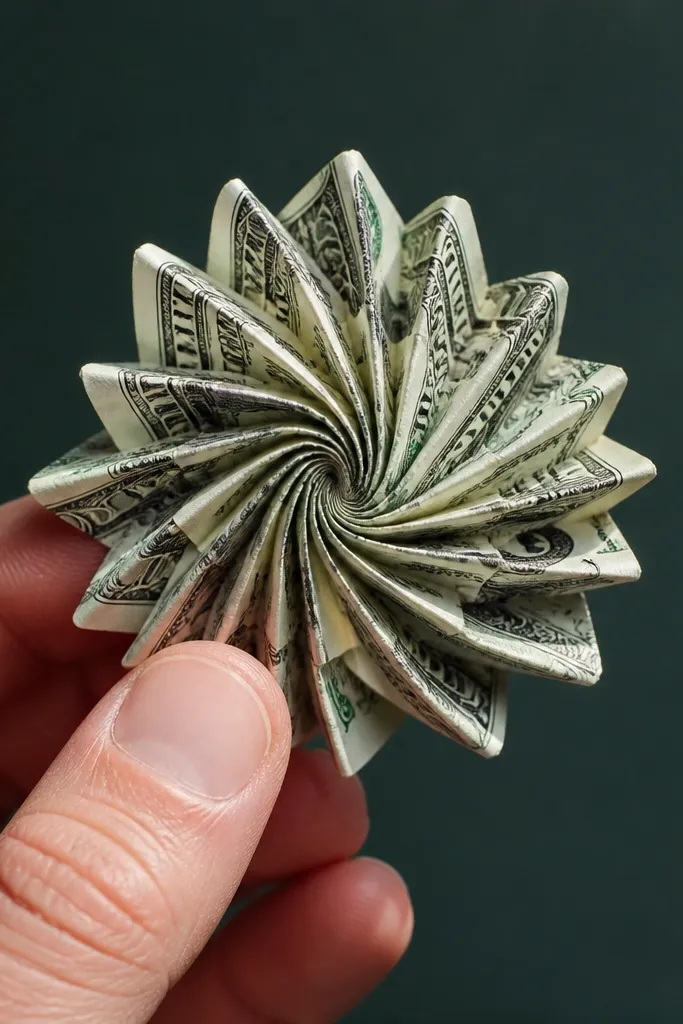
Pinwheel petals add movement to a bouquet even when everything is stationary. The accordion spiral creates a layered spiral edge that looks like it’s spinning in photos. It’s a great choice for events with bright lighting, because the stripes flash as the camera angle changes. This fold also gives you a full look with fewer bills because the spiral concentrates volume in a small area. Use it for the top layer or for a side cluster where you want extra sparkle.
Fold the bill into accordion pleats with a 1/4 inch width. Fold the accordion in half, then twist it gently so the pleats spiral. Pinch the twisted center and secure with a strip of tape around the pinch. Attach a wire stem through the center pinch, then glue the bottom edge to the wire so it holds tension. Shape the pinwheel by fanning the spiral slightly outward before you mount it.
Twist less than you think. A small twist reads as “pinwheel” without turning the petal into a kinked mess.
Don’t over-tape the face — tape lines show up as shiny streaks in photos.
13. Z-Fold Money Leaf With Curved Edges

Leaf folds make a bouquet look more botanical, and money leaves look especially good next to real or faux greenery. The Z-fold creates a strong ridge, which reads like a leaf vein in photos. You can use these leaves to fill gaps between flower petals, making the whole arrangement look fuller and more intentional. This is a smart pick if your bouquet has a lot of empty space on the sides of the foam block. It also helps hide stem ends because leaves cover the base area.
Fold the bill into a Z pattern by creating two creases that split it into three sections. Press the first crease, then fold again at the second crease in the opposite direction. To get curved edges, gently bend the folded leaf along the ridge and hold for 10 seconds. Secure the leaf by taping the underside where the folds overlap. Attach to a wire stem by poking a hole at the bottom fold point and wiring through, then add a small strip of floral tape to lock it in place.
Bend after creasing, not before. Flexing too early blurs the fold lines.
Avoid leaves that are too small — tiny leaves look like scraps instead of intentional decor.
14. Pocket-Flip Bill Petal (Hidden Fold Edge)

This fold is all about clean edges. The “pocket” hides the messy inside fold so the outside line stays smooth, which is what makes the bouquet look high-end in close shots. It’s also a good fix for bills that have slight print or edge imperfections because the hidden fold area reduces visual noise. Use this for the front-facing petals where people will see the money pieces most clearly. It’s also a good choice if you’re wrapping the bouquet tightly and want petals to look crisp instead of layered chaos.
Fold the bill in half lengthwise and press. Create a petal by folding one long side inward about 1/2 inch, then folding the other side in to meet it. Tuck the bottom edge into the crease pocket you create, so the inside fold disappears. Secure the pocket with a tiny piece of tape inside the tuck. Attach to the stem by wiring through the bottom fold pocket area, then shape the petal outward by bending gently at the top crease.
Use double-sided tape inside the pocket so you don’t get shiny tape streaks on the visible face.
Avoid taping on the visible outer edge — it creates a reflective line that looks sloppy on camera.
15. Layered Half-Circle Bill Scallops
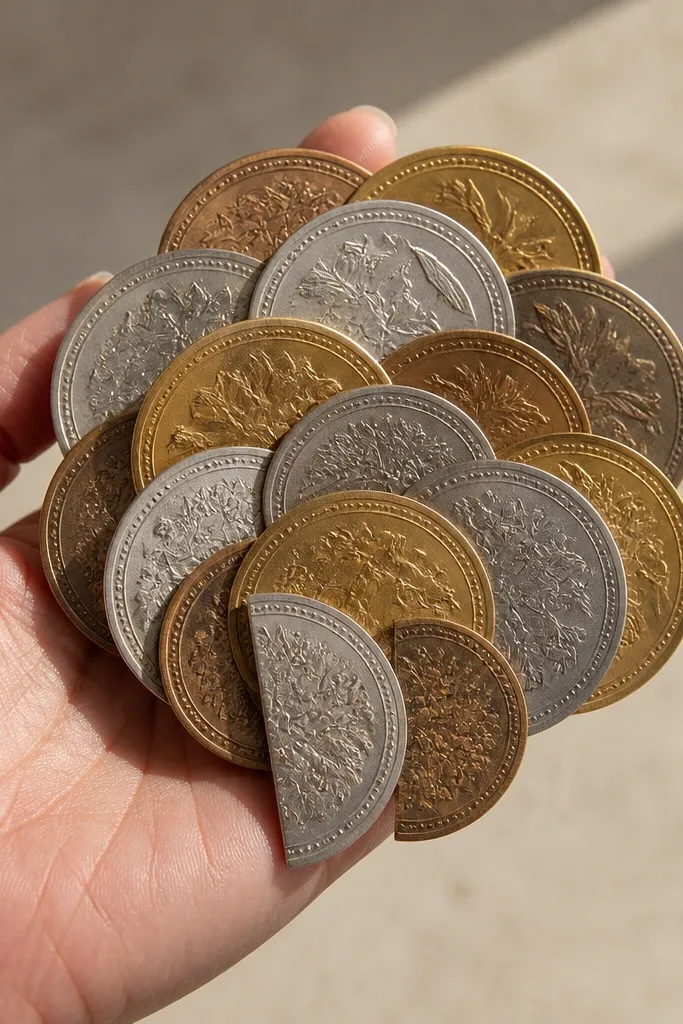
Scallops are one of the easiest ways to make a bouquet look designed without complicated origami. The half-circle shape creates repeating curves that look like petals in a pattern, and layering makes the cluster look thick. This is a great option when you want a dense top ball, like a wrapped bouquet head. It’s also forgiving with small imperfections because the scallop repetition hides minor unevenness. Choose this fold if your bouquet is going to be photographed from above or slightly angled.
Fold the bill in half lengthwise, then fold again to create a narrow strip. Shape the strip into a half-circle by bending the strip into an arc, then press a crease where it overlaps. Repeat to make multiple identical scallops, then layer them by gluing the flat base of one scallop to the flat base of the next. Attach the first scallop layer to your foam or wire frame using hot glue at the base only. Build upward in layers, rotating each scallop so the curves form a full ring.
Editor's noteMake 12 scallops first, then test their ring size on your foam top before gluing anything permanently.
Skip thisDon’t glue the curved face — it warps and the scallops stop looking like petals.



