
1. Foam Ball Bouquet With Blush Paper Roses and Bill Sleeves
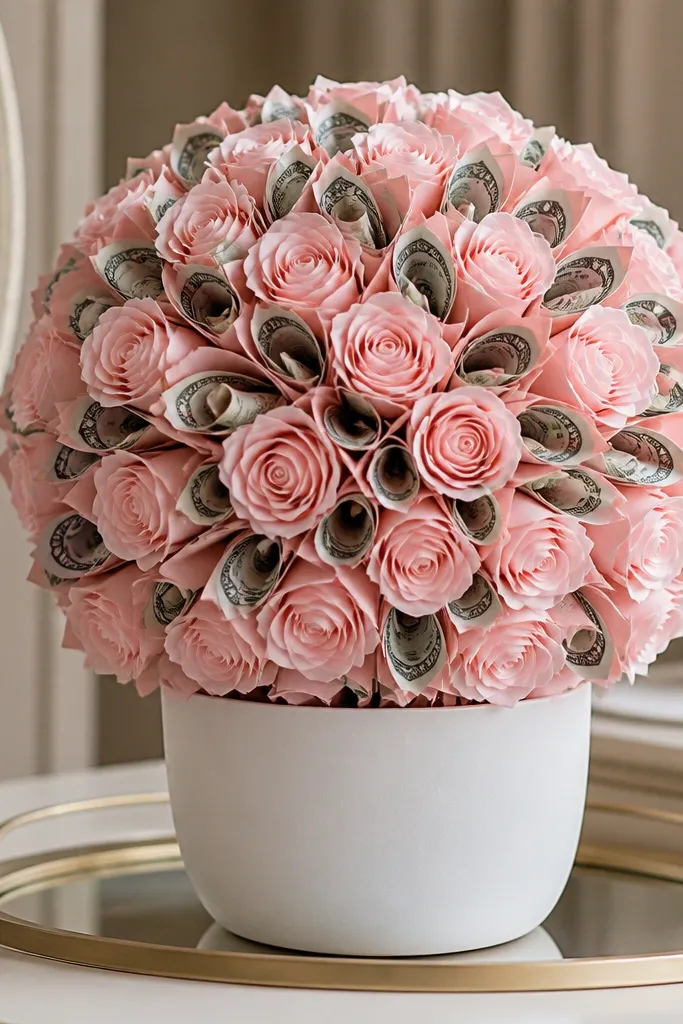
This one looks like a boutique flower bouquet because the foam ball gives you a perfectly rounded silhouette, and the roses cover every seam. The money reads as part of the design because each bill sits in a paper sleeve that matches the rose color family. Use cream and blush sleeve paper so the bills don’t look harsh against the flowers. It’s beginner-friendly because you don’t need fancy hardware — you just glue rose stems into the foam and keep money inserts removable.
Start with a 6-7 inch foam ball and wrap it with thin tissue or matte craft paper so the foam texture doesn’t show. Build paper roses with 2-3 petal layers and glue a covered stem (green floral tape over a craft stick). Cut 3x6 inch rectangles of matching paper, fold into a sleeve, and slide a folded bill inside before tucking the sleeve behind rose clusters. Glue the sleeve tabs or tuck points behind petals so only the bill face shows.
Editor's noteUse a fabric glue stick or hot glue for the rose bases, then keep the bill sleeve edges secured with tiny dots so you can remove the money later.
Skip thisDon’t glue money directly to the foam ball — it wrinkles and ruins the clean look.
2. Wreath Ring Bouquet With Cream Roses and Side-Tucked Cash
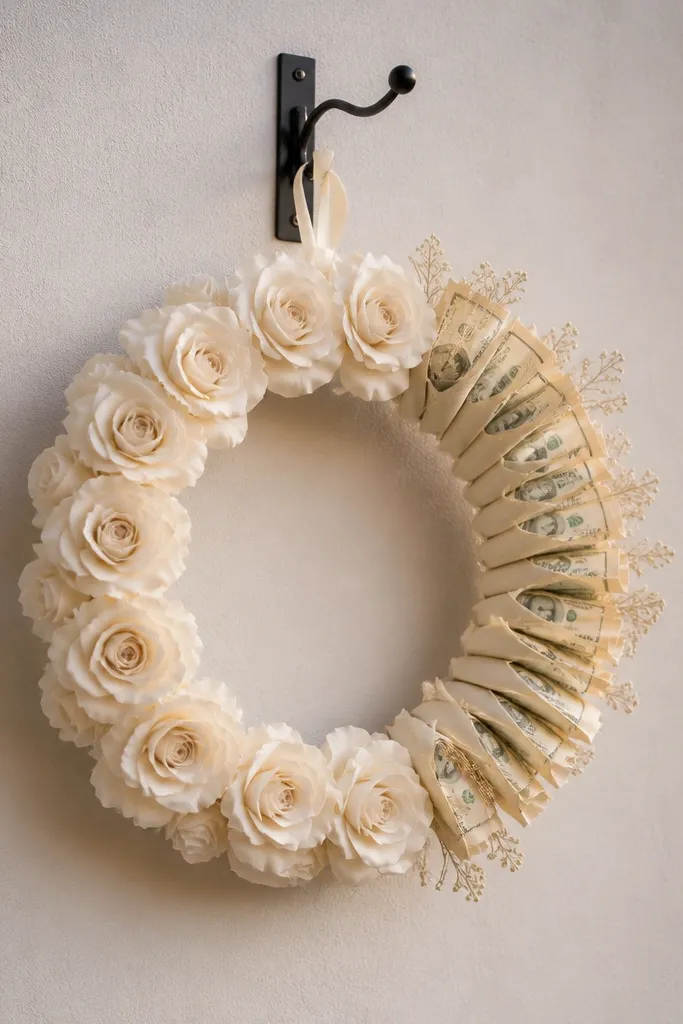
A wreath ring gives you a modern, photo-ready shape that reads well even from the side. The trick is placing money on one side like a “gift highlight” instead of scattering it everywhere. Cream roses look soft and expensive, and the wreath ring makes it easy to keep spacing consistent. This is great for birthdays and housewarming gifts because it hangs flat and doesn’t need a vase.
Use a 10-12 inch wire wreath ring (or bend craft wire into a ring) and cover it with green felt or ribbon strips. Make cream paper roses and attach them with hot glue to short stem wires you can tuck into the ring. Fold bills into thirds, then slide them into small paper tuck pockets made from 2x4 inch rectangles. Glue the pocket behind rose leaves so the bill faces sit slightly angled outward.
Add 5-7 small “leaf sprigs” cut from green cardstock so there’s a visual buffer between roses and money pockets.
Skip the random cash placement — side-tucked looks intentional, scattered looks accidental.
3. Dowel Frame Money Bouquet With Tall Rose Clusters
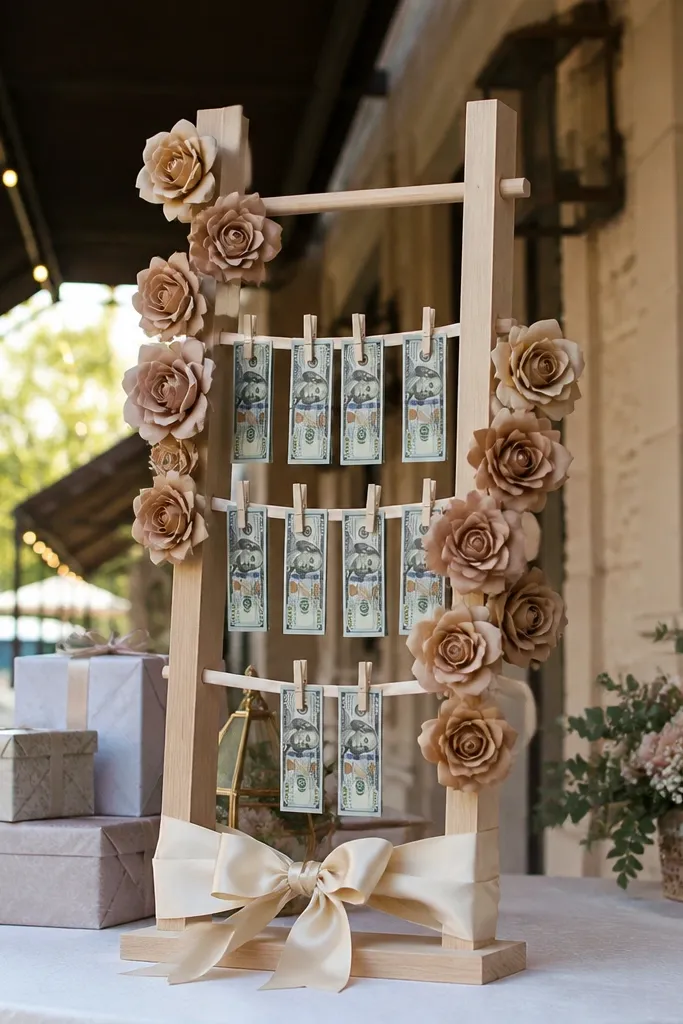
If you want something that looks like a keepsake display, build it on a simple dowel frame. Tall clusters of paper roses create height, so the money doesn’t get lost. This design also makes the money easy to pull out because bills sit in clipped holders between ribbon loops. It’s ideal for graduations, weddings, and milestone birthdays where you want a “standing” gift.
Cut two wooden dowels about 12-14 inches tall and connect them at the top with a ribbon-wrapped crossbar. Wrap the frame with satin ribbon or crepe paper strips, then glue small rose stems in groups of 3. Create bill holders using mini binder clips covered with cardstock sleeves so they don’t look shiny. Fold bills into thirds, slip into the clip sleeve, then clip between rose clusters.
Stagger rose heights: put taller roses on the outer edges and shorter ones in the center for a clean triangular silhouette.
Don’t use bare metal clips — they flash in photos and cheapen the look.
4. Basket Weave Look With Paper Roses and Money "Berries"
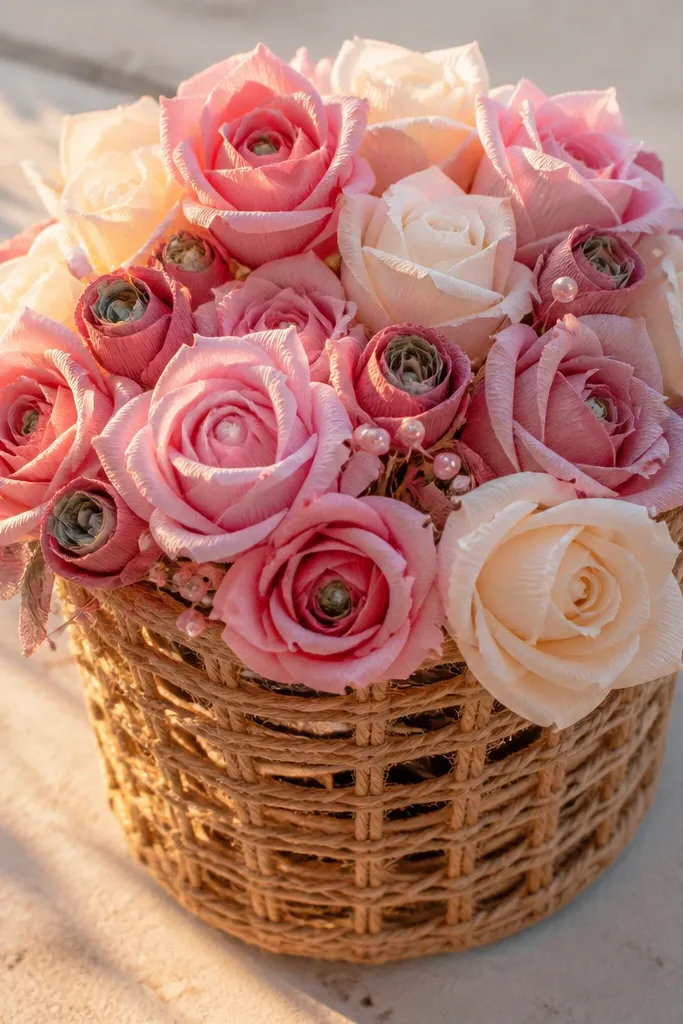
This is a cute, slightly whimsical money bouquet that still photographs well because the roses sit in a “basket” container. The money goes in as little berry-like accents that look like gift charms, not random bills. The photo effect is strong: the basket weave hides the base, and the rose petals make the money feel intentional. It’s a good choice for smaller budgets because you need fewer roses to look full.
Use a small basket (or build one from cardboard strips) sized about 8-9 inches wide. Cover the inside with floral foam or crumpled paper for stability, then anchor green paper leaves around the rim. Make rose buds and small half-roses so you can cluster tightly. For money berries, roll a folded bill into a tight cylinder, wrap with thin red or gold paper, and cap with a tiny green paper leaf before gluing into the foam.
Editor's notePick two money “berry” colors only — gold with blush roses or red with cream roses looks cohesive.
Skip thisAvoid oversized bills as berries — they look thick and won’t sit neatly in the cluster.
5. Long Ribbon Cascade Bouquet With Rose Bud Money Drops
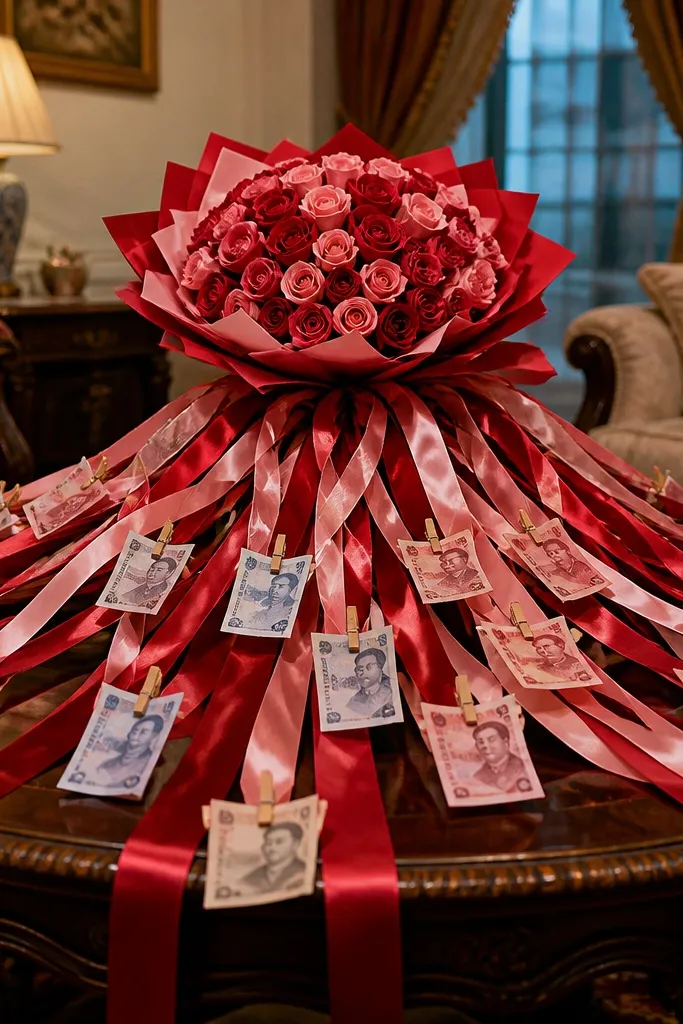
This one looks dramatic because the ribbon cascade creates motion in photos, and the money drops look like ornaments. Instead of stuffing money into the bouquet, you attach small bill “drops” to ribbon loops near the roses. It reads like a gift bouquet plus a hanging decor piece. This is especially pretty for Valentine’s Day and anniversaries, where you want the roses to be romantic and the money to be playful.
Start with a foam oval base or a stiff cardboard oval wrapped in fabric or matte paper. Glue paper roses at the top edge, then add long satin ribbon tails (8-12 inch tails) tied in pairs. Fold bills into quarters, then slide each into a thin paper sleeve and punch a hole at the top of the sleeve. Tie ribbon through the hole using a small knot, and position drops so they hang between rose clusters.
Editor's noteCut ribbon tails in different lengths by 1-2 inches so the cascade looks layered, not flat.
Skip thisDon’t attach bill drops directly with tape — it will show and wrinkle the sleeve.
6. Monochrome Black Rose Money Bouquet With Gold Bills
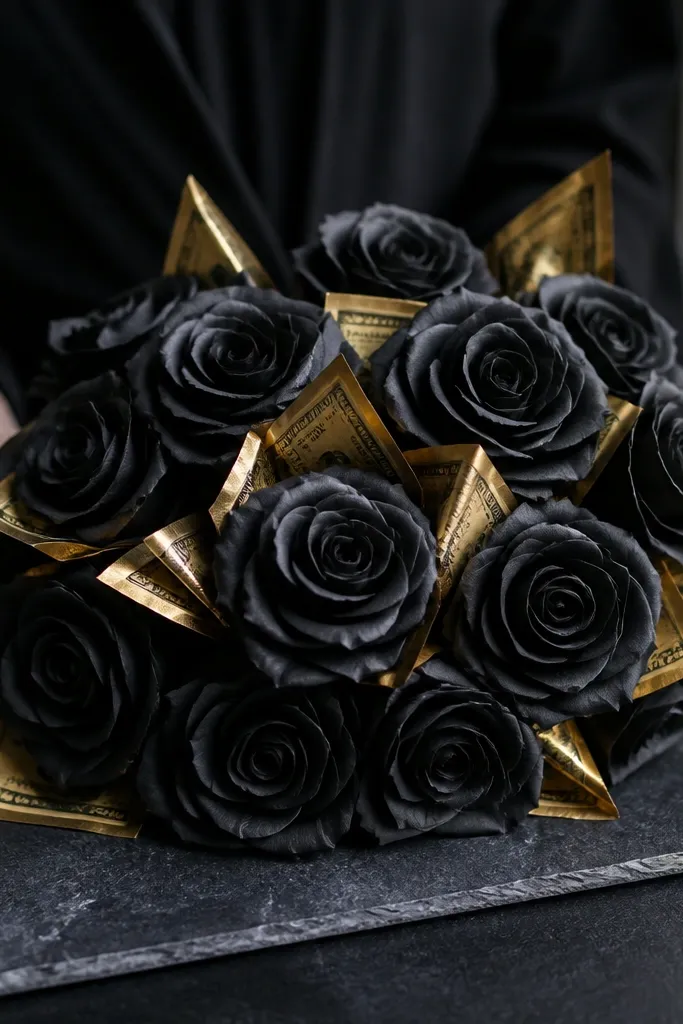
Monochrome looks bold, and it photographs cleanly because everything is one color family. Black paper roses hide minor glue lines better than light colors, and gold bills pop like jewelry. The money is the star, so you keep the roses slightly fewer but larger with strong petal shapes. This design fits men’s gifts, modern decor themes, and anyone who likes a less “cute” look.
Cut black cardstock rose petals in 5-6 layers so each rose looks full even with fewer roses. Build roses with thicker paper so they keep shape and don’t curl. For money, fold gold-toned bills or print-style money paper into thirds and tuck into mini pockets made from matte black cardstock. Glue the pocket behind rose leaves, then add small gold ribbon loops at the pocket top.
Use matte finish black cardstock; glossy black catches light and shows glare.
Avoid thin tissue paper for black roses — it looks see-through and loses structure.
7. Dusty Rose Paper Rose Money Bouquet With Mini Ruffle Envelopes
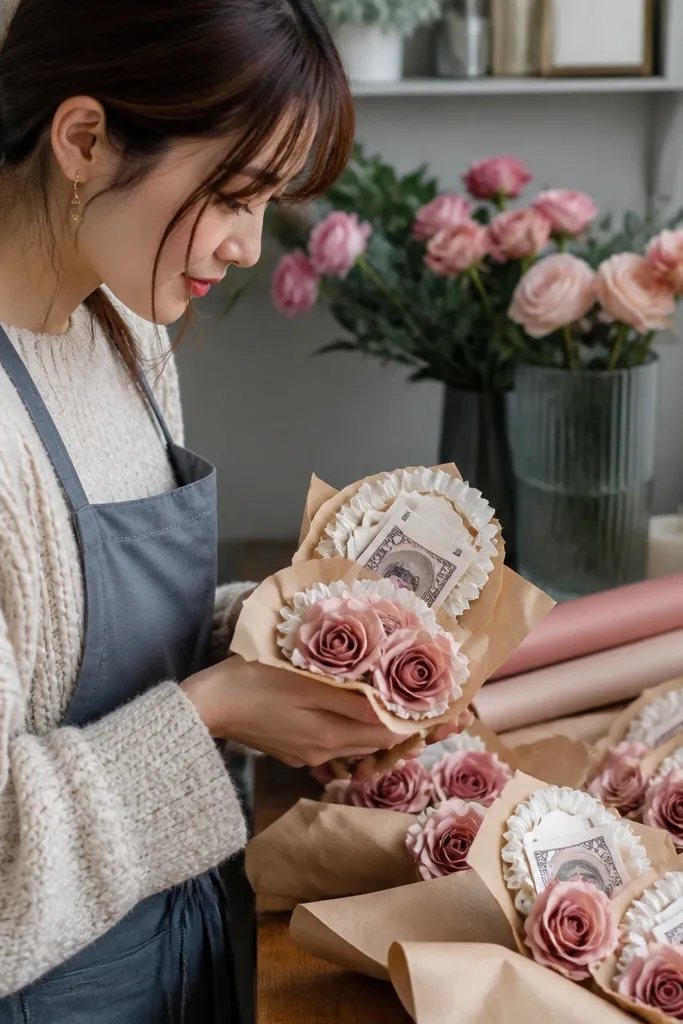
This one looks soft and giftable because the money is framed like mini invitations. Ruffled mini envelopes add texture, so the bouquet looks richer even with simple roses. Dusty rose paper roses keep the palette gentle, and the envelope edges hide where the bill folds. It’s a great fit for showers and birthdays where you want a pretty, feminine look without bulky money clips.
Make dusty rose roses using cardstock and keep stems short so the bouquet stays compact. Cut mini envelope pieces from 4x6 inch paper, fold into envelopes, and add a strip of ruffle paper along the flap. Place a folded bill inside each envelope, then glue the envelope back to short stems or toothpicks. Tuck the envelope stems between rose clusters so the ruffles peek out.
Editor's notePress the envelope folds with a bone folder so the paper looks crisp instead of wrinkled.
Skip thisDon’t skip a ruffle edge — flat envelope tops look like random packaging.
8. Pink Ombré Roses With Clear Bill Sleeves
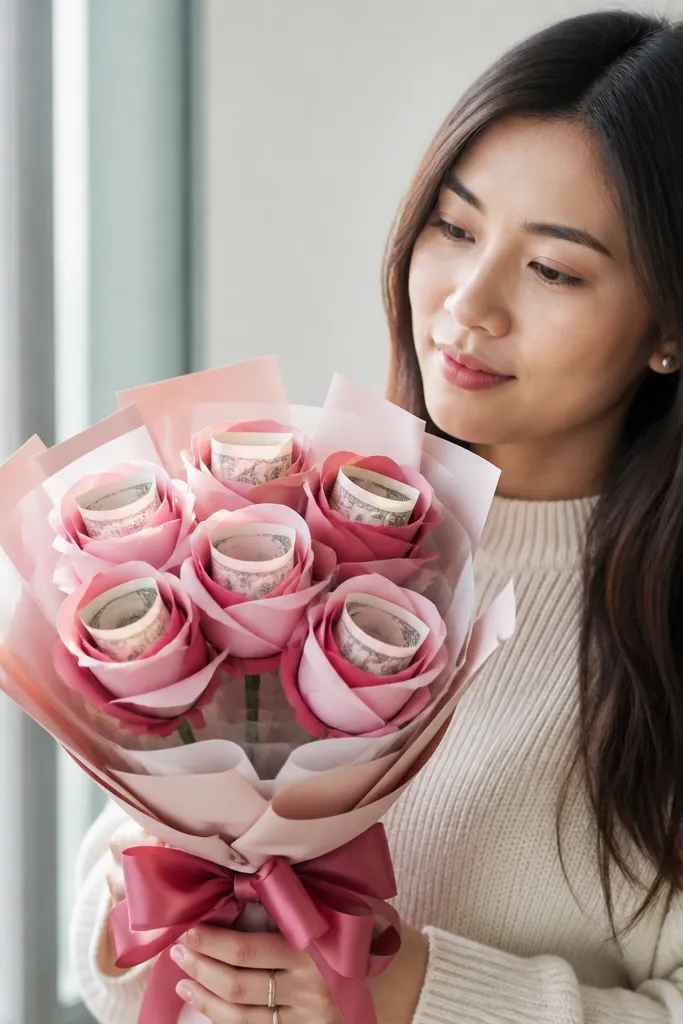
Ombré roses look expensive because the color shift adds depth without extra decorations. Clear sleeves make the money look clean and flat, like a curated accessory. The visual contrast — soft pink petals and crisp bill edges — makes the bouquet pop in photos. This is a solid choice if you want the money to look protected and neat rather than tucked into thick pockets.
Create ombré petals by blending two pink inks or using ombré cardstock for the rose layers. Build roses with tight inner rolls so the petals don’t separate. For bill sleeves, cut 3x5 inch clear acetate pieces, fold into a sleeve, and tape the top edges on the back side only. Insert folded bills, then glue the sleeve to green cardstock tabs that you tuck behind rose stems.
Use matte tape on the back so the clear sleeve edges don’t shine.
Don’t glue acetate directly to foam — it peels and the sleeve looks messy.
9. Crepe Paper Rose Garden With Money Tag Stakes
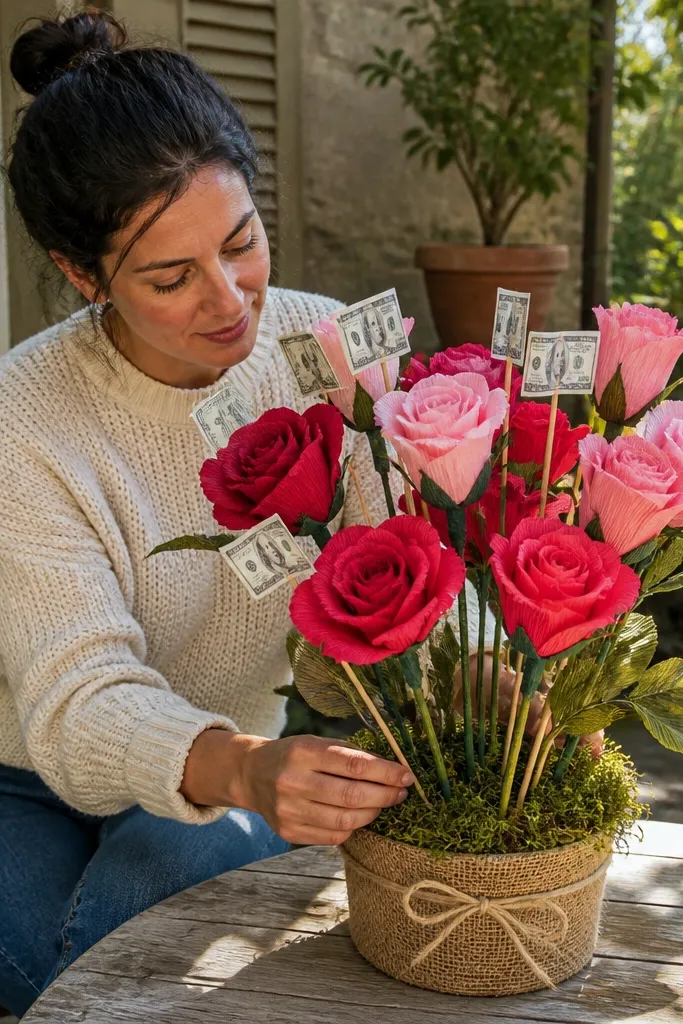
Crepe paper roses have a soft, lifelike texture that looks gorgeous in close-ups, and money tag stakes keep the display playful. Instead of hiding the bills, you present them like garden tags — the look reads intentional. This works well for rustic themes and outdoor party photos because the roses have a natural, airy feel. You’ll need a little patience with crepe, but the result is noticeably prettier than plain cardstock roses.
Cut crepe rose petals and stretch them slightly over a foam pad to create natural curves, then wrap around a small rolled center. Make 12-16 roses and attach each to a thin craft wire stem. For money tags, fold bills and attach to small cardstock rectangles, then glue a mini stick behind each tag. Insert the wire stems into foam and push the money tag stakes near the rose clusters.
Keep tag rectangles small — 2.5x4 inches — so they don’t overpower the roses.
Skip thick wire stems — they poke through crepe petals and ruin the softness.
10. White Rose Wedding Style With Gold Foil Money Accents
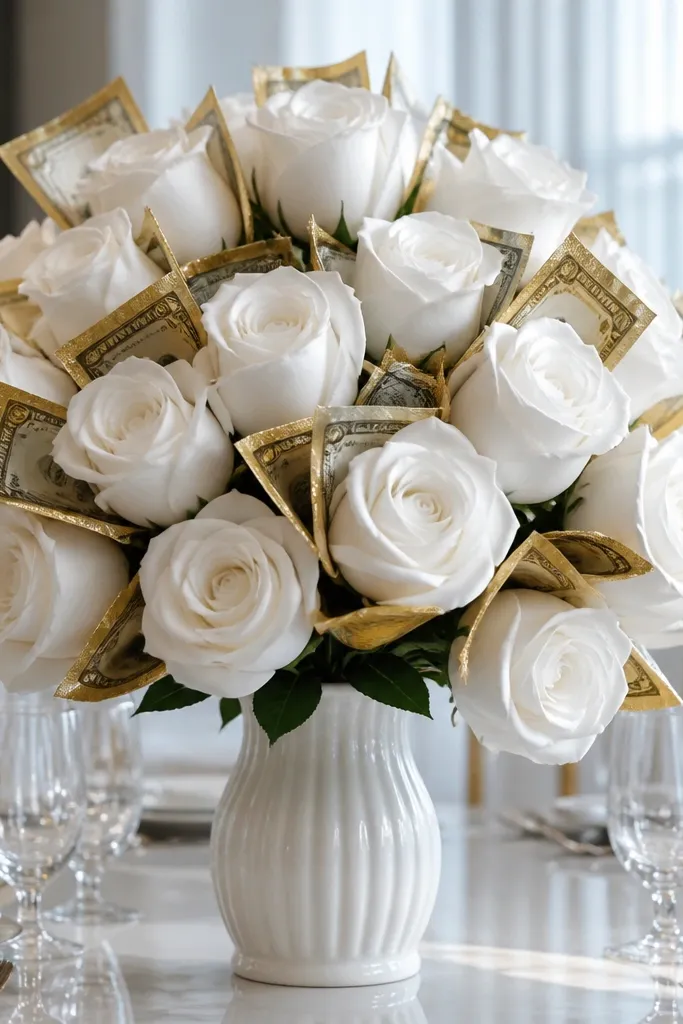
White roses make the bouquet look wedding-ready because they’re bright and clean in photos. Add gold foil money accents to keep it from looking flat — gold catches light while white stays crisp. The key is using gold accents as frames, not messy tape. This design is best for formal events where you want the bouquet to look like decor, not a craft project.
Make white paper roses with 4-5 petal layers and keep the outer petals slightly larger for a fuller shape. Wrap stems with thin green ribbon so the stems look smooth. For money, use folded bills or gold-foil paper tags, then slide them into tiny gold paper frames cut like thin rectangles. Glue frames behind rose leaves so the gold peeks out at the edges.
Editor's noteAdd two small satin bows at opposite sides to balance the bouquet visually.
Skip thisAvoid yellow-tinged white paper — it looks aged under camera lighting.
11. Sunflower Paper Rose Money Bouquet With Bright Yellow Centers
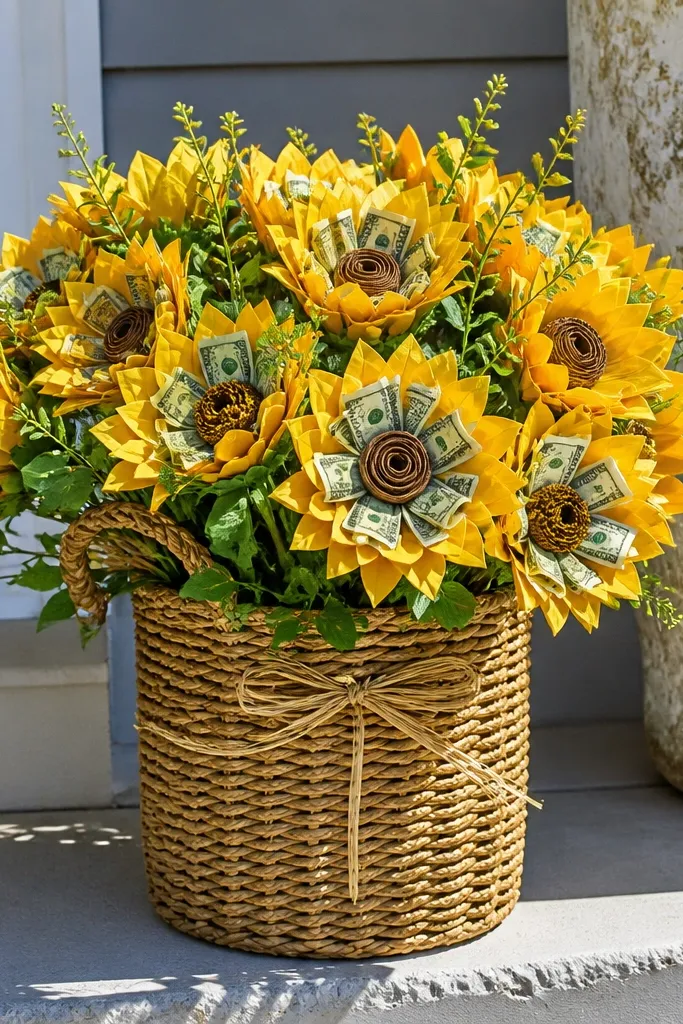
This idea is loud in a good way. Sunflower-style paper roses bring bold color, and the money tucked into the petals looks like part of the flower. You get a cheerful vibe that still reads as a bouquet because the stems and leaves connect everything. It’s a great choice for summer birthdays and anyone who likes a high-contrast look.
Build sunflower-like roses using yellow cardstock spirals for the center and layered petals in warm yellow and orange. Make green leaves and attach them to stems with hot glue. Fold bills into thirds and tuck them into small pocket cutouts shaped like leaf fans behind the sunflower centers. Glue the pocket base to the stem so the bill sits angled upward, visible but secure.
Use two shades of yellow for petals so the flower has dimension instead of looking flat.
Don’t use only one yellow shade — it looks like a single-color blob.
12. Teal and Coral Roses With Folded-Bill Rosette Holders
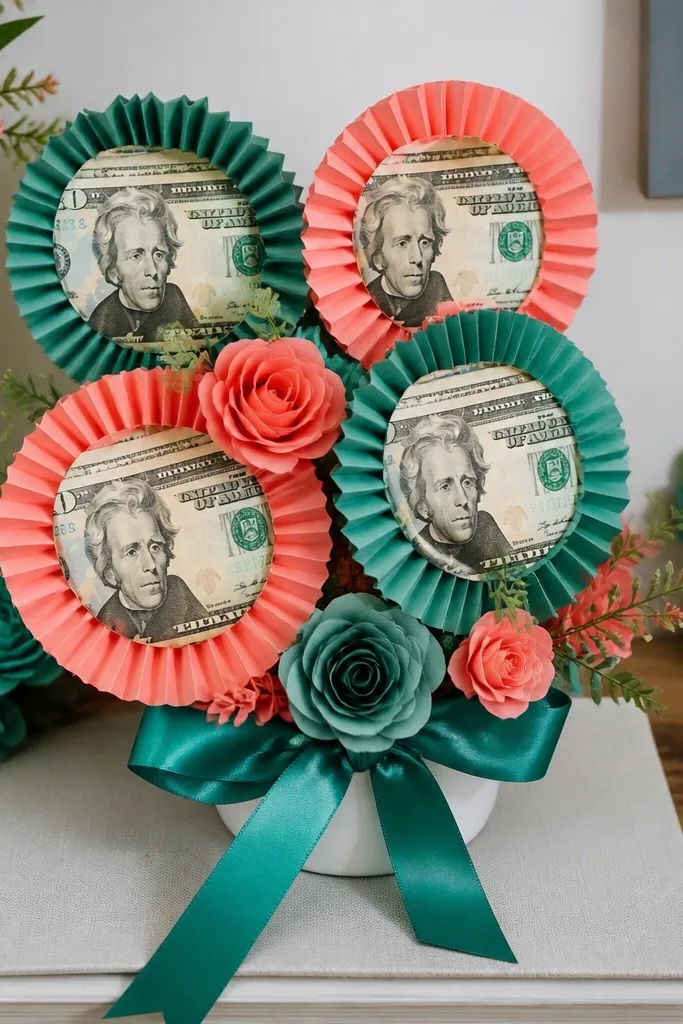
This color pairing looks modern and playful, and the rosette holders make the money look like it belongs in the bouquet. You’re not stuffing bills into the background; you’re giving each bill a decorative frame. Teal and coral also photograph well because they create strong contrast without needing extra glitter. This is a good pick for birthdays where you want the bouquet to look colorful and intentional.
Choose two rose colors: teal and coral, and make roses in two sizes (small and medium). Build rosette bill holders by cutting 2 inch circles from cardstock, folding into pleats, and gluing a small pocket in the center. Slide a folded bill into the pocket, then glue the rosette holder onto short stems. Arrange teal roses at the edges and coral roses in the center so the colors read as a gradient.
Editor's noteKeep rosette holders consistent in size so the bills line up visually.
Skip thisAvoid mixing too many colors in the rose petals — it kills the clean contrast.
13. Pastel Rainbow Rose Bouquet With Hidden Money Bands
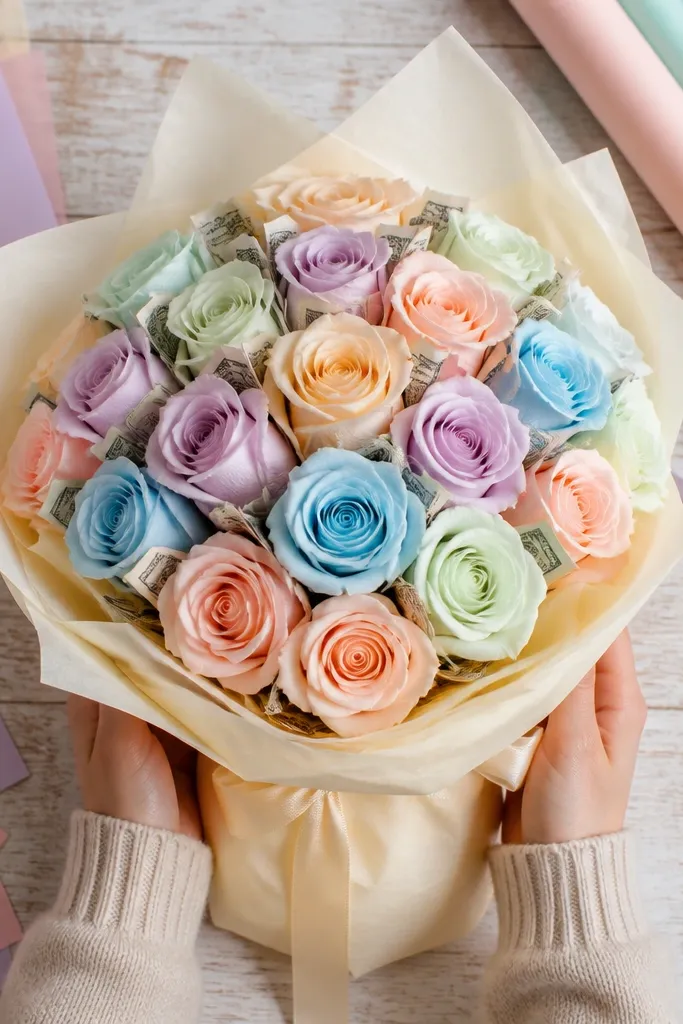
Rainbow bouquets can look messy fast, but you can keep this one photo-clean by hiding the money under uniform bands. The roses are pastel, so the palette stays gentle, and the money bands add a subtle pop without shouting. This design looks great for kids' birthdays and graduation parties because it feels fun while still looking neat. It’s also a good option if you want the bills to stay secure and protected.
Make 14-18 roses in pastel shades and group them by color in bands around a foam ball. Create money bands by cutting 1.5x6 inch strips of cardstock, folding to wrap the folded bill like a belt, and gluing the ends behind the bill. Slide the bill into the band, then tuck the band behind rose petals so only the top edge of the bill shows. Add small matching leaf sprigs to cover gaps.
Photograph from above with bright window light so the bill edge shows without glare.
Don’t show the full bill face for every rose — it turns into a cluttered wall of money.
14. Chocolate Brown Paper Roses With Cream Money Pocket Ribbons
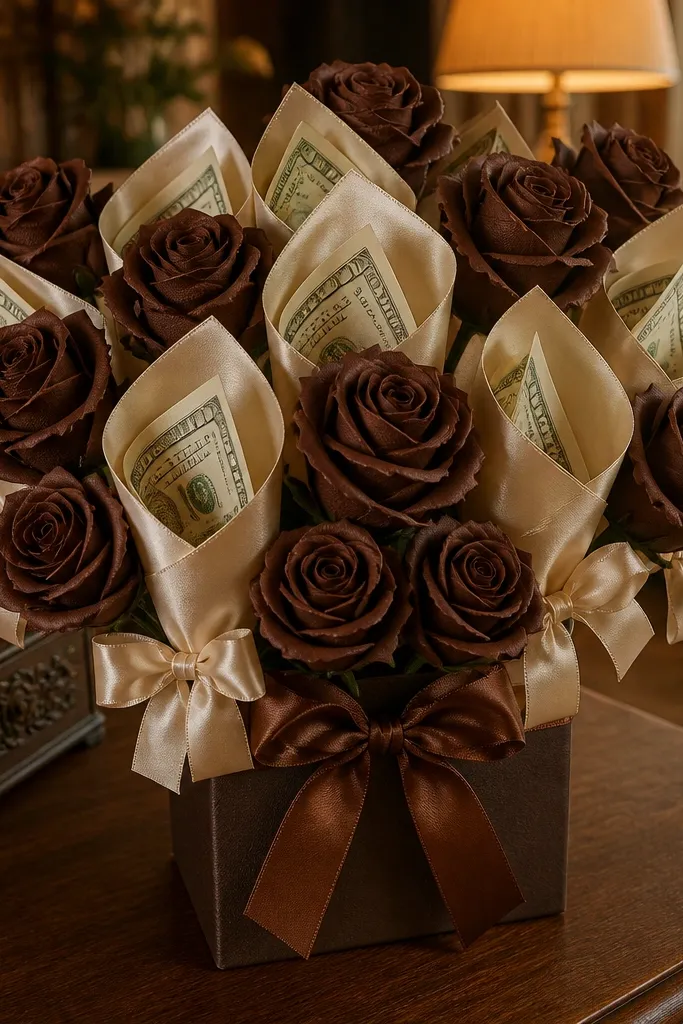
Brown roses look surprisingly classy, especially with cream ribbon pockets. The money pocket ribbon frames the bill neatly and keeps it from curling. This bouquet reads warm and cozy, which is why it works for anniversaries, Father’s Day, and housewarming gifts. The build is straightforward: roses on a base, pockets on ribbon, and a final ribbon wrap to hide the mechanics.
Make chocolate brown roses with thick cardstock petals so they keep shape. Use a foam cylinder or a wrapped cardboard bouquet base about 10 inches tall. Add roses in a spiral pattern up the base to create a clean look. Cut cream ribbon pockets from ribbon or cardstock ribbon strips (about 1.5 inches wide), fold into small pockets, and insert folded bills. Glue pocket tabs behind rose stems so pocket mouths face outward.
Editor's noteUse wide satin ribbon for pockets; narrow ribbon makes the bill look squeezed.
Skip thisAvoid thin brown paper — it droops and ruins the structured look.
15. Red Rose Money Bouquet With Transparent Flower Bud Holders

This design looks like a gift-meets-jewelry setup. The red roses provide the romantic punch, while the transparent bud holders make the bills look crisp and protected. You get a clean “flower bud” silhouette that pops in photos because the money is framed. It’s best for dates, proposals, and anniversaries when you want something bold and glossy-looking without actual glass.
Build red roses with layered petals and slightly ruffled edges using scissors. Make clear bud holders from acetate: cut a 3x4 inch sheet, fold into a cone, and tape the seam on the back side only. Insert a folded bill into the cone, then glue the cone base to a green cardstock circle that you can attach behind the rose. Place 8-10 roses around a compact foam base and keep bud holders clustered near the center for impact.
Editor's noteDry-fit cones before gluing so the bill sits centered and doesn’t tilt.
Skip thisDon’t overfill the acetate cones — they crinkle and show creases.
16. Black-Gold Geometry Bouquet With Rose Money Pegs
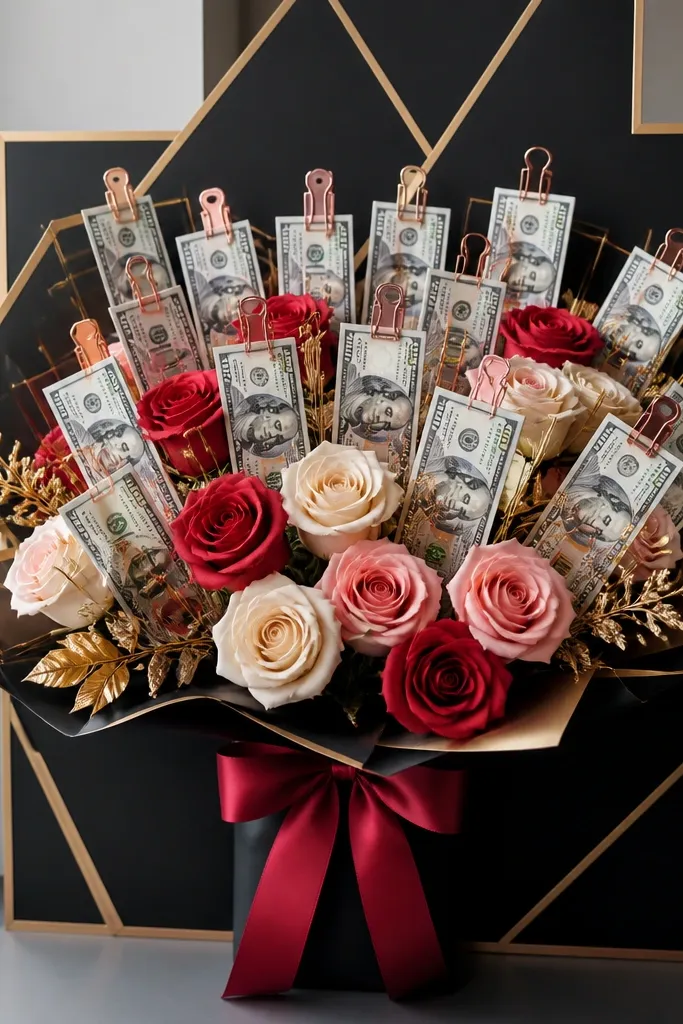
This one leans modern and graphic. The black-and-gold palette looks sharp, and the money pegs make bills look like design elements instead of inserts. Paper roses still soften the look so it’s not just a box of decorations. This works well for tech gifts, corporate-style celebrations, and anyone who likes clean lines.
Start with a square foam block or thick cardboard base wrapped in black matte paper. Build black and gold paper roses and attach them to short skewers. Create money pegs by folding bills and attaching them to tiny triangular cardstock tabs on the end of toothpicks or thin skewers. Stick pegs between rose stems so bills face forward at a slight upward angle. Add gold foil leaf accents around the peg points to cover any gaps.
Editor's noteKeep peg angles consistent — all bills tilted the same direction looks intentional.
Skip thisAvoid shiny black tape — it creates glare streaks across photos.
17. Teacup Bouquet With Mini Roses and Side Money Clips
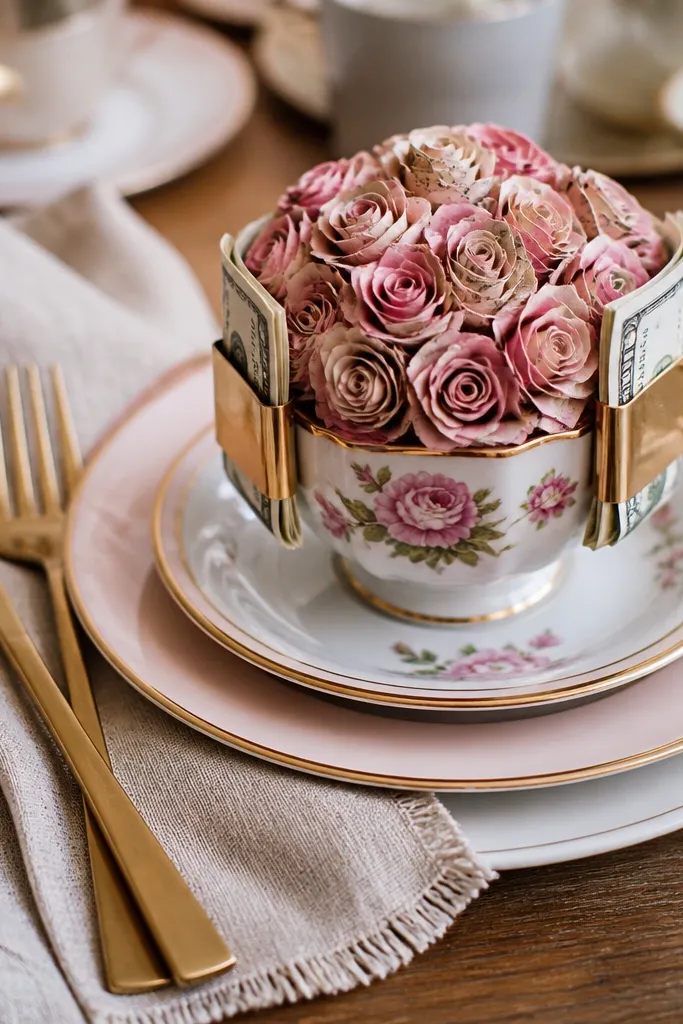
A teacup base makes this bouquet look like a vintage gift display. Mini roses are the right scale, and the side money clips create a neat, readable design. This is a great choice when you want something that sits on a table without looking bulky. The teacup also hides the mechanics, so the back looks finished even if someone sees it from a distance.
Choose a ceramic or faux teacup and fill it with floral foam or crumpled paper secured with hot glue. Make mini paper roses and glue them around a toothpick stem for thin, tight clusters. For money clips, use small clothespins painted matte white or covered with cardstock sleeves. Clip folded bills at the rim area where rose clusters don’t block them, then tuck small leaf cuts behind the clips to hide the hinge.
Editor's notePaint or cover the teacup rim area first so the clip base doesn’t show raw material.
Skip thisDon’t place clips too high — they can snag clothing and look awkward in photos.
18. Rose Spiral Money Bouquet With Twisted Ribbon Stem Wraps
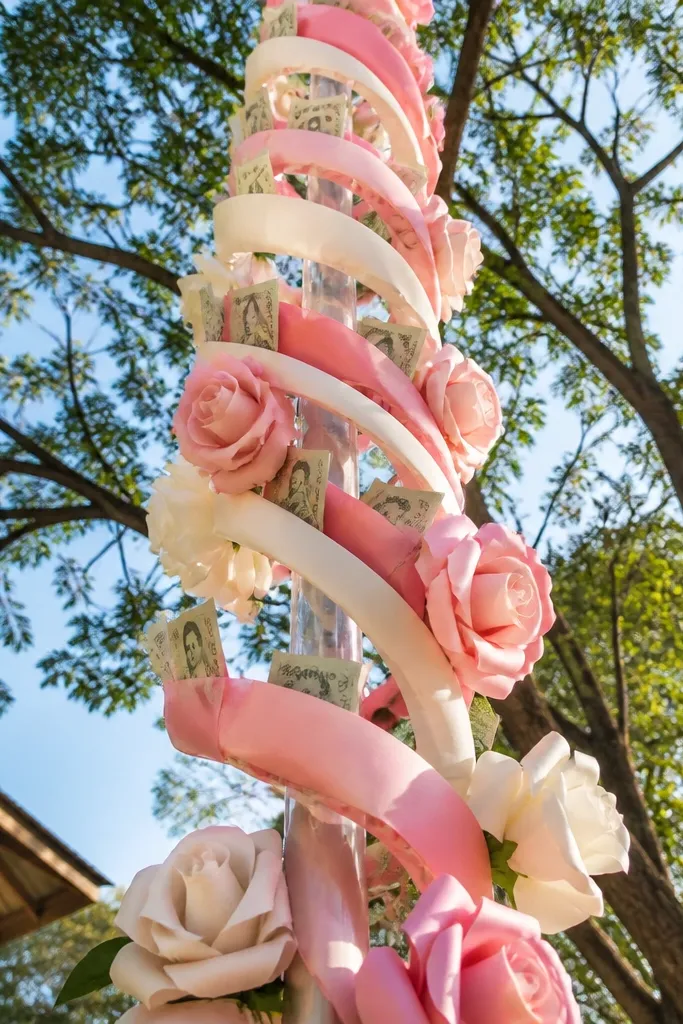
A spiral arrangement gives you that “wow” look because the bouquet has a clear path for the eye. Twisted ribbon stem wraps make the stems look intentional and decorative, which matters when money inserts are visible along the spiral. This design is photogenic because it creates movement — even standing still. It works for gifts where you want a structured, modern bouquet shape rather than a round ball.
Use a tall base tube (8-10 inches) covered in matte paper. Insert a central dowel and wrap it with twisted ribbon strips from bottom to top. Attach roses in a spiral pattern around the tube using short stem wires. For money, fold bills and tuck them into ribbon-wrapped mini pockets made from thin cardstock strips that wrap the bill like a sash. Place pockets at intervals so they line up with the spiral spacing.
Editor's noteMark rose placement on the base with pencil dots first — spiral bouquets look best when spacing is even.
Skip thisAvoid random pocket heights — uneven placements make the spiral look chaotic.
19. Hanging Heart Money Bouquet With Rose Petal Frame
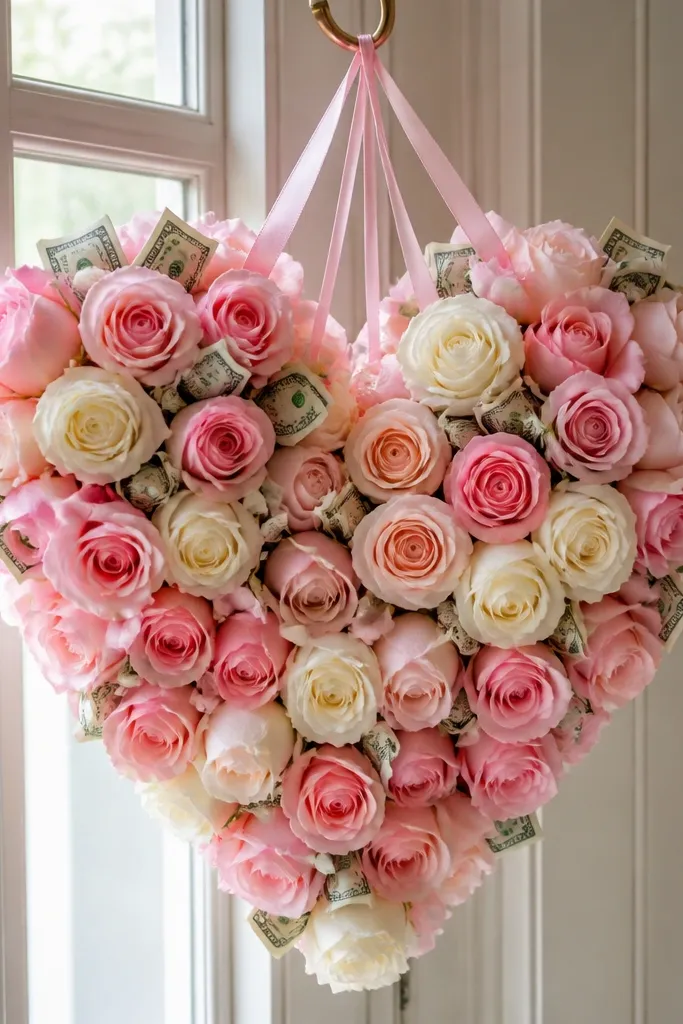
A hanging heart is one of the most photogenic money bouquet shapes because it’s instantly readable, even in busy backgrounds. The rose petal frame makes the heart look like a decorative wall piece, not a craft board. Bills tuck behind petals so the front stays clean and the money looks like part of the design. This works for Valentine’s Day, anniversaries, and engagement gifts where you want a romantic centerpiece.
Cut a heart frame from thick cardboard (about 10-12 inches tall) and cover it with green cardstock leaves or mossy paper. Glue paper roses across the heart in overlapping clusters, starting from the center outward. Create money slots by cutting small slits behind rose layers and sliding folded bills into place. Secure bill edges with tiny paper tabs so they don’t slip while still keeping the front smooth.
Editor's noteHang it using ribbon at two points on the top edge so it stays flat and doesn’t curl.
Skip thisDon’t glue roses only at the edges — the heart will bow and the money lines will warp.
20. Mini Money Bouquet Stack With Rose Bud Toppers
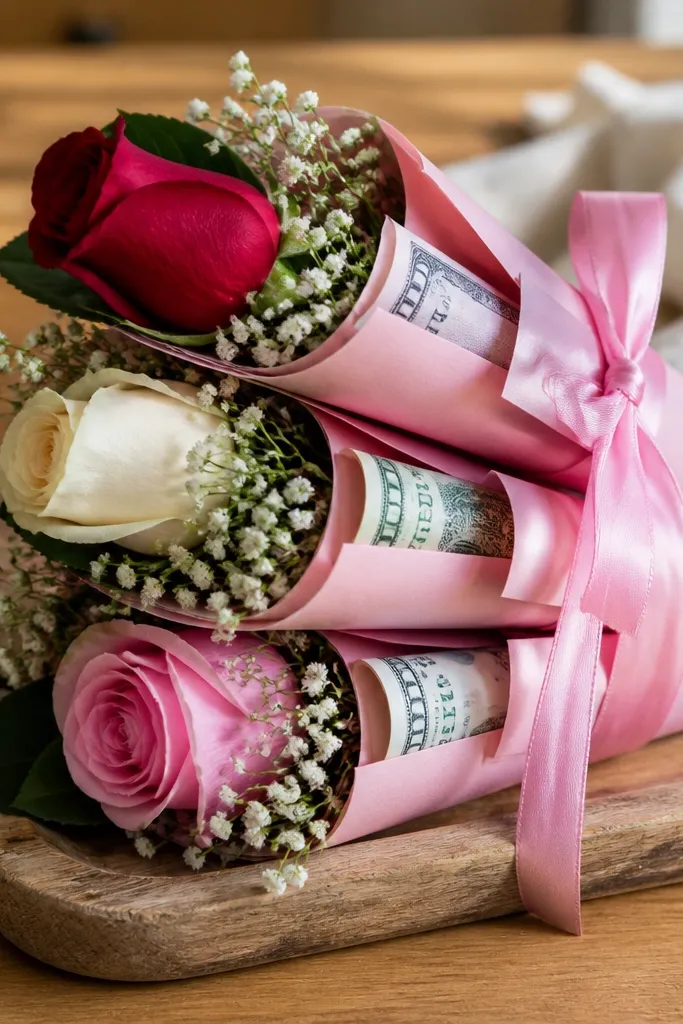
If you want something that looks like a set of gifts, stack mini bouquets. Each mini bouquet has its own money element, so photos look playful and intentional instead of one big pile. Rose bud toppers keep the look light, and the stacked arrangement makes it easy to fit in small spaces. This is good for table gifts at parties or for gifting multiple people without making multiple complicated bouquets.
Make 3-5 mini bases from small foam blocks or wrapped cardboard circles (about 3-4 inches wide). Build tiny rose buds and attach them to toothpick stems so you can poke them into the mini foam. Fold bills into small rectangles, then tuck into mini pocket slits cut into the base and glue the slit edges behind petals. Tie a small ribbon around each mini base and keep rose buds centered so the stack looks neat.
Choose one ribbon color across all minis; it makes the set look cohesive in photos.
Don’t vary base sizes too much — uneven stacks look accidental.



