


1. Accordion Bill Carnations with Sage Wrap
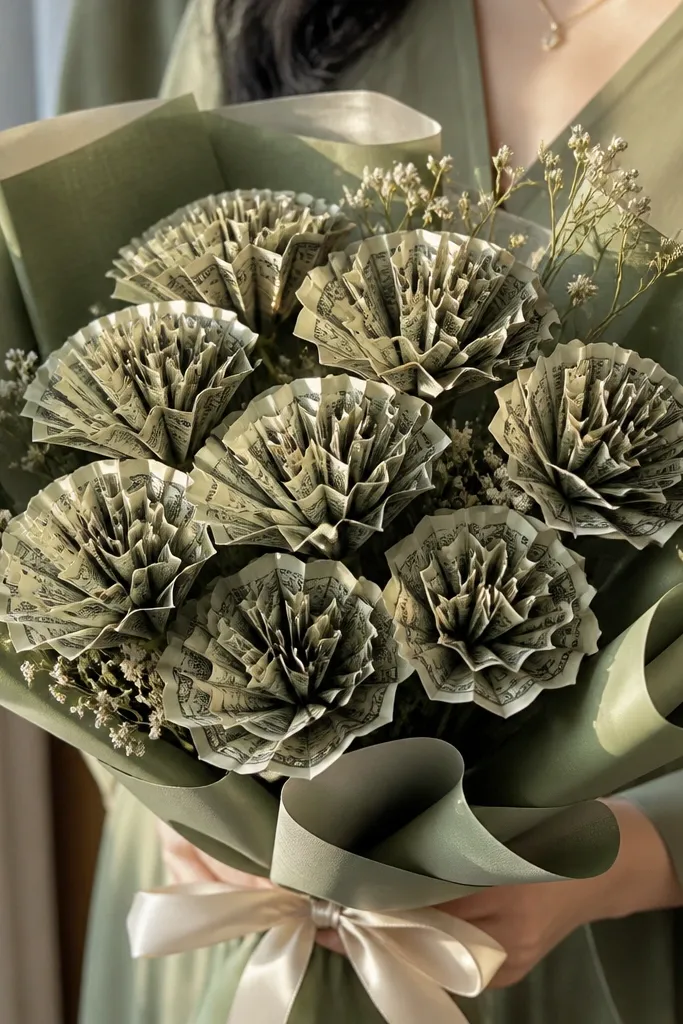
This one looks like a real bouquet because accordion folds create petal ridges. Bills stay crisp when you fold them tightly and keep the fan layers layered, not stacked randomly. It’s a strong choice for birthdays because carnations read sweet, and the money looks decorative instead of “hanging.” Build it with a sage wrap and matte greenery so the money ridges catch light without shiny glare. Skill level is beginner-friendly, and you can finish a small bouquet in about 90 minutes.
Start by cutting a foam block to a bouquet handle shape and inserting a dowel or skewer through the center. Fold each bill into a tight accordion fan (crease every 1/4 inch), then pinch the bottom with hot glue to form the base of a petal cluster. Layer 5-7 fans around a center spiral made from a rolled bill edge, then wrap the stems with floral tape. Finally, cover the foam with greenery and wrap the whole thing in sage paper, finishing with a ribbon bow at the handle.
Use a bone folder or the back of a butter knife to press each accordion crease — it makes the ridges look sharp.
Don’t use thick, glossy wrap paper; it reflects and washes out the folds in photos.
2. Rolled Rose Money Blooms in Kraft Paper Garden

Cut a foam dome (or a small block) and mount it to a handle using a dowel. Slice bills into consistent strips (about 1 inch wide) so every rose looks matched, then roll each strip from one edge into a tight spiral. Fix the spiral tip with a dot of hot glue, then tuck 4-6 spirals into a slightly larger roll to form the rose head. Attach the rose heads to floral wire stems, then push stems into the foam. Cover the base with small kraft paper leaves (cut leaf shapes, crease down the center) and wrap the bouquet with kraft paper and twine.
Rolled bills read like roses because the spiral edge mimics petals. This is the cleanest “money looks like flowers” option for people who want a classy look without making 50 tiny parts. Kraft paper also hides minor glue seams better than bright wrapping paper. The roses give you a structured silhouette, so the bouquet stays photogenic from every angle. Expect this to take a bit longer than fans because each rose needs a tight roll and a secure base.
Skip thisSkip random strip widths; mismatched widths make the roses look uneven fast.
Editor's noteRoll on a firm surface and keep tension steady — loose rolls look like coils, not petals.
3. Budget Bouquet Bow with Money Dollar Petals

Start with a shallow foam disc mounted to a handle or a small basket base. Cut bills into petal shapes by trimming each bill into 5-6 thin petal segments (keep sizes consistent). Curve each segment slightly by wrapping it around a pencil, then glue the curved edges together at the base to form a petal cup. Insert petals into the foam in tight rows, then add a second row in a contrasting color or denomination. Finish by covering the foam rim with a ribbon ring and tying a large bow at the front.
This idea is built for the “I want it cute but not complicated” crowd. The money petals give you a full look, while a single big bow makes the bouquet look styled instead of DIY. It’s also great when you’re working with a smaller number of bills because each bill becomes multiple petal pieces. Use a neutral color palette so the bow reads crisp in photos. The result looks intentional even if you’re not a crafting perfectionist.
Skip thisDon’t leave foam exposed at the rim; it ruins the “bouquet” look instantly.
Editor's noteMake petal segments slightly thicker at the bottom edge so they hold their curve after glue cools.
4. Monogram Money Flower Wall Frame
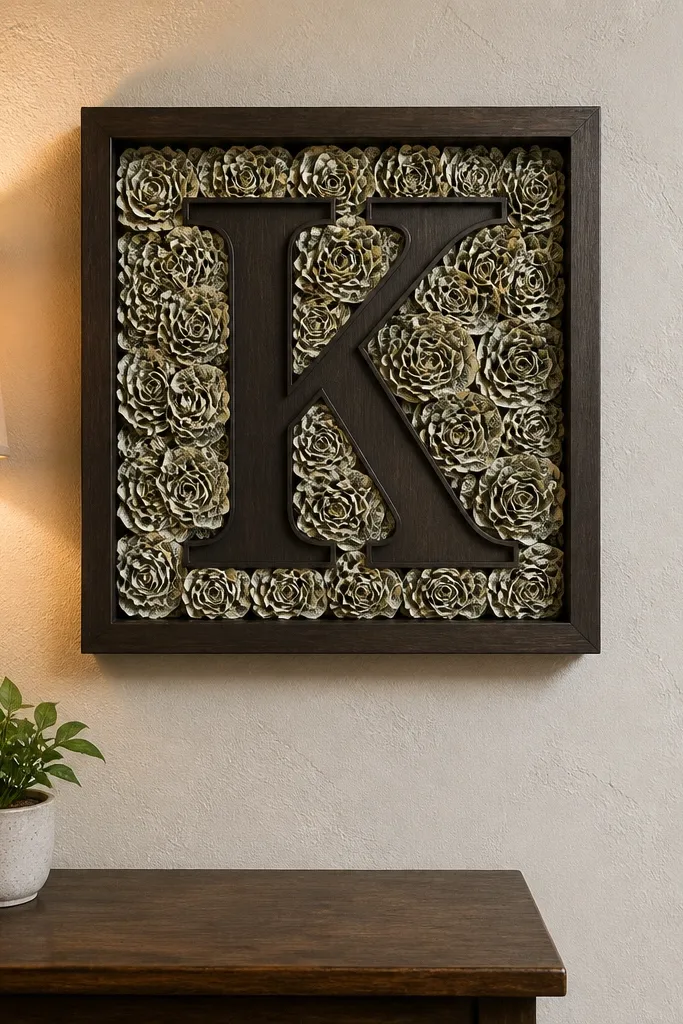
Cut a letter shape from 1/2-inch craft foam and mount it to a backing board (cardboard or foam board). Create flower centers by folding bills into small accordion circles, then glue each flower to the foam letter using a hot glue dot. For petals, layer 6-8 small fan petals around each center, then repeat across the letter. Add a thin border of greenery strips using faux leaves hot-glued around the outer edges. Place the finished monogram in a frame or add a backing stand so it can stand upright.
If you’re gifting money for a milestone, this gives you a keepsake look without needing a full bouquet. The monogram makes the money arrangement feel personal, and the money flowers create a tight, photo-ready pattern. It’s also easier to assemble than a handheld bouquet because the frame keeps everything aligned. Choose a letter size that fits the bills — for example, a 6-inch monogram works well with standard craft foam and smaller money folds. This is best for desks, dorm rooms, and entryway shelves.
Skip thisDon’t glue flowers directly to a shiny board; the glue can fail and cause lifting.
Editor's noteLay out a dry grid first with paper cutouts so your flowers don’t end up crowded on one side.
5. Mini Money Bouquet in a Clear Glass Vase
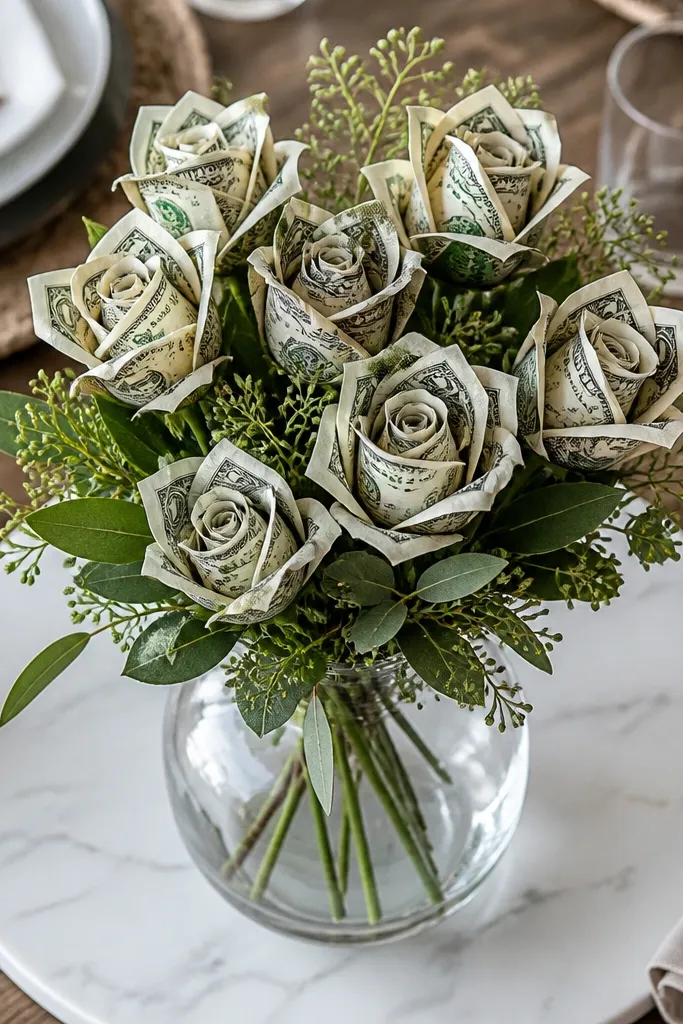
Choose a small clear vase and cut a foam insert to fit inside (leave a 1/2-inch gap below the rim). Make 8-12 money blossoms by folding bills into simple pocket petals: crease a bill into thirds, fold the bottom edge under, then glue the fold to create a petal pocket. Attach each petal pocket to floral wire stems with hot glue. Insert stems into the foam insert, add faux greenery around the gaps, then top with a small layer of filler greenery. Wrap the vase stem area with a ribbon band if you want extra polish.
This is the “clean table centerpiece” version of money bouquets. Clear glass makes the money look more elevated because you see the stems and greenery layers through the vase. Use small money blossoms instead of large heads; it keeps the bouquet light and prevents sagging. This style also photographs well from above because you can see the arrangement density. It’s a great option for housewarmings and dinners.
Skip thisDon’t overstuff the vase — too many stems crush the money petals and they lose their shape.
Editor's noteRough up the foam insert surface with sandpaper so stems grip better and don’t wobble.
6. Black-Gold Money Orchid Spray
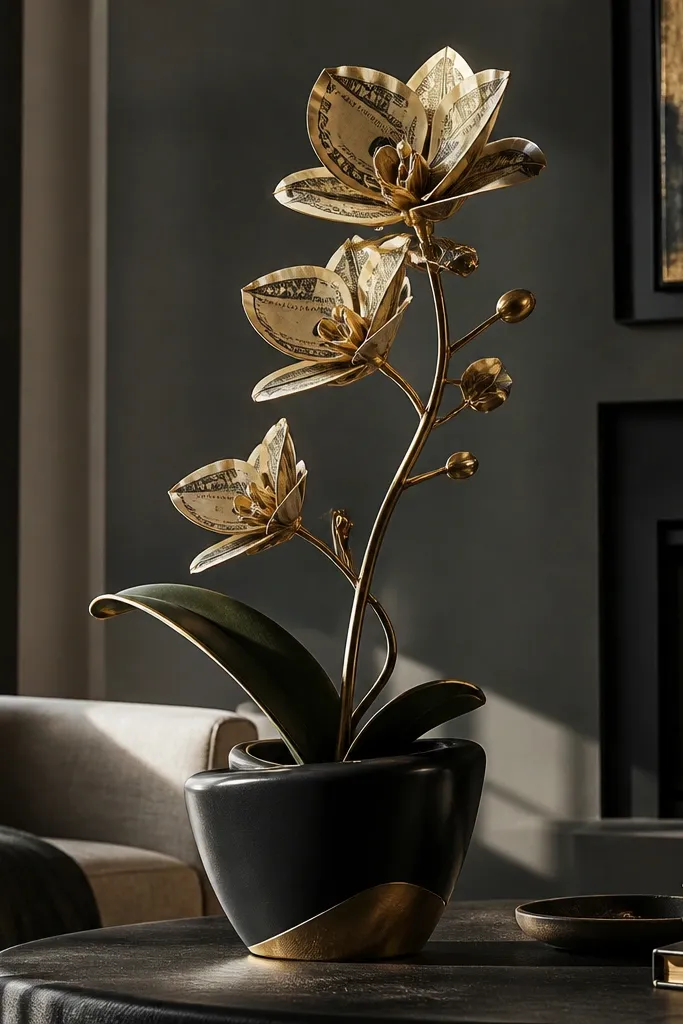
Orchids look modern because they’re sleek and asymmetrical. This money bouquet idea uses a spray format — fewer, stronger blooms instead of a dense ball of flowers — so it reads high-end in photos. The black-and-gold palette makes the money edges look intentional, even if the bills are plain. It’s also fast to build because you’re making fewer flowers and focusing on shape and placement. This suits anniversary gifts and anyone who hates “cute and cluttered.”
Start with 3 main stems made from floral wire wrapped in black floral tape. Create one orchid bloom per stem by making a central roll for the lip and two side petals from folded bill rectangles (fold in half, then crease a slight curve and glue the base). Add 2-3 smaller petal accents around the center using thinner bill strips. Attach blooms by hot-gluing the petal bases to the wire, then add faux leaves along the stems. Finish by wrapping the wire bundle with black ribbon and tying a gold accent band near the bottom.
Keep the orchid blooms slightly tilted — straight-on symmetry makes it look like a craft project.
Avoid using bright green filler; it clashes with black-gold and makes the money edges look less premium.
7. Pastel Money Tulips with Soft Pink Paper Wrap
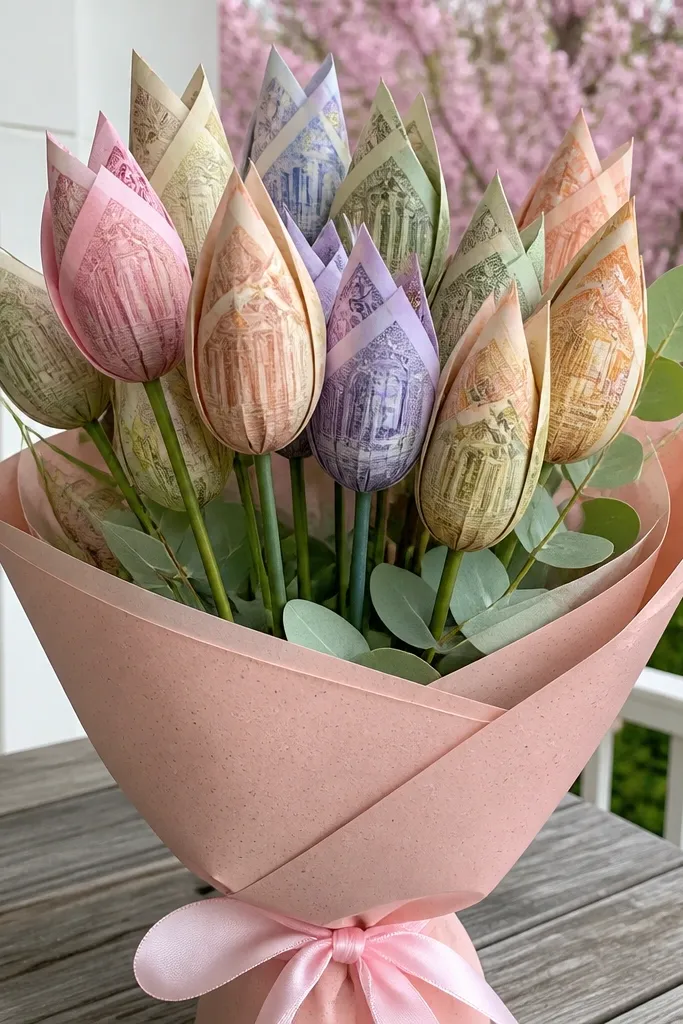
Tulips look modern when the heads stay upright and the stems are clean. This idea uses bill folds into pointed tulip shapes, then tops them with a thin ribbon tie at the base so they look like real blooms. Pastel wrap and pale greenery keep everything light and photogenic. It’s a strong pick for spring birthdays and baby showers because the shape reads gentle, not flashy. You’ll spend most of your time folding, but the build stays straightforward.
Cut your foam base to a narrow bouquet shape so tulips can stand upright. Make tulip heads by cutting each bill into a long rectangle, then folding a pointed “petal” tip at the top and gluing the sides to form a cup shape. Create 3-5 petals per tulip head, then glue them around a small rolled bill center. Insert wire stems into the foam and keep the spacing wider so the bouquet breathes. Wrap with soft pink paper, and add pale green tissue leaf strands around the foam for texture.
Press the petal fold lines with a ruler so the tulip point looks crisp, not floppy.
Don’t pack tulip heads too tight; tight clusters make the points blur together.
8. Sunflower Money Bouquet with Yellow Tissue Petals
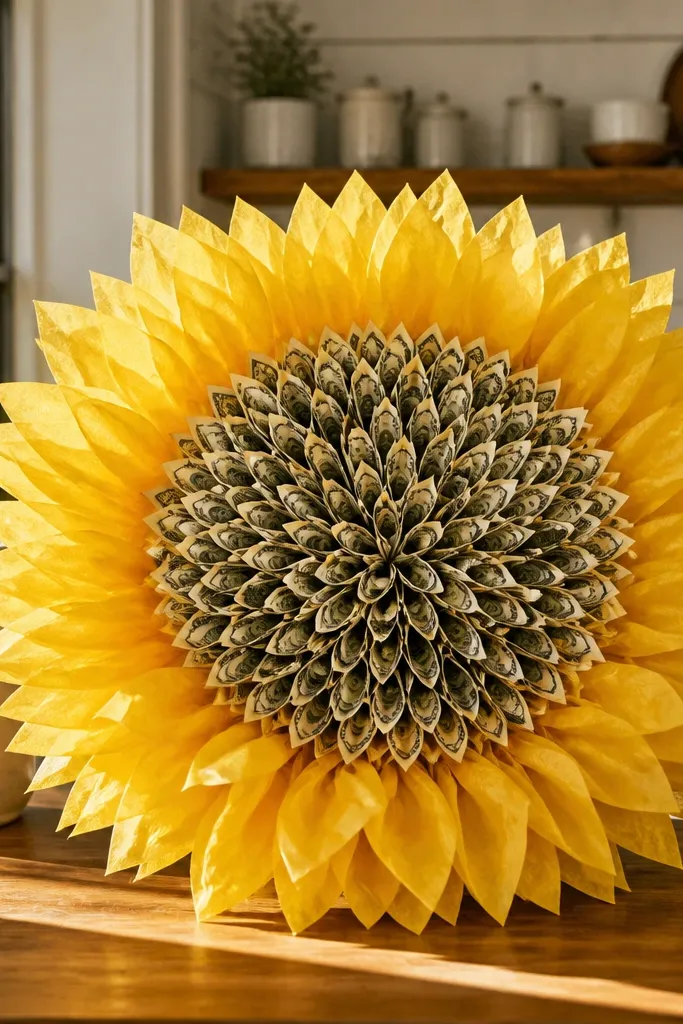
Sunflowers photograph like a dream because they’re all about bold contrast: a centered focal point and bright outer petals. Here, the money becomes the center, while yellow tissue petals create the fluffy look around it. This is an easy way to make bills look like decoration rather than the main texture. The tissue also hides small foam gaps and glue lines. It’s great for summer birthdays and anyone who likes a cheerful, modern statement.
Cut a foam ball (or a ball of floral foam) to fit your handle. Make the sunflower centers by rolling a bill into a tight spiral and gluing it as a disk, then add a ring of smaller bill curls around the outside. Create tissue petals by cutting strips of yellow tissue, folding each strip accordion-style, and gluing them around the center disk. Attach the finished sunflower head to a stem using floral wire and hot glue. Insert stems into the foam and cover the base with green tissue leaves before wrapping the handle with yellow ribbon.
Fold tissue petals the same direction each time — it keeps the sunflower “sunburst” look consistent.
Skip cheap thin tissue; it tears and makes uneven petal edges in photos.
9. Geometric Money Origami Cube Bouquet
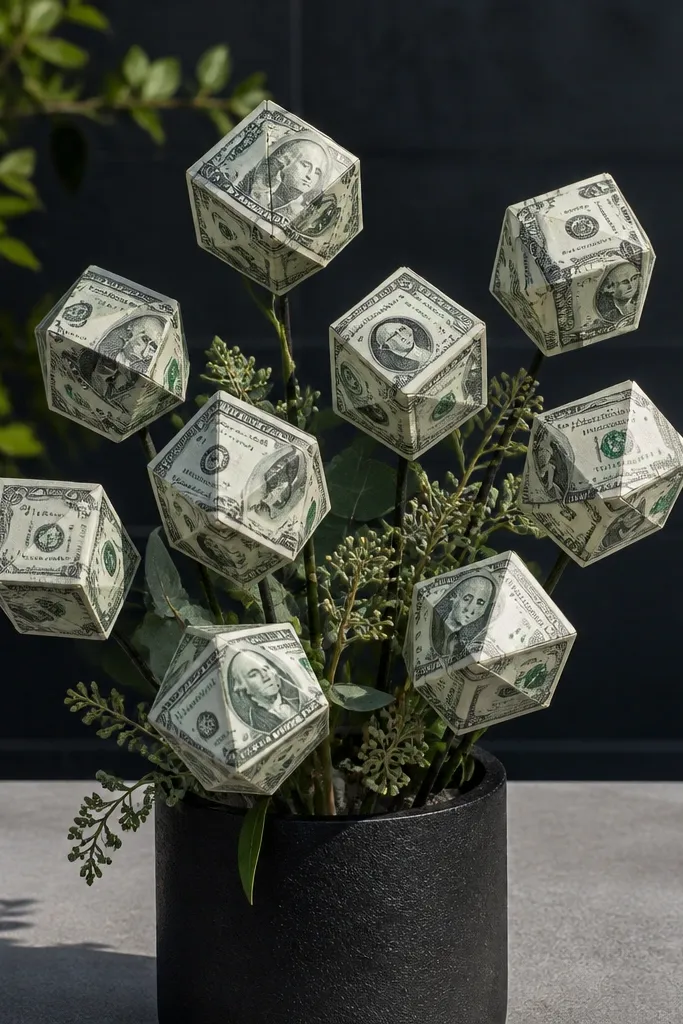
Cut your foam base into a compact shape and insert a handle dowel. Create cube units by folding bills into small squares and using glue tabs at the corners to lock the shape (aim for cubes about 1 to 1.25 inches). Attach each cube to a floral wire stem with a small glue dot on the cube’s corner. Insert the cubes into the foam leaving small gaps so the geometry shows. Add minimal greenery — just a few faux stems around the edges — then wrap the handle with matte wrapping paper and a thin ribbon.
This is the modern pick for people who want something different from flowers. Money bills fold into geometric cubes that catch light from multiple angles, so the bouquet looks stylish even with minimal greenery. It also helps stretch your budget: each cube uses small folds, so you can build a full-looking arrangement with fewer bills. It’s photogenic from the side because the cube edges create a grid pattern. If you’re gifting to someone design-minded, this one lands well.
Skip thisDon’t overfill the foam — you want negative space so the geometry reads clearly.
Editor's noteUse a ruler to keep fold lines straight; crooked folds make cubes look messy instead of modern.
10. Money Butterfly Bouquet for Kids and Teens
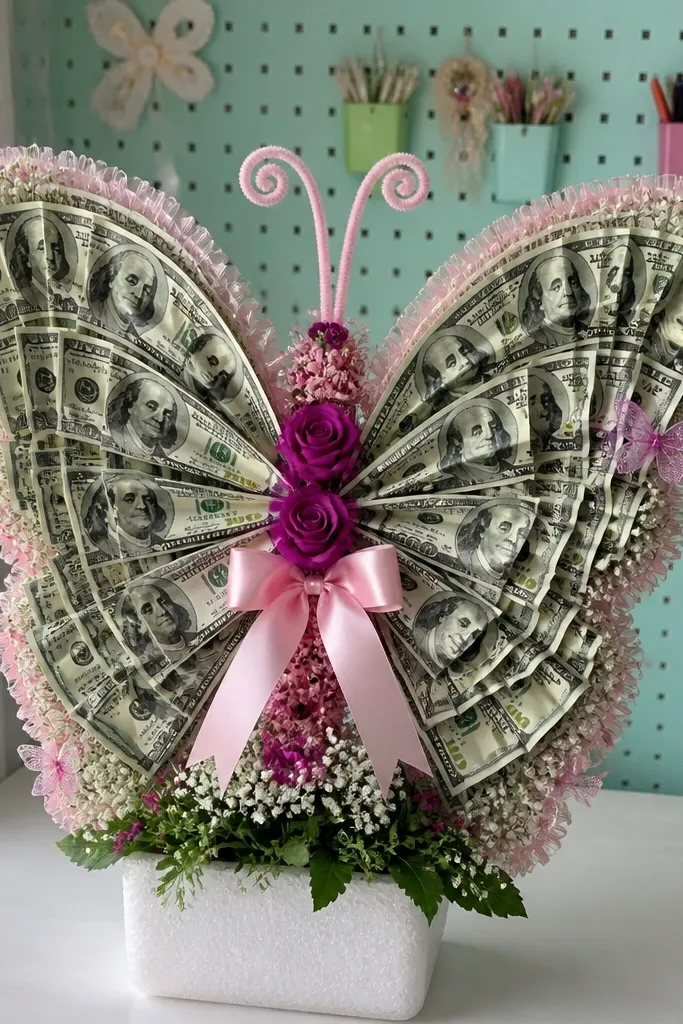
Butterflies make money gifts feel playful without turning them into a kiddie mess. The trick is to build them with two wing panels that look symmetrical in photos. This bouquet works well when you want a lighter arrangement that doesn’t weigh down a foam ball. Use bright ribbon accents and keep greenery minimal so the butterflies stay the star. It’s a fun option for graduations and birthdays where the recipient likes colorful decor.
Cut a foam block and mount to a handle. Make butterfly wings by folding bills into two matching wing shapes per butterfly: crease a bill into a fan, then trim or fold into a teardrop outline, and glue the base together. Form the body using a narrow strip of bill rolled into a small cylinder. Attach wings and body to a wire stem, then add a loop of thin ribbon at the top of the stem for movement. Insert butterflies into foam and add a small ribbon bow at the handle wrap.
Make wing pairs from the same bill so the color tone matches; it looks cleaner in photos.
Don’t use heavy ribbon tails that cover the butterflies — you want the wings visible.
11. Eucalyptus Money Bouquet with Hidden Stem Wrap
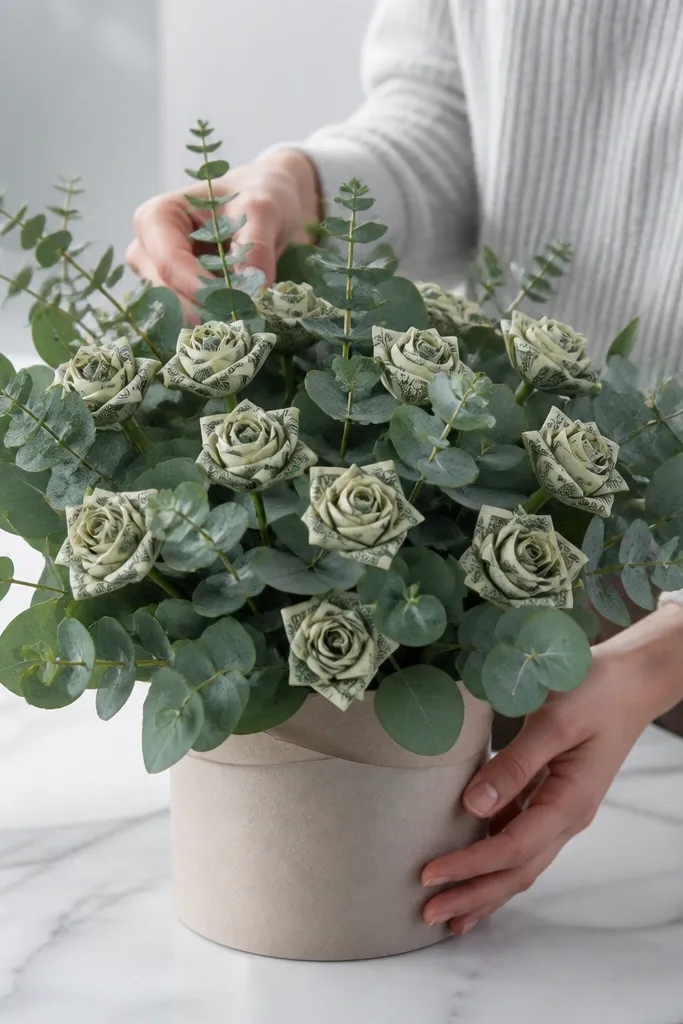
Start with a foam block and insert dowel handle. Build money blossoms by folding bills into simple pocket petals and gluing them around a rolled bill center, keeping each bloom under 2 inches wide. Attach each bloom to a wire stem and wrap only the stem section that touches greenery with floral tape. Cover the entire foam top with eucalyptus-style faux leaves, tucking leaves between stems so the attachment points disappear. Wrap the handle with kraft paper and a thin twine knot.
Eucalyptus bouquets look modern because they’re soft and textured, not dense. This version keeps the money blooms small and the greenery layer thick, so the overall look reads like a store-bought arrangement. The key is hiding stem wrap so the money attachment points don’t show. It’s also forgiving: if a money bloom isn’t perfectly centered, the greenery covers it. This is a great fit for weddings, baby showers, and calm-neutral home decor.
Skip thisAvoid shiny leaf picks; they reflect and make the bouquet look plastic.
Editor's noteTuck greenery deeper than you think — the hidden layers are what make it look expensive.
12. Gold Foil Money Bouquet with White Marble Wrap

This is the “clean luxury” look. The money still needs structure, but the gold foil accents and white marble wrap make the whole thing feel polished. Use gold ribbon and metallic paper to frame the money folds so the bouquet reads modern, not costume-y. This works especially well with rolled rose or accordion petal styles because both create crisp edges that catch highlights. Build time is moderate, and the payoff is a photo that looks like it belongs in a gift shop.
Cut a foam block and mount to a handle with a dowel. Assemble 10-14 money blooms using one consistent shape method, then attach blooms to stems with floral tape. Add gold foil leaves by cutting small leaf shapes from metallic craft paper and hot-gluing them behind some blooms for depth. Wrap the handle in white marble-pattern paper, then add a thin gold ribbon band around the base of the wrap. Finish with a small gold bow at the front where the money blooms are most visible.
Choose metallic paper that’s matte, not glossy; glossy foil creates glare that wipes out money details.
Don’t mix too many metallic shades — gold plus silver makes money folds look cluttered.
13. Black Ribbon Money Bouquet with Red Rose Petals
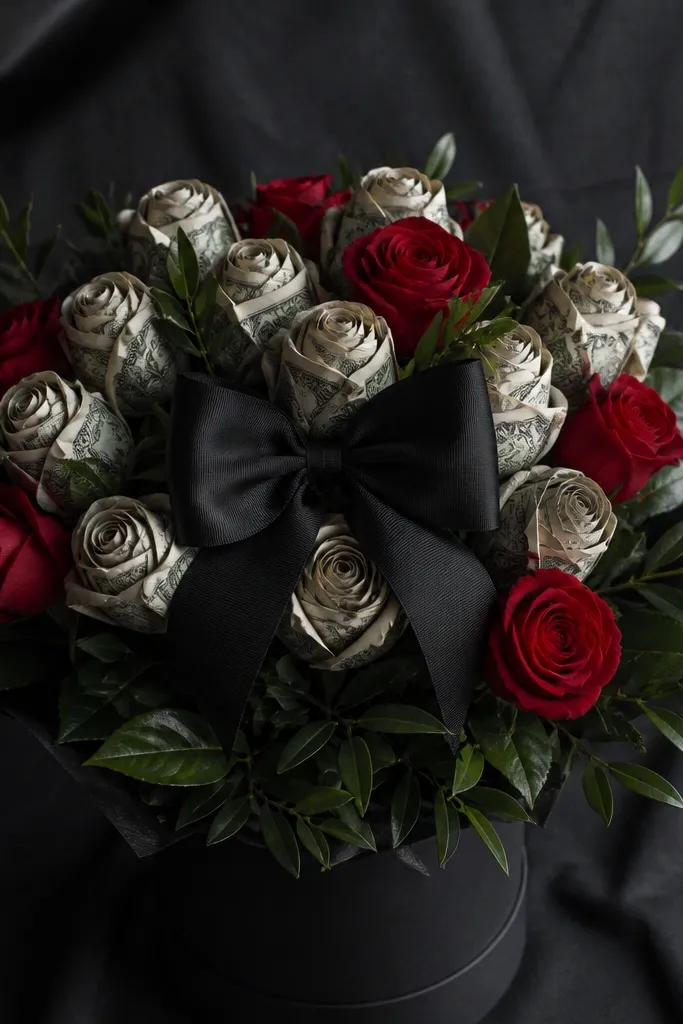
Start with a dark foam base and mount it to a handle. Make rose-like money petals using accordion folds turned into petal cups, then glue 5-7 around a rolled center. Attach each bloom to a wire stem and insert into foam, spacing so red heads don’t touch. Add dark faux leaves and a few deep red fabric leaf pieces to create layered texture. Wrap with black ribbon around the handle and tie a front knot with two long tails.
This is a bold, modern look that still reads romantic. Red money blooms pop against dark greenery, and black ribbon makes the bouquet feel graphic in photos. The money petals should be built with tight folds or rolls so the red tones look intentional rather than smeared. This bouquet is great for anniversaries and Valentine-style gifts when you want drama without glitter chaos. It’s also a good choice if you want a bouquet that looks good in low light.
Skip thisAvoid bright lime greenery; it clashes with red and makes the bouquet look costume-like.
Editor's noteCut fabric leaf pieces with pinking shears — the edge looks cleaner and doesn’t fray in photos.
14. White Lace Money Bouquet with Pearly Center Discs
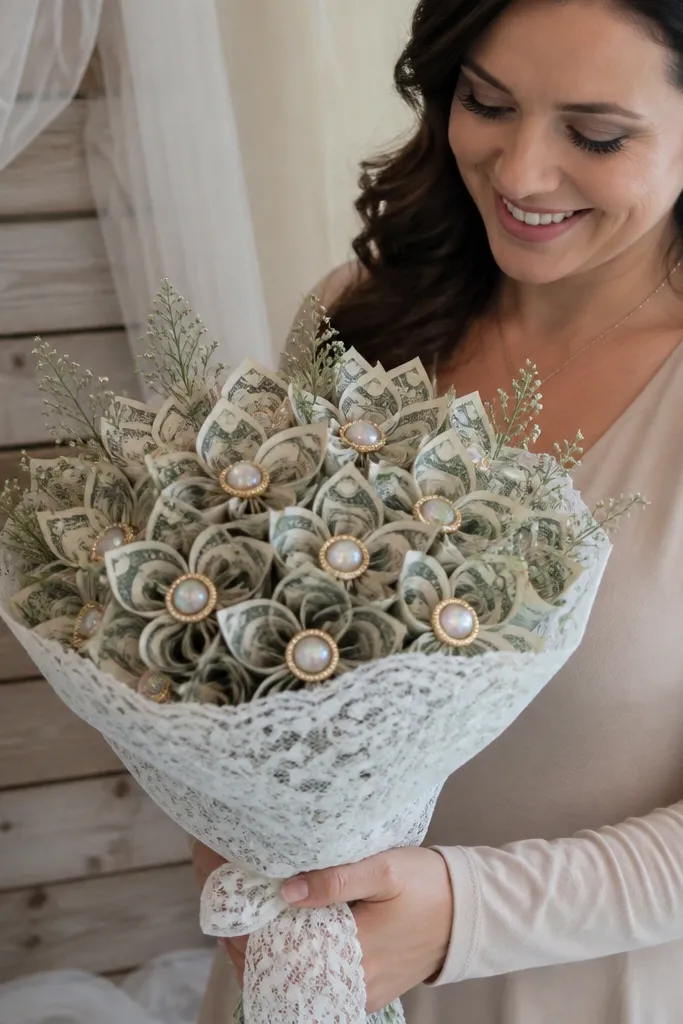
Mount a foam block to a handle, then cover the top with money flower heads made from accordion petals around a rolled center. For each center, glue a small pearl bead or foam pearl disk right on top of the rolled bill edge. Wrap the handle area with lace ribbon first, then add a second layer of thin tulle if you want more volume. Stitch or hot-glue lace along the wrap seam so it stays smooth. Tuck lace edges around the foam base so no foam shows.
This one looks delicate and modern because it pairs money flowers with lace texture. The money stays crisp, but the lace wrap softens the silhouette and hides foam edges. Use pearly embellishments at the center of each bloom so the bouquet looks styled even from far away. If you’re aiming for a bridal shower vibe or a classy gift for someone who likes soft decor, this is a strong choice. Build is beginner to intermediate and looks best with fewer, larger blooms.
Skip thisDon’t drown the bouquet in lace; too much fabric hides the money folds that you want people to see.
Editor's noteUse lace that has a stiff edge or wire — it holds shape better than floppy lace.
15. Chocolate Brown Money Bouquet with Mini Bow Toppers
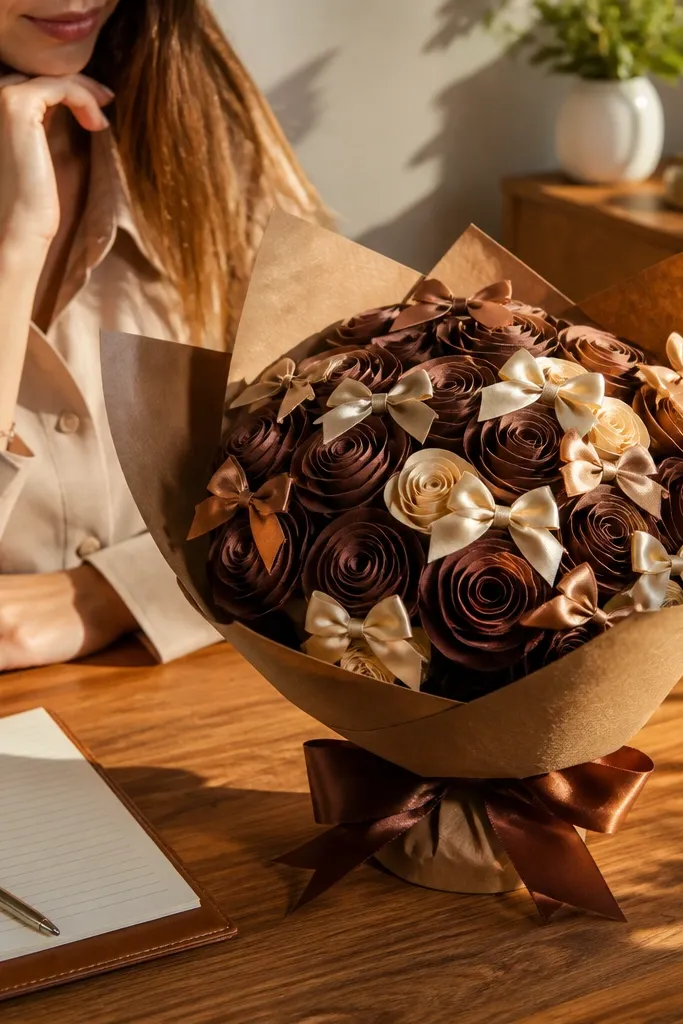
Brown and cream looks modern and warm, and it makes money folds look like part of the decor instead of a separate element. Mini bow toppers add a neat focal point without covering the blooms. This style works best with rolled rose money flowers because the rose silhouette looks good under small bows. If you want a gift that’s not overly sweet, brown tones keep it grounded. It’s also a good fit for housewarmings and “thank you” gifts.
Build 9-13 rolled rose money blooms and attach to wire stems. Insert stems into a compact foam base so the bouquet stays rounded but not huge. Cut tiny ribbon bows (about 1.5 to 2 inches wide) and glue one bow at the top center of each rose head. Add small sprigs of faux greenery around stems, then cover the foam with brown craft paper strips or coffee-brown tissue. Wrap the handle with chocolate paper and tie a larger bow at the base.
Use the same ribbon width for all mini bows so the bouquet looks consistent in a photo grid.
Skip mixing ribbon textures like satin plus burlap everywhere; it reads messy unless you keep it to one or two surfaces.
16. Rainbow Money Bouquet with Ombre Ribbon Ruffles
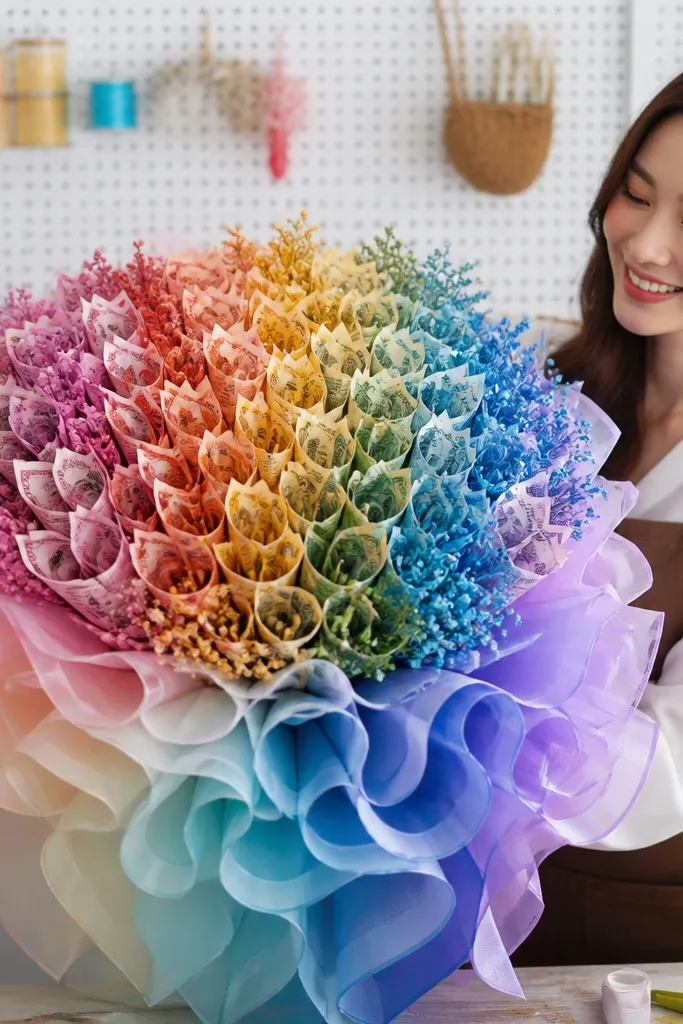
Pick one money petal method, like accordion fans, and make multiple fans per color group. Color-coding works best when you use colored tissue wrap or ribbon around the stems, not by trying to color the money itself. Insert blooms in rows: top row one color, middle row the next, bottom row the last, keeping the spacing even. Add ombre ribbon ruffles by cutting strips, gathering one edge with glue dots, then attaching ruffles around the foam base. Wrap handle with a solid ribbon that matches the middle color for a clean finish.
If you want the most eye-catching option, build a rainbow layout. The secret is that you don’t need different money shapes for each color — you need organized placement. Use money folds into a single petal style, then group blooms by color bands so the bouquet looks like an ombre rainbow from top to bottom. Ombre ribbon ruffles add movement and hide the foam base edges. This is perfect for parties and celebrations where you want color first.
Skip thisAvoid random color scattering; it turns into clutter instead of a rainbow gradient.
Editor's noteMake a quick paper template of your bouquet shape so you place each color band in the right spot.
17. Monochrome Money Bouquet with Black-and-White Contrast Petals

Create a foam base and mount to a handle. Make money petals using accordion folds, then glue each petal to a small black paper backing cut to the same size so the contrast shows through. Build flowers with 6-8 petals per bloom and insert blooms into foam in a tight cluster. Add a few matte faux stems only around the outer edge so the center stays the focus. Wrap handle in black paper and add a thin white ribbon stripe across the front.
Monochrome money bouquets look modern because they’re graphic. Use black-and-white contrast with alternating bill folds or with black paper backing behind the money petals. The result is a bouquet that reads like a design piece, not a craft pile. Keep greenery minimal and use a matte finish so the money edges stay readable. This style is great for weddings, modern home decor, and anyone who wants something clean and not too colorful.
Skip thisDon’t add too many different embellishments; monochrome looks best when it stays controlled.
Editor's noteUse matte black paper, not glossy cardstock; glossy reflects and flattens contrast in photos.
18. Pocket Petal Money Bouquet with Hidden Bill Ends
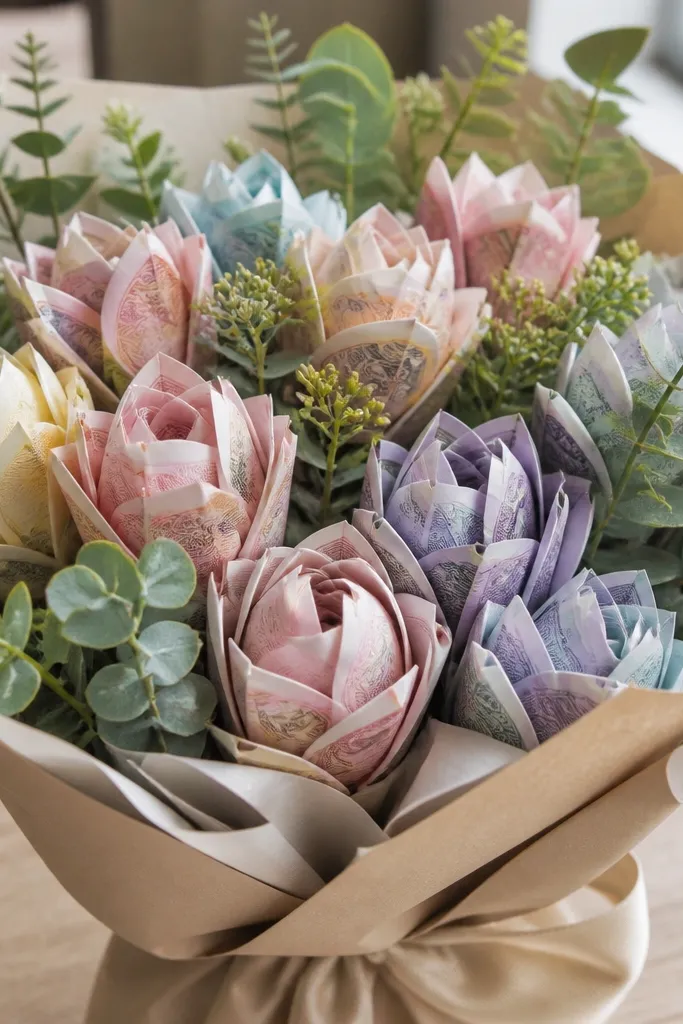
This is my favorite “clean finish” money bouquet build because the bill ends disappear. Pocket petals fold over on themselves, so you don’t see messy raw edges or crooked corners. It looks especially neat in close-up photos and holds up better over time than tape-on petals. If you’re worried your money will look sloppy, this design fixes that. It’s also efficient: each bill makes multiple pocket petals with consistent shape.
Start by cutting a foam base to your preferred bouquet size and mounting it to a dowel handle. For pocket petals, fold each bill into thirds, then fold the bottom edge up and glue the seam so the raw end is tucked inside the pocket. Make 10-15 pocket petals, then glue 6-8 into a flower cluster around a rolled center. Attach each flower to a wire stem and insert into foam, then cover foam edges with greenery. Wrap handle with textured paper and finish with a ribbon tie at the base.
Keep pocket width consistent at about 1 inch; uniform petals make the bouquet look professionally made.
Don’t glue pocket petals directly onto foam without stems; they can rotate and ruin the flower shape.
19. Tropical Money Bouquet with Pineapple Bill Centers
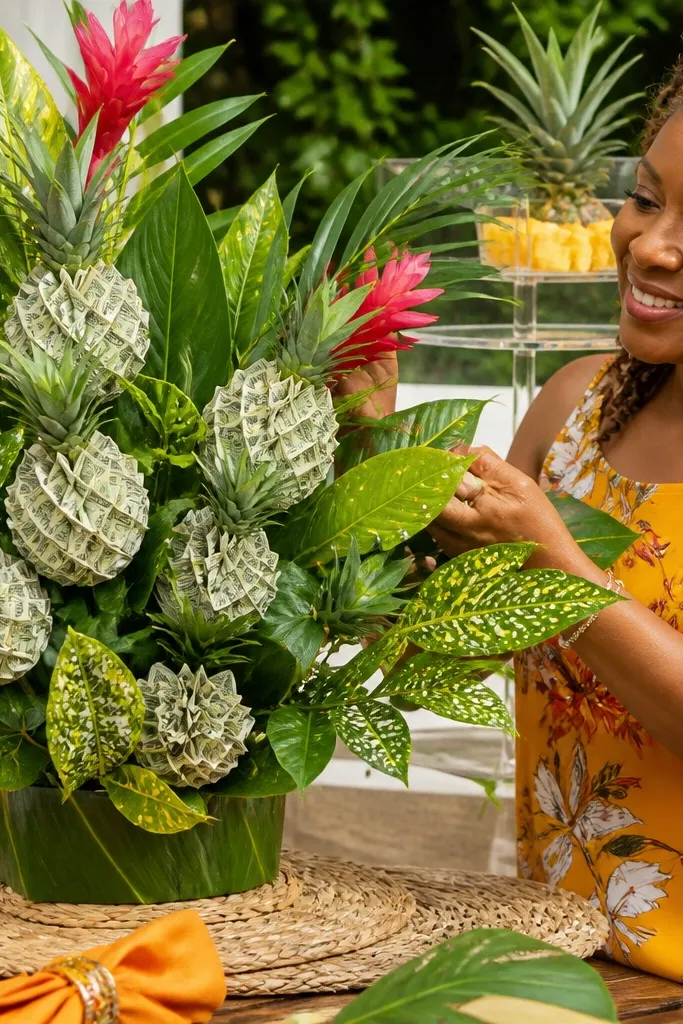
Make a foam base and mount to a handle. Build pineapple centers by folding a bill into a small accordion disk, then gluing small triangular bill folds around the disk to form “spikes.” Create 6-10 pineapple centers, attach each to a wire stem, and insert into foam. Add tropical leaves using faux palm picks, cutting stems to different heights so the bouquet has height. Finish by wrapping with a bright tropical-pattern paper and tying a ribbon bow near the handle.
Tropical bouquets look fresh and modern when the focal shape is clear. Pineapple centers give you that instant theme, and the money edges become part of the texture. Pair it with leafy greenery and bright ribbon so the whole arrangement reads like decor, not just a gift. This works well for birthdays and summer parties where people expect fun visuals. The build is more structured than it sounds because the pineapple center shape keeps everything aligned.
Skip thisDon’t overdo glitter accents; tropical looks better with texture and shape than sparkle.
Editor's noteStagger pineapple stems at different heights so the bouquet looks full, not flat.
20. Dollar Bill Starburst Money Bouquet in Clear Wrap
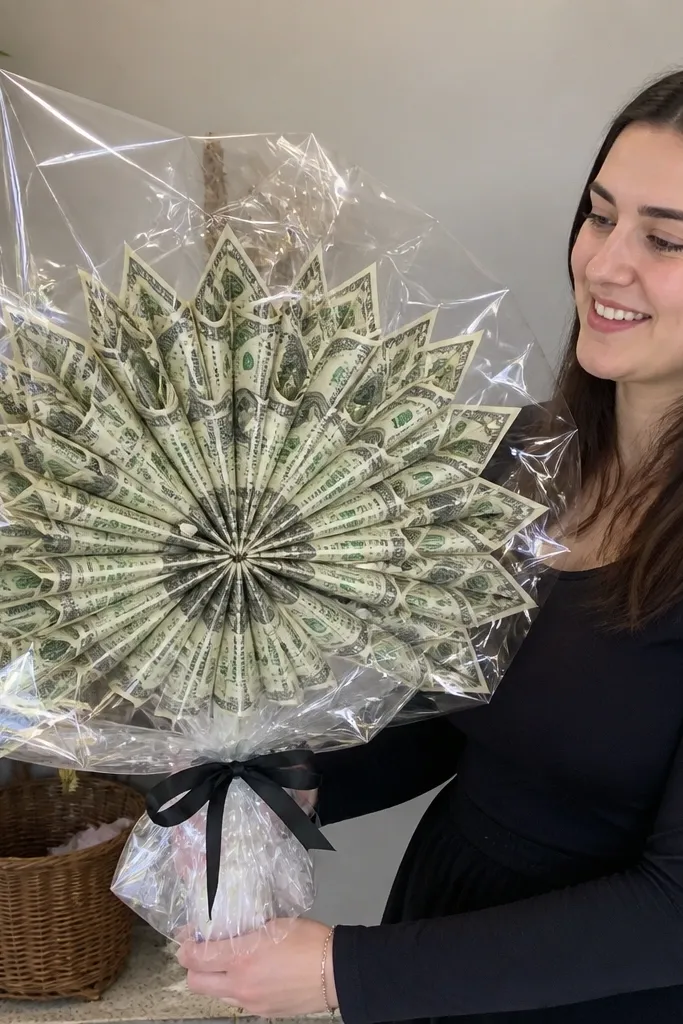
Cut a foam dome or star-shaped base and mount it to a handle or board. Make starburst “petals” by folding bills into narrow accordion strips, then gluing the bottom to a small paper circle so each petal stands outward. Arrange petals in layers radiating from the center, keeping the angles consistent. Add a center rosette made from a rolled bill spiral. Wrap the outside with clear gift wrap film and tie ribbon around the handle so the starburst stays visible.
Starburst money bouquets look modern because the shape is bold and geometric. The folded bills radiate outward, so even a small bouquet looks big in photos. Clear wrap adds a gift-shop finish and lets the starburst pattern stay visible instead of hiding under heavy paper. This is a great choice for graduation and big milestone money gifts where you want a “wow” shape without making dozens of flowers. It’s also fast once you get the folding rhythm.
Skip thisDon’t use thick, wrinkly clear wrap; it creates bubbles that ruin the starburst clarity.
Editor's noteUse a paper template for petal angle so each strip points the same direction.



