
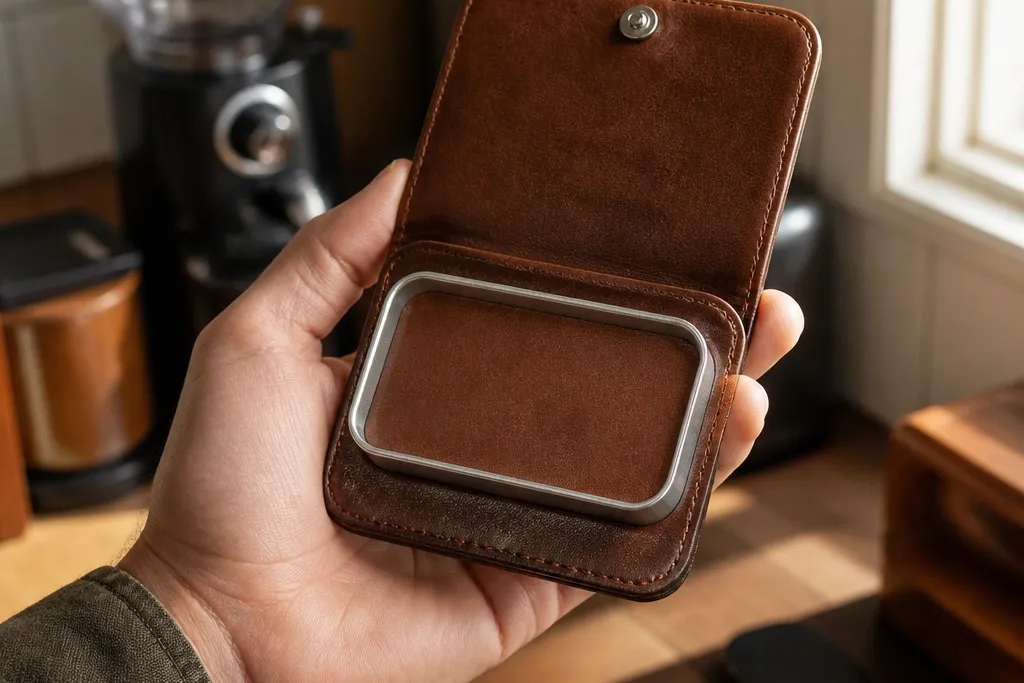
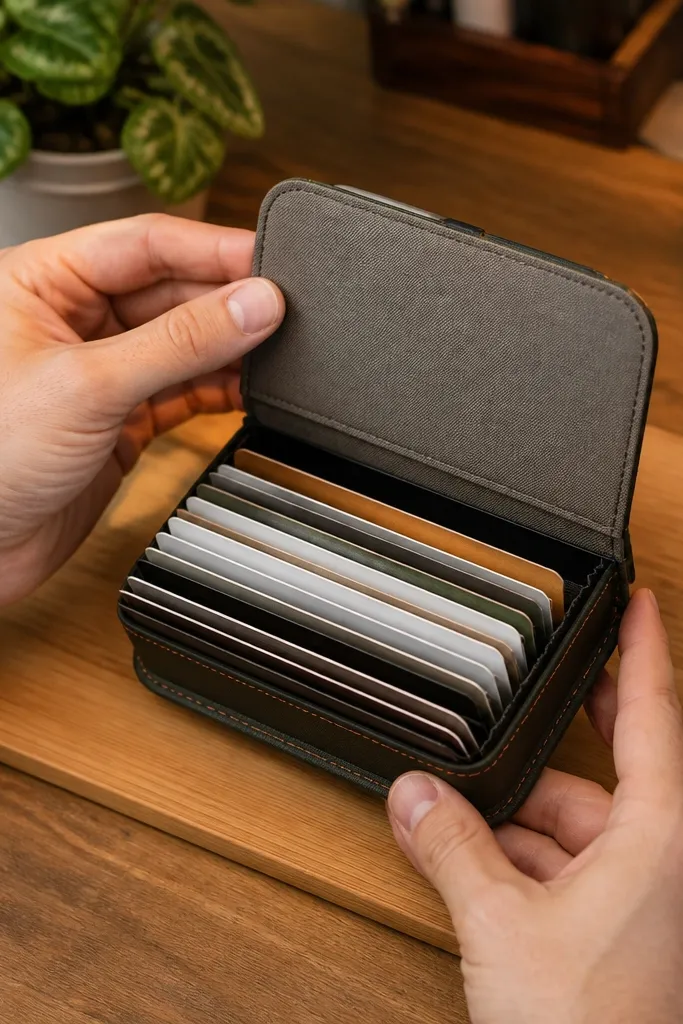
1. Matte Black Leather Sleeve with Polished Edge Paint
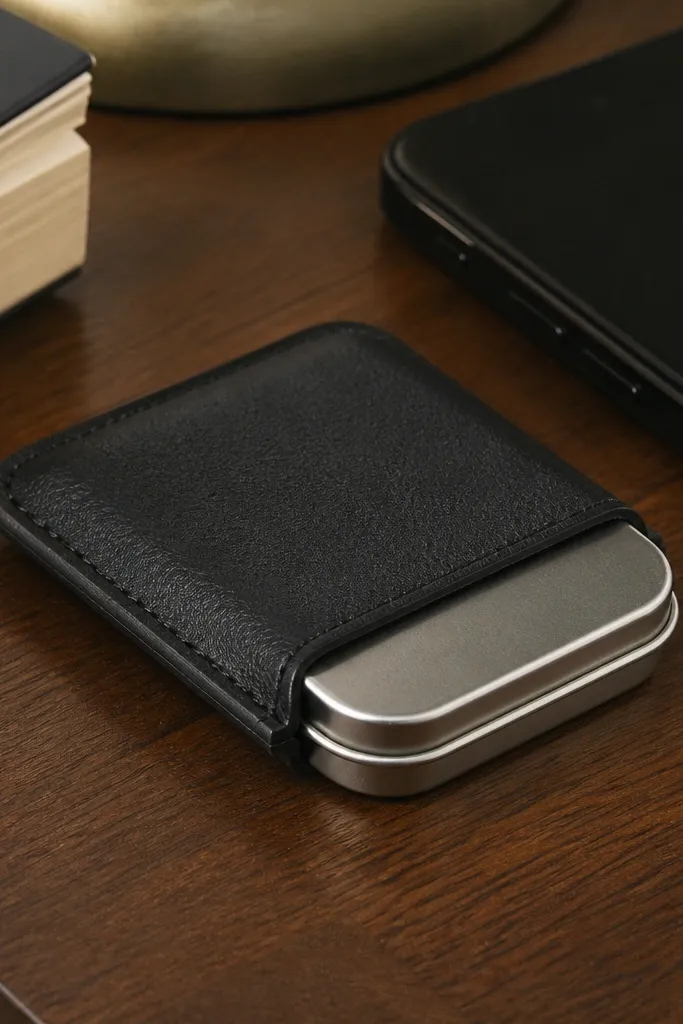
This is the clean, modern Altoids Wallet cover look: a simple sleeve that makes the tin feel like a small card case. Matte black leather hides scuffs, and edge paint gives you that crisp line that looks sharp in close photos. The sleeve format is forgiving for beginners because it doesn’t require complicated hinges or alignment. It also protects the lid seam, which is where most DIY wraps wear through first.
Cut two leather panels to the measured tin footprint plus 1-2 mm for slip. Skive the edges lightly, then fold and glue a narrow hem on the outer long edge so the edge paint has something to grip. Assemble the sleeve with contact cement, then add topstitch 2-3 mm from the edge for structure. Finish by applying edge paint in thin coats and burnish once dry.
Editor's noteUse a roller or burnishing tool to press the glued layers before stitching so you don’t get wrinkles.
Skip thisDon’t skip edge finishing — raw leather edges look unfinished fast.
2. Cognac Leather Flap Wallet with Hidden Magnetic Closure
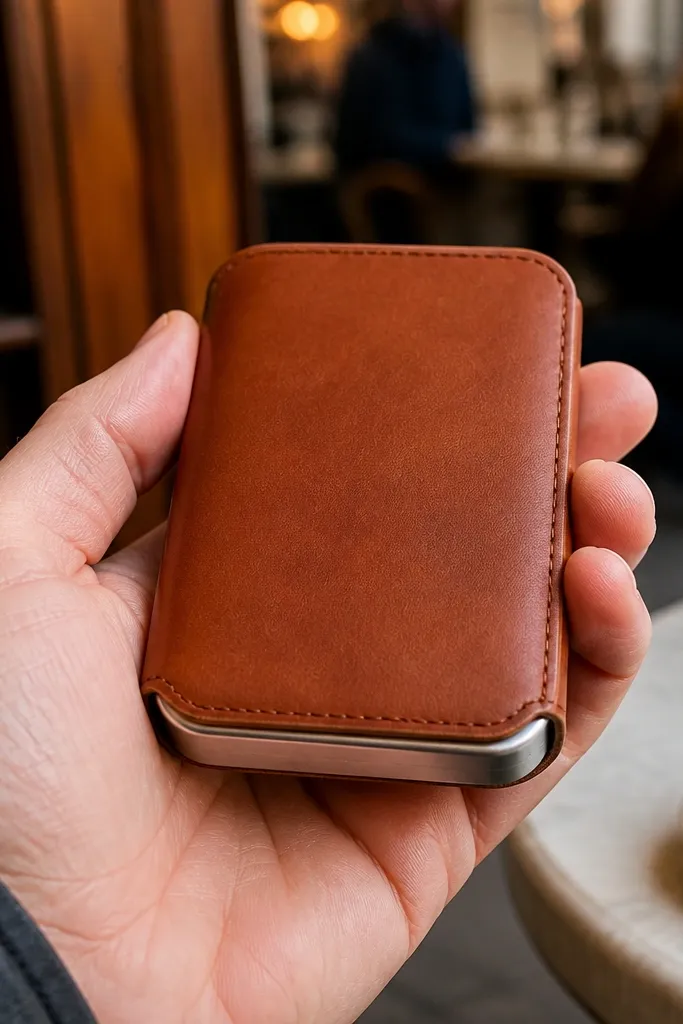
A flap wallet turns the tin into something that looks like a real accessory, not a craft project. Cognac leather looks warm and reads “grown-up,” and the hidden magnet keeps the front flat for a sleek profile in photos. This design also protects the front face from scratches because the flap covers it. When you keep the magnet placement centered, the cover snaps shut cleanly every time.
Cut a front panel and a back panel, then add a flap piece that overlaps by about 12-15 mm. Mark and install a single pair of neodymium magnets so the flap closes flat without tipping. Glue and stitch the flap perimeter, leaving the magnet area aligned with the tin lid seam. Finally, punch a small slit in the flap backing layer so the magnet sits flush.
Editor's noteTest magnet alignment with the tin inserted, then adjust before the glue fully sets.
Skip thisDon’t place magnets too close to the edge — they’ll pull the leather and look warped.
3. Waxed Canvas Cover with Contrast Stitching and Corner Reinforcement
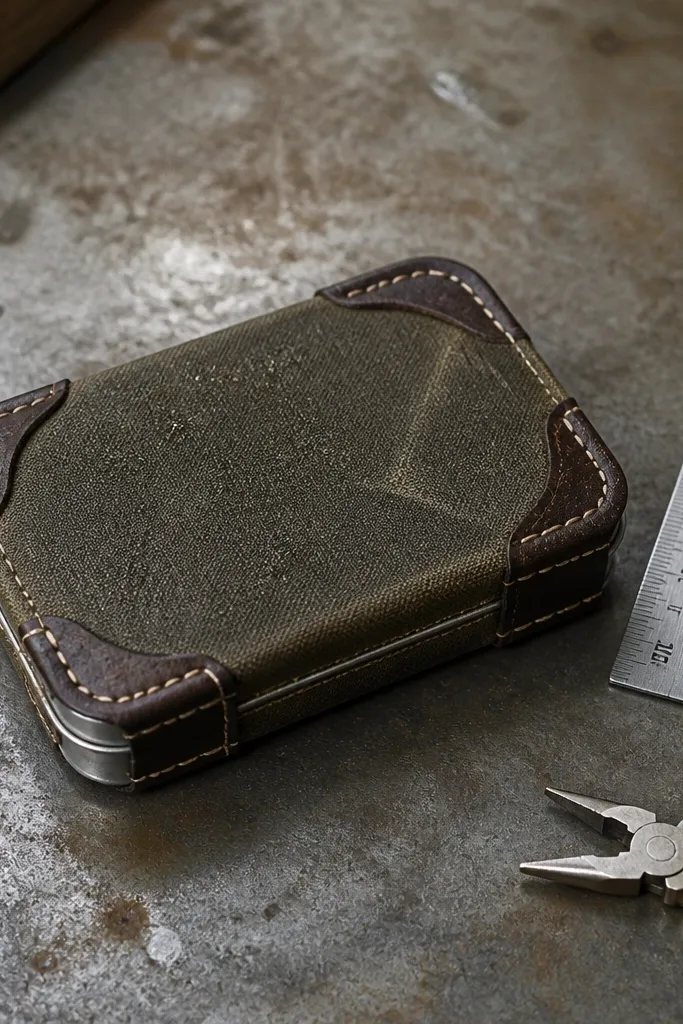
Waxed canvas gives a modern, outdoorsy look and resists light water damage better than untreated fabric. Contrast stitching makes the design photogenic because the thread line reads clearly even in low light. Corner reinforcement is what keeps it from looking homemade after a few days of pocket wear. This cover is also easy to tailor for a slim profile because canvas stays relatively flat.
Use waxed canvas and cut panels to tin size plus a 1 mm allowance. Add small corner patches using a second layer of canvas or thin leather at the four corners, then glue them before stitching. Stitch around the perimeter with a strong thread and a straight stitch line 3-4 mm from the edge. Seal the finished edges with a thin wax layer so fraying doesn’t creep in.
Warm the wax with your fingers before rubbing it in so it soaks evenly.
Don’t use floppy fabric — thin unreinforced canvas collapses and looks messy.
4. Denim Wrap with Slim Leather Edge Band
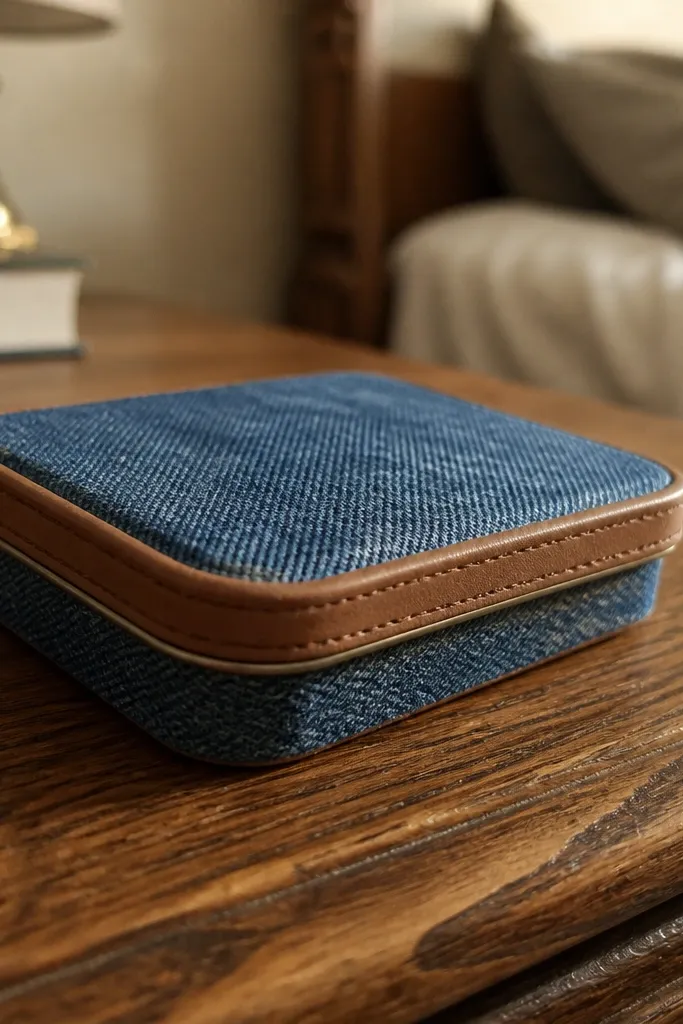
This is a modern Altoids Wallet cover that looks like upcycled fashion. Denim brings strong texture, and a slim leather edge band gives you that finished border that photos love. The leather band also protects the high-wear edge where the tin rubs in your pocket. Keep the denim wrapping tight and the edge band straight — that contrast is what makes it look intentional.
Cut denim strips for wrapping and two end pieces for the front and back. Add a 10-12 mm wide leather strip for the edge band, then glue it along the outer perimeter. Wrap the denim around the tin, then topstitch through the leather band so everything locks together. Finish by burnishing the leather edge and trimming any denim overhang flush.
Use a denim needle and stitch slowly — it prevents skipped stitches on thicker folds.
Don’t rely on glue alone at the edges; denim lifts without stitching.
5. Felt + Vinyl Panel Flip Cover with Clean Window Front
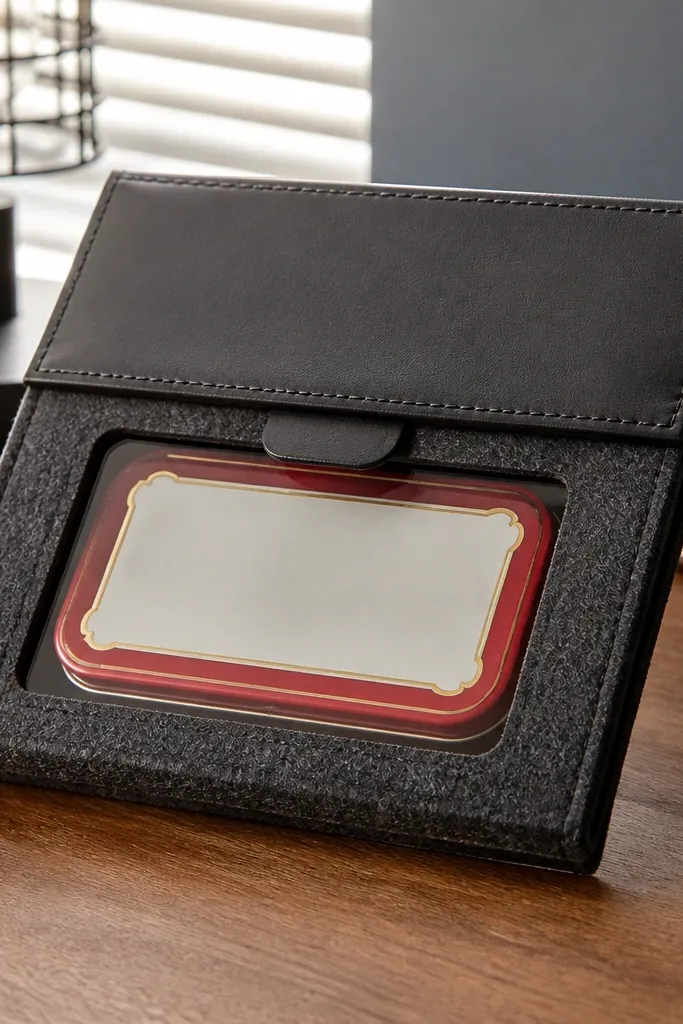
A felt base gives a soft, modern look, while a vinyl panel makes the design look crisp and graphic. The window front is photogenic because it creates a clear contrast block — you can see the tin through a neat opening. This cover also hides minor surface scuffs on the tin. It’s great for desk setups and bags where you want the tin visible.
Cut felt panels to the tin size and create a front opening by cutting a rectangular window hole. Back the hole with vinyl, then sew or glue it so it sits smooth without ripples. Build a flip cover by adding a back flap layer, then attach magnets or a snap behind the vinyl edge. Trim the vinyl edges neatly and seal with fabric glue for a clean finish.
Use a craft knife on a cutting mat so the vinyl window edges stay straight.
Don’t stretch vinyl while attaching — stretched vinyl looks wavy in photos.
6. Pebbled Faux Leather Sleeve with Minimalist Stud Line
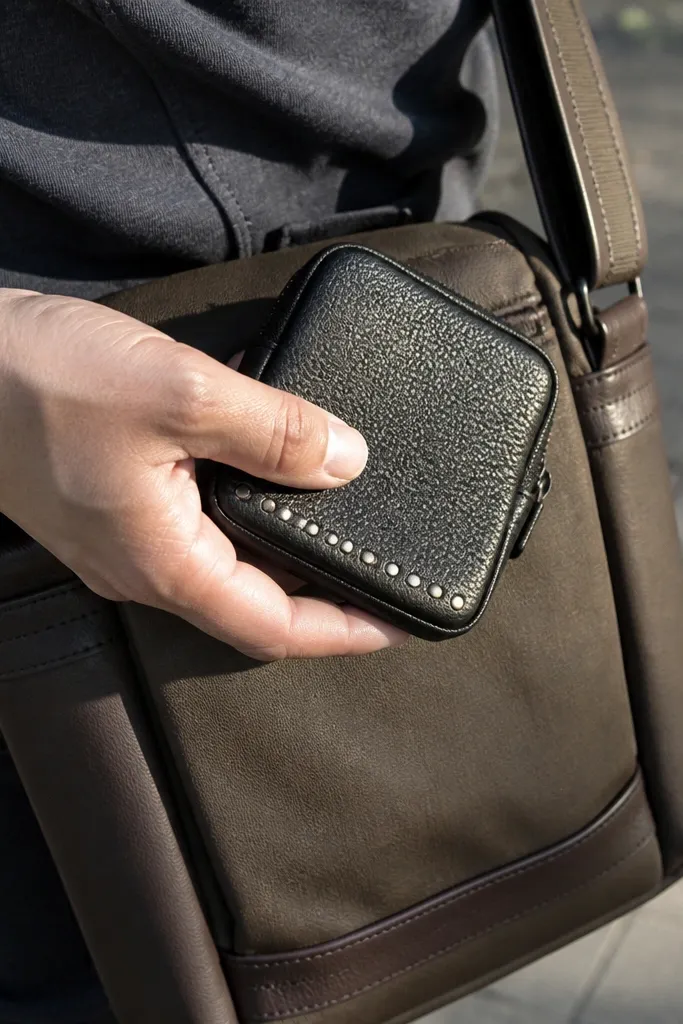
Pebbled faux leather looks expensive and reads clean in photos because the texture catches light evenly. A minimalist stud line adds a modern “hardware” detail without clutter. This design is good if you want something tougher than fabric but don’t want real leather. The sleeve keeps the tin protected and keeps the front face flat.
Cut a sleeve from faux leather with the same fit allowance of 1-2 mm. Mark a straight stud placement line using painter’s tape as a guide, then punch holes and install studs. Glue the sleeve seam, then stitch if your faux leather supports it; otherwise use strong fabric glue and press firmly. Finish the edges with a thin edge paint or binding strip so the cut line looks intentional.
Lay studs on a ruler and tack one stud first, then align the rest against it.
Don’t place studs randomly — uneven spacing is what kills the modern look.
7. Woodgrain Contact Paper Cover with Leather Strap Closure
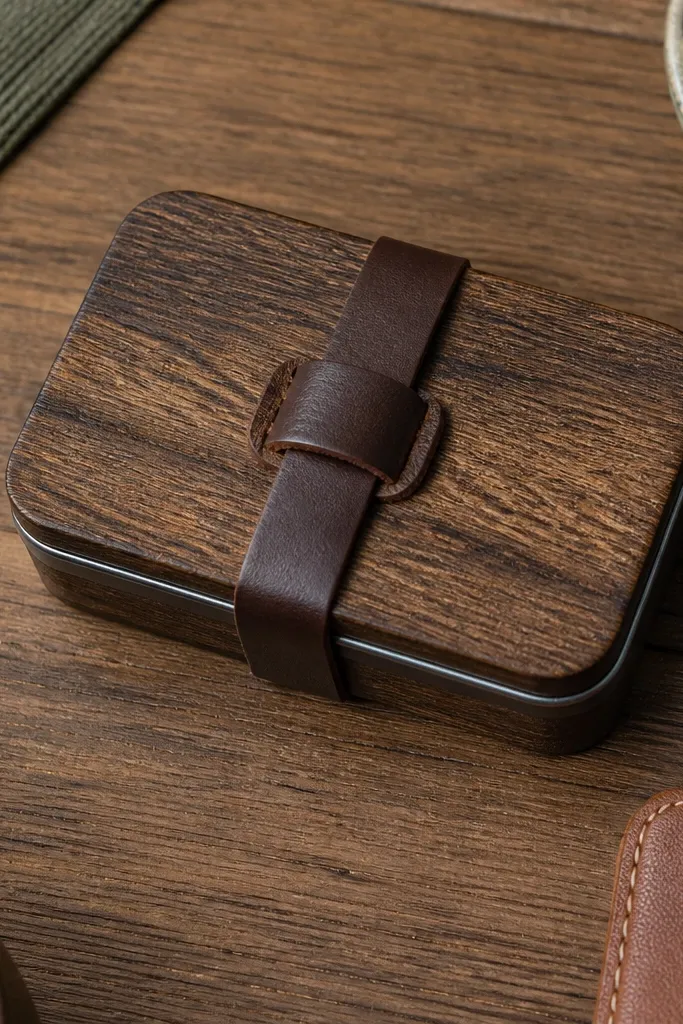
This cover is graphic and modern because the woodgrain print gives instant visual depth. Use contact paper only as the outer layer and keep the structure under it solid so the tin doesn’t flex. A leather strap closure keeps the look grounded and gives you an easy grip. It’s also a good option if you want a clean, snap-to-strap look without sewing.
Wrap the tin with a solid backing layer like thin craft foam or cardstock covered in fabric, then apply woodgrain contact paper on top. Trim the contact paper edges so they don’t lift, and seal the edges with clear matte tape or a thin clear coat. Attach a leather strap with two small rivets or screw posts so it folds naturally over the tin. Add a matching snap or hook on the opposite side for closure.
Seal the contact paper edges with clear matte varnish to stop peeling from pocket friction.
Don’t apply contact paper directly to the tin — it wrinkles and lifts at the corners.
8. Quilted Fabric Cover with Slim Elastic Band
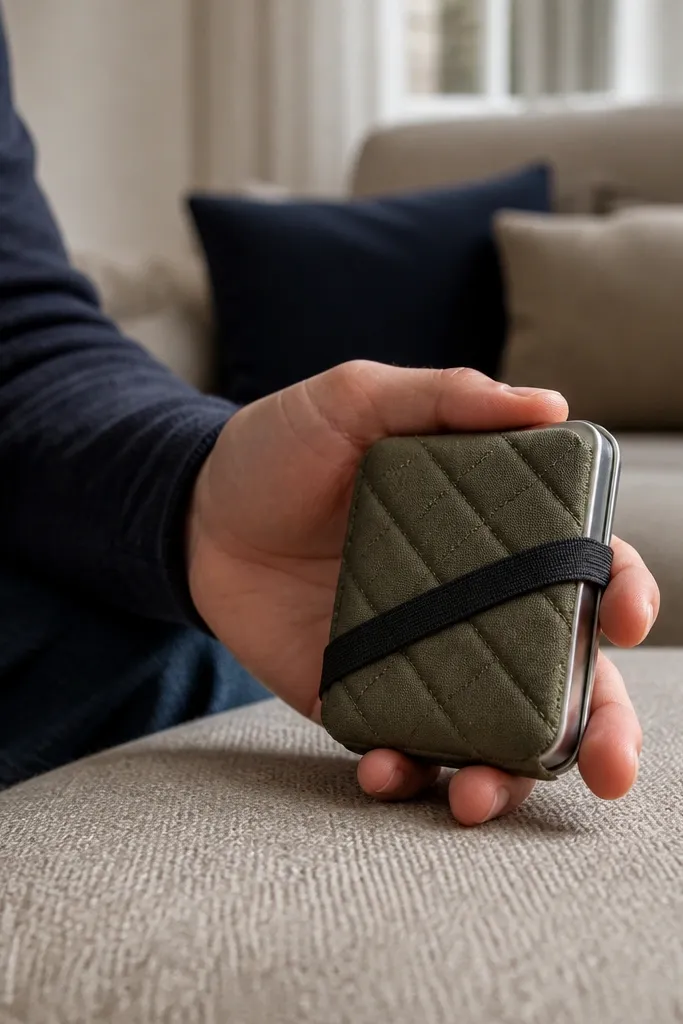
Quilting makes the cover look layered and premium, even when the project is simple. A slim elastic band keeps the tin from slipping and creates a clean diagonal or horizontal line that looks good in photos. Pick medium-weight fabric so the quilting stays structured. This design is ideal for people who want a soft cover that still holds shape.
Cut a quilted outer panel by layering fabric, batting, and a backing, then quilt in straight lines 10-15 mm apart. Build the sleeve shape around the tin and stitch or glue the side seams. Add elastic band placement by marking the front center and sewing the elastic ends onto the backing layer. Test the tension with the tin inserted so the band holds without warping the quilt.
Trim batting flush before attaching the lining so the quilt doesn’t bulk at edges.
Don’t use thick batting — it makes the cover too puffy for a wallet feel.
9. Neoprene Sleeve with Reflective Stripe Detail
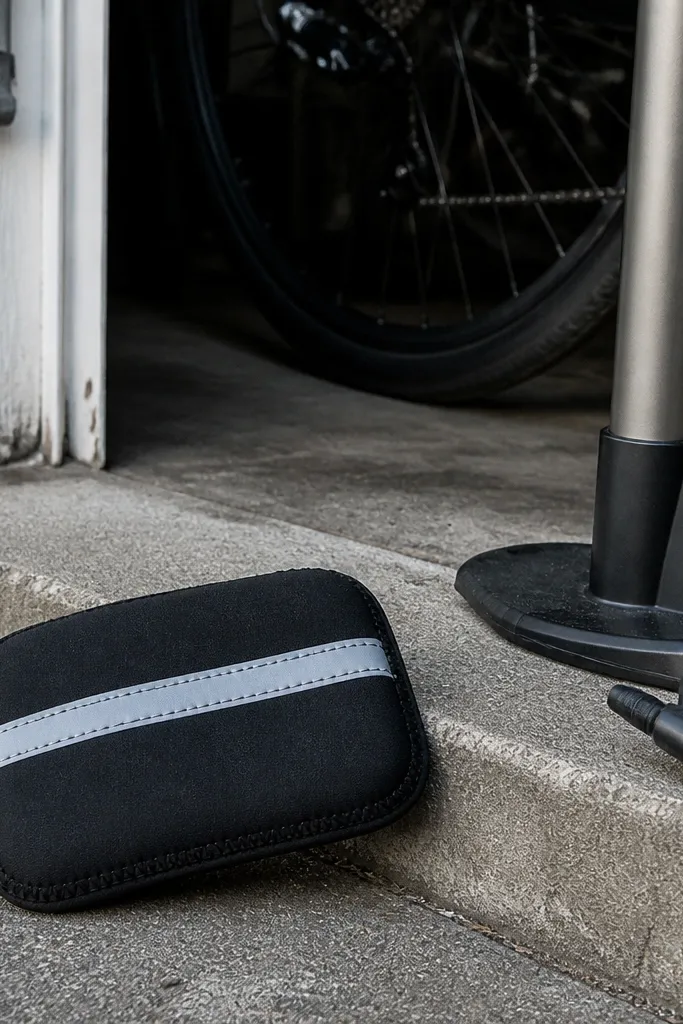
Neoprene is tough, flexible, and forgiving, so it keeps its shape even after repeated pocket use. A reflective stripe adds a modern, streetwear vibe and gives dramatic photo contrast. This cover is also easy to clean, which matters for fabric-based designs. If you want a modern Altoids Wallet cover that looks sharp fast, neoprene is a strong choice.
Cut neoprene panels to tin size plus 1 mm allowance and use a sharp blade for clean edges. Add reflective stripe tape by positioning it first with painter’s tape, then glue and stitch along both sides if your machine handles it. Assemble the sleeve by gluing seams with neoprene-safe adhesive, then add a stitch line for reinforcement. Finish the opening edge with a thin fabric bias tape to prevent fraying.
Use a stretch needle and shorter stitch length to avoid puckering in neoprene.
Don’t skip seam reinforcement — neoprene edges can peel if only glued.
10. Paper-Laminated Map Print Cover with Clear Laminate Finish
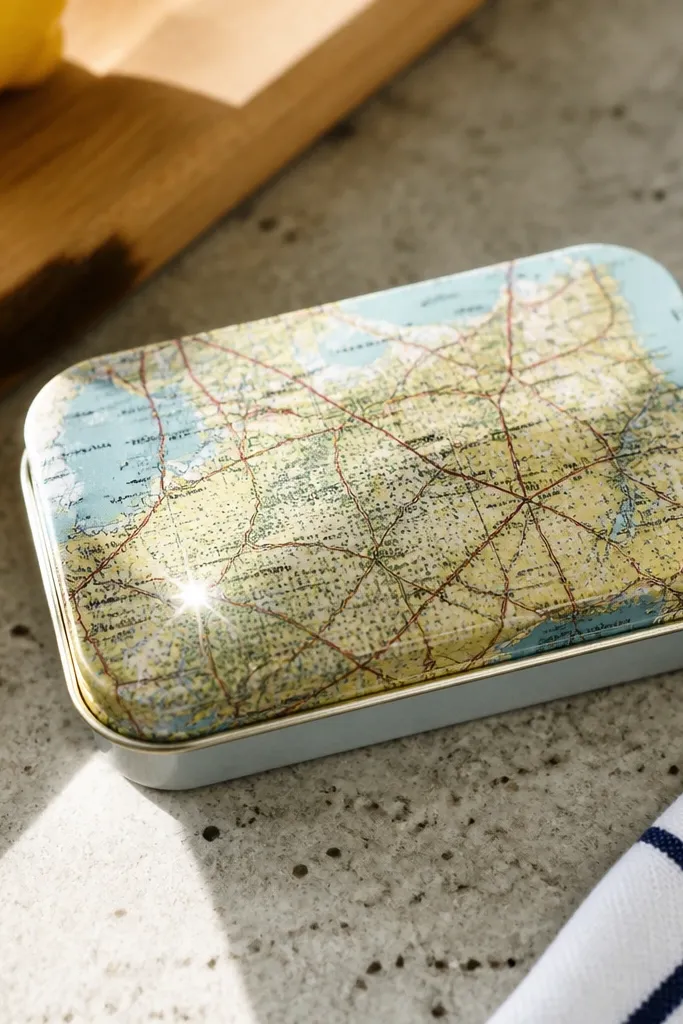
Map prints look modern because they’re graphic, not sentimental. Laminating the paper keeps the print crisp and makes it resistant to light scuffs. The clear laminate also creates a shiny highlight that pops in photos. This design is best when you want a flat, clean surface rather than bulky padding.
Create a rigid base with cardstock or thin craft foam cut to tin size plus 1-2 mm. Apply map paper, then trim edges and seal with a clear laminate sheet or liquid laminate. Wrap the laminated panel around the tin and glue the seam on the inside only. Add a closure using a small magnet sheet or a snap tab aligned to the tin lid seam.
Use a ruler and heavy book weight while the laminate sets to prevent bubbles.
Don’t use thick paper — it creases and the cover won’t sit flat.
11. Embossed Vegan Leather with Center Bar Magnet Closure
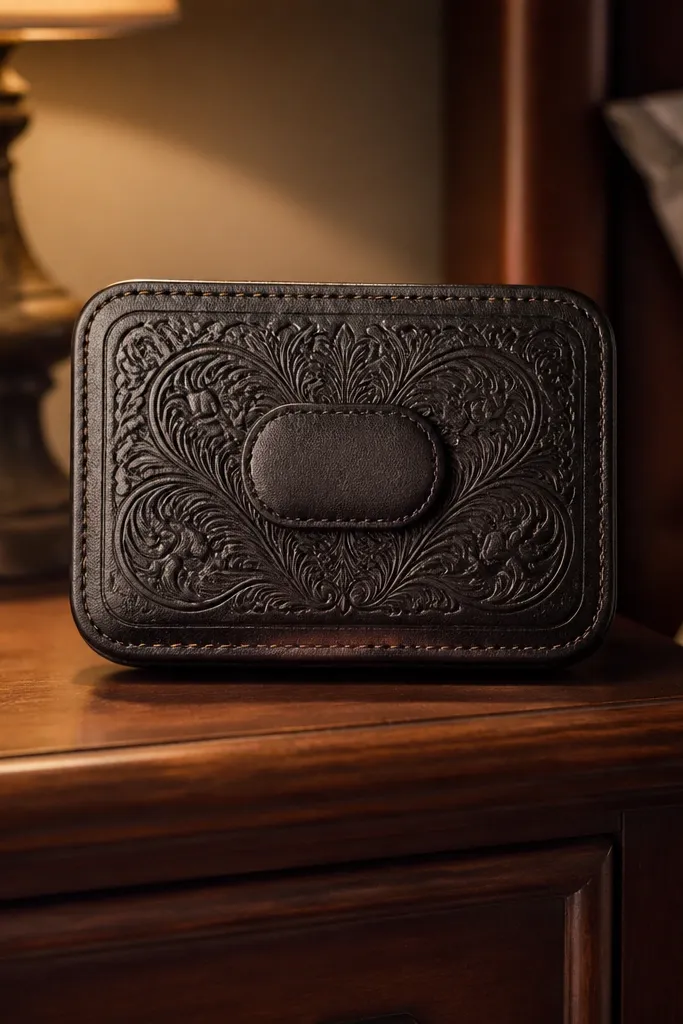
Embossing adds depth without adding bulk, which is exactly what makes a modern Altoids Wallet cover look expensive in small format. A center bar magnet closure keeps the front clean and symmetrical. Vegan leather is a practical choice if you want texture and easy cleaning without real leather care. This design also hides fingerprints better than shiny finishes.
Cut two panels and an optional flap from embossed vegan leather, using tin measurements plus 1-2 mm. Mark the magnet bar position in the center and install magnets so the flap closes flush. Stitch the perimeter with a matching thread color and keep stitch lines even. Seal any cut edges with a thin edge coating so the embossed texture doesn’t fray.
Do a dry fit with the flap before installing magnets — tiny alignment changes matter.
Don’t stretch embossed leather while cutting; it distorts the pattern.
12. Silk-Screen Painted Geometric Cover with Fabric Binding
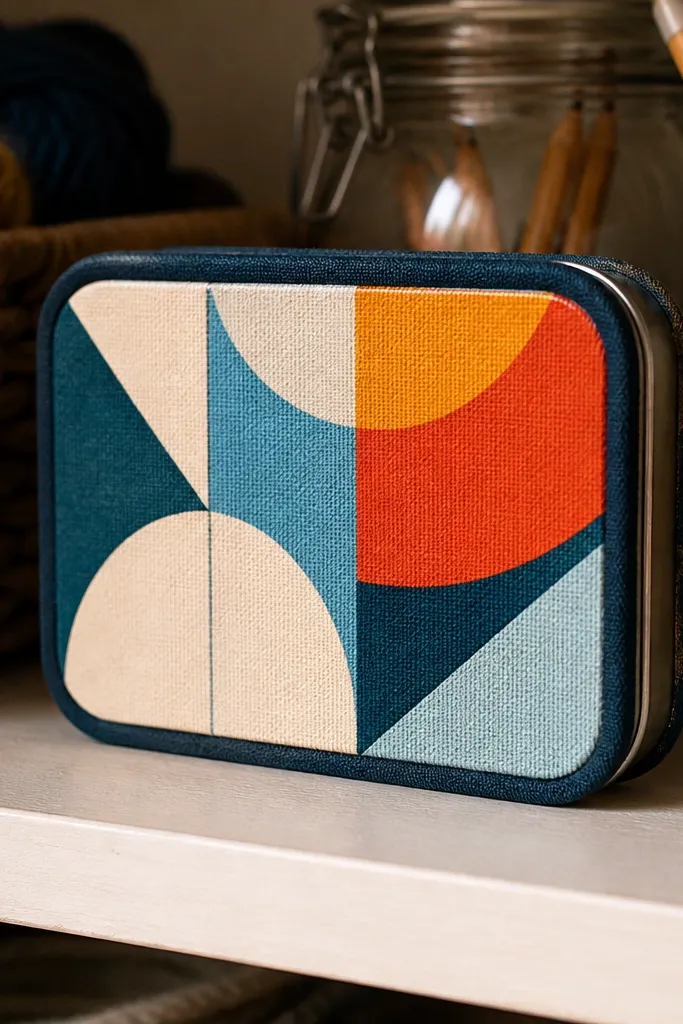
Geometric paint looks modern because it’s graphic and high-contrast, and silk-screen gives you sharp edges instead of messy DIY lines. Fabric binding makes the cover look professionally finished, even if the paint layer is simple. This is a great choice if you want a bold front without complicated hardware. The binding also protects the paint from rubbing off at the corners.
Pick a blank base fabric — cotton twill or canvas works well — and cut it to tin size plus 1-2 mm. Screen print geometric shapes using a stencil and fabric screen ink, then heat-set it per the ink instructions. Wrap the painted panel around the tin and sew fabric binding along all outer edges. Add a closure with a hidden snap under the binding so it stays flat.
Editor's noteTape the stencil in two steps: first tack it, then burnish the edges so paint doesn’t bleed.
Skip thisDon’t skip heat-setting — un-set ink smears when the cover rubs in pockets.
13. Woven Paracord Wrap with Leather End Caps
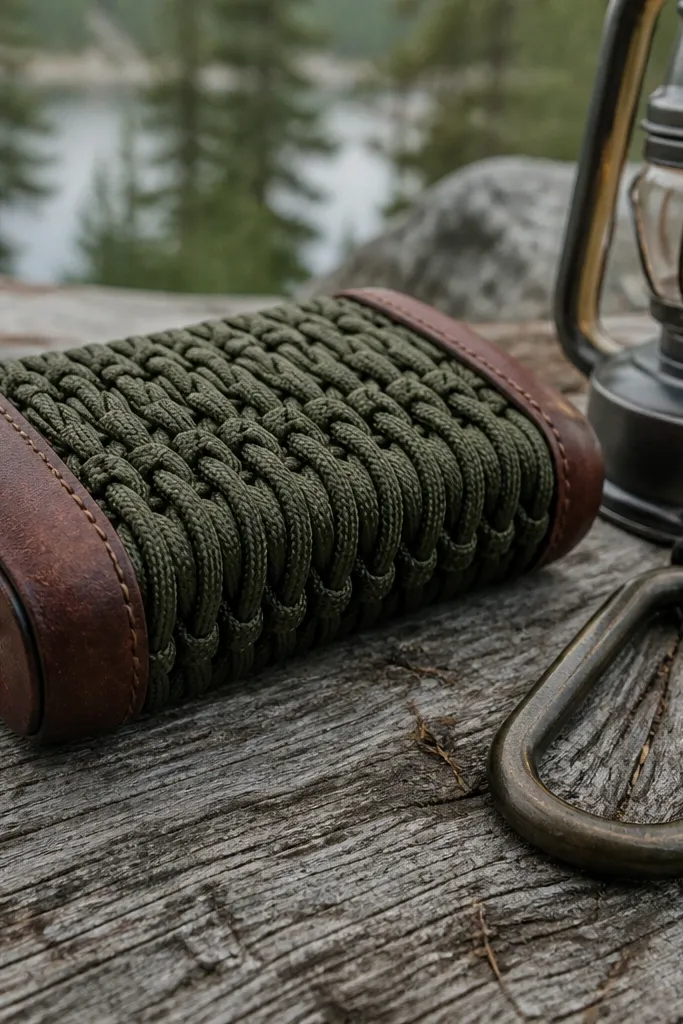
Paracord looks rugged and modern, and weaving gives you a texture pattern that photographs beautifully. Leather end caps finish the look and protect the rope ends from fraying. This cover is also grippy, so it doesn’t slide around in a bag. It’s a good build if you like handwork and want a visible, tactile result.
Cut paracord lengths based on the tin circumference and wrap pattern, then melt ends to prevent fray. Weave the cord around a temporary cardboard form the same size as the tin, keeping tension even. Glue or tie the weave to lock it in place, then attach leather end caps using rivets or strong contact cement. Trim any excess cord and tuck ends into the end caps before sealing.
Keep tension consistent — uneven tension makes the weave look lopsided fast.
Don’t skip melting and sealing cord ends — they’ll unravel at the edges.
14. Japanese Washi Tape Stripe Cover with Clear Tape Edge Seal
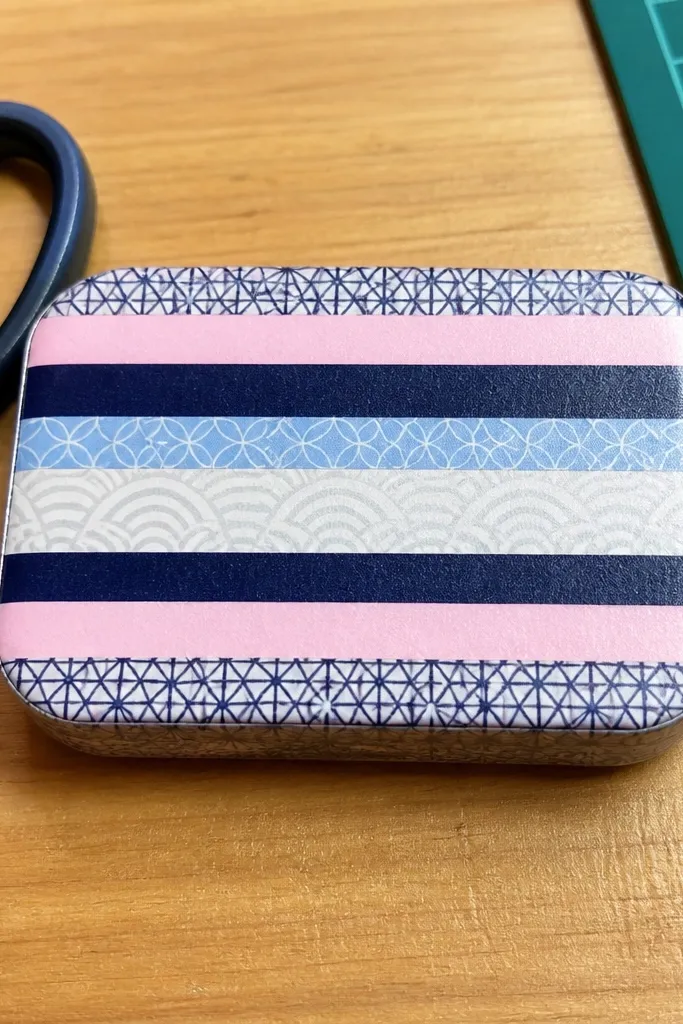
Washi tape stripes look clean, modern, and graphic, especially when you use a tight color palette. The trick is treating it like a finished surface, not a craft wrap: seal the edges so it doesn’t peel at the corners. This cover is quick, cheap, and very photogenic because tape layers create crisp stripes with visible texture. It works best for people who want an aesthetic cover for desk use or light daily carry.
Cover the tin with a thin base layer like cardstock or thin fabric so the tape sits flat and doesn’t cling unevenly. Apply washi tape strips in measured widths and burnish each strip down with a credit card edge. Seal the perimeter edges with a strip of clear tape or clear matte sealant so the corners stay locked. Add a small elastic loop or snap tab on the back to keep it from opening while moving.
Editor's noteStick tape strips in pairs — one down the center, one along a reference line — so stripes stay straight.
Skip thisDon’t overlap too many layers at corners; it makes a bulky ridge.
15. Micro-Suede Sleeve with Faux Buckle and Stitch-Through Detail
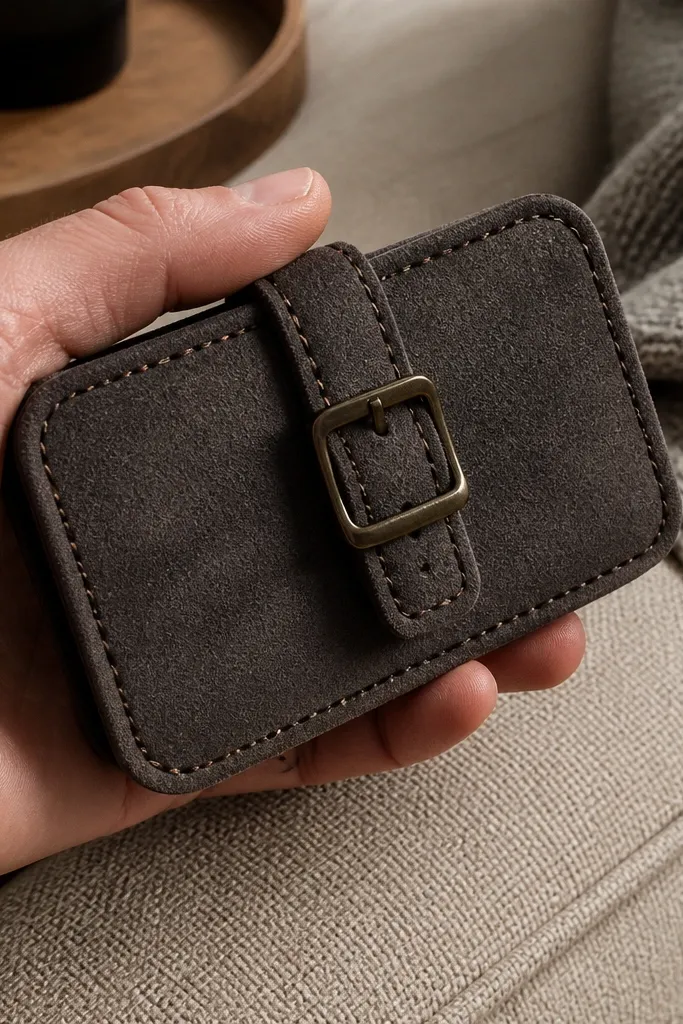
Micro-suede gives a soft, modern texture that looks great under indoor lighting, and it hides minor scuffs better than smooth materials. A faux buckle detail adds structure and makes the cover feel like a designed object. Stitch-through detail makes it look intentional, not just glued. This design is great if you want a wallet-like look without hard edges.
Cut micro-suede panels to tin size plus 1-2 mm and plan a front tab area for the buckle. Sew or glue a small faux buckle strap onto the front tab, then assemble the sleeve sides. Add topstitch lines around the buckle and perimeter to lock the tab down. Seal edges with a thin fabric edge finish or binding to stop shedding.
Use a suede brush lightly after assembly so the nap lines up and looks even.
Don’t use heavy glue — it stains micro-suede and creates shiny spots.
16. Silicone Stamp Pattern Cover with Matte Rubber Coating
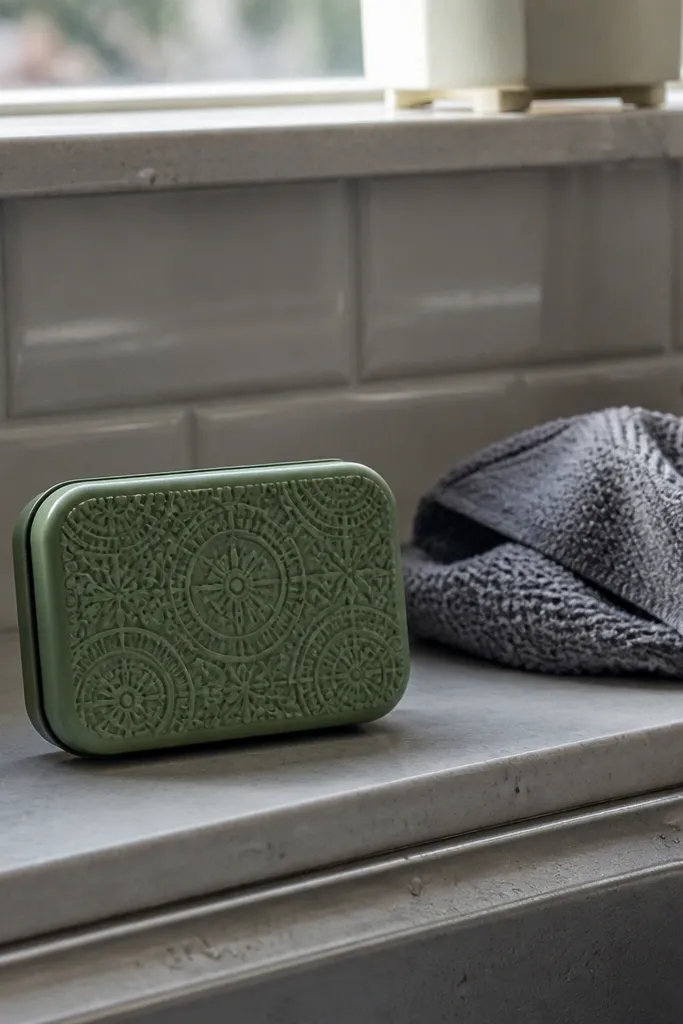
A stamped pattern gives you a modern, tactile surface that looks intentional even when the tin is plain. Matte rubber coating keeps glare down, so your photos show texture instead of shine. This is a strong option if you want grip and scratch protection without bulky layers. The stamp design also hides small marks that show up on smooth covers.
Start with a fabric or thin base that can accept coating, then stretch it slightly flat around a form the tin size. Use silicone stamps to press a repeat pattern, then apply matte rubber coating in thin layers so details stay crisp. Trim excess and reinforce the fold lines with a thin strip of fabric tape. Add a closure using a hidden snap or magnet under the top layer so the front stays clean.
Coat in thin passes — thick coating fills the stamp grooves and flattens the pattern.
Don’t press stamps after coating — the pattern blurs.
17. Stained Denim Patchwork Cover with Copper Rivet Corners
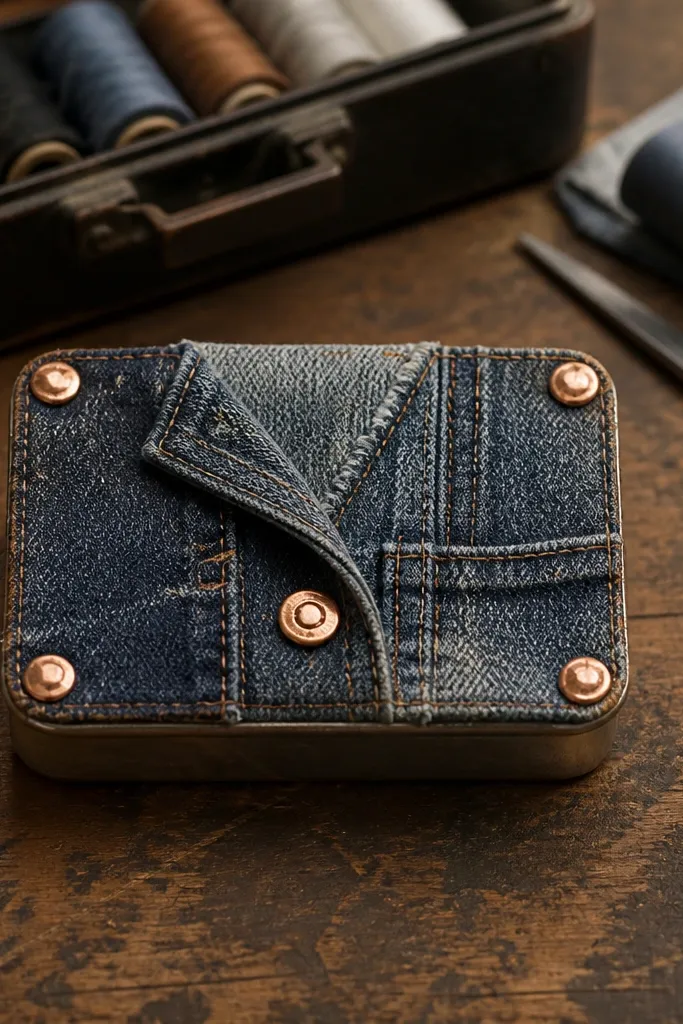
This modern Altoids Wallet cover looks like a worn jacket front, but it stays clean and structured. The patchwork breaks up the plain rectangle, and the copper rivets catch light even in flat indoor photos. You get a tough, slightly stiff cover that hides any imperfect edges because the seams are part of the design. It is a great fit for a garage-DIY vibe, and it works in bedrooms, offices, or a denim-themed desk setup. Skill level is medium — you are cutting and aligning fabric panels, not doing anything tricky with closures. Time is about 2 to 3 hours depending on how many patches you cut and whether you hand-finish the edges.
Cut 5 denim panels from two washes of denim (one dark indigo, one lighter blue), each panel sized to cover one face section of the Altoids tin with a 3/8 in margin on all sides. Arrange the panels on the tin to form a patch layout that looks intentional, then mark the positions with pencil on the back of the fabric. Stitch seams along the patch lines with a straight stitch, then trim seam allowances to about 1/4 in so the cover lies flat. Wrap the fabric around the tin, pull it tight on the corners, and glue with contact cement or fabric glue, then fold and glue the margins to the back. Install copper rivets at the four corners by punching through the fabric and tin back — use a rivet setter or a small hammer and an anvil block — and finish by sealing the edges with a thin brush coat of matte fabric sealant.
Editor's noteUse two denim weights — 10-12 oz for the outer panels and a lighter 6-8 oz for backing — so the cover stays crisp without getting bulky.
Skip thisDon’t skip trimming seam allowances; thick seams make the tin edges bulge in photos.
18. Matte Terracotta Clay-Textured Cover with Burnished Edge Paint
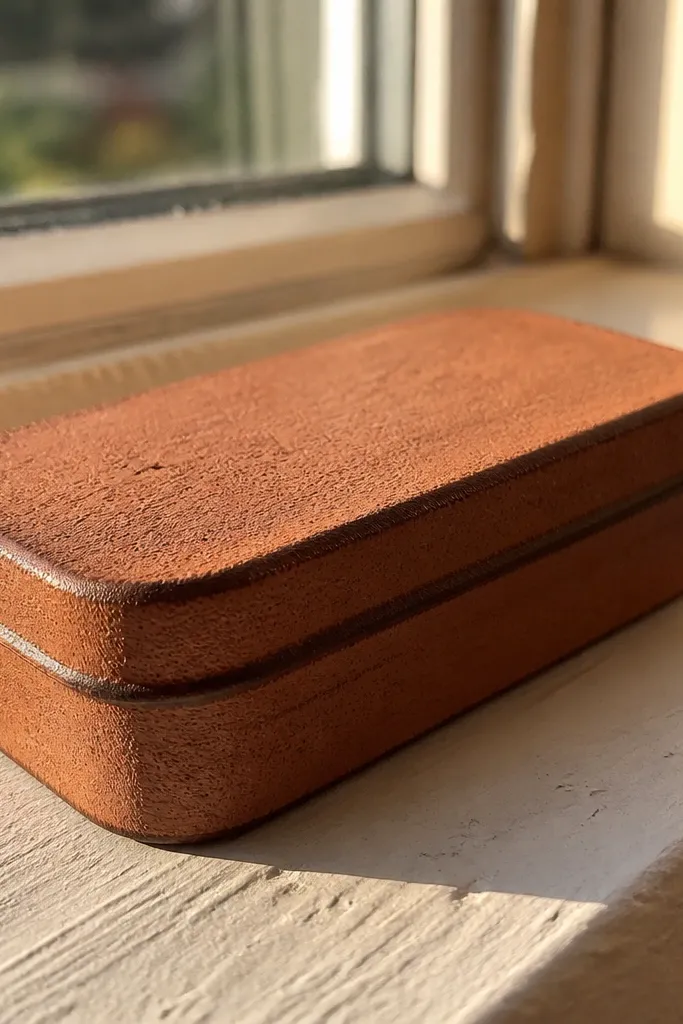
This is a modern Altoids Wallet cover that looks handmade even when it’s neat. The clay-like texture adds shadow and depth, so it photographs well from the side, not just straight on. Burnished edges keep it from looking messy — they read like a finished leather craft even though you’re using polymer clay texture or a textured coating. It is perfect if you want a warm, earthy look for a desk kit, outdoor bag, or coffee-table styling. Skill level is beginner-to-medium because the build is mostly measuring and coating. Time is about 2 hours plus a short cure window if your texture product needs it.
Clean the tin thoroughly and lightly sand it with 220 grit so coatings grip, then wipe with isopropyl alcohol. Mix or apply a clay-texture coating (textured gesso, modeling paste, or polymer clay sheet cut to size) to the tin front and sides, aiming for about 1/16 to 1/8 in thickness. Press a texture tool or fine sponge onto the surface to get a consistent terracotta grain, then let it cure fully. Mask the edges with painter’s tape, then paint a thin line of burnishing edge paint (or acrylic mixed with a little wax) and buff it with a soft cloth once dry. Seal the whole cover with matte clear coat so the texture stays crisp and doesn’t get sticky.
Buff the edge paint in short circles with a scrap cotton T-shirt — it levels the paint without sanding the texture.
Don’t apply thick texture all at once; it cracks at the corners.
19. Clear Frosted Window Cover with Cyan Gel Backplate
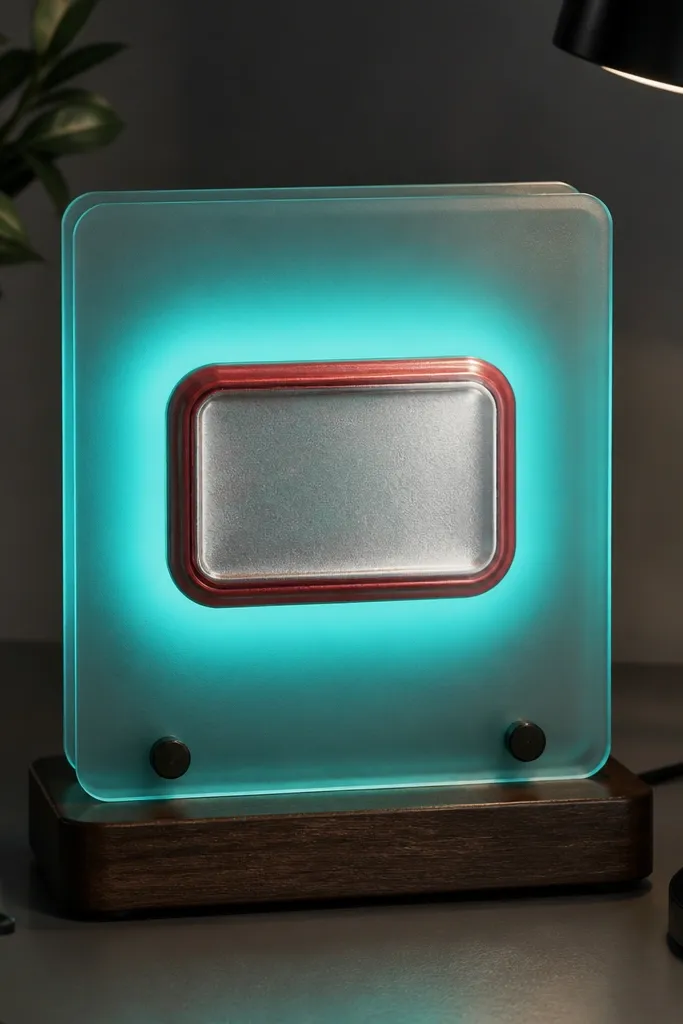
This one gives you a clean, modern Altoids Wallet cover look with a glassy pop. A frosted window makes the front readable at a glance while diffusing glare in photos. The cyan gel backplate creates a color glow behind the window, so the cover looks more expensive than it is. It also fixes a common issue with clear covers — fingerprints and reflections ruin the photo — because frosting hides both. Skill level is medium: you are cutting window film and sealing it cleanly. Time is about 2 to 3 hours, mostly for trimming and getting the window edges straight.
Cut a rectangle window opening on the tin-facing panel template, leaving a 1/4 in border all the way around for a crisp frame. Apply double-sided adhesive sheet or thin craft glue to the back of a frosted clear film (frosted vinyl or frosted acetate), then press it over the window opening and trim flush with a sharp craft knife. Cut a cyan gel sheet or translucent craft film to the same window size and place it behind the frosted layer, centered so you don’t get a lopsided glow. Wrap the rest of the tin with your main cover material (smooth faux leather or matte fabric) and glue the frame area last so the window stays aligned. Finish by sealing the window border with a thin bead of clear sealant or edge coat so moisture and dust can’t creep in.
Editor's noteChill the frosted film for 5 minutes in the fridge before cutting — it stays less stretchy and the edges are cleaner.
Skip thisDon’t use thick glue near the window edge; it squeezes out and turns shiny in photos.
20. Laser-Cut Cork Slices Cover with Black Elastic Hinge
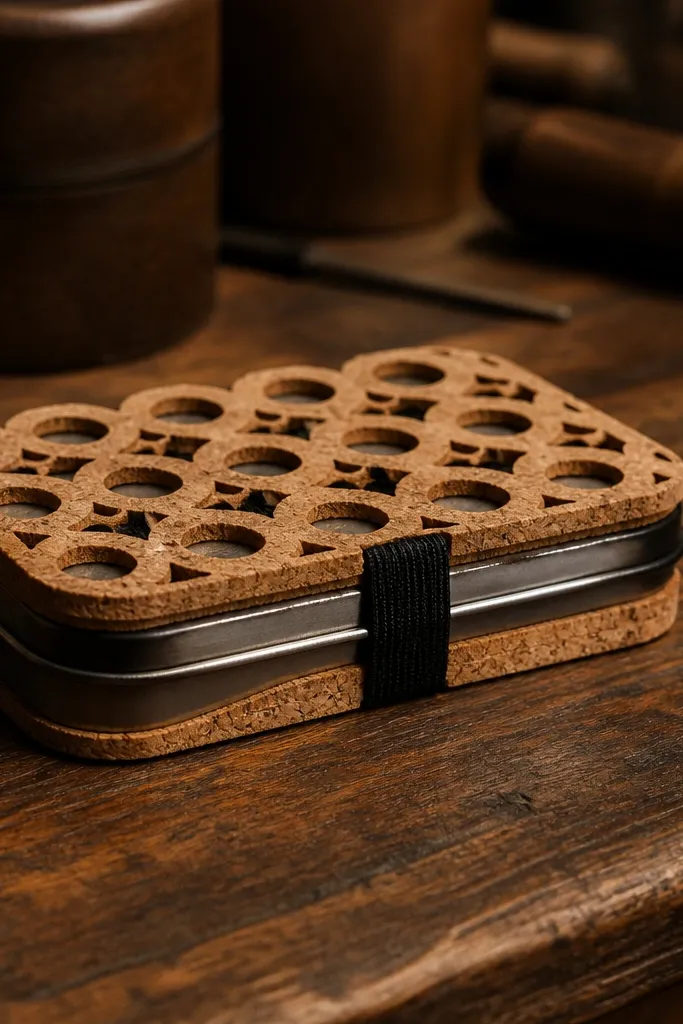
This modern Altoids Wallet cover looks like a slice-of-wood display, but it stays lightweight and grippy. The cork slices create a repeating ring pattern that reads as intentional, not random, and it photographs with strong texture even in low light. A black elastic hinge keeps the cover tight without adding bulk, so it slides into a pocket without snagging. It is a great option for people who want a tactile cover that doesn’t look like typical leather or fabric. Skill level is medium because you need clean slice alignment and a strong hinge attachment. Time is about 2 to 4 hours depending on how many slices you cut or purchase.
Trace the tin front and side panels onto cork sheets, then cut or purchase laser-cut cork slices sized to cover the front face with a 3/8 in overlap on the edges. Dry-fit the slices in a tight grid, then glue them down one row at a time with contact cement so you can correct alignment before it grabs. Wrap the cork over the tin edges and glue the overlap to the back, keeping the seam at the hinge side. Cut a length of black elastic (about 3/8 in wide) long enough to wrap around the tin and allow opening by 1/2 to 3/4 in — then stitch or glue the elastic ends to the back panel. Seal the cork surface with a matte cork sealer so it resists oils from fingers and stays even in color.
Editor's noteUse contact cement on cork, not hot glue — hot glue can warp cork slightly and it shows through the texture.
Skip thisDon’t glue the entire face in one shot; cork slice alignment shifts if you commit too early.



