

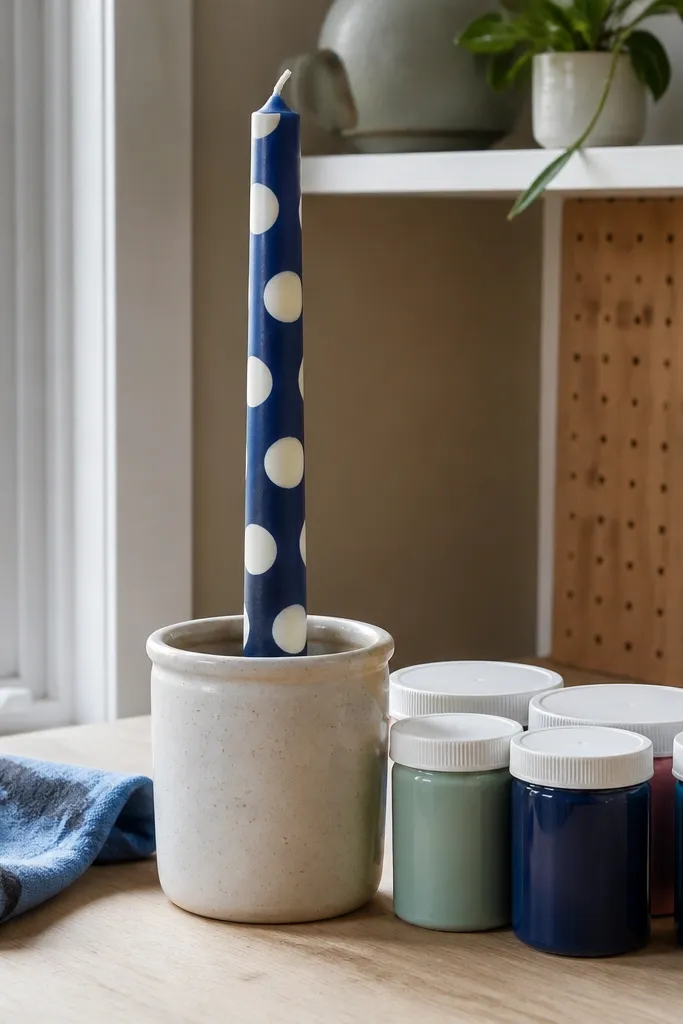
1. Moonlit Dots Band
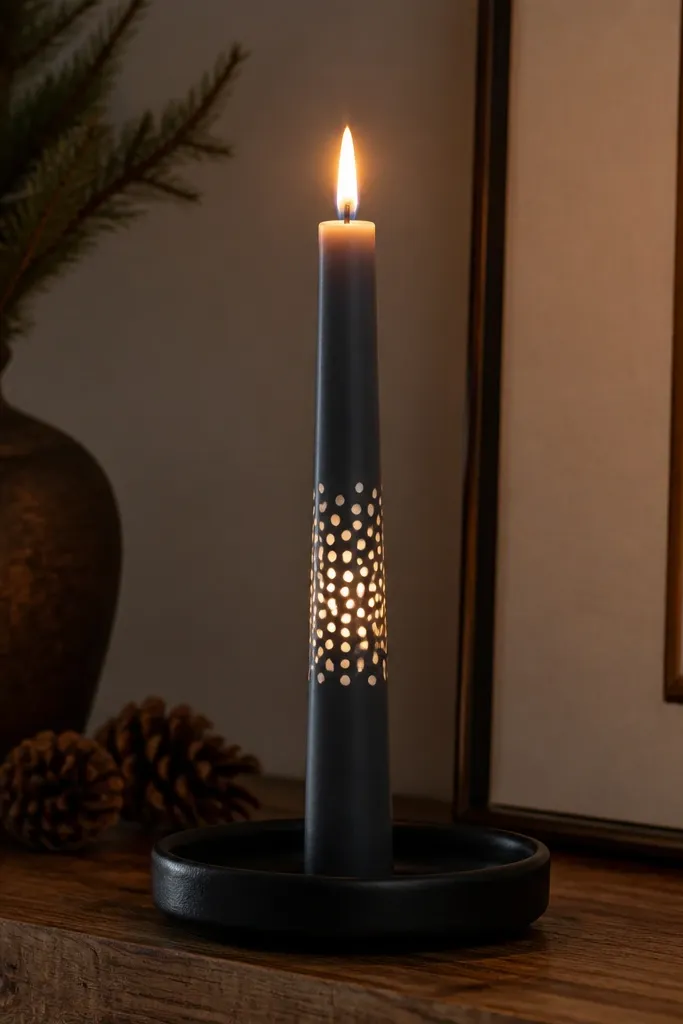
This one looks expensive because the dots act like a soft night-sky filter when the flame hits them. Paint a deep navy or charcoal base so the white dots pop without needing tiny details. Keep the dot sizes varied by 1-2 mm so it feels organic, not machine-made. It’s low-maintenance because you’re repeating one shape — dot, dot, dot — and you can stop once the band looks balanced.
First, tape a horizontal band around the candle at about 3-4 inches from the bottom, then paint the area with navy or charcoal and let it dry fully. Next, use a small dotting tool or the eraser end of a pencil to place white dots across the band, mixing 3-4 dot sizes for texture. Finally, remove tape carefully, then seal with a thin clear coat once the paint is dry.
Mark the band height with a pencil guide before painting so the dots land evenly.
Don’t use watery paint for dots — it spreads and turns into blobs.
2. Sunset Ombre Brushstroke
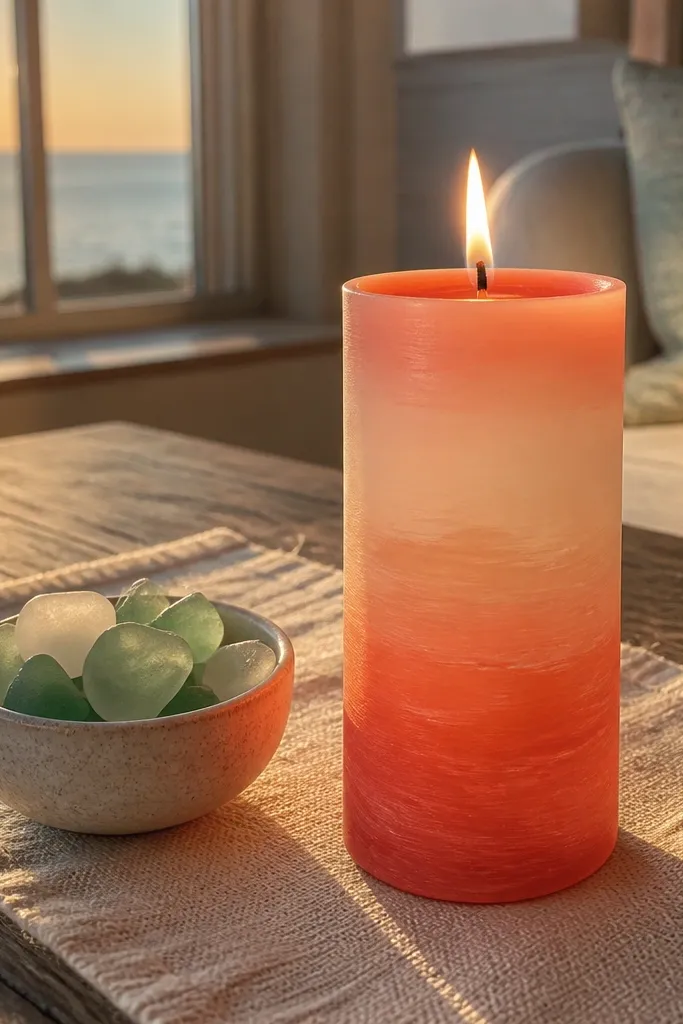
Ombre is the easiest way to look “designed” because it creates smooth depth with minimal control. Choose a warm gradient like peach to coral to soft terracotta so the flame makes the colors look warmer. You’re not painting fine lines; you’re blending broad strokes that forgive small unevenness. This is a great option when you want candle painting to look good even if you’re not a steady hand.
Start by painting the lower third with peach using a sponge or flat brush, blending upward slightly. Then layer coral in the middle third, using a dry brush technique to soften the transition — wipe your brush on paper first. Finish by adding a thin terracotta glaze near the top of the painted zone, then let it dry before sealing.
Editor's noteUse a dry brush for the blend; wet blends look streaky on wax.
Skip thisDon’t paint the ombre too high — keep it to the bottom half so it reads clean.
3. Botanical One-Line Sprig
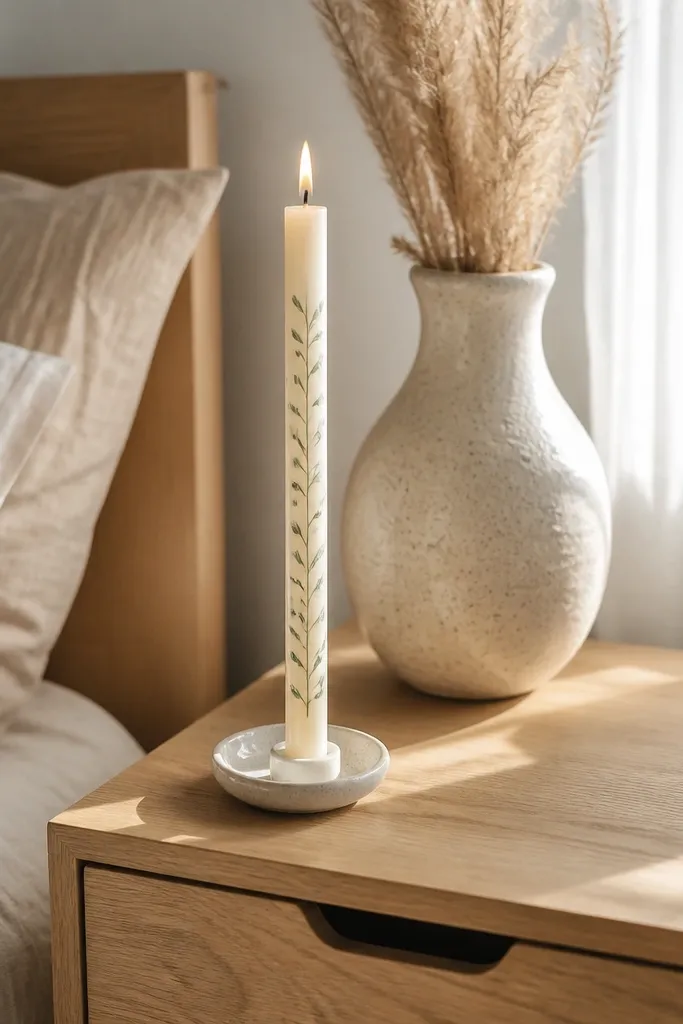
A one-line sprig looks delicate and modern without needing tiny leaf shading. The trick is to use a single continuous curve and repeat leaf shapes that are simple teardrops. Use muted greens and skip bright neon shades so it looks calm, not cartoonish. When lit, the linework glows softly and stays readable from a distance.
First, lightly sketch the sprig path on the candle with a pencil, then paint the line with a fine liner brush. Next, add small teardrop leaves on both sides of the line by touching the brush to the wax and pulling away. Finally, let it dry and seal with a clear coat, keeping the coat thin so the details don’t blur.
Practice on paper with the same brush so your leaf touch points match your candle texture.
Don’t thicken the line — heavy strokes look messy when the candle tapers.
4. Marble Vein Swipe
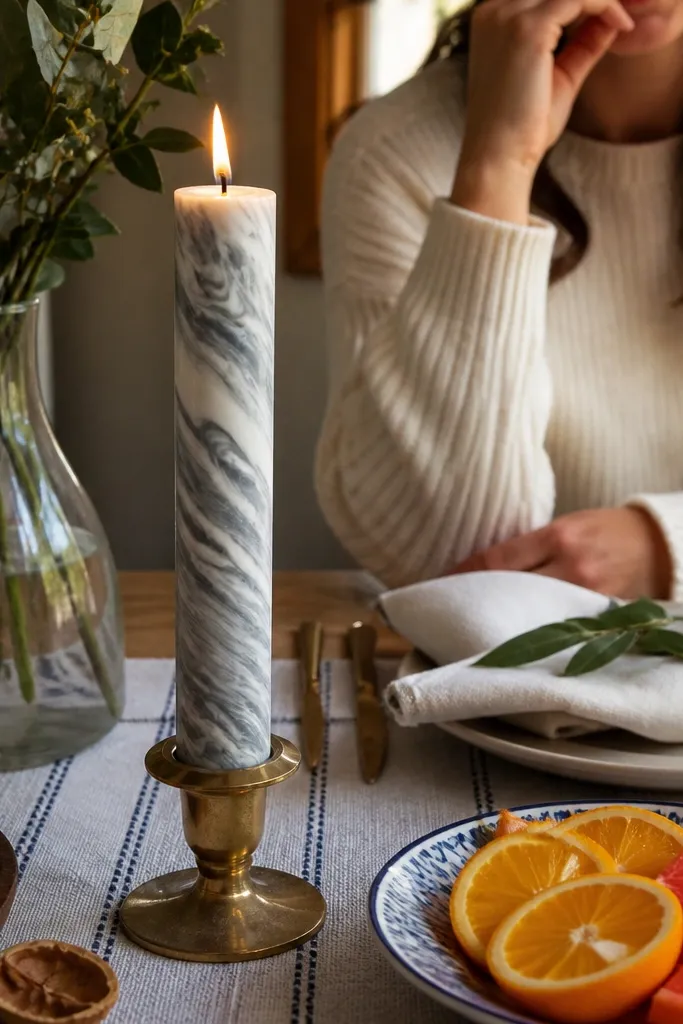
Marble veining gives instant sophistication because the eye sees movement, not a flat pattern. Use a creamy base and add gray veins with slight blue undertones for a natural look. The flame makes the veins shimmer, which is why this works even with minimal painting time. It’s also forgiving: marble never matches perfectly, so small variations look intentional.
Start by painting the whole candle with a smooth soft white base, then let it dry. Next, load a liner brush with diluted gray paint and drag 2-4 uneven veins vertically, then add tiny offshoot lines for realism. Finally, seal with a clear coat after the paint is dry; handle with gloves so you don’t leave fingerprints.
Editor's noteWipe the brush lightly between veins so each line gets thinner as you go.
Skip thisDon’t draw too many veins — too much detail makes it look like cracks.
5. Terracotta Geometric Steps
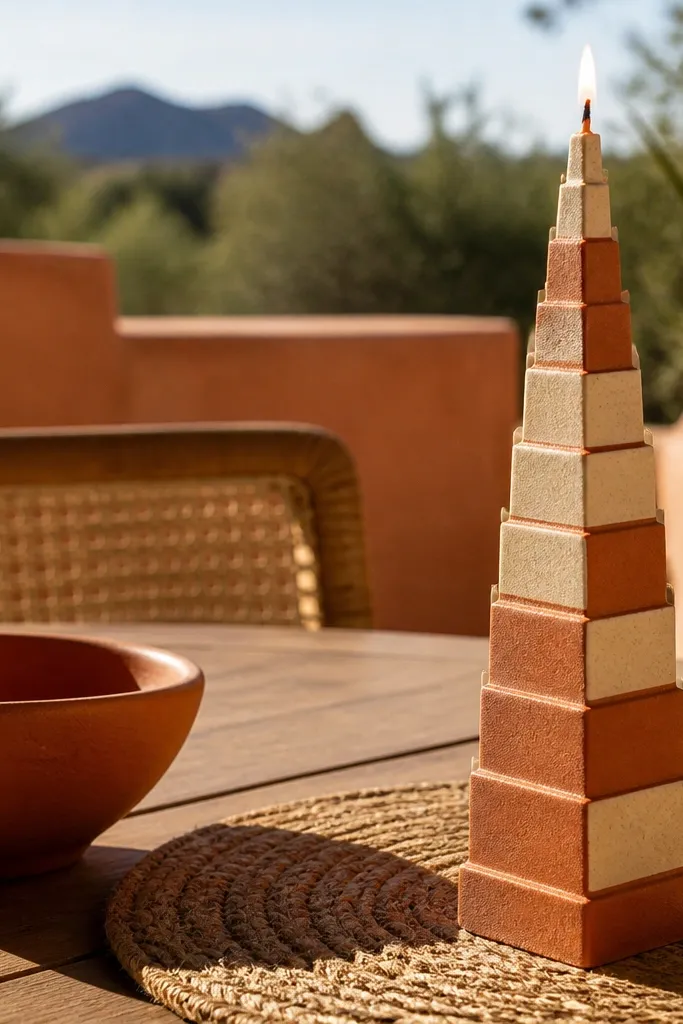
Geometric steps are photogenic because they create crisp edges that catch light along the taper. Use terracotta and cream for a warm, desert look that reads well in both daylight and candlelight. This one is low-maintenance because you’re repeating the same block shape and keeping it aligned. If you use tape, the result looks clean without needing freehand perfection.
First, wrap painter’s tape around the candle to create a guide line where each “step” will sit, spacing from 1-1.5 inches apart. Paint the taped sections terracotta, then remove tape to reveal cream gaps. After full dry, add a second color like a muted olive line between steps for contrast, then seal.
Press tape down firmly on the curved surface so paint doesn’t creep under.
Don’t use thick paint on tape edges — it can bleed and soften the steps.
6. Lavender Speckle Mist
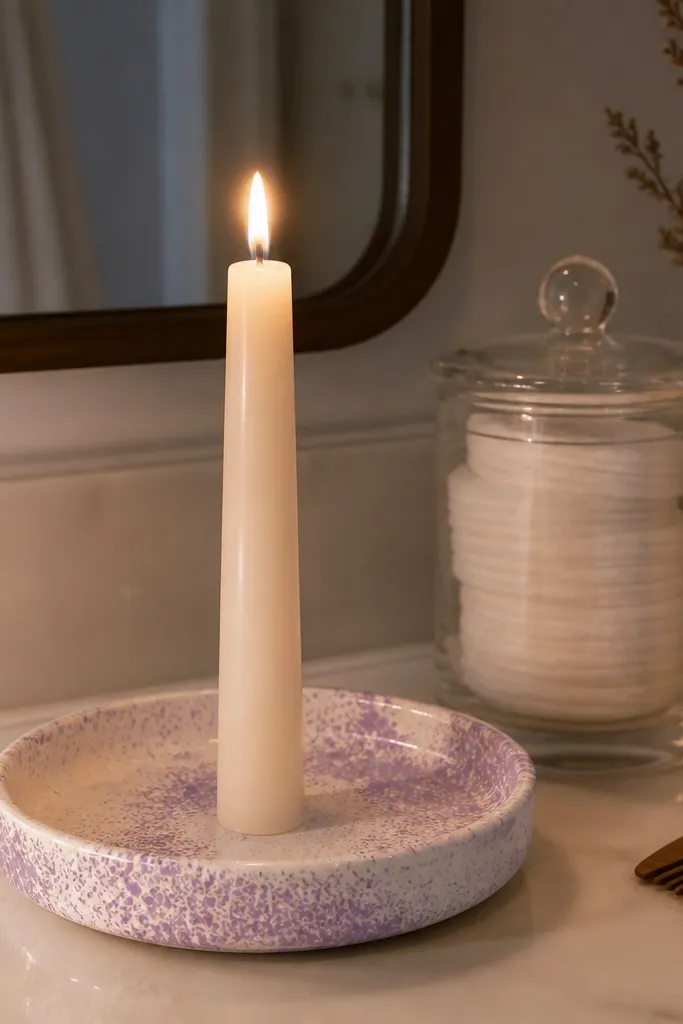
Speckle looks like a soft watercolor cloud, and it’s one of the fastest “finish it now” techniques. Use a pale base like warm white, then add lavender dots in clusters so it looks layered. You get texture without outlining anything. The flame makes the speckles glow, and it’s hard for this to look sloppy because randomness is the point.
First, paint the candle base with warm white and let it dry completely. Next, thin lavender paint slightly and flick it from a toothbrush or stiff brush held above the candle to create speckles, aiming for heavier density in the middle third. Finally, touch up any large smears with a cotton swab and seal once everything is dry.
Do two light passes instead of one heavy pass for better control.
Don’t flick too close — the paint will splatter into streaks.
7. Gold Foil Halo Edge
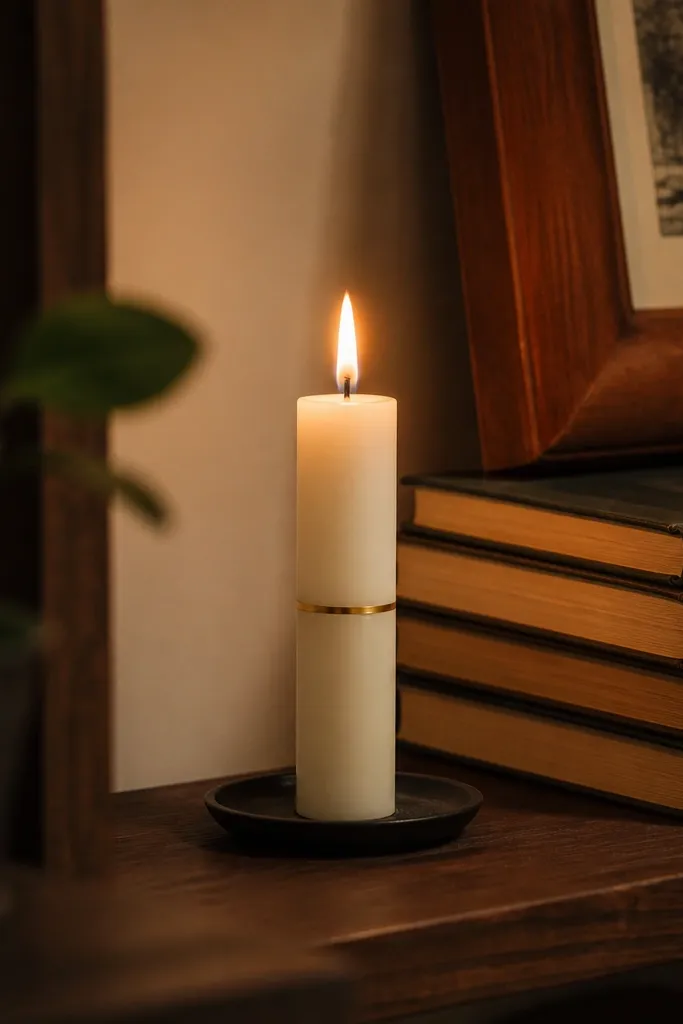
This is a “minimum effort, maximum glow” look. A thin gold halo line around the middle catches candlelight and makes the candle read as intentional decor. It’s perfect if you want something classy without painting lots of shapes. Use gold that looks warm, not greenish, so it flatters skin tones and wood shelves in photos.
First, apply a thin strip of acrylic gel or metallic leaf adhesive around the candle at the midline, about 1 inch wide. Next, press gold leaf onto the adhesive and smooth gently with a soft brush, then let it set. Finally, seal lightly with a clear coat so the gold doesn’t scratch when you stage the candle.
Editor's noteUse a silicone brush or soft makeup sponge to press leaf without tearing it.
Skip thisDon’t seal too thick — heavy clear coat dulls metallic shine.
8. Coastal Tide Line
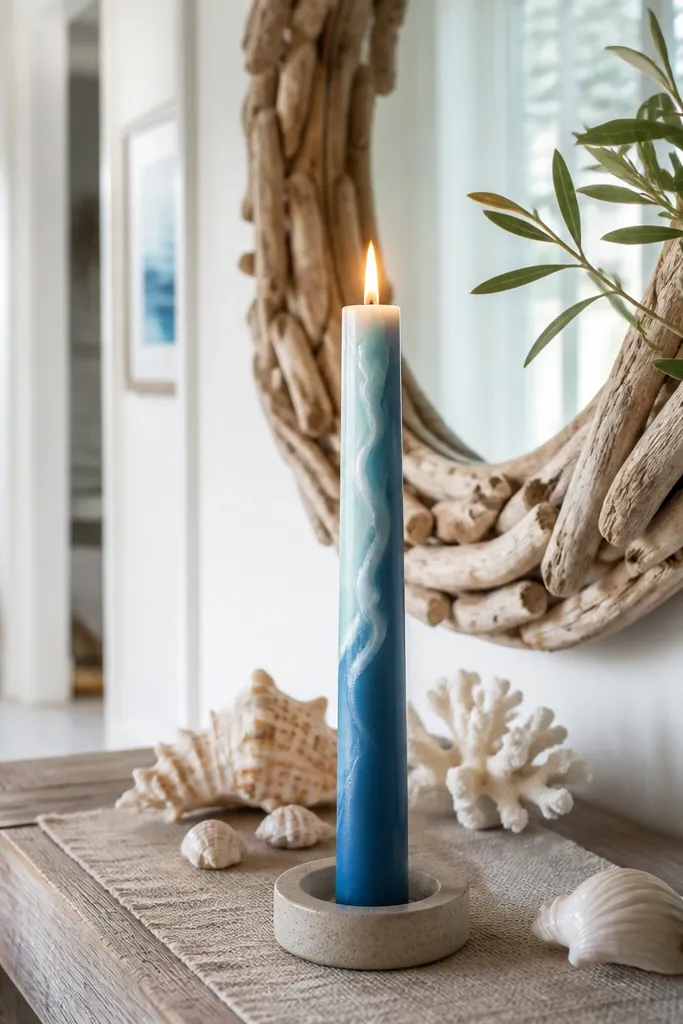
A single wavy tide line looks modern and calm, and it’s one of the easiest ways to get movement on a taper. Use a deep ocean blue base, then paint a seafoam wave that curves slightly more near the flame. The glow makes the wave edge look brighter, so the design reads even in low light. It’s low-maintenance because you’re doing one continuous wave, not a full scene.
First, paint the candle base with ocean blue and let it dry. Next, use painter’s tape to mark where the wave crosses the candle, then paint seafoam along the tape edge and remove tape while the paint is still slightly tacky for a crisp line. Finally, add a second lighter highlight stroke inside the wave crest and seal.
Angle the wave so it’s slightly higher on one side; it photographs more dynamic.
Don’t make the wave too symmetrical — symmetry reads flat on curved candles.
9. Black Cherry Heart Cluster
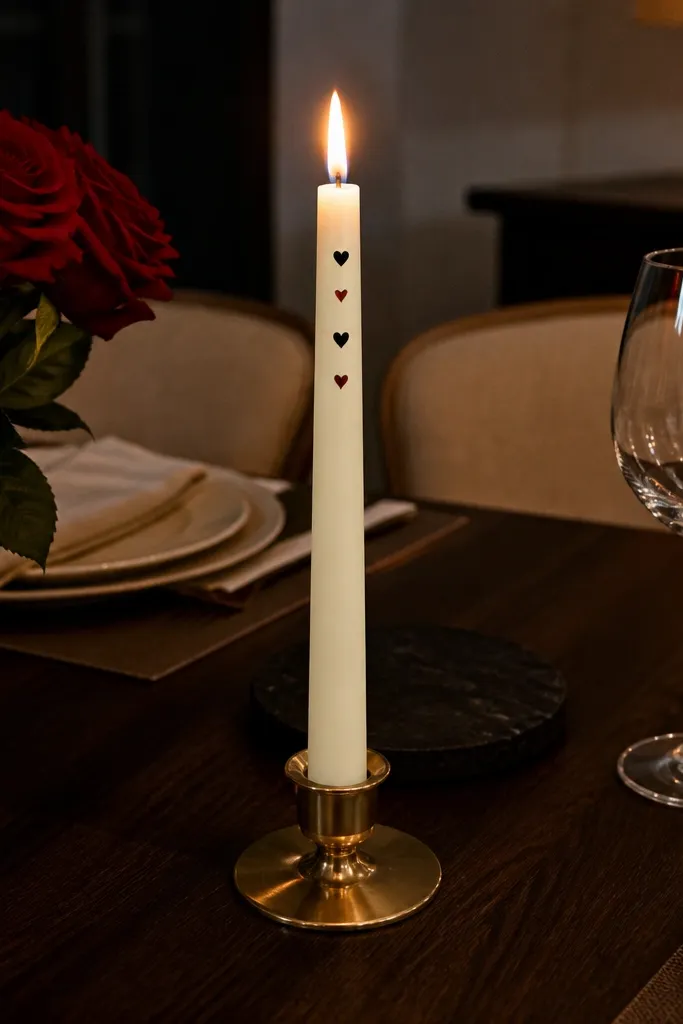
Hearts can look tacky fast, but a small cluster with restrained colors looks cute and elevated. Paint a handful of tiny black hearts near the top third and add deep red half-hearts as accents. Keep hearts small, about the width of a fingernail, so it stays classy. When lit, the red accents make the whole top area look warmer and more dimensional.
First, paint the candle a matte black or very dark charcoal and let it cure until dry to the touch. Next, sketch heart positions lightly with pencil, then paint black hearts with a fine brush. After that, add deep red half-hearts so they look like they’re peeking from behind, then seal with a matte or satin clear coat.
Editor's noteUse painter’s tape as a “stop line” so the hearts don’t creep down the taper.
Skip thisDon’t outline hearts thickly — it makes them look like stickers.
10. Cream Lace Pattern Stencil
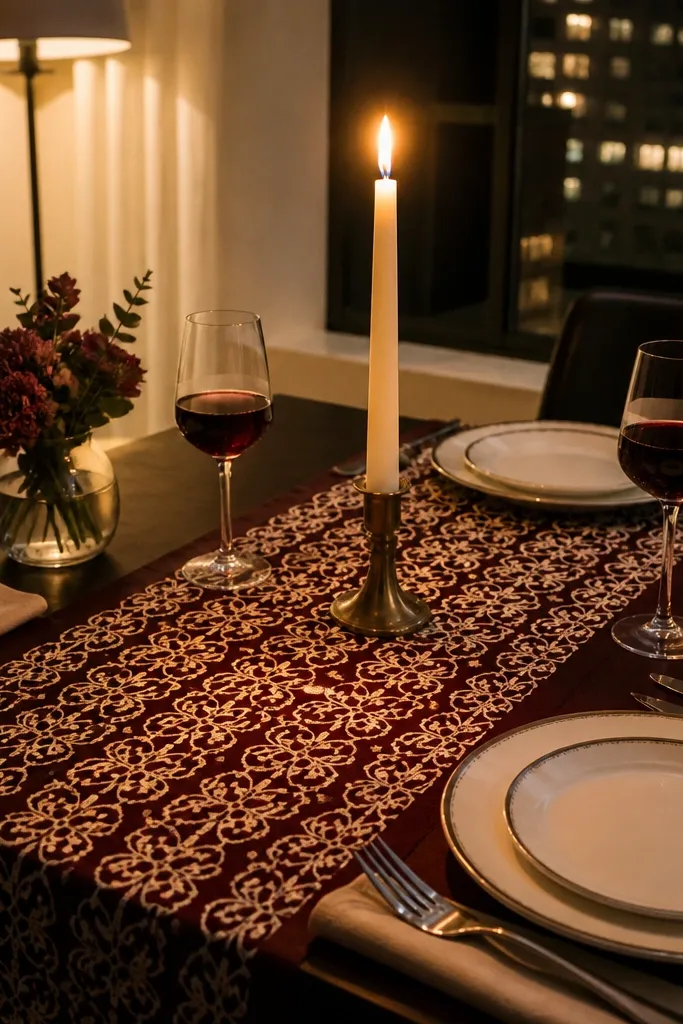
Stencil lace gives you that fancy table styling look without hand-drawing every curl. Choose a dark base like espresso brown or deep burgundy so the cream pattern pops. Use a repeating motif that fits the candle’s width change, so the pattern still looks consistent as it tapers. This is the best option when you want a crisp, high-end look with minimal precision stress.
First, paint the candle base with espresso brown and let it dry. Next, secure a lace stencil around the candle using low-tack tape, then dab cream paint with a stencil brush so paint stays on the raised areas. Move the stencil up in sections until the pattern covers the bottom half. Finally, touch up any gaps with a tiny brush and seal.
Editor's noteDab paint instead of brushing; it keeps edges sharp on wax.
Skip thisDon’t overload the stencil brush — thick paint bleeds under the stencil.
11. Smoked Pine Branches
Branch silhouettes look great because they create strong shapes that read well even when you’re not close. Use dark green and add a thin gray highlight line along one side of each branch to mimic winter light. It’s low-maintenance because you’re painting repeated “twig lines” rather than detailed needles. The flame makes the branches feel layered instead of flat.
First, paint a dark base like deep forest green and let it dry. Next, use a thin brush to draw 2-3 main branches starting near the middle and pointing upward, then add short angled twigs off each branch. Add gray highlights by painting a single thin line along one edge of the branches. Seal after everything dries.
Editor's noteKeep highlights on one side only for a cleaner, more realistic look.
Skip thisDon’t add too many twigs — sparse branches look more intentional.
12. Terracotta Dipped Bottom Fade
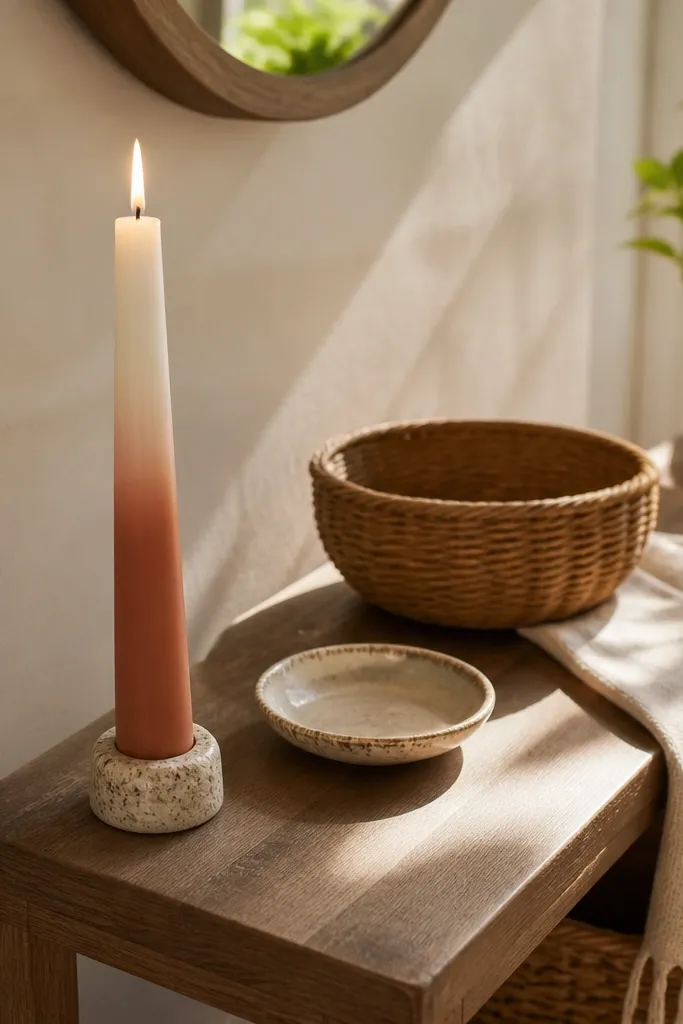
This “dipped” look is one of the fastest ways to make plain tapers look like decor. The bottom fade reads well in photos because the taper naturally amplifies the gradient. Choose terracotta for warmth, then blend upward into warm white so it doesn’t look harsh. It’s low-maintenance because you’re controlling only the transition, not drawing shapes.
First, paint the candle bottom third terracotta using a foam brush for even coverage. Next, blend upward with a slightly damp brush using long vertical strokes until the edge softens into warm white. Finally, go back and add a second terracotta layer only at the very bottom to deepen contrast, then seal.
Editor's noteUse a sponge to dab the blend edge — it creates a smoother fade than a straight brush.
Skip thisDon’t blend with soaking wet paint — it creates drips on wax.
13. Wax-Resist Crackle Lines
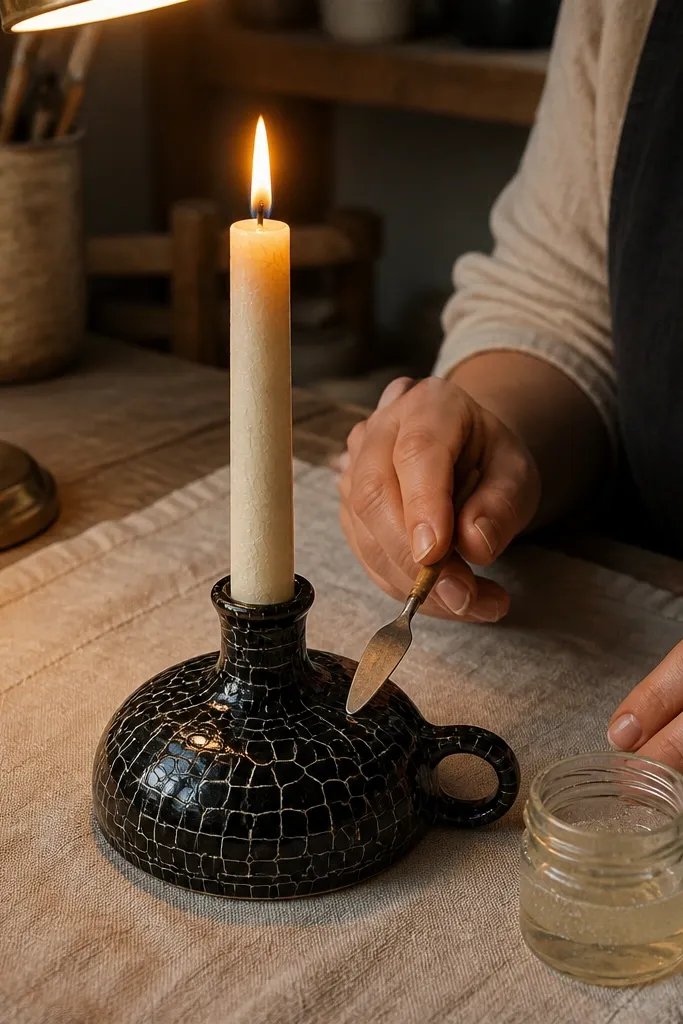
Crackle effect looks tricky, but wax-resist is forgiving. You’re creating irregular lines that look like ceramic glaze. Use a dark base so the white lines look like frost or aged porcelain. When lit, the crackle catches light in tiny bursts, making the candle look textured without heavy painting.
First, paint the candle base with dark paint and let it dry. Next, rub a thin layer of candle wax or a wax crayon over the areas where you want the crackle — press lightly so it creates uneven resist marks. Then paint over with white paint; the resist will block paint and reveal crackle lines when dry. Seal after curing.
Editor's noteTest the resist on a spare candle first so you know how much wax shows on your brand of paint.
Skip thisDon’t use too much wax — it turns into waxy smears instead of lines.
14. Pastel Arch Top Accent
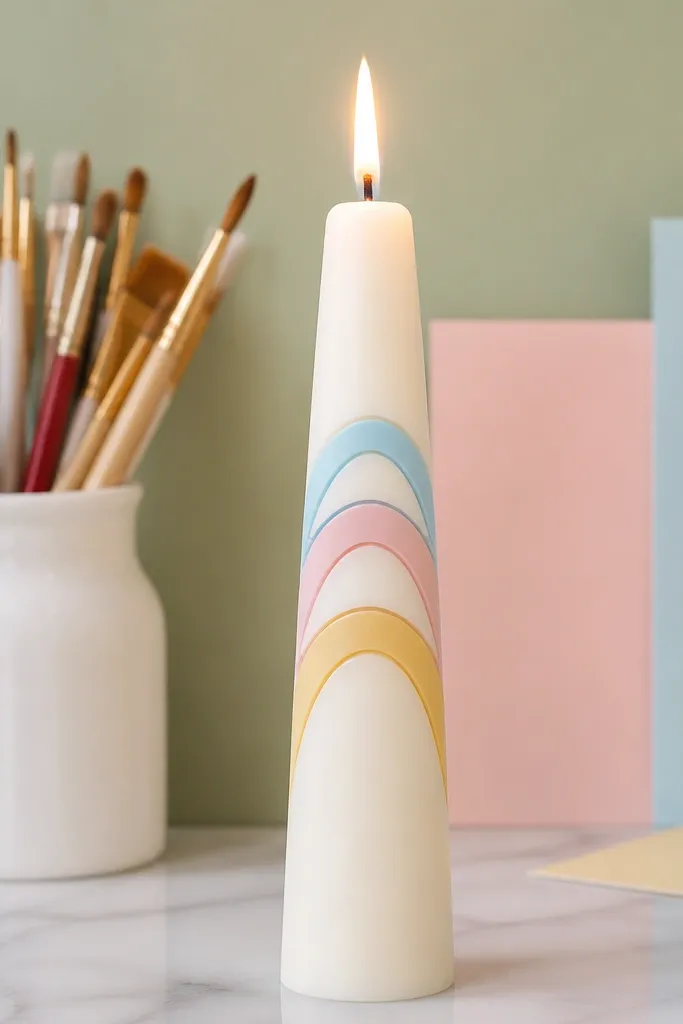
Stacked arches give a clean, modern look that reads even on small candles. Keep arches near the top third so the flame glows through the lighter colors. Use two or three pastels like powder blue, blush pink, and soft yellow, and keep the outline thickness consistent. This is low-maintenance because you’re repeating the same arch shape with tape guides.
First, tape three horizontal guide lines across the candle to define the arch heights. Next, paint arches by starting at the top guide line and using a flexible ruler or freehand with a stencil arc, then fill each arch with its pastel. Let each color dry before adding the next to prevent muddy edges. Seal when finished.
Editor's noteUse a thin brush for the arch outline, then fill with a wider brush for speed.
Skip thisDon’t let pastels mix on the brush — rinse between colors.
15. Monochrome Botanical Dots
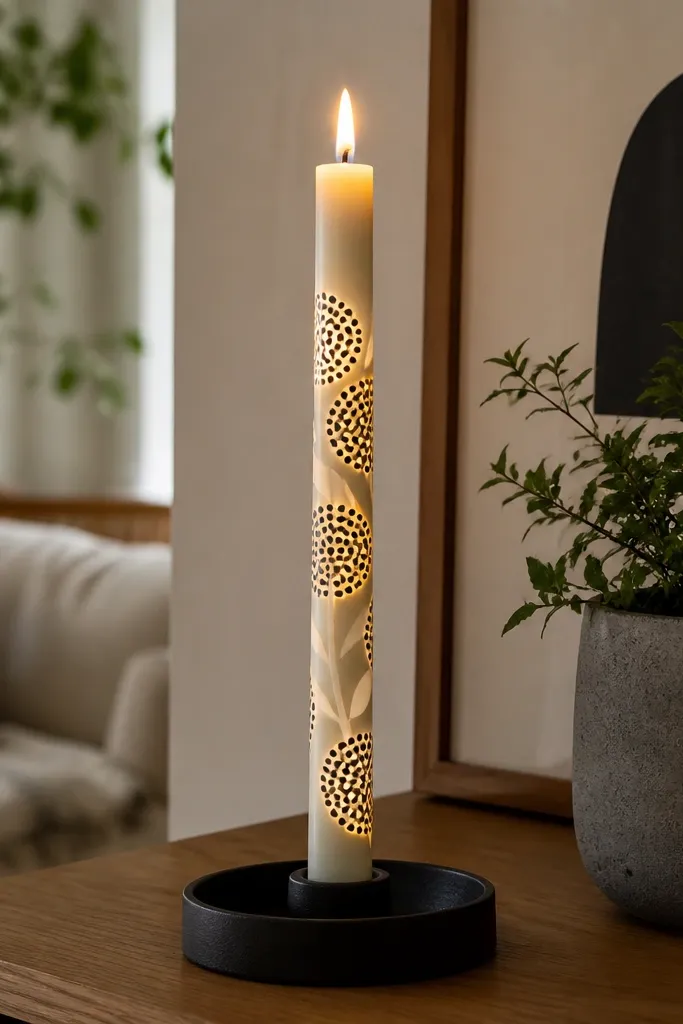
This one looks like modern botanical wallpaper. Dot clusters create a “bloom” effect without drawing full flowers, and the leaf shapes stay minimal. Use monochrome — black dots with off-white leaves — so it looks graphic rather than busy. The flame makes the dots feel like tiny lanterns, which gives strong photo contrast.
First, paint the candle a matte off-white base and let it dry fully. Next, add black dot clusters using a dotting tool, keeping clusters grouped in the middle third. Then paint tiny leaf shapes in off-white or pale gray to sit just above some dot clusters. Seal carefully with a thin coat.
Editor's noteKeep leaves smaller than the dot clusters so the dots stay the focal point.
Skip thisDon’t scatter dots all the way down — focus the pattern in one zone.
16. Rose Quartz Blush Swirls
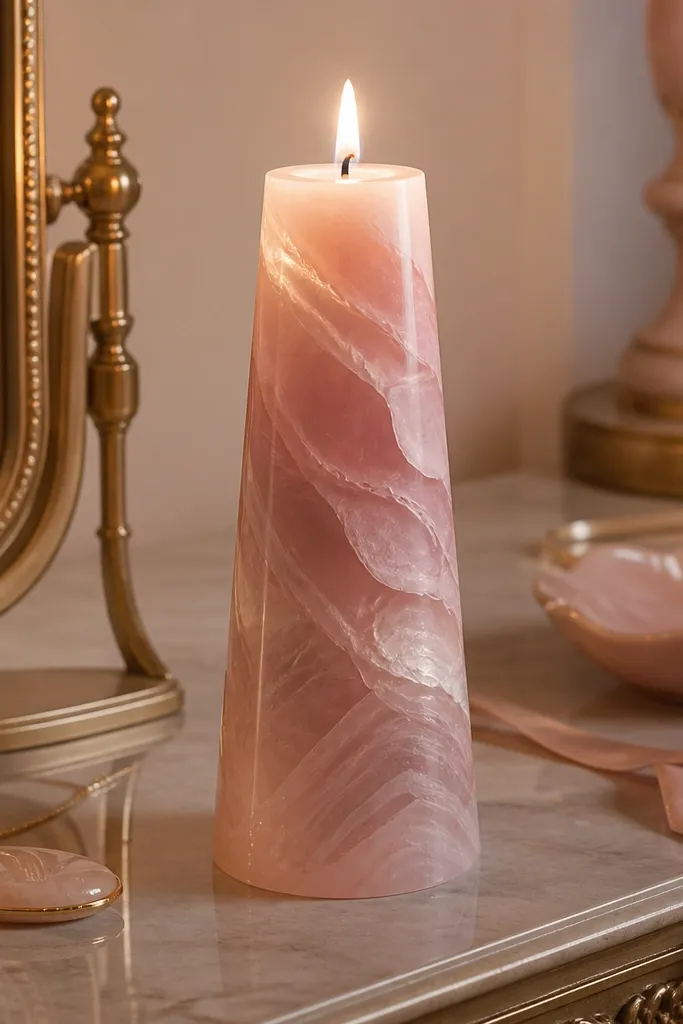
Rose quartz swirls look soft and romantic without taking forever. The look comes from layered, semi-transparent strokes, not detailed linework. Use a pale pink base, then swipe in a deeper blush and a tiny amount of white highlight. In candlelight, the swirls look like glowing stone because the translucent layers catch the flame.
First, paint the candle base pale pink and let it dry. Next, thin deeper blush paint with a little water or medium so it behaves like a glaze, then drag curved swirls vertically with a flat brush. Add a thin white highlight line on top of 2-3 swirls for depth. Seal after dry.
Work in short strokes — long swipes can pull wax texture and look streaky.
Don’t use fully opaque blush — it kills the stone-glow effect.
17. Midnight Starburst Specks
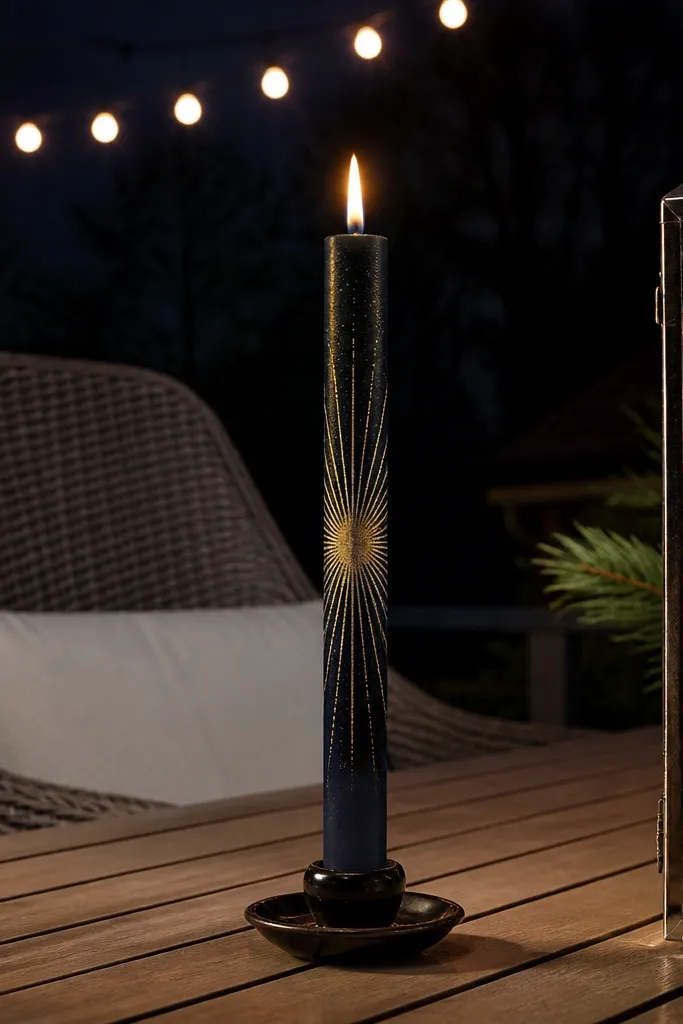
Starburst rays are a great way to make a candle look like it’s lit from inside, even when it’s unlit. Use dark navy or near-black, then paint pale gold rays that start from a central point around the midline. Keep the rays short and uneven so it looks like light scattering. This is low-maintenance because you’re repeating rays, not drawing a full scene.
First, paint the candle dark navy and let it dry. Next, mark one central point at about 5 inches from the bottom, then paint 10-14 short gold rays radiating outward. Fill a few rays with thicker gold while leaving others thinner for variation. Finally, seal with a satin clear coat so gold stays bright.
Editor's noteUse painter’s tape to keep your rays from drifting — tape a small cross guide first.
Skip thisDon’t make rays all the same length — that reads flat fast.
18. Chocolate Drip Highlight Line
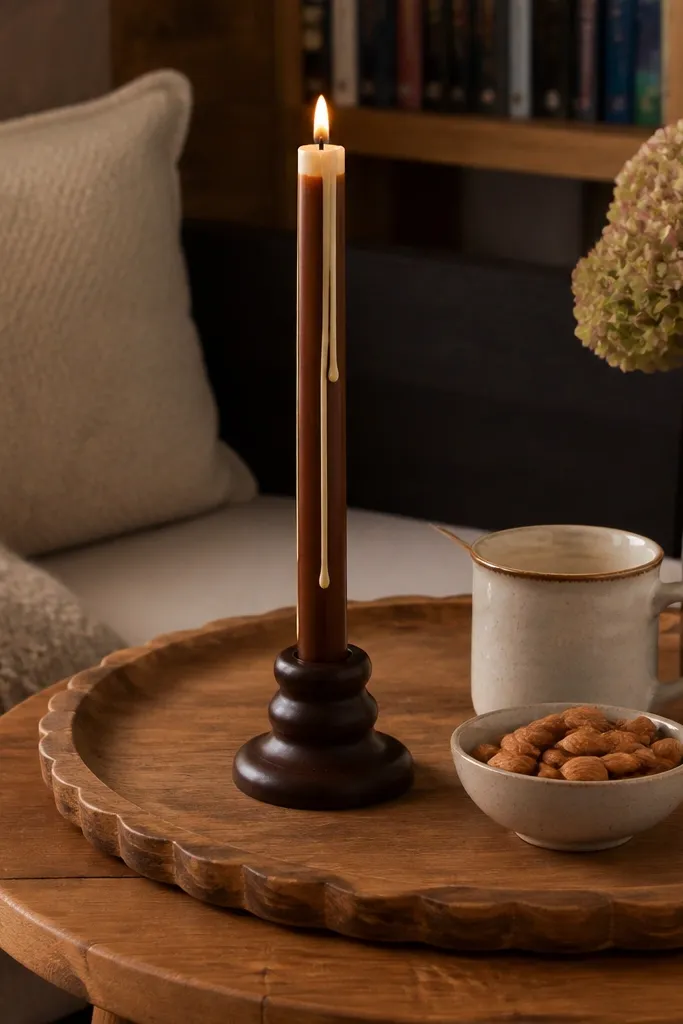
Drips look fun, but they need a controlled shape to look modern. This version uses one clean drip line near the midsection with a cream highlight edge, so it looks like stylized chocolate. Pick a dark brown base or keep the candle white and paint only the drip — either way, the highlight makes it photogenic. It’s low-maintenance because you’re drawing one motif repeatedly along a single vertical axis.
First, paint the candle base white (or leave it if it’s already cream) and mark a vertical center line with pencil. Next, paint a chocolate-brown drip motif by drawing a small teardrop and letting the bottom taper into 2-3 thin drips. Add a thin cream line along the right edge of the drip to create a highlight. Seal after dry.
Practice the drip on paper to get the teardrop-to-line transition right.
Don’t go too low with drips — keep them in the middle so the flame doesn’t compete.
19. Pearlized Stripe Wrap
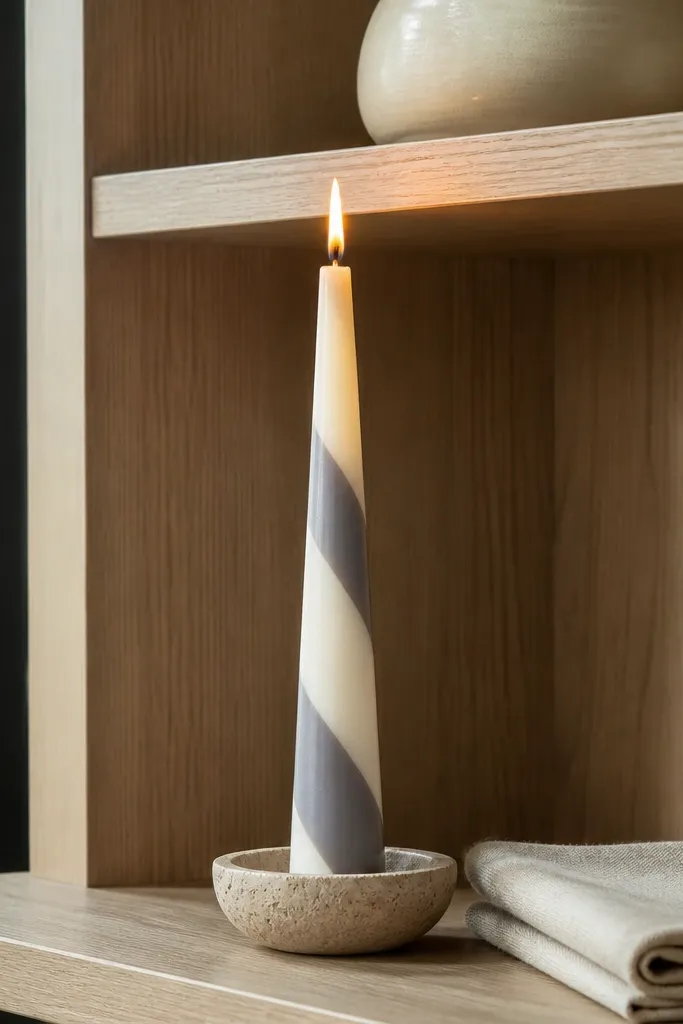
Diagonal stripes look slick because the taper turns them into a moving pattern. Use pearlized paint or metallic pearl for one stripe color and keep the second stripe matte gray to ground it. This gives a “styled shelf” look without needing complicated art. When lit, the diagonal stripes glow along the wax texture and look extra clean in photos.
First, wrap painter’s tape around the candle at a diagonal angle, spacing stripes about 1/2 inch apart. Paint one set of stripes pearl white, remove tape, then paint the remaining stripes matte soft gray. Let both colors dry fully, then seal with a clear coat that doesn’t go glossy. Finally, add a tiny touch-up line where tape edges left gaps.
Editor's noteUse a single roll of tape as a “measuring strip” to keep stripe width consistent.
Skip thisDon’t rotate the tape angle mid-candle — it reads messy in close-ups.
20. Candlelight Window Frame Glow
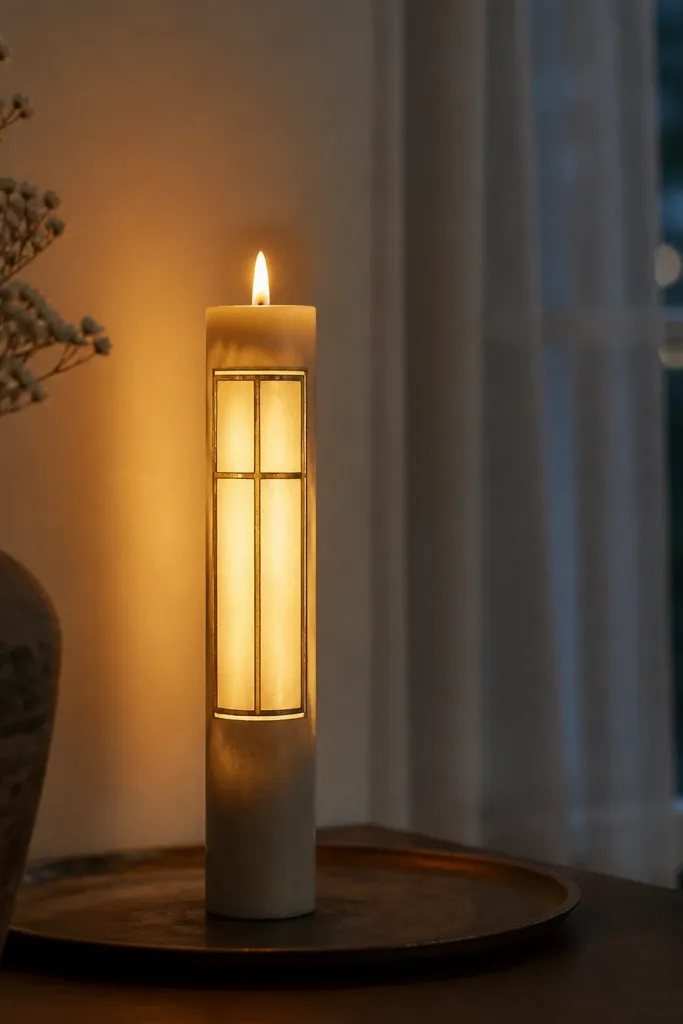
This one looks like candlelight leaking through a window — the frame is crisp, but the light around it is soft and dreamy. It nails low-maintenance Candle Painting because you do the hard edges with tape, then blur the glow with a dry brush in a few passes. Use warm off-white for the “glass” area and a thin gold line for the “light” so it reads as luminous in photos. It fits kitchens, hallways, and mantel displays where you want something that looks designed without hours of detail work. Skill level is beginner-friendly and the time is about 45-70 minutes per candle depending on how clean you keep the tape lines.
Clean the candle first with a dry paper towel so paint sticks. Tape a rectangular “window” centered on the candle — aim for a frame about 1.5 inches wide on a standard 2.5 inch diameter candle, leaving 1 inch of space from the top and bottom. Paint the frame area with opaque off-white (acrylic paint or candle-safe paint) and let it dry 20-30 minutes. Remove the tape, then add a second pass along the frame edges using a slightly thinned warm gold paint; blend it outward with a dry brush so the glow fades at the edges. Finish by sealing the painted surface with a matte clear coat made for candles or craft acrylics, and keep the candle away from direct flame until the paint cures fully.
Press tape down with the back of a spoon so paint doesn’t creep under the edges. If you see fuzz at the line, wipe it immediately with a damp cotton swab before it dries.
Skipping tape burnishing makes the frame edges look fuzzy, which kills the “window glow” effect.



