
1. Matte Black Tin With Oiled Leather Wrap
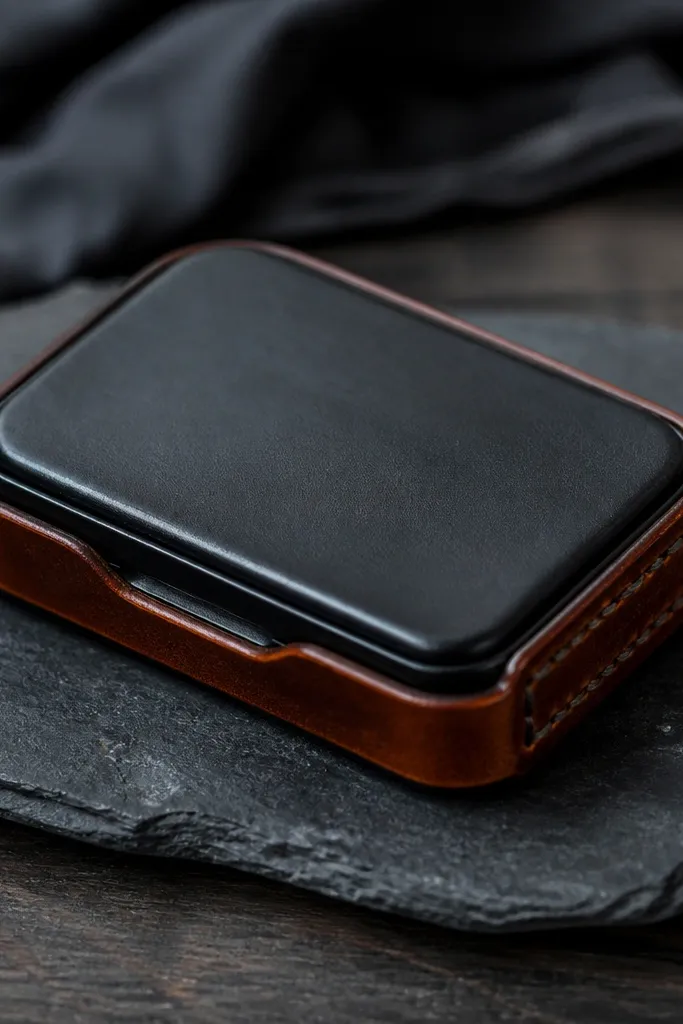
This one looks expensive because it hides the tin and makes the wallet read like a small leather product. Matte black paint on the tin gives a uniform base, and the oiled leather finish brings that soft sheen at the edges instead of a glossy plastic look. The key is to sand the lid and base so the leather wrap doesn’t lift at corners after it flexes. Keep the leather seams tight and straight across the front so the whole piece looks like it was made with a pattern, not a craft mod.
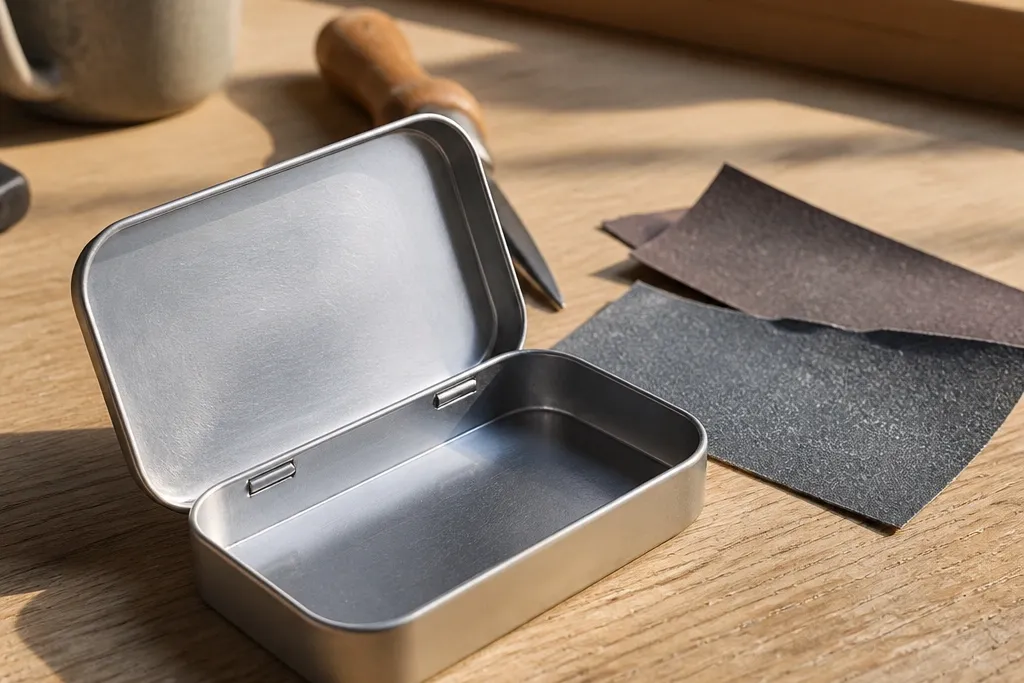
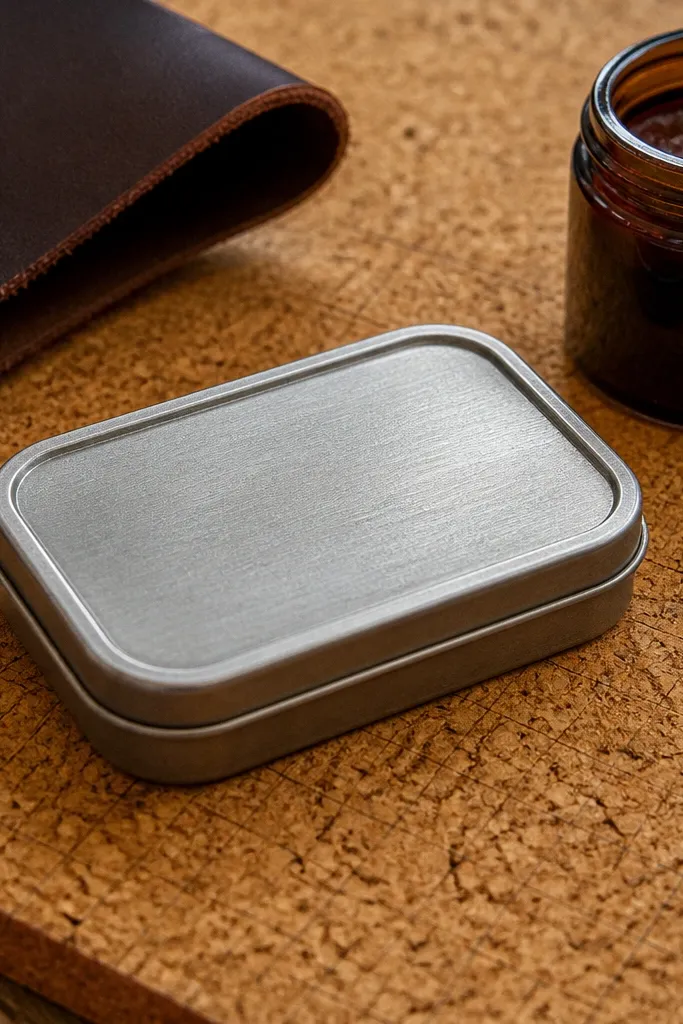
Start by sanding the lid face and base face with 220 grit in light, even strokes, then switch to 400 grit to remove scratches. Dry-fit your leather cover, mark fold lines, then cut with a sharp utility blade so edges stay crisp. Spray matte black on the tin after sanding, let it cure fully, then glue the leather wrap with contact cement or strong flexible adhesive. Finally, trim excess leather at the rim and press the corners firmly while the adhesive grabs.
Use a thin ruler or credit card to press the leather into the rim without stretching it.
Don’t skip the 400 grit pass — it’s what stops tiny sanding lines from showing through the leather.
2. Brass-Gold Leaf Rim Accent
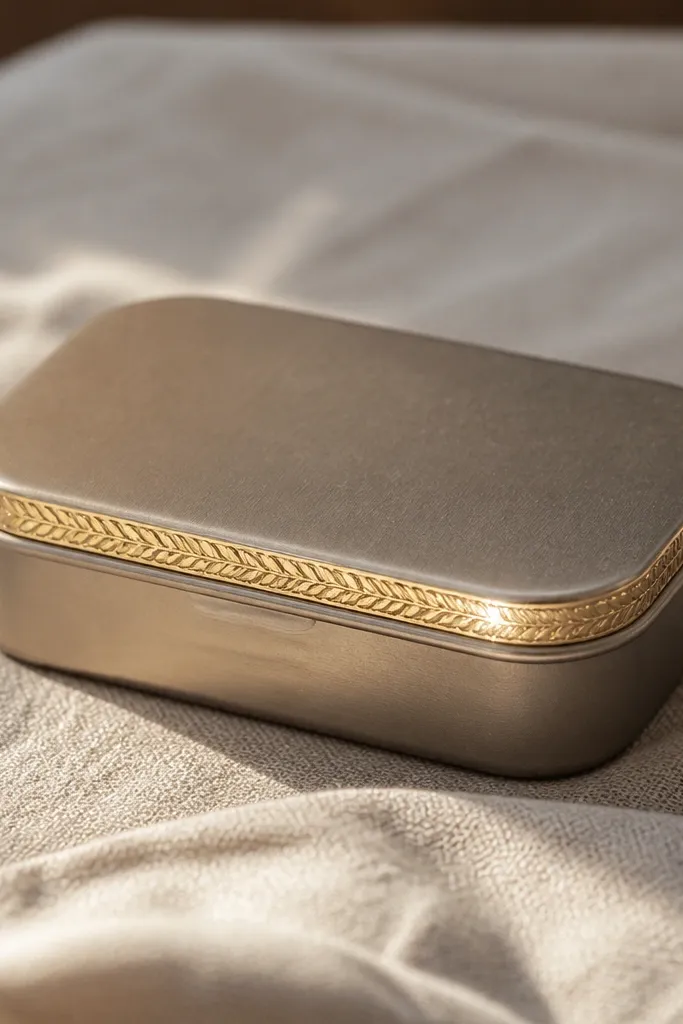
Gold leaf on a small rim reads high-end because it catches light in a narrow band, not all over the surface. You keep the body muted (tan or cream) and let the rim do the drama. This also helps with the most common Altoids wallet issue: the rim is the first place that looks sloppy. Sanding and a smooth rim make the gold leaf edges look sharp instead of ragged.
Sand the tin faces with 220 grit and then 400 grit, focusing extra time on the rim so it feels smooth under your fingertip. Paint the lid and base in a warm matte tone, then let dry. Apply adhesive size for gold leaf only on the rim line, wait for it to go tacky, then press gold leaf onto that band and burnish lightly. Seal with a thin clear matte or satin coat so the leaf doesn’t rub off when you carry it.
Mask the rim with thin painter’s tape, then remove while the paint is still slightly soft for a cleaner edge.
Don’t seal gold leaf before it’s fully set — it can smear and dull the shine.
3. Weathered Denim Blue Stain Look
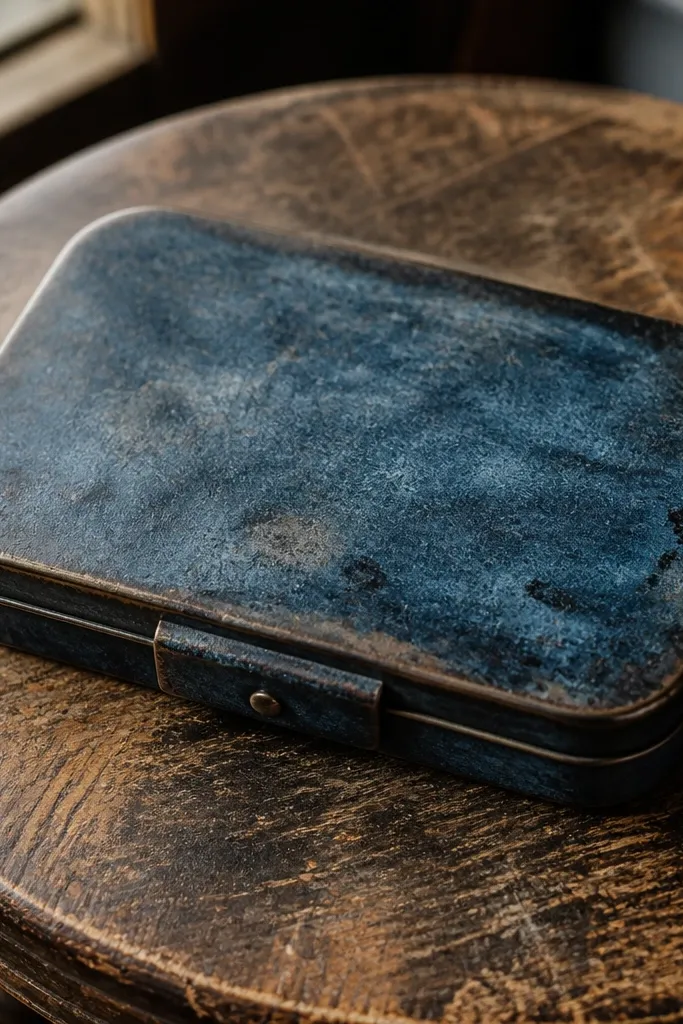
Sand the tin faces with 220 grit, then 400 grit, and wipe thoroughly with isopropyl alcohol. Apply a denim-blue acrylic stain or dye in thin coats, letting each layer dry before the next. Lightly distress with 600 grit sandpaper on raised areas only, so you get a believable worn look. Line the interior with canvas or thick felt and glue it after the exterior finish cures.
This design looks good because it mimics a worn jacket finish, but on a tiny object. The trick is a stain-like color rather than flat paint, plus controlled distress so it looks intentional. Sanding matters here because you need consistent absorption — otherwise the blue turns patchy and cheap. It’s a great wallet style for casual bags and desks since it doesn’t look too formal.
Skip thisDon’t flood the first coat — heavy stain pools and creates dark blobs.
Editor's noteUse a foam brush for stain — it spreads evenly and avoids streaks.
4. Two-Tone Walnut and Black Faux Leather
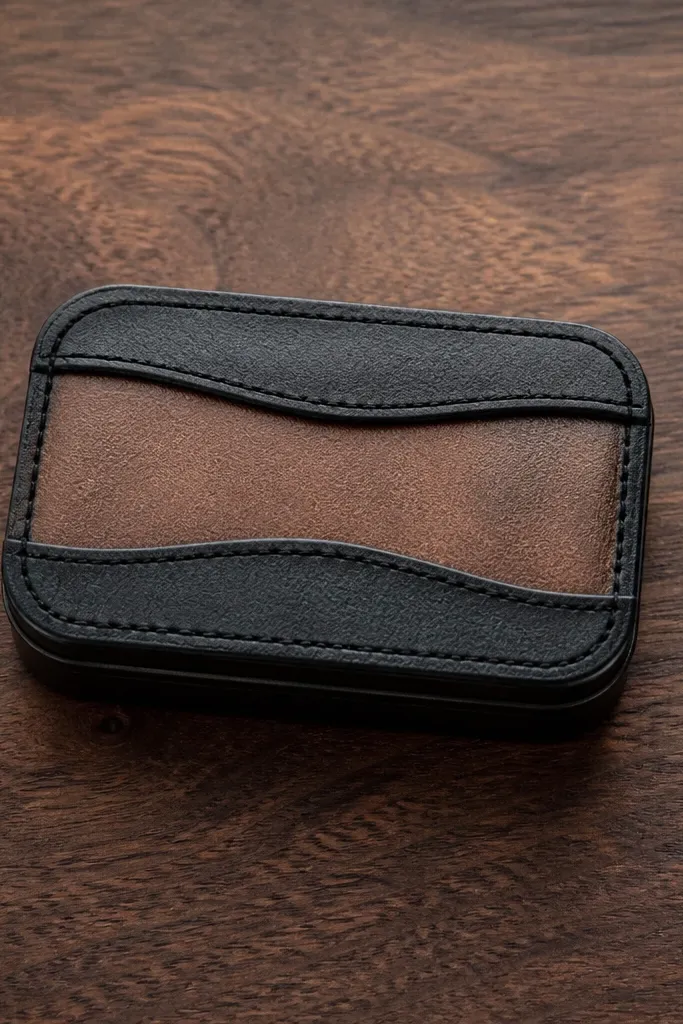
Sand the tin faces with 220 grit, then 400 grit, and wipe with alcohol. Paint the tin base with a thin neutral primer if your faux leather is light-colored so you don’t see through. Cut two pieces of faux leather: one for the main body and one for a top band, keeping the band aligned with the lid seam. Glue the backer to the tin, then glue the band over it so the seam looks like a design choice, not a join.
Two-tone faux leather looks high-end because the contrast makes the structure obvious. The black section frames the wallet and makes the walnut look richer, even if you’re using faux. It also hides any minor tin imperfections because the seams cover edges. Sanding still matters because glue needs a grip and the cover must sit flat to avoid bubbling along the seam line.
Skip thisAvoid stretching faux leather during gluing — it pulls the seam out of alignment.
Editor's notePress seams with a small rubber roller or a clean brayer to keep the bond even.
5. Marble-Effect Resin Coating Over Sanded Tin
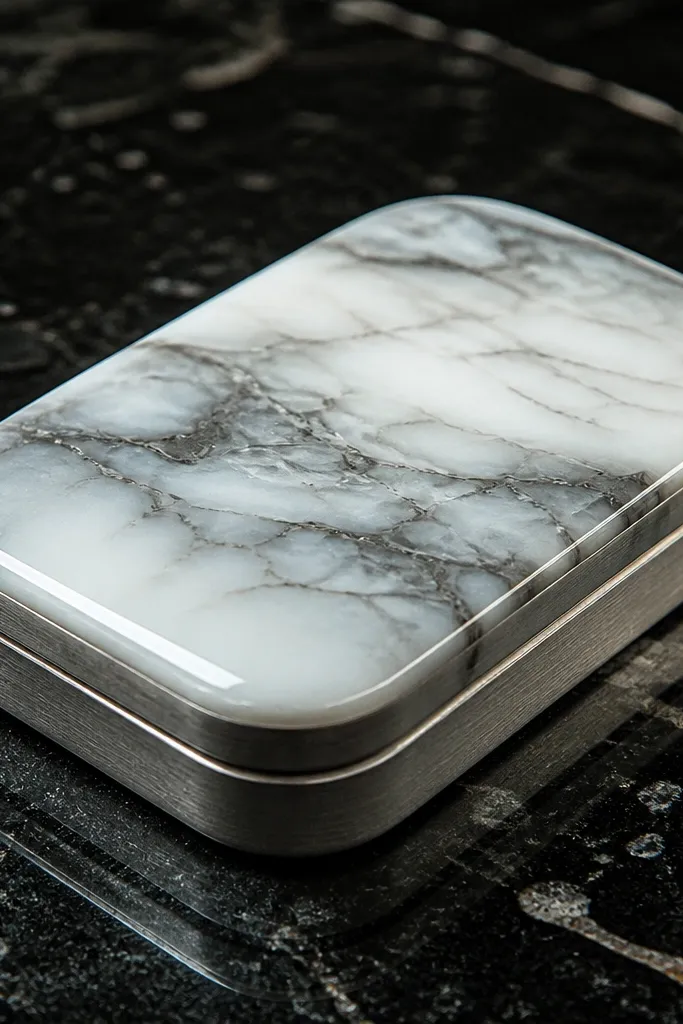
Marble-effect resin looks premium because it’s glossy, dimensional, and hard to fake with cheap paint alone. You get that veined look by layering pigments in resin, then sealing it so the pattern stays crisp. Sanding is the foundation here because resin needs mechanical grip; otherwise it can pop off later. This build also makes the wallet feel sturdier since the resin layer smooths the tin and protects edges.
Sand the lid face and base face with 220 grit, then 400 grit so the surface is smooth but not shiny. Wipe with isopropyl alcohol and let dry completely. Mix a thin first resin layer and brush it thinly over the tin to seal it, then add marble pigment drops and swirl with a toothpick without overmixing. After curing, apply a second clear coat for depth, then line the inside after the final cure.
If you see tiny bubbles, pop them with a pin right after pouring and tilt the tin gently to level the resin.
Don’t rush curing — moving the tin early creates ripples that ruin the marble look.
6. Aged Paper Map Print With Sealed Edges
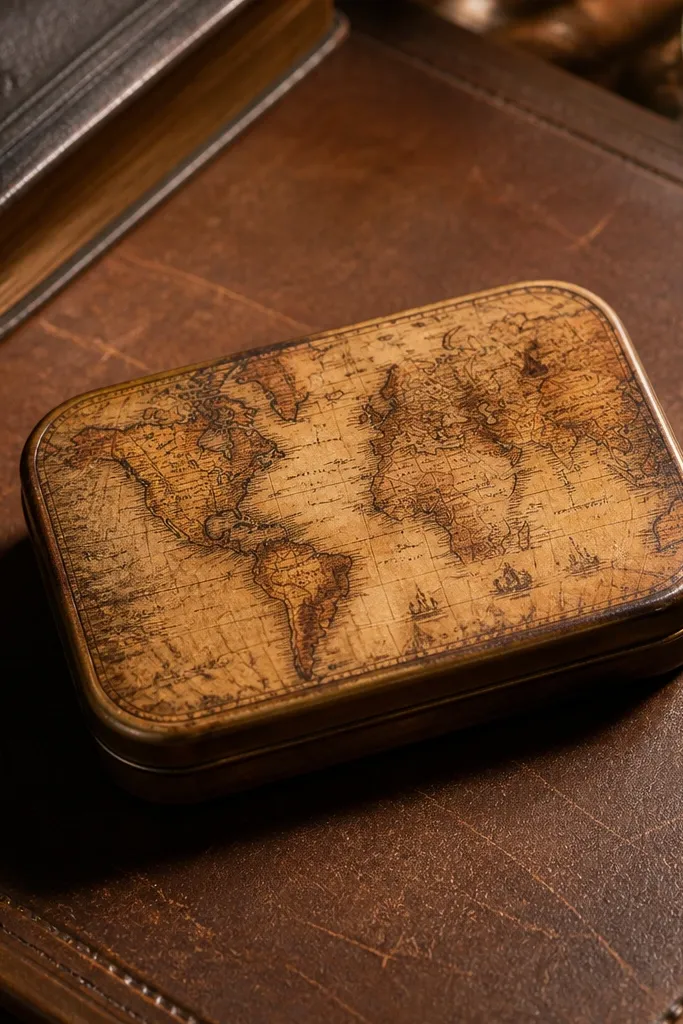
Sand the lid and base faces with 220 grit, then 400 grit, and wipe with alcohol. Apply a thin coat of matte medium or clear primer so the paper behaves and doesn’t absorb unevenly. Cut map print pieces to match the lid face and base with a small overlap at the rim, then apply with a brush and smooth from the center outward. Seal with 2-3 layers of clear varnish, sanding lightly between coats with 600 grit for a glassy finish.
This is one of the most photogenic styles because the paper print gives texture and the sealed edges make it look like a finished product. The sanding job prevents the paper from lifting, tearing, or wrinkling around the rim. You also want a smooth tin so the print doesn’t show sanding grooves under the clear coat. It suits desk organizers, gift sets, and anyone who likes vintage visuals.
Skip thisDon’t skip sealing the overlap — the rim is where paper edges lift first.
Editor's noteUse a craft blade and a metal ruler for clean print edges so you don’t get frayed paper at the rim.
7. Cork + Black Thread Card Holder Look
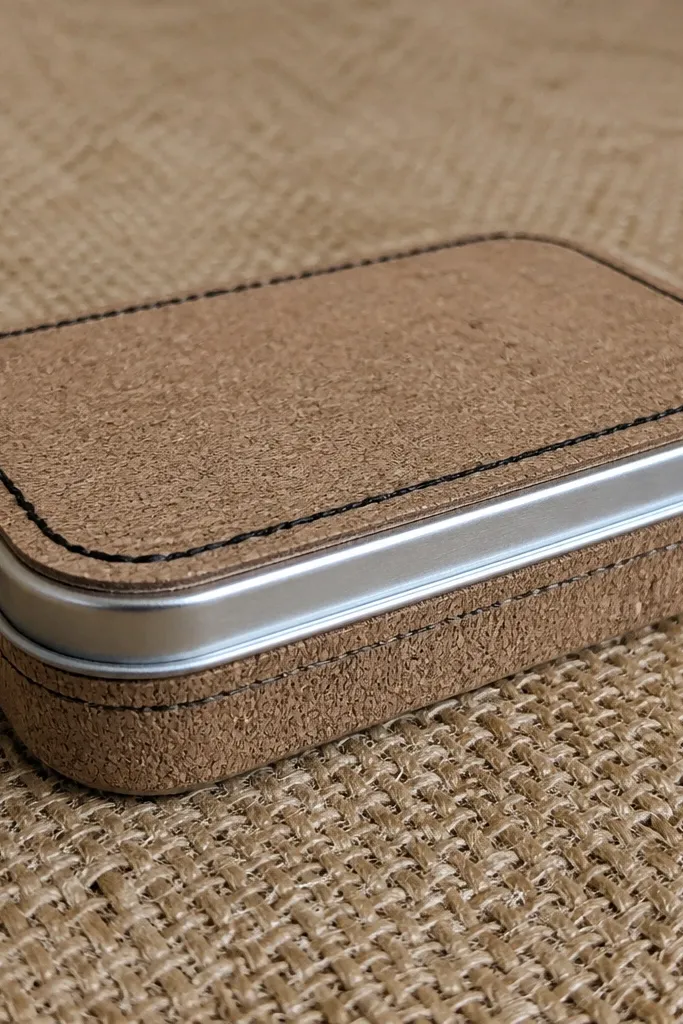
Cork looks high-end because it has natural texture and a warm, matte surface that hides tiny imperfections. Adding black thread detail makes it look like a real small leather goods piece, not a craft box. Sanding is about making the cork bond strong and preventing gaps at the rim where dust and oils get in. This build is great if you want a wallet that looks good even when it’s slightly scuffed.
Sand tin faces with 220 grit, then 400 grit, and wipe with alcohol. Cut cork panels to match the lid and base faces and test fit around the rim. Glue cork to the tin with a flexible adhesive, then clamp with binder clips for even pressure. After the glue sets, add faux stitching by punching small holes along a straight line and using waxed thread to tie knots at the back.
Stitch in 1 cm increments so the pattern reads intentional in photos.
Don’t glue cork too thickly — excess adhesive squeezes out and creates shiny spots.
8. Saffron Suede-Look With Braided Edge Strip
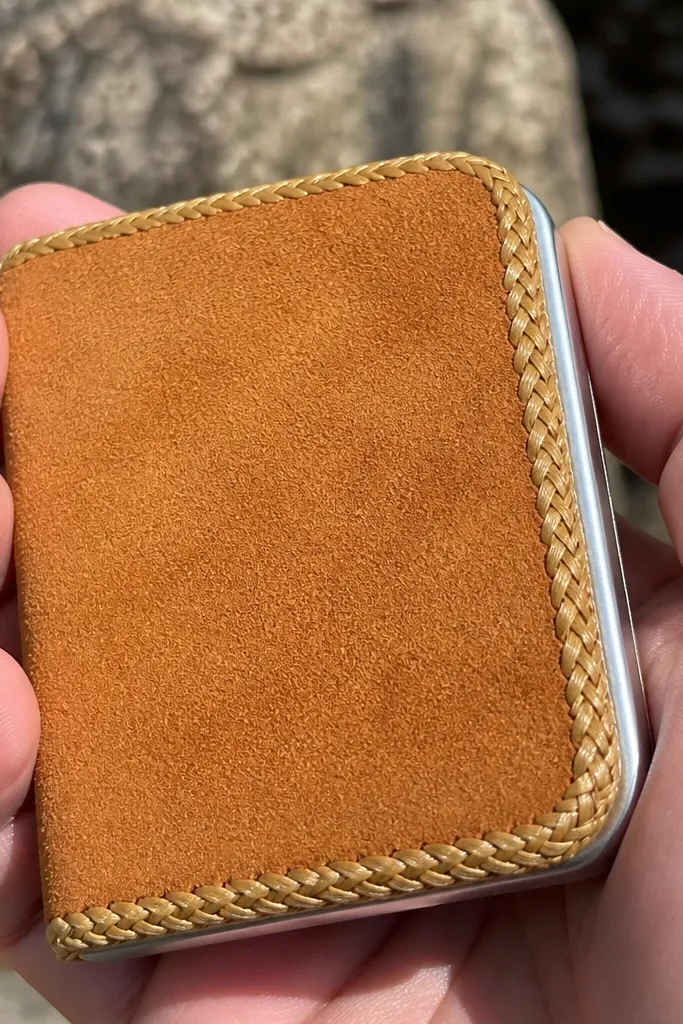
Sand the lid and base faces with 220 grit, then 400 grit, and wipe with alcohol. Apply contact cement to the tin and to the back of the suede-look fabric, let it tack, then press down starting from the center. Add a braided trim strip along the rim using a thin bead of flexible glue so the braid sits flat. Finish by trimming the inner edge cleanly and sealing the rim with a light brush of clear flexible sealant.
Suede-look covers look premium because they eat light instead of reflecting it, which makes the wallet look smoother. The braided edge strip gives you a clean border that hides the seam and makes the rim look designed. Sanding matters because suede-look materials show every ridge, and the rim is where ridges show up most. This version suits warm, earthy palettes and looks amazing on wooden shelves and desks.
Skip thisAvoid thick glue at the rim — it pushes the braid up and creates a raised line.
Editor's noteUse a small angle ruler or folded paper as a guide for trimming so you get an even inner edge.
9. Black Lacquer With Gold Corner Studs
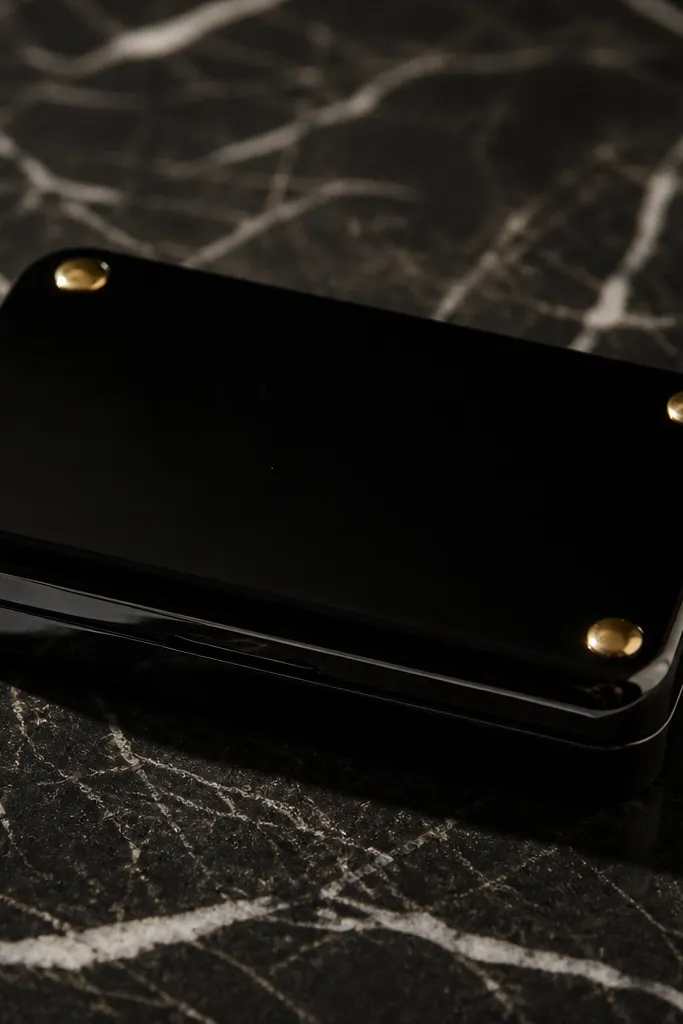
Sand lid and base faces with 220 grit, then 400 grit, and wipe with alcohol. Spray a glossy black lacquer in thin layers, letting each coat flash off before the next. Mark four stud points near the corners of the lid face, drill small pilot holes, and mount the studs with the included hardware or threaded posts. Seal the area lightly around studs with a clear top coat so moisture doesn’t creep under.
This wallet screams “small luxury” because lacquer shines and corner studs add structure. The contrast between glossy black and warm gold hardware makes photos pop. Sanding is what stops lacquer from looking rough or peeling at the edges. You also need a smooth rim so the studs sit flush and don’t wobble.
Skip thisDon’t sand through the tin coating in one spot — that causes a dull patch under lacquer.
Editor's noteWarm the lacquer can in a bowl of warm water for 3-5 minutes to improve spray consistency.
10. Pastel Ombre Fabric Wrap With Heat-Sealed Edge
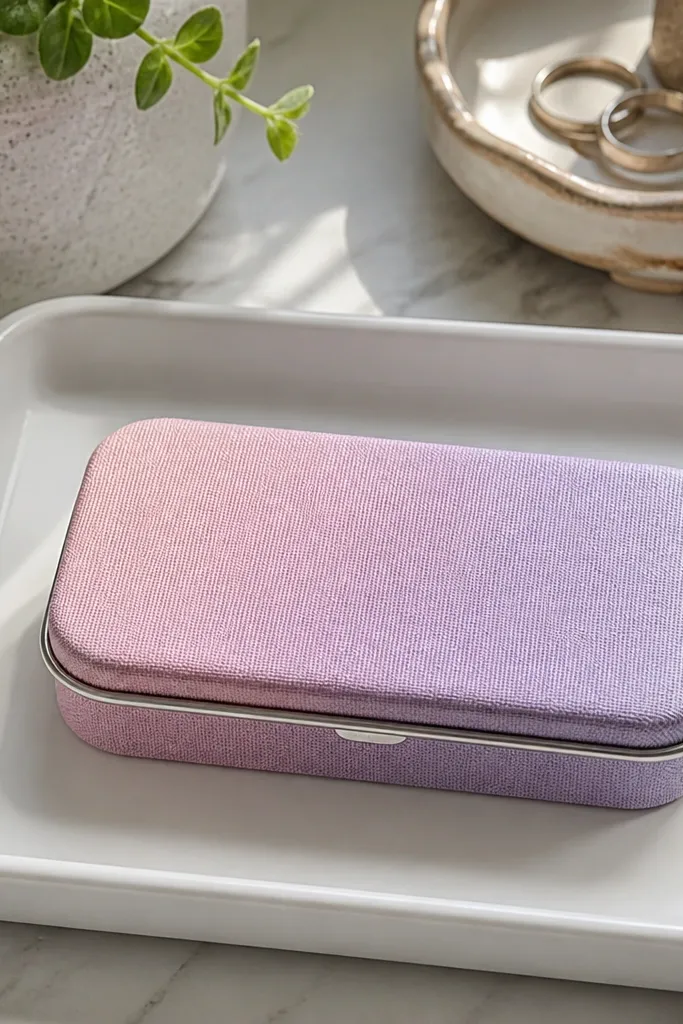
Fabric wraps look high-end when the edges are clean and the color transitions are smooth. Ombre pastel fabric gives a gentle, modern look that photographs well in daylight. The tin prep determines whether fabric shows bumps — you want the surface smooth enough that you don’t see sanding texture. This build takes a little patience, but the result looks like a designer accessory.
Sand tin faces with 220 grit, then 400 grit, and wipe with alcohol. If your fabric frays, pre-treat the cut edges with a thin line of fray-check or carefully heat-seal synthetic fabric edges. Wrap the fabric around the tin and glue on the back side so seams hide on the inside. For ombre, align the gradient so it centers on the lid — then trim the rim edge and add a thin clear flexible sealant over the fabric edge where it meets the tin.
Iron the fabric first with a low setting through a pressing cloth so it doesn’t ripple after gluing.
Avoid using too much glue — it soaks through fabric and creates darker stains.
11. Monogram Foil Transfer On Sanded Base
Sand the lid face with 220 grit, then 400 grit, and wipe with alcohol. Spray a matte base color and let it cure fully so foil doesn’t lift. Use a foil transfer system: apply transfer adhesive to your monogram area, wait until tacky, press foil down firmly, then peel. Seal with a thin matte clear coat only after the foil is fully set, so the letters stay sharp and don’t smear.
A monogram makes an Altoids Wallet look personal and expensive fast, especially when the foil is crisp. Sanding is the difference between sharp foil adhesion and dull, patchy lettering. You’re building a clean, minimalist look: neutral base color, matte tin finish, and one sharp foil element. This is ideal if you want something that looks good on a shelf without busy patterns.
Skip thisDon’t apply foil on glossy paint — it kills adhesion and makes the print look cloudy.
Editor's noteUse painter’s tape to mask around the monogram and keep the foil edge perfectly straight.
12. Leatherette With Micro-Stud Pattern Grid
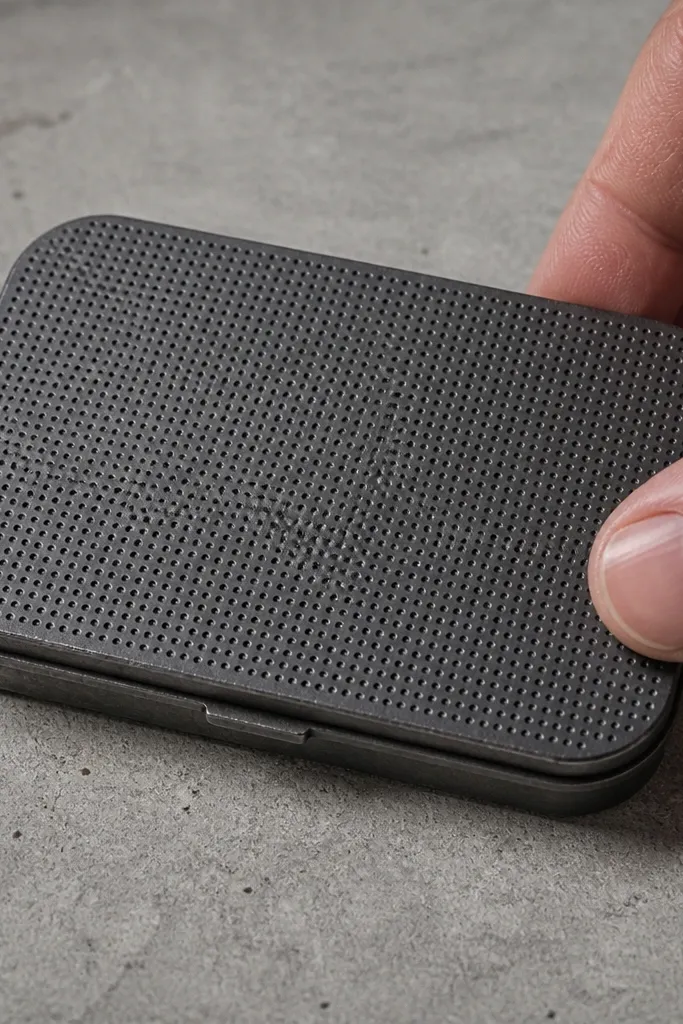
A micro-stud grid looks technical and high-end because it adds consistent texture. The trick is spacing: tight, even dots in a grid that lines up with the wallet edges. Sanding helps the leatherette lay flat so the studs don’t create dimples under tension. This style suits black and charcoal leatherette and looks great against denim or dark wood.
Sand tin faces with 220 grit, then 400 grit, and wipe with alcohol. Glue leatherette to the tin with a flexible adhesive, smoothing from center outward. Mark a grid with a ruler and fine pencil, then punch tiny holes where studs will go. Install studs from the back and press the front cleanly, then trim any excess leatherette at the rim and seal the rim edge with a thin flexible coat.
Use a punch guide (a scrap of thick foam) so the holes stay consistent depth.
Avoid uneven spacing — it turns “design” into “random dots” instantly.
13. Clear Frosted Window With Colored Backing
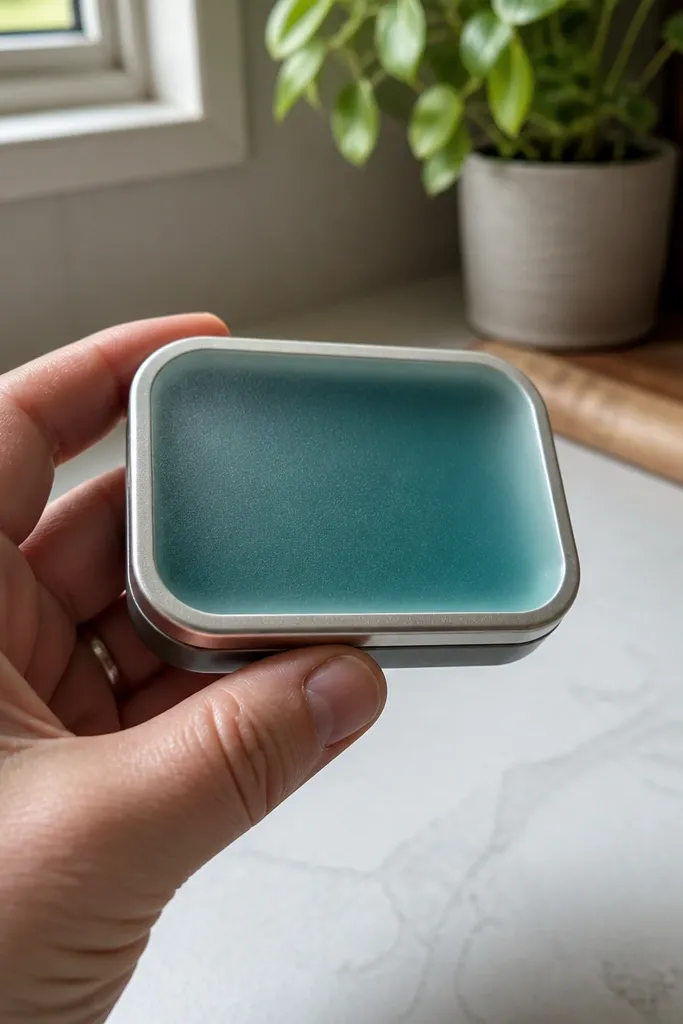
Sand the lid face with 220 grit, then 400 grit, and wipe with alcohol. Cut a frosted clear vinyl or acetate window to size, with a slight gap around the rim for movement. Glue the colored backing piece to the tin lid first, then glue the frosted window on top with clear craft adhesive. Seal the edges with a thin clear flexible sealant and let it cure before you assemble the interior.
This one looks premium because it has a “product display” feel. A frosted window on the lid lets you show a color layer underneath without making the whole wallet look busy. Sanding is still required so any coating or adhesive bonds cleanly and the rim stays smooth. It’s especially photogenic for seasonal colors like deep teal, burgundy, or moss.
Skip thisDon’t use thick glue around the window edges — it creates a visible ridge under the frosting.
Editor's noteDry-fit the window before gluing so you keep the gap even around the rim.
14. Olive Canvas Wrap With Faux Leather Strap Closure
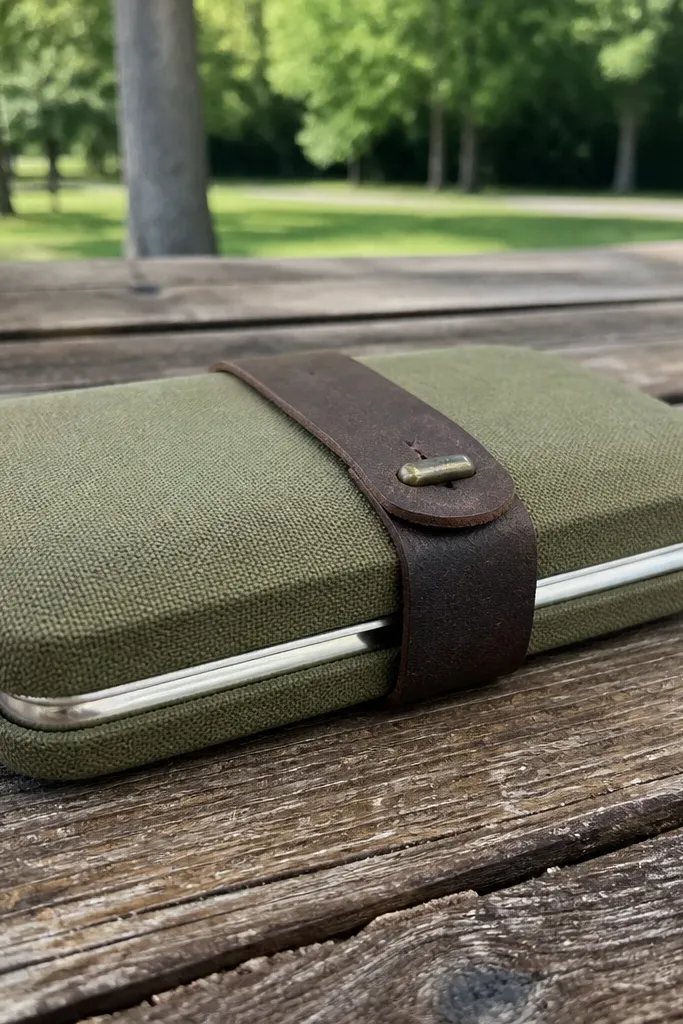
Canvas + a strap closure reads outdoorsy and high-end because it looks functional, not decorative. The strap also hides the lid seam and makes the wallet feel more like a gear item. Sanding keeps the canvas from peeling at the rim and gives the adhesive a grip so the strap doesn’t loosen later. This build is great for desk carry or EDC kits where you want something sturdy.
Sand lid and base faces with 220 grit, then 400 grit, and wipe with alcohol. Glue olive canvas onto the lid and base, wrapping around the rim and trimming cleanly. Add a faux leather strap across the front and mount a small snap or buckle at the ends — mark placement before you punch holes. Finish by sealing the canvas edges with a thin flexible fabric sealant so fray doesn’t start at the rim.
Use a scrap of cardboard to press the snap area so the canvas doesn’t buckle.
Avoid stretchy canvas — it warps the lid opening when the adhesive cures.
15. Stone-Look Paint With Dry Brush Highlights
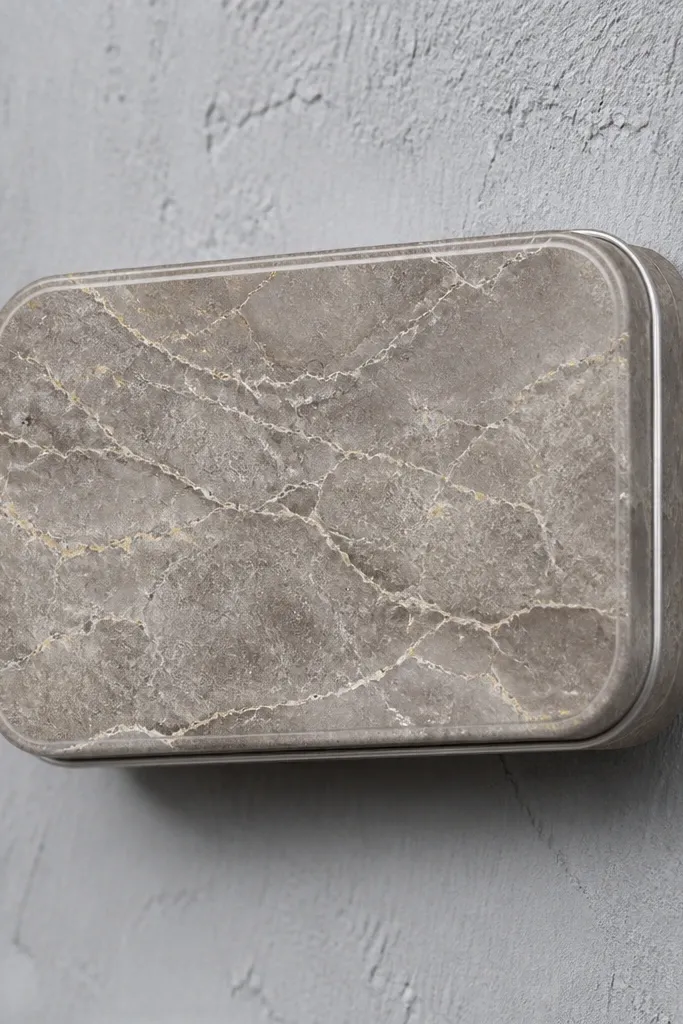
Sand lid and base faces with 220 grit, then 400 grit, and wipe with alcohol. Apply a matte base coat in a mid-gray or warm beige, then let cure. Mix a slightly lighter gray and a darker gray, then dry brush the lighter tone on raised areas and edges using a nearly dry brush. Finish with a thin clear matte sealer so the stone texture stays soft and doesn’t turn glossy.
Stone-look paint looks expensive because it has depth — you’re faking mineral texture with layered pigments and dry-brush technique. This style works best when the wallet is muted and the highlights are subtle, not sparkly. Sanding is critical so your base paint goes on evenly and the top texture doesn’t chip at edges. The final look reads like a small decorative object, not a craft tin.
Skip thisSkip the clear sealer and the texture rubs off on your hands fast.
Editor's noteTest your dry brush pressure on a scrap piece of cardboard first so the highlights don’t look chalky.
16. Crisp White Tin With Faux Croc Paneling
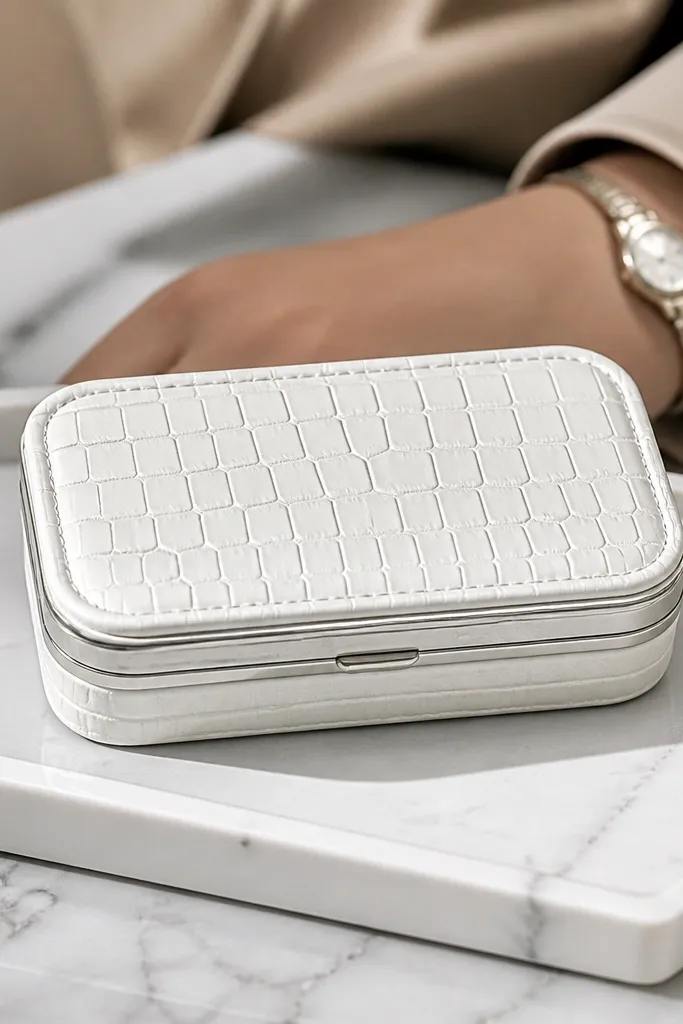
Faux croc paneling looks high-end because it adds a structured pattern that reads like luxury accessories. Crisp white gives a clean modern look, and the croc paneling concentrates the visual interest. Sanding makes the panel glue hold and keeps the white base from turning uneven at the edges. This build is photogenic on neutral backgrounds because the croc texture shows in light.
Sand tin faces with 220 grit, then 400 grit, and wipe with alcohol. Spray a smooth white primer and then a crisp matte or satin white top coat. Cut faux croc panels for the lid face and base, keeping seams aligned with tin corners. Glue panels carefully and press with a flat tool so edges stick flat; then add a thin border strip if you want the seam to look like piping.
If you’re using patterned vinyl, cut with the grain aligned so the croc pattern doesn’t look skewed.
Don’t glue over glossy paint — it reduces adhesion and causes panel edges to curl.
17. Red Velvet Look With Heat-Formed Inner Lining
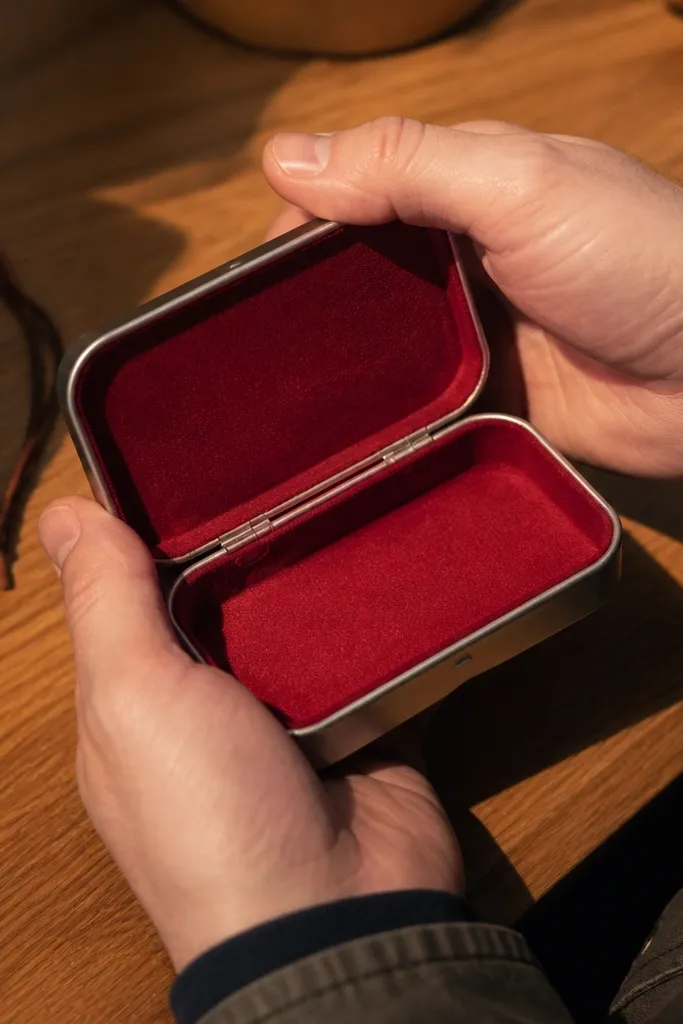
Sand the tin faces with 220 grit, then 400 grit, and wipe with alcohol. Glue a thin foam or heat-formable interfacing to the inside so the lining stays smooth and doesn’t sag. Cut velvet-look fabric and wrap it over the lining edges, then glue in place. For a clean lid interior, trim fabric so it ends just below the rim and seal the edge with a thin flexible glue line.
Velvet-look interiors feel fancy because they make the inside of the wallet look like a gift box. The outside can be simpler, but the moment you open it, the texture sells the premium feel. Sanding keeps the lining material from snagging and peeling along the rim, which is where velvet-look fabrics fail first. This is a strong choice for jewelry-style wallets, small cards, or cash carry.
Skip thisAvoid thick piles of fabric at the rim — it makes the lid harder to close.
Editor's noteUse a foam roller or the back of a spoon to press velvet-look fabric down without crushing it.
18. Smoked Glass Look With Dark Tint Film
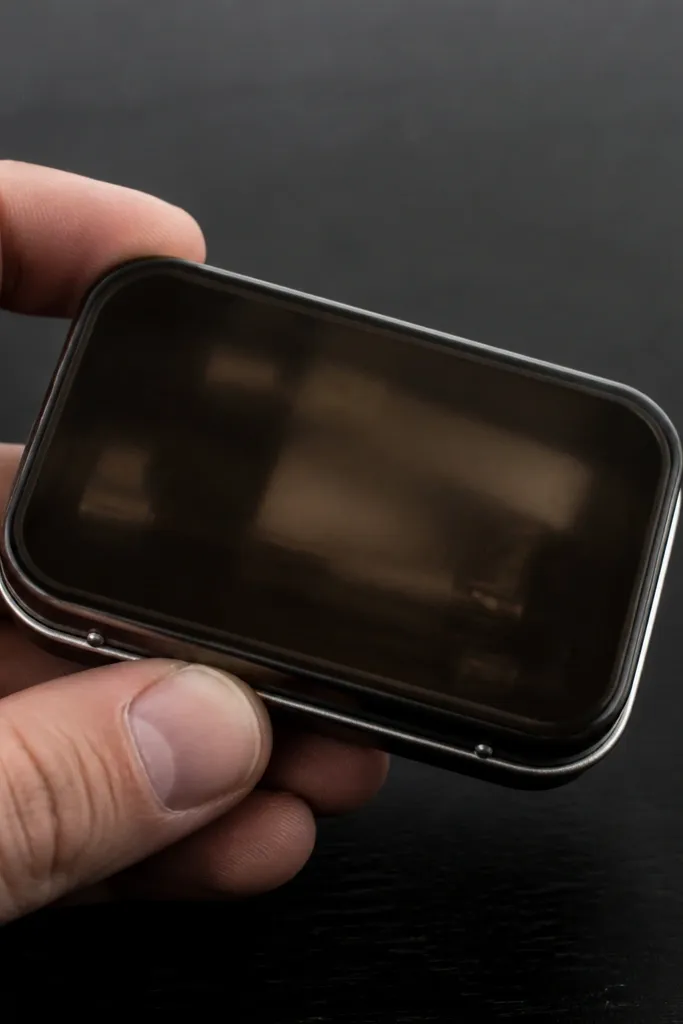
Sand the lid face with 220 grit, then 400 grit, and wipe with alcohol. Apply a matte black base coat to remove any shiny reflections from the tin. Cut dark tint film to size and test fit on the lid, then apply with a clear adhesive designed for film or with thin double-sided tape along the rim. Burnish edges gently and seal the rim line with clear flexible sealant so the film stays put.
Smoked glass look is modern and clean. The dark tinted film makes the tin read like a designer product, and it hides whatever is going on inside the lid. Sanding still matters because adhesive needs grip and the rim needs to be smooth so the film doesn’t peel. This build looks especially good if you keep the exterior minimal and let the tint do the work.
Skip thisDon’t apply tint film to a dusty tin — dust makes permanent specks.
Editor's noteUse a microfiber cloth to press the film — it helps avoid micro-bubbles.
19. Chocolate Brown Stain With Brass Button Closure
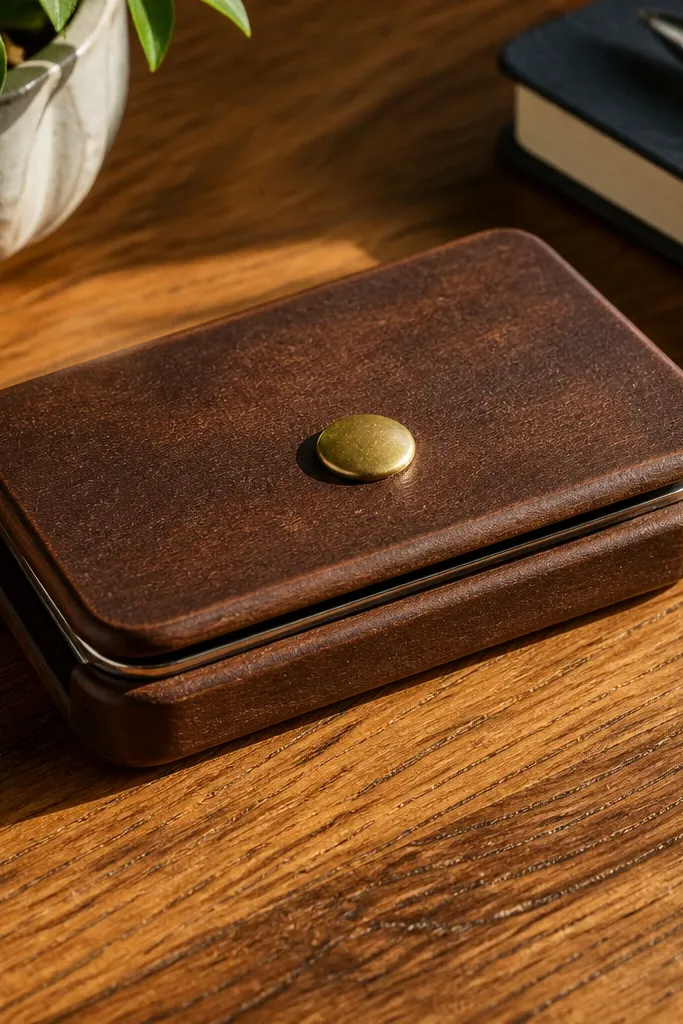
Brown stain plus a brass button closure reads classic and expensive. The warm tones look good in close-up photos and on warm wood desks. Brass hardware also hides small alignment issues because the button draws the eye to the center. Sanding matters because stain and sealers show uneven prep — you get patchiness if the tin surface isn’t consistent.
Sand lid and base faces with 220 grit, then 400 grit, and wipe with alcohol. Apply a chocolate-brown craft stain in thin coats, then seal with a clear protective top coat. Choose a brass button snap or magnetic button and mark placement on the lid. Drill a small pilot hole only where hardware mounts, attach the button, then line the interior with tan felt or thin leatherette.
Seal in two thin clear coats instead of one thick coat to avoid streaking.
Avoid staining over glossy spots — they create lighter patches that look like missed coverage.
20. Two-Layer Fabric Patchwork Front Panel
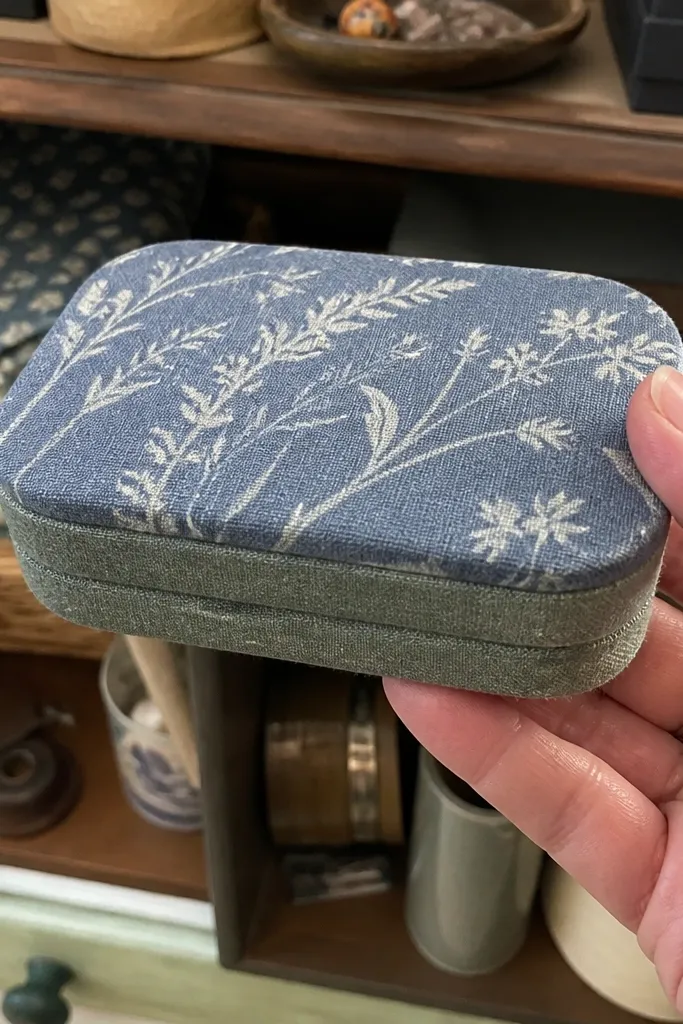
Sand tin faces with 220 grit, then 400 grit, and wipe with alcohol. Glue a thin stabilizer backing fabric to the lid face so the patchwork has a firm surface. Cut patch pieces and sew or glue them into a panel, then attach the finished panel to the tin. Seal the patchwork with a thin fabric medium so the colors don’t rub off, and trim the edges so the panel stops cleanly before the rim curve.
Patchwork looks high-end when the seams are straight and the color palette stays restrained. This design uses two layers: a stable backing layer for structure and a top fabric layer for texture. Sanding is what lets the backing adhere without bubbles, and it keeps the rim from creating a wrinkled edge. It’s a great choice for quilters' scraps and for matching a bag or room palette.
Skip thisDon’t use stiff, thick fabric scraps — they create a lumpy lid that won’t close smoothly.
Editor's noteUse a 1/8 inch seam allowance if you’re gluing — it keeps the panel from getting bulky at the rim.



