
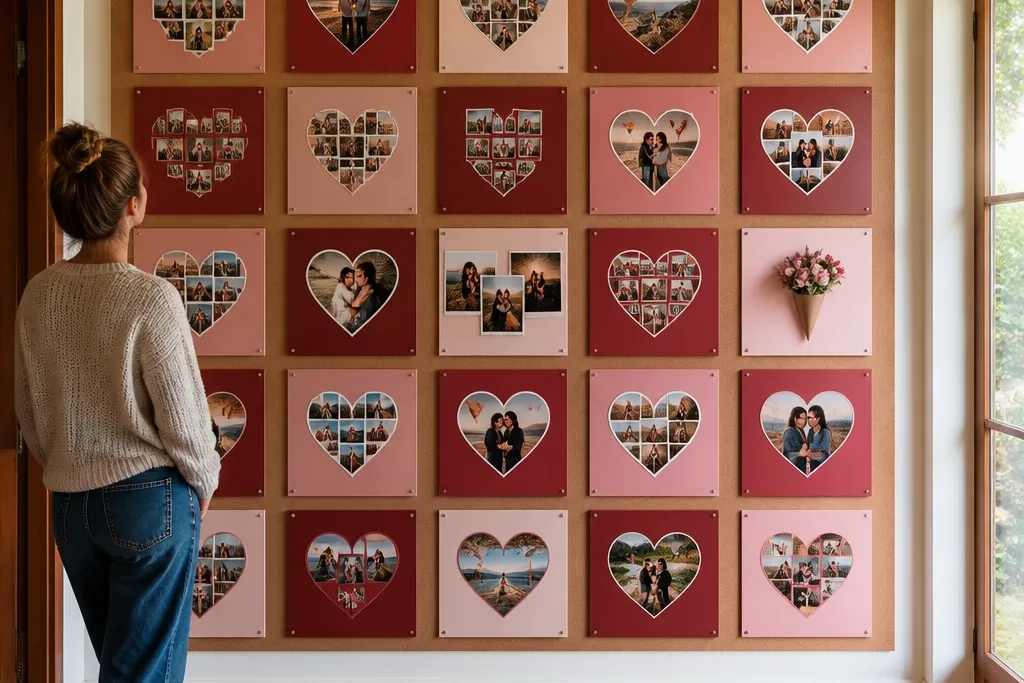
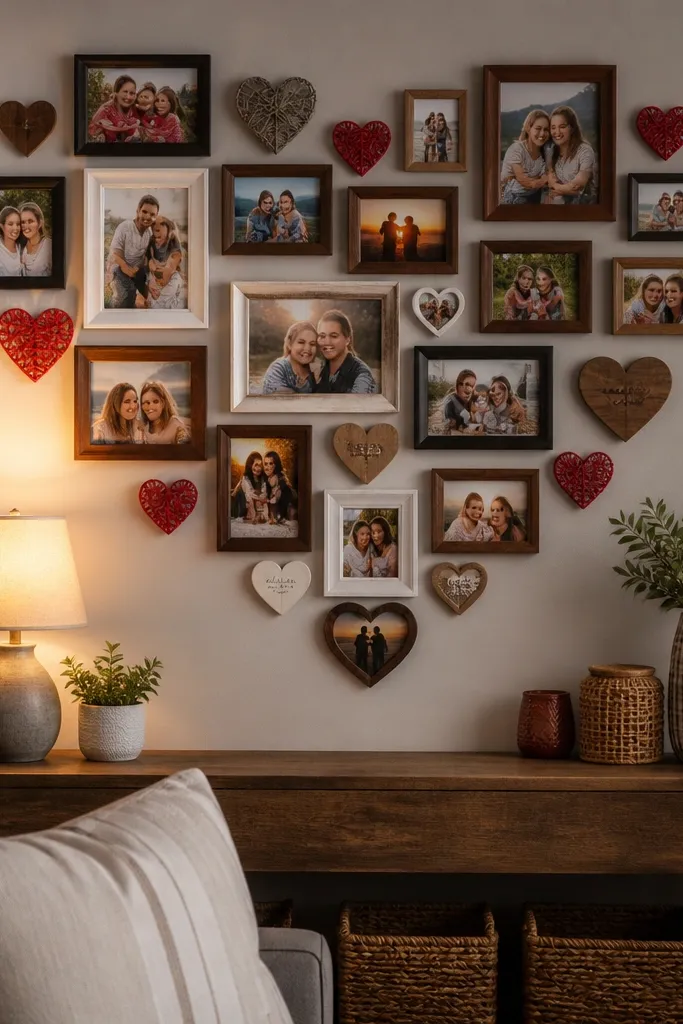
1. Classic Heart Outline With Polaroid Squares
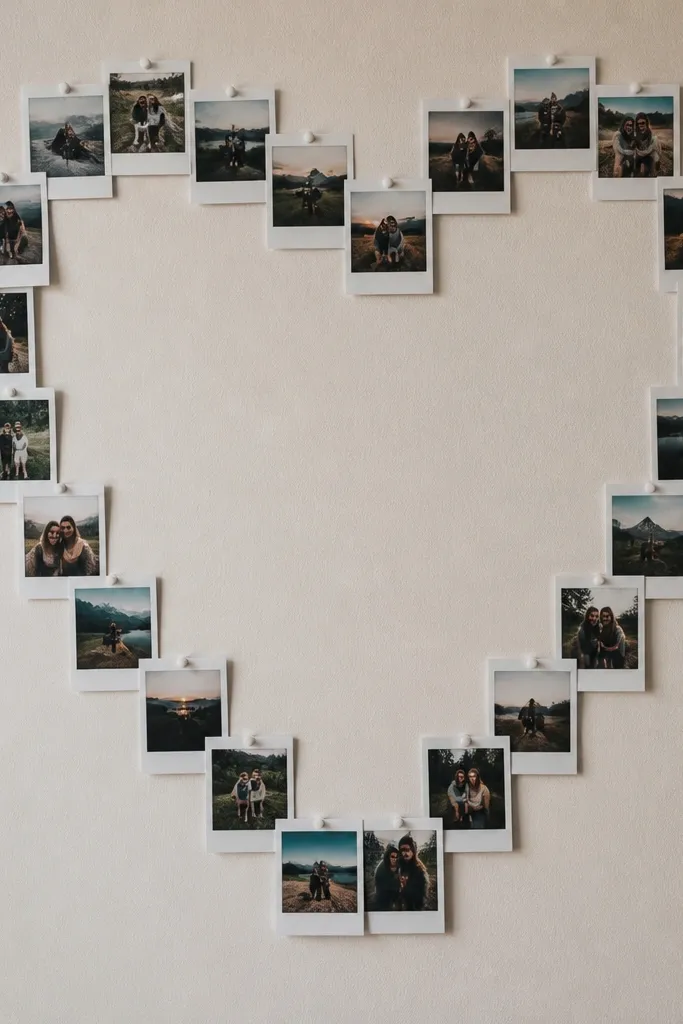
Start with a heart template printed on paper, sized to your wall space (a 24-inch tall heart looks great above a console). Lay out your photos on the floor in a grid, then trim or crop them to one exact tile size, like 3x3 inches. Add a 1-inch white border around each photo using cardstock, then position the tiles along the heart outline with 1/4 inch spacing. Secure with removable photo corners or tape, then mount the whole cluster to foam board for a flat, tidy look.
This layout gives you the cleanest heart read because the heart shape is the structure, not the decoration. You arrange photo “tiles” to trace a heart outline, then let the negative space inside the heart stay lighter. Use consistent polaroid-style borders so every photo feels like it belongs to the same set. It’s great for mixed-size photos because you’re not relying on perfect cropping; the border hides uneven print dimensions. Hang it on a plain wall and it looks intentional even when the photos are from different days.
Skip thisDon’t mix border widths; one photo with a thicker mat will make the outline wobble visually.
Editor's notePrint the heart template in matte ink or on plain paper — glossy templates reflect light and make alignment harder.
2. Filled Heart With 9 Photo Blocks And A Single Accent Color
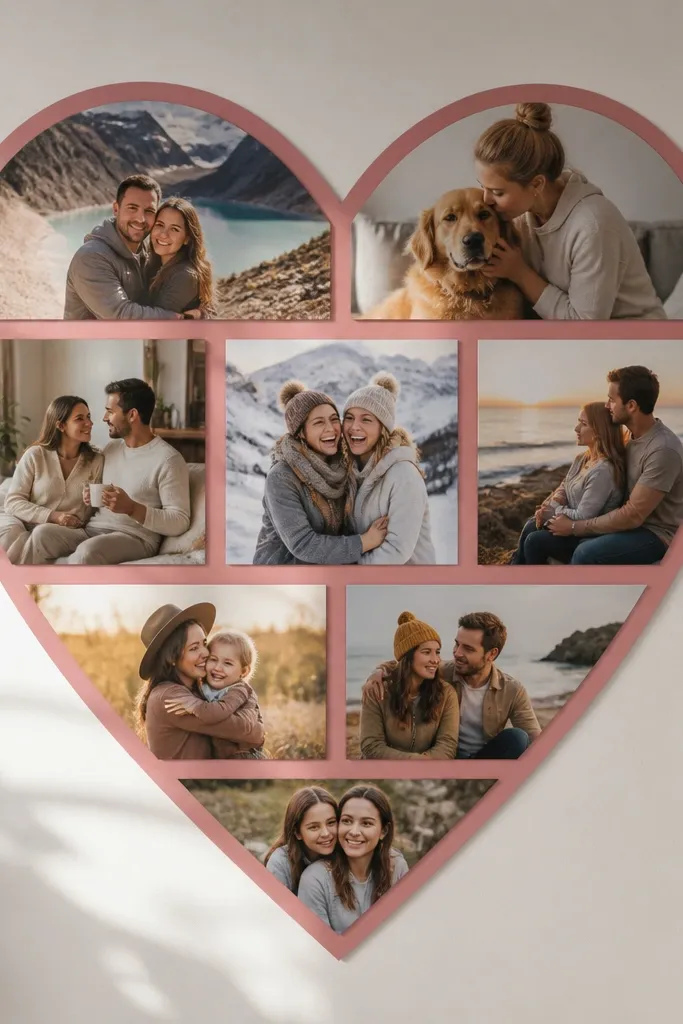
Choose a heart size like 18 inches wide and 16 inches tall, then draw or print a heart template that fits those proportions. Cut nine identical rectangles from your photos, for example 4x6 inches each, and mount them on cardstock mats in your accent color. Arrange the nine blocks to fill the heart shape with 1/4 inch gaps so the heart edge stays clean. Mount the finished heart to a backing board and hang with two hooks so it stays level.
If you want a heart that looks bold in photos, use a filled heart made from a small set of large blocks. Nine photo blocks create enough variety to feel personal while staying structured. Pick one accent color in your decor — like dusty pink or deep red — and use a matching border mat so the collage looks cohesive. This works best when your photos share a theme or color tone, because the heart fill makes every image visible. It’s a strong choice for above a bed, a hallway wall, or a small gallery area.
Skip thisAvoid using tiny photos inside a filled heart; scale mismatch makes the heart look patchy.
Editor's noteMat the photos first, then cut the heart shape — this prevents uneven edges from trimming your borders.
3. Heart-Cutout Gallery Wall With Photo Corners
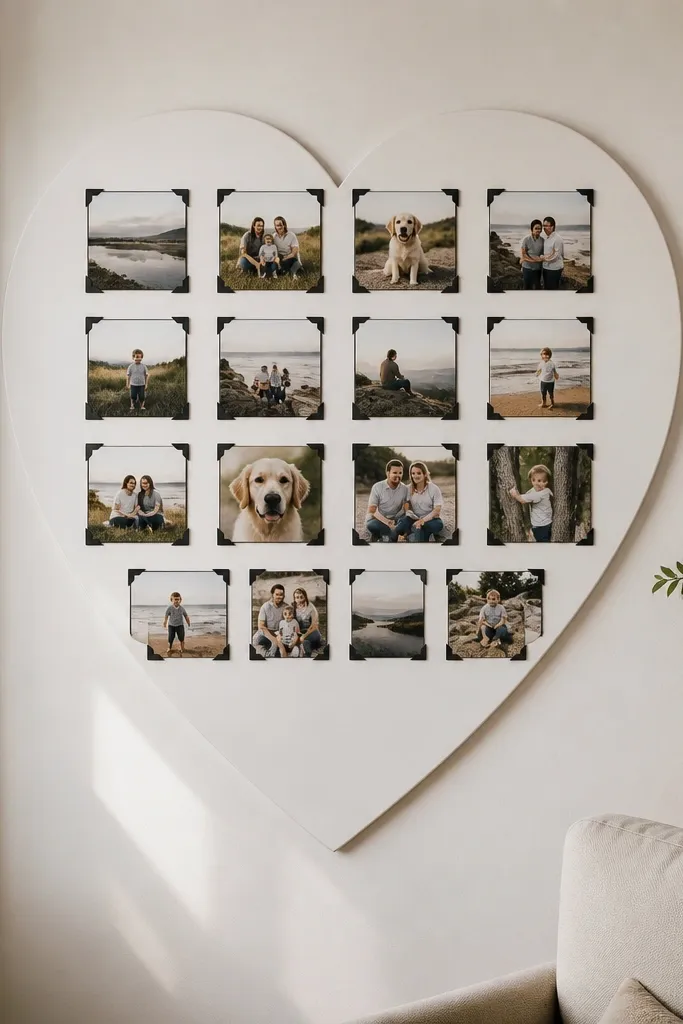
Build a backing board at least 30x40 inches, then create a heart-shaped window in the center using a craft knife and a metal ruler. Arrange your photos on the board first in a grid, leaving 1/4 inch gaps, and mark corners lightly with pencil. Mount each photo using photo corners so you don’t glue over your images. Finally, attach a border frame around the heart window using foam board or thin wood strips, then hang the whole piece flat.
This one is for people who like a clean gallery look but still want the heart theme obvious. You use a grid of photos, then frame the whole thing with a heart-shaped cutout mat so the heart sits around the collage like a picture frame. Photo corners keep everything aligned and removable, so you can swap pictures without redoing the layout. The heart reads as a shape even if your photos aren’t all the same size. It looks great in a living room because it’s neat, not scrapbook-y.
Skip thisDon’t skip the dry layout on the board; once photos are mounted, spacing mistakes are hard to fix.
Editor's noteUse a self-healing cutting mat and replace the blade when it starts to drag; ragged heart edges ruin the clean look.
4. Washi Tape Heart Frame Over Mixed Prints
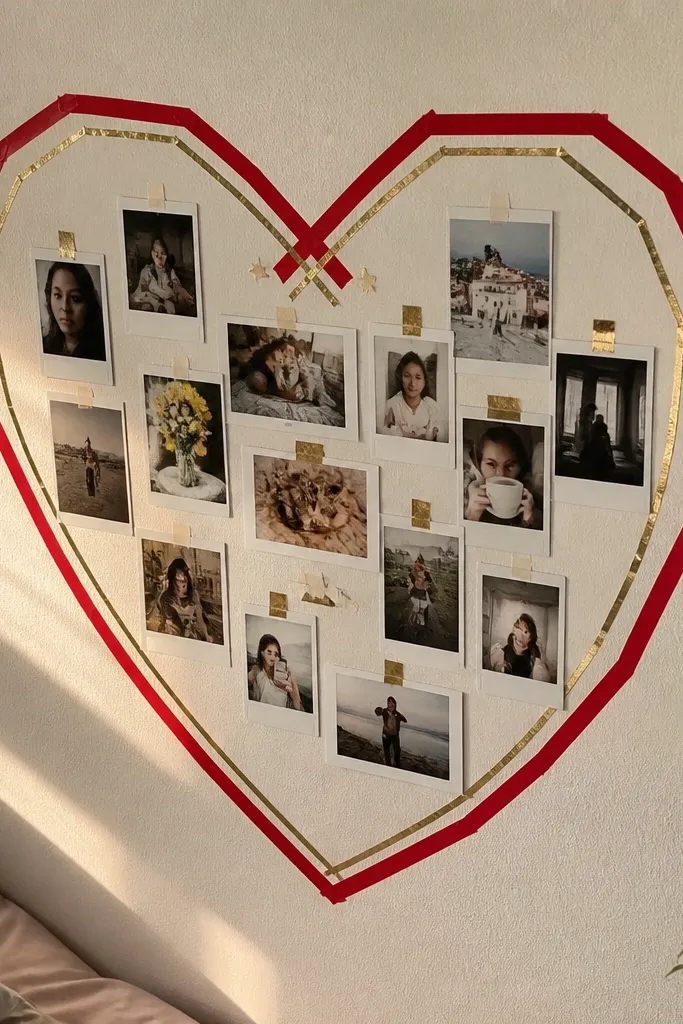
This is the quickest heart themed photo wall collage method that still looks designed. The core idea is simple: keep your photos slightly varied, then use washi tape to draw one crisp heart frame around them. The tape creates a visual boundary so the scatter doesn’t turn into chaos. Choose two tape styles max — one solid color and one patterned — so the heart stays readable. Great for renters because tape is removable and you can update the photos seasonally.
Pick a wall area and lightly pencil a heart outline, then place your photos inside it without sticking anything down yet. Start by taping the heart outline first — follow your pencil lines using tape strips with minimal wrinkles. Then add small tape borders around each photo, keeping edges consistent in thickness. Press down firmly and finish by adding a thin tape “stem” line so the heart feels anchored.
Use a ruler when taping curves; it keeps the heart smooth instead of wobbly.
Don’t use more than two tape patterns; the heart outline gets visually noisy.
5. Hanging Heart Garland With Photo Clips
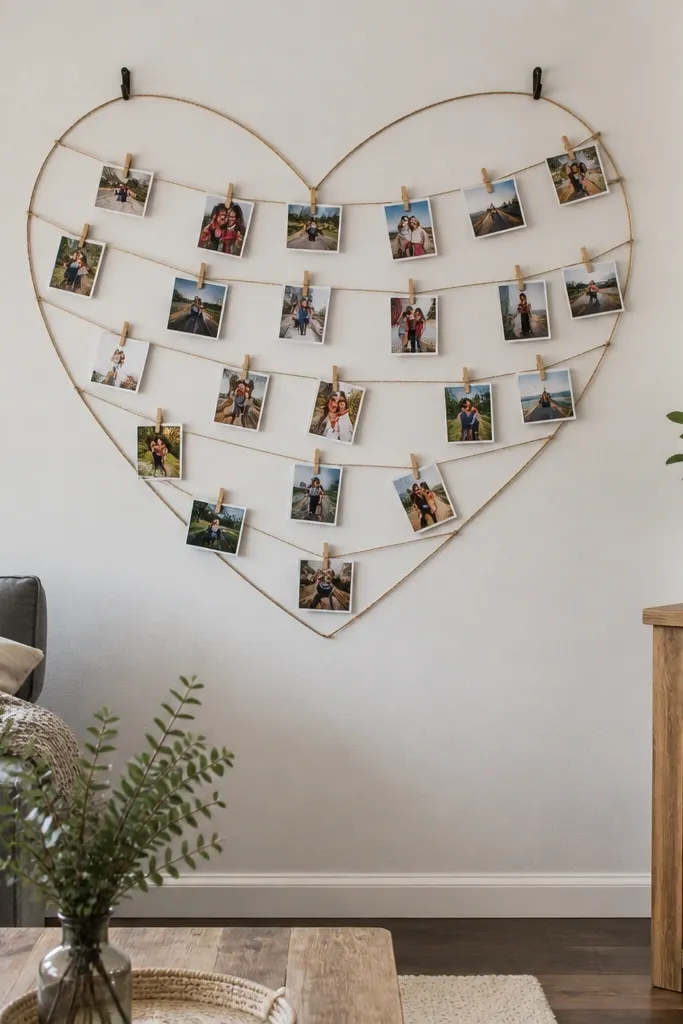
Cut a length of twine and shape it into a heart on the floor, then tie the ends securely. Attach the twine heart to two strong picture hooks so it stays taut, and keep the top hook slightly higher for a natural droop. Clip your photos onto the twine using small clothespins, spacing them about 1.5 to 2 inches apart. Mix horizontal and vertical shots, but keep the clip position consistent so the heart line stays clean.
This gives you motion and depth, which makes the heart theme look lively without needing perfect photo cropping. You create a heart-shaped line with twine, then clip photos along it using mini clothespins. The photos sit at different angles, so the wall catches light and looks great in candid photos. It’s also easy to swap photos when you want a different set. This works well above a desk, in a kids room, or on a mantel where you can see it up close.
Skip thisAvoid thin photo paper alone; it curls and makes the heart look uneven.
Editor's noteBack your photos with thicker cardstock so they don’t warp when they hang.
6. Heart Mosaic With 1x1 Inch Photo Tiles

Decide your heart size, then calculate tile count. For example, a 20-inch wide heart with 1-inch tiles needs about 20 tiles across the widest point. Cut your photos into 1x1 inch squares and mount each on a slightly larger white or cream cardstock square. Arrange them on the floor using a printed heart grid, then transfer to a backing board once the layout is right. Seal the finished mosaic with a light matte spray meant for paper if you want extra durability.
A photo mosaic turns the heart theme into something you can read as a shape and a story at the same time. The trick is scale: small tiles make the heart edge look smooth and give the wall a “designed” texture. Use a limited color palette in your photos — even 2-3 tones — so the heart doesn’t look like random snapshots. This looks amazing in a hallway where you walk past and the heart becomes clearer the closer you get. It also photographs well because the texture fills the frame.
Skip thisDon’t skip mounting the tiles on cardstock; loose photos look flimsy and don’t hold the mosaic shape.
Editor's notePrint a grid template with clear squares and tape it under your backing board while you assemble.
7. Two-Tone Heart Stack With Oversized Photo Borders
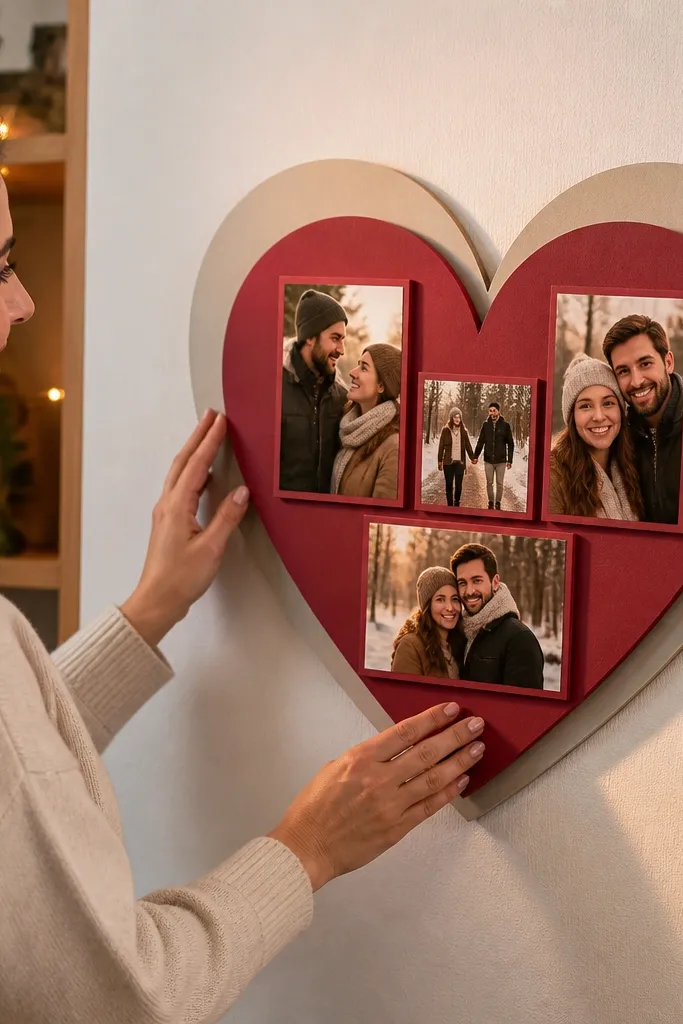
Cut two heart shapes from foam board: one large, one smaller by about 2-3 inches on each side. Mount the smaller heart to the larger heart using spacers so the top layer casts a slight shadow. Add photos inside the smaller heart using exact-fit photo panels on cardstock mats. Keep a consistent border thickness, like 1 inch, around each photo so the layer edges stay crisp. Hang using a single sturdy hook point so the layered piece doesn’t tilt.
Layering is how you make a heart themed photo wall collage look high-end without expensive frames. This idea uses two heart layers: a larger one in a soft neutral and a smaller one on top in a stronger color. Put photos in the top layer so the heart pops, while the bottom layer acts like a matte backdrop. The result is a collage that has depth and feels intentional, not flat. It suits modern rooms because the shapes are clean and the borders do most of the styling.
Skip thisDon’t use thick borders on photos in both layers; it makes the stack look bulky.
Editor's noteUse foam board spacers or thick double-sided tape for a cleaner shadow line than glue.
8. Heart Corner Collage With Diagonal Frames
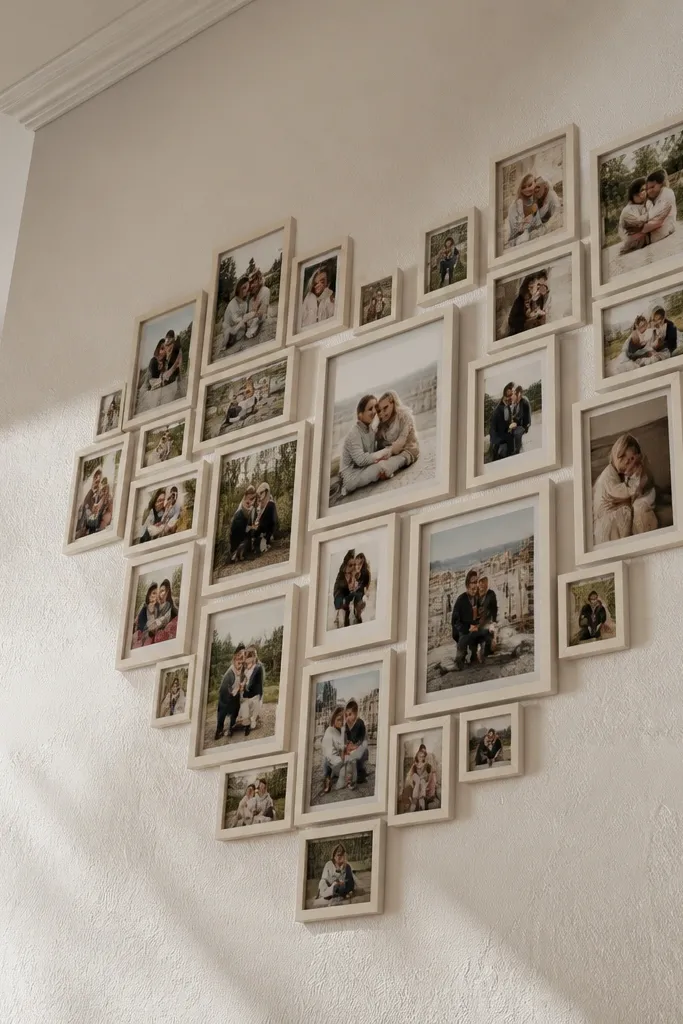
This layout leans into the idea that hearts don’t have to sit centered. Put the heart in the top corner of your collage and build it out with diagonal photo frames. The diagonal angles keep the wall from looking stiff, and they guide the eye through the heart. Use matching frames or cardstock mats so the diagonals look planned instead of accidental. This works especially well in small spaces where a full centered heart would feel too dominant.
Pick a backing board and decide how wide the corner heart will be, like 16 inches across. Cut a heart template and place it in the corner as your guide. Arrange photos in diagonal columns that follow the heart edge, keeping each frame border identical in width. Mount photos with foam squares so the angles stay consistent. Finish by adding a thin border line along the heart edge using cardstock strips.
Mark the diagonal angle with pencil on the backing board so each frame hits the same slant.
Avoid mixing frame sizes wildly; diagonal layouts punish uneven dimensions.
9. Heart Photo Strips With Mini Labels
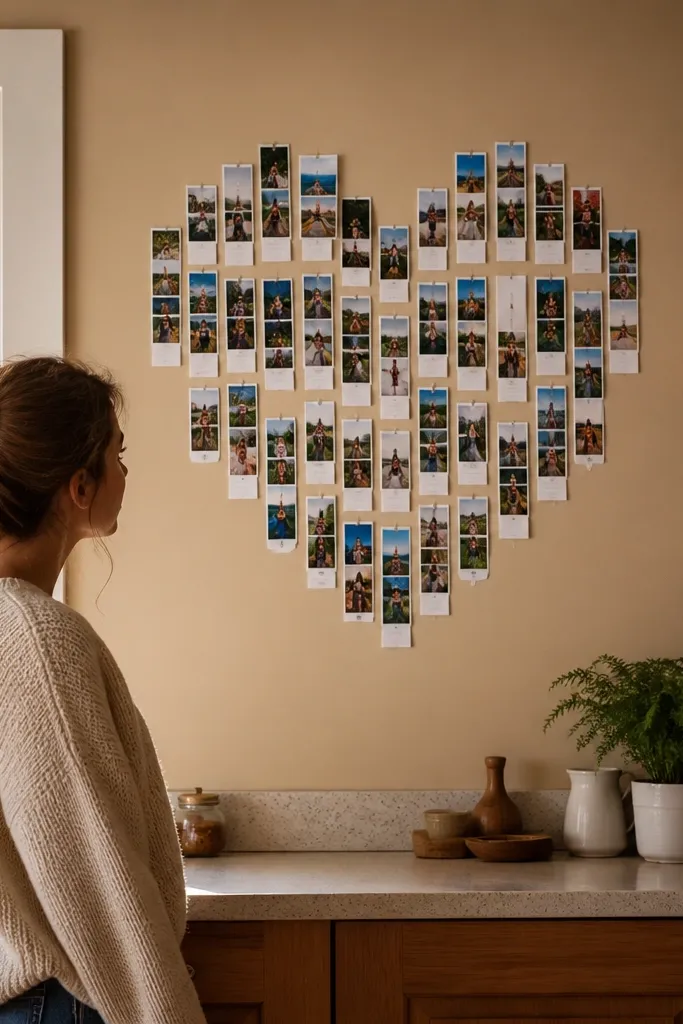
If you like a functional collage, this one adds mini labels to make the heart feel like a story wall. Use photo strips instead of single squares so the collage has rhythm. Keep labels short — dates, places, or a two-word theme — and place them in consistent spots under each strip. The heart reads clearly because the strips are aligned, and the labels add charm without clutter. It’s especially good for couples, anniversaries, and memory walls where you want meaning alongside aesthetics.
Print or crop photos into consistent strips, like 3x5 inches, and mount them on white cardstock. Arrange the strips to form a heart outline, keeping 1/4 inch spacing between strips. Add a label under each strip using a small font and print it on card stock, then glue it centered. Use a matte gel pen to write directly if you want a handwritten look, but print first so alignment stays clean. Mount the finished heart onto a backing board with tape along the edges.
Use the same label color for every strip, like charcoal gray, so the text doesn’t compete with photos.
Don’t write long captions; the heart shape gets visually crowded fast.
10. Framed Heart With Scrapbook Paper Backer
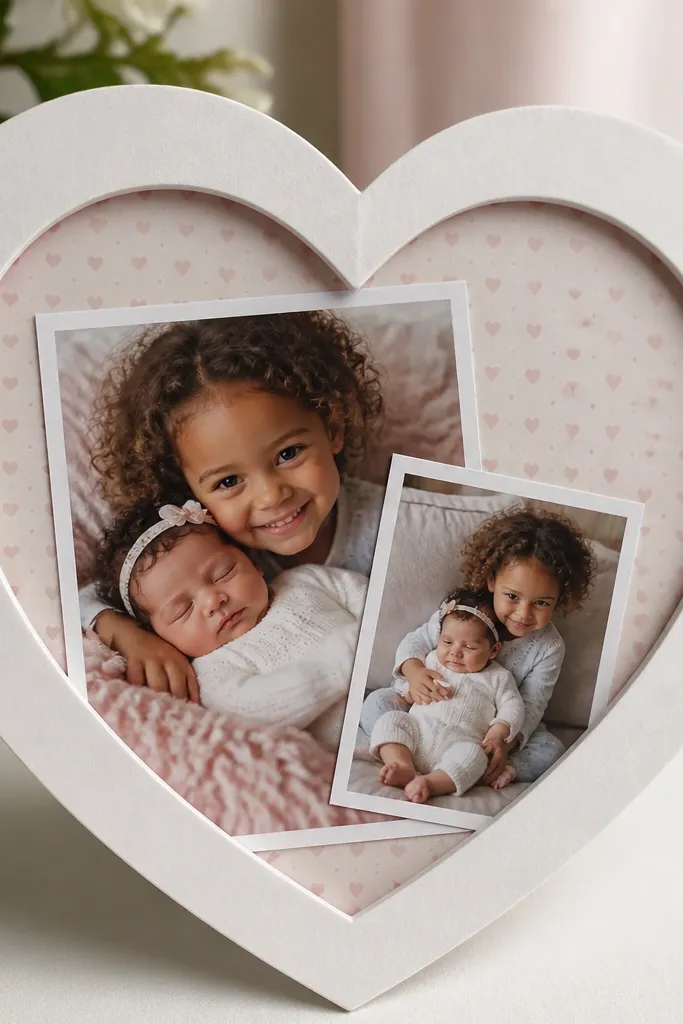
Cut a heart shape from thick cardstock or foam board and create a backing board covered with scrapbook paper. Mount a layer of photos inside the heart shape using photo corners so you can adjust spacing. Keep photos slightly smaller than the heart window so the paper border stays even, about 1/2 inch. Once you like the layout, glue down the heart frame and reinforce corners with small strips of tape on the back. Seal the paper with a matte spray if you want extra protection from scuffs.
A scrapbook paper backer gives you instant heart mood without overdoing the decorations. Put photos inside a heart frame cut from thick cardstock, then let patterned paper show through behind the photos. Choose one pattern with small scale — tiny hearts, soft polka dots, or subtle gingham — so the photos still lead. This works best when your photos have similar tones because the background pattern is always visible. Hang it where you want a warm, cozy vibe like an entryway or bedroom wall.
Skip thisDon’t stack too many patterns — one patterned backer is enough.
Editor's noteUse a paper with a small pattern scale; large patterns make the heart look busy behind photos.
11. Heart Timeline With Month-Spacing And Photo Pairs
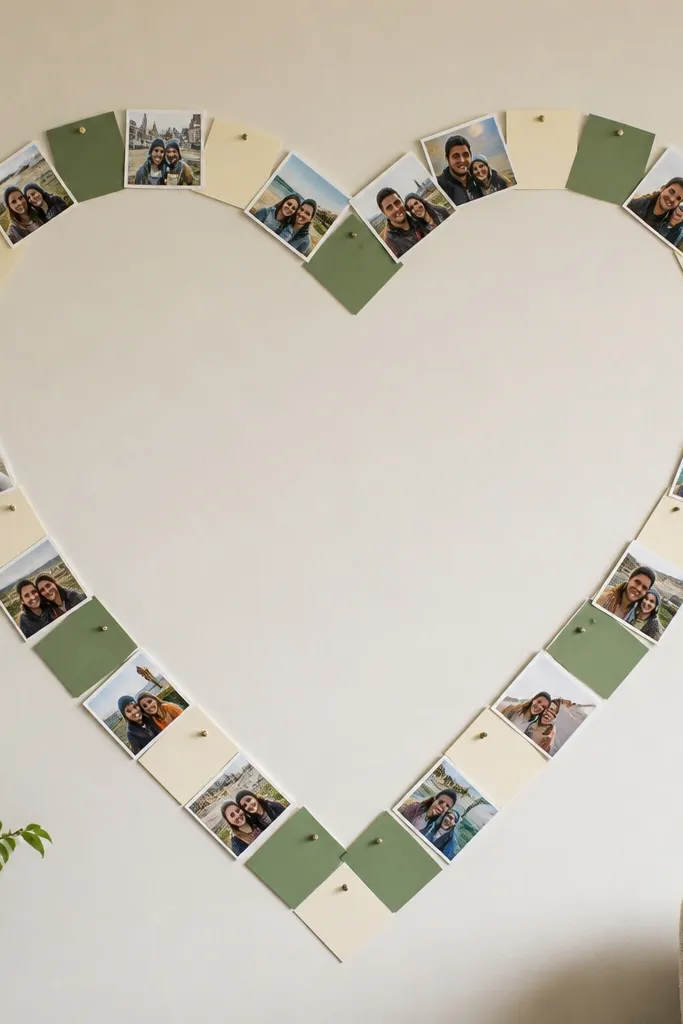
Decide the number of photo pairs, like 6 pairs for a 24-inch heart. Cut your photos into two consistent sizes and mount each pair on the same border mat. Place pairs along a heart curve, leaving consistent gaps between pairs so the heart edge stays smooth. Add month markers printed on small rectangles and place them under each pair. Mount everything onto a foam board backing and hang with two points so it stays flat.
This layout makes the heart feel intentional because each photo pair has a place in time. You place paired photos along the heart curve, then add small month markers so the story flows. The heart shape becomes the frame for progression, not just decoration. Use two matching border colors for the pairs so the wall stays cohesive. It’s a strong option for anniversary walls, pregnancy milestones, or any memory timeline where you want the heart theme without random placement.
Skip thisDon’t let the date text vary in size; it draws attention away from the photos.
Editor's noteAlign the top edges of each photo pair — it makes the heart curve look clean.
12. Mini Heart Frames From Scrapbook Paper Squares
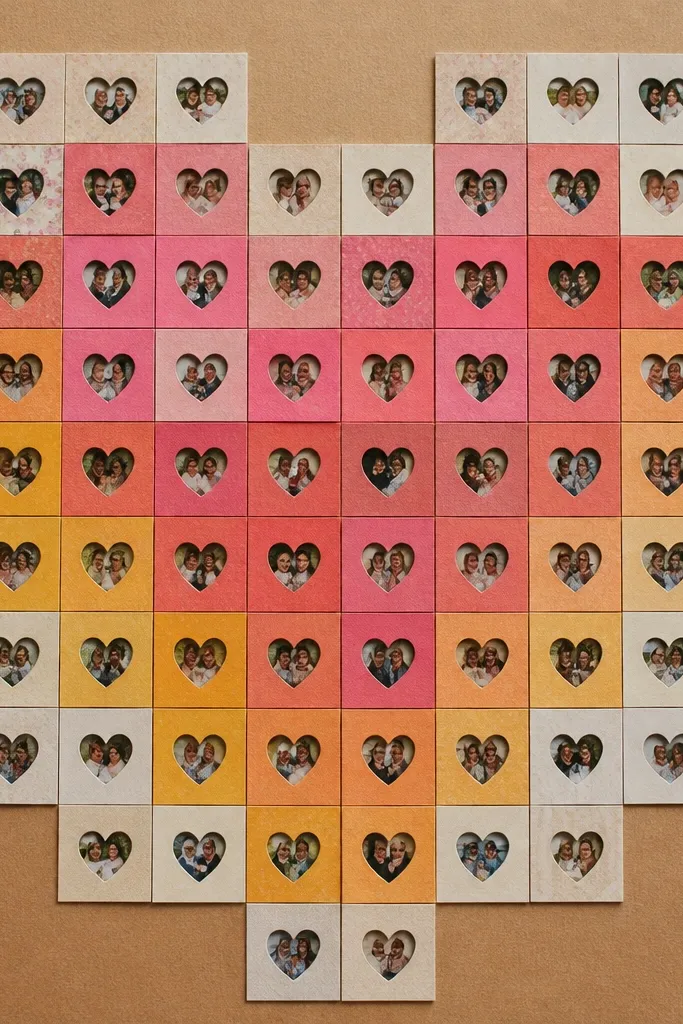
Cut a set of identical mini heart frames from cardstock, like hearts measuring 4 inches wide. For each frame, mount one photo behind it so the photo fills the heart opening. Arrange the mini hearts into a larger heart shape on a backing board, leaving 1/2 inch gaps between frames. Use removable adhesive dots under each frame so you can swap photos. Finish by adding a thin border around the entire big heart with solid cardstock to unify the look.
This is a cute, high-structure heart collage: each photo sits inside a mini heart frame, and the frames form a bigger heart grid pattern. The mini hearts make the theme obvious from close up while the overall grid stays neat. It works well when you have lots of small photos and want them all included without making a messy wall. Keep the frames consistent — same paper thickness and heart size — so the collage looks like a designed set. Great for kids' photo walls and Valentine season displays.
Skip thisDon’t mix frame thicknesses; some hearts will float and others will look flat.
Editor's noteUse a die-cut if you have one; hand-cut hearts show small edge differences that add visual noise.
13. Heart-Shaped Photo Wreath Wall Collage
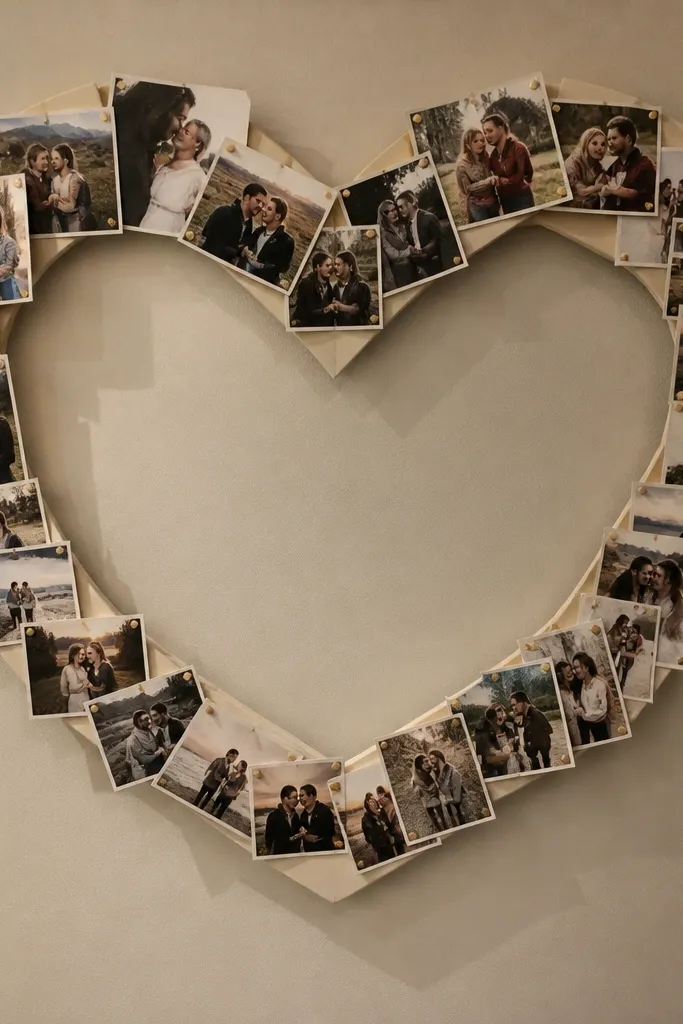
A wreath style gives you a fuller heart silhouette and more texture than flat squares. You build a heart wreath base from foam or cardboard, then pin or glue photos around the curve. This makes the collage look dimensional, and it photographs well because shadows add depth. Use a mix of photo sizes but keep the edges even so it still reads as a heart. It’s a good fit for a front door interior wall, a dining room, or a shelf-backed wall where you can see the depth.
Cut a heart wreath base from thick cardboard or foam board, leaving a hollow center. Cover the base with fabric or kraft paper so adhesive holds. Trim photos into ovals or rounded rectangles if you want a softer look, then attach them around the heart edge with hot glue on the back or strong craft tape. Fill gaps with small photo corners or mini prints so the heart edge stays solid. Mount the finished wreath to the wall using a hanging bracket at the back.
Use kraft paper as a base — it grips adhesive and hides small glue marks.
Avoid glossy photo paper on a wreath; it reflects light and makes photos look washed out.
14. One Large Heart Photo With Smaller Hearts Around It
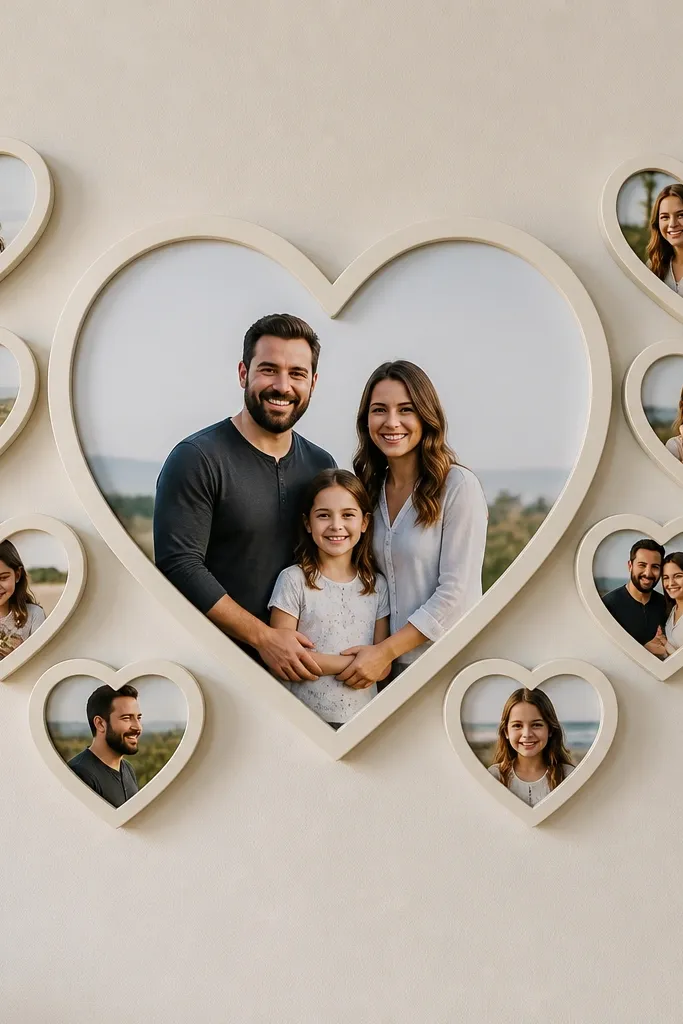
Pick one hero photo and crop it to a large consistent size, like 12x16 inches, and mount it on a matte cardstock mat. Cut a large heart frame window out of cardstock behind the hero photo so it looks like the hero sits inside a heart. Surround it with 4-6 mini heart clusters made from 2-3 smaller photos each, mounted on mini mats. Keep the mini hearts evenly spaced around the hero and mount them with foam squares for slight lift. Hang the whole piece centered and level.
This layout gives you a clear focal point: one large photo takes the center, then smaller heart clusters frame it. The center photo can be a portrait, a favorite moment, or a photo with lots of negative space for a clean look. Smaller hearts keep the theme going without crowding the main image. This is the easiest way to make a heart themed photo wall collage look “designed” even if you only have one standout photo. It’s perfect for above a bed or couch where people look straight at it.
Skip thisDon’t place mini hearts too close to the hero; leave at least 2 inches of breathing room.
Editor's noteChoose a hero photo with simple background tones so the heart frame reads clearly.
15. Heart Grid With Color-Matched Borders
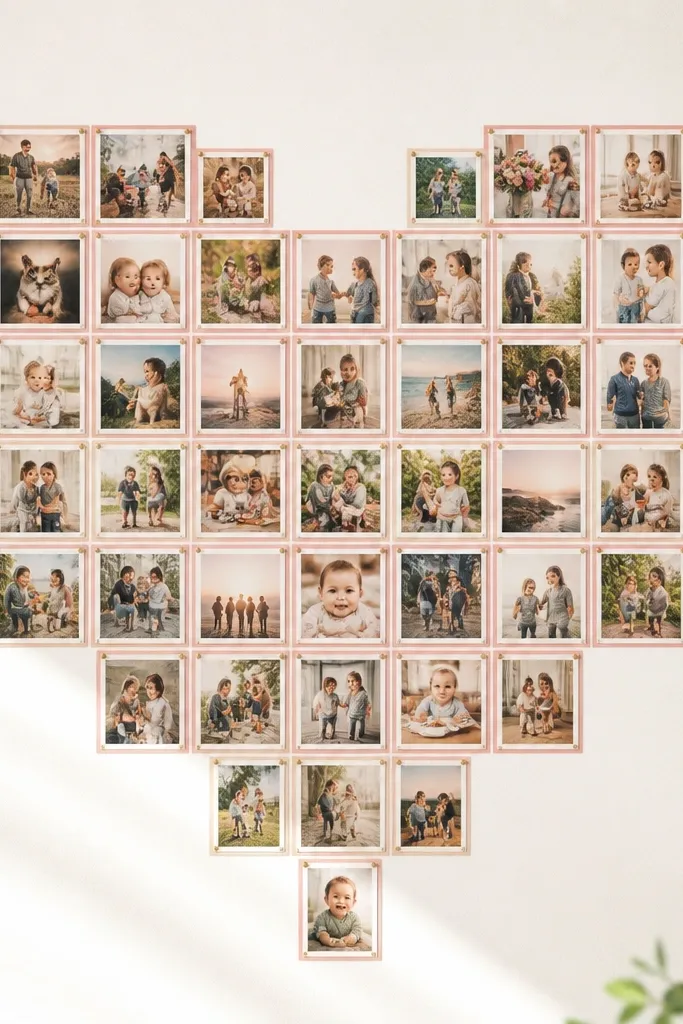
This is the “cleanest if you follow the math” option. You create a heart made from a grid of equal photo panels, then use color-matched borders so every tile looks like part of the same system. If your photos vary in brightness, borders fix it visually. The heart reads clearly because every panel is the same size and alignment stays consistent. This is ideal for people who want a modern look without fancy craft supplies. It’s also easy to photograph because edges are crisp.
Measure the wall area and decide on a grid count, like 10 columns by 8 rows. Make a heart mask on paper that tells you which grid cells are filled. Crop your photos into equal panels, like 4x4 inches, then mount each on a border mat that matches your color theme. Place the filled panels according to the heart mask and leave the rest blank for negative space. Mount to foam board and add a solid border strip around the outer edge.
Pick one border color per collage, not per photo; that keeps the grid from looking patchy.
Avoid mixing photo orientations inside a strict grid; it creates awkward white space.
16. Heart Photo Collage Using Shadow Box Depth
A shadow box turns the heart themed photo wall collage into a 3D display. You can layer photos at different depths, making the heart look dimensional instead of flat. This is where you get the most “wow” per effort because shadows do half the styling. Use a light background inside the shadow box so photos stay bright and readable. It’s especially good for small hearts — like 16 to 20 inches wide — where a flat wall piece can look too small.
Buy or build a shadow box frame with at least 1 inch depth. Arrange your photos on a backing board inside the box, then mark the heart layout with pencil. Mount one photo layer flat and mount another layer on 1/2 inch foam squares so it floats. Keep the heart edges consistent by using a template for where photos should stop. Seal the arrangement by securing all photos to the backing with tape or glue dots, then close the shadow box with the glass or front panel.
Use matte photos behind glass; glossy prints show glare lines across the heart.
Don’t overcrowd depth; if everything floats, the heart loses its shape.
17. Heart Corner Storyboard With Arrow Accents
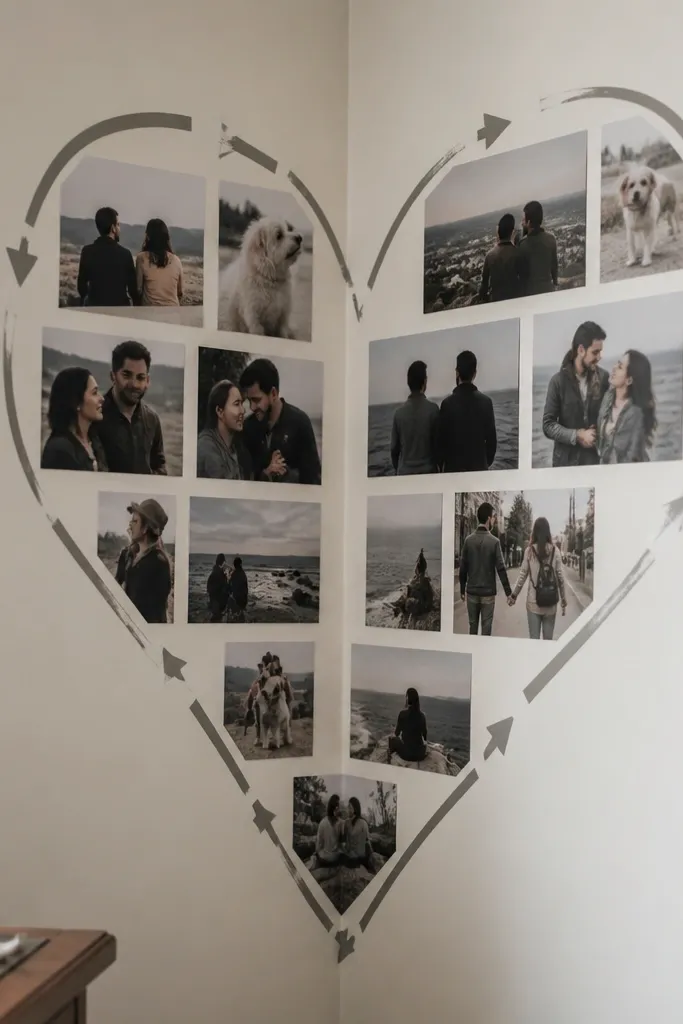
Create a heart outline on your backing board using a template. Arrange photos along the outline with even spacing, then decide where the story jumps happen — two or three points is enough. Add small arrow stickers or cut arrow shapes from colored cardstock, placing arrows between clusters. Use the same border color around every photo so the arrows don’t look random. Mount everything flat and hang so the arrows point toward the main viewing area.
This is a heart collage that guides the eye with simple arrow accents. You place photos in a heart shape, then add small arrows between sections so it feels like a story flow. The heart theme stays strong because the photos still form the heart outline, while the arrows add direction and make the collage more interesting in photos. It’s great for memory walls where you want a “start here” and “then this” feel without writing a lot of text. Keep the arrows minimal and consistent in color.
Skip thisAvoid adding too many arrows; more than three makes the layout feel busy.
Editor's noteUse one arrow size only; mixing arrow sizes makes the collage look like a school poster.
18. Heart Photo Strip Curtain On A Wall Rail
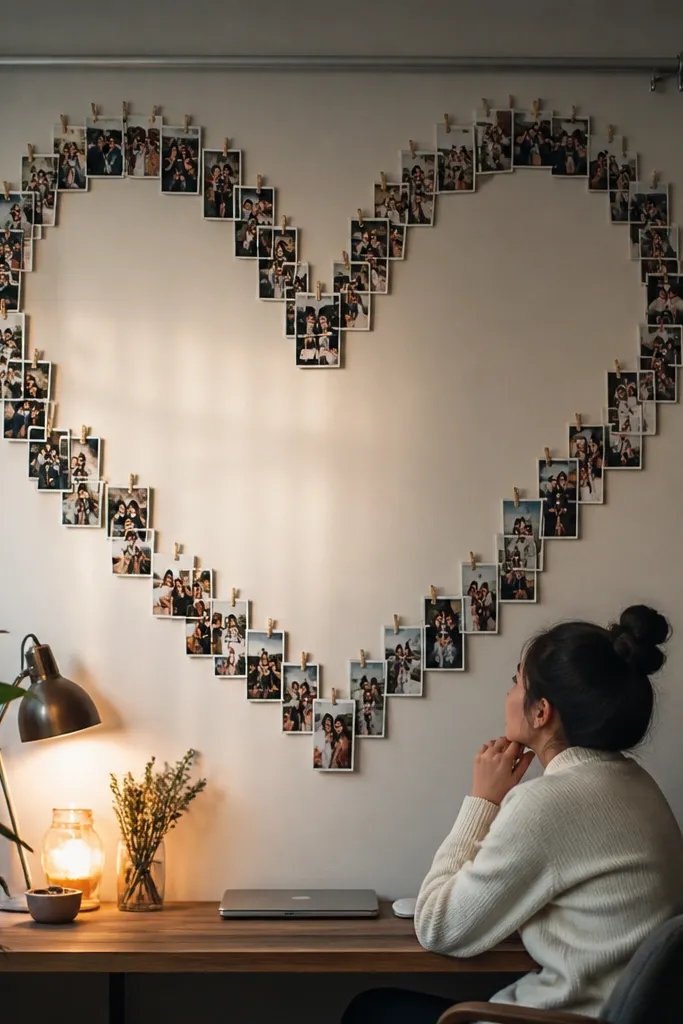
Install a thin wall rail or command strip hook line where you want the top of the heart to sit. Shape your heart by attaching strings from the rail down to a central point, then clip photo strips onto each string. Use photo strips around 2x5 inches and keep them all the same width. Space strings about 2 inches apart so the heart silhouette stays solid. Finish by adding a small label card at the bottom center if you want a clean anchor point.
A wall rail turns photos into a curtain effect, and the heart shape looks extra clear from across the room. You string photo strips on small clips so they hang with gentle curves. This gives that “aesthetic movement” look without needing a ton of craft skill. Use matte photo paper so the strips don’t glare under lights. This works best in entryways or above a desk where you see the heart shape as you walk by.
Skip thisDon’t use long photo strips; they tangle and blur the heart edge.
Editor's noteUse the same clip color across the heart so the hardware doesn’t distract from the photos.
19. Heart Collage With Circular Photo Cutouts
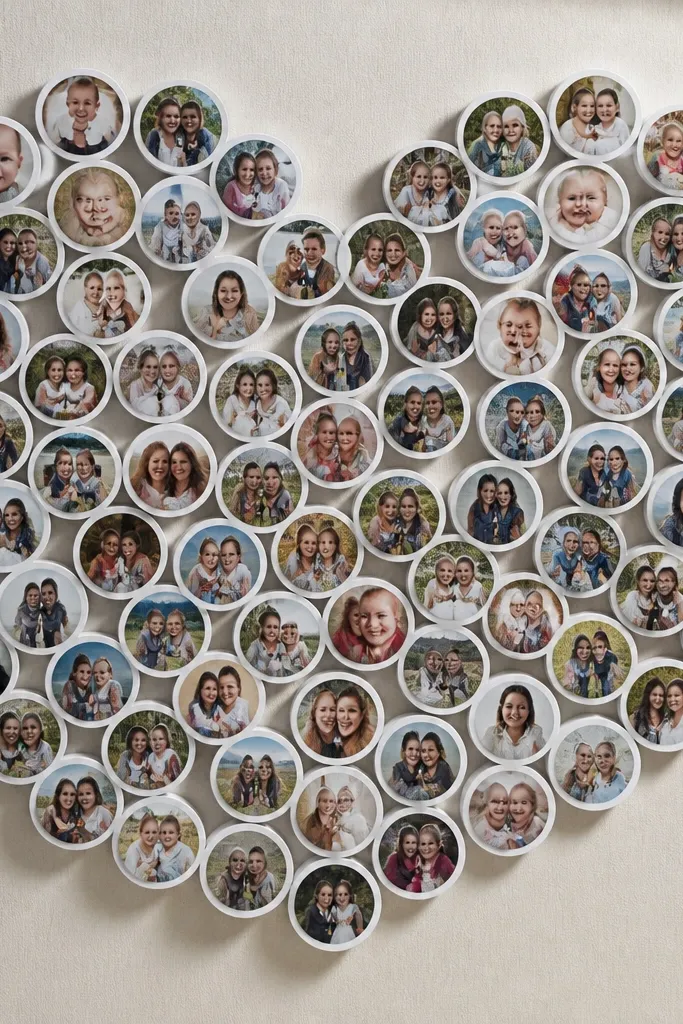
Choose a heart size and print a heart template with a circle grid, like 5-inch circles spaced 1/2 inch apart. Crop or print photos into circles using a circle cutter or print shop templates, then mount each circle on a cardstock ring. Arrange circles along the heart outline and leave a little negative space in the middle for balance. Glue rings to a foam board backing and add a solid border around the outer edge. Hang with two hooks so the board doesn’t warp.
Circle photos soften the heart theme and make the collage look playful and modern. The heart edge still reads because you place circles in a tight pattern that traces the heart outline. This works well if your photos are portraits or events where faces look good in circular crops. Keep border rings consistent so every circle looks like it belongs. It’s a strong option if you already have photos in different orientations and you want a uniform crop.
Skip thisAvoid mixing circle sizes; one off-size circle makes the heart look uneven.
Editor's noteUse a light cardstock ring, like cream, to make the circles pop against darker photos.
20. Heart Frame Using Mini Wooden Clothespins
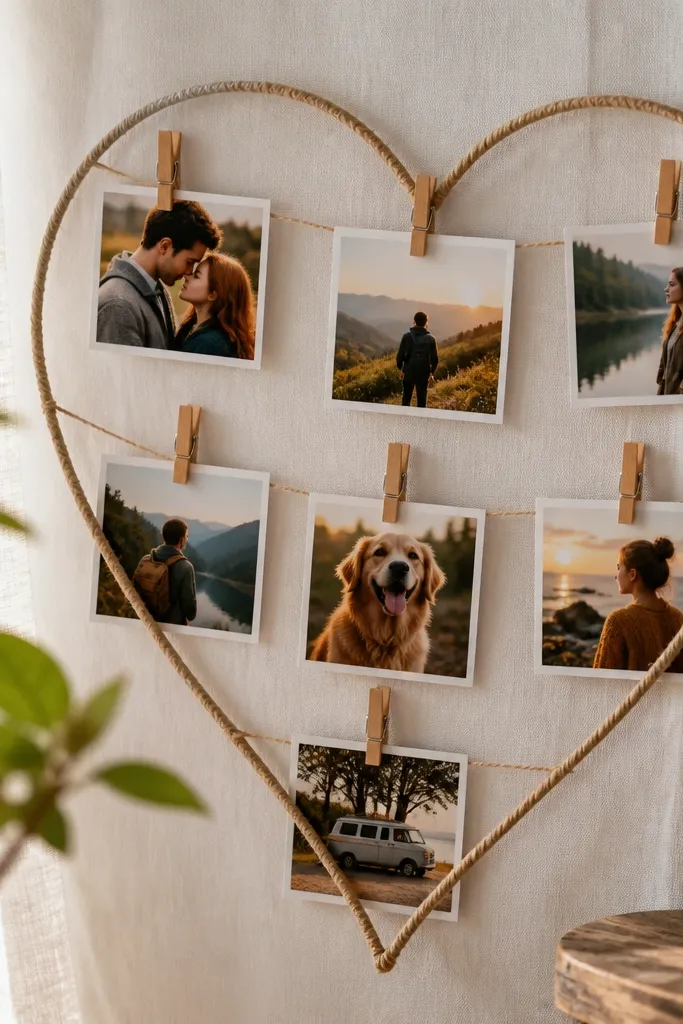
This is a textured heart collage that looks cozy and handmade without turning into clutter. You build a heart frame from twine or thin wire, then clip photos onto it with mini wooden clothespins. The wood adds warmth and makes the collage look good even with simple photo prints. Use a consistent photo size so the heart shape stays uniform. It’s ideal for rustic decor, but it also looks cute in modern homes because the frame is clean and the photos are the focus.
Make a heart frame by bending thin wire into a heart shape, then wrap it with twine so it looks soft. Secure the heart frame to two wall hooks using clear fishing line for stability. Clip photos using mini clothespins, spacing them evenly along the heart outline. Keep photos small, like 2x3 inches, so the clothespins don’t crowd the curve. Add a small kraft paper tag at the top center if you want a finishing detail.
Lightly sand the wire wrap edges so clothespins clip smoothly without snagging.
Don’t clip photos too low; the bottom of the heart will look stretched.
21. Two Overlapping Hearts With Separate Photo Sets
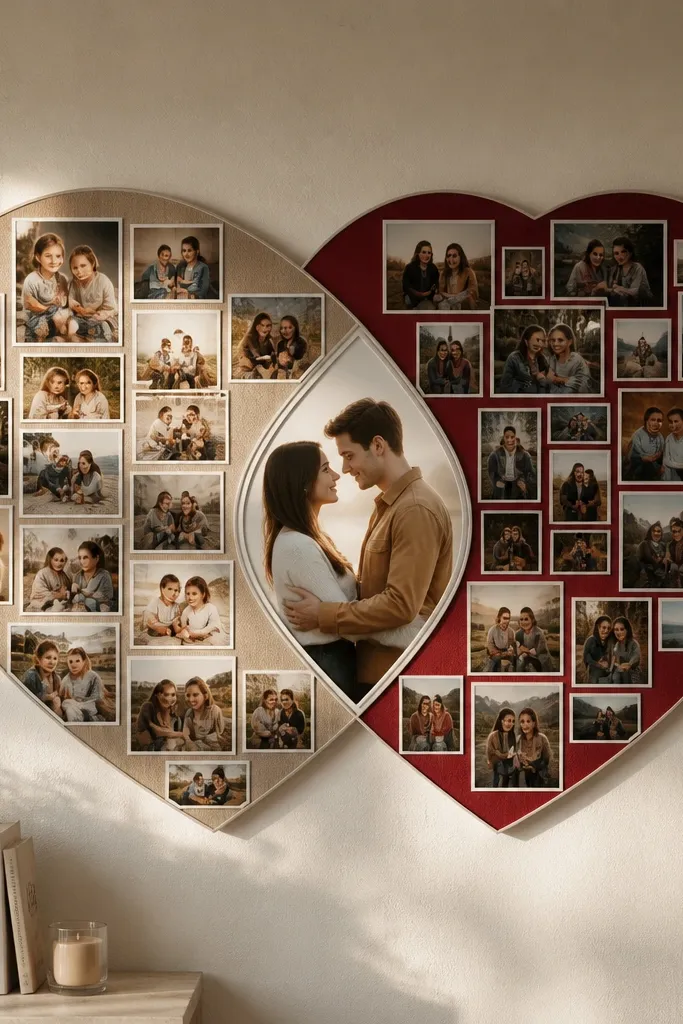
Cut two heart templates that overlap by about 3-4 inches. Place heart one and heart two on a backing board, then fill each heart with photo tiles in a consistent size. Use different border mats for each heart, like blush for one and charcoal for the other. In the overlap area, mount one or two photos with a neutral mat so they blend. Mount the completed piece to foam board and hang centered at eye level.
Overlapping hearts create instant design energy while staying readable. You split your photos into two themes — like “home” and “outings” or “year one” and “year two” — then place each theme in its own heart. The overlap area can hold a couple of matching images or a single hero photo so the hearts feel connected. Use two border colors so the separation is obvious. This layout looks great for couples and anniversaries because it feels like two worlds meeting.
Skip thisAvoid using the same border color for both hearts; the overlap will look accidental.
Editor's noteKeep the overlap photos slightly smaller so the overlap doesn’t look like a pile.
22. Heart Collage With Fabric Flags And Photo Squares
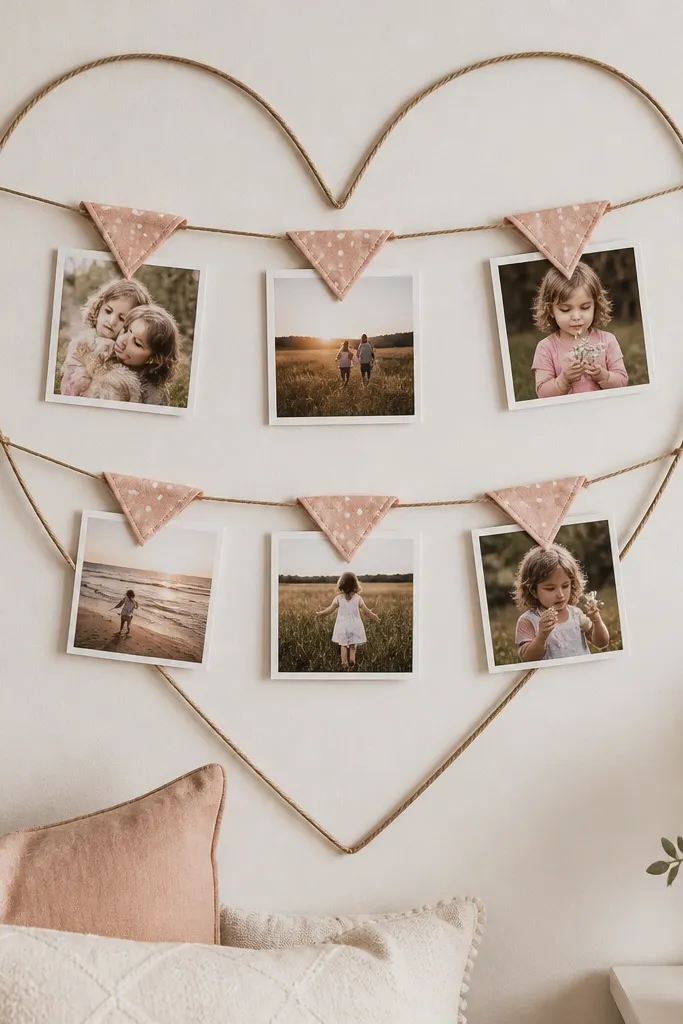
Cut a heart outline string guide on the wall or on a backing board. Sew or cut small fabric pennants, like 3x6 inches, and hem the top edge so they hang evenly. Attach each pennant to a string line and glue or staple a photo square onto the fabric using fabric-safe adhesive. Arrange pennants to trace a heart outline with 2 inches between each one. Finish by adding a small border ribbon around the outside if you want a cleaner edge.
Fabric flags add softness and texture, and they make the heart themed photo wall collage feel handmade. The photos sit on small fabric pennants, which adds depth and movement compared to flat paper. Use a heart outline made from strings, then attach flags at even intervals. This looks beautiful in nurseries, bedrooms, and any space with textiles. Keep the fabric pattern simple — solid cotton or tiny dots — so photos stay readable.
Skip thisDon’t use stretchy knit fabric; it sags and makes the heart line uneven.
Editor's noteUse fabric stiffener spray on the pennants so they keep their shape and don’t flop.
23. Heart Photo Collage With Matte Lettering As Titles
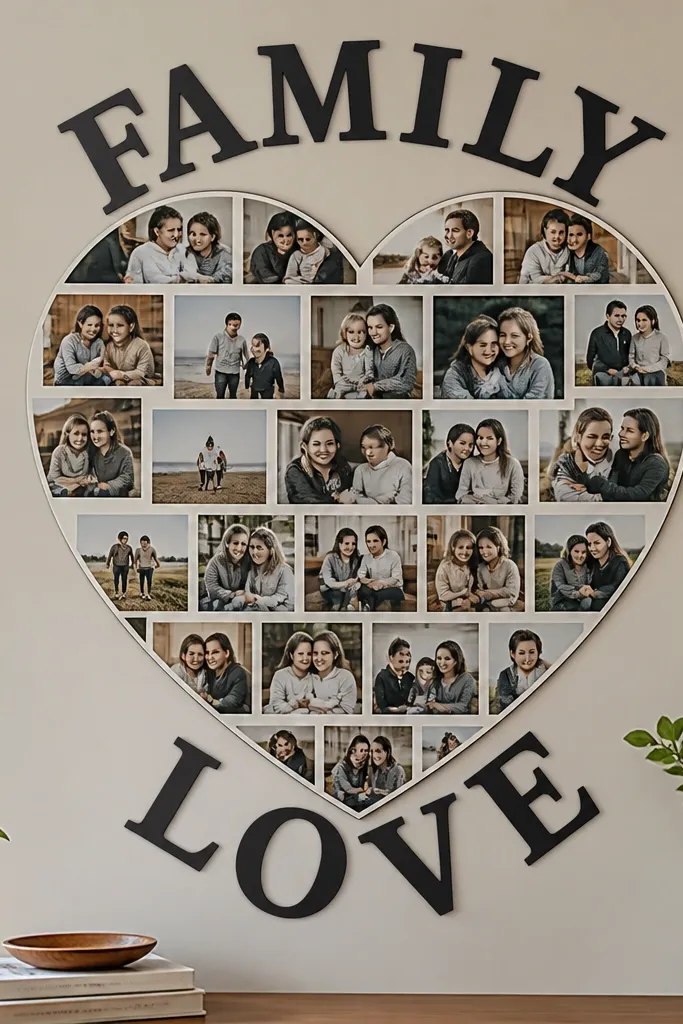
Make a heart photo layout on a backing board using a template and consistent photo sizes. Cut cardstock letters using a stencil or die-cut, then paint them matte if needed. Place letters above the heart and optionally one small word under it, keeping spacing even. Attach letters with double-sided foam tape for a slight shadow. Hang the entire piece flat and avoid glossy coatings on both photos and lettering.
This layout adds a clear theme without using a bunch of decorations. You arrange photos into a heart shape, then add matte lettering cut from cardstock like “LOVE” or a short date. The lettering frames the heart and makes the collage look intentional from a distance. Use matte finishes so the text doesn’t glare under lights. This is perfect when you want the heart to look like a gift piece or a dedicated memory wall. Keep the typography simple and bold.
Skip thisDon’t cover the heart edge with letters; keep text outside the heart boundary.
Editor's noteUse one font style only. If you mix letter styles, the heart reads less cohesive.
24. Heart Collage With Transparent Overlay Hearts
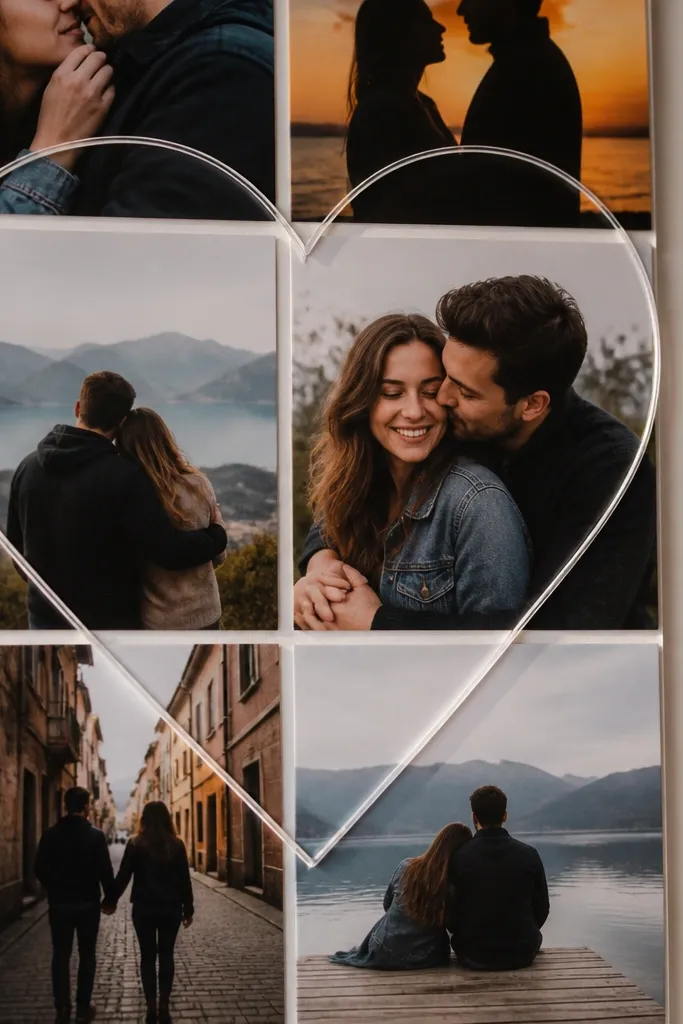
A transparent overlay gives you a modern look and makes the heart shape pop without hiding photos. You mount photos in a grid or outline, then place a clear acrylic or acetate heart over the center. The overlay catches light and adds a crisp heart boundary that reads on camera. This works best when your photos have strong contrast so they show through the overlay. It’s a smart option for people who want something more “graphic design” than scrapbook.
Cut or print a heart shape on acetate and place it over your photo layout as a guide. Mount photos on a foam board backing first, leaving space where the overlay will sit. Attach the acetate heart with small standoffs or clear tape so it floats slightly above the photos. Keep the heart size consistent with the overall collage, like 16-18 inches wide. Seal the backing so nothing curls, then hang with a stable mounting point.
Use matte photo paper so the overlay doesn’t create glare streaks.
Avoid thick tape under the overlay; it creates visible bumps on camera.
25. Heart Collage With Photo Strip Gallery In A Frame
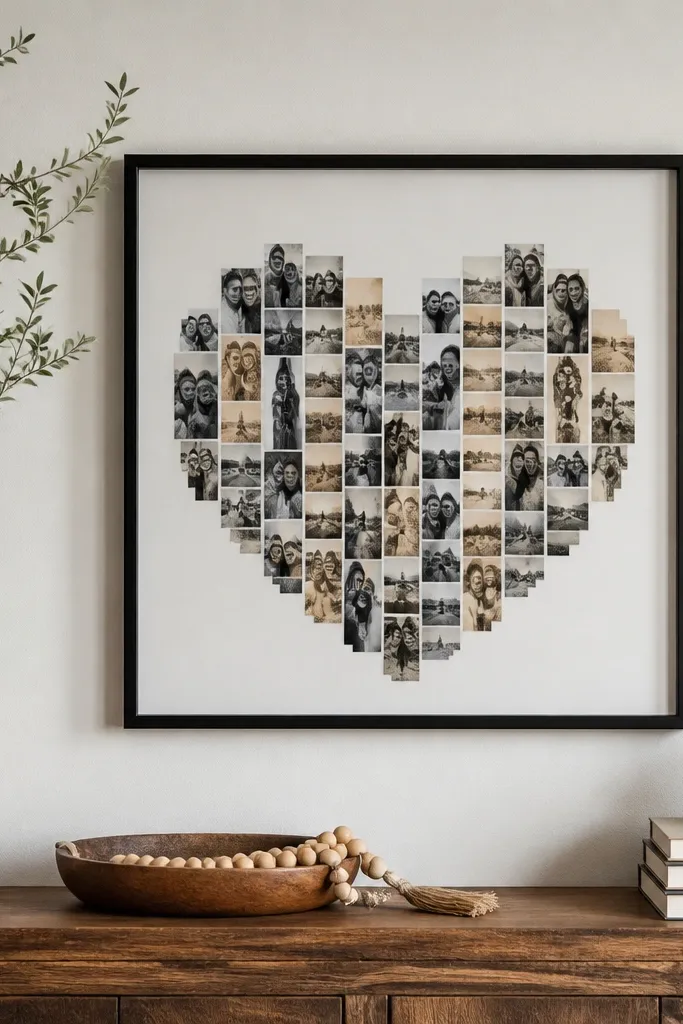
Find a frame with a flat backing, like 20x30 inches, and remove the glass if you want texture. Mount your photos as strips, like 2x4 or 2x3 inches, on a backing sheet. Arrange them to trace a heart shape using a template and keep 1/4 inch gaps. Once you like the layout, attach a paper border around the inside edge to hide adhesive. Reassemble the frame and hang it with the included hardware.
This design uses a simple frame to make everything feel finished. Inside the frame, you arrange photo strips in a heart pattern so the layout looks like a single artwork. The frame is doing the job of keeping edges straight and hiding tape lines. Use a thin black or natural wood frame for a modern look. It’s ideal when you want a heart themed photo wall collage that looks like it came from a print shop, not a craft table.
Skip thisDon’t use a deep frame unless you plan spacing; shallow frames keep everything crisp.
Editor's noteIf the frame has glass, add matte photo paper to avoid glare on the heart edges.



