
1. Vintage Tea Party Paper Doll Set
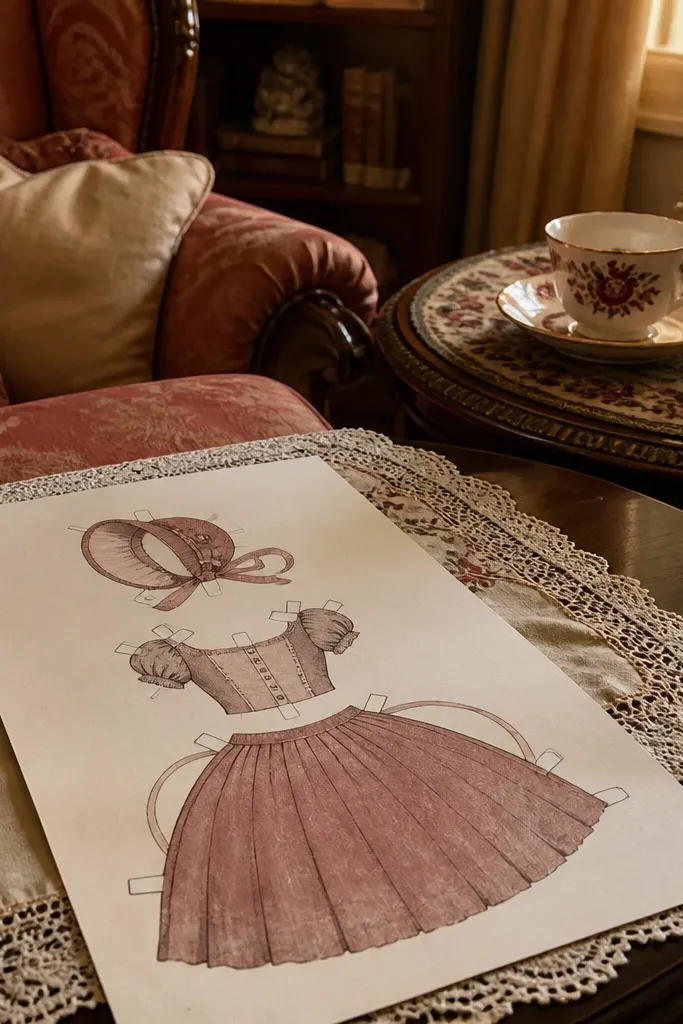
Start by printing the doll and outfit pages on 80-110 lb cardstock. Then cut the doll first, leaving the tabs intact, and test-fit one clothing piece on top before you cut every outfit tab. Finally, add color to the pieces before assembly, then attach moving parts with small brads at the joint circles if they’re marked on the template.
This template is a win for wall decor because it leans into classic silhouettes: a bonnet, a fitted bodice, and a skirt that looks full even with flat paper. The clothing pieces are separated enough that you can swap a tea dress for an apron without the outfit looking incomplete. The outline style is bold, so the doll reads clearly even when the light hits paper at an angle. It’s also easy to dress up with color — you’ll get a polished look using markers, colored pencils, or even light watercolor washes.
Skip thisDon’t print on thin printer paper — the skirt edges curl and ruin the “full” look.
Editor's noteTrace the tab edges lightly with a dull pencil so the fold line stays crisp after cutting.
2. Modern Monochrome Streetwear Doll
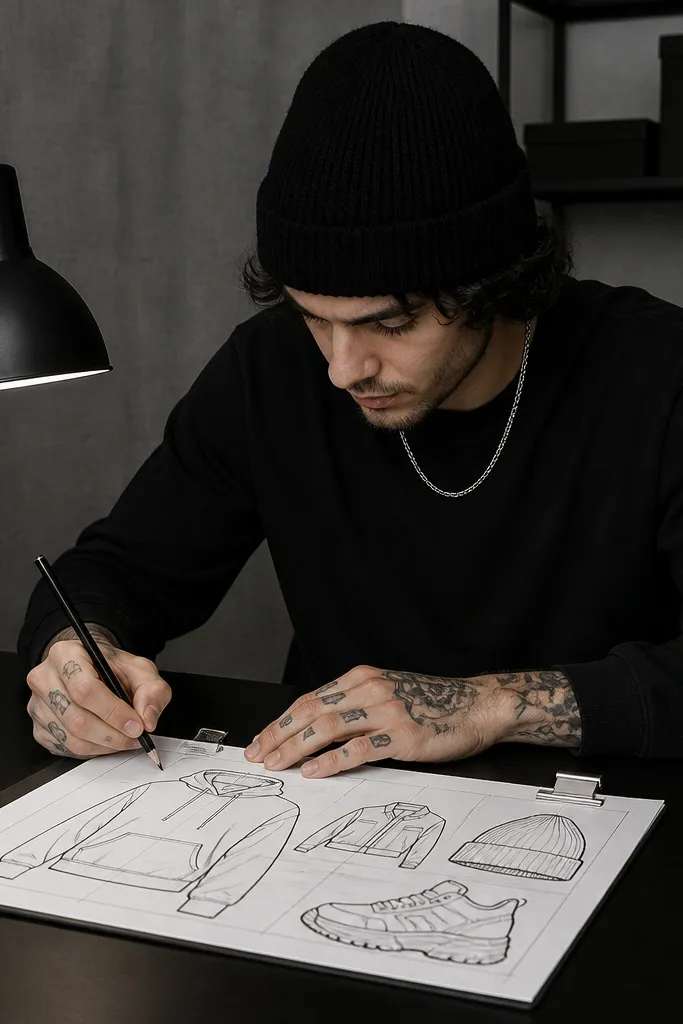
Print the doll page and the clothing page on cardstock at 100% scale. Cut the hoodie and jacket first, then align them over the torso and confirm the overlap area matches the template’s guides. Attach each swap piece using paper fasteners only if the template marks mounting points; otherwise, use glue dots on the back edges for a fixed outfit.
If you like a clean, graphic look, this template delivers. The outfits are designed around simple shapes — hoodie, crop jacket, beanie, and chunky shoes — so the doll looks stylish even when you keep the palette limited to black, cream, and gray. It’s photogenic because the clothing pieces have strong contrast and minimal clutter, so the outfit reads instantly. You can also build a “capsule wardrobe” quickly since the pieces layer without fighting each other.
Skip thisAvoid busy patterns on the smallest pieces like socks — they blur after cutting.
Editor's noteUse a black fine-tip marker for outlines after cutting to keep edges crisp in photos.
3. Garden Party Floral Dress Doll
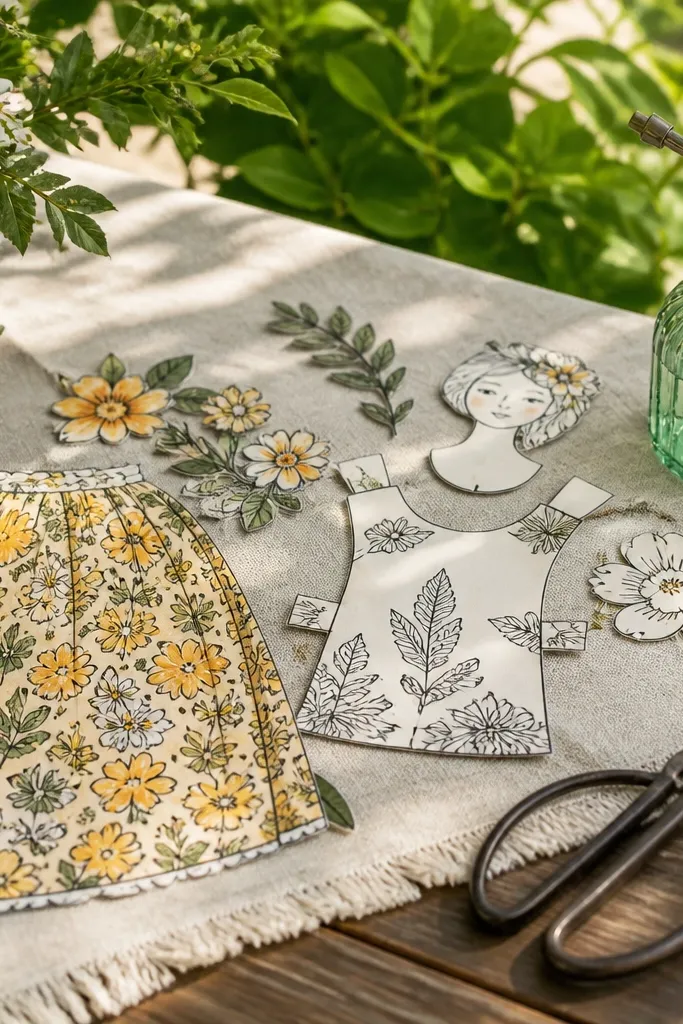
Print on 90-110 lb cardstock for smoother color fills. Cut out the skirt and sleeves first, then test-fit them over the torso so you see where to add glue or fasteners. Color the flower areas with colored pencils or light watercolor, keeping petals slightly darker at the center. Assemble by attaching the skirt at the waist tabs and the sleeves at the arm tabs.
This one looks like a mini fashion postcard. The floral clothing pieces are separated so you can mix a patterned skirt with a plain bodice, which gives you more outfit combinations than the page count suggests. The template’s line art keeps the flowers readable without turning into a muddy blob, which is exactly what you want for an aesthetic result. It also works great for gifting because the pieces feel “designed,” not like generic cutouts.
Skip thisDon’t over-wet watercolor on thin paper — it warps the skirt and makes tabs not line up.
Editor's noteFor color consistency, use the same brand of colored pencils across all outfits so the florals match.
4. Cozy Winter Sweater and Scarf Set
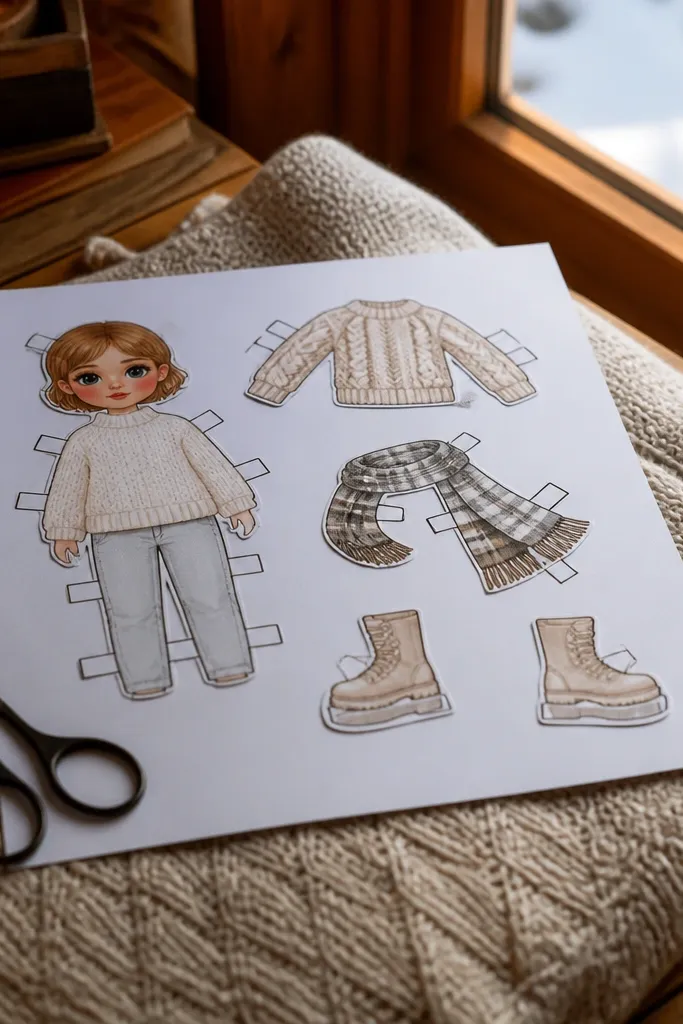
Print the doll and clothing pages on 80-100 lb cardstock, then cut the sweater and scarf pieces before you assemble anything. Align the scarf over the neck and mark the overlap with a tiny pencil dot so glue placement is fast. Attach with glue dots or a thin glue line at the scarf ends, leaving the middle flat so it doesn’t puff. Finish by adding color in warm neutrals and a slightly darker shadow under folds.
Winter outfits are where paper dolls look their best, because you get texture cues without real fabric. This template focuses on chunky sweater shapes, layered scarves, and boots with clear soles. The scarf piece usually overlaps the neck area in a satisfying way, which makes the doll look styled even from a distance. If you want a “cozy” aesthetic on a shelf, this is the template to save.
Skip thisDon’t glue the scarf all the way across — it kills the layered look.
Editor's noteUse a white gel pen for small highlight lines on sweater folds so the paper looks textured.
5. Princess Crown and Ballgown Mix-and-Match
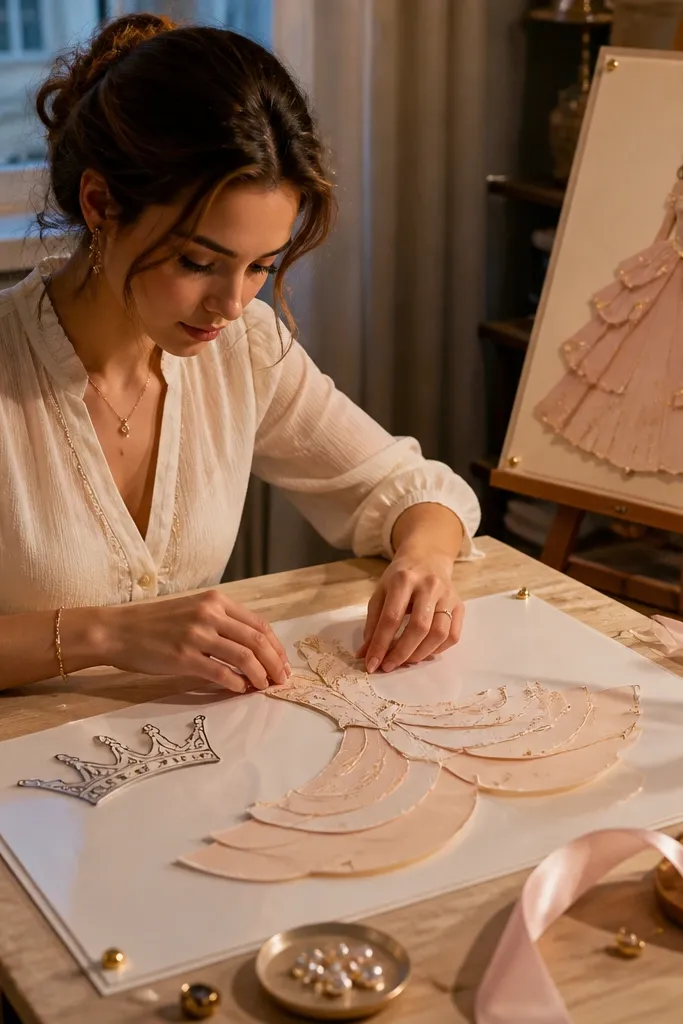
Print at 100% on cardstock and cut the crown first — it’s the most delicate piece, so handle it carefully. Assemble the bodice and skirt layers, then confirm the skirt edges sit evenly on the doll’s waist tabs. Attach gloves at the sleeve ends, then finish the full outfit with the crown. If you want easy swaps, use brads at the shoulder and waist tabs only for the main layers.
This set is made for people who want dramatic outfits without complicated assembly. The ballgown usually comes in multiple layers (bodice, skirt, sleeves), so you can build a full look even if you don’t want to glue everything permanently. The crown and accessory pieces are drawn with thick outlines, so they stay readable after cutting. It’s a strong choice for a framed paper doll wall because the silhouette pops.
Skip thisSkip glitter glue on tiny crown points — it smears and clogs the line work.
Editor's noteCut crown details with a craft knife and use a foam mat so you don’t tear edges.
6. Retro 70s Disco Doll Outfit Pages
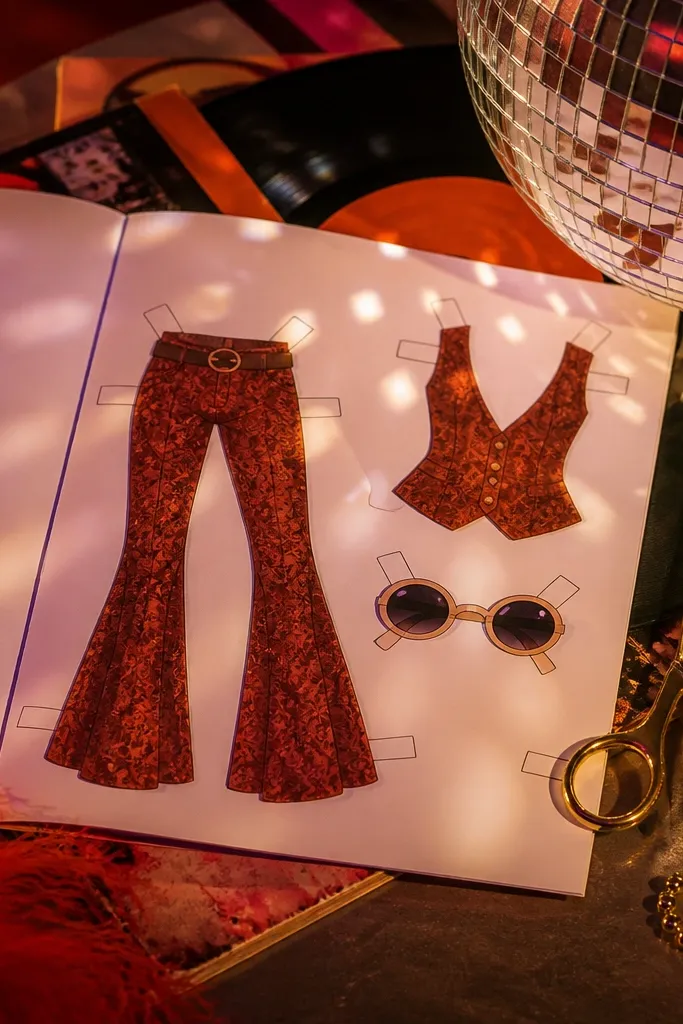
This template gives you instant party energy because the outfits are built around bold shapes: flared pants, a fitted vest, and chunky accessories. The sunglasses piece usually has clean edges, which makes it easy to color and still keep the look sleek. It’s also great for photos because the outfit contrast reads even on a busy desk background. If your saved templates list needs something that looks fun in under 10 minutes, this one is it.
Print the doll and clothing pages on cardstock and cut the flared pants as a single piece if the template offers that option. Color the vest and pants first, then add the sunglasses last so you don’t smudge. Assemble by gluing the pants tabs to the waist and attaching the vest over the torso outline. Finish with small adhesive dots behind sunglasses so they sit slightly off the face.
Use silver gel pen for reflective highlights on the vest edges.
Don’t color the sunglasses fully dark — leave a tiny gray highlight so they don’t look flat.
7. Art Teacher Smock and Supplies Doll
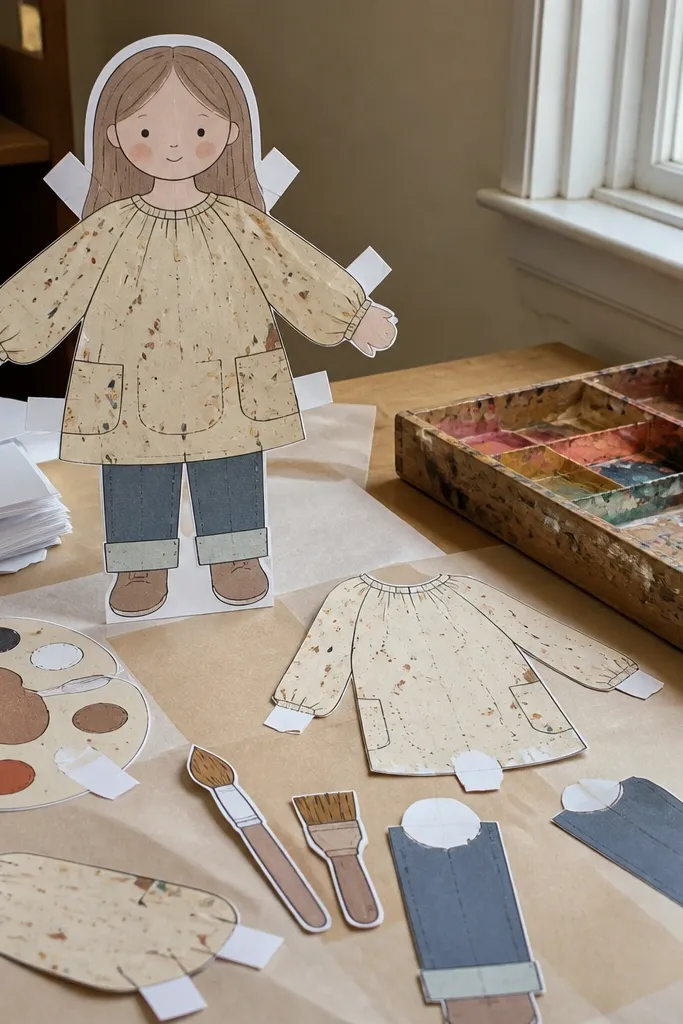
Print on cardstock, then cut the smock and prop pieces separately. Color the smock in a muted tone, then add paint marks with a fine brush or colored pencil to keep it crisp. Attach props with glue dots at the back tabs so they don’t slide forward. If the template has hand placement guides, follow them so the brushes look held instead of floating.
This is a decor-friendly template for craft rooms because it includes “props” that make the doll look like a character, not just a fashion cutout. The smock shape tends to be roomy, so it’s forgiving when your tabs aren’t perfectly aligned. You get extra visual interest from paint palette and brush pieces, which also makes the set great for shelf styling. If you want something that matches DIY spaces, this one fits naturally.
Skip thisDon’t glue props at the center — glue at the tab edges to keep the prop angle.
Editor's noteUse a toothpick to place tiny glue dots — it prevents messy squeeze-out behind the smock.
8. Beach Day Swimsuit and Cover-Up Set
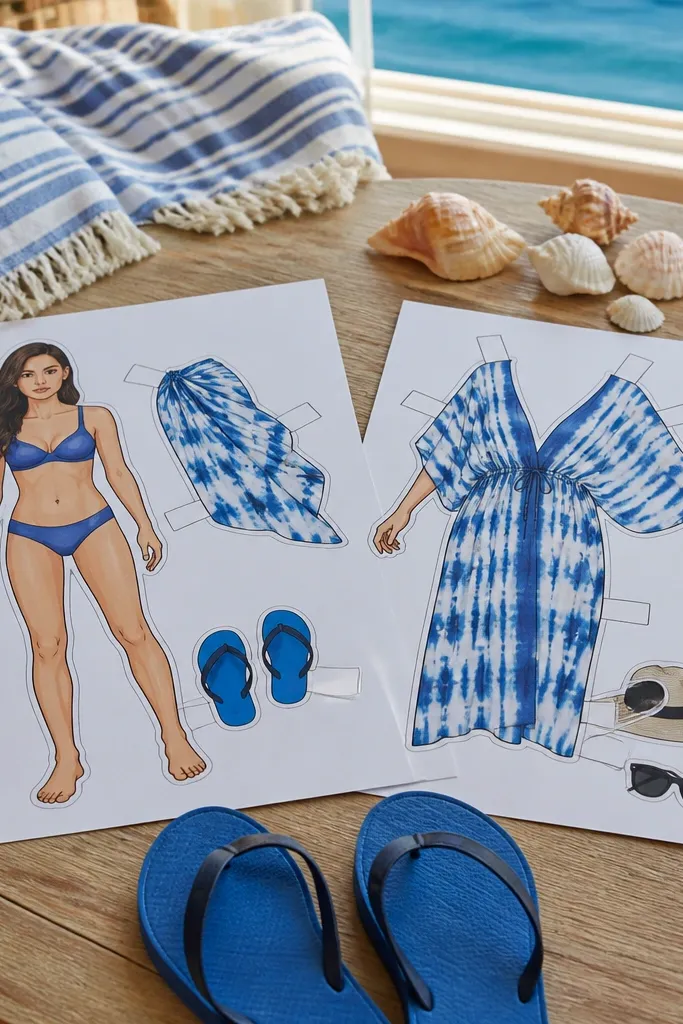
Beach outfits photograph beautifully because you get bright colors and clear layering. This template usually gives you a swimsuit base plus a cover-up that drapes over it, so the doll looks styled even if you keep the design simple. Flip-flops are drawn with thick outlines, which makes them easy to cut and still look neat. It’s also a strong choice for summer party decor where you want a cute, clean look that doesn’t require complicated assembly.
Print on 80-100 lb cardstock and cut the swimsuit and cover-up pieces first. Color the swimsuit base, then place the cover-up over it to check overlap before gluing. Attach flip-flops to the feet tabs, then glue the cover-up at the waist and side edges. If you want swaps, use paper fasteners only for the cover-up so the swimsuit stays fixed.
Add a thin wash of light blue pencil to the cover-up folds for a “fabric” effect.
Don’t over-saturate marker ink — it bleeds into the paper and softens the outlines.
9. Wizard Hat and Cloak Paper Doll
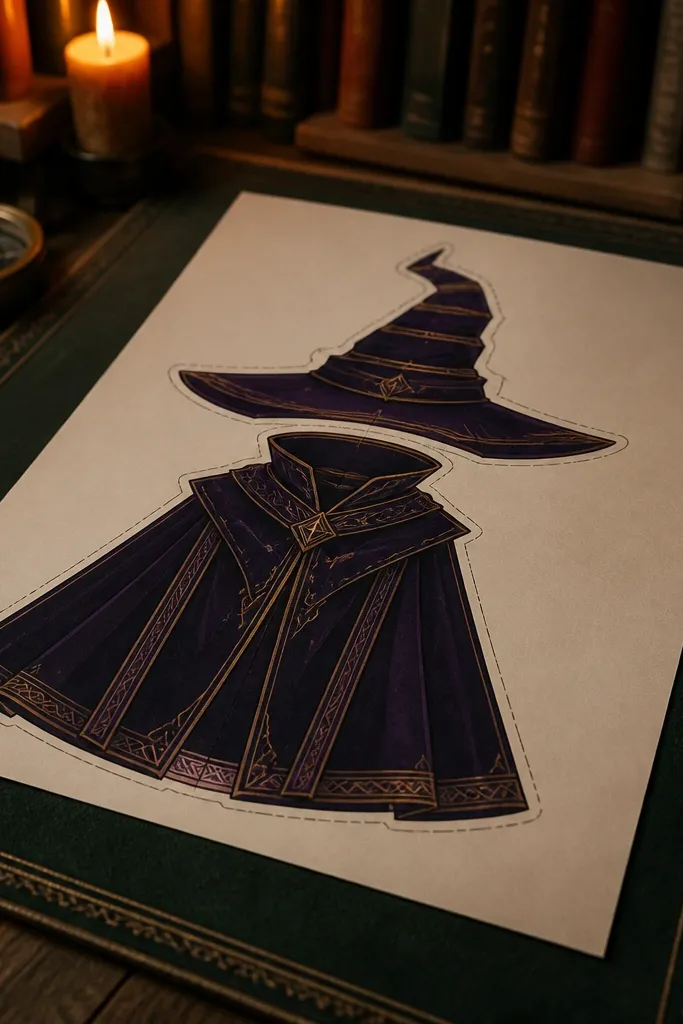
This template is dramatic without being hard. Cloaks are one of the easiest things to make look expensive on paper because the silhouette does half the work. The hat piece usually has layered bands, which makes it look detailed even with flat coloring. You can go classic (deep purple and gold) or keep it modern (black and teal) and the shapes still read clearly. It’s a great pick for a Halloween decor shelf or a themed classroom corner.
Print on cardstock and cut the cloak as one main piece if the template offers a single outer layer. Fold along the cloak tab lines if they’re provided, then attach the inner layer so the edges show. Glue the hat band only, leaving the top flat so it doesn’t curl. Assemble boots last so the cloak doesn’t get stuck in the glue while you position it.
Use metallic gel pen for the hat band and cloak trim so edges catch light.
Avoid thick glue on the cloak hem — it warps the bottom edge.
10. Space Ranger Helmet and Suit
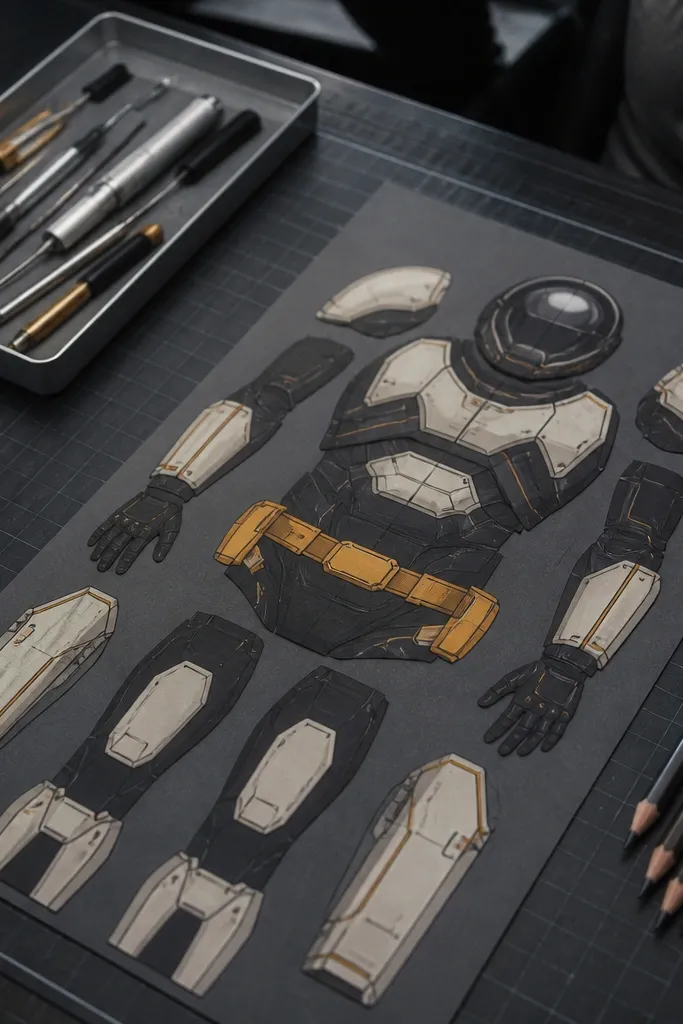
Print the pages on cardstock, then cut the helmet visor piece carefully with a sharp knife. Color visor borders in a slightly darker shade than the faceplate so it reads as a window. Assemble the suit by attaching the belt layer first, then the torso panels, then gloves. Finish by attaching the helmet last so you can line up the neck opening.
Space outfits are built for clean graphic art, and this template leans into that. The suit usually has separate panel pieces so you can color them like real gear — dark base, light panels, and a contrasting belt. The helmet visor is drawn with clear borders, so it stays crisp after cutting. This set looks great on a desk because the shapes are bold and the colors pop without needing extra texture.
Skip thisDon’t glue the visor to the helmet edge all the way around — leave a tiny gap so it looks layered.
Editor's noteUse a ruler under the knife for straight belt edges and uniform panel alignment.
11. Ballet Leotard and Tulle Skirt Doll
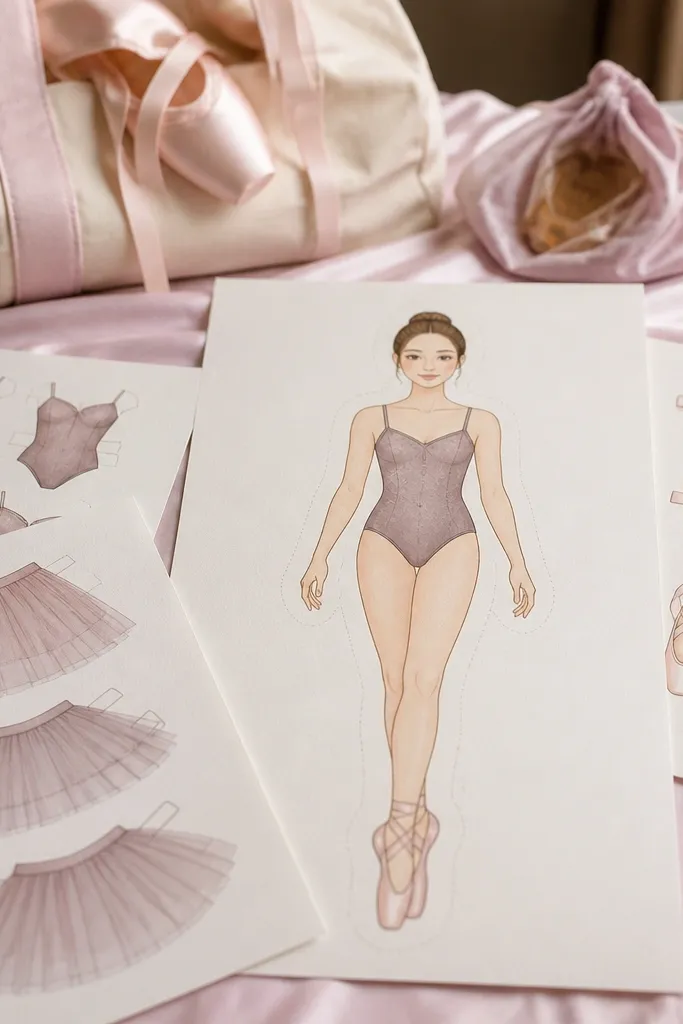
This template is all about softness, but it stays sharp because the lines are clean. The leotard is typically a single cut with a defined neckline, and the skirt comes in layered pieces so you get that tulle effect without real fabric. Ribbon shoe pieces usually have clear outlines, which makes them look delicate instead of messy. If you want “pretty” that still feels structured, this one is a keeper.
Print on 90-110 lb cardstock for smoother color gradients. Cut the leotard and skirt layers separately, then test-fit the skirt at the waist tabs. Color the leotard first, then lightly shade under the skirt folds so the layers show depth. Attach the leotard to the doll torso, then glue the top skirt layer at the waist and the lower layer slightly offset.
Use a white gel pen for tiny highlight lines on the skirt folds to mimic tulle shine.
Avoid heavy marker on the skirt — it can make the layers look thick and flat.
12. Chef Apron and Menu Board Doll
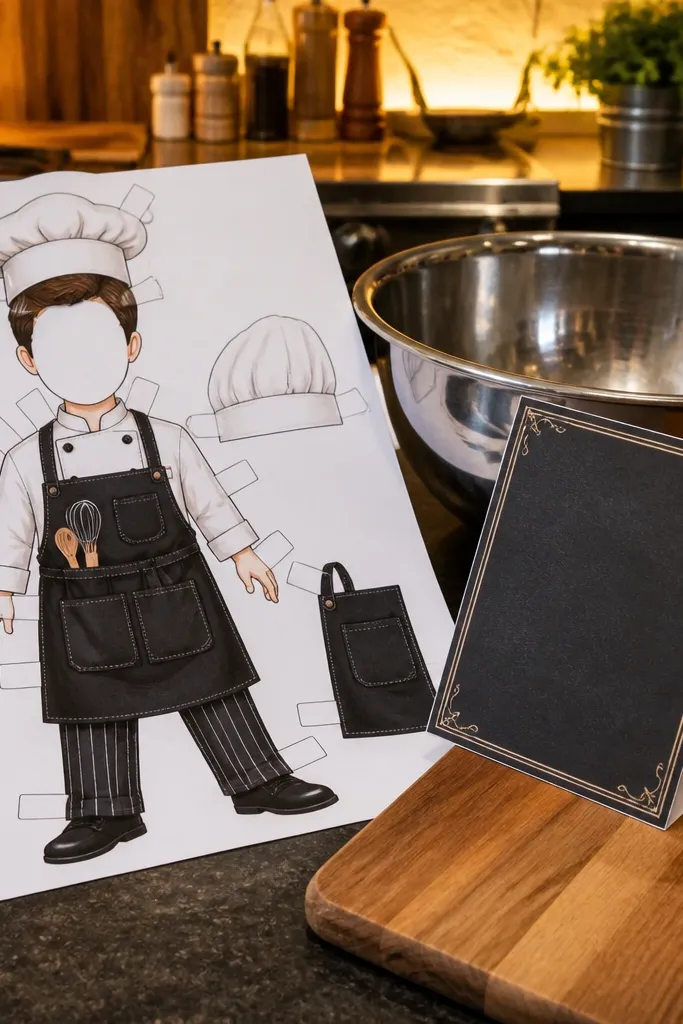
Print on cardstock, then cut the chef hat band and apron pockets first so you don’t miss tiny shapes later. Color the apron and menu sign, then assemble the pocket details before attaching the apron to the doll. Attach the menu sign with glue dots at the back so it sits slightly angled. Finish by adding the hat on top after you’ve positioned the apron so alignment looks intentional.
This set adds story. The menu board prop makes it feel like the doll is doing something, which makes your finished page look more styled than a basic outfit swap. The chef hat is usually drawn with a clear band and easy folds, so it cuts cleanly. The apron often includes pockets, which adds detail without clutter. It’s a solid choice for kitchen decor, handmade invitations, or a themed party table.
Skip thisDon’t glue pockets after the apron is attached to the doll — you’ll get uneven placement.
Editor's noteUse small binder clips to hold the menu sign in place while glue dries.
13. School Uniform with Plaid Skirt Doll
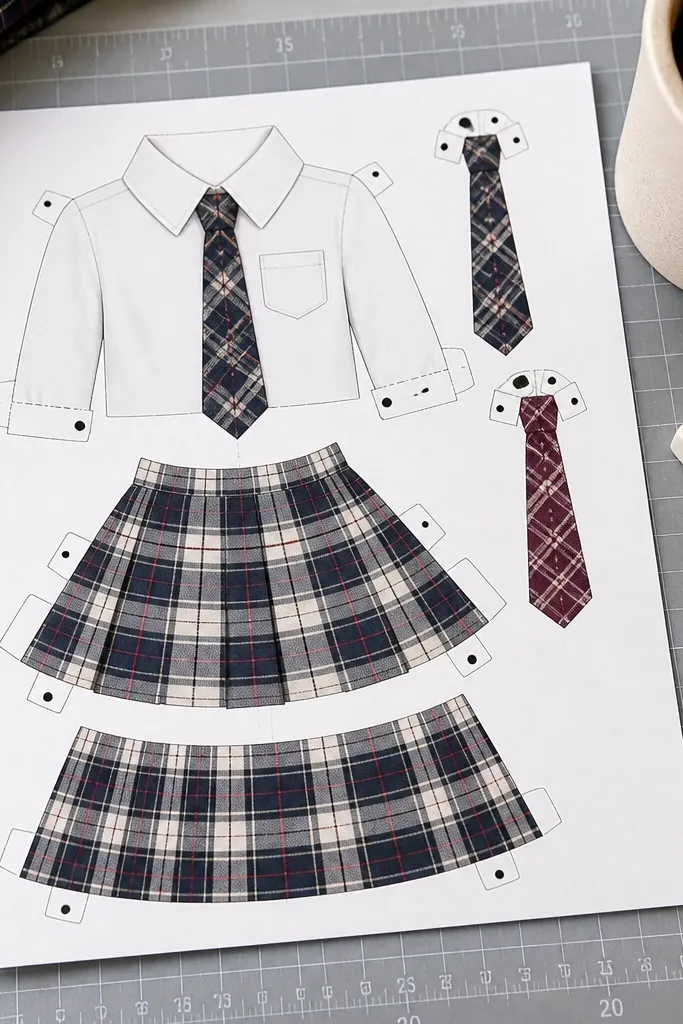
Print on cardstock and cut the tie first — it’s the easiest piece to miscut. Color the plaid with a ruler and colored pencil so the lines stay straight, then layer the skirt pieces over the doll waist tabs. Attach the tie to the collar area using tiny glue dots at the knot and the ends. If the template includes multiple shirt options, assemble one outfit at a time so tabs don’t get mixed up.
Uniform templates look great because the silhouette stays consistent across outfits. This one gives you a plaid skirt and tie options that feel crisp and intentional on paper. The skirt pieces are usually drawn with enough spacing that plaid coloring stays readable when cut. It’s also easy to keep neat: you can color within the lines and still get a clean, finished look without extra shading.
Skip thisSkip marker for plaid — it bleeds into the cut edges and blurs the pattern.
Editor's noteDo plaid with light pencil lines first, then darken the final grid so you can correct mistakes quickly.
14. Halloween Witch Hat and Potion Bottle Set
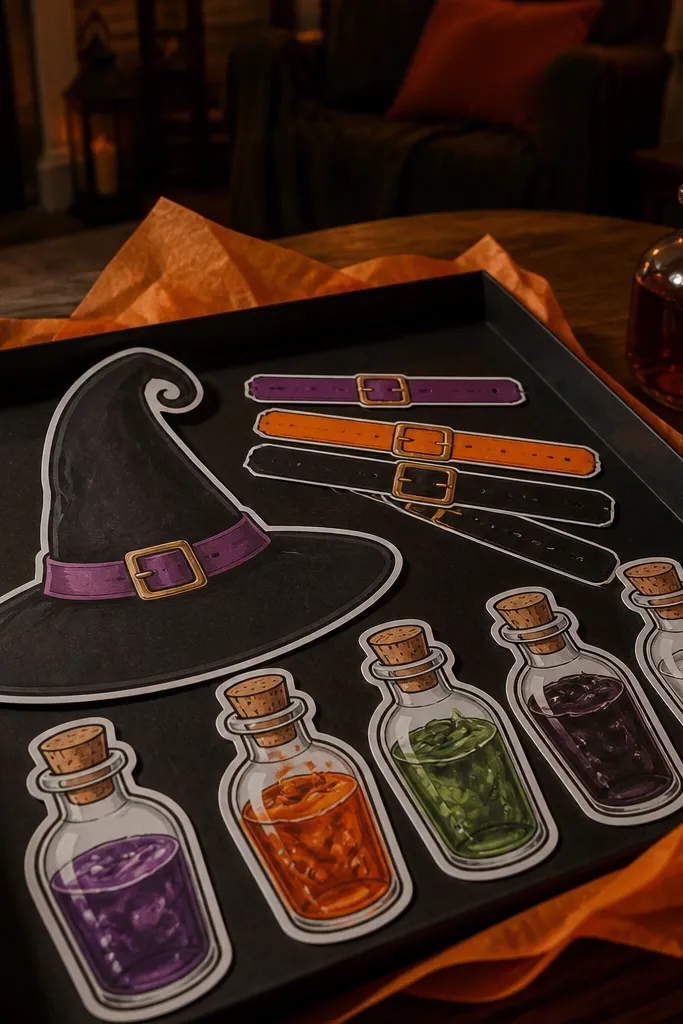
Print on cardstock and cut the potion bottle pieces separately so the bottle labels stay crisp. Color labels first, then assemble the bottle layers and attach to the hand tab area. Cut the witch hat and glue only the band and the brim so the hat doesn’t warp. Assemble the coat and stockings last so the accessories sit in the right order.
This template is worth saving because it’s not just costumes — it’s props. Potion bottles and hat bands give you those “wow” details that make the final page look like a scene. The outfit pieces are separated enough that you can mix the broom, bottle, and coat pieces without the doll looking messy. Lines are bold enough to stay readable, even if you use darker colors and want high contrast.
Skip thisDon’t overload the bottle with glitter — it makes labels illegible after cutting.
Editor's noteUse a black gel pen for label borders — it makes the bottle look like real glass.
15. Boho Ruffles and Headband Paper Doll
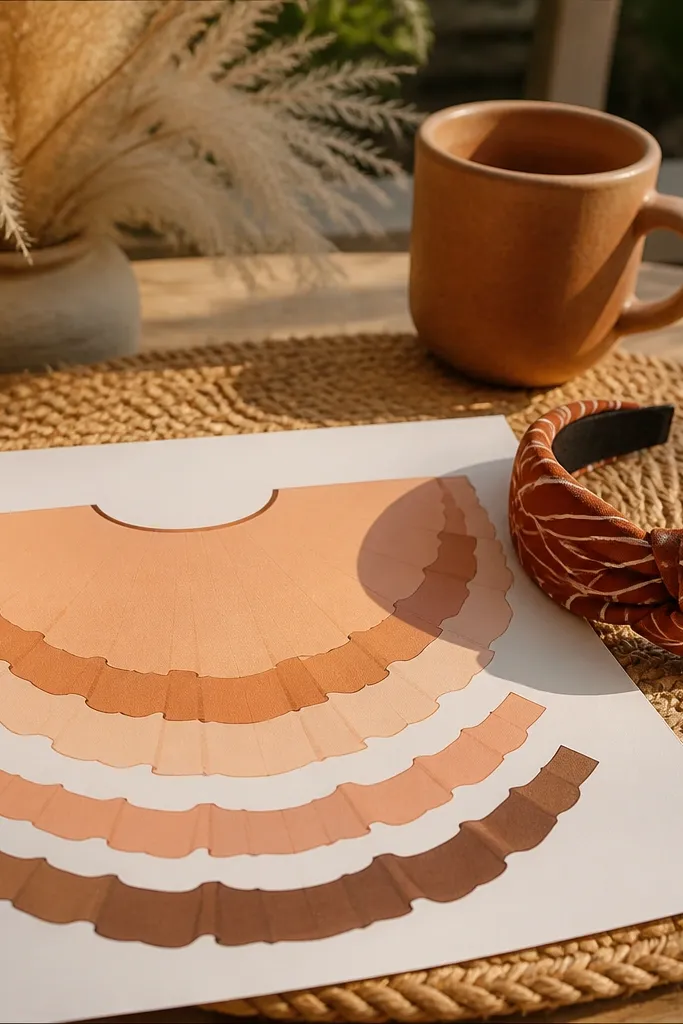
Ruffles look great on paper dolls because the silhouette creates motion even when everything is flat. This template gives you separate ruffle layers so you can color them in a gradient or keep them in contrasting tones. The headband piece is usually simple but bold, which keeps it from turning into tiny uncuttable shapes. It’s a strong choice for a cozy shelf display or a kids' craft that still looks adult when you’re done.
Print on 90-110 lb cardstock, then cut the headband and ruffles before the main dress. Color ruffles using colored pencil for softer shading, then assemble by gluing the inner ruffle at the waist tabs and the outer ruffle slightly offset. Attach the headband at the hair edge so it looks centered. Finish by smoothing the folded tabs with a bone folder for clean edges.
Fold ruffle tabs with a metal ruler for sharper creases.
Don’t glue ruffle layers flat end-to-end — offset them so you see the edge contrast.
16. Minimal Scandinavian Coat and Scarf
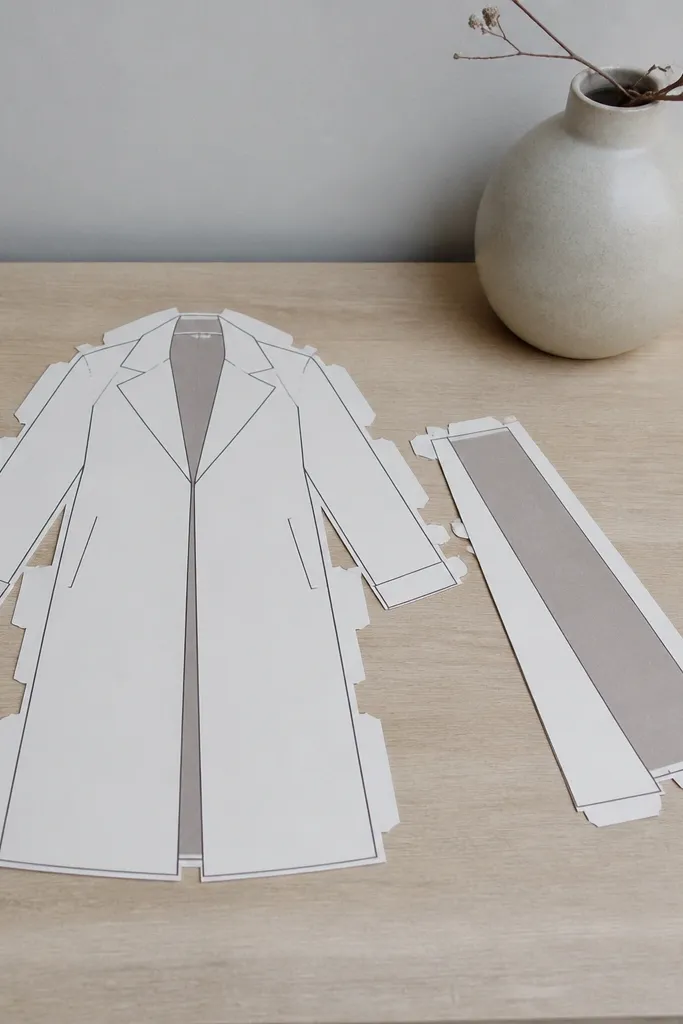
Print on cardstock and cut the coat as one main piece plus the belt and scarf pieces. Color the coat with a single medium tone, then add a slightly darker edge shade along the fold lines. Attach the belt at the waist tabs, then glue the scarf at the neck and one end at the side so it drapes. Keep the assembly glue thin so edges don’t bulge.
If you want something that looks expensive on a plain shelf, this is the template. The coat silhouette is long and clean, and the scarf piece adds a diagonal shape that looks good in photos. The style stays readable because the outfits don’t rely on tiny patterns. You can keep the palette to two tones and it still looks designed. This is the template I’d save for a calm, modern decor vibe.
Skip thisAvoid multi-color patterns — they break the minimalist look and blur when cut.
Editor's noteUse a kneaded eraser to lift pencil marks so the coat stays clean after test-fitting.
17. Anime-Inspired School Outfit with Accessories
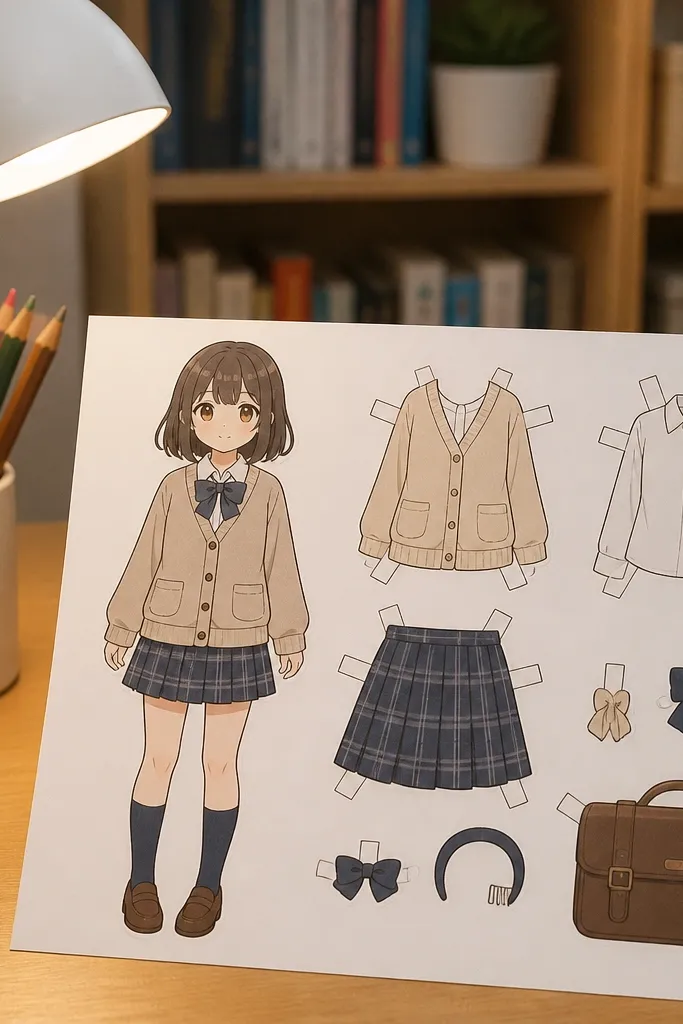
This template is photogenic because it includes hair accessories and small outfit details that read clearly even on paper. The cardigan and skirt shapes are layered so the doll looks dressed, not just outlined. It’s also a good pick if you like coloring — you get defined sections for highlights, shoes, and accessories. The overall look stays clean thanks to thick outlines and consistent facial features.
Print on cardstock, then cut hair accessories first so they don’t get lost. Color hair and face areas with colored pencils to keep the shading controlled. Assemble the torso layers by placing the cardigan over the shirt, then attach the skirt at the waist tabs. Add shoes and accessories last so everything lines up around the legs and head.
Use a gel pen for tiny accessory accents like bows or straps so they pop.
Don’t cut too close to the outline — a tiny border keeps faces and hair crisp.
18. Fairytale Red Riding Hood Outfit
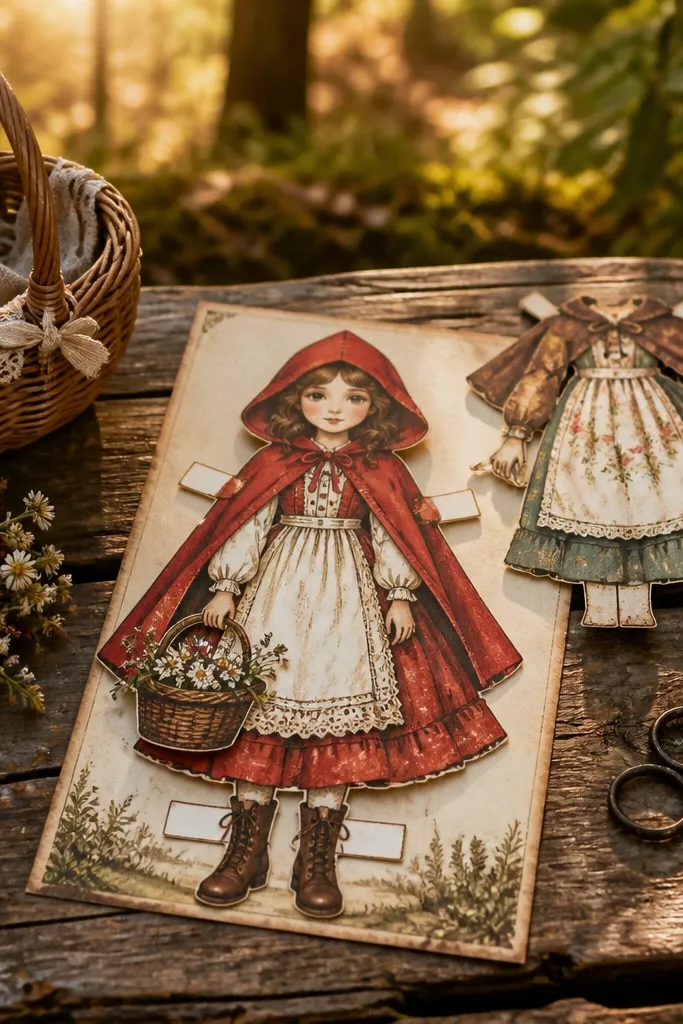
Print on cardstock and cut the basket pieces first since they often have multiple layers. Color the cloak and apron, then assemble the cloak around the shoulders tabs. Attach the apron at the waist and the basket at the hand placement marks. If the template includes a hood, glue only the edges so it still looks like a wrap.
Fairytale templates look best when they include a signature prop, and this one does. The cloak and apron pieces create a layered silhouette that reads clearly, while the basket adds a “scene” feel. The cloak edges are usually drawn with enough spacing that you can color them with soft gradients without losing the outline. It’s a strong choice for a story-time craft because it feels like a character, not just an outfit.
Skip thisAvoid thick glue on the cloak edge — it makes the wrap look stiff.
Editor's noteShade cloak folds with two pencil values — midtone and dark edge — for instant depth.
19. Beach Bungalow Summer Dress Set
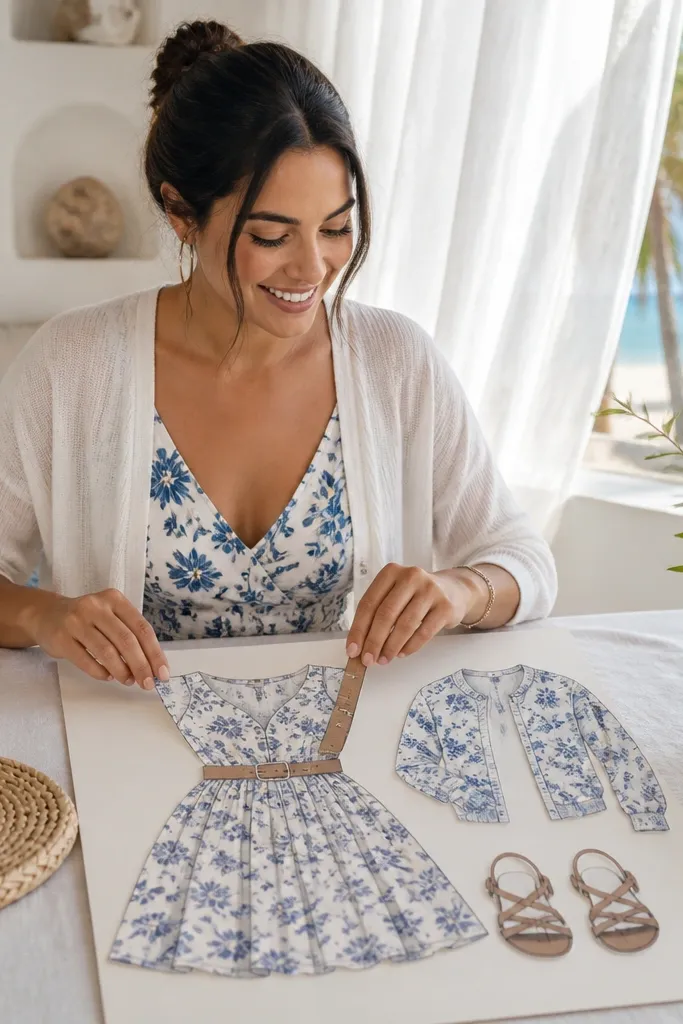
This template is a clean, sunny aesthetic with outfit pieces that swap without breaking the silhouette. The dress usually has a belt layer, which instantly makes the outfit look finished even when you only swap one piece. The cardigan or cover layer gives you a second look without needing new shoes. It’s perfect for a small craft station because you can build multiple outfits quickly and they still look coordinated.
Print on cardstock and cut the belt layer and skirt layer separately. Color the base dress first, then attach the belt at the waist tabs so the shape stays centered. Add the cardigan or cover piece on top using the provided overlap guides. Finish by attaching one shoe style at a time so you can keep your pieces organized.
Keep a small labeled envelope for each outfit so tabs don’t mix across prints.
Don’t glue the belt across the whole waist — glue the tab edges only.
20. Steampunk Gears and Leather Outfit Doll
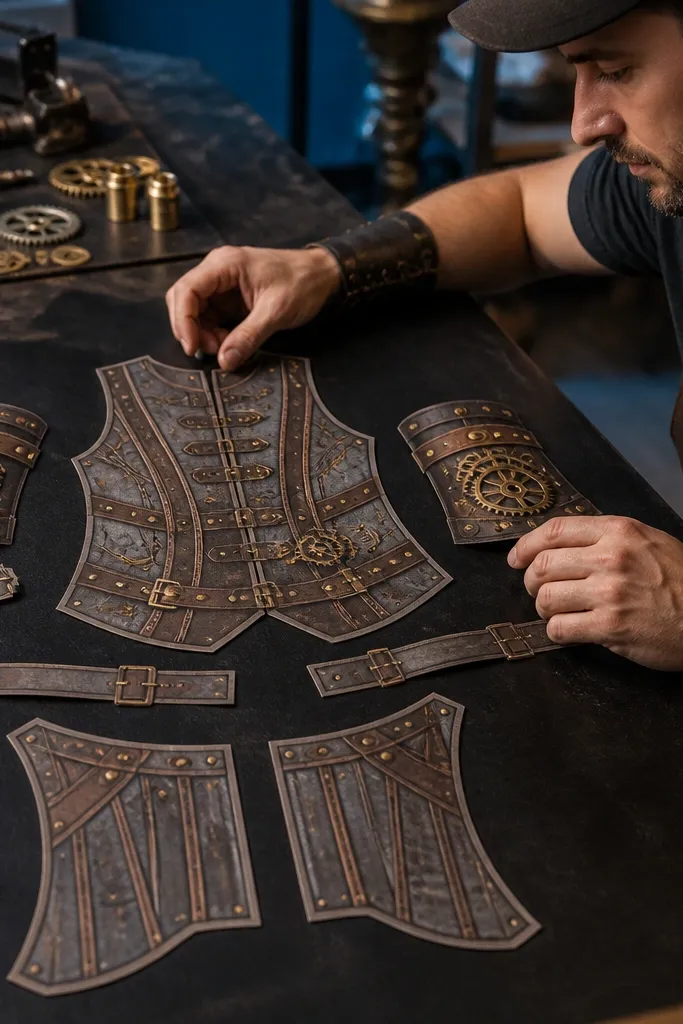
Print on cardstock and cut all gear pieces first so you can see how many layers you have. Color straps and vest panels with colored pencils, then add metallic accents with a silver gel pen. Assemble the vest over the doll torso, attach cuffs at the arm tabs, then add boots last so the outfit doesn’t sag while you work. Use a paper fastener only if the template marks joint circles for movement.
Steampunk looks great on paper dolls because it’s all shapes and line work — gears, straps, and layered vests. This template usually includes accessory pieces like gear cuffs or a collar that frame the face. The vest is typically drawn with panel lines so it colors cleanly and reads as textured even without real fabric. It’s a fun choice for a darker color palette that still looks sharp and deliberate.
Skip thisSkip heavy metallic ink on large areas — it can look streaky on paper.
Editor's noteUse a fine brush with diluted brown paint for strap shading so lines don’t look flat.
21. Holiday Party Dress with Bow and Wrap
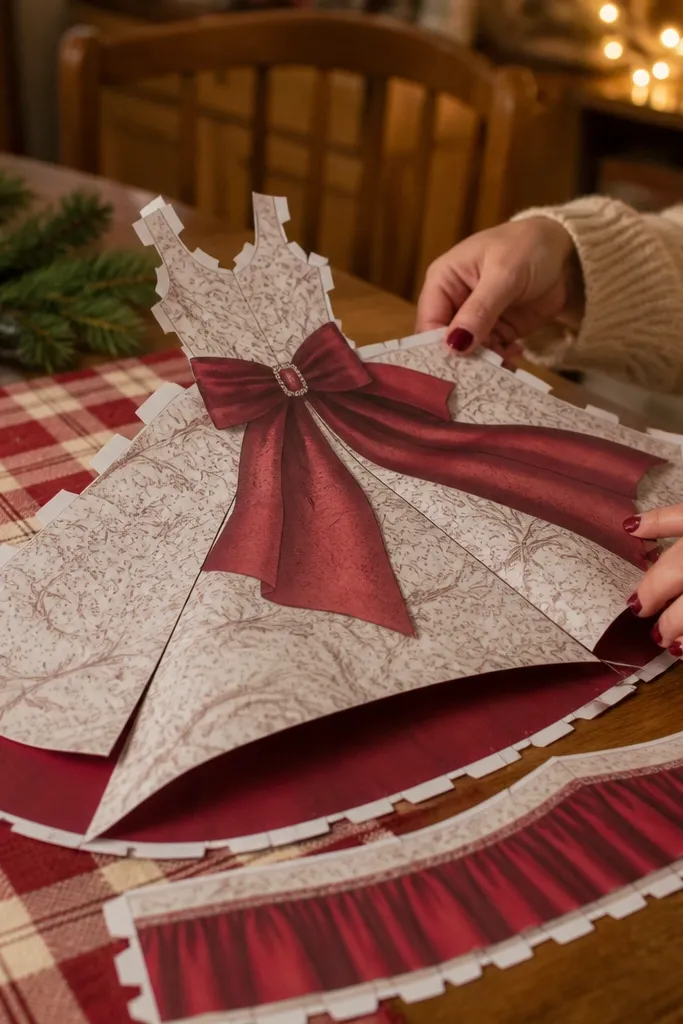
Print on cardstock and cut the bow and wrap pieces carefully. Color the dress base first, then add a darker edge shade along the wrap fold lines. Glue the wrap at the shoulder and one side tab, then attach the bow at the center chest area. Finish by attaching skirt layers from top to bottom so the edges stack cleanly.
This template is built for festive styling because it includes a wrap or cape layer and a bold bow detail. The bow piece creates a focal point that looks good even if your photo background is messy. The skirt layers are usually drawn in a way that keeps the silhouette full, so the doll doesn’t look skinny or unfinished. It’s a good pick for seasonal crafts when you want a finished look fast.
Skip thisDon’t glue the bow edges too thick — it squashes the shape.
Editor's noteUse a tiny triangle of foam tape under the bow center if you want it to look lifted.
22. Sports Team Jersey and Cheer Outfit Doll
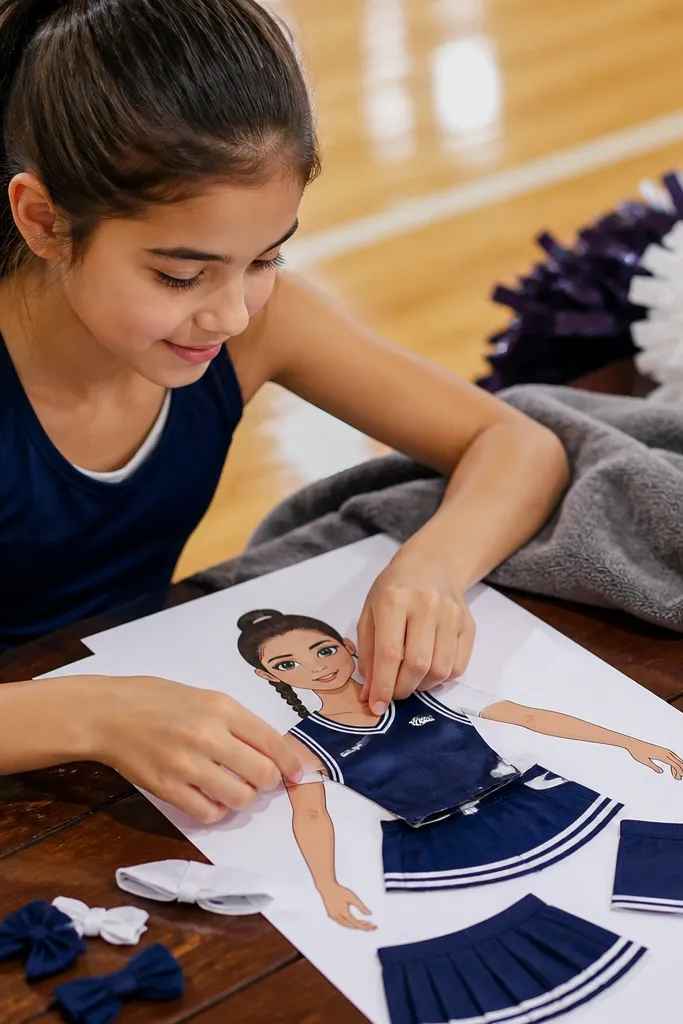
Print on cardstock, then cut the jersey and accessory pieces. Color the jersey with two tones: base and stripe, and add a simple number using a fine marker. Assemble by attaching the jersey at the waist tabs, then add the skirt/shorts layer. Attach pom-poms to the hand placement marks and keep glue only at the back tabs.
Sports templates look great because they’re high-contrast and easy to personalize. This doll set usually includes a jersey top plus a skirt or shorts layer and separate accessories like pom-poms or a headband. The pieces are designed to layer without hiding the face, so the outfit stays readable. If you’re making a gift for a kid or a team-themed decor moment, you can color the jersey in team colors quickly and it still looks neat.
Skip thisDon’t use too many colors — the jersey looks cleaner with one stripe and one accent.
Editor's noteUse a ruler to draw jersey stripes straight before coloring the rest.
23. Cat-Themed Pajama Doll with Blanket
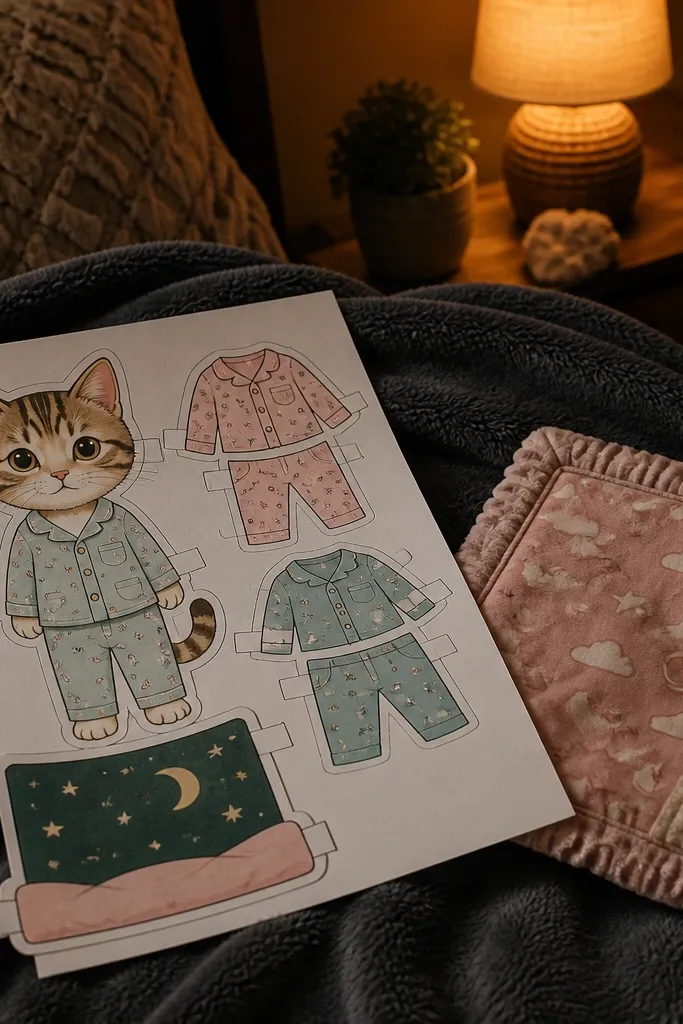
Print on 80-100 lb cardstock and cut the blanket and pajama top pieces first. Color the blanket in a simple pattern with colored pencil, then attach the pajama top to the doll torso. Place the blanket behind or around the doll using the overlap guides so it frames the body. Add cat accessories last and glue only at the tabs to prevent warping.
This is a cute template that still looks aesthetic. Pajamas are already a soft silhouette, and adding a blanket prop makes the final layout feel cozy instead of random. The cat details are usually drawn as clean shapes, so they stay cute after coloring and cutting. It’s also ideal for kid-friendly crafts because you can keep it simple: warm colors for the blanket, one accent color for the cat details.
Skip thisAvoid heavy cutting into the blanket outline — keep a small border for strength.
Editor's noteStencil paw shapes with a tiny sponge and light paint for clean edges.
24. Monogram Bridal Robe and Veil Doll
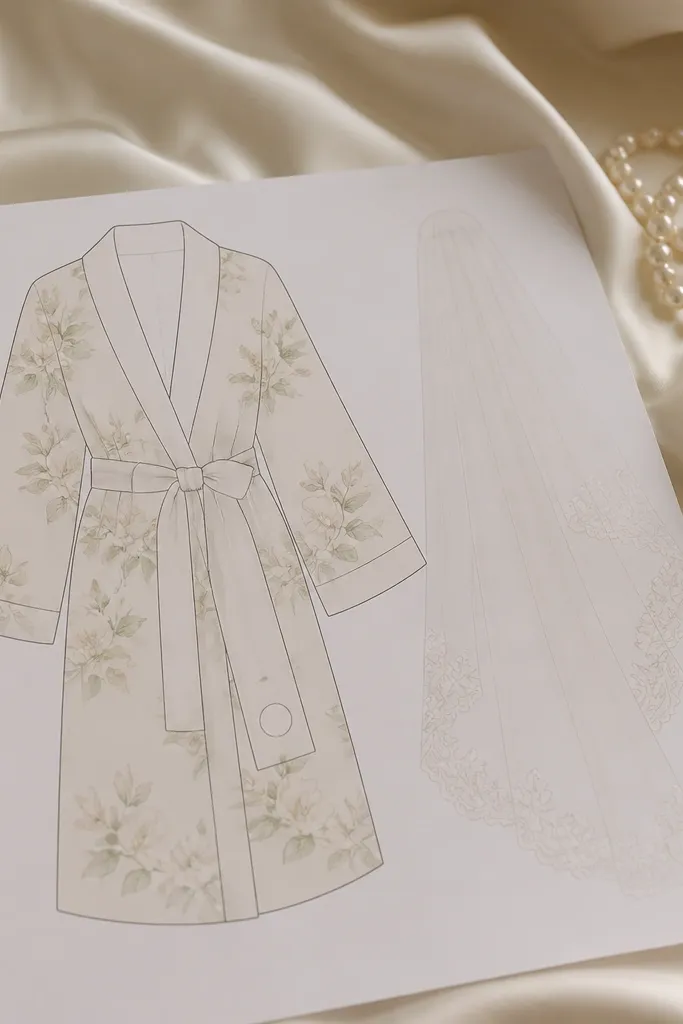
Print on cardstock and cut the veil piece first. Color the robe and sash, then attach the sash at the waist tabs with thin glue. Add the veil over the hair area and glue only at the edges so it drapes. If the template includes separate veil layers, attach the top layer slightly offset for depth.
If you want elegant-looking paper without tiny details, this template is a smart save. The robe silhouette is usually simple with a sash, and the veil piece frames the face with a soft outline. You can add a monogram by writing a single letter on the sash or robe panel, which makes it feel personal without clutter. It’s also great for wedding stationery craft projects because the look stays clean and photo-friendly.
Skip thisDon’t write monograms too small — keep the letter big enough to read from a couple feet away.
Editor's noteUse a fine pencil to lightly sketch the monogram placement before ink.
25. Rainy Day Umbrella and Trench Doll
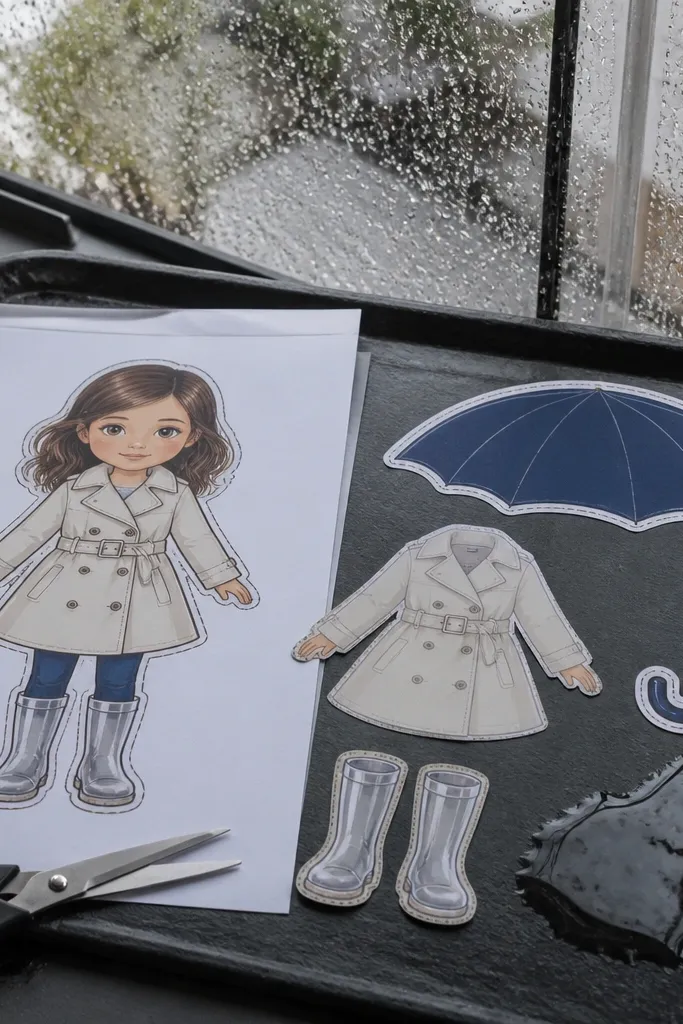
Print on cardstock and cut the umbrella canopy and handle pieces separately. Color the trench coat first, then attach the coat to the torso tabs. Glue the umbrella handle into the hand placement mark and attach the canopy so it sits slightly above the head. Finish by adding boots and any rain accessory pieces, keeping glue limited to tabs.
Rainy day outfits look charming because the umbrella gives a strong shape and the trench coat creates a layered silhouette. This template usually includes a coat layer and separate umbrella parts so you can color the umbrella pattern without smudging the rest of the outfit. The boot pieces are drawn with clear soles, which helps the doll look grounded on a shelf. It’s a fun decor template for desks, entryways, and seasonal craft boxes.
Skip thisDon’t attach the umbrella too low — it blocks the face and makes the outfit look crowded.
Editor's noteAdd tiny raindrop dots around the umbrella in light blue pencil for a subtle scene effect.
26. Underwater Mermaid Tail and Shell Accessories
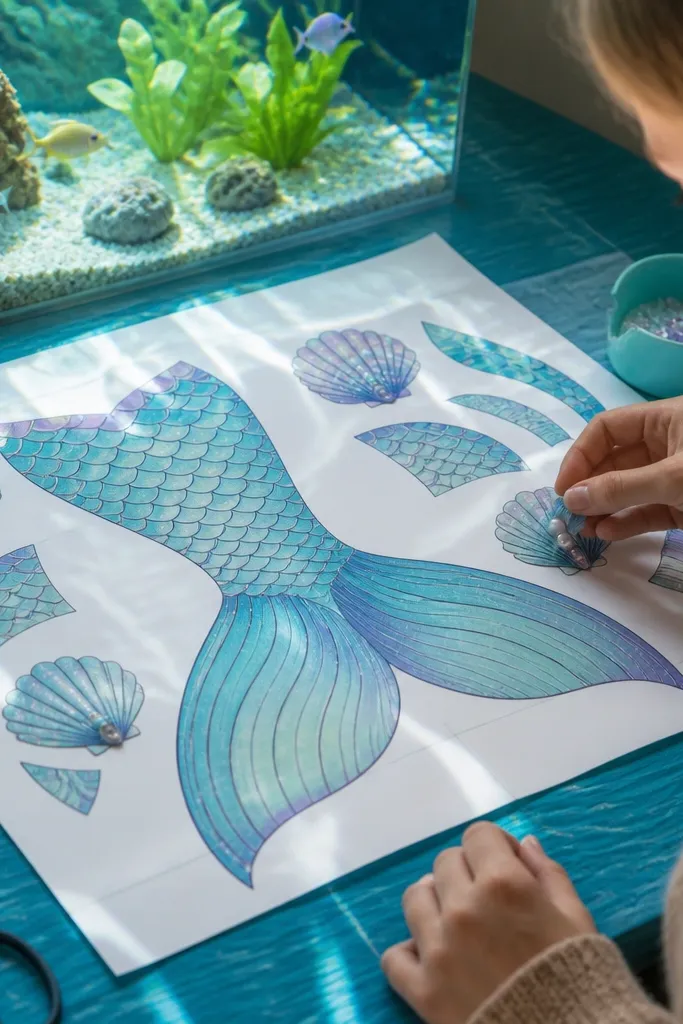
Mermaid templates are made for color play. This set typically has a tail with panel lines plus shell-like accessories that frame the body. The tail layers make the silhouette look curved and alive, even though it’s paper. Shell pieces add detail without needing micro-patterns, so you get a polished look quickly. If you want something that reads clearly in photos with bright backgrounds, this is a strong pick.
Print on cardstock and cut the tail layers first. Color the tail with a gradient approach: base color, then darker at the edges and lighter at the center. Attach the tail layers over the doll legs area using the provided tabs, then assemble the top shell piece at the torso. Add small shell accessories last, using glue dots on tabs so they don’t sag.
Use a ruler to keep fin edge highlights straight so the tail looks intentional.
Avoid thin glue on the tail — it seeps and can warp the edges.
27. Coat Rack Ensemble Doll with Multiple Outerwear
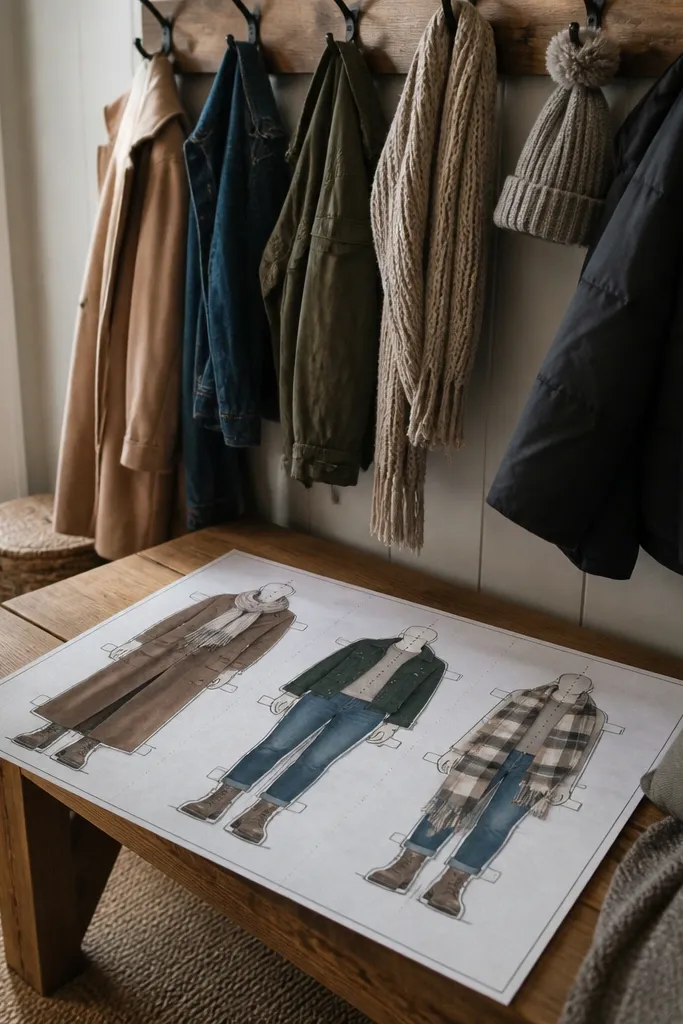
Print the doll page once and the outerwear pages as needed. Cut the base doll and keep it as your anchor piece. For each outerwear option, align the shoulders and waist tabs first, then glue or fasten only the tab edges. Store finished outfits in separate labeled bags so you can mix again later.
This template is designed for swapping. It usually includes multiple outerwear options — long coat, cropped jacket, and a scarf wrap — all with consistent alignment points. That means you can build a new look in minutes without guessing where pieces go. The visual payoff is that the doll always looks “put together” because every option covers the torso and frames the face. It’s a great choice for people who want variety but don’t want complicated assembly.
Skip thisDon’t mix glue and fasteners on the same overlap — it makes the piece sit at the wrong height.
Editor's noteUse the same cardstock thickness for every print so tabs and overlaps stay consistent.
28. Vintage Library Cardigan and Glasses Doll
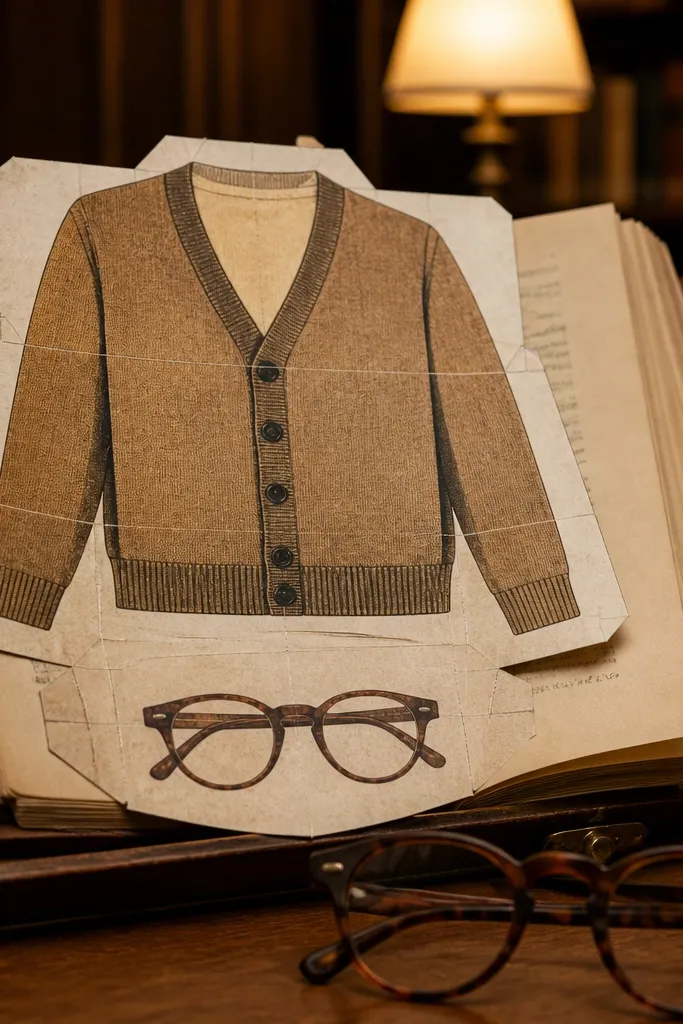
Print on cardstock and cut the glasses and buttons first. Color the cardigan in a muted tone, then darken fold lines with colored pencil for dimension. Attach glasses at the face placement guide, then glue the cardigan over the torso tabs. Finish by adding the scarf at the neck tabs and smoothing the folds with a bone folder.
This template gives you an intellectual, cozy look with minimal clutter. The cardigan silhouette has defined buttons and fold lines, and the glasses piece adds personality without being too tiny to cut. The scarf or collar accessory frames the face and makes the doll look styled even with a single outfit. It’s ideal for a book-themed display because the whole set looks tidy and readable from a distance.
Skip thisAvoid cutting glasses too close — leave a small border so the frame stays strong.
Editor's noteUse a clear gel pen for tiny highlight lines on glasses frames so they look glossy.
29. Cottage Kitchen Apron and Baking Tools Doll
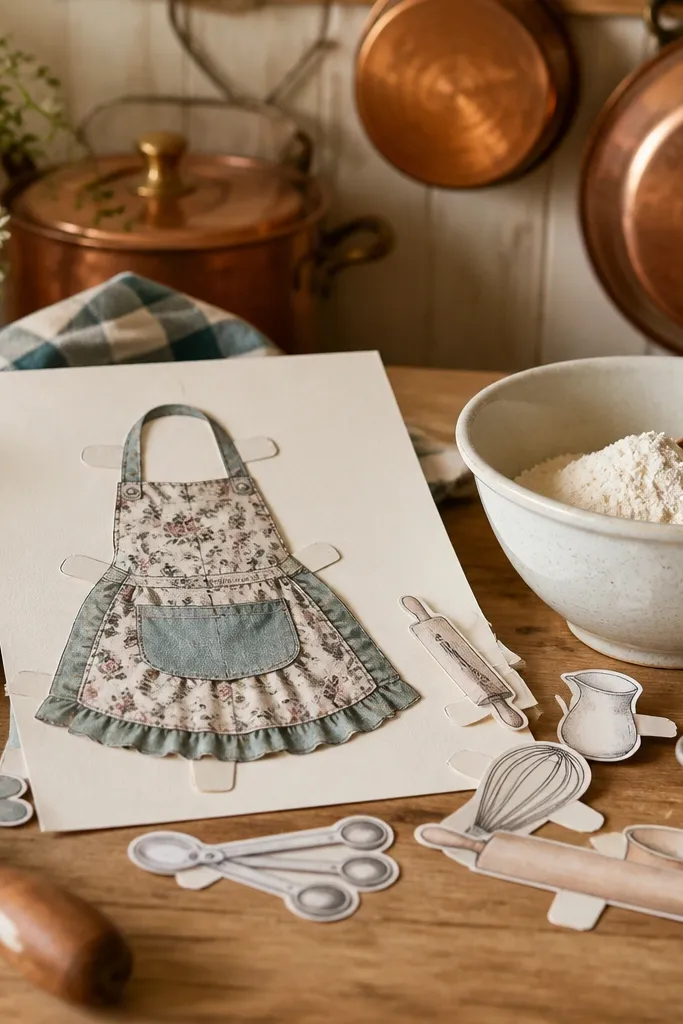
Print on cardstock and cut the apron and tool pieces separately. Assemble the apron pockets and straps first, then attach the apron to the doll torso. Color the rolling pin and cupcake pieces, then glue them at the hand placement marks. Add any head accessory last so the face stays clear and centered in photos.
This one looks like a craft shelf character. The apron has pockets or straps that create a nice visual structure, and the baking tools give you that “scene” feeling. The tools pieces are usually simple enough to color without losing detail, so you get a cute look quickly. It’s also a strong choice for seasonal decor because you can color the cupcake or utensil accents to match holidays.
Skip thisDon’t glue tools directly on the front — glue at the back tabs for clean edges.
Editor's noteUse a thin black marker to outline tool edges after coloring so they look crisp.
30. Festival Outfit with Flower Crown and Layered Skirt
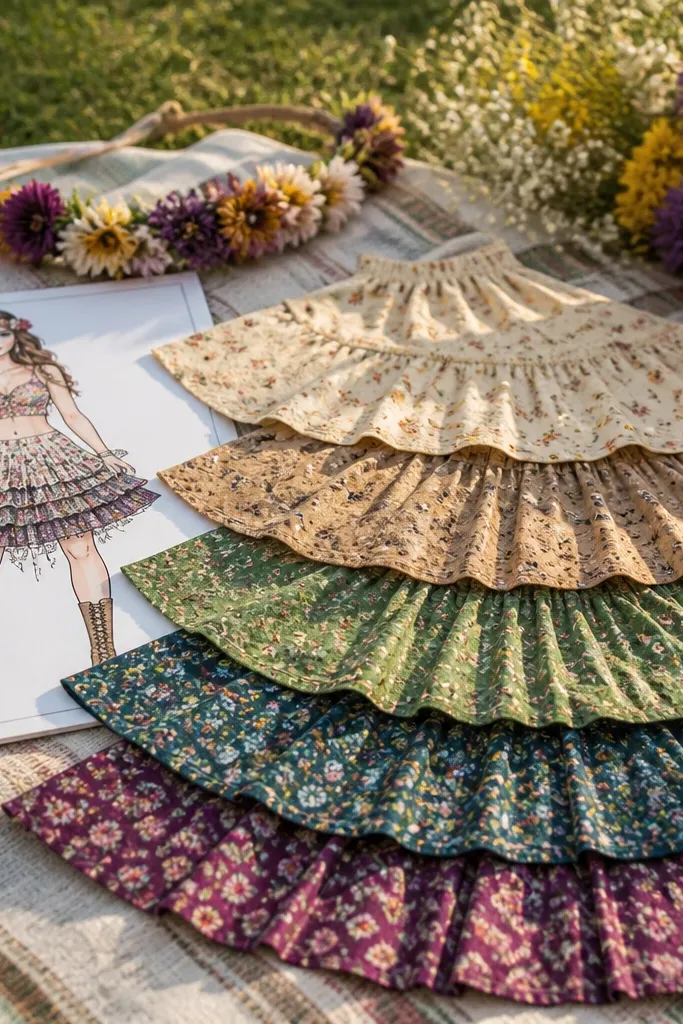
Print on cardstock and cut the flower crown segments carefully. Color the crown first, then assemble it around the hair placement guide. Attach the belt at the waist tabs, then glue the skirt layers from top to bottom so edges show. Add any extra accessories like wristbands last, using tiny glue dots only on tabs.
Festival templates are photogenic because they combine a bold headpiece with a layered body. This set includes a flower crown and a skirt that stacks into visible layers, which makes the doll look full and lively. The pieces are separated so you can swap the belt or skirt for different looks without rebuilding the whole doll. It’s a great choice for bright decor — the crown is the focal point and the skirt carries the color.
Skip thisSkip over-coloring the skirt with too many patterns — keep it to one main pattern and one accent.
Editor's noteColor flower crown petals with two shades — one for base and one for edges — to keep them readable.



