
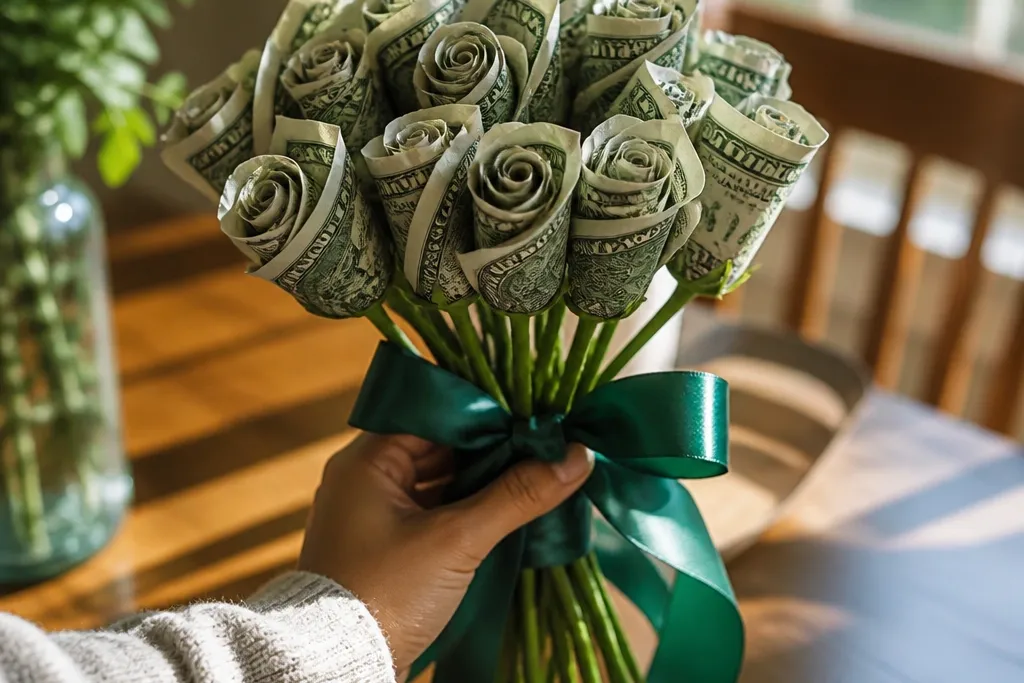
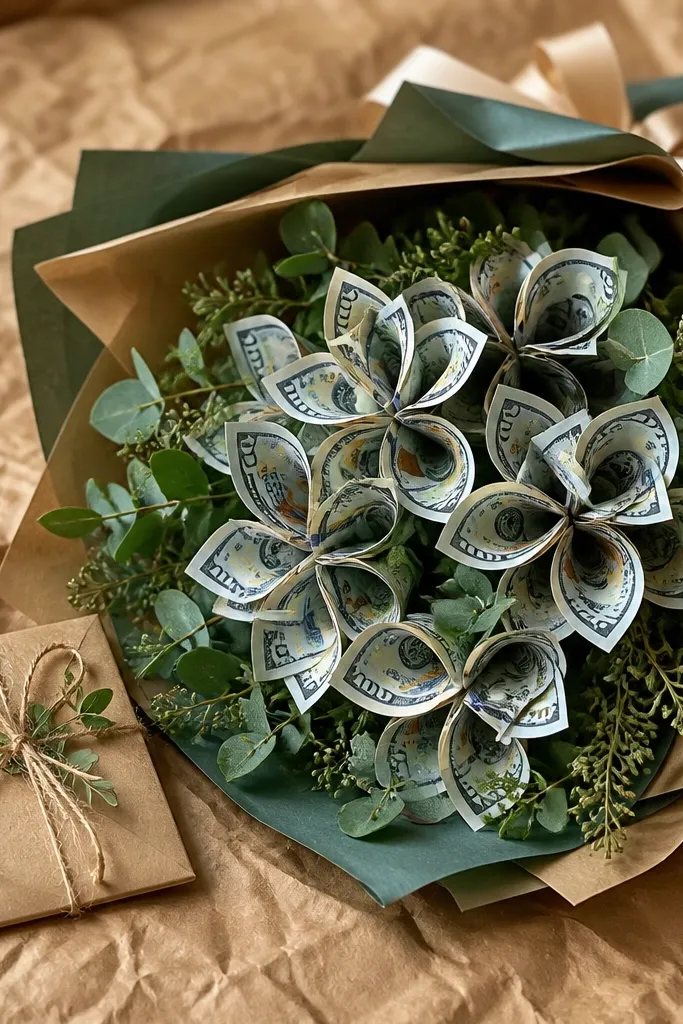
1. Rose Buds With Rolled Bill Centers
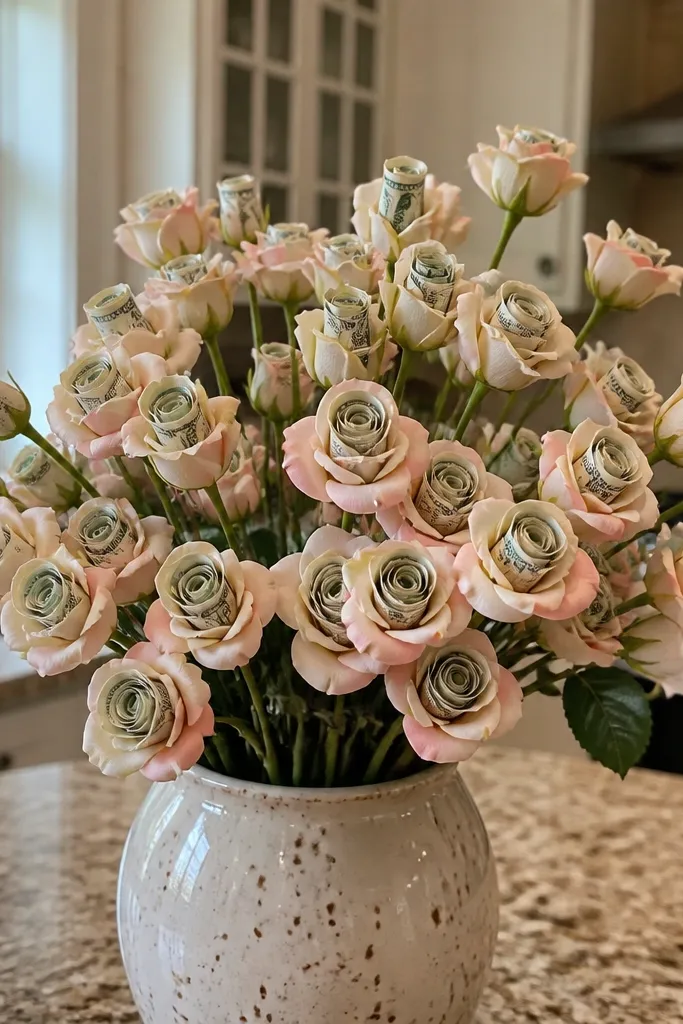
This one looks like a bouquet of real mini roses because the bill is treated like the rose center, not the whole flower. You roll each bill into a tight cylinder, then wrap paper “petals” around it so the money reads as an inner texture. The key is layering: start with 4-5 small petals, then add a second ring to create the bud shape. It’s neat from every angle, and it photographs well because the rose tops stay tight instead of opening like envelopes.
Cut a small circle of cardstock for each rose center (about 2.5 cm wide) and glue the rolled bill cylinder into the center. Wrap 6-8 petal pieces from tissue or thin craft paper around the cylinder, overlapping like a rose bud. Insert a floral pick or skewer into the bottom of the cardstock center, then tape the join with green floral tape. Build the bouquet on a foam block in a small vase or handled basket, trimming stems so the tops sit on one curved line.
Use floral tape to cover every paper-to-stem seam so you don’t see gaps in photos.
Don’t skip the center — wrapping money flat straight onto petals makes it look like stuck cash.
2. Dollar Lily Bouquet With Vertical Bill Strips
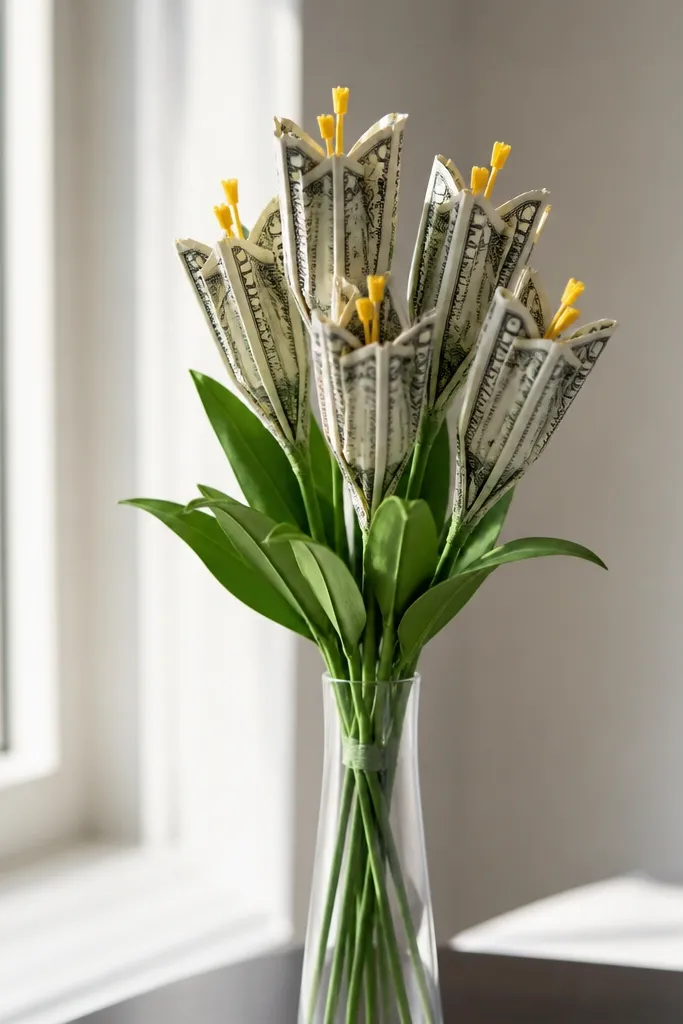
Lilies look expensive because their shape is long and clean. This idea uses money like lily “petals” by folding bills into narrow strips and keeping them vertical, so the bouquet reads as flowers first. Add a simple yellow paper “anther” at the tip and you get instant realism. The vertical layout also hides imperfections: even if a bill edge is a little uneven, it blends into the petal strip rhythm.
Cut bill strips by folding each bill into thirds lengthwise, then press hard so it stays crisp. Make a lily head by bundling 6 strips together at the top using hot glue and a small circle of cardstock. Add a tiny anther: cut a small rectangle of yellow craft paper, roll it, and glue it into the center. Attach each lily head to a stem (thin dowel or floral wire), wrap the stem with green tape, then arrange in a foam block with stems angled slightly outward.
Pre-crease folds with a ruler so the strips look sharp instead of wavy.
Don’t make the strips too wide — wide bills look bulky and kill the lily silhouette.
3. Peony Ruffles Using Bill-Edge Petals
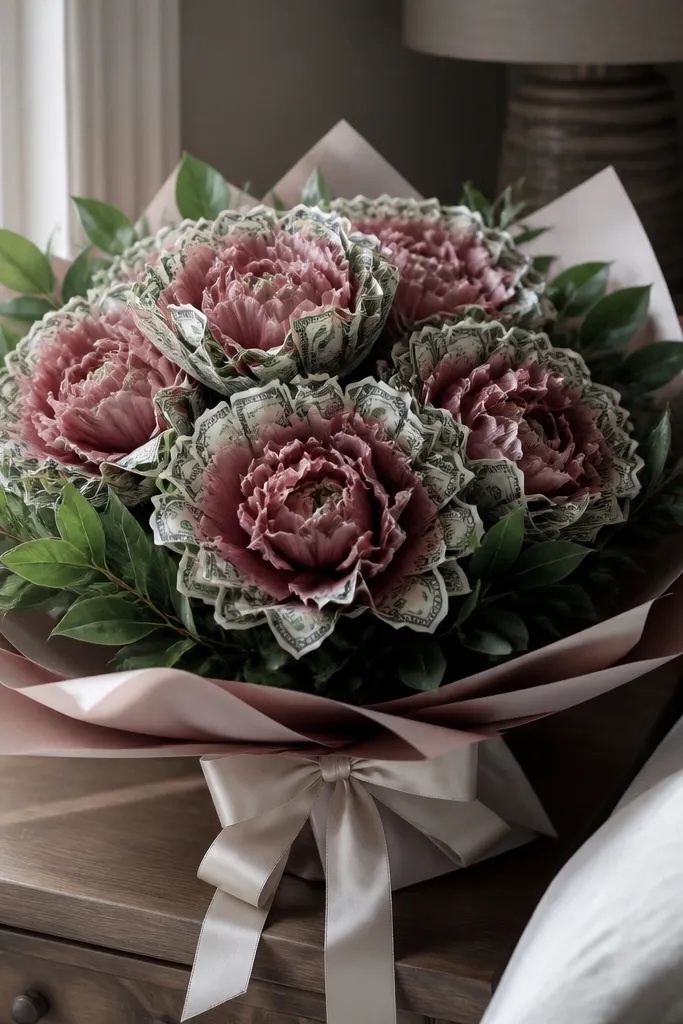
Peonies are all about volume, and this build gives you volume without bulk. Bills become a ruffled petal edge, so you get movement and texture while keeping the center tidy. The result looks lush in photos because the outer layers are layered like fabric. You’ll also love how forgiving it is: even if the bill folds aren’t perfect, the ruffle hides the seams.
Editor's noteUse thin tissue for the top layers; it drapes and makes the ruffle look soft in photos.
Cut petal shapes from tissue or craft paper in 3 sizes (small, medium, large). For the bill edge, glue a thin strip of money along the bottom of each petal piece, then fold the petal so the money edge shows like a hem. Layer petals from smallest to largest around a foam ball center (about 3 cm), gluing each ring. Build 5-7 peonies, then place them in a foam block so the heads overlap slightly for a dense look.
Skip thisDon’t glue money across the whole petal — only the edge should show or it looks like a wallet.
4. Sunflower With Rolled Bill Seeds Center
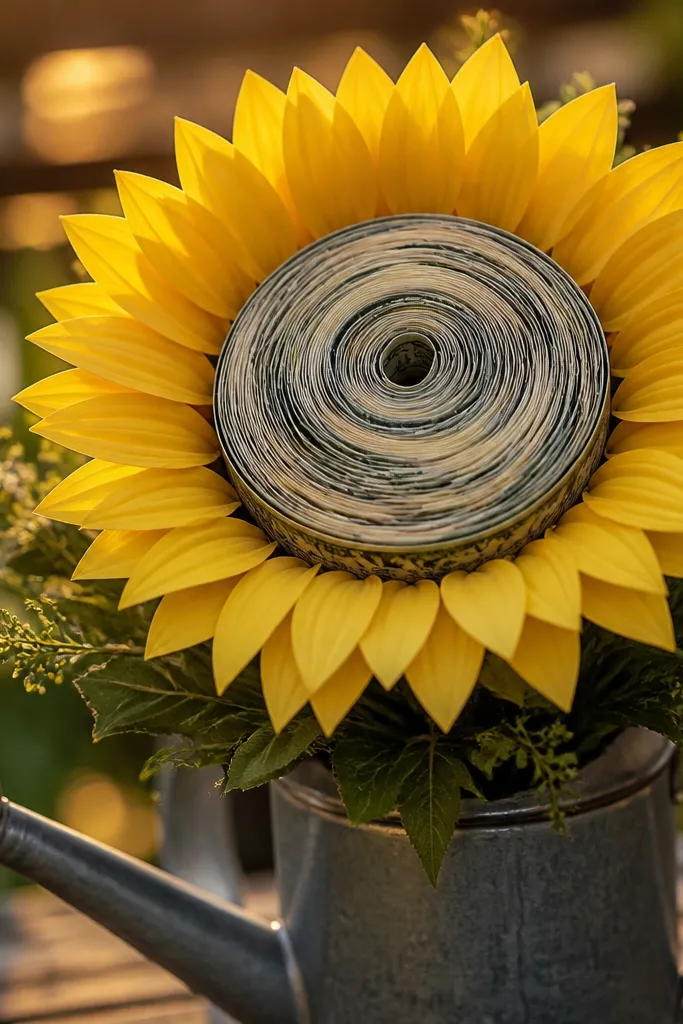
Sunflowers are bold, and they’re perfect for money because the center is naturally a “seed” zone. This idea uses a rolled bill coil for the center, then builds the sunflower rays from yellow paper petals. The center becomes the money focal point, and the petals keep the overall shape graphic and easy to photograph. It also works great in a small bouquet because the head reads big.
Editor's noteCurl the petal tips with the edge of scissors so they look lifted, not flat.
Roll a bill into a tight spiral (coil diameter about 2.5-3 cm) and glue it onto a cardboard circle. Add sunflower rays by cutting 12-16 yellow petal strips, each with a small bend for a curled tip. Glue petals around the circle in a tight ring, then add a second ring if you want extra fullness. Mount the head on a stem and wrap the stem with tape, then arrange in a short container with greenery tucked behind.
Skip thisDon’t use too few rays — a sunflower with 6-8 petals looks like a daisy.
5. Baby's Breath Style Mini Cash Blooms
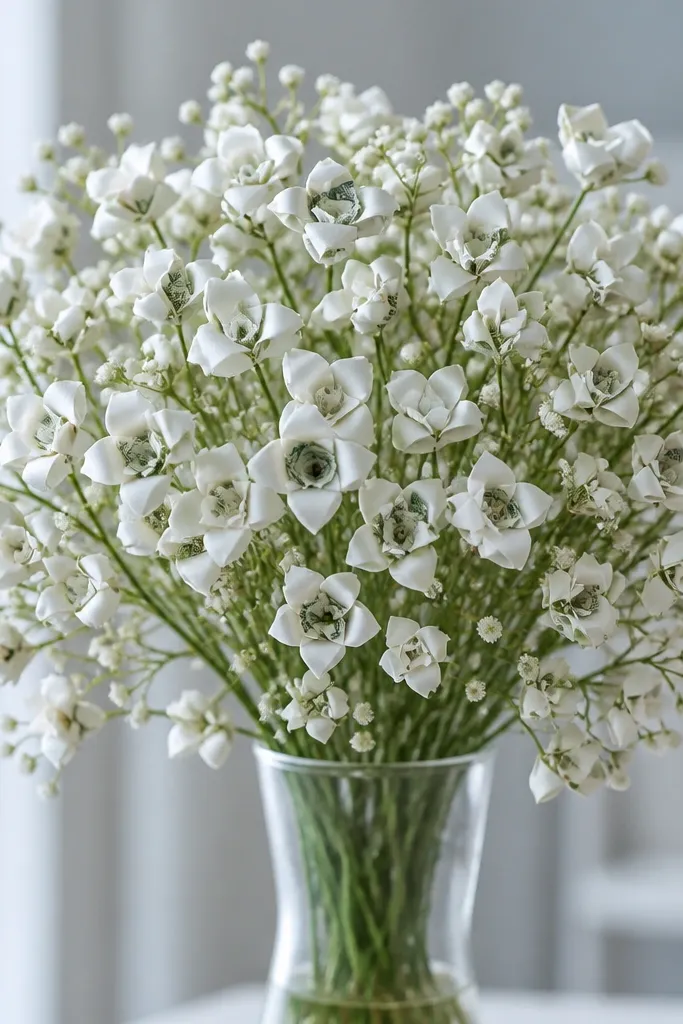
If you want a bouquet that looks airy but still money-forward, make tiny clustered blooms. These mini flowers hide the money inside small petal wraps, so the bouquet looks like a real “filler” flower arrangement. The aesthetic is clean: lots of small white shapes with occasional money texture peeking through. It also photographs well because the clusters create depth instead of flat cash panels.
Cut small petal circles from white tissue or thin paper (about 4 cm each). Roll a corner of each bill into a tiny cone, glue it onto the center of a petal circle, and fold 3-4 petals around it to form a mini bud. Attach to floral wire stems and tape them green. Bundle 10-14 stems per cluster, then place the clusters into a foam block so they form a soft dome.
Match tissue thickness across all petals — mixed thickness makes the mini blooms look messy.
Don’t let stems show through — add extra white filler stems to cover foam gaps.
6. Calla Lily With Money Tube Stem Wrap
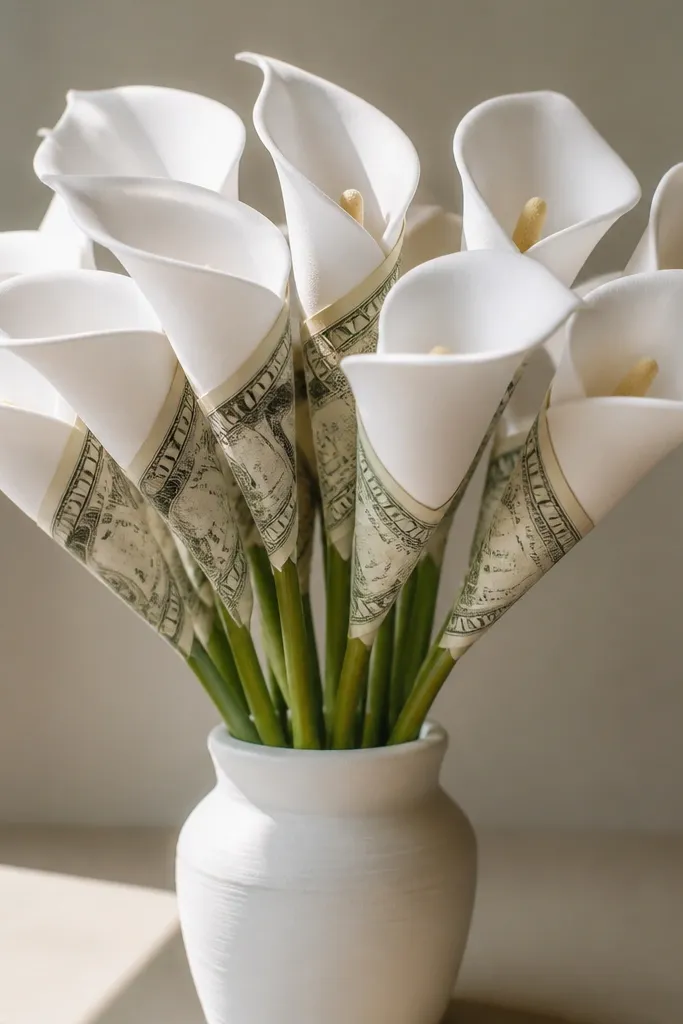
Calla lilies have a smooth, elegant shape, and the money works best as a wrapped detail rather than a whole bill flower. This build wraps money around the base of the calla tube so it looks like a decorative band. The lily head stays clean and minimalist, which makes the money pop without looking chaotic. It’s also a great choice if you want a smaller bouquet that still looks high-end.
Form a calla tube by rolling cream cardstock into a cone shape, then glue the seam and cut a small slit at the top for a natural fold. Wrap a bill strip around the base (about 1 cm wide overlap), then glue it and cover with a thin strip of clear tape or satin ribbon. Insert the tube onto a stem (wire or dowel) and wrap the stem with green tape. Arrange 6-9 lilies in a narrow vase or cylinder with foam inside.
Use satin ribbon over the money band for a smoother shine in photos.
Don’t wrap the bill too high — money above the base makes the lily look like a gift bag.
7. Cabbage Rose With Accordion-Wrapped Bills
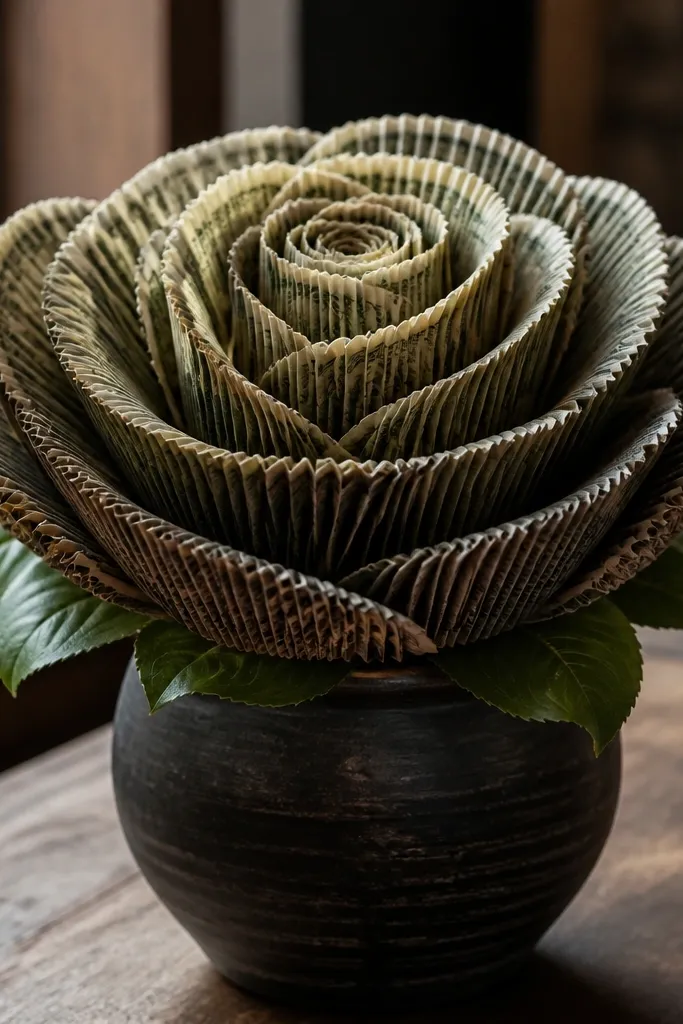
Cabbage roses look dense and sculptural. Accordion-folded bills create repeated texture that resembles layered petals, so the flower reads full even with fewer layers. The look is striking because the money texture forms a pattern, not random folds. This is a strong option for a dramatic bouquet where you want the money to be the star but still shaped like flowers.
Accordion-fold a bill lengthwise until it looks like a tight fan, then glue the fan into a teardrop petal shape on cardstock. Make 8-12 petal fans, stacking them around a foam ball center starting with smallest at the top. Glue each layer so the folds face outward for texture. Once the head is built, attach to a stem and cover seams with green tape, then arrange in a foam block with heads slightly tilted for a natural curve.
Press the accordion folds with a ruler before gluing so the fan edges stay crisp.
Don’t use thick foam petals — they hide the accordion texture and flatten the rose.
8. Ranunculus With Paper Petal Panels Over Money
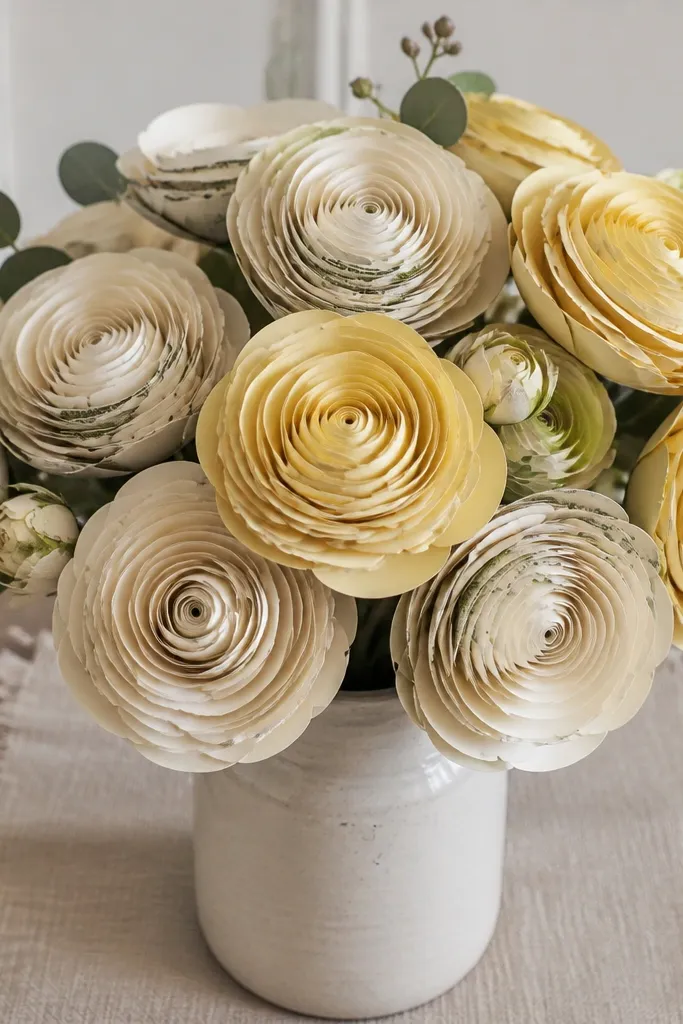
This build gives you a balanced look: money is inside the petals, but the outside reads like a flower. Ranunculus petals are tight and layered, and paper panels mimic that shape well. You’ll get clean photogenic edges because the bill is concealed behind multiple thin layers. Great for people who want the money visible only at the center, not plastered across the petals.
Editor's noteCurl petals with a pencil so the inner edges catch light and look dimensional.
Cut 3 sizes of petal panels from colored craft paper (small, medium, large) and curl each petal slightly. Create a center by folding one bill into a tight square and gluing it to a foam dot. Layer petals around the center, gluing only the base of each panel so the top stays open and dimensional. Mount the head on a stem, then assemble 7-10 ranunculus into a foam block with a few greenery sprigs for contrast.
Skip thisDon’t glue petals all the way to the center — that flattens the flower and kills the look.
9. Mini Orchid With Money Envelope Center
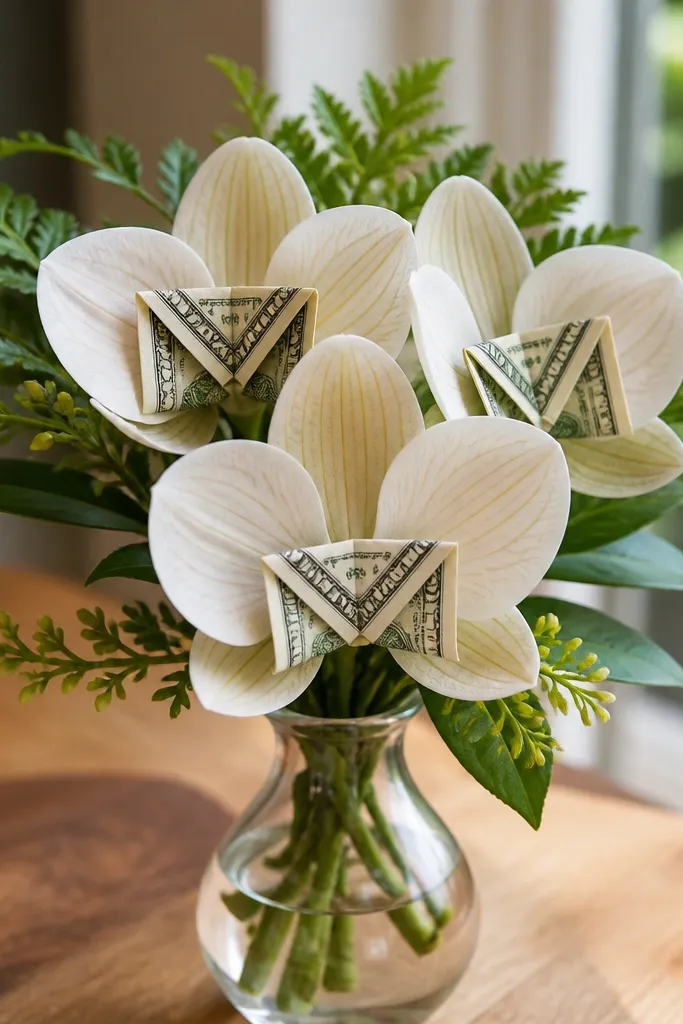
Orchids have a distinct center, and a little money “envelope” makes that feature pop. The outside petals are smooth and simple, so the bouquet looks refined while the money stays concentrated in the focal point. This is the right choice if you want a bouquet that looks neat up close and not like a pile of cash flowers from far away. The center also gives you a clean place to add a tiny decorative dot.
Editor's noteUse pastel cardstock for petals; it makes the money center look intentional instead of harsh.
Cut 5 petal shapes from white or pastel cardstock, with slightly pointed ends for orchid drama. For the center, fold a bill into a small envelope rectangle and glue it to a cardstock base. Add a small tongue piece in a contrasting color (pink or gold paper) at the front of the envelope. Assemble petals around the center, then attach to stems and tape with green floral tape before placing in a foam block.
Skip thisDon’t use tissue for orchid petals — tissue wrinkling makes the shape look sloppy.
10. Hydrangea Cluster With Bill-Confetti Flower Heads
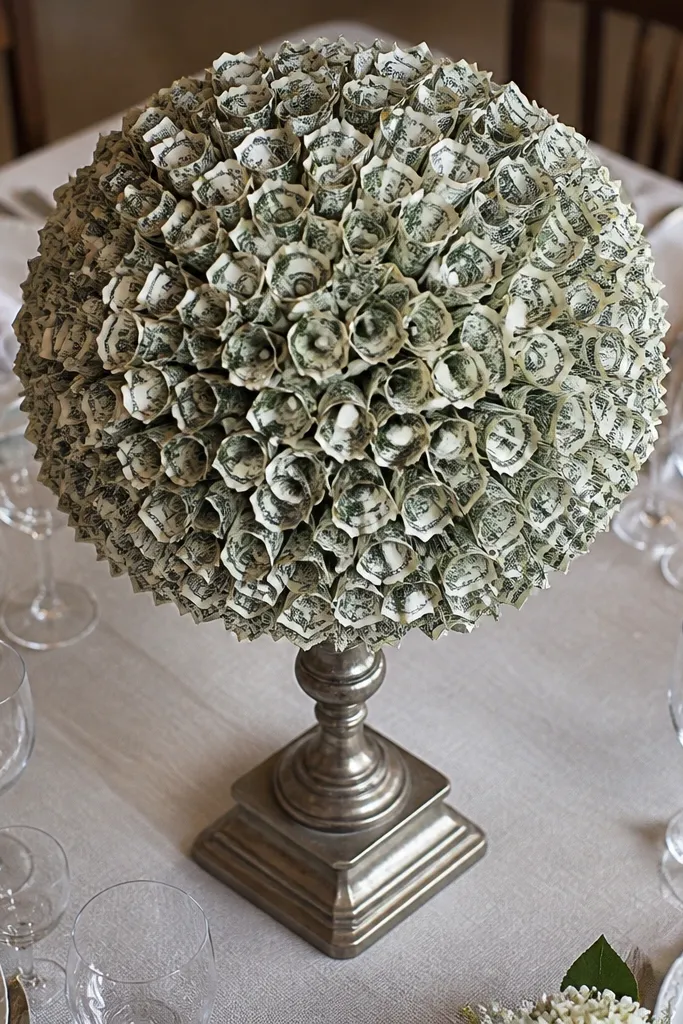
Hydrangea looks full and cloud-like, which is perfect for money because it hides individual bill pieces inside a rounded mass. Instead of folding bills into big shapes, you cut small bill confetti and glue them into a flower head. From a distance it looks like a real hydrangea ball, and up close you see money sparkle in dots. This is also easy to scale for a big bouquet without making every bill into a complex flower.
Editor's noteMix in a few tiny plain paper dots (not money) to avoid a harsh all-cash look.
Cut a foam ball (about 6-7 cm) or use a styrofoam sphere as the hydrangea head. Tear or cut bills into tiny squares and glue them onto the foam ball in overlapping layers. Cover any foam showing with extra paper dots in the same color family as your bills. Mount the head to a stem, then add small greenery sprigs around the base and place the hydrangea into a foam-filled container.
Skip thisDon’t leave foam gaps — gaps make the head look unfinished in photos.
11. Eucalyptus Money Bouquet With Bill Leaves
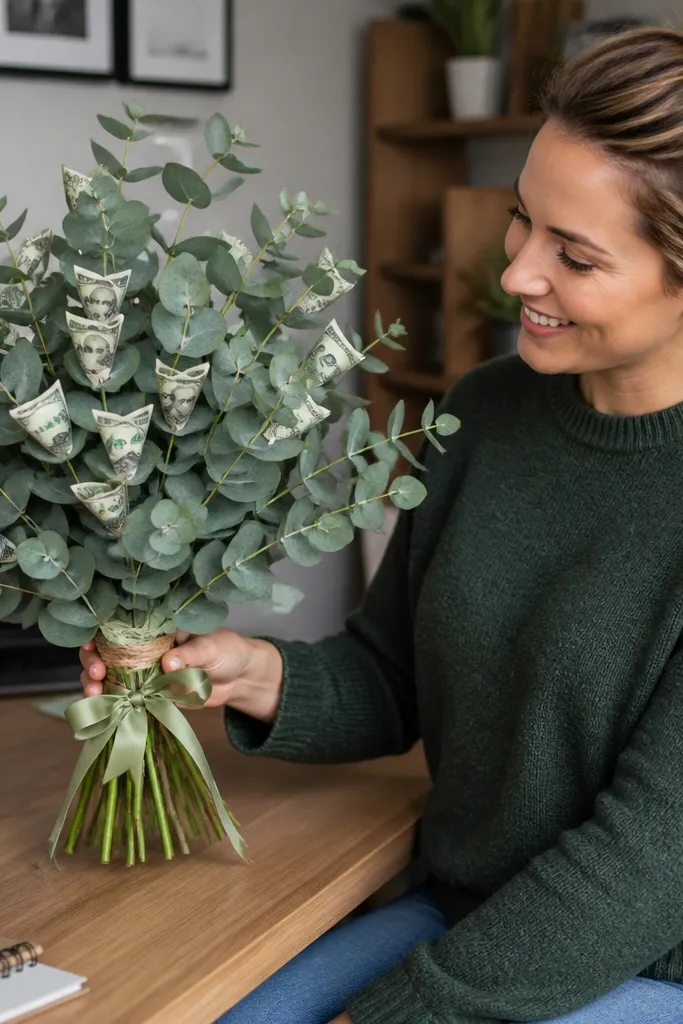
This is not a classic “cash rose” bouquet. It’s a modern eucalyptus look where bills act like leaves — small, flat, and evenly spaced. The aesthetic is clean and stylish because the green foliage is the structure, and the money adds texture at the tips. It photographs well because the leaves create repeat patterns, which reads as intentional design. If your goal is a money bouquet that looks like decor, this is the move.
Editor's noteUse matte felt for leaves; shiny paper makes money glare in daylight photos.
Cut leaf shapes from green felt or faux eucalyptus paper (about 6-8 cm long). Glue a small bill strip onto each leaf, then fold the leaf slightly down the center to mimic real leaf veins. Attach leaves to thin floral wire stems, then tape with green floral tape. Arrange 10-15 stems in a foam block, keeping the money leaves spread around the perimeter so the bouquet looks balanced.
Skip thisDon’t pile all money leaves on one side — the bouquet will look lopsided.
12. Dahlia With Spiral Bill Petals
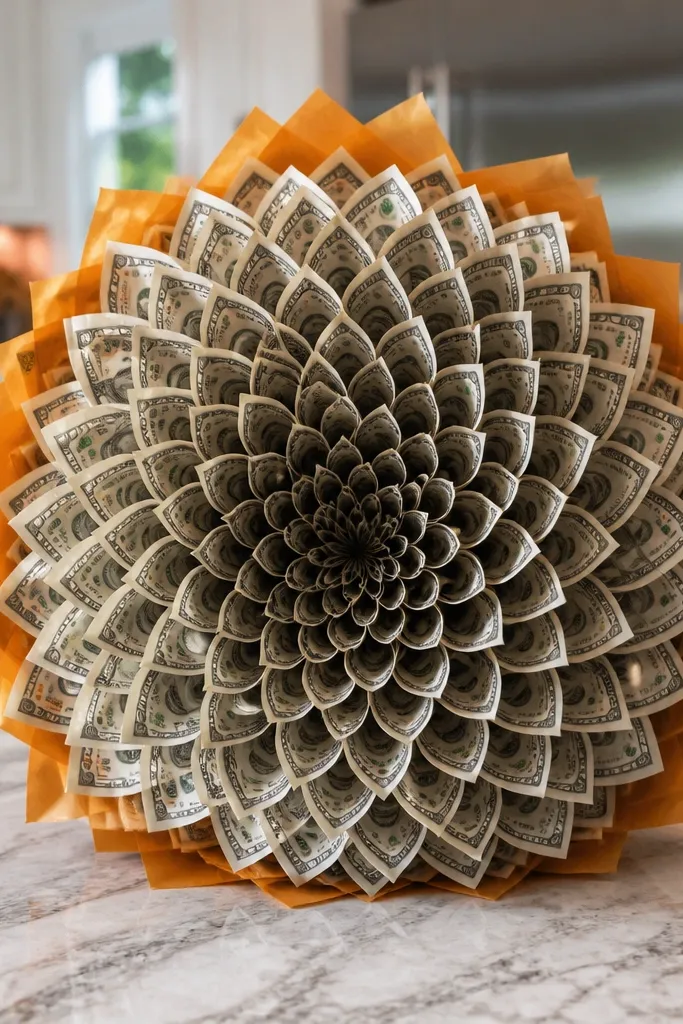
Dahlias look like layered spirals, and spiral bill petals replicate that structure fast. The money becomes a repeating curl pattern, so the flower looks complex without being hard to build. It’s a great option for a centerpiece bouquet because the head is dramatic and round. In photos, the spirals create a lot of texture and depth, which makes the bouquet feel “designed,” not assembled.
Cut bill strips into consistent widths (about 1.5 cm). Roll each strip into a tight spiral and glue the end down on a circle of cardstock. Build the flower by layering spirals around the center, using larger spirals for the outer ring. Mount the head onto a stem, cover the base with a green tape wrap, and place the dahlia in a foam block with a few supporting filler blooms.
Keep spiral diameter consistent by rolling around the same pen size.
Don’t mix widths — the dahlia looks uneven and loses the spiral rhythm.
13. Peacock Feather Money Bouquet With Long Bill Ribbons
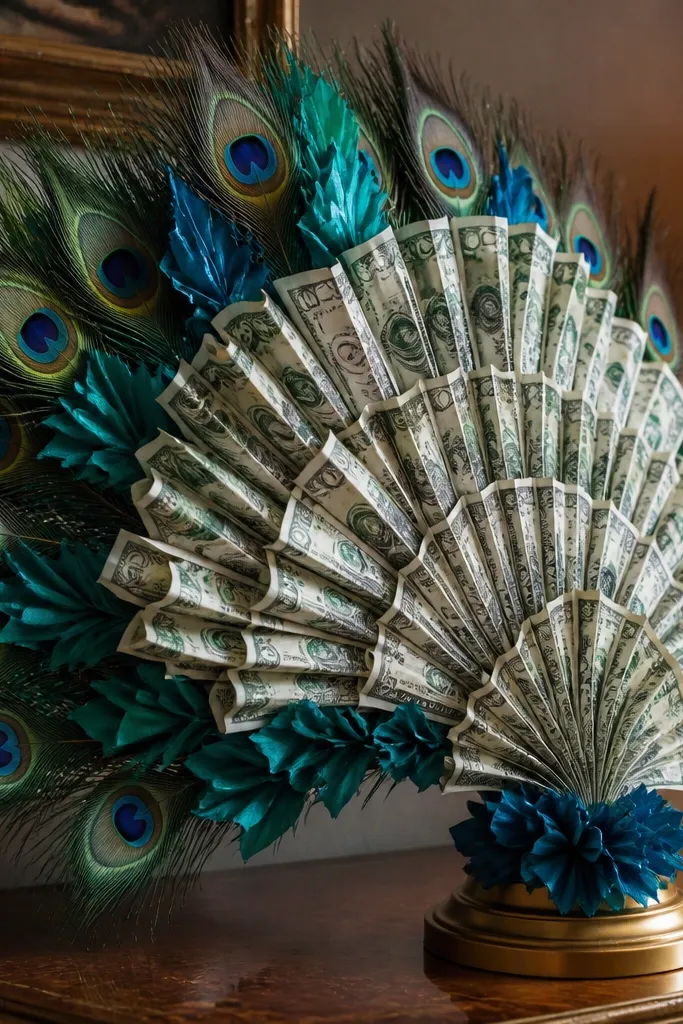
If you want a money bouquet that looks like art, do it with a peacock-feather shape. Bills are folded into long ribbon strips and fanned outward from a central spine, creating a dramatic arc. This design looks amazing in photos because it creates a sweeping silhouette, not just round flower heads. It’s also easier than building 25 separate flowers because the “feathers” repeat.
Editor's noteUse two bill denominations mixed with one solid color ribbon for a more polished look.
Cut a long floral wire spine and cover it with floral tape. Fold bills into long ribbons by accordion-folding each into a narrow strip, then glue the folded strip onto the spine at spaced intervals. Add a fan effect by bending each ribbon slightly upward with your fingers before it sets. Arrange the spine in a foam block and add a few small filler flowers at the base so it reads like a bouquet, not a sculpture.
Skip thisDon’t overstuff — too many ribbons make the silhouette heavy and messy.
14. Classic Tied Ribbon Bouquet With Money-Coated Picks
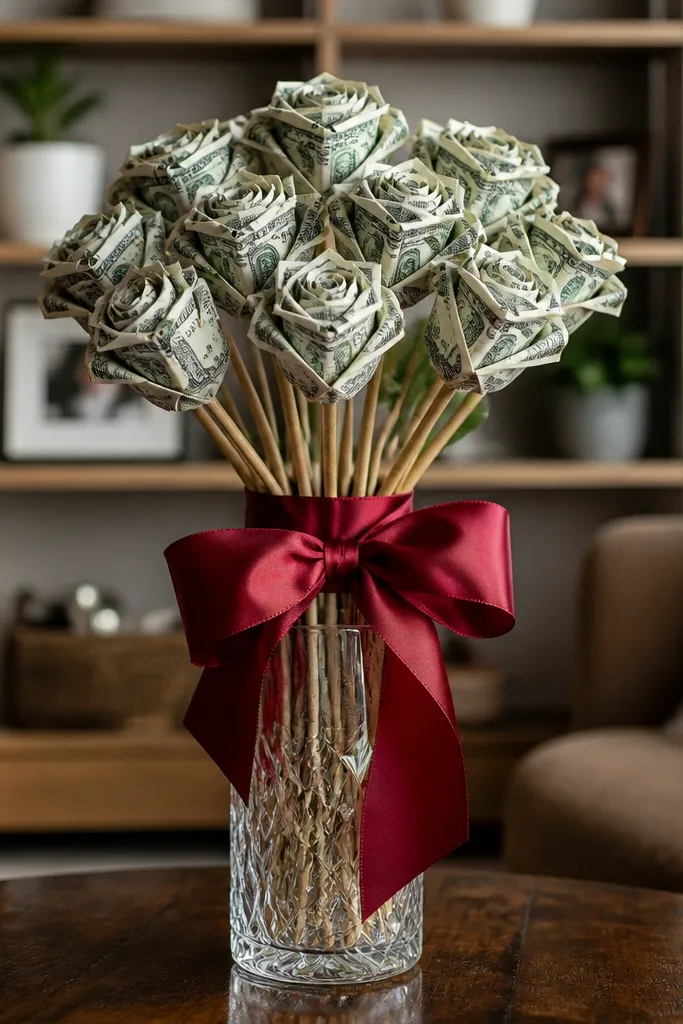
This one is for people who want the money bouquet to look like a store-bought gift. You build simple flowers on picks, then coat the pick heads with money so the money is visible but controlled. Finish it with a thick satin ribbon wrap around the stems so everything looks tidy. The result is clean, photogenic, and easy to replicate even if you don’t want to craft full flowers out of bills.
Editor's noteUse double-sided tape under the money rectangles for smoother edges.
Create 6-10 flower picks by making small paper blossoms (5 petals each) and gluing them to the top of floral picks. Cut small money rectangles and wrap them around the pick head base, then cover the join with a tiny piece of green tape. Bundle stems together and tie with a ribbon at 3 points: top near the heads, middle, and just above the bottom wrap. Finish with a bow on the front and trim stem lengths so the bouquet sits evenly.
Skip thisDon’t tie the ribbon directly over raw tape — it wrinkles and shows in close photos.
15. Rose With Money Petals Like Envelope Flaps
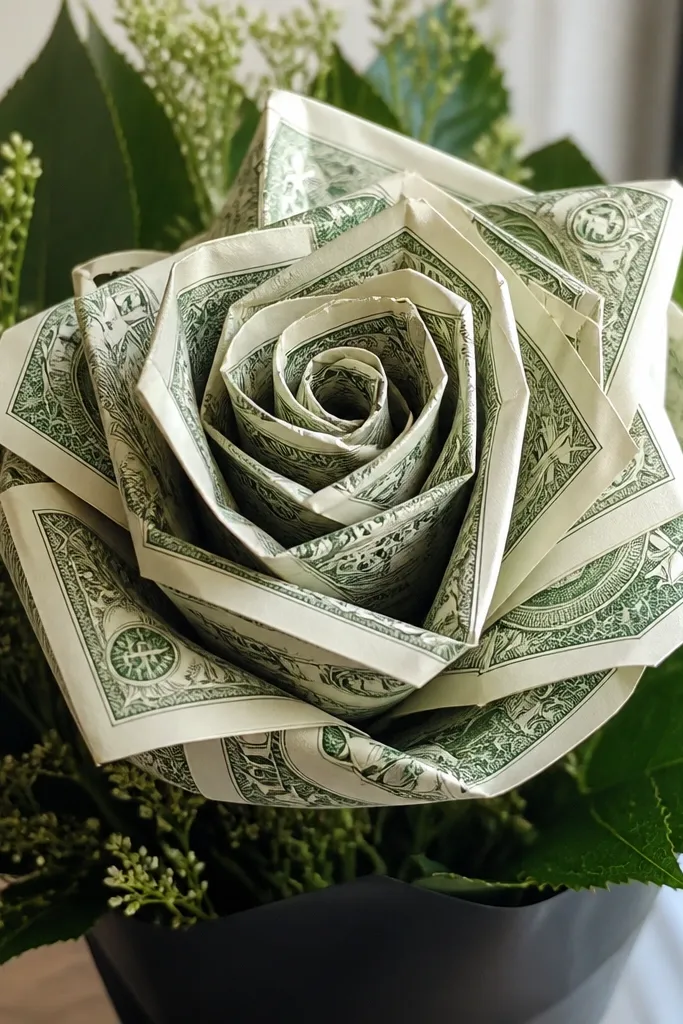
This rose looks crisp because each petal is a folded money piece shaped like an envelope flap. The bill texture becomes the petal surface, so you get a strong, graphic look that reads instantly as money flowers. It’s also stable: envelope-style folds hold their shape, which means the rose stays photogenic while you move it. If you want a bouquet that looks intentional from a distance, this is a strong choice.
Editor's notePress folds with a hard ruler before gluing so petals look sharp, not soft.
Fold each bill into a shallow “envelope flap” by creasing two long edges toward the center, then fold the bottom up to form a petal shape. Make 8-10 petals and glue them around a small foam ball center, starting with the smallest at the top. Attach the foam center to a stem, then cover any glue seams with a ring of green paper. Arrange 7-9 roses into a foam block and add a few small filler leaves for contrast.
Skip thisDon’t use too much hot glue — it soaks paper and leaves shiny blobs.
16. Gardenia With Money Ribbons Around a Foam Center
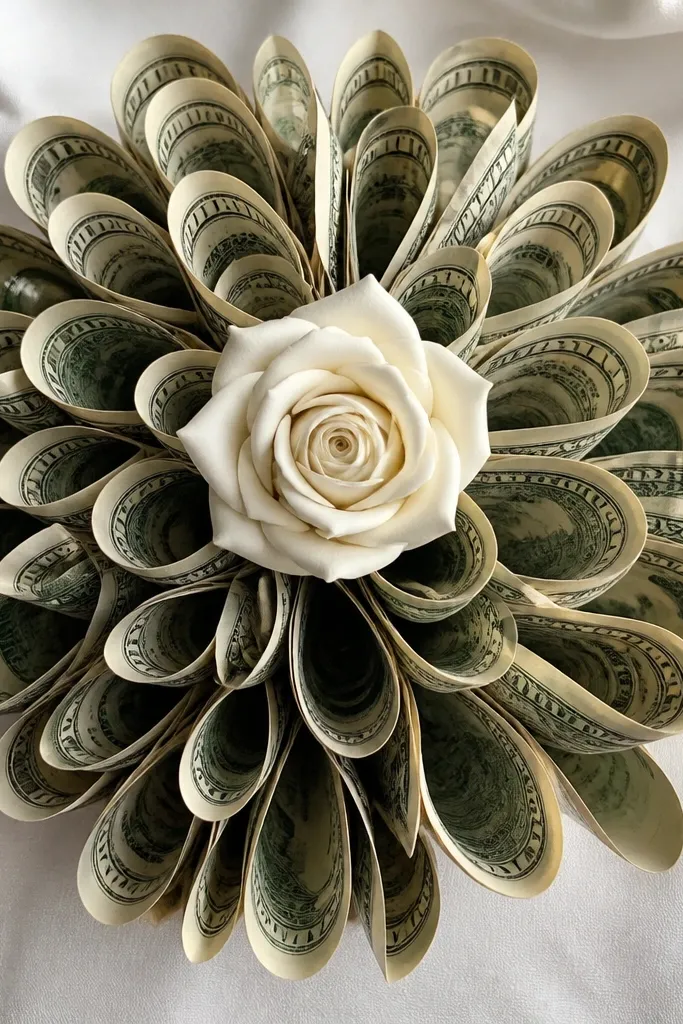
Gardenias are layered and smooth, and money ribbons mimic that drape. This build uses thin ribbon loops made from bills, wrapped around a white foam center so the flower looks soft and full. The money is visible, but it’s controlled into loops instead of flat sheets. It’s the best pick if you want a bouquet that feels romantic without turning into a messy cash pile.
Editor's noteMake loops the same diameter by using a bottle cap as a template.
Cut bills into narrow strips (about 1 cm wide) and fold each strip into a loop, gluing the ends to hold the circle. Glue loops onto a white foam disk starting at the outer ring and working inward. Add a second layer of loops to build thickness, then mount the center on a stem. Wrap the stem with green tape and place 8-12 gardenias into a foam block with white filler paper leaves.
Skip thisDon’t stack loops too tightly — leave slight gaps so the flower looks layered.
17. Tropical Money Hibiscus With Bill-Edge Petals
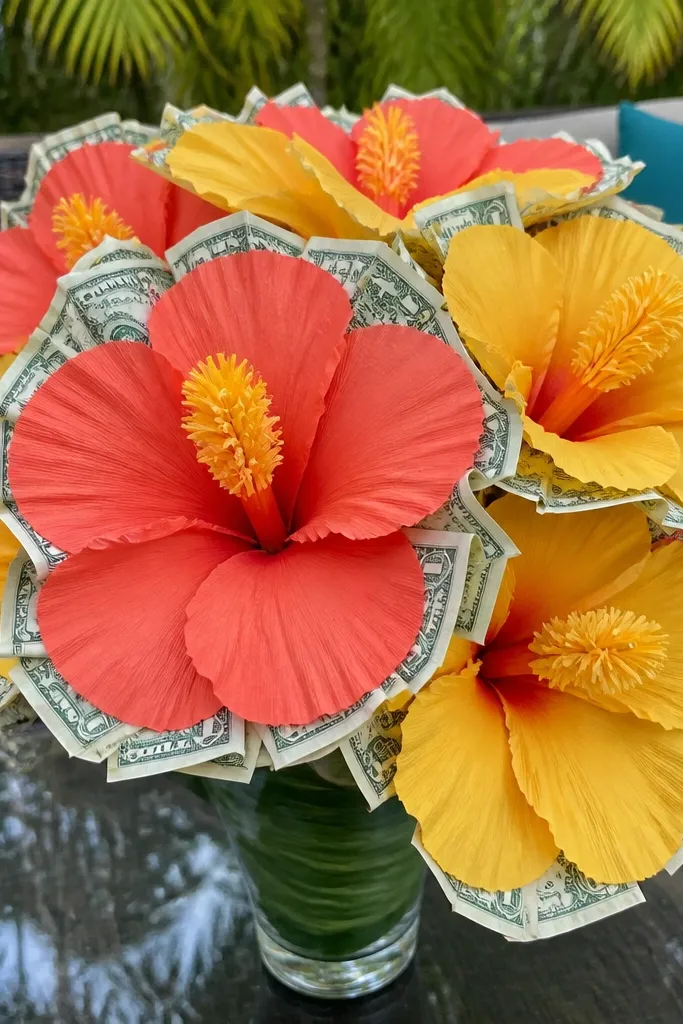
Hibiscus looks bold and tropical, and the money edge trick makes it pop without covering the whole petal. Use colored tissue or cardstock for the petal body, then add a money strip along the edge so it looks like a decorative trim. The center can be made with yellow paper fringes for instant flower credibility. This is a great choice for a bouquet that looks fun in photos and stands out at a party table.
Cut 5-7 hibiscus petals from bright tissue or cardstock (about 10 cm long). Glue a narrow money strip along the bottom edge of each petal, then fold the petal slightly so the edge faces outward. Build the center by gluing a small circle of cardstock and adding fringe strips in yellow and orange paper. Attach petals around the center, mount on stems, then arrange in a foam block with a few green palm-like leaves.
Choose one petal color and one money color; mixing too many tones makes it look busy.
Don’t cover the petal flat with money — edge-only trim keeps the flower readable.
18. Monochrome Black-White Money Bouquet With Single Accent Rose
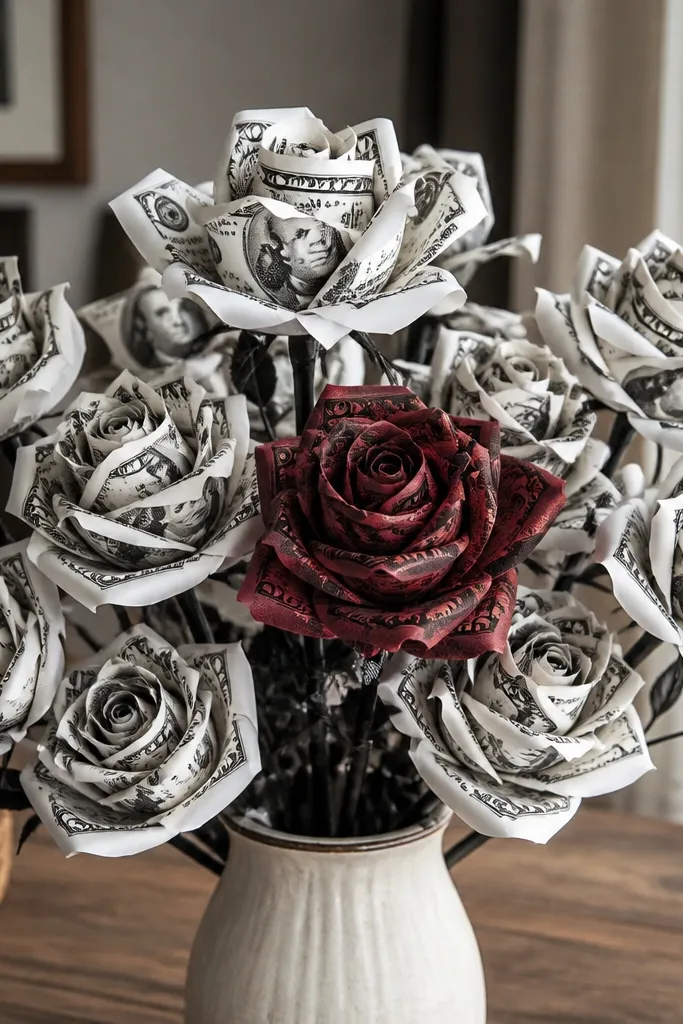
This design is about contrast. Most money bouquets fail because every bill and wrap fights for attention. Here, you keep everything black-and-white, then add one accent rose in red or deep burgundy made with money petals. The money still looks dramatic, but the bouquet reads clean and stylish. It’s especially strong for photos because monochrome backgrounds make the red center pop.
Editor's noteKeep the ribbon width around 2.5-3.5 cm so it looks intentional, not ribbon-thin.
Make 6-8 flowers in black-and-white tones: use white or cream paper petals with small money centers, or build mini buds with rolled bill centers. For the accent, create one rose using envelope-flap money petals in a deep red wrap around the stem. Arrange monochrome flowers in a foam block and tuck greenery between stems. Wrap the bouquet stems with kraft paper or black tissue, then add a satin ribbon in the same color as the accent rose.
Skip thisDon’t add multiple accent colors — two or more accents make the bouquet look cluttered.
19. Heart-Shaped Money Bouquet Box With Flower Cutouts
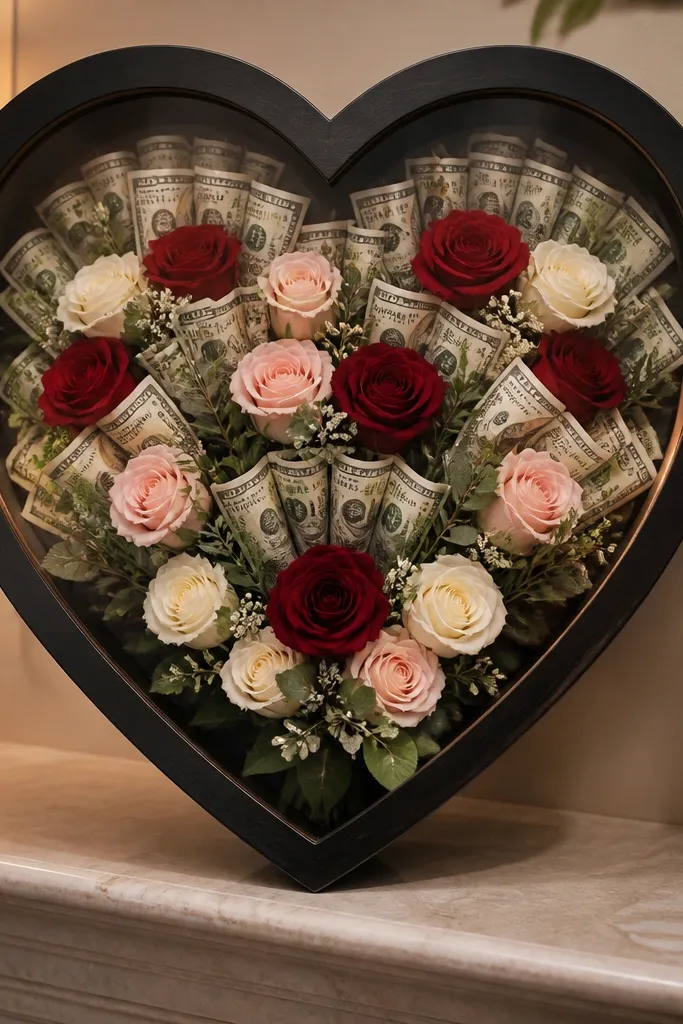
Not every money bouquet needs to be handheld. This is a heart-shaped shadow-box style arrangement where flowers sit in cutouts and money is integrated behind them. It looks great because the structure is flat and clean, so photos are easy — no drooping stems. The heart shape also makes it perfect for anniversaries and proposals where you want a “moment” without a messy bouquet. The money stays protected behind the front layer too.
Editor's noteUse vellum behind the cutouts — it softens bill glare and looks more like petals.
Cut a heart shape from thick cardboard (about 22-25 cm wide) and back it with foam or corrugated board. Create flower cutouts on the front layer using a flower stencil, then glue translucent vellum or thin paper behind each cutout. Place money behind the cutouts so it shows through as the “flower center” texture, then glue tiny paper petals around each opening. Add a ribbon loop at the top and frame the edges with craft paper strips.
Skip thisDon’t use thin cardboard without backing — the heart warps and ruins the clean silhouette.
20. Basket Bouquet With Money Flowers Around a Faux Water Surface
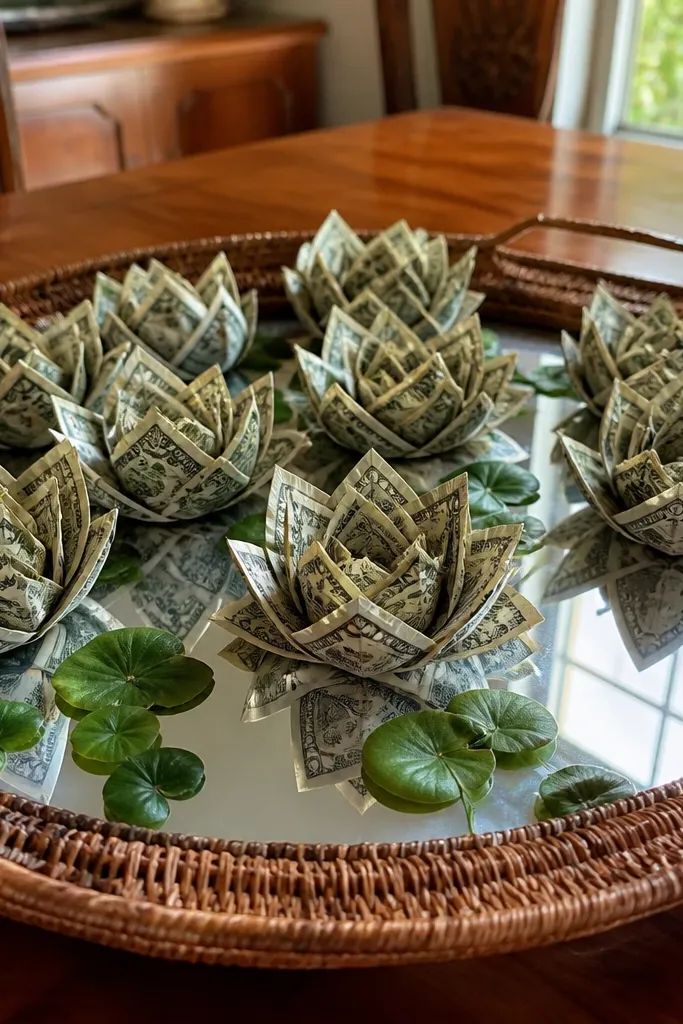
This setup looks styled because it adds a “scene.” Place a faux water or mirror-like panel in the basket base, then build money flowers around it so the bouquet looks like a designed centerpiece. The money reflects lightly in the water surface, which makes the whole arrangement feel premium. It’s best for dining tables and gift tables where people see the front and top at once. You still get flowers, but the basket base does the heavy lifting for photogenic impact.
Editor's noteTrim stems at slightly different heights (1-2 cm differences) so the bouquet looks natural, not straight-stamped.
Choose a small basket and line it with plastic or waterproof liner. Fill the bottom with foam blocks or dense floral foam, then cover the foam with a thin layer of clear craft film or a small piece of mirror-like acetate. Build 8-12 money flowers (mini roses or ranunculus) and insert stems into the foam. Arrange flowers so the tallest heads sit near the back edge and the shorter ones fill the front around the “water.”
Skip thisDon’t skip the liner — foam crumbles and can stain if the basket gets bumped.
21. Cash Burst Bouquet With Folded Bills Like Flower Confetti
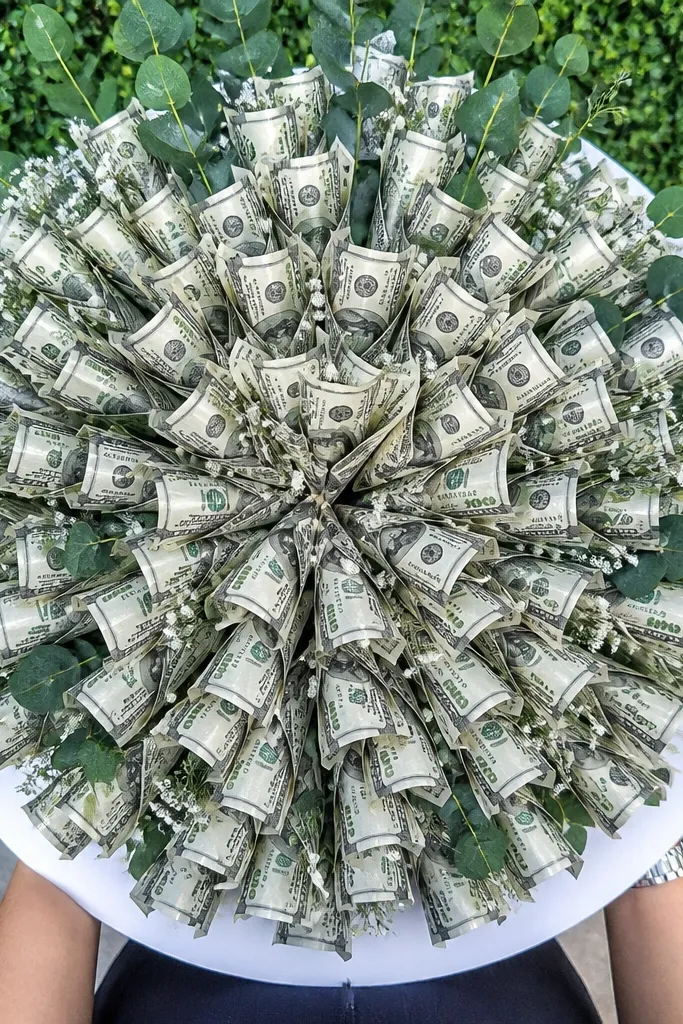
This is a fun alternative to classic stems: a cash burst that spreads outward like fireworks. Fold bills into small petal shapes and glue them onto a circular foam ring, then attach greenery sprigs behind. The look is dramatic, and the money becomes a pattern that reads like a flower bouquet from the photo’s first second. It’s also fast once you have the fold template down.
Editor's noteMake one petal template from cardstock and trace it onto bills for consistent shapes.
Cut a foam ring (about 18-20 cm diameter) and cover it with a layer of green paper or felt. Fold bills into small petal units by creasing each bill into a narrow strip, then folding the ends inward to form a teardrop. Glue petals onto the ring in radial lines, leaving tiny gaps for light. Attach the ring to a handle or stiff backing board, then add a few filler flowers behind the petals for depth.
Skip thisDon’t glue petals flat on top of the ring — angle them slightly outward for a burst effect.
22. Tapered Bottle Money Bouquet With Wrapped Stem Cluster
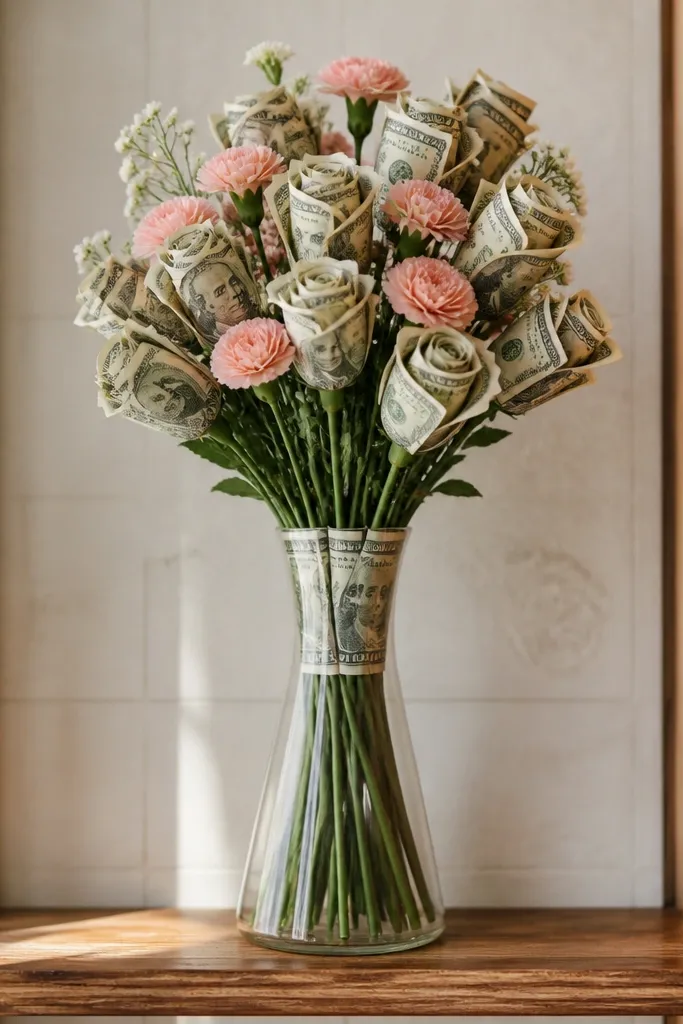
If you want a bouquet that looks like home decor, use a tapered bottle as the vase. The narrow top forces stems to cluster tightly, which makes the money flowers look intentional and tidy. You can keep the flowers simpler because the vase shape adds structure. This style also makes photos easier because the silhouette stays stable while you pose.
Editor's noteCover the foam with kraft paper circles before inserting flowers so no raw foam shows.
Pick a tapered glass or plastic bottle and wrap the neck with ribbon. Insert a foam block cut to fit the bottle opening, then secure with a piece of plastic wrap and rubber band. Build 7-10 money flowers with stems trimmed to different lengths, then place them so the tallest ones reach about halfway up the bottle neck. Wrap stems with a thin kraft paper band at the base to hide foam edges.
Skip thisDon’t use a too-wide vase — the bouquet spreads and makes money look scattered.
23. Money Rose Topiary Mini Bouquet (Desk Size)
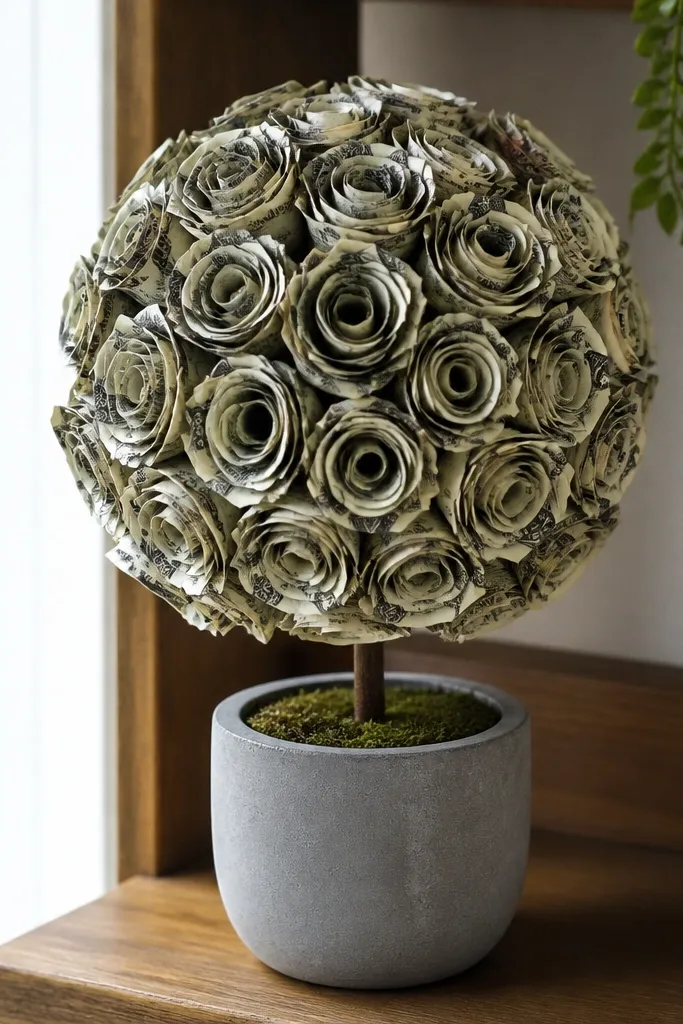
Topiary balls look adorable and giftable, and they solve the “droopy bouquet” problem. This one is made by packing money rose heads onto a small ball so everything stays rounded and photo-ready. It’s perfect for desks, shelves, and small gift tables because it doesn’t need tall stems. The look is clean because the sphere is a simple shape that hides construction seams.
Use a small foam ball (about 10-12 cm) and cover it with a base layer of green felt or craft foam scraps. Build 12-18 mini roses using rolled bill centers and 6-8 petal wraps each. Hot glue each rose into the foam ball, then attach the ball to a small pot or wooden base using hot glue and a short dowel. Add a ribbon around the pot and tuck tiny greenery picks behind the ball.
Glue roses slightly angled outward so the sphere looks full, not flat on one side.
Don’t leave the foam uncovered — bare foam shows through and ruins the clean look.
24. Satin Bow Money Bouquet With Hidden Bill Tubes
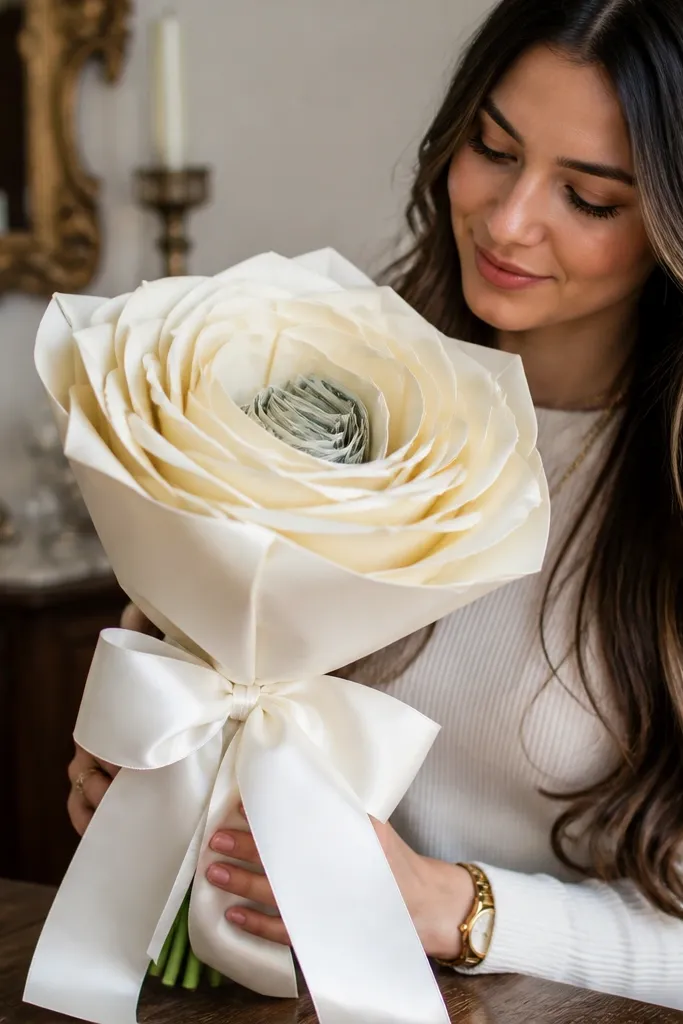
This one looks extra polished because the satin bow and wrap do most of the styling work. You hide the bills under petal layers so the outside looks like normal flower petals, with money only peeking through at the center. It’s the easiest route to a “wow” bouquet that still feels classy and not gimmicky. Great for graduation, birthdays, and anyone who wants money present but not obvious in every spot.
Make 8-10 flowers with a foam center dot (about 2 cm) wrapped in paper. Glue a rolled bill tube into each center, then cover the tube with 4-6 petal layers made from tissue or cardstock. Assemble stems into a foam block and tie stems with ribbon at the base. Wrap the stems with satin ribbon and finish with a large bow on the front, then add a thin layer of tulle or tissue around the bow for softness.
Choose one satin color and stick with it — mixed ribbon textures show in close photos.
Don’t place bow too low — if it sits on uneven stems, the bouquet looks crooked.
25. Lemon Blossom Money Bouquet With Rolled Bill Pollen
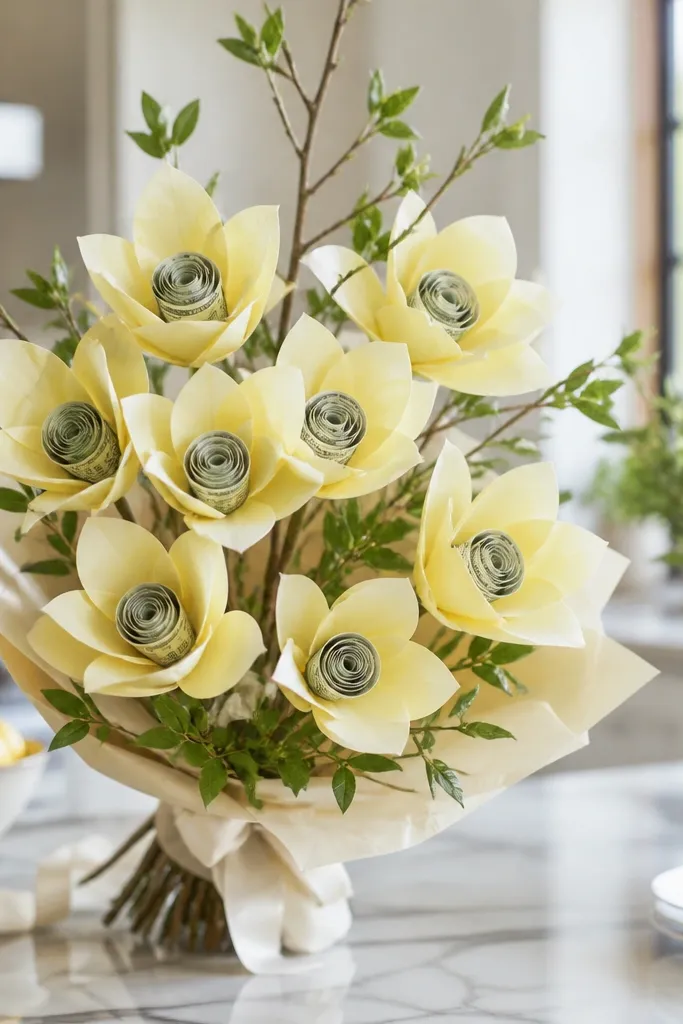
This one looks like fresh lemon blossoms, bright and clean, with the money hidden in the most believable place — the pollen center. The rolled bill “pollen” reads as texture from across the table, so it doesn’t look like a cash craft glued on top. You build a light, airy bouquet using thin foam or craft paper petals that curl at the edges like real citrus blooms. It works for spring birthdays, engagement parties, and any gift where you want the money to feel playful instead of loud. Skill level is beginner-friendly if you can use a glue gun carefully, and the build takes about 2-3 hours for a small bouquet of 8-10 blossoms.
Editor's noteUse a toothpick to swirl and tighten each bill roll so the edges stay crisp and don’t unravel in the glue.
Cut 10-12 lemon-blossom petals from pale yellow cardstock (about 2.5 in wide and 1.5 in tall). Round the top with your scissors and lightly curl the edges by running each petal over the edge of a spoon or dowel, then glue petals into small clusters around a center. Roll narrow strips of bill paper (about 1/4 in wide) into tiny cylinders for pollen, then glue 5-7 rolls into the center of each flower. For the stems, wrap floral wire with green crepe paper, then attach the flower cluster with hot glue and a small circle of green cardstock behind it. Finish by tying the stems into a bouquet with twine and wrapping the handle in yellow tissue or a thin ribbon band; add 2-3 leaves from green felt or crepe paper. Let everything cool flat for 10 minutes so the glue sets before you wrap the stems tightly.
Skip thisDon’t soak the bill rolls with hot glue — a thin glue dot holds better and keeps the paper from warping.



