
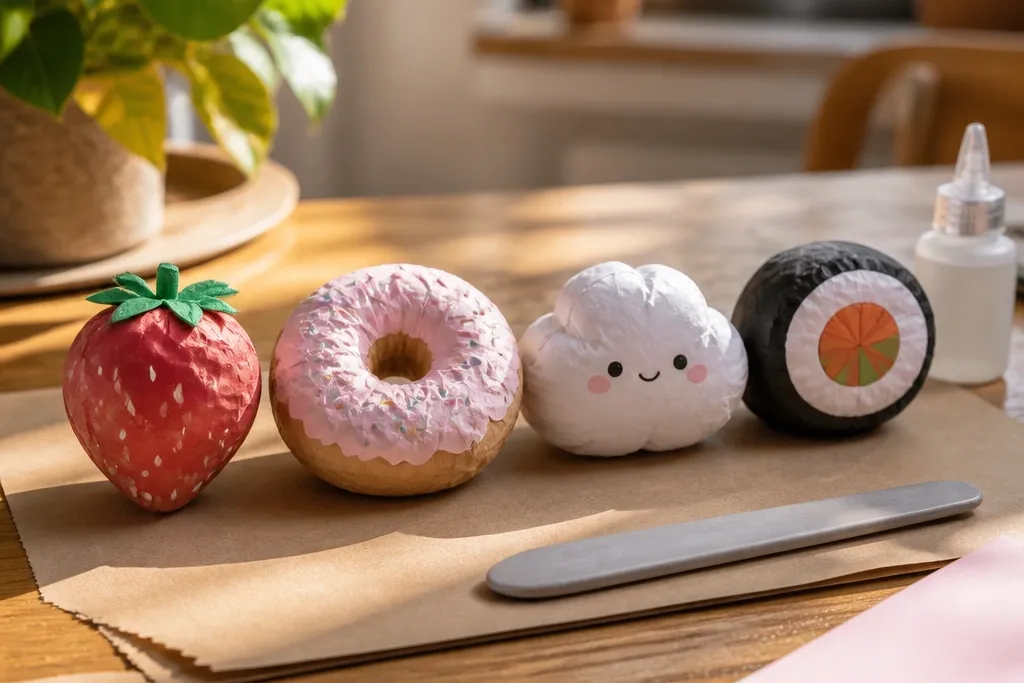
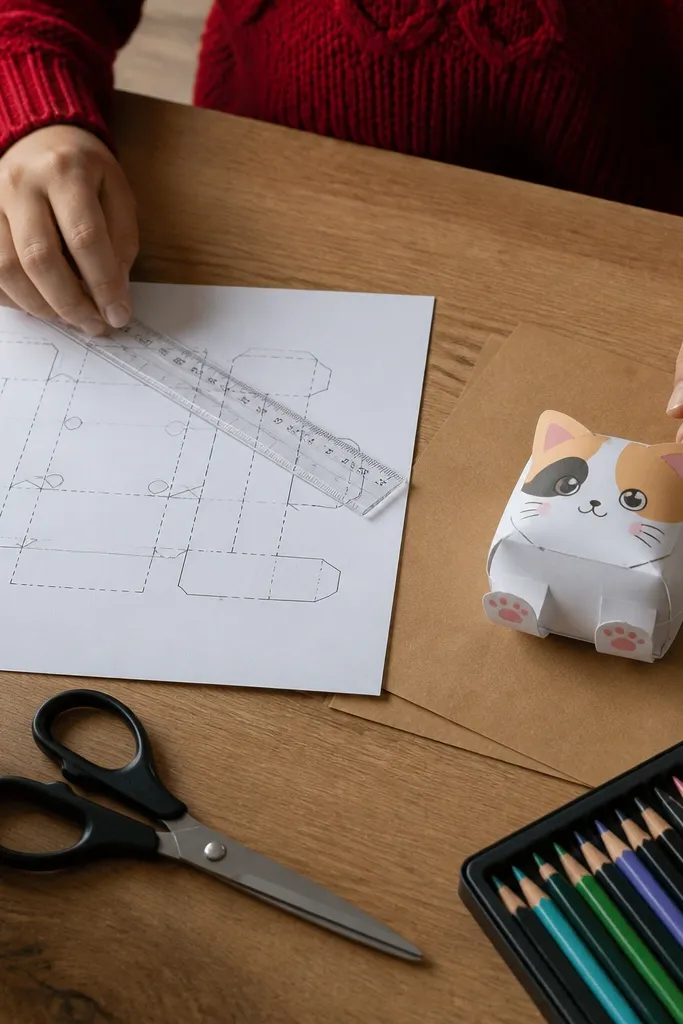
1. Mini Strawberry Squishy with Glossy Seed Lines
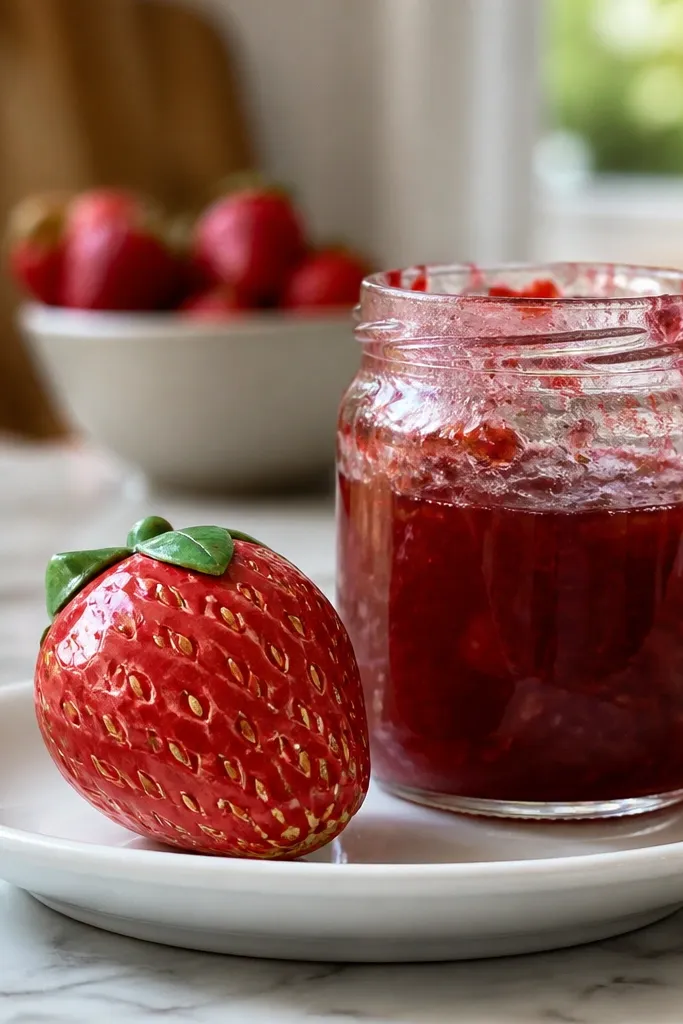
This one looks like a tiny strawberry you can hold — round at the bottom, slightly tapered at the top, and covered in a smooth red finish. The glossy seed lines make it pop in photos because they catch light instead of looking flat. It’s beginner-friendly because the shape is basically a curved dome with a leaf cap, and the seeds are just small circles or lines you repeat evenly. Plan for a clean finish: the better you seal the shell before filling, the more “plush” it feels when you gently press it. It suits desk decor, gift toppers, and small shelf styling where bright color reads instantly.
Cut a strawberry dome base from red cardstock using a traced bowl shape about 7 cm wide. Cut two identical domes, then glue them back-to-back with a narrow seam strip around the edge, leaving a small opening for filling. Add tissue stuffing until it holds a soft dome, then close the opening with a final glue line. Make the leaf cap from green cardstock by cutting 5 leaf shapes and gluing them at the top center, then add tiny seed dots with a white gel pen or yellow marker for a light-catching look.
Editor's noteDo the seed dots after the glue fully dries — wet ink bleeds and kills the glossy effect.
Skip thisDon’t overstuff; a tight filling makes the dome look lumpy and stiff.
2. Chocolate Donut Squishy with Speckled Cocoa Top
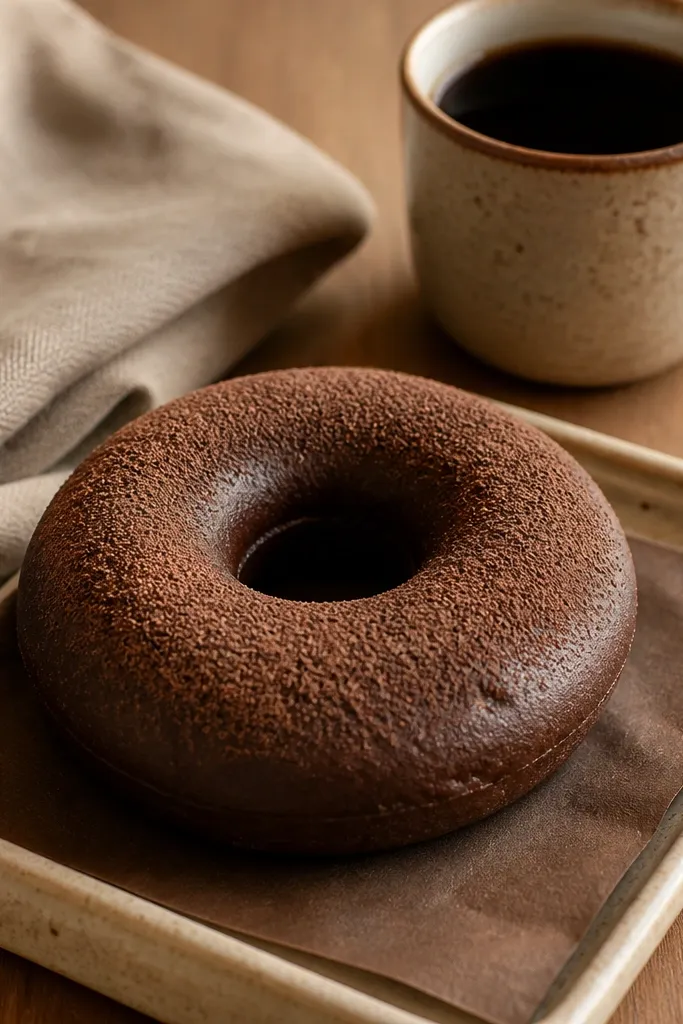
A donut squishy looks cute and instantly recognizable, and it photographs like a charm because the ring shape gives strong highlights around the edges. This version uses a speckled cocoa top so it doesn’t look like plain brown paper. The build is easy: you’re making a ring shell and stuffing it lightly so it stays rounded. Keep the center hole open so it reads as a donut, even from the side. This is great for room decor, keychain-style displays (with a small hook), and snack-themed party tables.
Draw and cut a donut ring from brown cardstock: outer diameter about 9 cm, inner hole about 3.5 cm. Cut two rings, then score and fold a thin strip to form a curved seam so the edges stack into a thicker squishy. Glue the rings together around the outer and inner edges, leaving a small gap, then add shredded tissue until the ring feels like a soft cushion. For the cocoa speckle, dab a toothbrush with brown paint diluted with water and flick tiny dots over the top, then let dry before handling.
Editor's noteUse a paper towel under the donut while flicking paint so overspray doesn’t ruin your workspace.
Skip thisSkip heavy paint layers; thick paint makes the donut look crusty instead of plush.
3. Peach Cup Squishy with Watercolor Ombre Bottom
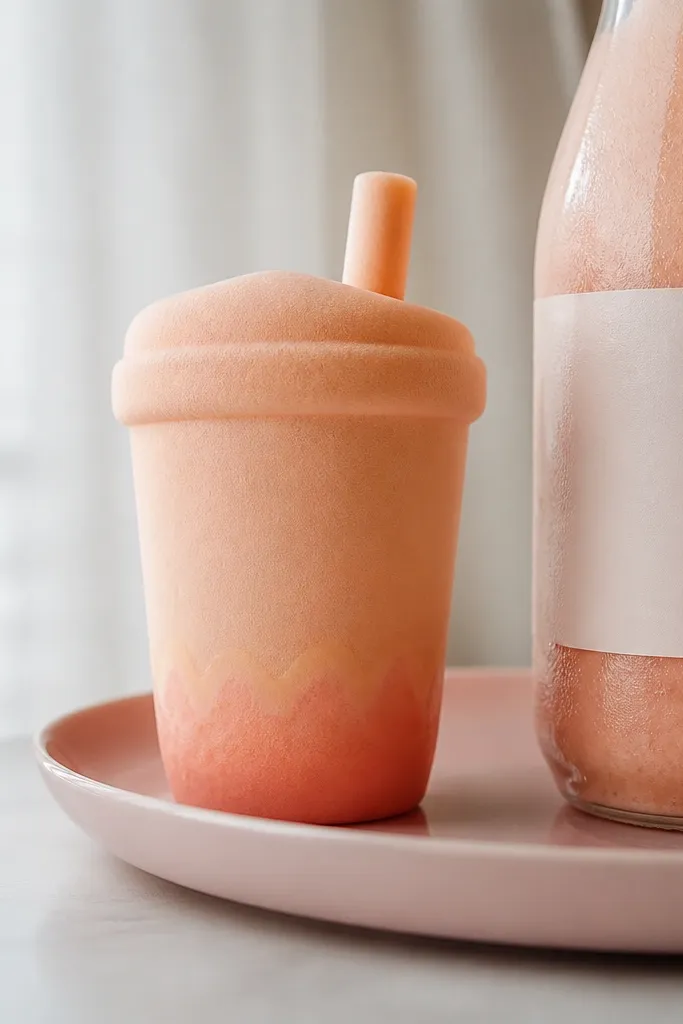
Peach colors look warm and “soft” on camera, and the ombre bottom gives you that realistic smoothie-shop vibe. This squishy also hides minor uneven cutting because watercolor fades away small edges. The cup shape makes it feel more decorative than a flat peach slice, so it works for shelf styling. You’ll get a rounded, squishy look by using a two-layer shell and light stuffing. It’s a good project when you want something pretty without complicated templates.
Cut two cup bases from peach cardstock using a curved template about 8 cm tall and 7 cm wide, with the top slightly flared. Glue the two layers together around the sides, leaving the top seam open, then stuff with small tissue pieces until the cup holds a soft shape. Close the opening with a thin glue line and press flat for 1-2 minutes. Paint the ombre bottom: lightly wet the lower half and blend peach to pink using diluted watercolor, then let it dry flat to prevent warping.
Paint the ombre after assembly so the color follows the squishy curve instead of looking like a sticker.
Don’t glue the top shut before painting, or you’ll trap wet paper and get ripples.
4. Sushi Gunkan Squishy with Nori Wrap Texture
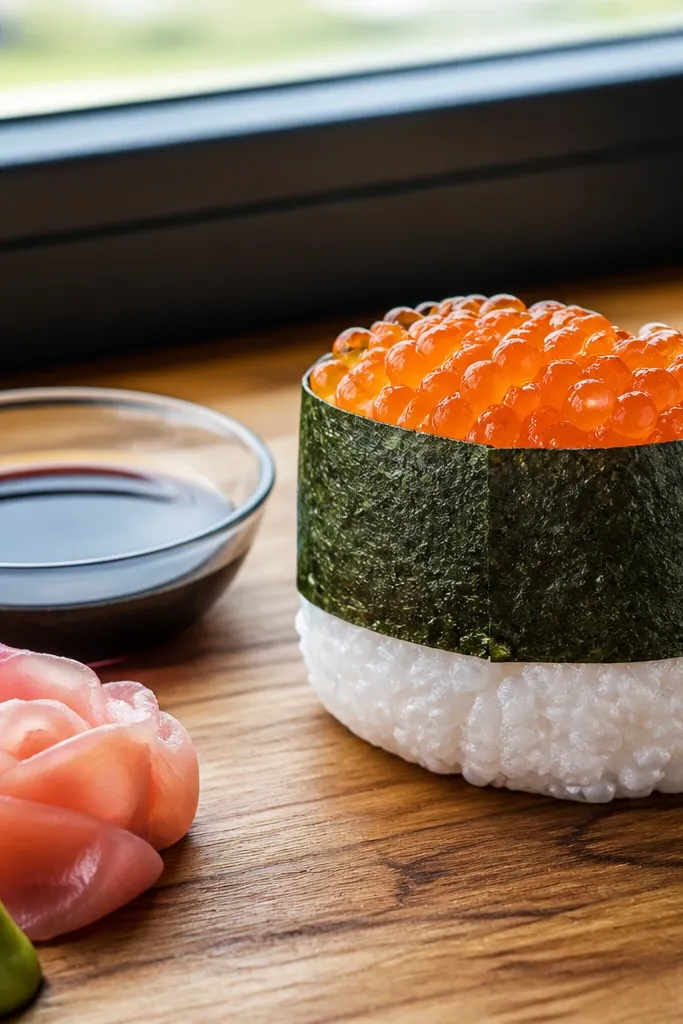
This is one of the most photogenic squishies because it has clear color blocking: white rice base, green nori band, and a bright topping. The nori texture makes it look real even if you’re using simple paper. It stays beginner-friendly because the shape is basically a short cylinder with a seam. When you press it gently, it looks like a mini food prop, which is perfect for a cute kitchen shelf. If you like food crafts, this one makes your decor look playful, not childish.
Cut a rectangle from white cardstock, about 8 cm tall and 5.5 cm wide, then roll it into a cylinder and glue the seam. Cut another identical cylinder and glue them together with a small gap at the top for stuffing. Stuff with tissue until it’s firm enough to hold shape, then seal the top with a glued circle. Wrap a green nori band: cut a strip about 2 cm tall, add crinkled texture by lightly scrunching and flattening, then glue around the middle. Add a topping band in red cardstock on top, like a thin oval strip.
Editor's noteCrinkle the nori strip briefly, then smooth it with your fingers so the texture stays subtle but visible.
Skip thisDon’t use glossy paper for the nori; it reflects too much and looks plastic.
5. Cloud with Raindrops Squishy (Cottony Tissue Cover)
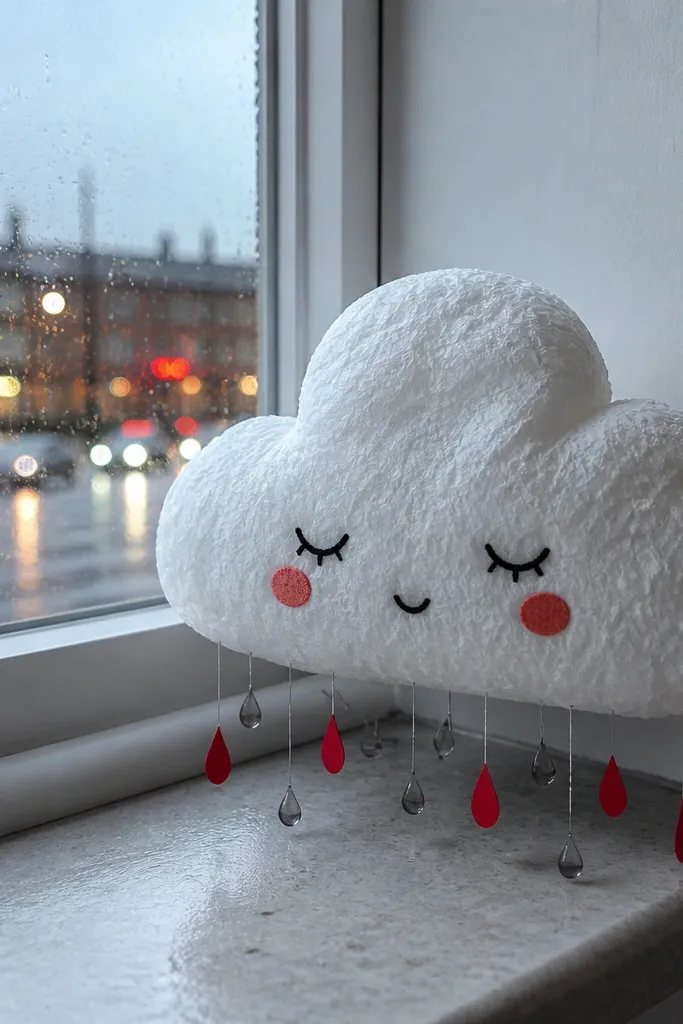
A cloud squishy looks airy and soft, and the tissue cover gives you a cotton-like surface that reads well in photos. The raindrops add motion and contrast, so it doesn’t look like a plain white blob. This is a smart beginner project because the cloud shape is forgiving — you’re tracing rounded bumps and then layering tissue. It also works in kids' rooms, nurseries, or as a calming wall decor accent. When you squeeze it, the cloud holds its puff and the cover stays smooth.
Cut a cloud outline from white cardstock, about 10 cm wide, and make two identical pieces. Glue around the edges leaving a small opening, then stuff with tissue until the cloud is puffy. Close the opening and press flat under a book for 10 minutes. Tear white tissue into small pieces and dab glue-water mix (glue + water in a 1:1 ratio) over the cloud, layering tissue until it looks evenly fuzzy. Add raindrops from blue cardstock: cut 5-7 teardrops, glue them under the cloud tips.
Use a foam brush or your fingertips for the glue wash so you don’t leave hard streaks.
Don’t soak the tissue — too much water makes the cloud buckle.
6. Cute Cat Face Squishy with Blush Nose
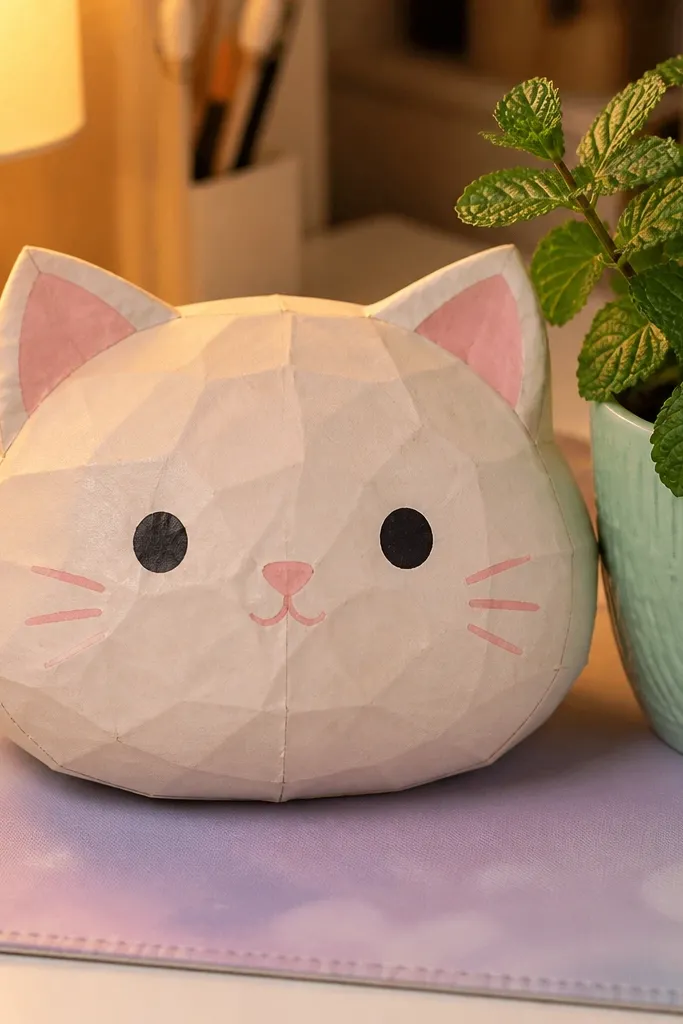
A cat face squishy is pure instant charm because the features are simple: ears, eyes, whiskers, and a blush nose. It’s photogenic because the face is centered and high-contrast. You’re building a rounded head, so it hides uneven seams. The whiskers look best when you draw them with a fine marker on top of the finished surface, not before assembly. Use light stuffing so the face stays soft and compressible without looking crumpled.
Cut two rounded head shapes from light beige cardstock, about 9 cm wide, and glue them together around the edges with a small opening. Stuff with tissue until you get a soft dome, then close the opening. Add ears: cut two triangles from beige cardstock, glue them to the top sides. Draw eyes and whiskers with a fine black marker, then add a pink nose using a small triangle cutout or a painted circle with watercolor.
Editor's noteAdd a tiny white highlight dot in each eye — it makes the face look alive in photos.
Skip thisAvoid thick black marker lines around the edges; they make seams look messy.
7. Rainbow Macaron Squishy Stack
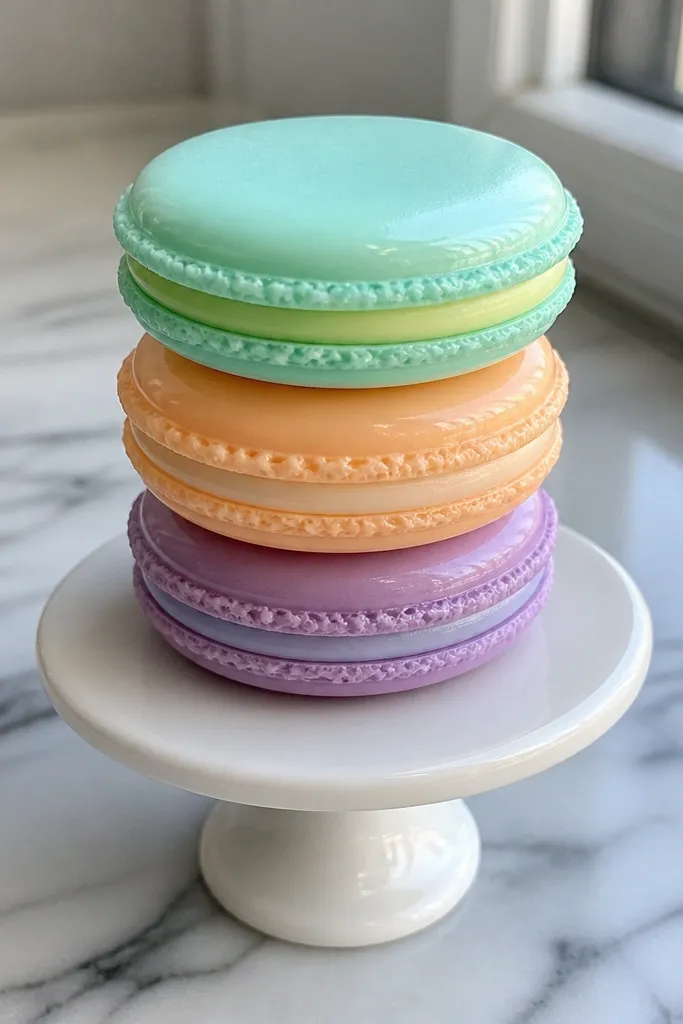
Macarons photograph like candy even when they’re made from paper, and stacking three colors gives you a “set” look. The trick is to keep the shells thin and the filling layer visible so it reads like a sandwich cookie. This project is beginner-friendly because each macaron is a simple circle with a small ring edge, and you repeat the same steps three times. Make the top shells slightly darker than the filling for that bakery look. It suits a dessert-themed shelf, a party favor display, or a desk corner that needs a pop of color.
Cut 3 pairs of circles from pastel cardstock, about 6 cm across, and cut 3 smaller circles from a contrasting cardstock for the filling, about 4.5 cm across. Glue each filling circle to the center of a top shell circle, then glue a bottom shell circle behind it. Lightly stuff between the shells with tissue so the macaron puffs — don’t overfill. For texture, crumple a tiny piece of tissue and press it over the top shell, then seal with a light glue-water dab.
Color-code your tissue stuffing by using matching tissue — it prevents weird peeking at the edges.
Don’t use heavy glitter; it scratches and sheds during handling.
8. Heart Balloon Squishy with Twisted String
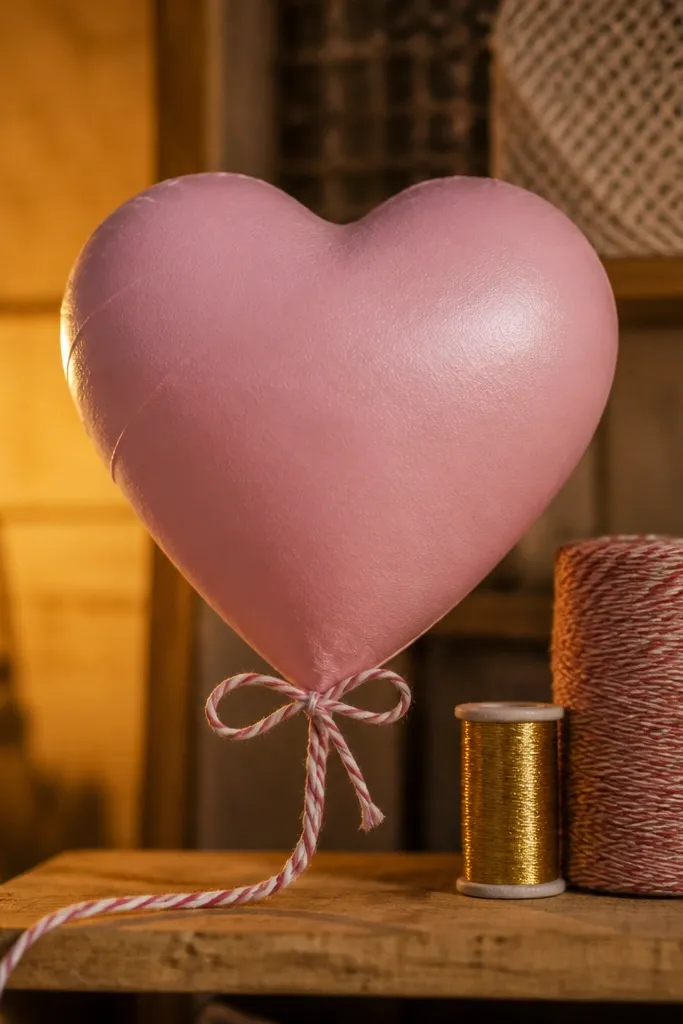
A heart balloon squishy looks festive and clean, and the balloon shape makes it feel special without being hard. The twisted string adds a clear detail that makes photos look intentional. This is a great beginner project because the heart outline is simple and symmetrical if you trace half and mirror it. You get a soft, rounded balloon by stuffing lightly inside a sealed paper shell. It suits Valentine decor, gift tags, and small hanging displays.
Trace a heart shape on pink cardstock using a template about 9 cm tall, then cut two hearts. Glue the hearts together around the edge with a small opening, then stuff with tissue until it holds a gentle curve. Close the opening with a final glue line. Make the balloon shine: add a curved white highlight stripe using a white gel pen. For the string, twist a thin strip of white paper around a pencil, then glue one end to the bottom point of the heart.
Editor's noteMirror your heart by folding the cardstock in half first — it keeps the top lobes even.
Skip thisDon’t leave the opening large; stuffing through a big gap creates lumpy seams.
9. S'mores Squishy with Toasted Edge Paper Texture
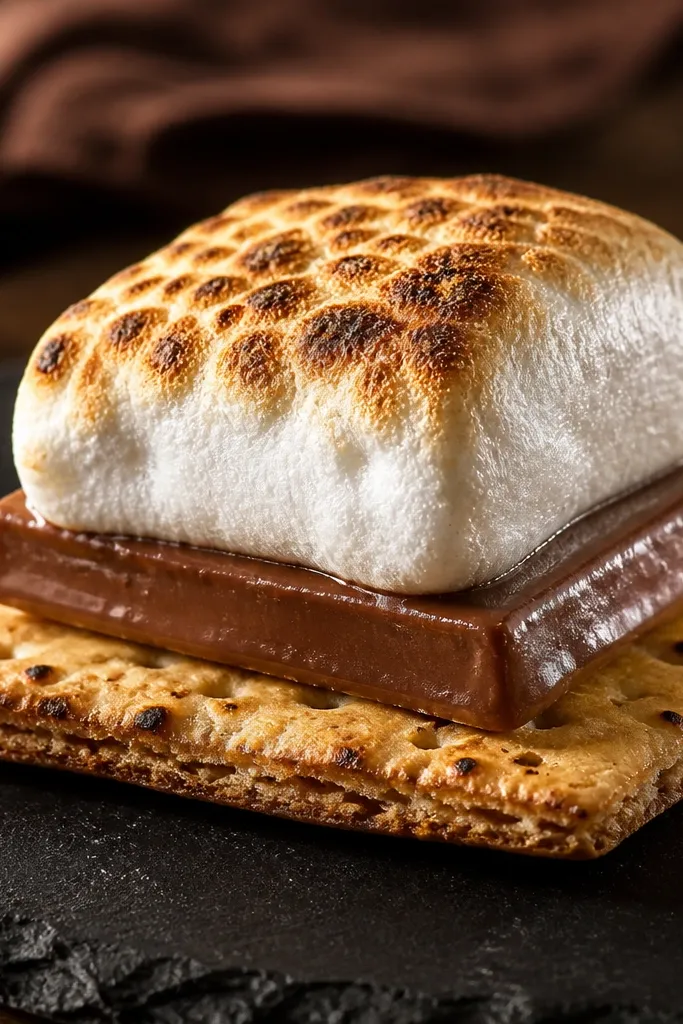
S’mores squishy looks like a mini dessert stack, and the toasted edge texture makes it feel warm and real. The layered look is what sells it: you can clearly see cracker, chocolate, and marshmallow sections. It’s beginner-friendly because you’re building three flat layers that stack into a rounded form with minimal sculpting. The marshmallow top gives you that soft white contrast that pops against the browns. Great for fall decor, camp-themed crafts, and gift baskets.
Cut a graham cracker base rectangle from light brown cardstock (about 9 x 6 cm) and round the corners, then cut two copies. Cut two chocolate layers from dark brown cardstock, same size but slightly smaller (about 8.5 x 5.5 cm). Cut two marshmallow domes from white cardstock, about 6 cm wide. Glue the base layers together, stuff lightly, then glue the chocolate layer on top, and finally attach the marshmallow dome. Add toasted texture by lightly rubbing a pencil on the edges for a shaded “toasted” look.
Use pencil shading on edges only; it makes the texture without warping the paper like paint can.
Avoid gluing all layers with thick glue; heavy glue creates hard ridges.
10. Ocean Turtle Squishy with Layered Shell Scales
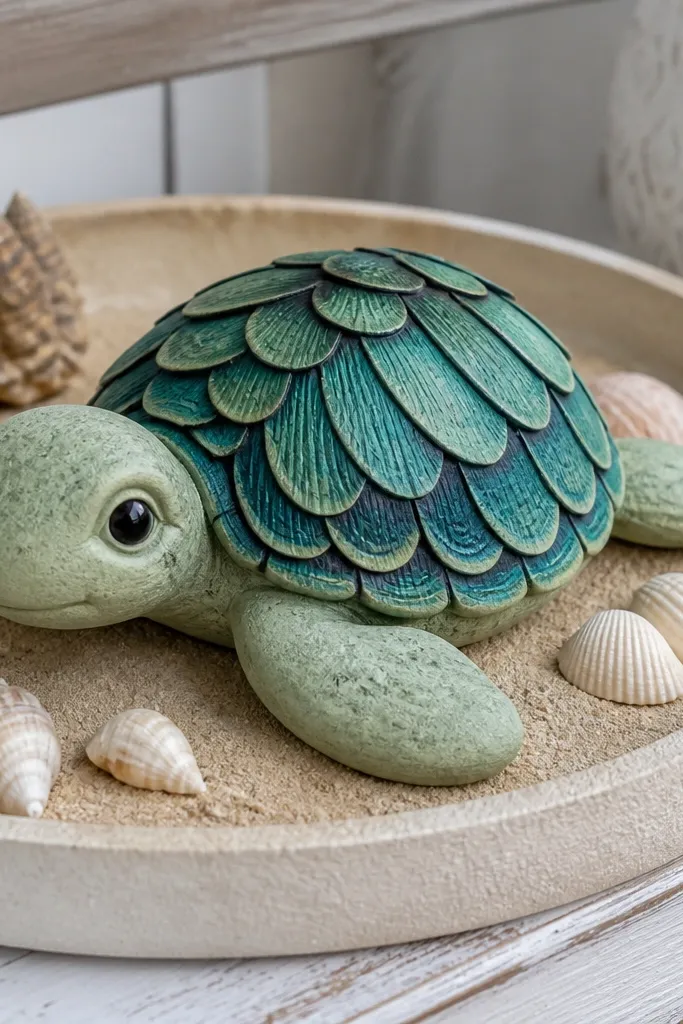
This turtle squishy has a cute “cartoon-real” look because the shell scales are layered, not drawn flat. The layered scales give depth that shows up in close-up photos. You build it as a rounded body with a shell dome on top, so it stays forgiving for beginners. It’s visually striking because the dark outline and green tones create clear separation. It fits ocean-themed rooms, toy storage labels, and summer decor.
Cut two rounded body bases from green cardstock, about 10 cm long, and glue edges leaving a small opening. Stuff with tissue and close the seam. Cut a shell dome from darker green cardstock, then cut small oval scales from lighter green paper. Glue the scales in rows on the shell dome, then attach the shell dome to the body. Add head and legs details using cut shapes, and outline everything with a fine black marker.
Make scales slightly overlap; tiny gaps make the shell look unfinished.
Don’t use too many tiny scales — it slows you down and makes edges bulky.
11. Kawaii Ice Cream Cone Squishy with Waffle Texture
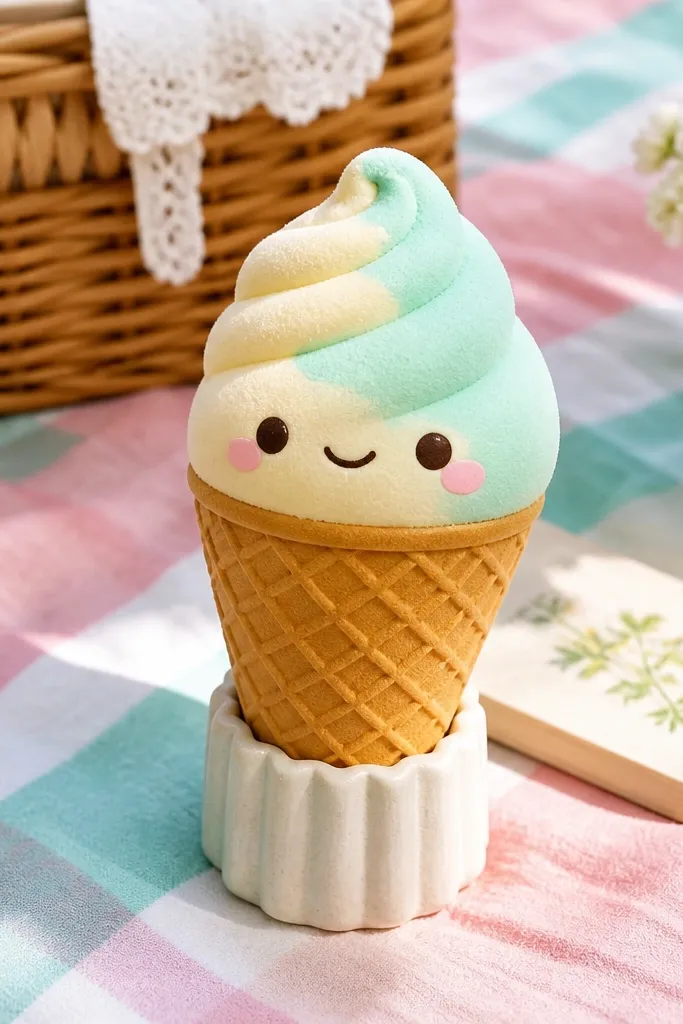
Ice cream squishies look instantly cute because the cone shape gives you a strong silhouette and the scoop colors pop. The waffle texture on the cone makes it feel more “crafted” than plain triangle paper. This is a beginner-friendly build: you glue two halves, stuff lightly, then decorate. The scoop is rounded, so small seam lines don’t stand out. It’s perfect for kitchen decor, kids' rooms, or a summer party table.
Cut two cone halves from brown cardstock, about 10 cm tall, then glue into a cone shell and close edges with a seam strip. Stuff with tissue and seal the bottom with a circle. Create a scoop dome from pastel cardstock using a circle cut with curved edges, glue two domes together around the edge, stuff lightly, then attach to the cone top. Add waffle texture by drawing short vertical and horizontal lines, then lightly shade the edges with a pencil.
Draw waffle lines with a ruler lightly — uneven lines look messy on camera.
Don’t overstuff the cone; it warps the triangle and makes the scoop sit crooked.
12. Boba Tea Squishy with "Chewy" Pearls
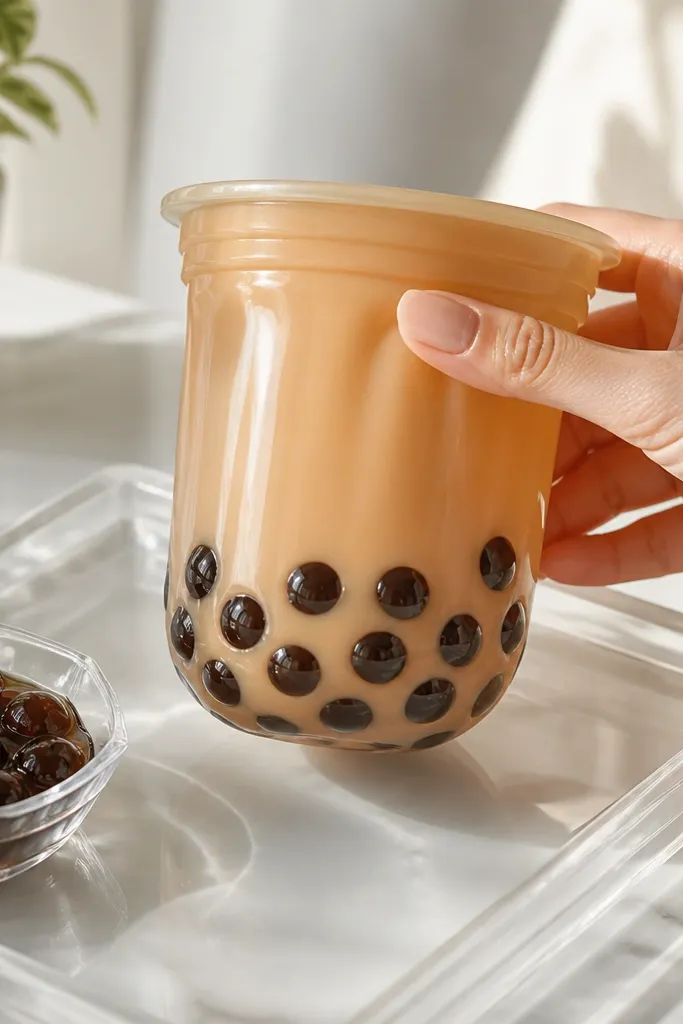
This squishy is fun to look at because the boba pearls create texture and depth. The cup shape is easy, and the “chewy” pearls are just small circles glued on top or tucked under a clear-looking layer. It’s photogenic because you get a strong contrast: dark pearls against light tea color. Build it as a puffy cup so it reads like a drink, not a flat card. It works great for cafes, kitchen shelves, and drink-themed decor.
Cut two cup shapes from light beige or pale brown cardstock, about 8 cm tall with rounded corners. Glue the sides together around the edge with a small opening, stuff with tissue, then close. For the tea surface, glue a slightly smaller oval of semi-translucent paper on top so it looks like liquid. Cut black circles for pearls (about 6-10 pieces), then poke a toothpick tip through lightly to create tiny dents before gluing so they look less perfect. Arrange pearls across the tea surface and add a small highlight with white gel pen.
Editor's noteIf you want the cup to look glossy, brush a thin layer of clear glue-water on the top surface.
Skip thisSkip large pearls; too-big circles look like buttons instead of boba.
13. Sunflower Squishy with Layered Petal Rings
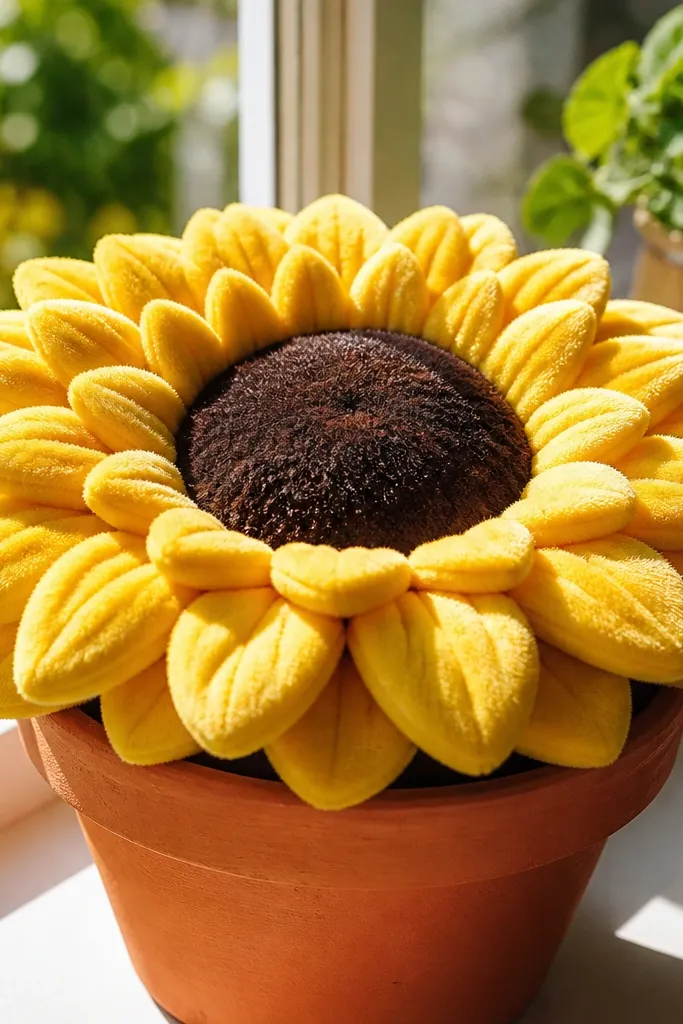
Sunflowers look bold and cheerful, and the layered petal rings create a 3D look that stands out even in busy decor photos. This squishy is visually striking because the center is dark and the petals are bright yellow with slight variation. It’s beginner-friendly when you build it as a dome with petal strips, not as intricate individual petals. The shape stays soft because the shell is stuffed lightly and the petals cover any small seam issues.
Cut two dome bases from light yellow cardstock, about 9 cm wide, and glue them together leaving a small opening. Stuff with tissue and close. Make petal rings: cut 1-2 circles of yellow paper and then cut narrow petal shapes around the edge, spacing them evenly. Glue the petal ring(s) around the dome, then add a dark brown center circle. For realism, add darker yellow shading with a pencil at the petal bases.
Editor's noteUse two shades of yellow — one bright, one slightly darker — for instant depth.
Skip thisDon’t glue petals flat to the base; lift the petal edges slightly so they curve outward.
14. Pumpkin Squishy with Carved-Look Segments
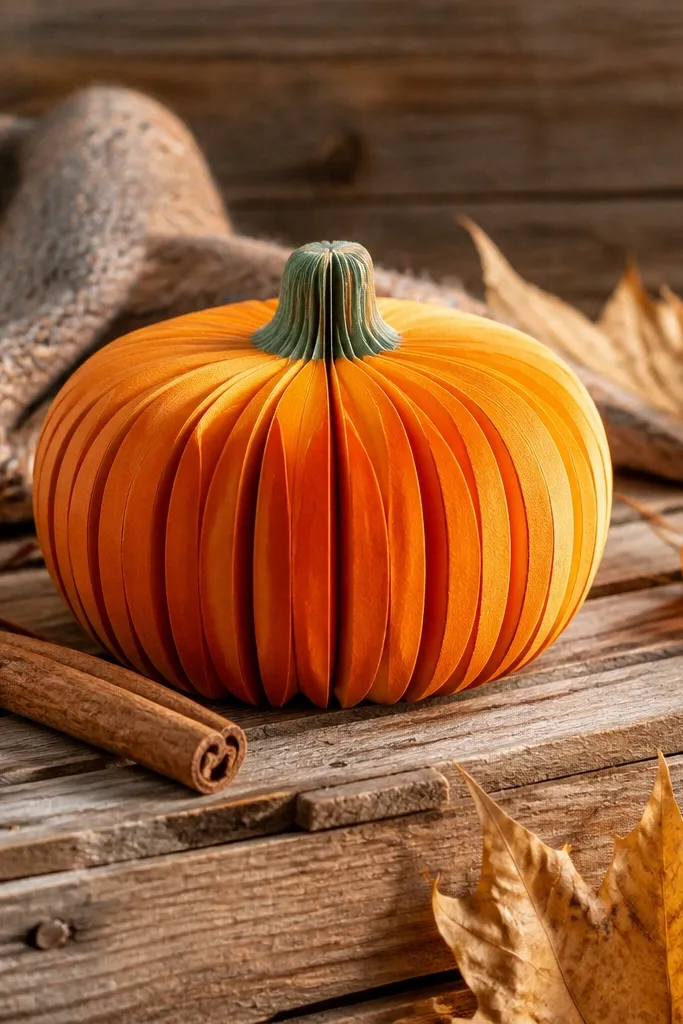
A pumpkin squishy makes fall decor feel more playful than paper cutouts, and the carved-look ridges make it look dimensional. You build it as a rounded pumpkin with vertical segment lines that guide the eye. This is beginner-friendly because the segments are just drawn or lightly embossed, not cut into complex shapes. The green stem is the finishing detail that makes it look like a real pumpkin in photos. It’s perfect for Halloween shelves, mantel accents, and small gift bags.
Cut two pumpkin domes from orange cardstock using a rounded template about 10 cm tall. Glue around the edges leaving a small opening, stuff lightly, and close. Add segments by scoring 8-10 vertical lines with a dull pencil around the dome, pressing gently so it doesn’t crack. Cut a small green stem from cardstock, attach it at the top center, then add a darker orange shadow at segment edges with pencil.
Score lines before stuffing if you want cleaner ridges; stuffing can hide small cracks.
Don’t use marker for ridges; it bleeds into the paper grain and looks smudgy.
15. Mini Bunny Butt Squishy with Soft Ears
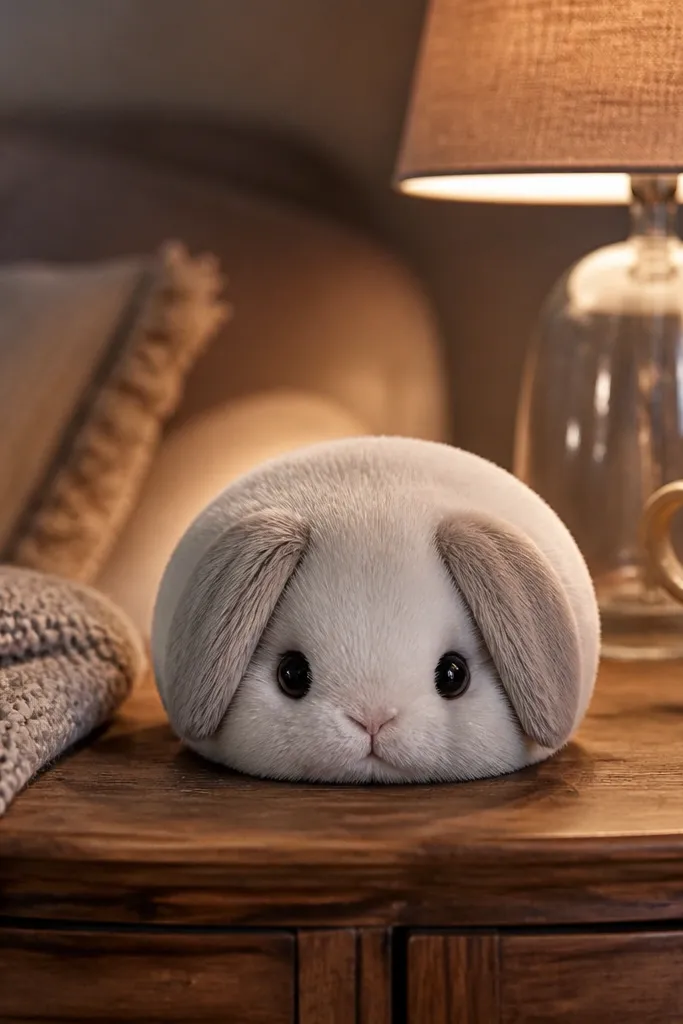
This is a funny, cute squishy that still looks good on a shelf because the shape is simple and the ears frame the face. The “bunny butt” silhouette is basically a rounded oval with two small ear triangles, which makes it easy for beginners to execute cleanly. It’s photogenic because the ears add height and the face details are centered. Keep the stuffing light so the bunny stays squishy instead of stiff. Great for Easter decor, kids' desks, and tiny gifting.
Cut two rounded oval bodies from white cardstock about 8 cm wide. Glue edges leaving a small opening, stuff with tissue, then close. Add ears: cut two long triangles, fold slightly at the base, and glue inside the top corners. Draw a small face on the front: two dot eyes, a tiny triangle nose, and a short mouth line. Add a blush area with very light pink pencil or watercolor.
Editor's noteFold the ear base so it sits slightly angled — it makes the bunny look more alive.
Skip thisAvoid thick blush paint; it soaks through and leaves dark spots.
16. Layered Cupcake Squishy with Sprinkles Top
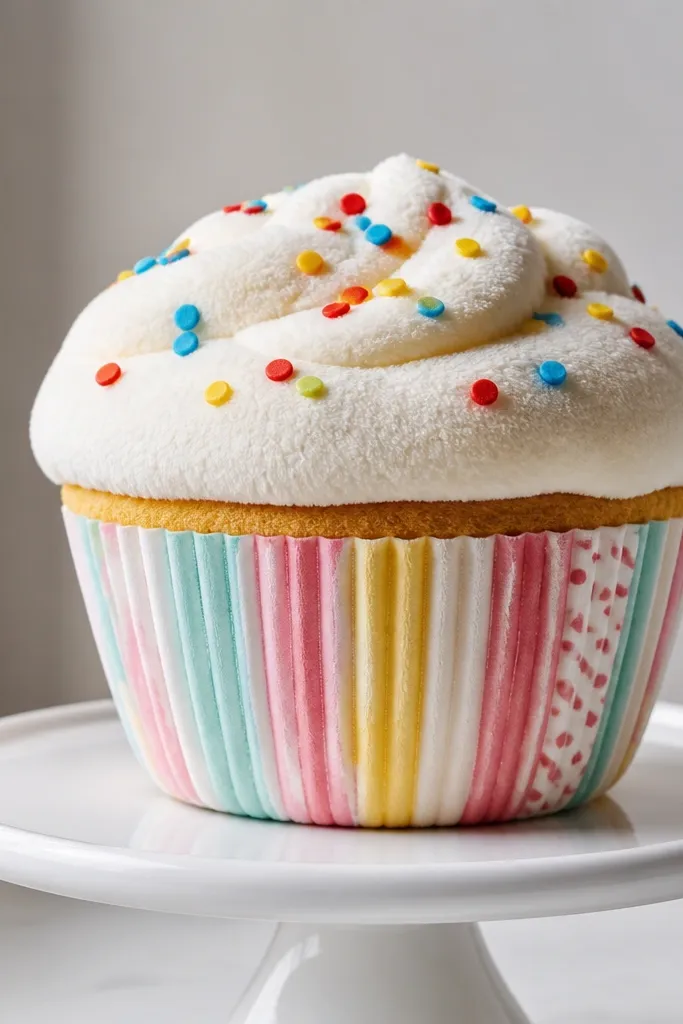
Cupcakes are the easiest way to get a “cute and full” look from paper because wrappers and toppings give you natural layers. This squishy uses a layered wrapper and a puffy frosting top so it looks bakery-made from any angle. Sprinkles are the key photo detail — small, bright dots scattered on top make it feel lively. It’s beginner-friendly because you repeat the same circle and strip cuts. Works for birthdays, party decor, and a dessert-themed wall display.
Cut two wrapper shapes from patterned or solid cardstock, about 8 cm tall, and glue them together with a small gap. Stuff lightly, close the seam, then add a thin strip band around the middle for extra structure. Make the frosting top from two circles of soft pastel cardstock, glue them together, and stuff lightly. Glue frosting to the wrapper top. Add sprinkles by cutting tiny rectangles or drawing short dashes in pink, blue, yellow, and green with a marker.
Editor's noteUse a white gel pen to draw sprinkle highlights — it makes the dots look glossy.
Skip thisDon’t place all sprinkles in a perfect grid; randomness looks more realistic.
17. Chubby Pencil Squishy with Eraser Tip
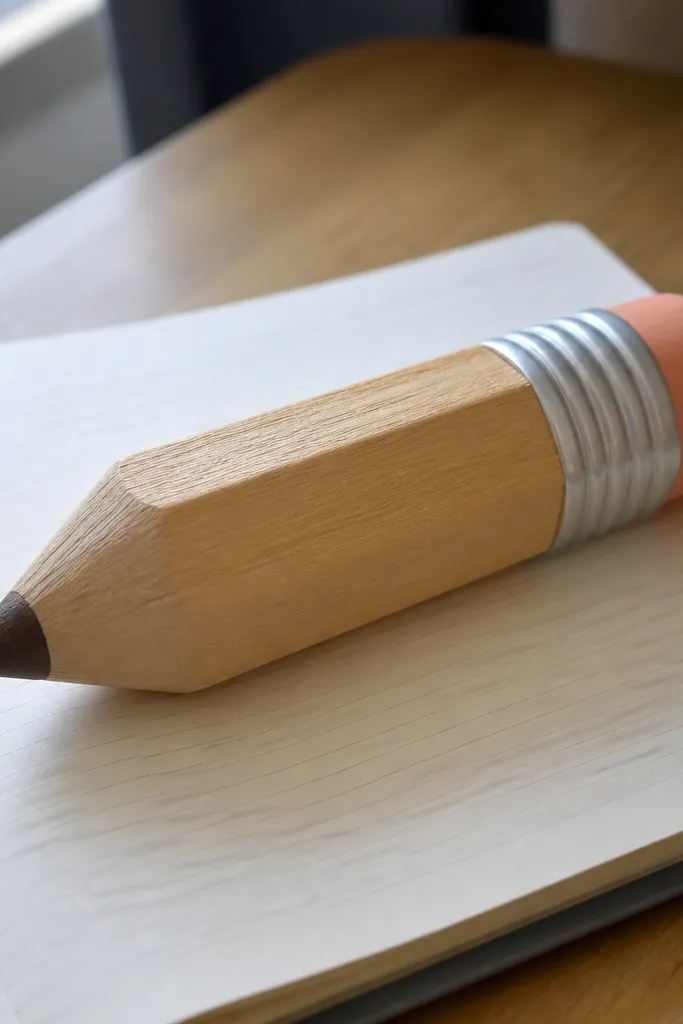
This pencil squishy is a decor win because it looks useful and playful at the same time. The trick is proportion: keep it chunky so it reads as a squishy toy, not a thin craft stick. The eraser tip adds a clear color block that stands out in photos. Beginners like it because it’s basically a rolled rectangle with simple end caps. It’s great for desk decor, stationery corners, and classroom craft spaces.
Roll a rectangle of yellow cardstock into a tube about 12 cm long and 3.5 cm wide, then glue the seam. Cut two end circles and glue one end closed, leaving the other end open. Stuff with tissue until the pencil feels firm, then glue the other end closed. Add the eraser by cutting a red rectangle, rolling it into a smaller tube, and gluing it on the top end. Draw a few thin pencil bands with a black marker near the middle.
Editor's noteCut the end circles slightly larger than the tube so you can trim flush after gluing.
Skip thisDon’t skip seam reinforcement; a weak seam splits when you squeeze.
18. Space Planet Squishy with Ring and Crater Dots
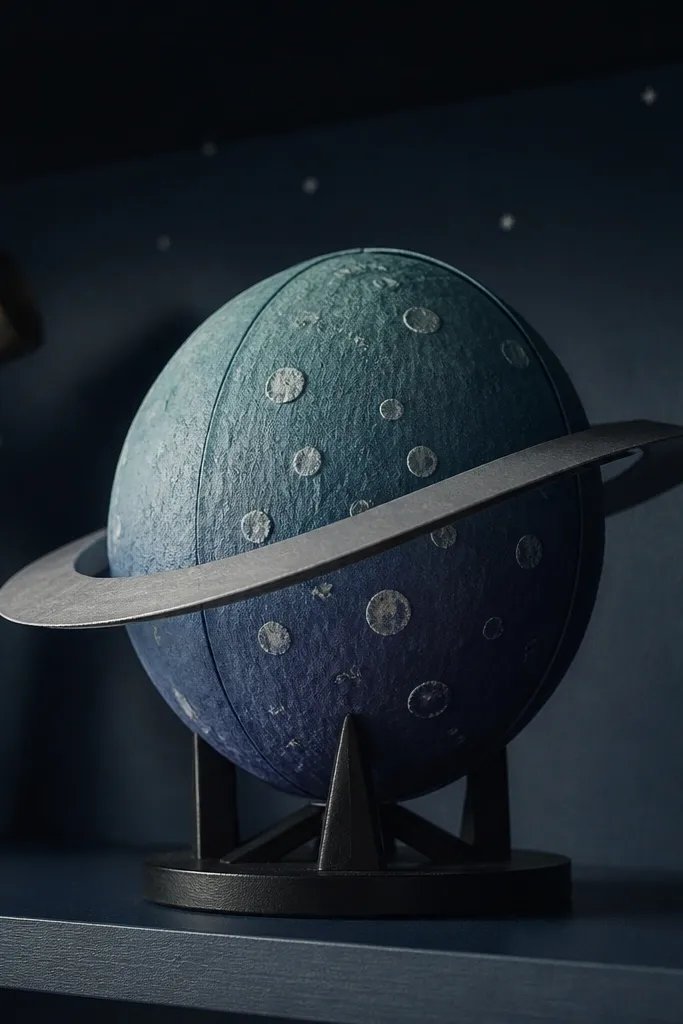
A planet squishy looks instantly “cool” because the colors read like space and the ring gives it a cinematic silhouette. Crater dots stop it from looking like a plain circle. It’s beginner-friendly because you’re making a sphere-like dome with simple decorations on top. The ring is a separate piece, so you can glue it after the planet is assembled. Great for a kid’s room, a science corner, or any shelf that needs something bold and round.
Cut two planet domes from blue cardstock, about 9 cm wide, and glue edges leaving a small opening. Stuff lightly and close. Add crater dots using a fine marker or small paper circles glued on with white dots for highlights. Make the ring from a strip of cardstock shaped into an oval about 12 cm across, then glue it across the planet so it looks like it sits in front and behind. To make the ring look layered, cut two ring pieces and offset them slightly before gluing.
Use a darker blue for crater shadows so dots look recessed, not floating.
Avoid metallic foil rings; they crease and look wrinkled when handled.
19. Mochi Ball Squishy Trio with Stitched Edges Look
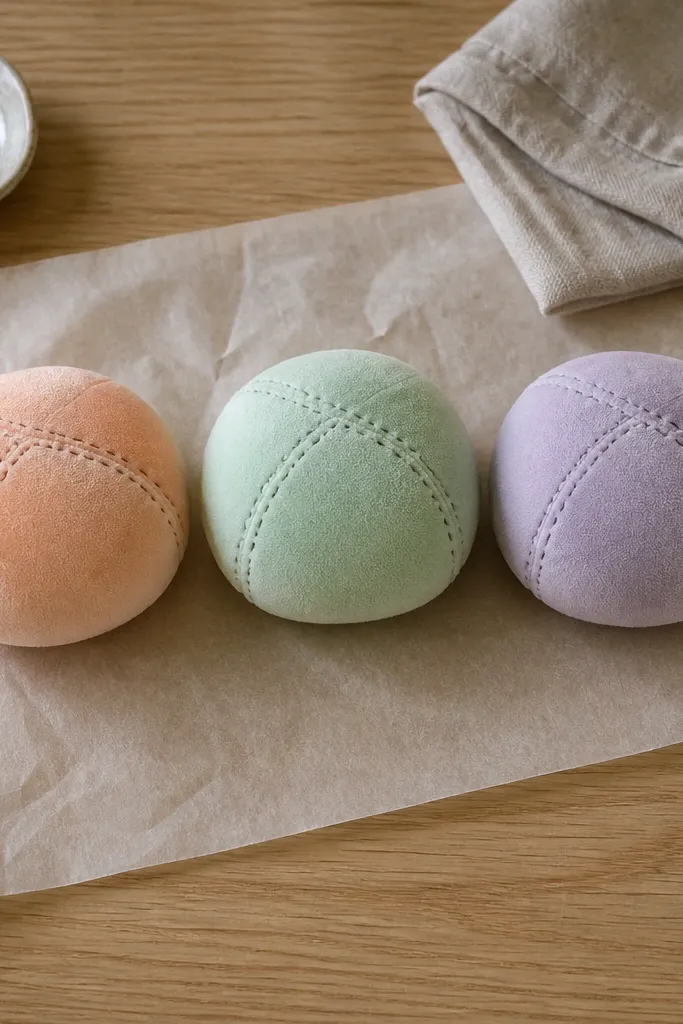
Mochi balls are adorable because they’re round, soft-looking, and simple to build. The stitched edge look gives you that mochi-bakery detail without sewing. This project is perfect for beginners because you’re repeating the same steps three times with different colors. It’s also very photogenic: pastel tones look clean together, and the stitched lines add texture. Put them in a small bowl on a shelf and they immediately look like decor, not craft clutter.
Cut six circles from pastel cardstock, about 7 cm wide, so you have three pairs. Glue each pair together around the edge leaving a small gap, then stuff with tissue and close. Create the stitched edge look by drawing short “U” shapes around the perimeter with a fine marker or white gel pen. For extra dimension, lightly shade the lower half of each mochi with pencil in a matching tone. Repeat for all three colors.
Editor's noteKeep the stitch marks consistent spacing — that’s what makes it look designed.
Skip thisDon’t overstuff; too much filling makes the circle bulge unevenly.
20. Watermelon Slice Squishy with Glossy Black Seeds
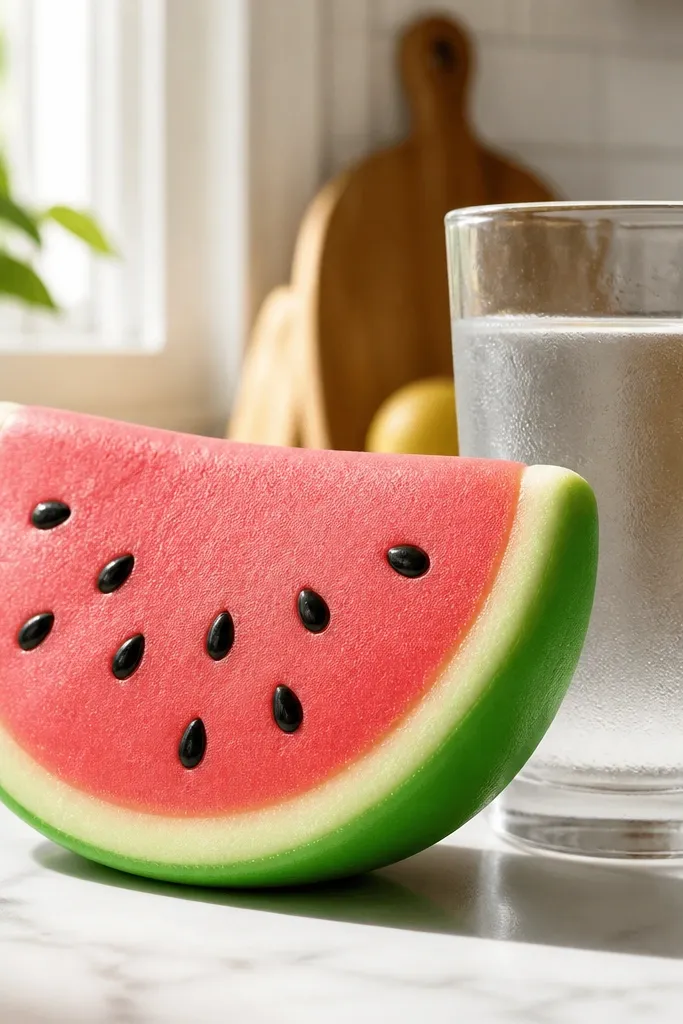
A watermelon slice squishy is one of the easiest ways to get bright, summer photos. The rind and pink middle are natural color blocks, and the black seeds add texture you can see clearly. It’s beginner-friendly because the slice shape is a simple wedge with curved ends. The glossy seeds make it look fresh instead of flat. This fits summer decor, picnic-themed craft tables, and gift tags with a cute twist.
Cut two wedge slices from light green cardstock for the rind layer and two matching smaller wedges from pink cardstock for the middle. Glue rind layers together and stuff lightly, then glue the pink middle wedge on top. Leave the top edge slightly rounded so it looks like a real slice. Add seeds by drawing tiny black teardrops with a white gel pen dot on each seed for highlight. Finish by sealing lightly with a thin glue-water layer over the pink area so colors look smoother.
Editor's noteUse a pencil first to place seeds — then ink them so spacing stays neat.
Skip thisDon’t use thick glue on seeds; it turns them into raised lumps.
21. Lemon Tart Squishy with Crust Crumble Detail
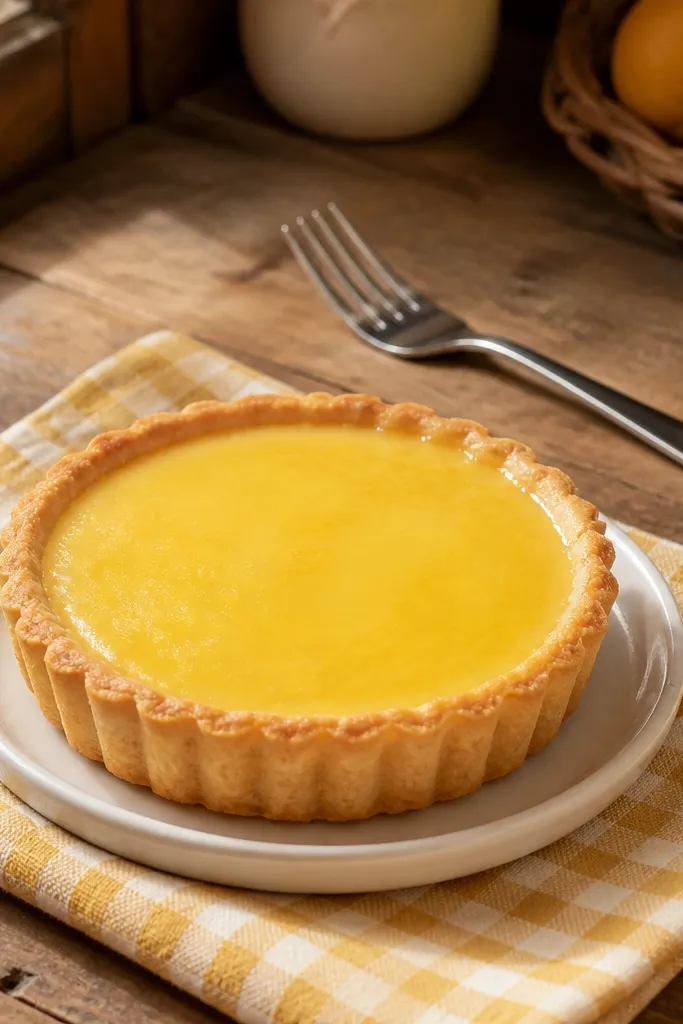
Lemon tart looks polished because you get a bright yellow center and a crust ring detail. The crust crumble detail is what makes it feel bakery-made, not like a plain circle. This squishy is beginner-friendly because it’s a stacked circle build: crust base, filling top, then decoration. It also sits flat enough for display while still squishy when you press it. Great for kitchen decor, spring party tables, and cute gift packages.
Cut two crust circles from tan cardstock about 8 cm wide. Glue edges leaving a small opening, stuff lightly, and close. Make the lemon filling top from bright yellow cardstock as a slightly smaller circle, then glue it on top. For crust crumble, cut tiny irregular strips from tan paper, crumple lightly, and glue around the outer edge like crumbs. Add a tiny swirl detail in the center using a marker.
Crumple the crumb pieces first, then glue while they are slightly open — it gives a better texture.
Skip perfectly uniform crumbs; they look like confetti instead of tart crust.
22. Christmas Ornament Squishy with Satin-Look Ribbon
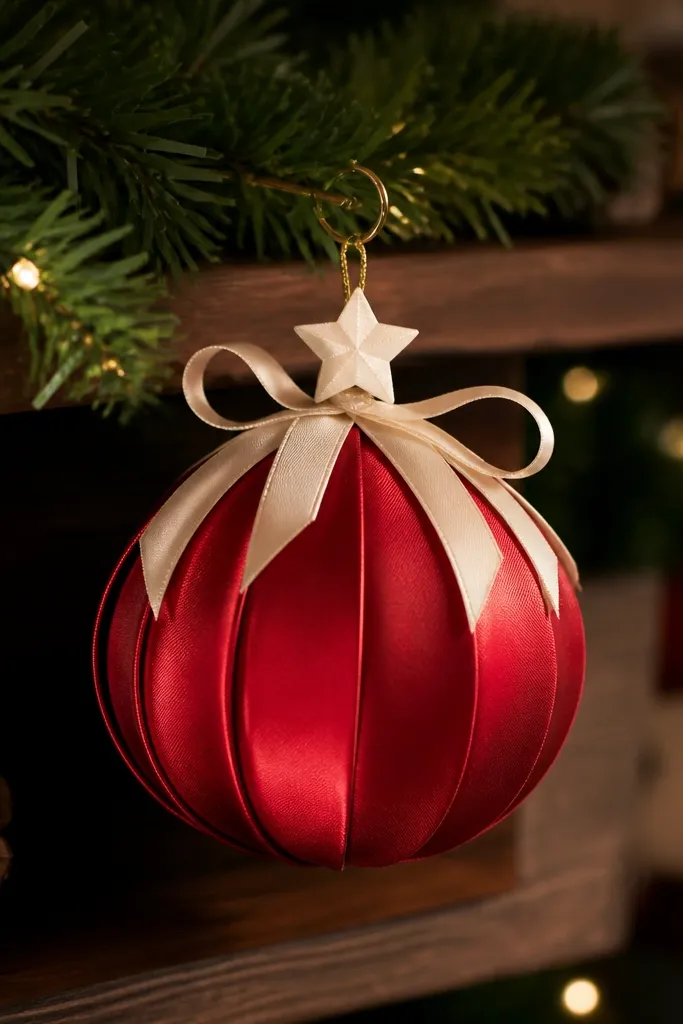
This ornament squishy looks like a soft, handmade decoration instead of a paper ball. The ribbon detail makes it feel “finished,” and the star adds a clear holiday focal point. It’s beginner-friendly because you’re making a simple sphere-like dome with a top cap. The trick for the ribbon look is drawing subtle fold lines so it reads like satin. It works for tree decor, gift tags, and as a hanging ornament on a bag or wreath.
Cut two ornament domes from glossy or matte cardstock, about 9 cm wide. Glue edges leaving a small opening, stuff lightly, and close. Cut a small gold star from cardstock and glue it near the top. Make a ribbon loop: cut a strip of ribbon-color paper, fold it into a loop, and draw gentle crease lines with a pencil. Glue the ribbon loop to the top so it hangs.
If you want extra shine, brush a thin layer of clear glue on the ornament surface only.
Don’t use thick glitter glue; it stays tacky and collects dust.
23. Halloween Candy Corn Squishy Trio
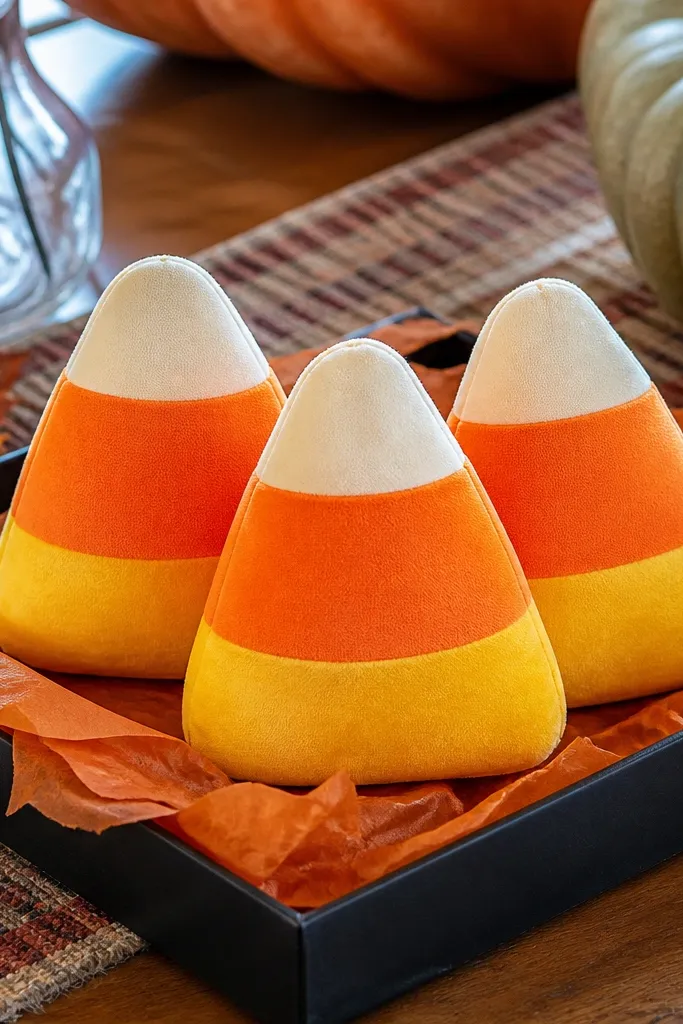
Candy corn squishy looks great because the layers are bold and easy to read in a photo. This trio version gives you variety without changing the build much. It’s beginner-friendly because each candy piece is basically a wedge with a flat base, and the layered colors are glued on top of the structure. You’ll get a soft, plush look by stuffing just enough to keep the wedge rounded. Perfect for Halloween shelves, party trays, and quick decor sets.
Cut two identical candy corn wedges from white cardstock, about 8 cm tall, then glue each pair around the edges with a small opening. Stuff lightly and close. Cut orange wedges slightly smaller and glue them as the middle band, then cut yellow wedges slightly smaller and glue them as the top band. Repeat for three colors or make two each in different sizes. Add a thin outline along edges with a light pencil or marker to sharpen the layers.
Editor's noteUse a paper trimmer for straight wedge edges so the layered bands line up.
Skip thisAvoid wrinkling the wedge while stuffing; it makes the layers slide off.
24. Bagel Squishy with Sesame Dot Sprinkle
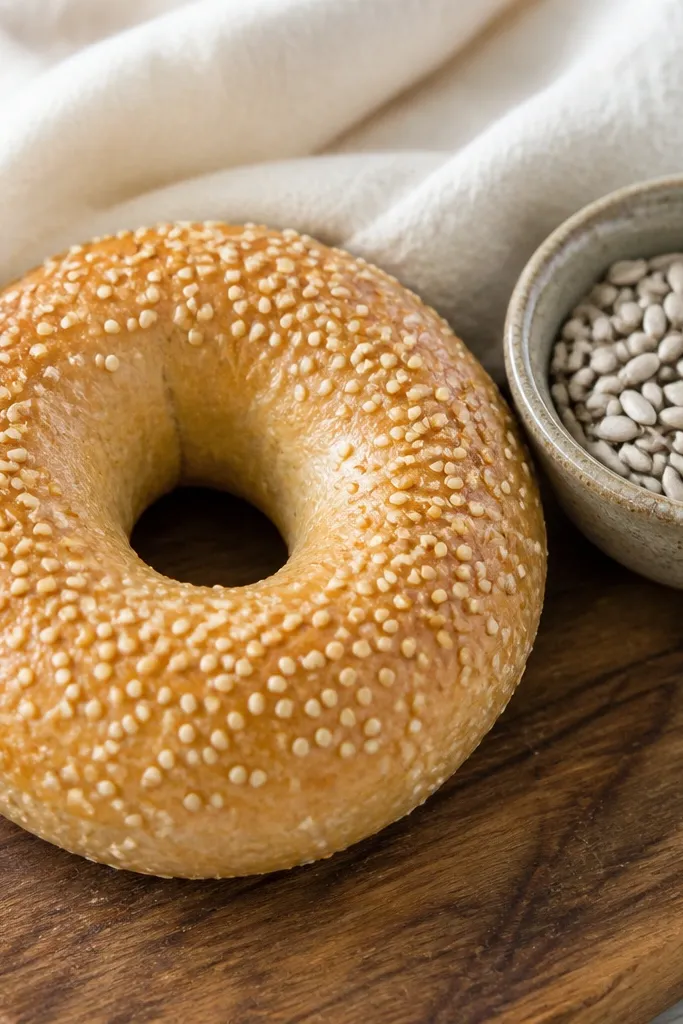
A bagel squishy has a strong silhouette because it’s a ring, and the sesame dots give it that “just baked” look. It’s beginner-friendly because you can use a simple circle-with-a-hole pattern and repeat the same finishing steps. The ring thickness comes from stacking two rings and stuffing lightly. This looks good on counters and shelves, and it pairs well with coffee-themed decor. The sesame dots are the key: they make the surface feel textured instead of flat.
Cut two bagel rings from tan or light brown cardstock: outer diameter about 10 cm, inner hole about 3.8 cm. Glue them together around the edge with a small opening and stuff with tissue until the ring puffs. Close the opening and press flat for a minute. Add sesame dots by dabbing tiny ovals using a toothpick dipped in brown paint or marker, then add a lighter dot highlight on a few seeds for variation.
Add sesame dots only on the top half — it looks more realistic and cleaner.
Don’t paint the whole top; it turns into a flat smear in photos.
25. Pastel Cloud Cake Squishy with Icing Swirls
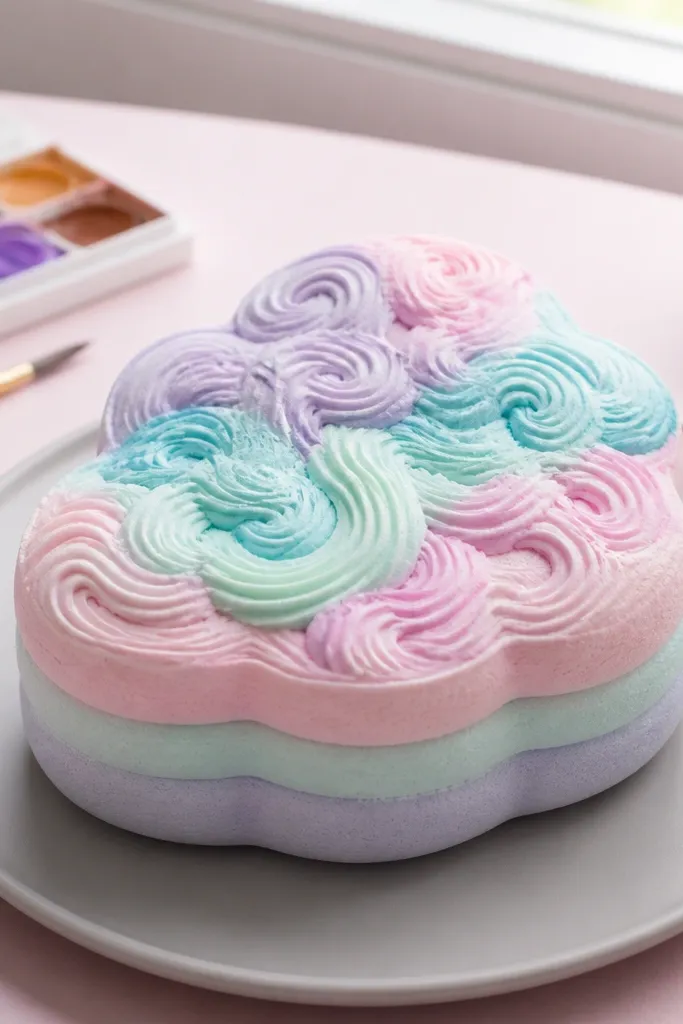
This cake squishy is airy and cute because it uses soft pastel layers and thick-looking icing swirls. The icing swirls are what make it look decorative, not plain. It’s beginner-friendly because you build it from stacked circles and then add swirl lines on top. The squish comes from light stuffing, so it still compresses gently. Great for birthdays, spring decor, and anyone who likes sweet visuals without complicated assembly.
Cut two identical base circles from pastel cardstock, about 9 cm wide, and glue around the edges leaving a small opening. Stuff lightly and close. Cut a smaller icing circle from white cardstock and glue it on top. Add icing swirls: draw looping lines with a white gel pen or light gray marker, then layer a thin strip of white paper along the swirl edges for a raised look. For extra dimension, add a thin darker pastel ring between base and icing.
Use a ruler to keep swirl starts near the center; the rest can be freehand.
Skip heavy stuffing; it makes the cake top bulge so swirls distort.
26. Paper Squishy Doughnut Hole with Glaze Drip
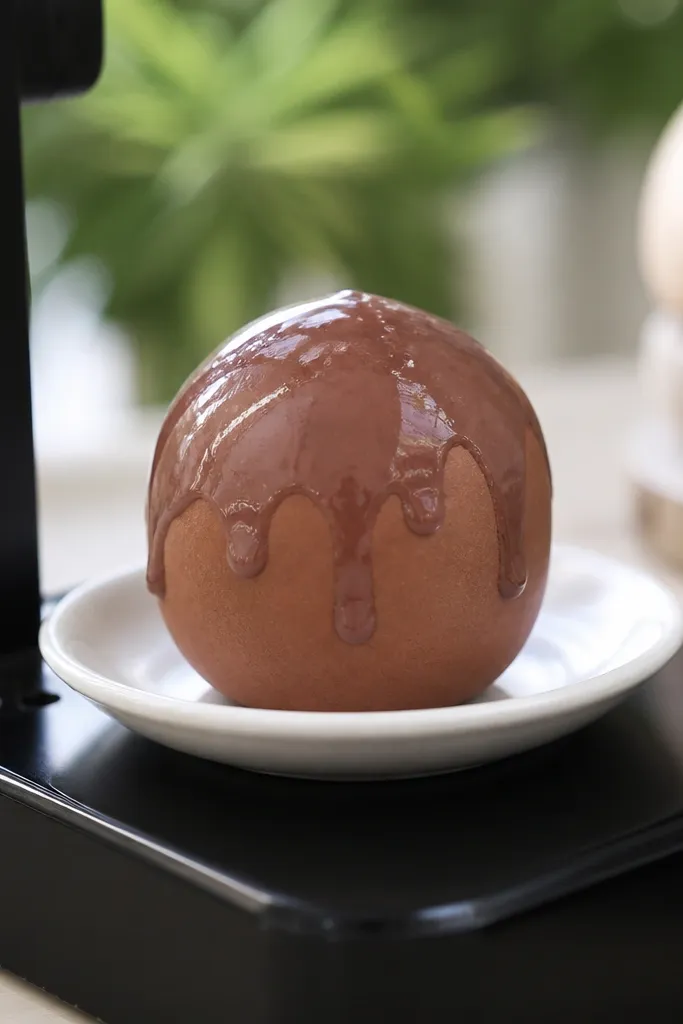
A donut hole squishy is small but high impact, and it’s easier than a full donut because you’re shaping a simple ball with a center hole. The glaze drip gives you a fun, glossy detail that looks great in close-ups. It’s beginner-friendly because the build is basically two circles glued with a center cut-out, stuffed lightly, then decorated. This fits desk decor, phone charm displays, and tiny gift bundles. If you want something fast and cute, this one hits.
Cut two circles from brown cardstock about 7 cm wide, then cut a smaller center hole in each using a circle punch. Glue the two rings together around the edge with a small opening, stuff with tissue, and close. Decorate the top glaze: cut a thin oval strip from pale cream cardstock and glue it on top, then cut 2-3 small drips and glue down from the oval. Add a shine by brushing a thin clear glue layer on the glaze paper once it’s dry to the touch.
Editor's noteUse tissue stuffing that’s loosely torn so it compresses smoothly when you press.
Skip thisDon’t glue drips too thick; they crack when the squishy bends.
27. Mini Flower Bud Squishy with Rolled Petal Edges
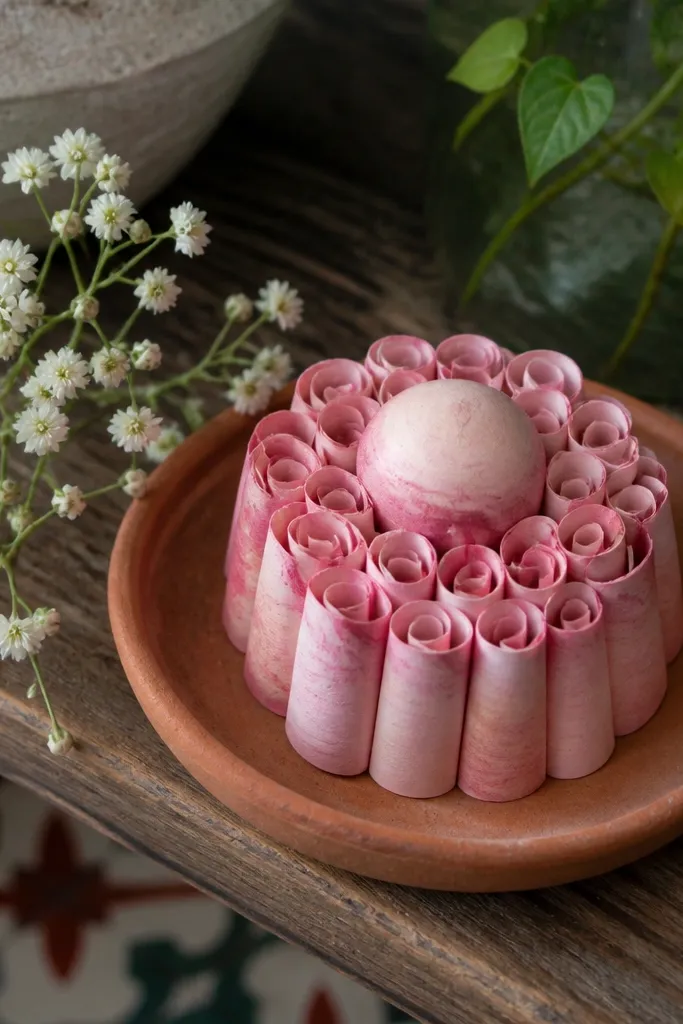
Rolled petal edges make a flower squishy look like it’s forming, not just sitting there. The rolled detail is subtle but it shows up in photos as little highlights along the petal curve. It’s beginner-friendly because the bud shape is a simple dome and the petals are strips you roll and glue around the top. You get a soft squish from a tissue-filled shell, and the petals hide seam lines. This is great for spring decor, small bouquets, and desk nooks.
Cut two domes from cardstock, about 8 cm wide, and glue them together leaving a small opening. Stuff lightly and close. Cut 10-12 narrow petal strips from pink or peach paper, about 4 cm long and 1 cm wide. Roll each strip around a pencil tip, then glue the rolled ends around the top edge like a ring. Glue a small yellow circle in the center and add tiny dot highlights.
Roll petals in alternating directions so the highlights look natural.
Avoid thin paper for petals; it tears when you roll it tightly.
28. Kawaii Hamburger Squishy with Layered Lettuce
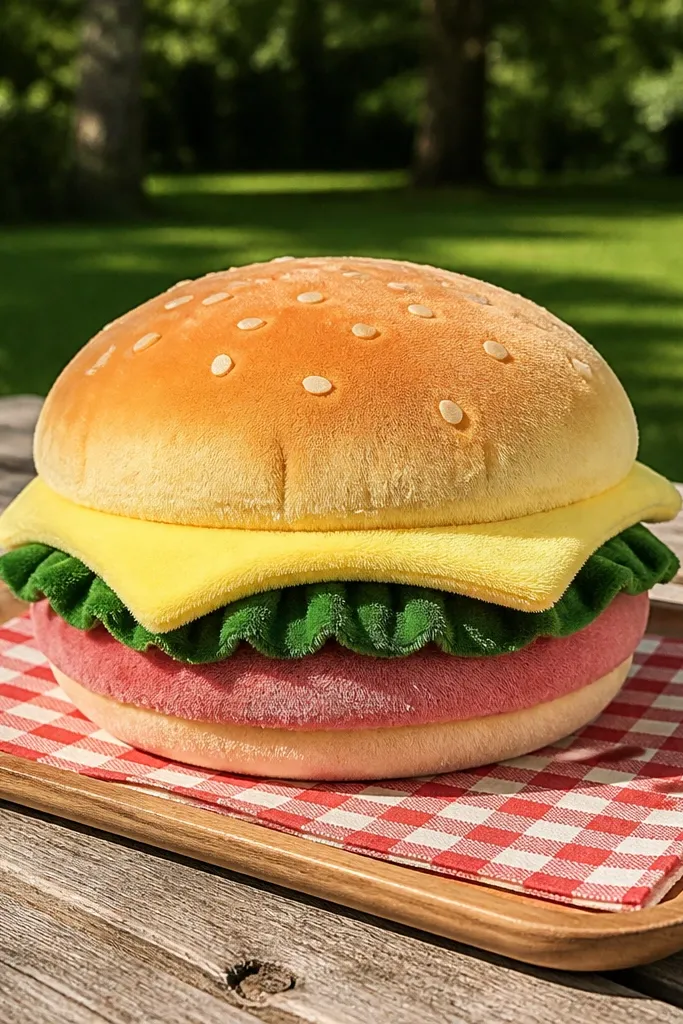
A hamburger squishy looks bold and fun because the layers are recognizable and the colors are clear. Layered lettuce and a cheese piece make it feel like a toy prop, which is exactly what you want from paper squishy decor. It’s beginner-friendly because each layer is just a cut shape glued in sequence on a soft base. You’ll get the squish by stuffing the bun base so the whole thing compresses. Great for kitchen decor, toy shelf styling, and food-themed parties.
Build the base bun: cut two rounded bun bases from tan cardstock, glue around leaving an opening, stuff lightly, and close. Cut lettuce strips from green cardstock and glue them on the top bun with small folds so they look layered. Cut a patty circle from brown cardstock and a cheese rectangle from yellow cardstock, then glue both in the center. Add bun top details: glue a second tan top piece with slightly smaller diameter and draw sesame seeds with a marker or dots.
Make lettuce slightly taller than the patty so the layers read clearly from the side.
Don’t stack layers too thick; it makes the hamburger unstable when you press it.
29. Penguin Squishy with Waddling Belly Tint
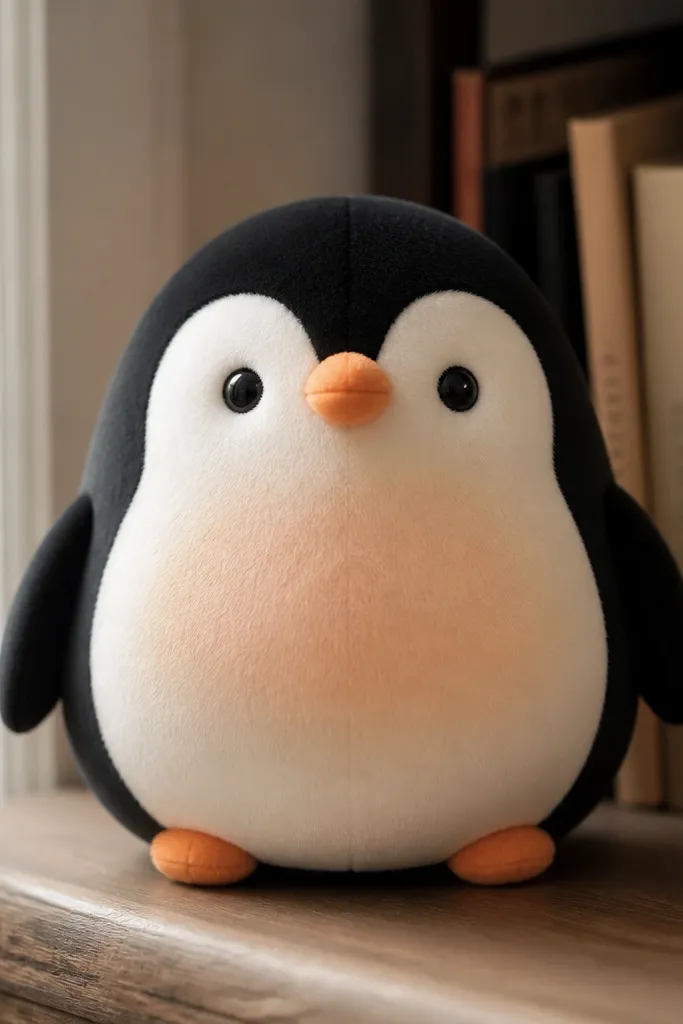
Penguin squishies look adorable because the contrast is simple: black body, white belly, and a tiny beak. The belly tint trick makes it look soft instead of flat white. This is beginner-friendly because the body shape is a rounded oval and the face details are small and easy. It photographs well because the black and white separation is strong. Perfect for winter decor, classroom craft displays, and cute shelf accents.
Cut two rounded body ovals from black cardstock, glue around leaving an opening, stuff lightly, and close. Cut a white belly oval and glue it centered on the front. Add wings by cutting two small black side shapes and gluing them on the sides. Make the face: cut a small orange beak triangle, add two eye dots, and tint the belly edges with light gray or pale blue pencil.
Tint only the edges of the belly; a full tint makes it look dirty in photos.
Avoid using wet paint for tint; it can warp the cardstock.
30. Layered Mermaid Tail Squishy with Scale Cutouts
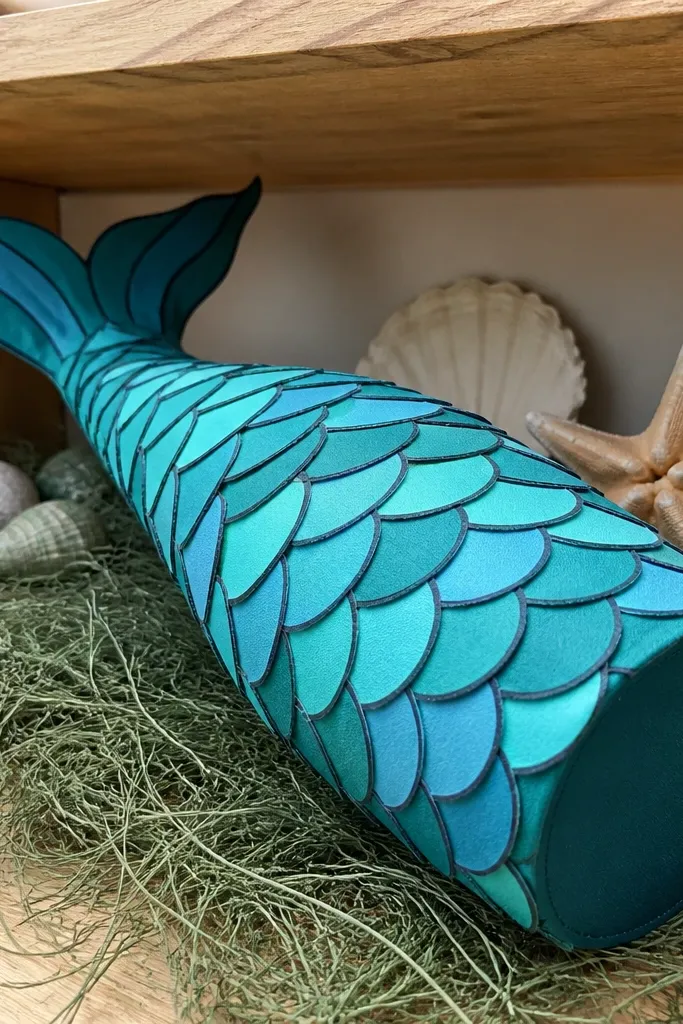
A mermaid tail squishy looks magical because the layered scales create a repeating pattern that reads clearly on camera. It’s not the fastest build, but it stays beginner-friendly if you keep the tail simple and use scale cutouts as one or two layers, not dozens. The squishy part comes from stuffing the tail base so it curves smoothly. Color choice matters: use two blues so the scales show depth. Great for ocean-themed decor and kids' craft rooms.
Cut two tail bases from medium blue cardstock, about 12 cm long, and glue edges leaving an opening. Stuff lightly and close. Create a scale layer: cut a strip of lighter blue paper with rounded scale shapes along the top edge, then glue it across the tail. Repeat with one more darker scale strip or add a single bottom ring. Add a fin tip from teal cardstock and glue it at the tail end.
Cut scales as a strip, not individual pieces — you get the pattern look with less work.
Don’t overstuff; the tail should curve, not bulge like a ball.



