
1. Layered Duck Window Silhouette
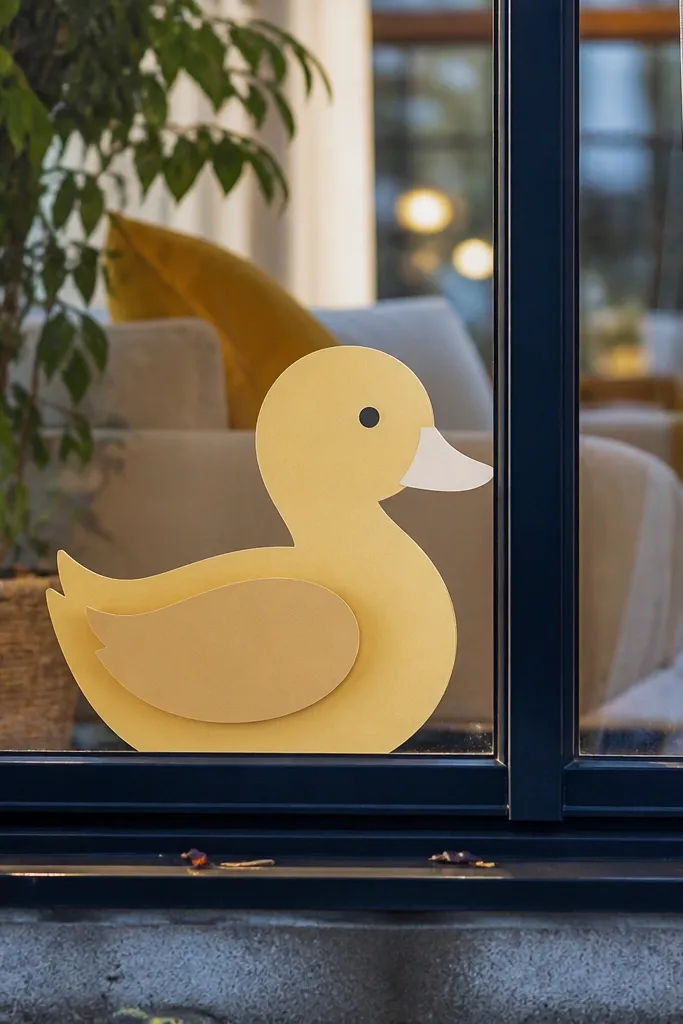
This one looks good because it reads instantly as a duck from across the room. You’re building a stacked silhouette: a warm yellow body, a slightly darker wing layer, and a crisp white highlight strip for the beak area. The window-style frame makes it feel like decor, not a craft. It’s also forgiving — if your beak lines aren’t perfect, the layered shape still looks intentional.
Start by cutting a duck body silhouette from yellow cardstock (about 6 inches tall). Cut a second duck body in a darker yellow for the wing and tail edges only, then glue it slightly offset to create depth. Add a thin white strip where the beak highlight would be and finish by mounting the whole duck onto a teal rectangular “window” frame. Use a glue stick for the main layers, then run a dot of hot glue only for the beak highlight so it stays flat and doesn’t warp.
Editor's noteTrace your duck outline on scrap paper first, then cut the final shape with a fresh blade so the edges stay sharp.
Skip thisDon’t use liquid glue on cardstock layers — it can ripple the paper and ruin the clean silhouette.
2. Paper Duck Rosette Wall Buddy
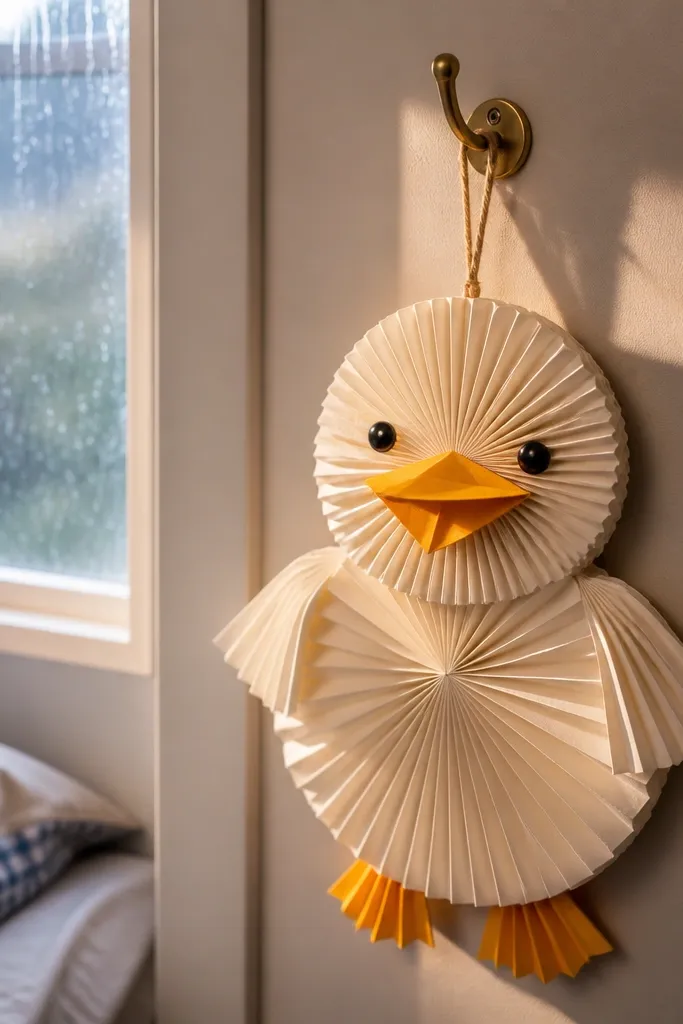
Rosettes look “store-bought” because the pleats catch light like tiny feathers. This duck uses a rosette for the body and folded paper triangles for wings, so the shape stays simple but the texture looks rich. It works great as a rainy-day wall decoration because it hangs flat and doesn’t need complicated assembly. The look is bright, graphic, and easy to photograph against a plain wall.
Make a rosette by cutting a strip of yellow paper about 1.5 inches wide and 18 inches long, then accordion-fold it. Glue the ends together to form a circle, then pinch the center slightly and glue it so the rosette has a gentle dome. Cut two small wing triangles from yellow paper and crease them so they sit like layered wings. Add a beak tab (small orange triangle) and two black paper dots for eyes, then glue the duck face onto the rosette center.
Editor's noteUse a bone folder or the edge of a plastic card to sharpen each accordion fold.
Skip thisDon’t make the rosette too flat — you want a dome so the pleats show in photos.
3. 3D Push-Tab Duck Bookmark
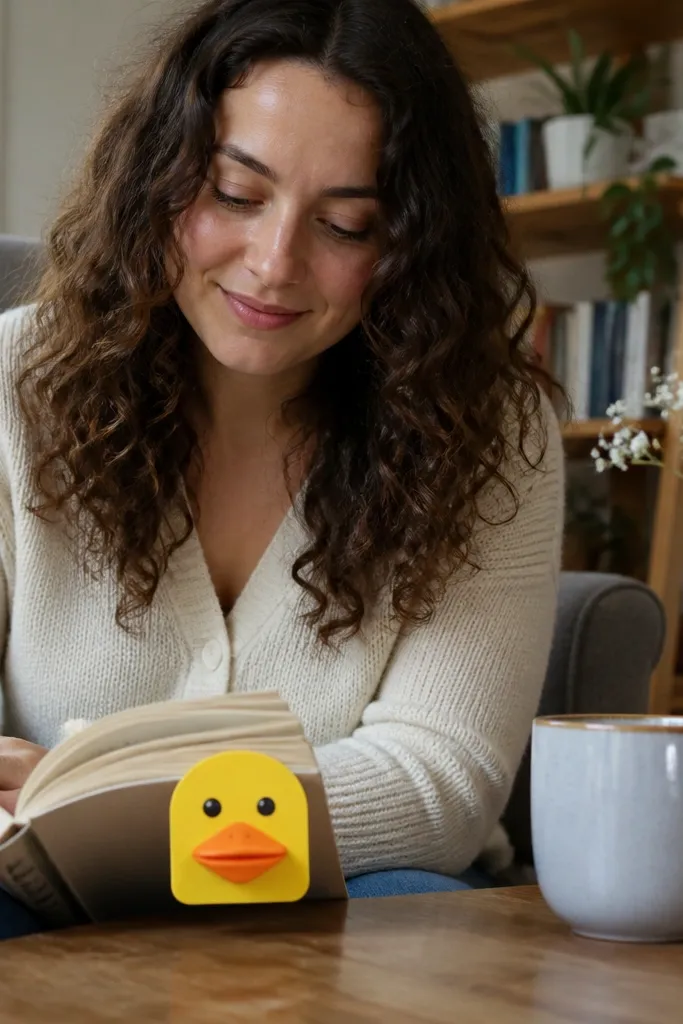
This is the kind of duck craft that looks cute up close and still reads from a distance. The push-tab gives you a beak that “pops” outward, which adds dimension and makes the project feel interactive. It’s also practical for rainy afternoons because you finish it fast and you’ll actually use it every day. The materials are minimal, but the 3D effect is the star.
Cut a duck bookmark base from thick yellow cardstock about 8 inches tall. Cut a beak piece from orange paper and attach it to a small tab made from cardstock so it can push outward. Score and fold a tab pocket on the bookmark so the beak slides into place and stays at an angle. Add a wing cutout on each side using small slits so the wings sit slightly raised. Finish by sealing the top edge with clear tape so it doesn’t fray.
Editor's noteUse a craft knife to cut the tab pocket — scissors leave fuzzy edges that show on thick cardstock.
Skip thisDon’t glue the beak directly flat — the whole point is the tab pop.
4. Duck in a Raindrop Frame (3-Layer Card)
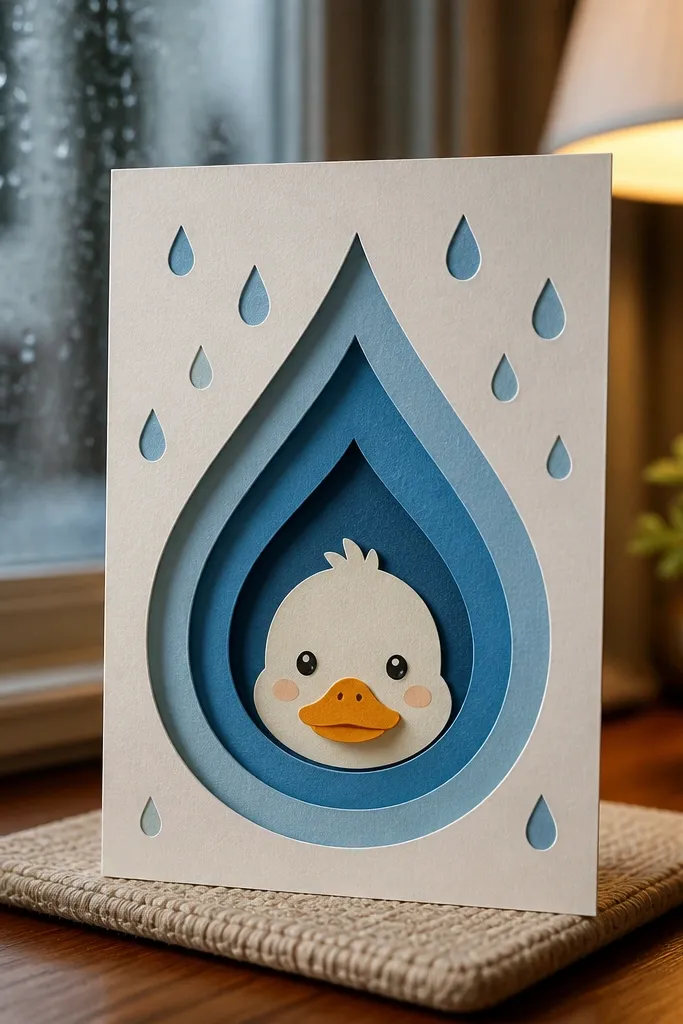
This one looks like a mini greeting card you’d actually keep. The raindrop frame is the visual hook: you stack two or three raindrop layers in different shades of blue and let the duck sit centered. The duck stays simple, but the stacked raindrops create a clean, elegant look without fine art skills. It’s great for a rainy-day craft because it’s only a few cuts and it still feels special.
Fold a white card base and cut a large raindrop window from the front (about 6 inches tall). Cut two smaller raindrop layers in light and medium blue and glue them behind the window so they peek out evenly. Place a small duck cutout inside the window and glue it only at the base so it doesn’t sag. Add raindrop speckles in a darker blue using a toothpick to dab paint or glue.
If you want crisp raindrop edges, cut the window layer first and use it as a stencil for the other layers.
Don’t overload the front with glue — the card front can warp and the raindrop frame stops looking symmetrical.
5. Paper Duck Lantern with Clear Tape Highlights
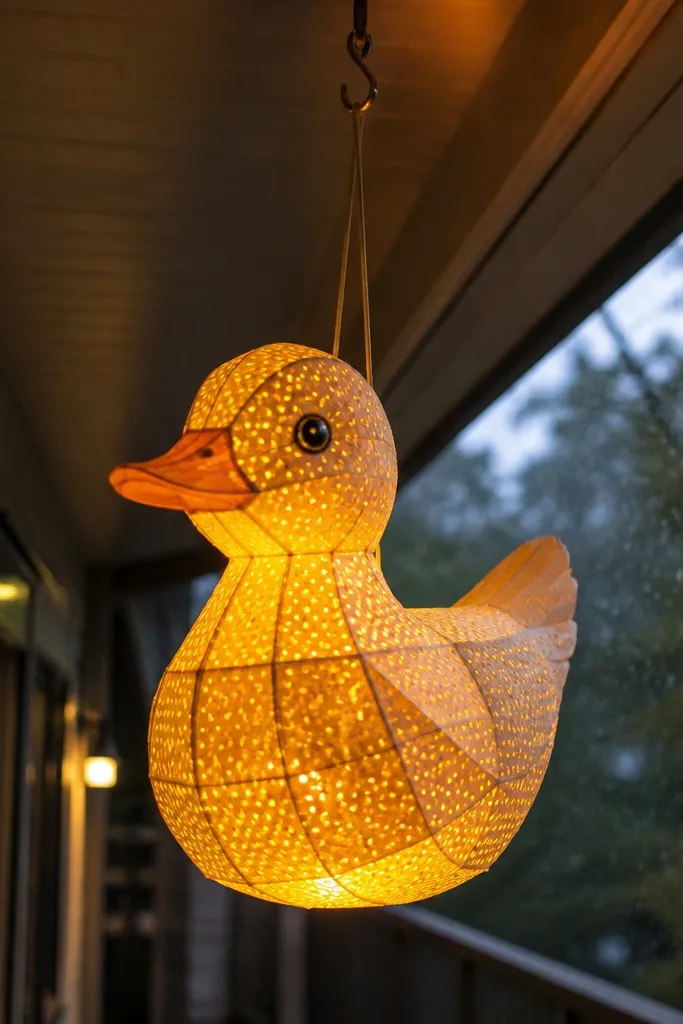
Lantern crafts photograph insanely well because the light makes the paper look warm and dimensional. This duck lantern uses perforated paper panels so light leaks through, plus clear tape highlights on the beak and eye area. It’s not just cute — it glows, and that glow is what sells the look in photos. You can hang it from a hook or just place it on a shelf for rainy-day mood lighting.
Cut a duck body template from yellow cardstock and score fold lines so it wraps into a cylinder. Cut matching “panel” pieces and punch small holes (1/8 inch) in a pattern across the belly area. Wrap the cylinder and glue the seam, then add a beak strip and eye dots on the front panel. Place two small pieces of clear tape to mimic shine on the beak and forehead. Finally, insert a small battery LED tea light inside the top opening.
Editor's noteUse a test LED first — if the holes are too dense, the lantern looks dim instead of glowing.
Skip thisDon’t use thin printer paper — it tears when you punch holes and the lantern looks flimsy.
6. Duck Feather Fan Ornament (Folded Strips)
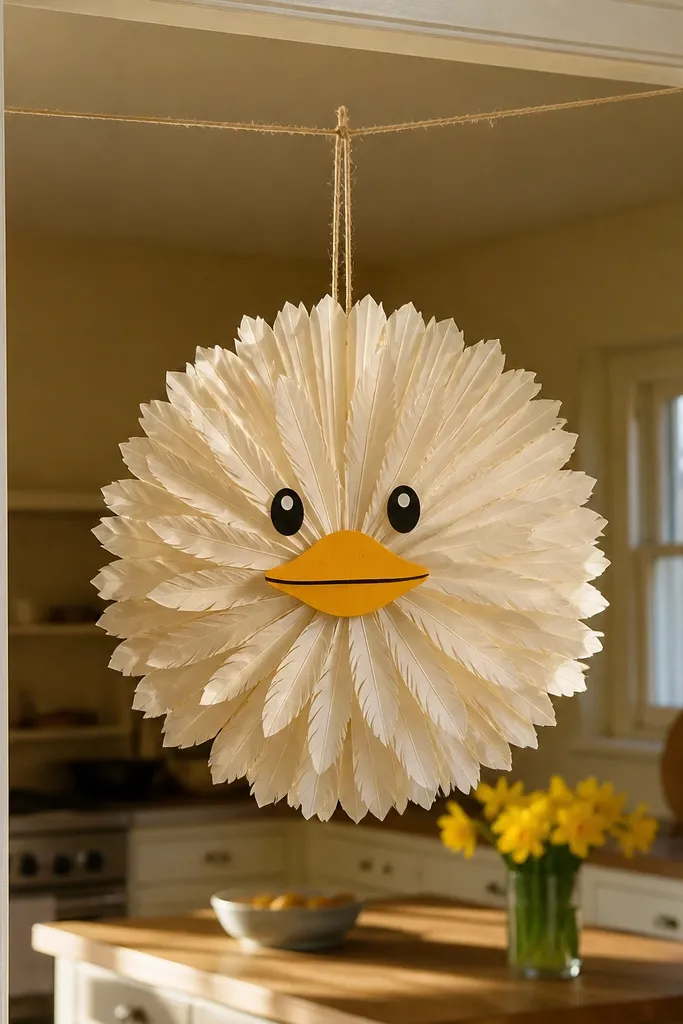
This craft looks fluffy without using fuzzy materials. You’re folding paper strips into a fan and arranging them around a simple duck face, so the body reads like feathers. It’s photogenic because each strip catches light differently, creating a soft texture. You can hang it on a string or tape it to a wall for a rainy-day decor moment.
Cut 10-14 narrow strips of yellow paper, each about 1 inch wide and 6 inches long. Fold each strip in half and snip the outer edge into a slight curve, then glue the folded base to a round paper circle. Cut a small orange beak and two black eye dots, then glue them to the top center. Add a tiny teal paper wing behind the face by tucking it under two strip bases. Punch a hole at the top and thread fishing line for hanging.
Editor's noteCut all strip lengths at once using a stack so the fan looks uniform.
Skip thisDon’t glue the face too low — keep it near the top so the feather fan doesn’t hide it.
7. Duck Confetti Pop-Up Box
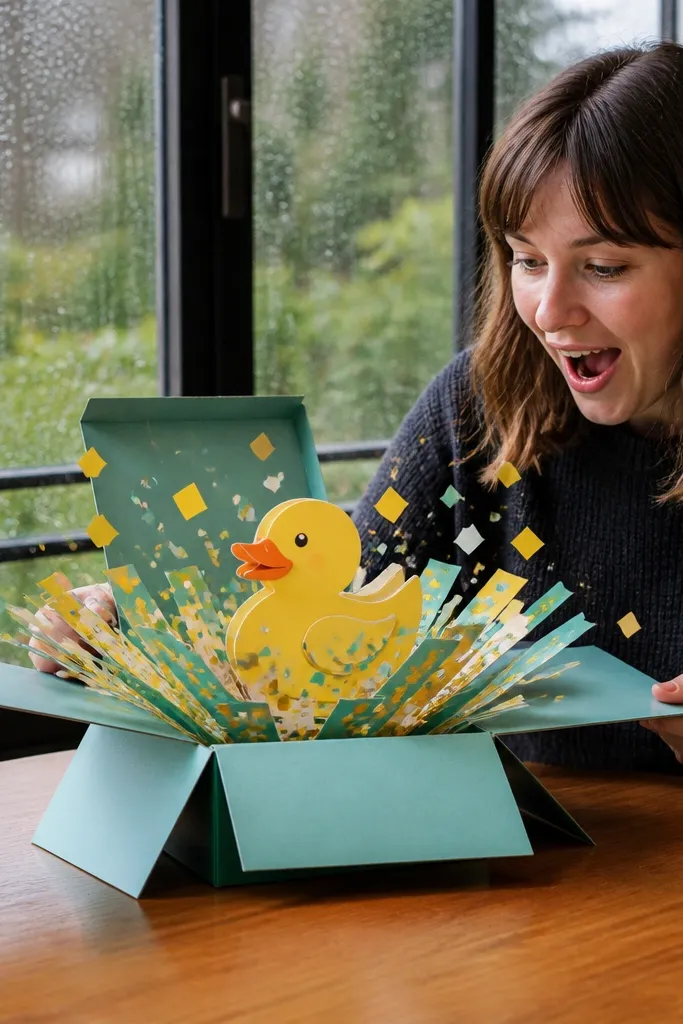
Pop-up boxes look playful and “photo-ready” because the movement is built into the design. This duck box has a simple pop-up duck on the inside lid and confetti tabs that create a burst effect. It feels like a rainy-day party, but it stays clean because everything folds flat. The color contrast — yellow duck against blue paper — reads instantly in pictures.
Build a small gift box base from cardstock (about 4x4 inches). Cut a duck pop-up piece with two tabs on the base and glue it to the center of the lid so it stands when opened. Add confetti strips by cutting slits in the lid edges and inserting narrow paper strips that stick out. Close the box to keep everything flat, then open to reveal the pop-up and confetti burst. Seal the inside folds with bone-folder pressure so it opens smoothly.
Use pre-cut cardstock for the box walls so edges stay crisp and square.
Don’t make confetti pieces too long — they tangle when the lid closes.
8. Duck Paper Rope Coaster
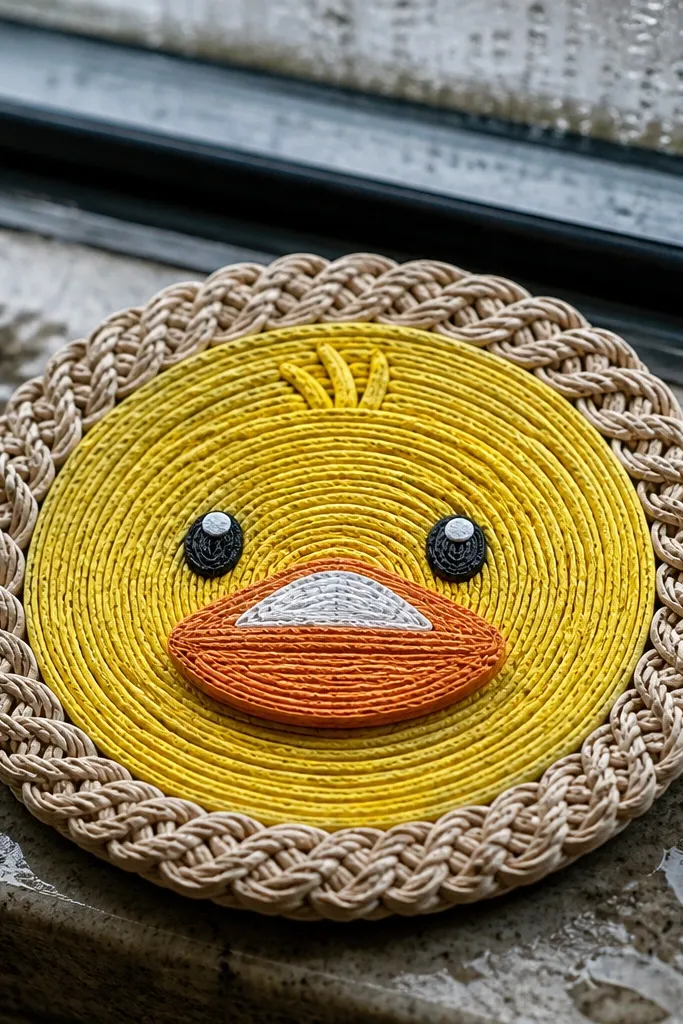
This one looks handmade in a good way because it has texture, not just flat shapes. The “rope” border is made from tightly rolled paper strips, and the duck face sits cleanly in the middle. In a photo, the rolled texture creates depth around the flat face. It also works as functional decor for rainy afternoons because you can use it under a mug or candle.
Roll yellow paper strips tightly around a toothpick, then glue the end to lock each roll. Form a ring of rolls on a round base (use cardboard or thick cardstock) by gluing them edge-to-edge. Cut a duck face circle and glue it in the center, then add a beak triangle and black eye dots. Finish by sealing the whole coaster with a thin clear glue layer or matte Mod Podge so the rolls don’t loosen.
Keep rolls tight and identical width — uneven rolls make the border look messy fast.
Don’t skip sealing — unsealed rolls can snag and peel when touched.
9. Duck Paper Chain Garland with Layered Heads
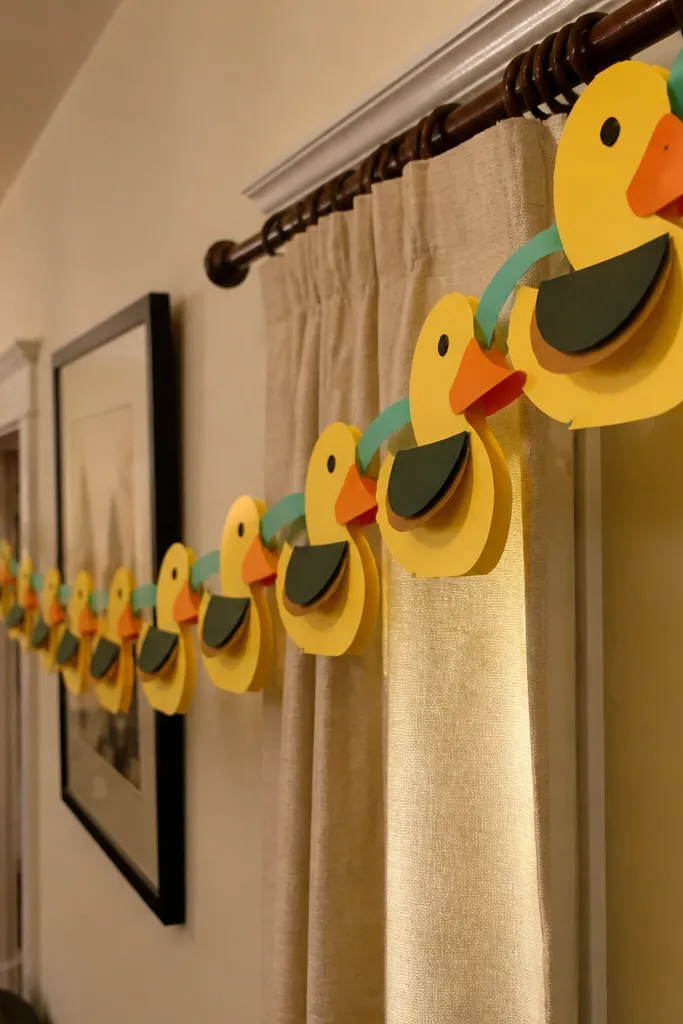
Paper chains look simple, but layered duck heads turn them into something you’d actually hang. Each link is a duck head silhouette, and the layered beak and wing pieces add depth. The teal accent pieces keep it from looking like plain party decor. It’s a good rainy-afternoon project because it’s repetitive in a satisfying way and you can stop when you hit the length you want.
Cut 12-18 duck head shapes from yellow cardstock, each about 2.5 inches wide. Cut matching beak pieces from orange paper and wing stickers from darker yellow, then glue them onto each head. Turn each head into a chain link by cutting a slit on one side and folding a small tab to interlock with the next. Keep the chain flat while assembling so the links don’t twist. Hang it against a window or pale wall so the yellow pops.
Editor's noteMake one template head and trace it for every repeat — that keeps the chain looking consistent.
Skip thisDon’t glue the chain closed — it needs to move enough to hang flat.
10. Duck Origami-Style Folded Wings Card
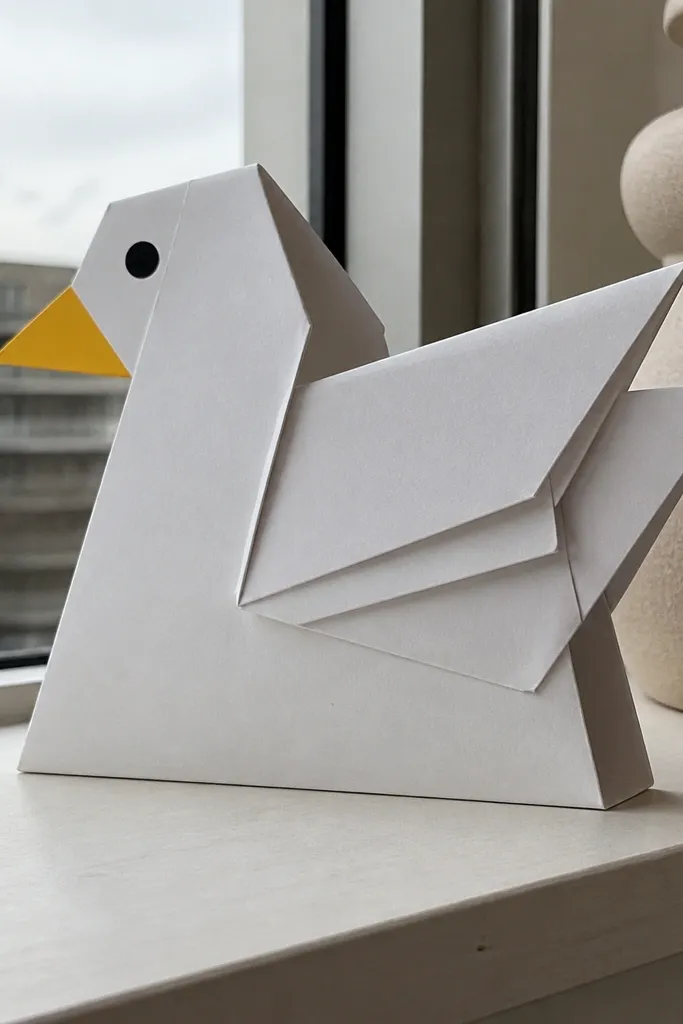
This is a paper duck craft that looks more advanced than it is. The wings are folded with sharp creases so they look like tiny origami panels, and the rest is a clean duck face. It works well for rainy-day cards and shelf decor because the folded wings cast little shadows. You get depth without tiny glue pieces everywhere.
Cut a teal card base and add a yellow duck body panel on the front. Create wing flaps by folding two paper triangles and gluing only the bottom edge so the top edge stays lifted. Add a small orange beak and black eye dots, keeping them centered so the face reads quickly. Press the folds with a bone folder before assembly so the wing creases stay crisp. Finish with a small white highlight strip near the eye.
Editor's noteUse thicker paper for the wings — 110-160 gsm reads sharper and holds creases longer.
Skip thisDon’t cover the wing folds with glue — you’ll flatten the shadow effect.
11. Duck Paper Quilling Burst Belly
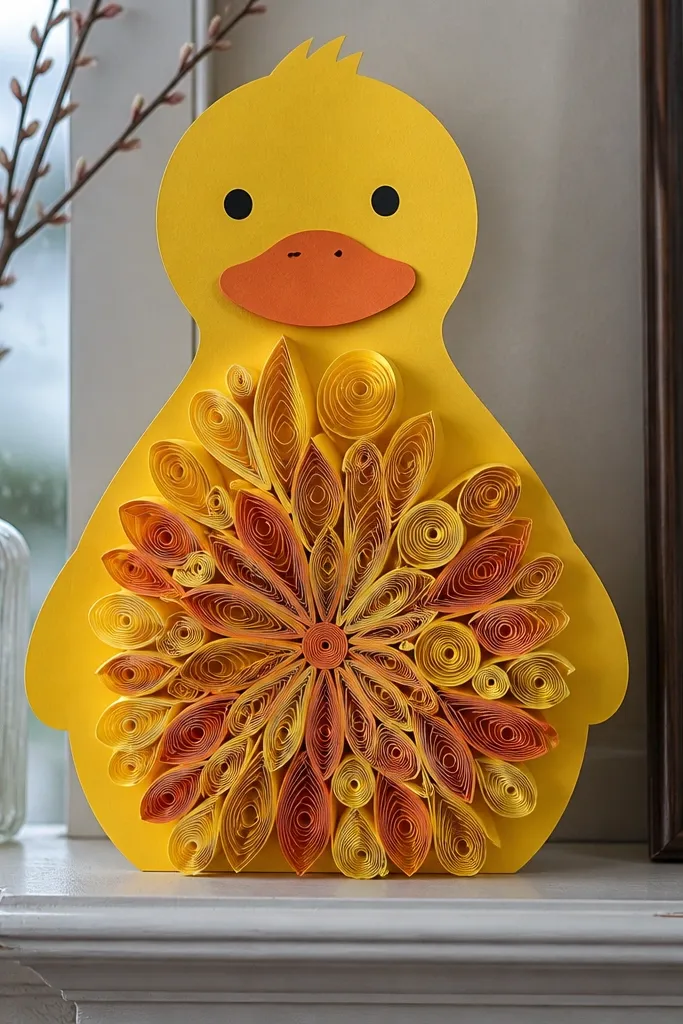
If you want “good-looking” without complicated painting, quilling does it. The curled strips form a burst pattern under the duck face, so the craft looks textured and high-effort even with simple materials. The duck body stays minimal and graphic, while the belly burst gives the visual interest. It’s perfect for rainy afternoons because you can stop mid-way and still have a clean center design.
Draw a simple duck face circle and cut it from yellow cardstock. Create curled strips by rolling thin paper strips around a quilling tool or the tip of a toothpick, then gluing the ends. Arrange the curls in a radial pattern on the belly area and glue them down. Add a beak and eye dots, then place a small teal crescent behind the face to frame it. Let the glue dry flat under a book so the curls don’t spring up.
Editor's noteUse a limited color palette: yellow curls for belly and one accent color for the frame.
Skip thisDon’t use wet glue — it can loosen the curls and make the burst look uneven.
12. Duck Bookmark Bookmark Clip with Cutouts
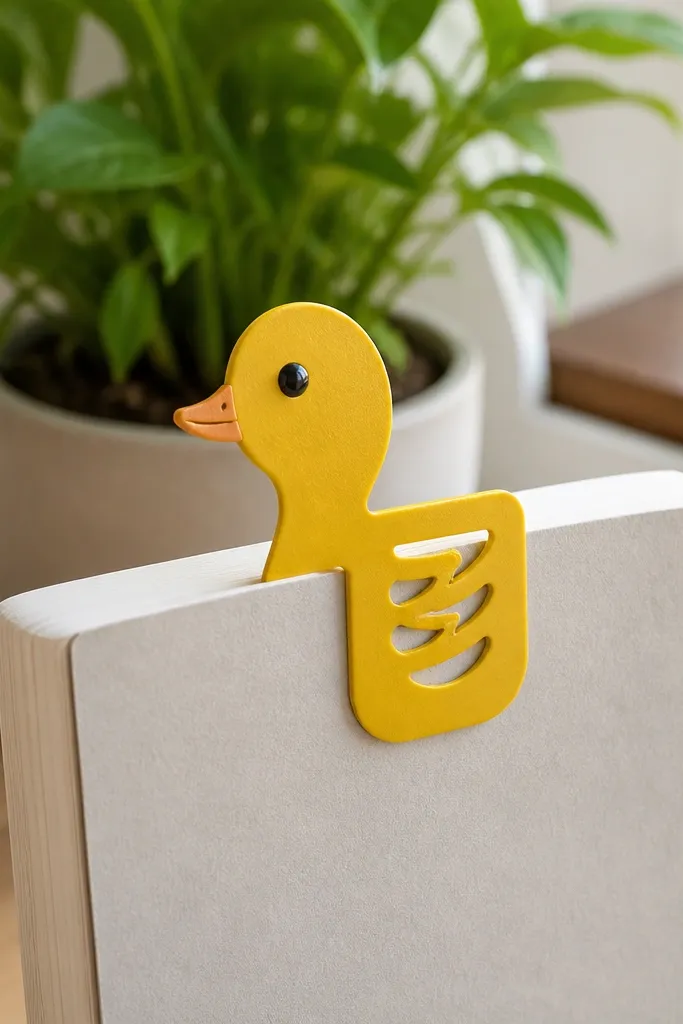
This is a bookmark that looks like cute stationery, not a school project. The cutout wings and the small clear tape shine on the beak make it feel polished. It also stays functional because the clip holds your page without needing you to slide it under thick book sections. The silhouette is the design — clean and graphic.
Cut a duck shape from cardstock about 2.5 inches wide and 6 inches tall. Cut two wing cutouts with a craft knife so you get negative space (that’s what makes the look airy). Add a beak piece and eye dots, then glue a small strip of clear tape on the beak for shine. Attach a binder clip to the back using two small cardstock tabs glued around the clip arms. Trim the tabs so they don’t snag pages.
Sand the edges lightly with fine grit if your cutouts have tiny burrs.
Don’t leave sharp corners on the clip tabs — they catch paper and look messy.
13. Duck Paper Diorama on a Teacup Stand
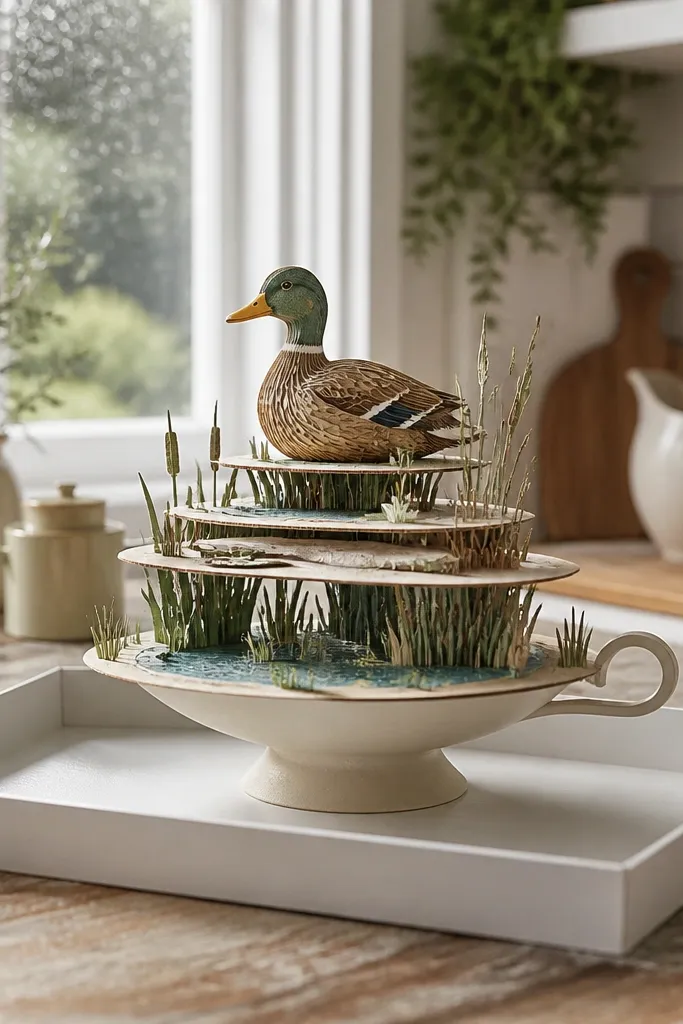
Dioramas are photogenic because they have depth layers, not because they’re complicated. This one puts a duck on a small “water” base with simple reeds, all built from paper cutouts and stacked platforms. It looks like a mini scene you’d buy, especially when you frame it with a white border. Rainy afternoons are perfect for this because you can build it in layers and stop when the stack looks balanced.
Make a base platform from thick cardstock (about 6x6 inches) and cut a shallow blue “water” shape in the center. Build two layer risers from folded cardstock strips so the duck sits above the water by about 1 inch. Cut a duck silhouette and glue it to the top riser, then add 3-5 reed strips from green paper. Add a white foam line on the water by cutting a jagged strip and gluing it along the edge. Place the whole piece on a small teacup or display stand.
Editor's noteCut reeds at different heights so the scene has a natural rhythm.
Skip thisDon’t glue the duck flat to the base — the scene needs height to read as a diorama.
14. Wet Window Duck Stickers (Peel-Off Paper Layer)
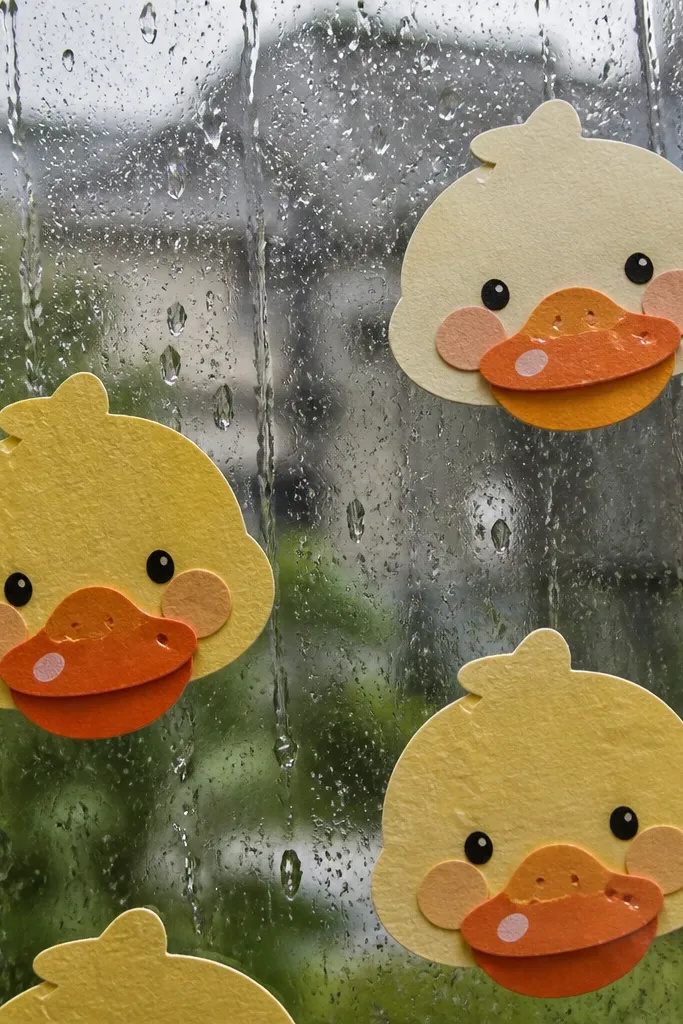
Window crafts look amazing in rainy weather because the background is already textured. These duck stickers use layered paper shapes and a small gloss highlight so the duck face pops against glass. The best part is the peel-off design — you can move them to different windows or change your decor when you get bored. It’s also a low-mess craft: no paints needed, just paper and clear tape.
Cut duck body and face layers from yellow and white paper, and glue them together on a backing sheet. Add a tiny gloss highlight on the beak with a small clear tape square. For the raindrop effect, punch small blue circles and place them around the duck with removable tape dots. To make it peel-off, attach thin strips of double-sided tape to the back edges only, not across the whole surface. Press gently to the window and avoid humid areas if the tape doesn’t stick well.
Use a lint-free cloth to wipe the window before applying so the tape grabs.
Don’t cover the whole back with tape — it tears paper when you peel.
15. Duck Confetti Mobile with Paper Circles
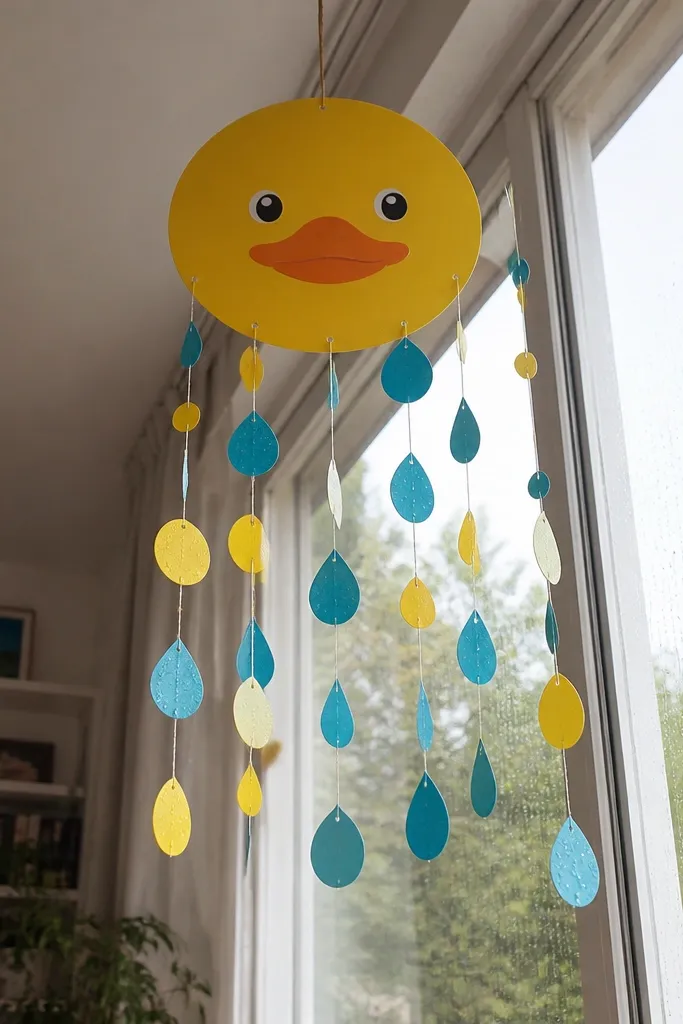
Mobiles look good because they move, and movement makes paper crafts feel alive. This duck mobile uses a simple duck face on a larger circle, plus hanging raindrop shapes that swing. The color pops under indoor light and makes a rainy-day room feel playful. It’s also easy to adjust — you can change the number of strands to match your space.
Cut one large yellow circle for the “body” and a smaller white circle for the belly window, then glue them together. Add a duck face on the top center with an orange beak and black eye dots. Cut 8-12 raindrop shapes from teal and light blue paper and punch small holes at their tops. Thread each raindrop onto fishing line and tie them to a ring made from thin wire or a paper circle frame. Hang the duck circle above the raindrops and adjust line lengths so it balances.
Keep the raindrops similar sizes so the mobile doesn’t look lopsided in photos.
Don’t use heavy string — it makes the mobile sag and lose the airy look.
16. Duck Paper Plate Mask (Party Face Decor)
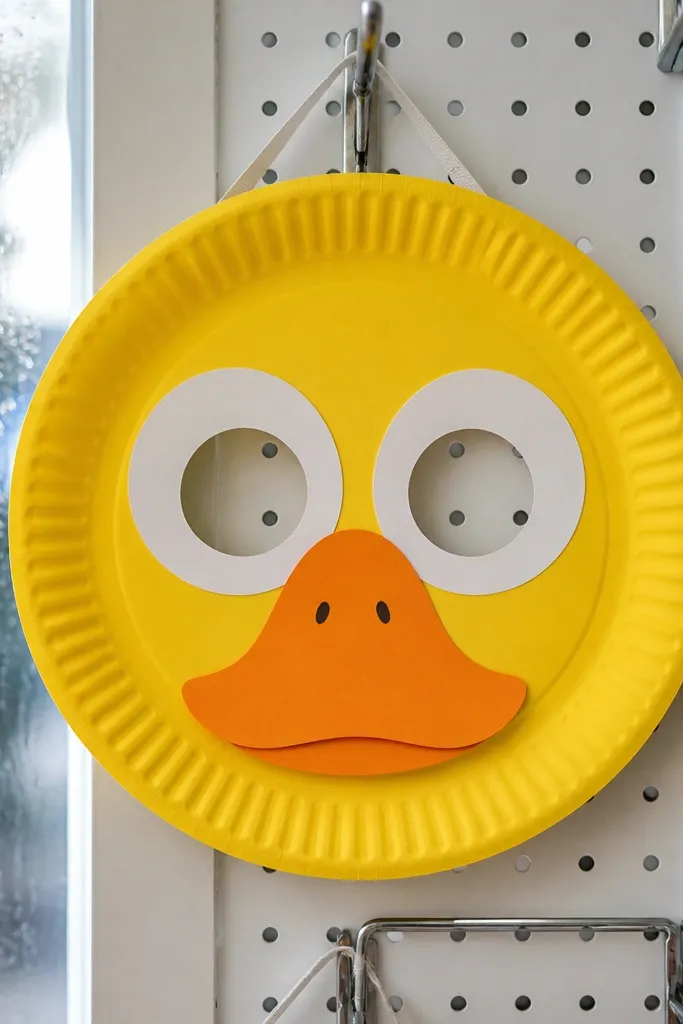
Paper plate masks look instantly fun, and the duck shape is recognizable even from a distance. This one focuses on clean proportions: wide eye circles, a centered beak, and a smooth plate base so it looks polished. It’s perfect for rainy afternoons because it’s fast and you can add decorations without worrying about perfect brushwork. Hang it on a door or use it as photo prop decor.
Cut a paper plate into a duck face shape by trimming the bottom edges into a gentle curve. Cut two large eye circles from white paper and add black pupils, then glue them on evenly spaced. Cut an orange beak triangle and glue it so the tip points forward. Add small wing patches from darker yellow paper near the sides. Punch two holes for elastic or ribbon if you want to wear it, or leave it as a wall mask.
Editor's noteUse a glue stick for plate paper so it stays flat and doesn’t ripple like wet glue.
Skip thisDon’t place eyes too close — keep them spaced for a readable duck face.
17. Duck Paper Wreath with Mini Feather Cuts
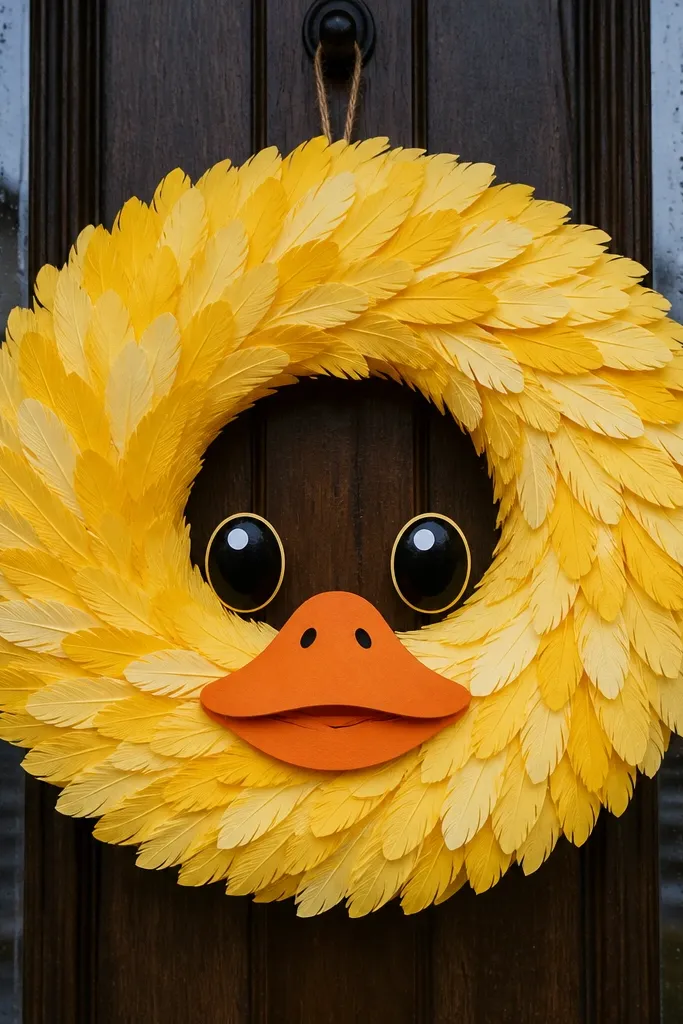
A wreath makes any rainy-day craft look like actual decor. This duck wreath uses a ring base plus mini feather-like paper cuts around the edge, so it has texture and a full frame. The center duck face keeps it cute and clear. It photographs well because wreaths give you a built-in border, and borders make everything look intentional.
Cut a ring from thick cardboard or foam board (about 8 inches outer diameter). Cut feather shapes from yellow paper and glue them around the ring edge, overlapping slightly. Cut a duck face circle and place it in the center, gluing only around the edges so it looks clean. Add a teal accent band by cutting a thin strip and wrapping it around the ring. Finish by adding a small white highlight strip near the beak.
Editor's noteVary feather sizes by 1/4 inch so the wreath doesn’t look uniform and flat.
Skip thisDon’t glue feathers all the way to the back — the wreath should stay light and not warp.
18. Duck Tear-Off Paper Tags (Snack Bag Decor)
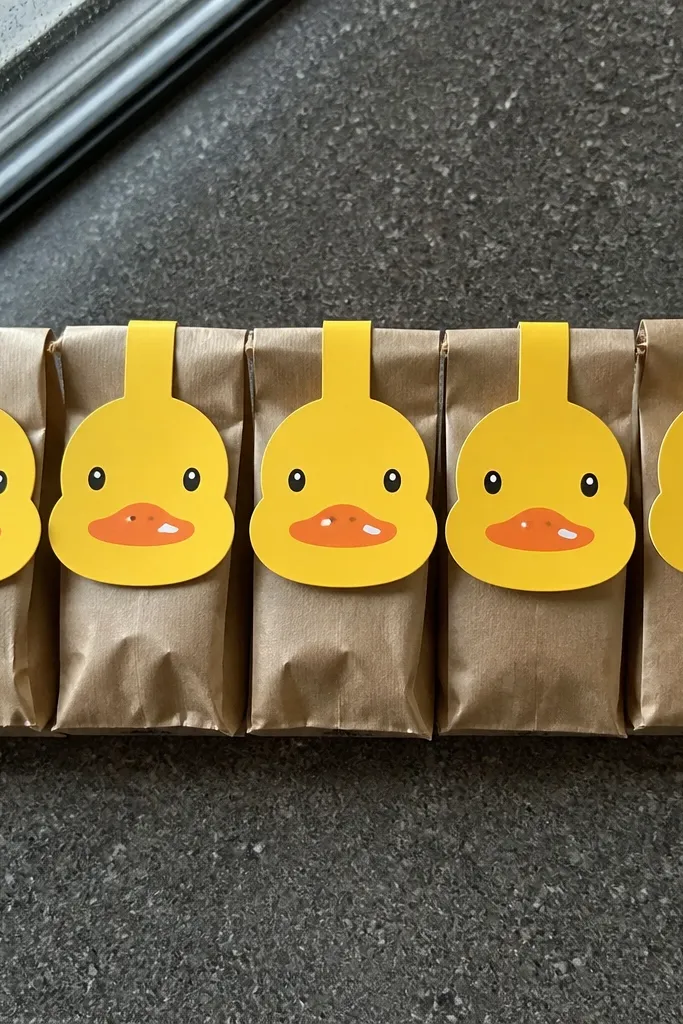
These are small, but they look great in photos because they’re crisp and graphic. Duck tear-off tags turn plain snack bags into a themed rainy-day set, and the tear-off format is satisfying. You’re making a repeatable system: each tag is quick to cut, and the duck face stays consistent. It’s also practical because you can use the tags for party treats, classroom snacks, or gift bags.
Cut a long strip of cardstock and draw or trace a repeating duck head shape across it. Cut out the duck heads with a craft knife, leaving thin tear lines between them. Add beaks and eye dots to each duck head and glue small teal raindrop marks near the top. Punch a hole in the top of each tag and thread with twine so they hang neatly. When you want one, tear along the cut lines.
Make the tear lines shallow cuts instead of full cuts so the strip stays sturdy while you handle it.
Don’t use too-thin paper — tear lines can rip early and ruin the clean tag shape.
19. Duck Paper Accordion Scene (Rainy Window Step)
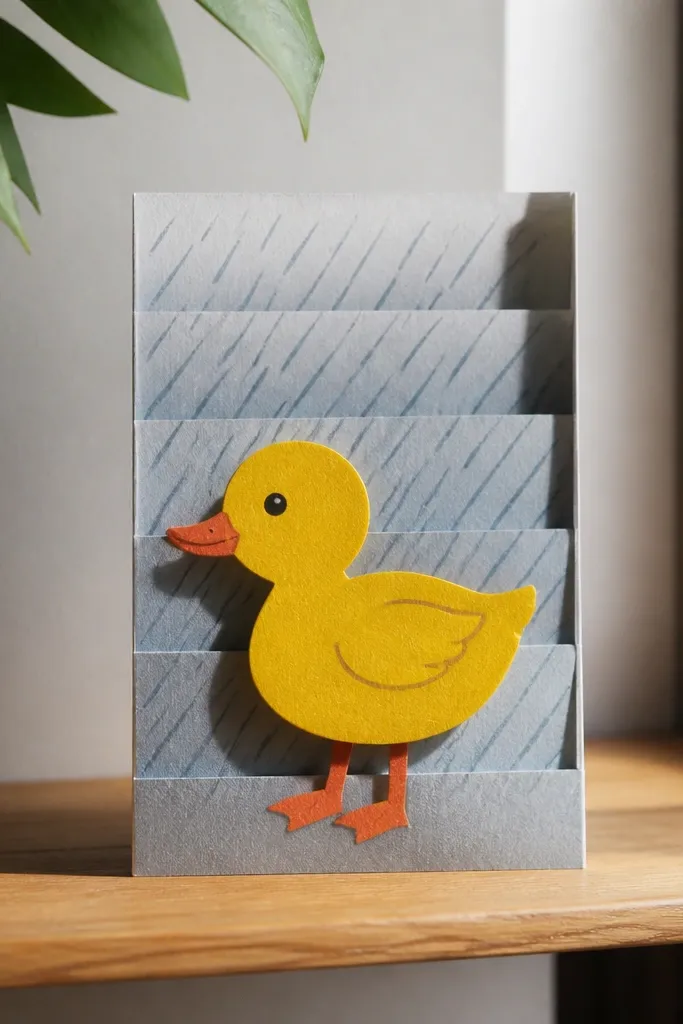
Accordion scenes look like tiny screens, and that makes them instantly photogenic. This duck scene uses a stepped accordion fold so the duck sits “in front” of the rainy background. The background is made with simple diagonal rain lines, so it reads instantly as weather. It’s one of the best rainy-day crafts because you get a reveal moment when you open it.
Cut a long strip of cardstock and mark fold points every 1 inch to create accordion panels. On one side, draw or glue diagonal rain lines using blue paper strips. Place a duck cutout on the front panel and glue small raindrop dots around it. Close the accordion to transport it, then open it to show the layered depth. Seal the folds by running a bone folder along each crease.
Use two shades of blue for rain lines so the background looks layered, not flat.
Don’t glue the duck across fold lines — it will crack when you open the accordion.
20. Duck Paper Plate Coaster Magnet (Fridge Friendly)
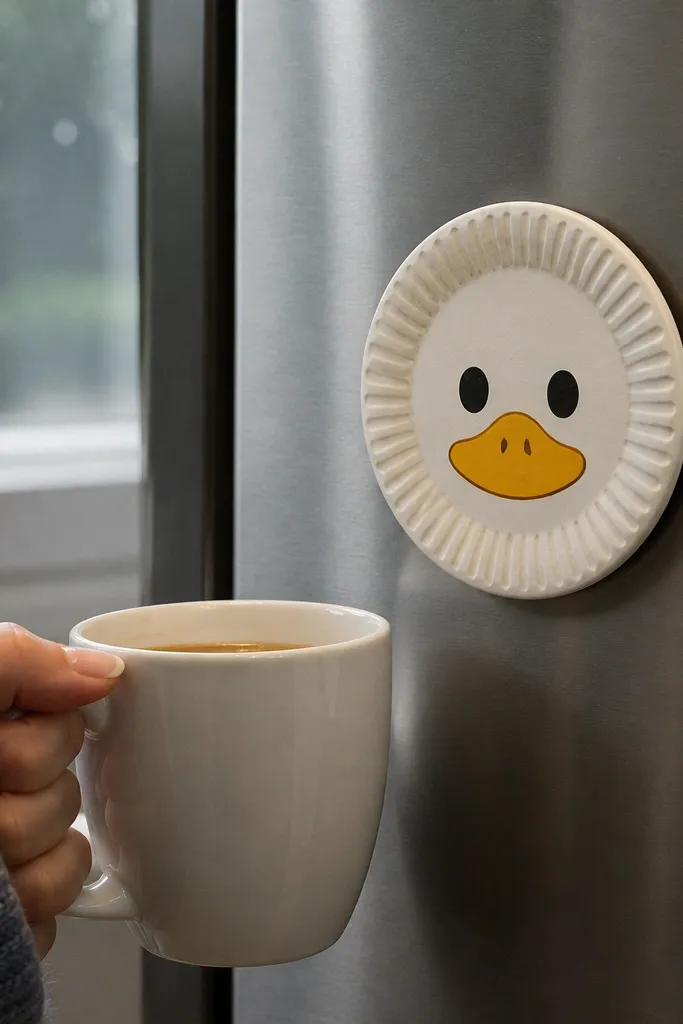
This one turns rainy-day paper craft into something you’ll see every day. The coaster-magnet combo is visually clean: a round duck face centered on a sturdy base, plus a gloss highlight that catches light. It looks like cute stationery decor on a fridge or metal cabinet. You get the satisfaction of a craft and the function of a magnet without needing heavy tools.
Cut a circle from thick cardstock and glue a smaller yellow circle on top. Add a duck face with an orange beak and black eyes, then place a small clear tape highlight on the beak. Cover the whole front with a clear matte sheet or thin Mod Podge so it resists fingerprints. Glue a small round magnet to the back using a strong craft adhesive. Let it dry flat with a weight on top so the circle stays smooth.
Editor's noteUse a matte finish if you don’t want glare in photos; gloss is great, but it can blow out highlights.
Skip thisDon’t use a weak magnet — it will peel off when the craft is handled.
21. Duck Paper Pinwheel with Center Beak
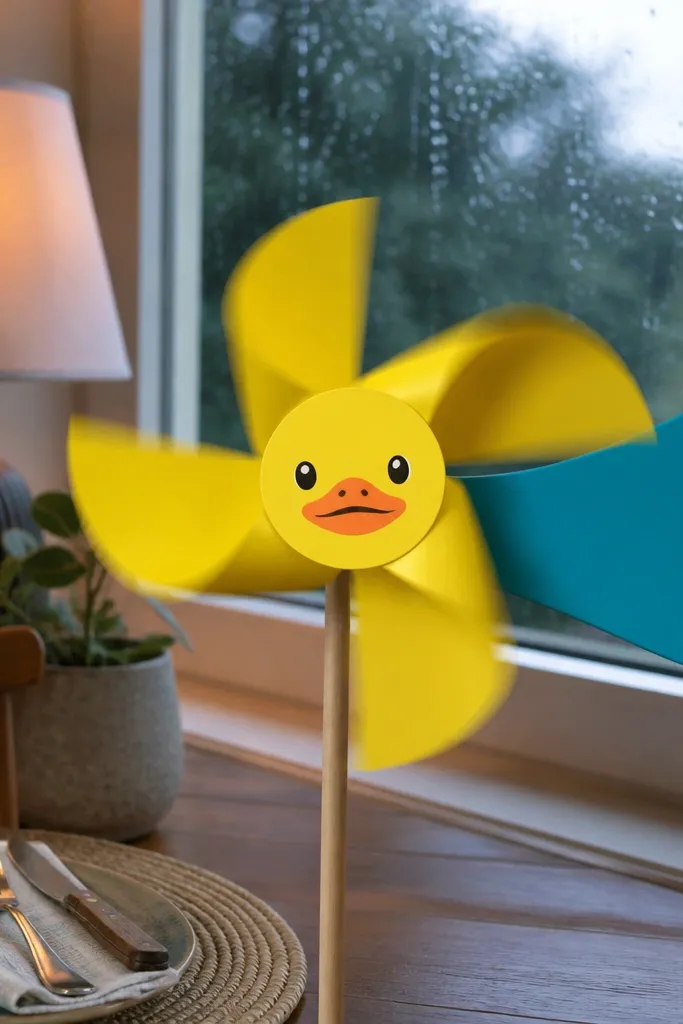
Pinwheels look fun in motion, which makes them perfect for rainy-day indoor photos where you can spin them on a table. This duck pinwheel keeps the design simple: yellow blades, a teal tail accent, and a centered beak disk. The center disk makes the duck identity clear even when the pinwheel is spinning. It’s also cheap and fast, so it’s a solid “make two while you snack” craft.
Cut 4-6 pinwheel blades from yellow cardstock using a template or a simple square-to-triangle method. Cut a small teal tail shape and glue it behind one blade for contrast. Punch a center hole and assemble with a brad fastener so the pinwheel spins freely. Cut a circular duck face disk and glue it to cover the brad center. Add two black eye dots and an orange beak, then test for balance by spinning gently.
Editor's noteTrim blade tips evenly so the pinwheel spins smoothly instead of wobbling.
Skip thisDon’t glue the center disk onto the brad — it will stop the pinwheel from moving.
22. Duck Paper Petal Flower Bouquet (Mini Center)
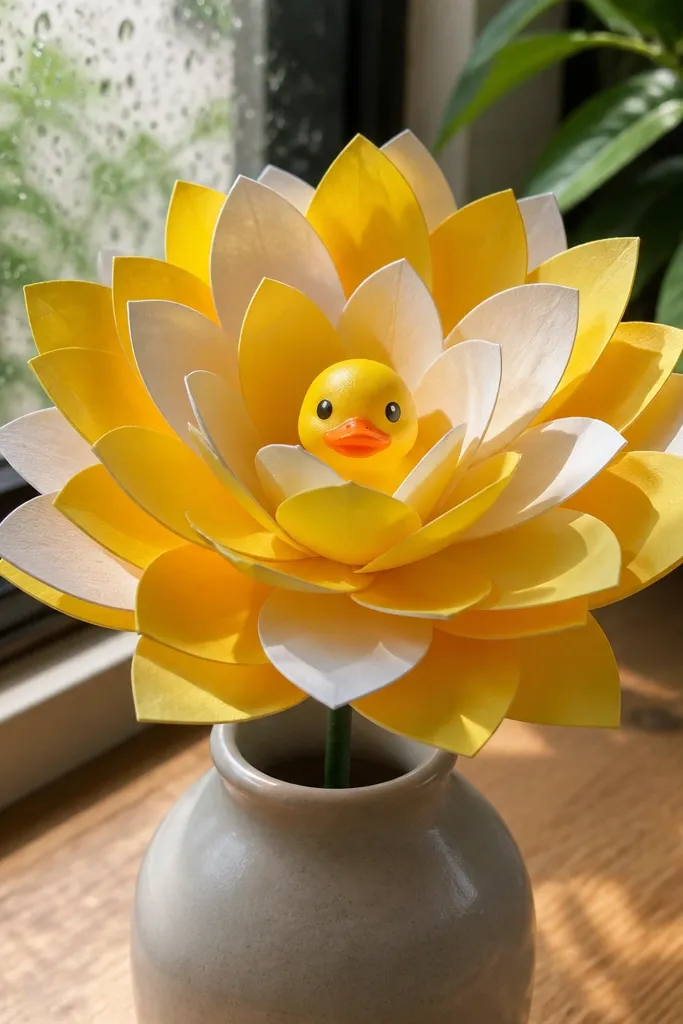
Flower bouquets are photogenic because they fill space with color and shape. This duck craft turns the duck into a tiny “center” while the petals create the big visual impact. You get a cute, rainy-day desk decor piece that looks like a bouquet even without real stems. It’s also easy to scale — make three for a small table or ten for a shelf.
Cut 10-12 petal shapes per flower from yellow paper and slightly curve them by folding each petal in half. Assemble each flower by gluing petals around a small circle base. Cut a tiny duck face circle and glue it on top of the center. For stems, glue each flower to a paper straw or wooden skewer wrapped with green paper. Arrange the bouquet in a cup and add a paper “water” base by wrapping the cup rim with blue cardstock.
Use slightly different yellow shades for petals so the bouquet looks dimensional.
Don’t make petals all the same angle — flat petals look like a craft, not a flower.
23. Duck Paper Plate Wall Art with Layered Raindrops
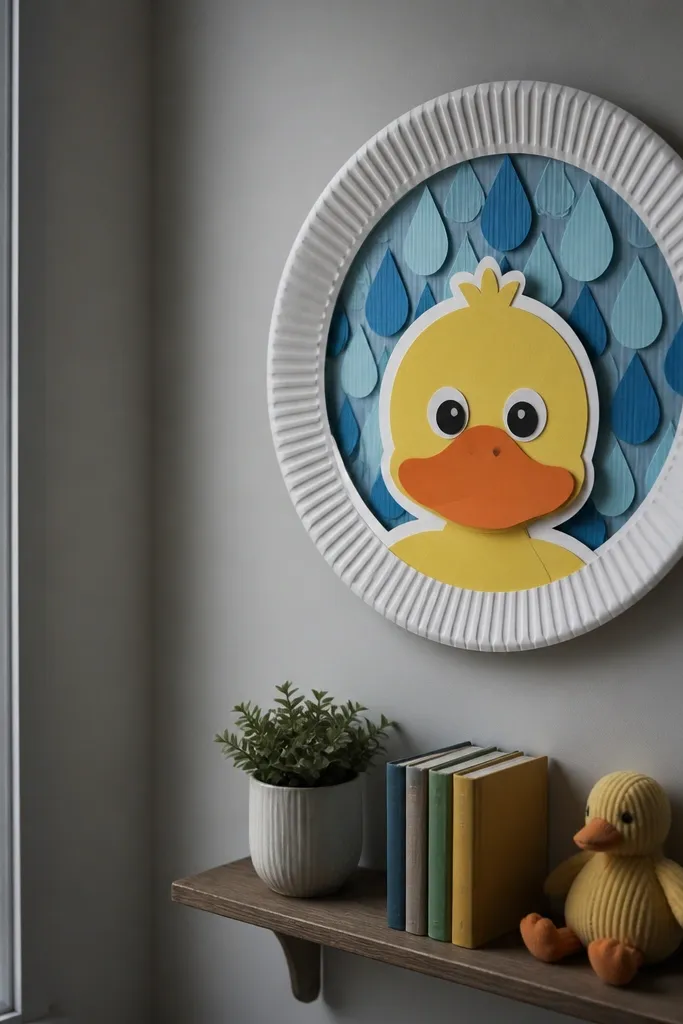
This is wall art that reads from across the room because it has a bold circular frame. You use a paper plate base for structure, then layer raindrops behind the duck face so the background has depth. The white border around the duck makes it pop even under dim rainy-day lighting. It’s a great “quick win” project because the plate gives you the perfect shape with almost no measuring.
Cut the center of a paper plate to create a ring and trim the outer edge lightly so it looks clean. Cut raindrops from blue paper in two sizes and glue them behind the duck face area. Add the duck face on top using a yellow circle for the body and a small orange beak. Glue the duck onto the ring so it sits slightly forward. Finish by adding a thin white strip border around the edge if you want extra crispness.
Press layers under a book for 10 minutes so the plate stays flat.
Don’t use too many raindrops — the background should support the duck, not compete.
24. Duck Paper Kites on a Rainy Day String
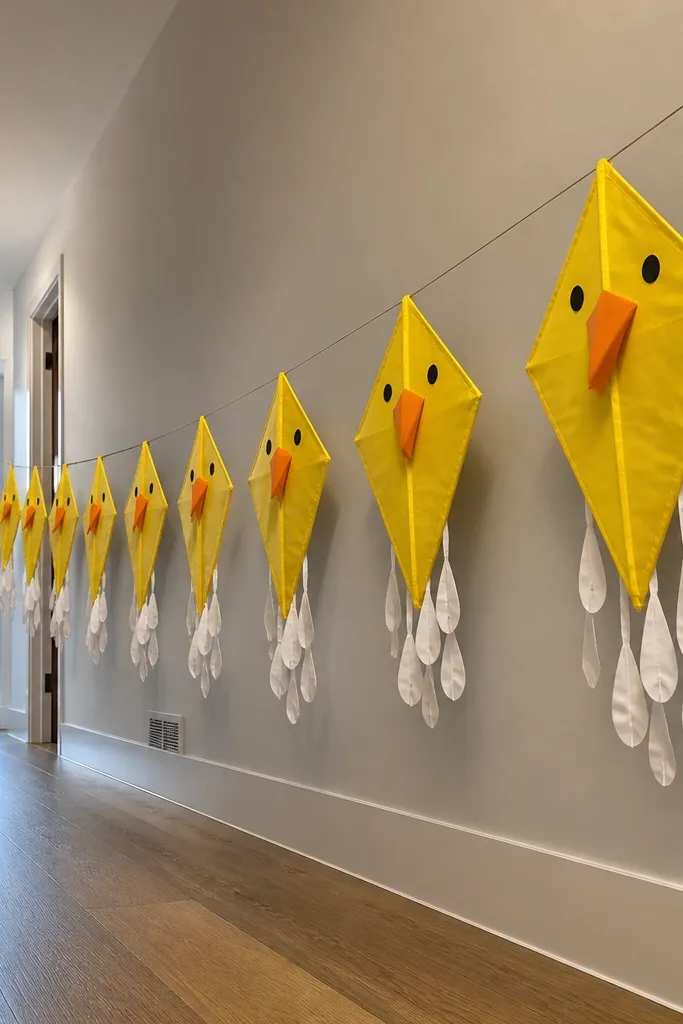
These duck kites turn a gray afternoon into something you can hang by the window or across a hallway. Each kite is a simple diamond body with a beak tip, then you add a layered tail that looks like rain streaks. The look is all about contrast — bright yellow paper against white raindrop tails — so it stays photogenic even in dull light. This is a good project for anyone who wants quick wins: you can finish one kite in about 20-30 minutes and make a little string of them. It suits kids' craft tables, apartment window displays, and anyone who wants rainy-day decor that moves when the air shifts.
Cut 3 diamond templates from 120-160 gsm cardstock: one 10 cm wide (top to bottom), one 8 cm, one 6 cm. Fold each diamond in half along the center line, then cut a shallow V notch at the folded top for the head point; open it back up to form the beak shape. Glue on a small white oval (eye) and a tiny orange beak triangle, then add a layered tail by cutting 5 strips of white paper 1 cm wide by 10-12 cm long and gluing them to the bottom edge in a fan. Punch two holes — one near the top point and one near the bottom center — thread with thin twine, and tie each kite to a main string spaced 15-20 cm apart. Finish by sealing the kite with a light coat of clear matte spray so the paper holds up to handling; keep spray in a ventilated area and let it dry fully before hanging.
Use a hole punch, not scissors, for the twine holes — it keeps the fiber from tearing and makes the kites sit flatter.
Don’t use flimsy printer paper; it crumples where the twine pulls and the kite looks sad fast.
25. Duck Umbrella Fold-Out Card with Spun Paper Raindrops
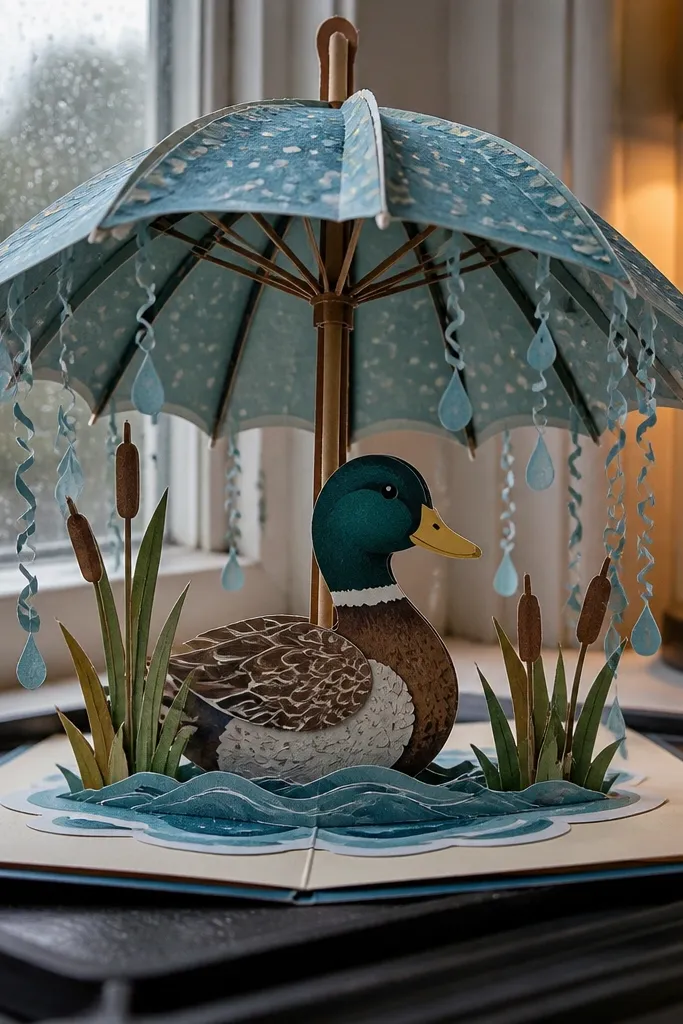
This card looks like a tiny rainy scene you can open and close, which makes it perfect for a rainy afternoon craft that still feels special. The umbrella is a clean folded circle with ribs, and when you open the card, the duck sits under it like it’s sheltering from rain. The raindrops are spun paper — thin strips curled with a pencil — so they catch light and look dimensional even on a flat card. It’s not hard, but it needs patience with the folds and glue placement. This fits desks, classroom tables, and anyone who wants a “wow” card without complicated tools.
Start with a folded card base from 200 gsm cardstock sized 15 cm by 20 cm, scored at 10 cm so it opens flat. Cut an umbrella canopy circle from yellow cardstock using a 12 cm circle template, then lightly crease 8-10 radial lines from near the center to create ribs; fold up a small center flap to form the umbrella opening. Cut a handle strip 2 cm wide by 10 cm, glue it to the inside bottom of the card, then attach the canopy so it stands up when the card opens. Make raindrops by cutting 10-12 thin strips of white paper (3 mm by 10 cm), wrapping each strip around a pencil for a tight curl, then gluing the ends to the underside of the umbrella so the curls point downward. Add the duck face on a small oval (about 5 cm wide) and glue it under the canopy; press flat for 2-3 minutes while the glue sets.
Editor's noteCurl the raindrop strips before you glue — it’s faster than trying to curl after they’re attached, and the curls stay consistent.
Skip thisDon’t overfill the umbrella underside with glue; it soaks the paper and kills the springy raindrop curls.



