
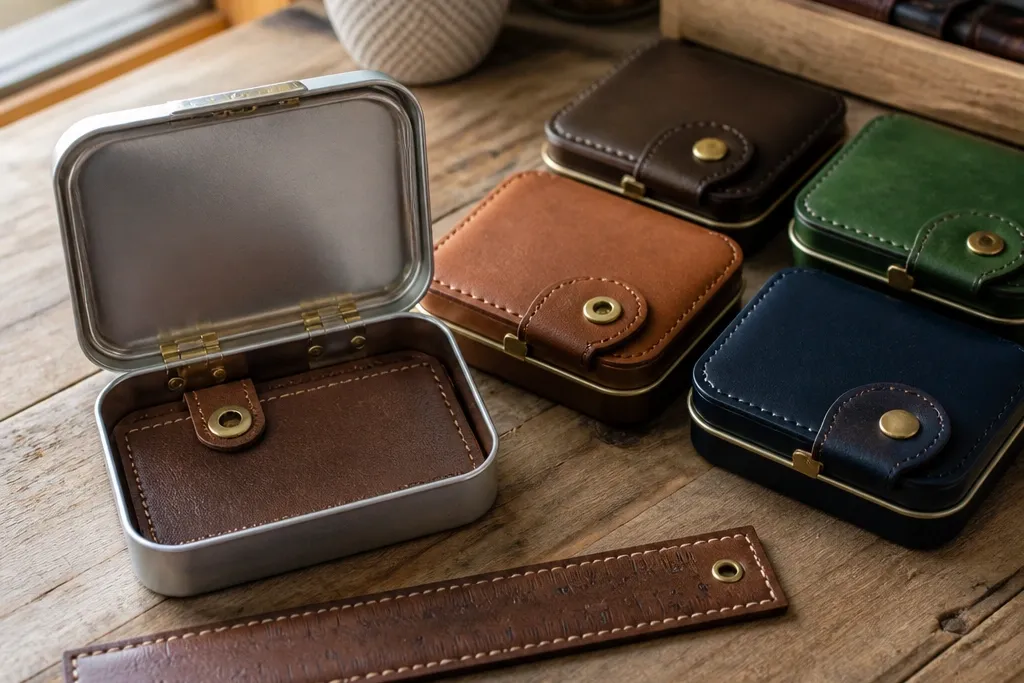
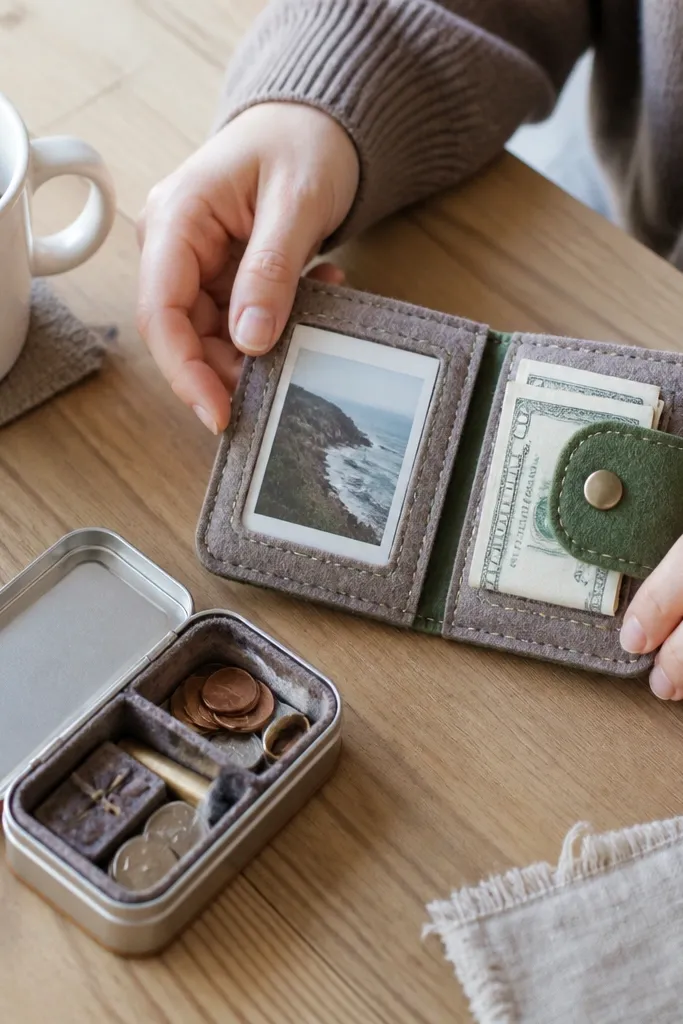
1. Chocolate Brown Faux Leather Frame Wallet
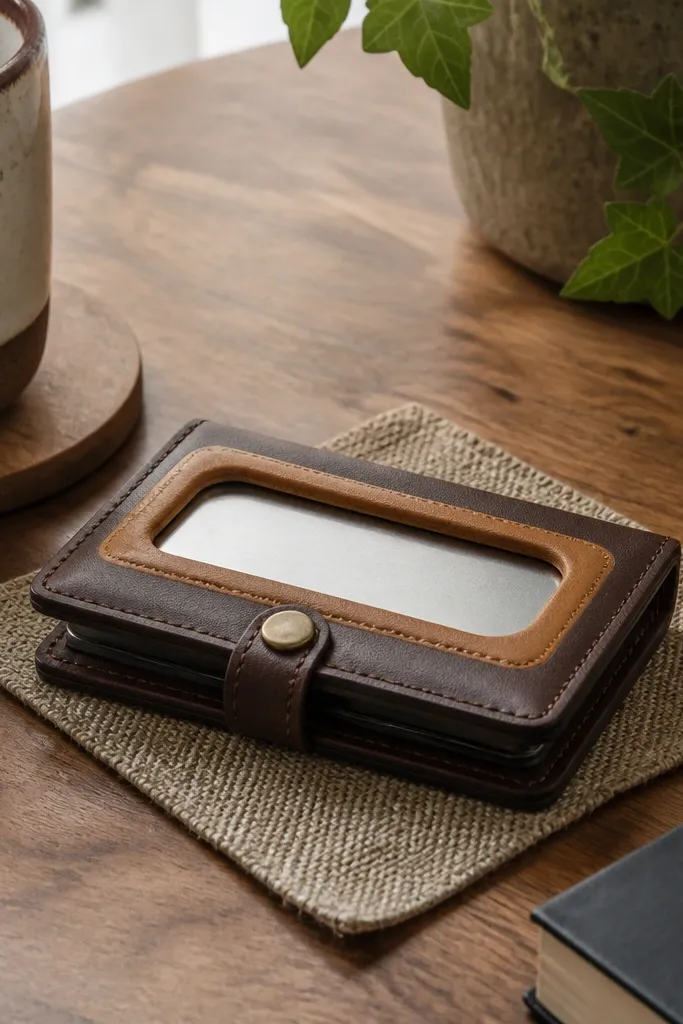
This one looks expensive because the front stays simple and the edges do the work. Use chocolate brown faux leather as the main skin and add a lighter caramel faux-leather frame around the tin opening so the design reads instantly in a photo. The snap closure sits low and centered, keeping the wallet profile flat. A thin lining prevents the leather from curling at the fold line. This build is great for gifts because it matches almost every outfit and looks neat even when someone pulls it out of a bag quickly.
Cut two outer panels from chocolate faux leather to fit the tin footprint plus a fold allowance of about 1/2 inch on the sides. Cut a rigid core from craft foam the size of the tin face area, then glue it to the back of the outer panels with contact cement. Add the lighter caramel frame by cutting strips about 1/2 inch wide and wrapping them around the window opening. Sew or glue the lining inside, then install a 1/2-inch snap centered on the front panel. Burnish the fold edges with a bone folder so the wallet stays crisp.
Editor's noteMark your hinge line with painter’s tape before gluing so the fold stays straight even if your hands shake.
Skip thisAvoid thick batting or too many layers near the hinge — it makes the snap sit crooked.
2. Black Felt With Gold Starburst Stitching
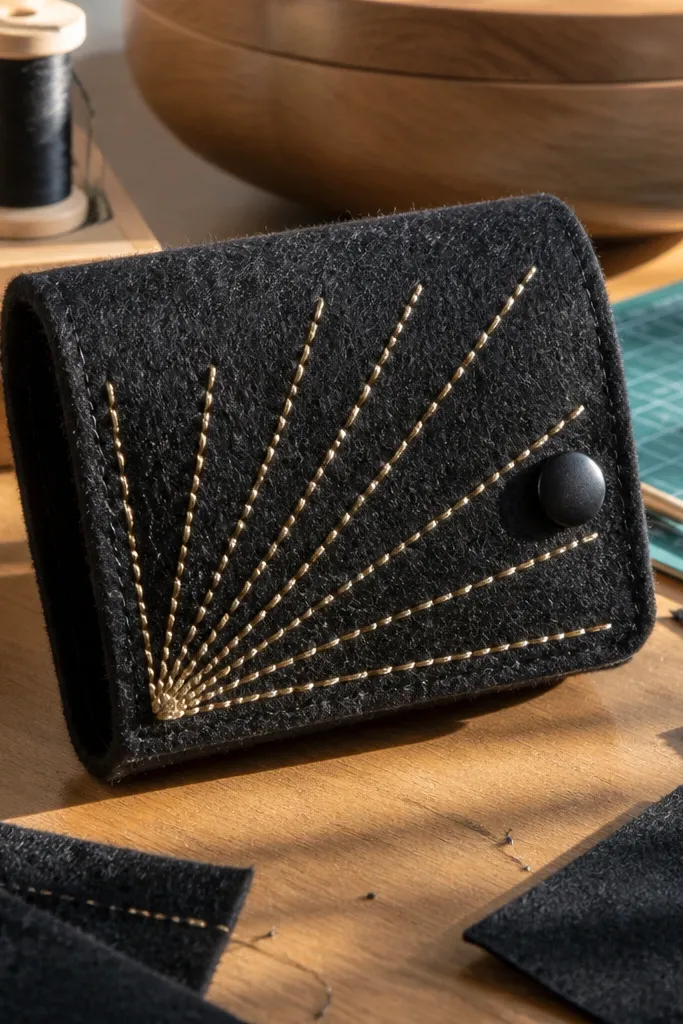
Felt wallets photograph beautifully because the surface is matte and the stitching pops. This design uses black wool-felt as the base and adds a gold starburst stitched pattern radiating from one corner to create a focal point. The closure is a single button with a small loop, which keeps the front clean and avoids bulky hardware. Wool felt also hides small cutting mistakes better than shiny materials. It’s a strong gift option for anyone who likes cozy, artsy accessories.
Cut two felt panels from black wool felt to match the tin footprint with a 3/8 to 1/2 inch fold allowance. Cut a thin lining layer from matching black cotton or felt, then stitch it to the inside panels with a whip stitch. Create the starburst by drawing 6 to 8 lines from a single point on the front and stitching over them with metallic gold thread. Add a small buttonhole or loop and sew a button at the opposite side. Finally, glue a craft foam core inside so the wallet keeps its shape when opened.
Editor's noteUse a single strand of metallic thread through a sharp needle so the stitching doesn’t look fuzzy.
Skip thisAvoid cheap polyester felt that sheds — it ruins the clean edges in close-up photos.
3. Pastel Marble Vinyl Window Wallet
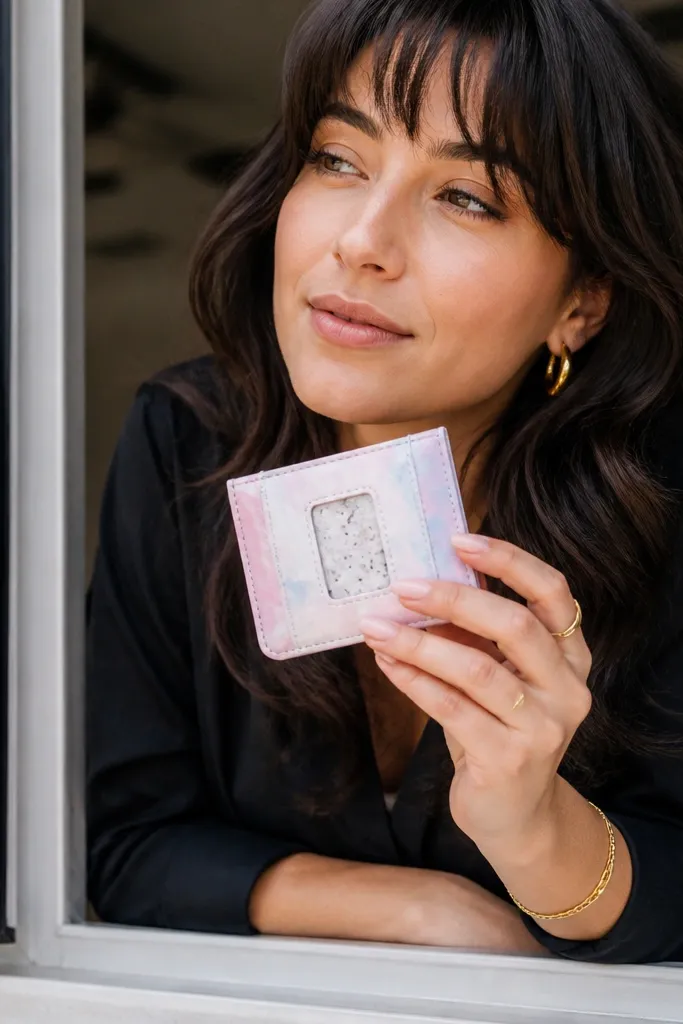
This one is all about a glossy, modern look. A pastel marble vinyl skin makes the wallet front pop, and a small clear window panel adds a “tiny display” vibe. The closure uses small bar magnets so you get a crisp close without a visible bulky clasp. The clear window is also a great way to show a small card or photo, which makes the gift feel personal. This is best if you want something that looks good under daylight and phone flash.
Cut outer panels from pastel marble vinyl, using a 1/2 inch fold allowance on each side. Create the rigid base with craft foam, then cover it with thin fabric lining to stop vinyl from wrinkling at the fold. Cut a window opening in the front panel and glue a clear vinyl sheet behind it using double-sided vinyl tape or clear adhesive. Add a frame border from thin vinyl strips so the window edges look finished. Install two 10mm neodymium magnets at the fold line area, aligned so the closure snaps shut evenly.
Warm vinyl with a hair dryer before bending so it holds a clean curve instead of creasing.
Avoid hot glue on vinyl — it can fog and create shiny bumps that show in photos.
4. Navy Denim With White Contrast Topstitch
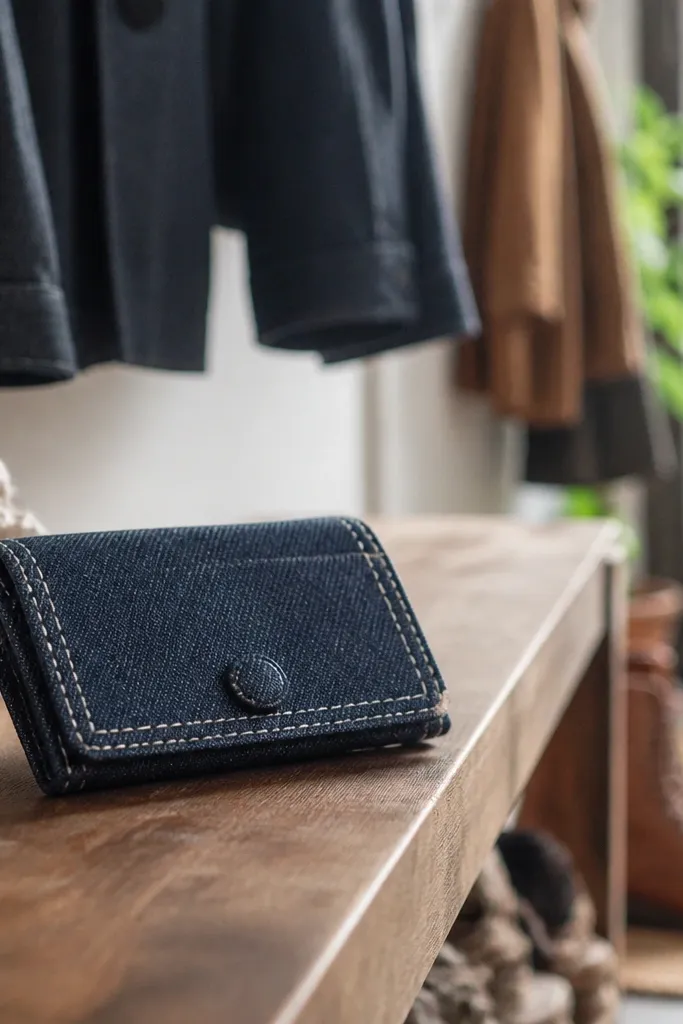
Denim gives you that rugged-cute look, and topstitching is the fastest way to make it look intentional. Use navy denim as the outer skin and stitch a simple rectangle around the opening with thick white thread. The closure is a small snap that blends into the denim, so the front stays flat. Denim also wears in nicely, which helps the gift look lived-in instead of fragile. If you’re making gifts for teens or anyone who wears jeans constantly, this design is a safe bet.
Cut denim panels with a fold allowance of about 1/2 inch. Interface the inside with a thin fusible stabilizer so the denim doesn’t stretch and warp at the hinge. Sew the topstitch rectangle around the opening first, then attach a lining layer with a neat edge finish like bias tape. Install a 1/2-inch snap using a snap-setting tool to keep it tight. Add a craft foam core between lining and denim so the wallet stays structured.
Editor's notePress seams with a dry iron through a cloth — denim topstitch looks cleaner when it’s flat and crisp.
Skip thisAvoid skipping the stabilizer — denim stretches and your opening ends up skewed.
5. Olive Canvas With Leather Wrap Corners
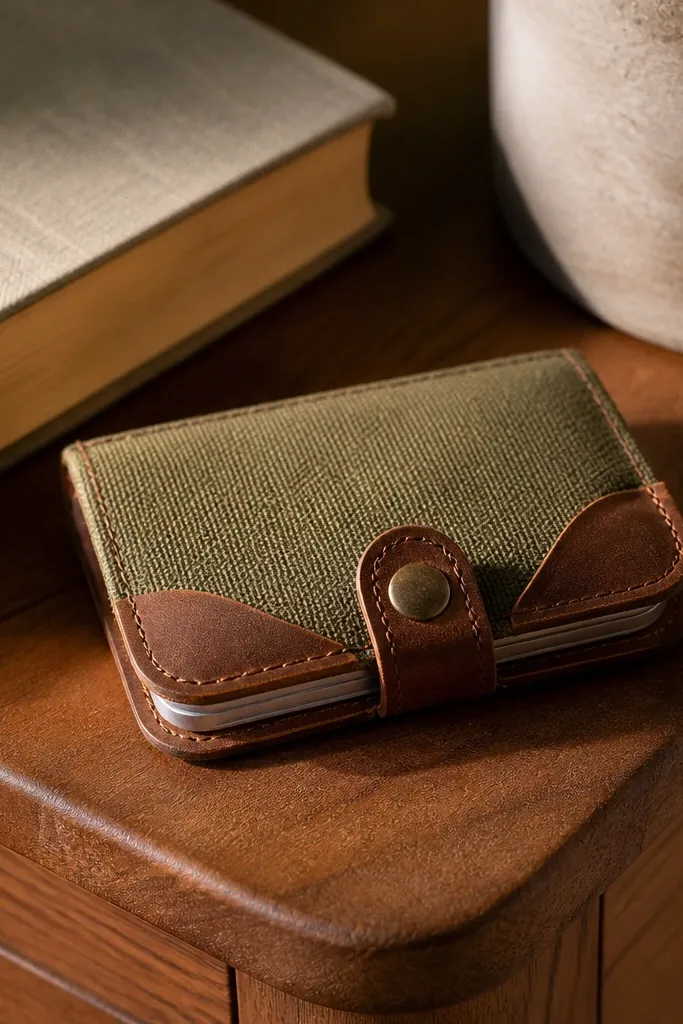
Canvas plus leather corners looks like a small accessory from a store, not a craft table. Olive canvas gives the base a muted, grown-up vibe, and the tan leather wraps at the corners create a strong shape in photos. The closure is a slim snap so the front stays tidy. This design also hides wear well because canvas can take scuffs and still look good. It’s a great pick if you want a gift that feels outdoorsy without being themed.
Cut the olive canvas panels with a 1/2 inch fold allowance, then back them with a medium-weight interfacing. Cut a craft foam core to the tin face area and line it with thin cotton. Cut tan leather strips for the corner wraps, about 3/4 inch wide, and glue them to the outside where the panels meet. Sew the sides using a straight stitch or edge-stitch close to the leather seam. Install a 1/2-inch snap centered on the fold edge, then press the wallet flat under a book for 30 minutes.
Editor's noteSkive or thin the leather corners slightly so the snap closes without a gap.
Skip thisAvoid thick, square corner pads — they bulge and ruin the clean silhouette.
6. Red Plaid Flannel With Hidden Magnet Closure
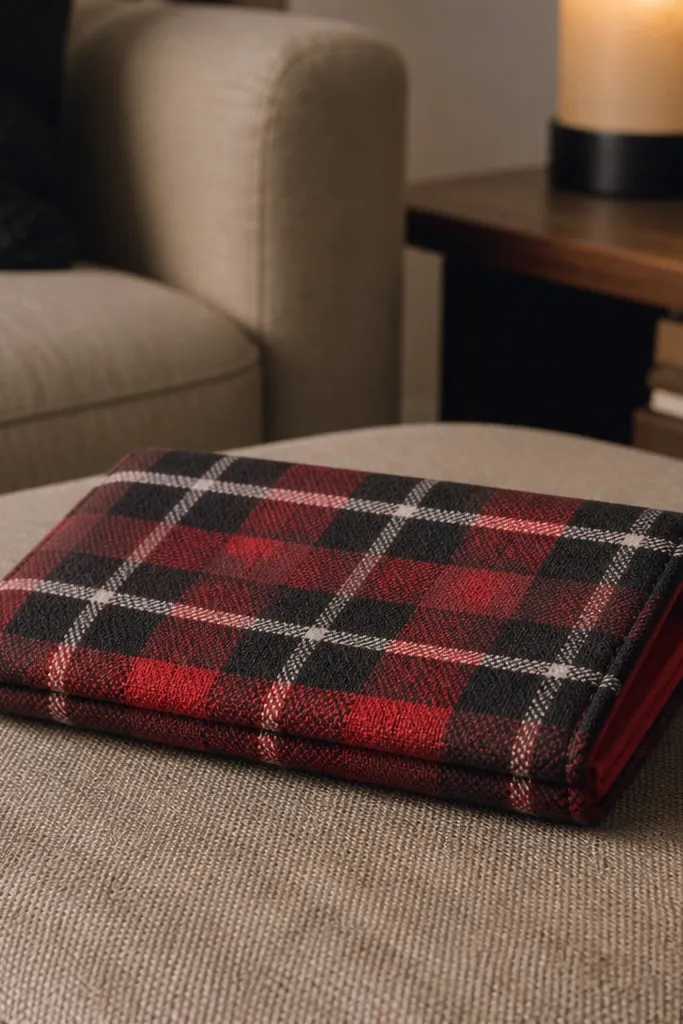
Flannel gives a warm, nostalgic look, and hidden magnets make the front look sleek. This design uses red plaid flannel as the outer layer and keeps the closure invisible by placing magnets behind the lining. The plaid pattern also gives you built-in decoration, so you don’t need extra embellishments. Because magnets don’t need a buttonhole or visible hardware, the wallet front stays smooth for photos. It’s a good gift for holidays, cozy bedrooms, and anyone who likes soft accessories.
Cut flannel panels with a 1/2 inch fold allowance and interface the inside with lightweight fusible backing. Make the core from craft foam and cover it with a thin cotton lining. Align plaid pattern lines before cutting so the front looks intentional, then tack the lining edges. Install two 10mm magnets inside: one on the inside front panel and one on the back panel, aligned on a marked center line. Test closure strength before final glue so the magnets snap evenly without forcing the fold.
Editor's noteMark magnet placement with a pencil dot through the lining so you don’t misalign after gluing.
Skip thisAvoid super-strong magnets that fight the fold — they warp the lining and make the wallet look crooked.
7. Cream Leather-Look With Black Stamped Coordinates
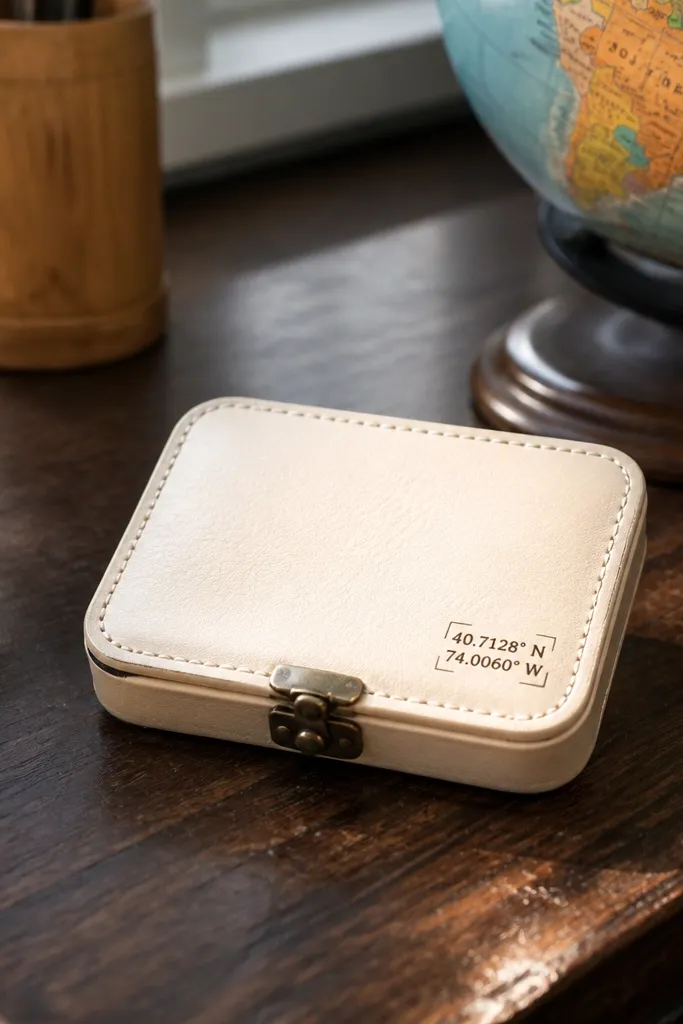
This is a clean, personal-looking wallet without going overboard. Use cream leather-look material as the base, then add black stamped coordinates or numbers in a small corner frame. The design looks intentional because the typography stays small and high-contrast. A small clasp closure keeps the front sharp and flat. If you’re gifting to someone who likes subtle personalization, this is the move.
Cut the outer panels from cream leather-look with a 1/2 inch fold allowance. Add a rigid core from craft foam and line with a thin fabric that won’t show bumps. Use a stamp or stencil to place black numbers on the front, then seal with a leather-safe finisher or fabric medium so the ink doesn’t smear. Install a small clasp or magnetic tab closure on the centerline. Stitch or glue the binding along the edges to hide raw cuts.
Seal stamped ink with a thin, matte layer — glossy sealant makes stamped areas look like stickers.
Avoid large text placements — they crowd the small front and look messy in close-ups.
8. Turquoise Quilted Fabric With Mini Piping
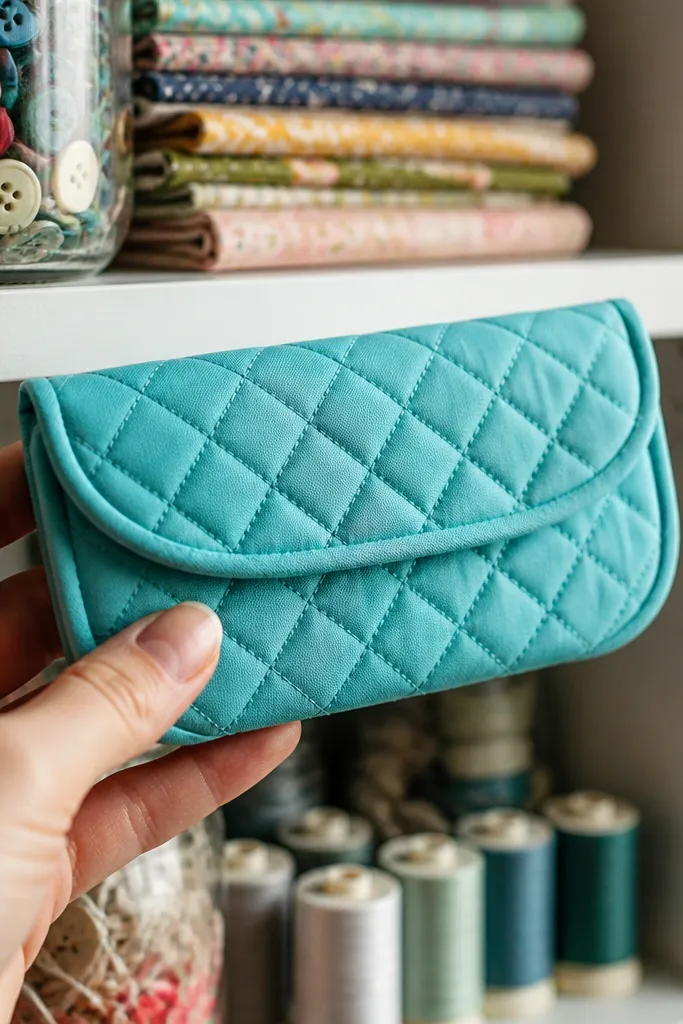
Quilted fabric adds texture that reads well even in low light. This wallet uses turquoise fabric quilted in a simple grid or diagonal lines, then adds mini piping around the opening for a crisp border. The closure is a small snap or magnet hidden under the lining so the front stays smooth. It’s visually striking because piping creates a “frame” effect on a tiny object. This works especially well for gifts where you want the wallet to feel soft but structured.
Cut the quilted outer panels first so the stitching pattern stays aligned, using a 1/2 inch fold allowance. Make the core from craft foam and cover it with thin cotton batting to soften edges without adding bulk. Sew piping along the opening edge using a zipper foot so the piping sits evenly. Attach the lining with a clean edge finish like bias tape binding. Install a snap centered on the front and back panels, then press the wallet flat under weight to set the shape.
Editor's noteUse 1/8-inch piping for the tight opening — thicker piping makes the wallet look bulky.
Skip thisAvoid quilting that adds too much loft — it makes the closure fight and the wallet won’t close flat.
9. Sunflower Felt Appliqué Wallet
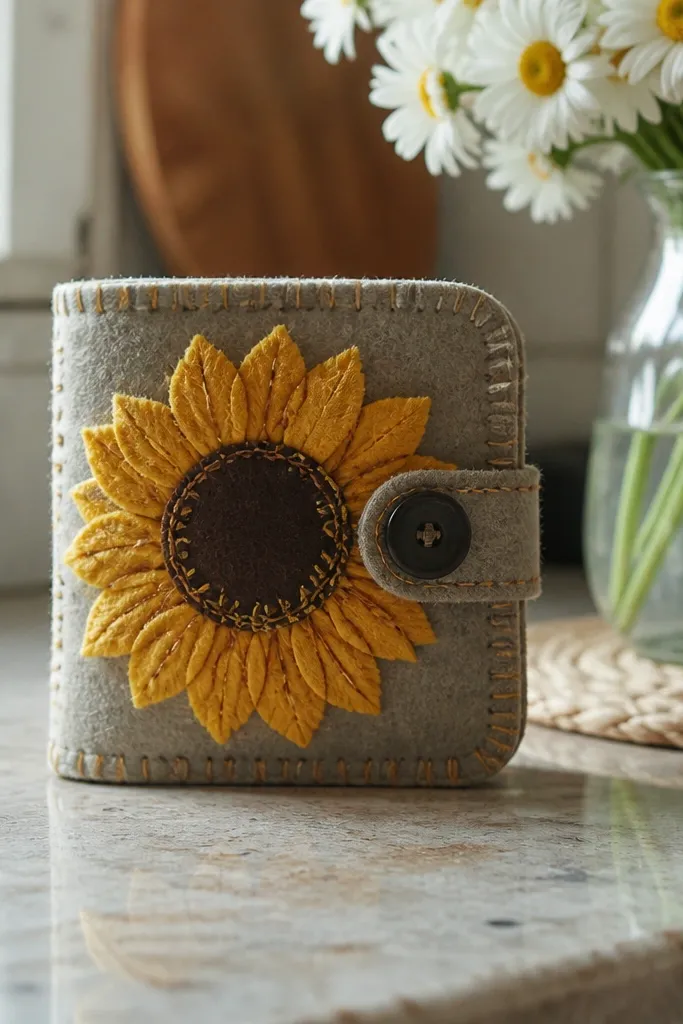
Appliqué looks bold on a small wallet because each shape is chunky and readable. This design uses a neutral felt base and one large sunflower appliqué on the front, with stitched details on the petals and center. The button closure keeps it simple and cute, and the felt surface makes the sunflower feel like a patch. It’s a great gift for birthdays because it looks cheerful without needing a lot of extra color elsewhere.
Cut a neutral felt base panel with a 1/2 inch fold allowance and add a rigid core underneath. Build the sunflower from felt pieces: petals in yellow, center in brown, then outline stitch with matching thread. Glue or stitch the appliqué onto the front first so you can adjust placement before assembly. Add a lining layer inside and finish edges with whip stitch or bias tape. Install a button on one side and a loop on the other for closure, then press the wallet flat.
Editor's noteUse contrasting thread for the appliqué outlines — it makes the sunflower pop in photos.
Skip thisAvoid tiny appliqué pieces — they look fuzzy and uneven once the wallet folds.
10. Black-and-White Striped Canvas With Red Tab
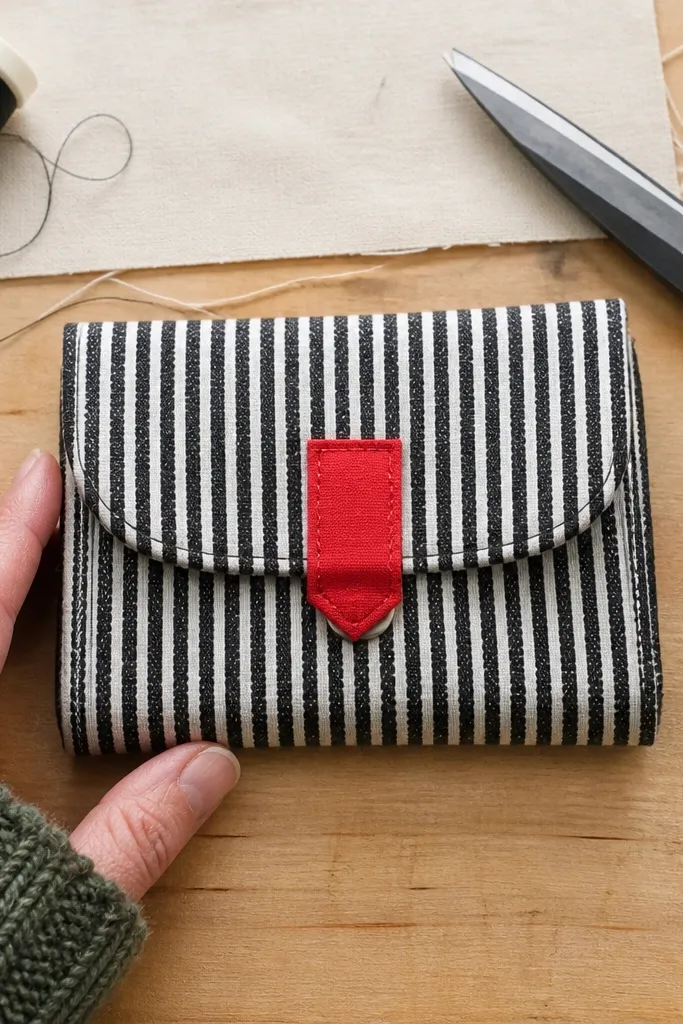
This design uses a simple graphic formula: stripes as the background and one red tab as the focal point. The result looks clean and modern, and the red tab makes it easy to spot the closure in a photo. The closure uses a snap or small magnet hidden behind the tab so the front stays neat. Canvas keeps it sturdy, and the red tab adds color without clutter. It’s a strong choice if you’re making a batch of gifts and want them to look consistent.
Cut striped canvas panels so the stripe lines hit the same way on both sides of the front opening. Add a craft foam core and line with a thin cotton layer. Create the red tab from a separate red fabric strip about 1 inch wide and attach it to the closure area only. Install a snap through the tab and the matching back panel, using a snap tool for a tight fit. Finish edges with edge-stitching in black thread so the wallet looks crisp.
Editor's noteAlign stripes using painter’s tape on your cutting mat before you cut both panels.
Skip thisAvoid random stripe alignment — the wallet looks off even if it’s sturdy.
11. Sage Green Suede-Look With Stitched Monogram
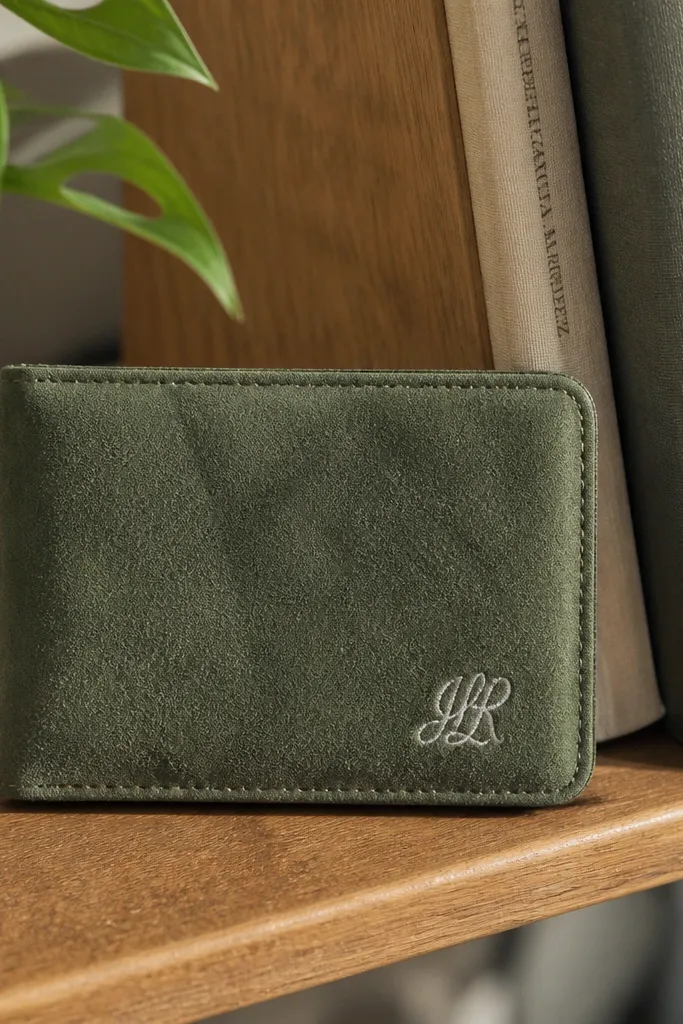
A single stitched monogram turns a basic wallet into a gift people keep. Sage green suede-look gives a soft, high-end vibe, and the monogram in white thread reads cleanly without needing extra embellishments. The closure is a snap so it stays flat and doesn’t distract from the letter. The suede-look finish hides small imperfections, which makes this a forgiving build for beginners. It fits well for wedding favors, office gifts, and small thank-you presents.
Cut suede-look outer panels with a 1/2 inch fold allowance and add a rigid core inside. Trace your monogram onto the front using chalk or a disappearing fabric marker. Stitch the monogram with a tight satin stitch or simple backstitch so the letter edges look smooth. Line the inside with matching fabric and bind the edges with thin bias tape. Install a 1/2-inch snap centered on the fold area and test closure before trimming any excess.
Editor's noteUse a sharp needle and short stitch length on suede-look so the thread lays flat.
Skip thisAvoid thick yarn thread — it makes the monogram sit high and the wallet won’t close smoothly.
12. Charcoal Corduroy With Leather Loop Closure
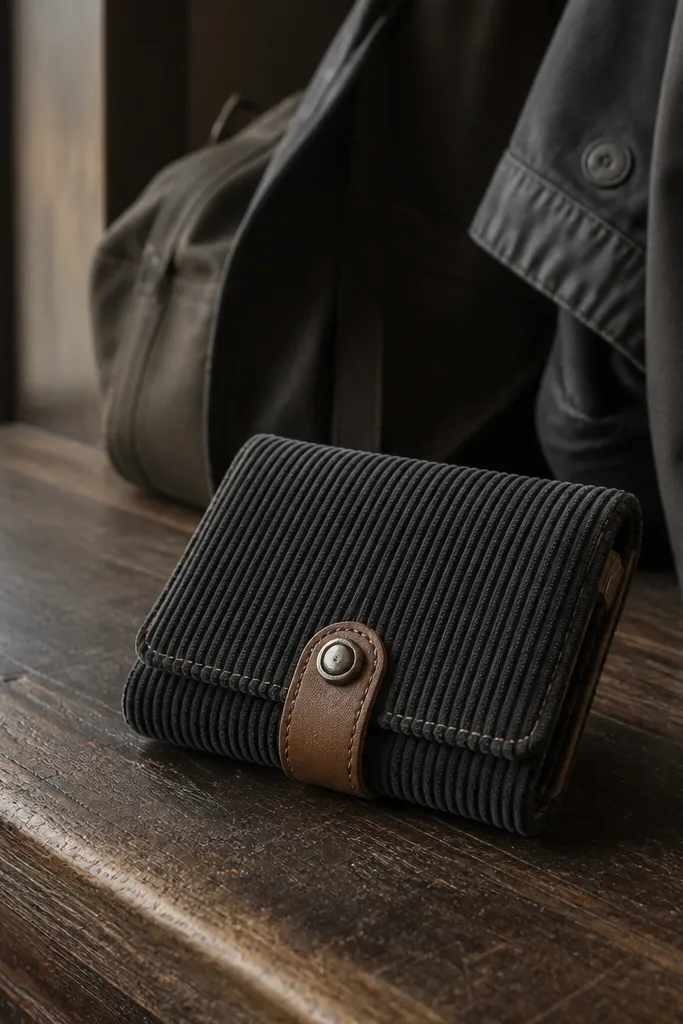
Corduroy has that cozy texture that still looks structured. This wallet uses charcoal corduroy as the outer layer, then adds a tan leather loop closure that looks intentional and aged-in. The leather loop also protects the fold area because it takes the stress of opening and closing. The closure is a button or magnetic snap tucked inside the loop so the front stays clean. This is a great gift for anyone who likes tactile accessories.
Cut corduroy panels with a 1/2 inch fold allowance and interface the inside with stiff fusible web so it doesn’t sag. Build a craft foam core and cover it with a thin lining. Sew or glue a leather loop strip on the inside so it lines up with the closure point. Add a small button or snap on the matching back panel, then test the loop tension. Finish edges with a simple bound seam so the corduroy pile doesn’t fray.
Cut corduroy with the nap direction consistent across both panels for a cleaner look.
Avoid leaving the loop too loose — it makes closure look messy in photos.
13. Rainbow Pride Fabric With Fold-Out Wallet Tabs
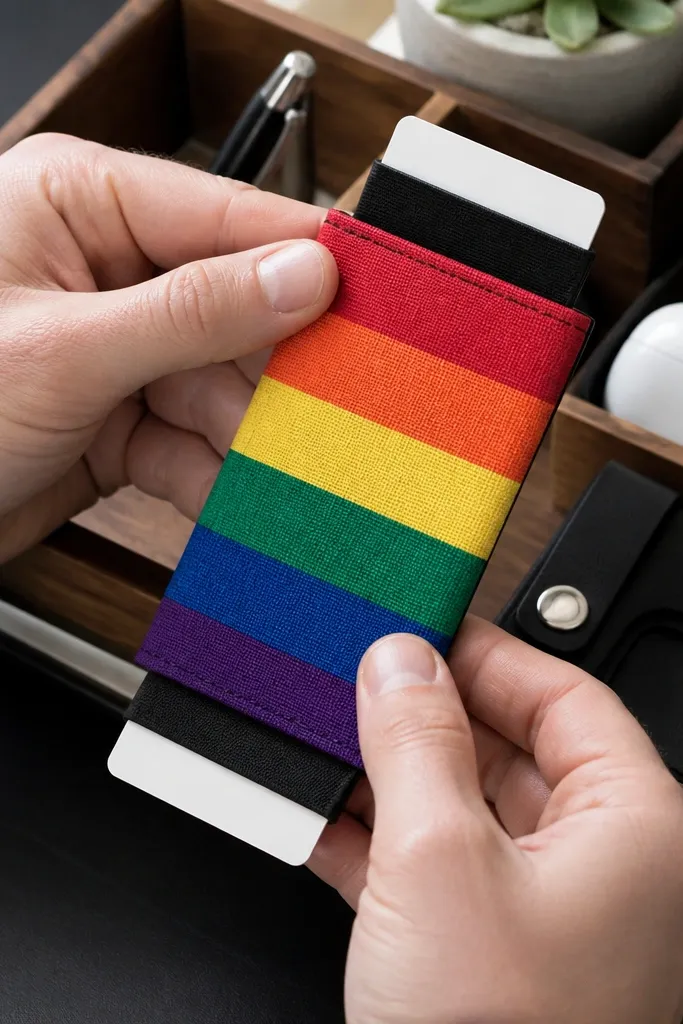
If you want a pride-themed wallet that still looks polished, go for a design that has functional tabs. This build uses rainbow fabric as the outer layer, then adds two slim fold-out tabs that hold two cards each. The tabs look cute in photos because they create visible layers and movement when opened. Magnets keep the front closure clean. The wallet reads as playful but structured, not like a flat pouch.
Cut rainbow fabric panels with a 1/2 inch fold allowance and interface with medium stabilizer. Make a rigid core from craft foam and line the inside. Add two tab pieces from the same fabric, each about 1 inch wide and long enough to fold out inside the wallet. Glue the tab bases to the side panels and reinforce with stitching. Install 10mm magnets at the closure points so the wallet shuts securely, then press the tabs flat.
Make tabs 1/8 inch narrower than the tin face so they don’t catch on the hinge.
Avoid tabs that are too wide — they snag and the wallet looks messy when opened.
14. Monochrome Botanical Print With Clear Resin Charm
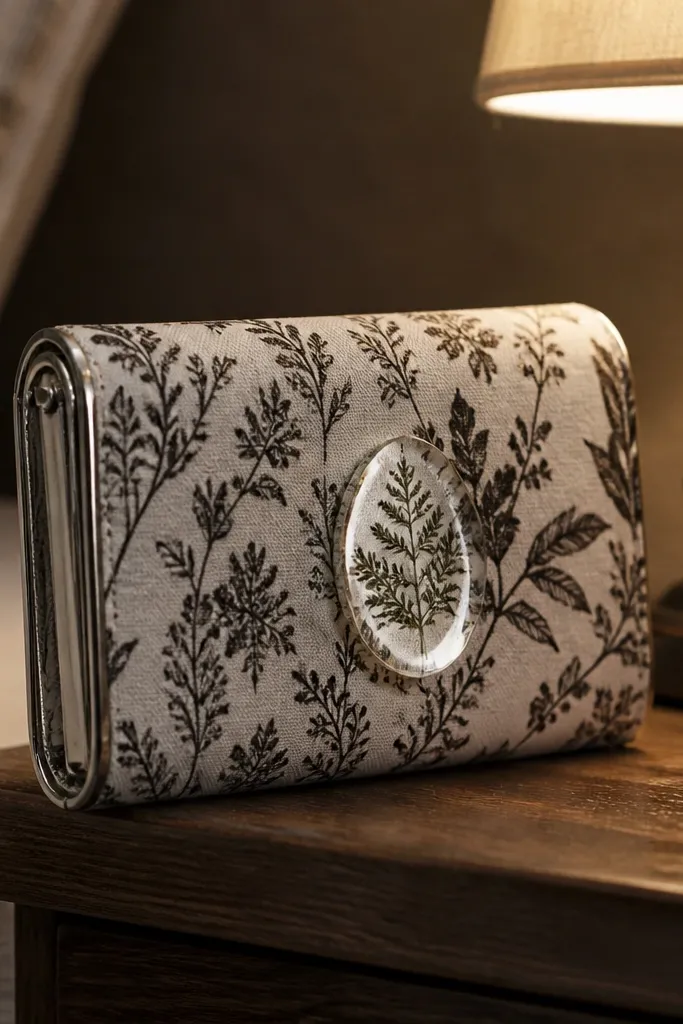
Botanical prints look high-end when you keep the palette tight. Use a monochrome botanical print fabric as the outer skin, then attach one clear resin charm on the front — a small leaf, pressed flower, or tiny shape. The charm adds glossy highlights that catch light in photos. The closure stays simple with a hidden magnet so the charm is the only “sparkle” on the front. This design is a good gift for plant lovers and anyone who likes subtle drama.
Cut outer panels from botanical print fabric with a 1/2 inch fold allowance and interface lightly. Build a rigid core from craft foam and line the inside with a smooth fabric. Create a resin charm using a small silicone mold and a pressed element sealed under resin, then let it cure fully. Attach the charm with a small jump ring to a stitched loop or a glued resin-safe anchor point on the front. Install 10mm magnets for closure and bind edges with bias tape.
Editor's noteUse a matte top layer on the wallet fabric near the charm so the resin gloss stands out.
Skip thisAvoid adding multiple charms — the front turns cluttered and the wallet looks cheap.
15. Black and Red Leatherette With Double Snap Belt Loop
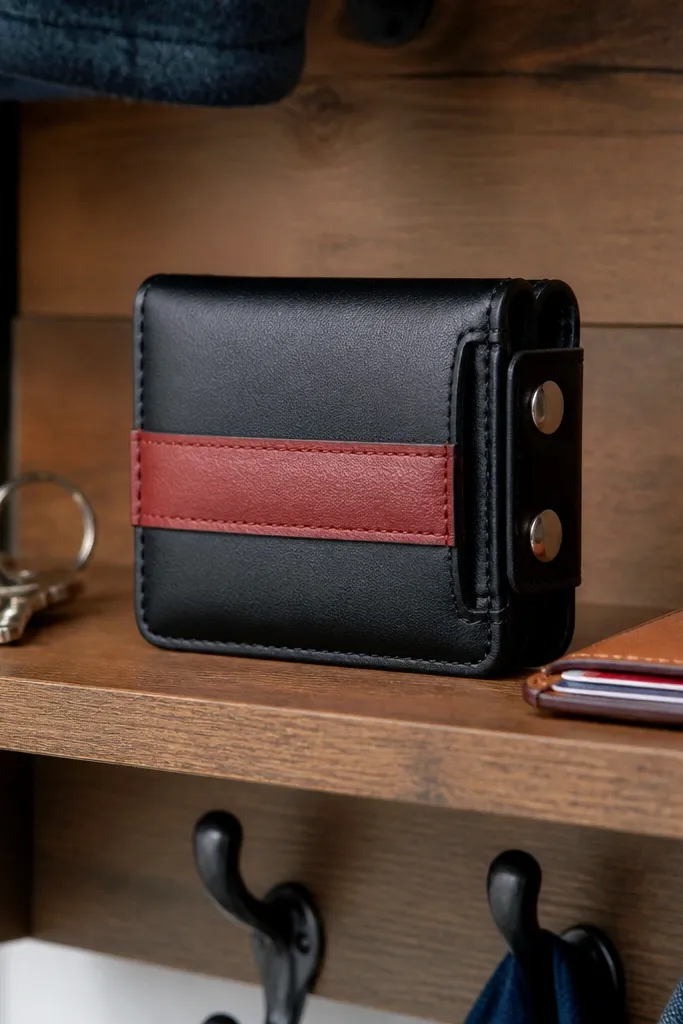
This is the most “accessory” looking wallet — it has belt-loop energy without being bulky. Use black leatherette for the main body and red leatherette as a contrast strip, then add a belt loop on the side. Double snap closure keeps it secure, which matters if the gift recipient carries it in a pocket. The red strip also gives you a crisp visual line that reads well in photos. It’s a great pick for practical gifts.
Cut main outer panels from black leatherette with a 1/2 inch fold allowance. Cut a red contrast strip about 3/4 inch wide and place it along the front opening edge. Add a rigid core and line with thin fabric. Create a belt loop from a leatherette strip about 1 inch wide, then stitch it to the back panel so it sits flat. Install two snaps at the front closure area and test alignment before sealing the lining.
Punch snap holes with a proper hole punch — tearing leatherette makes ugly gaps around the hardware.
Avoid one snap only — the wallet can gape when cards shift.
16. Pastel Knit Fabric With Buttoned Flap
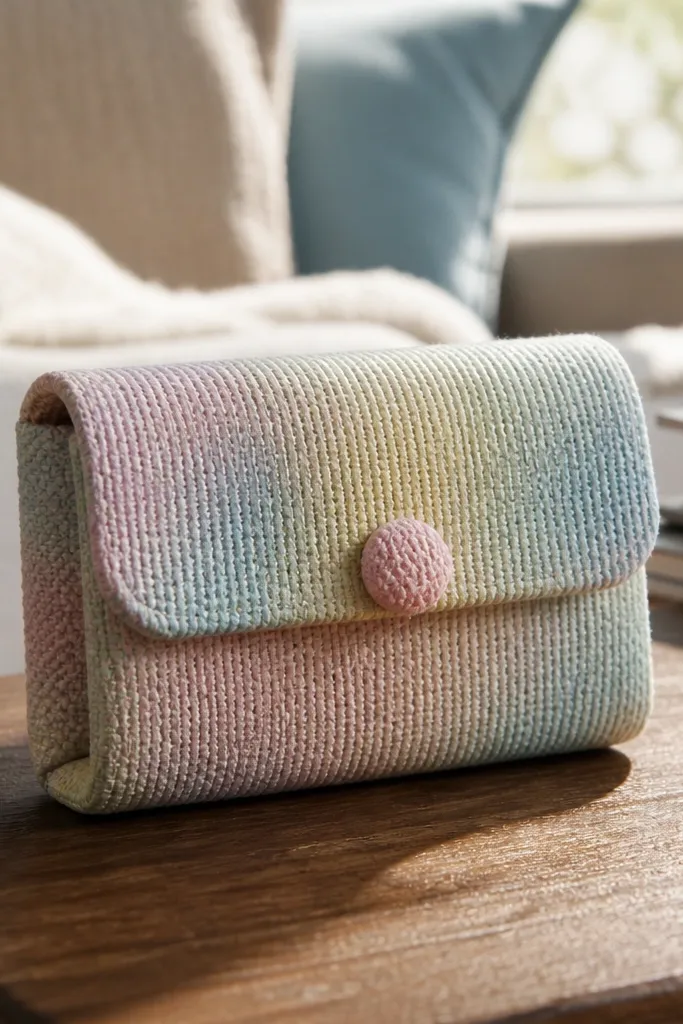
Knit fabric looks soft and sweet, and a flap button closure keeps it structured. Choose a pastel knit with a tight weave so it doesn’t stretch too much, then add a small flap over the front opening. The flap is stitched down at the sides only, so it folds neatly. This design is photogenic because knit texture shows clearly and the flap creates a layered silhouette. Great for cozy aesthetics and baby shower favors.
Cut knit outer panels with a smaller fold allowance of about 3/8 inch since knits stretch. Stabilize the knit with fusible interfacing on the wrong side. Add a rigid craft foam core and a thin cotton lining. Cut a flap piece that covers the front opening by about 1/4 inch and stitch the flap sides. Install a small button and loop on the flap so the closure sits centered and snug.
Editor's noteUse a walking foot if you’re sewing knit so stitches don’t pucker.
Skip thisAvoid stretchy knit without stabilizer — the flap will twist and the wallet won’t sit flat.
17. Geometric Faux Leather Patchwork With Center Magnet
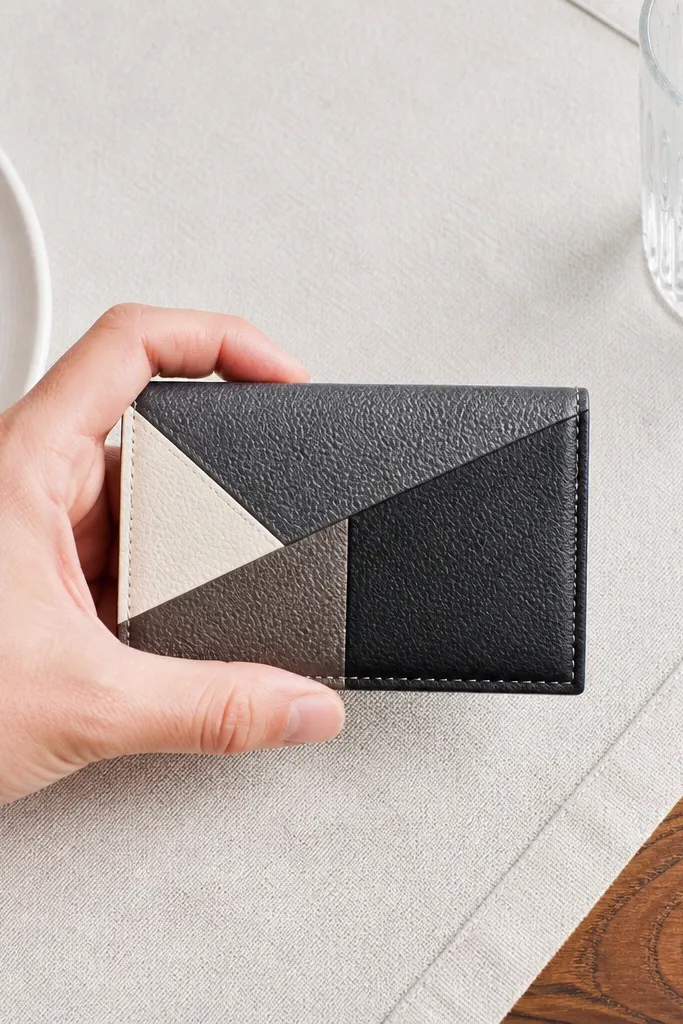
Patchwork looks modern when the shapes are clean and the palette is limited. This wallet uses two or three faux leather colors cut into simple triangles or rectangles, then assembled into a geometric front panel. A centered magnet closure keeps the front smooth so the geometry stays the focus. The rigid core makes the patchwork lie flat, which is what keeps it looking sharp. This is a great “batch gift” idea because you can repeat the pattern across multiple wallets.
Choose two faux leather colors plus one accent, and cut geometric pieces with a rotary cutter for crisp edges. Sew or glue the patchwork panel onto a base faux leather panel sized to the front. Add a craft foam core and line the inside. Install a single center 10mm neodymium magnet on the front and matching magnet on the back fold area. Bind edges with a thin strip so raw patchwork seams don’t show.
Editor's noteDry-fit the patchwork on the core before you glue so the triangle points don’t land over the hinge.
Skip thisAvoid patchwork seams at the hinge line — they will crack and lift.
18. White Canvas With Navy Sailboat Embroidery
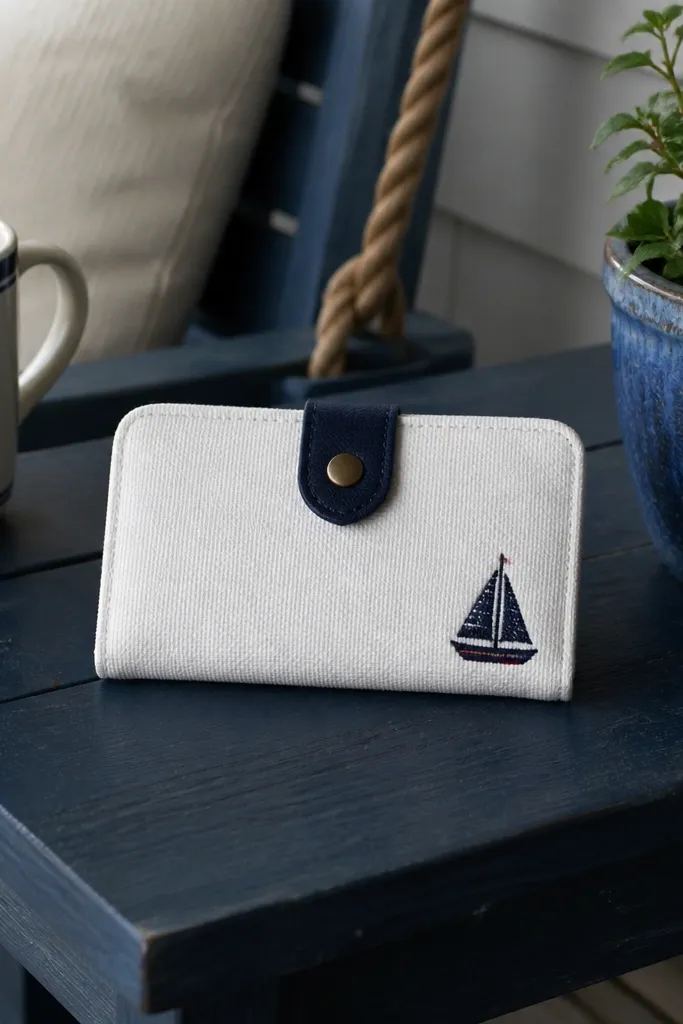
This design is charming without being childish because the sailboat embroidery is small and framed. Use white canvas as the base for a bright, clean look, then stitch a navy sailboat or anchor motif in one corner. The snap closure is navy too, so it blends into the theme. Canvas makes the wallet sturdy and easy to press flat for photos. It’s a solid gift for summer birthdays, beach trips, or anyone who loves nautical décor.
Cut white canvas panels with a 1/2 inch fold allowance and add fusible interfacing on the inside. Create a craft foam core and line with a smooth fabric. Transfer your sailboat pattern using fabric chalk, then embroider with a backstitch outline and satin stitch sails. Add a navy binding along the edges for a finished look. Install a 1/2-inch snap centered on the closure line and press the wallet under a book after assembly.
Use embroidery hoops for the front panel so the stitching stays taut and even.
Avoid large embroidery blocks — they create thickness that makes the closure sit uneven.
19. Black Base With Silver Foil Heat Transfer Pattern
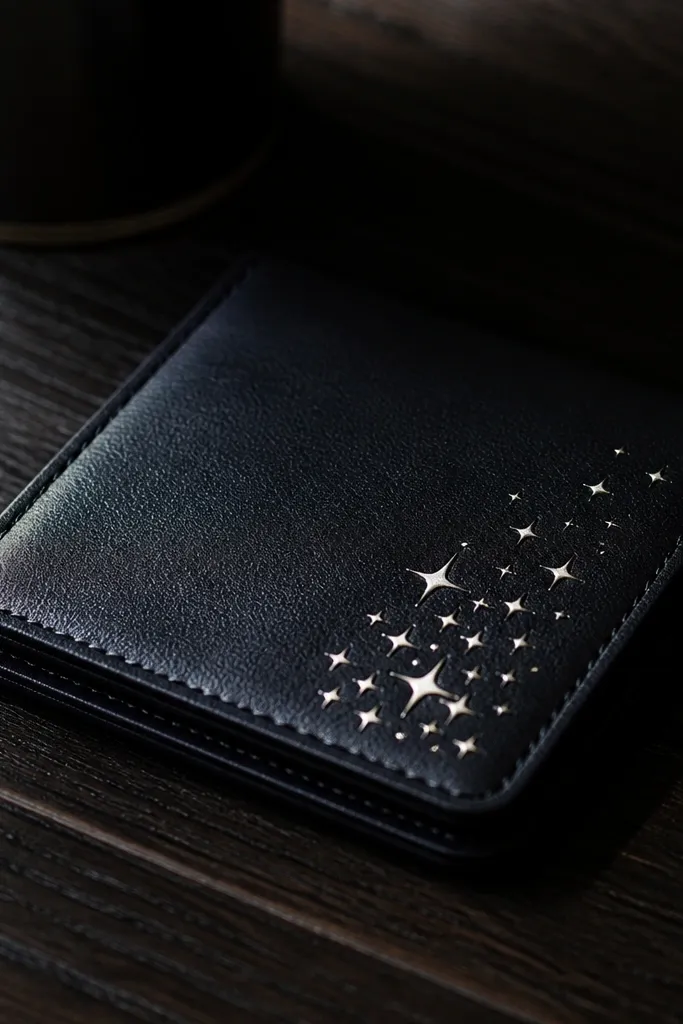
Foil heat transfer gives you instant “wow” because it reflects light sharply in photos. Use a black faux leather or coated fabric base, then apply a silver foil pattern like a star cluster, geometric lines, or a simple word in a small corner. Keep the rest minimal so the foil is the hero. The closure is a hidden magnet so the foil doesn’t get interrupted by hardware. This one is perfect for gifts where you want a sleek, party-friendly look.
Cut outer panels from black faux leather or coated fabric with a 1/2 inch fold allowance. Stabilize with thin interfacing and create a craft foam core inside. Apply foil heat transfer using the correct temperature and time for your material, pressing evenly and letting it cool before peeling. Seal the foil with a thin protective layer that won’t dull it too much. Install 10mm magnets on the inside fold area and bind edges for clean seams.
Test your foil on a scrap — coated fabrics need different peel timing than faux leather.
Avoid applying foil on thick seams — it cracks when the wallet folds.
20. Brown Paper Bag Style With Wax Seal Sticker
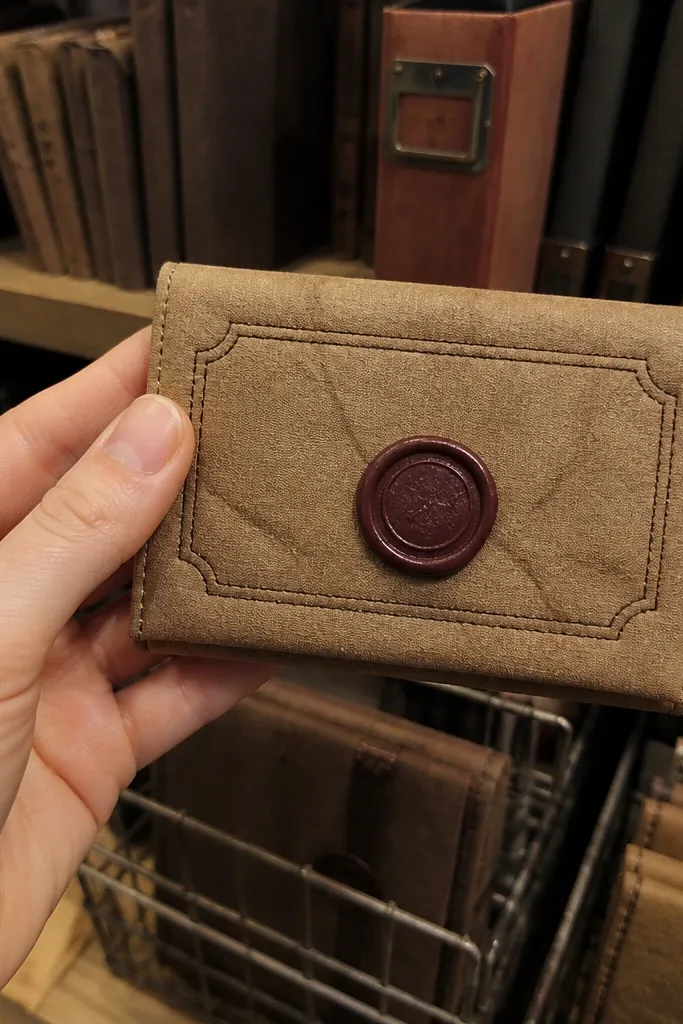
Paper-bag style looks handmade in a good way, and it photographs like craft-store décor. Use a sturdy kraft fabric or faux paper material as the base, add a stitched border frame, and place one wax seal sticker or resin wax seal on the front center. The closure is a snap or magnet that stays hidden under a flap so the seal is the focal point. This is a great gift look for thank-you notes, wedding favors, and small keepsakes. It also hides minor imperfections better than smooth leather.
Cut kraft fabric panels with a 1/2 inch fold allowance and back them with stiff interfacing. Add a craft foam core and line the inside with cotton. Stitch a simple border rectangle around the opening using thick thread. Attach a wax seal element with a strong fabric-safe adhesive or a small sewn loop behind it. Install a hidden snap on the inside so the front stays uninterrupted. Press and shape the wallet under weight before gifting.
Use a slightly off-center seal placement — centered wax can look flat and too “stamp-like.”
Avoid glossy “paper” materials — they show creases and look plasticky in close-ups.
21. Gray Felt With Braided Trim Edge
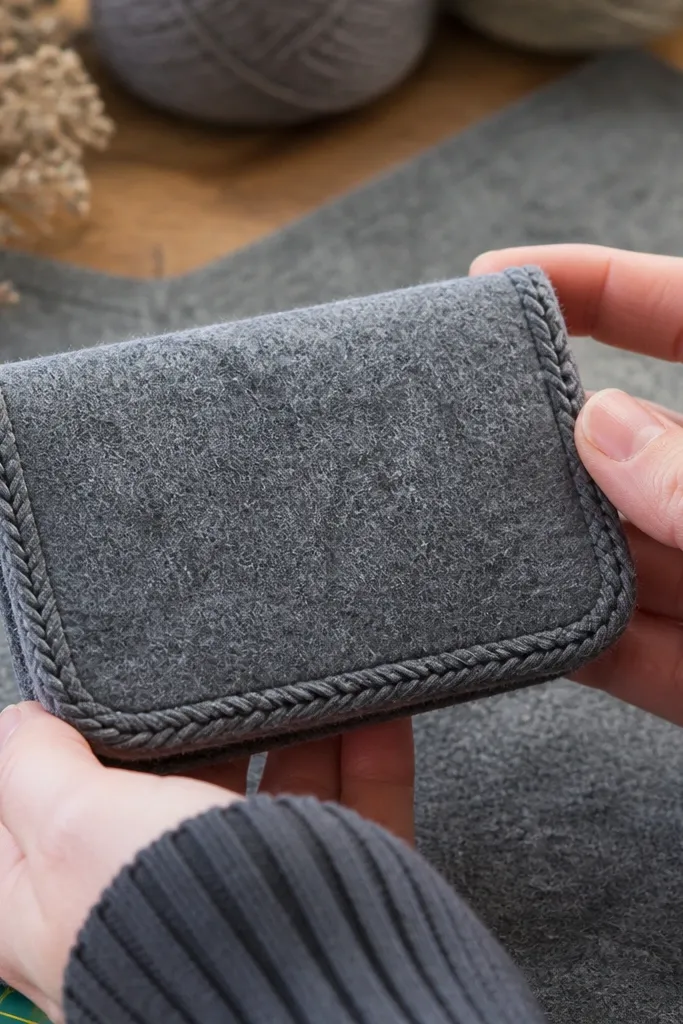
Braided trim makes felt look styled, not basic. This wallet uses gray felt as the base and adds a thin braid around the front opening and along the bottom edge for a clean frame. A hidden magnet closure keeps the front smooth, so the braid is the only decorative border. The result is structured, cozy, and super photogenic because braid creates a raised highlight line. This is a good gift for anyone who likes cozy home crafts and winter colors.
Cut gray felt panels with a 1/2 inch fold allowance and glue or stitch a craft foam core inside. Add a thin lining layer to prevent felt fuzz from catching on cards. Sew braided trim around the opening edge using small stitches so it sits flat. Install two 10mm magnets at the closure fold area, aligned carefully with a pencil mark center line. Finish the outer edges by folding felt over raw edges or binding with a thin strip of matching felt.
Sew braid with the braid slightly compressed — it looks neater and won’t gap when the wallet flexes.
Avoid bulky trim — it makes the wallet thick and the magnets won’t close flat.
22. Terracotta Tile Pattern With Small Tile Frame
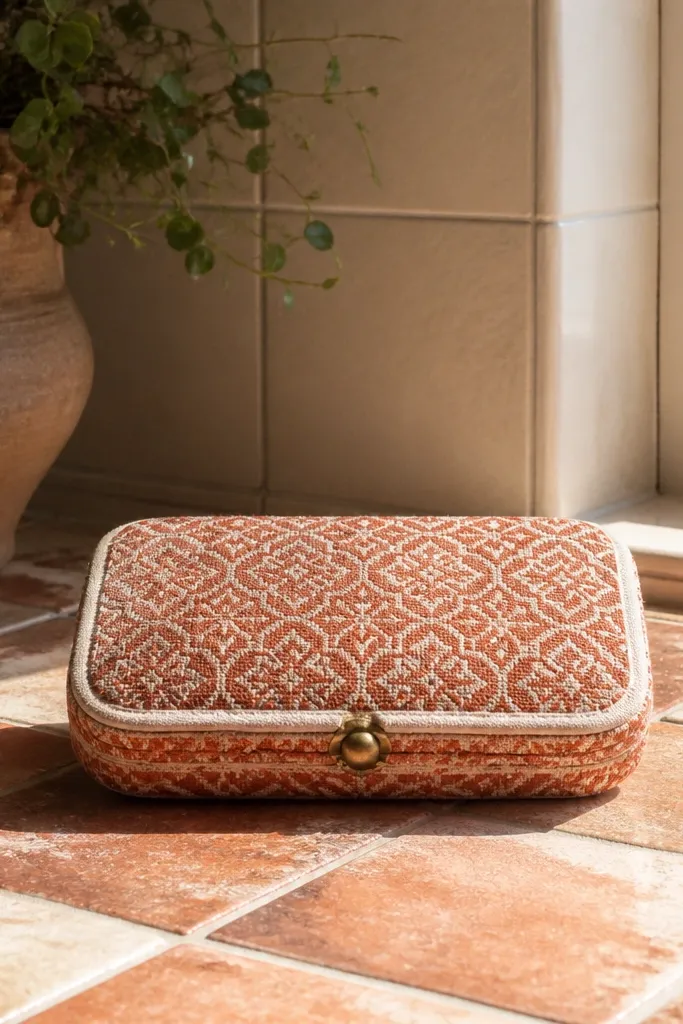
Tile pattern fabric gives you an instant “designed” look because the pattern reads like décor. Use terracotta tile-pattern cotton as the outer skin, then add a small faux tile frame in a lighter tone around the opening. Keep closure hardware small and centered so the pattern stays the star. This wallet is great for kitchen-themed gifts, housewarming presents, and anyone who likes warm color palettes. It also looks good even if the gift recipient doesn’t carry it daily.
Cut tile-pattern fabric panels with a 1/2 inch fold allowance and interface lightly to keep the pattern crisp. Add a craft foam core and line with neutral cotton. Create the faux tile frame by cutting a rectangle frame piece from coordinating fabric or foam sheet, then glue it around the opening. Install a 1/2-inch snap centered on the fold edge. Bind edges with a solid matching fabric strip so the frame and pattern look intentional.
Use a light pressing cloth — terracotta prints show shine if you press too directly.
Avoid framing that’s too thick — it pushes the closure and makes the wallet look uneven.
23. Olive Cord With Woven Front Knot Panel
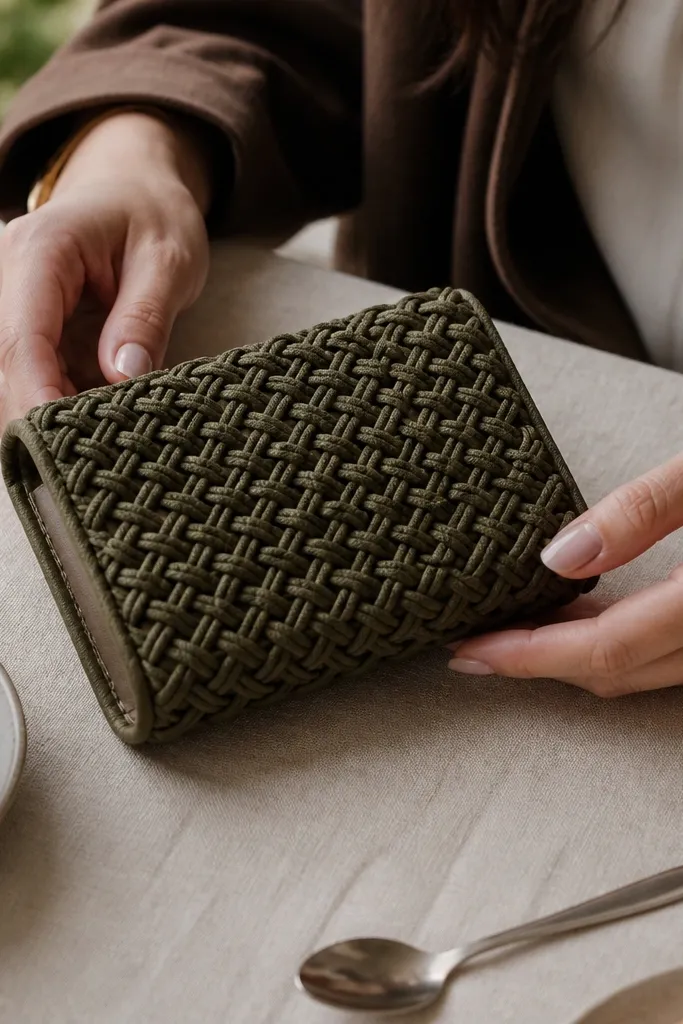
Woven cord looks like a tiny handbag detail. This wallet uses an olive cord or braided rope accent on the front as a knot or woven panel, then keeps the rest simple with a neutral lining. A hidden magnetic closure keeps the front smooth enough that the woven panel is the only texture star. The woven front also gives you a strong silhouette that shows in photos from multiple angles. This is a gift for people who love tactile décor and handmade accessories.
Cut neutral outer panels from canvas or felt with a 1/2 inch fold allowance. Build a rigid core and line the inside. Create the woven knot panel using braided cord strips, then stitch or glue the weave onto a flat backing piece first. Attach the woven panel to the front with strong fabric glue and a few stitches at the corners. Install two 10mm magnets aligned on the fold area and bind edges so cord ends don’t fray.
Editor's noteSeal cord ends with fabric glue so they don’t fuzz and ruin the clean look.
Skip thisAvoid leaving cord ends exposed — they catch lint and look messy fast.
24. Sea Glass Colors With Clear Window Insert
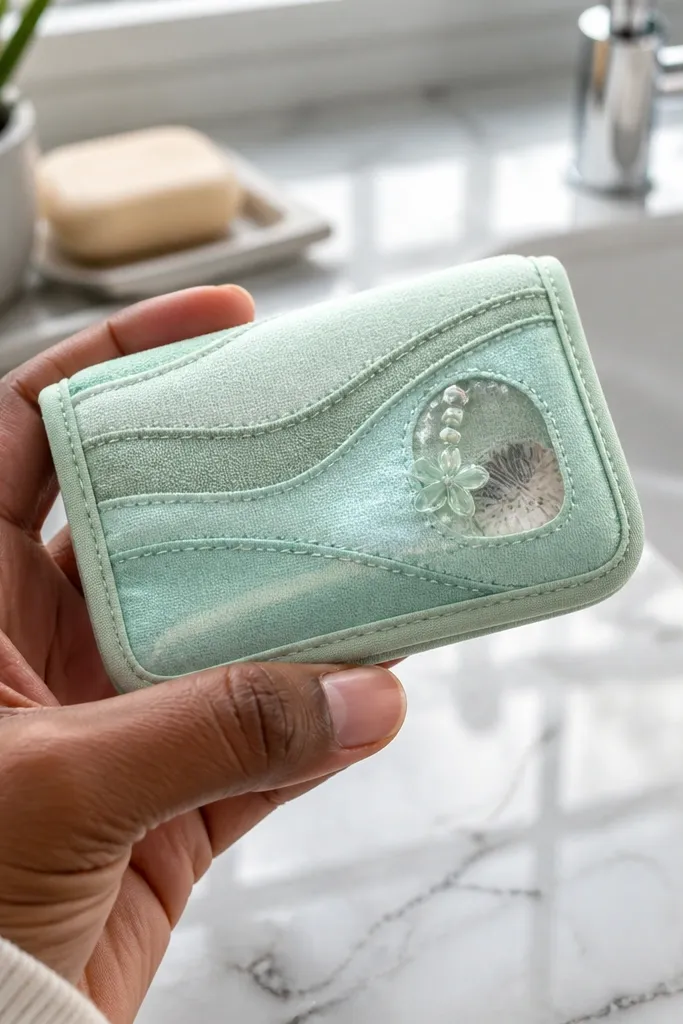
Sea-glass color palettes look soft and premium, and the clear window adds a “collector” feel. Use a layered sea-glass fabric stack on the front, then add a small clear window panel so a card or tiny charm peeks through. Use magnets so the closure is invisible. The key photogenic trick is the window border — it makes the wallet look like a mini display case. This is a great gift for someone who likes stationery or keeps tiny notes.
Cut sea-glass fabric outer panels with a 1/2 inch fold allowance and interface inside. Build a craft foam core and line with smooth fabric. Cut a front window opening and glue clear vinyl or acetate behind it, then frame it with a thin strip of coordinating fabric. Layer two fabric tones behind the window so you get depth without bulk. Install 10mm magnets inside the fold area and press the wallet flat before trimming edges.
Editor's noteUse thin acetate so the window looks glassy without adding thickness.
Skip thisAvoid thick window materials — they make the wallet bulge and the closure won’t line up.
25. Monochrome Leatherette With Laser-Cut Heart Frame
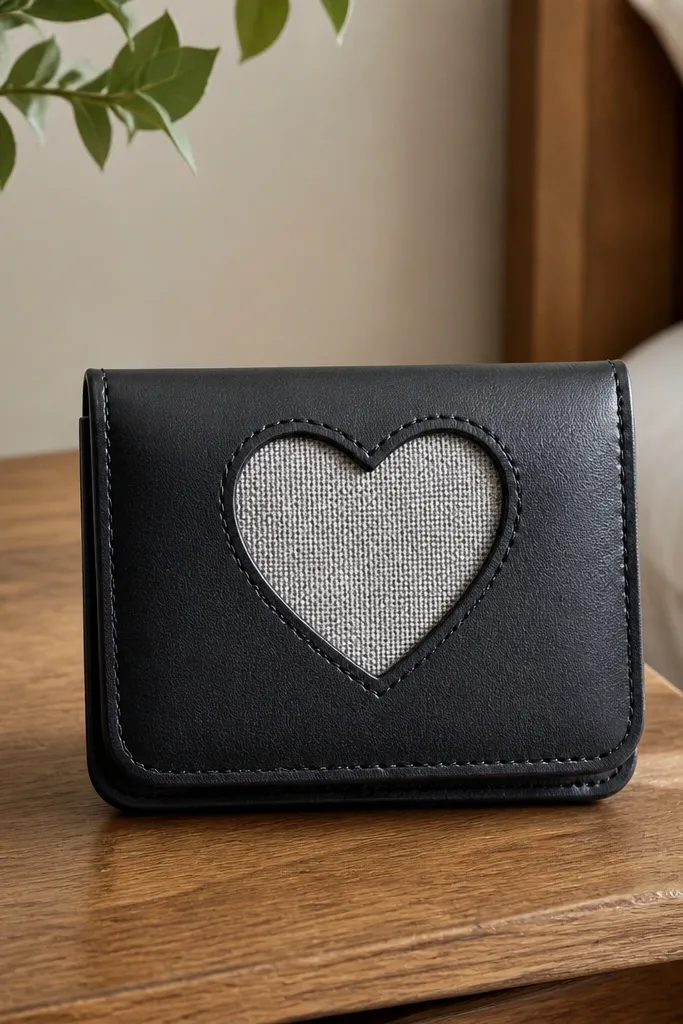
A cut-out frame looks sharp because it creates negative space. This wallet uses a monochrome leatherette base and adds a heart-shaped cut-out frame on the front, backed with a contrasting fabric so the heart area looks dimensional. The closure is a slim snap placed under the heart frame area so it stays hidden. The heart cut-out also makes the wallet look graphic and modern rather than overly cute. Good for Valentine gifts, anniversary keepsakes, and anyone who likes clean shapes.
Cut leatherette panels with a 1/2 inch fold allowance and stabilize with interfacing. Cut a heart frame shape from thin foam sheet or laser-cut vinyl and glue it to the front panel. Back the cut-out with a contrasting fabric piece so the interior looks clean through the opening. Assemble the wallet with a rigid core and line the inside. Install a snap centered on the closure line and press edges flat so the cut-out frame doesn’t lift.
Editor's noteRound the heart corners slightly — sharp corners lift on leatherette and look ragged in photos.
Skip thisAvoid placing the cut-out too close to the hinge — it weakens the fold area.



