
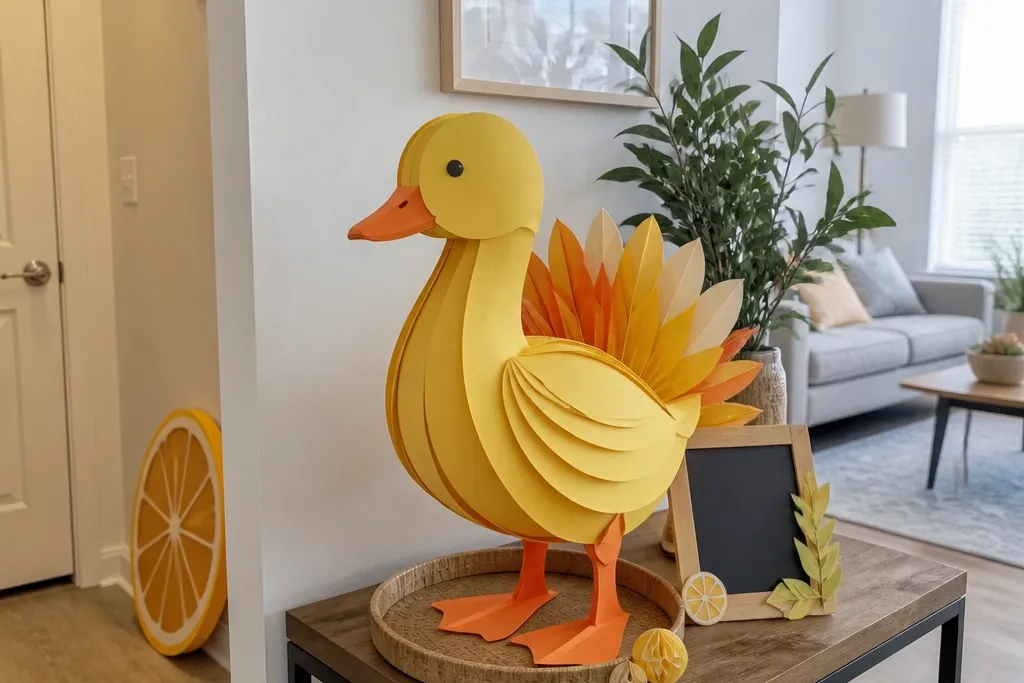
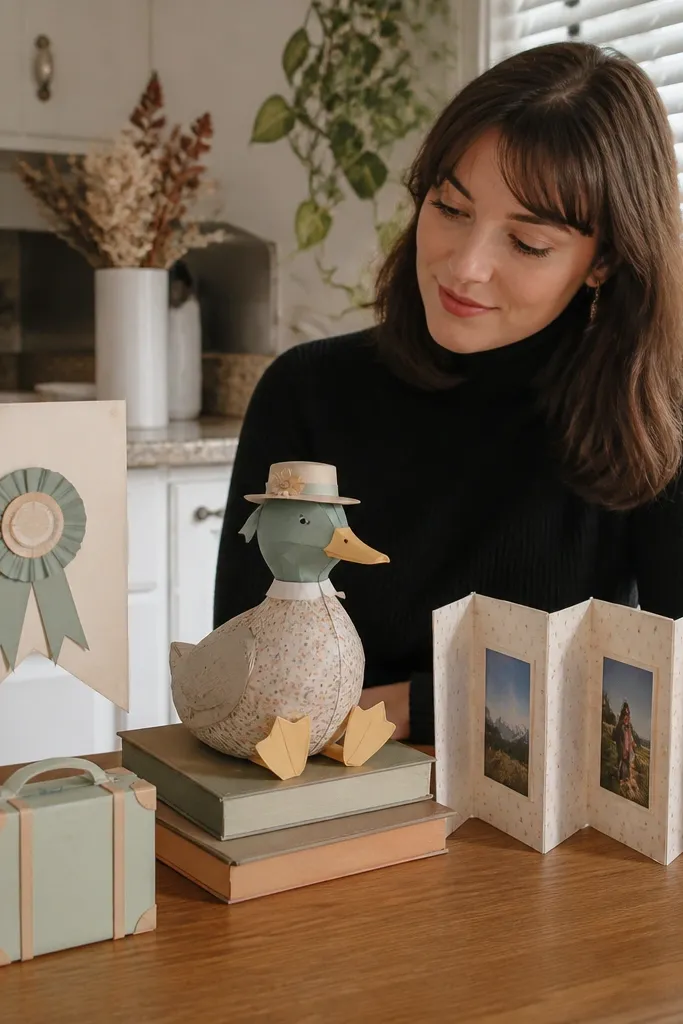
1. Citrus Slice Door Sign for Duck Welcome
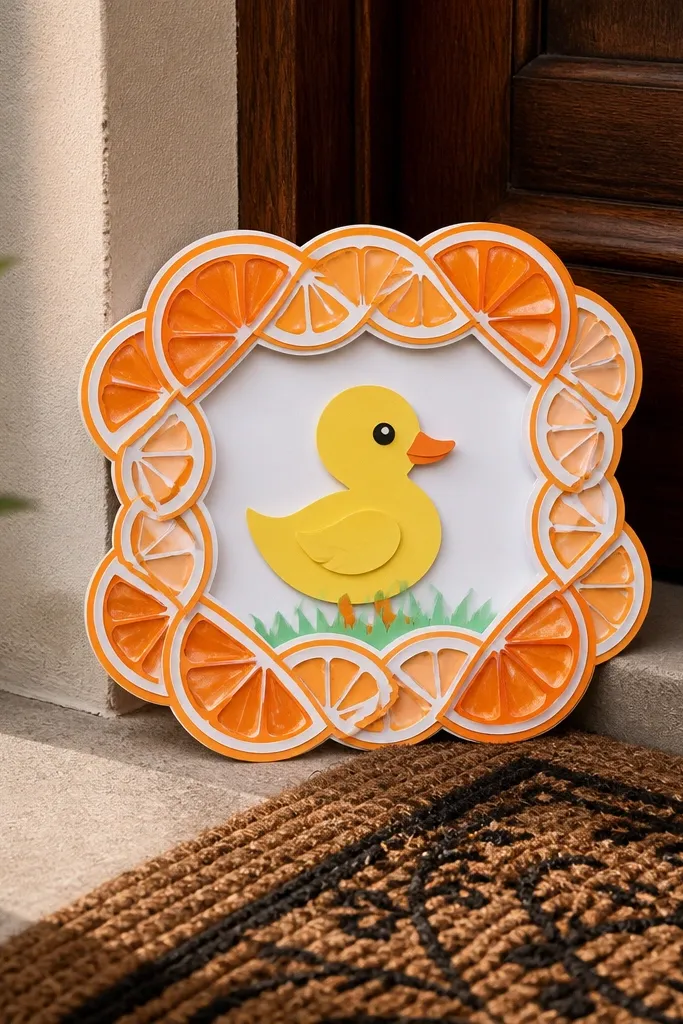
This is a renter-friendly way to make the Paper Duck feel “hosted” without hanging a heavy plaque. The design uses a citrus-slice border that frames the Duck and gives you a bold outline that reads clearly in photos from the hallway. Paper stays lightweight, but the layered slices create depth so it doesn’t look flat. It’s also easy to swap — make a new slice set for spring, fall, or a holiday theme. Keep it matte with one glossy orange segment so it catches light instead of glare.
Editor's notePrint your text on sticker paper so the letters stay crisp and you don’t fight uneven handwriting on paperboard.
Cut a 10 x 14 inch backing from 200 gsm paperboard and score fold lines so the center can sit flat while the slice border stands up. Make 6 to 8 slice segments from 160-200 gsm paper, each about 1.5 inches wide, and glue them to the backing in a shallow arc around the center opening. Add a simple “welcome” word strip in a contrasting color and finish with one small metallic marker or foil sticker on the orange slice edges. Mount it with a removable command-style hook or painter’s tape tabs on the back corners, keeping the tape away from the slice edges so it peels cleanly.
Skip thisDon’t use heavy foam board — it makes renters mounts fail and the sign looks bulky in photos.
2. Mini Garland Bow Tie for Duck Collar
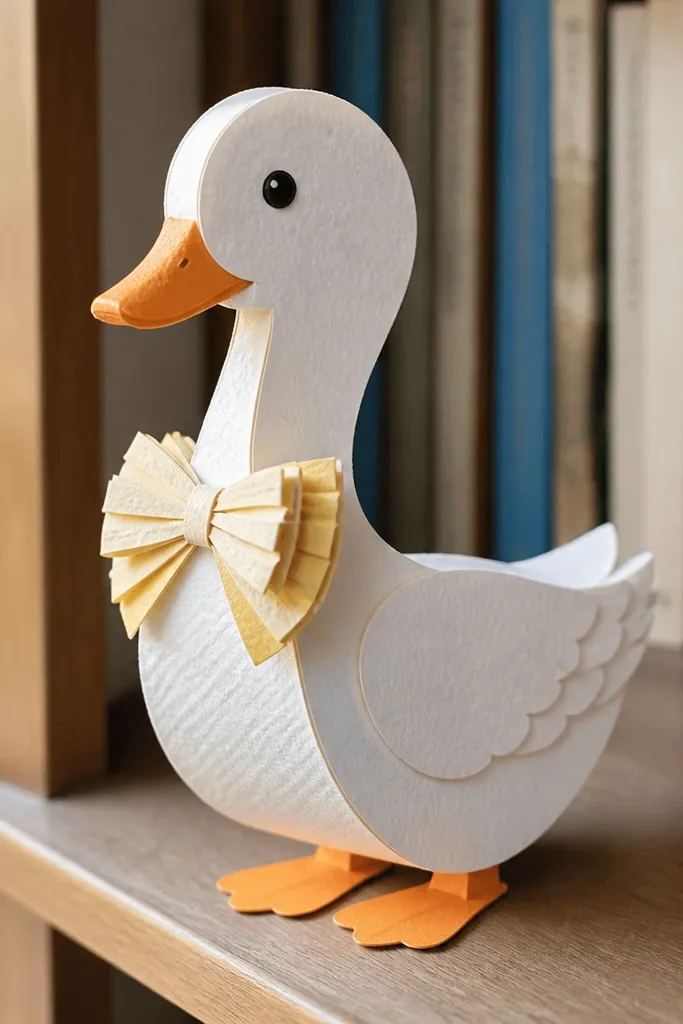
A bow tie accessory instantly makes the Paper Duck look dressed, which is exactly what reads as “cute” in quick photos. This one uses a garland-like loop strip that wraps around the Duck’s neck area, so it has motion and texture without needing glue on the Duck itself. The layered bow shape gives strong silhouette lines. It’s perfect for birthdays, “first day of school” vibes, or just daily styling. Use matte paper for the bow and a thin metallic thread-like strip for the loop accents.
Editor's noteMake the neck wrap adjustable by using a 1-inch overlap and a tiny Velcro dot on the ends.
Cut two bow wings from 200 gsm paperboard, each about 4.5 inches long with a slight inward curve, then cut a small center knot piece about 1 inch wide. For the garland loops, cut a 12-inch strip of 120 gsm paper and score it every 1 inch so you can accordion-fold into 10 to 12 loops. Glue the loops along the inside edge of the bow center knot piece, leaving the ends free. Wrap the loop strip around the Duck neck area and secure ends with a small piece of double-sided tape on the loop ends only, not on the Duck body.
Skip thisDon’t glue the loop strip directly to the Duck — you’ll regret it when you switch themes.
3. Accordion Photo Frame for Duck Shelf Styling
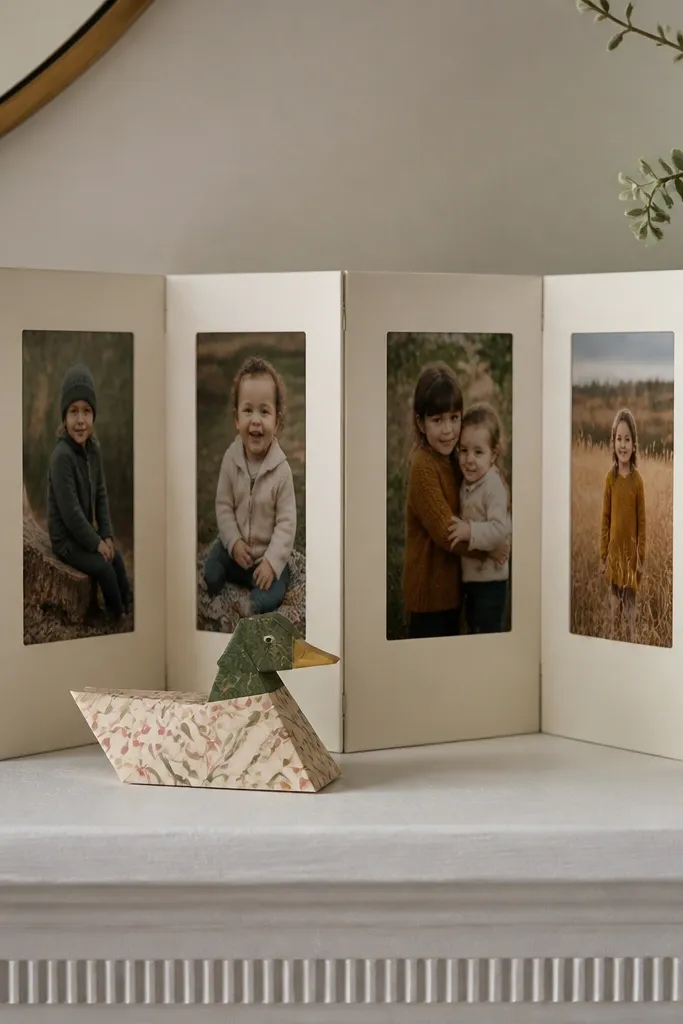
This accessory turns your Paper Duck display into a styled shelf moment. The accordion frame stands upright on a shelf, so you don’t need wall access at all. It also creates a clean backdrop for pictures, which makes the Duck look like it’s part of a set. The frame silhouette is dramatic but still lightweight. You can swap the photo insert seasonally, and the paper stays stable because the accordion ribs act like a built-in stand.
Cut a 9 x 12 inch rectangle of 200 gsm paperboard and mark vertical fold lines every 0.5 inches across the short direction. Accordion-fold to create 7 to 8 ribs, then glue the ends to form a standing frame with a 1/2 inch gap for your insert. Cut a 3 x 4.5 inch photo window insert from 160 gsm paper and slide it into the gap using a pocket flap you glue on one side only. Place the frame next to the Paper Duck on a tray or shelf; if you need it to stay put, add a removable strip of museum putty under the base rib.
Use a matte photo print or matte photo paper insert so the frame doesn’t glare under overhead light.
Don’t make ribs wider than 0.6 inches or it collapses when you bump the shelf.
4. Shadow-Puppet Paper Duck Stage Backdrop
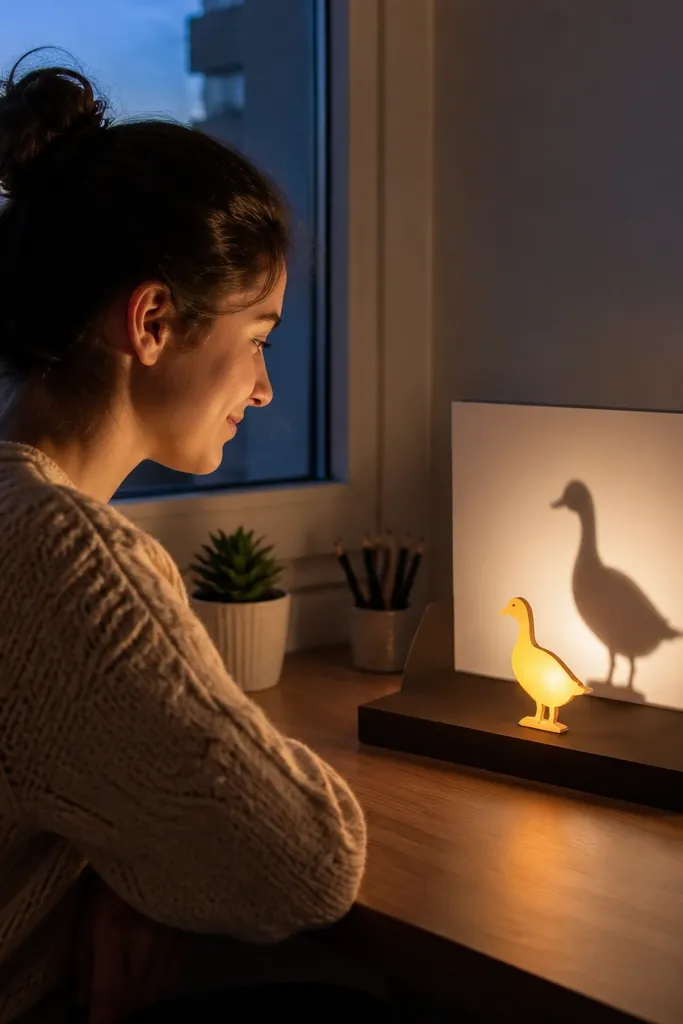
If you want “wow” photos without any permanent installation, this stage backdrop does it. The cutout duck silhouette creates a crisp shadow effect when you place a small lamp behind it. The stage base keeps everything upright on a desk or console, so it’s renter-friendly and doesn’t require wall mounting. It also frames the Paper Duck so your accessory photos look like a scene, not a pile of crafts. Keep the backdrop matte black with a gold trim strip for a theater look.
Editor's noteAdd a 1-inch gold paper strip along the top edge to catch light and make the silhouette pop.
Cut a 12 x 18 inch backdrop from matte black paperboard and trace a duck silhouette cutout on the center. Use a craft knife to cut the silhouette, then reinforce the edges with a thin strip of clear tape on the backside. Build the stage base from two 6 x 10 inch rectangles of 200 gsm paperboard scored at 2-inch intervals, then fold into a triangular stand. Place a small lamp behind the cutout and set the Paper Duck in front; if needed, secure the base to the surface with removable tape under the stand feet.
Skip thisDon’t use glossy black paper — it reflects and kills the shadow effect.
5. Renter-Friendly Paper Duck Umbrella Handle Charm
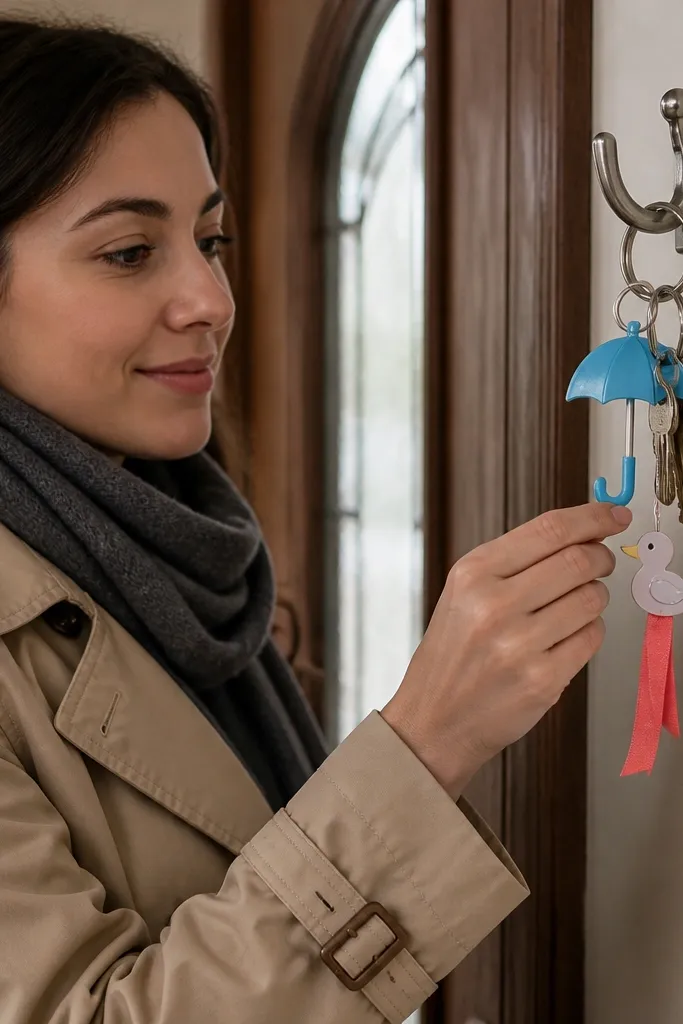
This is a small accessory that looks intentional even up close: a mini umbrella handle charm that hangs from a key hook, closet knob, or a stand near the Paper Duck. It’s photogenic because the umbrella canopy forms a clear dome shape, and the ribbon adds a soft highlight. Since it’s light, you can attach it with a removable hook or a zip-tie style twist on a stand without leaving residue. It also works for rainy-season themes and Halloween (black and orange version).
Editor's noteUse thin wire inside the handle strip if you want the umbrella to angle naturally instead of drooping.
Cut an umbrella canopy from 200 gsm paper using a 4.5-inch circle template, then fringe it with 10 to 12 evenly spaced cuts from the edge toward the center for the panel effect. Roll the circle slightly into a dome and glue the overlap. Add umbrella ribs using thin marker lines or strips of thin paper glued from center to fringe points. Create a handle from a 1/4-inch wide paper strip curled around a pencil, then tie ribbon through a small hole at the top and hook it to your display point.
Skip thisDon’t make the canopy from cardstock alone — it stays too stiff and won’t dome nicely.
6. Duck Desk Nameplate with Removable Tape Tabs
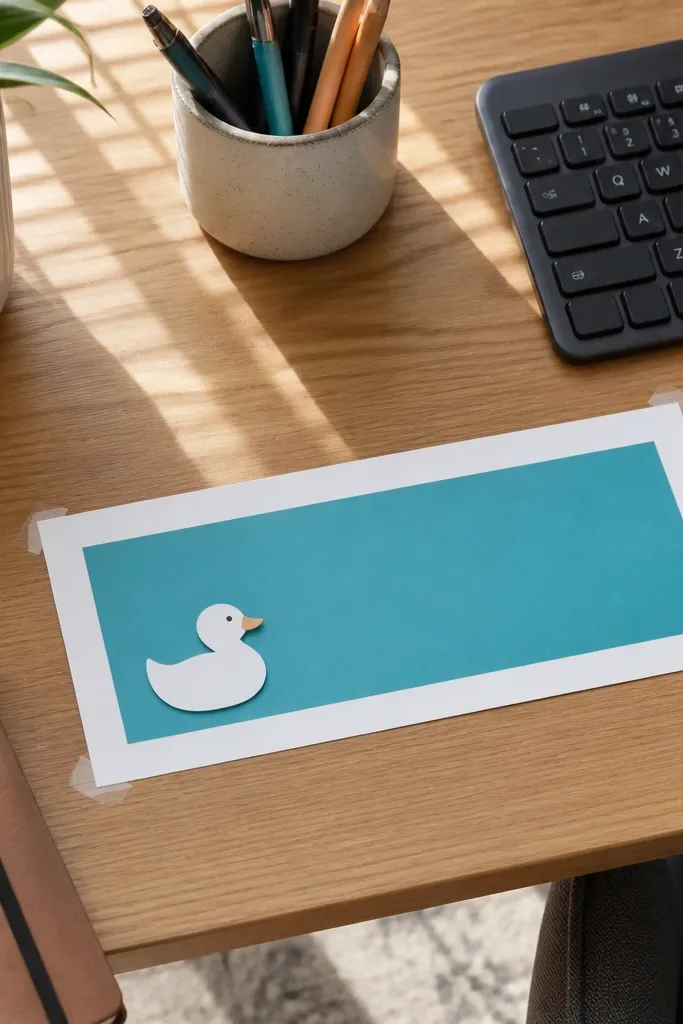
A nameplate makes your Paper Duck look like it has a job. This one is designed for desks, shelves, and tabletop displays where you want it to look styled, not random. The trick is using removable tape tabs so you can reposition it without tearing paper or leaving sticky residue. The clean white base plus one color block behind the label reads sharply in photos. It’s also easy to customize: change the label for holidays, school, or season themes in minutes.
Cut a 6 x 11 inch backing from 200 gsm paperboard and round the corners with scissors. Create a 5 x 4 inch color block from 160-200 gsm paper and glue it centered behind the label area. Add the label text using a bold vinyl sticker or printed label strip, then top with a small duck icon made from scrap paper. Make four tape tabs by cutting 1-inch wide strips of painter’s tape and sticking them to the back corners so you can press the plate to a surface and peel cleanly.
Use painter’s tape tabs instead of double-sided tape for paperboard — it releases cleaner on most painted walls and desks.
Don’t cover the entire back with tape; you’ll struggle to remove it and risk bending the plate.
7. Layered Paper Feather Fan Backdrop
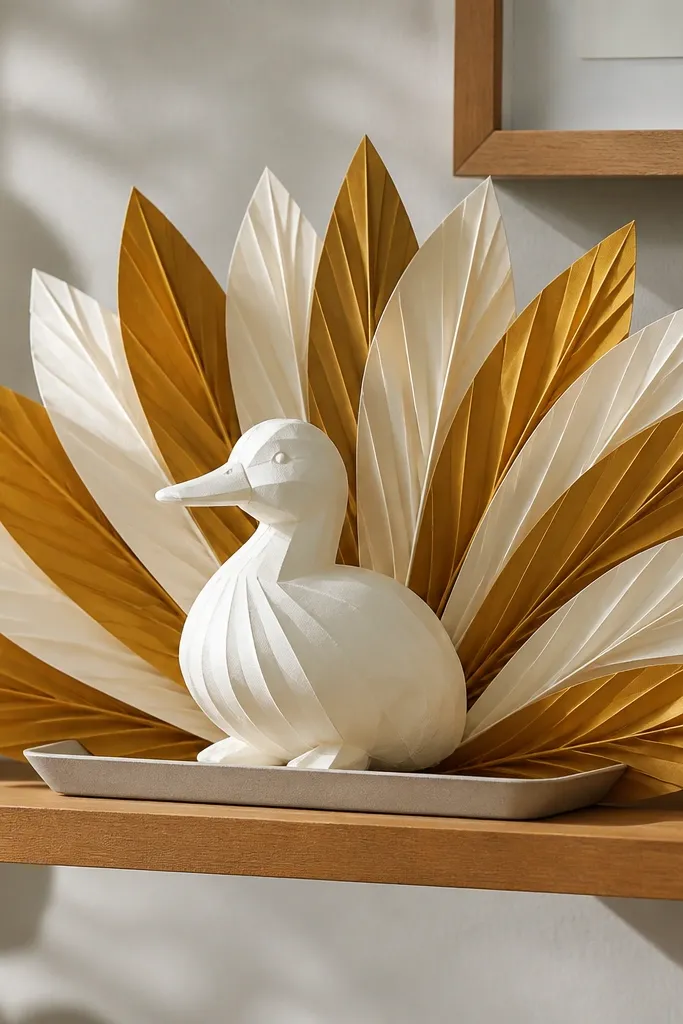
Feathers look expensive on paper because the edges create movement and depth. This fan backdrop sits behind your Paper Duck and gives you a dramatic, photogenic background that makes the Duck look like a centerpiece. You can keep it renter-friendly by placing it on a stand or tray instead of hanging it. The layered shape also hides messy shelf clutter behind it. Use a matte base and switch feather colors gradually from light to darker for a clean gradient look.
Cut 10 to 14 feather shapes from 160-200 gsm paper, each about 7 inches long with a rounded tip and slightly pointed base. Use a ruler to score a shallow center line on each feather so it curves backward. Create the fan base from a 9 x 12 inch paperboard rectangle and glue feather bases in a staggered arc, leaving the top edge tallest. Stand the fan behind the Paper Duck using a folded base flap or a removable bookstand, then secure with two small removable tape dots on the stand feet.
Add a thin metallic line down every third feather for a highlight pattern that shows up in photos.
Don’t glue all feathers flat — curvature is what makes it look like a real fan.
8. Mini Paper Duck Market Bag Organizer
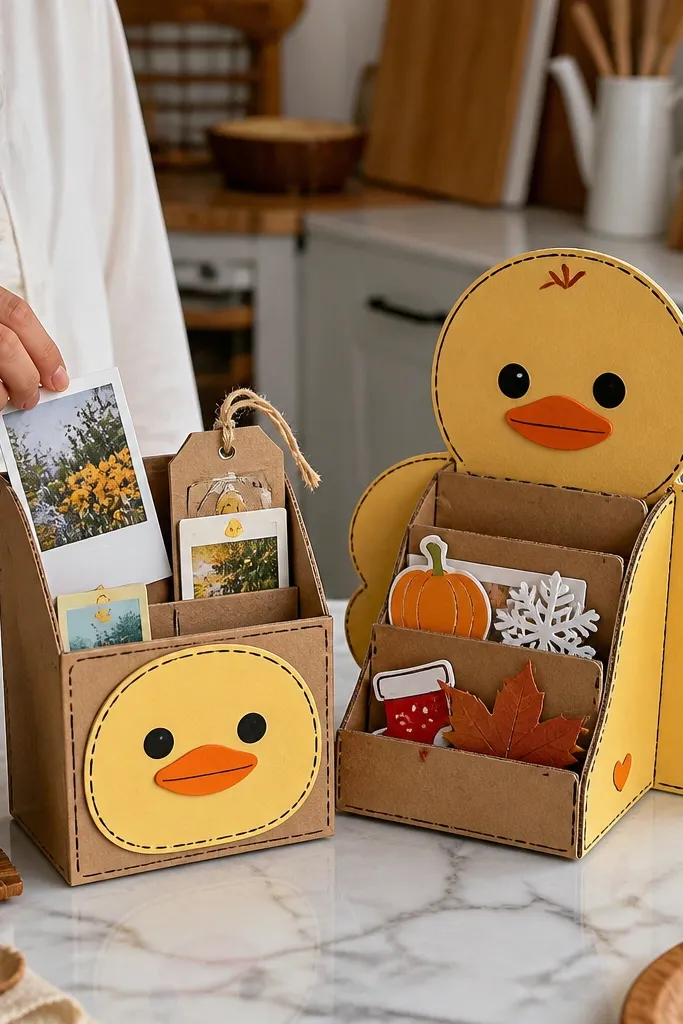
This accessory is practical and pretty: a mini market bag organizer that holds tiny props near your Paper Duck display. It gives you a styled “scene” because you can store things like mini signs, photo cards, or seasonal tags right there. The bag silhouette looks cute and helps prevent clutter from showing in pictures. Since it’s a standalone piece, it’s renter-friendly by default. Pick a patterned paper for the bag exterior and plain paper for the interior so it doesn’t look messy.
Use a simple boxy bag pattern: cut a 10 x 12 inch sheet of 200 gsm paper and fold along 2-inch vertical panels to create sides, then fold the top down 1 inch for the bag opening. Add a 1-inch gusset by folding the bottom flap up and gluing along the edges to form a shallow box. Cut two 1/4-inch wide paper handles, 8 inches long, and glue them inside the top folds so they don’t sag. Add a duck label sticker centered on the front and place the bag beside the Paper Duck on a tray.
Line the inside with a scrap of plain paper so the bag doesn’t show glue seams in photos.
Don’t use flimsy craft paper — the bag collapses and looks sloppy on display.
9. Washable Paper Duck Sticker Banner
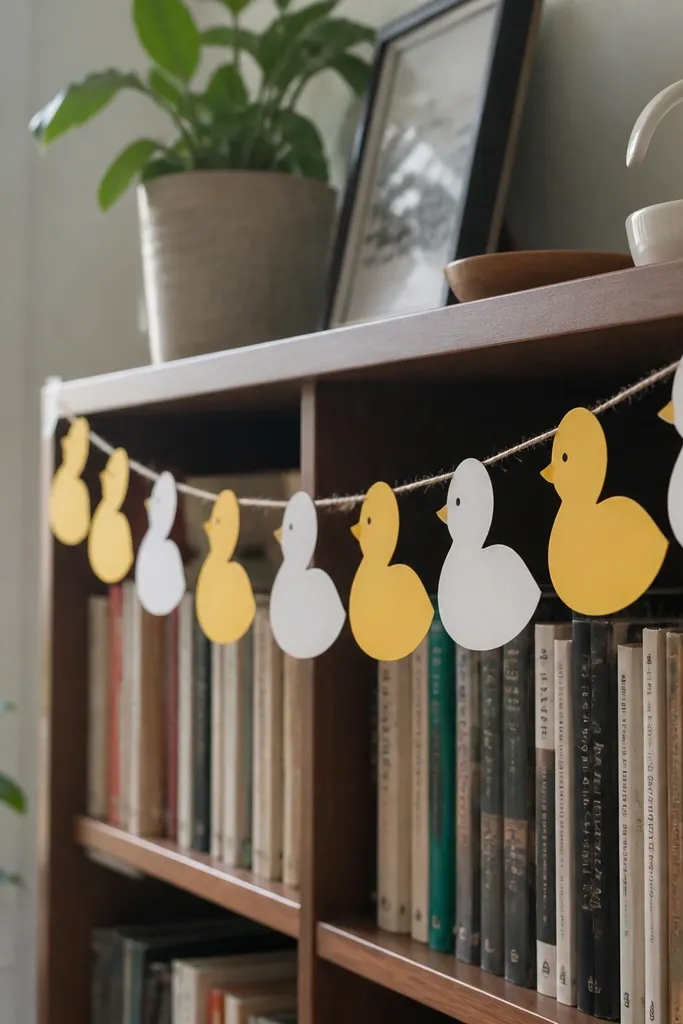
A sticker banner makes the Duck feel festive without covering your walls in permanent decor. The look comes from repeating shapes with consistent spacing, plus a clean twine line that reads as intentional. This is great for renters because you can hang it with removable tape at the corners or drape it over a bookshelf. The paper is light, and the banner packs flat. Use matte paper with one glossy accent duck per section to keep it from looking flat.
Editor's noteUse a laminating sheet or clear tape on the stickers if the banner will be handled a lot — it stays crisp.
Cut 12 duck shapes from 160-200 gsm paper using the same template size, about 3 inches each. Punch a hole at the top of each duck and thread them onto 10-12 feet of thin twine, spacing them 3/4 inch apart. Add two end loops made from extra twine so you can hang the banner easily. Mount by taping only the twine ends to the surface with painter’s tape, then remove by peeling from the edge.
Skip thisDon’t mix sizes — uneven repeats look like a mistake in photos.
10. Paper Duck Outfit Mini Hats on Clips
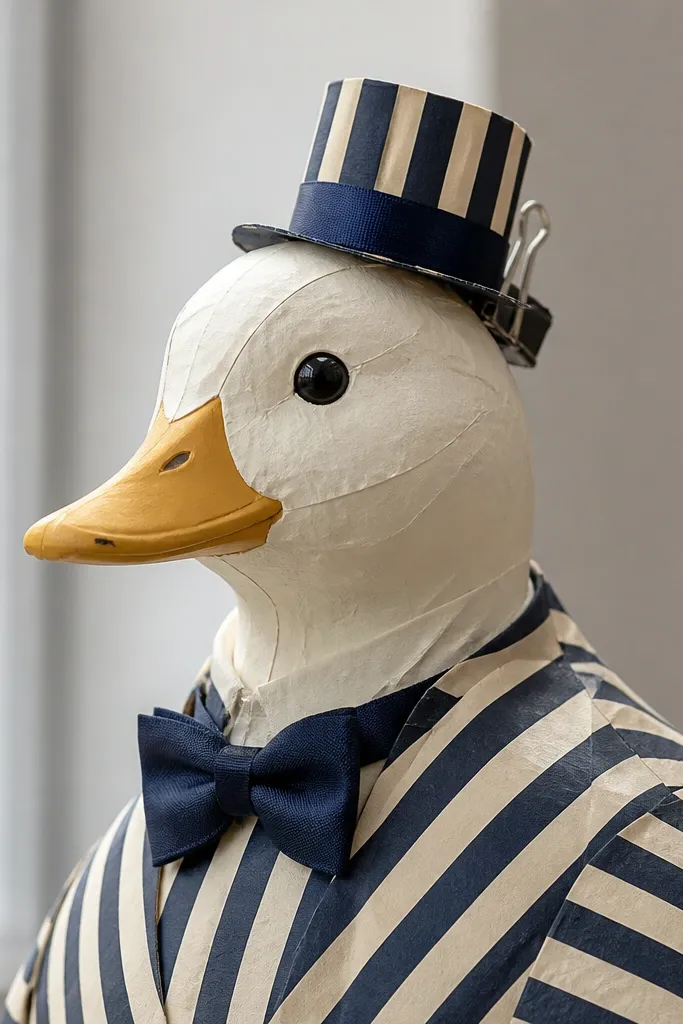
Mini hats are the quickest way to make the Paper Duck feel like it has outfits. These are built to clip on and off, so you’re not gluing anything to the Duck. The binder clip mounting also turns the hats into props for photos: you can line them up like a styling rack. This is ideal for renters because you can store the hats in a small box and swap them daily. Keep each hat in a distinct color story so the set looks cohesive.
Cut three hat crowns from 200 gsm paper in different widths (2.5, 3, and 3.5 inches tall). Roll each into a cylinder and glue the seam, then create a brim strip about 1 inch wide and glue it around the base. Glue a small binder clip pad area behind the hat by wrapping a 1-inch wide paper strip around the clip arms and gluing it flat. Clip onto the display stand near the Duck or clip to the Duck base if it has a compatible edge.
Add a 1/2-inch paper band around the crown seam for a clean finish line.
Don’t rely on tape alone to hold hats — clips keep them aligned for photos.
11. Renter-Friendly Paper Duck Wall Pocket for Cards
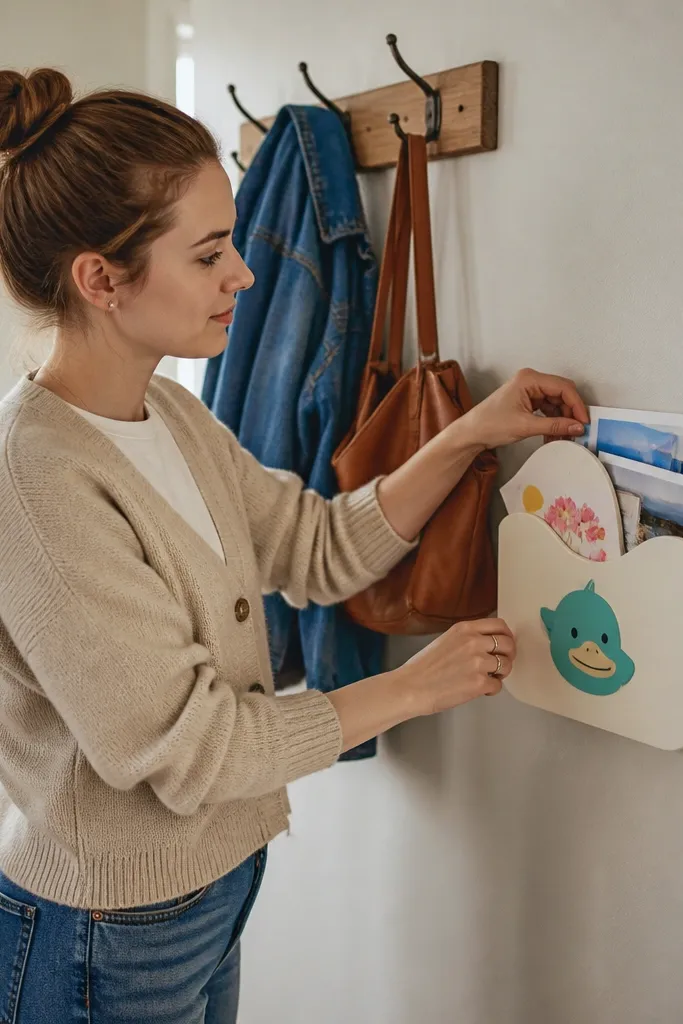
A wall pocket makes your Paper Duck display functional, not just decorative. This pocket holds greeting cards, tiny notes, or photo prints you swap for seasonal changes. It’s still renter-friendly because it mounts with removable tabs and stays lightweight. The duck face label makes it match the theme without needing extra decor. Use thick paperboard for the pocket so cards don’t sag and ruin the look.
Cut a 7 x 10 inch pocket backing from 200 gsm paperboard and fold the top down 1 inch to create a pocket opening. Create side gussets by scoring 1/2-inch folds on left and right edges, then glue the gussets so the pocket holds a flat card stack. Add a duck face label on the front with cutout eyes and a beak shape, then seal edges with clear tape to prevent fraying. Mount with four painter’s tape tabs on the back corners so you can remove cleanly after peeling from the tape edge.
Use a sharp craft knife for pocket folds — clean edges make it look store-bought.
Don’t use thin paper for the pocket — it bows and the duck face will look crooked.
12. Paper Duck Mini Chalkboard Sign with Magnetic Strip
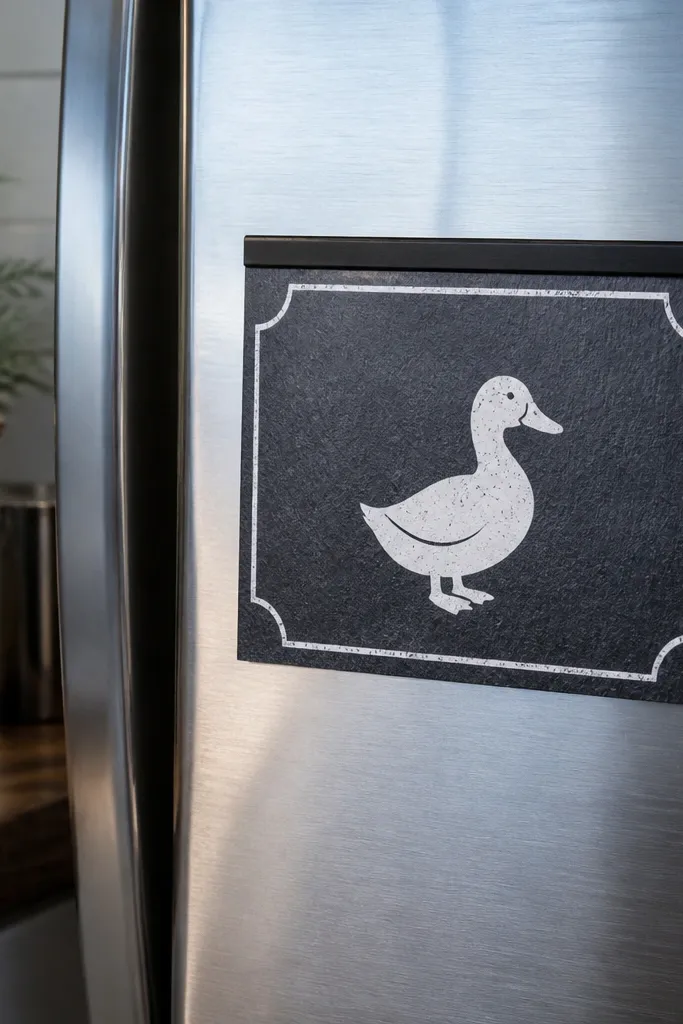
Chalkboard-style signs look great in photos because they create a strong dark rectangle behind lighter decor. This mini sign is built as a lightweight paperboard chalkboard panel with a magnetic strip so you can attach it to a metal surface without hooks. If your rental has a fridge, metal cabinet, or magnetic board, this becomes an easy “move it anywhere” accessory. The duck icon keeps it on-theme and lets you rotate messages. Use matte black paperboard and keep the text white for readability.
Editor's noteUse a chalk marker instead of regular paint pen if you want erasable text and quick swaps.
Cut a 5 x 8 inch rectangle from matte black paperboard and frame it with a 1/2 inch strip of colored paper glued around the edges. Add a duck icon using cut paper eyes and a beak, then write a message on top with a white paint pen or chalk marker. Apply a thin magnetic strip to the back center using double-sided tape meant for magnets, then let it set flat. Attach it to a metal surface near your Paper Duck display, or place it on a small metal tray for a tabletop look.
Skip thisDon’t use glossy black — it reflects overhead lights and makes the text harder to read.
13. Folded Paper Duck Star Garland Clips
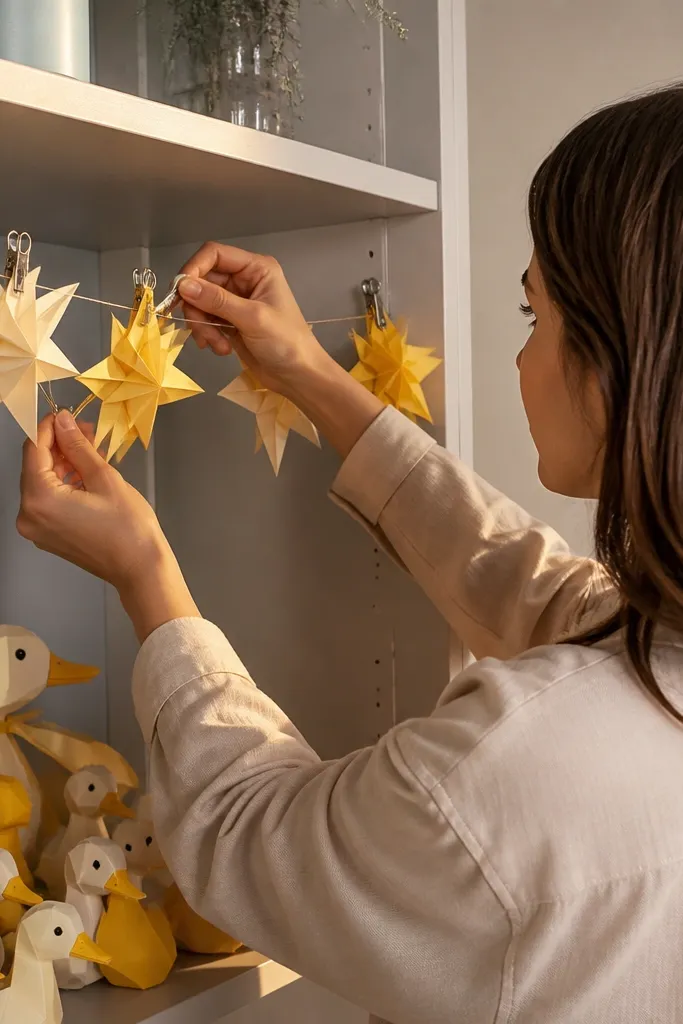
This one gives you a customizable garland that you can clip on and off for events. The folded stars create crisp 3D edges, and the clips let you rearrange the spacing for different photo compositions. It’s renter-friendly because you can drape it over a shelf edge or hang it from a removable hook without taping each piece. The look is bright and graphic, perfect for spring and birthdays. Use two star colors plus one accent glitter pen for sparkle.
Fold 10 to 14 five-point stars from 160-200 gsm paper by using a star template and scoring each fold line lightly before folding. Glue the base points lightly so the star keeps its shape, then punch a small hole at the top point of each star. Thread stars onto a string with knots, then add small binder clips at both ends of the string. Clamp the garland ends to a shelf edge or display frame so it hangs without touching walls.
Keep star paper matte and use metallic ink only on the fold tips so it reads as detail, not mess.
Don’t glue the string directly to the stars; you need flexibility to restyle quickly.
14. Paper Duck Ribbon Rosette Wall Flag
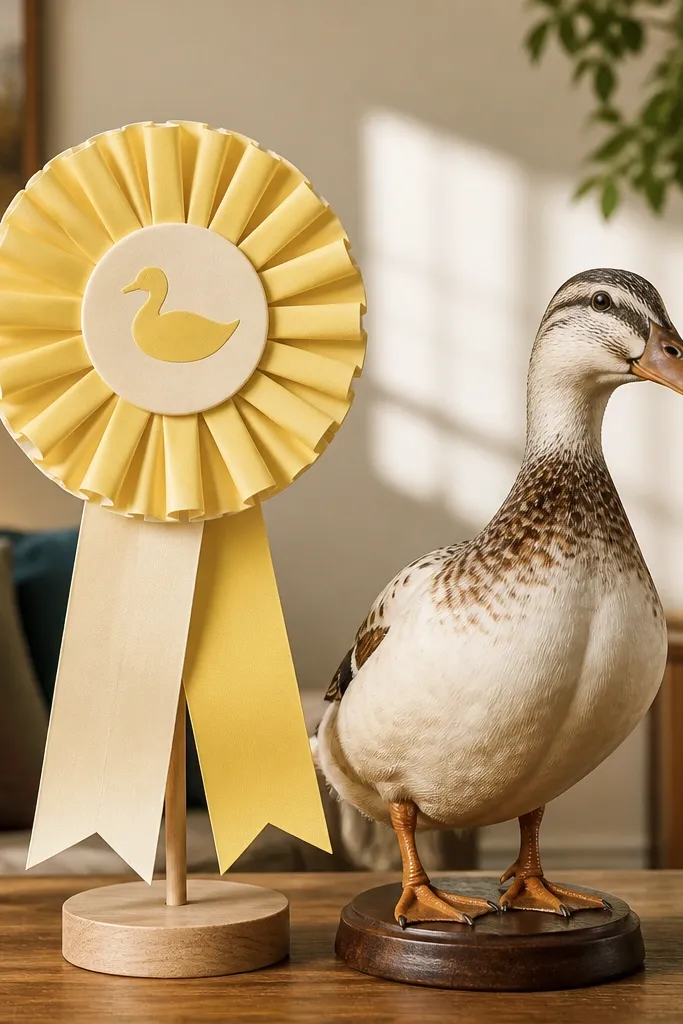
Rosettes look like party decor without the weight. This rosette wall flag sits on a small tabletop stand or is taped to a wall using removable tabs, giving you that “big moment” look around your Paper Duck. The ribbon tail adds movement in photos, and the rosette’s layered paper petals create depth. It’s great for milestones, themed weeks, or just dressing up the display. Keep the ribbon simple: one color, one shine finish.
Editor's noteUse a loop of ribbon behind the rosette to create a built-in hanging point even if you move rooms.
Cut a 10-inch circle from 200 gsm paper and cut 12 to 16 petal slits toward the center, then curl each petal slightly and glue tips to build a rosette. Add a smaller 4-inch circle rosette layer on top using a contrasting paper for a two-tone look. Attach a ribbon tail by threading ribbon through two small holes at the back of the rosette and knotting it so it hangs straight. Mount using removable tape tabs on the back or place on a small stand made from folded paperboard so it doesn’t touch walls.
Skip thisDon’t over-size the rosette — large paper rosettes wobble and blur in photos.
15. Paper Duck Mini Suitcase for Display Props
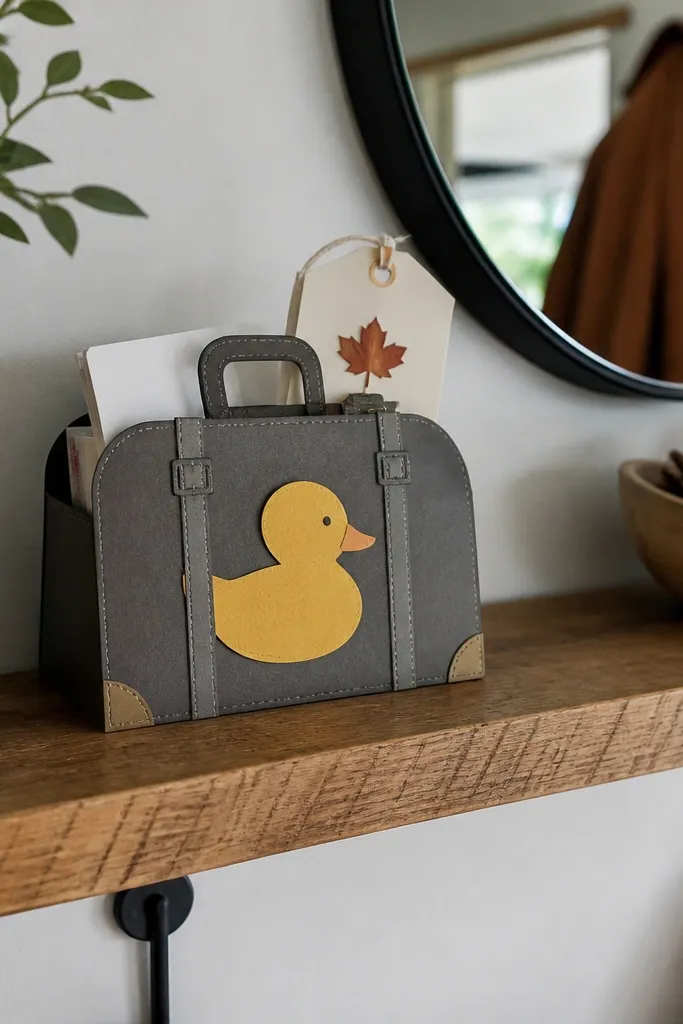
This is a display accessory that makes your Paper Duck look like it’s traveling with you. The mini suitcase shape gives a strong silhouette and creates instant photo staging for tiny props. It’s renter-friendly because it sits on a shelf and doesn’t require any wall mounting. You can use it to hold mini cards, tiny accessories, or a seasonal note. The look is clean when you keep the color palette tight and add a simple “handle” detail.
Build a suitcase from 200 gsm paperboard: cut a 9 x 12 inch base sheet, score a 2-inch fold for the sides, and glue into a shallow box. Create a lid from a 10 x 6 inch paperboard piece with a 1-inch fold so it can open. Add a handle strip across the top and glue two small folded tabs behind it to reinforce. Label the front with a duck icon and add an elastic band to keep the lid closed during storage.
Use a thin layer of clear tape along the corners to stop scuffing when you move it around.
Don’t skip corner reinforcement — paperboard corners wear fast in real use.
16. Duck-Themed Gift Tag Chain for Shelf Decor
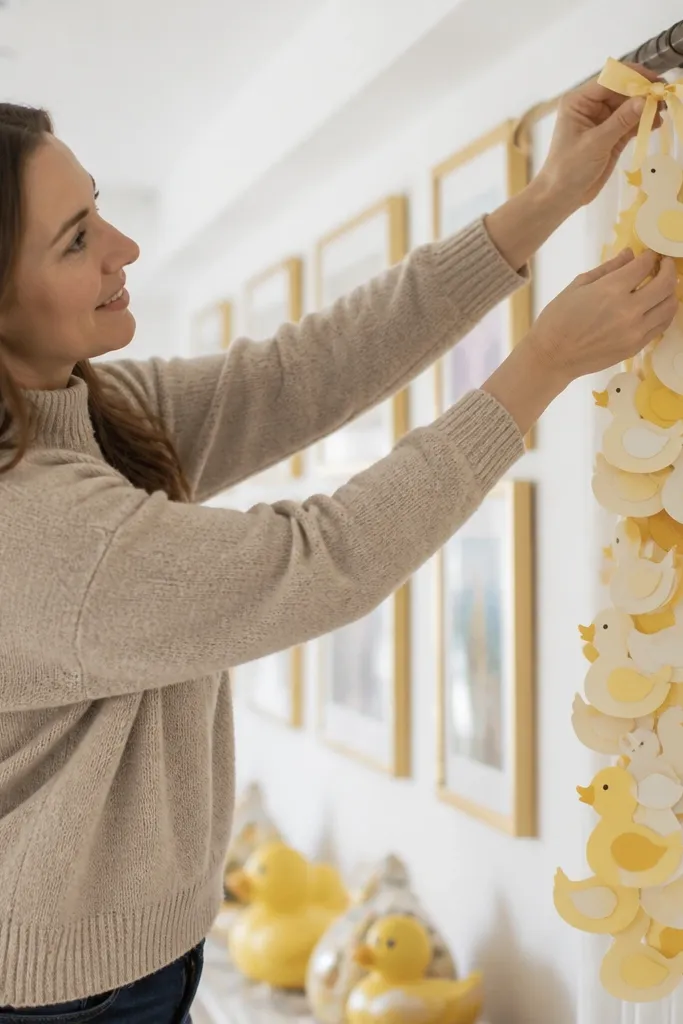
Gift tag chains create a cute, layered look without taking up much space. This accessory makes your Paper Duck display feel styled because the tags create a vertical element that frames the Duck. It’s renter-friendly because you can hang it from a shelf lip, curtain rod, or a stand using ribbon ties. The tags are also easy to make in multiple colorways so you can swap themes quickly. Keep the duck tags consistent in size so the chain looks intentional.
Cut 18 to 24 gift tags from 160-200 gsm paper, each about 2.5 x 3.5 inches, and punch a hole at the top. Thread them on a ribbon or thin twine with alternating colors, then tie the ends to a small rod or shelf edge. Add a duck face cutout to each tag using a single color for eyes and a contrasting beak. For extra depth, glue a small second paper layer behind the duck face so it looks raised.
Use a ruler for hole placement — uneven holes make the chain twist.
Don’t use super-thin paper for tags — they wrinkle and look cheap fast.
17. Paper Duck Weather Vane for Window-Like Displays
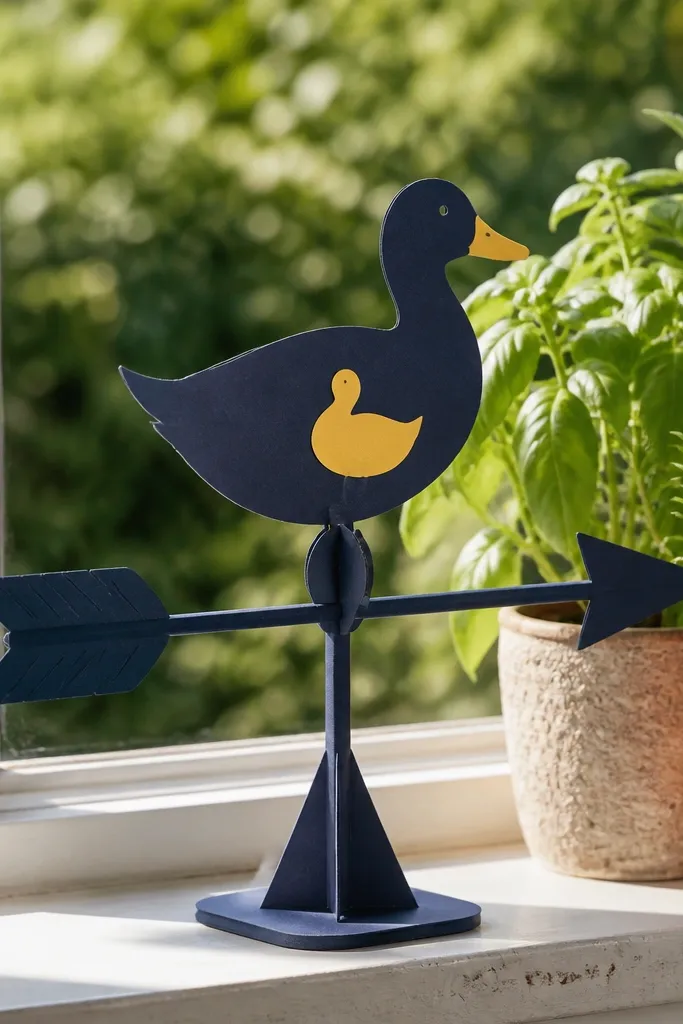
A weather vane is a clever way to make your Paper Duck display feel interactive. The arrow silhouette reads clearly, and it looks great near a window or light source. This is renter-friendly because it mounts to a tabletop stand or a clamp, not a wall. The duck icon ties it to the theme while the arrow gives it a strong graphic shape. Make the vane with matte paper and one metallic arrow tip for a clean highlight.
Cut an arrow body from 200 gsm paperboard, about 10 inches long, and add a small duck icon near the tail end. Reinforce the arrow with a second layer glued behind it for stiffness, then poke a center hole. Insert the arrow onto a short dowel rod or straw and create a base stand from a cardboard circle with a slit. Add a removable clamp to hold the dowel on a shelf or window ledge, then rotate the arrow by hand for different photo angles.
Use a thin metal paper fastener (brass brad) at the pivot point so it spins smoothly.
Don’t glue the arrow to the dowel — you want it to rotate for better photos.
18. Paper Duck Festival Lantern with Folded Panels
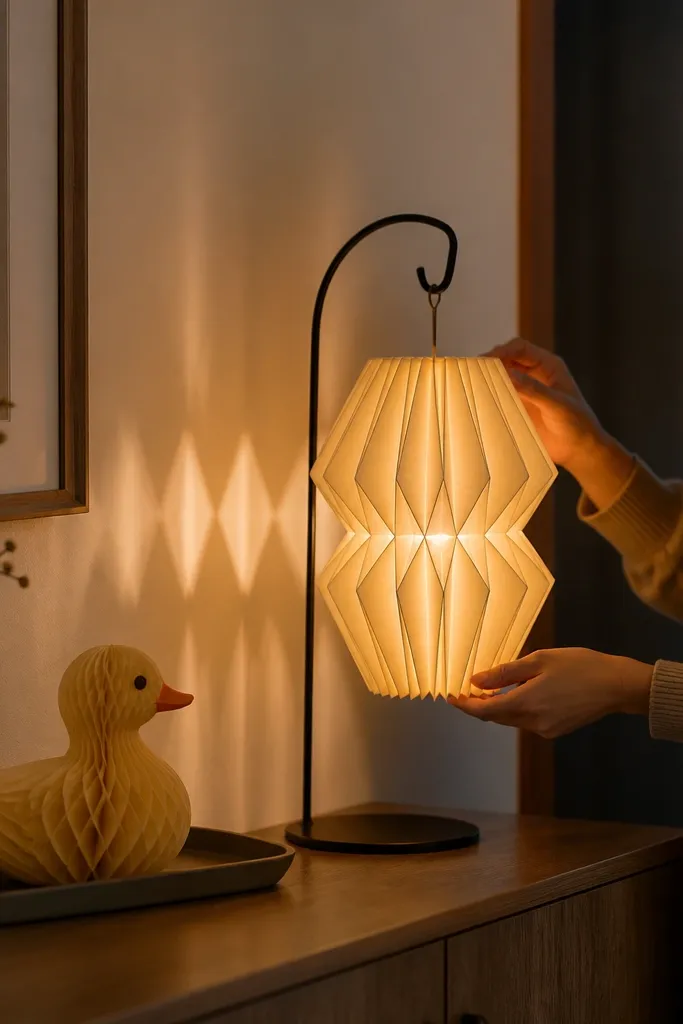
Lanterns look magical in photos, and you can keep this renter-friendly by using battery LED tea lights inside. The folded panel construction creates repeating shapes that cast soft shadows and make the Duck look like part of a festival scene. The lantern sits on a hook or hangs from a removable hook, but the weight is low. Use cutout duck shapes or simple dots for a pattern. Matte paper plus LED light gives a warm glow without glare.
Editor's noteUse a clear plastic LED cover if your lantern has cutouts — it keeps the light steady and safer.
Cut 6 to 8 lantern panels from 160-200 gsm paper, each about 8 x 4 inches, and fold along the long edge to create a crease. Glue panels into a cylinder by overlapping edges, then cut small duck silhouettes or dot patterns in the panels. Add a top ring from a thin paper strip and punch holes to thread a hanging ribbon. Place a battery LED tea light inside on a small paperboard base to prevent direct contact with the paper.
Skip thisDon’t use real candles — paper lanterns are a fire risk, especially in rentals.
19. Duck-Themed Table Runner Strip for Photo Backdrops
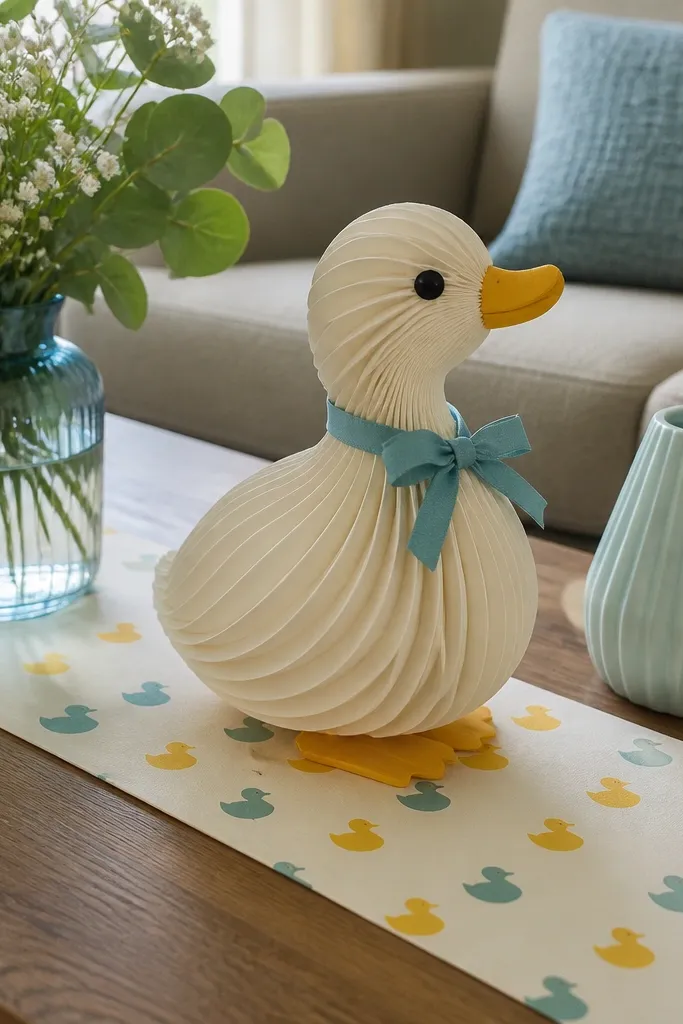
If your Paper Duck accessories look good but your photos look messy, this table runner strip fixes that fast. It’s a long, narrow background that you can place under the Duck and props to create a clean stage. Because it’s just a strip of paperboard, it’s fully renter-friendly and packs into a drawer. The duck icons repeat like a pattern, and the border keeps the look crisp. Use one accent color for icons and a neutral base so it doesn’t fight your other decor.
Cut a 12 x 30 inch strip from 200 gsm paperboard and fold a 1-inch hem along both short edges for durability. Add a border strip 1 inch wide by gluing a contrasting paper along each long edge. Print or draw duck icons at 3-inch intervals and glue them on using a thin adhesive so the strip stays flat. Lay it under the Paper Duck display; if it slides on smooth surfaces, tape the corners with tiny painter’s tape dots.
Roll it around a cardboard tube for storage so it stays flat instead of curling.
Don’t choose a busy pattern background — repetition should be the ducks, not random shapes.
20. Paper Duck "Gallery Wall" Micro Frame Set
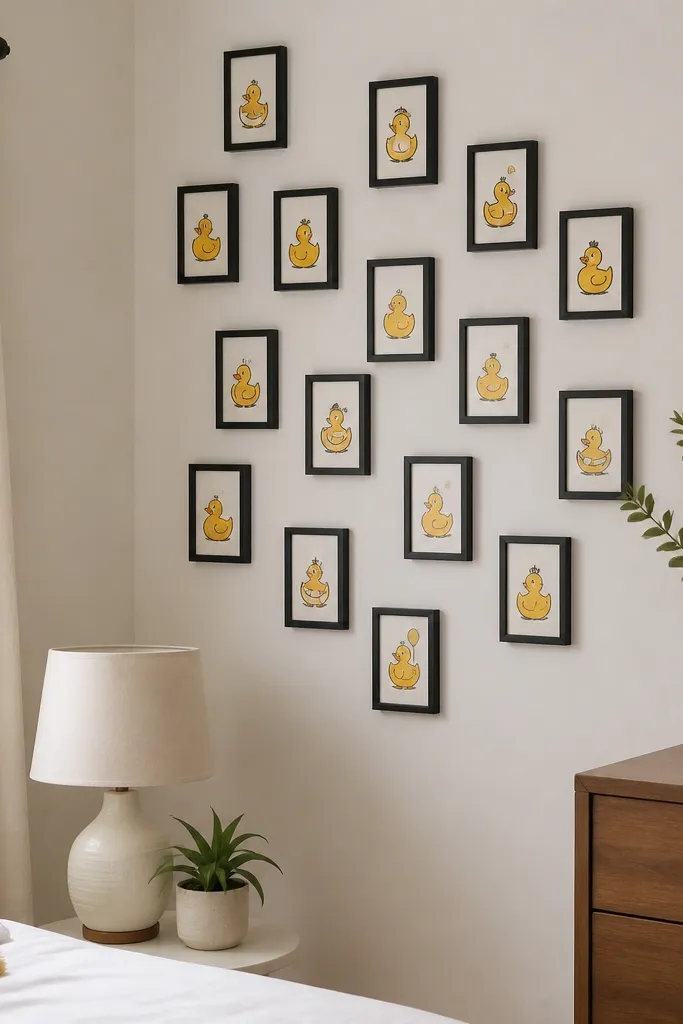
This accessory turns a small space into a coordinated wall of Duck art without committing to a full gallery. The micro frames look premium because the frames are uniform and the art cards repeat a color system. You can mount them with removable hooks or tape tabs, and you can rearrange them whenever you change the Duck’s accessories. It also gives you a background for close-up photos of the Duck outfit details. Use simple duck drawings or cut-paper duck shapes inside each frame for a cohesive set.
Editor's noteKeep the frame spacing consistent at 2 inches between frames for a clean grid look.
Make three identical frame bases from 200 gsm paperboard, each 4 x 6 inches, with a 2 x 3.5 inch window cut out. Create three art cards from 160 gsm paper and glue one card behind each window so it sits flush. Add a thin frame border strip around the window using 1/4-inch paper strips for a clean edge. Mount using removable command-style hooks in a vertical line or use painter’s tape tabs on the back corners if your surface is delicate.
Skip thisDon’t use different frame sizes — the “gallery” effect relies on repetition.
21. Renter-Friendly Paper Duck Bookmark Signposts
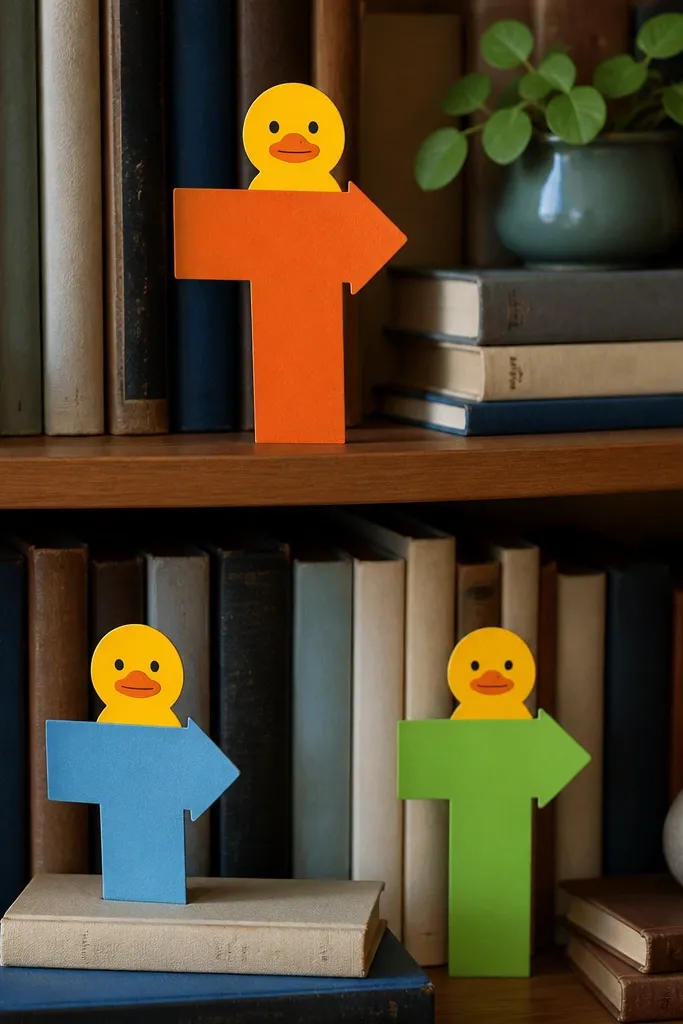
These signposts are perfect when your Paper Duck sits on books, a tray, or a bookshelf edge. They add height and direction in photos, and they’re renter-friendly because they don’t require wall access. The bookmark format is also naturally stackable, so you can store them flat. Use bright paper for the top arrow shape and a muted base for readability. This accessory is best for “theme days” where you want a clear message near the Duck, like “morning routine” or “story time.”
Editor's noteUse a thicker paper for the fold area so it stands straight after repeated handling.
Cut 5 bookmark signposts from 200 gsm paperboard, each 3 x 10 inches, with a pointed top and a rectangular base. Score a 1-inch fold at the bottom so each signpost can stand upright on a book edge. Add a duck icon and a short label using a sticker strip or printed text. To mount, slide the folded base between book pages or press it onto a book spine edge for friction hold. If you need extra grip, add a tiny strip of removable tape to the base fold.
Skip thisDon’t make the signs too tall and narrow — they tip over and ruin the photo angle.
22. Paper Duck Party Confetti Garland in a Jar Look
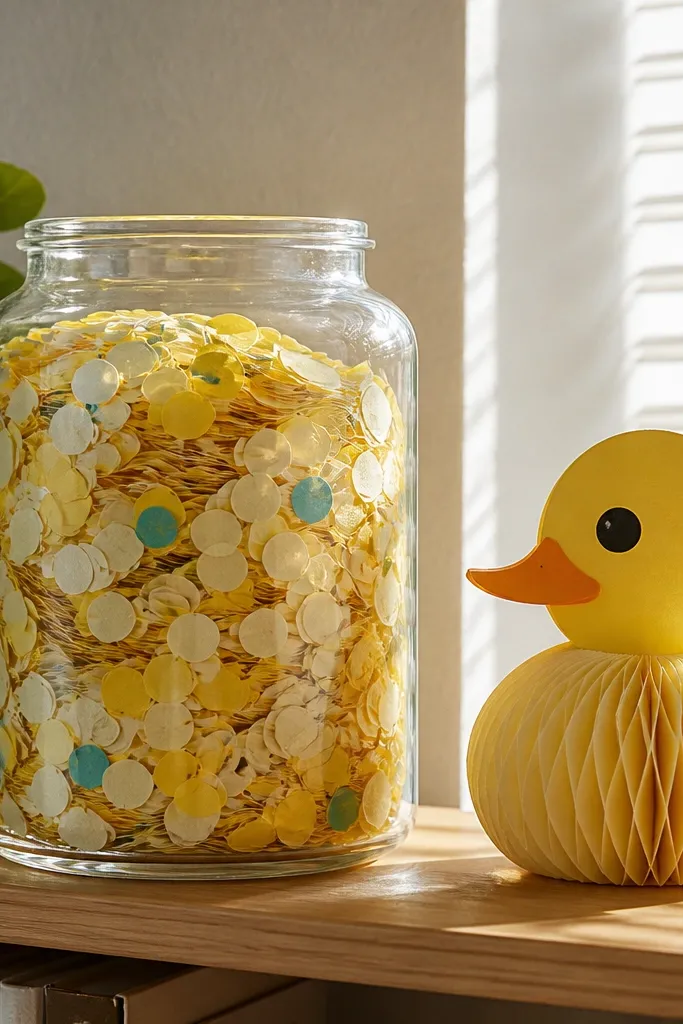
This one looks like a decorative jar of confetti, but it’s lightweight and removable. The jar shape frames the Paper Duck and makes the accessories feel like a coordinated prop set. The confetti pieces add sparkle without using glitter that sheds everywhere. It’s renter-friendly because you can place it on a shelf or hang it from a single removable hook at the top. Use paper confetti in 3 colors and add a small duck label on the jar front.
Editor's noteSkip glitter paper — use metallic marker dots on a few confetti pieces for controlled shine.
Create a jar container from a 7 x 9 inch paperboard rectangle rolled into a cylinder, then add a flat base circle and a top rim strip. Cut 30 to 50 tiny confetti pieces from 160-180 gsm paper in three colors, then punch a tiny hole in each. Thread confetti onto thin twine and hang it inside the jar so it looks like it’s floating. Add a duck label sticker on the front, then mount the jar on a shelf using removable tape under the base or hang it by a ribbon loop glued to the rim.
Skip thisDon’t glue confetti directly to the jar — it looks flat and clumpy in photos.
23. Paper Duck Mini Sign Stand for Plant Pots
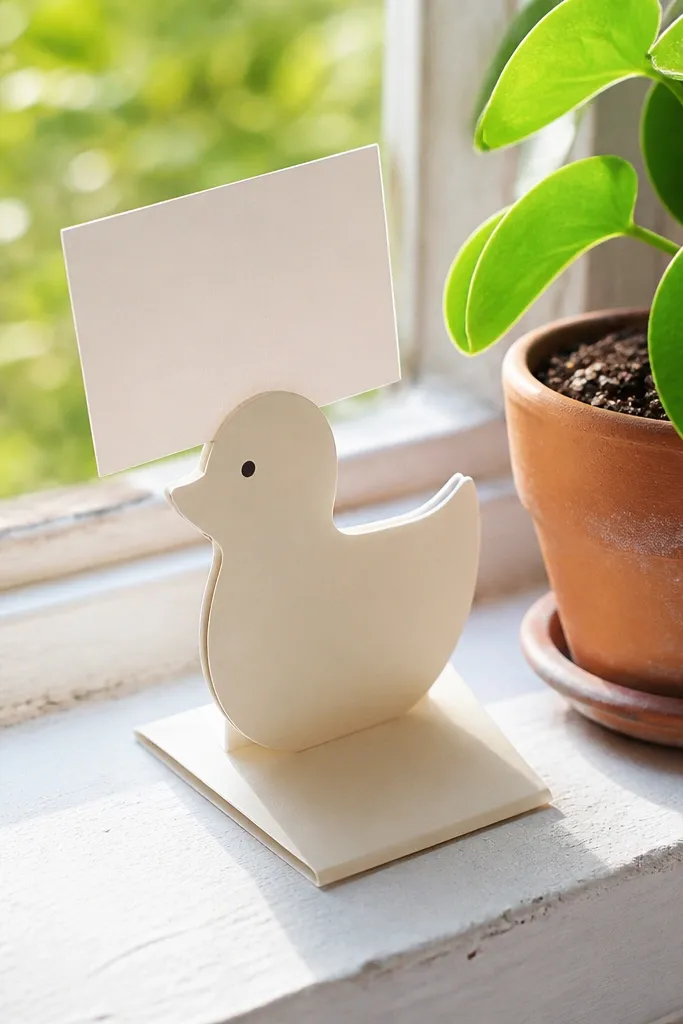
This accessory makes your Paper Duck display look like it belongs in a tidy home corner. The mini sign stand works next to plant pots, shelves, or a windowsill where small items need labels. It’s renter-friendly because it’s freestanding and doesn’t stick to walls. The duck icon keeps it on-theme, and the stand shape gives a clean vertical line that photographs well. Use sturdy paperboard for the base so it stays upright.
Editor's noteUse a matte label sticker so it doesn’t glare like glossy ink next to windows.
Cut a 3 x 7 inch sign panel from 200 gsm paperboard and round the top corners. Score a 1-inch V-fold at the bottom to create a stand that holds the sign at a slight angle. Add a duck icon and short label using a vinyl sticker for clean edges. For a stronger stand, glue a small 2-inch wide base strip behind the fold so it doesn’t tip. Place the stand next to a plant pot and keep it stable by pressing the base into a thin layer of potting-shelf stones or foam insert.
Skip thisDon’t make the base too narrow — narrow stands fall over when bumped.
24. Duck Outfit Washi Tape Frame on Clear Plastic
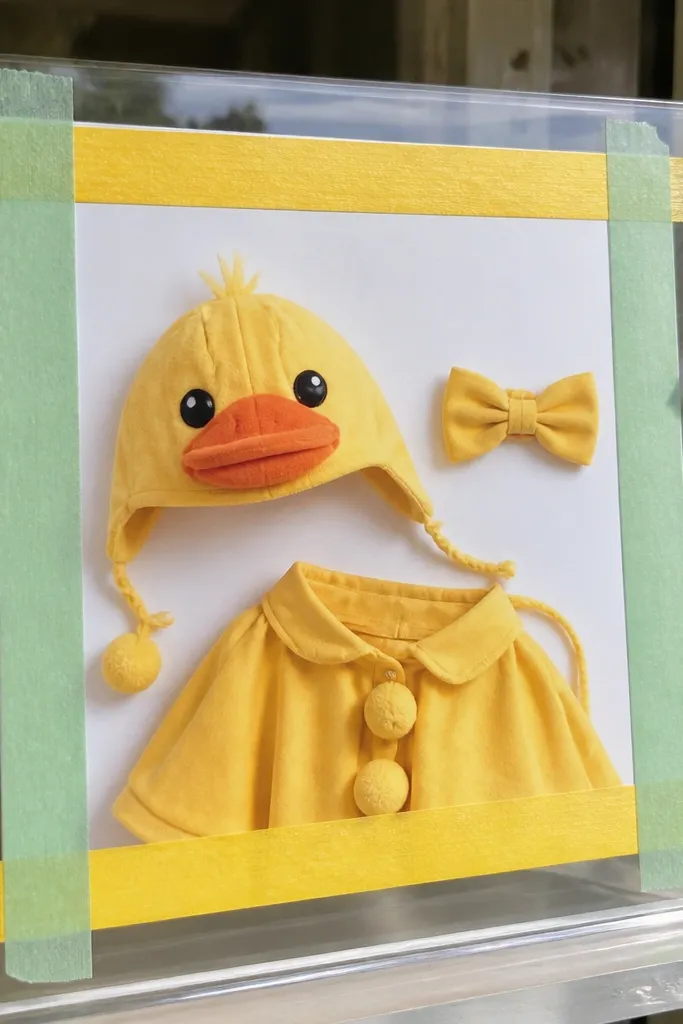
This is one of the cleanest renter-friendly ways to add color without committing to wall paint or permanent adhesives. You build a frame on clear plastic so your Paper Duck accessories look like they’re behind a “glass” layer in photos. Washi tape gives you a tidy border and lets you change themes by swapping tape colors. It’s also easy to store because the plastic sheet stays flat. Keep the design simple: straight tape borders and one duck label in the center.
Editor's noteUse the same tape widths for all four sides so the frame looks intentional instead of patchy.
Cut a clear plastic sheet to 8 x 10 inches, then wipe it with a dry microfiber cloth so tape sticks cleanly. Apply washi tape in a 1/2-inch border around the edges, pressing corners firmly with a fingernail. Add a duck label sticker centered and place a small paper accent card behind it if you want a layered look. Mount by leaning it against a shelf or using removable mini adhesive pads on the back corners that come off cleanly.
Skip thisDon’t wrap washi tape over edges that flex — it lifts and looks messy.
25. Paper Duck Keychain Charm for Bag Hooks
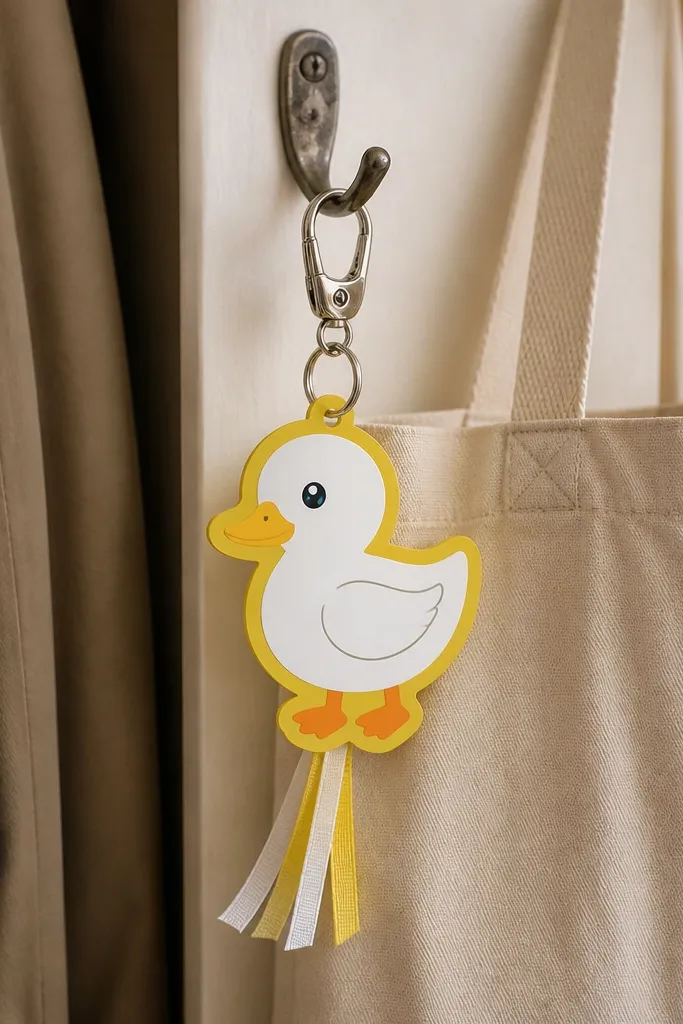
A keychain charm is a renter-friendly accessory because it doesn’t touch walls at all, and it adds personality to your display area. The look is photogenic: a small duck shape with a bright border and a dangling ribbon makes it easy to spot in cluttered scenes. This charm also doubles as a portable prop for photos — clip it to a bag hook near your Paper Duck display. Keep it simple and sturdy with layered paperboard so it doesn’t collapse.
Editor's noteMake the duck shape slightly larger than you think — tiny charms look lost in photos.
Cut two duck shapes from 200 gsm paperboard, then glue them back-to-back with the edges aligned. Punch a hole at the top and thread a ribbon loop through, tying a knot on the back side. Attach a small keychain ring through the ribbon loop so the charm can move slightly. For extra durability, seal the front with a thin layer of clear matte tape to protect edges when handled.
Skip thisDon’t use only one layer of paperboard — single-layer shapes bend and curl.



