
1. Smiling Ramen Bowl with Steam Puffs
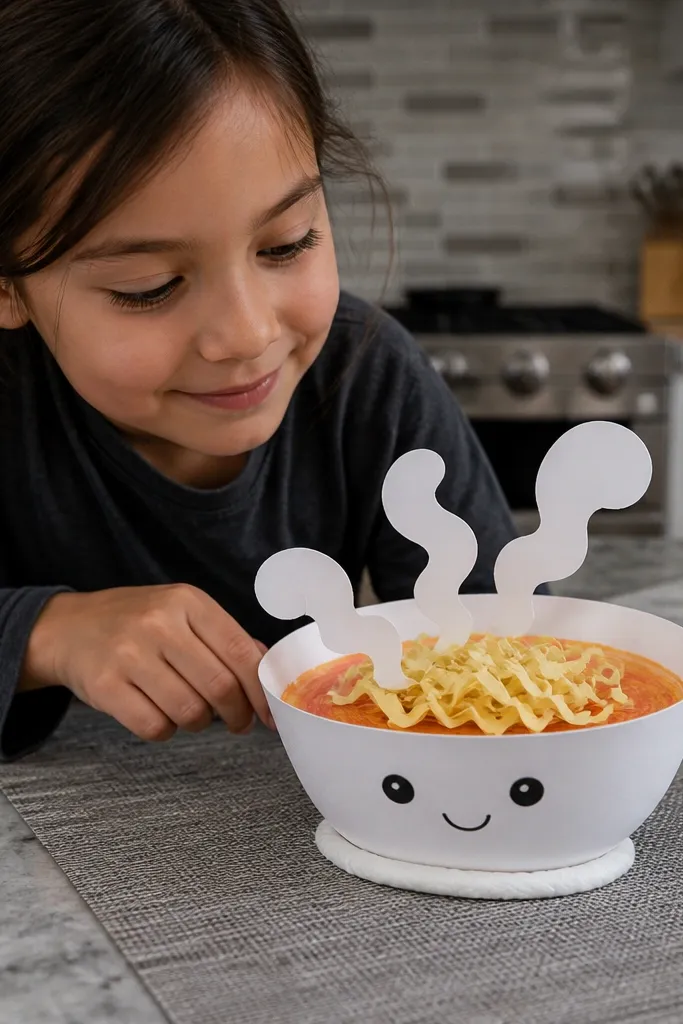
Start with a shallow bowl silhouette cut from heavyweight cardstock. The noodles are strips with small zigzags so they look springy, and the broth is a warm gradient using marker blended from red-orange to pale cream. For the cozy squish, put a thin foam sheet behind the bowl base so it compresses but returns. Steam is made from three small tissue circles scrunched into puff shapes, then glued at the top so they look airy in photos. This one reads as food immediately, and the big bowl shape makes it easy for kids to handle without crushing the details.
Step 1: Cut a bowl base (about 4.5 inches wide) from cardstock and add noodle strips (0.25 inch wide) attached at the bottom edge. Step 2: Glue a thin craft foam rectangle behind the bowl, then attach the noodles and draw a simple face on the broth area. Step 3: Scrunch tissue into three puffs, glue them on top, and outline the bowl rim with a darker marker for contrast. Let liquid glue dry flat for 10 minutes before squeezing.
Editor's noteShade the broth with marker in short strokes, then blend with a dry paper towel so it looks like broth instead of flat color.
Skip thisDon’t glue the steam puffs directly onto the foam core or they’ll tear when kids squeeze.
2. Taco Truck Taco with Salsa Drips
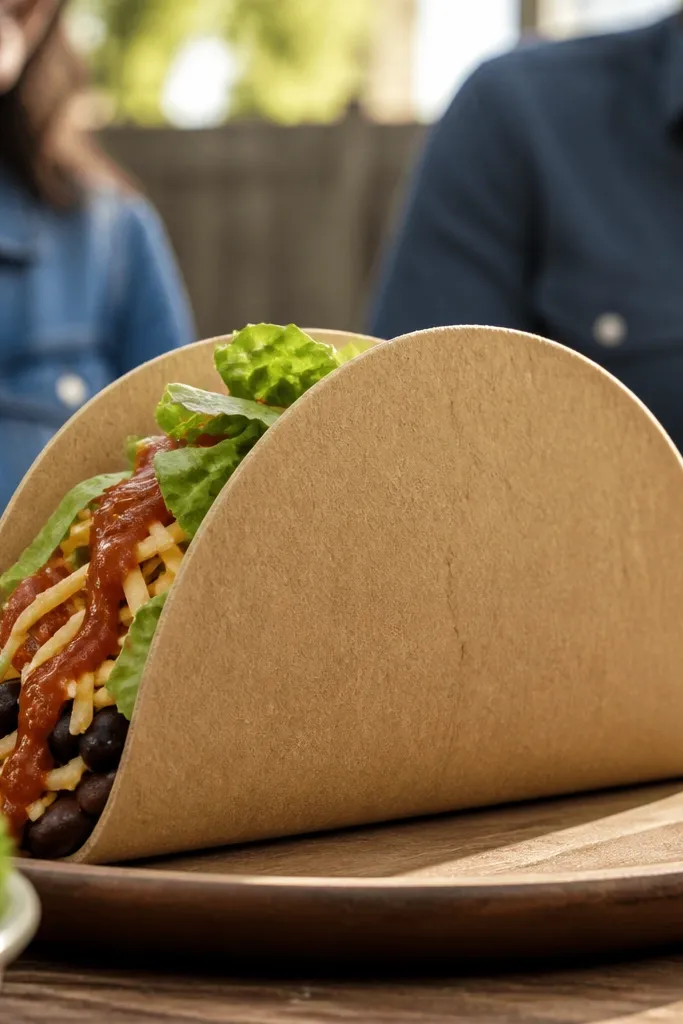
This taco works because it’s built around one strong curve. Shape the taco shell from cardstock into a cone-like fold, then line the inside with a softer paper layer over a compressible core so it squishes at the bottom but holds the shell curve. The filling is layered: lettuce made from folded green paper strips, cheese made from small yellow squares with ragged edges, and salsa drips made from thin red paper strips curled with your finger. Add a tiny “truck” label tag on the side for a cute food-world vibe without adding fragile parts. It’s photogenic from the front, and the drips catch light.
Step 1: Cut a taco shell pattern and roll it into a curve, then glue the seam with liquid glue and hold 30 seconds. Step 2: Insert a folded foam strip or rolled tissue sleeve inside the shell bottom so it compresses. Step 3: Glue lettuce strips across the top edge, then add cheese squares in a loose cluster. Finally, twist salsa strips into drips and glue just the top ends so they look like they’re falling.
Curl salsa drips by wrapping them around a pencil for 5 seconds before gluing.
Skip tiny beads or pepper flakes here; they pop off when kids squeeze.
3. Dumpling Stack with Soy Sauce Cup
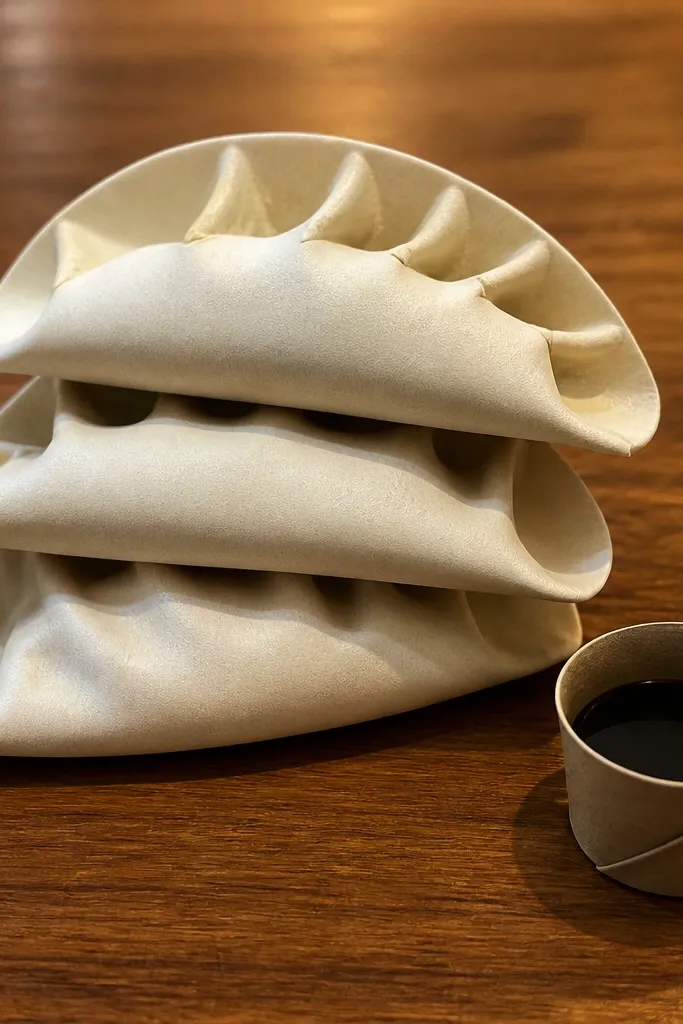
Dumplings are perfect for cozy Paper Squishy because their shape hides seams. Stack three folded dumpling pockets from thicker paper, then attach a soft core behind the bottom dumpling only. That way, the stack compresses as one unit without warping the top folds. Soy sauce is a small cup made from rolled paper with a glossy look using clear tape on the inside. Add pleats with marker lines from top center outward. This set looks extra “snack shop” on a table and holds up to repeated squeezing.
Step 1: Cut three dumpling bases from cardstock, fold into pockets, and pinch pleat lines with a ruler edge. Step 2: Glue the bottom dumpling to a foam pad, then attach the middle and top dumplings on top using small glue dots. Step 3: Roll a cup for soy sauce, line it with a thin rectangle of darker brown paper, and add a highlight stripe with marker. Finish by drawing simple steam lines above the top dumpling.
Use a ruler to press pleat lines for sharper folds kids can replicate.
Don’t fully glue the inside of the cup; leave it open so it doesn’t buckle.
4. Berry Cheesecake Slice with Whipped Cream Swirl
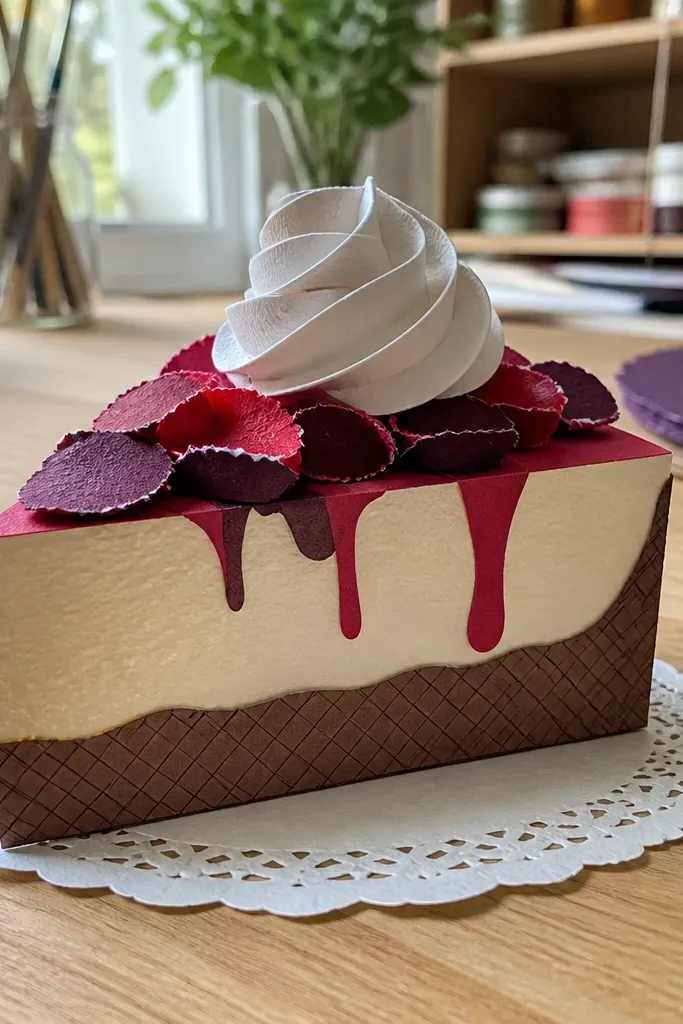
A cheesecake slice is all about clean edges and a creamy color palette. Build a wedge from cardstock, then add a soft base layer so the slice compresses slightly like a real dessert. The crust is dark brown with a crisscross texture made from short marker lines. The cheesecake top is pale cream with a berry layer: tear-shaped purple and red paper pieces layered unevenly. Whipped cream is a spiral strip rolled tight and glued along one edge so it looks fluffy. Kids love this because it looks “fancy” but the pieces are big and forgiving.
Step 1: Cut a wedge (about 4 inches tall) and glue a thin foam sheet behind it. Step 2: Add crust texture on the bottom band, then glue berry pieces on the top in a clustered pattern. Step 3: Roll a white paper strip into a spiral and glue it on one top corner so it sits like a dollop. Outline the slice edge with a light brown marker for a crisp photo look.
Add tiny paper “shine” dots with a white gel pen to make the berry layer pop.
Don’t use thin printer paper for the slice; it collapses and looks flat.
5. Chocolate Chip Cookie with Soft Bite Mark
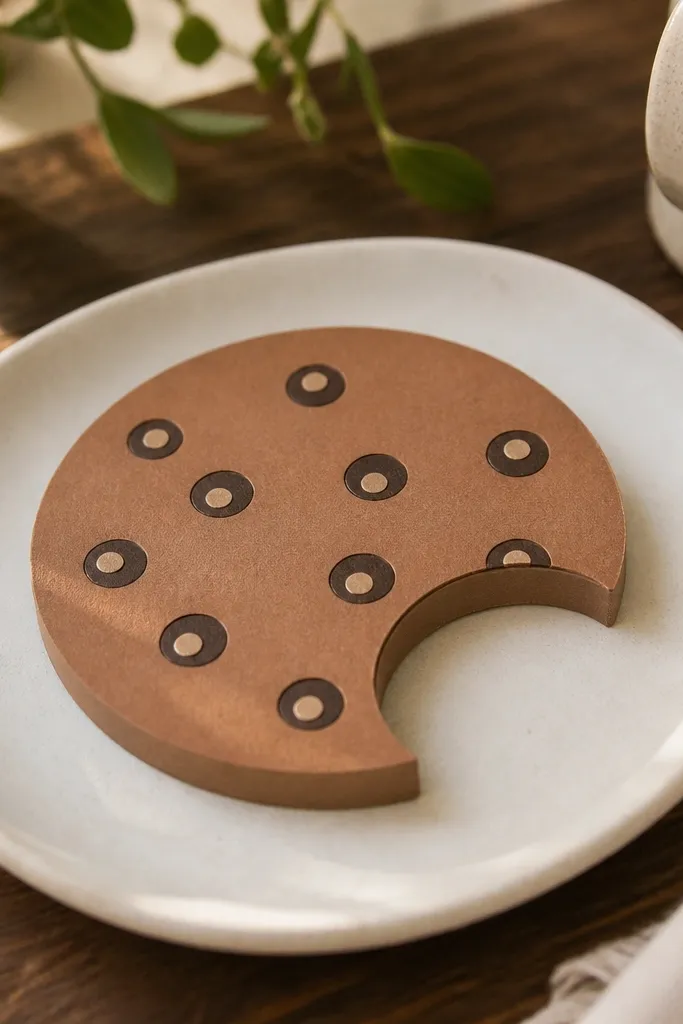
This cookie reads instantly because you show the bite. Cut a circle for the cookie, then remove a curved bite chunk so the missing section creates a cozy “just bitten” look. The squish comes from a foam pad behind the cookie so kids can press the surface without tearing the bite edge. Chocolate chips are small circles or ovals cut from dark brown paper, then dotted with lighter brown centers. Shade the cookie with brown marker around the bite edge for depth. It looks great in close-ups because the bite creates strong shadows.
Step 1: Cut a 5-inch cookie circle from cardstock and cut out a wedge-shaped bite. Step 2: Glue a foam pad behind the full cookie, then attach chips across the remaining surface using glue dots. Step 3: Shade the inner bite edge with marker and add a few “crumb” lines using a lighter brown. Let glue set 10 minutes before handling.
Editor's noteMake chips slightly uneven in size so the cookie looks hand-made, not printed.
Skip thisSkip metallic markers on the cookie; they smear and look messy on the foam.
6. Strawberry Milkshake Cup with Straw Loop
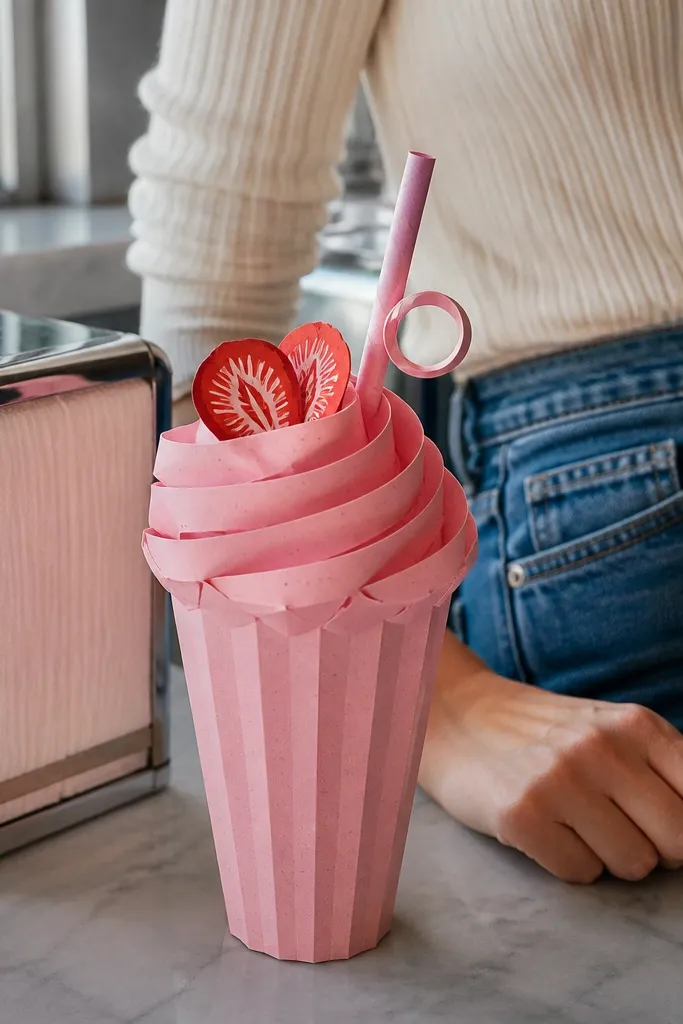
Milkshake squishies work because the cup shape gives you structure while the top swirl stays playful. Use a cardstock cup with a soft core insert so the cup compresses at the center but keeps its walls. The milkshake is pink paper layered in curved ribbons to form a swirl, with a few strawberry slice cutouts on top. The straw is a rolled paper tube with a looped end so it looks like it’s ready to slurp. A small highlight stripe on the cup edge makes it look glossy in photos. This is a great “kid craft” because there are no tiny details — just clean shapes.
Step 1: Roll a cup from cardstock, glue the seam, and insert a foam rectangle inside the center. Step 2: Cut 6-8 curved pink strips, layer them from bottom to top, and glue to form a swirl. Step 3: Add two strawberry half-circles on top and glue a rolled straw tube through the cup opening. Finish by drawing a thin highlight line on the cup with a lighter pink marker.
Cut straw tubes slightly longer than needed and trim after gluing so the loop lands where you want it.
Don’t glue the swirl ribbons flat against the foam; leave a tiny gap so they puff up.
7. Hot Dog with Ketchup and Mustard Squeeze
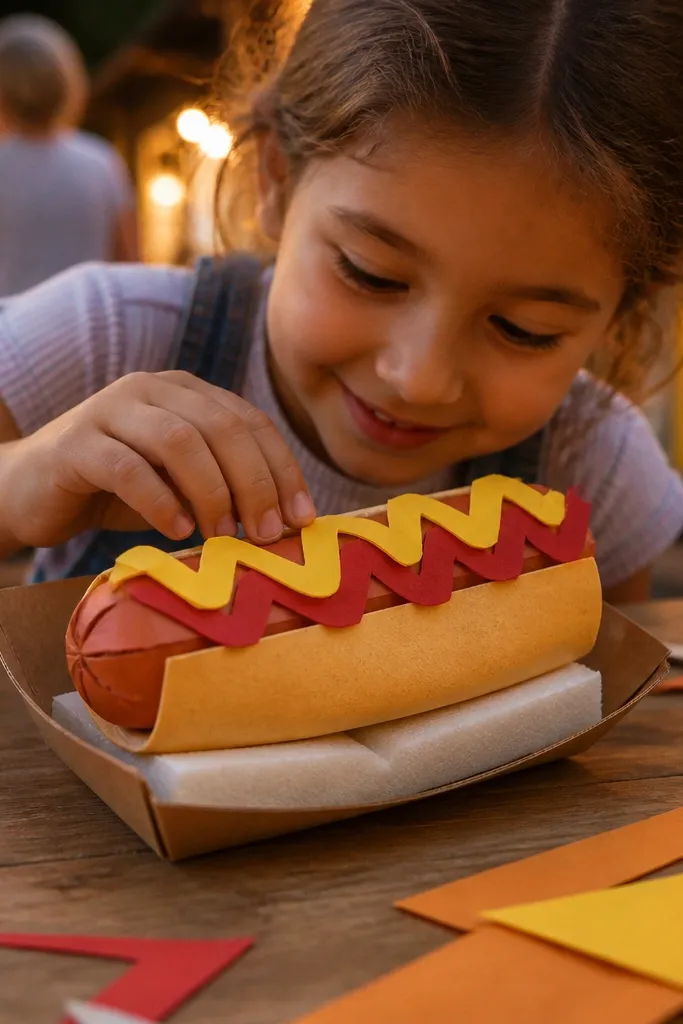
A hot dog squishy is simple but looks loud and fun, which matters for kids' attention and photo appeal. Build a rounded “bun” shape from thick paper, then add a compressible pad behind it so the hot dog yields in the middle. The ketchup is made from thin red paper strips cut into zigzag lengths. Mustard is a strip with small curled ends so it looks like it’s being squeezed. Add a few bun crease lines with a marker so the bun reads as bread, not just a tube. This one is fast, sturdy, and easy to repeat for a whole “snack menu” set.
Step 1: Cut a hot dog bun base (about 6 inches long) and fold it into a rounded tube, gluing the seam. Step 2: Glue a foam insert inside the tube so the center squishes. Step 3: Wrap a thin brown paper “fringe” around the top seam for bun texture, then glue ketchup zigzags and mustard stripes on top. Let dry flat with a book on top for 5 minutes.
Editor's noteUse a craft knife and ruler to cut crisp zigzags for ketchup — it makes the whole look cleaner.
Skip thisAvoid liquid glue blobs on the squeeze lines; they soak the paper and look shiny in a bad way.
8. Rainbow Cupcake with Fluffy Icing Top
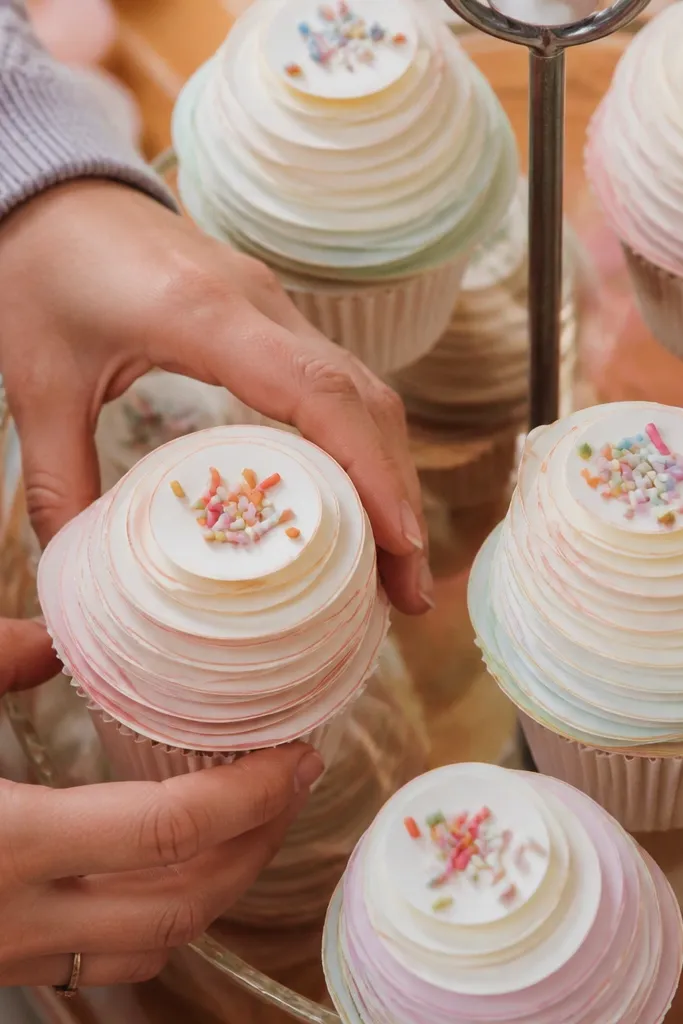
This cupcake is all about height. Make the base from cardstock and add a soft core beneath so it squishes, then build the icing as a layered spiral stack. The icing spiral is made from multiple thin paper rings, each slightly larger than the one below, glued at the center only. That creates a bouncy top that looks cloud-like in photos. Sprinkles are tiny paper rectangles in 5 colors scattered over the icing. The liner is a rolled paper ring with a subtle stripe pattern so it reads like a cupcake wrapper.
Step 1: Cut a cupcake liner ring and glue it into a cylinder, then attach a foam disk under the base. Step 2: Build icing by cutting 6 paper circles with a spiral cut, then roll each into a ring and glue rings from smallest to biggest. Step 3: Add sprinkles with glue dots, then outline the liner edge with marker for contrast.
Glue only the center of each icing ring so the top stays springy instead of flattening.
Don’t add sprinkles before the icing dries; the glue can warp the spiral shape.
9. Slice-Stack Chocolate Brownie with Fudge Edge
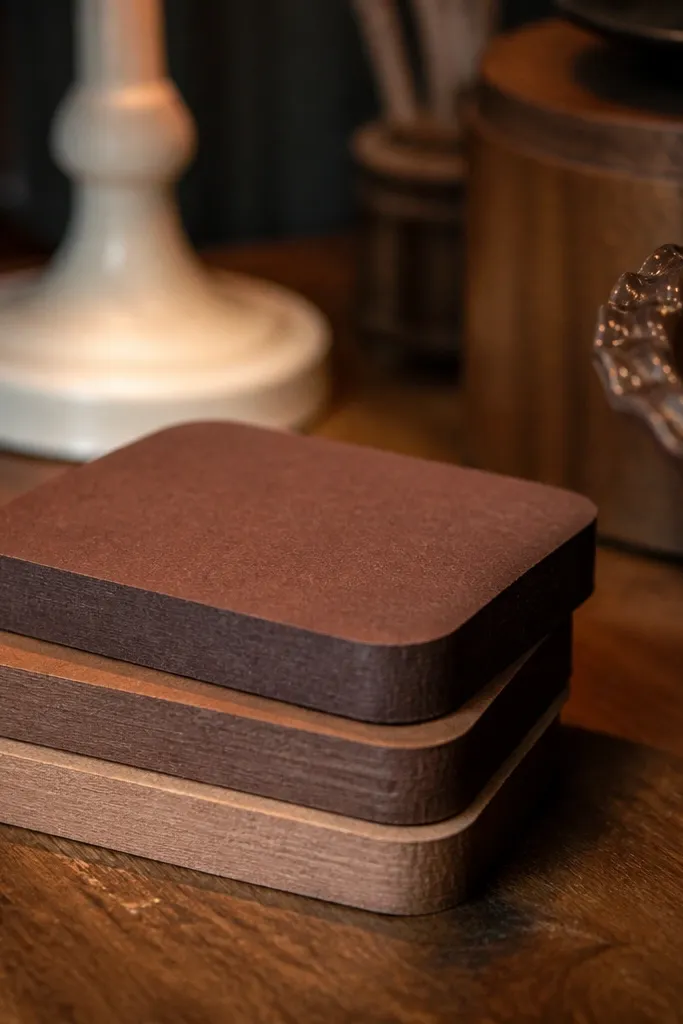
A brownie stack looks best when you show cut edges. Cut three squares from thick cardstock with slightly rounded corners, then tint the top and sides with different brown shades. The squishy part is a foam layer behind only the bottom square so the stack compresses as one. The “fudge edge” is a darker strip glued along each side, giving you a crisp, photogenic border. Add a few tiny lighter spots for chocolate chips or air bubbles. Kids like it because it’s sturdy and doesn’t require delicate decorations.
Step 1: Cut three 3-inch squares from cardstock and layer them with foam behind the bottom one. Step 2: Color each square with marker: lighter on top, darker on sides, and add a thin fudge strip around the edges. Step 3: Glue the squares together so the top square sits centered. Let everything dry flat under a book.
Use a paper scoring tool lightly along the edges to keep corners crisp when kids squeeze.
Don’t use one flat brown color; the edges need contrast to read as food.
10. Sushi Roll with Ginger Pink Dots
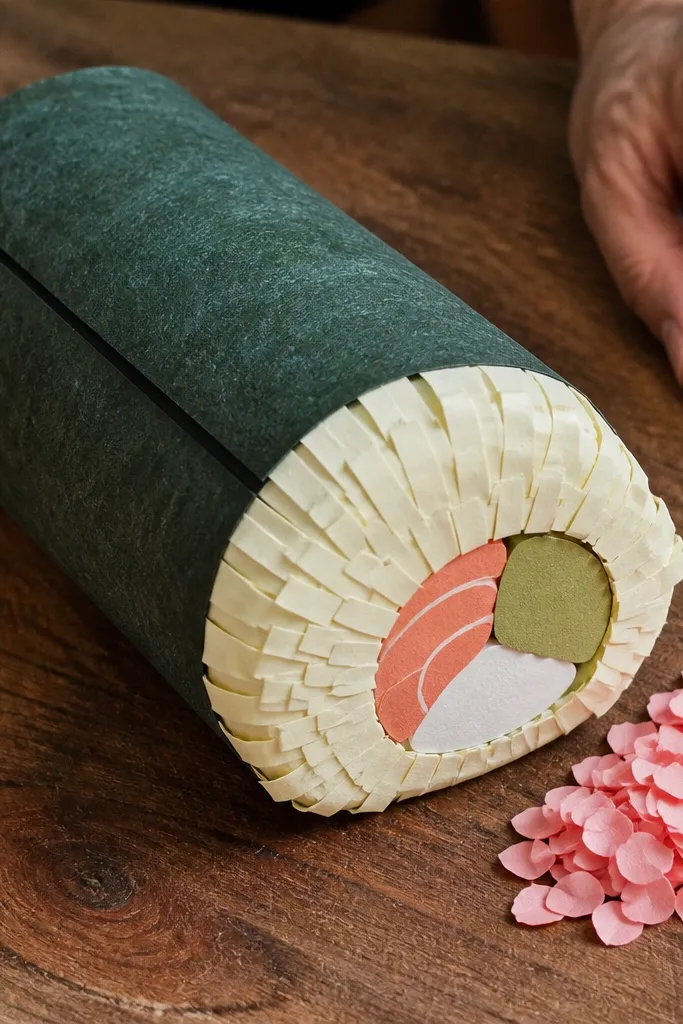
A sushi roll looks clean and modern, so it photographs well even with simple pieces. Make the roll from a thick paper rectangle rolled tight, then add a soft core so the roll squishes gently. The seaweed wrap is dark green cardstock with a thin black line down one edge. Rice is pale yellow paper strips, cut with tiny uneven edges to look grainy. Ginger is a set of small folded pink paper “petals” placed near the roll. This is a great choice if you want a food squishy that looks tidy and not messy.
Step 1: Roll a green rectangle into a tight tube and glue the seam, then insert a foam strip inside. Step 2: Add rice strips across the top and a thin darker strip to hint at the nori edge. Step 3: Fold 6-8 small pink paper pieces into petal shapes and glue them beside the roll. Draw a simple line shadow under the roll to ground it.
Editor's noteUse a ruler to keep the roll diameter consistent so it looks like one neat piece.
Skip thisAvoid cutting rice strips too thin; they tear when kids press the core.
11. Rainbow Fruit Cup with Jelly Cubes
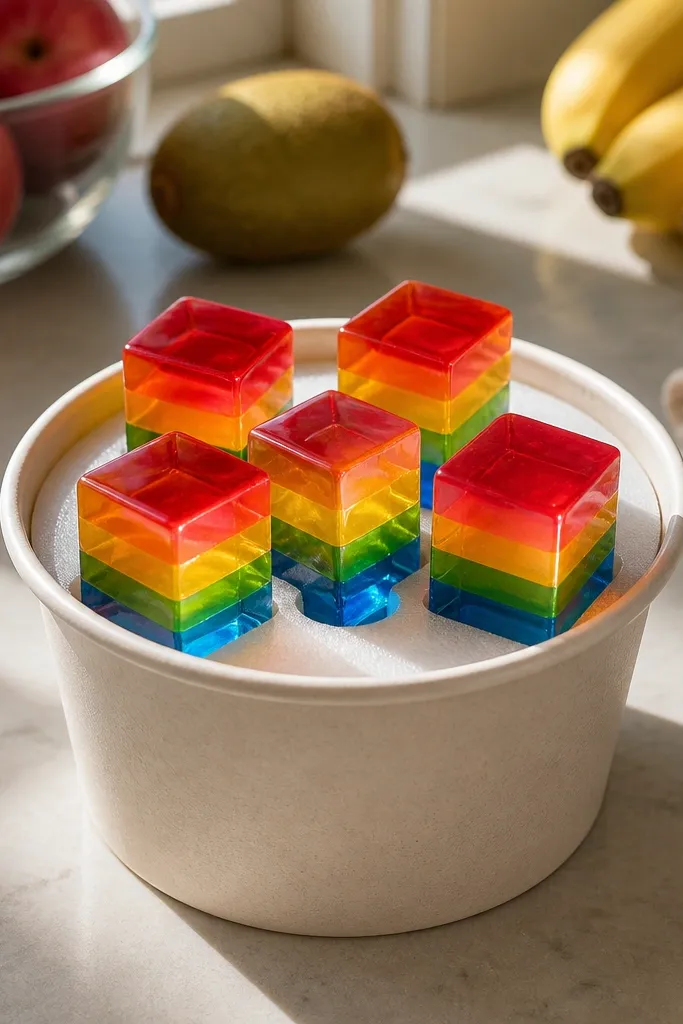
Fruit cups sell the cozy vibe because everything looks chunky and layered. Build the cup from cardstock with a soft foam insert, then add “jelly cubes” as clear-looking layers using cellophane or thin plastic sheet backed by colored paper. If you don’t have cellophane, use glossy magazine paper for the jelly effect. Arrange the colors in bands so the cup looks like it has multiple flavors. A few tiny fruit slice circles on top create a “fresh” look. It’s great for kids because it’s easy to assemble and forgiving if the layers are slightly messy.
Step 1: Cut a cup from cardstock (about 4 inches tall), glue into a cylinder, and insert a foam rectangle. Step 2: Cut small cube shapes (about 0.7 inch) from colored paper, then back them with thin plastic or glossy paper and glue onto the cup front. Step 3: Add a top layer of 3 fruit circles and outline the cup rim with a darker marker.
For jelly shine, tape a tiny strip of clear tape over one side of each cube.
Don’t use matte paper for the jelly layer; it looks flat and less “squishy” in photos.
12. Macaron Trio with Soft Cracked Shell
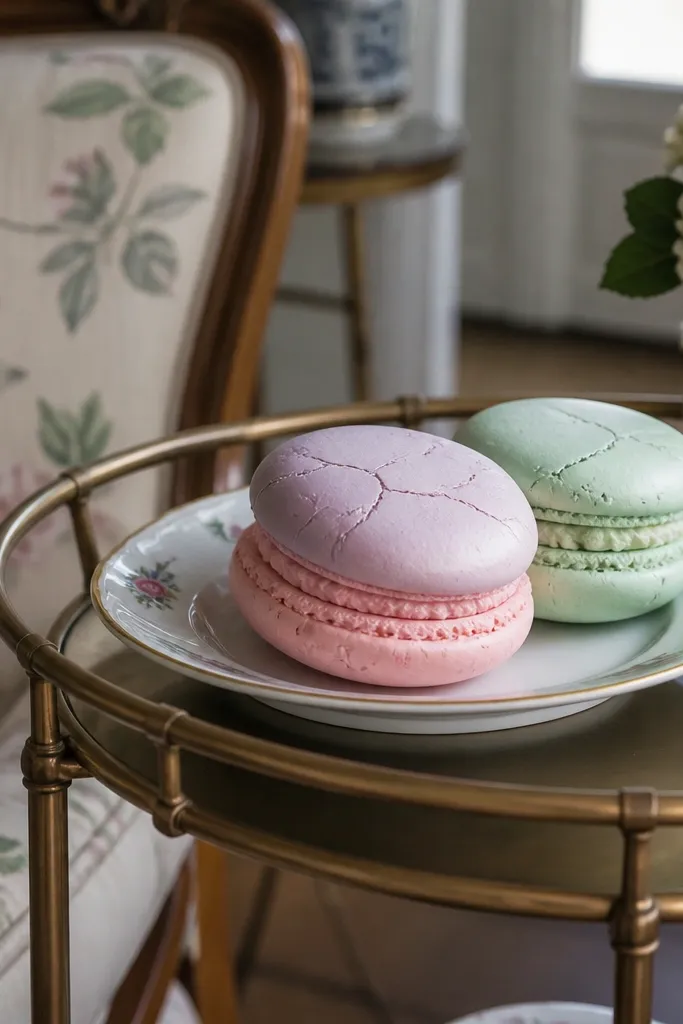
Macarons are photogenic because they look symmetrical, and you can exaggerate that for cuteness. Make three macaron sandwiches from thick cardstock, then add a foam core behind each so the shells compress slightly. The cracked shell is drawn with a marker as thin branching lines on the top shell — keep them sparse for a neat look. Filling is a layered paper oval in pastel colors, with a small highlight stripe. Stack the trio on a small base strip so it looks like a set. Kids love it because it feels fancy without fragile parts.
Step 1: Cut 6 circles per set (top and bottom), then glue pairs into shells with foam behind the top shell only. Step 2: Draw crack lines on the top shell with a fine marker and add filling as a layered oval between top and bottom. Step 3: Create a base strip, glue the three macarons in a row, and add tiny feet dots with a darker pastel marker.
Use a hole punch for perfect circles, then trace on the foam so all pieces match.
Don’t glue the foam between both shells; it makes the macaron look lumpy.
13. Pizza Slice with Pepperoni Dot Pop
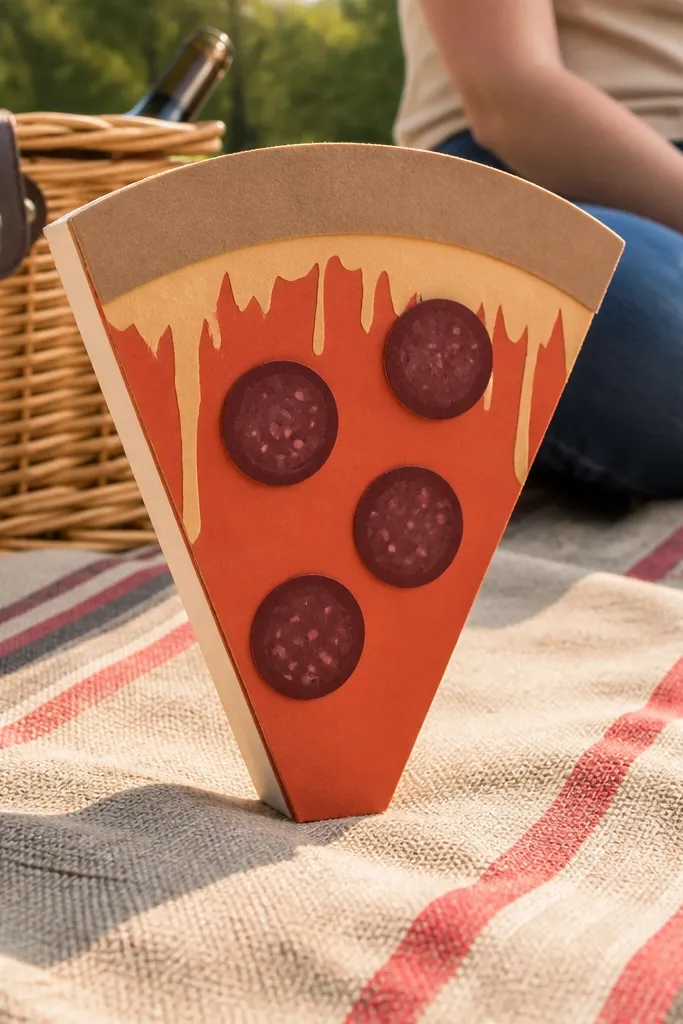
Pizza works because it has recognizable shapes and bold colors. Cut a triangle slice from cardstock, then glue a foam layer behind it for squish. Cheese is represented by a pale yellow base with marker “melt” lines that droop slightly from the crust edge. Pepperoni is a set of dark circles with lighter centers, plus a few black marker dots for char spots. Add basil bits as tiny green leaf shapes. This reads as pizza instantly from any angle, and the pepperoni dots look great in close-up photos.
Step 1: Cut a pizza slice triangle (about 5.5 inches tall) and glue foam behind it. Step 2: Color crust edge with darker brown, then draw cheese melt lines on the yellow area. Step 3: Glue pepperoni circles in a loose cluster and add basil leaf cuts near the tip. Finish with a thin dark outline around the slice edge.
Use a fine-tip marker to draw cheese melt lines — thick lines make it look cartoonish instead of tasty.
Skip tiny basil stems; only place small leaves so kids don’t peel them off.
14. Ice Cream Cone with Waffle Texture
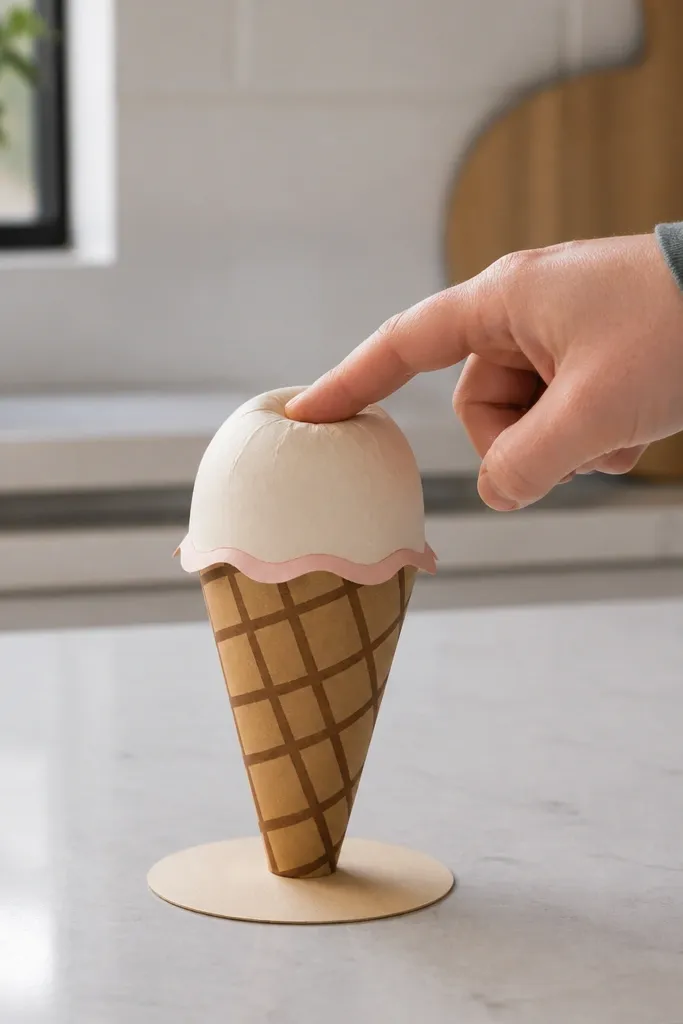
This is a classic cozy Paper Squishy because the cone gives structure and the scoop gives the fun squeeze. Build the cone from rolled cardstock shaped into a triangle cone, then glue it to a flat base with foam behind the scoop area. The waffle texture is drawn with a darker marker in a grid pattern across the cone. The scoop is a layered paper circle with a soft core insert so it pushes in and springs back. Chocolate drizzle is thin brown paper strips twisted slightly so it looks like it’s running. It’s photogenic because the cone lines create strong visual texture.
Step 1: Roll a cone from cardstock and glue the seam, then add a foam pad inside the scoop area. Step 2: Cut 3 layers for the scoop, stack them, and glue only the center so it stays rounded. Step 3: Draw waffle grid lines on the cone and add chocolate drizzle strips across the top. Let everything dry flat before squeezing.
Twist drizzle strips before gluing so they catch light with small highlights.
Don’t oversaturate the cone with marker; it bleeds into the paper fibers.
15. Pancake Stack with Maple Syrup Peaks
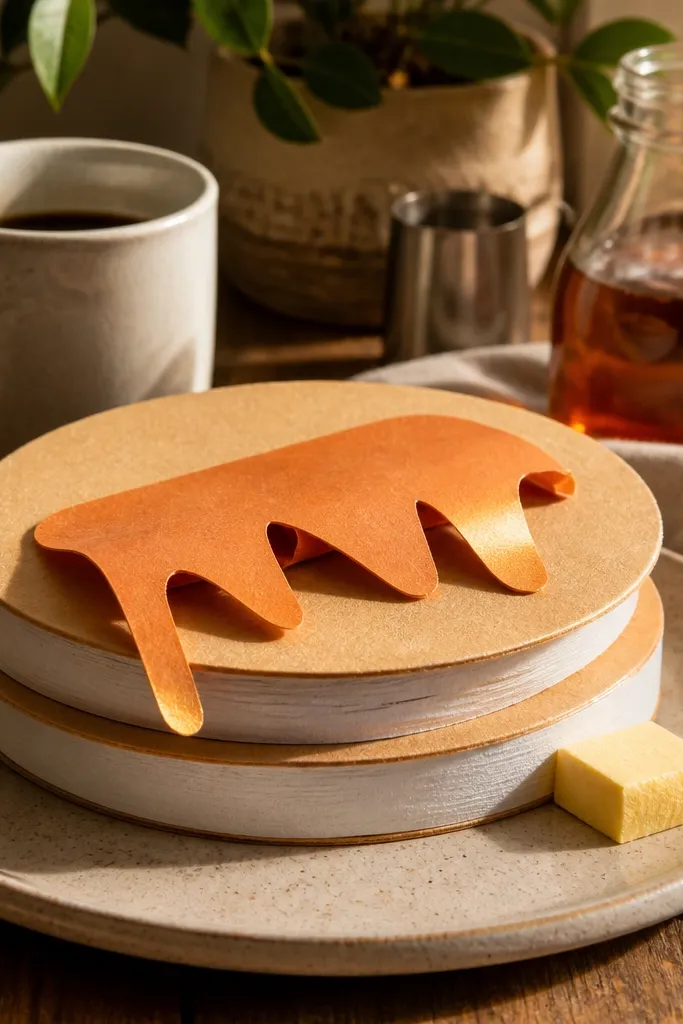
A pancake stack looks cozy because it’s layered and rounded. Cut two or three pancake rounds from thick cardstock, then add a foam layer behind the bottom pancake so the whole stack compresses. Syrup is made from a strip cut into peaks and drips, then curled slightly so it stands off the surface. Add butter as a small yellow paper square with a few angled crease lines. Shade the pancakes with warm brown marker around the edges for “browned” texture. This project is kid-friendly because it’s forgiving — syrup lines can be uneven and still look right.
Step 1: Cut pancake rounds (about 4 inches wide each) and stack them with foam behind the bottom one. Step 2: Cut syrup from thick paper into a wavy strip, then glue it across the top and let drips fall to the front. Step 3: Add butter on top and outline each pancake edge with a slightly darker brown. Press under a book for 5-8 minutes.
Make syrup drips longer than you think; short drips look flat in photos.
Avoid thin paper for syrup; it collapses and won’t hold peaks.
16. Burger with Lettuce Layer and Squishy Patty
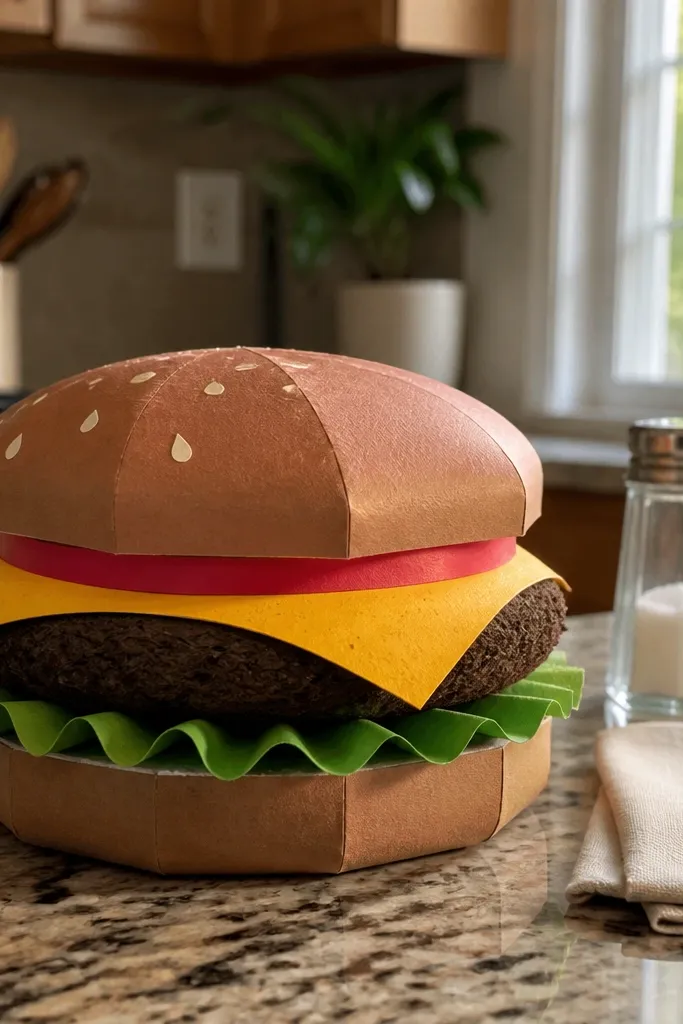
Burgers are the easiest food squishy to photograph because they have clear stacked layers. Build the bottom bun and top bun from thick paper, then place foam behind the patty so it squishes when pressed. Lettuce is thin folded paper strips that curl slightly to look textured. Cheese is a smooth yellow square with a few marker freckles like melted spots. The bun edge has a sesame seed pattern drawn with dots. Kids love this because it feels like a toy food that’s still handmade.
Step 1: Cut and glue bottom bun, then glue foam behind the center patty area. Step 2: Add lettuce strips and cheese square on top of the patty, then glue the top bun last so layers align. Step 3: Draw sesame seeds along the top bun edge and outline all layers with marker for definition.
Fold lettuce strips over a pencil for 2 seconds to make them curl consistently.
Don’t glue the top bun directly onto the foam; it can warp and look off-center.
17. Mango Popsicle with Paper Drip Core
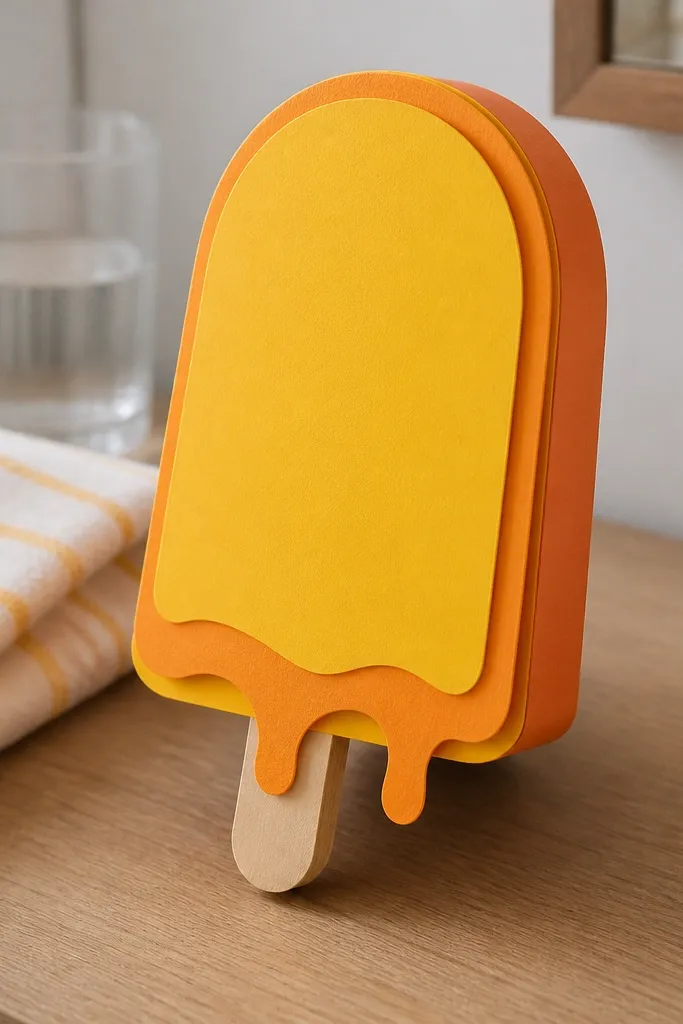
Popsicles look amazing because their shape is simple and the layers show color gradients. Cut a popsicle shape from thick cardstock and add a foam core so it squishes slightly in the center. Mango color is built with 3 layers: bright yellow base, orange mid layer, and a thin darker orange edge to mimic fruit depth. The drip look is created by cutting small downward “drips” in the top layer and curling them outward. Add a wooden stick tab at the bottom from a strip of cardstock. It’s a cozy Paper Squishy that kids can squish without tearing small parts.
Step 1: Cut the popsicle base shape and glue a foam insert behind the middle. Step 2: Layer two more popsicle shapes in orange shades, then cut small drips in the top layer and glue them so they curve. Step 3: Add a stick tab by gluing a cardstock strip to the bottom center. Outline edges with a darker orange marker.
Editor's noteUse a ruler to keep drip edges straight; uneven drips look sloppy, not juicy.
Skip thisDon’t make the stick too wide or it blocks the foam squish.
18. Cinnamon Roll with Rolled Swirl Layers
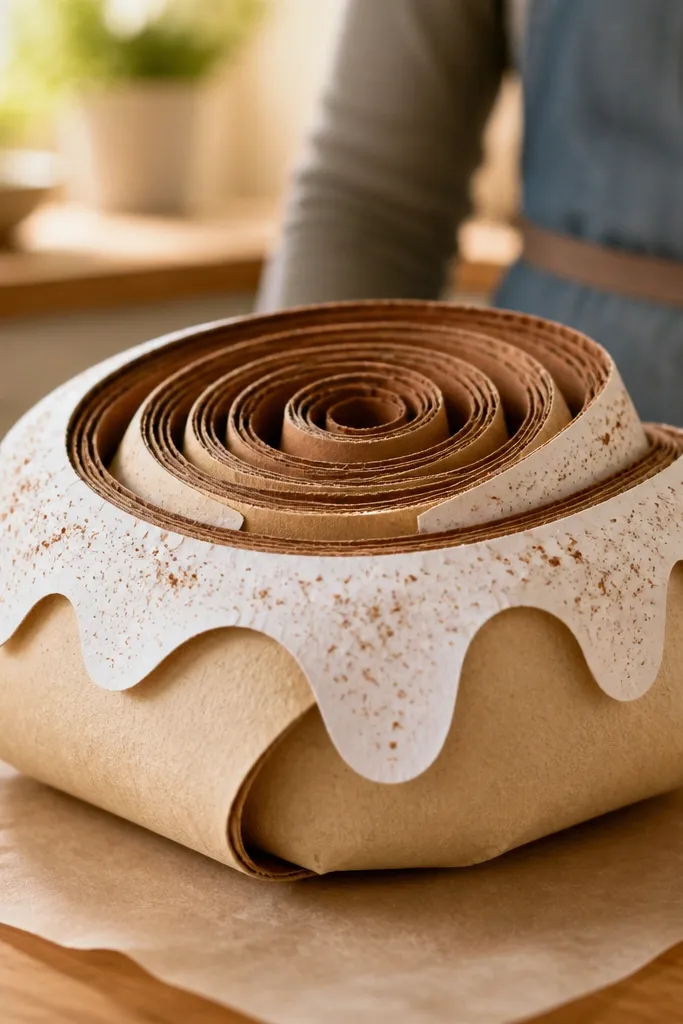
Cinnamon rolls are pure photogenic comfort. Build the roll as a layered swirl using rolled paper strips, then add a soft core under the swirl so it compresses like a fluffy bun. The icing is a white ribbon strip cut with tiny scallops along the edge, glued in a loop across the top. Cinnamon sugar is drawn with brown marker dots inside the swirl lines. Add a small shadow under the roll using a gray marker so it looks grounded. This project looks “baked” without needing tiny icing details.
Step 1: Cut a long spiral strip from cardstock, roll it into a tight cinnamon swirl, and glue the end underneath. Step 2: Glue foam beneath the swirl base, then attach the roll to a flat backing. Step 3: Cut icing ribbon with scalloped edge, glue it across the top, and dot cinnamon sugar with a marker. Let dry flat.
Roll the strip tighter than you think; loose swirls look messy once kids squeeze them.
Skip glitter for cinnamon sugar; it catches glue and sheds.
19. Apple Pie Slice with Lattice Top
A pie slice looks “real” when you show the lattice. Cut a wedge from thick cardstock and build the filling as a layered red-orange paper shape with curved edges. The lattice is made from thin strips glued in crisscross rows. For squish, place foam behind the slice so the filling compresses but the lattice stays on top. Add a glossy look to the filling with clear tape on two small spots. Outline the crust with a darker brown marker to make it pop. This one is a little more work, but it’s worth it for the photogenic top texture.
Step 1: Cut the pie wedge base and glue foam behind it. Step 2: Layer filling pieces in red-orange shades, then glue lattice strips across the top in a grid. Step 3: Add a small “steam” tail by curling thin tissue above the center and taping it lightly. Finish with crust edge outline and let everything dry flat 10 minutes.
Use a ruler to space lattice strips evenly; even 1/8 inch spacing makes it look bakery-level.
Don’t make lattice strips too long; they sag and collapse under foam pressure.
20. Chocolate Milk Bottle with Cocoa Foam Cap
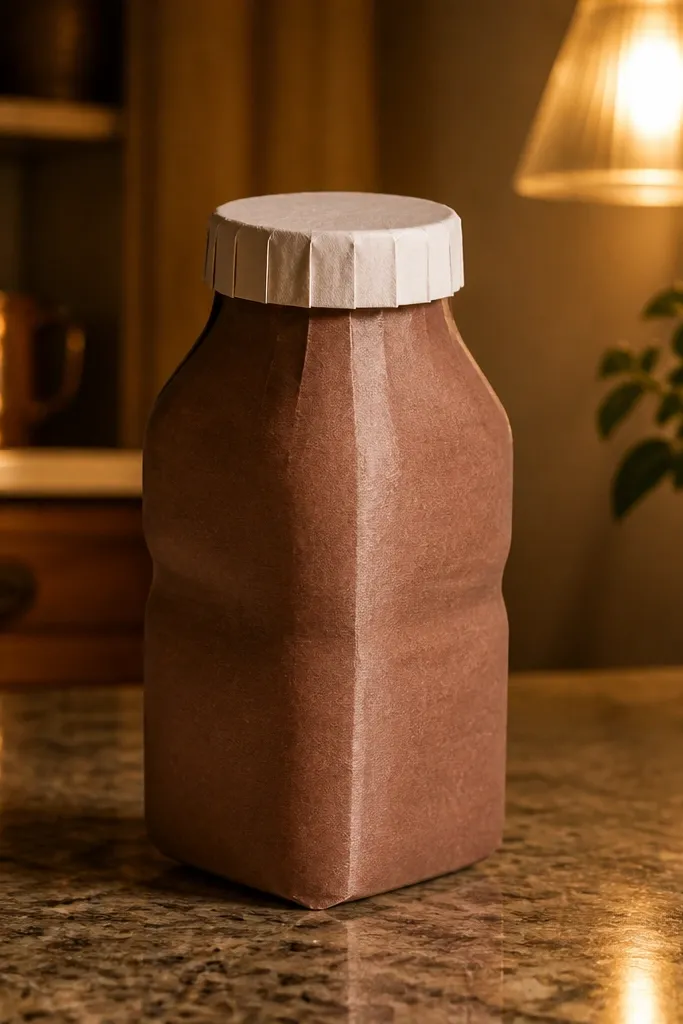
Chocolate milk looks cozy because it has a warm, creamy color. Make the bottle from cardstock shaped into a rounded rectangle, then add a foam core so the bottle compresses. The “milk” is brown paper blended with darker cocoa edges and a lighter highlight stripe. The foam cap is a strip of white paper cut into tiny cloud frills, glued on the top. Add a small label rectangle with a simple icon like a milk droplet. It’s photogenic because the bottle shape gives clean lines and the foam cap adds texture.
Step 1: Cut bottle panels, glue into a tube shape, and insert a foam rectangle inside. Step 2: Color the bottle front with brown marker shading and add a highlight stripe. Step 3: Cut foam frills from white paper, glue them along the top edge, then add a small label tag. Press under a book while glue sets.
Editor's noteAdd the highlight stripe after the glue dries so it doesn’t smear.
Skip thisAvoid using very glossy paper for the bottle; marker can slip and streak.
21. Blueberry Muffin with Crumb Sprinkle Top
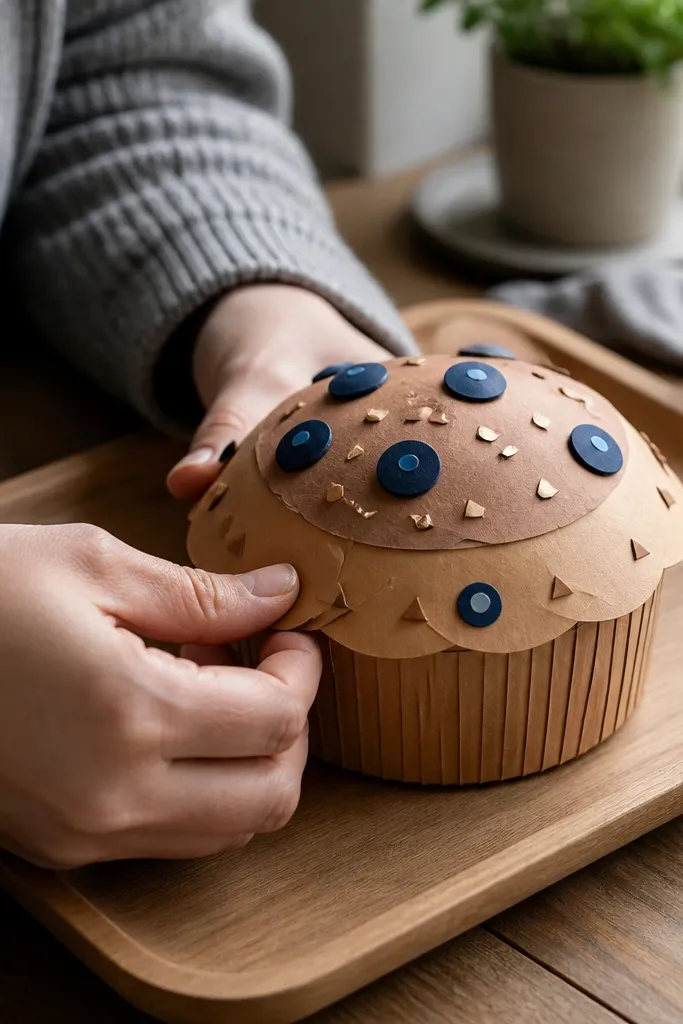
Muffins are a great cozy Paper Squishy because they have a domed top and crumb texture. Cut a muffin base from thick cardstock, then glue foam behind it for squish. The top dome is layered with a slightly darker brown paper circle, and crumbs are tiny paper triangles sprinkled across the surface. Blueberries are small circles in deep purple with a lighter dot highlight. Add a few “cracks” drawn with marker lines for that baked look. This is an easy win for kids and looks adorable in a group photo.
Step 1: Cut muffin base and dome top layers, glue foam behind the base, then attach dome on top. Step 2: Add crumb triangles by gluing them randomly across the dome. Step 3: Glue blueberry circles in clusters and draw a few baked cracks with marker. Let everything dry flat.
Editor's noteMake crumbs two sizes only. More sizes look chaotic fast.
Skip thisSkip tiny blueberries; they fall off and ruin the look.
22. Mac and Cheese Bowl with Cheesy Zigzags
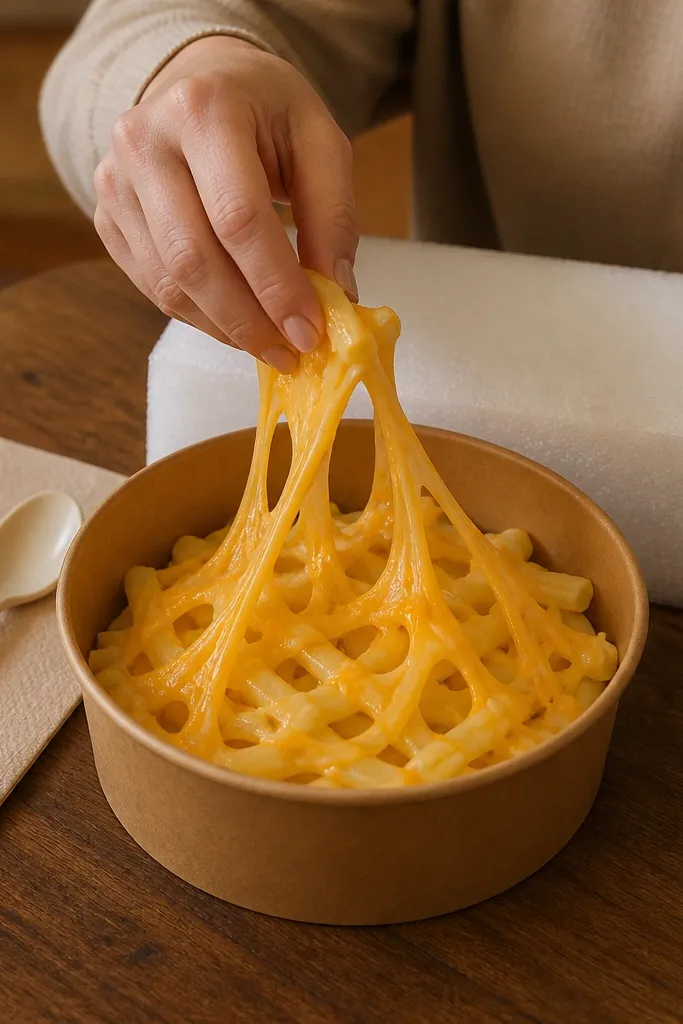
This bowl is all about warm color and texture. Cut a bowl from cardstock and glue a foam pad behind it for squish. For the mac, use short noodle strips with rounded ends, then glue them across the bottom of the bowl. Cheese is created with zigzag strips of yellow paper stretched slightly so it looks stretchy. Add a few orange marker dots for cheese bubbles. In photos, the zigzags give movement and depth even though it’s paper.
Step 1: Cut bowl shape and glue foam behind it, then outline the rim with a darker marker. Step 2: Add noodle strips across the bowl bottom and glue cheese zigzags across the top. Step 3: Add orange bubble dots and draw a subtle shadow under the noodles. Dry flat for 10 minutes.
Editor's noteStretch zigzag strips slightly before gluing so they curve naturally.
Skip thisDon’t overfill the bowl with noodles; it makes the top too flat to look cheesy.
23. Cherry Soda Bottle with Bubble Cap
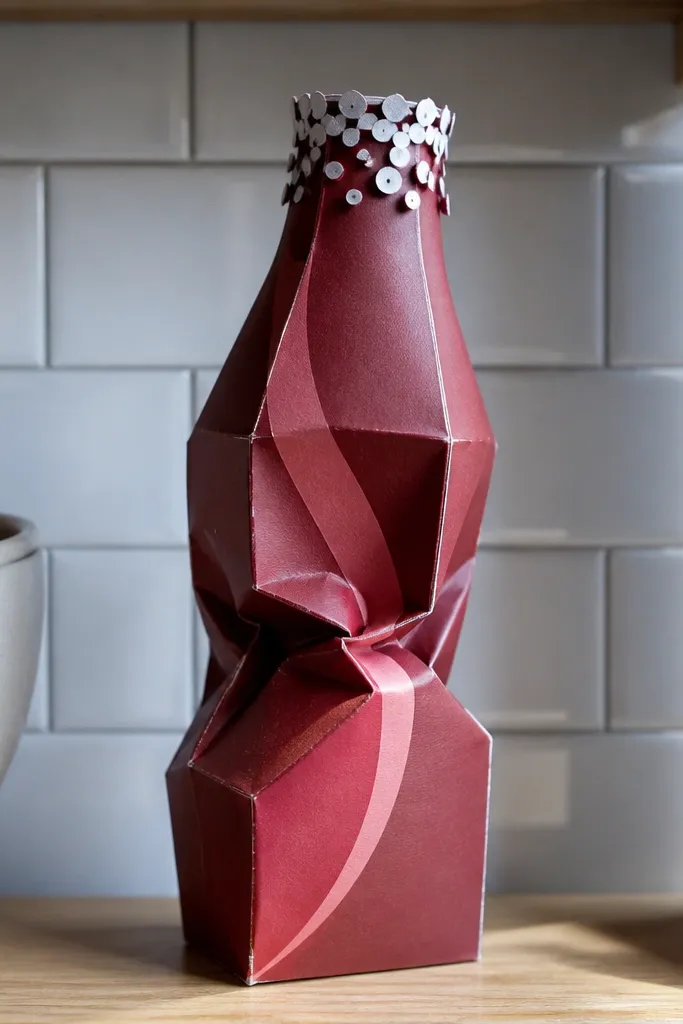
Soda bottles look fun because they have a long silhouette and a clear color. Make a bottle from cardstock with a foam core so it compresses in the center. The soda is deep cherry red with a lighter pink swirl highlight. The bubble cap is made from a thin strip of white paper cut into tiny circles, glued around the top like foam. Add 6-8 “bubbles” on the front using clear tape circles backed with light blue paper for a glassy look. This one photographs well because bubbles catch light.
Step 1: Cut bottle panels, glue into a tube, and insert a foam rectangle. Step 2: Color with cherry red shading and add a swirl highlight stripe. Step 3: Cut white circle foam and glue around the top, then add bubble dots using tape-backed blue circles. Let set flat so bubbles don’t slide.
Editor's noteUse a hole punch for bubble circles so they match size and look intentional.
Skip thisDon’t use too much tape on bubbles; it makes them bulky and hard to squish.
24. Rainbow Taco Shell with Crunchy Fringe
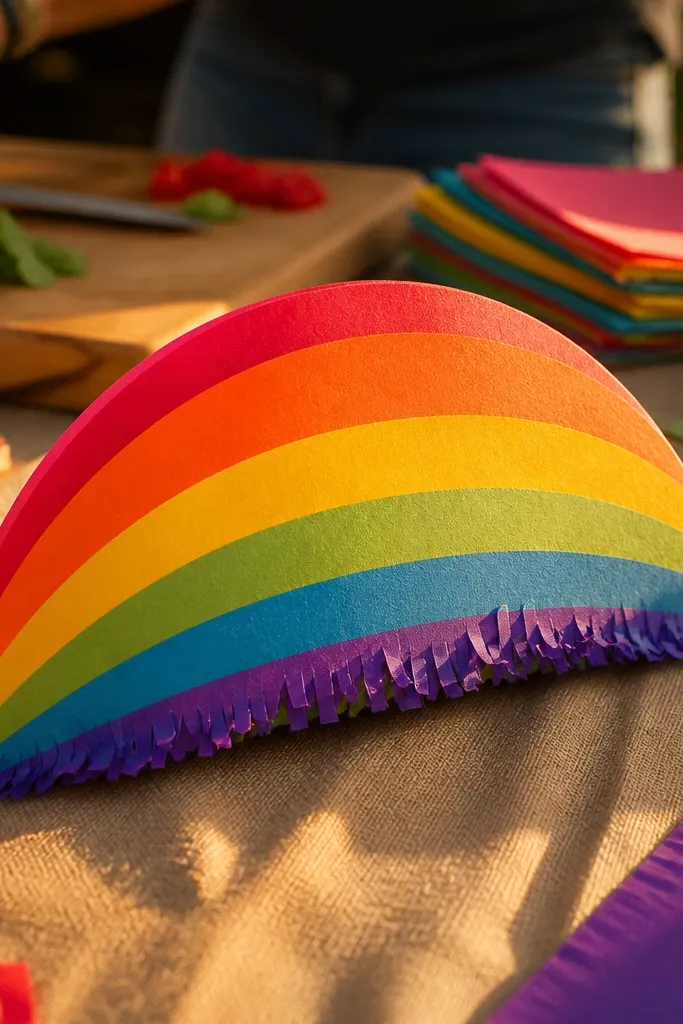
This taco version looks different because it uses “crunchy fringe” instead of only filling layers. Build the shell from cardstock with a rainbow gradient strip glued along the outside, then add a foam core so the shell compresses. The fringe is cut from thin paper strips along the bottom edge of the shell to mimic crispy taco edges. Toppings are tiny dots in green and yellow for lettuce and cheese. Add a small face sticker on the shell for extra cuteness. The fringe creates strong texture in photos and makes the taco look crisp even though it’s soft.
Step 1: Cut and roll a taco shell, glue the seam, and insert foam at the bottom. Step 2: Glue a rainbow gradient strip along the outside and cut fringe strips along the shell bottom. Step 3: Add topping dots across the top opening and draw a simple outline around the shell edge. Press flat while drying.
Editor's noteCut fringe strips with a ruler so they’re evenly spaced and don’t tangle.
Skip thisAvoid thick fringe strips; they bend weird and look messy.
25. Cherry Tomato Bruschetta Mini Board
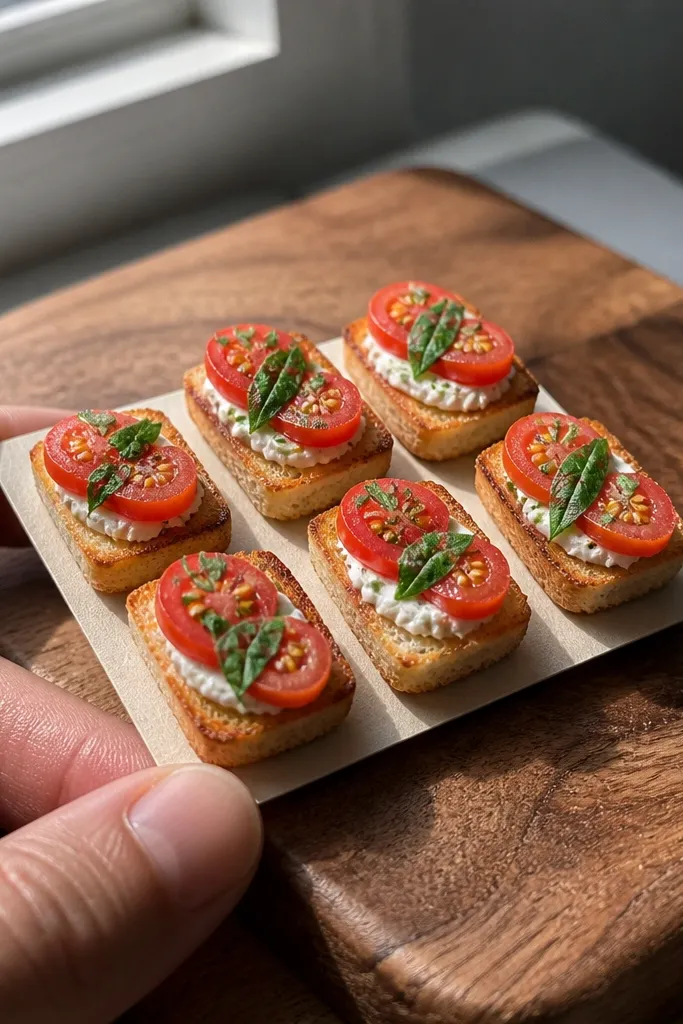
This one is a decor squishy that still passes as food. Make a mini board from cardstock, then glue toast squares on top with foam pads under each toast to create localized squish. Tomatoes are half-circle paper slices in bright red with a small yellow seed dot cluster. Add a green basil sprinkle using tiny leaf cutouts. The whole board is photogenic because it’s a scene, not a single item, and kids can rearrange pieces slightly without breaking the core. It also looks great on shelves after craft time.
Step 1: Cut a small rectangle board (about 5x3 inches) and cover with a light tan paper layer. Step 2: Cut 3 toast squares, glue foam under each, and attach to the board. Step 3: Add tomato halves and basil leaves on each toast, then draw faint wood grain lines on the board edges with marker.
Glue foam only under the center of toast squares so edges stay flat for clean photos.
Skip loose glitter on tomatoes; it sheds onto faces and clothes.
26. Rainbow Candy Lollipop with Center Squish
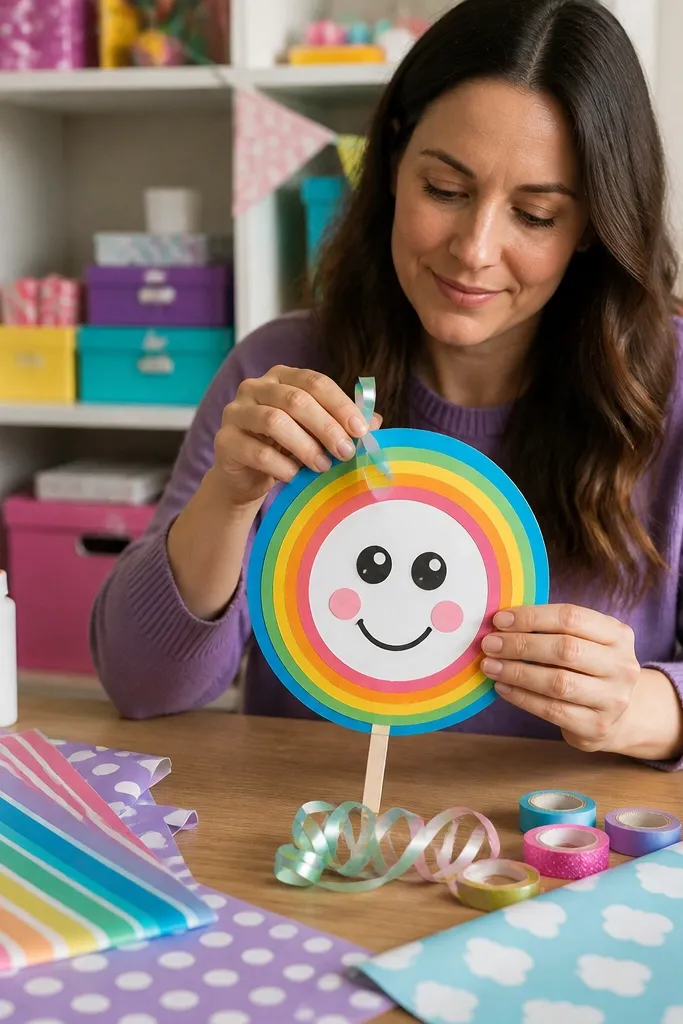
Lollipops are perfect for cozy Paper Squishy because the candy face is round and bold. Make a candy circle with a foam core behind it so kids can press the middle. The rainbow is created by cutting 6-7 thin curved bands and layering them from edge to center. Add a small “shine” ribbon using clear tape strip on the top area. The stick is a cardstock strip glued to the bottom center, with a small paper label near the top. This looks bright and candy-like in pictures, and it’s easy to scale for a set.
Step 1: Cut a large candy circle and a foam disk slightly smaller, then glue foam to the back of the candy circle. Step 2: Cut rainbow curved bands, layer them on the front, and glue along one edge only so they look dimensional. Step 3: Add a clear tape shine strip and glue the cardstock stick to the bottom center. Let dry flat for 5-10 minutes.
Make rainbow bands start slightly off-center so the stripes look organic, not printed.
Don’t glue the rainbow bands all the way down; flat layering kills the candy depth.
27. Crispy French Fries in Paper Cone
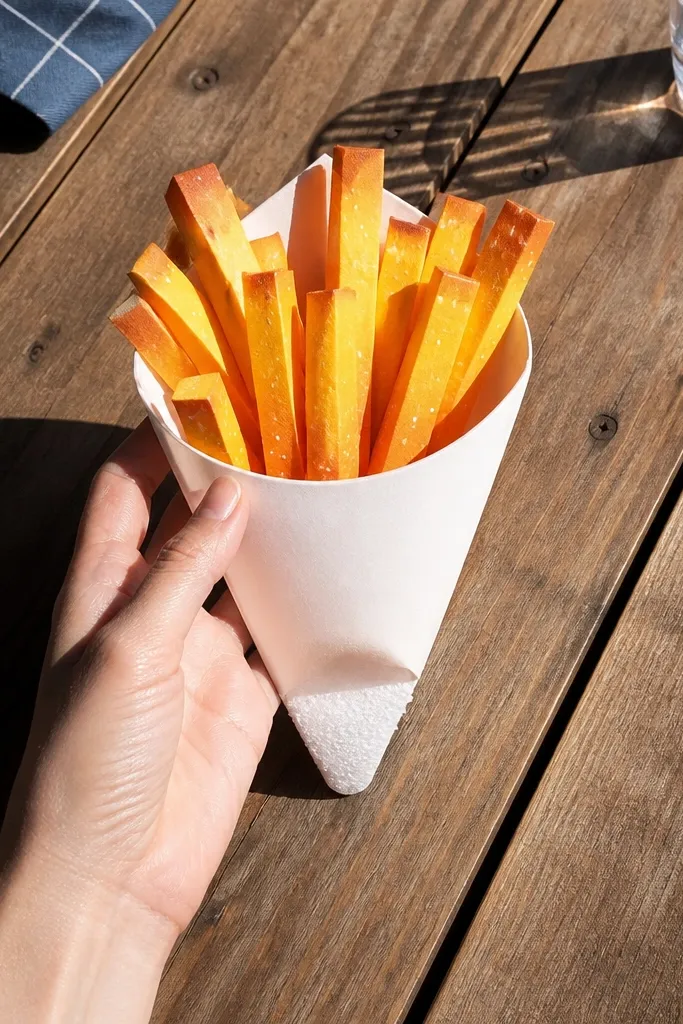
French fries look best when you show volume. Build a paper cone and add a foam base insert so the cone squishes at the bottom but stays upright. Fries are cut as long rectangles with slightly rounded ends, colored orange-gold with darker tips. Add a small pile of “salt” specks using white gel pen dots. This is photogenic because the cone opening frames the fries like a real serving basket. Kids can squeeze the bottom and still keep the pile intact.
Step 1: Roll a cone from cardstock, glue the seam, and insert a foam disk at the bottom. Step 2: Cut 12-18 fry pieces, glue them into a fan across the cone opening. Step 3: Color fries with marker gradient tips, then add salt dots with gel pen. Let set flat so fries don’t slide.
Glue fries only at the top edge of the cone so they look piled, not stuck flat.
Skip thin paper fries; they bend and look limp.
28. Chocolate Truffle Box with Pressable Lids
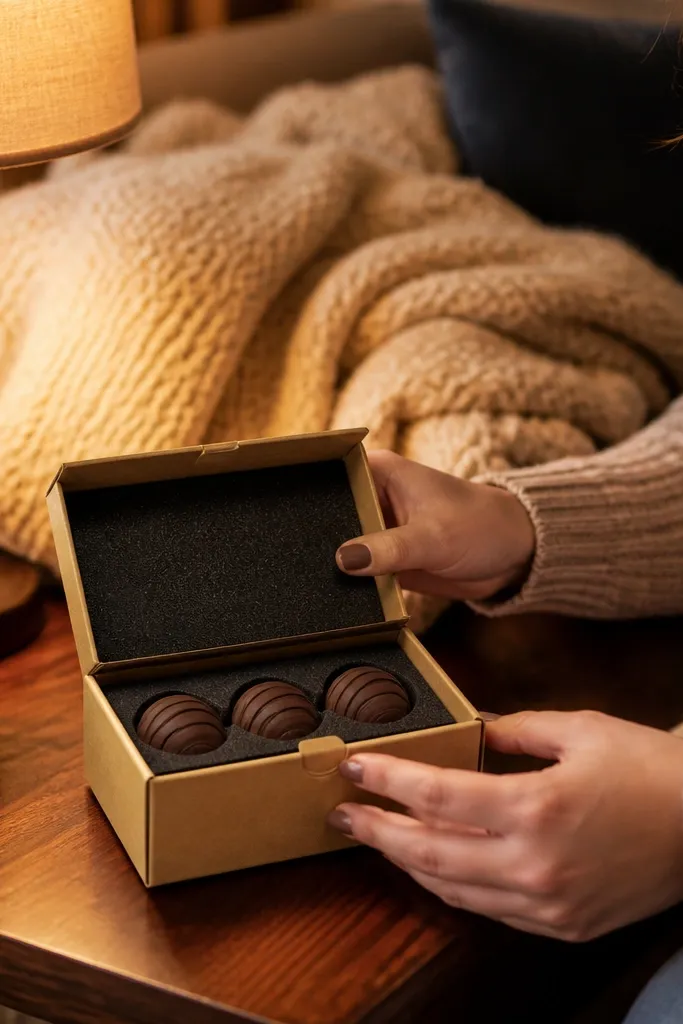
A truffle box is cozy Paper Squishy for kids who like “toy packaging.” Create a small openable box from cardstock with a pressable lid made from foam-covered paper. Inside, add three truffles as round paper balls with foam cores so each one squishes slightly when touched. The chocolate look is done with brown paper circles shaded with darker edges and tiny lighter dots. The lid has a simple bow cutout or ribbon strip. This piece looks great on a shelf because it’s a mini display, and kids get the satisfying squeeze when they press the lid.
Step 1: Cut box sides and base, glue into a shallow tray, then add foam-covered lid panels. Step 2: Build truffles by stacking two paper circles around a small foam disk, then glue into the tray. Step 3: Add lid bow and outline box edges with darker marker. Test closure and adjust so lid presses without crushing truffles.
Editor's noteScore fold lines with a butter knife so the box stays sharp after repeated opening.
Skip thisDon’t glue truffles to the lid; they should stay in the tray for clean pressure.
29. Rainbow Macaron Wreath Cookie
This wreath shape is a trick for photogenic squishies: it fills the frame. Build a circular base from cardstock, then glue 8 small macarons around the edge with foam pads behind each macaron so they squish a little. Each macaron uses a different pastel shell color and filling to create a rainbow ring. Add a small center circle with a bright yellow “candy” dot. The result looks like a treat display and gives kids a satisfying press across the whole ring rather than one spot.
Step 1: Cut a 6-inch ring base and glue foam behind each macaron placement point. Step 2: Make 8 macarons (top shells only are fine) and glue them around the ring, leaving gaps for a clean wreath look. Step 3: Add pastel filling ovals and draw crack lines lightly, then glue a center yellow circle. Let dry flat under a book.
Keep macaron sizes within 1/8 inch so the wreath looks intentional.
Don’t overfill the ring with glue; it makes macarons slide before it sets.
30. S'mores Campfire Sandwich with Marshmallow Puff
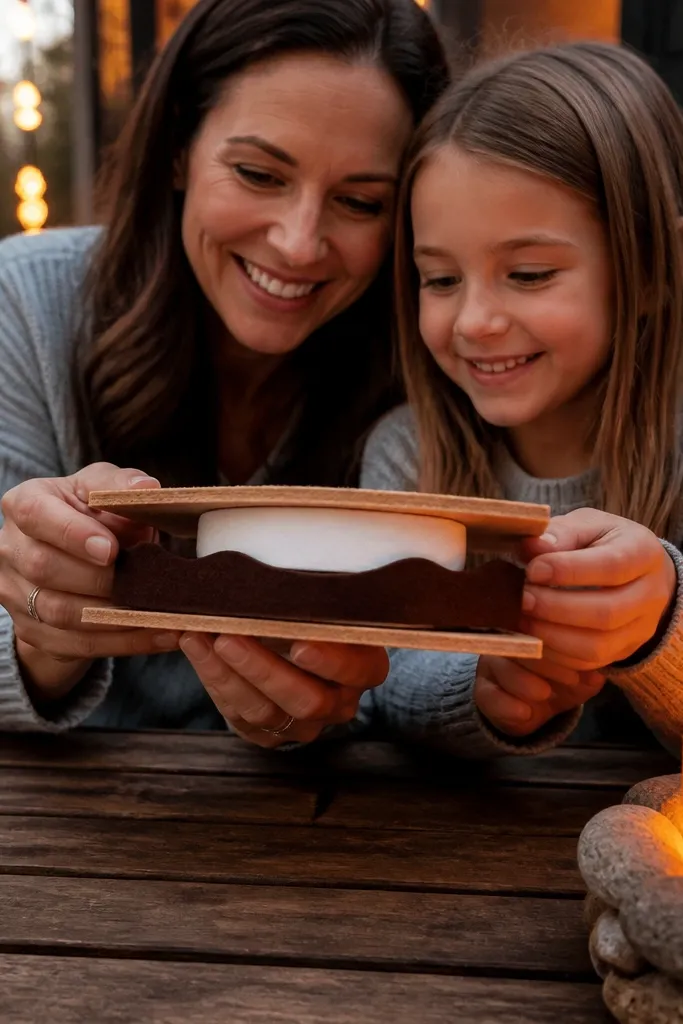
S’mores look cozy because they’re layered and familiar. Build two graham cracker rectangles from textured brown paper, then add chocolate as a dark brown strip with a slightly wavy top edge. The marshmallow is the squishy hero: cut a large rounded marshmallow from thick paper, glue a foam disk behind it, and attach on top so it compresses. Add a few toasted lines using marker as if it’s been over a fire. Optional: a tiny “campfire” flame made from orange tissue curls on the side. This one looks great on a picnic-themed table and holds up to repeated squeezes.
Step 1: Cut graham cracker rectangles and texture them with marker crosshatch. Step 2: Glue chocolate strip between crackers, then place foam behind the marshmallow and attach it on top. Step 3: Draw toasted lines on the marshmallow and add flame tissue curls at the side if desired. Press flat to keep edges crisp.
Editor's noteTo make marshmallow look airy, glue only the bottom edge to the chocolate so it floats a bit.
Skip thisAvoid tiny flame cuts; tissue curls are much more durable.



