


1. Cream tissue + dusty rose wrap instead of bright cellophane
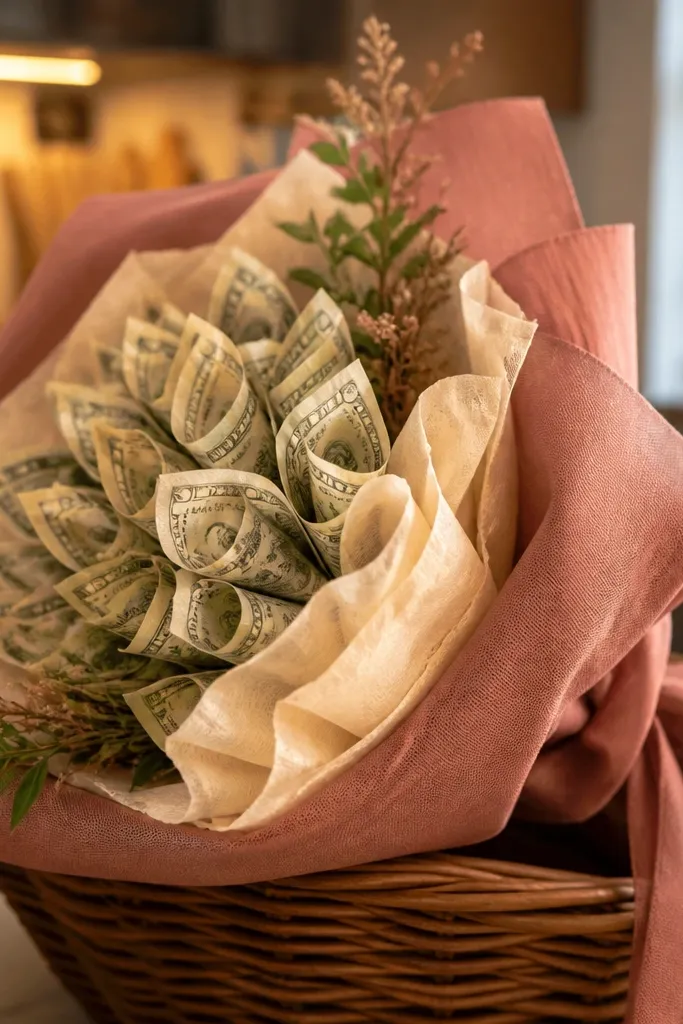
The cozy part comes from soft materials that blur harsh edges. Bright, glossy cellophane makes the money look shiny and cheap, even if your folding is good. Tissue paper with a slight matte finish gives bills a warmer tone and makes the whole bouquet feel gift-like. I’d keep the outer wrap to cream or oatmeal and add a dusty rose accent layer so you get contrast without loud colors. This suits housewarming gifts, birthdays, and any time you want the bouquet to feel calm and thoughtful instead of loud.
Start by wrapping your bouquet stems with a strip of cream tissue paper that covers the base but leaves the top of your money pieces visible. Add one more layer in dusty rose tissue, slightly offset so you can see the edge like a soft flower petal. Tie a brown satin ribbon around the wrapped base with a firm knot, then trim the ends at an angle so they don’t fray. Finish by adding two to four small leaf sprigs to cover the knot and tape points.
Editor's noteUse matte tissue, not shiny craft paper — it makes the bills look warmer under indoor light.
Skip thisAvoid a single shiny wrap all the way around; it highlights folds and tape seams.
2. Foam block base wrapped in burlap so stems don't wobble
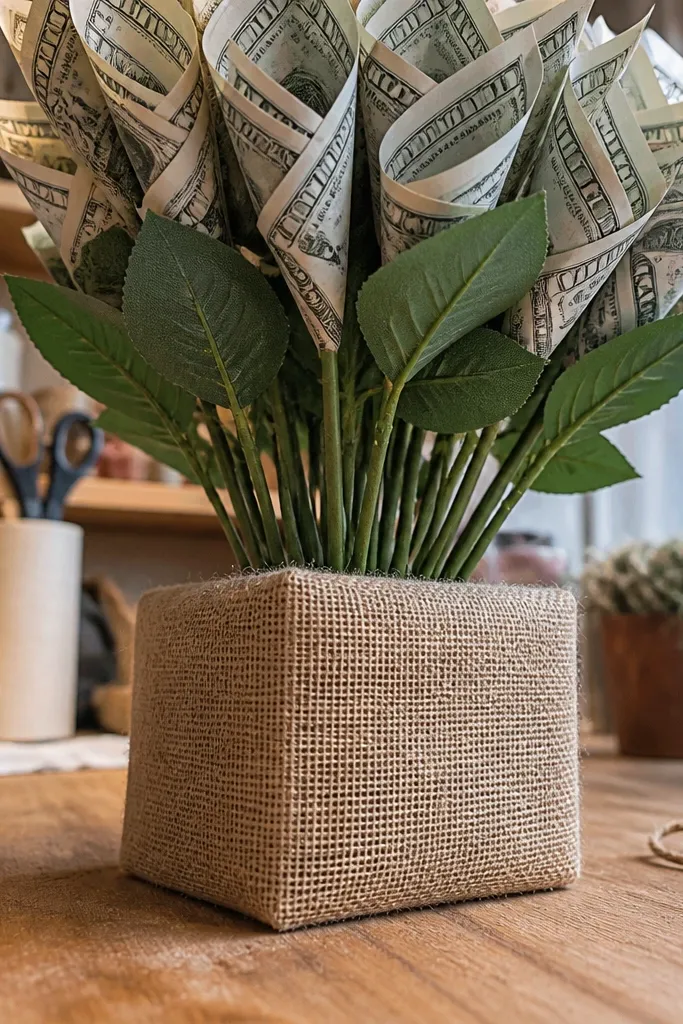
Most first attempts fail because the base is too flimsy. When the bouquet wobbles, folded bills shift and your “petals” stop looking uniform. A foam block gives you depth and keeps each money stem at a consistent angle. Burlap (or coarse linen fabric) hides the foam and makes the whole bouquet read cozy, not plastic. This is easiest for beginners and works for desk displays, gift tables, and small hand-held bouquets.
Cut a foam block to about 4 x 4 x 6 inches for a medium bouquet, then round one edge slightly so it’s comfortable to hold. Wrap the entire block in burlap, pulling tight and securing with hot glue at the back seam. Insert your main stems first, spacing them like a fan — leave a little air between stems so tissue and leaves can fill gaps. Only after the stem layout looks right do you attach folded money pieces so you can adjust angles without ripping glue.
Editor's noteBefore gluing, dry-fit your stems into the foam and step back every 20 seconds — spacing mistakes are easier to fix early.
Skip thisSkip the flat cardboard base; it flexes and makes bills droop.
3. Bill "fan fold" anchor that hides tape inside the crease

If you tape bills flat, they sag and show shiny adhesive spots. The fan fold gives each bill structure, like a small flower, and it keeps the face smooth. The trick is to hide the attachment point inside the fold so the front stays clean. This makes your money look like part of the bouquet design instead of something stuck on afterward. It’s a solid choice for bouquets that use 10-30 bills and need visual rhythm.
Take one bill and fold it lengthwise so the edges line up sharply, then crease hard with your fingernail. Open it slightly and fold the top third into a narrow accordion-like fan, pressing each pleat. Pinch the bottom fold to form a petal base, then wrap a thin floral wire around the base and twist it tight. Insert the wire into your stem or foam, then add a tiny dab of hot glue at the wire base — never on the front face.
Press pleats with a ruler edge so they hold their shape while you attach.
Avoid tape on the front of the bill; it catches light and looks messy.
4. Single-stem money spacing using a 2-finger rule
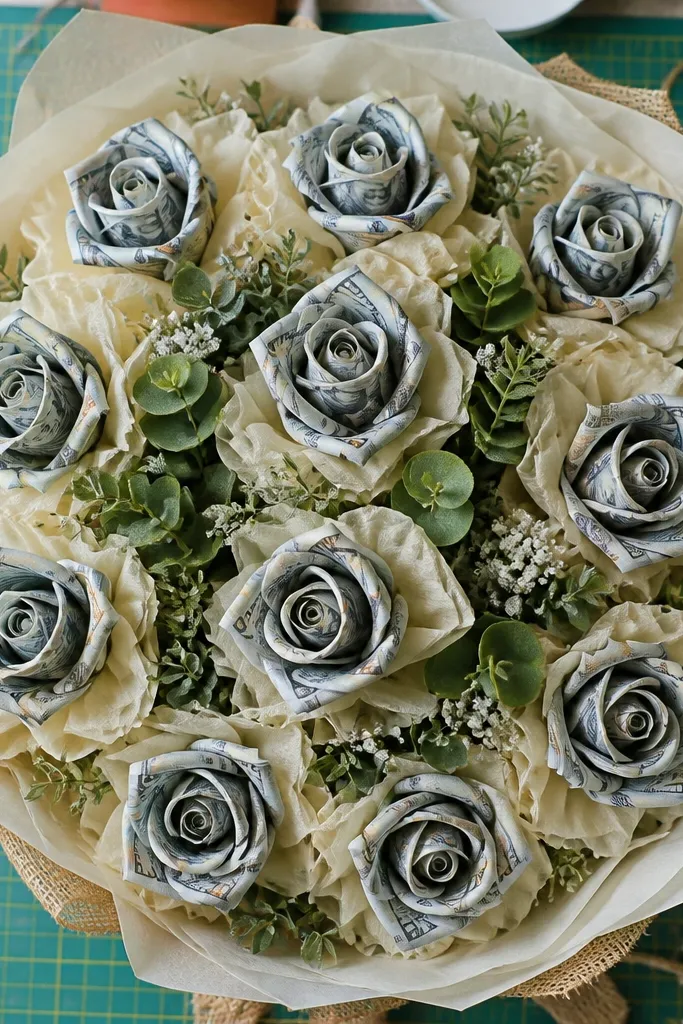
People bunch money pieces too tight. Then the bouquet looks like a pile of cash instead of a flower-like arrangement. The cozy look comes from breathing space — you want to see the texture of leaves and tissue between money petals. A simple spacing rule keeps the bouquet balanced: two fingers' width between each money “petal” cluster at the front. This works well when you’re using a mix of faux flowers, leaves, and 15-25 folded bills.
After you insert your main stems, place one folded bill petal near the front and hold it in place with a pin or toothpick. Measure spacing by holding two fingers between the bill and the next petal position. Adjust stem angles until you can maintain that gap around the front third of the bouquet. Only then glue or wire the money pieces so you don’t fight spacing after everything is attached.
Editor's noteBuild the front layer first, then fill the sides; it keeps the bouquet from looking lopsided.
Skip thisAvoid adding every money piece at once; you lose control of spacing.
5. Brown craft wire + green floral tape for realistic stems
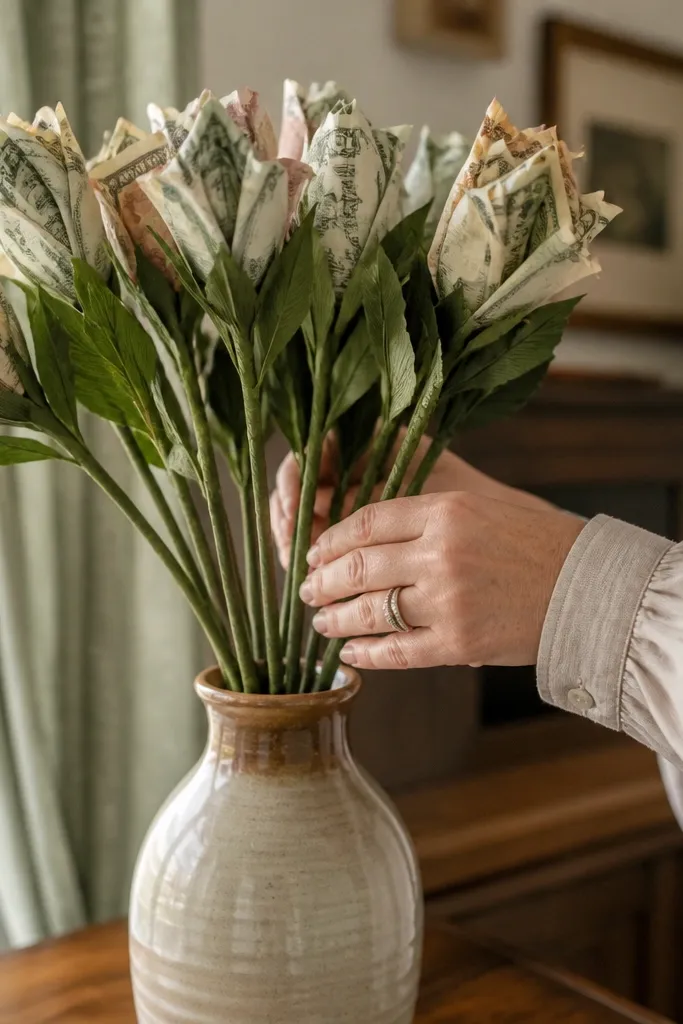
If your money petals look like they’re floating, the stems are usually too obvious. Brown craft wire wrapped in green floral tape creates a natural stem color and hides the attachment point. It also gives you control over angles so the bouquet looks intentional. This matters for cozy bouquets because warm tones and soft textures can still look messy if the “plumbing” shows. Use this when you want a slightly rustic vibe with leaves, burlap, and matte tissue.
Cut craft wire into 6-10 inch lengths depending on your bouquet height. Wrap floral tape starting at the top of the wire and stretch it slightly as you wind downward. When attaching a money petal, twist the wire base into a small loop, then insert into foam or secure to a main stem with tape. Cover any shiny glue spots with one more pass of floral tape so everything blends.
Editor's noteStretch floral tape lightly; if you stretch too much it tears and leaves gaps.
Skip thisAvoid using only hot glue to connect wire; it can pop off when the bouquet is moved.
6. Leaf coverage at the knot: cover tape, don't hide bills

Most messy bouquets show the knot and tape at the base. Leaves fix that instantly, but only if you place them correctly. Cover tape points and ribbon knots at the base, not over the front faces of bills. If leaves cover the money, the bouquet loses its focal point and looks cluttered. This technique is great for keeping a cozy, handmade feel while still looking neat from front-on.
Tie your ribbon first, then wrap a small strip of floral tape around the knot to lock it. Add two or three leaf sprigs so they overlap the knot area and extend upward just enough to frame the first row of money petals. Glue leaves to the back of the foam wrap so they don’t shift. Finally, add one tiny sprig to the center front to anchor the composition.
Editor's noteGlue leaves on the underside edges — you get coverage with less visible glue.
Skip thisAvoid covering the money petals with leaves; you want leaves to frame, not bury.
7. Ribbon width math: 1-inch ribbon for small bouquets, 2-inch for medium

Ribbon is where cozy bouquets either look gift-ready or look like an afterthought. Too wide and it dominates; too narrow and it disappears against tissue and burlap. A simple sizing guideline fixes this fast: use 1-inch ribbon for hand-held small bouquets and 2-inch for medium foam bases (around 4-5 inches wide). Choose brown, cream, or muted olive so it matches warm tones. This is also the easiest place to improve a first attempt without redoing your whole build.
Measure the bouquet base width and add 12-14 inches for the wrap plus bow tails. For a medium bouquet, cut about 40-50 inches of ribbon so you can tie a full bow without stretching. Wrap the ribbon around the base once, pull snug, and tie a firm knot. Create the bow loops by folding each side into equal arcs, then trim tails to 6-8 inches and cut the ends on a diagonal.
Editor's noteUse a hot glue dot to tack the bow center to the knot so it stays symmetrical while you carry it.
Skip thisAvoid tying a ribbon directly over bare foam or tape; it wrinkles and looks sloppy.
8. Matte photo corners for attaching bills to back cards (when you want reusability)
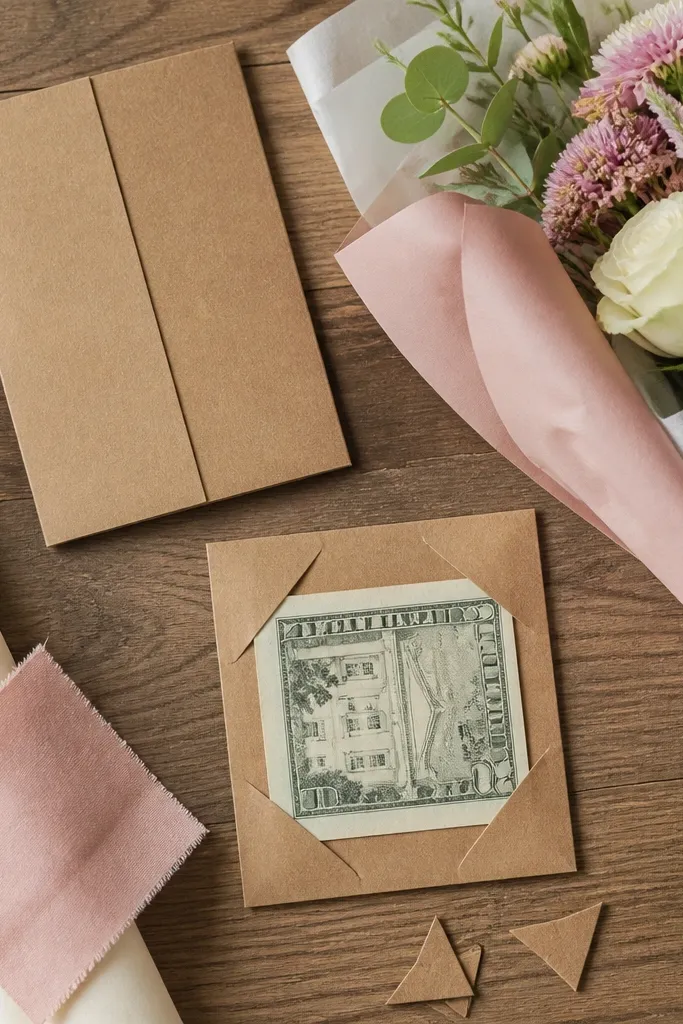
If you hate the idea of permanently gluing bills, use small photo corners or corner tabs to attach folded money to a backing card. This keeps the front clean and prevents tape residue on the money. It also means you can remove and reattach bills later for transport or gifting. The cozy part comes from using a warm backing (kraft cardstock) so the attachment stays hidden. This method fits bouquets meant for multiple occasions or gifts where you want the money to be usable without peeling glue.
Fold each bill into a petal shape, then place it on kraft cardstock cut into small rectangles (about 2 x 3 inches). Use two photo corners per bill petal — one near each side — so the bill stays curved but secure. Attach the card backing to your stem with hot glue only at the back edge. Position the finished petal so the cardstock edge sits behind leaves.
Editor's noteUse kraft cardstock, not white — white peeks out and kills the cozy warmth.
Skip thisAvoid clear tape all around the bill; it creates shine and leaves residue.
9. Tissue "cloud" filler: crumple small squares, not long strips
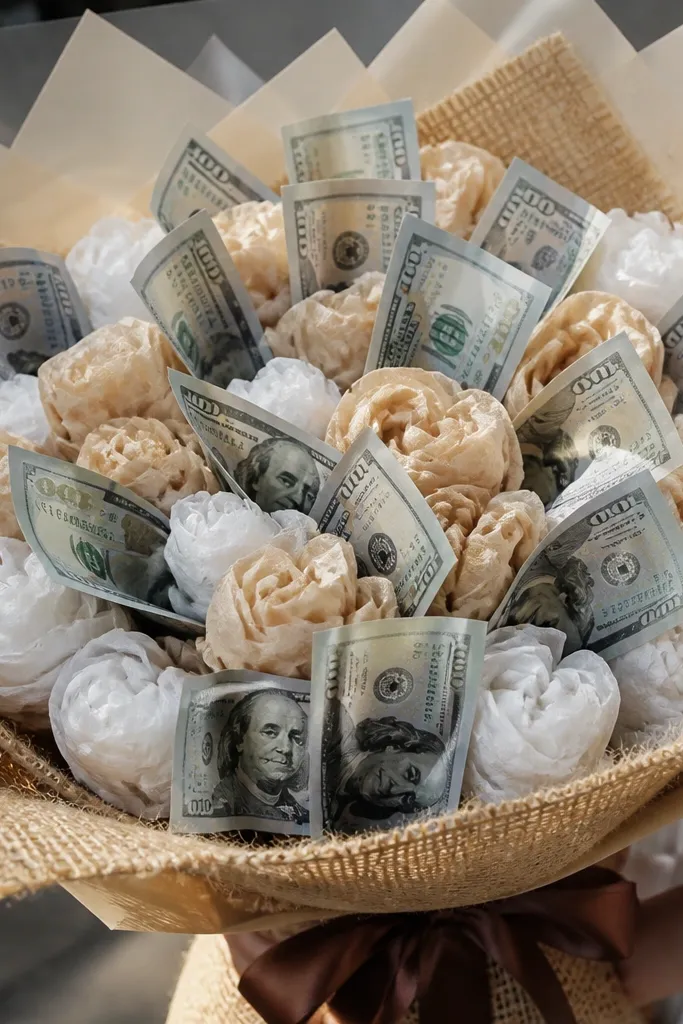
Long strips of tissue look like streamers. That’s the opposite of cozy. Crumpled squares create a soft, cloud-like filler that hides gaps and makes the bouquet feel full without adding bulk. It also makes the money pieces look more dimensional because the filler sits behind them. This is perfect when your foam base shows too much or when your leaves don’t cover every seam.
Cut tissue into 3 x 3 inch squares. Crumple one square lightly between your fingers, then pinch it into a small puff. Hot glue the back edge of the puff to the foam wrap or stem bundle, leaving the front face fluffy. Build in layers — start behind the money petals and move outward so the filler frames the front layer.
Editor's noteKeep puffs small; big tissue lumps look like stuffing instead of filler.
Skip thisAvoid taping long tissue strips across the bouquet; they flatten and look cheap.
10. Rustic faux eucalyptus placement: three points, not a scatter
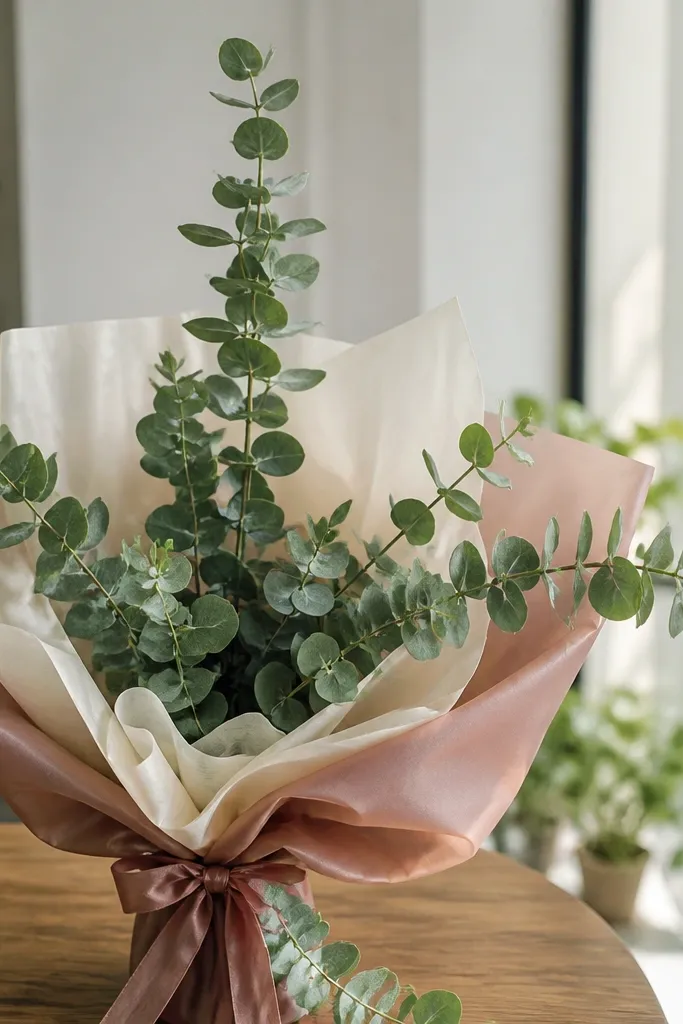
Eucalyptus sprigs look great in cozy money bouquets, but scatter placement makes everything feel random. The better approach is to place them in three directions so the bouquet reads like a single shape. Think of it like a tripod: one sprig points up, one sweeps outward, one anchors down toward the ribbon. This gives structure and makes your money petals look intentional. It’s ideal when you’re using warm wraps and want a slightly rustic, calm vibe.
Insert or wire one eucalyptus sprig into the center back of the foam base, angled upward. Add a second sprig into the left side, angled outward about 30 degrees. Add a third sprig on the right side, angled downward toward the ribbon. Glue or tape only the base contact points, then fill the space between those sprigs with small leaves or tissue puffs so the bouquet stays cohesive.
Editor's noteTrim sprigs to different lengths (short, medium, long) before attaching so you don’t end up with a flat top.
Skip thisAvoid scattering sprigs evenly all over; it kills the shape.
11. Bill bow fold for the center: one statement piece, not ten identical ones

When all bills look identical, your bouquet looks like a repeating pattern instead of a gift with a focal point. Cozy bouquets need one center statement — a larger, slightly different money shape — while the rest stay consistent. A bill bow fold does that without feeling flashy. It also makes the bouquet look styled even if your leaf coverage is simple. Use this when you’re making a medium bouquet and want the center to catch the eye first.
Pick one bill for the center and fold it into a bow: fold in half lengthwise, then fold the two ends back toward the center to create symmetrical loops. Press creases firmly and pinch the middle tight. Twist a short piece of floral wire around the pinch point and insert into the foam at the front center. Surround it with your standard fan-fold money petals, keeping their spacing consistent so the bow stays the focal point.
Make the center bow slightly taller than the surrounding petals so it reads as the top of the bouquet.
Avoid making every bill the same big bow; it makes the bouquet heavy and flat.
12. Trim ribbon tails with a V-cut so they don't fray and curl
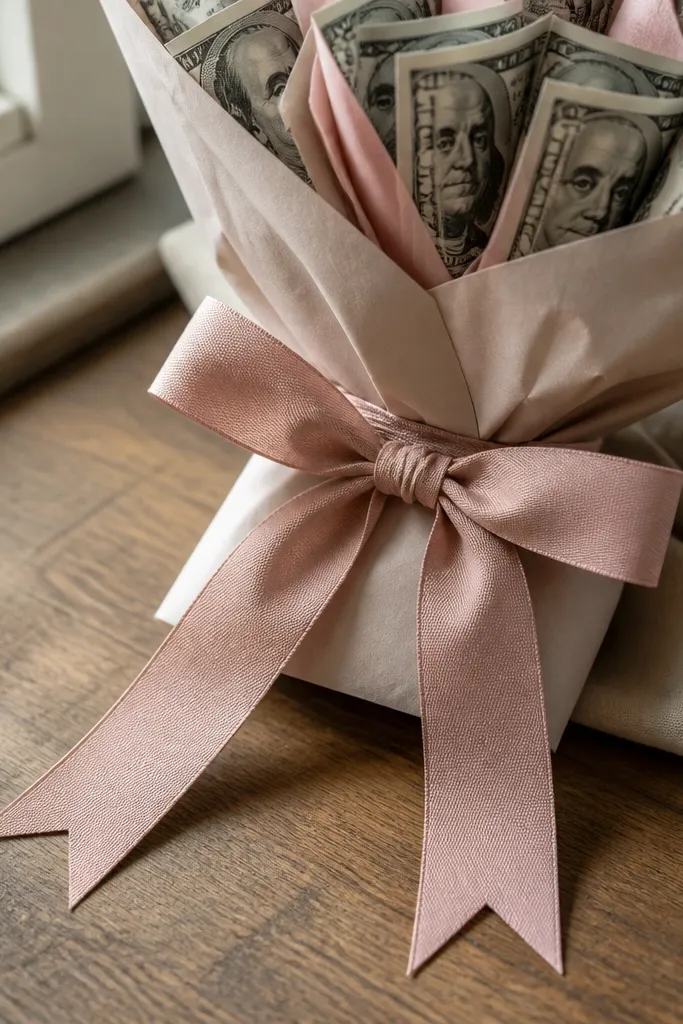
Ribbon tails that fray or curl ruin the cozy look fast. A clean V-cut keeps tails neat and helps them lie flatter. This matters because the base is what people grab when they hand the bouquet over. If your ribbon looks messy at the ends, the whole thing reads unfinished. This fix takes minutes and makes the bouquet look more gift-ready, even when the rest is DIY.
After tying your bow, trim tails to 6-8 inches. Cut a V shape off the very end so there’s a pointed tip rather than a straight fray line. If the ribbon is satin, seal the cut edge with a tiny touch of clear fabric glue or careful heat sealing on the edge. Let it dry flat before you move the bouquet so the tips settle into place.
Editor's noteCut tails after the bow is tied, not before; the knot changes the effective length.
Skip thisAvoid leaving long tails that sweep over the money petals; they tangle and hide the bills.
13. Hot glue discipline: glue only at foam contact points
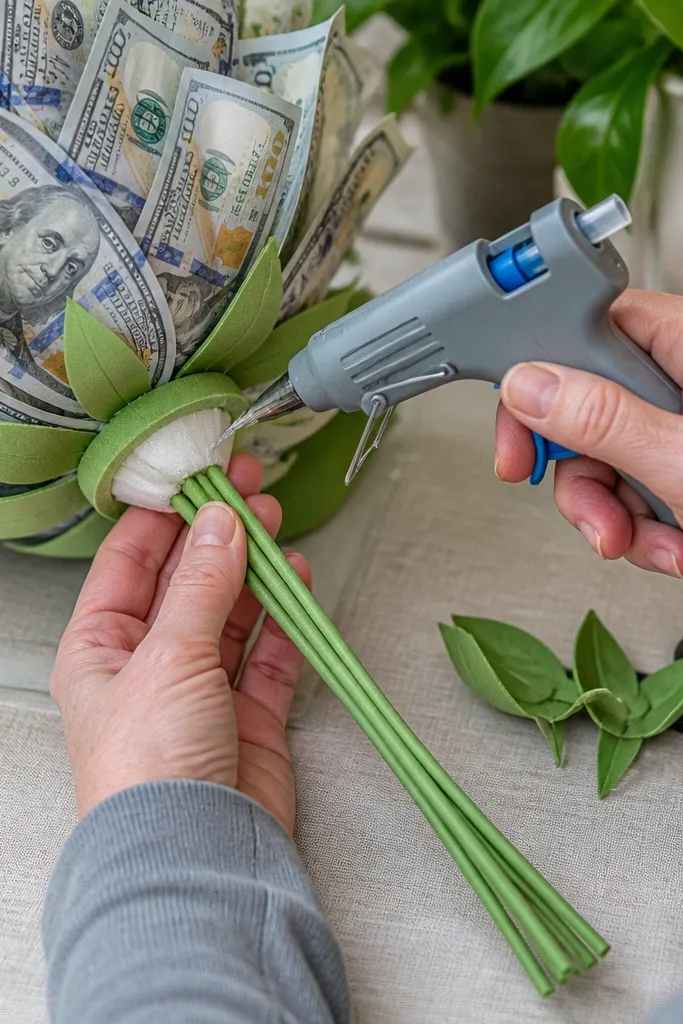
Hot glue blobs are the quickest way to make a money bouquet look messy. If glue shows on the front of bills or on the shiny face of faux flowers, it reads sloppy. The cozy look needs clean fronts and hidden attachments. Glue only where materials meet — foam to tape, stem to wire, leaf to underside edge. This keeps the bouquet tidy and prevents glue strings from catching on tissue and ribbon.
Plan your attachment points before you glue — touch the bill petal to the foam and mark the contact spot mentally. Apply a small dot of hot glue at the contact point, then insert the wire or stem and hold for 5-10 seconds. Remove excess strings immediately with a quick tug while glue is still warm. Finish by covering any tiny glue edges with a leaf or a tissue puff so nothing shiny stays exposed.
Use a low-temp glue gun for smaller paper folds; it makes cleaner edges and reduces scorching tissue.
Avoid gluing across the face of the bill or wrapping tape over glue blobs.
14. Color control with one accent metal: brown or brass, not both
Mixing too many metal tones makes cozy bouquets feel confused. If you use brown ribbon and also add bright gold picks, the money can start looking like a mismatch of craft supplies. Pick one accent metal tone and stick to it: brown leather-like ribbon, brown wire, or a single brass-toned element. This keeps the money presentation warm instead of flashy. It’s especially important if your bills are newer and look crisp — contrast can make shine stand out.
List your visible hardware: ribbon color, wire color, any faux flower centers with metallic paint, and any clip-on decorations. Choose either all-brown or all-brass for those elements. Swap anything that conflicts — for example, replace gold binder clips with brown clothespins or remove metallic picks entirely. Then add one small matte texture layer (burlap or matte tissue) so the bouquet doesn’t look glossy overall.
Editor's noteIf your faux flowers have gold glitter centers, paint over them with matte acrylic in a warm brown.
Skip thisAvoid combining shiny gold accents with matte burlap and expecting it to look cozy.
15. Budget-friendly faux florals: matte petals in 3 sizes, not one huge spray

A single big floral spray pushes the money aside. Cozy bouquets need layered texture so bills look like they belong. Use matte faux florals in three sizes: one larger bloom near the center, medium blooms around the outer ring, and tiny buds near the ribbon. This creates depth without making the money feel crowded. Choose subdued colors like dusty rose, muted mauve, or sage so the warm wrap does the heavy lifting.
Pick faux flowers with flat, matte petals instead of glossy ones. Trim stems so the largest bloom sits slightly higher than the money center, then place it at the front center of your foam base. Add two medium blooms on left and right, angled outward. Fill the top gaps with tiny buds and a few leaf sprigs so the money petals stay visible and framed.
Editor's noteIf your faux stems are too thick, shave foam with a knife and insert the stems at a slant for cleaner angles.
Skip thisAvoid one giant bouquet spray; it makes the money look like filler.



