
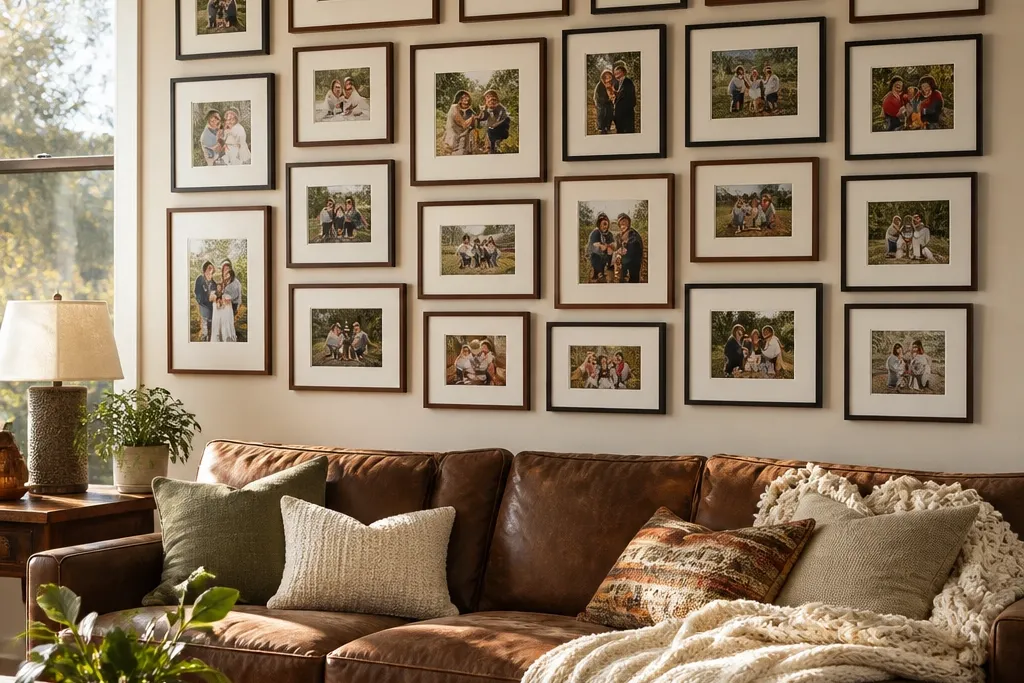

1. Warm Wood Frame Grid With Cream Mats
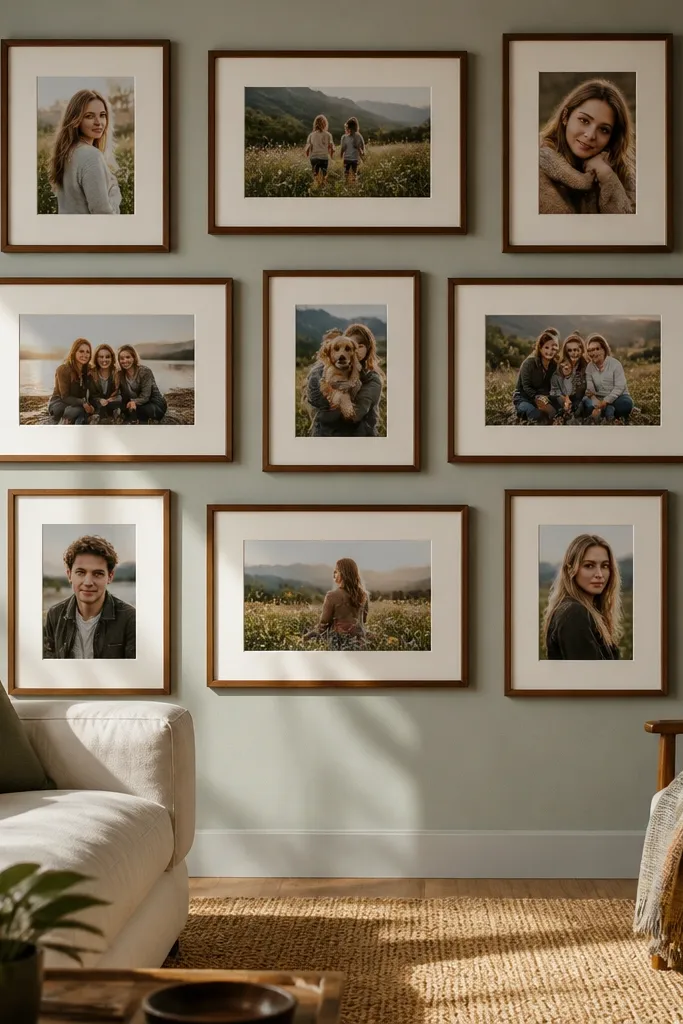
This is the “cozy but clean” option. A warm wood frame grid makes the wall look finished because the frame tone repeats and the cream mats create a soft buffer around every image. Use mostly portrait photos or landscapes with people — the mat makes faces and warm scenes pop without harsh contrast. It also hides small print size differences, since the mat standardizes the look. If your living room gets lamp glare, matte prints inside these frames keep the collage readable from across the room.
Start by choosing a grid footprint, like 2 across by 3 down, and pick frames that have the same outer width. Cut or order prints to fit the mat openings, then keep mat color consistent across all frames (cream or warm white). Lay the frames on the floor, measure the full width and height, and mark the center point on the wall. Hang the middle frame first, then use a level and the same spacing between frames for the rest.
Use spacers or painter’s tape strips to keep gaps consistent while you hang.
Don’t mix black frames with warm wood in the same cluster unless you repeat both colors deliberately.
2. Overlapping Polaroid-Style Corner Cluster
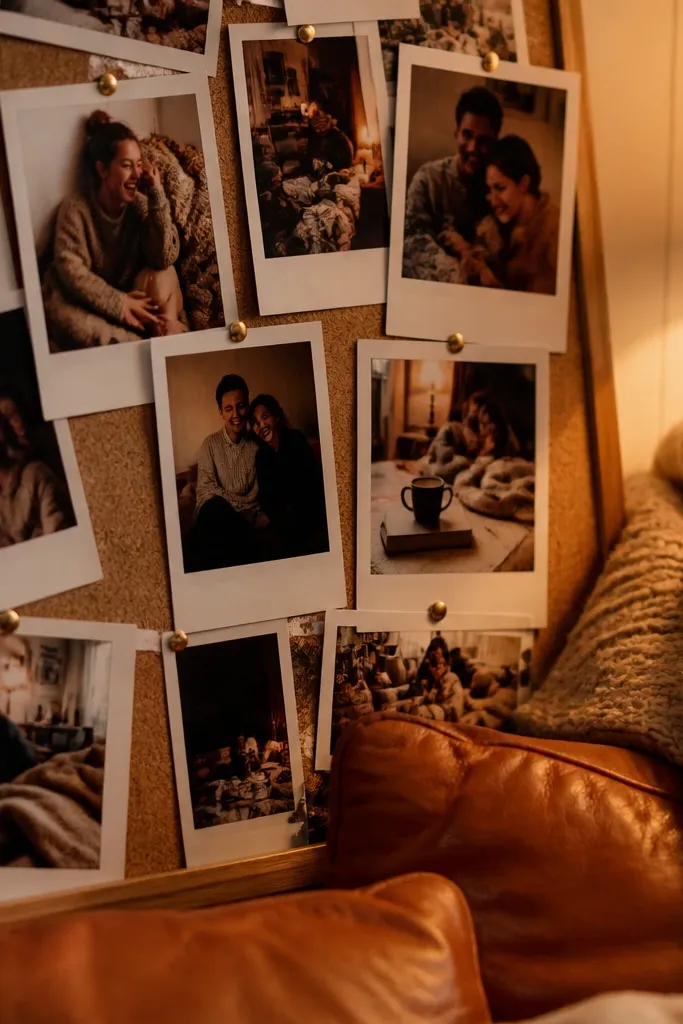
This layout feels instantly cozy because it looks like memories laid out on a table, then pinned up. Overlap creates depth, so the collage doesn’t look flat. Use photos with warm indoor lighting, blankets, coffee mugs, and candid moments — the white borders give them a gentle, nostalgic frame. Keep the cluster in one corner of the wall so the rest of the wall stays calm. The overlap also forgives minor alignment mistakes because the eye reads the cluster, not each exact edge.
Print photos with a border look, then trim them to a consistent size like 4x6 with a white margin. Arrange them on the wall starting with a slightly tilted “anchor” photo in the top position. Overlap each next photo by about 1/4 to 1/2 inch so edges kiss but don’t cover faces. Tape the arrangement, then swap tape for removable hooks or small picture nails one photo at a time.
Editor's noteUse the same direction for tilt (all slightly clockwise or all slightly alternating) to keep it from looking messy.
Skip thisDon’t overlap so much that you block faces or key objects in multiple photos.
3. Gallery Strip Along the Sofa Rail
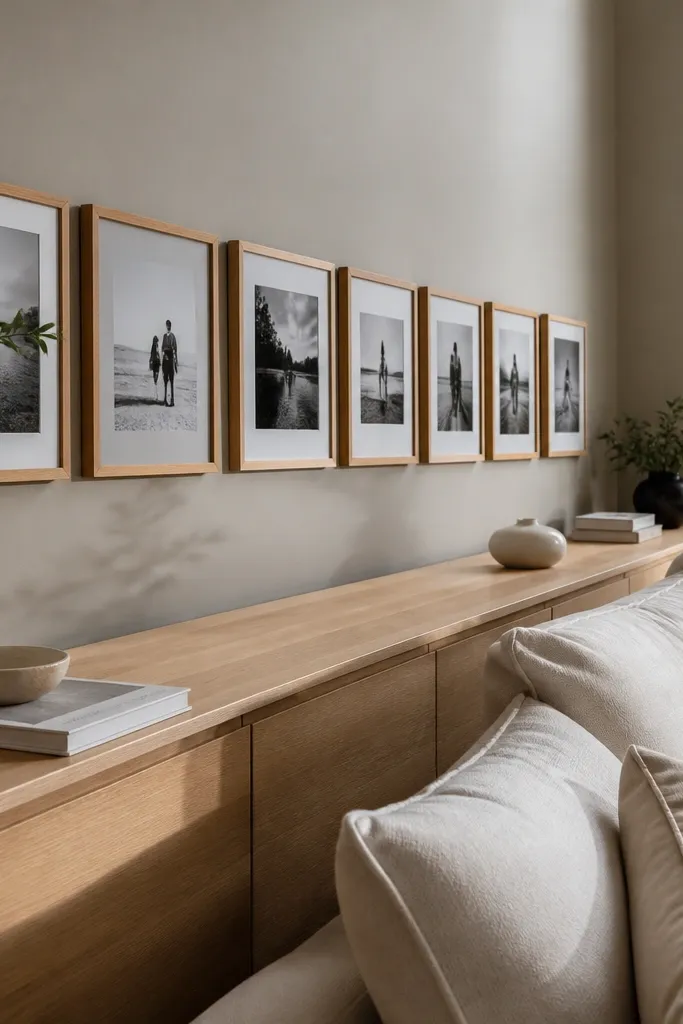
If your living room has a sofa and a long blank wall, a gallery strip makes the whole space feel styled without overwhelming it. The long horizontal line visually ties together the room, and smaller frames keep the collage from looking heavy. Choose a limited palette: wood frames with black-and-white photos, or gold frames with warm color photos. This works especially well when you want the collage to complement a rug and throw pillows instead of competing with them. For cozy, pick images with soft light and warm tones — the strip format makes those scenes feel like a continuous story.
Measure the wall width above the sofa and decide how long the strip should be — aim for about 60-75% of the sofa width. Use frames that are the same height, then vary only photo orientation (some portrait, some landscape). Place the first frame near the center mark, then place the rest so the gaps are equal, like 1/2 inch between frame edges. Mark each hanger point lightly, then hang from the center outward so the strip stays straight.
Use a paper template for each frame so your hanger points land consistently.
Don’t put the strip too high — if the bottom row is above eye level by a lot, it stops feeling cozy and starts feeling decorative.
4. Twelve-Photo Hexagon Cluster
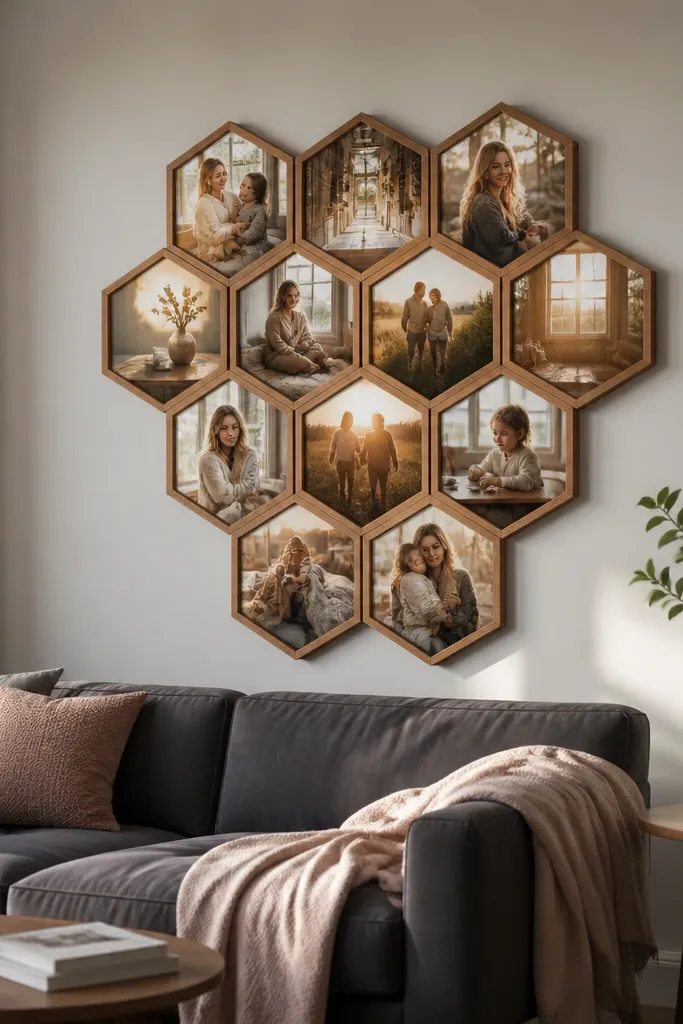
A hexagon cluster looks intentional and modern, but it still feels warm because the photos touch in a pattern. The honeycomb layout gives you density without the chaos of a random wall. It’s great for people who have a lot of photos but don’t want a standard grid. Choose frames in one finish and use matte prints so the edges don’t glare. This arrangement also makes the collage read as one object, which is exactly what a cozy living room photo collage needs.
Pick a base frame size, like 5x7, and decide the overall height of the hexagon. Lay out six frames around the center, then add six more to complete the honeycomb look, leaving tight spacing of about 1/8 to 1/4 inch. Mark the center point on the wall, then place the center frame at that mark. Work outward, measuring from the center each time so all angles stay consistent.
If your frames don’t match perfectly, use mats to standardize outer edges before you hang.
Don’t use glossy prints — the reflections make the hexagon pattern look messy instead of crisp.
5. Floating Shelf With Mini Frames and Hinged Photos
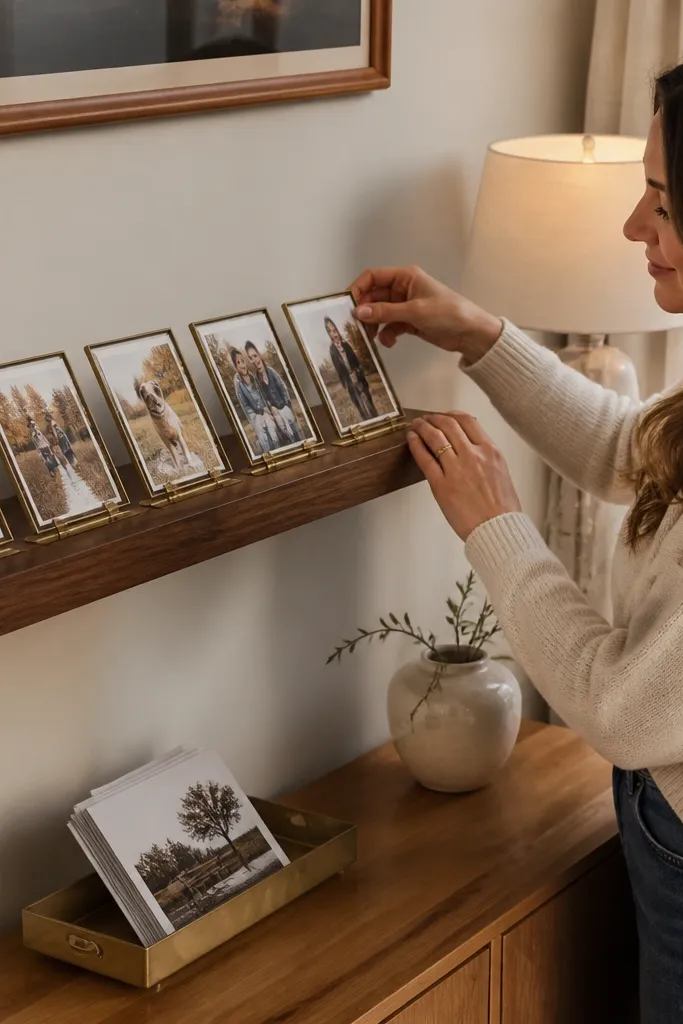
This collage style warms a room because it has dimension. A floating shelf holds mini frames and lets you lean a few prints at angles, so your wall looks lived-in. It’s also practical: you can swap seasonal photos without re-measuring the whole layout. Use small frames with warm finishes, and include a couple of slightly taller pieces to create rhythm. The shelf line also breaks up the wall, so the collage doesn’t feel like it’s fighting with furniture above or below.
Install a shelf at a comfortable height above the sofa, leaving room to sit and look at it. Use a group of mini frames with the same outer dimensions, plus two frames that are slightly taller for a focal point. Lean a few prints against the back of the shelf using small frame stand-offs or folded photo corners. Secure anything that can slide with museum gel pads or non-slip shelf liner.
Use museum gel for leaning frames so you avoid visible tape marks.
Don’t place the shelf so low that it blocks sightlines to the room’s main decor.
6. Clothesline Photo Wall With Warm Clothespins
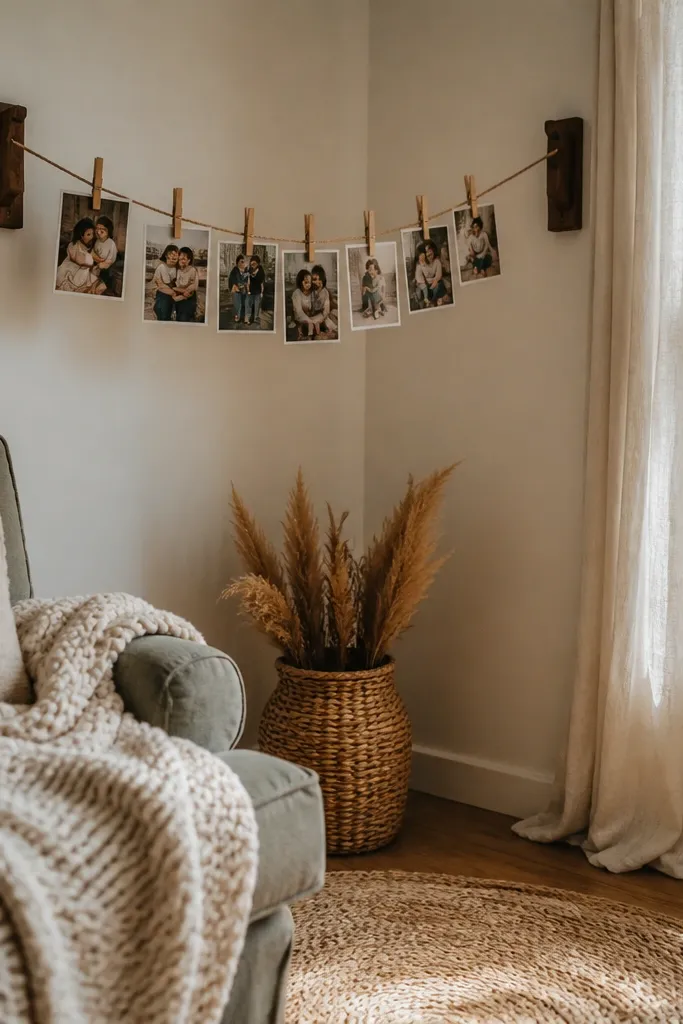
A clothesline photo wall is cozy because it looks casual and hands-on. The warm wooden clothespins add texture, and the line gives your photos a soft, slightly imperfect rhythm. This works best in living rooms that already have textiles — knit throws, linen curtains, or a chunky rug. Use matte prints and keep the photo sizes consistent so it looks styled, not like a craft project that spilled onto the wall. It also lets you rotate photos easily when you want the collage to feel current.
Mount two small anchors on the wall and run a line between them, leaving a gentle sag. Print photos to one size, like 4x6, then punch small holes near the top border or use photo corners designed for hanging. Clip photos with wooden clothespins, spacing them so the line stays balanced. Tie the line tight, then test the sag by gently pushing the center with your hand before fully tightening.
Editor's noteChoose one string color (natural jute or dark brown) so the background doesn’t steal attention from the photos.
Skip thisDon’t use glossy prints — the reflection on the line makes the wall look shiny and less cozy.
7. Fabric Backdrop Photo Wall With Burlap or Linen
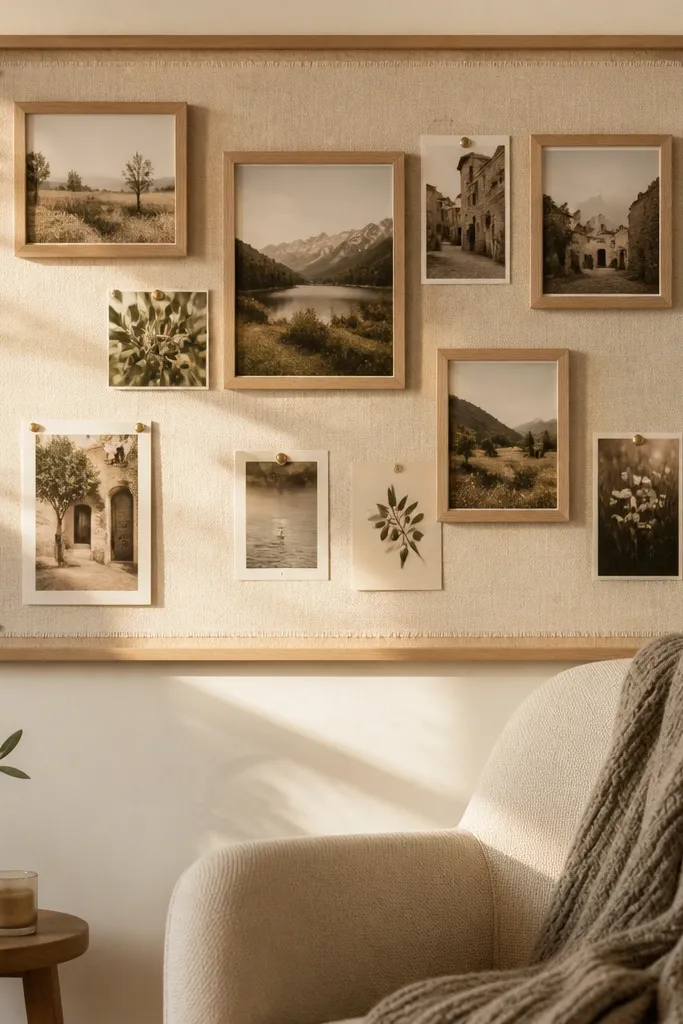
A fabric backdrop makes a photo collage feel soft and warm even if you use simple frames. Linen or burlap adds grain that hides wall imperfections and gives the photos a cozy “homey” stage. You can pin photos directly or layer them with small frames for a mixed look. This style is ideal for apartments and rentals because you can tension the fabric with a removable system and keep the photos lightweight. It also makes the collage feel more intimate than straight frames on a painted wall.
Stretch linen or burlap over a backing board or directly mount it with removable adhesive hooks along the edges. Decide your collage footprint, then pin or clip prints onto the fabric using small binder clips or thumbtacks with flat heads. Add 2-3 small matching frames to anchor the layout so it doesn’t look purely random. Keep photo spacing consistent by using one “pin-to-pin” measurement like 2.5 inches.
Iron the fabric flat first — wrinkles make the whole wall look unplanned.
Don’t pin too close to the fabric edges; it can warp and pull the collage out of alignment.
8. Oval Frame Cluster With Warm Neutral Photos
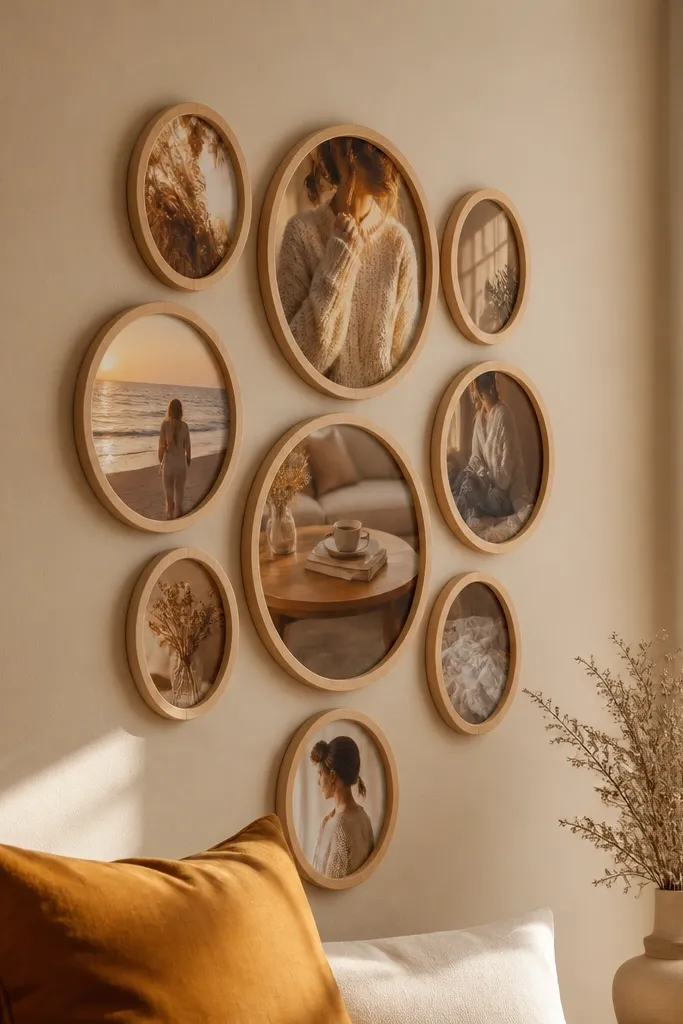
Rounded frames calm the wall. An oval frame cluster feels more inviting than square frames because the shape softens the geometry of a living room. Use warm neutral photos — cream sweaters, golden hour light, wood surfaces — because the oval openings keep the look cohesive. This idea also works well if you want a smaller collage that still reads as intentional. The key is to keep frame finishes consistent and let the oval shapes do the visual work.
Pick oval frames with the same finish and similar outer sizes, like 8x10 and 9x12. Arrange one larger oval as the anchor, then place two medium ovals slightly above and to the sides. Mark the wall with light pencil dots for each hanger, then hang the anchor first so the cluster sits level. Add your photos inside after you confirm the spacing from the sofa viewpoint.
Editor's noteUse matte photo paper in ovals so reflections don’t show inside the rounded glass.
Skip thisDon’t mix multiple frame shapes in the same small cluster; it reads chaotic, not cozy.
9. One Big Center Canvas With Surrounding Photo Frames
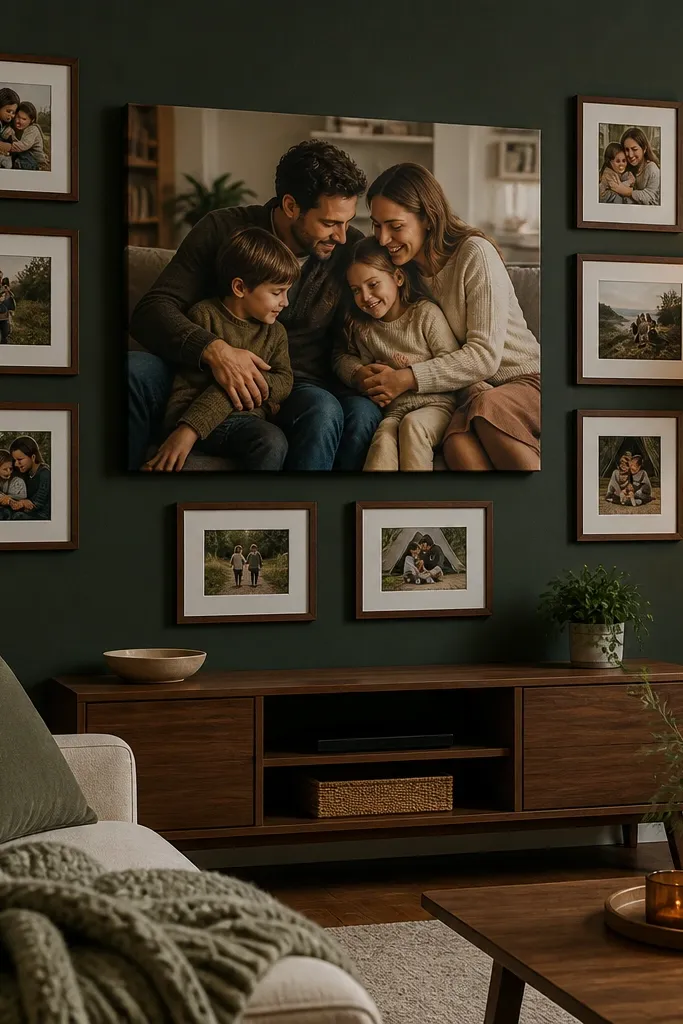
This is a cozy living room photo collage layout for people who want a focal point. The big center piece pulls your eye first, while the smaller frames act like supporting characters. Choose one photo with strong composition — a family moment, a scenic view, or a warm interior shot. Then surround it with 6-8 smaller frames in a matching finish. This works especially well when you have a statement piece in the room, like a bold rug or a large plant, because it gives you a clear visual anchor.
Choose a center canvas size, like 24x36, and build around it with frames that are consistent in width. Arrange the smaller frames in two rows that mirror each other, leaving equal gaps, like 1/2 inch between frame edges. Mark the center of the wall, hang the canvas at eye level, then align the frames using a level along the canvas sides. Secure each frame, then step back and check symmetry before you remove any guide tape.
Editor's noteKeep the smaller photos slightly darker than the center so the center photo stays dominant.
Skip thisDon’t pick a center image with messy clutter — the canvas will amplify it.
10. Book Page Collage With Photo Cutouts and Linen Tape
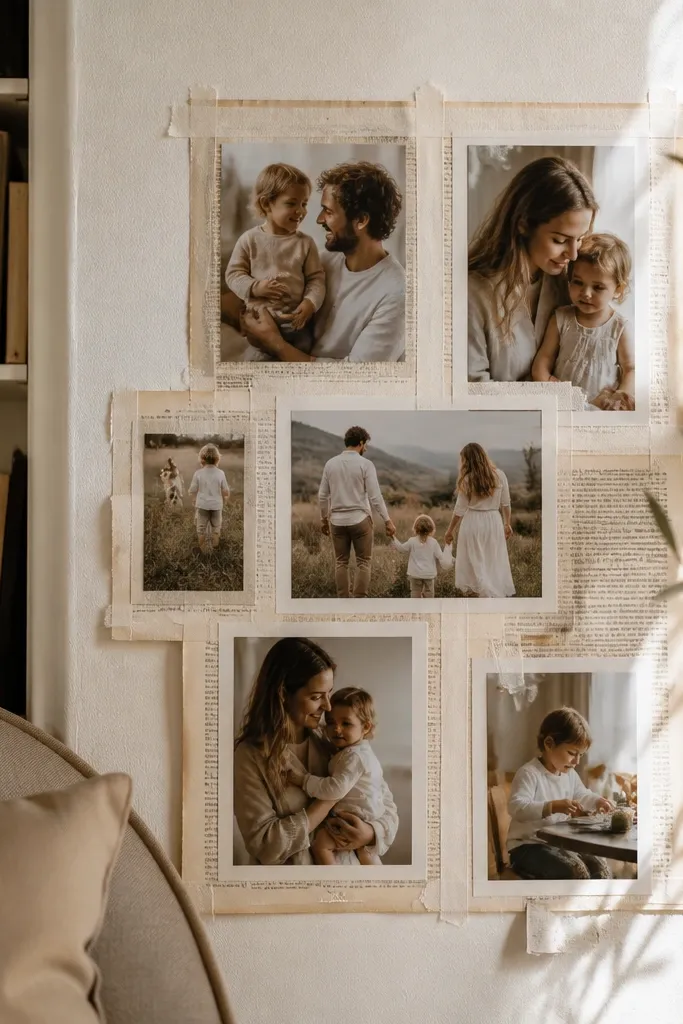
This one feels cozy because it adds paper texture. Using old book pages as the background makes the wall warmer without adding color chaos, and linen tape gives clean, handmade structure. Place photo cutouts in small clusters, then frame them with tape borders instead of glass frames. It’s a great option if you have lots of small prints or you want a softer look than traditional frames. The result reads like a scrapbook wall, but with controlled spacing so it looks styled.
Cut book pages into rectangles that match your photo cluster plan, like 6x8 or 8x10. Attach the pages to the wall or to a board using matte gel medium or removable wallpaper adhesive. Place photos on top, then tape around each photo edge using linen tape with crisp corners. Add one or two larger photo cutouts to create hierarchy, then press everything flat with a clean brayer or smooth cloth.
Use matte adhesive and matte tape — shiny stuff shows glare fast.
Don’t use thick tape layers under photos; it makes the paper ripple.
11. Mirrored Accent Frame With Photos Behind Glass
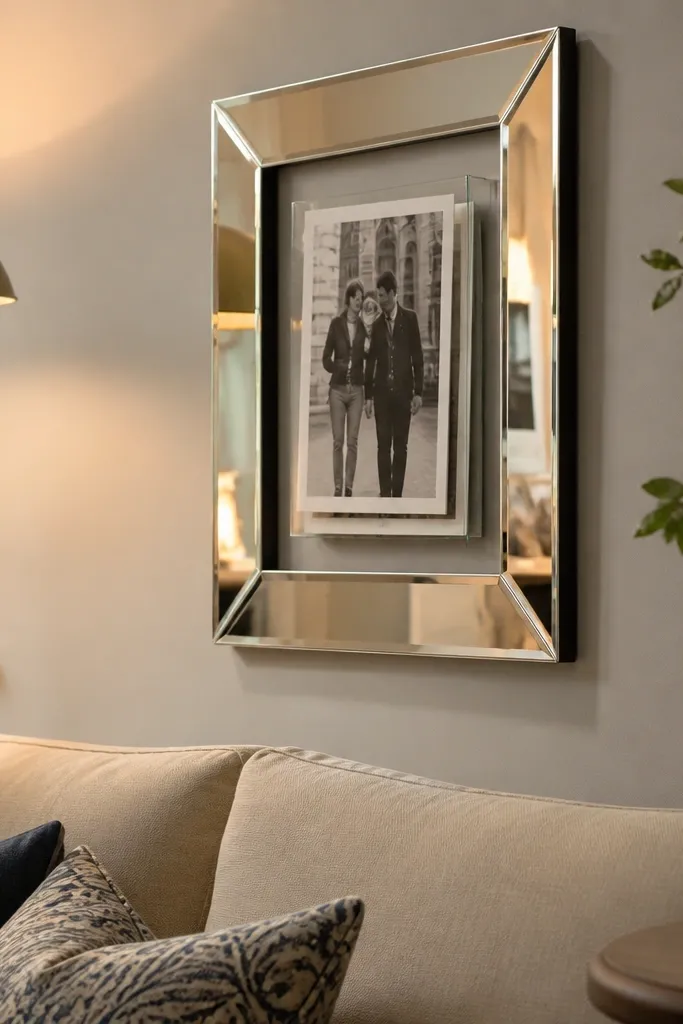
If your living room gets strong light, a photo collage with a mirrored accent can still feel cozy because it bounces light softly. Put a set of photos behind a single clear panel or shadowbox-style glass frame, then add one mirrored or silver-toned frame around it. The photos look organized but layered, and the glass adds depth. Choose warm photos with consistent exposure so the reflections don’t break the look. This is also a clever way to protect prints in homes with kids or pets.
Buy or build a shadowbox-style frame with a flat backing panel and clear front. Arrange photos on the backing using small photo corners so they sit flat, not wrinkled. Add a mirrored layer behind the photos if you want extra brightness, then seal edges according to the frame system. Hang the whole unit centered above a console or sofa, then keep surrounding decor minimal so the glass can read cleanly.
Editor's noteWipe glass with a microfiber cloth before sealing so fingerprints don’t show as smudges.
Skip thisDon’t place this near a direct lamp glare angle — the reflections can overpower the photos.
12. Rattan or Woven Frame Wall With Monochrome Photos
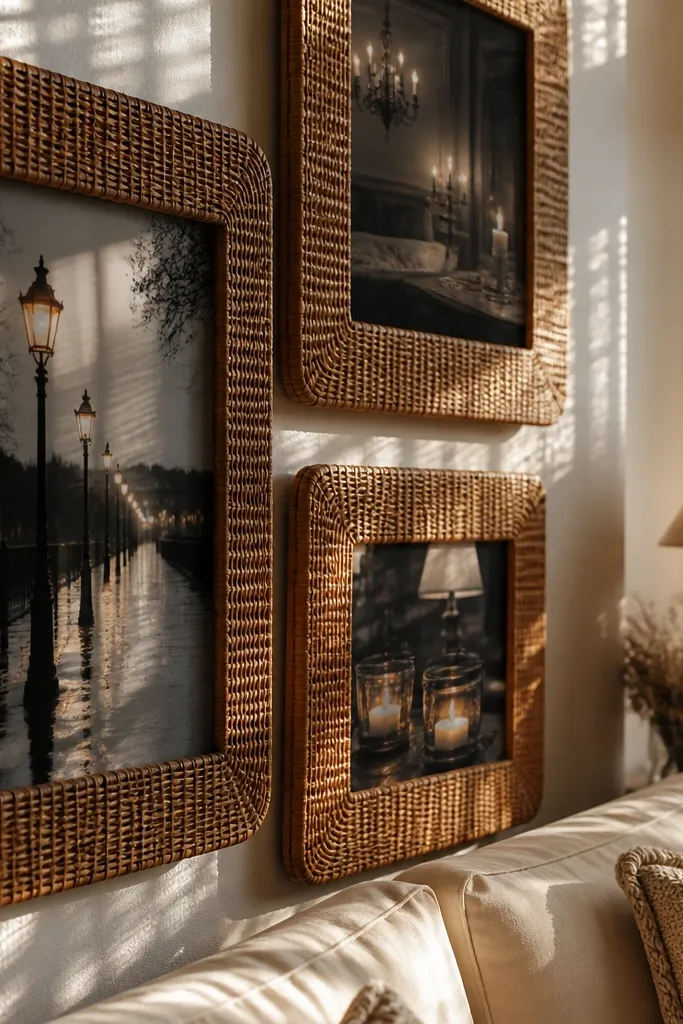
Woven frames add texture, and texture is what makes a cozy living room photo collage feel warm even when the photos are black and white. Choose monochrome photos with strong contrast and warm tones in the scene, like street lights, candles, or cozy interiors. The rattan texture brings softness without needing lots of color. Keep the layout simple — a 3x3 grid or a 2x4 strip — and repeat frame finish for consistency. This style looks great on white walls and also on darker walls because the weaving adds light texture.
Pick woven frames that have the same outer dimensions, then order or print photos to match the inner opening. Arrange a grid layout on the floor and check that the woven patterns don’t clash too much — consistency matters. Hang the first row, use a level, then hang the second row aligned to the first. Use hanging hardware rated for the frame weight and add wall anchors if your wall is drywall.
Use matte black-and-white prints so the weaving texture stays the star, not glare.
Don’t mix woven frames with glossy glass; the reflections fight the softness.
13. Mat-Only Photo Layout With No Frames
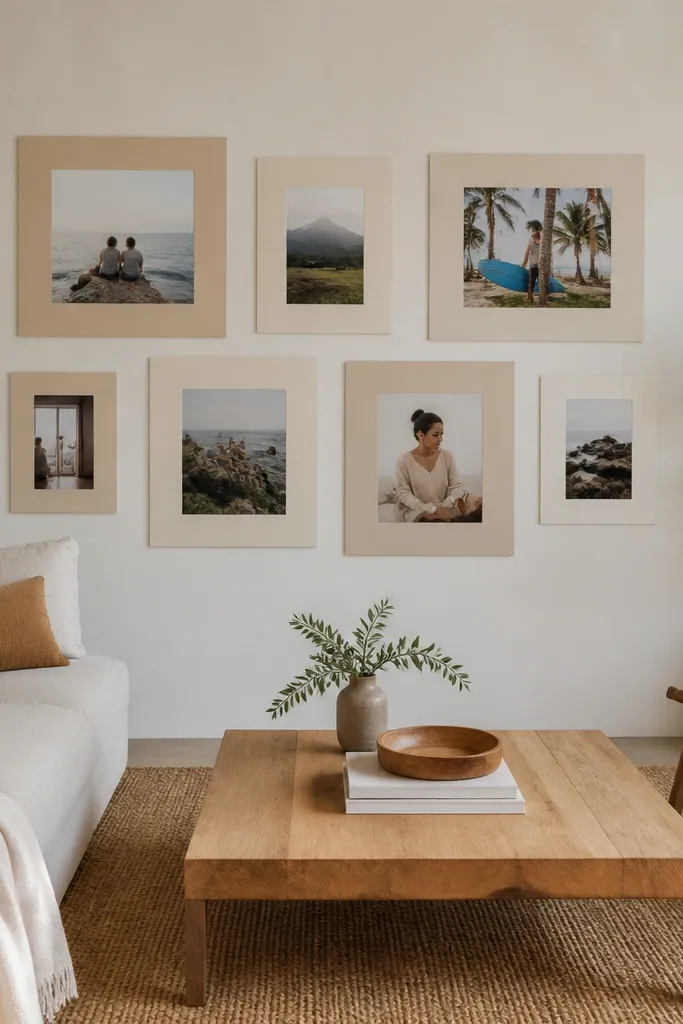
If you want the cozy look without bulky frames, mat-only mounting gives a clean, warm gallery effect. Cream mat board softens hard wall color and makes the photos feel like they belong in a gallery. This is also a smart option if you have uneven photo sizes because you can standardize with mat openings. Use this when you want the collage to feel airy and light, not heavy. The trick is spacing: equal gaps make it look intentional.
Cut or buy mat boards in one color and standardize outer size, like 8x10 mats for 4x6 prints. Mount prints onto the mat using photo corners or acid-free tape. Lay out a grid or staggered pattern on the floor, then measure the overall footprint. Attach the mats to the wall using picture mounts or hanging tabs, then add a light protective film if you’re using them in a high-sun area.
Editor's noteUse acid-free mounting tape so the photos don’t discolor over time.
Skip thisDon’t eyeball spacing; mat-only layouts show uneven gaps immediately.
14. Corner-to-Center Triangle Layout
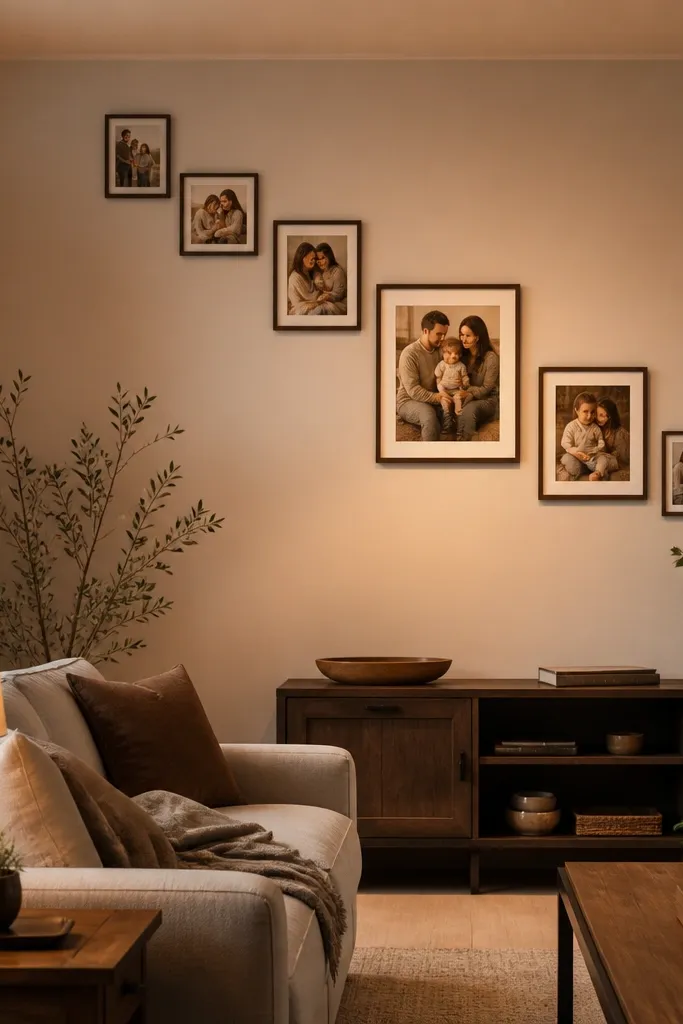
A diagonal triangle layout makes a wall feel dynamic and cozy at the same time. It creates a natural path for your eyes — from the corner up to a focal point near the center of the room. This is great for living rooms where the seating angle makes standard grids look awkward. Keep photos consistent in tone so the diagonal line reads as a single story rather than separate snapshots. Use warm frames and matte prints so the diagonal shape doesn’t look harsh.
Pick a focal point near the center of the wall, then choose a triangle footprint from that point down to one corner. Use 7-10 frames total, with the largest photo near the top point. Arrange frames on the floor, then transfer placement to the wall using painter’s tape outlines. Hang from the focal frame first, then add the rest along the diagonal ensuring equal gaps and a consistent frame width.
Editor's noteKeep the diagonal tilt subtle; a steep diagonal can feel “off” in a living room.
Skip thisDon’t mix frame widths; the triangle shape exaggerates differences.
15. Seasonal Color Blocks With Photo Squares
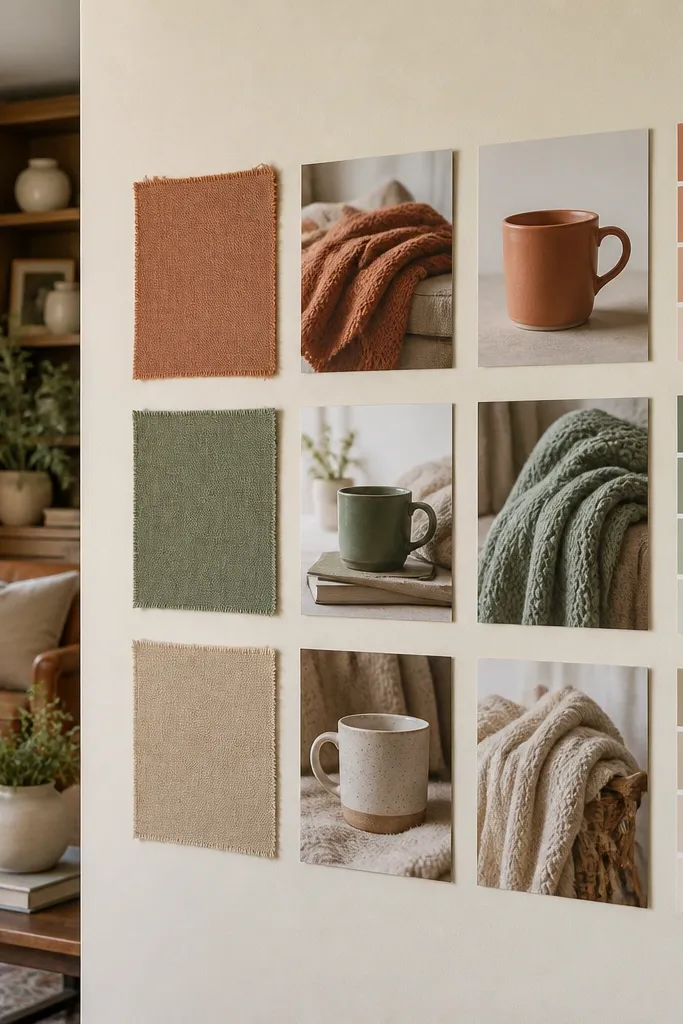
Color blocks make the collage feel warm even when photos vary. Use a few paint chips or fabric colors you already have in the room, then place photo squares inside that color rhythm. This style looks great with warm, cozy photos like blankets and mugs, but it also works with travel photos because the color blocks unify them. Choose matte prints so the color blocks stay soft. It’s a DIY-friendly option because you can redo the photos without repainting the whole wall.
Choose 3-4 warm wall colors that match your couch and rug palette, like terracotta, oatmeal, sage, and clay. Paint or apply removable color panels behind your photos in blocks, leaving consistent margins. Print photos to a uniform square size like 5x5 and mount them on thin foam board for a slight lift. Arrange the squares in a grid that follows the color blocks, then seal edges with small removable tabs so you can swap later.
Use painter’s tape to keep block edges crisp; pull it while paint is still slightly tacky.
Don’t use high-contrast colors like neon — it kills the cozy warmth.
16. Rope and Nail Photo Hang With Uneven Spacing
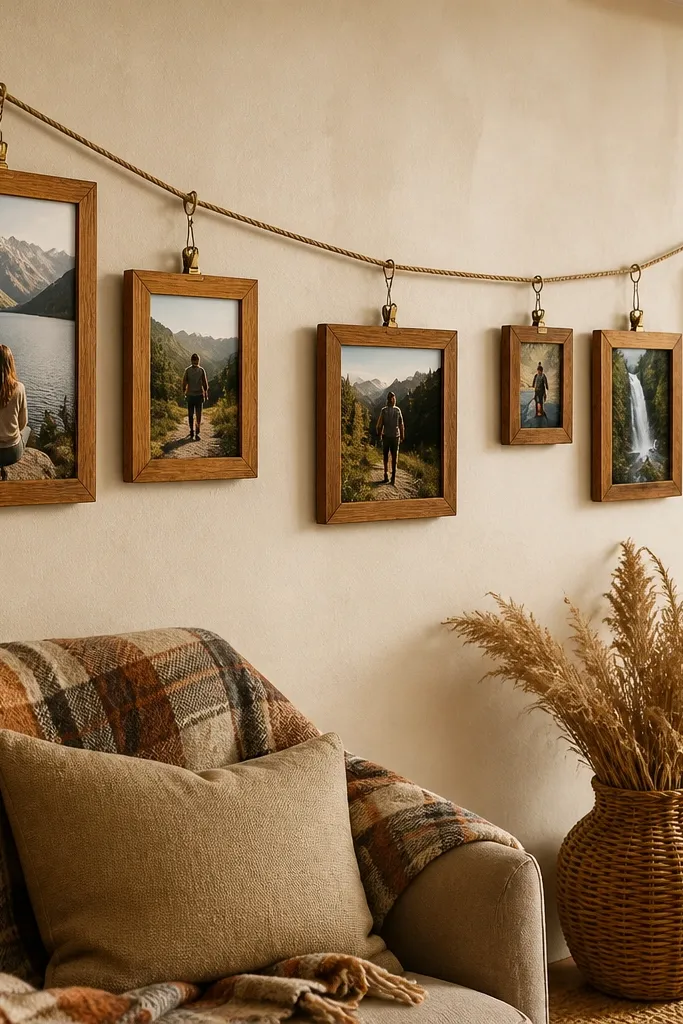
This is cozy because it looks hand-set and slightly imperfect. A rope-and-nail system creates texture, and uneven spacing makes it feel more organic than a strict grid. It works best with warm-toned frames or clip mounts, and matte prints to keep it soft. Use this style if your living room has a rustic or cottage vibe, or if you want warmth on a plain wall without adding bulky furniture. The rope also helps you hang photos quickly — you adjust by sliding clips.
Install two nails or hooks near the top corners of your chosen area, then string a rope between them with a gentle curve. Print photos in one consistent size, then use small clip mounts or clothespins to attach them. Space the photos with slight variation, but keep the top edges aligned within about 1/2 inch so it still looks intentional. Level the rope first, then clip and adjust until the cluster feels balanced.
Use a rope stain or warm twine color so it matches your wood decor.
Don’t let the rope sag unevenly; it makes the collage look lopsided.
17. Black Frame Mosaic With One Warm Accent Photo
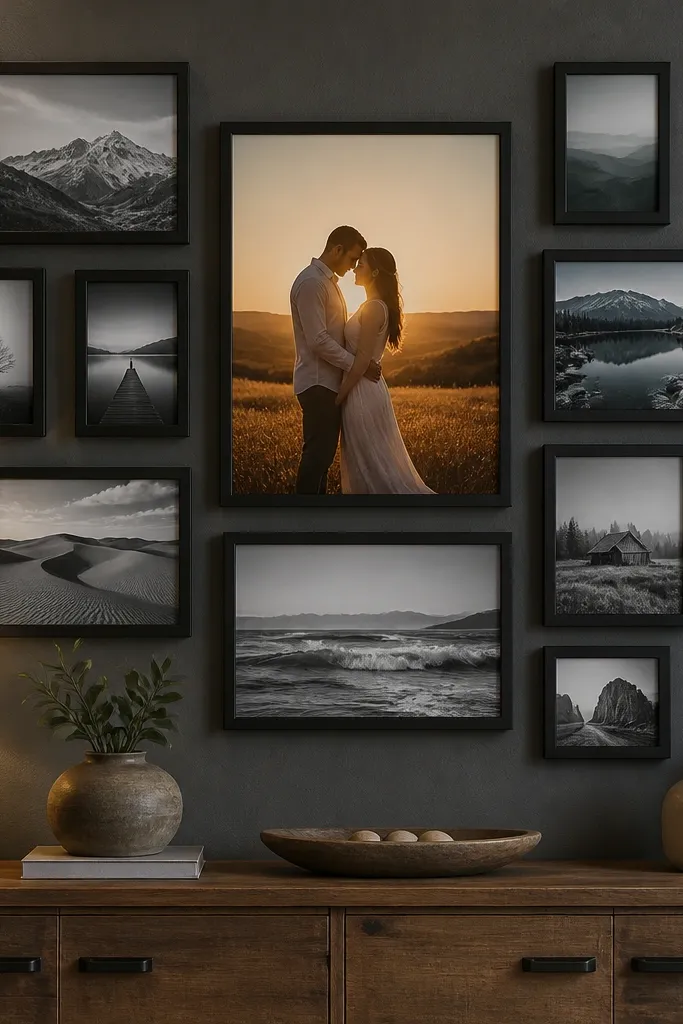
This layout gives you contrast and coziness at the same time. Black frames can feel cold, but the warmth comes from choosing one large, warm-toned accent photo — think sunset light, a cozy kitchen scene, or a family portrait with warm skin tones. The rest of the photos can be black and white or cooler tones to keep the wall from looking chaotic. A mosaic grid also makes your wall feel like a curated gallery when you keep the spacing consistent. It’s a strong option if your living room has black hardware, a dark TV stand, or black lamp bases.
Pick matching black frames with the same outer width, and decide your grid, like 3x4 or 4x4. Choose one photo to be larger than the rest, then arrange the mosaic around it so the larger frame sits at the center. Use equal spacing between frames, like 1/4 to 1/2 inch, and mark the centerline on the wall. Hang the center frame first, then work outward in rows to keep alignment tight.
Use matte black frames with matte photos; glossy finishes make reflections look harsh.
Don’t choose warm accent photos plus warm color frames all around — it turns into visual clutter.
18. Shadowbox Collage With Fabric Backing and String Lights
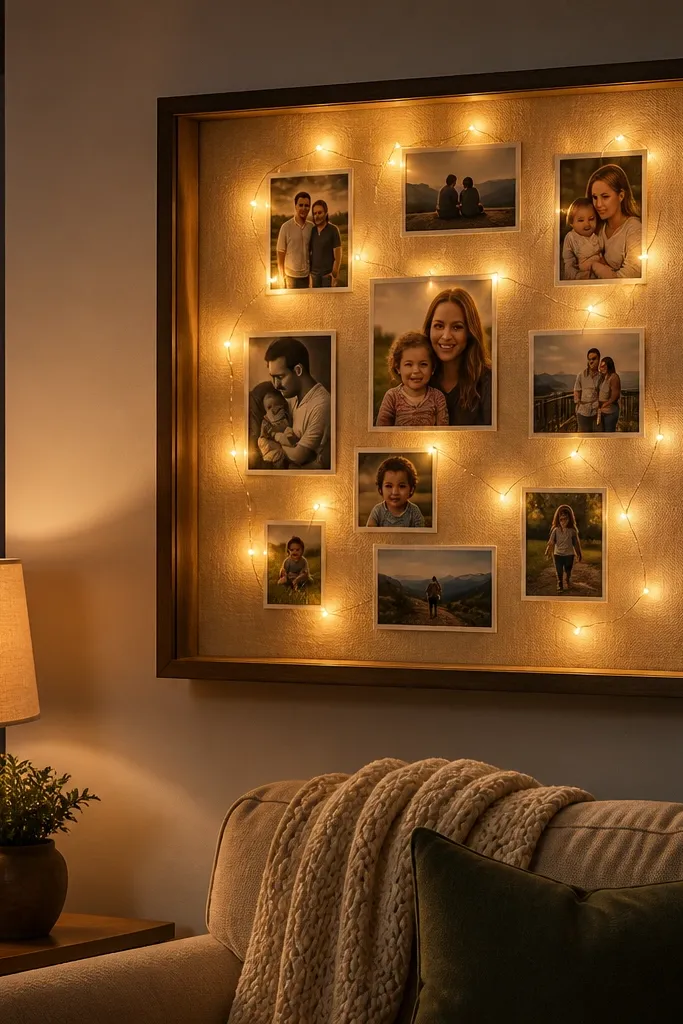
A shadowbox collage is cozy because it adds depth and a soft glow. Fabric backing hides the wall and adds warmth, while string lights create a gentle halo effect around the photos. This is a great choice for evenings — the collage looks like it’s lit from inside without using harsh overhead light. Use small prints and keep the layout layered, with a few photos angled slightly. It also protects your photos, which is helpful in busy living rooms.
Build or buy a shadowbox with a deep frame, then add a fabric backing panel sized to the inside. Arrange photos in a layered layout, securing them with photo corners so they don’t sag. Add warm white string lights along the back edges, then route the cord through a small hole in the frame hardware. Plug in, check brightness, then close the back panel and hang the shadowbox at eye level.
Editor's noteUse warm white lights on the lowest brightness setting so it reads cozy, not theatrical.
Skip thisDon’t crowd the interior; if photos touch the lights, you get hot spots and glare.
19. Map-Grid Travel Photos With Warm Paper Mats
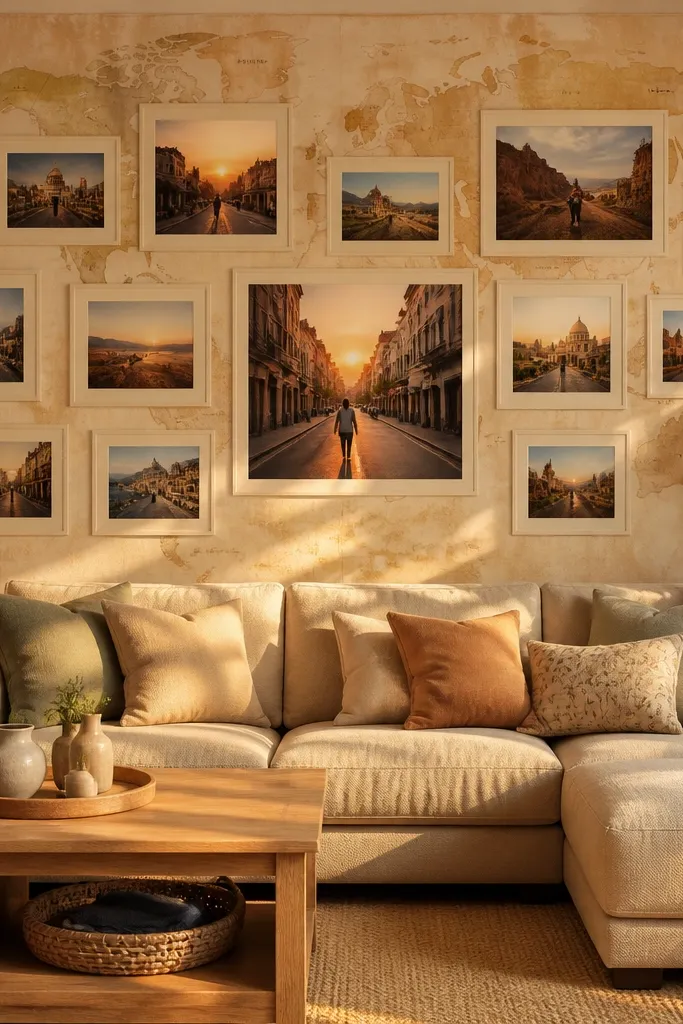
Travel photos can feel cold if you hang them like a standard grid, especially if the prints are bright. A map-grid approach warms them up by adding a textured background and consistent mat color. Use warm paper mats and keep the photos mostly in the same exposure style — golden hour shots look best. The map pattern gives visual texture without competing with the images. This is a cozy living room photo collage idea for people who want their wall to feel like a story, not just pictures.
Apply a subtle map background using removable wallpaper or a printed map sheet behind your frames. Choose mat boards in one warm tone, like kraft or light tan, and mount each photo onto a mat. Arrange frames in a grid pattern that matches the wall footprint, using equal gaps between frames. Hang the grid level, then step back and adjust so the map texture isn’t visible through gaps more than a few inches.
Pick mats that are one shade darker than your wall paint for better contrast.
Don’t use a highly saturated map background; it steals attention from the photos.
20. Wood Pegboard Photo Display With Clip Frames
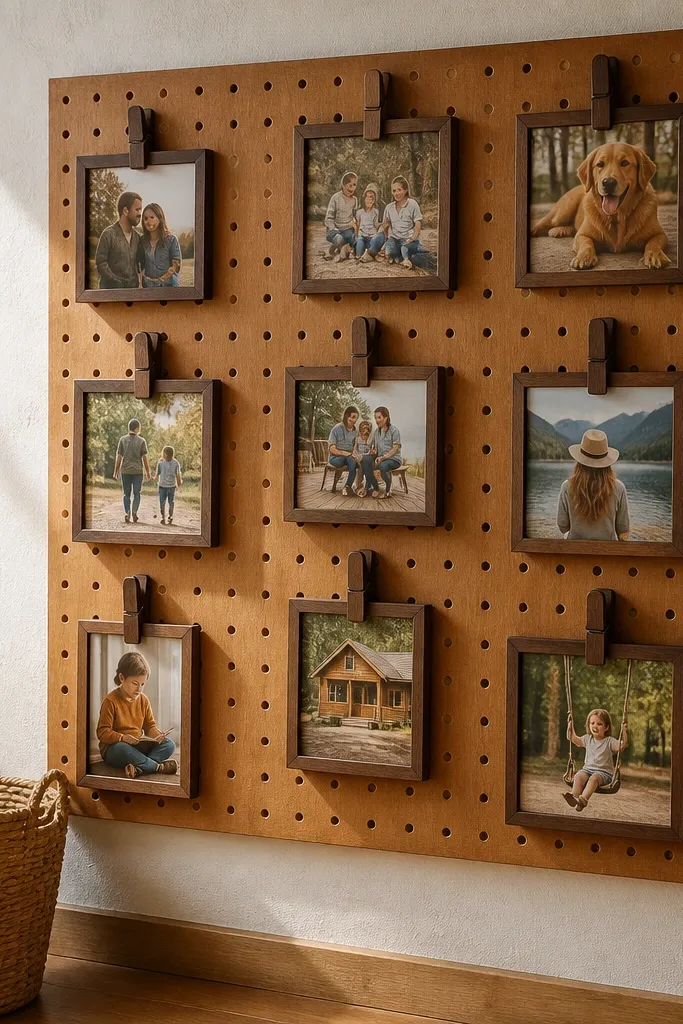
Pegboard turns your photo wall into something you can rearrange without rebuilding. It looks cozy because wood texture reads warm, and clip frames let you swap photos quickly. You also get a grid of holes that makes alignment easier than tape and measuring. Use a mix of frame sizes, but keep one finish and one color palette so it doesn’t look like storage. This is great for people who change photos seasonally or who want a wall that evolves.
Mount a wood pegboard to the wall using anchors, then sand any rough edges and finish with a warm stain if needed. Use clip frames or small mini frames that hook into the pegboard holes. Start with a center cluster, then add surrounding frames so the layout forms a rectangle. Label nothing permanently — just keep the spacing consistent by using the same hole spacing between frames.
Editor's noteUse matte clear coat on the pegboard so it doesn’t look shiny under lamps.
Skip thisDon’t overload the pegboard — too many photos makes it feel like a bulletin board.
21. Single-Line Photo Strip With Floating Ledges
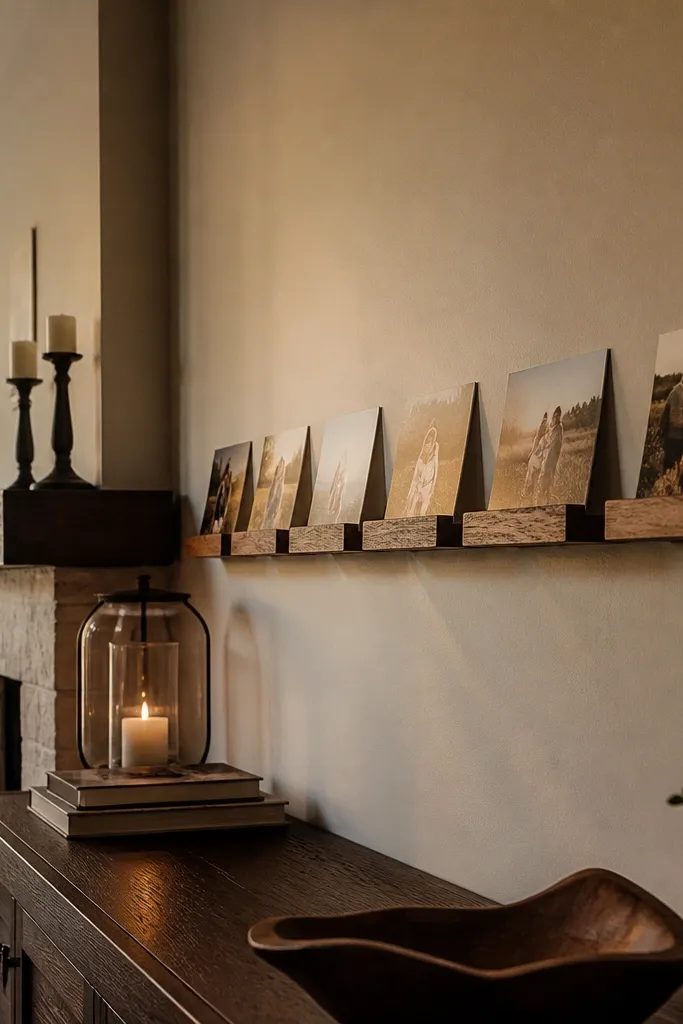
A single-line strip with floating ledges is cozy because it adds a gentle rhythm without clutter. The ledges create small elevations, so photos catch light differently and feel dimensional. This works best when you want the collage to sit above a console, fireplace mantel, or low cabinet. Choose photos with warm colors and consistent brightness so the strip looks harmonious. It also keeps frames from feeling too heavy on the wall.
Install two or three narrow floating ledges in a staggered height pattern, leaving enough clearance for the photo edges. Mount photos to lightweight backing, like foam board, then place them on each ledge with small non-slip pads. Arrange the photos in a single left-to-right line, then add a few slightly higher pieces to create a focal point. Check the line from sofa height so it reads straight, not tilted.
Editor's noteUse the same photo size across the ledges for a tighter, cozier look.
Skip thisDon’t use thick frames on ledges; they make the wall feel top-heavy.
22. Fabric Banner With Mini Frames and Warm Letters
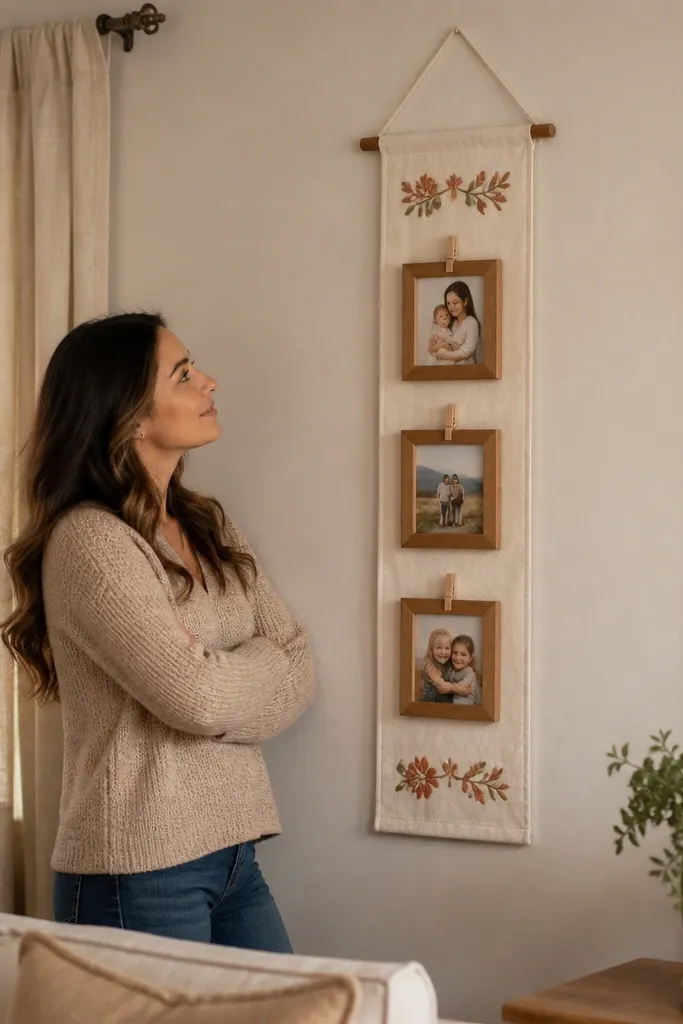
A fabric banner photo collage feels cozy because it adds soft movement and texture. Mini frames clipped along a banner create a gentle, casual line that still looks designed. If your living room has neutral furniture and warm lighting, this style fits perfectly. The trick is keeping the banner narrow and the frame sizes consistent, so it reads like a styled display, not a craft supply wall. It’s especially good for small walls or for adding warmth above a sideboard.
Cut a fabric banner in a long strip, then hem the edges or use fabric tape for a clean finish. Attach the banner to two wall hooks or a simple rod, then clip mini frames evenly along the strip. Use one or two mini frames as anchors, then fill the rest with smaller consistent frames. Add a few optional warm letters printed on cardstock behind glass-free mini frames, then keep the total number low so the photos stay the focus.
Editor's noteChoose a fabric color from your throw pillows so the banner blends instead of standing out.
Skip thisDon’t add too many text elements; it turns the collage into a signboard.
23. Color-Matched Frame Ladder With Photo Steps
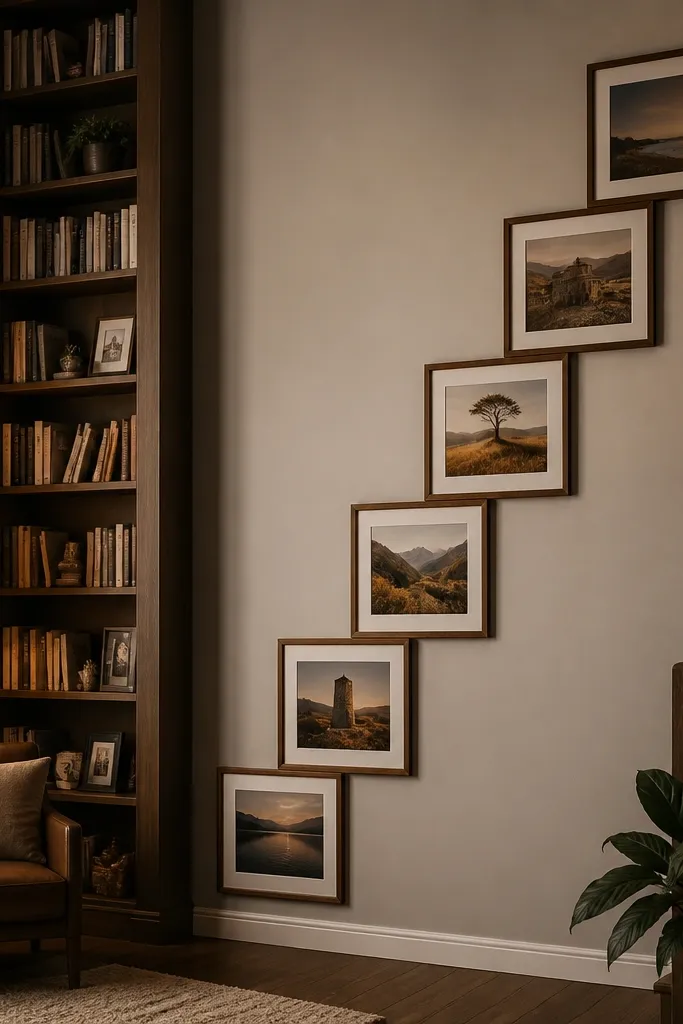
A ladder or stair-step layout feels cozy because it creates vertical movement without forming a rigid grid. You get a clear focal path from the bottom step to the highest point, which works well in living rooms with tall walls. Keep frame finishes matched and use photos that share a color theme, like warm browns and creams. This arrangement also looks great with a mix of portrait and landscape because the “steps” organize the variety. It’s a good DIY project if you want something more interesting than a straight grid.
Pick frame sizes that step evenly, like 8x10 on the bottom, 9x12 in the middle, and 11x14 at the top. Arrange them on the wall in a staircase pattern with equal horizontal offsets, like 2 inches. Mark each hanger point using a level and a ruler so the steps don’t drift. Hang the top frame first, then align the two lower frames to it, then fill in any extra frames on the sides if you want a fuller look.
Use the same mat color for all frames so the ladder edges look crisp.
Don’t choose random frame widths; the ladder amplifies inconsistencies.
24. Photo Tiles in a Single Matte Board Layout
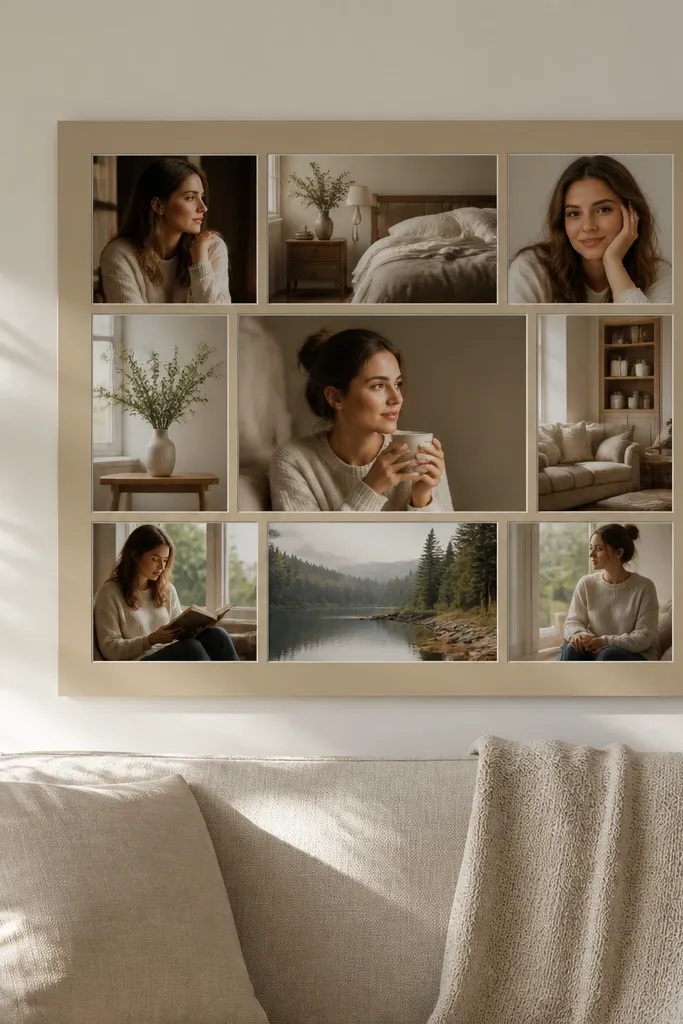
One large board with photo tiles feels cozy because it looks cohesive, like a single artwork. It’s also a smart fix for walls where individual frames never line up. The matte board absorbs glare, and the thin separators keep the photos distinct. Choose a warm-toned board color like light tan or soft gray, then place photos as squares or rectangles. This style works for big walls because the whole collage reads as one piece, not scattered items.
Buy a large foam board or mounting board and cut it to your desired footprint, like 24x36 or 30x40. Print photos to uniform sizes, then arrange them on the board with a consistent gap, like 1/8 to 1/4 inch. Use photo corners or double-sided photo tape to mount each tile flat. Seal the edges, then attach hanging hardware to the back so the board stays level.
Editor's noteUse a cutting mat and a sharp blade so the tile edges look clean and straight.
Skip thisDon’t leave large uneven gaps; tile layouts show spacing errors immediately.
25. Framed Photo Collage With Linen Rope Border
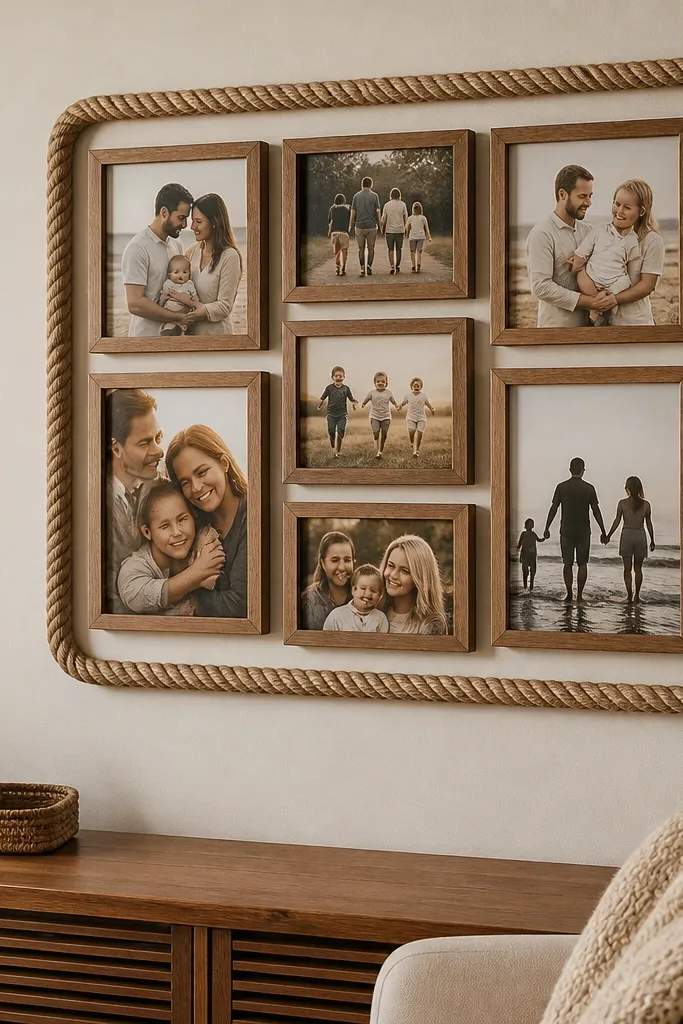
This adds warmth without adding clutter. A framed collage with a linen rope border looks handmade and cozy, and it also makes the whole piece feel like one unit. Use matching frames inside, then let the rope be the only “extra” texture. It works well when you want a photo wall that looks special but still simple. Keep the rope border tight and centered so it doesn’t overpower the photos.
Build a main frame or use a large shadowbox frame, then mount your photos inside with consistent matting. Wrap linen rope around the outer edge of the frame and glue it down with a hot glue gun, keeping the rope taut and smooth. Add small corner clamps while the glue sets so the rope doesn’t shift. Hang the finished piece with a secure bracket so the weight doesn’t sag.
Test glue placement on scrap rope first; some ropes soak glue and darken.
Don’t use thick, fuzzy rope; it blurs the edges and makes the piece look sloppy.



