
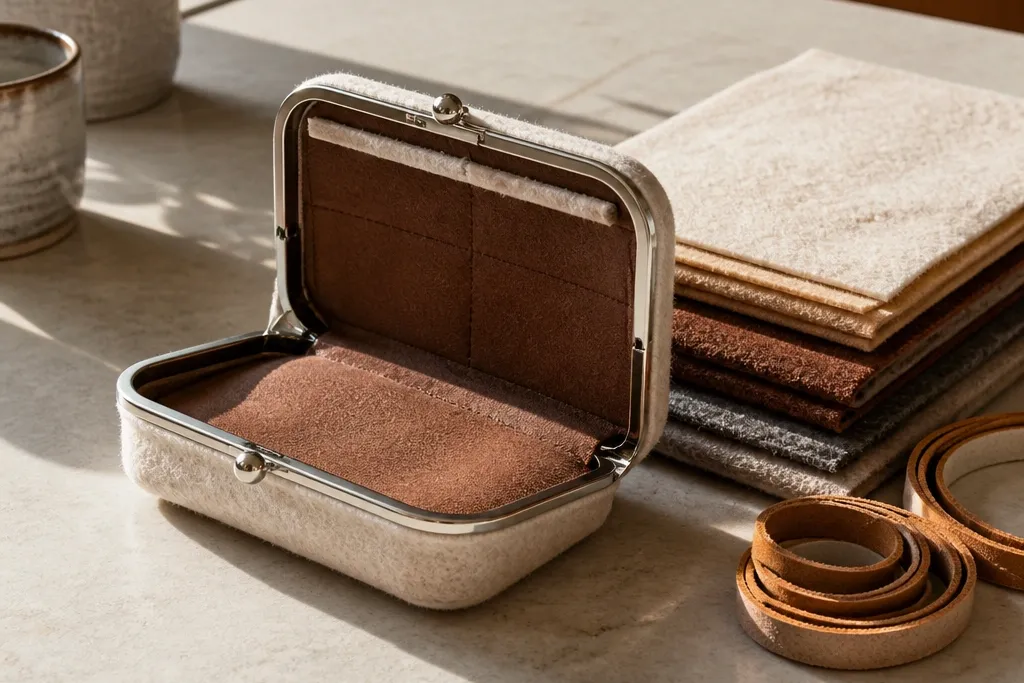
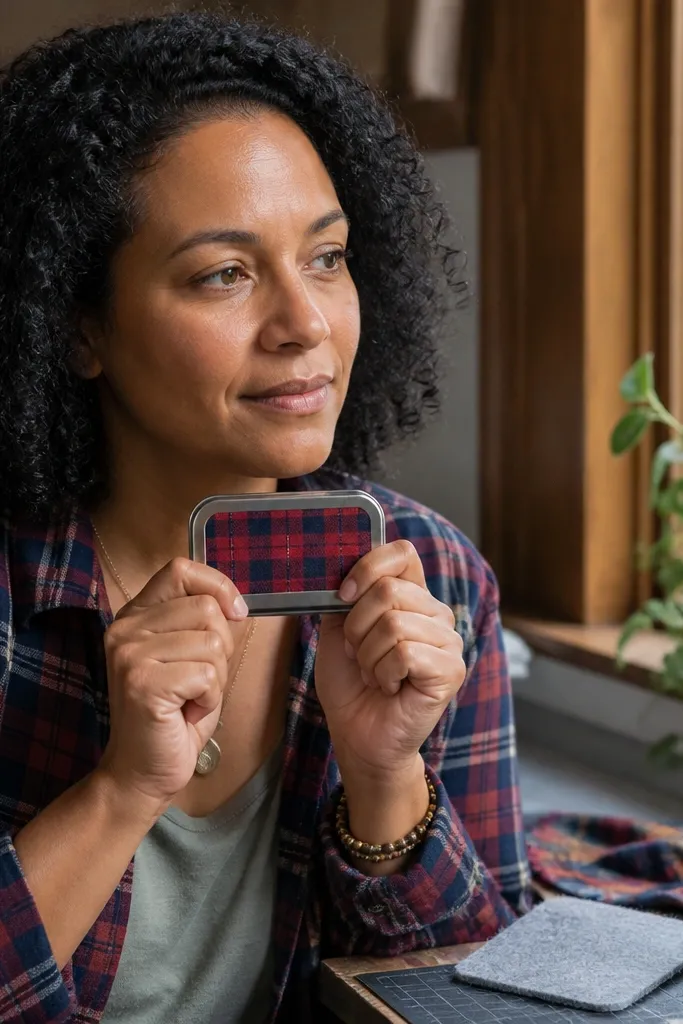
1. Felt + Micro-Suede Edge Binding Wallet
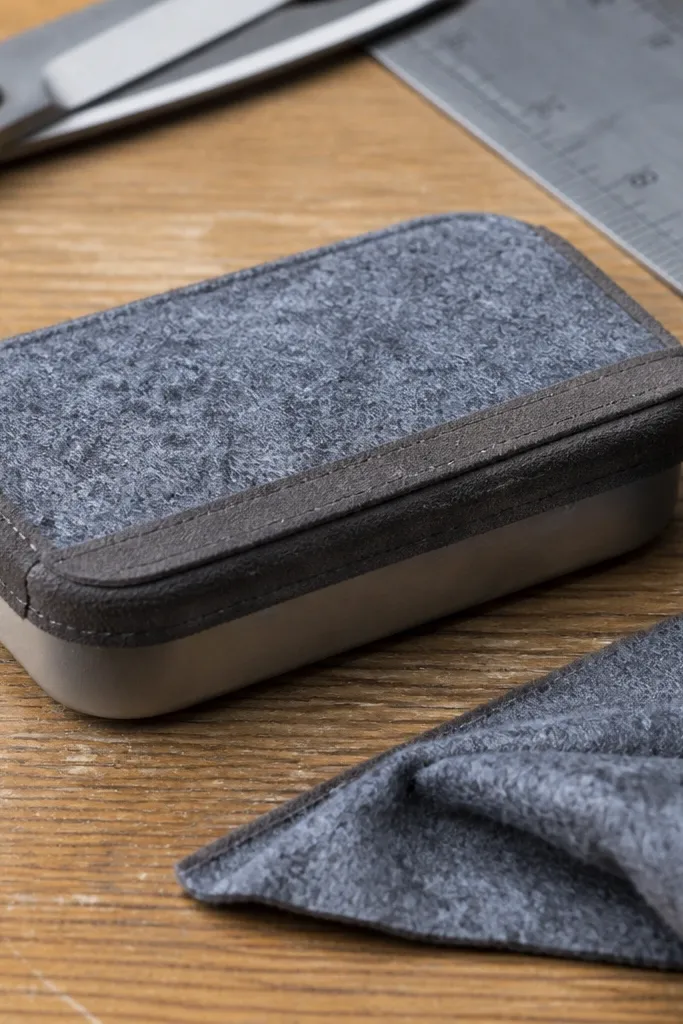
This is the cleanest “cozy” route because felt hides tiny unevenness, and binding gives you a straight, finished edge. The micro-suede binding also photographs well — it catches light softly instead of looking shiny like plastic. You’ll wrap the outer felt around the tin and then cap the seams with a narrow binding strip, so the inside doesn’t peek out. It’s a beginner-friendly build that still looks intentional, especially if you keep the binding width consistent from top to bottom.
Cut a felt rectangle sized to wrap the tin body with a 1 cm overlap on the back. Cover the tin with a thin layer of fabric glue, press the felt, then fold the overlap to the inside and glue it down. Make a binding strip about 6-8 mm wide from micro-suede, fold its edges inward, and glue it over the seam line. Finally, trim any felt that sticks past the binding and let the glue cure fully before testing the hinge.
Use painter’s tape to hold the fold while glue sets; it keeps the seam straight.
Don’t use thick glue blobs at the corners — they print through felt and ruin the clean edge.
2. Flannel Lining With Contrast Topstitch Look
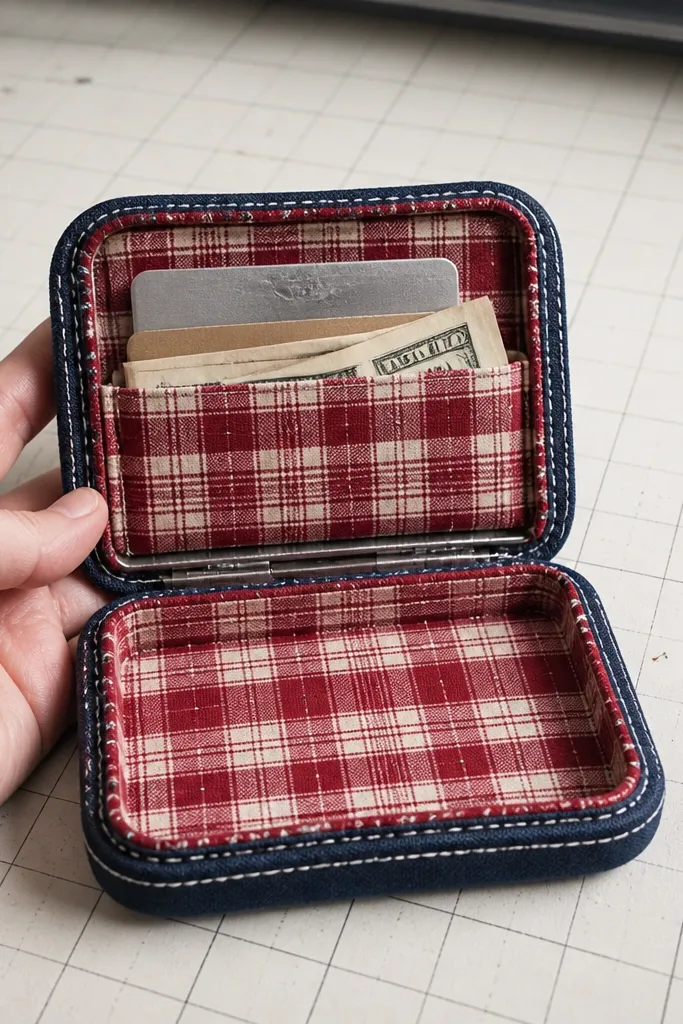
If you want cozy that looks vintage, flannel lining is hard to beat. The fabric texture makes the tin disappear visually, and the contrast border gives that neat “sewn” look without needing a full sewing setup. You’ll use flannel for the inside card holder and a contrasting outer facing so the wallet looks designed, not just wrapped. This works great for wallets that need to hold cards flat, because flannel is stable when you back it with a thin fusible layer.
Iron a fusible interfacing to the flannel (lightweight, 1-2 passes) so it stays crisp and doesn’t sag. Cut the lining panels to match the tin’s inner walls, leaving 2-3 mm clearance at the hinge side. Glue the panels in place, then add a faux topstitch border using fabric paint lines or a fine-tip marker on a sealed surface. Let the paint dry, then apply a quick clear matte seal over the border so it doesn’t smear.
Do your faux stitching with a ruler and lightly pencil guide lines first.
Skip stretchy flannel — it warps while glue dries and makes card slots misalign.
3. Washi Tape Panel Wrap With Clear Edge Seal
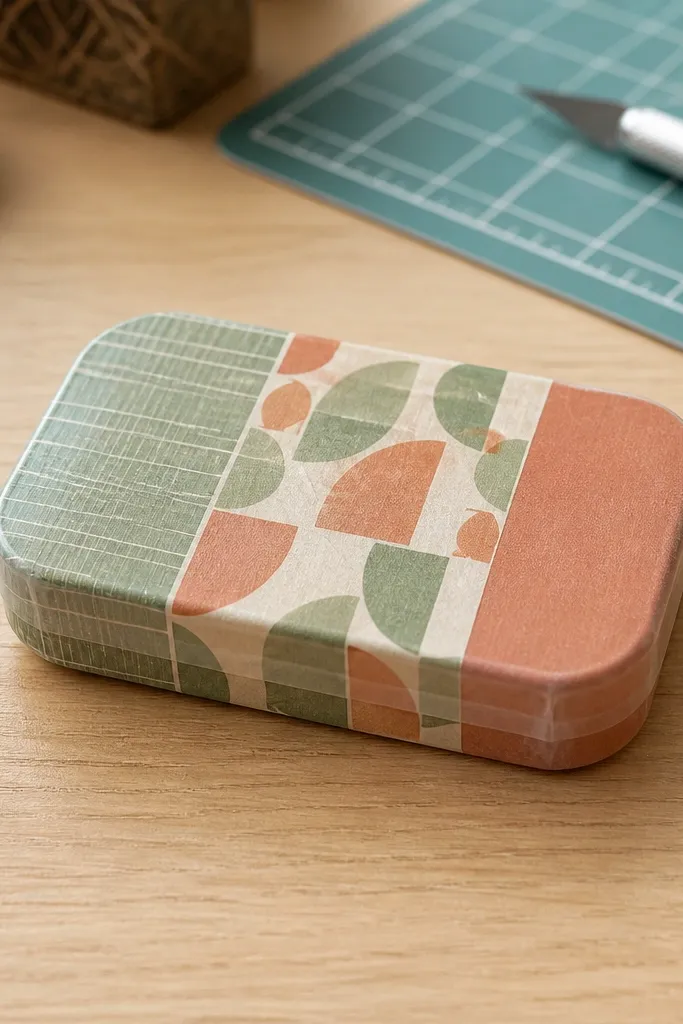
Clean the tin with rubbing alcohol so tape sticks. Cut tape strips to form 2-3 straight panels around the tin — keep ends aligned at the corners. Press firmly, then trim excess with a craft knife straight against a metal ruler. Seal the entire taped area with 2 thin coats of matte clear (spray or brush-on), letting each coat dry before the next. After sealing, lightly sand only the very edges if any tape ridge shows.
Washi tape is cozy because it adds color and pattern without bulk. The trick for a clean finish is treating it like a panel system: straight lines, minimal overlap, and a final clear matte seal that locks everything in. This gives you a “paper craft but grown-up” look that’s very photogenic. It’s also fast, so you can test multiple colorways — warm stripes, plaid, or autumn florals — and keep the structure tidy.
Skip thisDon’t skip alcohol cleaning; tape lifts at the corners and ruins the clean look.
Editor's noteUse a craft knife blade that’s fresh — dull blades pull tape fibers and make edges look messy.
4. Quilted Fabric Top Layer Over Foam Pad
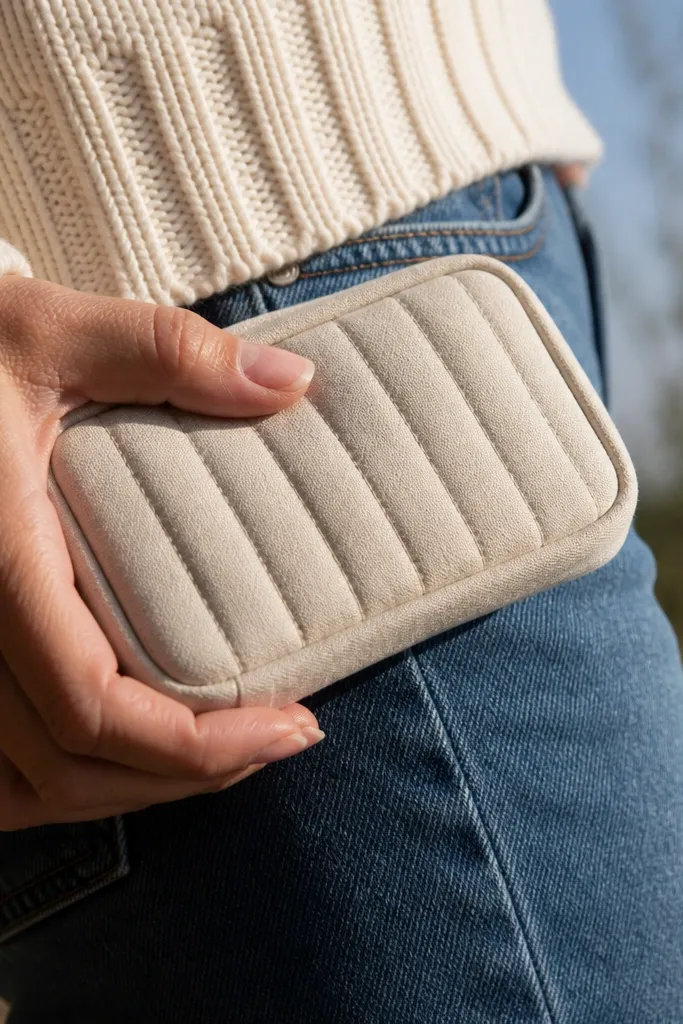
This gives you a cozy, cushioned look that hides tin dents and makes the wallet feel premium. The quilting lines create a warm visual rhythm and also act like seam control, so edges don’t flare. You’ll add a thin foam pad under the outer fabric to keep the surface smooth and padded. It’s best for people who want cozy texture in photos — the light catches the quilting ridges instead of showing glue lumps.
Cut a thin foam sheet the size of the outer tin face, leaving a 5 mm gap around the edges for folding. Glue the foam to the tin face, then stretch fabric over it and glue the edges to the back. Mark simple quilting lines with chalk (like 1 vertical and 2 horizontal), then add stitched-looking lines using fabric paint or real stitching if you have the setup. Finish by trimming fabric at the fold line and sealing edges with a narrow strip of bias tape.
Use 2-3 mm foam, not thicker — thick foam makes the tin hard to close.
Don’t quilt over thick foam — you’ll create bulk at the hinge and the clasp won’t shut cleanly.
5. Cork Outer Wrap With Micro-Card Slots
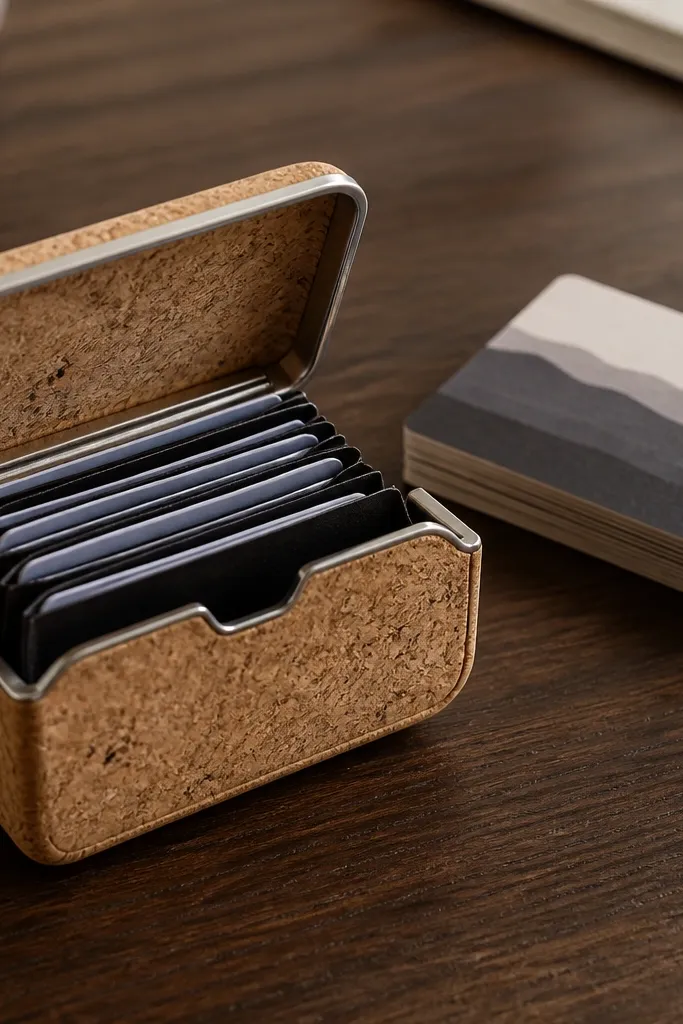
Cork reads cozy because it’s warm-toned and has a natural texture that looks expensive without extra work. It also grips glue well and holds shape, so you can get crisp, straight edges. The micro-card slots are the part that makes it functional and photogenic — each slot has visible dividers and doesn’t sag. If you want a cozy look that still feels structured, cork is a strong pick.
Cut cork panels for the outer wrap, sizing them to fold around the tin edges with a 1 cm back overlap. Glue cork to the tin using contact cement applied in thin coats; press firmly and let it set according to the product directions. For the interior, cut two lining pieces and add card divider strips from thin felt or cardstock sealed with glue. Glue dividers in place, then cover the inside with lining so all raw edges are trapped. Finish with a folded-facing strip at the outer seam line.
Lightly sand cork edges after trimming so the seam line looks smooth under flash.
Don’t use hot glue on cork seams; it creates shiny lumps and can lift corners.
6. Knit Sleeve Wrap With Folded Facing
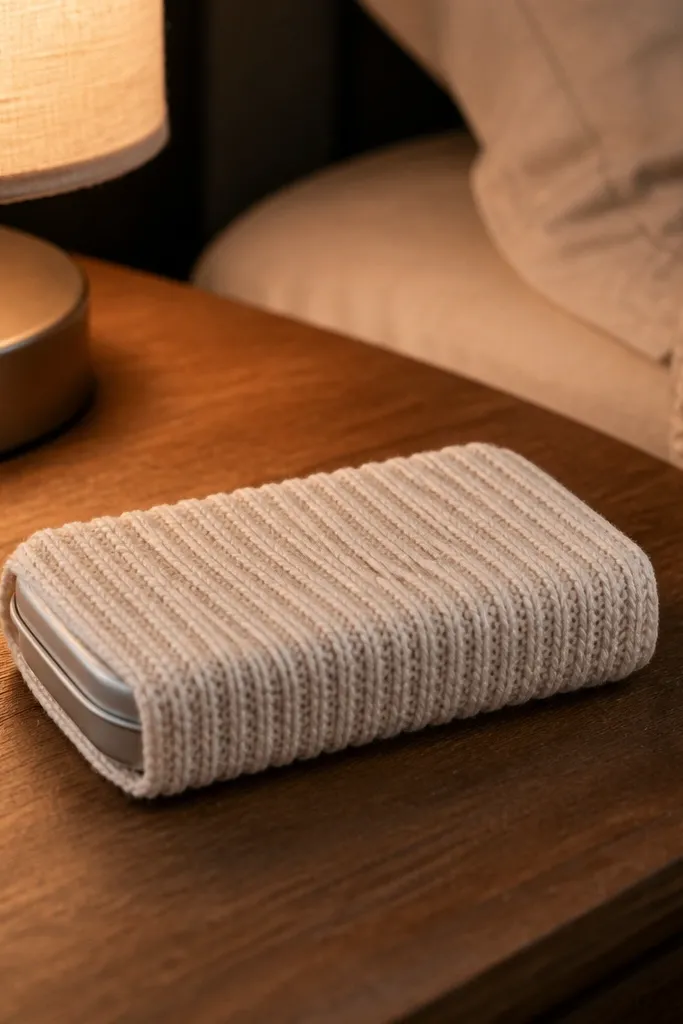
Cut knit fabric panels that cover the tin body and allow a 1 cm fold to the inside. Back the knit with lightweight fusible interfacing so it doesn’t stretch out of alignment while you glue. Glue the knit to the tin body, then fold the edge inward and tack it down with fabric glue. Cut a facing strip from a non-stretch fabric (cotton or faux suede) and fold its edges to hide raw edges. Glue the facing over the seam line and trim anything that interferes with the tin’s closing.
Knit fabric is cozy in a way felt sometimes isn’t — it stretches slightly and gives that soft, lived-in look. The folded facing is how you keep it clean: it creates a crisp boundary where knit meets the tin edge. This build looks great in neutral tones — gray, cream, oatmeal — because the knit pattern reads like texture, not clutter. It’s also forgiving if your first cut is slightly off, since knit will conform.
Skip thisDon’t glue knit directly to metal with thick glue; it hardens and makes the seam look bumpy.
Editor's notePress the fusible with an iron first, then cut — it stops knit from fraying unpredictably.
7. Leatherette Wrap With Burnished Edge Paint
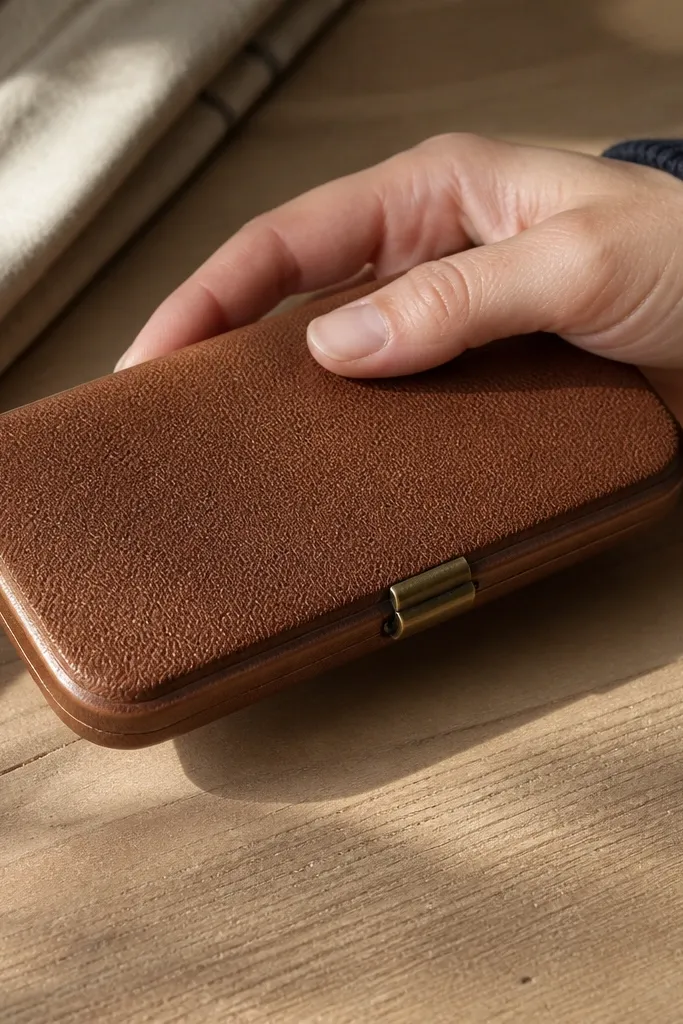
Cut leatherette pieces with a 1 cm fold-back allowance. Glue the leatherette to the tin using a thin contact cement layer, then fold the excess to the inside and glue down. Trim the seam flush so you don’t get a ridge. Apply edge paint along the seam, let it dry 10-15 minutes, then burnish with a smooth tool (or a soft cloth) in short strokes. Seal with a matte leather finish so the edge paint doesn’t rub off.
Leatherette gives you a clean, cozy look when you treat the edges like the hero. Edge paint and burnishing make the seam disappear, which is the whole point of a clean finish. This style looks especially good in warm browns and tans, and it holds up well against daily handling. It’s a bit more work than felt because you need thin layers and careful trimming, but the result looks sharp and cozy at the same time.
Skip thisDon’t skip trimming flush; any extra leatherette thickness shows as a raised line.
Editor's noteIf your edge paint looks streaky, do a second thin coat instead of thickening the first one.
8. Felt Flower Corner Accents on Minimal Wrap
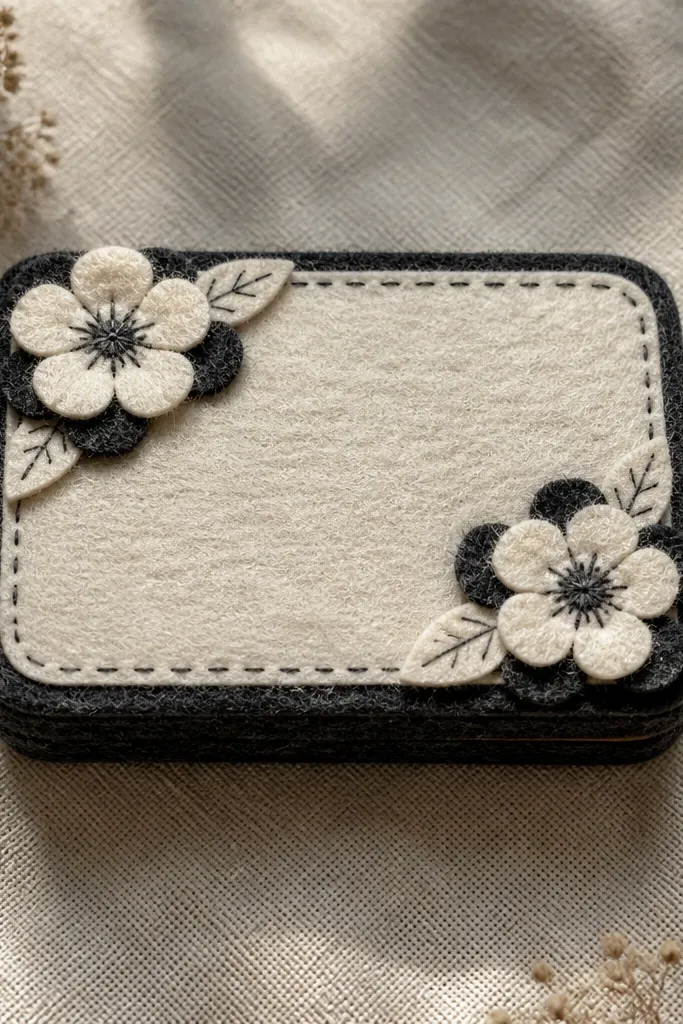
This is cozy because it adds warmth without adding bulk. The minimal wrap keeps the structure clean, and the felt flowers are placed at corners where visual focus lands in photos. You get a tidy, symmetrical look if you stick to two corner accents (top-left and bottom-right) or four small ones. The flowers also cover any tiny seam imperfections, which helps if you’re still learning clean trimming.
Wrap the tin in solid felt, keeping the seam on the back so the front stays smooth. Cut flower shapes from felt in two sizes and layer them with glue for a dimensional look. Glue the largest petals at the corner seam line and add a small center circle on top. Use a thin needle and thread only if you want real stitching; otherwise glue is enough for felt. Finish by trimming any glue strings and sealing the felt edge where needed.
Make petals slightly asymmetrical by hand — perfect circles look flat and less cozy.
Don’t place flower accents on the hinge side; they add thickness and interfere with opening.
9. Bias Tape Frame Around a Plain Outer Wrap
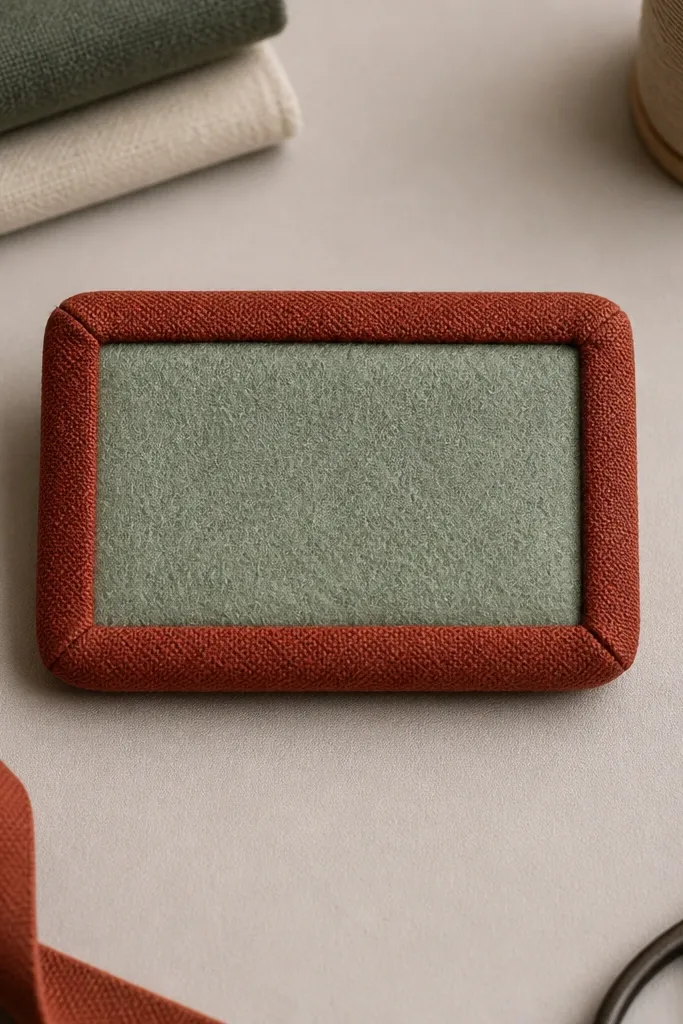
Bias tape frames look clean because they create a consistent border and hide the seam line. Keep the outer wrap plain (felt or cotton) and let the bias tape do the styling. This reads cozy because the border color gives warmth against darker bases, and the fabric-on-fabric texture looks soft. It’s also one of the fastest ways to make an Altoids Wallet look finished without covering every seam in glue.
Wrap the tin with a single fabric layer and glue the back seam to the inside. Cut bias tape into two lengths for the front frame and two for the sides, keeping the corners at 45 degrees. Glue bias tape along the front edge line where the seam would show, pressing with tape until it sets. Trim tape ends flush and add a small touch of glue under each corner fold to lock them down. After curing, run a fingertip along the frame to check for ridges.
Use a ruler and mark the frame line lightly in pencil on the fabric before gluing.
Don’t stretch bias tape while gluing; it will curve and look crooked in photos.
10. Candle-Wax Style Sealed Fabric Pockets
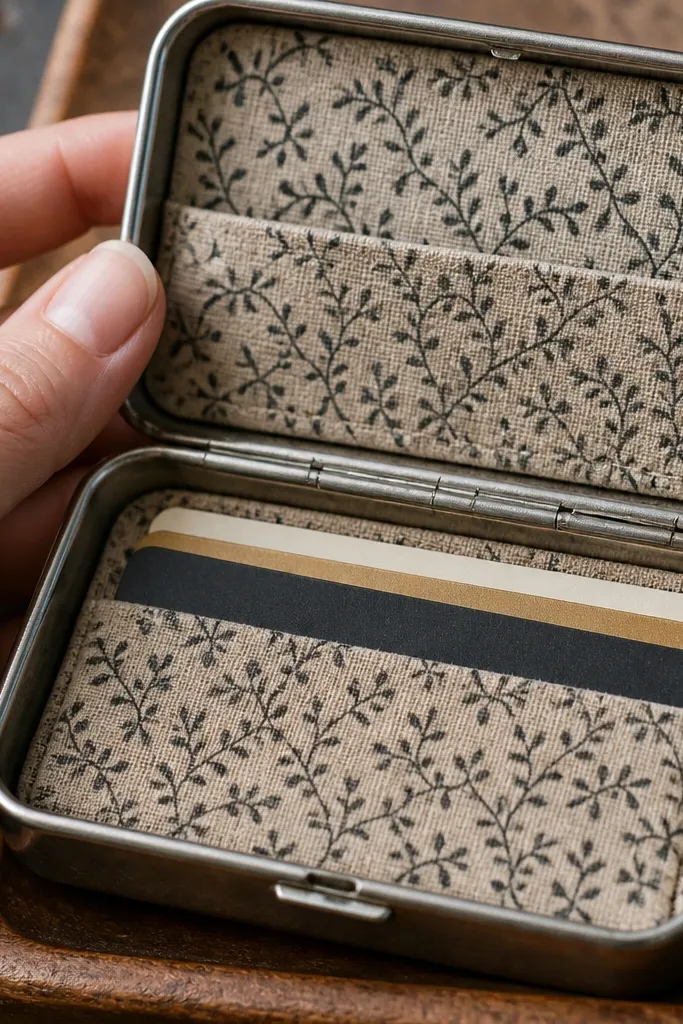
This idea makes the inside look tidy and cozy by sealing fabric pocket edges so they don’t fray or curl. The look is warm and slightly rustic, like a wax-sealed envelope, but you’re applying a clean finish that holds shape. You’ll build card pockets with sealed edges, then cover the pocket openings with a matching fabric facing. It’s great for people who want the inside to look as good as the outside.
Cut pocket pieces from cotton or canvas and fuse a lightweight interfacing to them so pockets stay flat. Fold and glue pocket sides, then seal the top edge with fabric sealer or a thin matte acrylic medium. Create a facing strip for the pocket opening and glue it over the sealed edge. Assemble pocket panels into the tin interior using thin glue layers, then cover the back with lining so no raw fabric shows. Let everything cure fully before inserting cards.
Seal edges twice — first coat so it soaks, second coat to lock fibers down.
Don’t over-saturate — wet sealer warps fabric and makes pocket openings look wavy.
11. Patchwork Grid Outer With Corner Binding
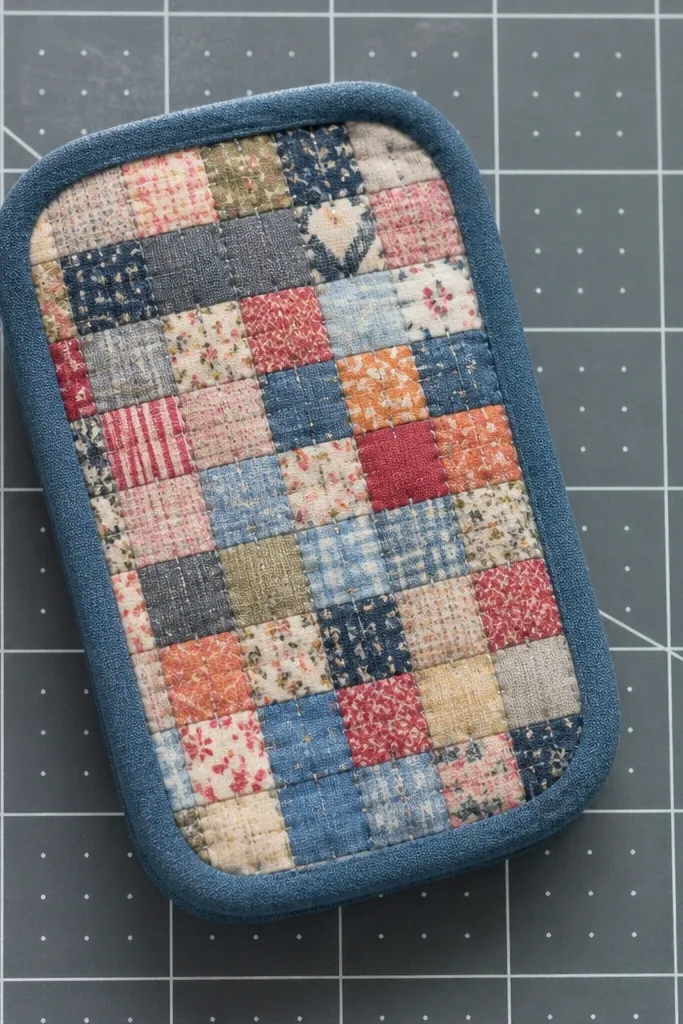
Patchwork gives cozy charm because it looks like a tiny quilt, but you keep it clean by using a grid layout and binding at the corners. The key is controlling seam thickness: use thin fabric scraps and back them with fusible so the grid doesn’t bulge. In photos, the grid creates a strong pattern that reads clearly even at a small size. This is a great option when you have fabric scraps in warm tones and want one wallet that looks like a project, not leftovers.
Cut four to six fabric squares sized to cover the outer tin face with 1-2 mm seam allowance. Fuse lightweight interfacing to each square, then glue them together on a flat surface in a grid. Wrap the finished patchwork panel around the tin, keeping seams on the back where possible. Add corner binding strips to hide any raw edges and keep the outline crisp. Trim excess patchwork so the tin closes without catching.
Use a single seam thickness by trimming all fused layers the same size before assembly.
Don’t use thick upholstery fabric — patchwork seams will stack and stop the tin from closing.
12. Solid Color Suede-Look With Hidden Magnet Catch
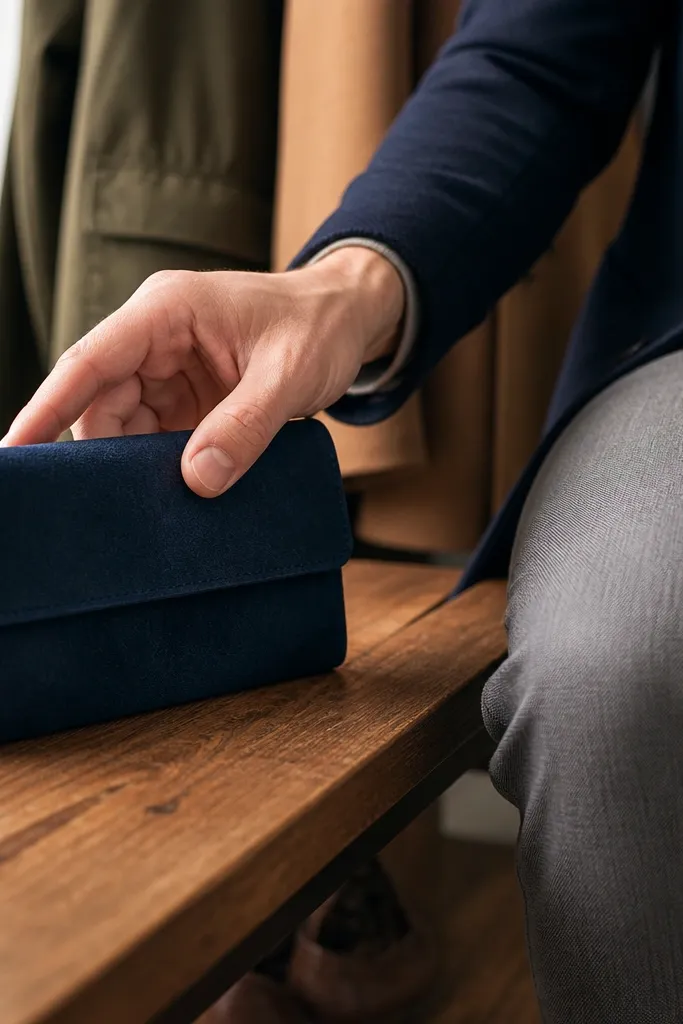
A suede-look outer makes the wallet feel cozy instantly, and a hidden magnet catch makes the closure feel cleaner than a bulky strap. The front stays sleek, so photos look tidy and intentional. You’ll still keep the Altoids tin opening mechanism working, but you add a magnet to help it close snugly without forcing. This build is slightly more technical because magnet placement needs accuracy, but the finish is worth it.
Wrap the tin with suede-look fabric or faux suede using thin contact cement. Mark the closure area on the front panel, then place a small rare-earth magnet pair so they align when the tin closes. Glue magnets carefully to the fabric backing or a thin inner reinforcement piece, keeping them flush so they don’t create a bump. Add a small fabric reinforcement patch behind the magnet spot for strength. Finish by sealing the outer edge seam with a narrow facing strip.
Test magnet placement with a paper template before glue — alignment errors show immediately.
Don’t glue magnets directly onto thin fabric without reinforcement; they pull loose with repeated opening.
13. Satin Ribbons Bow Front With Flat Lining Base
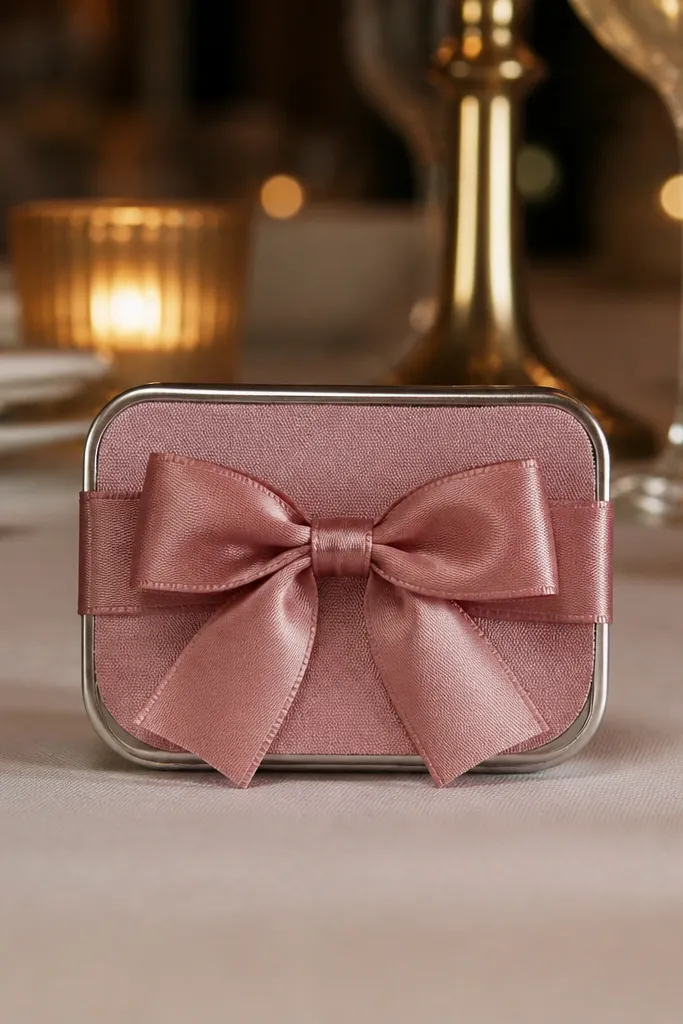
Build a flat inner lining first using flannel or cotton fused with lightweight interfacing. Glue lining panels in, then attach the outer wrap so the seam sits on the back. Cut two ribbon lengths and form a small bow, then sew or glue it onto a backing patch of felt so the bow doesn’t sag. Glue the backing patch to the front panel in a spot that clears the hinge area. Finish by adding edge binding or edge paint so the outer seam stays clean.
You get a cozy-meets-fancy look when you pair a soft satin bow with a flat fabric lining base. The lining matters most: if the inside is bulky, the tin won’t close and the bow looks crooked. The satin ribbon is photogenic because it reflects light in a smooth way, while the cozy lining keeps the overall vibe warm. This is best for gifts or desk carry where you want something pretty that still works.
Skip thisDon’t place the bow too close to the hinge; it will press when the lid opens.
Editor's noteUse a small felt backing under the bow so the satin doesn’t fray or peel at the glue line.
14. Corduroy Outer With Matching Top Flap Divider
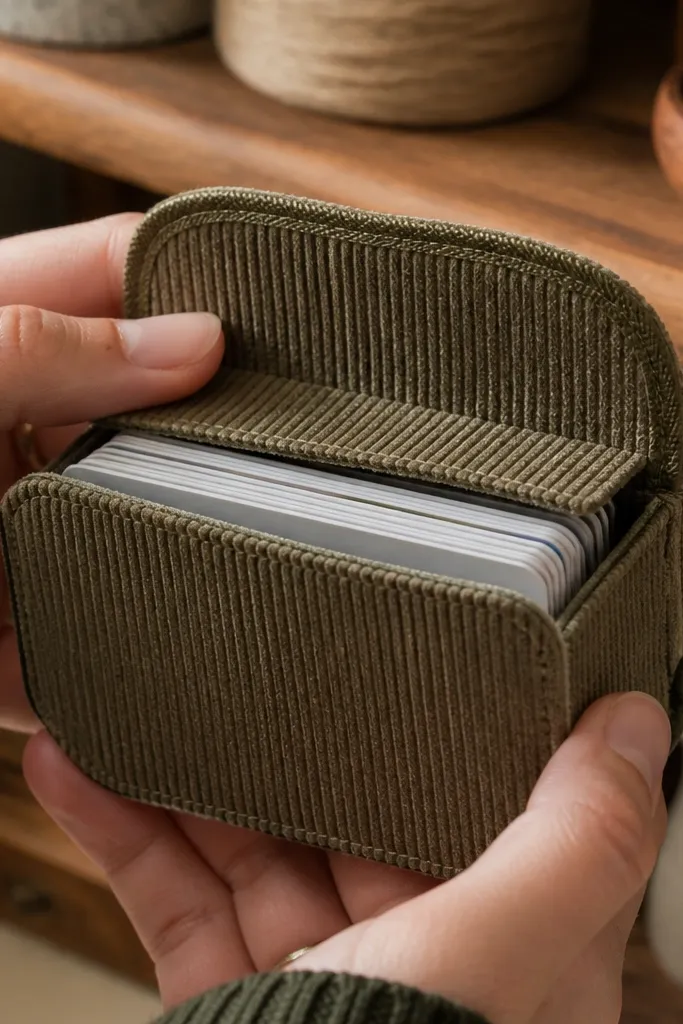
Cut corduroy to wrap the outer tin body, keeping pile direction consistent (run it vertically on the front for a tidy look). Back the corduroy with lightweight fusible interfacing so it doesn’t stretch while gluing. Glue outer wrap, then cut an interior divider flap from matching fabric backed with interfacing. Glue the divider at the top inside edge, leaving a 3-4 mm gap so it flexes when you open the tin. Seal the outer seam with bias tape or a thin folded facing strip.
Corduroy is cozy because it has built-in texture and warmth, and it hides minor surface bumps from wrapping. This idea keeps the front clean by using a matching divider flap inside, so card edges sit flat and neat. The top flap also makes the wallet look more structured in photos because you see a crisp interior line. It’s a good choice if you want a cozy aesthetic without going full felt.
Skip thisDon’t mix pile directions on the same panel — it makes the wallet look patchy even if the seams are straight.
Editor's notePress corduroy gently with a low iron through a cloth so you don’t flatten the texture.
15. Embroidered Initial on Canvas With Folded Zipper-Tape Ledge
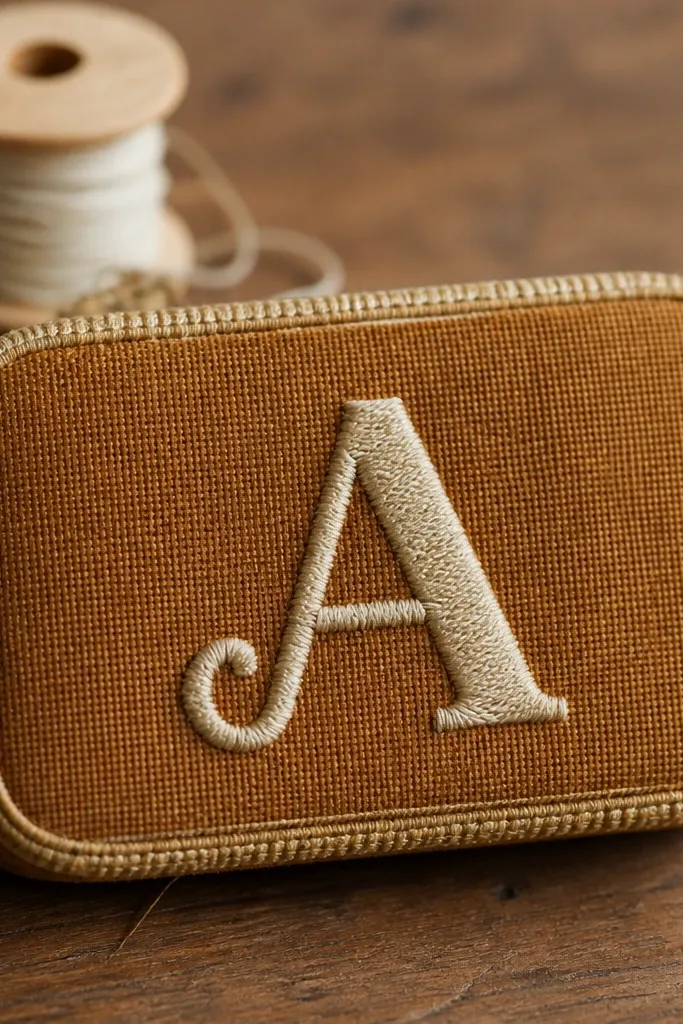
This is cozy in a graphic way: warm canvas plus a stitched initial reads handmade and intentional. The zipper-tape ledge is the clean finish trick — it creates a crisp lip at the edge where fabric meets the tin fold. You get a clean, straight boundary that hides uneven trimming and keeps the wallet looking sharp after lots of opening. If you like personalization, this one looks great on desk shots and close-ups.
Wrap the tin in canvas and fuse the canvas lightly so it stays flat. Stitch or paint a simple initial using a backstitch or running stitch with embroidery thread. For the ledge, cut zipper tape to the length of the front edge and fold it so the teeth area stays inside the seam line. Glue the folded zipper tape along the edge where the fabric fold happens, then trim flush at corners. Finish by sealing the glue line with a thin matte fabric medium so it doesn’t look shiny.
Use a single strand for small initials — thick thread makes the design look bulky on the tin size.
Don’t glue zipper tape directly on raw fabric edges; fold fabric first so the ledge covers everything.



