
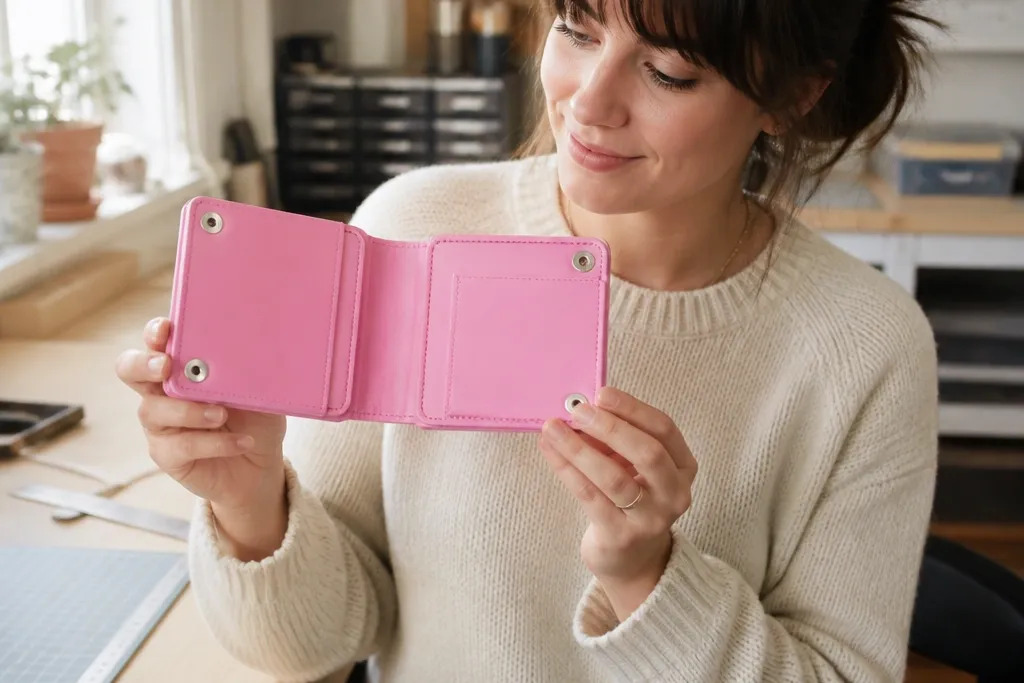
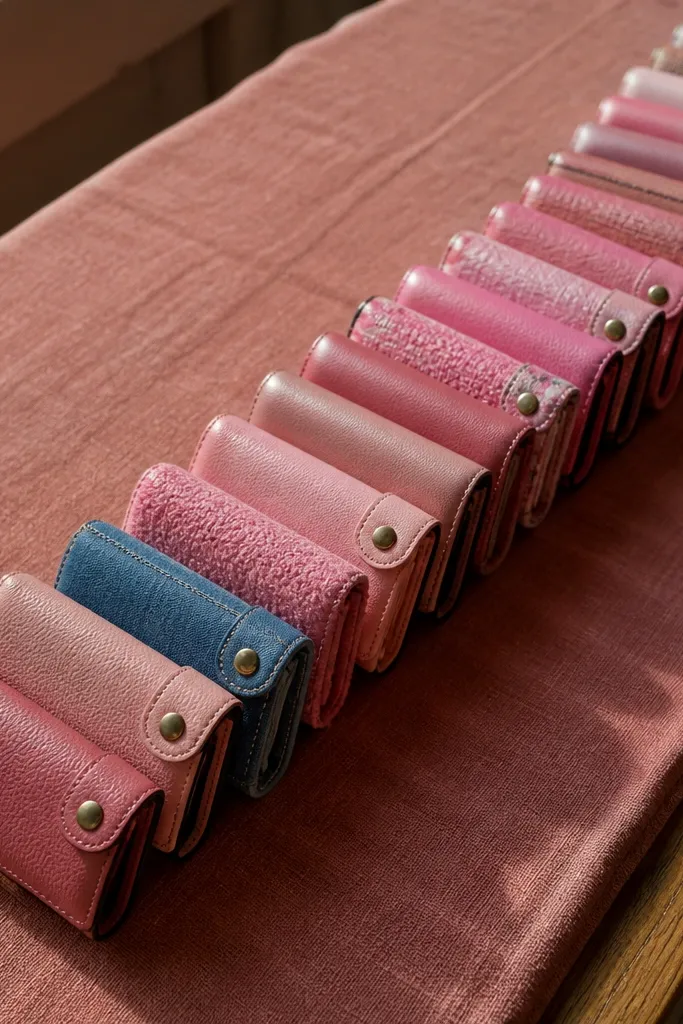
1. Bubblegum Pink Faux Leather Snap Wallet
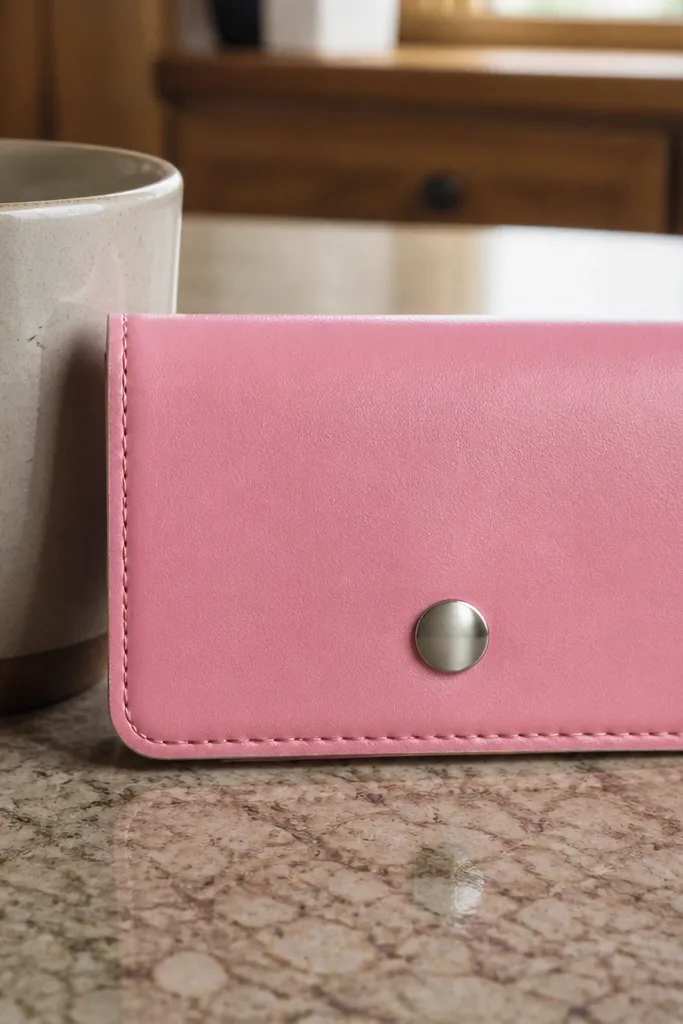
This one is the closest thing to a “finished product” look. Faux leather lays flatter than most fabrics, so your front stays smooth and your corners don’t ripple. Use a rigid foam core inside so the wallet opens cleanly and folds without creasing in random places. The centered snap gives a crisp line in photos, and it’s forgiving if your interior stitching isn’t perfect.
Editor's noteUse a leather punch for the snap holes so the edges stay clean instead of tearing.
Cut a template from cardboard using the Altoids tin lid as a guide, then add 1 cm seam allowance for the cover. Cut the faux leather and a matching lining piece, glue them to a foam core, and press with a flat weight for 30 minutes. Install a snap at the exact center of the front panel, then fold and mark the hinge line before stitching or hand-gluing the sides.
Skip thisDon’t skip the foam core — fabric-only covers sag and look cheap fast.
2. Pink Satin Ribbon Bow Wallet (No Bulk)
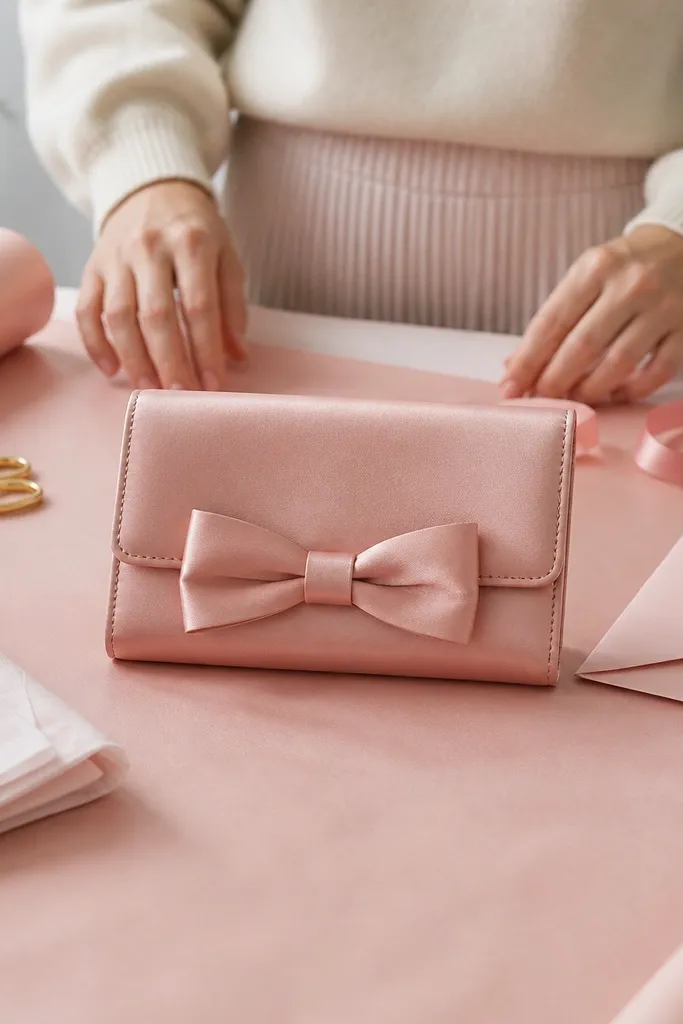
This is for the dreamy, gift-ready look without turning the wallet into a thick brick. Satin ribbon looks gorgeous because it catches light in soft highlights, but it can fray and it can add bulk if you attach it wrong. Keep the ribbon as a flat accent on the front while using a hidden closure underneath. The result is photogenic from the front and still practical in a pocket.
Editor's noteRun a lighter quickly along ribbon ends to stop fraying before you glue anything.
Make the base wallet with a thin foam core and a fabric exterior like cotton drill or faux leather. Bind the edges with bias tape so the ribbon attachment area stays flat. Glue or stitch a ribbon loop on the front panel using a small backing patch, then close the wallet with a magnetic snap placed slightly below the bow so it stays hidden.
Skip thisDon’t tie a full bow on top of a bulky hinge — it will warp the fold.
3. Hot Pink Quilted Wallet with Faux Channel Stitching
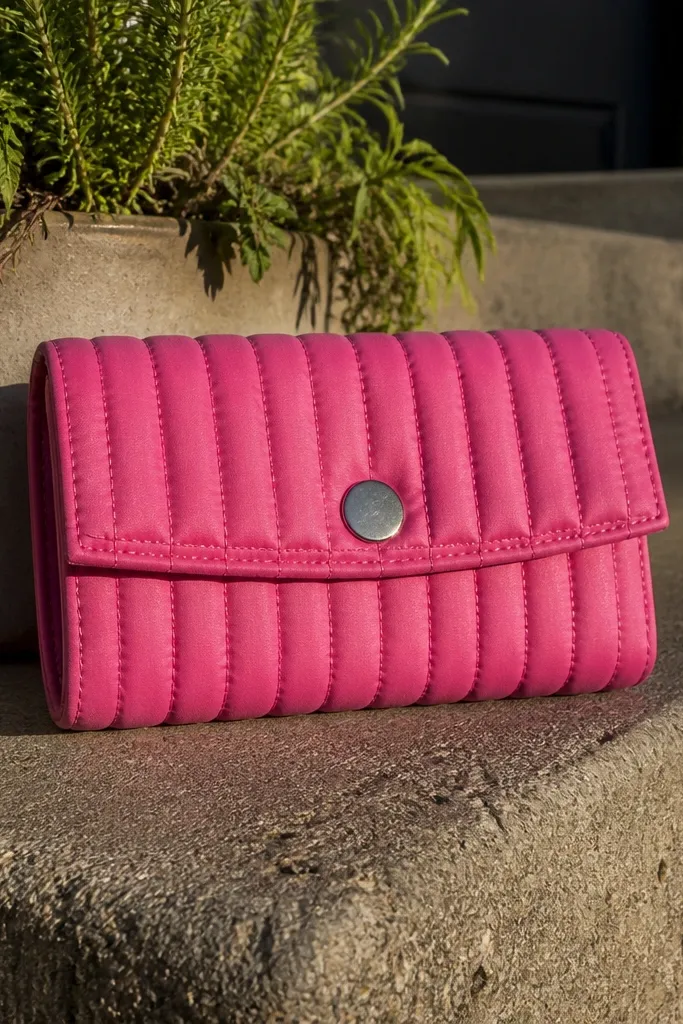
Quilted texture reads expensive in photos, even when it’s DIY. The key is channel lines that look intentional instead of wavy. A hot pink exterior plus simple faux stitching makes the front pop, and the raised channels hide minor alignment issues. You’ll also get a softer, cushioned feel while still keeping the wallet rigid enough to hold its shape.
Cut a foam core to tin size, then cover it with hot pink fabric (cotton or velvet-feel fabric works well). Mark 3 or 4 evenly spaced channel lines with a disappearing fabric marker, then stitch along them using matching thread. Add a thin backing layer so the stitch doesn’t warp the foam, then install a small snap or hook-and-eye at the center.
Use a walking foot or go slow — quilting stitches look cleaner when the fabric feeds evenly.
Don’t use slippery satin fabric for the quilt top — it shifts and the channels won’t line up.
4. Dusty Rose Denim Wallet with Contrast Topstitch
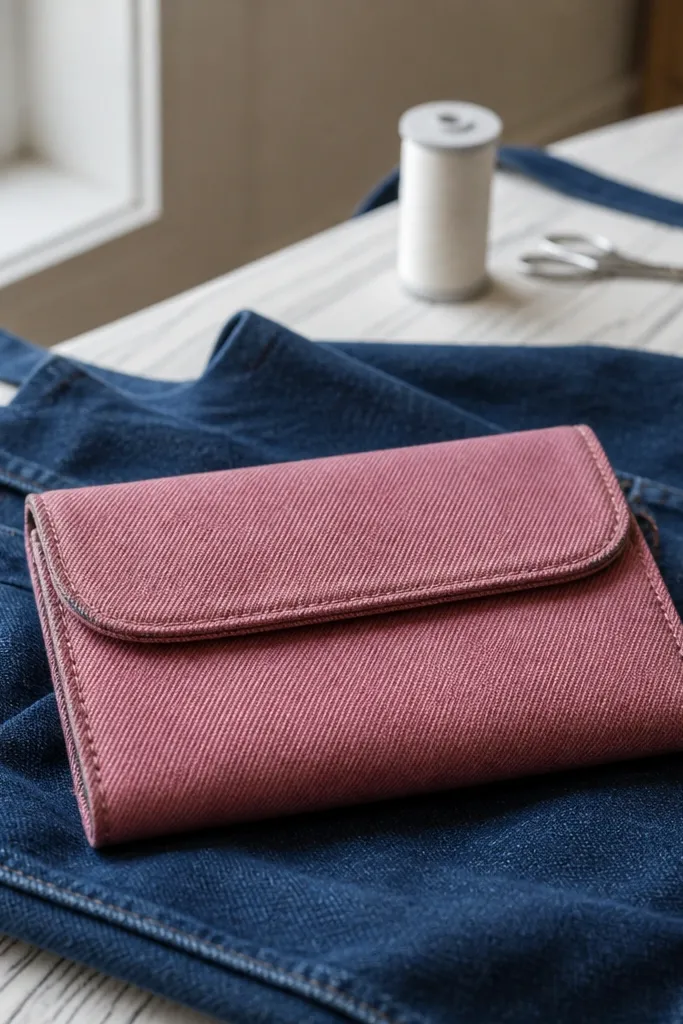
Denim gives you structure and a casual, stylish look that still photographs well. Dusty rose denim is forgiving and hides small bumps, but it still holds a crisp edge when you bind it. Contrast topstitching makes the wallet look intentionally designed. This is a great choice if you want a pink wallet that doesn’t look like it came from a craft bin.
Editor's notePre-wash and dry denim so the color doesn’t shift and the fabric doesn’t shrink later.
Use a denim exterior and add a thin layer of interfacing or craft foam to keep it stiff. Bind the perimeter with matching fabric bias tape, then topstitch 3-4 mm from the edge using thick thread. For the closure, sew a snap tab on the inside and a matching snap on the front so the outside stays clean.
Skip thisDon’t skip interfacing — denim alone can bow and ruin the flat front.
5. Pastel Pink Faux Fur Wallet with Magnetic Clasp
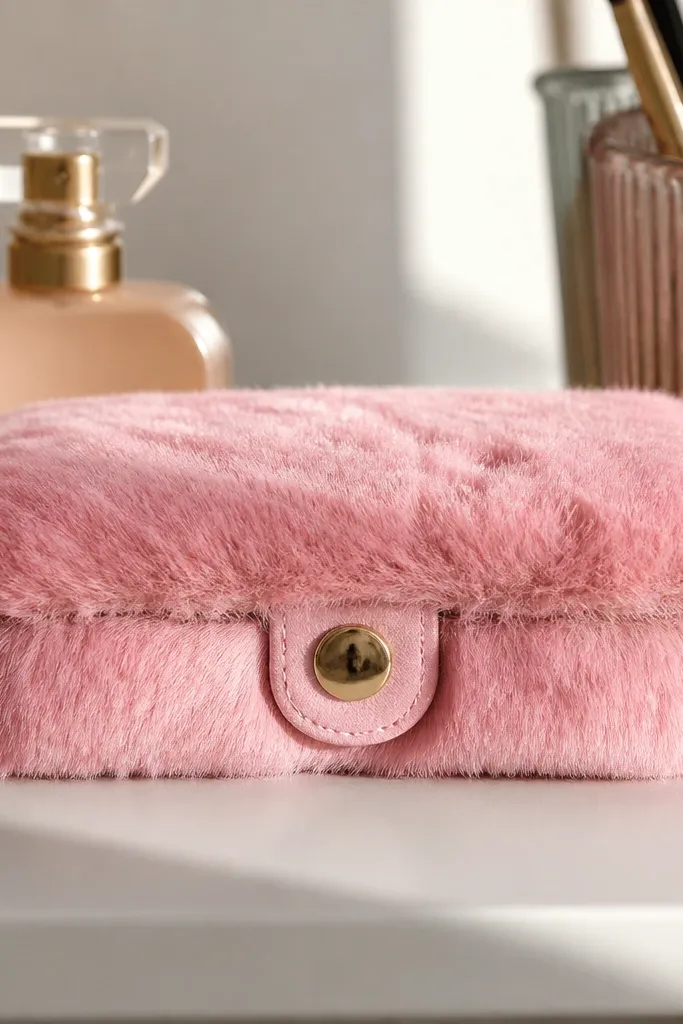
Faux fur looks dreamy in bright light because it creates soft texture and shadows. The trick is using a magnetic clasp so the fur stays uninterrupted and clean. Pastel pink keeps it sweet, not loud. You’ll need a firm base underneath so the fur doesn’t collapse and the wallet still closes tightly.
Build a standard foam-core wallet base first, then cut faux fur with the nap direction going the same way. Glue a lining layer over the foam, then attach the fur on top using fabric glue so you don’t soak the backing. Install a magnetic clasp on the front and inside panel, and press seams with a heavy book for an even set.
Brush the fur with a soft toothbrush after gluing so the nap lines up for a clean photo finish.
Don’t glue fur directly to weak cardboard — it tears when you open the wallet.
6. Pink Marble Vinyl Wallet with Edge-Coated Finish
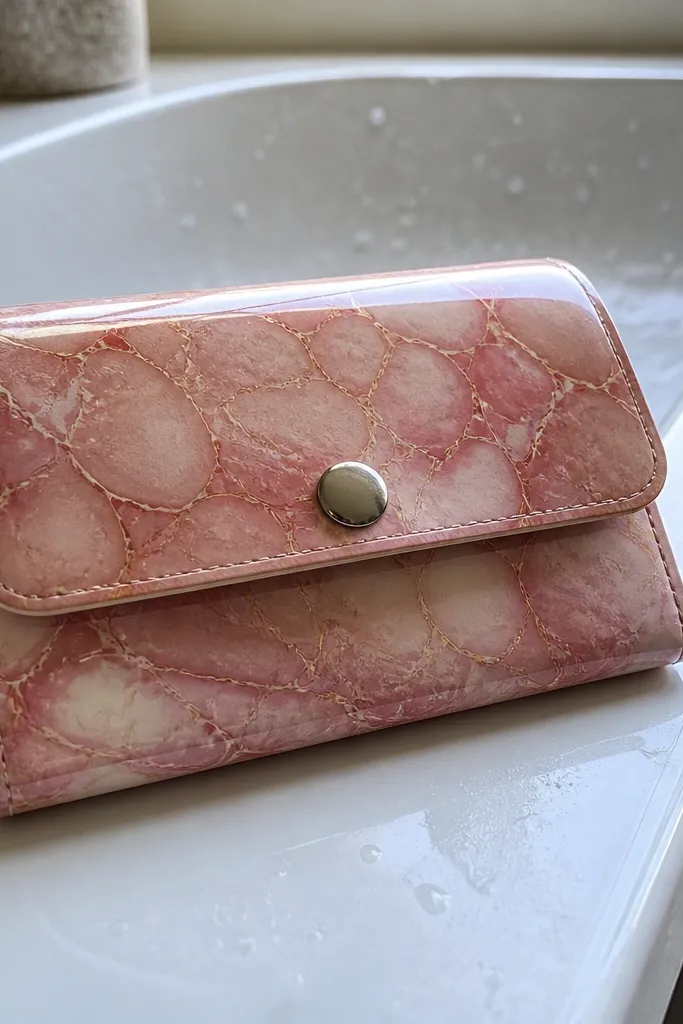
Marble-pattern vinyl looks like real stone in photos, and it’s incredibly forgiving for DIY because the pattern hides tiny imperfections. Glossy edge sealing makes the wallet look polished instead of homemade. Keep the design simple: let the vinyl do the heavy lifting. A simple snap closure keeps the front looking clean.
Cut the marble vinyl slightly larger than the foam core, then trim after gluing so edges stay sharp. Seal exposed foam edges with fabric glue or Mod Podge matte, then let it dry fully before assembly. Attach a snap closure at center, and coat the outer edges with a thin, even layer of clear acrylic or edge finishing product.
Use a plastic ruler to burnish vinyl edges — it reduces lifting and keeps corners crisp.
Don’t use heavy fabric glue blobs — they show through vinyl.
7. Powder Pink Felt Wallet with Embroidered Heart Frame
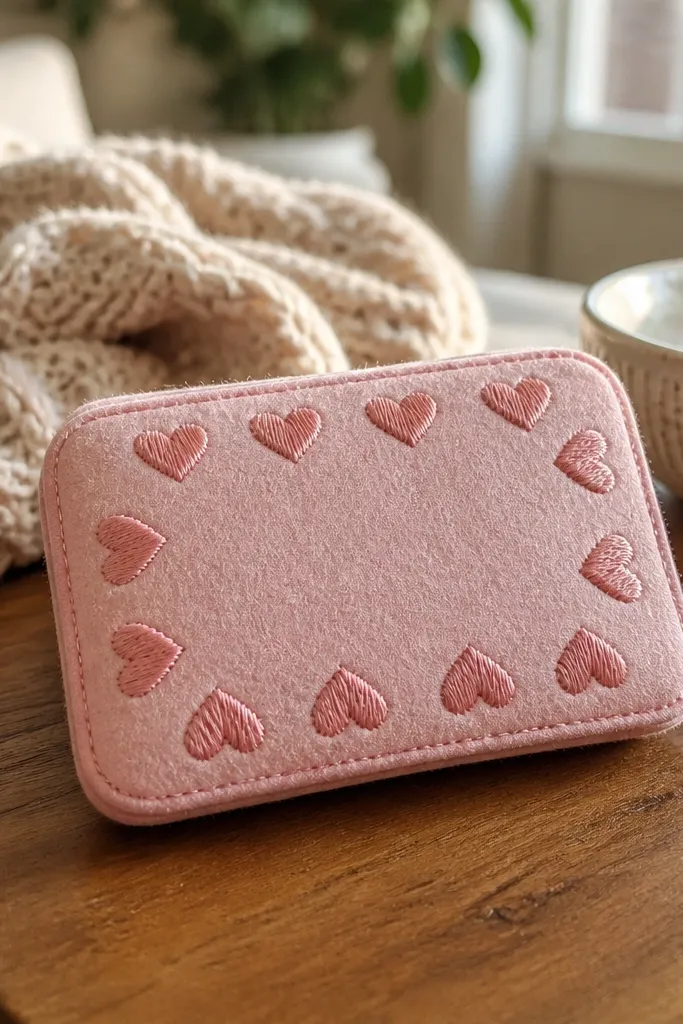
Felt gives you a soft, cozy look and it hides bulk better than most fabrics. Embroidered hearts add a sweet focal point without needing fancy materials. Powder pink is flattering because it reads gentle in indoor light. This project is also friendly for beginners because felt won’t fray much, and you can skip complicated edge binding.
Editor's noteUse 6 strands of floss for a thicker, more visible embroidery line on felt.
Cut felt panels for exterior and lining, then glue them to a thin craft foam core. Outline a heart frame with a fabric marker, then embroider using backstitch or satin stitch with embroidery floss. Add a simple snap or Velcro tab at the center back, then stitch the sides closed using a whip stitch for clean edges.
Skip thisDon’t stretch felt while stitching — it makes the heart look wonky.
8. Pink Glitter Heat-Transfer Wallet with Clear-Coat Top
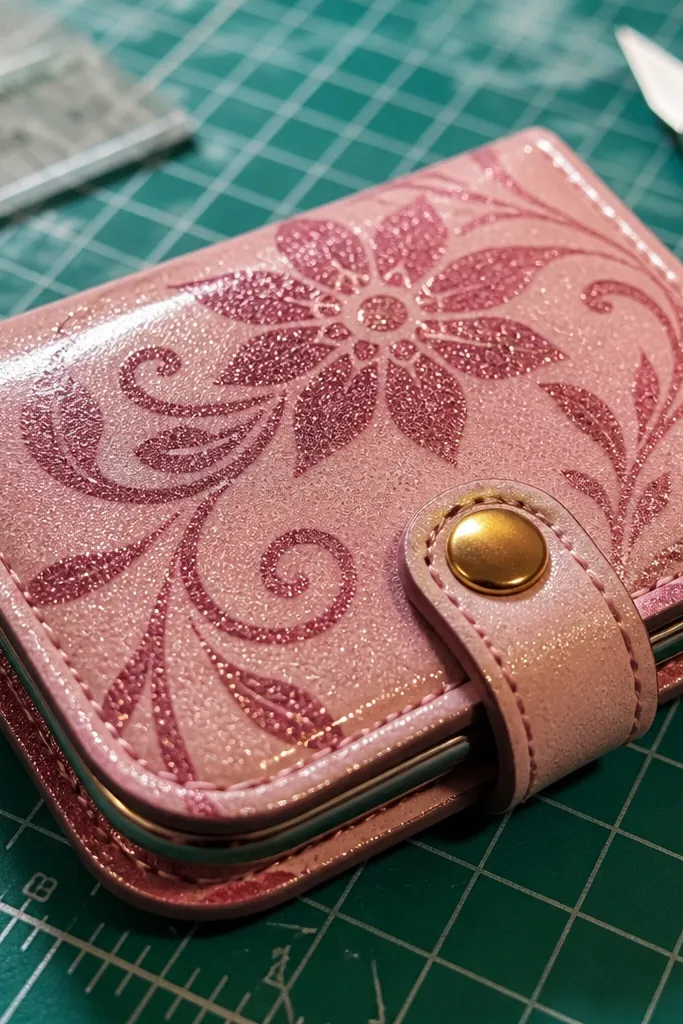
Glitter looks amazing when it’s sealed. The downside is glitter can shed or look messy if you don’t protect it. This idea uses a heat-transfer glitter sheet for a sharp design, then locks it under a clear topcoat so it stays smooth and doesn’t snag. Pink base plus sealed glitter reads extra in photos, especially under window light.
Cover a foam-core wallet base with a solid pink fabric or vinyl so the surface is even. Apply a glitter heat-transfer design (like a small bow or monogram) using a heat press or careful iron method with parchment paper. After the transfer cools, paint a thin layer of clear acrylic medium over the design and edges, then let it cure fully before handling.
Test your iron pressure on scrap first — heat-transfer edges can lift if you press too lightly.
Don’t coat the design while it’s still warm; you’ll get bubbles.
9. Rose Quartz Beaded Wallet with Single-Strand Fringe
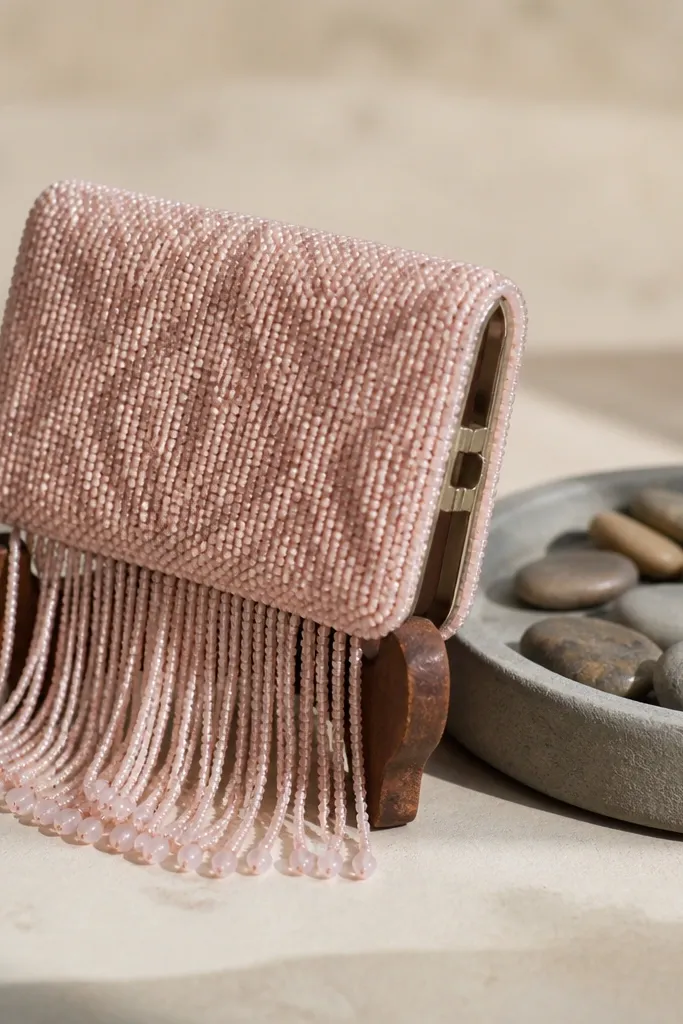
Beads turn a tiny wallet into a statement piece. The goal here is controlled sparkle: a bead field on the front plus a short fringe so it moves when you open it. Rose quartz tones look classy and pink without being neon. You’ll need a solid backing so beads don’t sag and the closure stays aligned.
Editor's noteUse a toothpick to place glue so you don’t smear it between beads.
Start with a rigid base — foam core covered in felt or thin faux leather. Plan your bead pattern with painter’s tape on the front, then attach beads using fabric glue in small sections. Add a short fringe strip using a single strand of beads tied to a stitched anchor point. Finish with a snap closure at the center and a lining to protect the beads from rubbing.
Skip thisDon’t use super-thick glue — it dries cloudy and kills the sparkle.
10. Pink Lace Overlay Wallet with Satin Ribbon Closure Tab
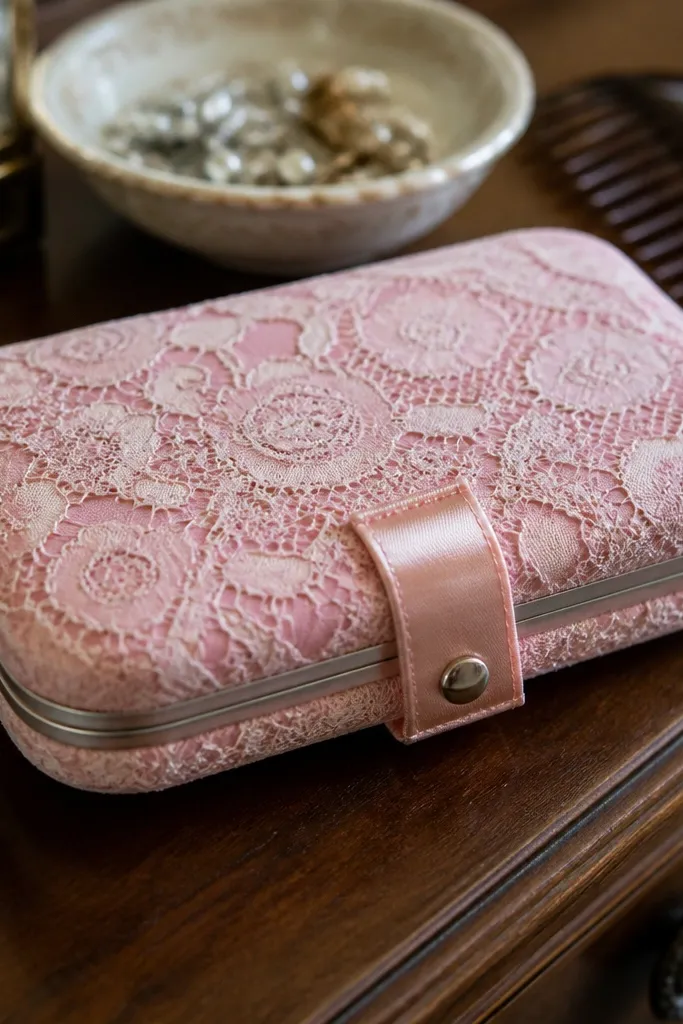
Lace looks romantic, but it needs a smooth underlayer so it doesn’t look messy. This wallet uses lace as an overlay on top of a satin or faux leather base, so the front stays neat and the lace pattern shows clearly. A satin ribbon closure tab keeps the closure pretty instead of hidden. It’s a strong pick for photos because the lace creates a soft, detailed texture.
Editor's noteUse pinking shears on lace edges before gluing to reduce fraying.
Build the base wallet with a foam core and a satin or faux leather lining so the surface is flat. Cut lace pieces to cover the front panel and glue them with fabric glue, trimming excess at the edges. Sew or glue a small satin ribbon tab on the inside, then attach a snap or magnet on the corresponding front spot. Add a thin edge binding to keep lace from peeling.
Skip thisDon’t glue lace directly onto bare foam — it lifts and looks uneven.
11. Pink Leatherette Wallet with Perforated Star Panel
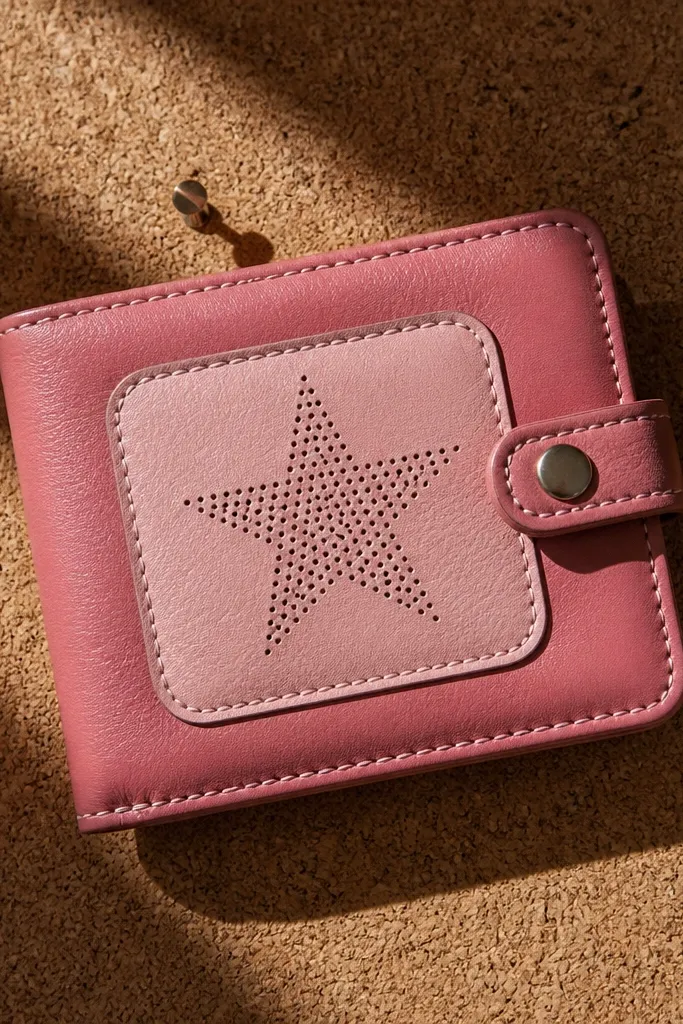
Perforation adds a designer look without needing paint or glitter. A star panel in a lighter pink leatherette makes your wallet feel intentional and modern. The interior still needs structure, so the panel stays flat and doesn’t stretch. This is a good idea if you like clean lines and want a pink wallet that looks graphic in photos.
Editor's noteIf you’re cutting leatherette, use a new blade and cut on a self-healing mat.
Cut your main exterior from pink leatherette and place a thinner layer of interfacing on the back to keep it stable. Mark a star shape on the front and carefully cut perforations or remove the star area depending on your material thickness. Back the cut area with a contrasting sheer or solid liner fabric to create a clean window effect. Install a snap closure and stitch the edges with a tight zigzag or edge stitch for durability.
Skip thisDon’t skip backing fabric behind cutouts — the edges fray and look raw.
12. Pink Washi Tape Tile Wallet with Clear Laminate Cover
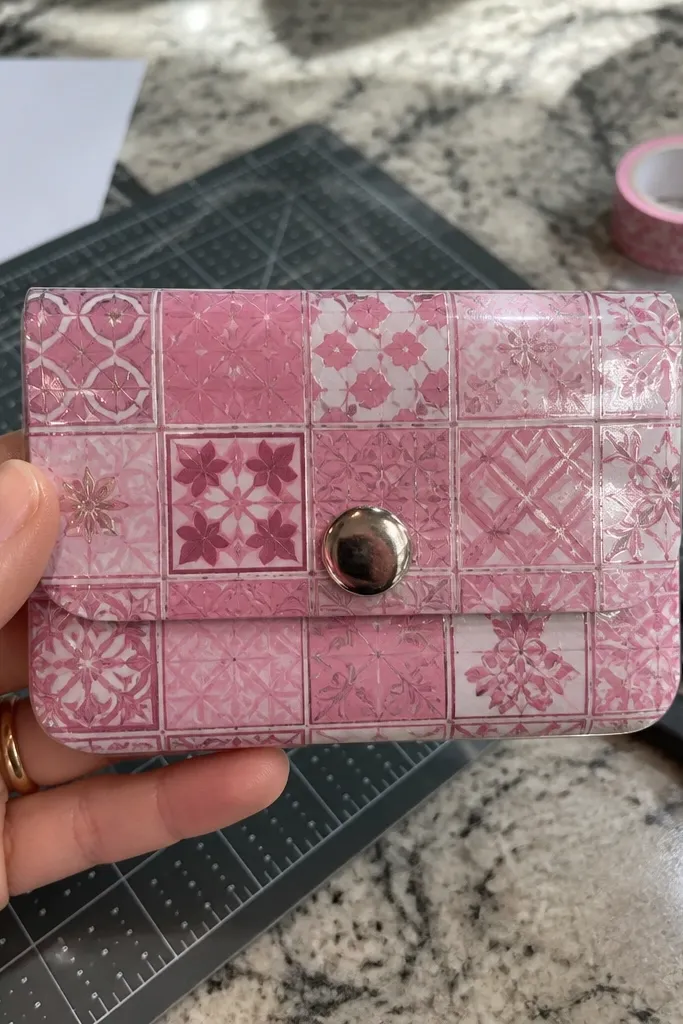
Washi tape is cheap, fast, and perfect for experimenting with pink patterns. The problem is tape edges lift unless you seal it. This version fixes that by sealing the entire front under a clear laminate sheet, keeping the pattern crisp and glossy. It looks like a tiny design project instead of a craft hack.
Cut a foam-core wallet base and cover the front with a solid pink underlayer so tape colors stay true. Apply washi tape in small rectangles or strips like a tile grid, overlapping edges slightly for clean seams. Trim carefully along the wallet outline and seal with a clear laminate or clear adhesive film, smoothing from the center outward. Add a snap closure and lining so the laminate doesn’t scratch.
Use a craft knife to trim the tape edges after sealing — it keeps the outline razor sharp.
Don’t apply tape straight onto soft foam — it wrinkles and the seal won’t bond.
13. Pink Button Cluster Wallet with Fabric-Backed Stitching
A button cluster makes a tiny wallet feel like a collectible. The aesthetic is all about spacing: buttons should sit in a tight group with a consistent arc, not scattered randomly. Use different shades of pink buttons for depth, but keep sizes controlled so it reads intentional. A center snap keeps it functional and keeps the front looking tidy.
Editor's noteUse two thread passes for the largest button so it doesn’t loosen with bag friction.
Cover a foam core with a solid pink fabric or felt for a stable base. Arrange 10-20 buttons in a cluster shape and mark placement with a washable marker. Sew each button through the fabric and foam liner using strong thread, then reinforce the area with a small fabric patch on the back. Install a snap closure at center and stitch the wallet closed using matching thread.
Skip thisDon’t use loose shank buttons without reinforcing — they wobble and look sloppy.
14. Pink Ombre Fabric Wallet with Folded Edge Binding
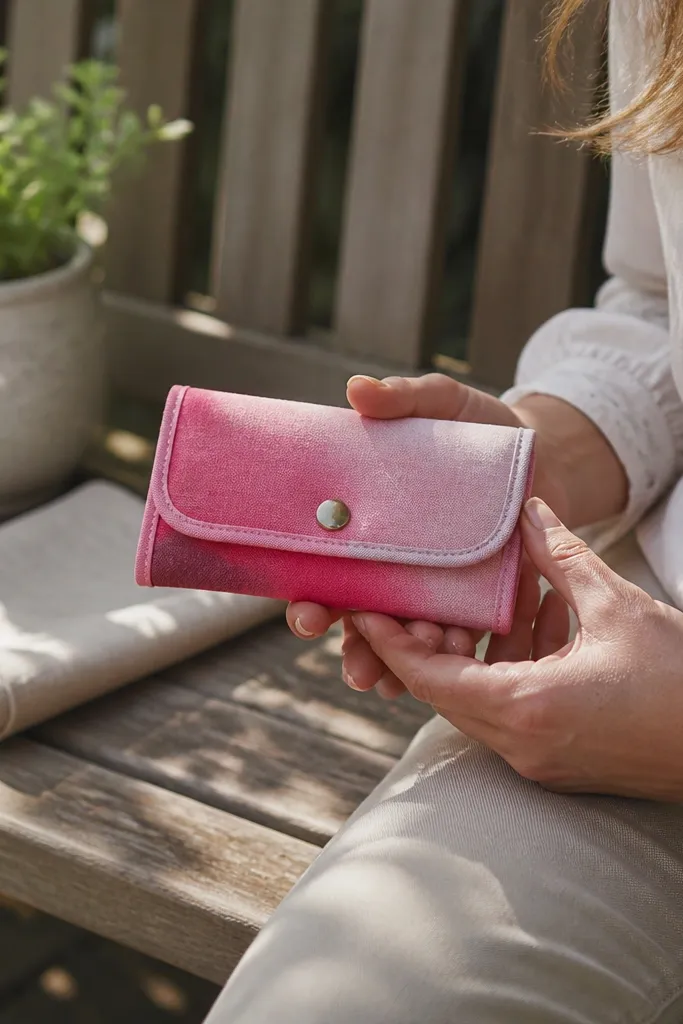
Ombre is one of the few patterns that looks great even on a small object. You get depth across the front without adding bulky decoration. Folded edge binding makes the wallet look finished because it hides raw fabric edges and gives you a crisp line. It’s best for fabric exteriors like cotton, canvas, or jersey blends.
Choose an ombre fabric panel that transitions from light pink to hot pink across the width of the tin. Cut a foam core to size, then wrap the ombre fabric around it and glue or stitch the back seam. Bind the perimeter using folded bias tape, then install a snap or magnetic closure at the fold line so the front stays smooth. Line the inside with a coordinating solid fabric to prevent fraying.
Match the ombre transition to the wallet’s center so the darkest pink lands where the eye goes.
Don’t cut ombre fabric randomly — you’ll lose the gradient effect.
15. Pink Vinyl Starburst Wallet with Heat-Sealed Pocket
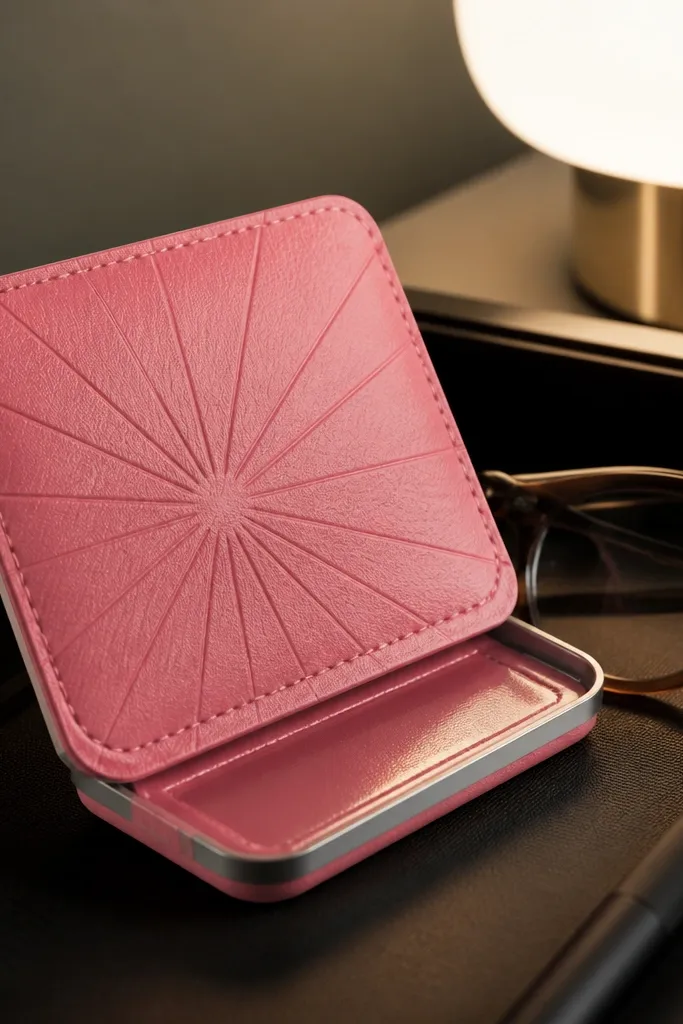
Starburst shapes look bold and cute, and vinyl makes the edges look sharp. This idea also adds a simple interior pocket with heat-sealed vinyl, which makes it feel more useful than a decorative wallet. Pink vinyl with a starburst front reads graphic in photos. It’s a stronger pick if you want something that holds small cards without stretching.
Make a vinyl-covered foam core wallet shell. Cut a starburst shape from a contrasting pink vinyl and attach it to the front using vinyl glue or heat-activated adhesive. For the interior pocket, cut a rectangle of clear or solid pink vinyl, place it where you want it inside, and heat-seal around the edges with a heat tool or using a heat-seal tape method. Add a snap closure and trim any excess vinyl from the pocket edges.
Use a pressing cloth when heat-sealing vinyl so you don’t leave shiny marks.
Don’t skip trimming pocket edges — trapped vinyl layers catch on cards.
16. Pink Photo-Frame Wallet with Mini Window Card Slot
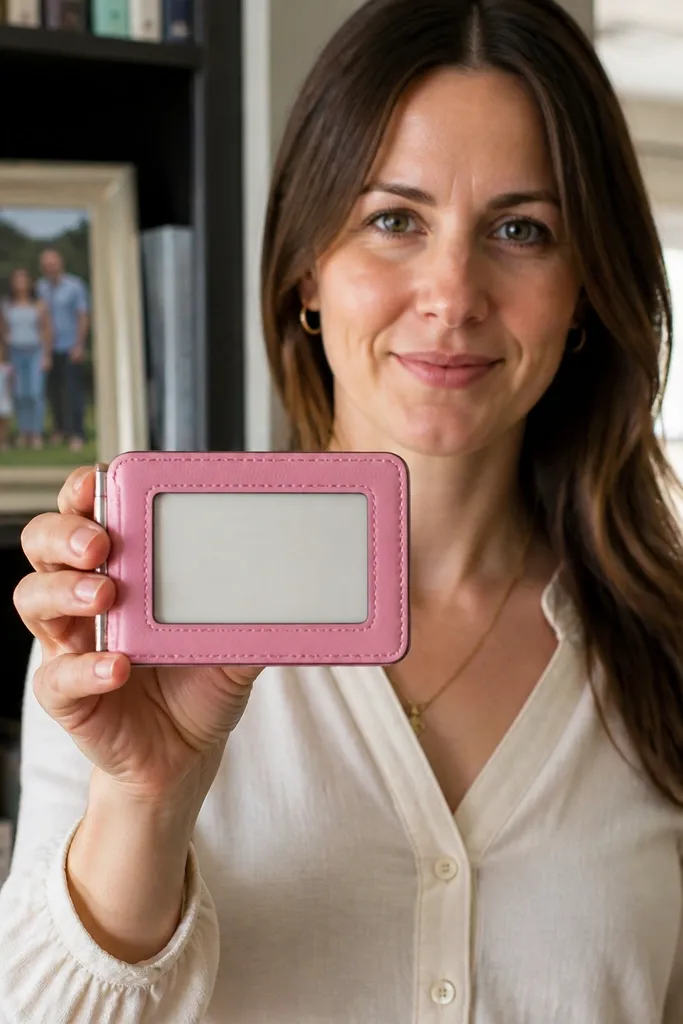
This design gives you a “display” look. A mini window slot lets you tuck in a small card or quote card, and the frame style makes the front read like decor, not just storage. Pink tones keep it dreamy, and the window keeps it visually interesting even when it’s empty. Use clear plastic or laminate for the window so it stays smooth and scratch-resistant.
Editor's noteRound the corners of the window plastic — sharp corners scratch faster.
Build a foam-core wallet base and cover it with pink fabric or vinyl. Cut a rectangular window opening on the front and back it with clear plastic, attaching it with a thin frame layer on top. Sew or glue the frame edges down so the window feels flat. Add an internal card slot behind the window and use a small snap closure at center back.
Skip thisDon’t use thin paper for the window — it wrinkles and blurs the card.
17. Pink Fold-Over Wallet with Chain Strap Detail
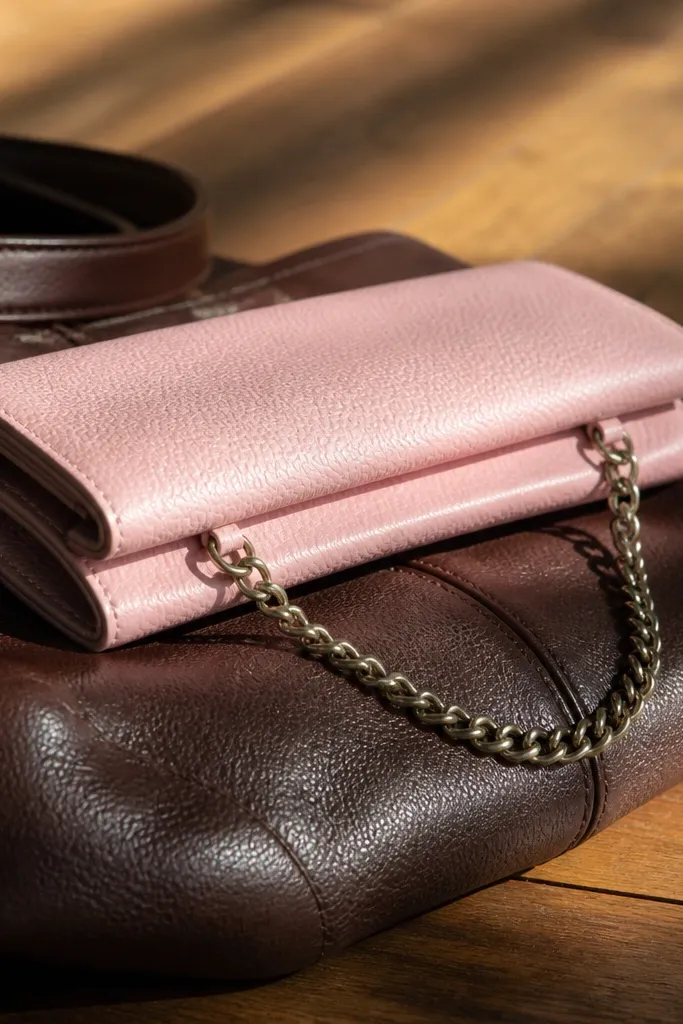
If you want “cute accessory” energy, add a chain strap detail. The fold-over shape keeps the front smooth, while the chain gives motion and makes the wallet look styled. Use a small chain and attach it to reinforced fabric tabs inside so it doesn’t pull through. Pink faux leather or coated canvas holds the fold shape and photographs clean.
Editor's noteUse a metal awl to guide stitches through faux leather — it prevents jagged holes.
Cut a fold-over wallet pattern: one front panel that wraps over the base and one back panel that stays flat. Add foam core to both panels but keep hinge area thinner by using thinner foam or trimming foam away at the fold. Attach chain tabs on the inside corners using stitched reinforcement squares. Install a snap closure so the fold locks tight, then cover the outside with pink faux leather and trim edges.
Skip thisDon’t attach chain directly to foam without fabric — it tears at the anchor points.
18. Pink Paper-Craft Wallet with Laminated Origami Panels
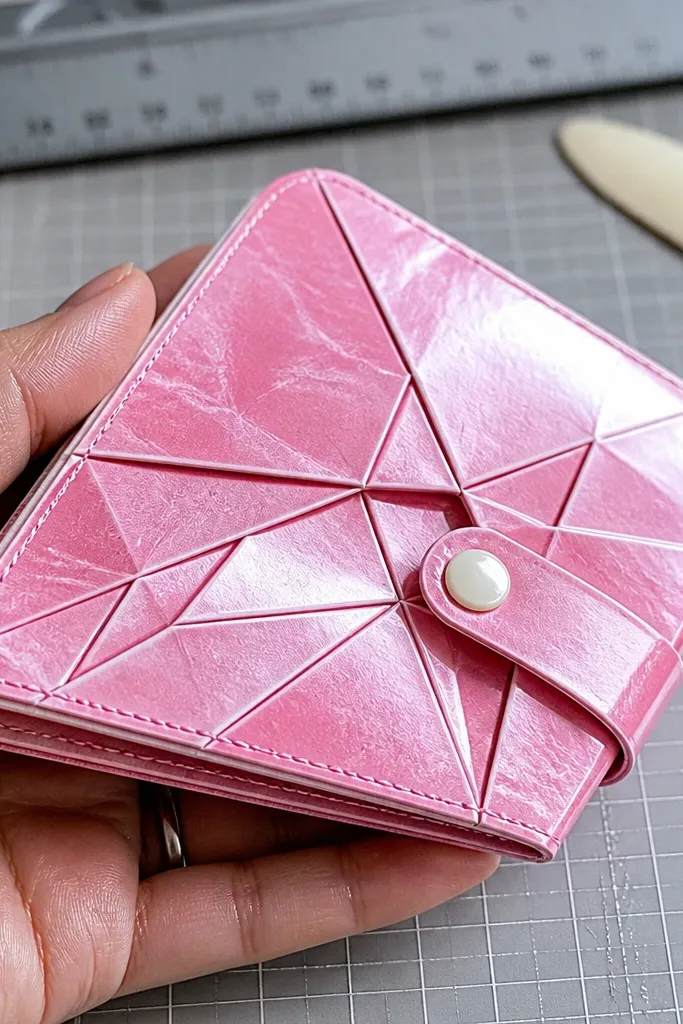
Origami-style panels look super dreamy because they catch light on the folds. The catch is paper needs protection, so you laminate the front. Use thicker paper like cardstock or craft paper, fold it into simple geometric layers, then laminate so it stays crisp. This makes a wallet that looks like mini wall art while still functioning as a wallet.
Editor's noteFold on a cutting mat with a bone folder so the lines stay sharp before you laminate.
Cut and fold geometric panels from thick craft paper, keeping the folds tight and squared. Laminate the finished panel with clear adhesive film, smoothing out bubbles. Glue the laminated panel onto a foam-core wallet front, then add a lining behind so edges don’t snag. Install a snap closure and finish the perimeter with binding tape to keep paper from lifting.
Skip thisDon’t skip lamination — paper scuffs fast and looks dull in photos.
19. Pink Marbled Polymer Clay Accent Wallet
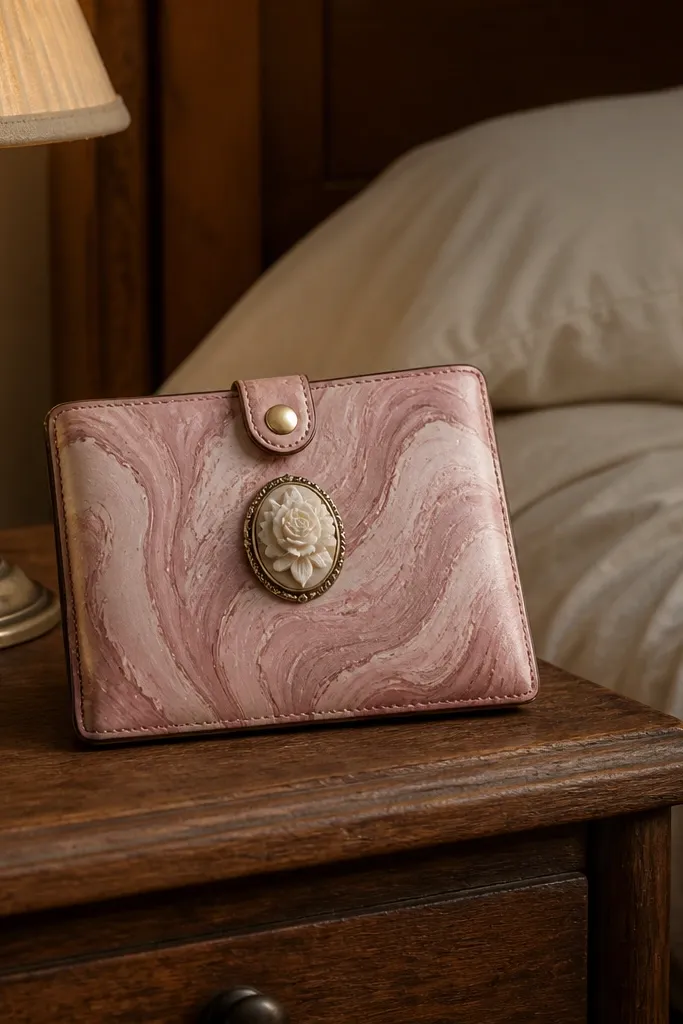
Polymer clay accents make the wallet look like it has real jewelry details. A small marbled flower or cameo sits on the front and turns a basic wallet into a statement piece. Pink marbling looks especially good because it adds depth without needing glitter. Keep the clay piece small so it doesn’t interfere with the closure.
Editor's noteSand the clay edges after baking so it doesn’t look rough under bright light.
Make a small polymer clay accent (flower, cameo, or heart) using pink and white clay for marbling. Bake it according to the clay brand instructions, then sand lightly for a smooth finish and wipe clean. Attach it to the front panel on top of a fabric or vinyl base using strong craft adhesive or two-part epoxy for durability. Seal the wallet exterior with fabric-safe clear coat if you used porous fabric, then install a center snap for a clean close.
Skip thisDon’t place a thick clay piece where the wallet folds — it will crack.
20. Pink Ribbon Rosette Wallet with Split-Edge Lining
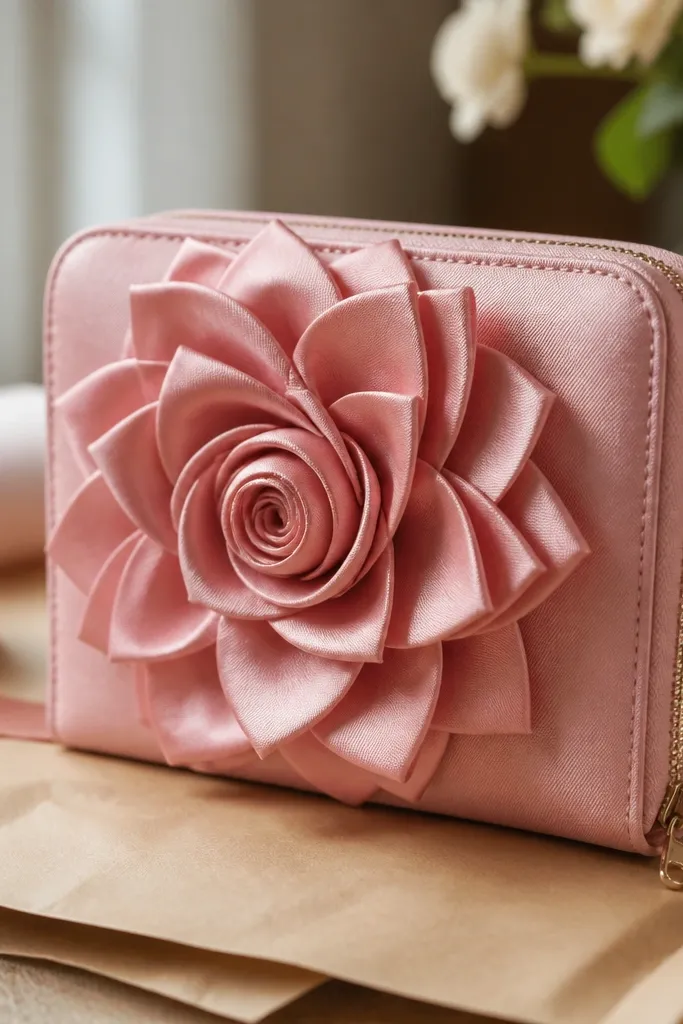
Rosettes look dramatic on small items, and pink ribbon makes it soft instead of costume-y. The rosette is the hero, so the rest needs to be clean and controlled. A split-edge lining hides the rosette mounting area so the inside looks neat. This is a strong pick if you want your wallet to read like a gift embellishment.
Editor's noteUse wired ribbon for the rosette — it holds petal shape without fighting you.
Build the wallet base with a foam core and a solid pink exterior. Make a ribbon rosette by looping ribbon around itself and stitching through the center to hold the shape. Cut a small opening area on the lining so the rosette mounting sits flat, then stitch the lining back in place. Attach the rosette to the exterior and finish with a small snap or magnetic closure aligned to the center.
Skip thisDon’t use thin ribbon without wiring — the rosette collapses over time.



