
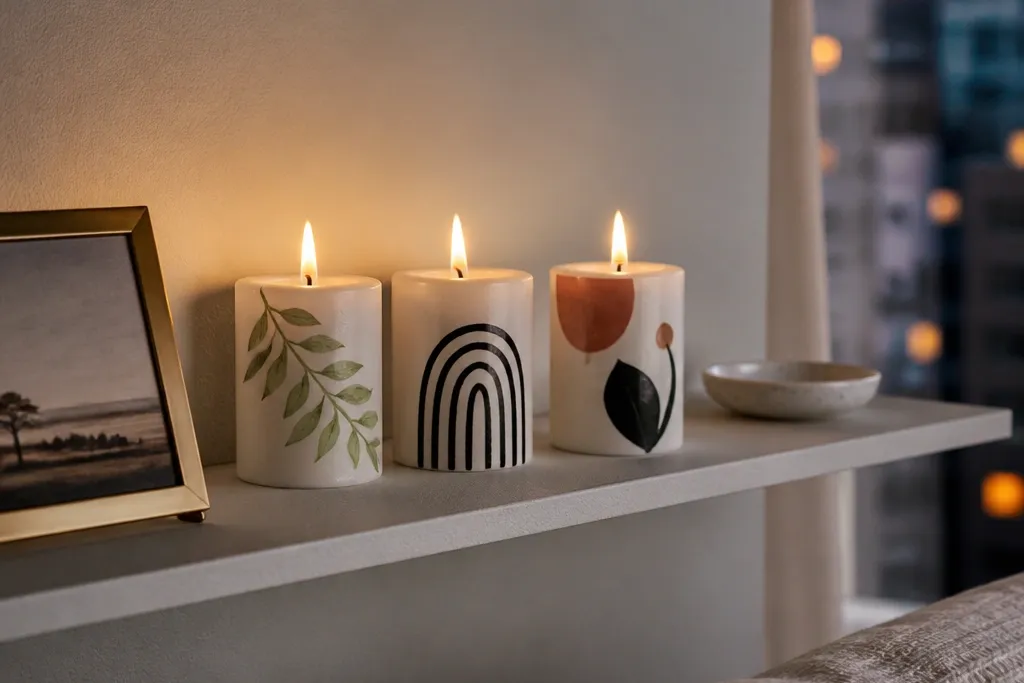

1. Tape-Stripes French Bistro Pillar
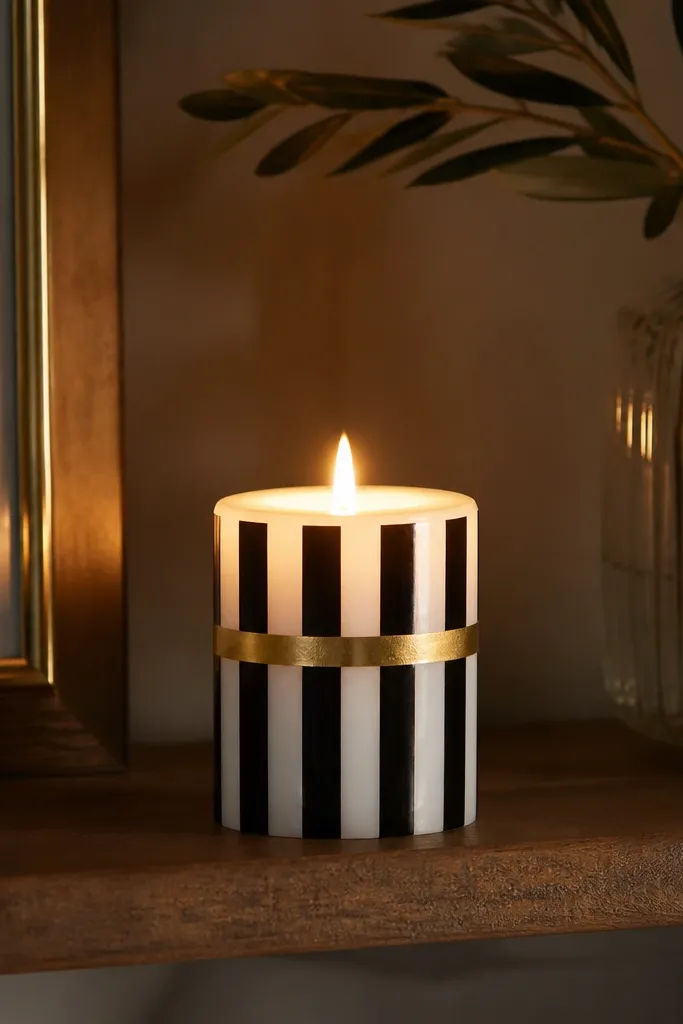
This design looks sharp even from across a small room because the stripes read instantly. You get that “designed” look without freehand pressure, and the gold line gives a warm highlight when the candle is lit. It works great on narrow shelves where you only have one candle’s visual weight. Use black for the structure and a thin gold accent so the candle doesn’t turn into a block of color. Skill level is easy, and the time is fast because tape does the hard work.
Editor's noteUse a new piece of tape for the gold line; old tape edges can smear and make the accent look messy.
Start by wiping the candle with rubbing alcohol, then dry it completely. Wrap painter’s tape around the candle at even intervals and press it down firmly so paint doesn’t bleed underneath. Paint over the exposed bands with thin black acrylic, let it dry, then remove the tape carefully. Add a single gold line using a fine liner brush, and let everything cure upright before placing it on display.
Skip thisDon’t paint thick coats over tape — they creep under the edges and blur the stripes.
2. Monochrome Botanical Dot Trail
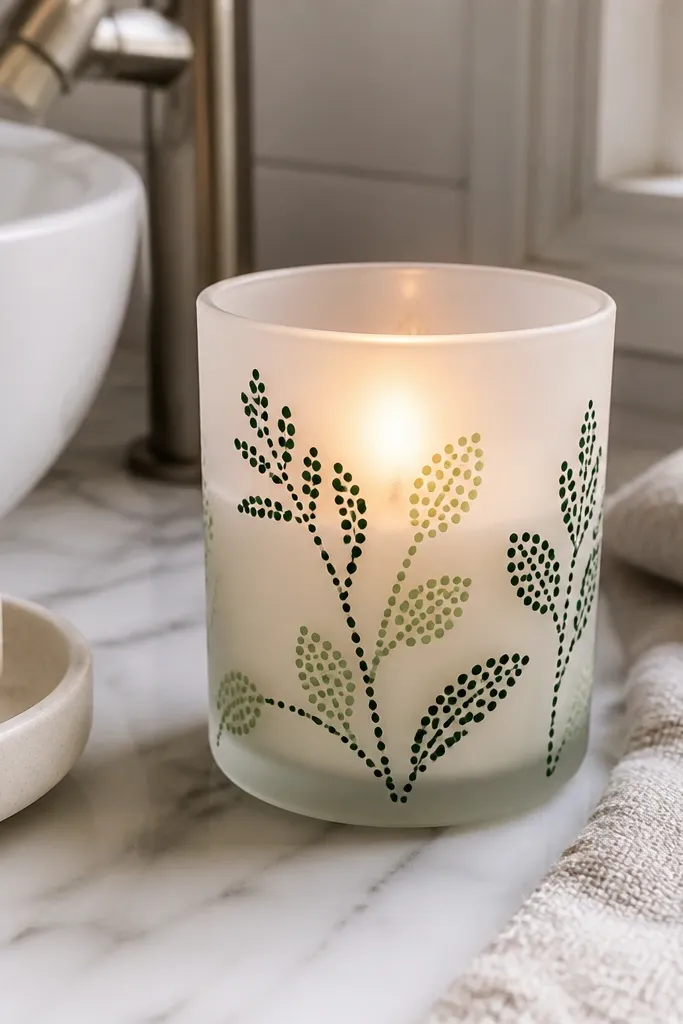
Dot trails are perfect for small spaces because they’re delicate and still readable. This one gives a plant vibe without needing detailed leaf painting. When lit, the dots glow softly and look intentional rather than random. Keep the palette monochrome (sage green, olive, or deep green) so it matches almost any decor. It takes patience, but it’s realistic for one night because you’re repeating a simple mark, not sketching complex shapes.
Draw a light guideline down the candle with a pencil or chalk pencil, then plan a gentle curve for the trail. Dip a small round brush or dotting tool into thin green paint and tap consistent dots along the guideline, spacing them evenly. For leaf hints, add tiny comma-shaped marks between dot clusters. Let it dry, then reinforce the brightest dots with a second thin layer only where needed.
Make a dot test on paper first; it tells you the exact pressure that makes dots the right size.
Skip heavy outlines — dots already carry the shape, and thick lines make it look cartoonish.
3. Scratch-Off Galaxy Swirls (No Glitter Mess)
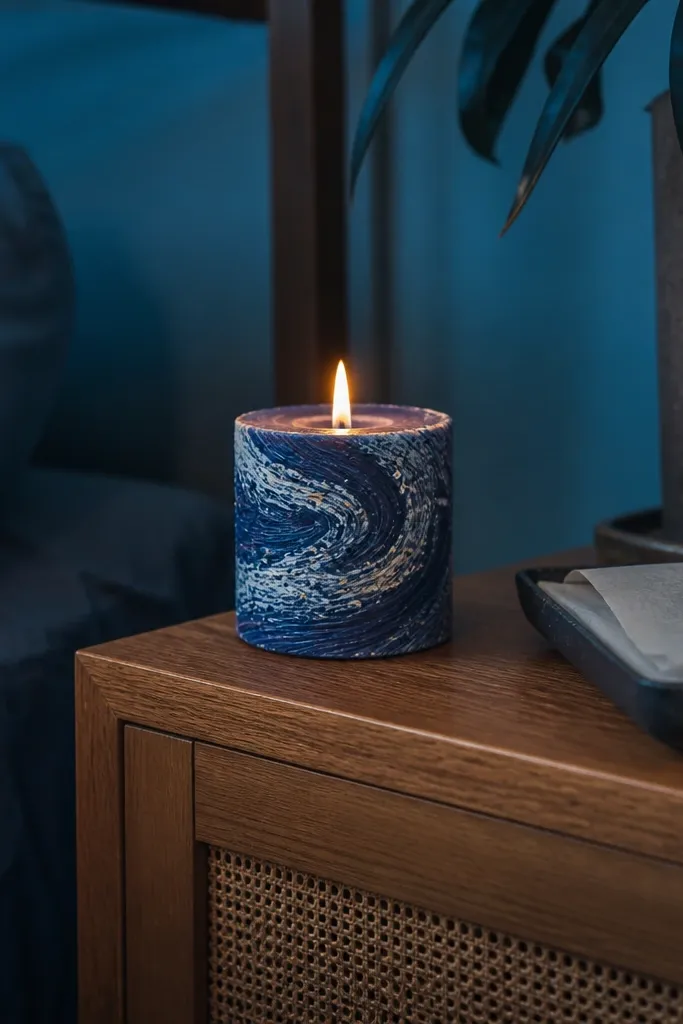
Galaxy swirls look amazing on a small table because they create movement in a compact space. The best part is that you can keep it clean without using loose glitter everywhere. This design uses layered paint and a controlled “scrape” effect to reveal lighter underlayers, so it looks textured and photogenic. You also get strong contrast: deep navy or black base plus a pale silver or icy blue reveal. It’s medium-easy and takes longer than dots, but still fits a night if you batch coats.
Editor's noteScratch at a shallow angle so you reveal “streaks,” not gouges.
Paint the candle base with two thin coats of deep navy or black acrylic, letting each coat dry. Apply a layer of a lighter color (icy blue or silver) while it’s still tacky, then use a toothpick or palette knife to gently scratch curved lines and small star shapes through the top layer. Add a few tiny specks with a toothbrush flick using watered-down paint. Let it cure fully upright before lighting.
Skip thisDon’t rush the first base coat; if it’s streaky, the galaxy effect turns muddy.
4. Terracotta Grid With Off-White Squares
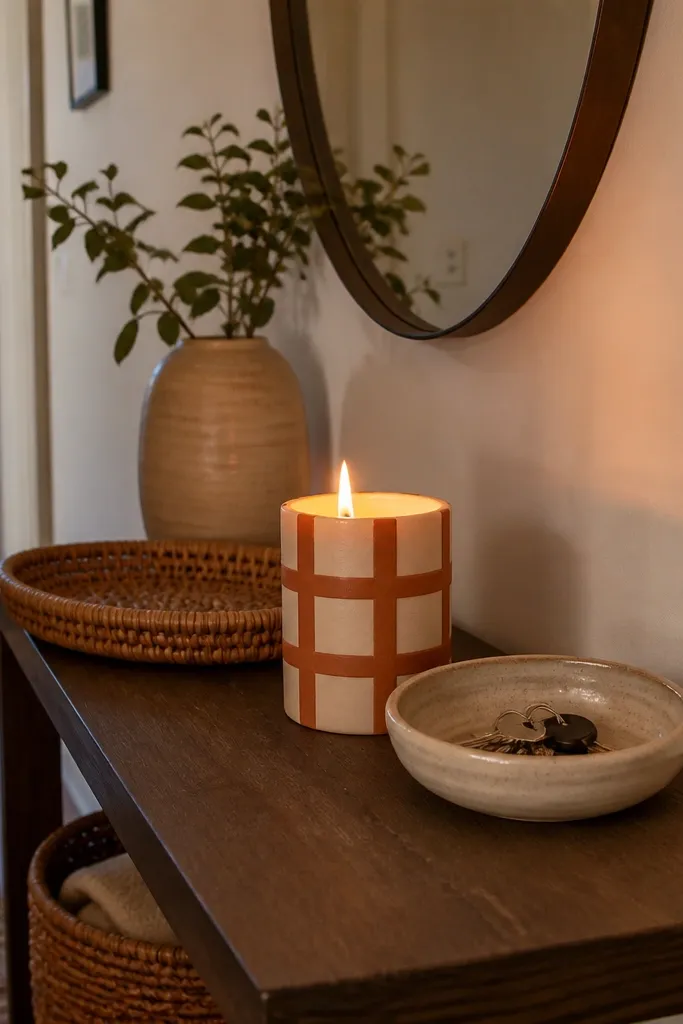
A grid design reads modern and organized, which is exactly what small spaces need. The contrast between terracotta and off-white makes it look like a design object, not a hobby candle. It also hides minor brush marks better than delicate florals. This works well on short pillars because the grid scales nicely and looks balanced from any angle. It’s easy to execute with tape and looks good even with minimal skill.
Editor's notePress tape edges with a fingernail to stop bleed; clean tape pressure is the difference between crisp and sloppy grids.
Measure the candle height and mark a few horizontal guide lines with a pencil. Use painter’s tape to form a grid, then paint the off-white squares first for a clean base. Remove the tape after the off-white dries, then tape again for the terracotta sections. Fill terracotta areas with thin paint, peel tape once dry, and touch up edges with a fine brush.
Skip thisAvoid uneven square sizes — small spaces make asymmetry obvious.
5. Rope-Tie Look Using Dry Brushing
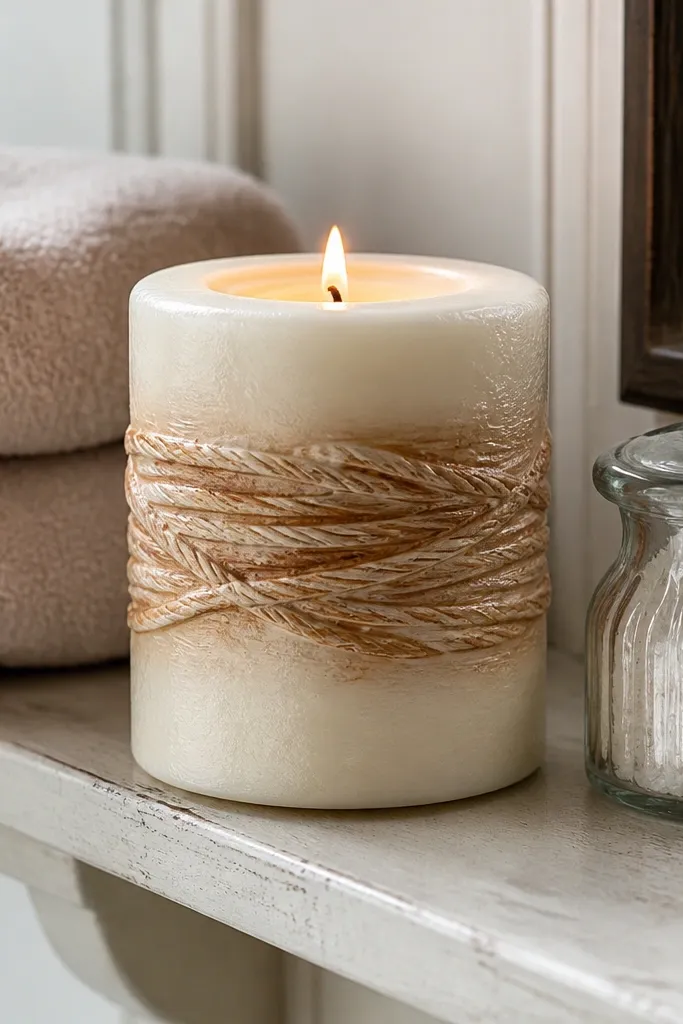
If you want the look of a wrapped candle without wrapping anything, dry brushing gives you that rope-tie effect. It’s photogenic because the texture catches light, even in a small corner. The color palette is warm and forgiving: cream base with caramel brown rope band. This is perfect for entryway shelves, bathrooms, or any spot where you want cozy without clutter. It’s beginner-friendly because dry brush technique does most of the work for you.
Paint the candle base cream and let it dry fully. Load a small flat brush with warm brown, then wipe most paint off on a paper towel until the brush looks almost dry. Brush a band around the candle in short strokes, then lightly drag the brush to create rope-like ridges. Add a second brown shade for shadow lines, then seal with a clear acrylic varnish after cure.
Use a slightly stiffer bristle brush for rope texture; soft brushes blend too much.
Don’t flood the band — wet paint kills the rope illusion.
6. Black Cherry Ombre Edge
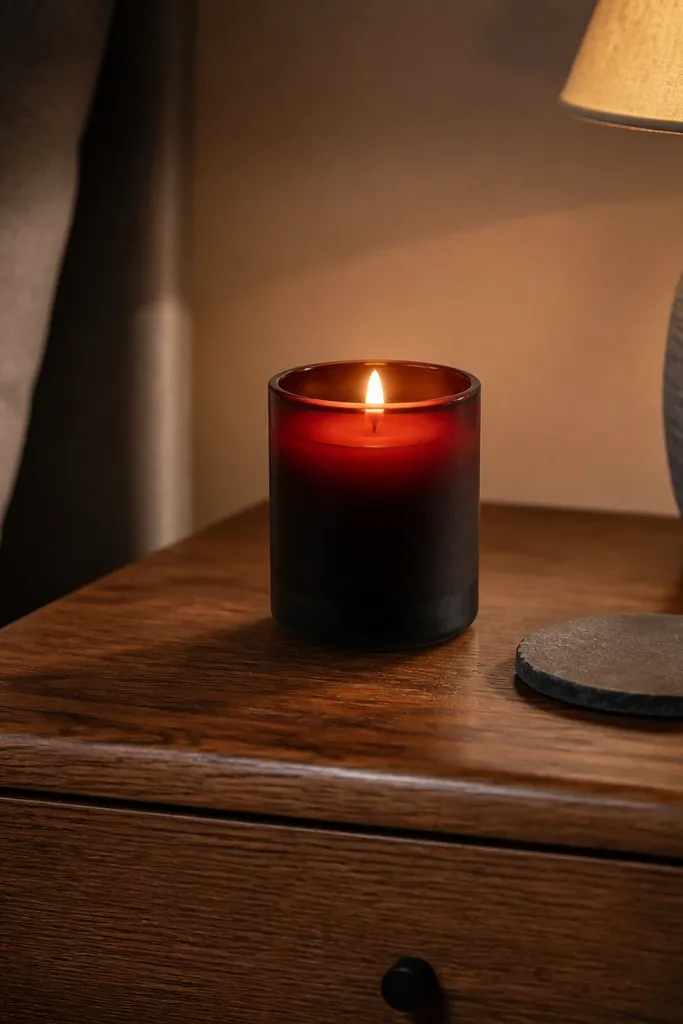
Ombre looks expensive because it creates smooth depth, even when you’re painting a small object. This “black cherry” version gives a dramatic rim effect that’s perfect for a tiny nightstand. The key is keeping the fade soft and controlled, not streaky. When lit, the darker edge frames the glow and makes the candle feel like a centerpiece. It’s medium-easy and takes about an hour with drying time.
Mark a height band on the candle rim area (about 2 inches down for a standard pillar). Paint the top band black first, then immediately blend downward with cherry red using a damp sponge or a wide brush. Work in small sections, blending until the transition is smooth. Once dry, add one more thin cherry layer where you want the color to deepen, then let it cure upright.
Blend with a slightly damp sponge — it softens transitions without leaving brush lines.
Don’t blend after the paint fully dries; you’ll get hard streaks.
7. Tiny Marble Veins With Toothpick Lines
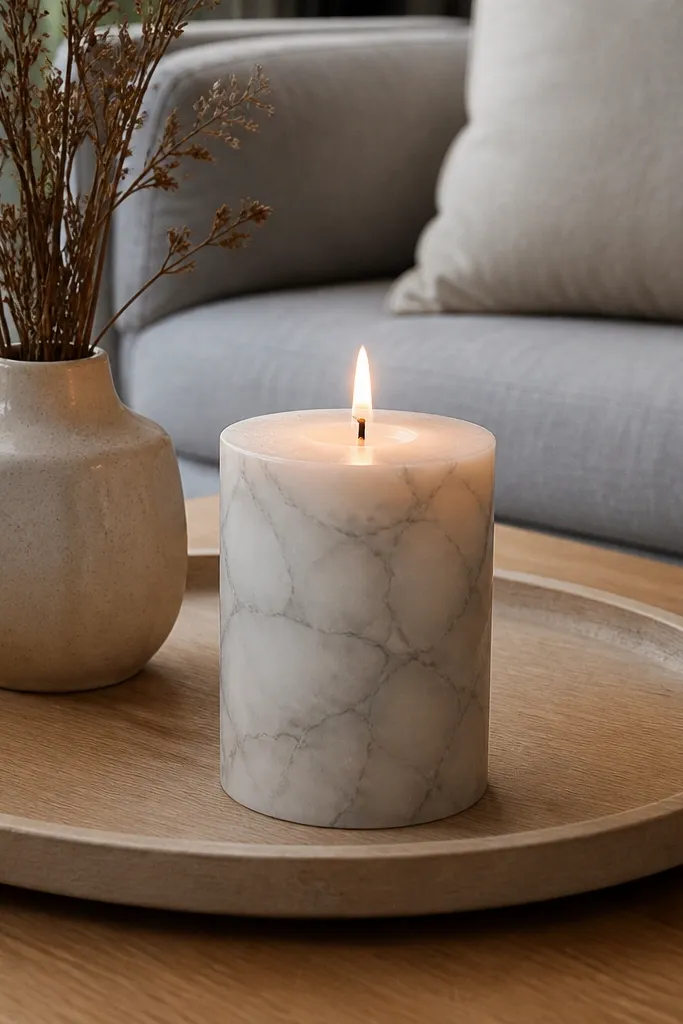
Marble veins look upscale and they photograph beautifully because the lines catch light. This version is designed for small spaces, so it stays delicate: a soft gray wash on white, then fine vein lines. You get a clean, neutral look that matches almost any room color. It also hides small dents and uneven wax texture because the marble pattern covers it. Skill is easy-to-medium; the time is quick if you keep veins thin.
Base coat the candle with white acrylic, then add a very light gray wash over the top half using a sponge. While the wash is still slightly tacky, drag a toothpick through thin gray paint to create vein lines that taper. Add a few tiny crossings, then blend the edges lightly with a dry brush so the veins don’t look like stickers. Let it dry upright and apply a clear acrylic sealer once fully cured.
Keep veins uneven in thickness; perfect symmetry makes it look fake.
Avoid thick paint veins — they turn into ropes instead of marble.
8. Sunflower Accent Band on a Plain Base
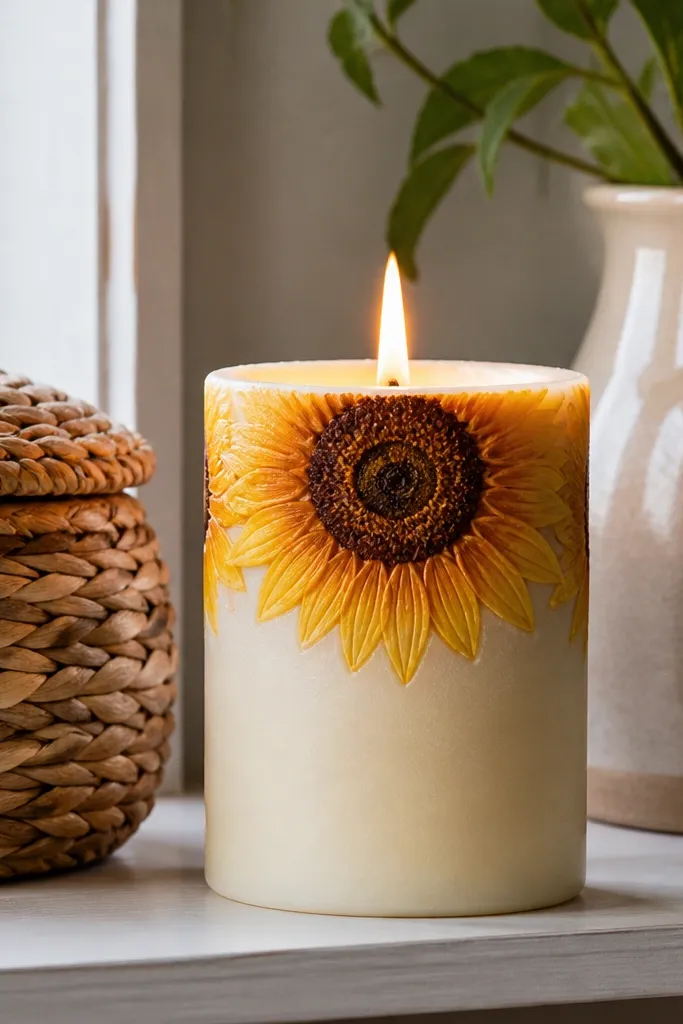
One bold sunflower on a plain base is the fastest way to get a “decor moment” in a small space. It’s photogenic because the center and petals create a focal point even in cluttered shelves. Keep the rest of the candle mostly clean so the sunflower doesn’t fight other decor. Use warm yellow and a deep brown center so it looks dimensional when lit. This is medium-easy and works well if you like drawing shapes more than texture.
Editor's noteUse a stencil for the main circle; it keeps your sunflower centered and symmetrical.
Paint the candle base a light cream or leave it natural if it’s already clean. Stencil or lightly sketch a sunflower circle in the center, then paint the center dark brown. Add yellow petals one by one with a small angled brush, starting at the outer edge and curving inward. Finish with a few tiny dots around the center for texture, then let dry fully before sealing.
Skip thisDon’t outline everything in black — it makes the sunflower look like a coloring book.
9. Pastel Chevron Wrap Using One Ruler Guide
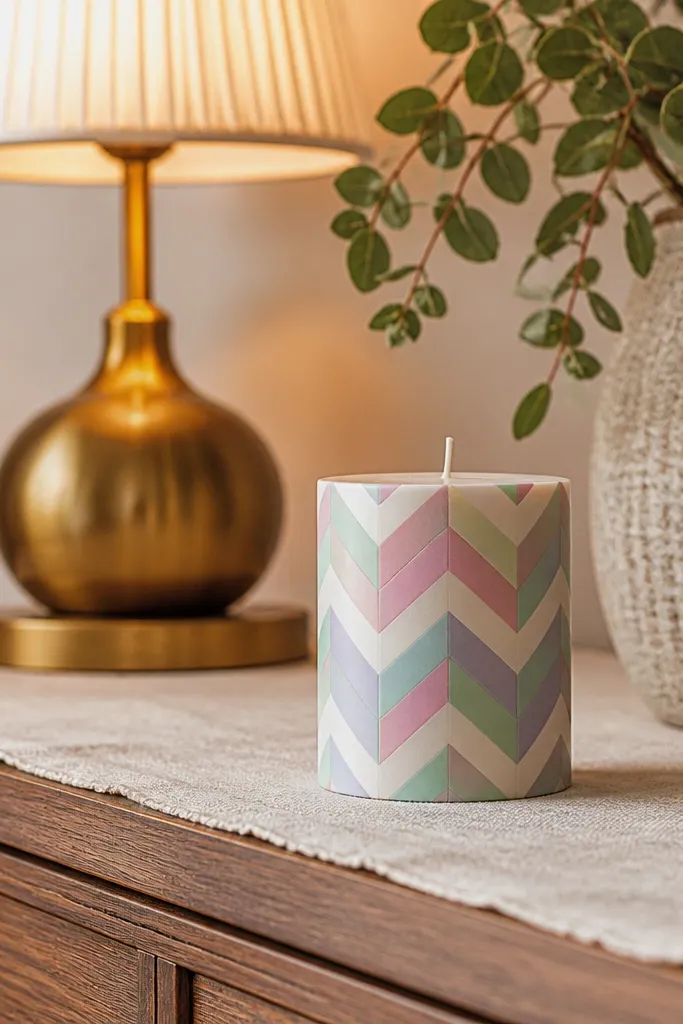
Chevron is clean, modern, and it reads well from different angles, which matters on small shelves. The pastel mix makes it feel airy instead of heavy. This design has a “wrap” effect because the triangles follow the candle’s curve. It’s also forgiving because chevrons hide slight unevenness better than circles. You can finish it in one night if you do tape lines first, paint second, and keep layers thin.
Editor's noteUse thin tape strips for the chevron tips; wide tape makes sharp angles look rounded.
Wrap painter’s tape around the candle to mark a straight baseline, then use a ruler to angle tape pieces into a chevron pattern. Paint the first chevron color (like mint) over exposed areas and let it dry. Remove tape carefully, then tape again for the next color (soft pink) and paint. Peel all tape once fully dry and touch up edges with a fine brush for crisp points.
Skip thisAvoid painting over tape more than one coat; multiple coats increase bleed.
10. Copper Dot Halo Around a Glass Candle
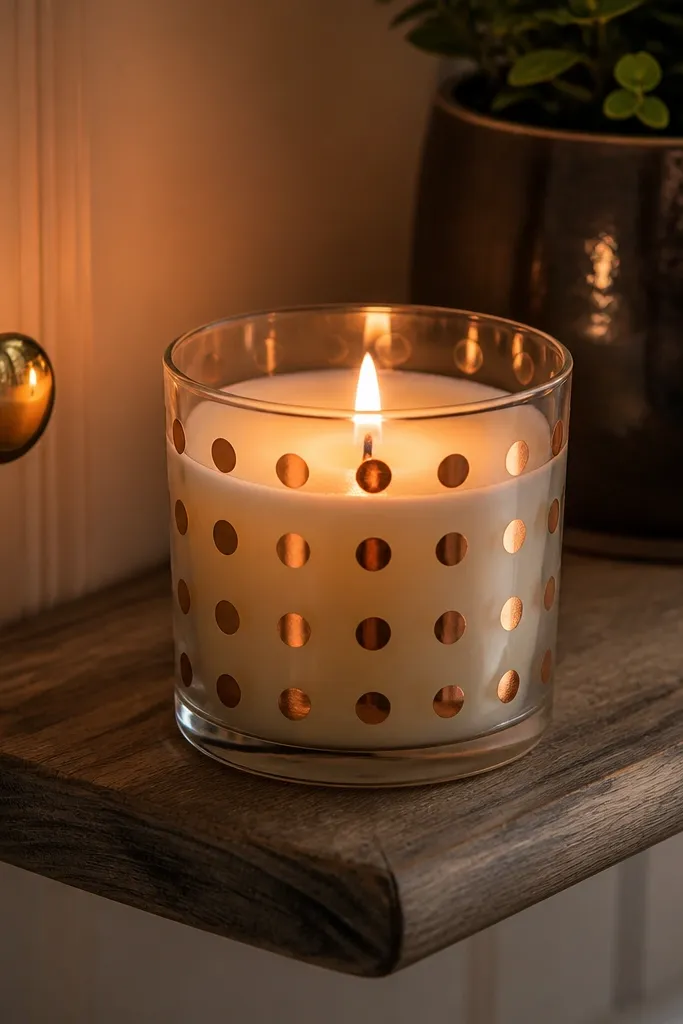
A halo of dots around a glass candle looks like jewelry, and it works perfectly in small spaces because it frames the glow instead of taking up more surface area. Copper paint reflects warm light, so the dots look brighter when the candle is lit. This design is also clean because dots are easy to control and you’re not filling large areas. It’s ideal for bathrooms and desks because it looks polished even without a lot of extra decor. Skill level is easy and the time is fast.
Clean the glass with rubbing alcohol and let it dry. Mark a ring location with a pencil (about halfway up for a standard jar), then apply dots using a dotting tool or the end of a stylus dipped in copper acrylic. Keep dots evenly spaced and use consistent pressure. Let it dry, then add a second micro-dot layer inside some dots for a dimensional look, and seal if your paint requires it.
If you want the dots to look like they “hover,” leave a tiny gap between dot edge and glass glare by rotating the candle as you paint.
Don’t use metallic paint that’s too thick — it drags and creates blobs.
11. Star Map Corner With Tape Border
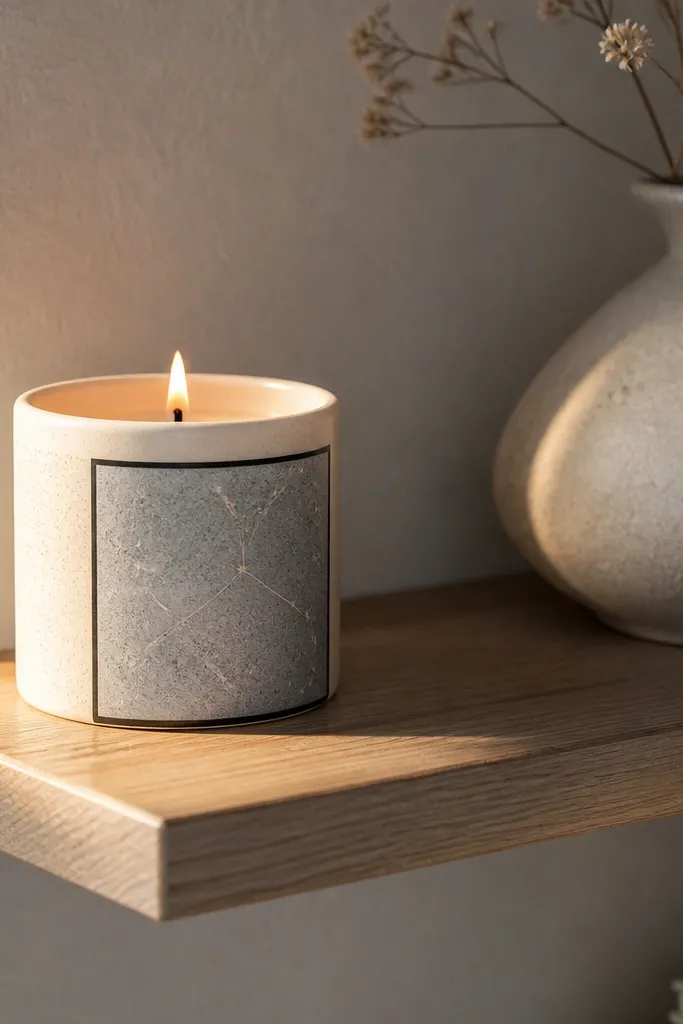
This is the kind of candle painting that looks like a mini art print, even when your shelf is tiny. By limiting the artwork to one corner with a clean border, it stays stylish instead of busy. Star map marks also create visual texture without heavy color. Use black paint for the border and pale gray for the “constellation” lines. It’s medium-easy because you’re tracing simple shapes, not drawing detailed planets.
Paint the candle base cream or use a clean natural candle. Use painter’s tape to create a thin border in one corner, then paint the border black and let it dry. Remove tape and add a few small star dots with a fine liner brush. Connect a few dots with thin gray lines, then add tiny tick marks like chart coordinates. Cure upright and apply a clear acrylic sealer if your paint needs it for durability.
Use a reference photo grid on paper to place dots — it keeps the constellation spacing balanced.
Avoid covering the whole candle — corner-only art looks intentional in tight spaces.
12. Blue Check Accent With White Break Lines
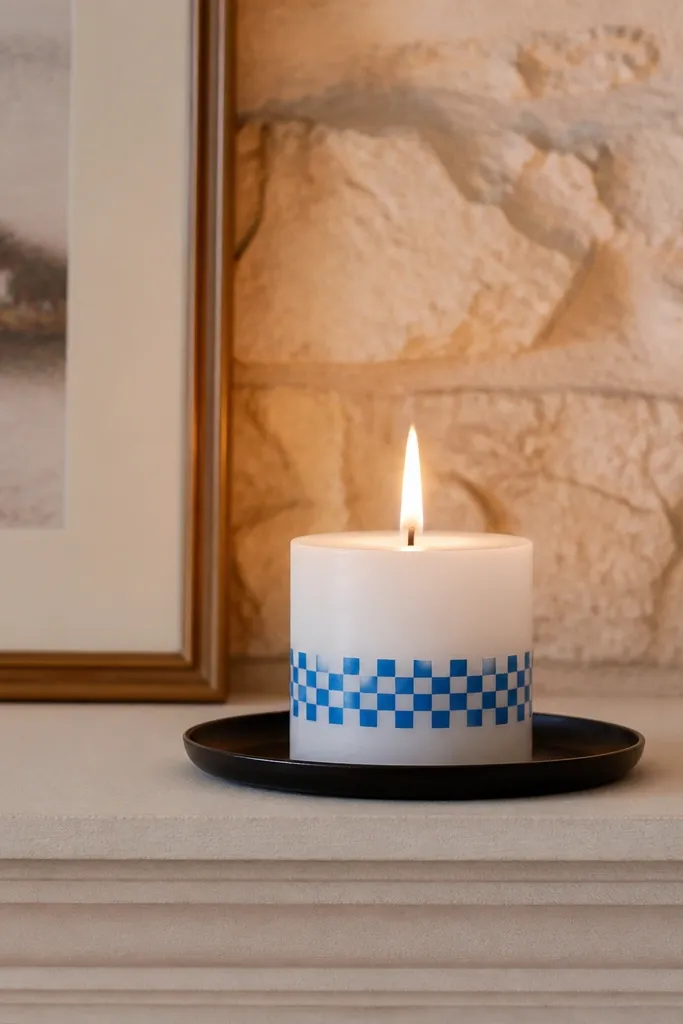
Checks read instantly and they look clean in photos because each square is defined. The white break lines make the design feel light, which helps it fit small shelves without looking heavy. Use one main blue tone plus white, and keep the check spacing consistent. This works especially well on short pillars because you get a full pattern at once. It’s easy and repeatable, which is exactly what you need for painting multiple candles in one night.
Editor's noteIf your tape edges lift, seal them down with a thin pass of the white base so paint can’t creep under.
Base coat the candle in white and let it dry. Mark rows and columns lightly with pencil to map your check size (about 1 inch squares on a standard pillar). Use painter’s tape to separate squares, then paint blue over the exposed areas. Remove tape after dry and touch up any spots with a fine brush so the white lines stay crisp.
Skip thisDon’t eyeball square size; inconsistent checks look messy fast.
13. Gold Leaf-Look With Tissue Paper Resist
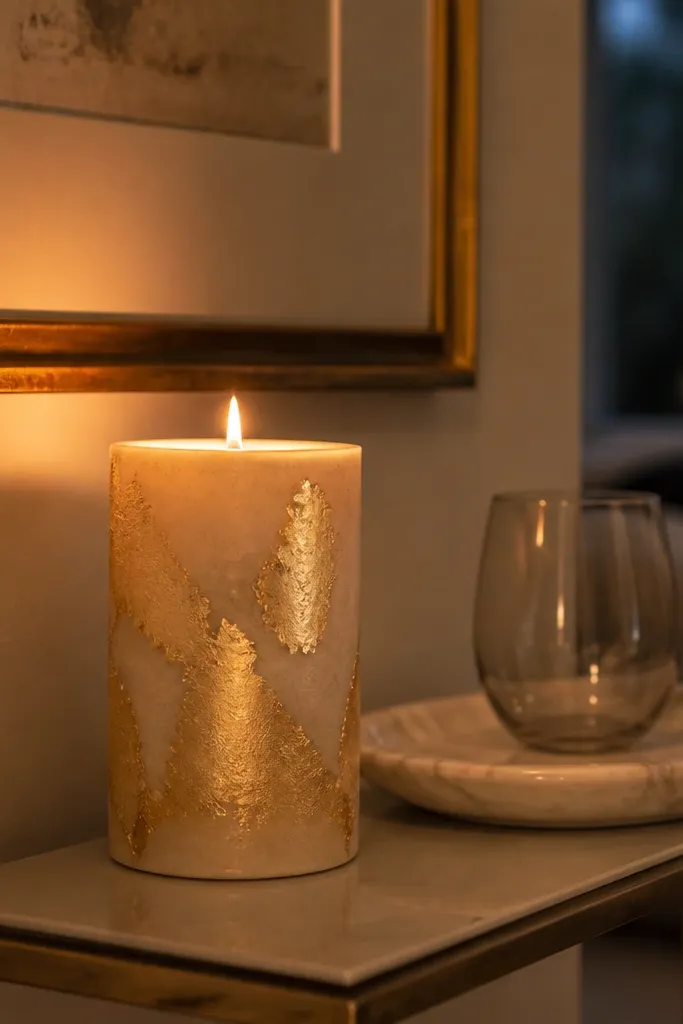
This gives you the look of gold leaf without buying gold leaf sheets or dealing with messy adhesion. The torn tissue resist creates irregular edges, which is what makes it look organic and expensive. The gold pops against a light base, and it looks great on a tiny console where you want warm glow. It also hides small brush marks because the texture is part of the pattern. Skill is easy if you follow the layering order.
Editor's noteTissue paper thickness matters — thin tissue tears cleanly and gives sharper edges.
Paint the candle base cream and let it dry. Tear thin tissue paper into leaf-like shapes and lightly press it onto the candle in a loose cluster. Paint gold acrylic over and around the tissue, then remove the tissue while paint is still slightly tacky to reveal crisp textured edges. Add a second gold pass only where you want deeper shine, then seal after full cure.
Skip thisDon’t remove tissue after paint fully dries; you’ll peel paint off the candle.
14. Hand-Painted Lettering Strip in One Color
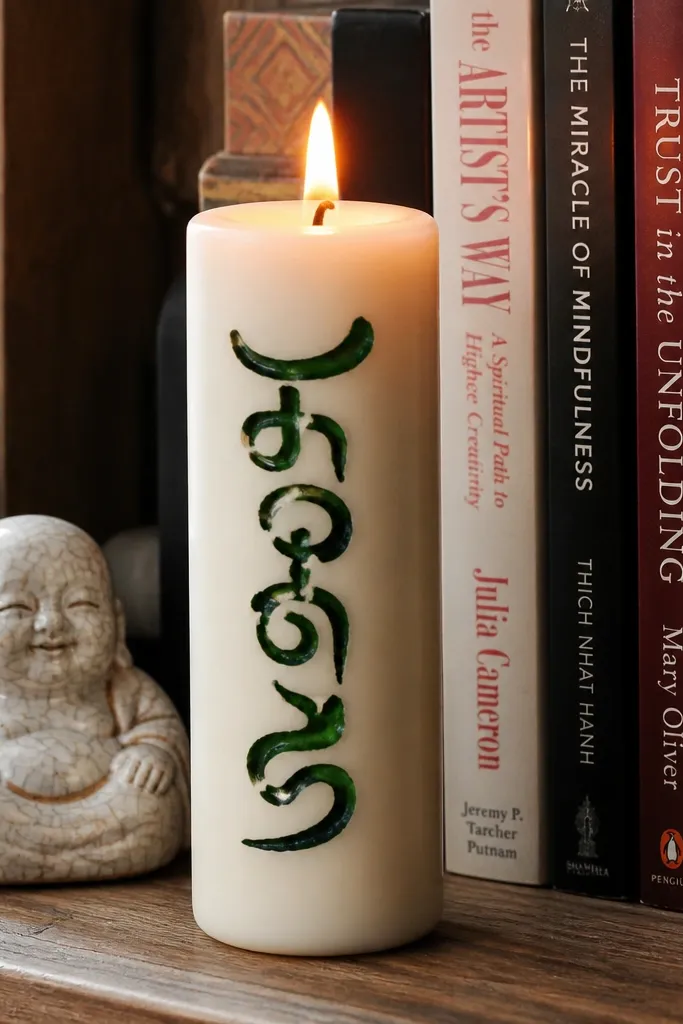
Lettering makes a candle feel personal, and it’s perfect for small spaces because it takes up a narrow strip of visual space. Keep it one color and one short word or symbol so it doesn’t clutter the candle. Deep green, black, or terracotta lettering looks clean and modern. This idea is photogenic because the contrast is high and the negative space stays calm. It’s easy if you use a template or trace your text first.
Editor's noteUse a stencil so the lettering stays sharp; freehand lettering on wax looks uneven under light.
Choose a short word or symbol and print it on paper, then cut out the letters like a stencil. Tape the stencil to the candle at the height you want the word, then paint over it with a flat small brush or sponge brush. Remove the stencil carefully while paint is still slightly tacky for cleaner edges. Let dry, then add a tiny underline flourish or a single dot accent to make it look finished.
Skip thisDon’t choose a word that’s too long — cramped letters shrink the design and kill the look.
15. Terracotta Waves With White Edge Highlights
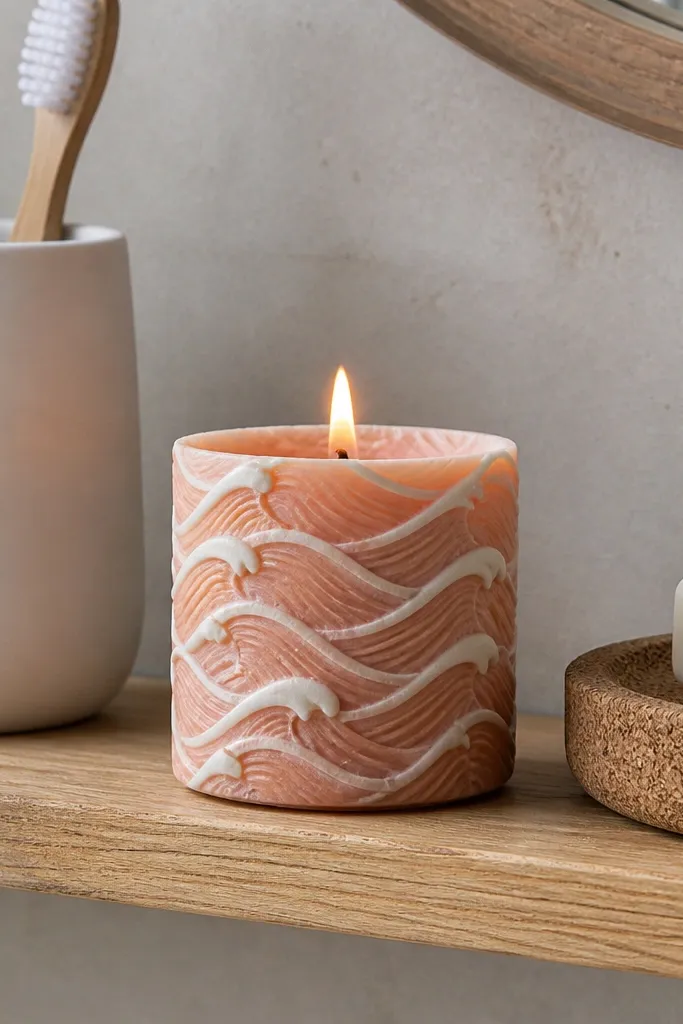
Wave bands are a great choice for Candle Painting for small spaces because they add motion without needing lots of color. Terracotta feels warm and works with neutral interiors, while white highlights give a crisp, modern finish. When lit, the wave crests catch light and look dimensional. This design suits candles on bathroom counters and small living room shelves where you want calm, not loud. Skill is beginner-friendly and the time is manageable because waves repeat in a rhythm.
Editor's noteKeep wave peaks rounded, not pointy; rounded peaks look more natural and less cartoonish.
Paint the candle base a soft cream. Draw 3-4 horizontal wave guidelines spaced evenly using pencil. Paint terracotta wave lines following the guidelines, then let dry. Use white paint on a fine brush to trace the top edge of each wave crest, creating a highlight strip. Cure upright and seal if needed for durability.
Skip thisAvoid uneven wave spacing; it makes the pattern feel accidental.



