
1. Midnight Sunburst Center Glow
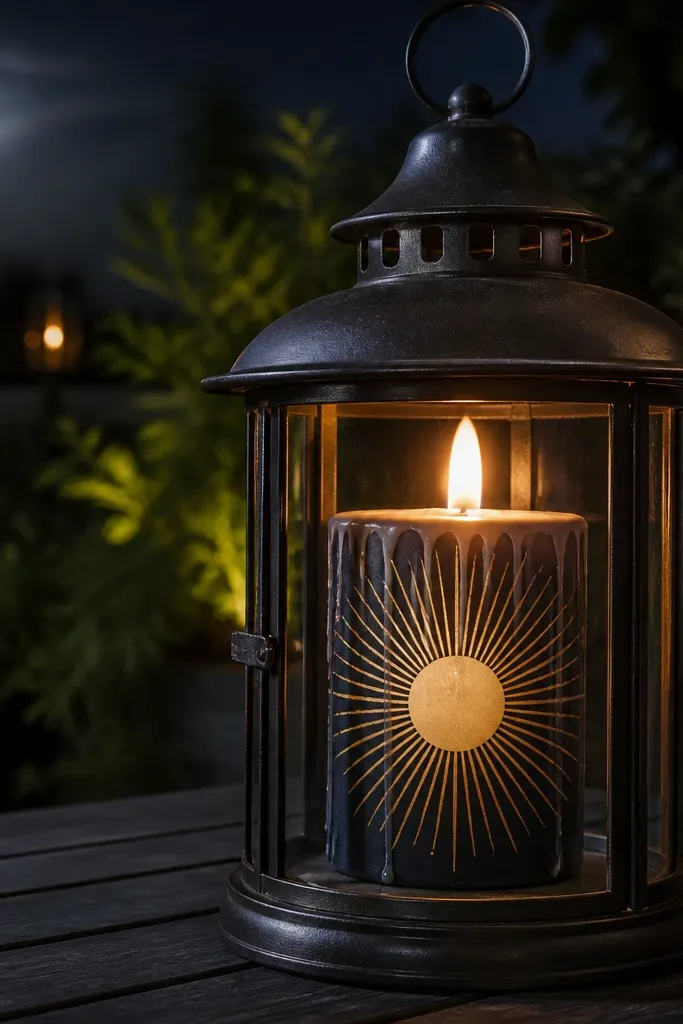
This one looks expensive when lit because the flame sits inside a bright “sun” and the rays pull your eye outward. Start with a deep navy or black base so the gold reads like metal, not dust. The design is basically a target inside a burst: a small pale circle, then evenly spaced rays that get slightly thinner toward the edges. When the candle burns, the center glows and the rays stay crisp, so the whole thing looks intentional instead of like random brush marks. It’s beginner-friendly because you can use a stencil for the rays and still get a clean look.
1) Clean the candle with a wipe of isopropyl alcohol, then mark a center circle about 2.5 cm wide on the front. Paint the circle with opaque warm white, let dry, then add a thin ring of light yellow around it. 2) For the rays, use a ruler to draw 16-20 lines from the center circle outward, spaced evenly. Paint rays in metallic gold acrylic in thin strokes, then add a second, lighter gold pass on every other ray for depth. 3) Seal with a flame-safe clear sealant once fully dry and keep all paint above the wick line.
If your gold looks streaky, load the brush lightly and do two thin coats instead of one heavy coat.
Don’t paint thick rays — they look bumpy when lit and can crack.
2. Stained-Glass Rose Window
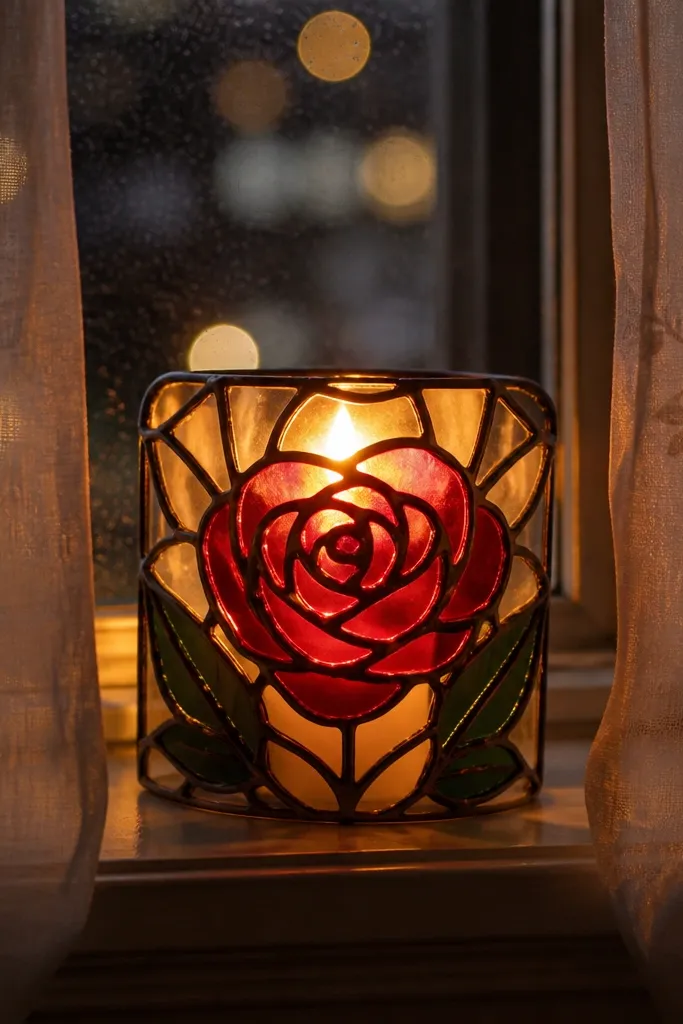
Stained-glass style looks stunning lit because the flame turns your translucent layers into a warm, glowing panel. The rose shape is simple, but the color layering makes it look like real window art. Use translucent reds, burgundies, and a touch of deep green for leaves, then trap it all with black “lead lines” for crisp separation. The candle glow makes the reds look richer and more dimensional than they do in daylight. This is a great first project if you want something floral without needing fancy brushwork.
1) Transfer a small rose silhouette onto the candle front (about 10-12 cm wide). Trace the main edges and vein lines with a black paint pen or black fabric paint in a steady line. 2) Fill sections with translucent red and burgundy using thin coats; let each color dry before adding the next so they don’t muddy. Add small highlights with a diluted warm white wash. 3) Seal with a clear, flame-safe top coat, and keep paint away from the wick and any area that might soften near the flame.
Editor's noteDilute your translucent colors with a paint medium (not water) if you want smoother coverage on wax.
Skip thisAvoid overmixing colors before drying — it turns stained-glass into brown.
3. Bold Blackline Witchy Botanicals
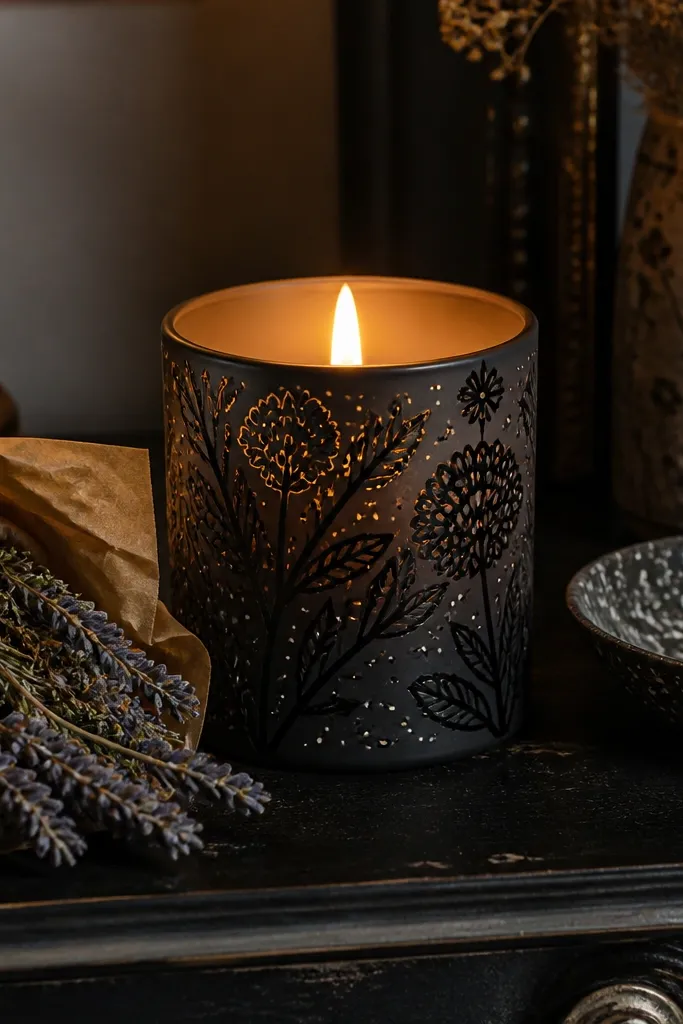
High-contrast botanical line art looks sharp when lit because the flame makes the negative space feel brighter. This idea uses black outlines and minimal fills so you get a crisp silhouette even if your brush isn’t perfect. Add tiny white dots like pollen or stars and keep the leaves slightly overlapping for depth. The result reads like modern witch decor — clean, graphic, and photo-friendly. It’s beginner-safe because you can rely on line quality more than shading.
1) Sketch a simple cluster: three leaves and one small sprig, roughly 15 cm tall on the candle front. Go over the sketch with black paint pen, using one smooth pass per line. 2) Fill only a few leaf areas with pale gray wash, leaving most space unpainted for glow. Add white dots in a loose pattern and a thin white highlight stripe along one leaf edge. 3) Let it dry fully, then seal with a flame-safe clear coat.
Editor's noteIf your line wobbles, pause, rotate the candle slightly, then keep the pen angle consistent.
Skip thisDon’t fill the entire leaf with gray — it kills the glow.
4. Terracotta Clay Vibes Geometric Arches
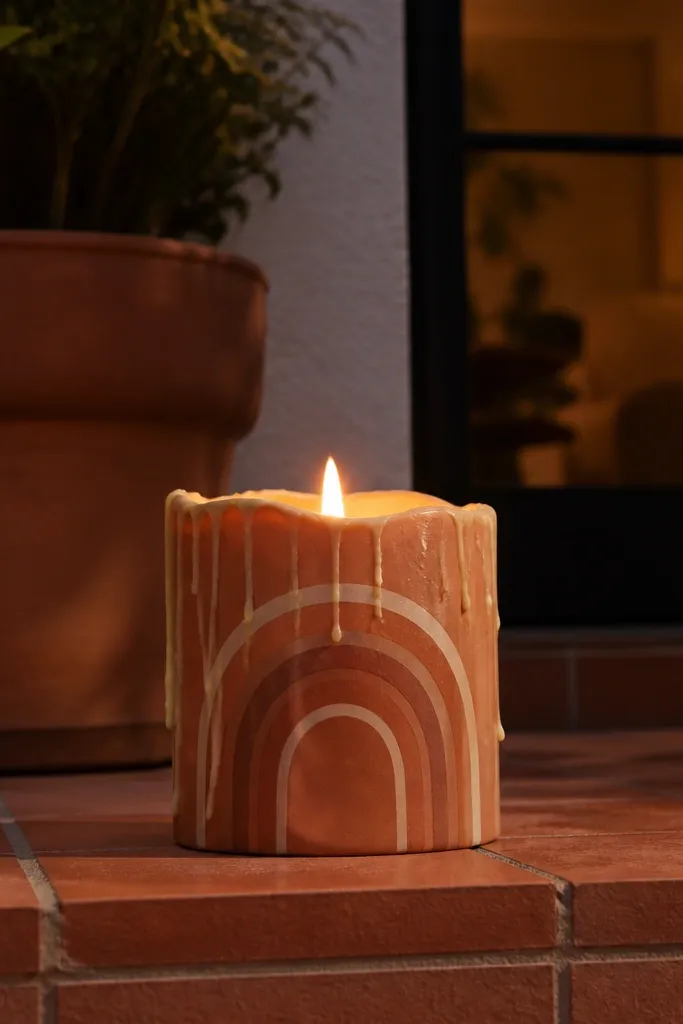
Geometric arches look stunning lit because the warm terracotta color turns even flat paint into something that feels like pottery. The trick is to build layered bands: thick terracotta arcs, thin dark lines between them, and a small highlight band that catches candlelight. When lit, the arcs look dimensional because the flame makes the lighter bands appear brighter. This is a fast project that still looks like you spent hours. It’s also easy to scale — use the same pattern on multiple candles for a set.
1) Mark three horizontal bands across the front, each about 4 cm tall, leaving 1 cm gaps. Draw arch outlines inside each band using a compass or a round object as a guide. 2) Paint the arches terracotta, then paint the gaps with a dark brown or charcoal line. Add a thin cream highlight line on the top edge of each arch. 3) Seal and let cure fully before lighting; keep paint away from the wick area.
Use painter’s tape to get straight band edges, then remove it while paint is still slightly tacky.
Don’t use bright orange — terracotta needs a muted base to look like clay when lit.
5. Ocean Tide Ombre Waves
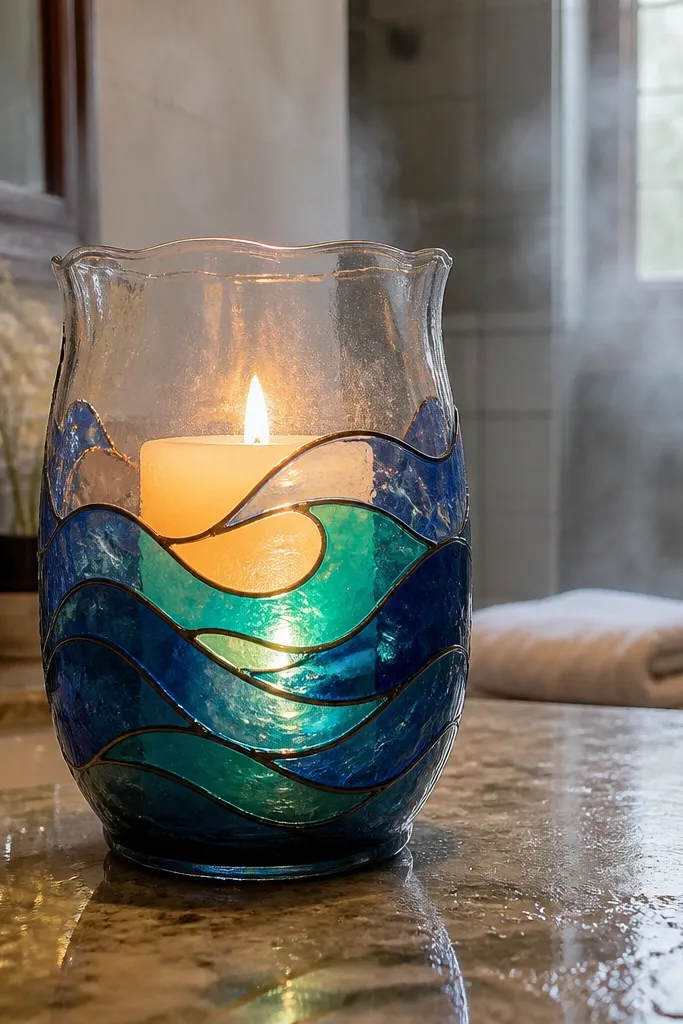
Ombre waves look gorgeous lit because the flame creates a soft glow that makes gradients feel like water movement. You’ll paint wave bands in layered blues, from deep navy edges to lighter teal centers. The darker outline gives the wave shape structure, while the lighter middle looks luminous. This is one of the easiest ways to get “stunning lit” without detailed drawing skills. It suits beach decor, bathrooms, and any shelf where you want calm, not chaos.
1) Paint a horizontal base gradient: start with deep navy at the bottom, blend upward with teal, then end near white at the top. Use a sponge or makeup wedge for blending; keep layers thin. 2) Add three wave crests by painting curved lines in dark navy, then fill each crest with a lighter teal wash. 3) Finish with a thin white foam line on the highest crest. Seal with a flame-safe clear coat and dry fully.
Editor's noteBlot your sponge on scrap paper first so you don’t get hard dots in the gradient.
Skip thisDon’t overblend — muddy transitions look flat when the flame is on.
6. Emerald Leaf Mirror Frame
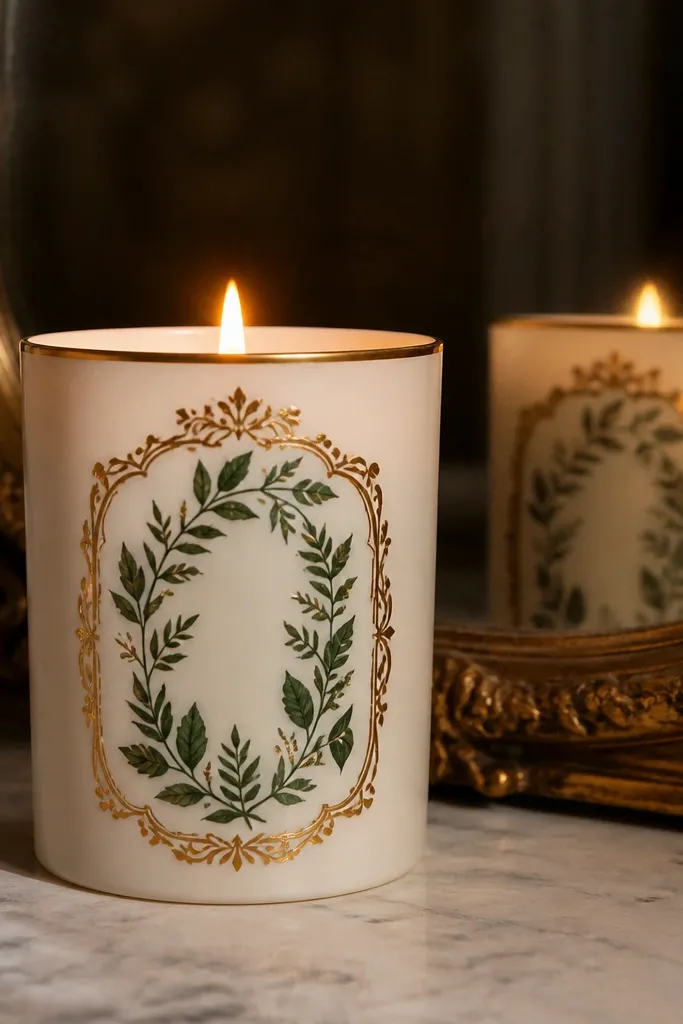
A frame border makes candle art look like decor, not a craft project. This design uses a gold outline frame around the candle front, then places emerald leaves inside like a wreath panel. Lit, the gold border catches warm highlights and the green looks deeper because of the contrast with the cream base. It’s a great beginner choice if you want something “finished” with minimal brush detail. The leaves can be simple shapes — the frame does most of the heavy lifting visually.
1) Clean the candle and draw a rectangle frame about 2 cm in from each edge. Paint the border with metallic gold acrylic and let it dry. 2) Add 5-7 leaf shapes inside the frame, painting them emerald green with a darker edge line. Add tiny gold vein lines by dragging a fine brush through wet paint. 3) Seal with a flame-safe clear coat, and keep all paint above the wick zone.
Editor's noteFor leaf edges, use a fan brush so the shape stays clean even if you’re new.
Skip thisDon’t paint the frame too thick — it looks raised and can chip.
7. Galaxy Stars With Deep Purple Nebula
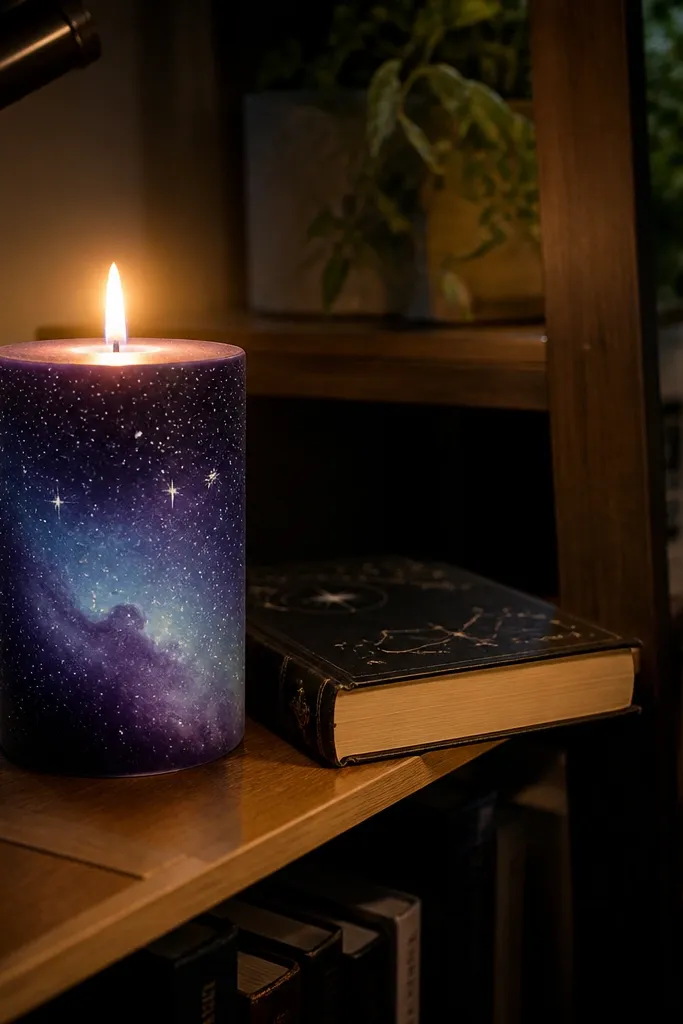
Galaxy candles look stunning lit because the flame makes the star points feel brighter and the nebula fades into a soft atmosphere. Use a deep purple base, then add a lighter blue cloud that fades outward. Finish with white dots of different sizes so it looks layered, not flat. This is beginner-friendly because you don’t need to draw planets — just control your dot sizes and keep the nebula edges soft. It also photographs well under warm light, which is exactly what candles do.
1) Paint the base with deep purple in smooth, thin coats. For the nebula, dab a diluted periwinkle wash in cloud shapes using a sponge and blend edges with a dry brush. 2) Add stars: flick white paint with a toothbrush for tiny specks, then use a toothpick for medium dots. Add a few larger star dots with a dotting tool. 3) Seal with a flame-safe top coat after everything dries completely.
Editor's noteMask the wick area with tape while you paint so star flecks don’t land where you’ll light it.
Skip thisAvoid heavy splatter — big drips look messy once the candle is lit.
8. Gold Foil Style Leaf Veins (Paint Pen Edition)
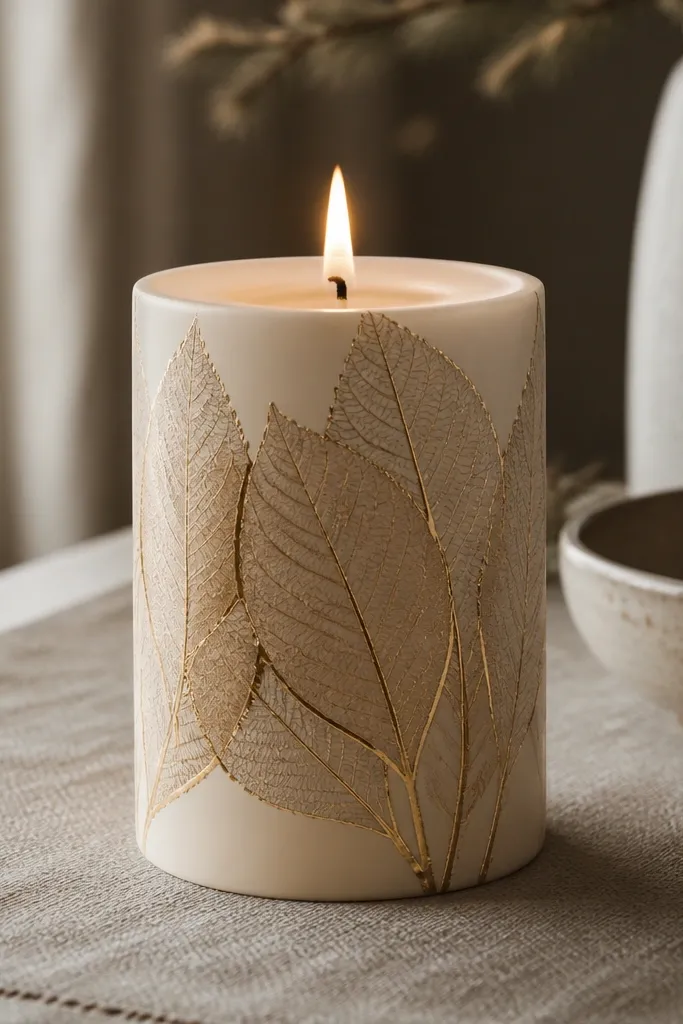
This is the look of gold foil without needing actual foil. You paint leaf silhouettes in a warm beige or pale gold, then add thin “vein” lines in metallic gold. Lit, the gold lines pick up the candle glow and make the leaves look like they’re lit from within. It’s also forgiving: even if your silhouette edges aren’t perfect, the vein lines make it feel intentional. Great for weddings, dinner tables, and anyone who wants something glam but not flashy.
1) Sketch two large leaves on the front of the candle, about 12-14 cm long. Fill the leaf shape with pale gold or creamy beige paint. 2) Using a metallic gold paint pen, draw a center vein, then add short branching veins that curve toward the edges. Add a tiny highlight line near one side of each leaf. 3) Seal with a flame-safe clear coat and let cure fully.
If your pen skips, warm the tip in your hand for 10 seconds before drawing the veins.
Don’t cover the whole candle in metallic — it dulls the look and chips faster.
9. Sunset Gradient With Silhouette Mountains
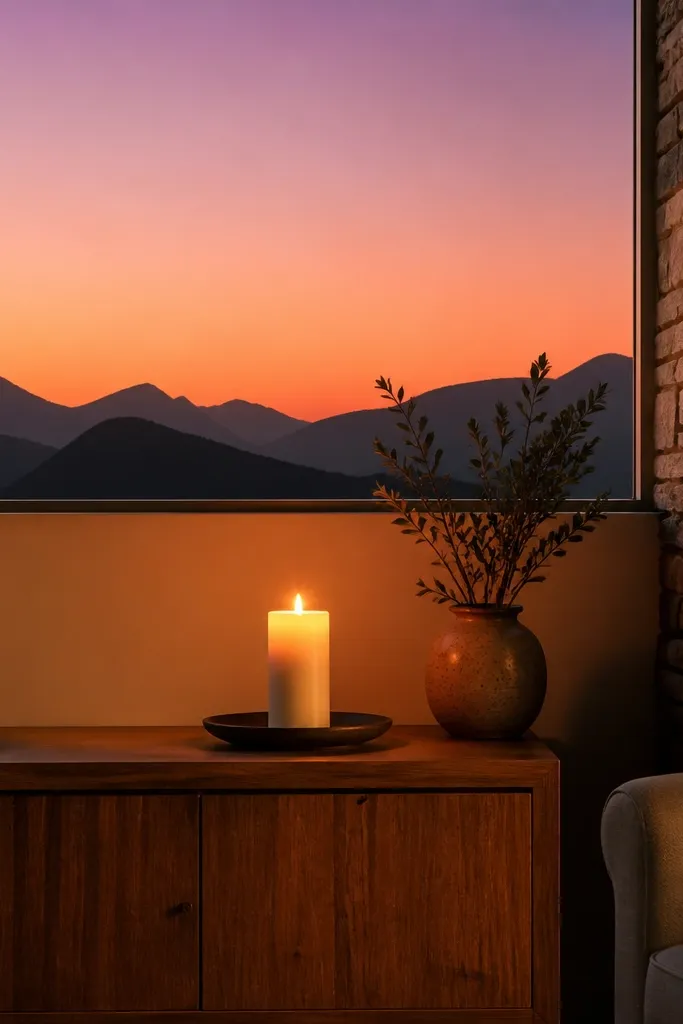
Mountains + a sunset gradient reads instantly at a distance, and the flame makes the gradient feel like it’s glowing. You paint a smooth sky: peach to pink to a soft purple near the top. Then you block in mountain shapes in deep charcoal so the silhouette stays crisp. Lit, the bright sky behind the mountains looks like a window into another place. This project is perfect if you want a “wow” look without needing to paint details like trees or clouds.
1) Blend the sky: sponge-paint orange near the bottom, then blend into pink and then purple using progressively lighter loads of paint. Keep transitions smooth and thin. 2) Paint two to three mountain layers: start with the darkest base mountain, then add lighter gray layers in front. Keep peaks sharp and angles clean. 3) Add a small sun glow circle behind the tallest mountain and seal with a flame-safe clear coat.
Use a makeup sponge for the gradient; brush strokes show under candle flicker.
Don’t add too much texture — the sky should look smooth when lit.
10. Monochrome Marble Veins
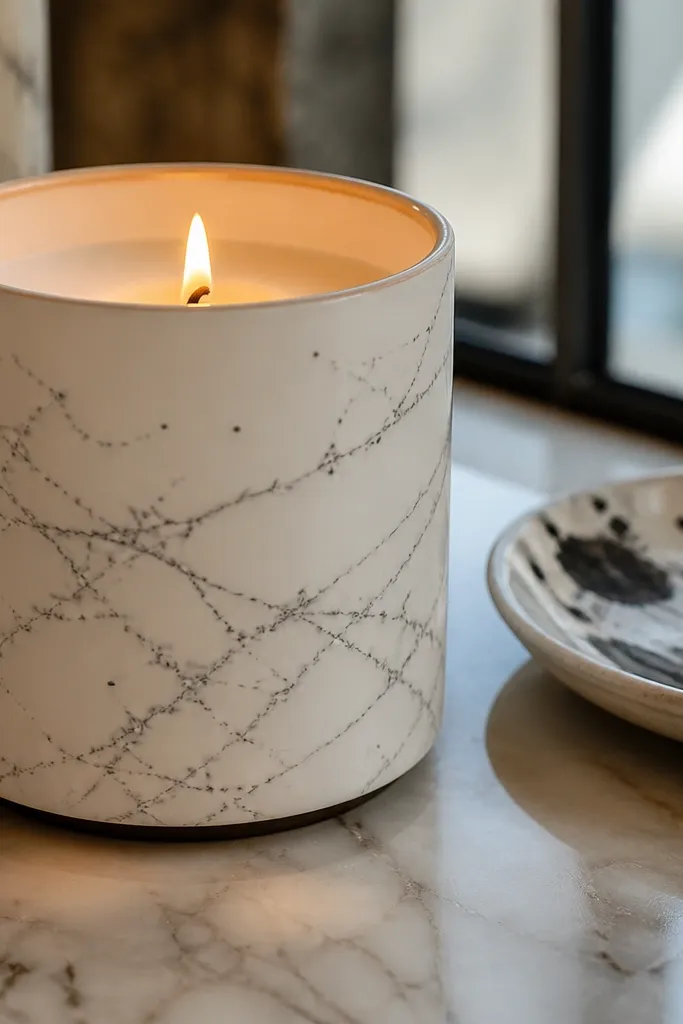
Marble looks stunning lit because it has subtle movement and depth — and the flame makes the veining look alive. This design uses a white base with thin gray veining and a few tiny black pinpricks. Keep the lines delicate so the wax glow can do the rest. Marble is also a great “starter” because you only need controlled swirls, not realistic painting. It works in modern spaces and pairs well with neutral decor.
1) Paint the candle base white with two thin coats. While it’s still slightly tacky, use a fine liner brush to draw thin gray swirls with irregular curves. 2) Add a few darker gray lines crossing and tapering, then add tiny black dots sparingly. 3) Blend any harsh edges with a dry brush lightly, then seal with a flame-safe clear coat.
Editor's notePractice one marble line on scrap wax or paper first — marble veins look best when they vary in thickness.
Skip thisAvoid thick gray lines; they look like cracks instead of marble.
11. Candy Cane Stripes With Frosted Edge
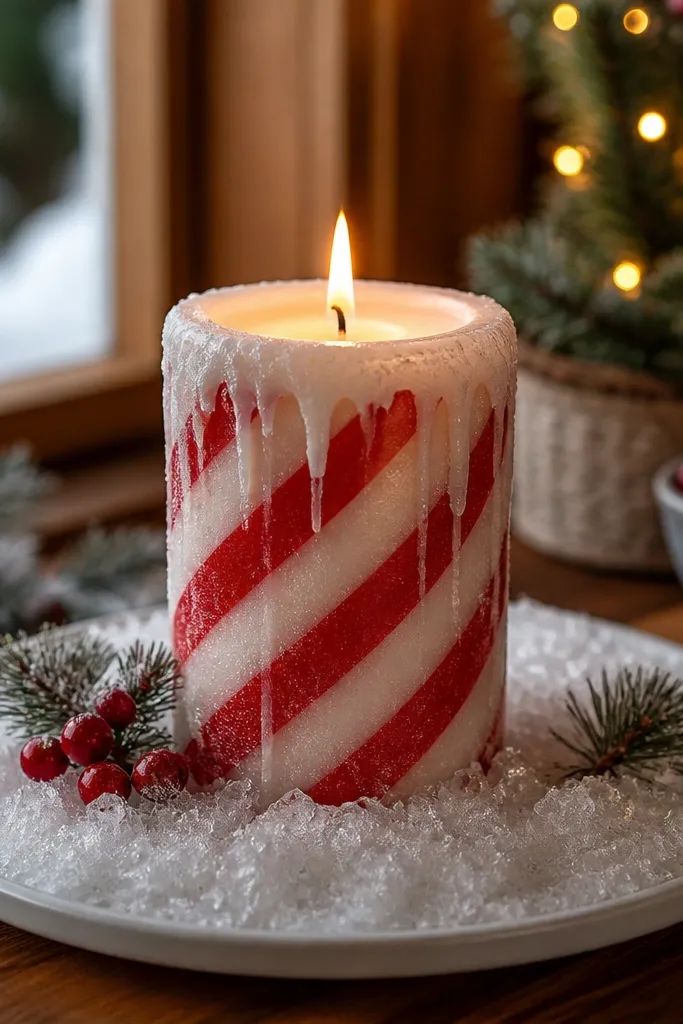
Candle stripes look great lit because the diagonal lines catch flicker and make the candle feel playful. This version adds a “frosted” edge effect so the stripes look like they’re coated in sugar. Use crisp red stripes, then soften the outer edges with a light gray or diluted white layer. The result reads festive without needing any characters or lettering. It’s also fast: you’re repeating the same stripe shape all the way around.
1) Mark diagonal stripe guides using painter’s tape, aiming for 8-10 cm between stripes depending on candle size. Paint red in thin coats, then remove tape while the paint is still slightly wet. 2) Add a frosted edge: lightly sponge diluted white or light gray along the outer edge of each stripe. 3) Seal with flame-safe clear coat and keep paint away from the wick line.
Use two thin coats for red — thick red bleeds and looks uneven when lit.
Don’t paint directly over glossy wax without cleaning; stripes will peel.
12. Botanical Sunflower Halo
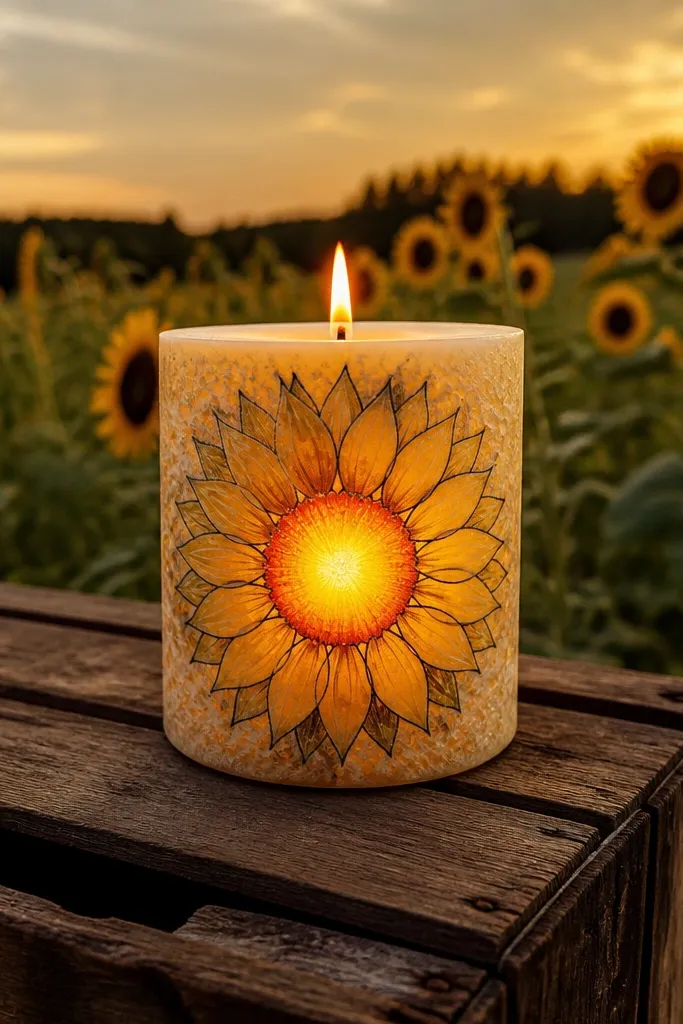
Sunflowers look stunning lit because the flame makes the yellow center feel like a warm halo. You’ll paint a circular center first, then add petals that radiate outward with dark outlines. Keep petals slightly staggered so they overlap and create depth. When lit, the yellow reads bright, and the dark outlines keep it graphic. It’s beginner-friendly because it’s mostly circles and repeating petal shapes.
1) Paint a sunflower center circle about 4 cm wide in deep golden yellow. Add a darker ring around it in burnt orange, then add a few small dot accents in brown. 2) Draw 12-16 petals using a simple teardrop shape, outlined in dark brown. Fill petals with lighter yellow and add a small highlight on the top half of each petal. 3) Add a thin glow ring around the whole flower, then seal with flame-safe clear coat.
Editor's noteA small silicone makeup sponge helps you pack color into the center without brush streaks.
Skip thisDon’t outline the entire candle — keep outlines only on petals and key edges.
13. Black Velvet Candle With White Aura
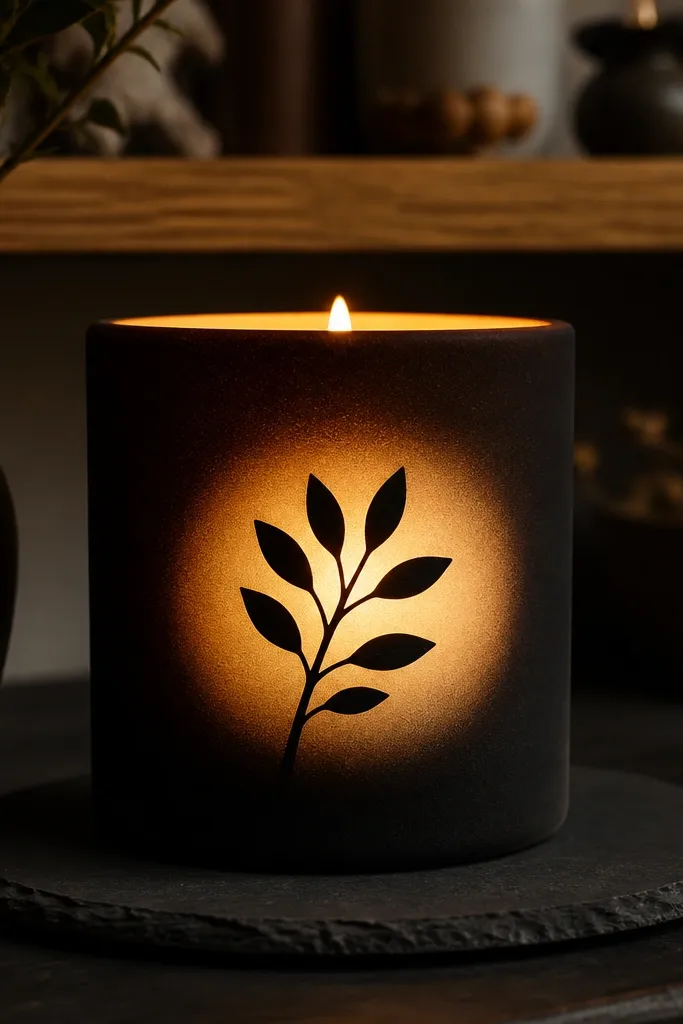
This design looks dramatic lit because the white aura circle feels like light radiating from behind the subject. Start with a matte black base so it doesn’t look shiny or patchy. Then paint a soft-edged white circle around a simple leaf or branch silhouette. Lit, the aura brightens and the black stays deep, creating a high-end contrast. You’re not doing realistic shading — you’re doing glow effects. Perfect for beginners who want “mood” without complexity.
1) Paint the candle black with two thin coats, letting each coat dry fully. 2) Add a centered aura circle: sponge white paint in a circle, then soften the edges by lightly tapping with a dry brush. 3) Paint a single leaf silhouette in dark gray or black in front of the aura, then seal with flame-safe clear coat.
Matte black looks better than glossy black because flicker doesn’t create glare spots.
Avoid thick aura paint; it dries uneven and looks chalky.
14. Rose Gold Geometric Dots Grid
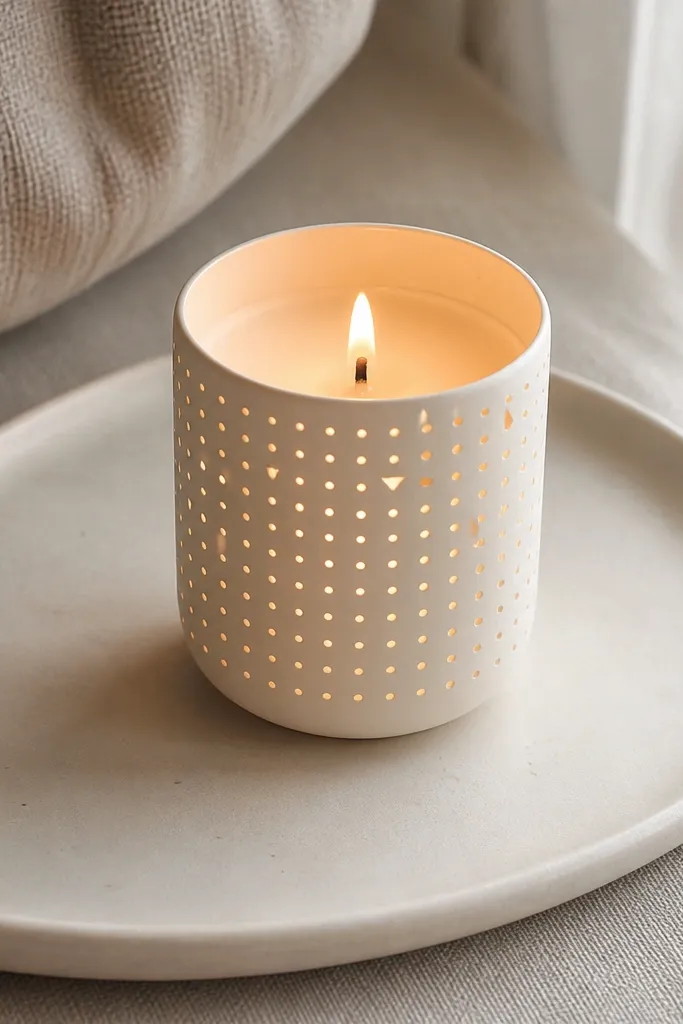
Dot grids look amazing lit because the flame turns the dots into tiny points of light. This project uses rose gold dots arranged in a clean grid, then adds a few triangles or small diamond shapes to prevent it from feeling flat. Choose an ivory base so rose gold pops warm instead of looking pink. It’s extremely beginner-friendly and repeatable, which means you can make a set that looks cohesive. The look is modern, clean, and still romantic when the candle burns.
1) Clean the candle and mark a grid with light pencil lines: for example, 5 rows by 6 columns. Use a dotting tool or the tip of a paint pen to place rose gold dots about 6-8 mm apart. 2) Add small accent shapes in two spots: tiny triangles or diamonds painted in diluted rose gold so they look lighter than the dots. 3) Seal with a flame-safe clear coat after dots dry fully.
If dot spacing is hard, use painter’s tape to create temporary guide blocks, then remove before sealing.
Don’t make dots too big — they look like blobs once lit.
15. Citrus Slice Confetti
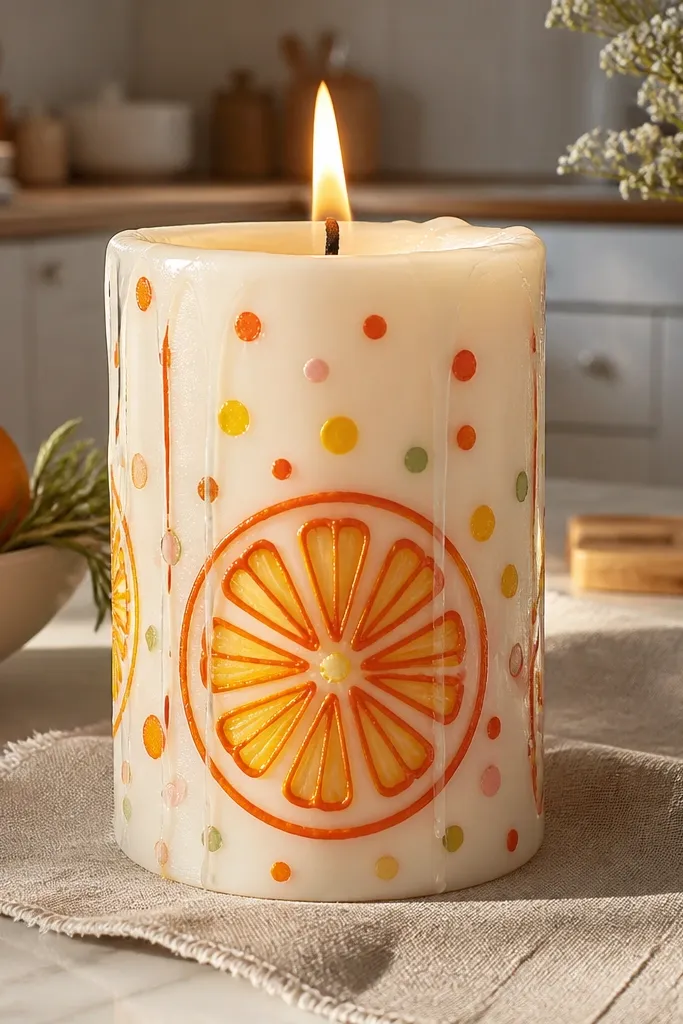
Citrus art looks stunning lit because the warm colors feel like sunlight through fruit. You’ll paint thin orange segments with a yellow center, then add small confetti dots around them. The segmentation makes the candle look layered even without shading. It’s also a fun beginner project because you can repeat the same slice pattern across the front. Lit, the orange reads brighter and the yellow centers glow. Great for kitchens, dining tables, and summer decor.
1) Paint a few citrus slice shapes on the front, each about 6-7 cm long, with a light pencil outline. Use orange paint for outer segments and add a yellow center segment. 2) Add segment lines: use a thin brush to draw short lines from the center outward, then paint tiny white highlights on a few segments. 3) Sprinkle small confetti dots in orange, yellow, and warm white around the slices. Seal with flame-safe clear coat.
Use a small round brush for segment lines; it keeps them crisp under flicker.
Avoid muddy brown mixes — keep oranges clean and warm.
16. Evening Garden Lantern Vines
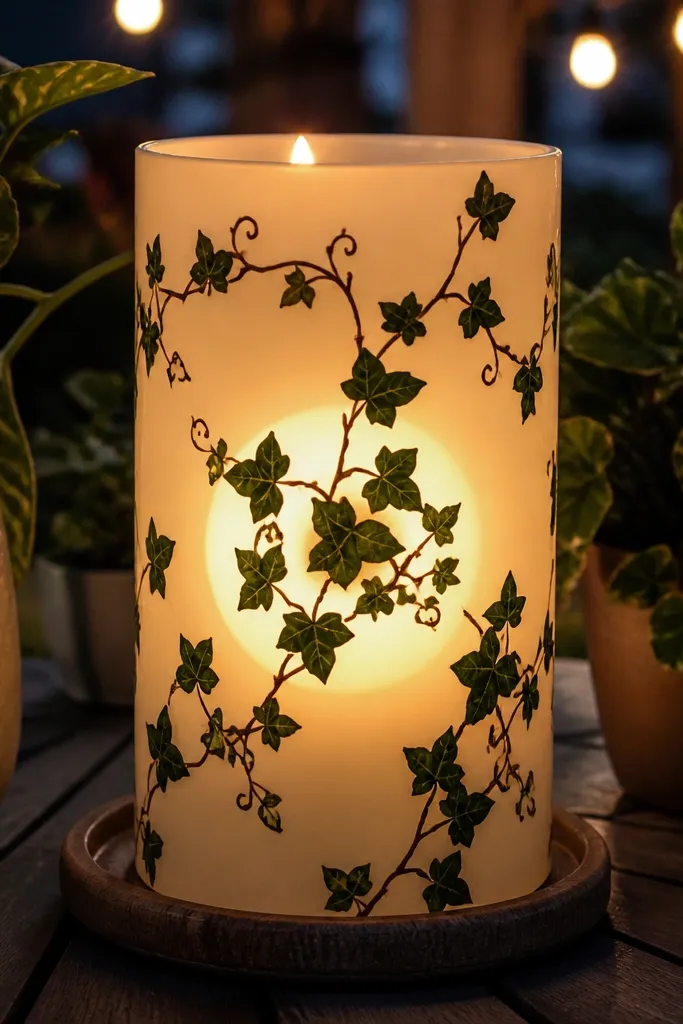
This design looks like a lantern hanging in a garden because you combine vine line art with a warm glow circle. The glow circle is the lit effect: it makes the surrounding vines feel like they’re lit from inside. Use deep green for leaves, black or dark brown for vines, and a warm yellow halo behind the main cluster. When the candle burns, the halo brightens and the vines stay readable. It’s a strong choice if you want something story-like but still simple enough for beginners.
1) Draw a vertical vine line down the center, branching into leaf shapes about 10-12 cm tall. Paint vines dark brown or black, then fill leaves with deep green and add a lighter green vein line. 2) Paint a lantern glow circle behind the vine cluster: sponge warm yellow into a circle, then lightly blend edges with diluted white. 3) Add two small dots like “lantern lights” near the glow and seal with flame-safe clear coat.
Keep the glow circle slightly larger than your vine cluster for a stronger lit effect.
Don’t put glow paint right next to the wick; keep it above the safe zone.
17. Lavender Night Gradient With Stars
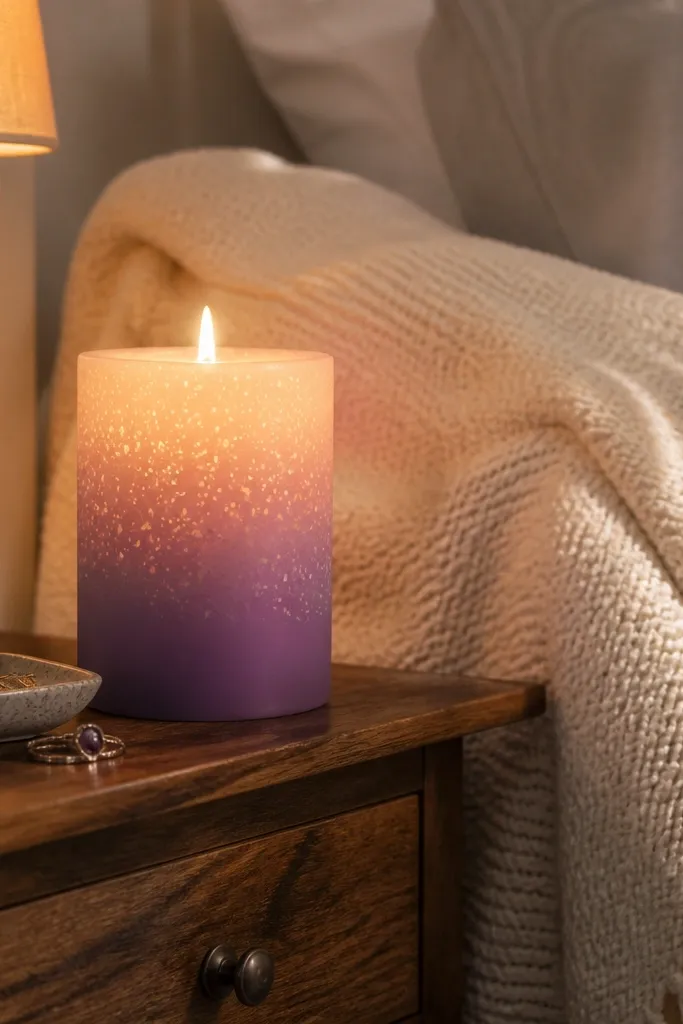
Lavender gradient candles look soft and dreamy lit, but they still stay readable because the gradient has direction. Start with deeper purple at the bottom, then blend to lavender near the top. Add star dots that vary in size, and keep them denser near the top. The flame adds warmth, making the purple feel more romantic instead of cold. This is a clean, beginner-friendly way to do “space” without drawing full galaxies.
1) Sponge paint the gradient: deep purple at the base, then blend to lavender higher up using a makeup sponge. Work in thin layers and stop while it still looks slightly streaky — it evens out as it dries. 2) Add stars: place more dots near the top third, then fewer toward the bottom. Use a paint pen for medium dots and flick a toothbrush for tiny ones. 3) Seal with flame-safe clear coat once fully dry.
Editor's noteIf the gradient looks blotchy, go back with a dry sponge to soften edges instead of adding more paint.
Skip thisAvoid blue-white stars on lavender; they can look icy and harsh when lit.
18. Matte Terracotta Checkboard Border
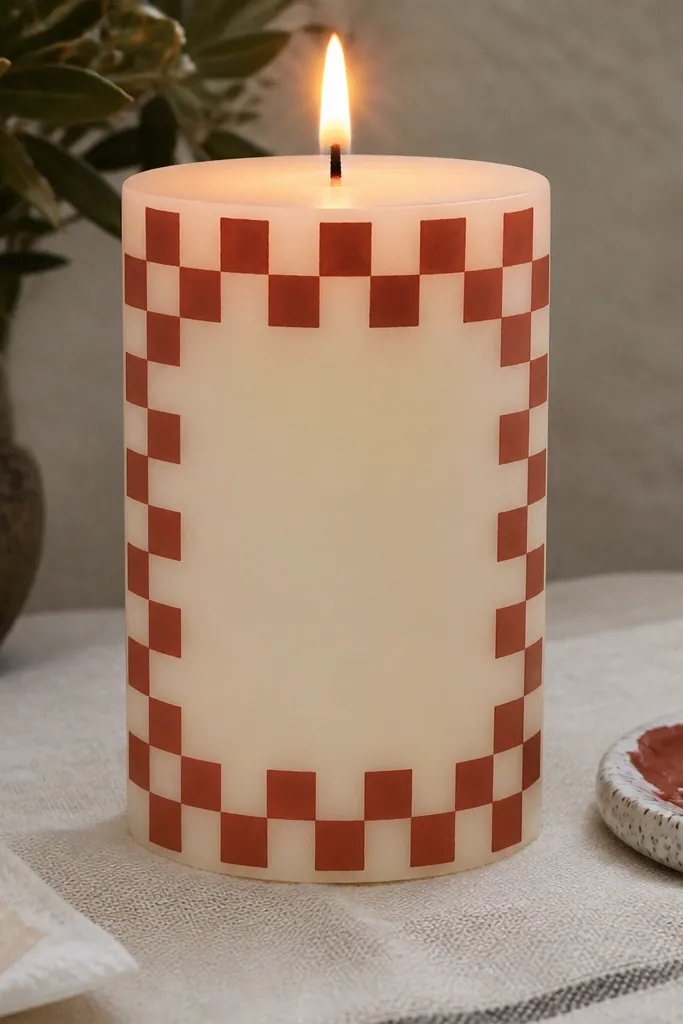
Checkboard borders look great lit because they create a rhythm the flame highlights as it flickers. This design keeps the center plain so the border does the work and the candle looks stylish from any angle. Use matte terracotta checks and a slightly darker terracotta for the alternate squares. Lit, the center stays clean and the border looks like it’s glowing around the edges. It’s also easy to repeat across a set of candles for a cohesive look.
1) Paint a clean cream base, then draw a border rectangle on the front about 2 cm in from the edges. 2) Inside the border, mark a grid of squares (for example 10 squares across). Paint alternating squares terracotta and darker terracotta, keeping square edges crisp with a small brush or tape. 3) Add a thin cream outline around the border to separate it from the candle body, then seal with flame-safe clear coat.
Editor's noteUse painter’s tape to block squares for the first row; you’ll get straighter checks fast.
Skip thisDon’t paint the checks too close to the wick — the border should stay in the safe zone.
19. Copper Leaf Corners (Modern Minimal)
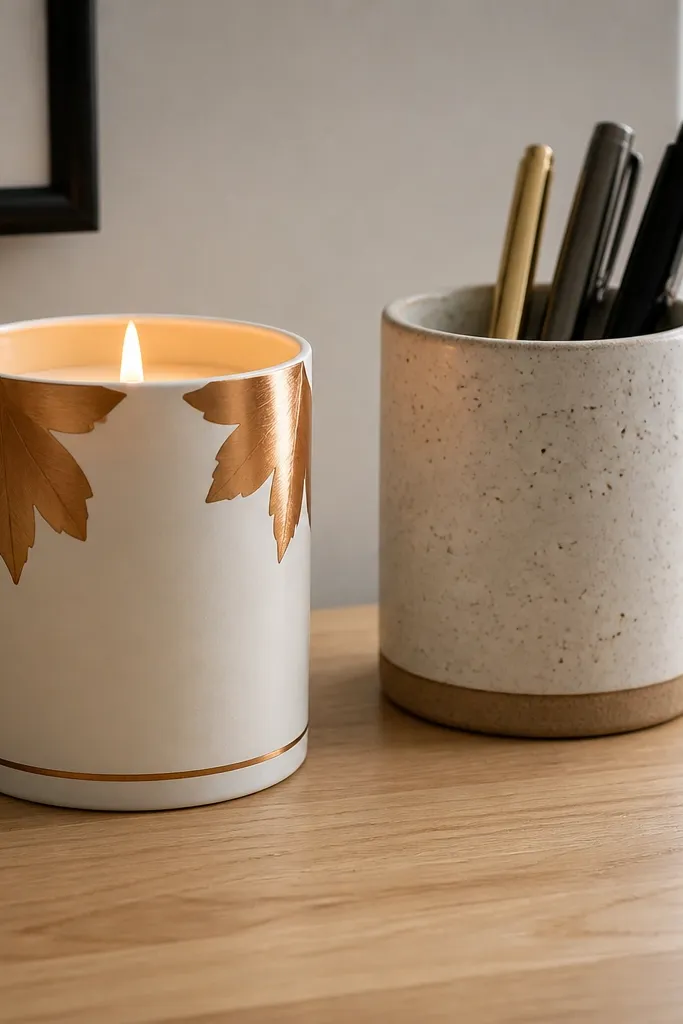
Minimal corner art looks stunning lit because the flame makes small metallic accents feel like candlelight reflections. This design puts copper leaf shapes only in two top corners, plus a thin line across the base area. The rest stays clean, so the candle looks modern on a table. Lit, the copper warms up and the thin line glints, giving a polished “designer” look without covering the whole candle. Beginners like this because you can focus on two shapes instead of a full scene.
1) Clean the candle and draw a thin line about 3 cm from the bottom using a ruler. Paint the line in metallic gold or copper. 2) Sketch two leaf shapes in the top corners, about 6-8 cm tall, and fill them with copper metallic paint. Add one darker copper vein line on each leaf. 3) Seal with flame-safe clear coat and let cure fully before lighting.
Editor's noteKeep copper paint thin — it spreads as the candle warms and can look blotchy if it’s too heavy.
Skip thisAvoid adding extra elements once the corners look balanced; clutter kills the minimal look.
20. Winter Pine Sprig With Frost Highlights
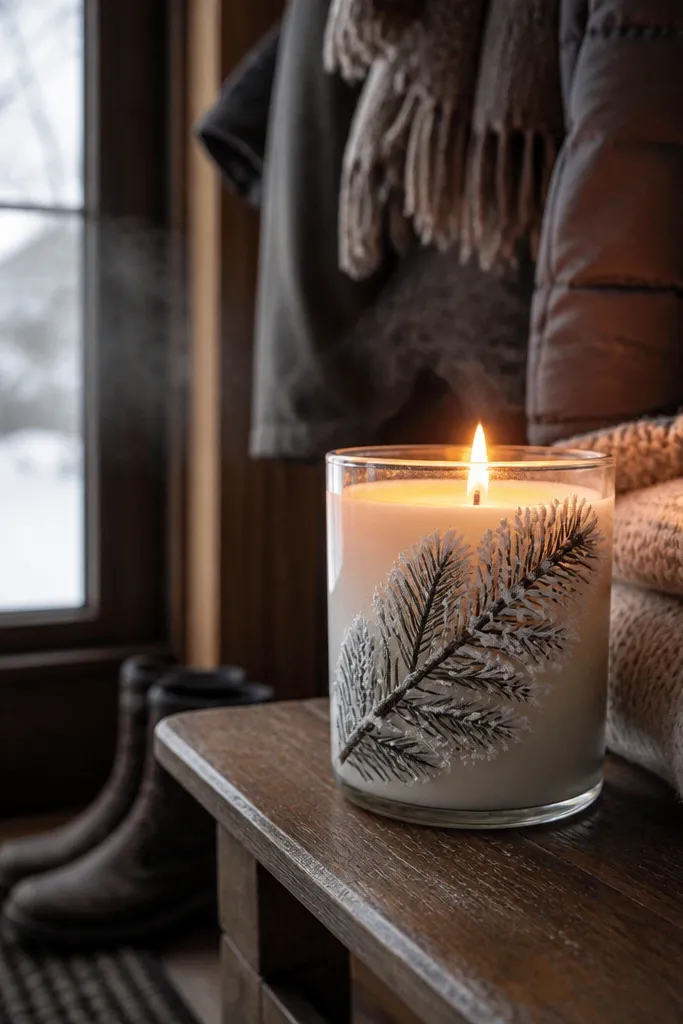
Pine sprigs look stunning lit because the dark branches stay crisp while the frost highlights feel like snow catching light. This design uses a single diagonal sprig, painted in deep green or charcoal, then adds tiny white dots and short “frost streaks” along the needles. When lit, the white dots brighten and make the candle look snowy even in warm rooms. It’s perfect for winter decor and gift candles because it reads clearly from a distance. Beginner-friendly because you only need one branch to be the hero.
1) Draw a diagonal pine sprig from bottom left to upper right, about 12-14 cm tall. Paint branch lines deep green, then add short needle strokes outward. 2) Add frost: dot tiny white specks along the needles and paint a few short curved streaks on the outer edges. 3) Seal with flame-safe clear coat and keep paint away from the wick and any area that could soften.
Editor's noteUse a dry brush for needle texture so it looks airy instead of solid blocks.
Skip thisDon’t paint big snow blobs — they look like paint drips when lit.
21. Peach Blush Bloom With Warm Center
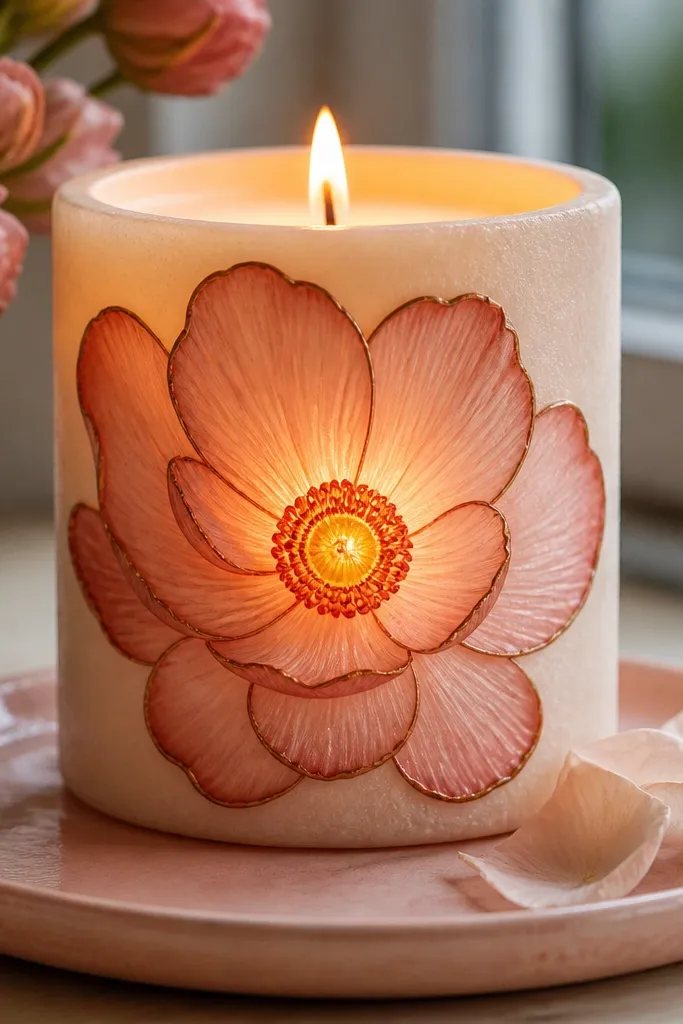
Soft blush florals look stunning lit because the warm center glows and the peach petals feel like they’re lit from behind. Use a deep outline around the petals so the flower doesn’t fade when the candle is on. The center is where the magic is: paint a warm yellow disk with a tiny burnt orange ring. Lit, the center looks brighter than the petals, giving real depth. This is an ideal beginner floral because it uses simple shapes and controlled color blocks.
1) Sketch one flower about 10-12 cm wide on the candle front. Outline petals in a dark brown or charcoal, then fill petals with peach paint in thin layers. 2) Paint the center disk warm yellow, then add a burnt orange ring and a few small dot highlights. 3) Add two leaves with deep green and a lighter vein line, then seal with flame-safe clear coat.
If your peach looks too pale, add a thin layer of diluted orange under it before sealing.
Don’t skip the dark outline — without it, the flower fades when lit.
22. Midnight Cherry Blossoms
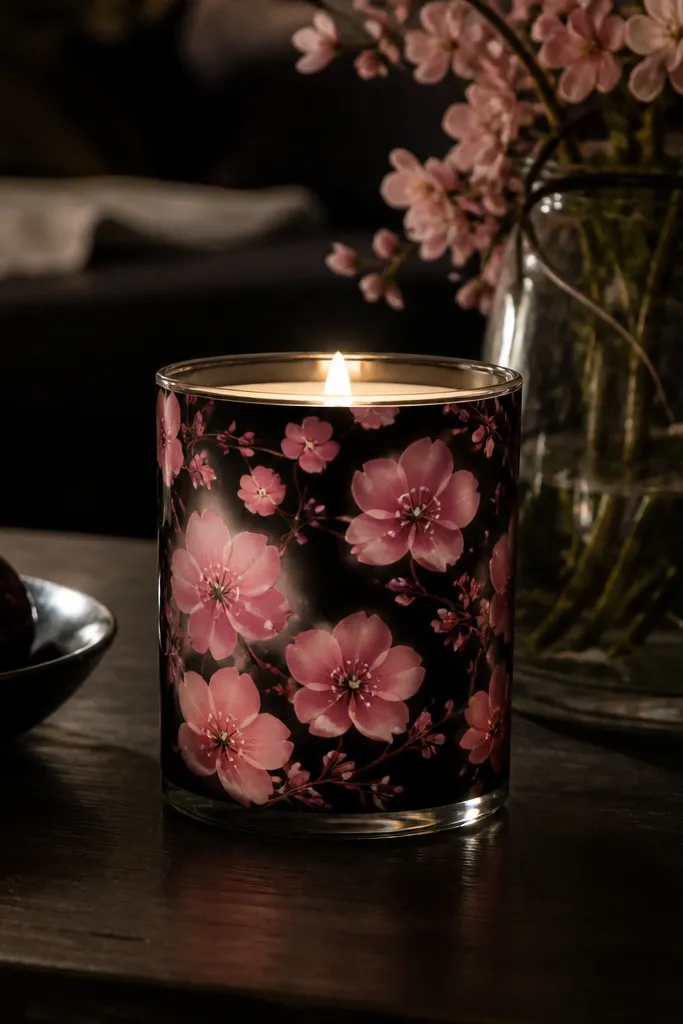
Black base plus pink blossoms looks dramatic lit because the flame turns the petals into soft light. You’ll paint clustered blossoms with a few overlapping petal shapes and tiny white dots as highlights. Keep the blossoms spaced so each cluster reads clearly. The black background makes the pink look richer and prevents the candle from looking washed out. This is a great option if you want something romantic but still bold and graphic.
1) Paint a smooth black base in thin coats and let it dry. 2) Add blossom clusters: paint 5 overlapping teardrop petals in blush pink around a small center dot. Add tiny white dot highlights in a few petals and keep centers small. 3) Seal with a flame-safe clear coat and keep all paint above the wick zone.
Editor's noteUse a small stencil for petal spacing if your hand struggles with symmetry.
Skip thisAvoid heavy white outlining on every petal; it turns the look chalky when lit.
23. Sunlit Honeycomb Pattern
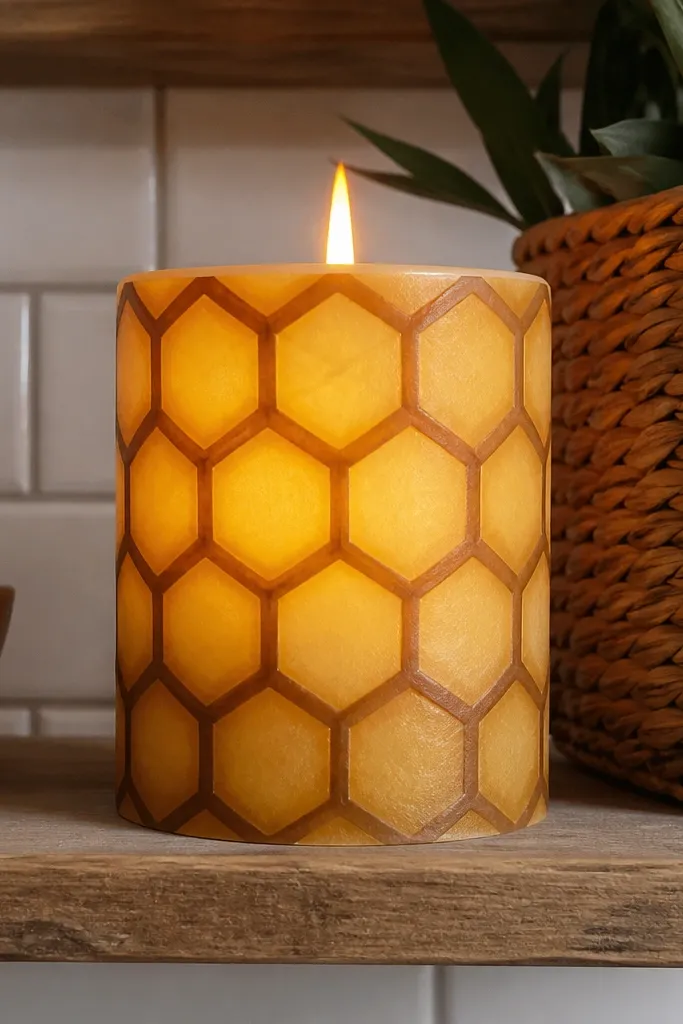
Honeycomb patterns look stunning lit because the repeating hexagons create a glow texture. You outline hexagons with a warm brown, then fill them with a mix of warm yellow and diluted amber so the flame makes the pattern look like it’s catching light. The repeating geometry stays legible from across a room. This is beginner-friendly because you can draw a grid and repeat the same hexagon shape. It also looks great in sets.
1) Draw a light pencil grid for hexagons on the front, then outline each hexagon with warm brown paint. Keep lines thin and consistent. 2) Fill alternating hexagons with warm yellow, leaving a few lightly translucent so the candle glow shows through. Add a tiny amber dot in the center of a few filled cells for sparkle. 3) Seal with flame-safe clear coat once fully dry.
Editor's noteUse a small round brush for consistent hexagon outlines instead of a wide one.
Skip thisDon’t fill every hexagon the same opacity — it looks flat when lit.
24. Rose Quartz Drips and Swirls
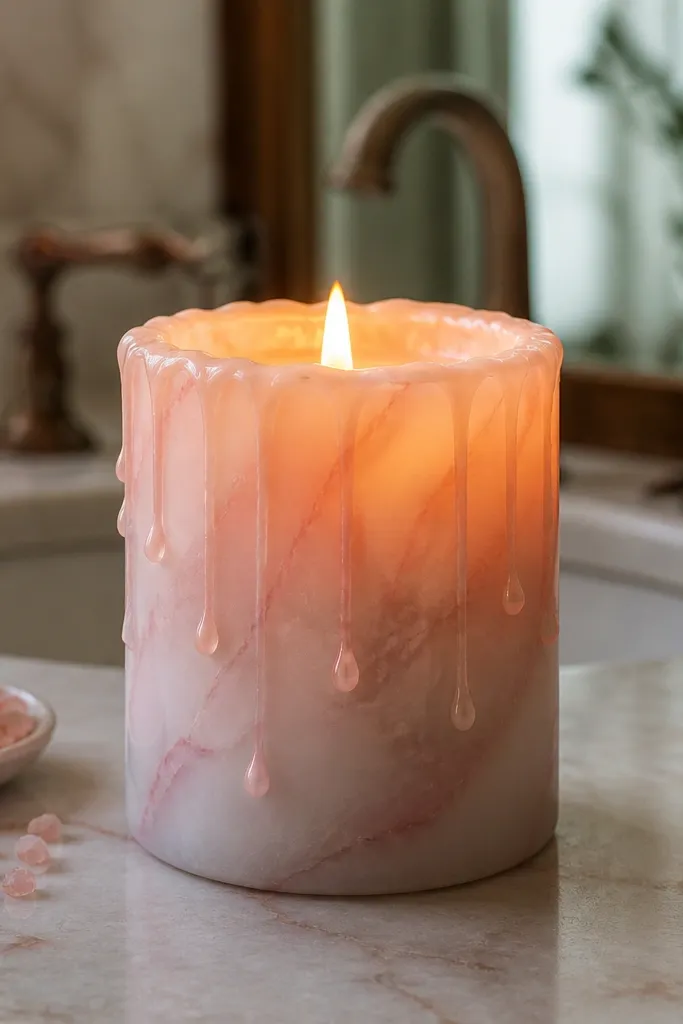
Rose quartz looks stunning lit because the pink veins soften in candlelight and the translucent drips create a gem-like feel. The look is controlled imperfection: pale pink swirls on a light base, plus thin vertical drip lines that taper. Keep the drips subtle so they don’t look like mistakes. When lit, the pink reads warmer and the “veins” appear to float. This is a great project for beginners because it’s more about line rhythm than perfect shading.
1) Paint a light base in warm off-white or pale pink. 2) Add rose-quartz veins: use a liner brush to draw thin swirls in pale rose, then add slightly darker pink lines that cross. 3) Add vertical drips: draw a few thin lines that start thicker and taper downward, then blend the edges lightly with a dry brush. Seal with a flame-safe clear coat and keep it away from the wick.
Editor's noteIf your pink looks too opaque, dilute it with paint medium so it stays translucent.
Skip thisAvoid big drips — heavy lines look like runs once the candle is lit.
25. Classic Red Ribbon Lettering Frame
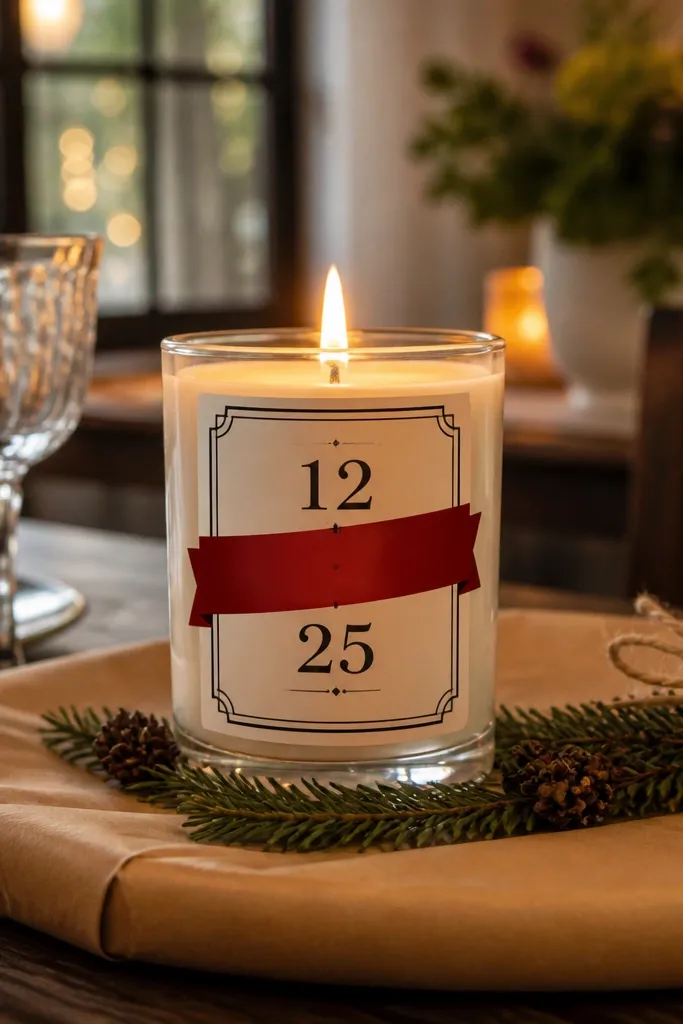
This is a beginner-friendly way to make a candle look like a gift tag. You paint a ribbon banner across the front, add simple lettering or a short date-like number, and frame it with thin black lines. Lit, the ribbon red looks deep and the black frame stays readable, so the candle feels intentional and celebratory. Keep the lettering minimal — one word or even just “LOVE” — and use a stencil if your handwriting isn’t steady. The flame makes the banner look like it’s glowing.
1) Draw a ribbon banner shape across the front, about 8-10 cm wide, with tails that curl slightly. Paint it with red in thin coats and outline the banner edges in black. 2) Add one short word using a stencil or letter stickers, then paint letters in black or dark brown. 3) Seal with flame-safe clear coat and keep paint above the wick line.
Editor's noteUse painter’s tape to mask the banner edges so your ribbon looks sharp.
Skip thisDon’t paint multiple lines of small text — tiny letters blur in candlelight.



