
1. Single Rose Bud with Three Petals
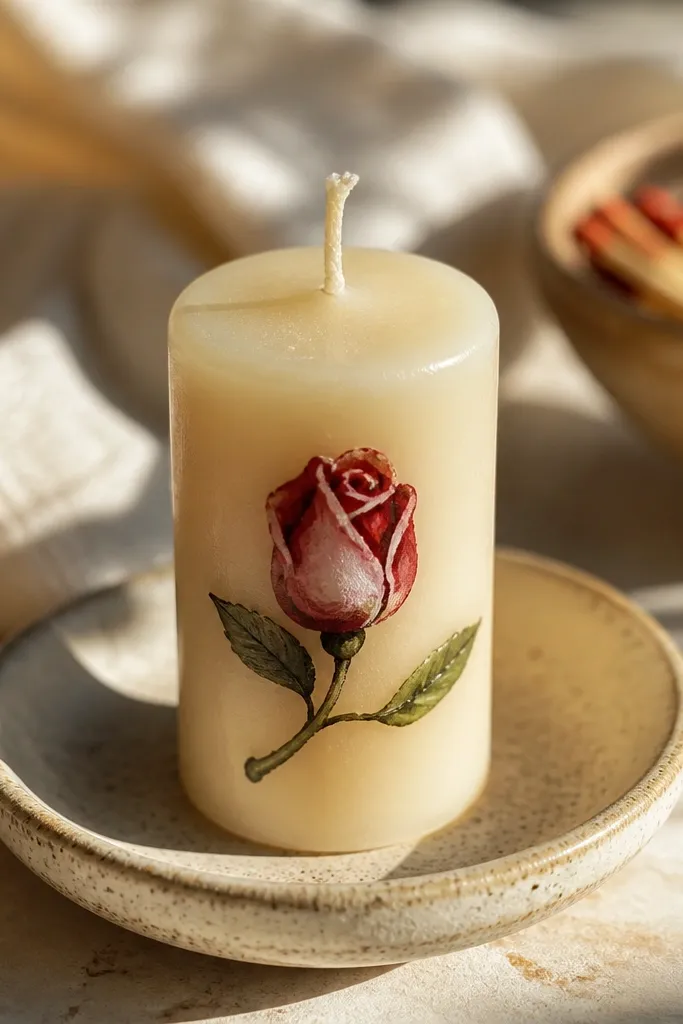
This is the flower to start with if you want “pretty” without doing a full bouquet. A rose bud looks great even when it’s tiny because the shape reads instantly: three overlapping petals and a tight center. Use deep red for the outer petal edges and pink for the front petal so the bud has depth. It’s photogenic on cream, ivory, and off-white candles because the colors pop without needing heavy shading. Plan on about 20 minutes total, including sketching and letting paint set.
Start by marking a small oval where the bud center will sit using a pencil or light gel pen on tape. Paint three teardrop petals around the center — each petal should touch the next. Add a thin shadow line along the outer edge of each petal using a slightly darker red, then dab a tiny highlight dot in the middle with light pink. Finish with a small center swirl using a fine brush or toothpick.
Editor's noteKeep your petal edges slightly uneven — perfect symmetry looks fake on tiny flowers.
Skip thisDon’t thin the paint with water; runny paint makes the petals bleed into wax.
2. Sunflower with a Ring of Petals
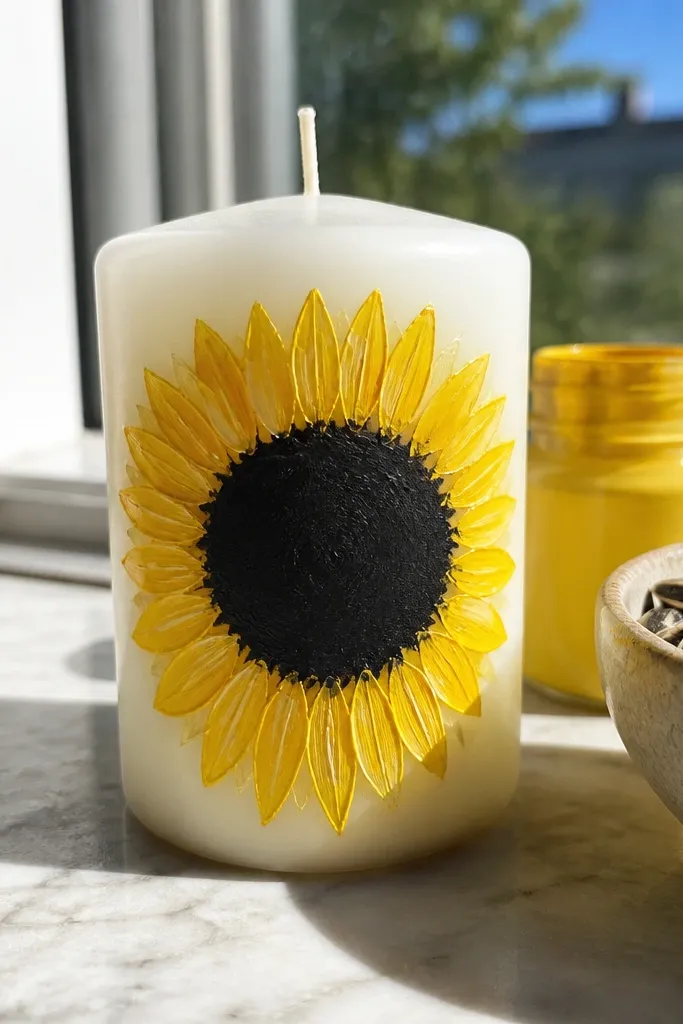
Sunflowers are beginner-friendly because their structure is simple and forgiving. You’re basically painting a circle of short petals around a bold center — any minor wobble still reads as sunflower. The look pops on white, light gray, and pale yellow candles because the dark center anchors the design. Use bright yellow for petals, then a warmer orange-brown for the shadow side so the flower looks sunlit. This one is a great first “full flower,” usually taking 25-35 minutes.
Draw a circle for the center using a marker and masking tape as a guide. Paint the center first: a dark brown ring with a slightly lighter brown ring inside it. Then add petals by painting small elongated teardrops around the circle — keep them all the same length. Add a thin orange-brown shadow along half of each petal, and finish with a few short center dots using a toothpick.
Editor's noteMake petals slightly thicker at the base; it helps them read as petals from a distance.
Skip thisSkip outlining petals in black; it makes the flower look sticker-like.
3. Wild Daisy with a Dot Center
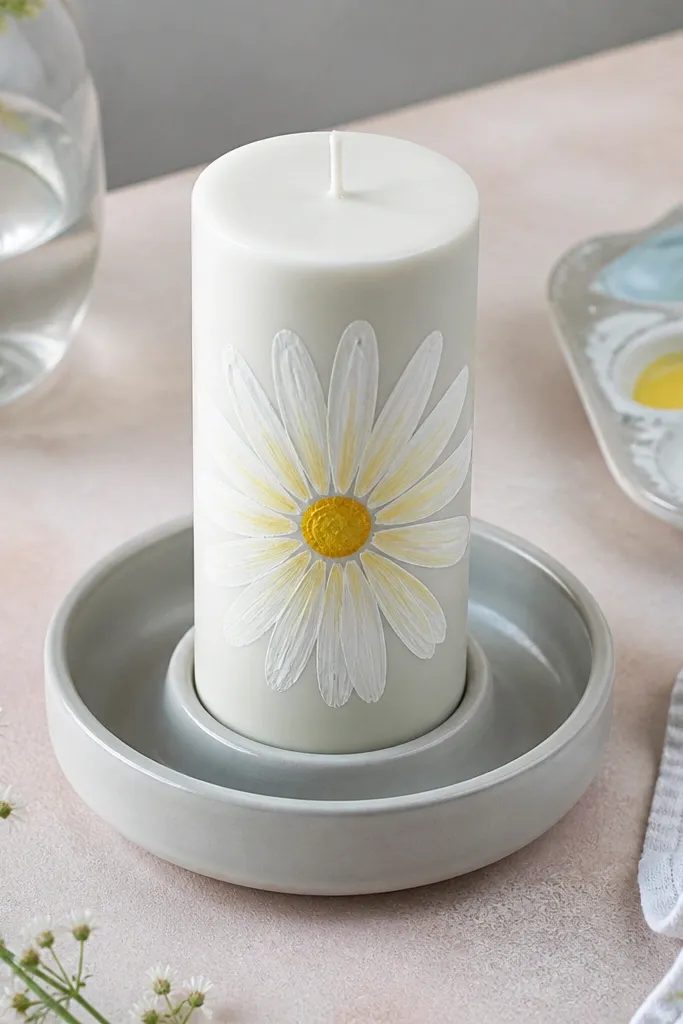
Daisies look clean and airy, which is why they photograph well. This design uses white petals with a faint yellow shadow near the center, plus a simple dot center. It works on pastel candles because the flower looks like it belongs there. You’ll get a soft, natural look without heavy blending. It takes about 15-25 minutes, and you can repeat the same technique to make a cluster.
Mark a small circle for the center. Paint 10-12 petals as thin teardrops radiating outward, leaving a tiny gap between each petal for crisp separation. Mix white with a tiny dab of yellow for the shadow and paint a small crescent near each petal’s base. Finally, add a bright yellow dot center, then a tiny darker yellow dot in the middle for texture.
Editor's noteUse the corner of a small brush for petals; it gives you thinner ends.
Skip thisDon’t overpaint the petals; multiple passes make them look chalky on wax.
4. Lavender Sprig with Tiny Buds
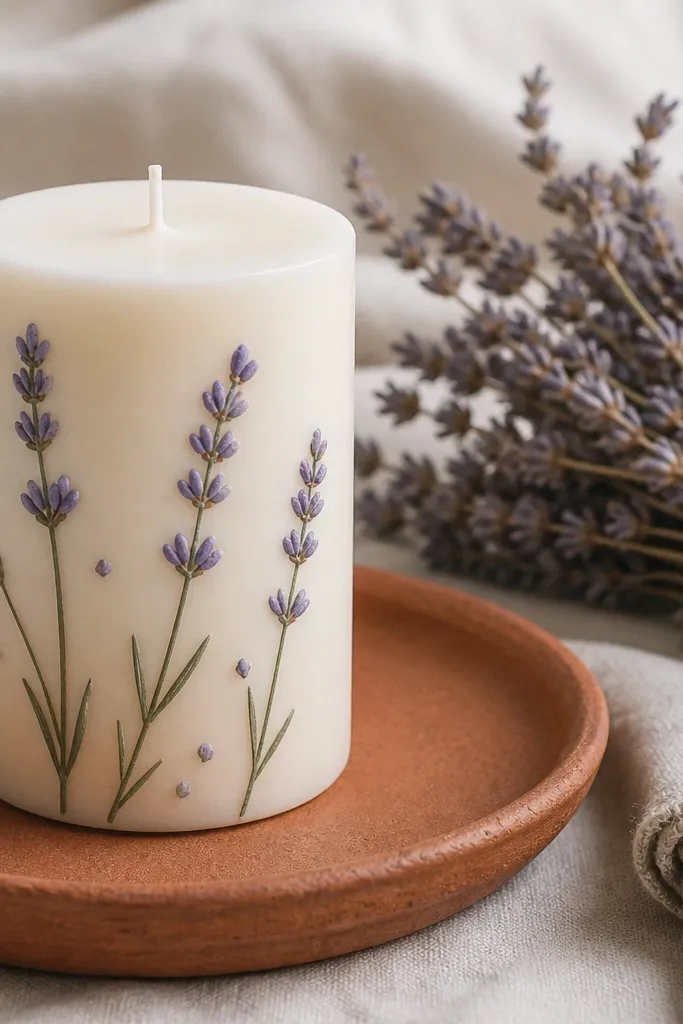
Lavender sprigs are a cheat code for elegant decor without complicated drawing. The buds are tiny, repeated shapes, and the stems give your candle movement. Choose a muted lavender for buds and a slightly darker purple for shadow so it looks real, not neon. Add thin green stems and a few leaf dashes to keep it airy. This is a great option if you want a vertical design that reads well on tall candles.
Paint a thin green stem line first, curving slightly upward. Along the stem, add bud clusters using tiny comma strokes in lavender — press and lift so each bud has a pointed end. Add a darker purple on one side of each bud cluster for shadow. Finish with a few short leaf dashes off the stem using green mixed with a touch of yellow.
Editor's noteKeep buds in a loose line; packed clusters look messy instead of lush.
Skip thisDon’t use thick paint for stems; it will look like blobs on wax.
5. Peony-Style Flower with Layered Petals
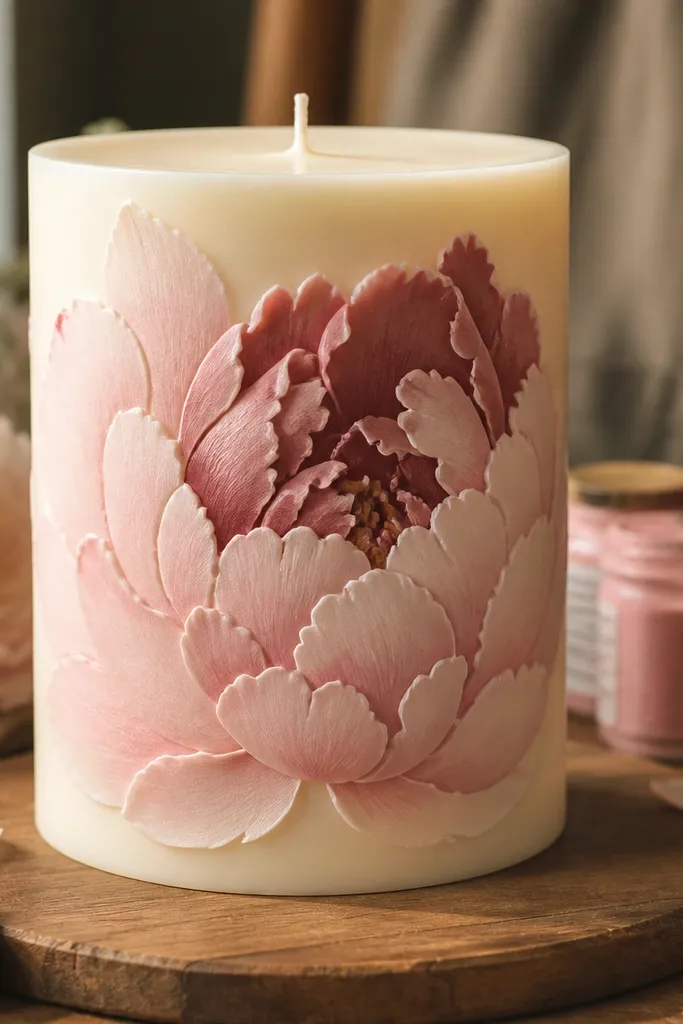
Peony-style flowers look full and romantic, even when you only paint a few layers. The method is simple: scalloped petal arcs stacked around a center. Use two pink tones plus a darker rose tone for shadow so the flower looks layered. This design is perfect for larger candles because the petals need space to breathe. Expect 30-45 minutes depending on how many layers you add.
Sketch a large circle lightly with tape. Paint the outer layer first: scalloped arcs that overlap slightly, using a medium pink. Add a second inner layer with smaller scallops in a lighter pink, then deepen the base of each petal with a thin line of darker rose. Finish by dabbing a small center swirl using light pink and adding a few tiny darker dots for texture.
Editor's noteLet each layer dry 5-10 minutes before adding the next so edges stay distinct.
Skip thisDon’t smear the petal edges while paint is wet; that’s what turns peonies into flat circles.
6. Cherry Blossom Branch with Blurry Petal Dots
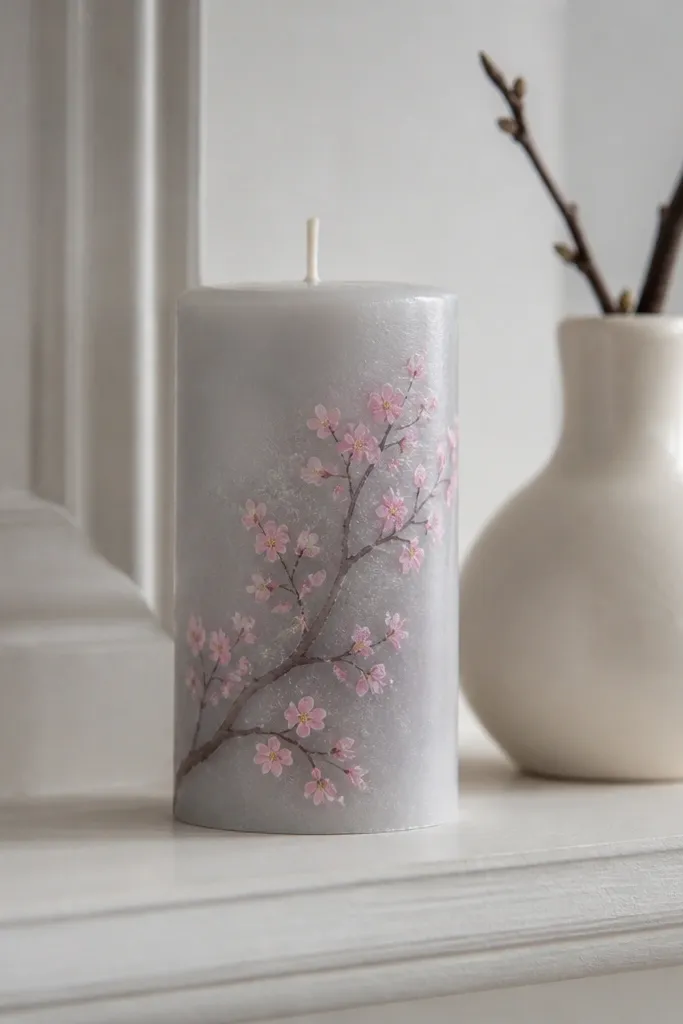
Cherry blossoms look delicate, which is exactly what makes them beginner-friendly. You’re not drawing each petal perfectly; you’re placing small paired strokes that read as blossoms. This design looks best on white, cream, or pale gray candles because the negative space does the work. Use soft pink for petals and a slightly darker pink for subtle depth. It takes about 25-35 minutes and gives you a “spring decor” look without fuss.
Paint a thin brown branch line that curves from one side to the other. Add blossoms by painting small pairs of rounded teardrops — two per blossom — leaving a tiny gap between them. Use a darker pink to shade one side of each blossom with a short half-moon. Add tiny yellow dots for centers using a fine brush or toothpick tip.
Editor's noteVary blossom size by changing brush pressure; it makes the branch look natural.
Skip thisDon’t outline each blossom with dark paint; it kills the soft look.
7. Tulip with One Big Petal and a Stem
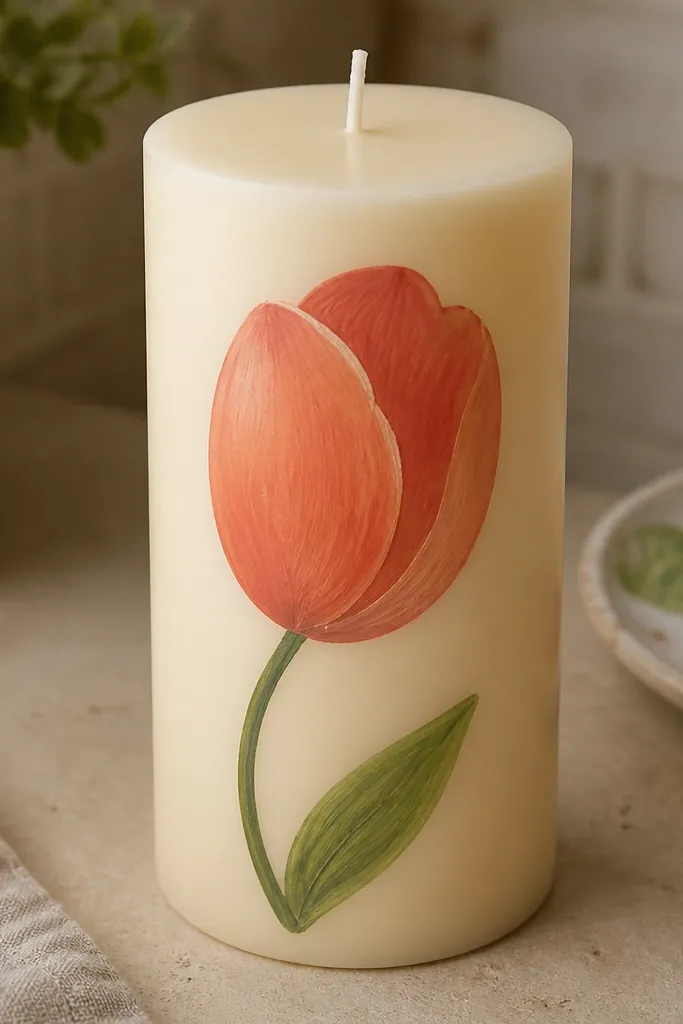
A single tulip is clean, modern, and easy to place anywhere on a candle. The “one big petal” approach keeps it simple: you paint the outer shape, then add a shadow curve and a small highlight line. Choose orange, coral, or yellow for the petal and green for the stem. This looks great on cylindrical candles because the tulip silhouette stays readable as it wraps. Plan on 15-25 minutes.
Draw the stem first with a thin green line that slightly leans. Paint the tulip petal as a tall teardrop shape, then carve the inner curve with the candle color or a lighter paint. Add a shadow band along one side of the petal using a darker orange or red-orange. Finish with a small highlight streak on the opposite side and add a leaf dash near the base.
Editor's noteUse a slightly darker green for the stem shadow so the tulip doesn’t float.
Skip thisDon’t make the petal too wide; a wide tulip looks like a blob instead of a flower.
8. Rose Cluster of Three Minis
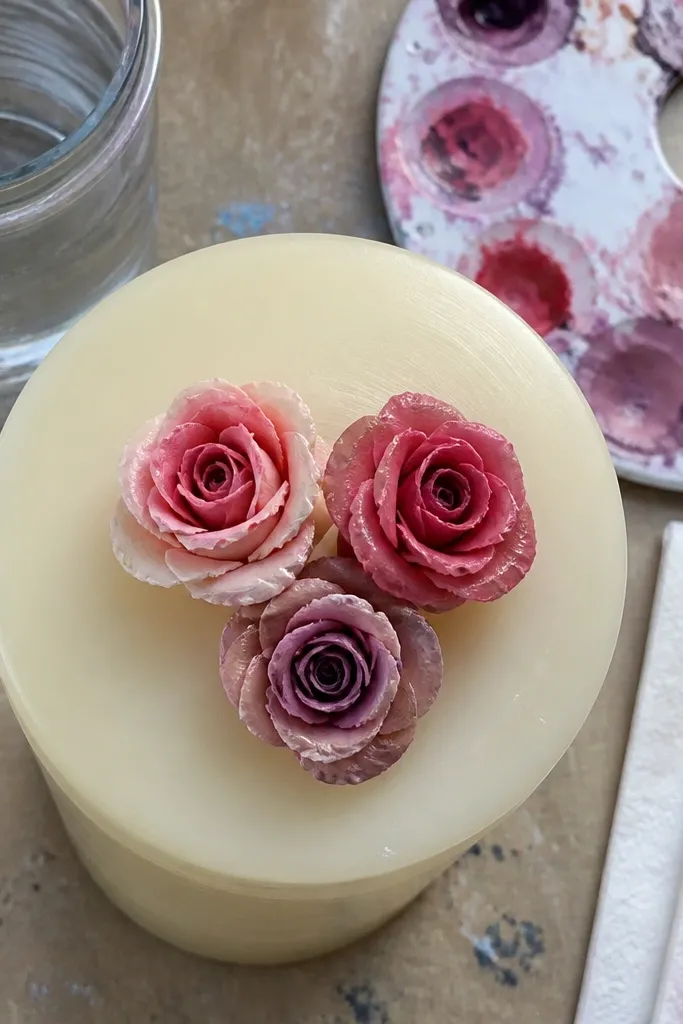
If you want a fuller look without painting one huge flower, do three mini roses. The cluster fills the space, and each tiny bud is quick on its own. This design looks good on candles that are hard to cover with a single large motif. Use two rose tones and one deeper accent tone so the cluster looks intentional, not random. It’s a solid 25-40 minute project.
Mark three bud centers in a triangle layout using tape. Paint each bud using the three-petal method, keeping petals slightly smaller for the top buds. Shade each bud with a thin darker edge and add a tiny center swirl. Add a couple of green leaf dashes between buds so the cluster has breathing room and looks connected.
Editor's noteKeep all three buds at slightly different angles; it makes the cluster feel alive.
Skip thisDon’t place buds in a straight line; it looks like a pattern, not flowers.
9. Butterfly-Kissed Daisy Border
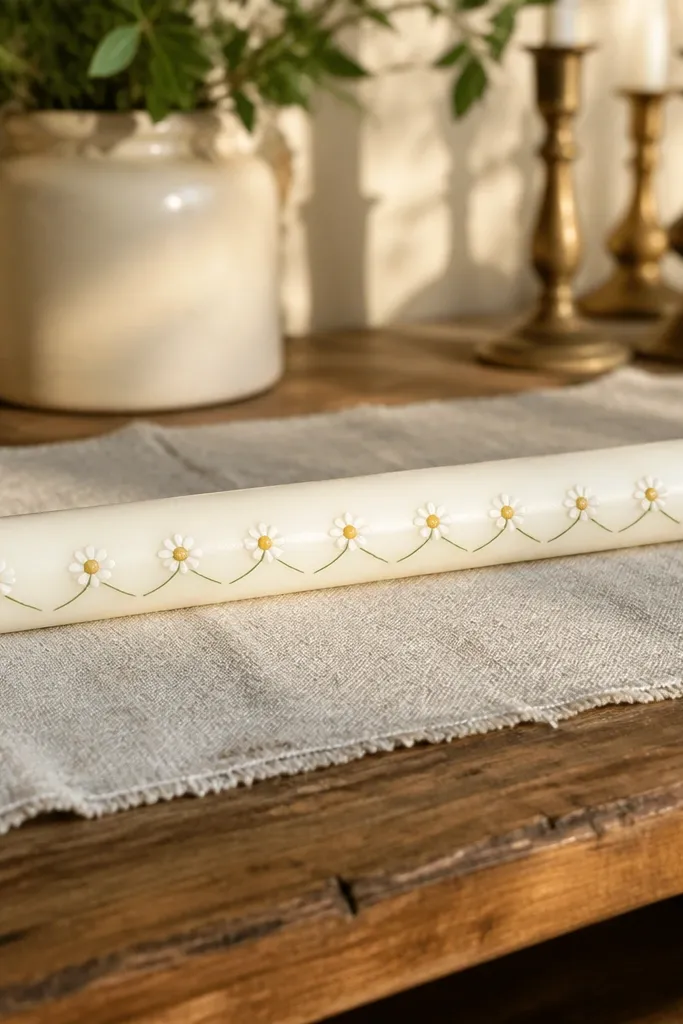
Borders look polished fast, especially for candles that sit on shelves. This one uses tiny daisies repeated in a line, plus little green stem curves. The daisies are simplified: 6-8 petals and a dot center. It reads as cheerful and intentional, and it’s easy to keep consistent across the full candle length. Expect 30-50 minutes depending on how long your border is.
Choose a strip height and mark it with masking tape as a guide. Paint the stems first as a gentle zigzag line in green. Add daisies along the line by painting 6-8 small teardrop petals around a dot center, repeating the same spacing. Add tiny shadow lines at the petal bases using a light yellow mix and let dry before you remove tape.
Work in sections of 5 daisies so you can match spacing without losing your place.
Don’t overfill the border; leaving small gaps makes it look airy.
10. Hydrangea with Puffy Dot Petals
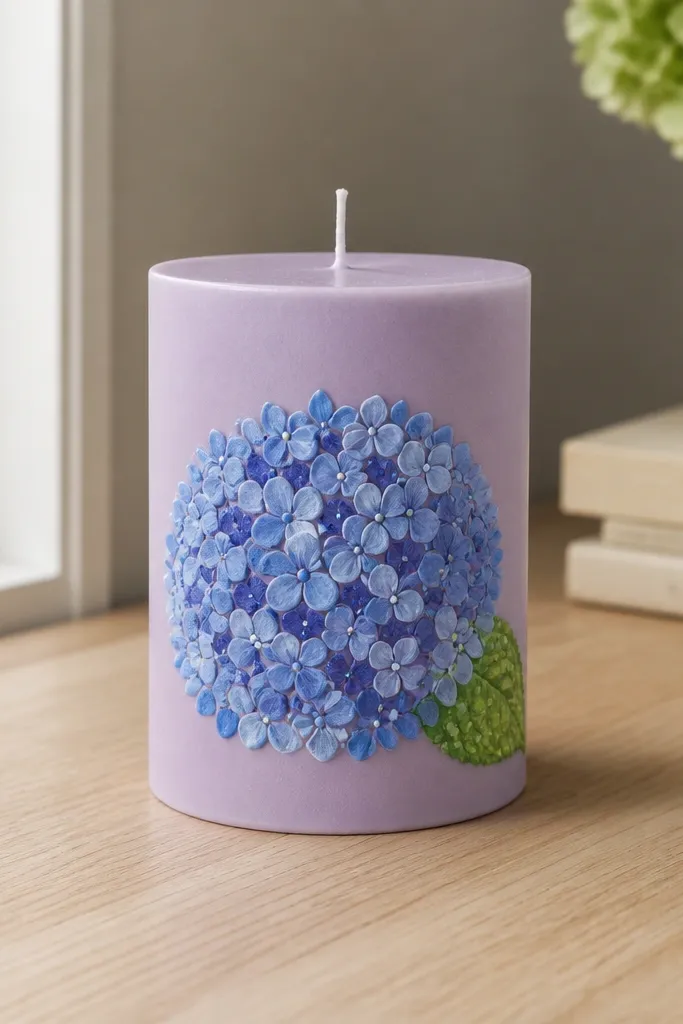
Hydrangea looks hard, but beginners can fake the “puffy” look with dot clusters. You paint a cluster shape, then fill it with repeated small circles and teardrops. This design is gorgeous on pastel candles because the blue-purple petals look like soft watercolor. Use 2-3 blue tones and one green for leaves, and you’ll get natural variation. Time: 35-45 minutes for one cluster.
Sketch a loose round cluster outline with tape. Fill the cluster with small dot petals using a round brush: place dots close together and slightly overlap. Add a darker blue shade on the lower edges of the cluster, then sprinkle a lighter blue shade on top for highlight. Finish with a few green leaf dashes and a thin stem line under the cluster.
Editor's noteUse a paper towel to blot your brush before dotting; it prevents big blobs.
Skip thisDon’t try to “paint smooth petals” on hydrangea; the dot texture is the whole point.
11. Wild Rose with Curved Petal Strokes
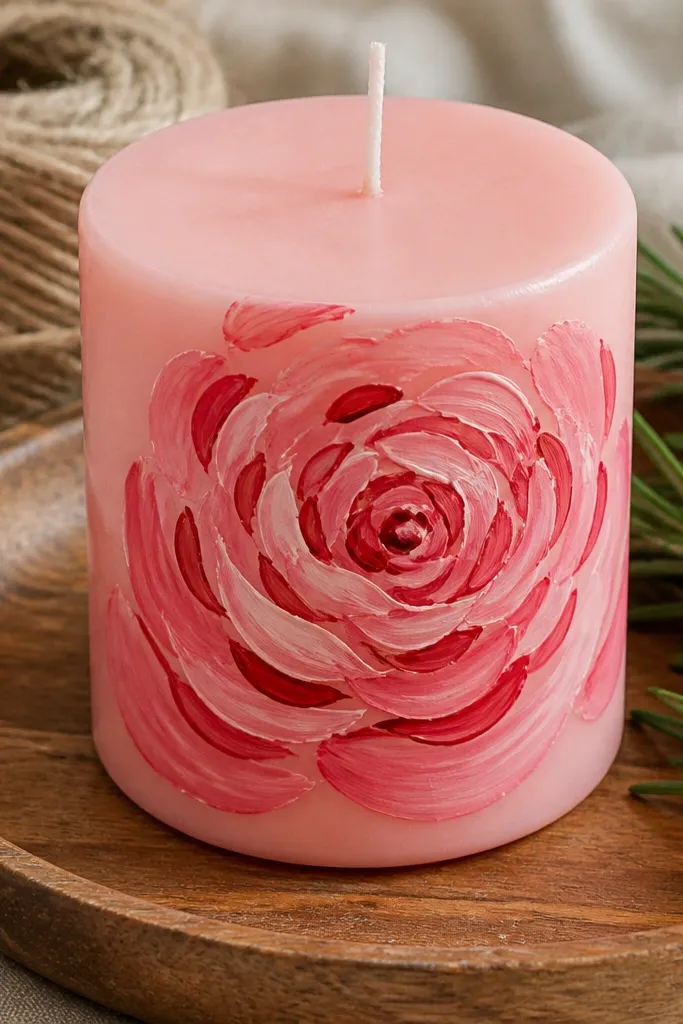
Wild rose has a looser, romantic look, and it’s very forgiving for beginners. Instead of perfect symmetry, you use curved petal strokes that overlap in a spiral. The design looks best when you keep petals slightly irregular — it reads as hand-painted, not sloppy. Use blush pink and red, with a darker red shadow to give the spiral depth. This takes around 25-35 minutes.
Draw a small spiral center using a pencil or light gel pen on tape. Paint the first ring of petals as curved teardrop strokes that overlap the center. Add a second ring with slightly larger strokes, then shade each petal with a thin darker line along one edge. Finish with a tiny center dot cluster using a darker red and a light pink highlight dot.
Editor's noteKeep your spiral tight; a wide spiral makes the flower look like a wreath.
Skip thisDon’t fill the whole area with solid red; negative space is what makes it read as a rose.
12. Morning Glory with Starry Center
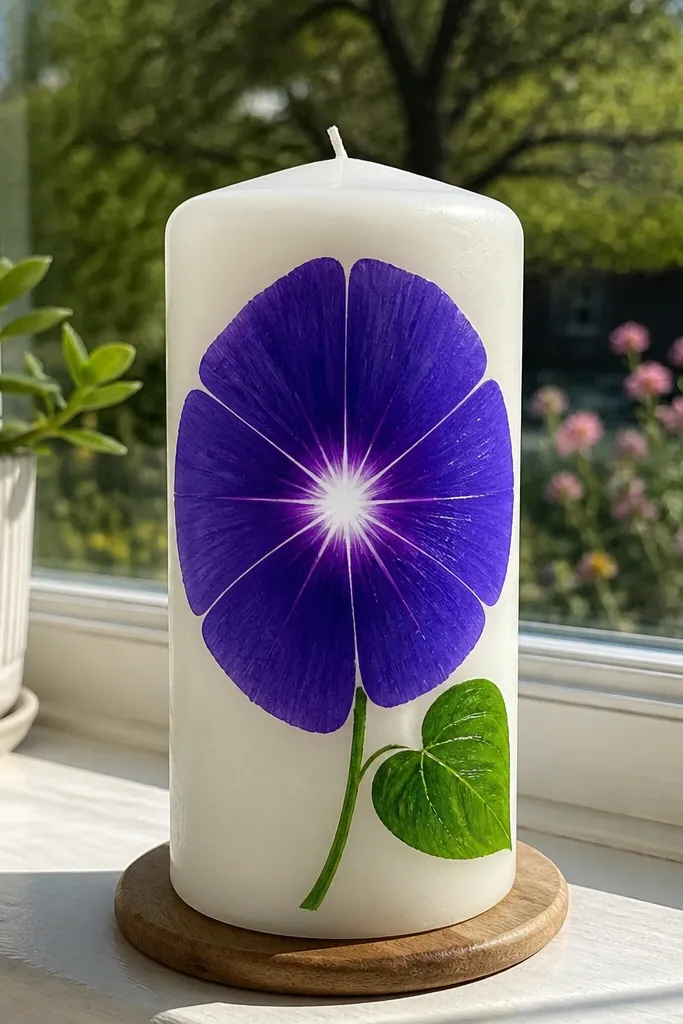
Morning glory is dramatic and photogenic because it has a star center. The flower is made from a few large petal shapes that meet in the middle, then you add a bright highlight center that looks like light. Choose purple or blue for petals and white for the star center. Add a green stem and one leaf to keep it simple but complete. Time: 20-30 minutes for one flower.
Paint the petals first as 5 large teardrop shapes that meet at a point in the center. Shade the base of each petal with a darker purple using a thin brush. Add a white star center by painting a small cross shape and then extra short lines radiating outward. Finish with a tiny yellow dot in the middle and add a green leaf dash.
Editor's noteMake petal tips slightly pointed; round tips make it look like a generic flower.
Skip thisDon’t use black for the center lines; use deep purple so it stays soft.
13. Simple Four-Petal Clover Flower
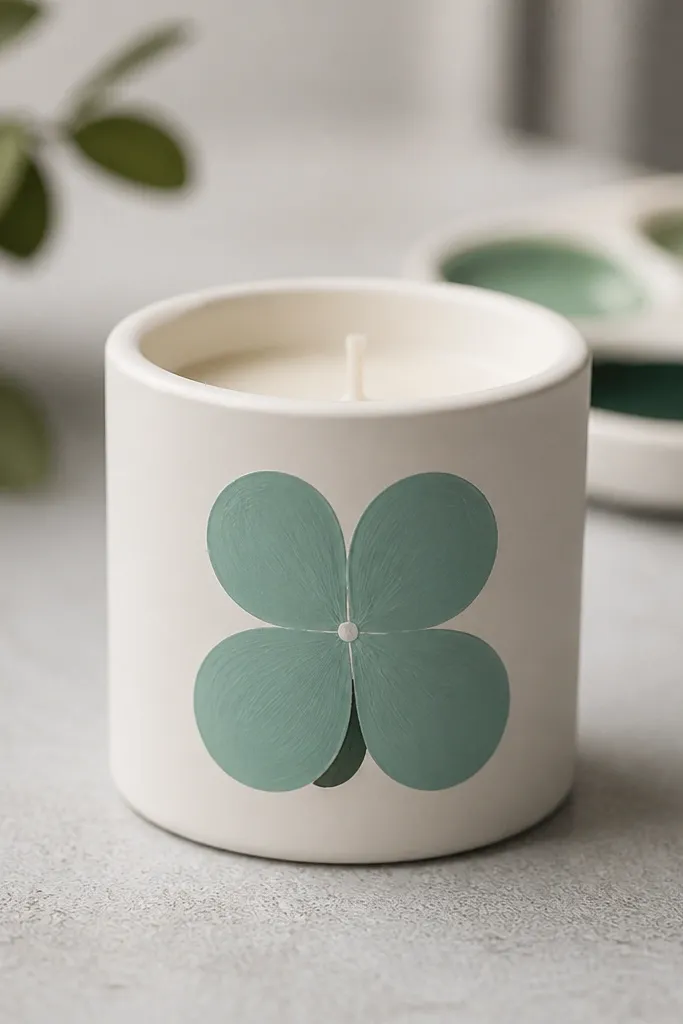
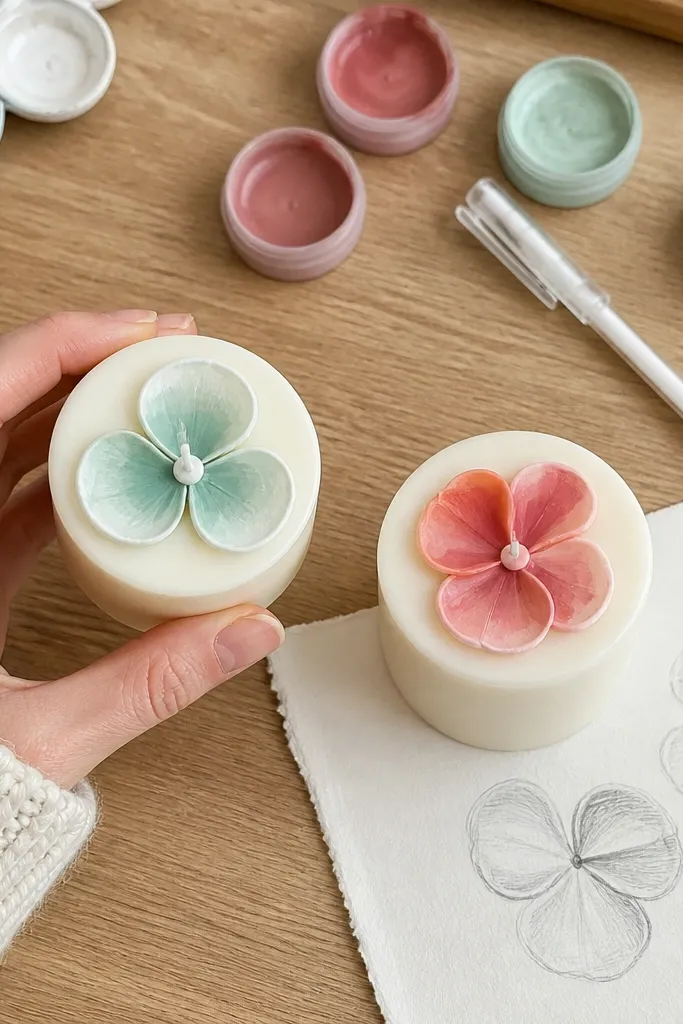
This is the fastest “flower” that still looks intentional. You paint four rounded petals like a clover, then add a small center dot and a tiny shadow. It’s perfect for beginners who want something cute on candle holders, votives, or short candles. The mint-and-white look is especially clean and modern. Time: 10-15 minutes.
Mark a small center dot. Paint four rounded teardrop petals around it, keeping each petal the same size and spacing. Add a light shadow by mixing a tiny amount of gray or a darker mint and painting a small crescent on the inner edge of each petal. Finish with a bright white highlight dot in the center and a thin green stem line if you want it to look like a small bloom.
Editor's noteUse a dry brush for the shadow so it looks soft, not harsh.
Skip thisDon’t overwork the center; too many layers make it muddy.
14. Rosebud Vine Wrap (Two Leaves)
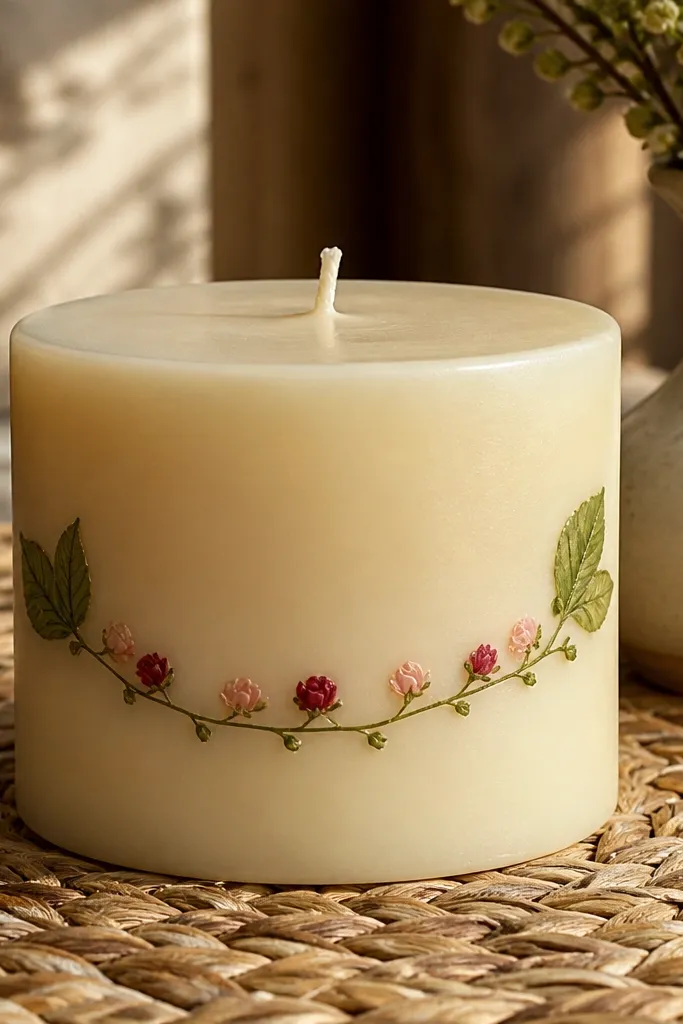
A vine wrap looks more “decor” than “craft” because it moves around the candle. You’re painting a curved line of tiny rosebuds with two leaf shapes to frame it. This design is great when you want a repeating element without doing a full border. Keep the rosebuds small and repeat the same petal stroke so it stays consistent. Time: 30-45 minutes depending on how many buds you add.
Paint a thin green vine line that curves vertically around the candle. Add rosebuds along the vine by painting three-petal mini buds at intervals. Shade each bud with a darker rose edge and add a tiny center swirl. Add two bigger leaf shapes — one on each side of the vine — using a teardrop leaf with a darker green vein line.
Rotate the candle a little as you paint; it keeps the vine line from looking flat.
Don’t make leaves symmetrical; one leaf should be slightly smaller for realism.
15. Dandelion Clock with Tiny Seed Dots
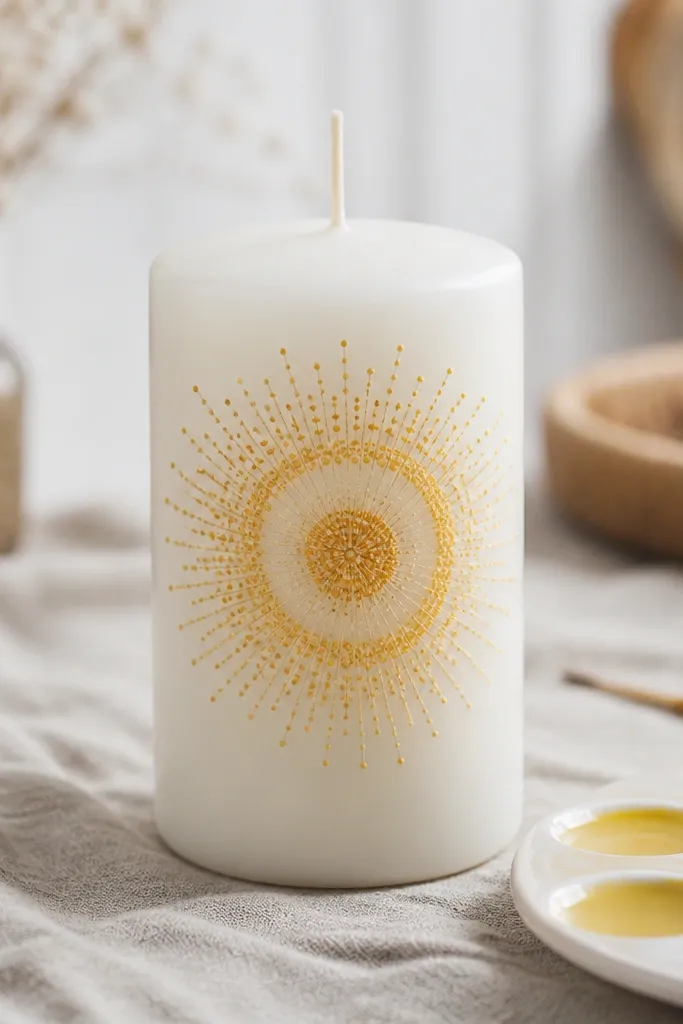
Dandelion clocks are surprisingly easy because the “flower” is a circle of tiny dots. You paint the center ring, then dot out the seed rays. It looks airy and high-detail without requiring fine drawing skills. Use a warm yellow center and a light yellow outline ring so the seeds look delicate. This looks best on white and light gray candles because the dot rays show clearly. Time: 25-35 minutes.
Paint a small yellow circle for the center and add a slightly darker yellow ring just outside it. Use a fine brush or toothpick to place tiny dots in a circle around the center, leaving space between dots. Add a few longer dots for a “clock” effect by placing some dots farther out. Finish by blending a light cream highlight at the top of the center circle for shine.
Editor's noteHold the toothpick like a pencil so the dot size stays consistent.
Skip thisDon’t connect seed dots into lines; separate dots read as seeds.
16. Blueberry Flower with Five Petals
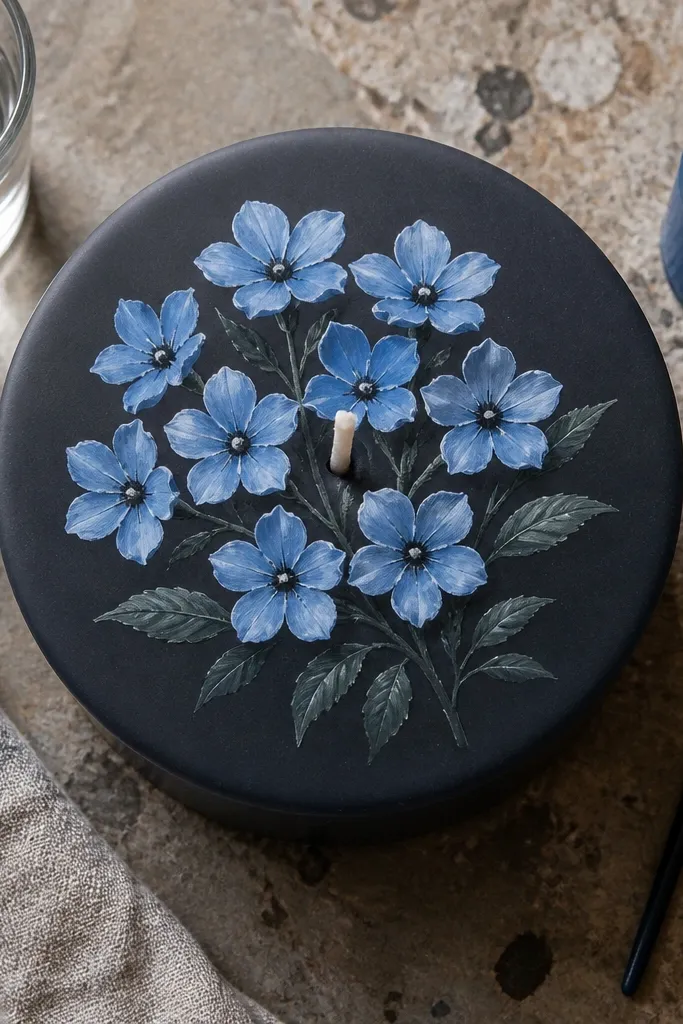
Blueberry flowers are cute and unusual, and they look great as a small cluster on a candle. Each flower has five petals, but you don’t need perfect symmetry. The secret is the dark center dot and a tiny highlight on each petal so they look fresh. Use dusty blue for petals and deep navy or dark gray for centers. Time: 20-30 minutes for a cluster of 6-10 flowers.
Draw small center dots for each flower cluster spot using tape as a guide. Paint five petals around each dot as short teardrops. Shade one side of each petal with a slightly deeper blue, keeping the other side lighter. Add tiny dark center dots and a micro white highlight dot on one petal per flower.
Editor's noteMake petals slightly different lengths; it prevents the cluster from looking printed.
Skip thisDon’t use watery blue; it turns translucent and disappears on wax.
17. Peach Blossoms with Split Petals
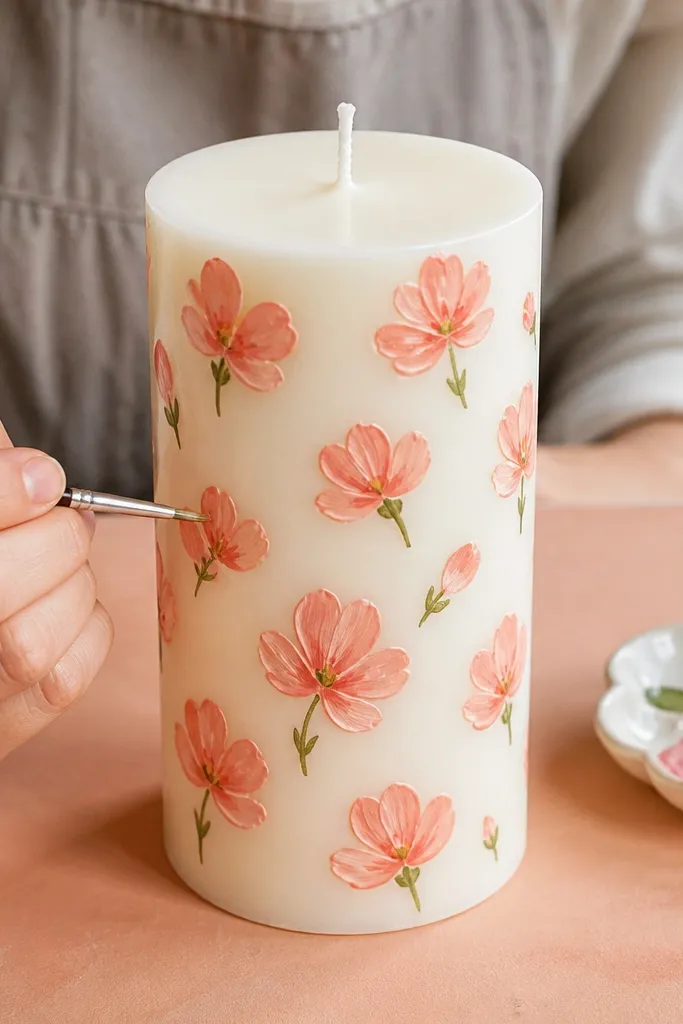
Peach blossoms look soft and warm, and the split-petal look is easy to fake with two rounded strokes. This design gives you a “flower scatter” effect without needing a full branch. It’s ideal for beginners who want multiple mini blooms that still look coordinated. Use peach-pink and a warmer rose tone for shading. Add tiny yellow centers and a few green leaf dashes. Time: 25-35 minutes.
Pick 8-12 bloom spots and mark them lightly on tape. For each bloom, paint two rounded petal halves that meet in the middle, then add a small third petal half behind if you want a layered look. Use a darker rose tone to shade the inner edge of each petal. Finish with a tiny yellow dot center and a couple of green leaf dashes around the cluster.
Keep petals thick enough to hold their shape after drying.
Don’t space blooms too evenly; random spacing looks more natural.
18. Calla Lily with One Curve and a Dot
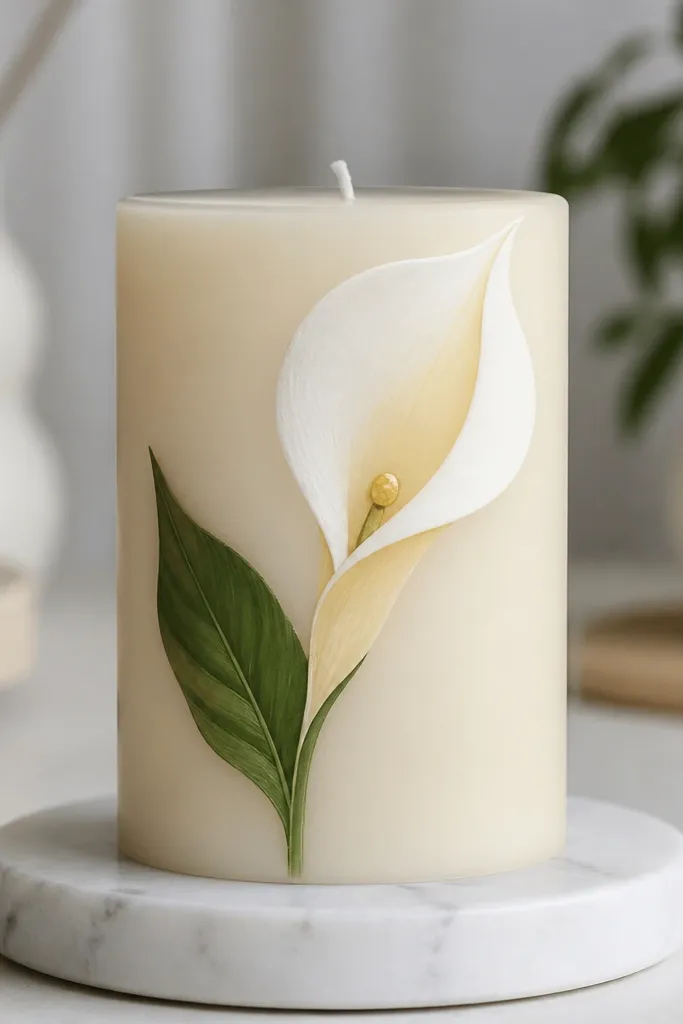
Calla lilies look sleek and modern, so they’re great if you’re painting for a clean, aesthetic shelf. You paint one curved petal shape and then add a simple center dot that makes it read instantly. Use white or off-white for the petal and a pale yellow for shading. Add one green leaf for balance. This is fast and looks sharp on tall candles. Time: 15-20 minutes.
Paint a single curved petal as a teardrop that opens at the top, leaving a small gap. Shade the inside curve with a light gray or pale yellow so it looks hollow. Add a small yellow dot at the center opening, then a tiny white highlight dot on the petal edge. Finish with a thin green leaf dash near the base.
Editor's noteUse a smaller brush than you think; calla lilies look best with clean edges.
Skip thisDon’t add extra petals; calla lilies look wrong when they turn into generic flowers.
19. Ditsy Rose with Micro Petals
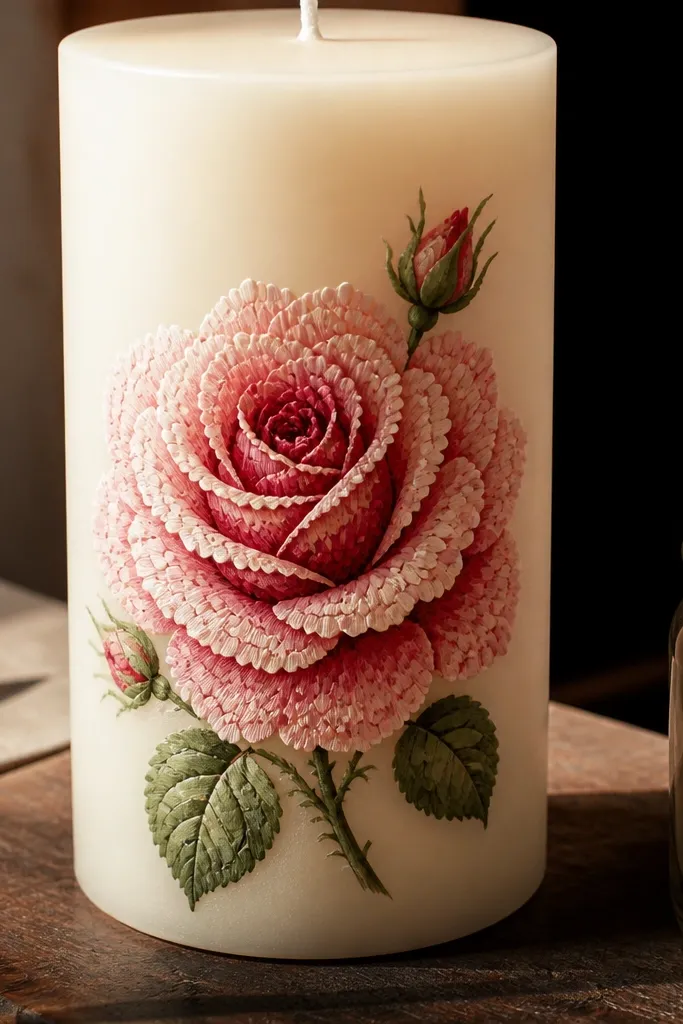
Micro roses are a style choice: they look cute, delicate, and a little vintage. The method is simple — you build the rose from many tiny strokes instead of large petals. This makes it forgiving because each tiny stroke can be slightly different and still look like a rose texture. Use blush pink and deep red for contrast and a darker red for shadow at the base. Time: 30-40 minutes for a small cluster of 1-2 roses.
Draw a small circle center outline using tape. Paint the first layer with 6-8 tiny teardrop strokes around the center, slightly overlapping. Add a second layer of even smaller strokes, then shade the lower edge of each stroke with darker red. Finish with a tiny swirl center using a toothpick tip for control.
Editor's noteLet the first layer dry a few minutes so the micro petals don’t merge.
Skip thisDon’t overload the center with thick paint; micro roses need space to read.
20. Aster Flower with Star Petals
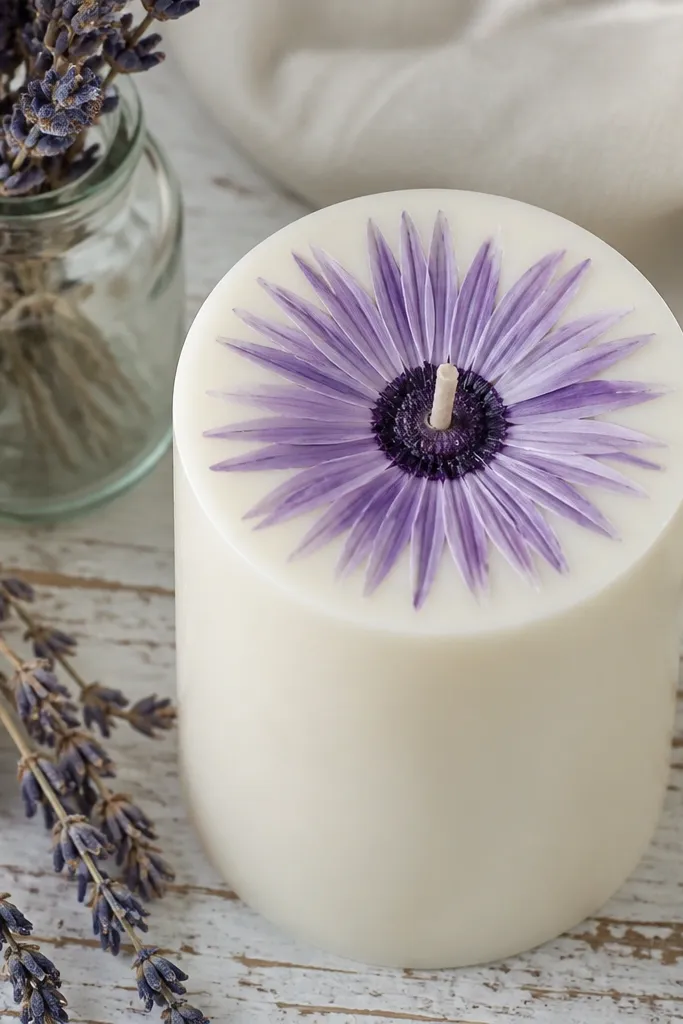
Aster flowers look like they have movement because the petals are thin and radiating. Beginners can do it by painting short, narrow “spokes” around a center circle. Choose purple or lavender and use a darker purple for shadow so the spokes look dimensional. The dark center makes it pop, especially on white and cream candles. Time: 25-35 minutes.
Paint a dark center circle first. Then add thin spoke petals by placing short brush strokes radiating outward, keeping them all similar length. Add a lighter purple highlight on alternating spokes, then add darker shadow on the base portion of each spoke. Finish with a few extra tiny dots in the center to create texture.
Editor's noteCount your spokes as you go — 18-24 gives a full look without crowding.
Skip thisDon’t make spokes too long; long spokes turn into messy scribbles.
21. Geranium Leaves with One Flower
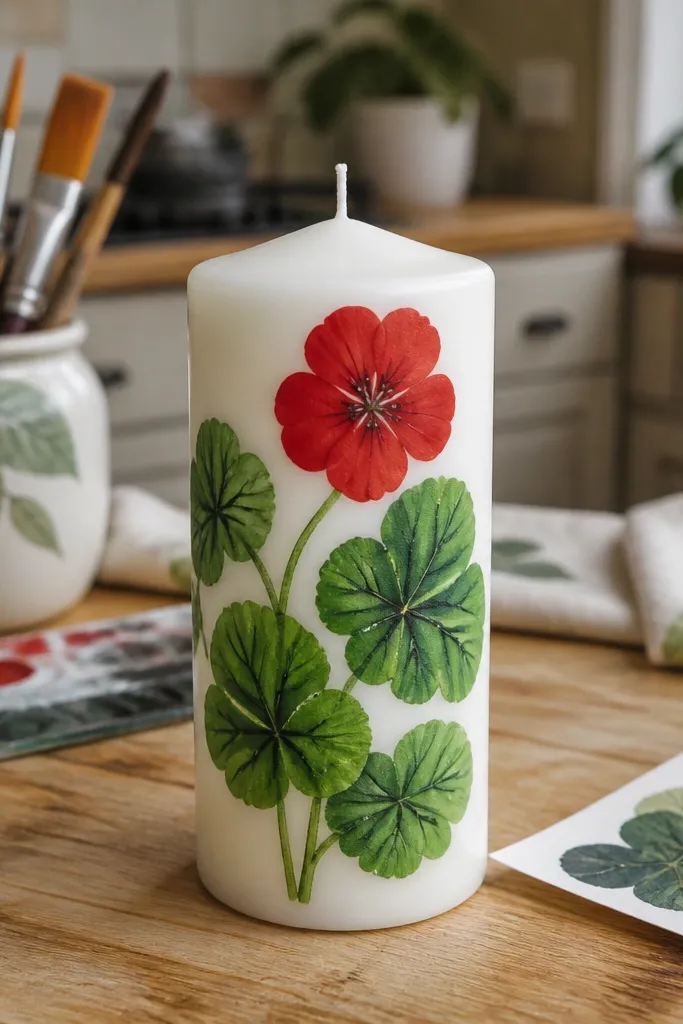
Geranium-style designs look styled because you get leaves plus one bold flower. It’s a smarter beginner layout than trying to cover the whole candle with blooms. Use a green leaf pattern with darker veining and then paint a single red flower with five rounded petals. Add a tiny white highlight on the petals and a darker center dot. Time: 25-40 minutes.
Paint the leaf first: a teardrop leaf shape with a few darker green veins running from the center. Add stems in thin green lines connecting leaf to flower. Paint the flower as five rounded petals around a small center dot, then shade each petal base with a darker red. Finish with a tiny white dot highlight on two petals and add a small darker red center ring.
Editor's noteKeep leaf edges crisp by using tape to mask where you want clean boundaries.
Skip thisDon’t skip the leaf veins; without them, the flower looks unfinished.
22. Rosemary Flower Sprig with Soft Blue Blooms
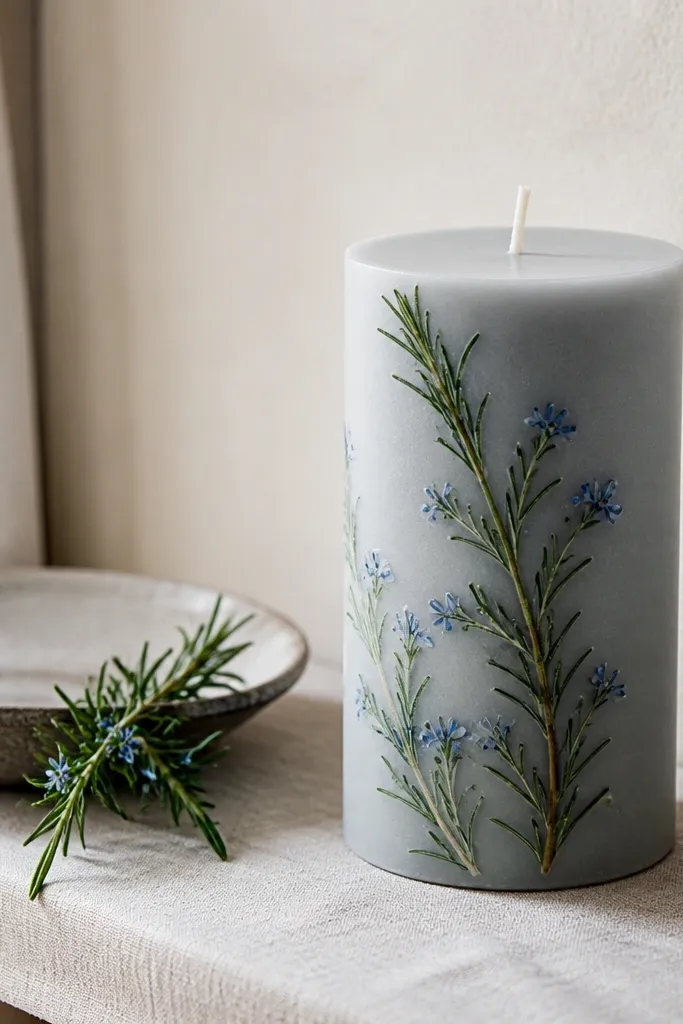
This sprig style looks like herbs and flowers combined, which makes it feel more intentional than a random floral. The blooms are small and the leaves are thin lines, so the candle looks detailed without heavy coverage. Use muted blue for tiny blossoms and green for needle-like leaves. It looks great on off-white and light brown candles because the greens read warm. Time: 30-45 minutes.
Paint a thin green stem line and add needle leaves as short thin strokes on both sides. Place tiny blue blossoms along the upper section of the stem by painting small circles or short teardrop buds. Add a darker blue dot inside each bud for depth. Finish with a few tiny highlight strokes on the needles using a lighter green.
Use a liner brush or the tip of a small round brush so leaves stay hair-thin.
Don’t make leaves thick; chunky leaves ruin the herb look.
23. Simple Five-Petal Flower with Ombre Center
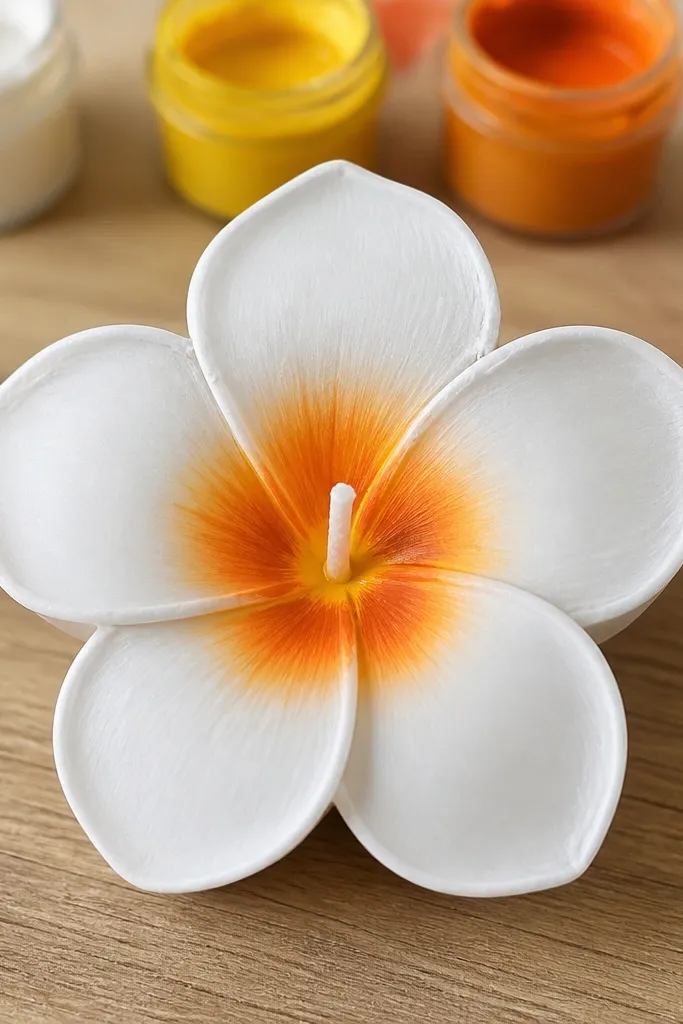
This is the clean, classic flower that looks good anywhere because it has a strong center. You paint five petals once, then do a center gradient that makes it look “designed.” Use white petals and blend the center from bright yellow to orange to a deeper amber ring. It’s simple but the gradient is what makes it look polished. Time: 20-30 minutes.
Paint five petals as rounded teardrops around an empty center circle. Mix three center shades: bright yellow, yellow-orange, and amber-brown. Paint the bright yellow in the center, then add yellow-orange around it, and finish with amber-brown as a thin outer ring. Blend the ring edges gently with a clean brush so the gradient looks smooth.
Use a damp brush edge to soften the gradient — not wet paint, just slightly damp.
Don’t blend with too much water; it turns the center streaky.
24. Wildflower Mix Cluster with 5 Different Blooms
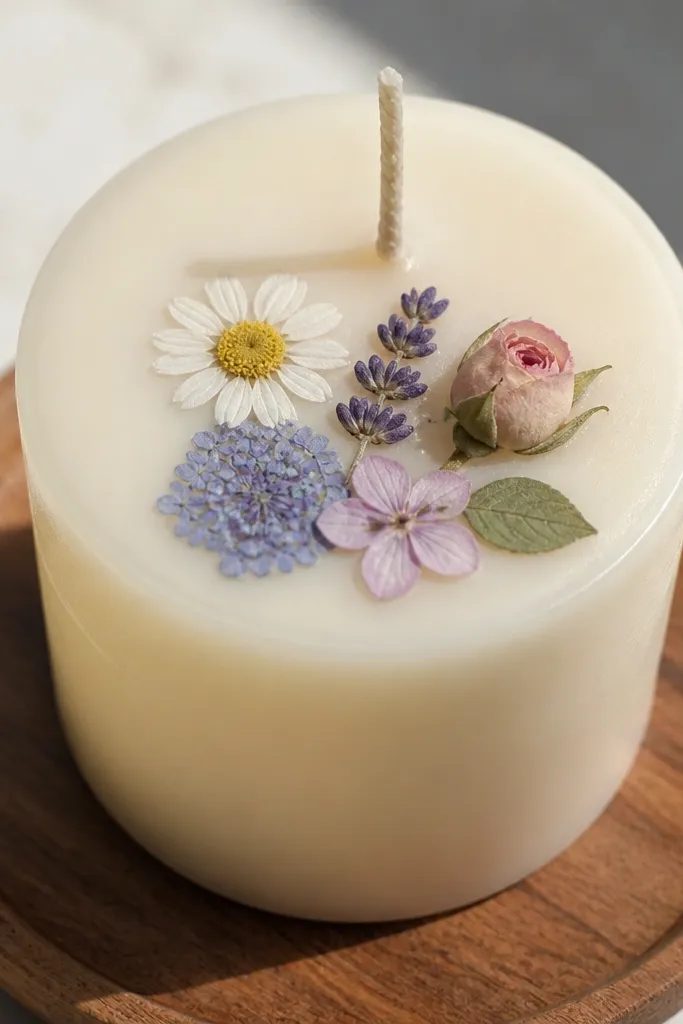
This cluster is for when you want maximum visual impact without covering the candle in one massive flower. You’ll paint a cluster that includes a daisy, a small rosebud, a lavender bud, a tiny five-petal bloom, and one small dot-based hydrangea patch. The mix looks artsy and alive because each bloom has a different shape and texture. Use a tight color palette — two pinks, one yellow, one purple, one green — so it stays cohesive. Time: 45-70 minutes depending on how many details you add.
Pick one placement area on the candle and sketch a loose circle cluster boundary with tape. Paint one anchor flower first (a daisy or rosebud), then fill around it with 4 smaller blooms using the petal stroke methods from this list. Shade each bloom using one darker tone so everything ties together. Add a few green leaf dashes between flowers, then let the cluster dry fully before removing tape.
Editor's noteChoose one “texture leader” like hydrangea dots so the cluster looks intentional in photos.
Skip thisDon’t add too many colors; random rainbow clusters look chaotic on candles.
25. Strawberry Blossom with Seed Dot Center
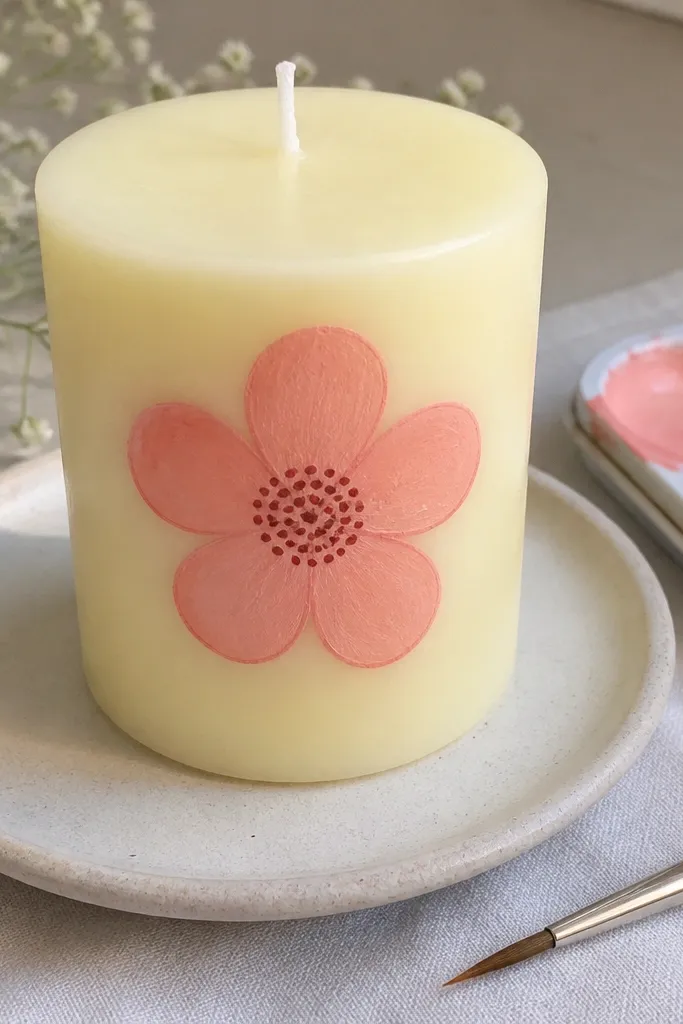
This flower is a great beginner win because it uses a simple petal shape and a repeatable dot pattern. The center looks like strawberry seeds, so even if your petals are slightly uneven, the dots pull the whole thing together. You get a clean, modern look that photographs well on both pale and dark candles. It also hides small painting mistakes because the dot center has lots of tiny points that distract the eye. Plan on about 30 to 45 minutes for one candle, and it works great for kitchen shelves, gift sets, and spring-themed tables.
Start with a clean candle and sketch the blossom placement lightly with a pencil. Paint five rounded petals in a single color (soft pink or red-rose), spacing them like a star — keep each petal about 1/2 inch wide on a standard pillar candle. While the petals are still dry to the touch, dot a ring of tiny seed marks in the middle using a toothpick or a dotting tool, then add a few more dots inside for depth. Finish by painting a thin yellow center ring and a tiny green calyx at the base of the blossom if you want it to look more “plant-like.” Let everything dry fully, then seal with 2 light coats of clear matte acrylic sealer so the paint doesn’t scuff when the candle gets handled.
Use a toothpick for the seed dots and load only a tiny amount of paint — too much paint turns dots into blobs fast.
Don’t try to paint the seed dots before the petals set, or the center dots smear into the petal edges.



