
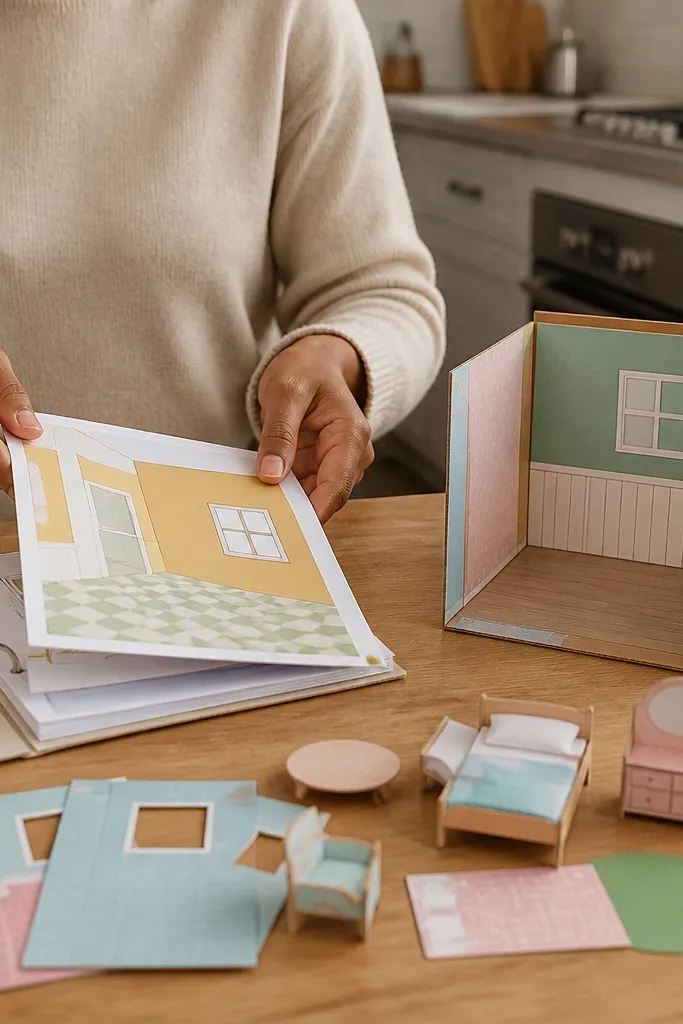
1. Sunset Window Row House with Foldable Front
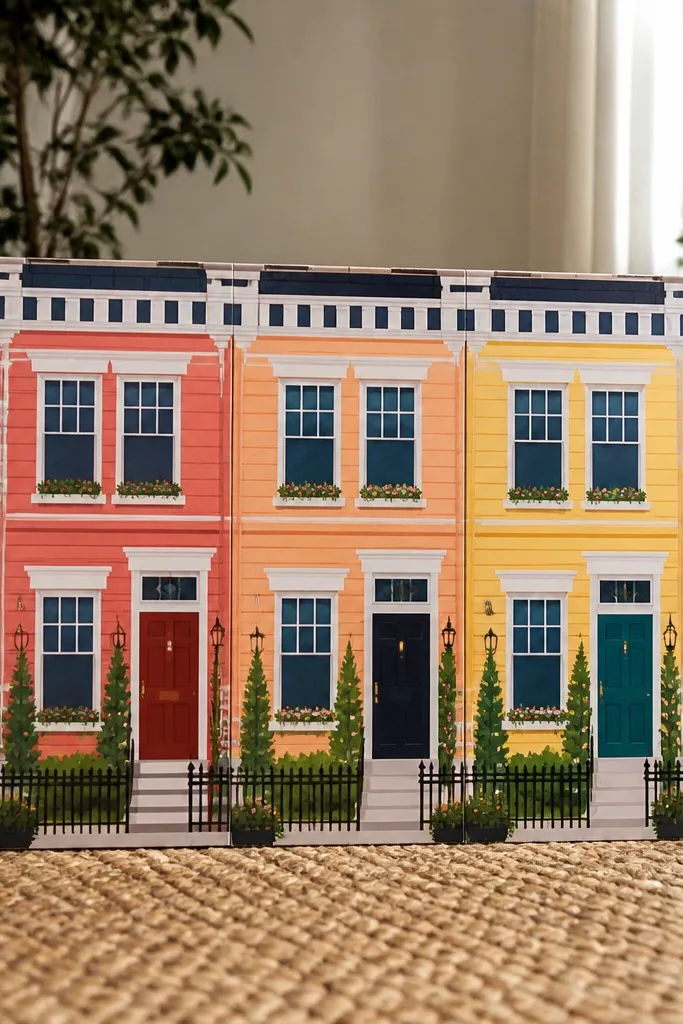
This template is built for the “front view” look — the windows are big, the wall art is bold, and the front folds into a stable rectangle. Kids get a house they can set down and play with immediately, and you get a clean photo angle because the design faces forward. The foldable front also hides messy edges better than glue-only walls. It’s a strong pick when you want a house that looks finished even before you add furniture.
Start by printing the wall panels and roof on 90 lb cardstock. Fold along every printed line, then glue only the tab points that lock the front frame — leave doors un-glued until the last step. Next, attach the roof with two tabs so it sits flat and doesn’t bow. Finish by adding the window inserts after the house is assembled so alignment stays crisp.
Editor's noteRun a bone folder over the roof folds; paper roofs look 10x neater with sharper creases.
Skip thisDon’t glue the door tabs first — they shift and make the front look crooked.
2. Pastel Duplex with Removable Side Walls
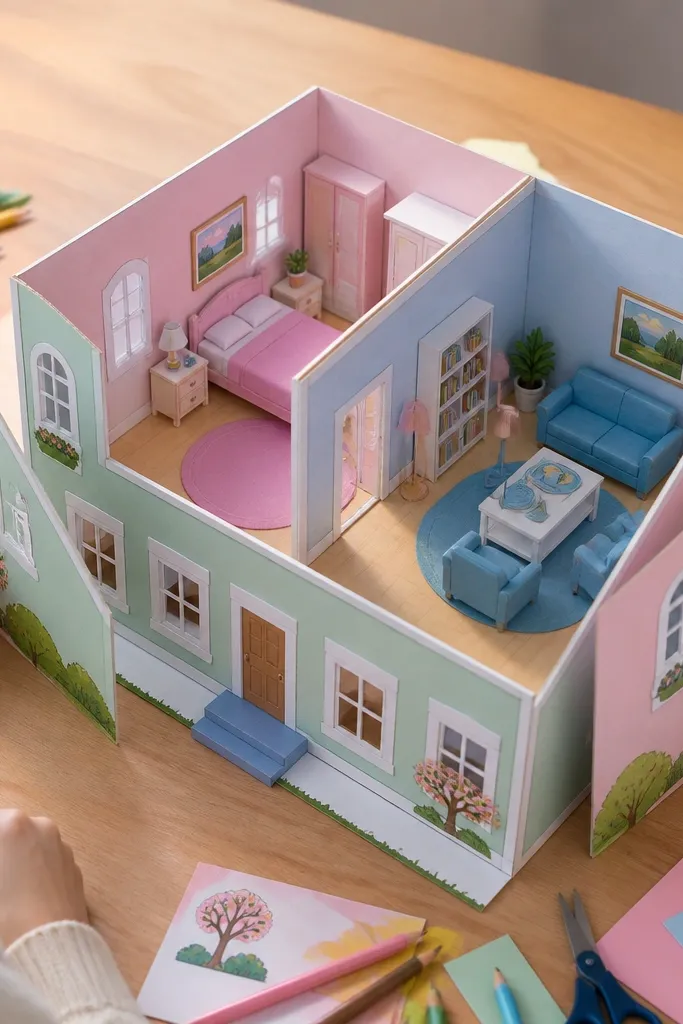
This one is for people who want play without rebuilding. Removable side walls mean kids can switch between rooms quickly, and the template still keeps the exterior looking tidy. The pastel palette makes colored-in details pop, so crayon marks don’t look messy. It also photographs well because both rooms show at once when the side panels are off.
Print the base plus two interior rooms on cardstock. Assemble the base first, then glue the back wall and floor tabs. Cut along the removable side wall edges, then attach them with small tabs only — so they can be lifted off later. Add furniture pieces after you confirm the rooms open cleanly without catching.
Use a glue stick for the tabs; it dries fast and keeps the removable panels from warping.
Skip liquid glue on removable parts — it soaks paper and makes tabs curl.
3. Rainbow Stair Townhouse with Layered Levels
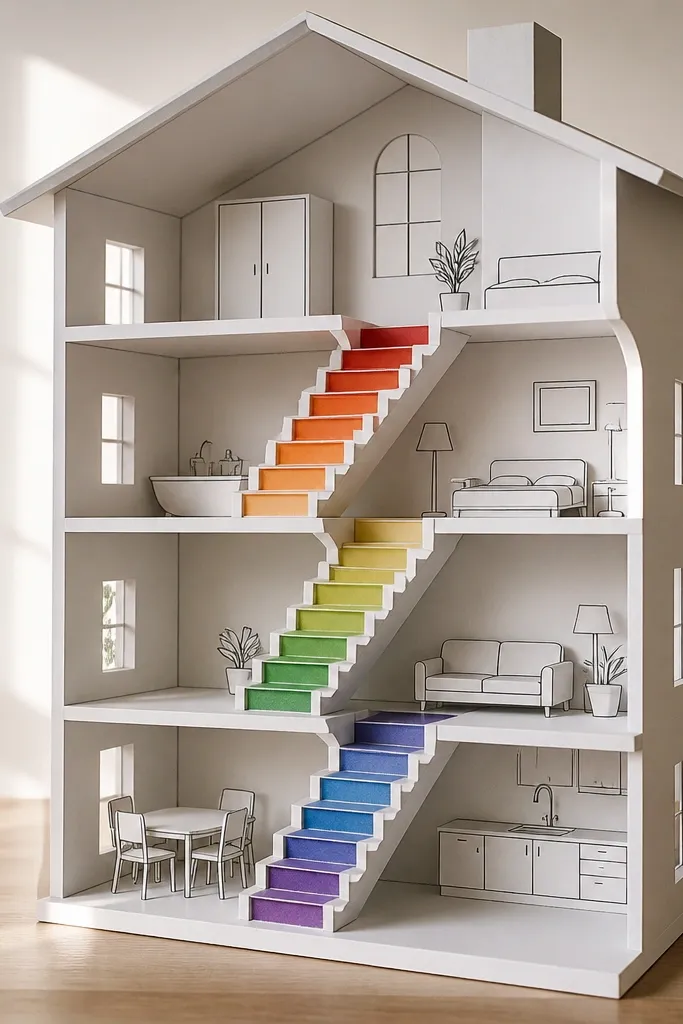
Layered levels are the secret to making a paper doll house look expensive. This template gives you a staircase section that visually separates floors, so the house reads clearly in a photo even with minimal furniture. The rainbow accent gives kids a fun color guide without requiring perfect coloring. If your child loves movement play, this layout makes it easy to “send” dolls up and down.
Print floor layers and wall panels on 110 lb cardstock for stiffness. Cut the staircase pieces carefully and dry-fit them to the floor openings before gluing. Glue the bottom floor tabs first, then attach the middle floor and staircase so everything stays aligned. Finally, add the top wall and roof, then test doors and windows before decorating.
Editor's noteDry-fit once. A 30-second test prevents hours of crooked layering.
Skip thisDon’t press glue directly on stair edges; it can seep into the fold line.
4. Cozy Cottage with Textured Brick Wall Pattern
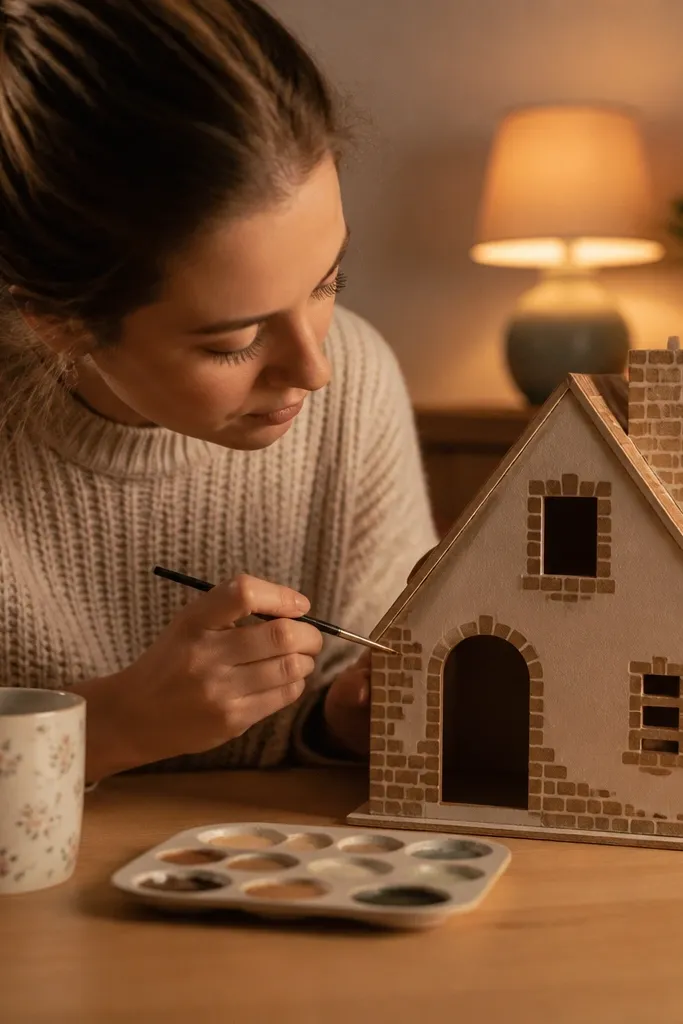
Brick patterns look amazing on paper doll houses because they create depth even without 3D materials. This template gives you a cottage silhouette with a clear front door and window spacing that stays readable on a tabletop. It’s great for kids who like coloring — the brick lines guide their crayons into neat strokes. The cottage shape also makes the house feel sturdier than a flat rectangle.
Print the exterior panels on 90 lb cardstock and the furniture on regular paper. Use a craft knife for door and window cutouts so edges look clean. Assemble the back wall and side walls first, then glue the front panel last to keep the door centered. Add the roof pieces with tabs, then seal only the roof edges with a thin glue layer to stop lifting.
Editor's noteCut windows with a metal ruler; straight frames look better in photos.
Skip thisDon’t rush window cutouts — jagged holes make the whole house feel cheap.
5. Modern Minimal House with Black-and-White Facade
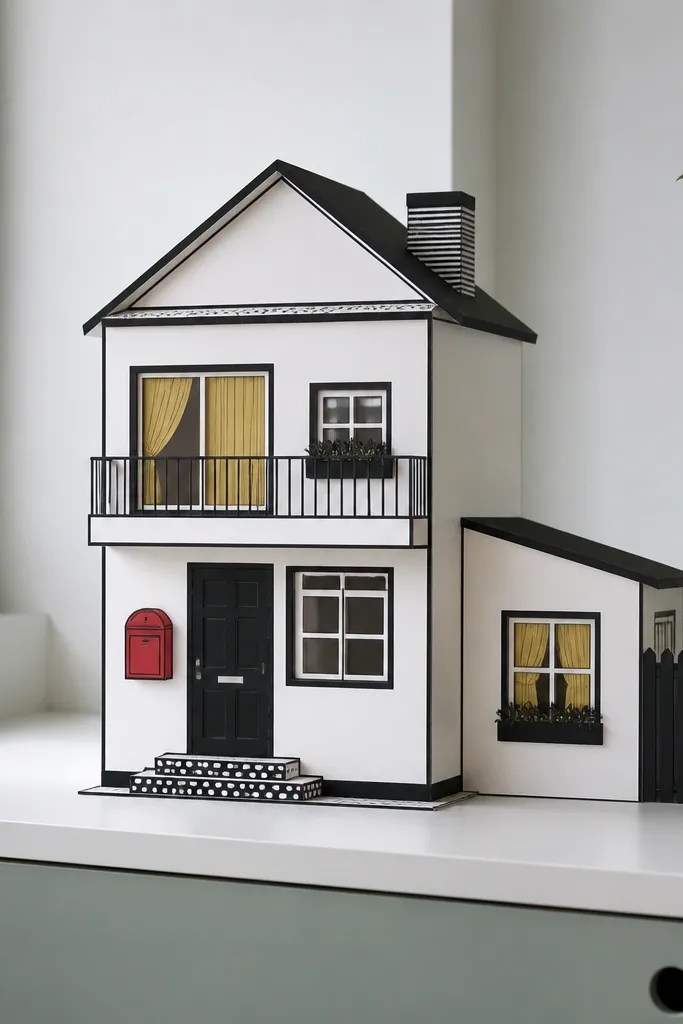
If you want “aesthetic” without clutter, this is the template. The black-and-white layout gives you instant graphic structure, and kids can color accents (like a red mailbox or yellow curtains) without messing up the design. The clean lines photograph well and look crisp even when printed at home. It’s also the most forgiving template for less-skilled cutting because the design hides minor edge imperfections.
Print walls and roof on 80-90 lb cardstock. Score fold lines with a dull butter knife or scoring tool, then fold carefully. Assemble the rectangle shell, then add window frames after the walls are square. Finish by gluing small accessory pieces only after you confirm doors open without rubbing.
Use a black gel pen to thicken any thin window lines kids might miss.
Skip heavy coloring on the facade — it muddies the graphic look.
6. Garden House with Flower Window Boxes
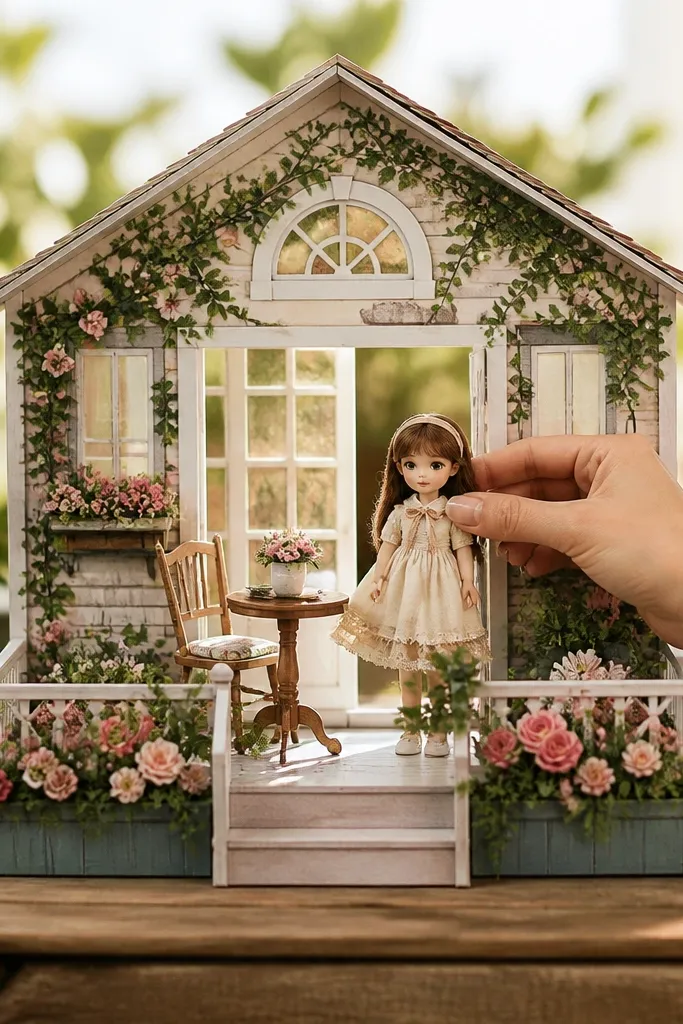
Garden details make paper doll houses feel alive. This template includes window boxes that kids can color in greens and pinks, and the exterior stays bright even if you keep furniture minimal. The windows are sized for easy doll placement, so it’s not just decorative. When you photograph it, the flower accents pull focus and make the house look styled.
Print exterior panels and window box pieces on cardstock. Cut the window openings, then glue the window box strips under the frames. Assemble the house shell first, then attach windows so the boxes don’t get crushed during folding. Add a small grass base piece if included, then glue furniture after the exterior is fully dry.
Editor's noteColor the window boxes before assembly; it’s easier to stay inside the lines.
Skip thisDon’t glue the boxes after the roof — access is worse and alignment drifts.
7. Under-the-Sea House with Wavy Wall Panels
Sea-themed houses read instantly because of the porthole windows and wave-like wall panels. This template gives you movement in the design, so it looks fun in photos even with one or two props. It’s also great for kids who like theme play — dolls can “live” in a pretend aquarium. The wavy panel shapes hide small cutting errors and make assembly feel more playful than precise.
Print wall panels with wavy edges on 90 lb cardstock. Cut porthole circles with a hole punch if the template includes them; it makes round shapes neat. Build the shell from the back wall outward, gluing tabs in sequence so waves line up. Attach the roof last, then add the sea-floor base piece if provided.
Use a hole punch for circles — it beats scissors for clean portholes.
Don’t fold wavy walls without scoring — unscored waves crack and look jagged.
8. Space Station House with Starry Roof and Hatches
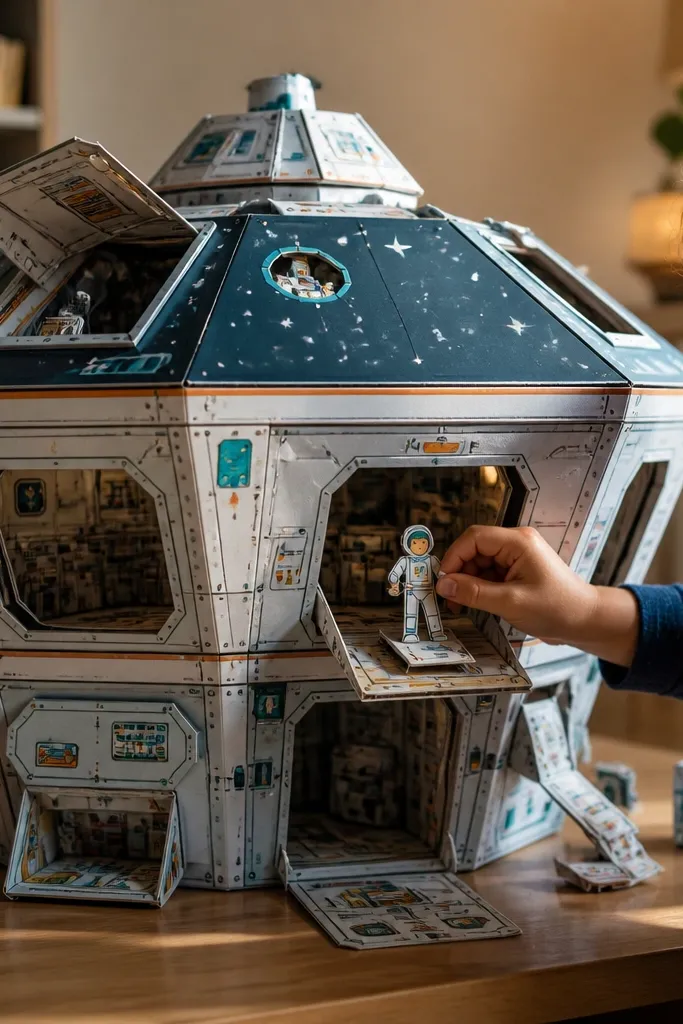
This template is photogenic because the roof is visually loud in a good way — stars, panels, and hatches create instant depth. It also gives you functional play points: hatch openings and doorways that make the house feel like a “place,” not just a backdrop. Kids can color planet shades quickly using a few colors, and the design still looks cohesive. It’s a strong choice for rainy-day craft sessions when you want something dramatic.
Print roof and main walls on 110 lb cardstock to keep the roof from sagging. Cut circular hatches and doors cleanly, then dry-fit the hatch ring pieces. Assemble walls first, then glue roof tabs onto the top edge. Finish by attaching hatch covers with a small amount of glue so they don’t pop off when kids lift them.
Add a tiny strip of tape behind hatch openings for extra hinge strength.
Skip thin paper for the roof — space roofs bend and ruin the look.
9. Haunted House with Spooky Window Silhouettes
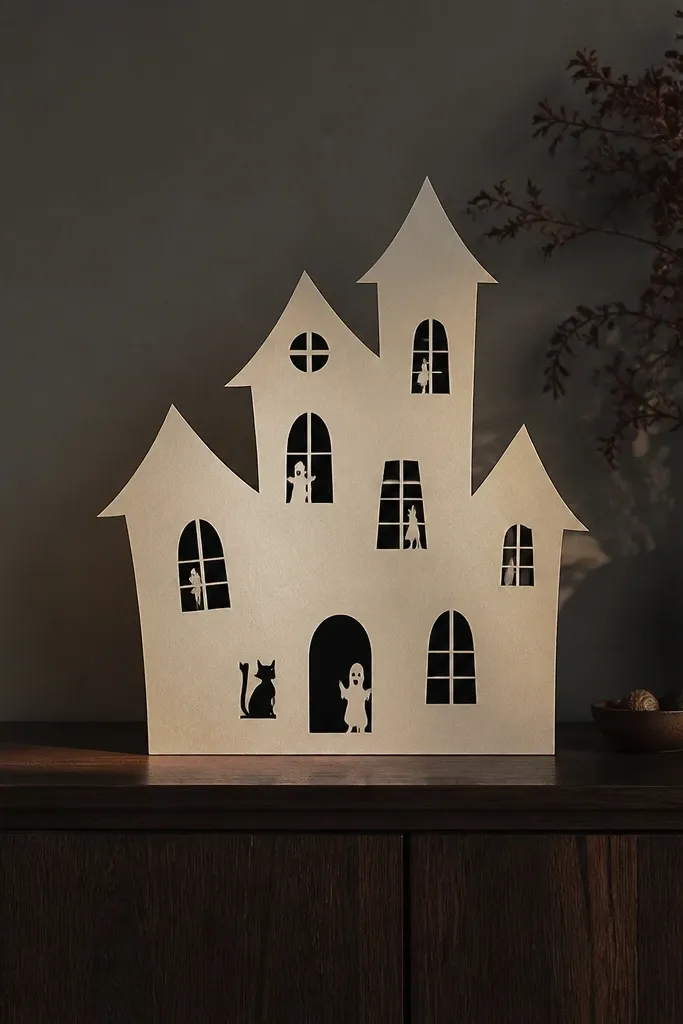
Even if you avoid heavy scary themes, silhouette windows look great and keep the palette controlled. This haunted house template uses simple shapes that read clearly on paper, so it stays aesthetic instead of messy. The uneven roofline adds character, and the window cutouts make it fun for lighting with a flashlight at playtime. It’s also a good option for kids who like Halloween crafts but still want a house that looks “cool” on a shelf.
Print exterior walls and roof on 90 lb cardstock. Cut window shapes carefully, then reinforce the back with a second layer of cardstock behind each window. Glue the back wall and side walls first, then attach the front panel last so the crooked roof sits right. Add any ghosts or bats pieces after assembly so they don’t get bent during cutting.
Back windows with black cardstock for instant spooky contrast in photos.
Don’t skip reinforcement behind window cutouts — they tear with handling.
10. Kitchen House with Tile Floor and Cupboard Doors
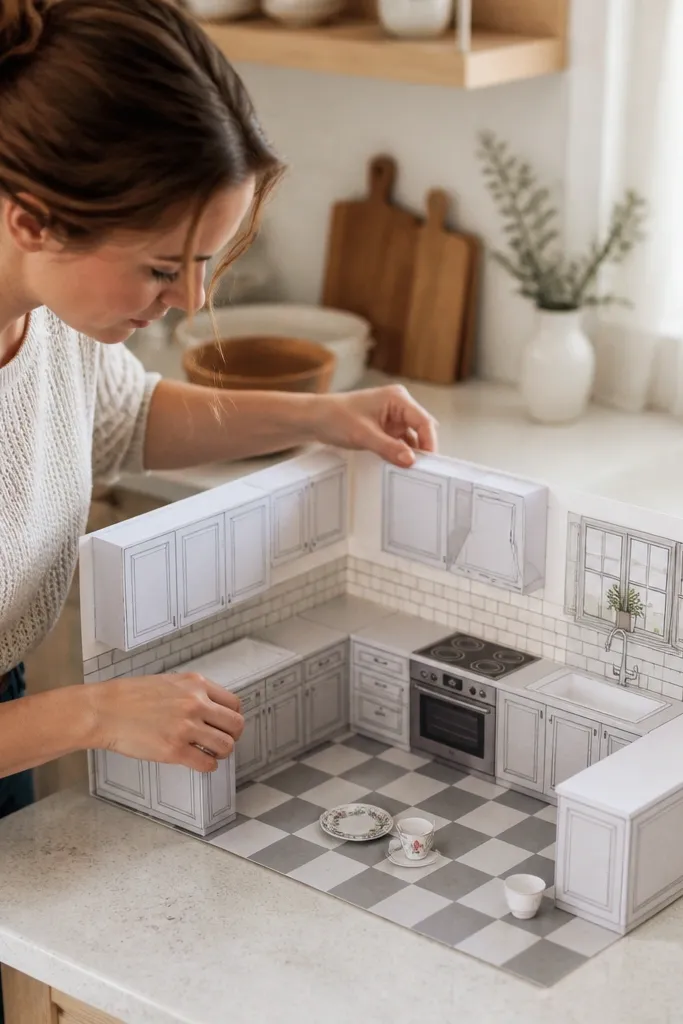
A kitchen layout is one of the most satisfying builds because furniture placement feels obvious. This template includes tile floor graphics and cupboard door panels that look detailed even when printed cheaply. The design makes it easy to add play props like plates, cups, and a stove piece, so the house stays busy without extra purchases. For a photogenic setup, the tile floor creates a strong “base layer” under dolls.
Print the kitchen interior back panel and floor on cardstock, and cut the cupboard doors. Assemble the kitchen shell, then glue the floor last so it stays flat. Attach cupboard doors using tabs or small hinges if the template includes them; keep glue away from the hinge edge. Finish by adding stove and sink pieces, then decorate the tile floor with a few colored accents.
Editor's noteUse a ruler to press tile floor lines so they don’t curl at the edges.
Skip thisDon’t glue cupboard doors closed if the template expects opening — it limits play.
11. Bedroom House with Patterned Wallpaper Walls
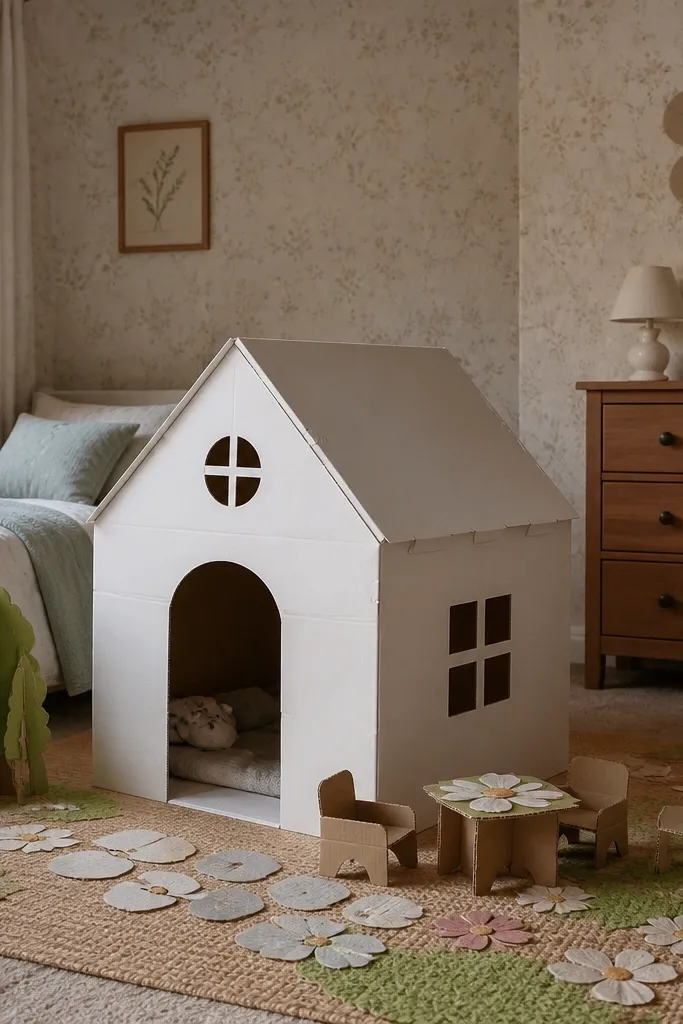
Wallpaper patterns make a bedroom feel instantly styled. This template gives you walls that look like real decor, so kids don’t need to color everything to make it pretty. The room layout is designed for furniture grouping: bed, dresser, and rug pieces land where the eye expects them. It’s ideal for kids who like arranging small items and taking “room tour” photos.
Print wallpaper wall panels on 90-110 lb cardstock so the patterns stay crisp. Cut the window opening and glue the window frame in place after the walls are square. Build the room box, then add the floor panel and base tabs. Attach furniture after the box is assembled; keep small pieces on regular paper for easier cutting.
Lightly color the window frame before gluing so it doesn’t look faded against the wallpaper.
Don’t trim the wallpaper edges too close — you need the tabs for clean corners.
12. Living Room House with Big Rug and Curtain Panels
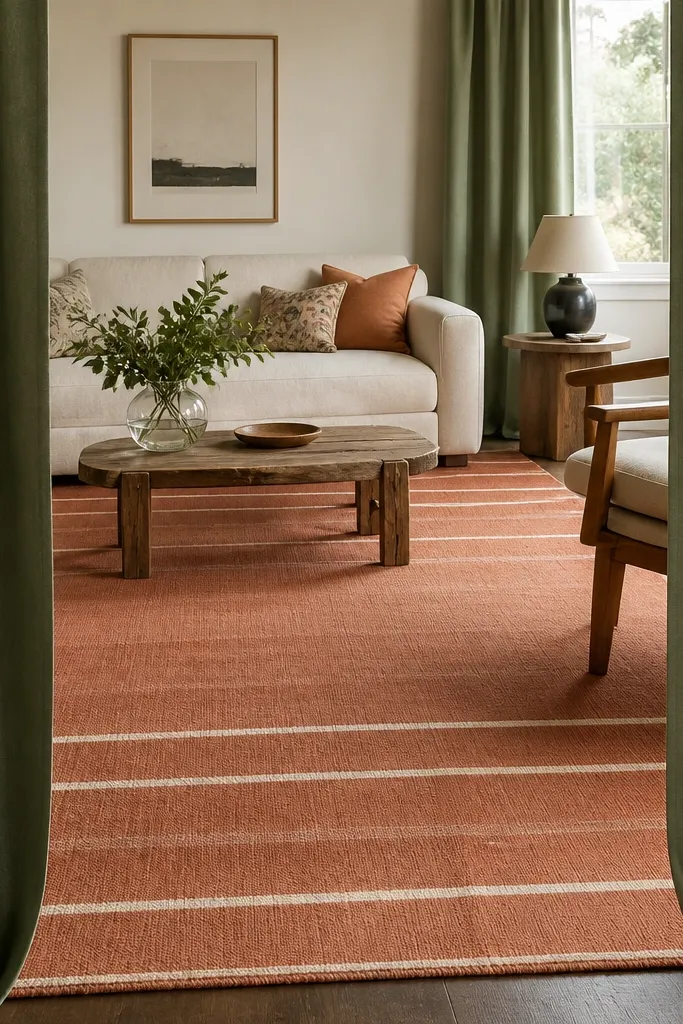
A living room template wins because it has “center stage” elements: a large rug and curtains that frame the scene. Those pieces create depth and make the house feel like a real room even with simple furniture. The curtain panels are also forgiving — small alignment differences look intentional. This is a great choice if you want a photogenic house display that still works for pretend play.
Print the rug panel and curtain pieces on thicker paper so they don’t flop. Assemble the living room shell and floor first, then glue the rug to the floor center. Add curtains to the window frames after the shell is dry. Finally, glue or slot furniture pieces so they sit on the rug surface.
Use double-sided tape for curtains; it holds but peels off if you want to swap styles.
Don’t stack too many furniture pieces on the rug — the scene looks crowded fast.
13. Bathroom House with Mirror Frame and Shower Stall
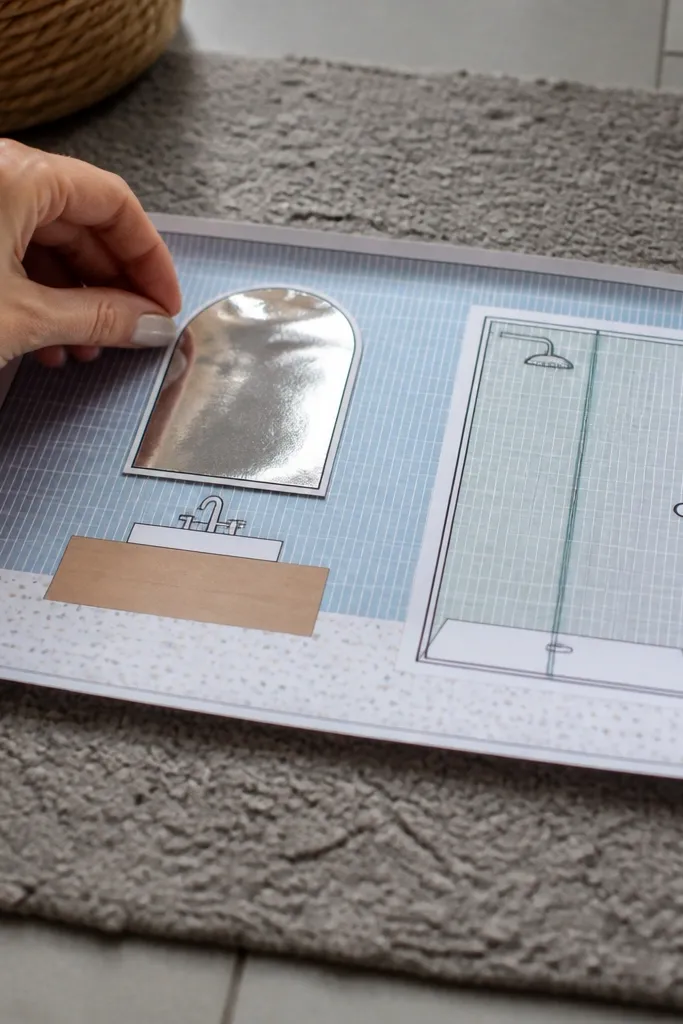
Bathrooms are small, so they’re perfect for budget templates that still look detailed. This design includes a mirror frame and a shower stall outline that creates a clear focal point. The mirror area is ideal for adding a shiny sticker or foil paper if you want extra pop in photos. It also helps kids learn tidy arrangement — everything sits in a compact layout.
Print the main bathroom back panel, floor, and wall sides on cardstock. Cut the mirror and shower openings, then glue mirror backing behind the cutout if included. Assemble the walls into a box, then attach the floor last to keep corners crisp. Add the shower stall front panel and any accessory strips, then seal only the edges with a thin glue layer.
Foil on the mirror backing makes it look “glass” without buying special supplies.
Skip glossy glue near mirror areas — it smears print and dulls the shine.
14. Playroom House with Wall Pegboard and Art Frames
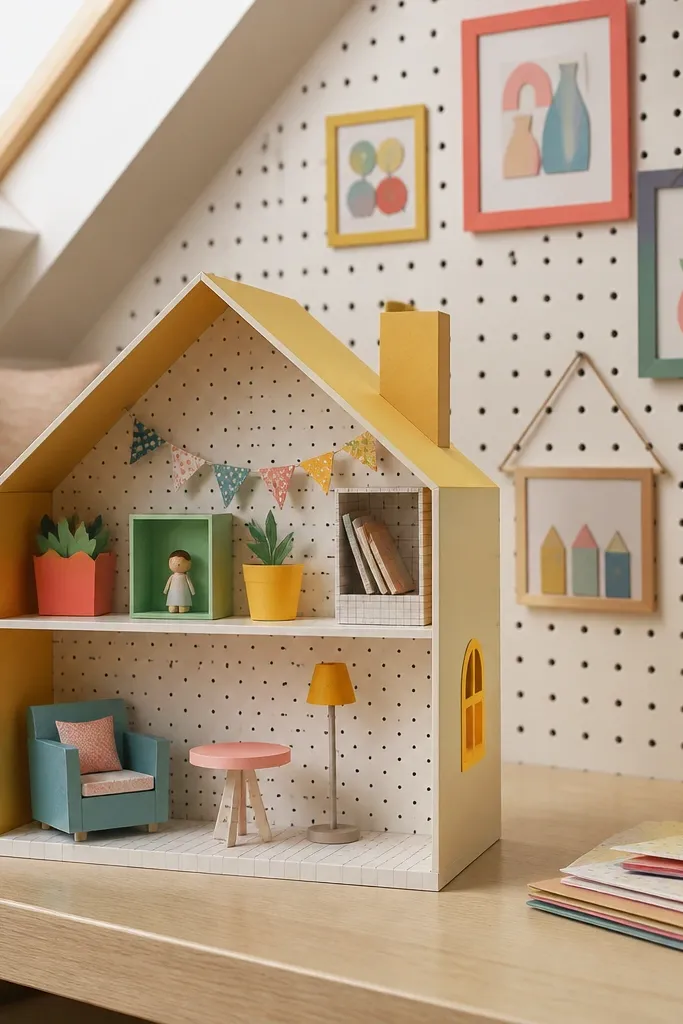
This template is for kids who love organizing. A pegboard-style wall gives you a place to hang small accessories, and it looks cool even when only a few pieces are attached. The art frames add a gallery vibe, which makes the house look styled for photos. It also encourages clean play because everything has a “home” on the wall.
Print the pegboard wall on cardstock and cut the frame openings. Assemble the room shell, then glue the pegboard wall into the back. Attach frames and small hanging pieces using tabs so they can be removed later. Finish by adding floor items last so they don’t block wall access during assembly.
Back pegboard holes with a second cardstock layer if the holes tear easily.
Don’t glue tiny frame tabs with too much glue — they warp and twist.
15. Classroom House with Chalkboard Wall Panel
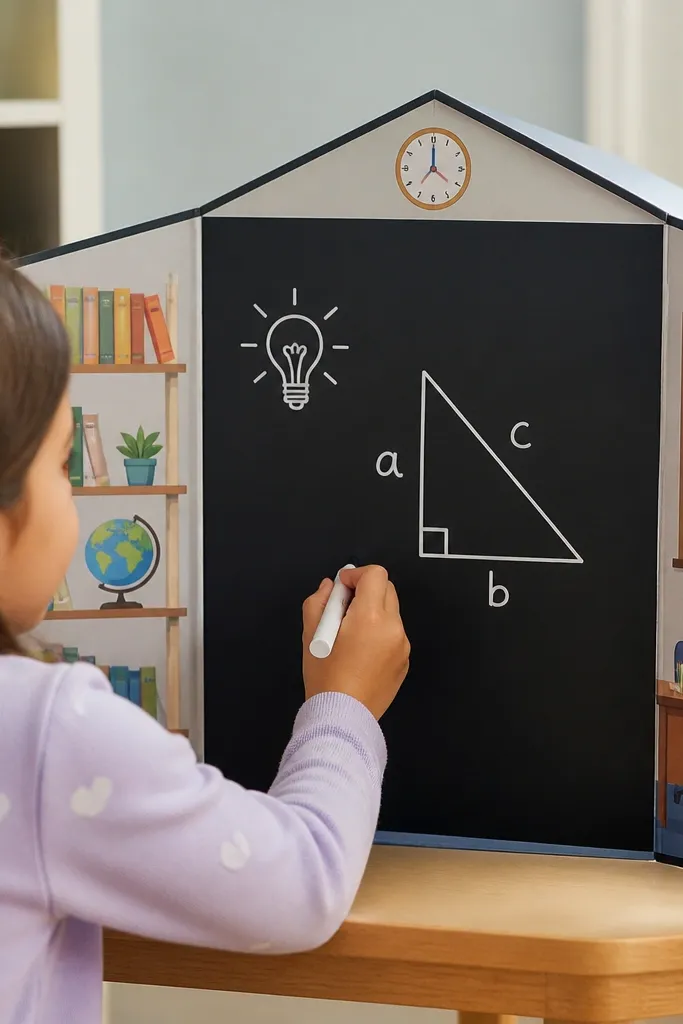
A chalkboard panel turns a paper house into a pretend learning space. The design is photogenic because the chalkboard area is a solid block of color, so it stands out against lighter walls. Kids can add “chalk” marks with a white gel pen, and the look stays neat. This template also works well for classroom-themed play without needing extra sets.
Print the chalkboard wall panel on cardstock and color it dark green or black before assembly. Cut the main room openings and glue the shell together using tabs. Glue the chalkboard panel into the back wall last so you can adjust its position. Add the desk and chair pieces on top of the floor panel, then decorate with gel pen lines once everything is dry.
Use a white gel pen for chalk marks; it looks like chalk and wipes off with dry erase on some papers.
Don’t use watery markers on the chalkboard — they bleed into the print lines.
16. Coastal Beach House with Wave Border Wallpaper
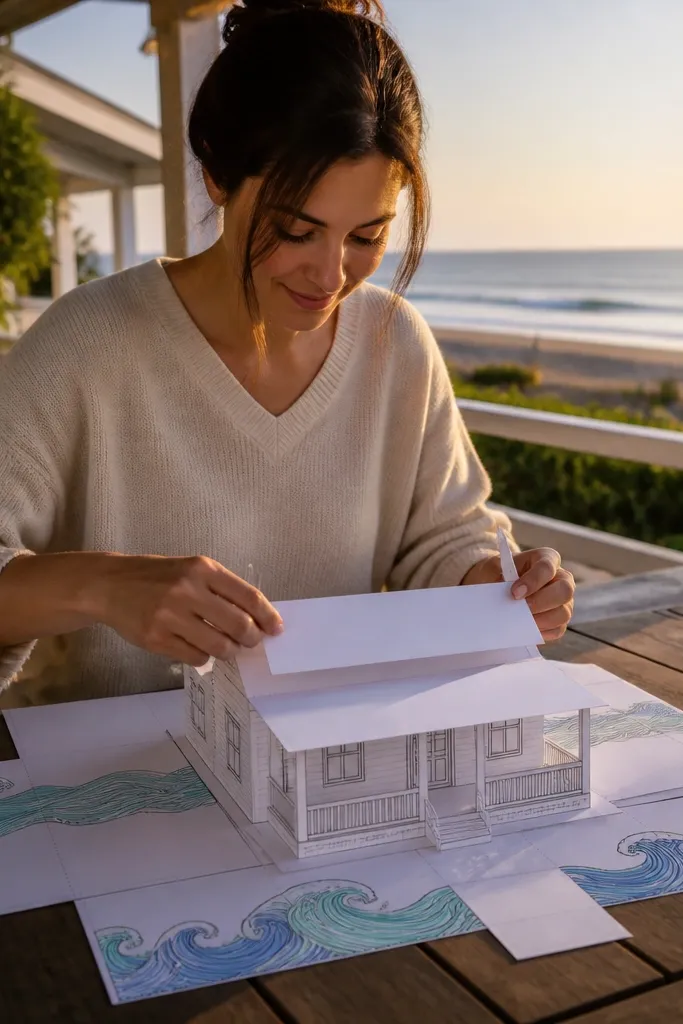
This template gives you a porch plus wave-border wallpaper, which creates an instant coastal vibe. The porch adds depth, so the house looks layered instead of flat. The wave border also gives kids an easy coloring target that won’t look chaotic. For photos, the porch edge frames the scene and makes the house feel like it has a setting, not just rooms.
Print porch pieces and wall panels on cardstock. Assemble the base and back wall, then attach porch columns or supports if included. Glue the side walls, then mount the front porch roof last to avoid crushing folds. Add interior room backdrops after the porch is stable, then finish with windows and any beach accessory pieces.
Editor's noteShade the porch roof edges with a light gray pencil for instant “shadow” depth.
Skip thisDon’t glue the porch roof before the columns — it will sit uneven.
17. Cabin House with Pine Tree Silhouette Exterior
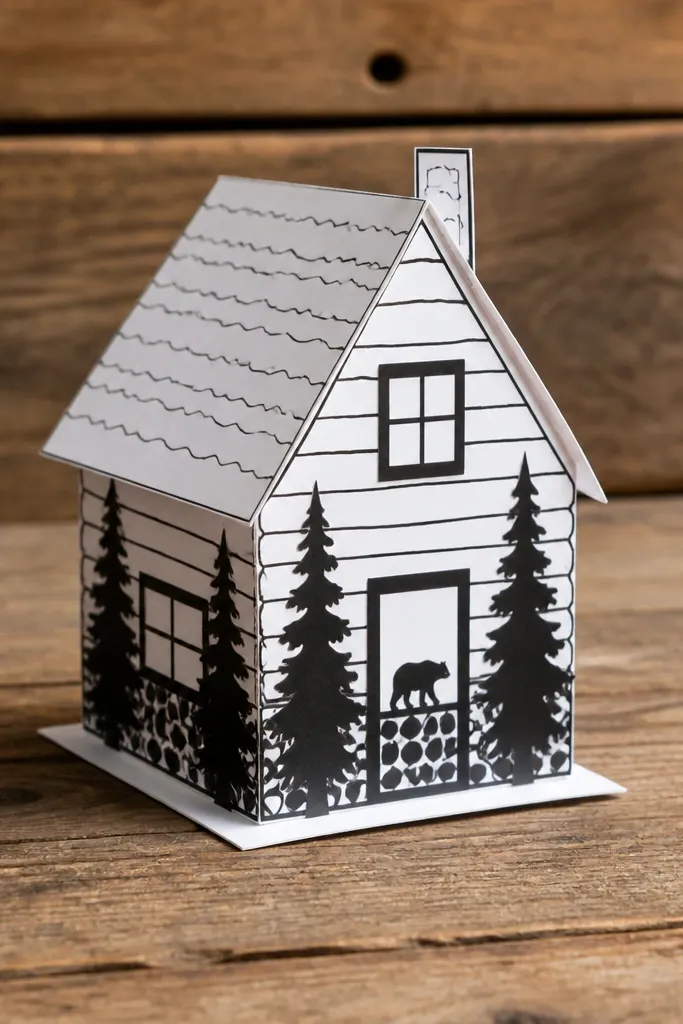
Cabins look great on paper because the shapes are bold and the silhouette style reads from a distance. This template uses pine tree exterior panels and a simple cabin front, so it stays photogenic without tiny details. Kids can color the sky or leave it mostly printed and still get a finished look. It also works well for stacking play scenes since the cabin fits on small shelves.
Print exterior panels on cardstock, then cut window and door openings. Assemble the back wall and floor first, then glue side panels to lock the cabin shape. Attach the front panel so the door sits centered. Glue the roof pieces last, and reinforce the roof tabs with a thin strip of tape on the inside.
Use pencil shading under windows to make the tree silhouettes pop in photos.
Skip overcutting the roof tabs — they need the full tab width to hold.
18. Townhouse with Window Awning Strips
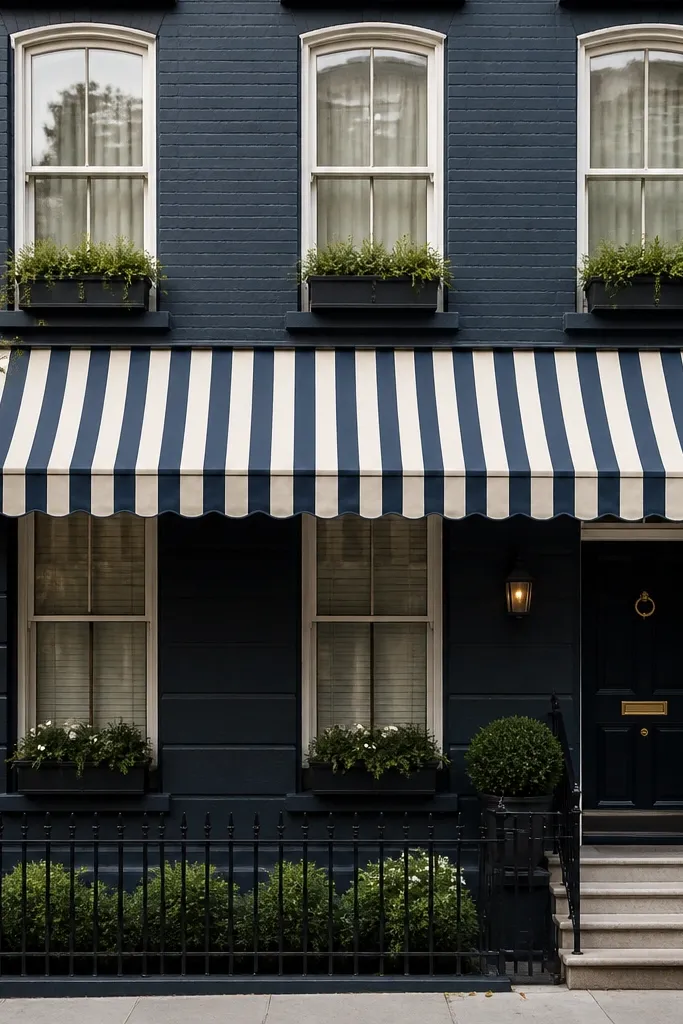
Awning strips are a simple design trick that makes paper houses look more “designed.” This template includes striped awnings that frame each window and add a sense of height. They also hide minor alignment issues because the stripes create a visual band. Kids can color the stripes quickly, and the result still looks cohesive.
Print walls and awning strips on cardstock. Cut out window openings, then attach awning strips behind or above the window frame tabs depending on the template. Assemble the house shell, then glue windows last so awnings stay aligned. Add furniture pieces and a small table accessory on the floor so the room looks lived-in in photos.
Color awning stripes with two markers only — too many colors makes it look noisy.
Don’t glue awnings flat if the template expects them to fold outward.
19. Fairytale Castle with Two-Tone Turrets
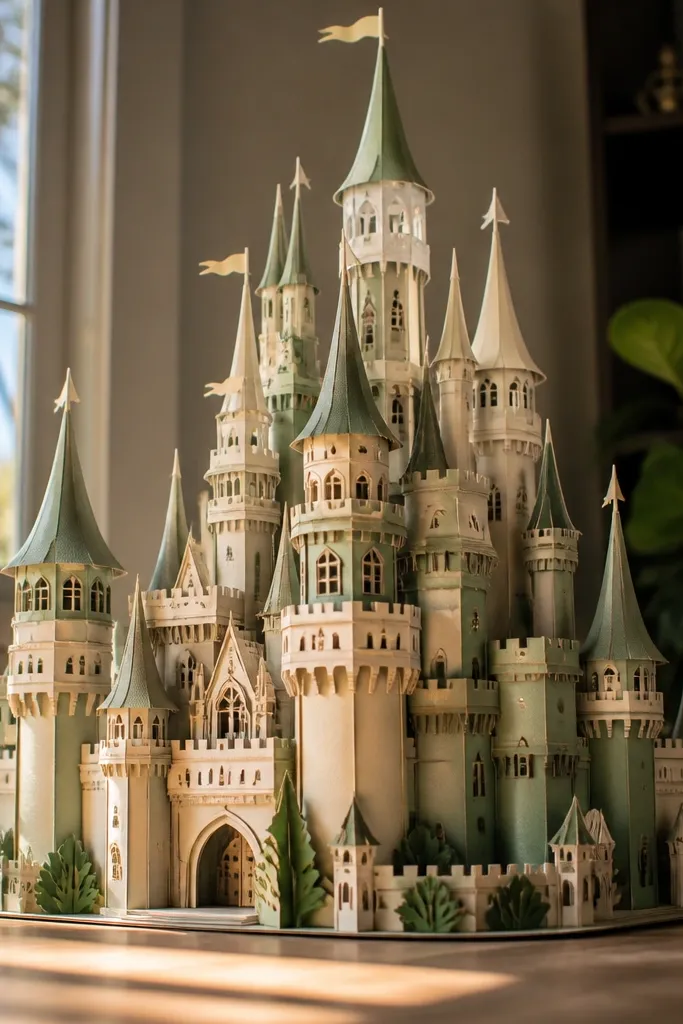
Turrets make paper houses instantly recognizable, and two-tone designs keep it from looking like a coloring page. This template gives you arched windows and layered castle walls that look dramatic on a tabletop. It’s great for kids who want a “big” build without buying 3D kits. The arched shapes also create a clean photo silhouette.
Print castle walls and turret pieces on 110 lb cardstock so the turrets hold their shape. Cut arched windows carefully with a craft knife. Assemble the main shell first, then glue turrets onto the corners so they don’t shift. Attach the roof layers last, pressing down only at tab points to avoid bending.
Editor's noteUse a thin glue stick and let it tack for 30 seconds before pressing turret tabs together.
Skip thisSkip flimsy paper for turrets — they collapse and ruin the castle look.
20. Modern Dollhouse with Gallery Wall Frames
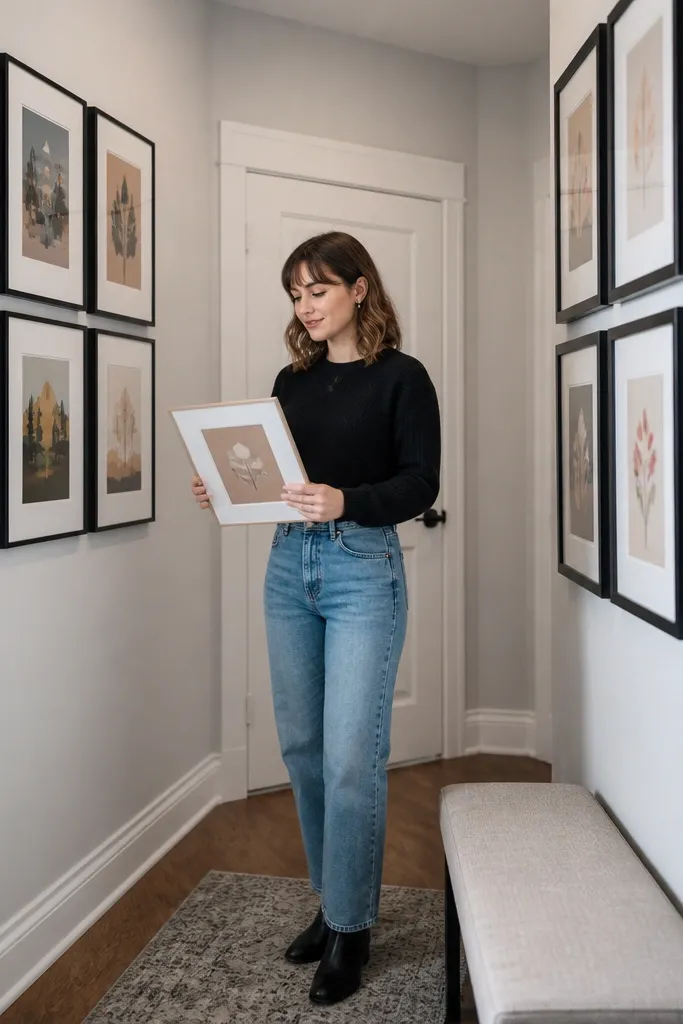
A gallery wall is the fastest way to make a paper doll house look curated. This template uses frame grids so you can add printed art pieces or colored drawings without cluttering the whole room. The hallway layout keeps the house photogenic because you see multiple frames from one angle. Kids can swap picture inserts, which means the house stays “new” without reprinting everything.
Print the hallway walls and frame panels on cardstock. Cut the frame openings and attach backing pieces if included. Assemble the hall shell, then insert picture cards behind the frames using tabs or slots. Finally, glue the roof and add a small floor base so the hall stays upright.
Editor's noteIf you want more color, print the picture inserts on thicker paper so they don’t sag behind frames.
Skip thisDon’t glue picture cards; you want them removable for repeat play.
21. Farmhouse with Barn Door Side Panel
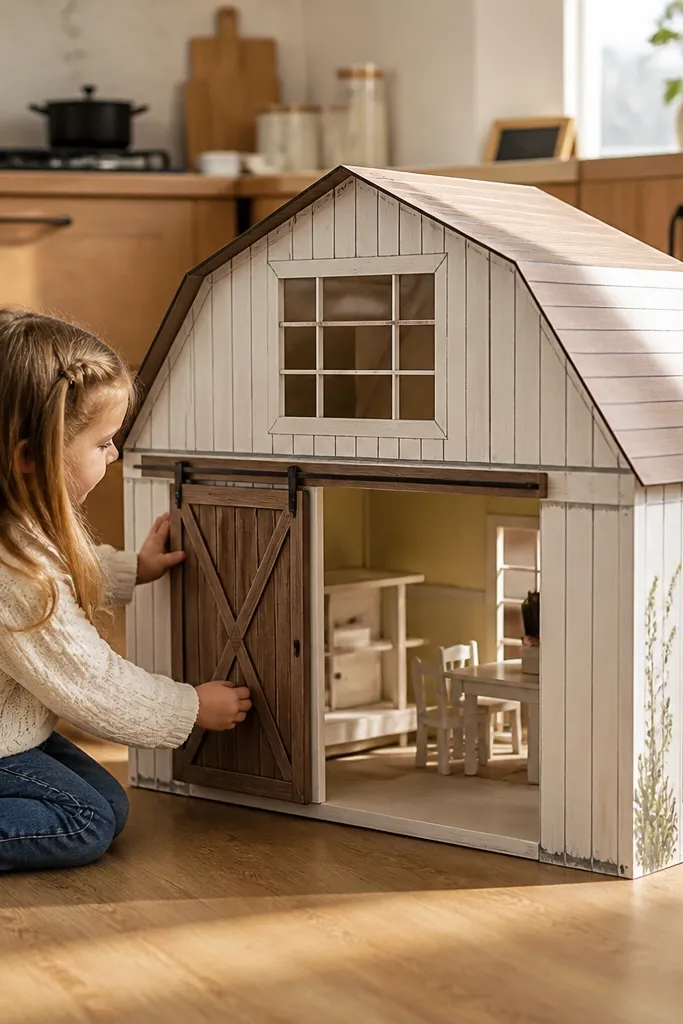
A sliding barn door adds play value and makes the house look interactive. This template uses a side panel that moves, so kids get a “mechanical” moment without gears or electronics. The farmhouse style is also easy to decorate: simple siding lines and a clear door area. In photos, the door creates a strong shape that reads well even from above.
Print the farmhouse walls and the barn door panel on cardstock. Cut the door opening and the door piece, then dry-fit the door to check clearances. Assemble the base and back wall, then glue the side frame so it stays square. Attach the barn door with tabs or a slot method included in the template, and test sliding before you glue the roof.
Editor's noteLightly sand the door edges with a nail file if it catches — paper door friction is real.
Skip thisDon’t glue the door tracks until the door slides freely.
22. Outdoor Patio House with Planter Boxes
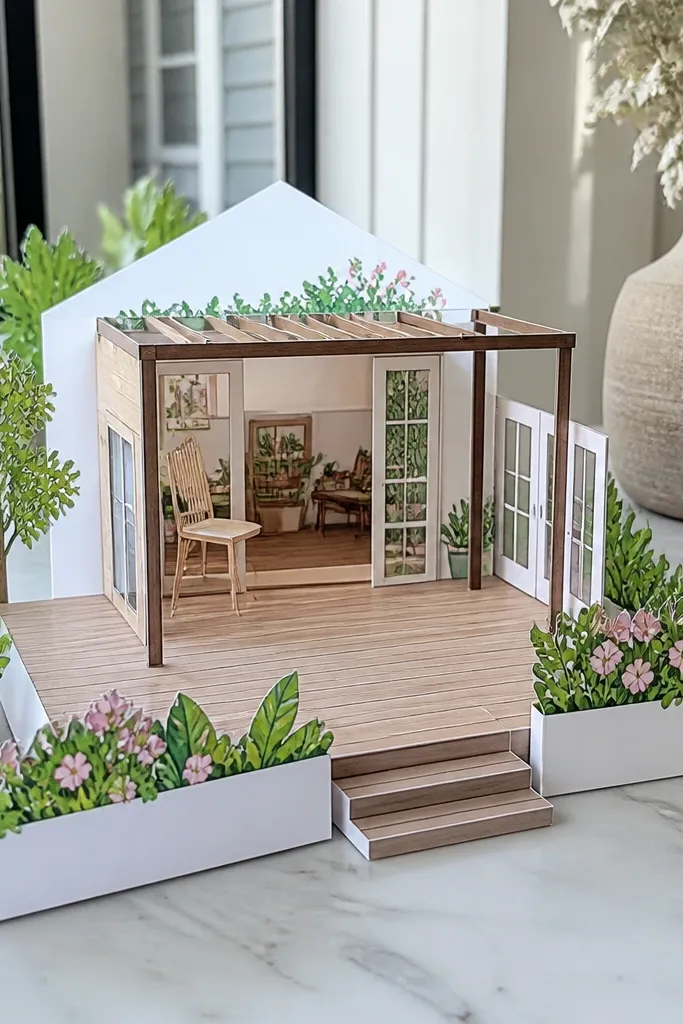
Patios look good because they add a “foreground” layer. This template includes planter boxes that frame the deck, so the house photo has depth and a styled feel. Kids can color flowers and leaves quickly, and the deck gives you a place for outdoor furniture like chairs or a bench. It’s also easier to keep clean than indoor clutter because the outdoor layout stays organized.
Print patio deck and planter box pieces on cardstock. Assemble the house shell first, then glue the deck panel to the front base tabs. Attach planters around the deck edges, then add any railing pieces. Finish by placing outdoor furniture on the deck after glue is fully dry so items don’t slide.
Use a ruler to press planter box tabs so planters sit straight on the deck.
Skip stacking heavy cardstock planters — they tip and ruin the deck line.
23. Treehouse House with Rope Ladder Steps
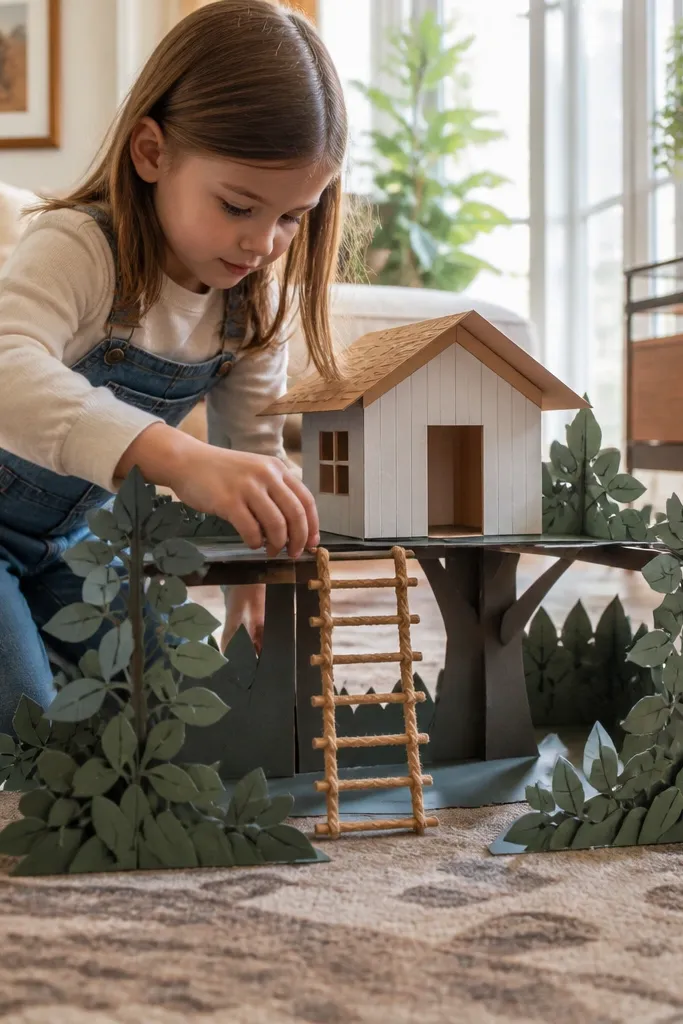
Treehouses are fun because they feel elevated, even in paper form. This template uses a rope ladder and leafy border pieces that create a clear “up in the tree” vibe. The ladder steps are also a built-in play mechanism, so dolls have a reason to move. For photos, the leafy frame makes the scene look like a set, not just a box.
Print treehouse walls and ladder pieces on cardstock. Cut ladder steps and glue them to the ladder rails, keeping spacing even. Assemble the treehouse shell, then attach the ladder to the entrance opening with small reinforcement tabs. Add leaf border pieces last so they don’t interfere with folding.
Reinforce ladder attachment with a small tape patch behind the tab.
Don’t glue leaves first — they snag while you’re assembling the ladder.
24. Row House with Brick Chimney and Mail Slot
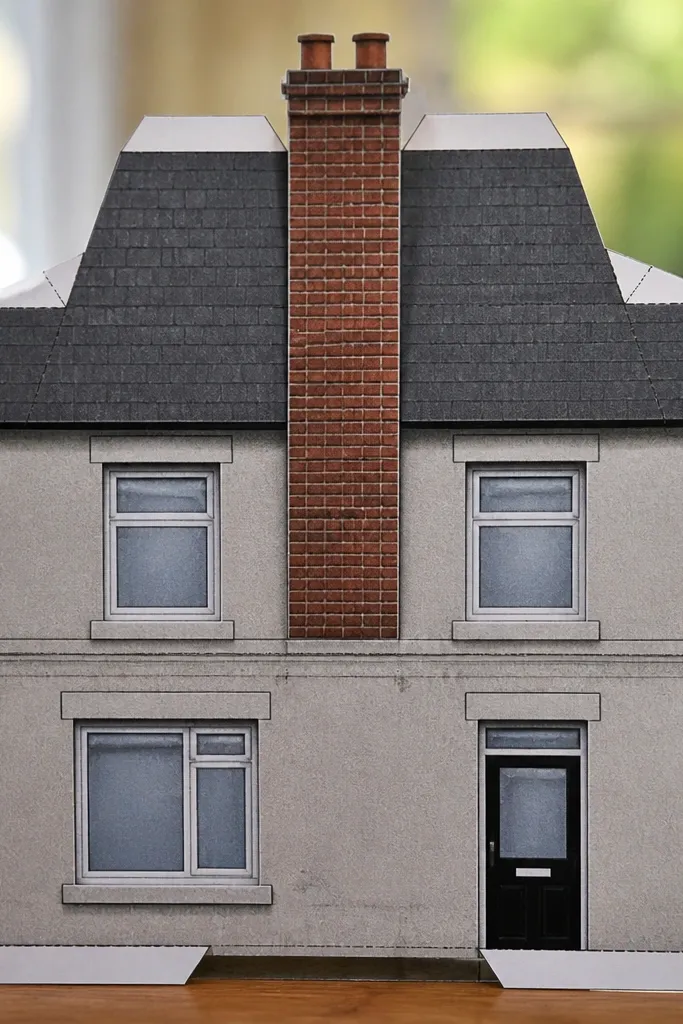
Small exterior details are what make a paper doll house look finished. This template includes a brick chimney and a mail slot, so the front has personality beyond windows. The brick chimney adds texture that shows up in photos, even if you keep the rest simple. It’s a good choice for kids who like props — mail slot play works with tiny paper letters and cards.
Print exterior and roof on cardstock and cut out the chimney and mail slot openings. Assemble the front and side walls first, then glue the chimney to the roof edge before attaching the roof. Add the roof last so the chimney sits aligned with the front. Cut tiny paper letters and slide them into the mail slot after assembly.
Use a darker marker to outline the chimney edges so brick lines look crisp in photos.
Don’t glue the chimney after the roof — it won’t match the roof angle.
25. Winter House with Snow Drift Base and Icicle Roof
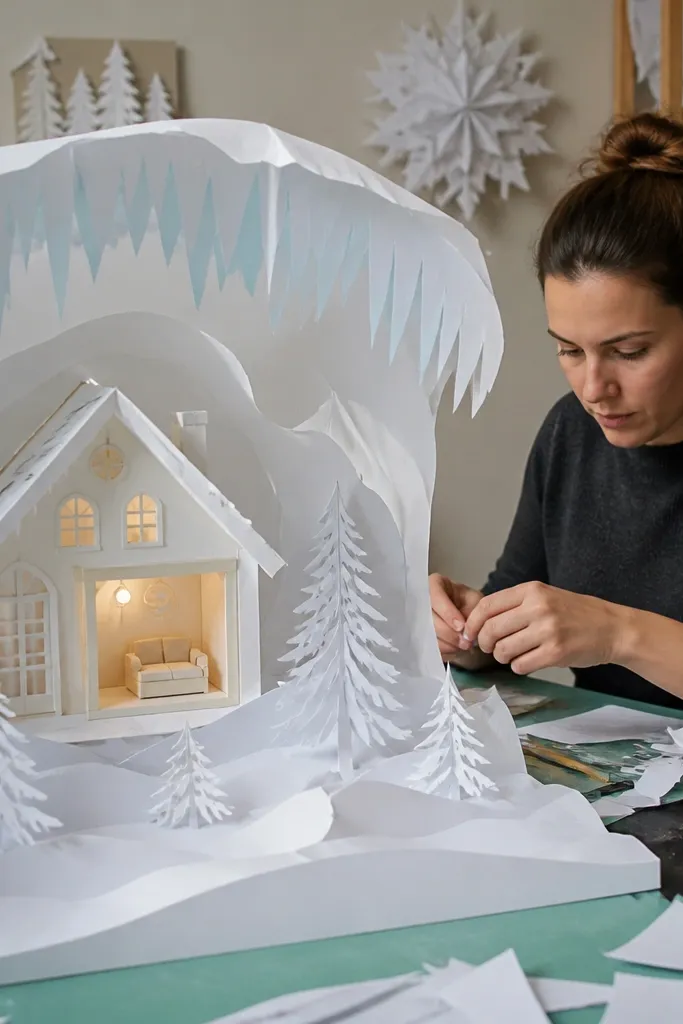
Snow drift bases and icicle roof edges make this template stand out instantly. Even if the interior is simple, the base makes the house look like it belongs in a scene. It’s also one of the easiest ways to make the house photogenic without extra furniture because the roofline creates drama. Kids can add “snow” with white crayon or gel pen for texture.
Print the base, walls, and roof on cardstock. Assemble walls into a shell, then glue the snow drift base underneath so the silhouette looks grounded. Attach the roof with tabs, then check icicle alignment before pressing fully. Finish by adding a few interior pieces so the house looks lived in from the front.
Lightly crumple a scrap of white paper and glue it to the snow base for texture.
Skip super-wet glue on the snow base — it warps the cardstock.
26. Spring House with Butterfly Wall Decals
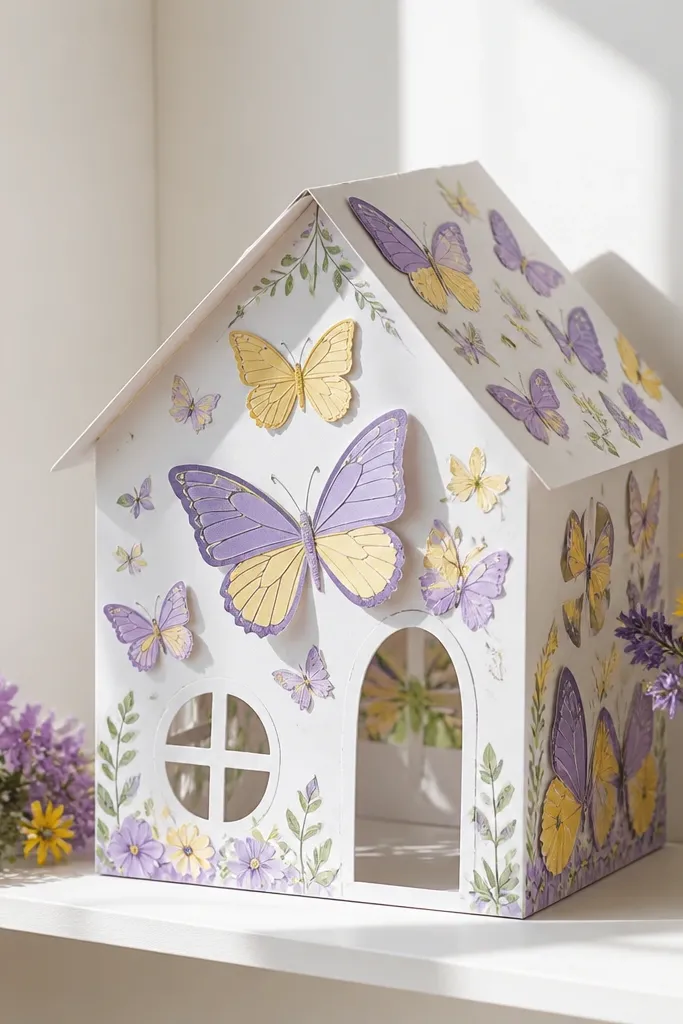
Wall decals are a budget win because you get big visual impact without lots of furniture. This template puts butterflies and spring motifs in clear spots, so kids get a colorful house quickly. The design is airy, so the house looks light in photos and doesn’t feel heavy or cluttered. It also works well if you want to mix and match different room backdrops later.
Print walls on cardstock and cut decal sections cleanly if they’re separate. Assemble the shell first, then apply decals using glue stick or thin tape on the back. Press each decal flat with a clean scrap paper sheet to avoid bubbles. Add windows and roof after the decals are placed so you don’t smear motifs during folding.
Use a glue stick, then wait 1 minute before pressing decals — it reduces sliding.
Don’t apply decals to folded tabs — they peel when you assemble the walls.
27. Library House with Bookcase Wall and Ladder
A bookcase wall is the fastest way to make a paper house look like it has storage and personality. This template includes a bookcase backdrop plus a ladder detail, so the house feels designed even with few furniture pieces. Kids can color book spines quickly, and the ladder gives you a fun play prop for “reading” scenes. It also photographs well because the vertical book spines create strong lines.
Print the bookcase wall and room panels on cardstock. Cut the ladder pieces and glue them so they hold their angle, then attach the ladder near the bookcase. Assemble the room shell, then glue the bookcase wall to the back. Add floor pieces and any desk furniture, then color book spines last so they don’t smear during cutting.
Color book spines with 3-4 colors only; it looks more like a real bookshelf.
Don’t smear marker ink over the book spine outlines — it bleeds and blurs the pattern.
28. Restaurant House with Menu Board and Counter
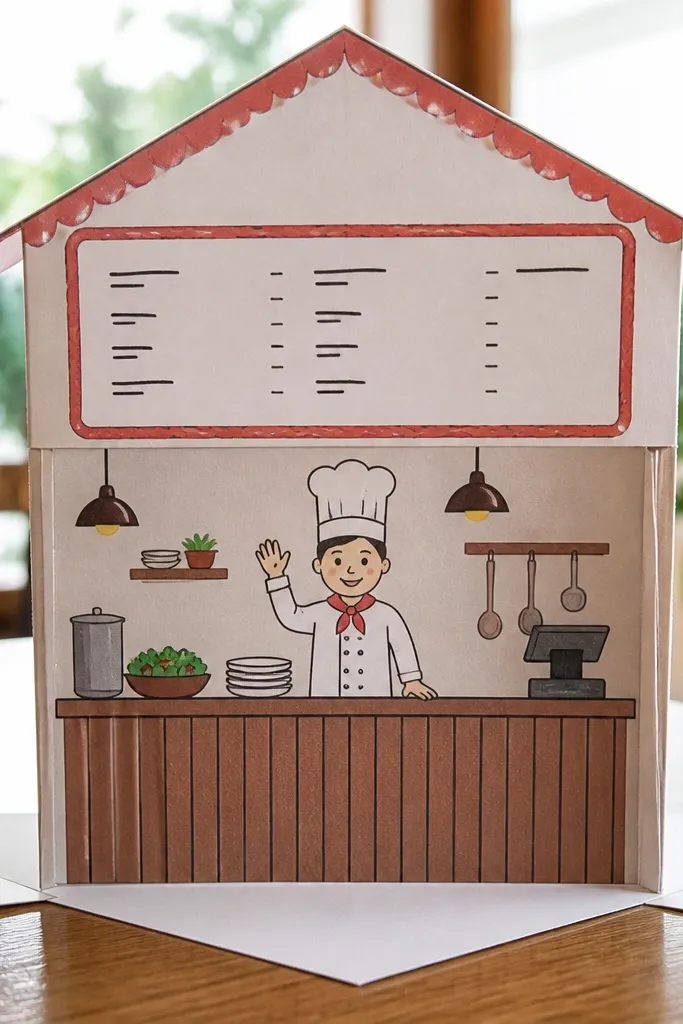
A restaurant layout is perfect for kids who like role play with props. This template includes a menu board and a counter that gives the house a clear purpose and a strong front-facing look. The menu area is great for quick writing with a fine-tip marker, and it looks great in photos because it’s a bold rectangle. The counter also makes it easy to place toy food and cups neatly.
Print front panels and counter pieces on cardstock. Assemble the front and side walls first, then glue the counter into its base position. Cut the menu board opening, then attach the menu board so it sits upright without sagging. Finish by adding interior seating and tiny menu items after the shell is dry.
Editor's noteWrite menu items on separate paper inserts so you can swap them without reprinting the whole template.
Skip thisDon’t glue menu text directly onto the backing if the template expects inserts.
29. Princess House with Tower Windows and Balcony
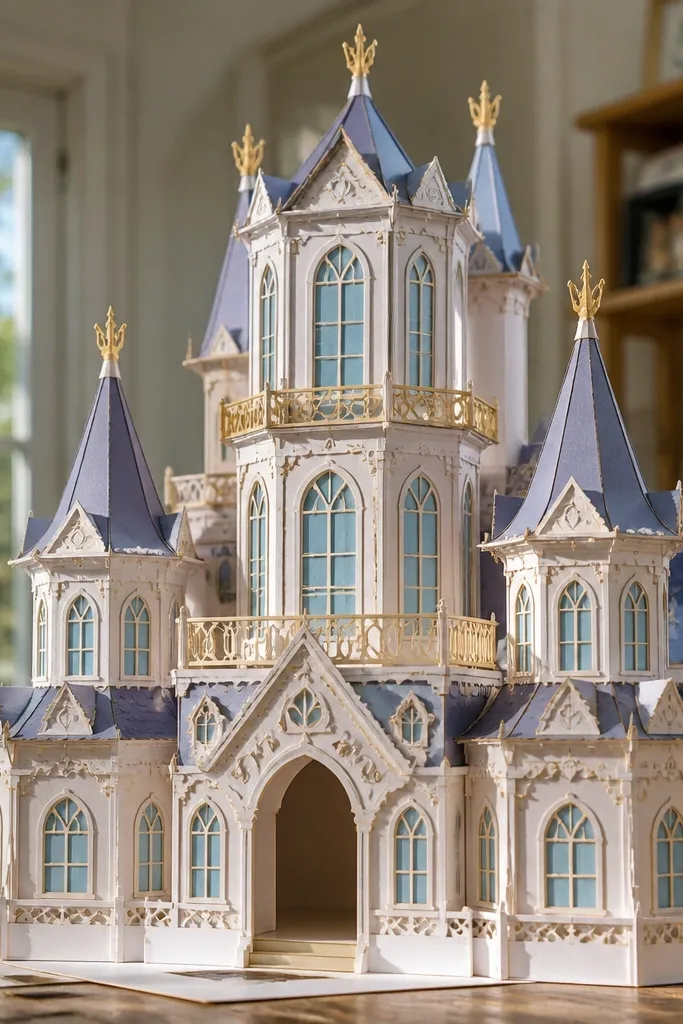
Tall tower windows and a balcony create that instantly “fairytale” look without needing 3D foam. This template is photogenic because the balcony gives a horizontal line that balances the tall windows. Kids can color curtains and window frames, and the silhouette stays recognizable even with simple decor. It’s a strong pick if you want a dramatic house piece for a shelf photo.
Print tower window panels, balcony pieces, and walls on cardstock. Cut balcony supports and glue them to the balcony underside so it sits flat. Assemble the main shell first, then attach the balcony to the front opening tabs. Add tower windows last and press only around the tab points to avoid bending the tower edges.
Use a pencil to lightly trace balcony fold lines so you don’t crack the cardstock.
Skip bulky glue under balcony supports — it can seep and warp the fold.
30. Spy House with Secret Door and Agent Control Panel
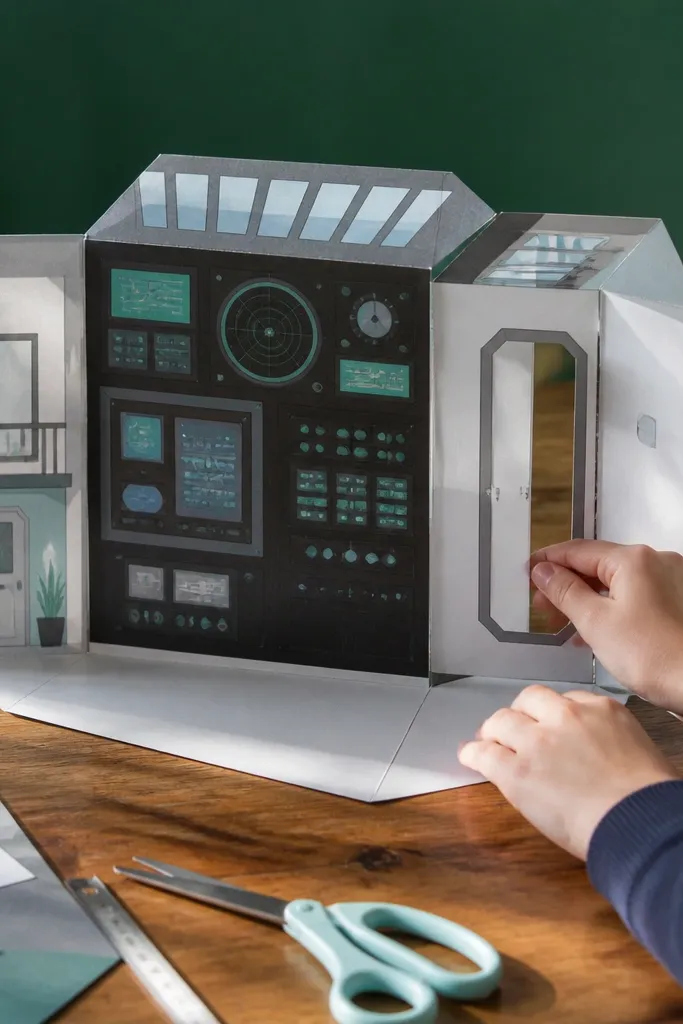
Secret door templates make paper houses feel like a game board. This one includes a control panel wall and a hidden door area that kids can open during play, so it’s more interactive than a static backdrop. The control panel creates a strong visual center, which means the house looks styled even with minimal furniture. It’s great for older kids who like puzzles and careful placement.
Print the spy room walls and control panel panel on 90-110 lb cardstock. Cut the secret door opening and the door piece, then test-fit before gluing anything. Assemble the room shell, then glue the control panel to the back wall. Attach the secret door with hinge tabs or a slot method included in the template, then reinforce the hinge area with a small tape strip inside.
Use a dry-fit and mark the hinge alignment with a pencil dot so the door opens straight.
Don’t glue the secret door fully closed unless the template clearly says it stays fixed.



