
1. Deadline Radar Board for Each Class
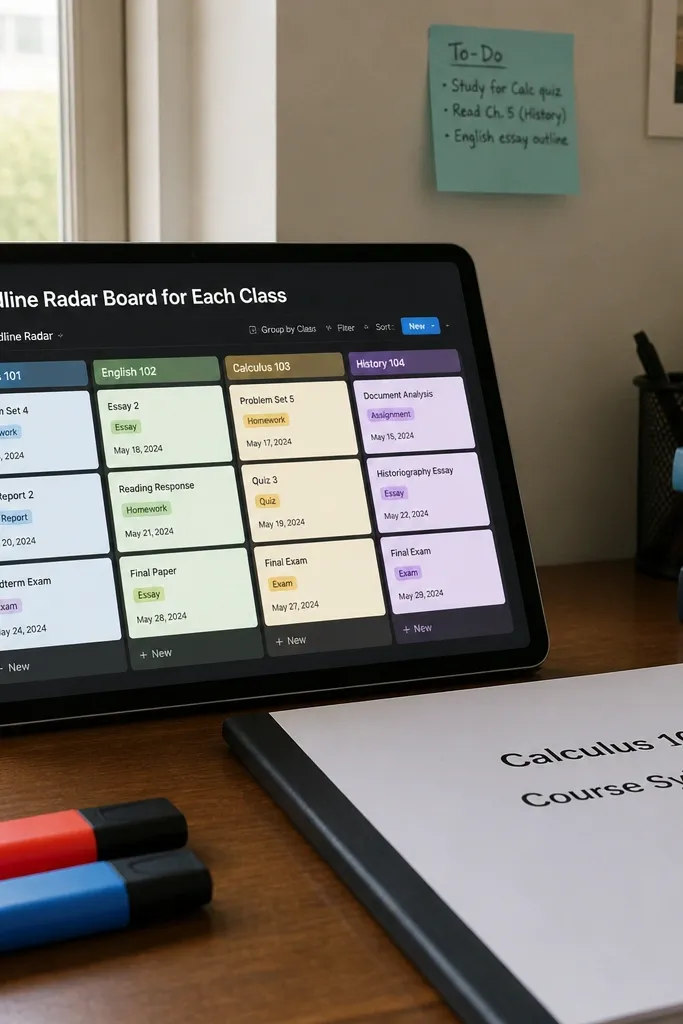
This is the cleanest way to see what’s actually due without scrolling forever. You set up one database for assignments and deadlines, then show it as a board grouped by class. Each class gets a color, so your brain reads the page instantly when you’re stressed. The look stays sharp because cards are consistent and the board header repeats the same layout every week. You end up with a workspace that looks organized even when your task list is messy.
Start by creating a Notion database called Assignments with properties: Class (select), Due date (date), Type (select like homework/reading/quiz), Status (select), and Link (URL or text). Then add a Board view grouped by Class and turn on the properties you want visible on cards (Status and Due date are enough). Finally, add a top section called Today with a linked view filtered to Due date is within the next 7 days and Status is not Done. Keep the color palette to three class colors plus one neutral for “no class.”
Set Status values to Not started, In progress, Done, and use “In progress” as your visual cue for what you’re actively cramming.
Don’t include 8-10 properties on the cards; it makes the board look cluttered.
2. Exam Sprint Page with a Mistakes Wall
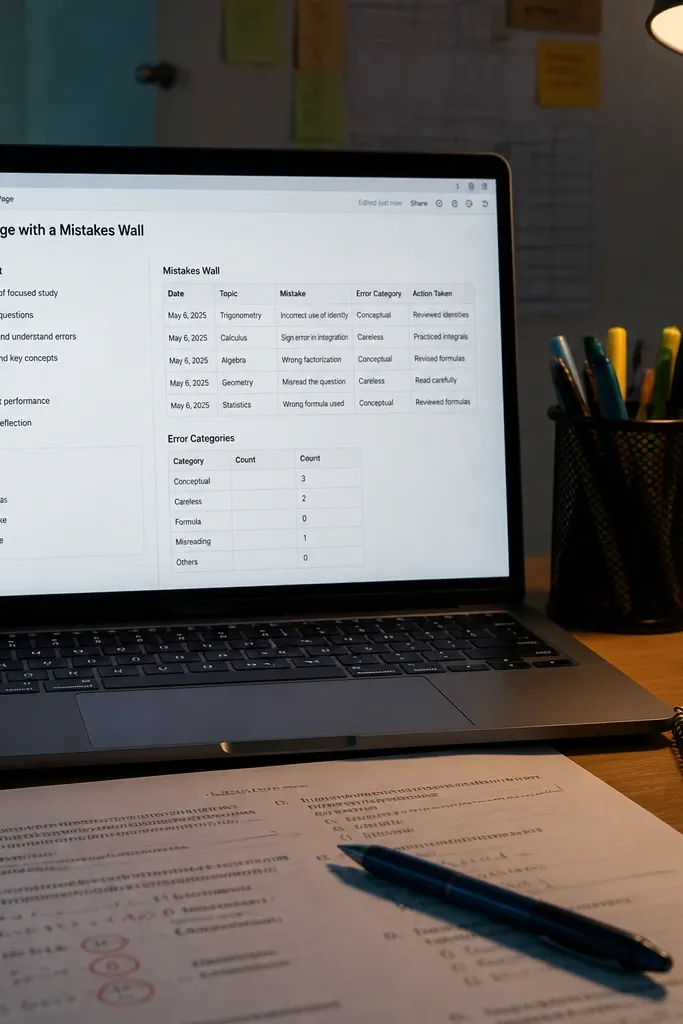
Cramming fails when you repeat the same mistakes. This template turns practice into a visible wall of errors so you stop wasting time on the same topic. The page is photogenic because it has two strong blocks: a checklist on the left and a mistakes tracker on the right. You get structure fast: what to do today, what to review tonight, and what to stop doing. It’s designed for students who need a short, repeatable workflow during exam week.
Create a page called Exam Sprint and add a checklist section with toggles named Warm-up, Practice set, Review mistakes, and Final flash review. Next, create a database called Mistakes with properties: Topic (select), Error type (select), Problem link (URL or text), Fix (text), and Date logged (date). Then place a linked view filtered to the current exam topic or course and sort by Date logged descending. Finish by adding a small callout labeled “Focus tonight” that pulls the top 3 Topic values from Mistakes using a manual list you update once a day.
Write fixes in one sentence using the format “I assumed X, but Y is the rule.” It makes review fast.
Don’t log vague mistakes like “confusing” without the actual rule you missed.
3. Weekly Planner with a Two-Track Layout

This layout helps you cram without losing your life. Two tracks keep school work separate from everything else, so your week doesn’t get hijacked by random chores. The look is clean because it uses a consistent two-column grid: Track A is coursework, Track B is admin. You can color-code Track A items by class and keep Track B neutral. It’s perfect for students who need structure but hate complicated systems.
Build a page called Weekly Planner and add two columns. In the left column, insert a database view called This Week’s Tasks filtered to date is this week and Status is not Done. In the right column, add another linked view filtered to Type is Admin or Personal, still within this week. Then add a small “Weekly focus” section at the top with three bullet points you update every Sunday: hardest class, biggest deadline, and one practice goal. Keep your week start date consistent so the filters behave predictably.
Editor's noteUse the same three statuses in every database so the planner looks consistent across your workspace.
Skip thisAvoid mixing admin and coursework in one list; it makes the page harder to read under pressure.
4. Lecture Notes Template with Toggle Sections
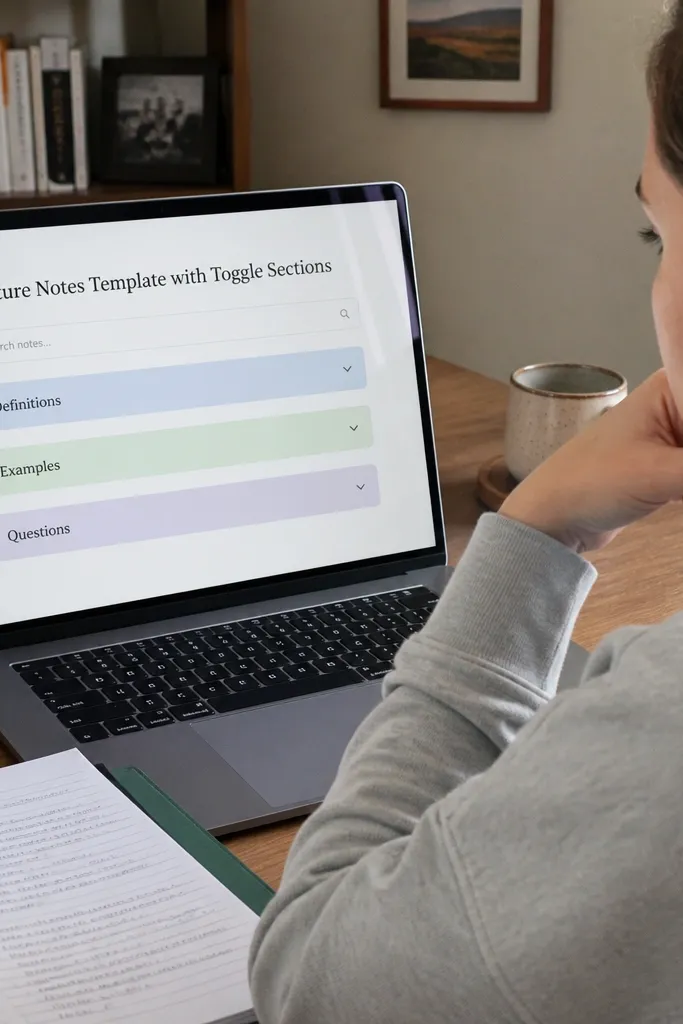
This template makes notes look organized even when you write fast. Toggles are the visual trick: they hide the long stuff but keep it searchable. Each lecture page has the same structure, so your eye knows where to find definitions, examples, and questions. During cramming, you can open only the toggles you need and leave the rest closed, which feels calm. It’s also easy to scan later because headings are consistent across weeks.
Create a page template named Lecture Notes with sections in this order: Lecture info (date, class, instructor), Key ideas (bullets), Definitions (toggle), Examples (toggle), and Questions I still have (toggle). Add a property on the page or a linked database for Class so you can filter lectures by course later. For the toggles, keep each one to a single list or short paragraphs so they don’t balloon. Finally, add a small “Next action” checkbox line with two items: review tonight and add to practice set.
Start each lecture page with 5 bullets max for “Key ideas.” It forces your notes into a scan-friendly shape.
Don’t put full paragraphs under toggles; use bullets and short sentences for faster review.
5. Reading Log with Quote Cards
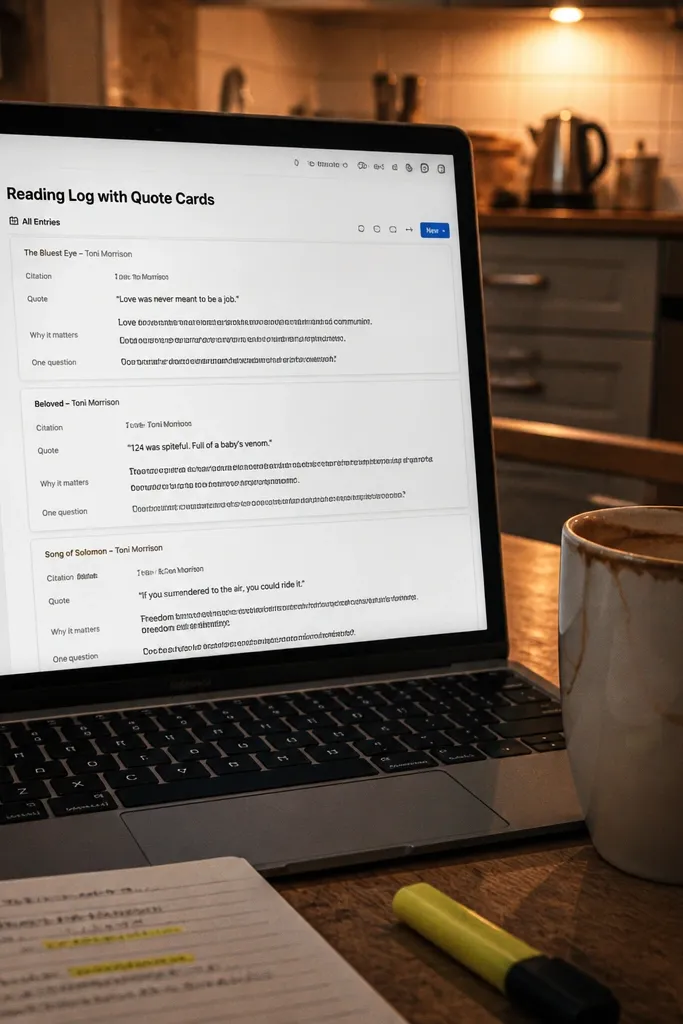
Reading feels invisible until you capture what matters. This template turns readings into quote cards that you can pull during essays and exam review. It stays aesthetic because each entry has the same visual order: citation info, quote block, why it matters, and one question. When you’re cramming, quote cards give you instant recall without rereading everything. It’s best for students in humanities, biology courses with papers, or any class that assigns articles.
Create a database called Reading Log with properties: Class (select), Date assigned (date), Source (text), Pages (text), Status (select), and Quote (text). Then add a table view for admin and a gallery view for the quote cards. In the page template for each reading entry, include a quote block at the top, followed by “Why it matters” and “My question.” Finally, add a linked view on your Weekly Planner filtered to readings with Status not Done and due within 7 days.
Editor's notePaste quotes with the exact page number format your professor uses so you don’t hunt later.
Skip thisDon’t log a reading without one quote and one question. Two fields are the minimum for later value.
6. Problem Set Tracker with Color-Coded Difficulty
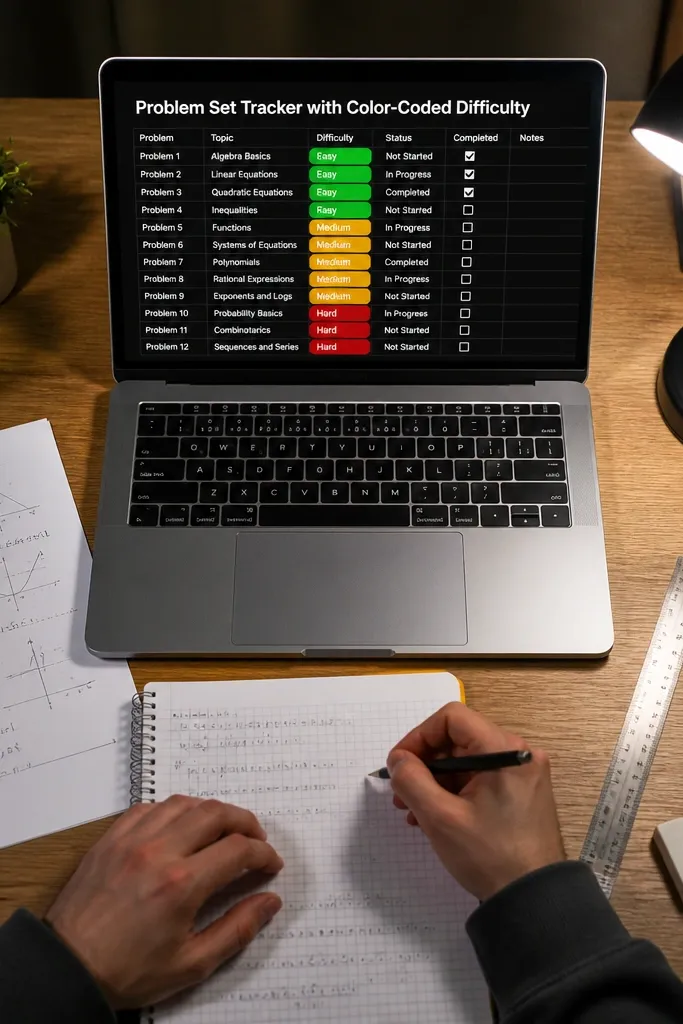
This template helps you practice smarter instead of doing random problems. Difficulty colors make your plan readable at a glance: easy problems for speed, hard ones for points. You also get a completion view that looks clean because each row is consistent and uses the same property order. During cramming, you pick the top 2 hard topics first, then fill in easy wins. It’s great for math, physics, coding, and any course where practice problems drive grades.
Create a database called Practice Problems with properties: Class (select), Topic (select), Difficulty (select with values Easy, Medium, Hard), Set name (text), Status (select), and Score (number or text). Then create a table view sorted by Difficulty descending and add a filter for Status is not Done. Add a separate view called “Hard Focus” filtered to Difficulty is Hard and Status is not Done. For the aesthetic, set the table column order to Topic, Difficulty, Set name, Score, Status and keep the rest hidden.
Use Score as a short label like 3/5 or “mostly correct” so you can review patterns without writing essays.
Don’t track every tiny subproblem; track sets by topic and difficulty.
7. Flashcard Deck Builder with Review Dates
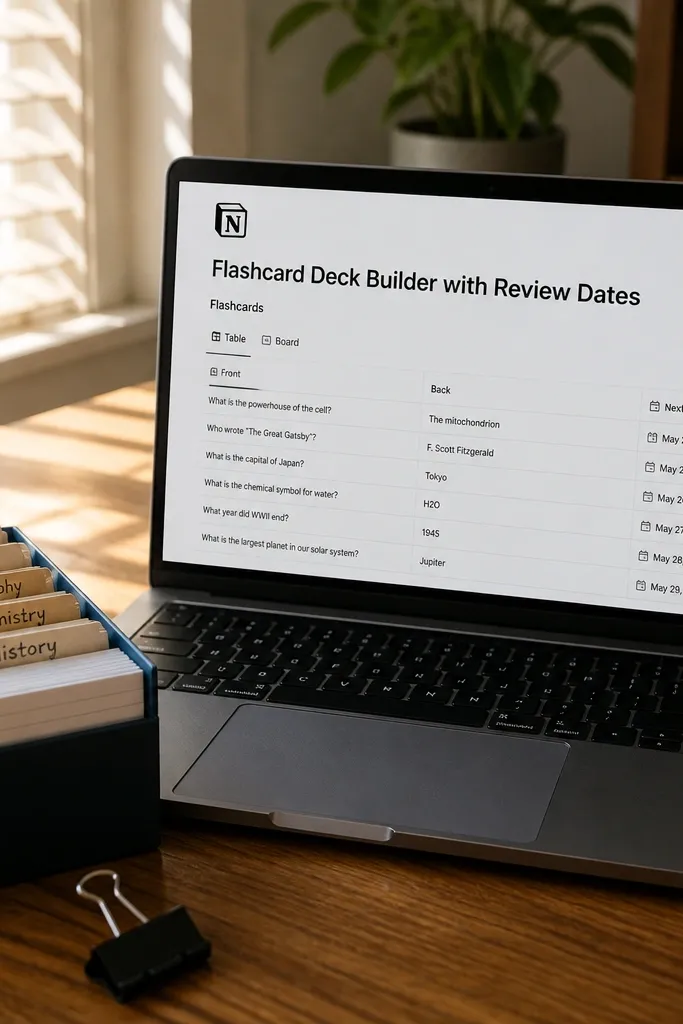
Even if you use another flashcard app, this Notion template organizes your deck creation and review schedule. It’s photogenic because each card entry is a compact row with front, back, and the next review date. You stop cramming everything at once because the template forces spaced review. Students who cram benefit most when they can see what’s due tomorrow versus what can wait. It’s also easy to reuse across classes without reinventing your system.
Create a database called Flashcard Seeds with properties: Class (select), Front (text), Back (text), Deck (select), Next review (date), and Status (select). Add a view called Due Soon filtered to Next review is on or before today and Status is not Mastered. Then add a template for creating new card entries with a simple two-field layout: Front first, Back second, plus a “Deck” dropdown. Finally, add a linked view on your Weekly Planner showing cards due in the next 3 days.
Write the Back side as a short rule + one example. It speeds recall and keeps answers consistent.
Don’t write long paragraphs on the Back side; flashcards are for fast retrieval.
8. Assignment Cover Page with One-Screen Checklist
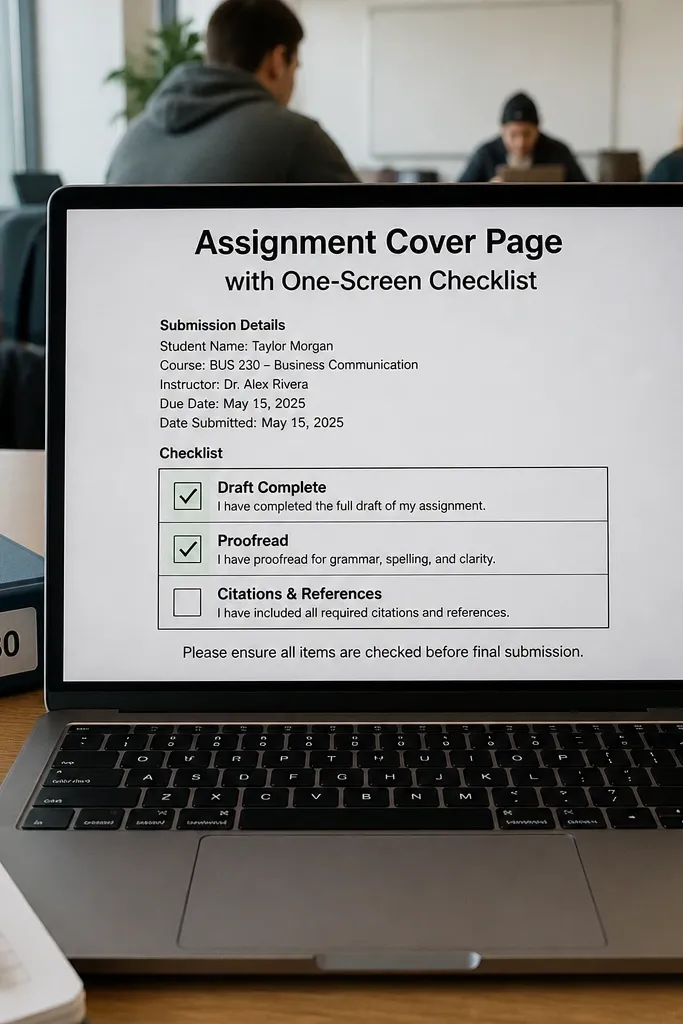
This is the template you want when you have multiple assignments and you’re trying to start the right one. The cover page has submission details at the top and a one-screen checklist below, so you never lose your place. It looks good because the checklist is short and uses consistent phrasing like Draft, Proofread, Cite sources, Submit. Students cram better when the checklist turns into a step-by-step plan. It’s best for essays, projects, and labs where you need a clear sequence.
Create a page template called Assignment Cover Page with a header section containing Assignment name, Due date, Class, and Submission method (text). Add a checklist with exactly four items: Plan outline, First draft, Final edits, Submit. Then add a toggle called “Requirements” where you paste the rubric or instructions. Finally, link it to your Assignments database by adding a “Assignment page” relation property so you can jump from the board directly to the checklist page.
Paste the rubric into the Requirements toggle once, then copy only the grading criteria you actually need into the checklist.
Don’t make the checklist 10+ items; if it doesn’t fit on one screen, you won’t use it.
9. Study Session Timerless Plan with Blocks
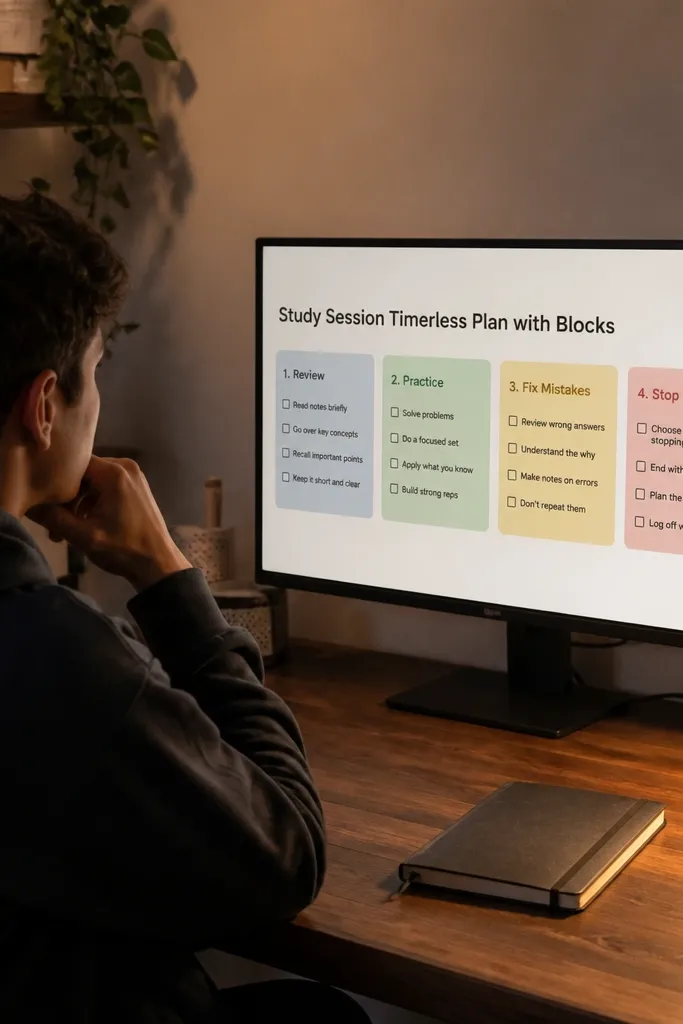
A lot of cramming advice is about timers, but students often need a plan more than a countdown. This template gives you four blocks for one session: review, practice, fix mistakes, and stop point. The look is structured and calming because each block is a separate section with a checkbox list. You get momentum without obsessing over time. It’s great for late nights when you know you’ll study, but you don’t want to track every minute.
Create a page template called Study Session Plan with a title and a date property. Add four sections with headings: Review, Practice, Mistakes to fix, Stop point. Under each heading, add a short bullet list area: 3 bullets for Review, 2-4 bullets for Practice, and a 1-2 item list for Mistakes to fix. End with a Stop point checkbox like “Stop after one practice set” or “Stop after rewriting formulas page.” Duplicate the template for each session from your Weekly Planner.
Editor's noteWrite your stop point as a task, not a time. “After one practice set” is easier to follow.
Skip thisDon’t set “Study until you feel better.” That turns into endless scrolling.
10. Cram Calendar with Color Bars
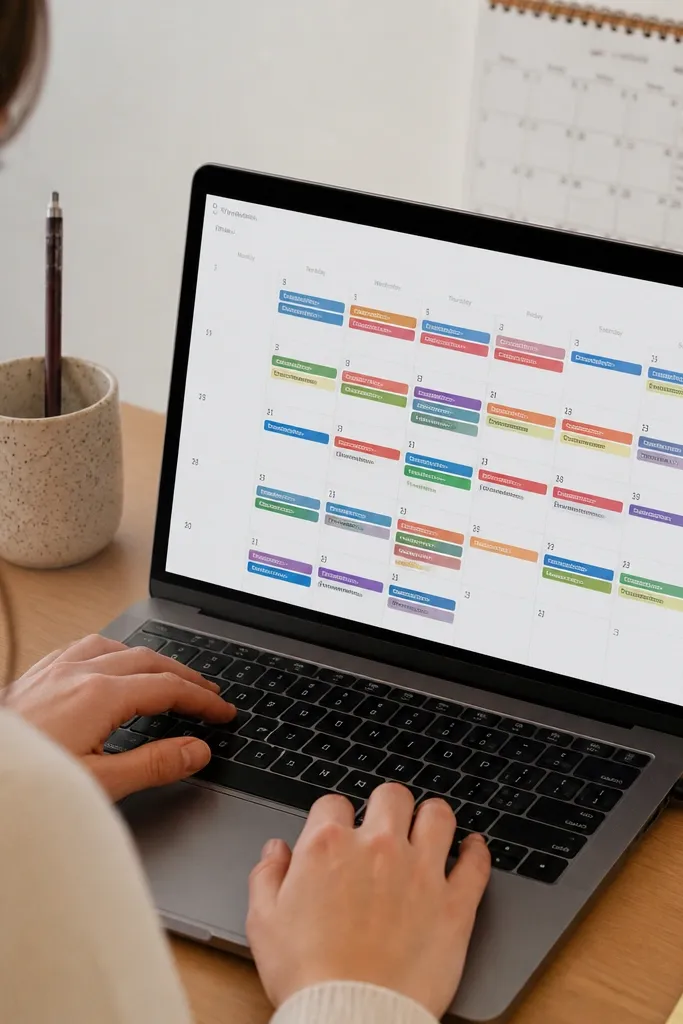
When exam week hits, you need a visual map that tells you where to focus each day. This template uses a calendar view in Notion that shows assignments and review tasks as color bars. It looks good because each day becomes a clear block of class colors, not a list of chaos. You can plan a realistic path: review fundamentals early, practice sets mid-week, and mistakes fixes the final days. Students who cram benefit because the calendar reduces decision fatigue.
Use your Assignments database and add a Calendar view in Notion. Set the color coding to Class (select property) and ensure each task has a due date or scheduled date. Create a second database for Review Tasks with properties: Class, Topic, Scheduled date, and Status. Add a Calendar view for Review Tasks too, then place both calendar views on a single page called Cram Calendar. Filter both views to the next 14 days so it stays focused.
Use Review Tasks for “scheduled review” and Assignments for deadlines; mixing them makes the calendar harder to read.
Don’t plot every tiny micro-task on the calendar. One task per topic is enough.
11. Class Dashboard with Three Views
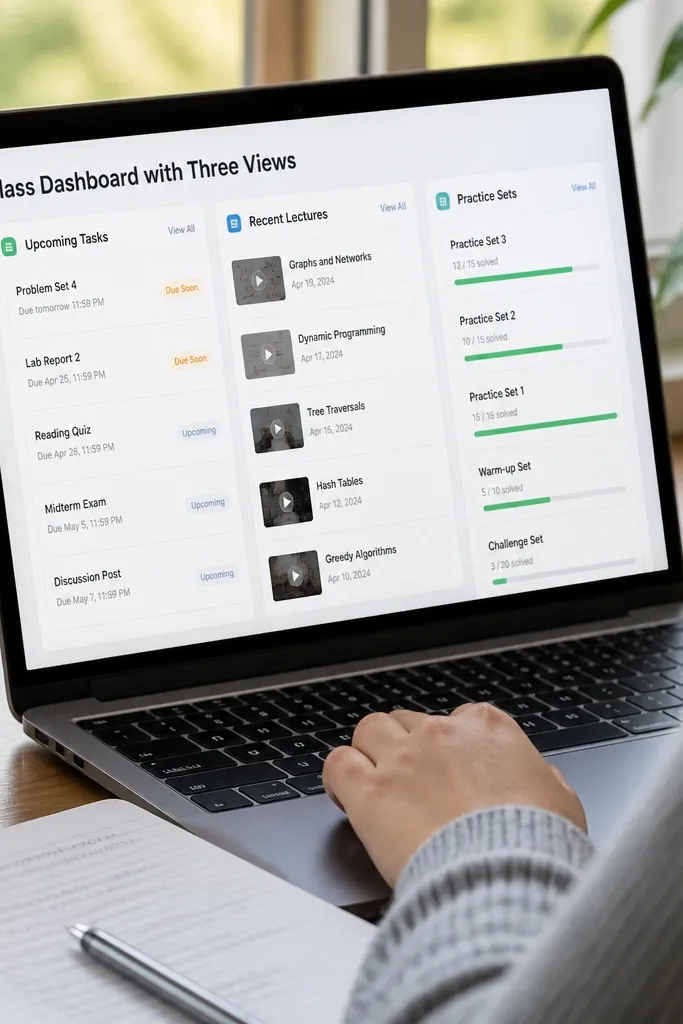
This is how you get the “one page per class” setup without duplicating everything. Your class dashboard page has three linked views: upcoming tasks, recent lectures, and practice sets. It looks clean because the page is consistent — same order every time, same type of cards. During cramming, you open the class dashboard and immediately see what matters now. It’s perfect for students juggling 4-6 classes with different workloads.
Create a page template called Class Dashboard with a header showing Class name and a small “Next up” callout. Add three linked views: (1) Assignments filtered to this class and due within 7 days, (2) Lecture Notes filtered to this class, and (3) Practice Problems filtered to this class and Status not Done. To keep it tidy, limit each view to 10 items and show only the key properties. Finally, create navigation links so each class dashboard links to your Exam Sprint and Mistakes Wall pages.
Keep view limits low (10-15). The dashboard should guide you, not overwhelm you.
Don’t show every lecture ever. Recent lectures are enough for cramming.
12. GPA-Friendly Study Plan for 2-Hour Days
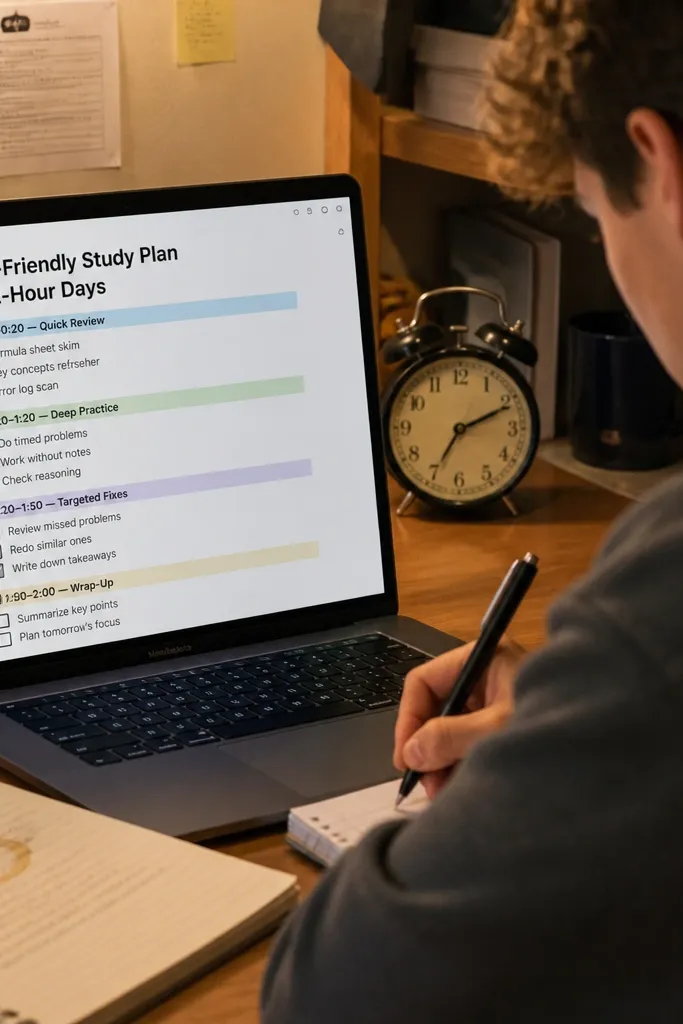
This plan is built for realistic student days, not fantasy schedules. You structure a 2-hour block into segments that match how learning sticks: quick review, deep practice, then targeted fixes. It looks good because the sections are short and the checkboxes make it feel progress-driven. You also get a consistent format across weeks, which makes your workspace look polished. This template helps you cram without turning every day into a messy restart.
Create a page template called Two-Hour Study Block with sections labeled 0-20 review, 20-80 practice, 80-110 fix mistakes, 110-120 stop. Put “Review” as bullets of topics, “Practice” as one problem set reference, and “Fix mistakes” as a link to your Mistakes database filtered to the current topic. Add a “Stop” checkbox that includes a quick recap line like “What I got wrong and the rule.” Then link this template to your Weekly Planner so you can duplicate it for the days you choose.
Use the same stop recap sentence format every time. It keeps your notes consistent and easier to skim later.
Don’t let practice be “anything.” Always name the set or topic.
13. Essay Outline Pages with Citation Slots
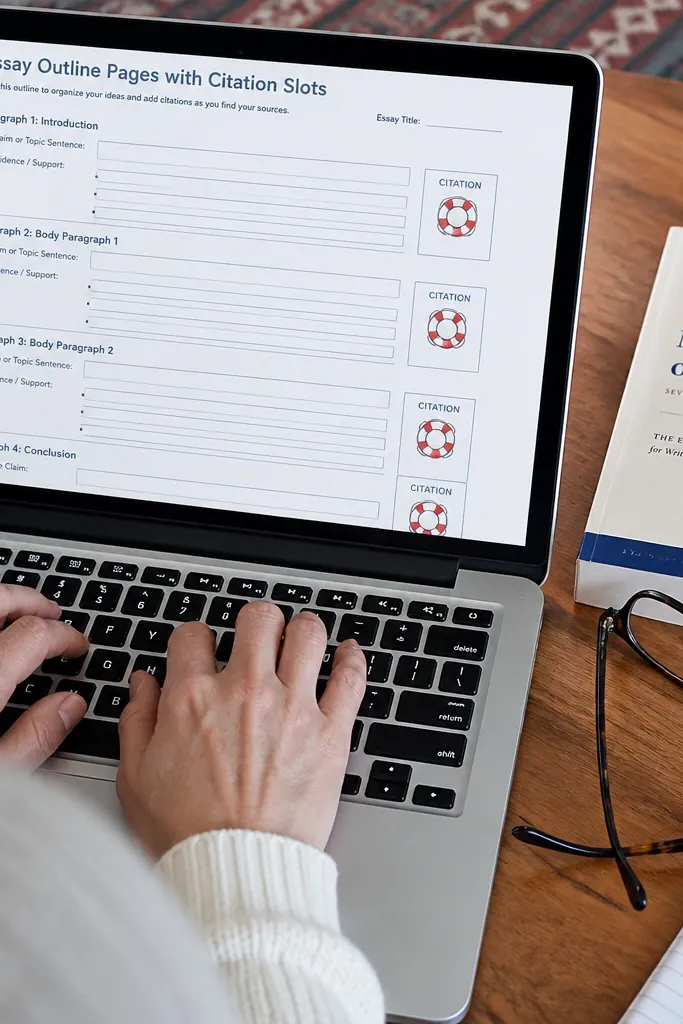
Essay cramming fails when you can’t find sources fast enough. This template gives you paragraph slots plus citation slots so you build arguments with real references. It looks structured because each paragraph has a consistent mini-layout: claim, evidence, and citation. You also get a checklist at the bottom for formatting and proofreading. Students like this because it reduces the panic of “I don’t know how to start.” It’s best for classes with writing assignments and reading-heavy courses.
Create a page template called Essay Outline with properties: Class, Due date, and Topic. On the page, add a section called Thesis and then a divider for Body Paragraphs. Create 3-5 repeated blocks for each paragraph with headings Claim, Evidence, Citation, and One sentence that links to the thesis. Add a toggle called “Sources” where you paste bibliographic info. Finally, add a linked view from your Reading Log filtered to this class so you can pull quotes quickly.
Editor's noteKeep citations short during cramming. Store full bibliographic details in the Sources toggle.
Skip thisDon’t write the whole essay in the outline page. Outline first, then draft in a separate doc.
14. Flashy Mini Dashboard for Finals Week

Finals week needs fewer pages and bigger signals. This template is a mini dashboard that puts the essentials at the top: the next exam, the next assignment, and the top two practice topics. It looks photogenic because the page uses bold headings, two-column sections, and short lists that don’t sprawl. It also helps crammers because it forces you to pick focus instead of trying to do everything. If your workspace looks chaotic, this one page brings it back under control.
Create a page called Finals Week Dashboard and add a date range note at the top for your exam week. Add a two-column layout: left column has “Next exam” with a linked database view filtered to upcoming exams, right column has “Next deadline” from Assignments. Below, add two side-by-side lists labeled Top Practice Topics and Mistakes to Fix, each with 3 bullets you update daily. Link your Mistakes database and your Practice Problems database so you can copy the top items quickly.
Use short bullet phrasing like “Trig identities — focus on transformations” so you can scan fast.
Don’t add more than 6 items total to the dashboard. It stops feeling like a dashboard.
15. Lab Notebook with Procedure Steps and Results Table
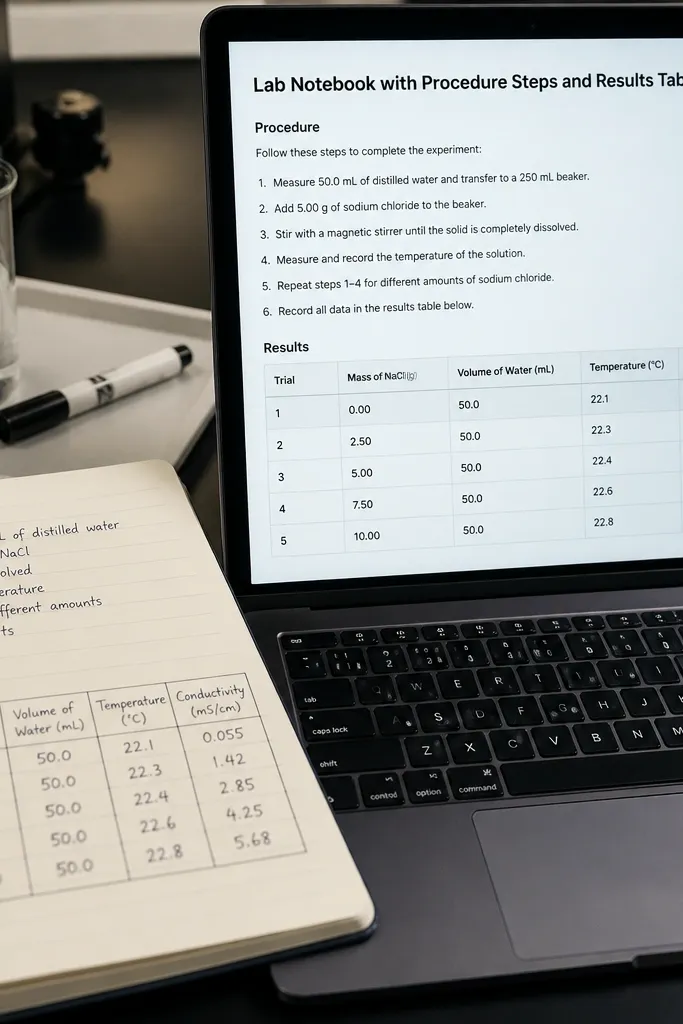
For lab classes, cramming is about repeating the procedure and interpreting results. This Notion template looks clean because it separates procedure steps from results in a table. You can paste the procedure as numbered steps, then log observations with units. The aesthetic comes from a consistent table layout and clear headings that don’t blend into text walls. It helps students because you can review what you did and why your results happened. It’s built for courses where you need to show method and interpretation, not just memorize facts.
Create a page template called Lab Notebook with header fields: Class, Experiment name, Date, and Goal. Add a numbered list section titled Procedure Steps and keep it short with 6-12 steps. Then create a database called Lab Results with properties: Experiment (relation), Parameter (text), Value (number), Unit (text), Observation (text), and Notes (text). Add a linked view filtered to the current experiment and display it as a table. Finish by adding a toggle called “What to redo next time” with 2-4 bullets.
Editor's notePut units in their own column so you can spot unit mistakes during review.
Skip thisDon’t write results as one paragraph; a table makes patterns obvious.
16. Math Formula Sheet with Error-Proofing Notes
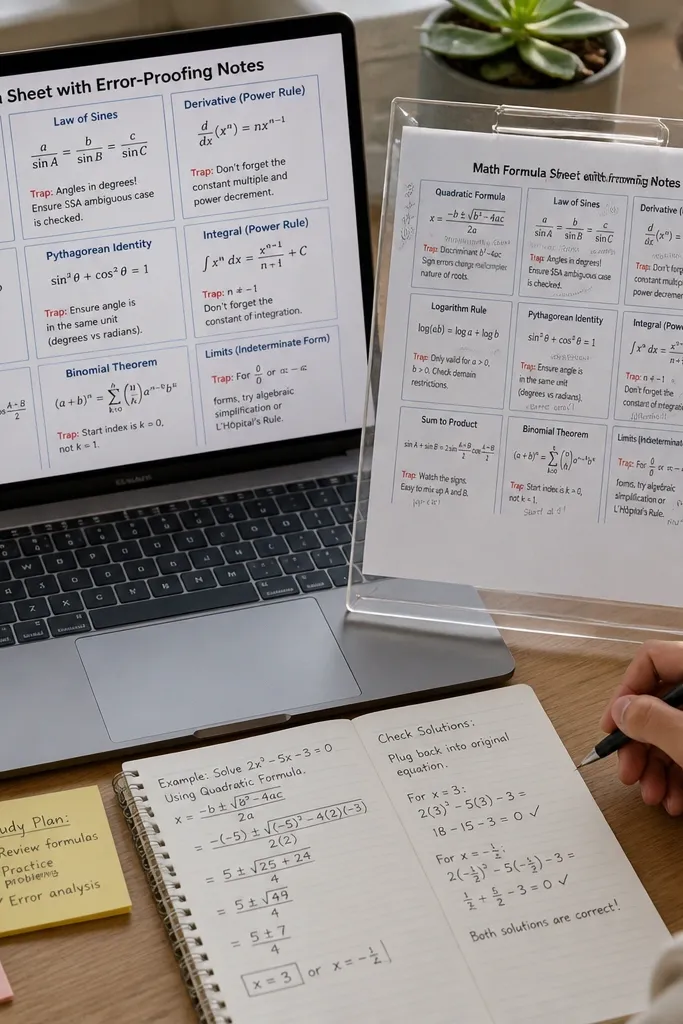
This template is for students who memorize formulas but still mess up usage. Each formula block has a small error-proofing note that tells you the most common trap — like sign errors, domain limits, or when to use a specific identity. It looks good because formulas are grouped by topic and each block has a consistent mini-layout. During cramming, you open this sheet and quickly review not only formulas, but when they break. It’s perfect for calculus, algebra, physics, and coding math problems.
Create a page called Formula Sheet and add dividers by topic like Derivatives, Integrals, Limits, and Trig. For each formula, add a short text block for the formula and a second line labeled “Trap” where you write the most likely mistake. Keep each topic to 6-10 formulas so the page doesn’t become unreadable. Add a link to your Mistakes database filtered by Topic so you can copy trap notes from real errors. Update the trap notes only when you log a mistake.
Editor's noteWrite traps in one sentence that starts with “Use this when...” or “Don’t use this when...”
Skip thisDon’t dump every formula you find; include only ones you’re tested on.
17. Coding Sprint Board with Bugs and Learnings
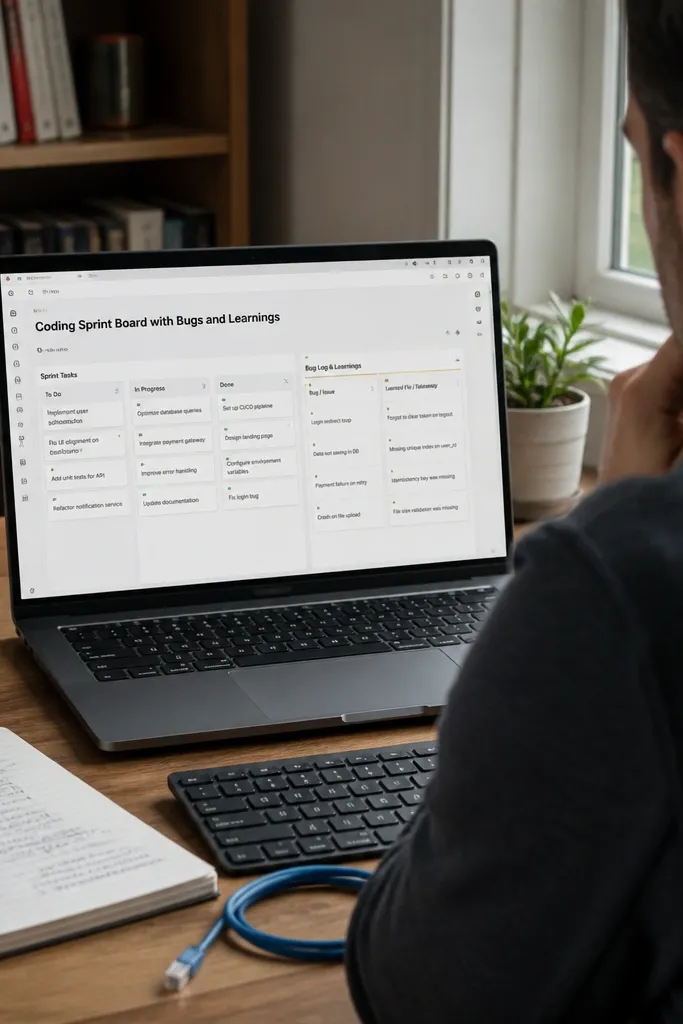
This template makes coding practice feel organized instead of chaotic. It has a task board for sprint items and a separate bug log that turns failures into reusable fixes. The page looks good because it’s split into two clear sections: what you’re building and what you learned. Students cram coding by running tests repeatedly, but without a bug log they repeat the same mistakes. This fixes that and gives you a quick review page for your next sprint.
Create a database called Coding Sprints with properties: Class, Sprint name, Status, Goal, and Repo link (URL). Add a board view grouped by Status so you can see progress. Create a second database called Bugs with properties: Sprint (relation), Error message (text), Cause (text), Fix (text), and Test passed (checkbox). On the sprint page template, add a linked view of Bugs filtered to that sprint. Keep the bug list short by only logging issues that caused a test failure or crash.
Store the exact error message text. It speeds up searching when you hit the same bug again.
Avoid logging every tiny warning. Log only what breaks behavior or tests.
18. Study Resource Library with Cover Images
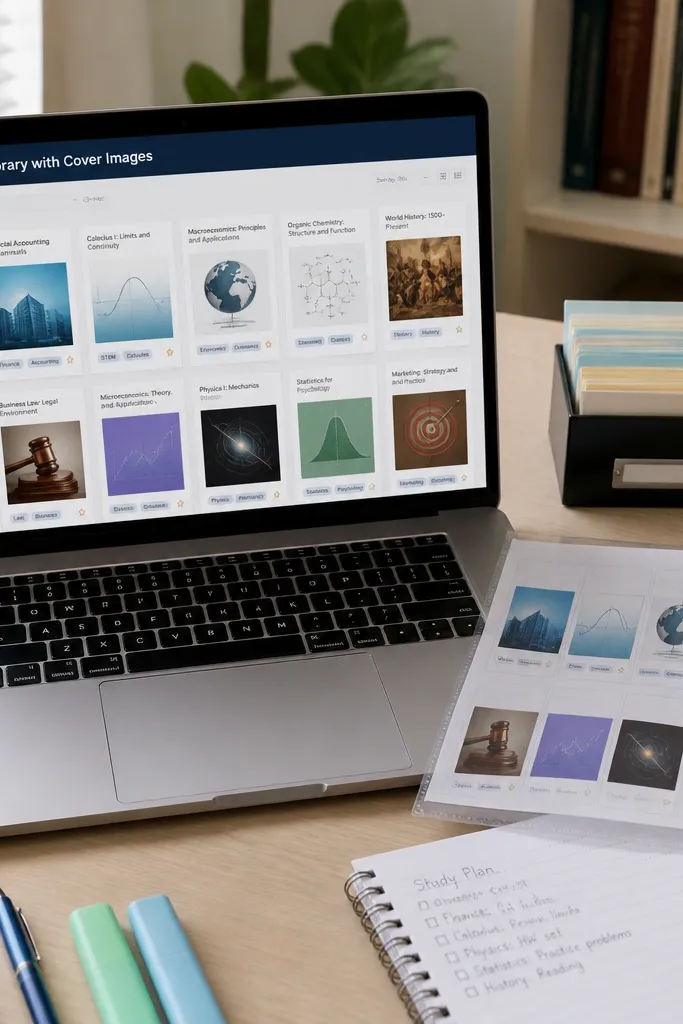
This template cleans up your sources so you stop digging around when you need a figure, definition, or practice set. It looks aesthetic because each resource entry has a cover image area and consistent tags, so the library feels curated. Students cram better when they can grab the right resource in seconds. You also get a searchable tag system that keeps your library from turning into another mess. It’s useful for any class that uses multiple PDFs, slides, or problem sets.
Create a database called Study Resources with properties: Class (select), Type (select like PDF, slides, problem set), Topic (select), Status (select), and Link (URL). Add a gallery view and enable cover images by using the database cover feature and setting a small set of consistent cover colors or icons. Create a page template for resources with sections: What it helps with, Key section links, and Notes. Finally, add a filtered linked view on your class dashboard showing resources for that class and topic.
Editor's noteUse 1-2 tags per resource max. Too many tags makes searching feel like guessing.
Skip thisDon’t store resources as plain text links only; use a consistent card view so you can scan.
19. Group Study Sign-Up Page with Roles
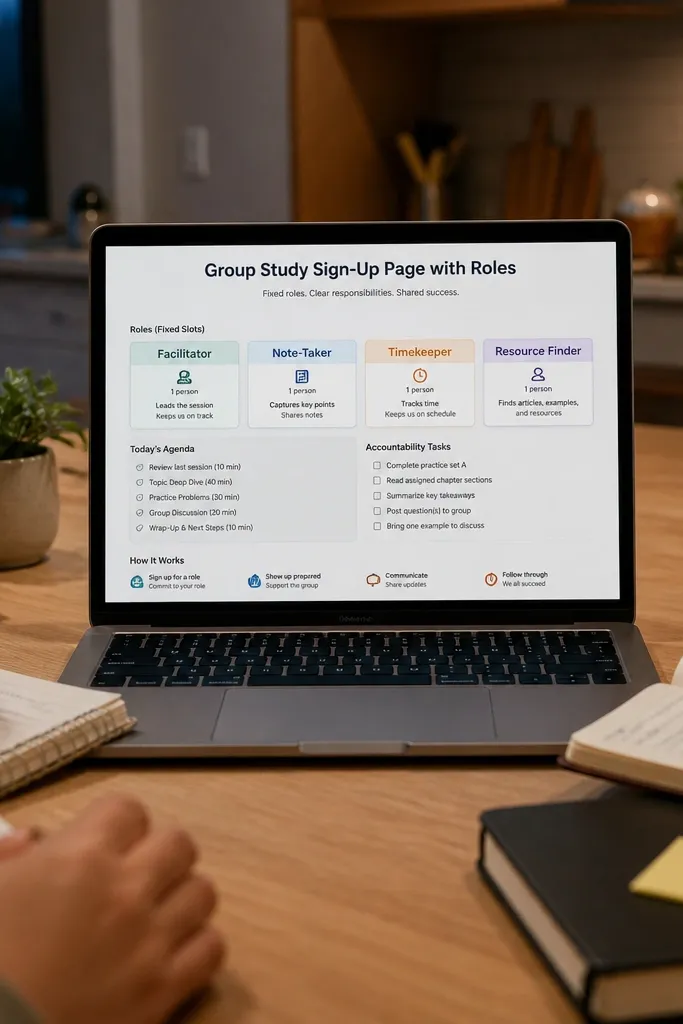
Group study can save you during cramming, but only if roles are clear. This template makes it look organized by having fixed role slots and topic assignments. You get a page that’s easy to share and easy to read in chat. The aesthetic is built from simple sections: roles, agenda, and accountability tasks. Students like it because it reduces awkward “so what are we doing?” moments. It’s best for classes where practice problems and explanation help — math, science, and language study.
Create a page called Group Study with a section called Agenda and add 3 items: Topic 1, Topic 2, Topic 3. Add a database called Group Slots with properties: Class (select), Role (select like Explainer, Problem Driver, Note Taker), Topic (select), Person (text), and Status (select). Then add a linked table view on the Group Study page filtered to the current class. For the accountability, add a checklist called Post-session tasks with items like Summarize key rules and Log 3 mistakes into Mistakes database.
Assign one person as Note Taker and force them to paste 5 bullets into the session notes page within 30 minutes.
Don’t let the agenda be vague. “Review unit” is too broad for a group session.
20. Vocabulary Builder with Synonym Flags
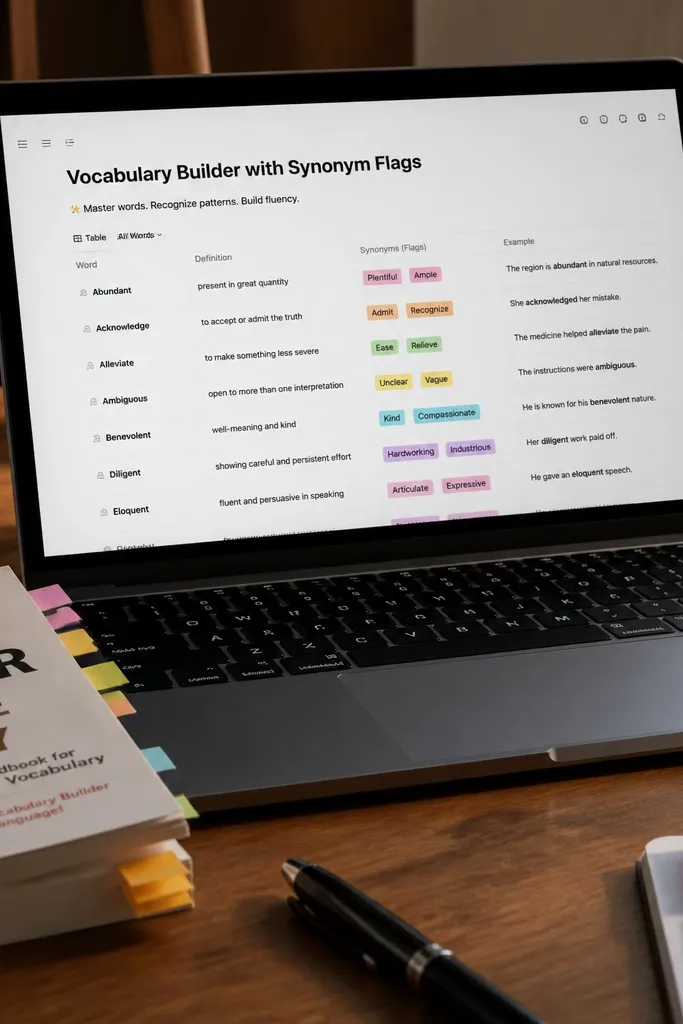
Language and memorization-heavy courses need a vocabulary system that’s easy to review. This template uses a vocabulary database with a synonym flag so you can spot words that are easy to confuse. It looks clean because each entry is short and consistent, and the review view can be filtered by the flag. During cramming, you focus on the confusing words first. It’s good for foreign languages, biology terms, and any class where definitions matter.
Create a database called Vocabulary with properties: Class (select), Term (text), Definition (text), Synonym confusion (checkbox), Example sentence (text), and Next review (date). Add a view called Confusable Words filtered to Synonym confusion is checked and Next review is on or before today. Add another view called All Terms sorted by Term. On your class dashboard, add a linked view filtered to this week’s due vocabulary terms so it stays connected to your schedule.
Editor's noteWrite the example sentence using your class’s topic. It makes recall faster than generic examples.
Skip thisDon’t store multiple definitions at once. Use one definition you can explain in a sentence.
21. Attendance and Participation Tracker with Reflection Prompts
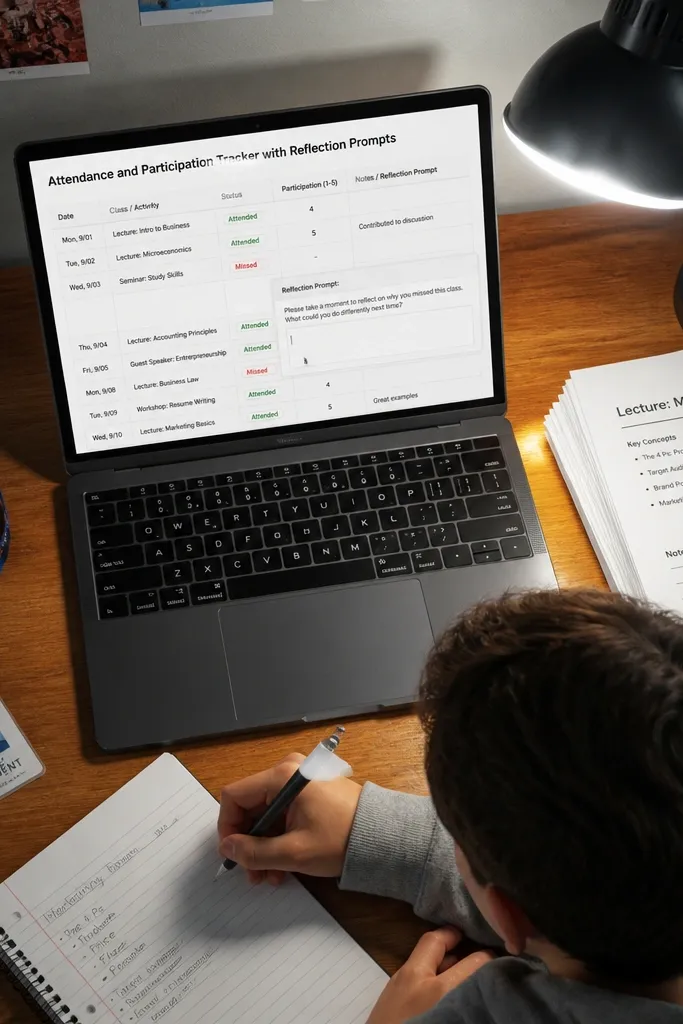
Some students ignore participation until grades drop. This template keeps it visible without turning your Notion into a guilt machine. The look is tidy because it uses a table for attendance and a small reflection prompt area that only appears when you mark “missed.” During cramming, you can also use it to identify which topics you likely missed. It’s helpful for classes where participation affects points and where lecture attendance changes your understanding.
Create a database called Participation with properties: Class (select), Date (date), Status (select: Present, Missed, Late), Topic of the day (text), and Reflection (text). Create a table view sorted by Date descending. Add a filter view called Missed and Late filtered to Status is not Present. On your Participation page, add a toggle titled Reflection Prompts and include two prompts: “What concept did I probably miss?” and “What do I need to review tonight?”
After each missed class, log one topic and one action. That’s enough to prevent repeat confusion.
Don’t write long reflections. Keep it to one topic and one review action.
22. Project Milestone Builder with a Clean Timeline
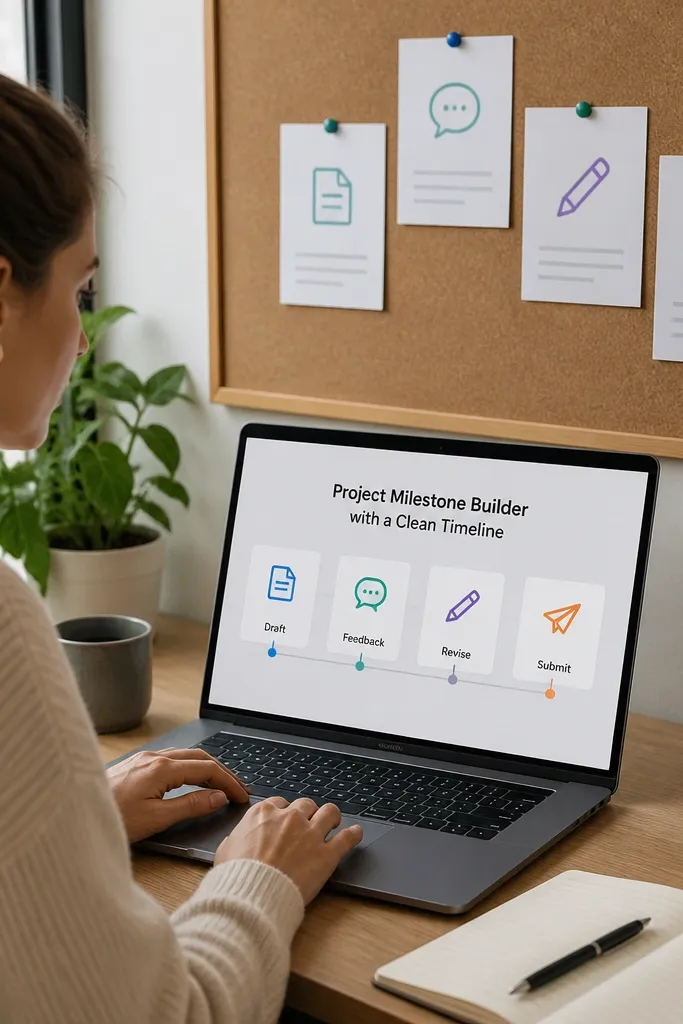
Projects derail cramming when you only track the final deadline. This template breaks a project into milestones so you always know what to do next. It looks good because milestones are shown in a timeline view with consistent card text. The page keeps you moving: draft, feedback, revise, submit. Students benefit because you can cram the right milestone instead of dumping everything into the last night. It’s ideal for group projects, labs, and creative assignments.
Create a database called Project Milestones with properties: Project (text), Class (select), Milestone (select like Draft, Feedback, Revise, Submit), Due date (date), Status (select), and Deliverable link (URL). Add a Timeline view grouped by Project and set it to show due dates. Then create a page called Project Dashboard with linked views filtered to the current project and Status not Done. Use the milestone template to keep the text short: one deliverable description and one link to where the work lives.
Editor's noteKeep milestone names identical across projects so your timeline stays readable.
Skip thisDon’t create milestones smaller than a day of work. Tiny milestones become noise.
23. Personal Cram Rules Page with Checkboxes
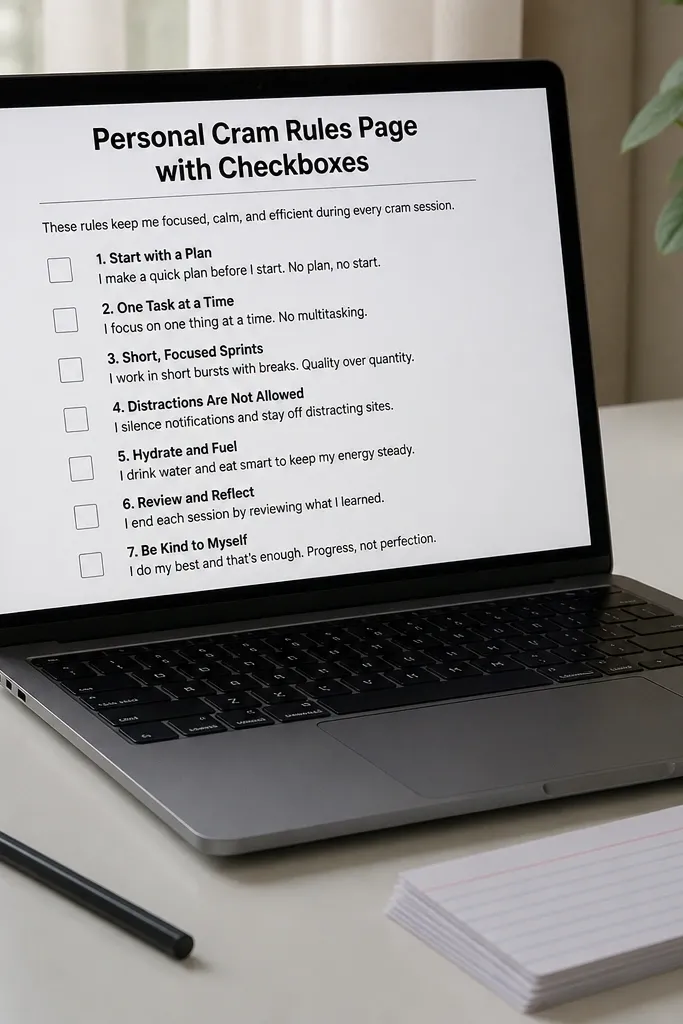
This template looks simple, but it fixes a real problem: students cram the same way every time and wonder why it doesn’t work. The rules page turns your behavior into checkboxes you can follow during stress. It’s photogenic because it’s minimal, with bold headings and a short list, so it doesn’t add clutter to your workspace. The best part is practical: you can tie each rule to what you do in your study session plan. It’s the anchor page you open when you’re tempted to “just reread everything.”
Create a page called Cram Rules and add a checklist with 6 items: Review mistakes first, Practice one set, Summarize key rules, Log new mistakes, Stop when the session goal is done, Prep tomorrow’s first task. Add a toggle called “If I’m stuck” with three bullets: check notes for one concept, do 2 easy problems, then return to the hard set. Place this rules page link on your Weekly Planner and on your Study Session Plan template. Make sure the checklist stays short so it’s easy to mark quickly.
Editor's noteWrite your rules in action language. “Review mistakes first” beats “Work on weak areas.”
Skip thisAvoid long rule paragraphs. If you can’t scan it fast, it won’t get used.
24. Exam Day Bag Checklist + Panic-Proof Packing Map

This fixes the last-minute chaos that hits when you’re cramming and your brain is loud. The template gives you a one-screen packing system for your exam bag plus a visual “where it goes” map so you can pack in 3 minutes without hunting. It also includes a tiny panic-proof section for the stuff that causes delays: batteries, ID, and the two backups you never remember until it’s too late. The look stays clean and photogenic with bold checkbox blocks, a simple grid map, and color-coded categories that read instantly. This is perfect for students who cram hard and need a repeatable routine on test morning, not another complicated planner. Build it once, reuse it every semester.
1) In Notion, create a page called “Exam Day Bag” and add a table with 4 columns: Item, Category, Where it goes, Backup needed. Set the Categories to four colors (ID/Docs, Power, Writing Tools, Food/Comfort) using select properties. 2) Add a second section right under the table called “Packing Map” and use a 3x2 board layout made from a database view. Label each grid square with a short spot name like Front pocket, Side bottle, Top zipper, Bottom pouch, then link each item to the spot using the Where it goes property. 3) Add a final “Pre-Leave Check” block with 6 large checkboxes for the non-negotiables (ID, student card if needed, pen, calculator if needed, charger cable, water/snack). Keep the text short so it fits on one phone screen.
Editor's noteUse one color per category across the whole page so your eyes lock onto the right section in seconds.
Skip thisDon’t make the list too long — keep it to what you truly need for one exam bag, not every possible scenario.
25. Cram-to-Recall Confidence Scoreboard (After-Each-Session Review)
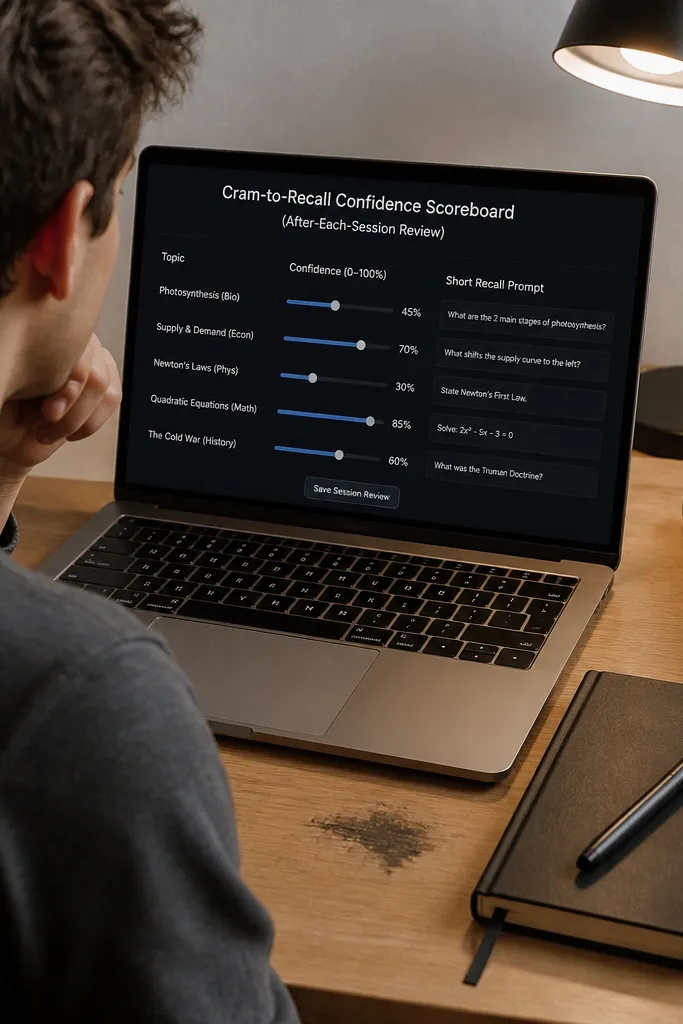
This is for the moment you finish a cram session and realize you studied but can’t recall. The template forces a quick after-session check that turns “I feel like I did it” into numbers you can track. You get a confidence slider for each topic, a short recall prompt that asks for what you can write from memory, and a next-session action box that tells you exactly what to fix. The design is punchy and visual with a scoreboard layout, big progress bars, and topic chips that look good in a screenshot. It takes 3-5 minutes per session, so it’s realistic during finals week. This suits students who cram by studying hard but need a system to study smarter.
1) Create a database called “Cram Sessions” with properties: Date, Topic, Confidence (number 0-10), Recall Output (short text), Mistake Pattern (select with 4 options), and Next Action (short text). Turn Confidence into a number property and display it as a progress-style bar by sorting highest to lowest in the view. 2) Add a view named “Scoreboard” that groups by Topic and shows Date, Confidence, and Mistake Pattern as the three main fields. Place a template button for new sessions that auto-fills Date and Topic, then leaves Recall Output empty for you to write right after studying. 3) On the “Session Detail” page, add a callout block labeled “Recall Prompt” with a fixed sentence like “Write what you remember without looking, then circle what you missed.” Under it, add another callout labeled “Next Action” with a checkbox list of 2 steps: redo missed questions, then make 5 flashcards from the exact gaps.
Keep Mistake Pattern as a select with only 4 options so you can spot trends in one glance.
Don’t skip the Recall Output field — confidence without recall text turns into false progress.



