
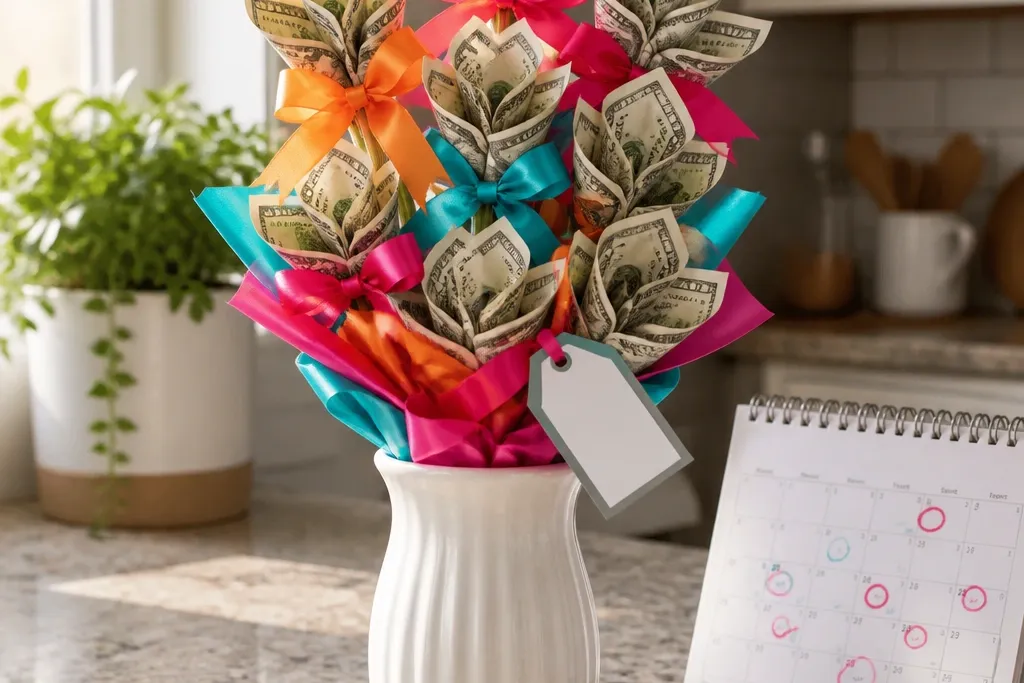

1. Classic Bill Rose Bouquet With Burgundy Ribbon
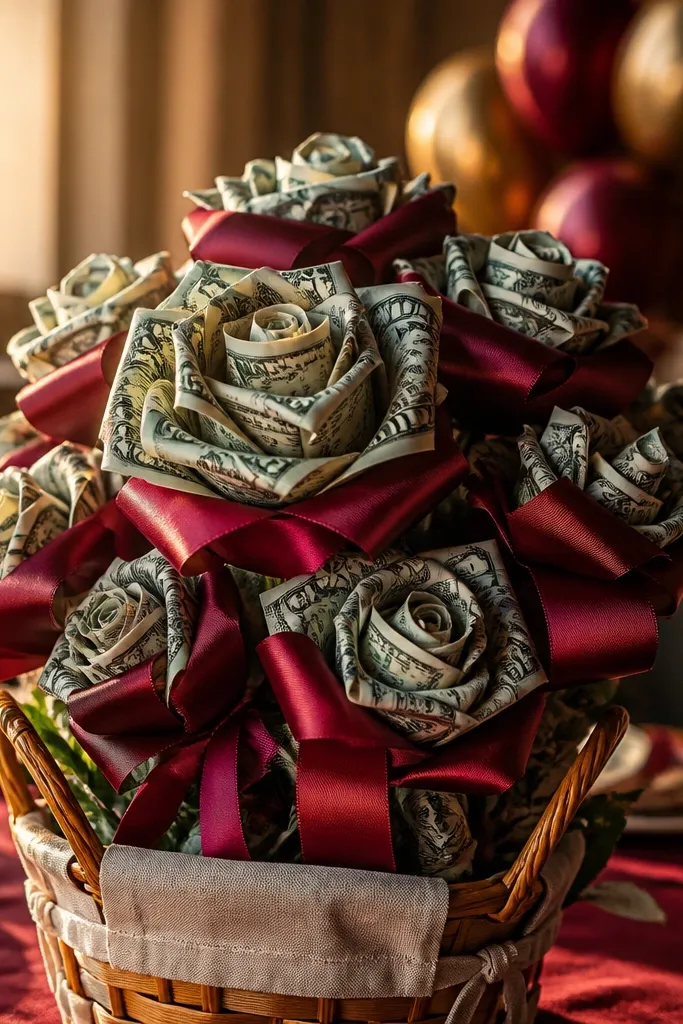
This is the money bouquet that looks like flowers at a glance. The bill roses hold their shape well, so you don’t get the droopy, messy look that ruins photos. Burgundy ribbon gives you that gift-store feel without spending much, and the roses create a layered silhouette. It’s best for birthdays and anniversaries where you want something pretty, not gimmicky. Skill level is beginner-friendly because you’re repeating the same rose fold over and over.
Start by folding 12 to 16 bills into roses: roll the bill lengthwise, pinch the base, then open the top slightly to look petal-like. Build a foam block base at about 3 inches wide and 6 to 8 inches tall, then insert the rose “stems” using thin floral wire or straight pins. Wrap the foam with burgundy tissue or fabric, then cover it with wrapping paper tucked tight around the sides. Finish by tying a burgundy ribbon bow and adding one thin gold ribbon band near the top.
Editor's noteUse a glue dot under each rose base so it doesn’t unwind while you insert it.
Skip thisDon’t skip the step where you pinch the rose base — loose bases slide and ruin the shape.
2. Accordion Fan Money Bouquet in Teal and White
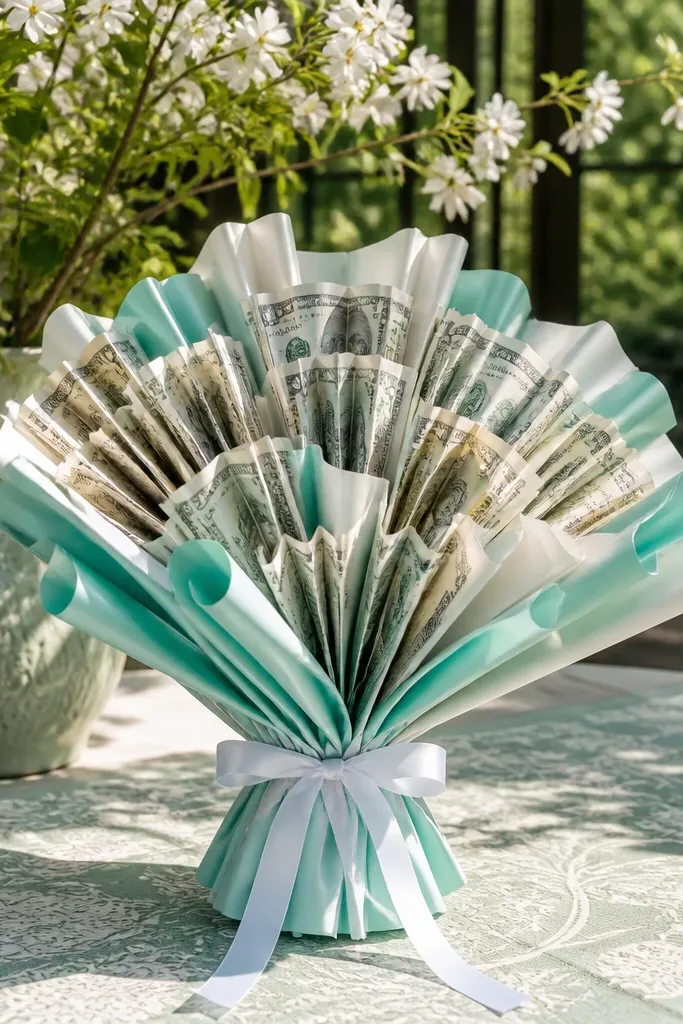
Accordion fans make money look like actual bouquet petals, and they’re fast because you’re folding straight lines, not shaping tight spirals. Teal and white reads clean and modern, especially for spring birthdays or baby showers. The fans also catch light differently than roses, so the bouquet looks lively in pictures. This works well when you need a gift that looks “designed” but you’re still moving quickly. It’s a solid pick if you can’t spare time for careful flower shaping.
Fold 10 to 14 bills into accordion fans by making tight back-and-forth creases along the length. Tie each fan at the center with a thin piece of matching thread, then glue the ends slightly so the fan holds open. Make a cardboard base about 4 inches wide and 8 inches tall, then poke holes in it in a grid pattern for even spacing. Insert the fans on floral picks or skewers, then wrap the base with teal tissue and add a white ribbon around the middle.
Press each crease with a ruler edge for crisp folds that look good even from a distance.
Don’t use thick string — it makes the center bulky and the fan looks lumpy.
3. Dollar Bill Tulips With Kraft Paper Wrap
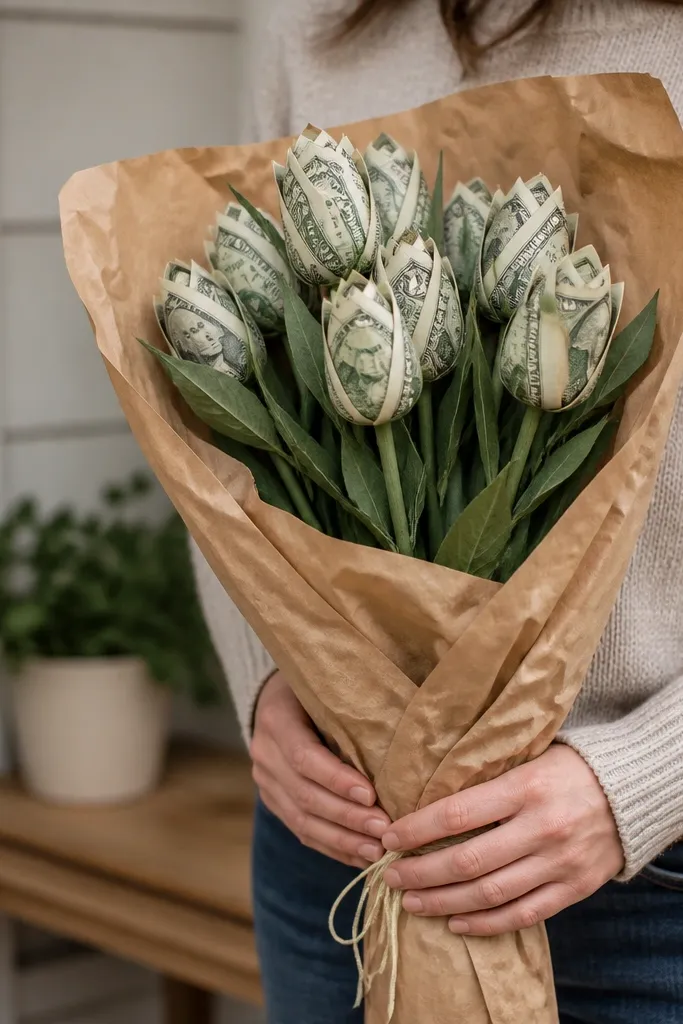
Tulip shapes look elegant, and kraft paper wrapping makes the money look like part of the design instead of the centerpiece pretending to be flowers. This is a great choice for housewarmings and “just because” gifts. Tulips hold a clean, upright form, so the bouquet stays photo-ready even if you’re carrying it for a while. You get a warm, rustic look that still feels intentional. It’s beginner-friendly if you keep the fold simple and repeatable.
Fold 12 bills into tulip-like “toppers” by folding each bill into thirds lengthwise, then bending the ends back to form a pointed top. Secure each tulip with a small dab of hot glue at the base and attach to floral wire. Build a cardboard cone base or a foam block wrapped in kraft paper, about 4 inches across at the top. Insert the tulips into the base in a slightly staggered pattern, then tie twine around the wrapping and add a small kraft label tag.
Use a matte hot glue stick for cleaner edges — shiny glue can show through kraft paper.
Don’t overload the top with too many tulips — overcrowding makes them slump.
4. Chocolate-Candy Money Bouquet With Clear Cellophane
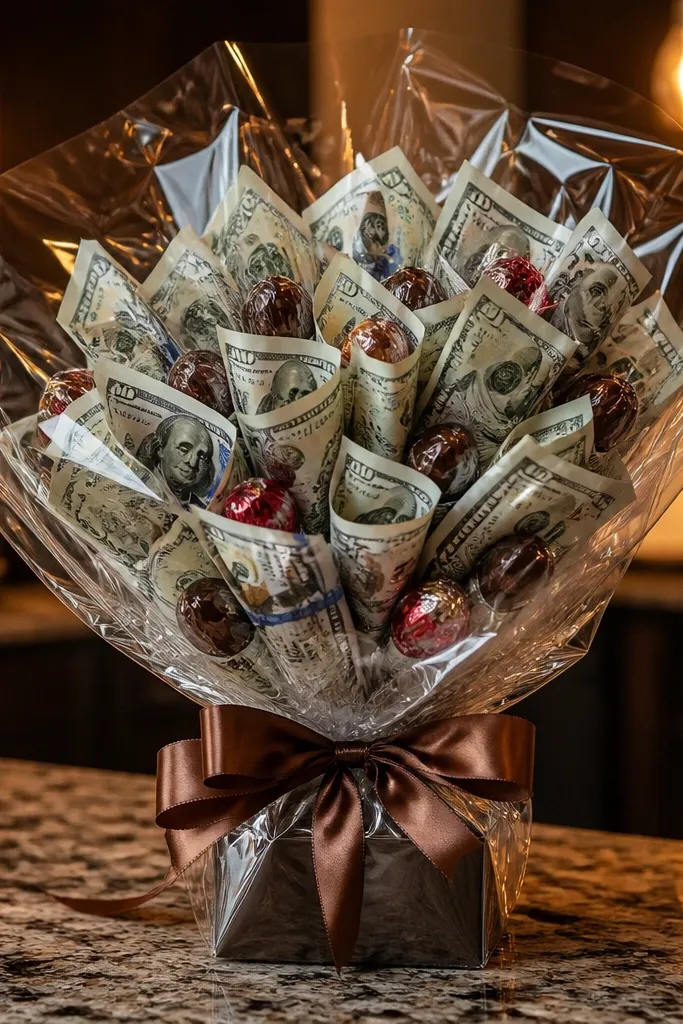
This one looks fun and giftable because the money is mixed into a candy bouquet silhouette. Clear cellophane makes the whole thing pop in photos, and the candy gives you texture beyond folded bills. It’s a good move for kids' parties, graduation, or anyone who likes sweet treats. You’re not building a fragile flower — you’re building a wrapped bundle that stays together. It’s also forgiving if some folds aren’t perfect since the candy draws attention.
Cut a piece of clear cellophane about 16x20 inches and set it aside. Wrap 8 to 10 bills around lollipop sticks or small candy sticks, then secure with a tiny piece of tape or a glue dot. Arrange 6 to 8 candy items plus the money-wrapped sticks into a tight bundle. Gather the cellophane around the stems and tie with ribbon, then add a second ribbon loop at the top for a neat bow. Finish by adding a small bow near the base to cover the stem wrap.
Keep bill edges inside the cellophane fold so they don’t catch on the ribbon while carrying.
Don’t use heavy glue on the candy — it can smear and show through clear plastic.
5. Mini Money Bouquet in a Mason Jar With Burlap Bow
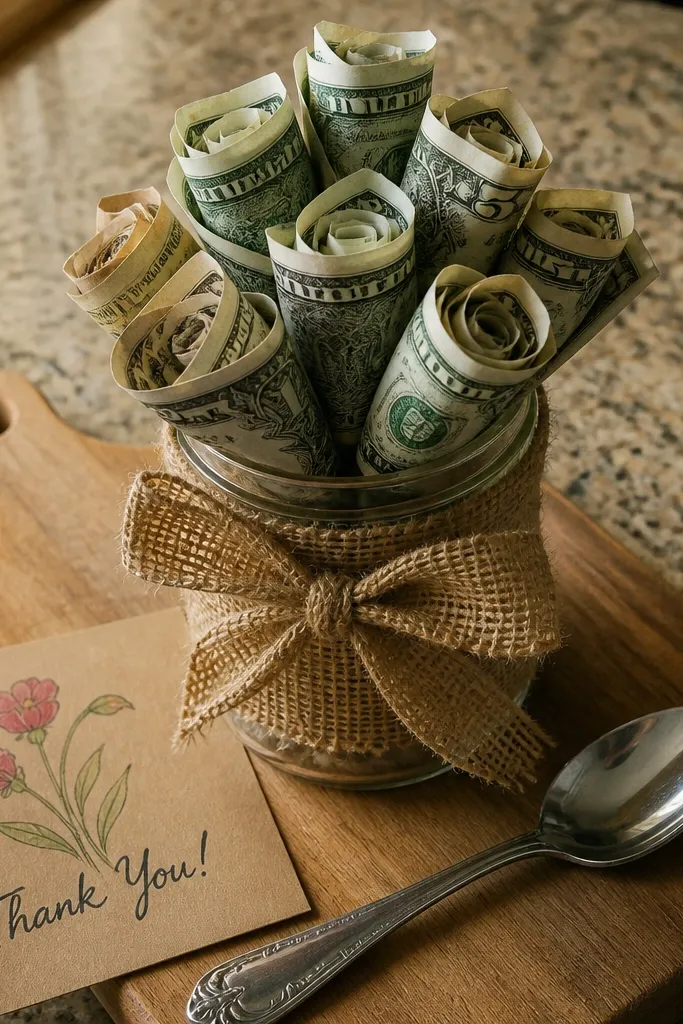
Mason jar money bouquets are fast because the jar does the job of the base and wrapping. You get a clean, sturdy shape that photographs well on tables and counters. Burlap adds texture and makes the money look less like “just bills” and more like a styled gift. This works for coworker gifts, housewarming, and thank-yous where you want something compact. It also buys you time because you can tuck messy stems inside the jar.
Fill a small mason jar with floral foam or crumpled tissue paper packed tightly. Attach 10 to 12 money “blossoms” to short floral picks (or toothpicks) and insert them into the foam. Use bill roses or accordion fans, but keep them short so they sit above the jar rim. Wrap the jar lid area with burlap ribbon and secure with twine. Add a small bow on top of the burlap knot and tighten the tissue around the foam if it shows.
If you don’t have foam, crumpled tissue plus a few hot-glue dots holds surprisingly well for a quick gift.
Don’t leave the jar rim uncovered — the jar edge shows and makes the whole thing look unfinished.
6. One-Handle Money Bouquet Like a Bridal Toss

This style looks like a real bouquet because it has one clean handle line. It’s a great last-minute option when you need something that looks polished even if you’re not wrapping paper perfectly. The money pieces are arranged upward and held by the handle wrap, so nothing flops. Satin ribbon gives it a sleek look that reads “event gift” without the work. It fits weddings, bridal showers, and anyone who likes classic presentation.
Wrap floral wire or wooden skewers into stems and attach 10 to 14 money units (roses, fans, or folded petals). Gather the stems into one bundle and wrap with ribbon starting 2 inches below the top of the money pieces. Tie the bundle with a strong knot, then cover the knot with a second ribbon band. If you want extra structure, add a thin cardboard strip inside the ribbon wrap near the handle. Finish by trimming ribbon ends into angled tails.
Use a wide ribbon (1.5 inches) for the handle — thin ribbon twists and looks messy fast.
Don’t spread stems too wide — a wide bouquet collapses and looks uneven in photos.
7. Money Bouquet With Paper Flower Backing (No Foam)
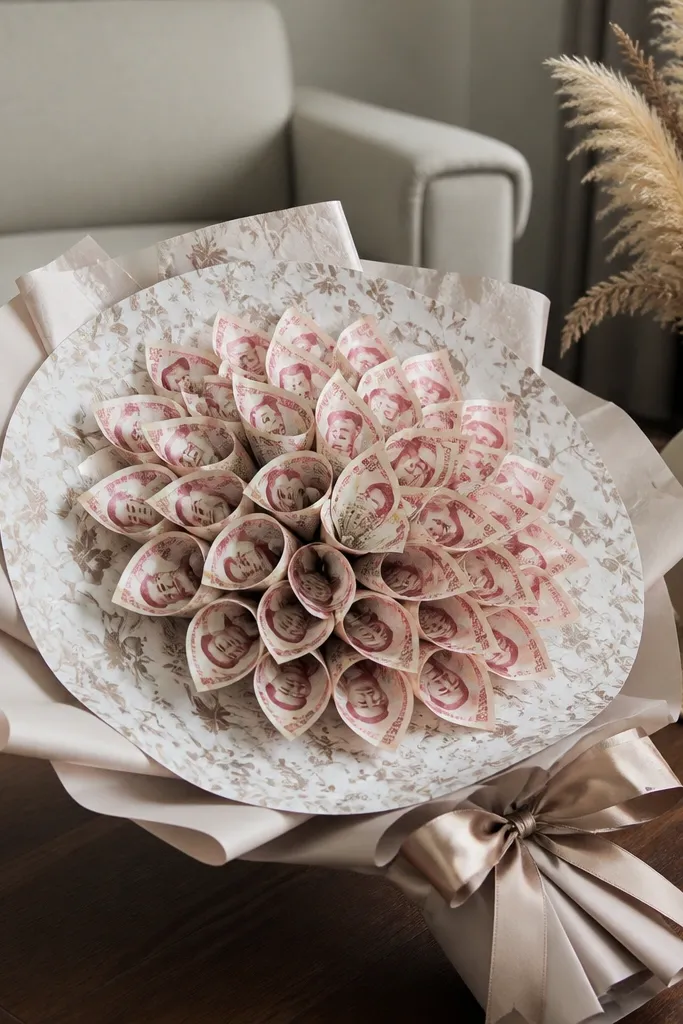
If you don’t want foam blocks or messy bases, this backing method looks clean and stays stable. You’re building a flat flower “plate” that you can attach to stems, so the money sits upright and photogenic. It looks great when you wrap it with decorative paper and a bow. This is ideal for last-minute gifts because you can assemble it quickly in layers. It’s also cheaper since you only need cardstock and a few ribbon pieces.
Cut a large circle from cardstock (about 6 to 8 inches across) and another smaller circle for layering. Glue 10 to 12 money pieces onto the cardstock using hot glue dots at the base edges. Attach a sturdy backing to the back using tape and add floral wire or a skewer as the stem. Wrap the stem with ribbon and cover the attachment with a small strip of cardstock tucked under ribbon. Add a ribbon bow at the top and trim the paper edges so they peek behind the money.
Editor's noteLightly crinkle the cardstock edge with your fingers so it looks like layered petals instead of a flat disk.
Skip thisDon’t put hot glue directly on the bill faces — it can ripple the paper and look shiny.
8. Black-and-Gold Money Bouquet With Sharp Satin Lines
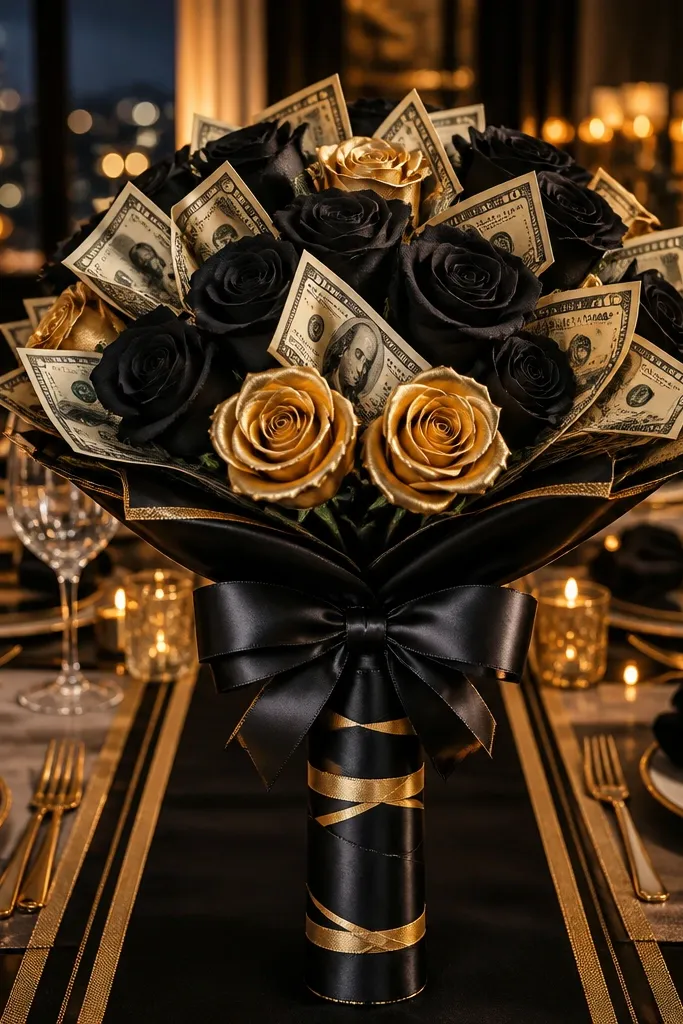
This is the “grown-up” money bouquet look. Black and gold reads luxe in photos, and the contrast makes the folds pop even if the lighting isn’t perfect. You’re aiming for sharp lines: straight stem wrap, clean ribbon bands, and consistent money shapes. It works for anniversaries, retirement gifts, and upscale birthdays. The build is the same as other bouquets, but the styling makes it feel expensive without extra cost.
Choose one money unit style and make 12 to 16 of them (accordion fans look especially strong in this palette). Wrap each stem with black ribbon in tight spirals, then secure with a small tape strip at the bottom. Use gold ribbon as two accents: one band near the top and one bow at the handle. For wrapping, use black tissue paper around a foam base and cover with black wrapping paper. Place the money units in a tight circle so the silhouette is uniform.
Use matte black ribbon — shiny ribbon can look cheap under indoor lights.
Don’t mix gold ribbon textures — foil and satin side-by-side looks mismatched.
9. Pastel Rainbow Money Bouquet With Mini Clothespin Holders

This looks playful and bright, but it’s still structured. Clothespins are a secret weapon for last-minute builds because they hold paper securely without complicated glue work. Each money piece hangs like a tiny flag, giving movement in photos. Use pastel ribbon colors so the bouquet looks airy instead of chaotic. This fits baby showers, birthdays, and anyone who likes cheerful gifts.
Cut a foam base about 3 inches wide and 7 inches tall, then insert floral skewers as stems. Make 10 to 12 accordion fans or simple folded bills, then clip each one to a mini clothespin attached to the skewer with a small zip tie or wire. Arrange the clips in a rainbow order from top to bottom. Wrap the base with pastel tissue and finish with a bow made from two ribbon colors. Add one small loop of ribbon at the top so you can hang it if needed.
Editor's notePaint the clothespins with pastel craft paint first — it hides the wood and keeps the look consistent.
Skip thisDon’t clip too low — hanging pieces get tangled and the bouquet looks messy.
10. Money Bouquet With Fabric Rosettes and Bill Centers
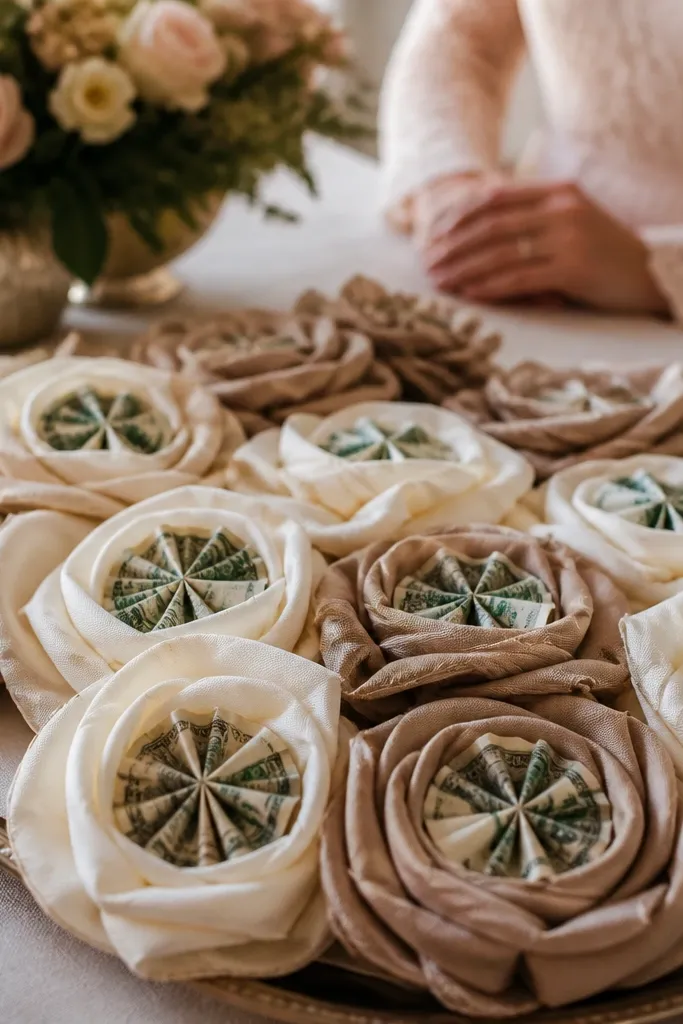
Fabric rosettes make this bouquet look like a real floral craft, and bill centers keep it on-theme. The rosettes also hide any uneven edges from bill folds, which is huge when you’re in a hurry. Neutrals like cream and taupe look clean and expensive, even with budget materials. This works for weddings, bridal showers, and classy birthdays. The skill level is easy because rosettes are repeatable if you use pre-cut fabric circles or ribbon strips.
Cut fabric strips (about 1 inch wide, 12 inches long) and roll them into rosettes, securing with hot glue at the base. Make 10 to 12 rosettes and attach a small folded bill piece in the center using glue dots. Attach each rosette to a floral pick, then insert into a foam base. Wrap the foam with cream tissue and cover with neutral wrapping paper. Tie a taupe ribbon band around the middle and add a simple bow at the top.
Use double-sided fabric tape for the first tack so you don’t burn your fingers with glue.
Don’t make rosettes too tight — tight rolls look like buttons, not flower petals.
11. Surprise Stack Money Bouquet in a Gift Box Lid

This is a smart last-minute trick: the gift box lid hides the base so you can focus on the money tops. The bouquet looks like it’s “rising,” which is more interesting than a flat arrangement. It’s also stable because the box lid gives you a flat platform. This works for small gifts, thank-you baskets, and anyone who likes clever presentation. You can build it quickly because you don’t need wrapping paper perfection.
Take a sturdy gift box lid and cut a foam or cardboard insert to fit inside. Insert floral picks or skewers into the insert and attach 12 money pieces on top. Fold bills into petals or roses so they stand upright. Wrap the outside of the lid with ribbon around the perimeter and cover the top edge with tissue. Add a ribbon bow on the top center where the money pieces peek through.
Use a box lid that’s at least 10 inches wide so the money has space to fan out.
Don’t leave the insert edges visible — cover them with tissue before adding money.
12. Single Color Theme Money Bouquet With Matching Tissue Fringe
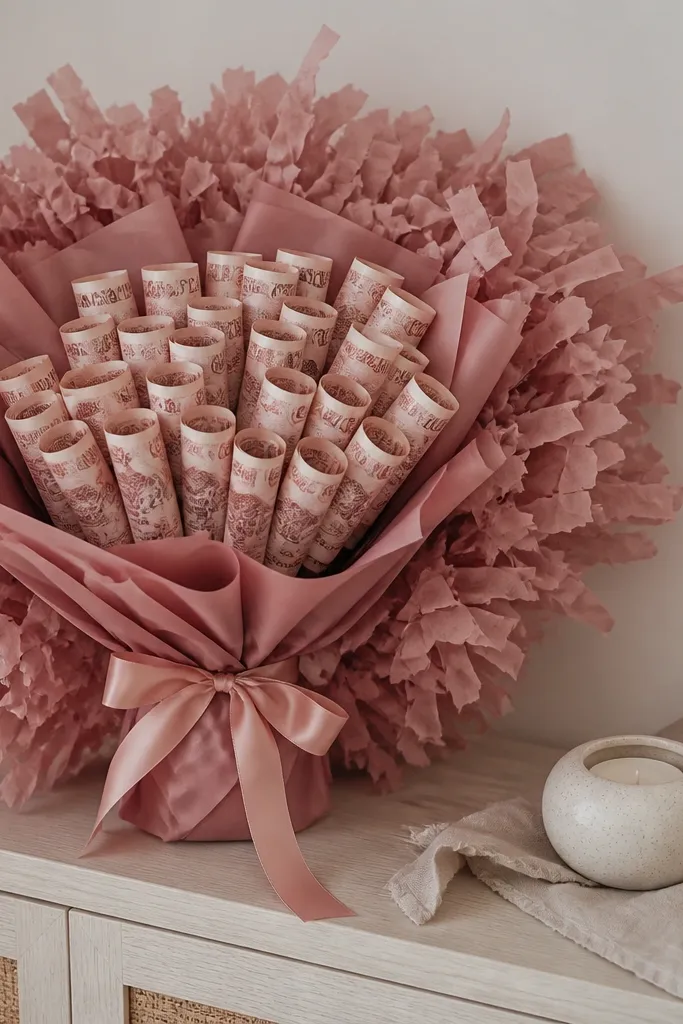
Monochrome money bouquets look expensive because everything reads as one color story. Tissue fringe adds movement and texture behind the money, so the bouquet looks full even with fewer bill pieces. This is a great option when you want an aesthetic gift without adding more money units. Pick one strong color like dusty blue, emerald, or plum. The look works for photos because the fringe creates a soft background.
Choose one color ribbon and one tissue color. Make 10 to 12 money units and attach them to skewers. Cut tissue paper into fringe strips about 1 inch wide and 8 to 10 inches long. Glue or tape fringe around a foam base so it hangs outward. Wrap the foam with the same tissue color, then add ribbon bands and a bow in the same shade.
Editor's noteTrim tissue fringe unevenly by hand — perfectly even fringe looks artificial.
Skip thisDon’t mix two shades of the same color — it looks like you grabbed random supplies.
13. Green Money Bouquet With Faux Succulent Wrap

This one hides the base and makes the money look like part of a plant-themed gift. Faux succulent leaves create a photogenic texture behind the bills, and green ribbon ties it together. It’s a strong fit for houseplants people, birthdays, and desk gifts. You get a fresh look without needing to keep anything alive. Skill level is easy because you’re using ready-made faux greenery.
Build a foam base or use a small potted-plant container. Insert 10 to 12 money pieces on floral picks into the foam so they rise above the greenery. Arrange faux succulent leaves around the base and tuck them between the money picks. Wrap the container or base with green tissue and tie a ribbon around it. Finish by adding a small twine bow and trimming leaf tips so they don’t poke the ribbon.
Hot glue the faux leaves to the container edge, not the bill — it keeps money paper clean.
Don’t let leaves cover the money fronts — it makes the bouquet look like decoration, not a money gift.
14. Pink Bubblegum Money Bouquet With Lollipop Center
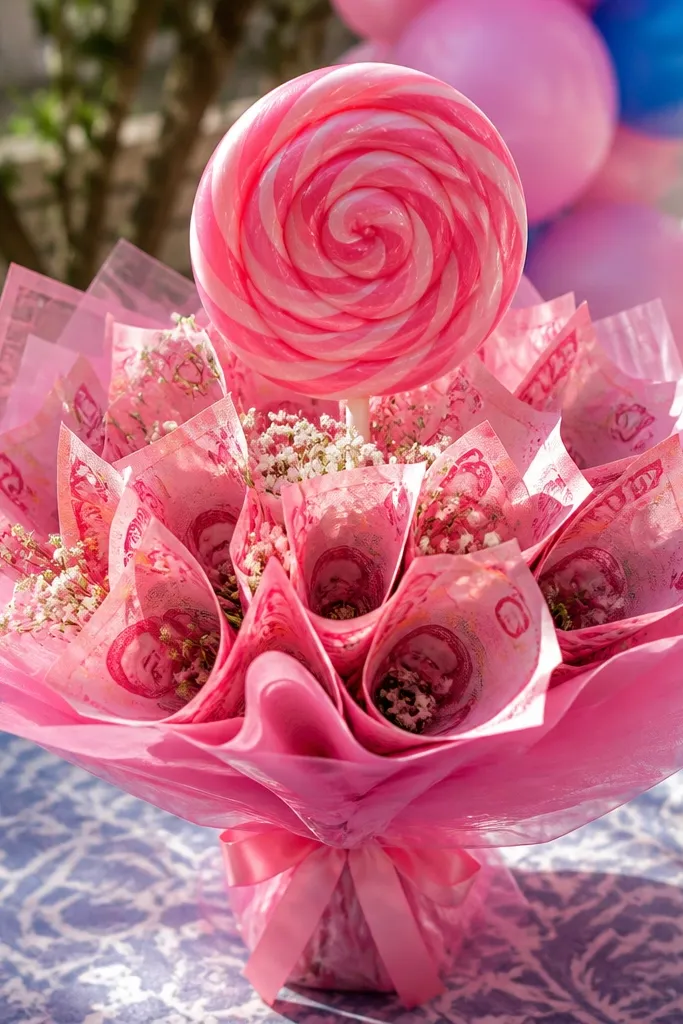
A lollipop centerpiece makes this bouquet instantly cute, and it gives you a focal point when you’re rushing. Pink bubblegum tones look great in daylight photos. The money pieces act like petals around the candy center, so you don’t need a full dozen perfect flowers. This is ideal for kids, teens, and sweet-tooth adults. It’s quick because you’re mixing a store-bought candy item with simple bill folds.
Pick 8 to 10 money pieces and fold them into simple fans or small roses. Wrap each bill around a short skewer or toothpick, then tape the base. Place a large lollipop in the center on a skewer and insert it into a foam base or thick cardboard. Arrange the money sticks around it like a ring. Wrap the base with pink tissue and add a bow made from wide satin ribbon.
Editor's noteChoose a lollipop with a bright wrapper so it shows through the ribbon without extra decoration.
Skip thisDon’t use thin ribbon tails — they twist and look sloppy around candy.
15. Blue Denim Money Bouquet With Rope Wrap

This is a textured, outdoorsy look that still reads clean. Denim-blue tissue or wrapping paper plus jute rope makes the money feel like a rustic gift, not a craft project. It’s great for dads, grads, and anyone who likes simple, sturdy aesthetics. The rope also hides foam edges and messy stem tape. You can build it fast because rope covers imperfections.
Wrap a foam base with blue tissue paper, then cover with a piece of blue wrapping paper tucked tight. Insert 10 to 14 money pieces on floral wire stems into the foam. Tie a jute rope around the base in two wraps, then knot it and tuck the ends under. Add a second smaller rope bow near the top and place it so it doesn’t cover the money fronts. Finish by trimming stem wrap tape so it sits under the rope line.
Use hot glue to tack rope in place at the back seam so it doesn’t shift while you carry it.
Don’t overfill with too many money pieces — denim backgrounds show clutter fast.
16. Monochrome White Money Bouquet With Minimal Green Accents

White and a touch of green makes money bouquets look modern and airy. The money folds become the texture, and the green accents add depth without adding more clutter. This works for weddings, spring gifts, and anyone who likes clean design. It also photographs well because the white background doesn’t compete with the bills. It’s a good choice when you don’t want the bouquet to look “busy.”
Make 12 money units in a consistent fold style, then attach them to stems. Use a white foam base wrapper made from tissue and a plain white paper sleeve. Add small green ribbon loops around the stem wrap at two points. Tie a white ribbon bow at the top and keep it centered. If you use greenery, keep it to 3 to 5 small leaf picks so the money stays visible.
Editor's noteUse matte white tissue — glossy tissue reflects light and makes the bouquet look cheap.
Skip thisDon’t add multiple accent colors — it breaks the clean look.
17. Yellow Sunflower Money Bouquet With Tissue Petal Backing
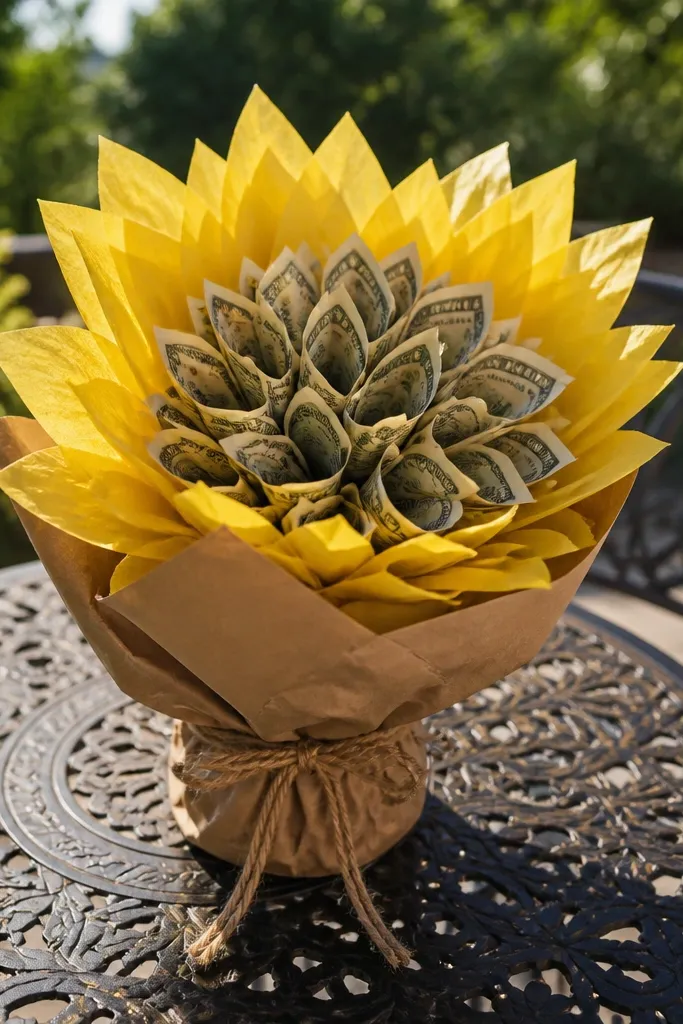
Sunflower-style bouquets look bright and happy, and tissue petal backing makes them look full even with a small number of bill pieces. Yellow creates instant visual pop, and the back petals make the money look like it belongs in a flower arrangement. This is great for summer birthdays and “thank you” gifts. The build is easy because tissue petals are quick to cut and attach. You’re aiming for one big center flower shape, then money tucked into it.
Cut a large circle of cardstock for the center backing, about 7 inches across. Cut yellow tissue into petal strips and layer them around the circle edge. Attach 6 to 10 money pieces to the center using glue dots so they sit upright. Insert a stem (skewer or wire) into the back of the cardstock and secure with tape. Wrap the stem with ribbon and add a small leaf accent ribbon near the base.
Editor's noteLayer petals in 2-3 heights — the center should look slightly raised for depth in photos.
Skip thisDon’t glue tissue petals flat against the cardstock — they need lift to look like petals.
18. Black Rose Money Bouquet With Faux Velvet Ribbon
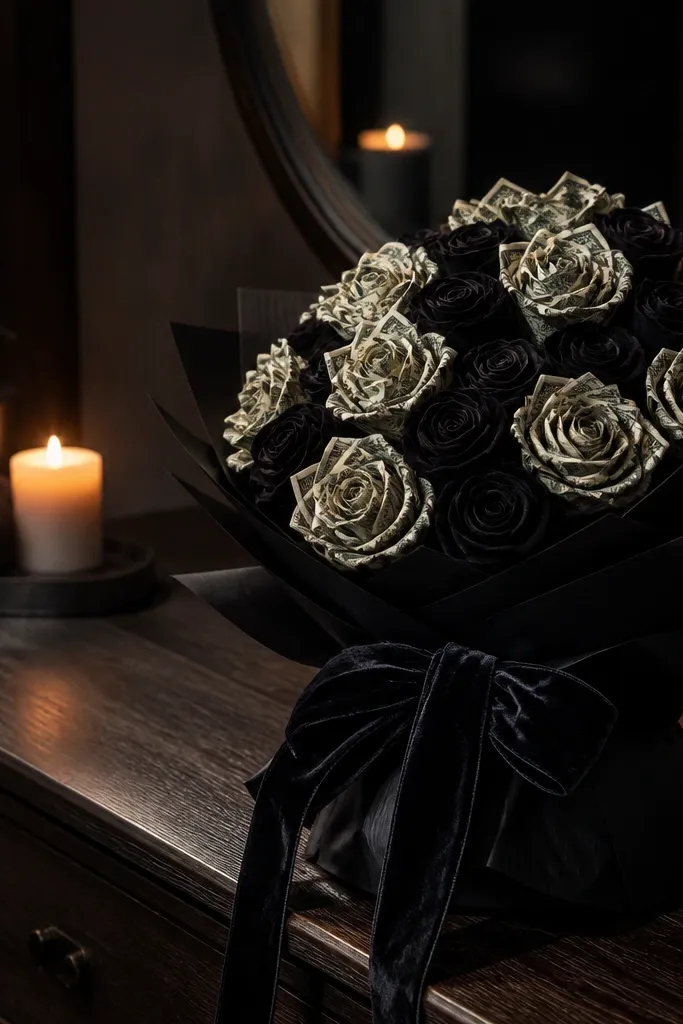
Velvet-style ribbon makes money bouquets look dramatic and expensive. Pair that with black wrapping paper and you get a moody, photo-friendly gift for anniversaries and late-night celebrations. The bill rose form stays the star because velvet doesn’t overpower it. This works best with a dark color palette and clean spacing between money units. It’s also a good choice when you want “wow” without adding extra craft complexity.
Fold 12 to 16 bills into roses and attach each to a floral wire stem. Build a foam base and wrap it in black tissue, then cover with black wrapping paper. Insert roses in a tight circle at the top and a slightly wider circle near the middle for a dome shape. Wrap stems with faux velvet ribbon, then tie a big bow at the handle line. Add a thin silver ribbon accent only once near the top so it doesn’t look busy.
Use a small dab of clear tape under the velvet ribbon end so it doesn’t fray.
Don’t add more than one metallic accent — silver + gold together makes it look costume-like.
19. Budget Money Bouquet in a Reusable Tote Bag Wrap

This is a clever presentation that avoids wrapping paper entirely. A small reusable tote gives you a built-in container, so you can build a bouquet inside it and keep everything tidy. It’s also practical because the recipient has something to carry other items in. This look is best for small bouquets, like 8 to 10 money units, where you don’t need a tall foam base. It’s a good move when you’re running late and don’t want to manage ribbon around a bare base.
Line the tote bottom with crumpled tissue or a folded cardboard insert to create a flat support. Insert 8 to 10 money stems into foam placed inside the tote. Arrange stems so money tops face outward. Tie ribbon around the tote handle or across the top opening, then add a bow centered above the money. If you want the bouquet to stand, use a taller foam block but keep the tote wide enough to prevent tipping.
Editor's noteChoose a tote color that matches your ribbon so the inside looks intentional in photos.
Skip thisDon’t overstuff the tote — tight packing makes stems push sideways and collapse the shape.
20. Mint Green Money Bouquet With Mini Gift Tags

Mint green makes money bouquets look fresh and “new,” and mini gift tags add a polished detail without much work. The tags let you write a short note while the bouquet stays photogenic. This is ideal for teacher gifts, baby showers, and small celebrations. The money units create the main texture, while tags add readable charm in photos. It’s easy to assemble because it uses the same money-fold styles you already know.
Make 10 to 12 money units and attach them to skewers. Insert into a foam base wrapped with mint tissue and a mint paper sleeve. Tie mint ribbon around the stems and add a bow near the top. Punch holes in small cardstock tags (about 2x3 inches), write a short message, and attach with thin ribbon to 3 stems spaced around the bouquet. Keep tags angled slightly outward so they show in pictures.
Use black pen for tags — mint backgrounds make lighter ink look washed out.
Don’t attach tags too close to the bill fronts — they block the money and look cluttered.
21. Red and White Money Bouquet With Striped Ribbon Wrap

This design screams party without needing extra decor. Red and white striped ribbon gives you a strong graphic look, and the money pieces create the vertical sparkle. It’s perfect for holidays, birthdays, and anyone who likes bold color. The striped wrap also hides stem tape and gives a clean, finished feel. It’s a fast build because the styling does a lot of the heavy lifting.
Choose a money unit style and make 12 to 14 pieces. Build a foam base and wrap it in red tissue, then cover with white wrapping paper. Insert stems into the foam so the money tops form a rounded shape. Wrap the stems with striped ribbon starting at the base and spiraling upward to about halfway. Tie a red bow at the top and add a small red ribbon band around the bouquet handle line.
Editor's noteCut ribbon ends at an angle and seal with a tiny bit of clear tape so stripes don’t fray.
Skip thisDon’t use too many different patterns — stripes plus polka dots makes it look messy.
22. Gold Confetti Money Bouquet With Clear Tulle Wrap

Clear tulle makes the bouquet look airy and “event-ready,” and gold confetti gives you sparkle in photos. This style looks like a party centerpiece without requiring expensive decorations. Money roses or fans look best here because the tulle frames them. It’s great for New Year’s, birthdays, and celebrations where you want something that feels special. The build is quick because tulle does the hiding and finishing for you.
Create 10 to 12 money units and attach them to stems. Wrap the foam base with a layer of tissue, then place clear tulle around it and gather it at the base. Tie the tulle with gold ribbon. Sprinkle gold confetti lightly around the money tops before closing the tulle so it doesn’t fall everywhere. Finish with a gold bow at the top and keep the ribbon lines straight for a clean look.
Editor's noteUse a small piece of tape to anchor tulle at the back — it keeps the front smooth.
Skip thisDon’t dump confetti into the base — it sticks to bills and makes them look dirty.
23. Purple Velvet Money Bouquet With Lavender Accent Band
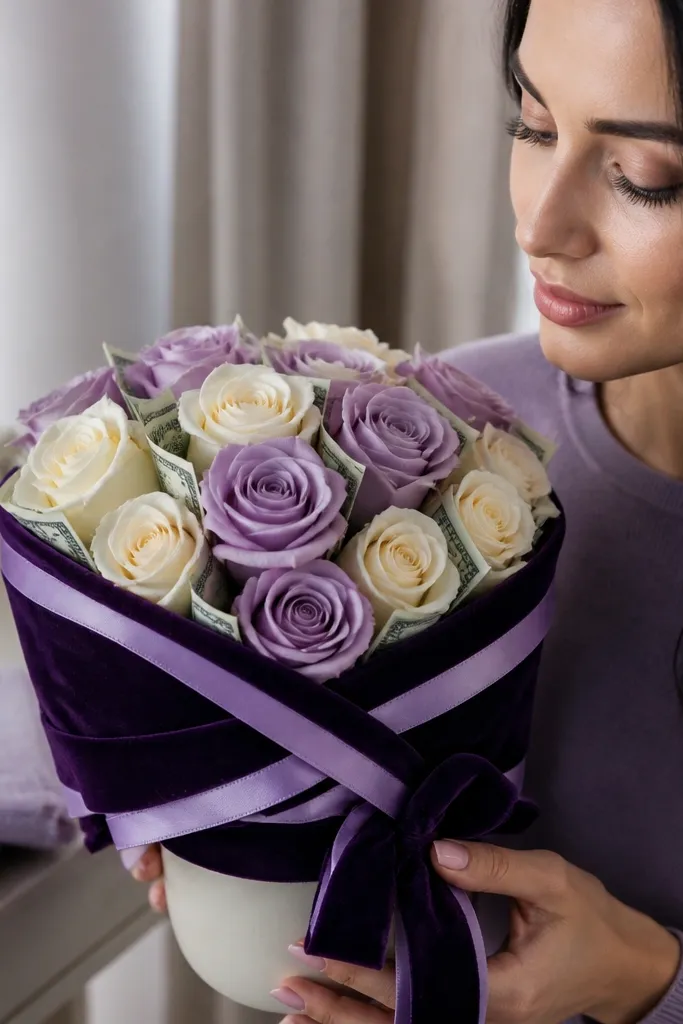
Purple velvet-style ribbon gives this bouquet a luxe look that still fits a budget. The lavender accent band makes it feel styled, not random. This is a strong pick for birthdays, anniversaries, and gifts for people who like soft, dramatic colors. The bill rose form works well because velvet ribbon adds contrast and the roses give texture. It’s a quick build if you keep the palette tight and the placement even.
Fold 12 bills into roses and attach to floral wire stems. Build a foam base and wrap it in purple tissue, then cover with purple wrapping paper. Insert roses in a tight dome shape and wrap stems with purple velvet ribbon in spirals. Add a lavender ribbon band around the bouquet at about one-third down from the top. Tie a lavender bow at the handle line and trim velvet ends neatly.
Editor's noteKeep velvet ribbon tension consistent — loose spots make it look wrinkled in photos.
Skip thisDon’t mix purple ribbon shades — one deep purple reads better than multiple tones.
24. Money Bouquet With Mini Picture Frame Photo Backing

This is a money bouquet that looks like a keepsake. A small photo frame behind the money petals gives instant personalization in photos, and it hides the base. Use it for birthdays, anniversaries, or anytime you want the gift to feel thoughtful without spending on flowers. The money pieces look like decorative elements around the frame. It’s fast because the frame is your structure, not the foam.
Find a small tabletop picture frame and remove the back panel. Attach 10 to 12 money units to a cardstock backing panel that fits inside the frame. Add a floral wire stem support by taping it to the frame’s back corners. Place the photo you want behind the money backing and reinsert the frame back. Wrap the frame edges with ribbon and add a bow on the bottom center.
Use a mat board inside the frame if you have it — it makes the money stand out and looks cleaner.
Don’t pick a frame with a busy pattern — it competes with the money folds.
25. Hot Cocoa Money Bouquet With Mini Marshmallow Accents
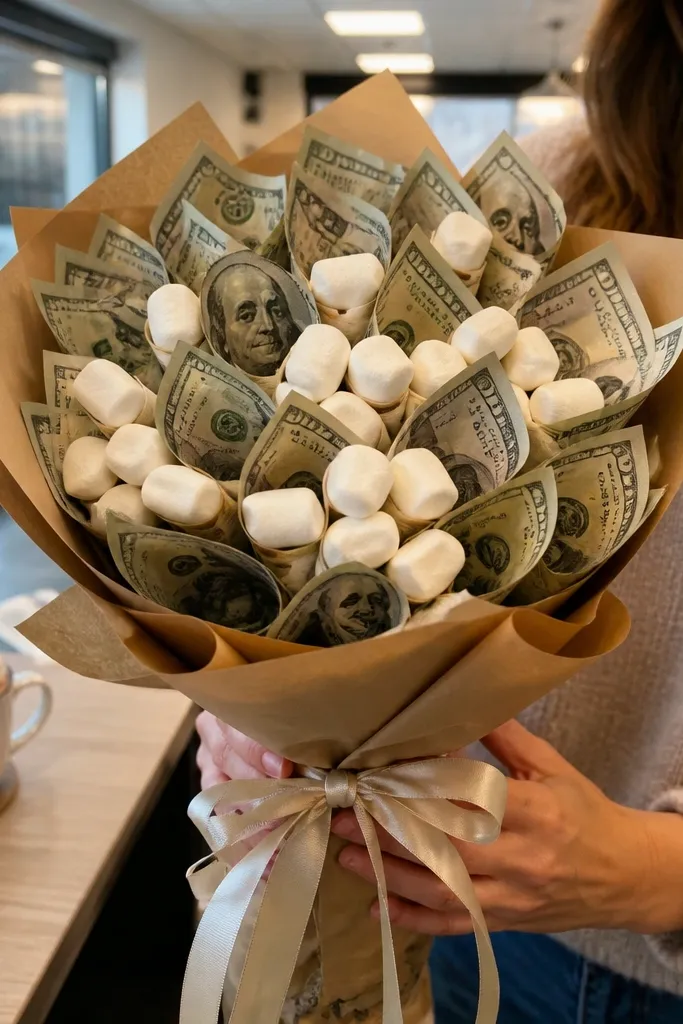
This winter-themed bouquet looks like a cute gift basket in bouquet form. Mini marshmallows add a soft, playful texture, and ribbon keeps it photogenic. It’s a good move for holiday birthdays, office gifts, and “winter thank-you” moments. You’re using simple money folds but adding a seasonal focal point so it doesn’t look like a generic cash gift. Skill level is easy because you’re assembling, not crafting complex flowers.
Make 8 to 10 money units and attach them to skewers. Place a small bag of marshmallows or a few marshmallows in a cellophane pouch at the center of a foam base. Insert the skewers around the pouch so money tops rise outward. Wrap the foam base with winter tissue and cover with wrapping paper or fabric. Tie a ribbon bow around the handle line and add one small tag like “Warm wishes” if you want.
Use cellophane pouch at center — it keeps marshmallows from getting crushed and sticky.
Don’t let marshmallows touch the bill faces — moisture can warp paper.
26. Money Bouquet With Paper Butterflies and Bill Wings
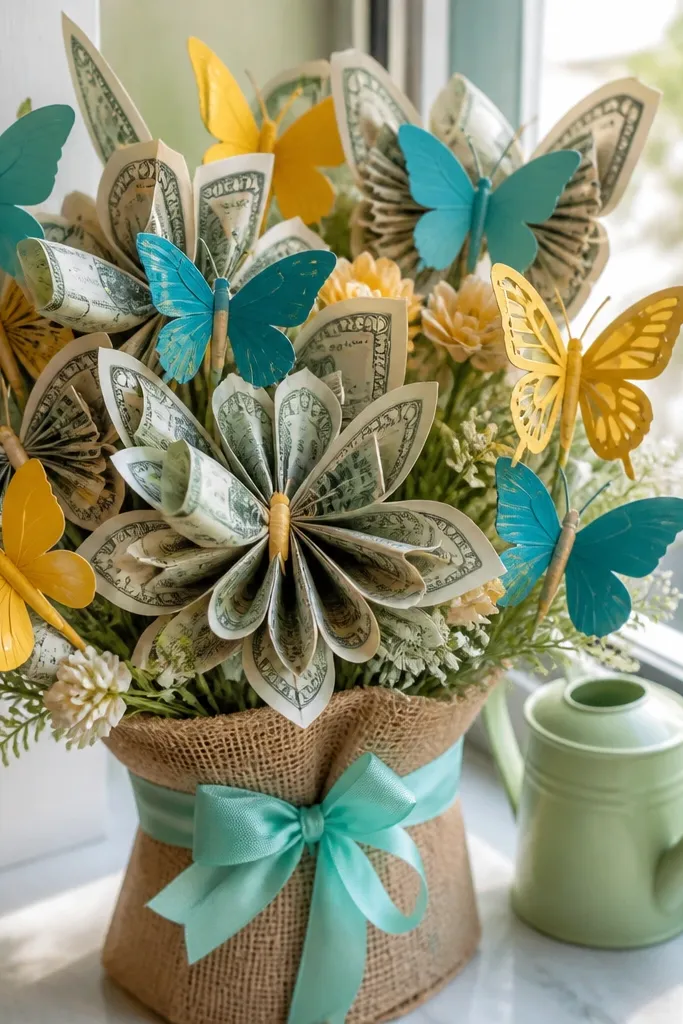
Butterfly accents make the bouquet look whimsical and designed, not just wrapped cash. You’re using bill folds as “wings” or attaching small bill pieces to butterfly cutouts. It’s bright and photogenic, especially if you pick two bright ribbon colors and keep the rest simple. This works for birthdays, spring gifts, and anyone who likes cute decor. It’s also a fast build because butterfly cutouts are quick to trace and cut.
Cut butterfly shapes from cardstock or use pre-cut craft butterflies. Attach small folded bill “wings” to the butterfly bodies with glue dots. Make 8 to 10 money stems and insert into a foam base, then place butterflies between stems so they peek through. Wrap the base with tissue in a matching color and tie ribbon around the stem wrap. Finish by adding two ribbon tails at the top to frame the butterflies.
Editor's noteChoose cardstocks with a slight sheen — butterflies catch light and look crisp in photos.
Skip thisDon’t overcrowd butterflies — too many small pieces make the bouquet look cluttered.
27. Simple Money Bouquet With Fabric Knot Bow and No Flowers

If you want speed above all, skip flower folds and tie bills directly to stems. This looks clean and graphic because the bills become the “petals” in a straight arrangement. A big fabric knot bow makes it look styled even if the money is simple. This is perfect when you have 15 to 30 minutes and still want it to look put-together. It’s also great for beginners who don’t want to learn complex folding.
Cut 10 to 14 floral picks or skewers to similar length. Fold bills in half, then wrap the fold around the stem and secure with a small strip of tape at the back. Insert stems into a foam block base or thick cardboard. Wrap the base with fabric or tissue, then tie a large fabric knot bow at the front. Add one ribbon band around the base so you hide all stem tape.
Editor's noteUse a stiff ribbon for the knot bow — soft ribbon collapses and looks sloppy fast.
Skip thisDon’t tie bills too loose — loose ties slide down and ruin the straight look.
28. Red Rose Money Bouquet With Paper Rose Petals Behind Bills

This one looks layered and detailed because the paper rose petals sit behind the money. Even if a bill fold isn’t perfect, the petal backing makes it look intentional. It’s photogenic because you get color depth: red paper petals plus the pale bill tones. This works for Valentine’s vibes, anniversaries, and romantic birthdays. It’s still quick because you’re cutting petal shapes once, then attaching money pieces.
Cut paper rose petals from red cardstock: 3 sizes per rose, about 2 inches, 3 inches, and 4 inches tall. Assemble each mini rose by layering petals and gluing the base. Attach one folded money piece (small rose or fan) in the center of each paper rose. Create 10 to 12 roses and attach to stems with wire. Insert into a foam base wrapped in red tissue, then add a matching ribbon bow.
Editor's noteUse a glue stick for the petal layers, then hot glue only at the very base to avoid warping.
Skip thisDon’t make petals all the same size — flat stacking kills the rose look.
29. Teal Money Bouquet With White Lace Ribbon Trim
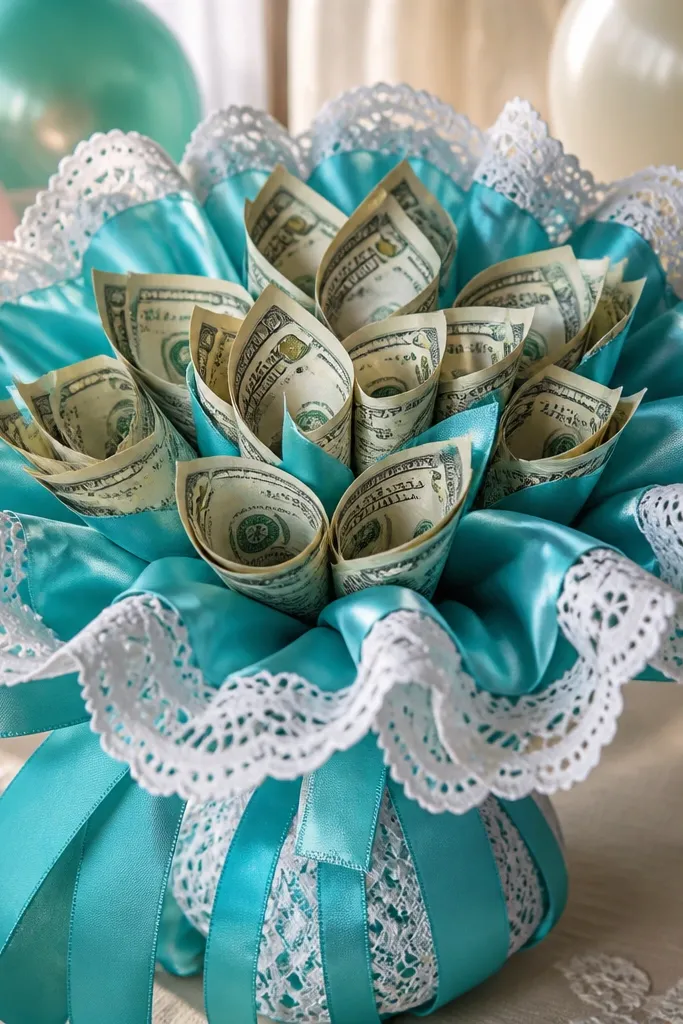
Lace trim makes the bouquet look delicate without costing much. Teal plus white lace feels bridal or baby-shower pretty, and it photographs softly. The money units stay crisp because the lace sits around the edges and doesn’t block the bills. This is a good choice when you want a feminine look that still reads clearly as a money gift. It’s easy because you’re adding lace as a finishing layer, not as a complicated craft.
Make 10 to 12 money units and attach to stems. Wrap a foam base in teal tissue and cover with teal wrapping paper. Wrap stems with teal ribbon, then add white lace ribbon around the handle line and around the base seam. Tie a white lace bow at the top and trim edges cleanly. Space money units so lace frames them; keep the front center slightly fuller for a photo-friendly shape.
Editor's notePin the lace in place before gluing so it stays straight and doesn’t twist.
Skip thisDon’t glue lace directly onto bill faces — it can snag and pull paper.
30. Gold Ribbon Money Bouquet With Tiny Bow Buds

Tiny bow buds add a high-end look because they create repeated visual points around the money. Gold ribbon makes the bouquet feel celebratory, even if you’re only using 10 bills. Money fans look great here because the bows can sit at the fan centers and look like flower buds. This is a strong choice for birthdays, weddings, and retirement gifts. It’s also quick because bows are small and repeatable.
Make 10 to 12 accordion fans from bills and tie each center with a thread. Add a tiny gold bow at each center using pre-made bow pieces or quick hand-tied loops. Attach each fan to a stem with floral wire. Insert into a foam base and wrap it with tissue in a neutral color like cream. Tie a gold ribbon band at the base and add a larger gold bow at the top.
Editor's noteUse pre-made mini bows if you’re short on time — they keep the look consistent.
Skip thisDon’t use oversized bows — they cover the money and make the bouquet look bulky.



