
1. Strawberry with Glossy Seeds and a Soft Core
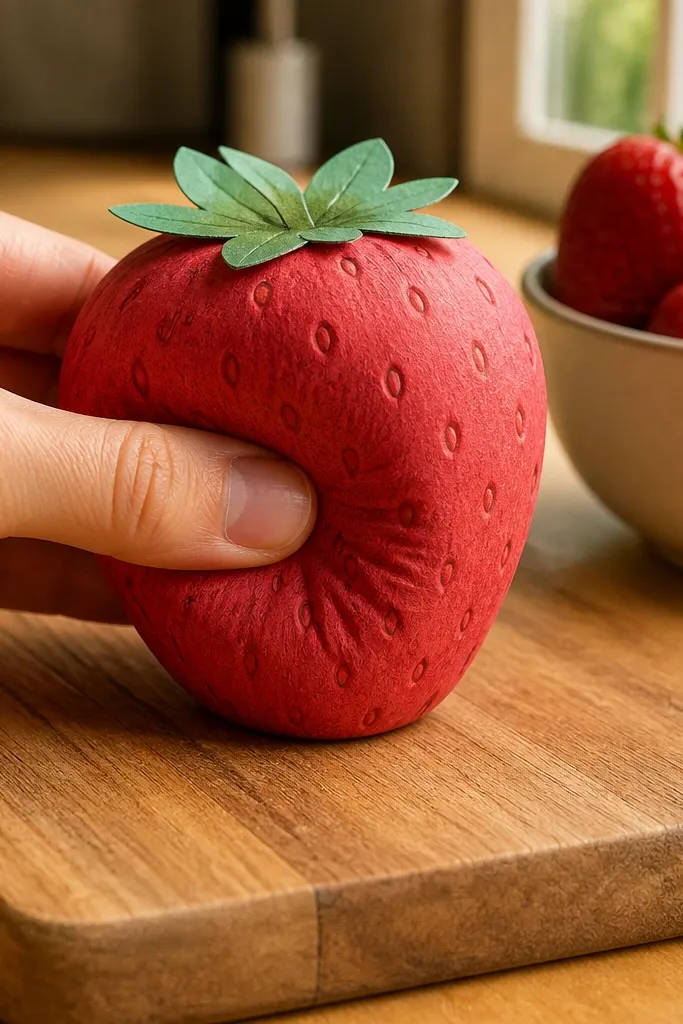
This strawberry works because it has one simple silhouette — a rounded teardrop — plus tiny texture cues that read as fruit in photos. The red outer skin gets a slightly translucent depth using colored pencil shading at the edges, then you add seed dots for realism. For squish, the inner fill is wrapped so it rebounds instead of folding. It looks best on a light background because the green top and red body contrast hard in pictures.
Cut a strawberry outline from 160-200 gsm cardstock and mirror it for the front and back. Make a thin inner “core” by rolling a strip of shredded paper or crumpled scrap into a loose ball, then wrap it in baking parchment or thin plastic to keep glue off the fill. Glue the core to one half, place the other half on top, and seal the edges with a line of white glue plus a thin strip of clear tape on the seam. Paint or color the red body, then add black seed dots with a fine marker and a tiny white gel pen highlight on the curve.
Editor's noteLightly sand the seam after it dries so it doesn’t show bumps in photos.
Skip thisDon’t overfill; if the core is too big, the strawberry won’t close cleanly and will tear at the seam.
2. Matcha Ice Cream Swirl Cup
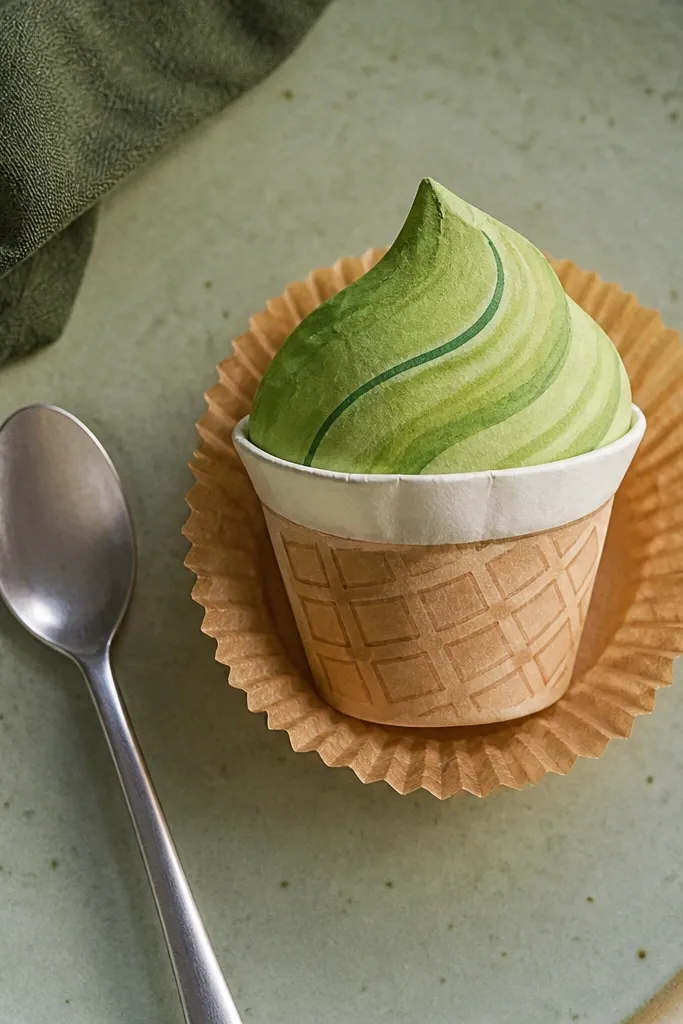
This one is all about the swirl. A matcha squishy looks cute because green gradients plus a single curved swirl line make it instantly recognizable. You’ll get a soft press feel by using a flatter inner pad rather than a bulky ball, so the swirl stays smooth. Add a waffle texture to the cup with a marker pattern, then finish with a subtle shine on the “ice cream” top.
Draw and cut a waffle cup from brown cardstock, then cut two identical swirl lids from green cardstock. For the inner squish, cut a small rounded rectangle from foam sheet or folded felt scraps and glue it between the two green layers. Seal the edges with glue, then press under a book for 5-10 minutes so the swirl holds its curve. Color the swirl with green pencil from darker to lighter across the spiral, then add a thin white gel highlight following the swirl ridge.
Use a ruler edge to draw the waffle cup lines so they look even.
Skip thick glue blobs on the swirl — they create hard ridges that ruin the squishy feel.
3. Blueberry Muffin with Crumb Top Texture
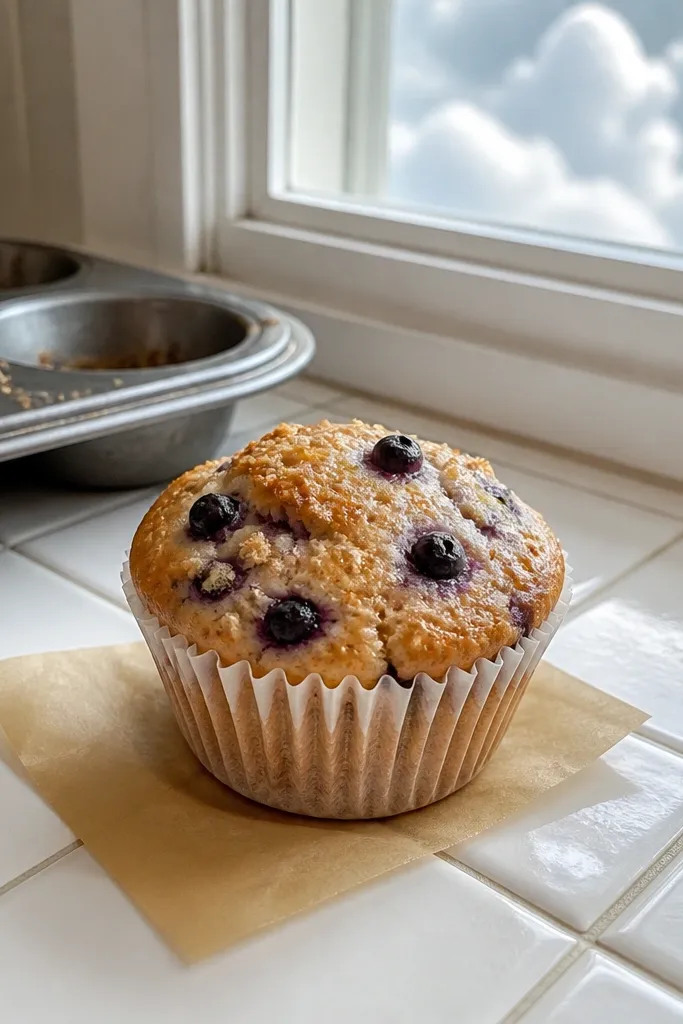
Muffins photograph well because the top has lots of small shapes. This blueberry muffin uses crumb texture to make it look layered, even though it’s paper. The squish comes from a thin inner cushion, so the top springs back and doesn’t collapse into a flat dome. Color choices matter: purple blueberries with tiny white dots read instantly as baked berries.
Cut the muffin body as a half-round from beige cardstock and cut a matching top layer from slightly thicker cardstock. For crumb texture, crumple a small piece of tissue paper, flatten it, then glue it onto the top layer and dust it with light brown pastel or pencil. Add blueberries by cutting tiny circles from dark purple paper and gluing them in clusters on the crumb top. Sandwich a thin foam pad between the body halves, then glue the top layer on after the pad is sealed.
Editor's noteUse a dry brush with tan pencil on the tissue so the crumb looks speckled, not flat.
Skip thisDon’t stack too many layers under the top; the muffin will look lumpy and won’t compress evenly.
4. Mini Donut with Icing Drip and Rainbow Sprinkles
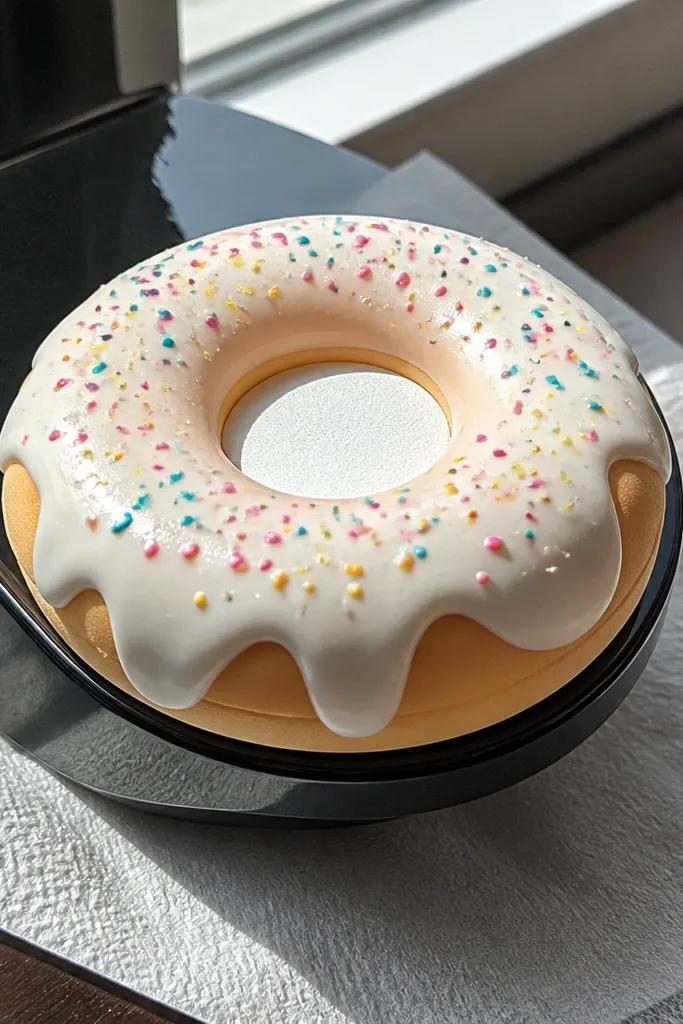
Donuts are the easiest way to get a “cute squishy” look fast because the shape is bold and symmetrical. The icing drip gives it motion in still photos, and sprinkles add instant color. For squish, you want a circular inner pad that sits inside the donut ring, so the hole stays crisp. Finish with glossy icing highlights so it looks like it’s wet.
Cut two donut rings from cardstock using a circle template and a smaller center hole. Make an inner pad from foam sheet cut into a ring that fits inside the donut hole area without touching the outer edge. Glue the pad to one ring half, add the drip and sprinkle pieces on that half, then seal with the second ring half. Color the icing base with markers, then paint a thin clear gel layer over the drip and add sprinkles using small paper strips or punch-out dots.
Editor's noteTint clear glue with a drop of food-safe acrylic paint for a glossy icing look.
Skip thisAvoid thick foam that bulges past the ring — it makes the donut look like a coaster instead of a squishy.
5. Cloud with Raindrop Highlights
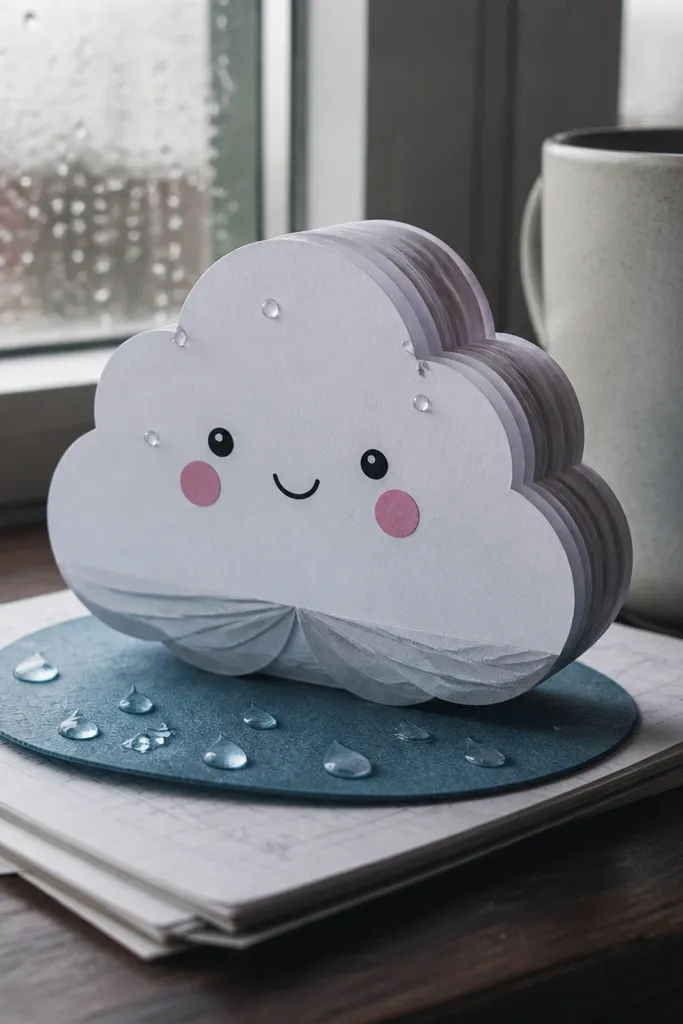
This cloud is photo-friendly because it has clean edges and a simple color palette. The raindrops add a cute rainy-day theme without making the build complicated. Use a soft inner layer so the cloud compresses smoothly across its whole surface. The secret to making it look “real” is adding a few shaded folds under the cloud edge and tiny glossy dots on the raindrops.
Cut the cloud shape twice from white cardstock. Cut three to four small raindrops from light blue paper and glue them onto the front cloud layer before sealing. For squish, cut a cloud-sized foam or folded felt piece and glue it between the two cloud layers. Seal the edges with glue, then add shading by coloring the underside of the cloud with light gray pencil. Finish raindrops with a tiny white gel pen dot in each drop’s top corner.
Use a paper punch to make raindrops the same size — symmetry reads as cute.
Don’t leave the raindrops unsealed; if they’re only glued to one side, they pop off when squeezed.
6. Kawaii Peach with Fuzzy Edge Look
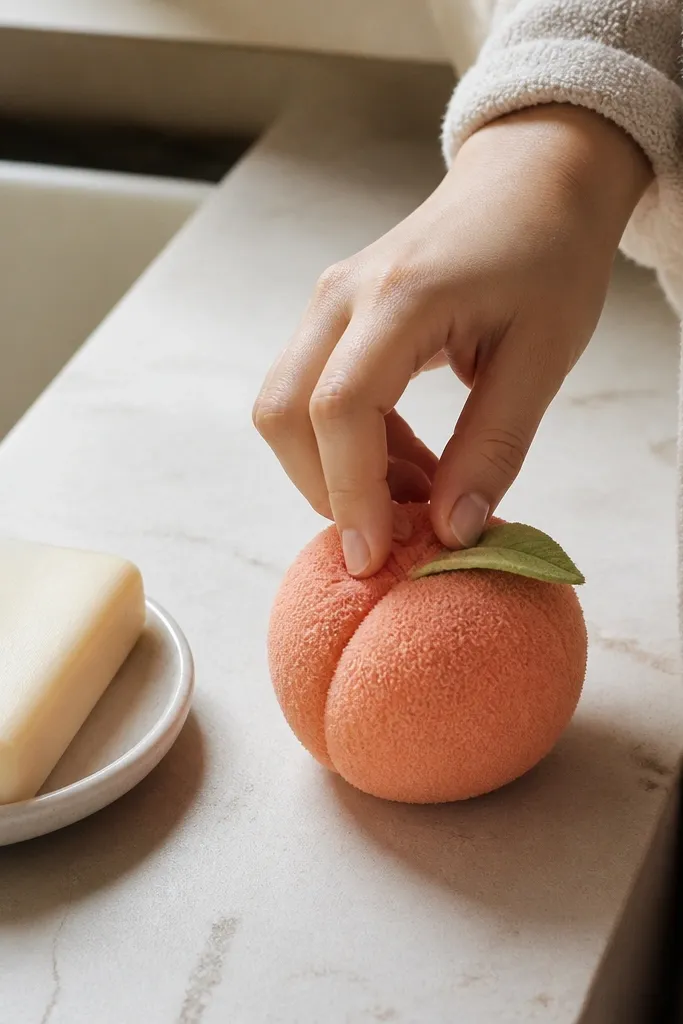
Peaches look adorable because they combine a smooth body with a “fuzzy” edge. You can fake the fuzz using short fibers or textured paper, and it makes the project stand out from flat paper crafts. The squish stays believable by using a thin foam core so the fuzz doesn’t crush into hard creases. Add a tiny leaf and a curved blush line for that kawaii vibe.
Cut two peach bodies from peach cardstock and cut a small leaf from green cardstock. For the fuzzy edge, tear tiny pieces of beige tissue or use a thin fuzzy craft fabric strip and glue it around the outer edge of one peach half. Add a small blush arc with pink pencil and glue the leaf on the top. Place a thin foam piece between the two halves, seal the edges, then trim any fuzz that gets trapped inside the seam.
Editor's noteGlue the fuzz just inside the outline so it doesn’t interfere with sealing.
Skip thisDon’t soak the fuzz with glue — it will go flat and look stringy.
7. Cute Cat Face with Rounded Cheeks
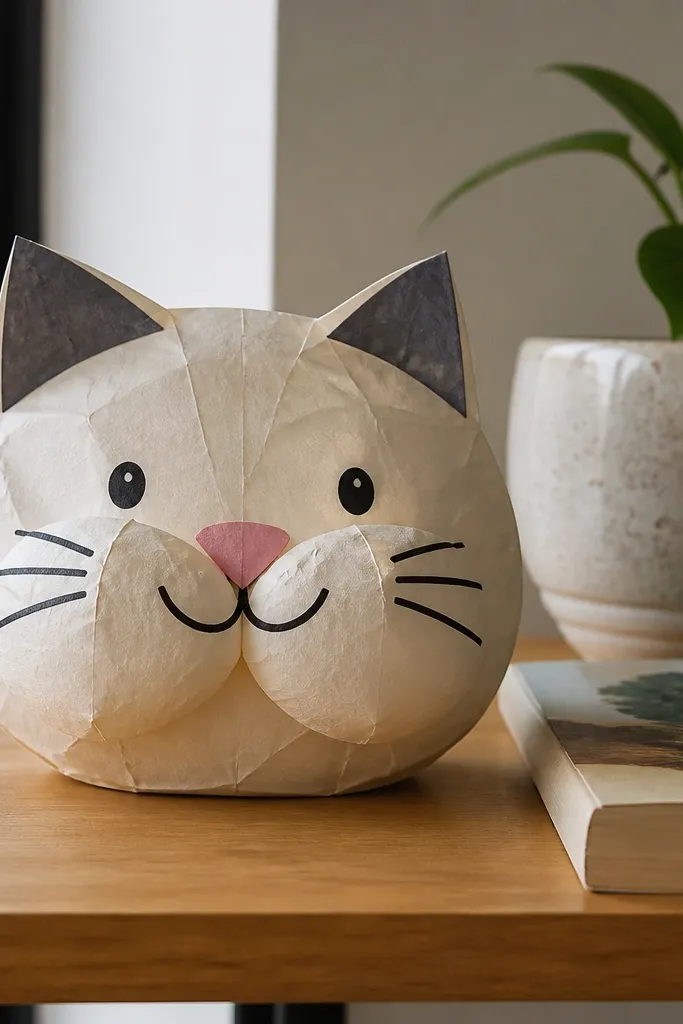
A cat face works because people recognize it from a few key features: eyes, cheeks, whiskers, and ears. This squishy uses a rounded inner pad so the cheeks puff when you squeeze. It’s also a great rainy-day craft because you can keep the palette simple: cream face, pink nose, and dark whiskers. The look stays clean if you draw features after the squishy is sealed, not before.
Cut two identical cat-face outlines from cream cardstock. Make a small foam pad shaped like a face oval and glue it to one half. Seal the two halves together, then draw eyes and nose with a fine black marker. Add whiskers with a white gel pen outline (for contrast) then a darker marker line inside. For blush cheeks, use a pink pencil lightly over the foam bulge area.
Editor's noteDraw whiskers after sealing so they don’t shift when the paper compresses.
Skip thisSkip tiny paper cutouts for eyes — they lift and peel when you squeeze.
8. S'mores Square with Toasted Texture Layers
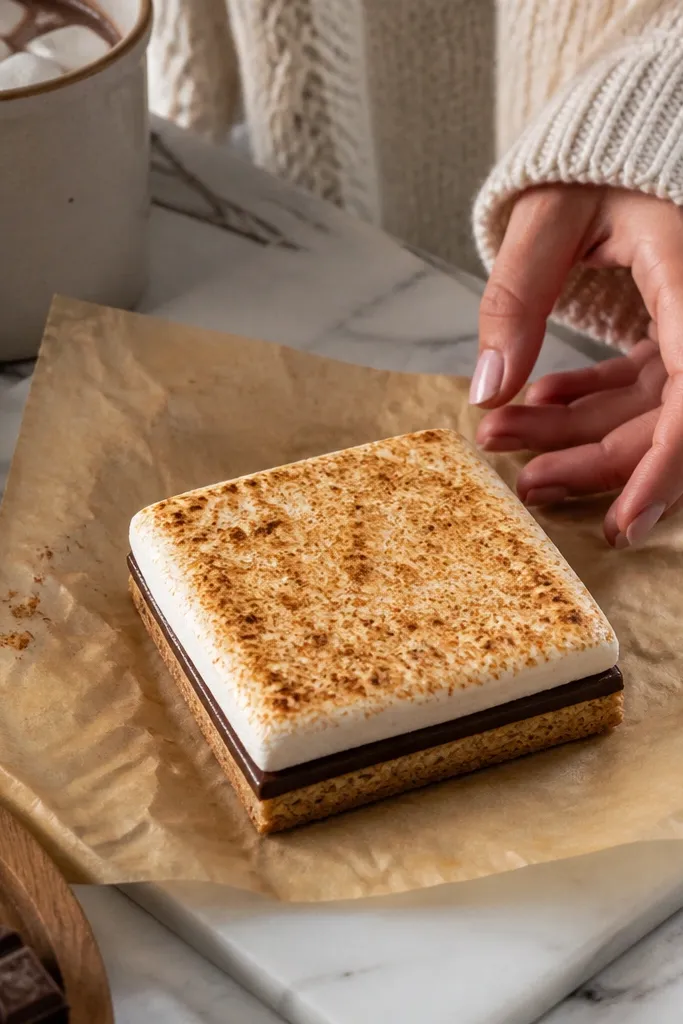
S’mores look good because the layers create instant depth. A square squishy also compresses evenly, so you get satisfying “press and release” without warping. The toasted texture matters: it needs speckling so it looks baked, not flat brown paper. Keep the layers thin and aligned so the edges stay crisp in photos.
Cut two square outer shells from cardstock. On one shell, glue a thin chocolate layer strip from dark brown paper, then a marshmallow layer from white cardstock, then a toast top from tan cardstock. Add texture by stippling the toast with a brown marker using a sponge tip. Place a thin foam pad between shells, seal edges, then run a very thin line of glue along layer seams so they don’t peel when squeezed.
Editor's noteUse a craft knife to trim the foam pad so it doesn’t show under the layers.
Skip thisDon’t make the toast layer too thick; bulky layers prevent smooth compression.
9. Tropical Pineapple with Spiky Fringe
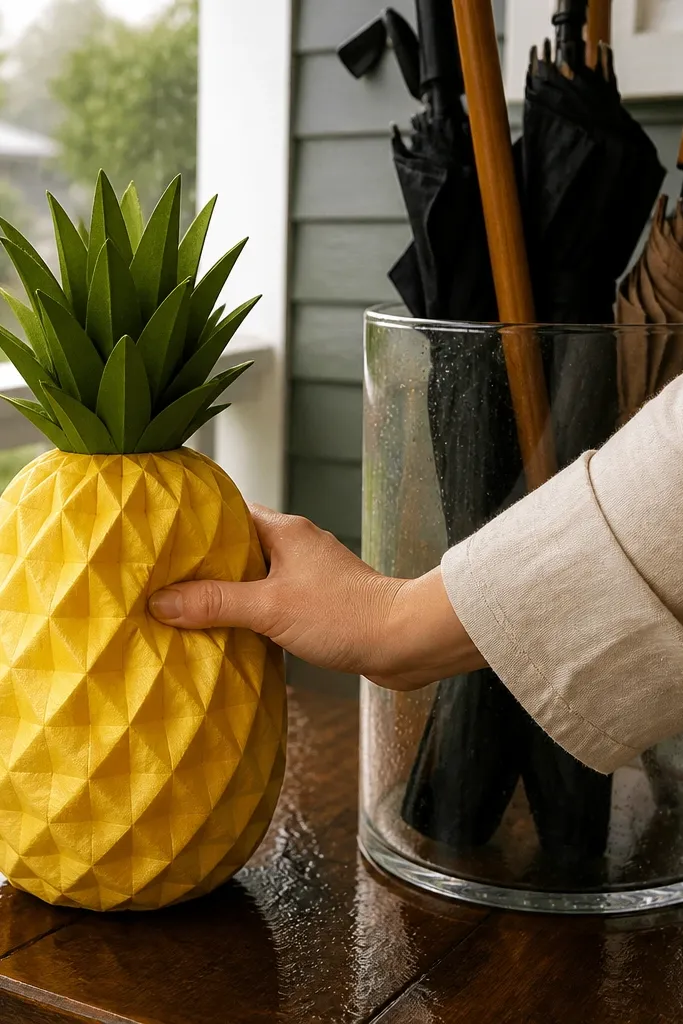
Pineapple looks bright and stands out in rainy-day photos. The spiky top gives the project energy, and the diamond pattern on the body makes it feel more “real” than a plain yellow circle. The squishy part is mostly the body; keep the spikes thin so they don’t break off. A slightly darker edge shading makes the pineapple pop even on dull lighting days.
Cut two pineapple body shapes from yellow cardstock and cut the spiky top from green cardstock. Add the top spikes to one half before sealing. For the squish, glue a thin foam pad under the yellow body area only, not under the spikes. Seal with the second half, then draw diamond segments using a pencil grid and a darker yellow-brown marker. Add a tiny white gel highlight on the top edge for a glossy look.
Editor's noteDraw the diamond pattern lightly first; erase before you ink so lines stay clean.
Skip thisDon’t press hard with the marker on cardstock; it leaves dents that show when the pineapple squishes.
10. Cute Boba Tea Cup with Black Pearl Pop
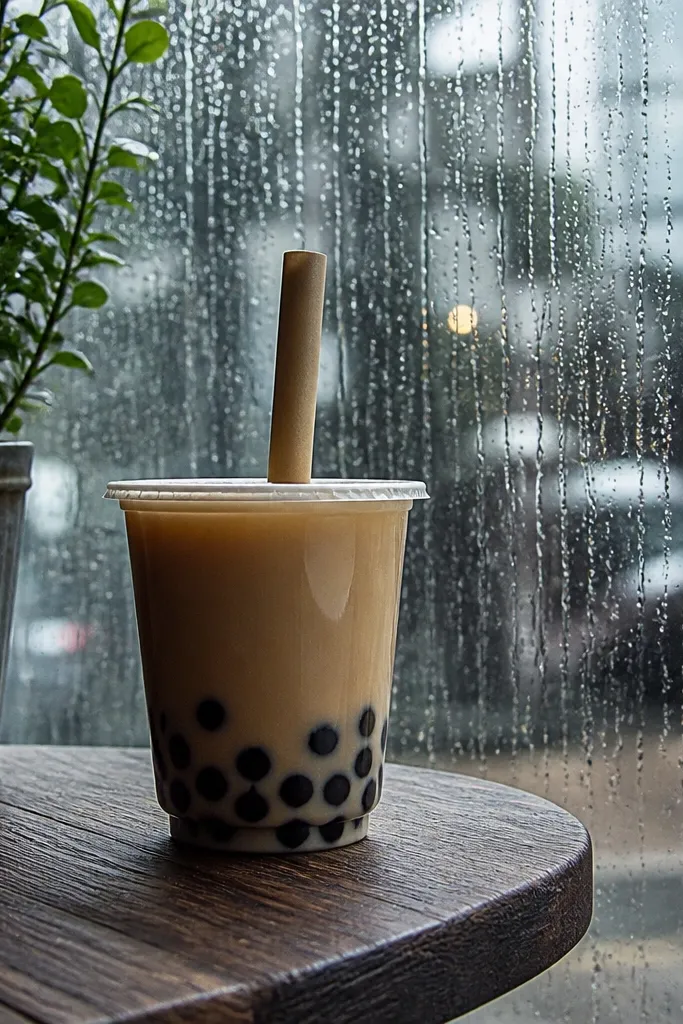
Boba is instantly recognizable, and the black pearls give you high contrast. This project looks best when the cup walls are semi-transparent or lightly shaded, so the “tea” reads as liquid. The squish should come from the cup base, not from thick layers under the straw area. If you want it to look extra cute, add a straw highlight and a few pearl reflections.
Cut two cup shapes from light brown or tan cardstock and a separate straw from brown paper. Glue a thin foam pad to the bottom center of one cup half. Add black pearl dots by punching circles or cutting small rounds and gluing them inside the cup. Seal the cup halves, then draw tea shading and a straw highlight with a lighter pencil and white gel pen. Attach the straw by gluing it on top of the seam so it doesn’t get trapped inside.
Editor's noteMake pearls slightly irregular sizes; perfect circles look too graphic.
Skip thisDon’t fully fill the cup with foam; it makes the straw area buckle.
11. Ocean Wave with Teal Foam Texture
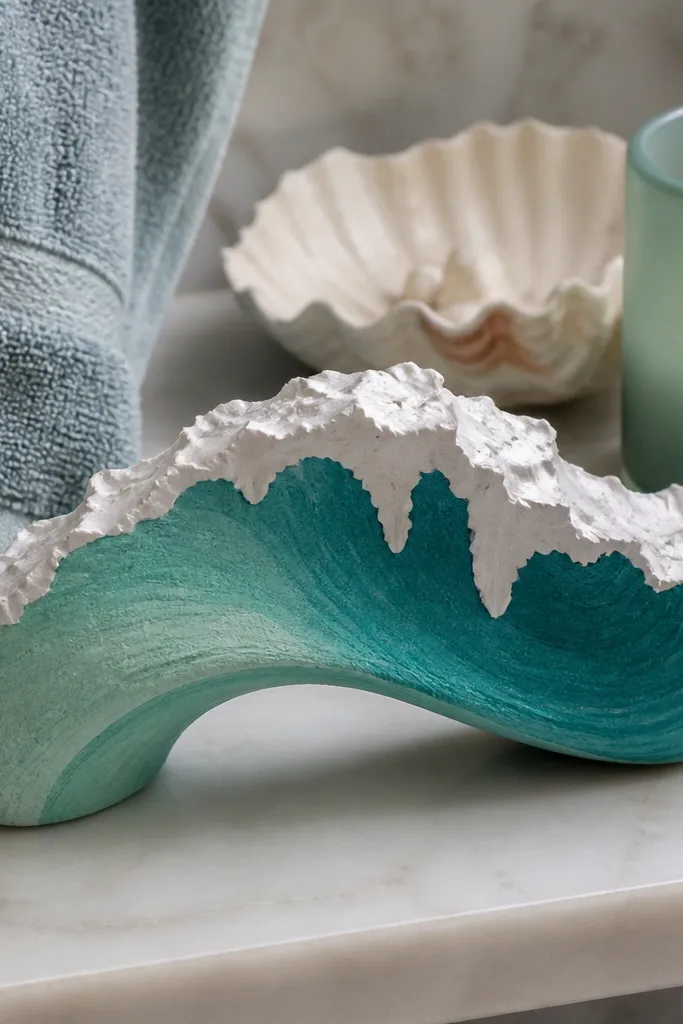
A wave squishy looks calm and cute, and it’s easy to make it photogenic with a gradient and foam peaks. The best part is the foam texture: you can create it with torn white paper glued in little cloudlets along the crest. For squish, the inner fill should be a curved pad so the wave compresses like a soft bow. This one looks great against a plain wall or a desk corner where the teal pops.
Cut two wave outlines from white and teal cardstock, or cut both from white then color one side teal. Glue torn white paper pieces along the crest on one half, then press flat while it dries. Add a thin foam pad shaped like the wave curve between the two halves and seal edges. Color the wave body with teal marker, then blend with a light pencil for a smooth gradient. Finish foam peaks with tiny specks of gray pencil for depth.
Editor's noteUse a makeup sponge to blend teal — it avoids marker streaks.
Skip thisDon’t glue the foam peaks too low; they should sit on the crest so they don’t mash into the seam.
12. Kawaii Sushi Nigiri with Shiny Rice
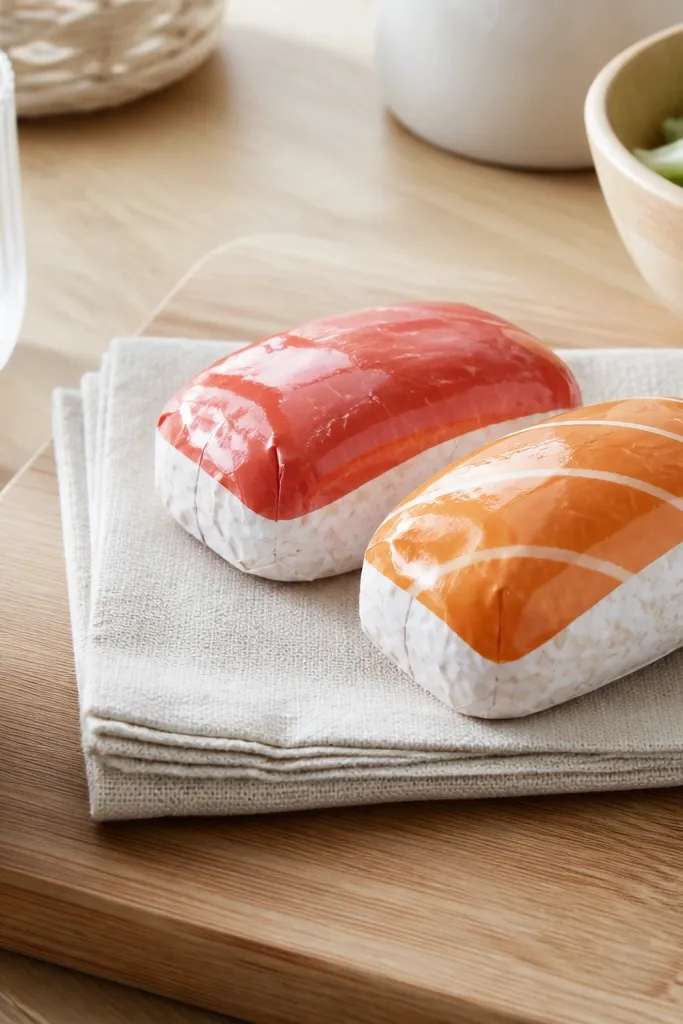
This nigiri looks cute because it has two clean bands — rice and topping — plus a tiny shine. The squish is subtle: you want a firm pad so it doesn’t slump, since sushi shapes show bending. Use a narrow foam insert under the center so the ends stay straight. Add a glossy highlight on the topping so it reads like fresh fish in photos.
Cut two long rounded rectangles for rice and two for topping, then glue rice to topping on one side and repeat on the other. For squish, cut a narrow foam strip and place it under the center between the two halves. Seal the edges with glue and clear tape. Color the topping with a layered pink-orange pencil gradient, then draw a thin white gel highlight across the center. Outline the rice edge with a darker pencil so it separates from the topping.
Editor's noteKeep rice and topping layers thin so the shape stays crisp when squeezed.
Skip thisDon’t use thick foam full-length — it makes the nigiri bow instead of squish.
13. Cute Heart with Pixel Border Confetti
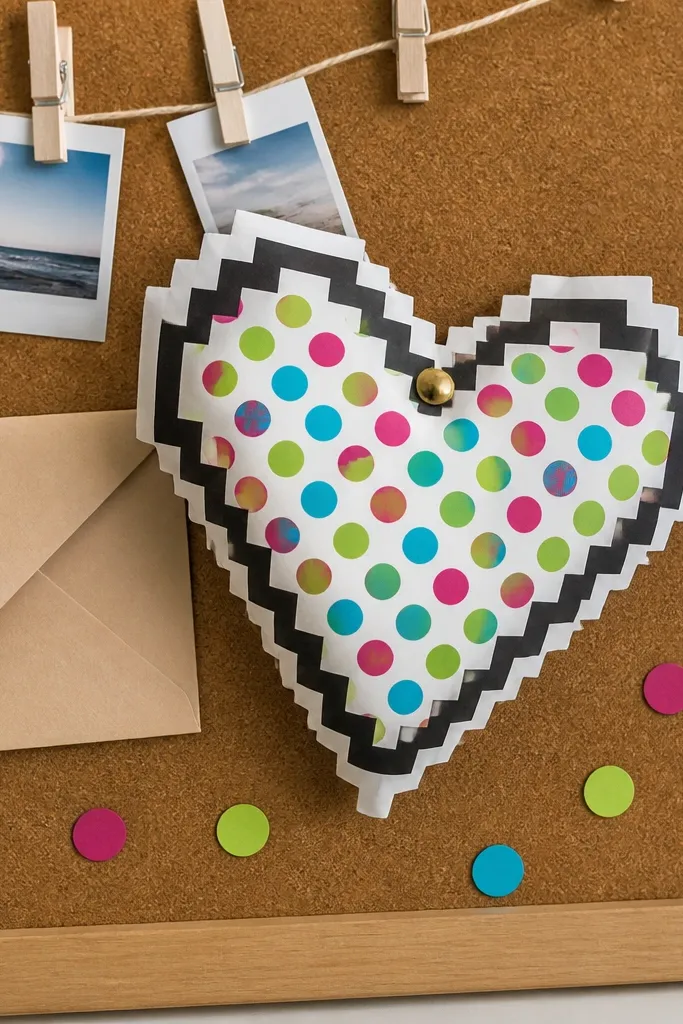
Hearts are a guaranteed rainy-day mood-lifter, and pixel-style borders look playful in photos. This squishy works because the heart outline is bold, and the confetti dots add sparkle without needing complex shading. The inner fill should be firm enough to keep the heart points from rounding off. A simple glossy highlight makes the paper look like it has a smooth coating.
Cut two matching hearts from red cardstock. Make an inner foam heart slightly smaller than the outer shell and glue it to one half. Seal the heart with edges covered in a thin glue line, then reinforce with a strip of clear tape. For the pixel border, draw a tiny grid around the edge using a fine marker and fill squares with colored pencil or marker dots. Add a white gel pen highlight near the top curve.
Editor's noteUse a paper punch or hole punch to make uniform confetti dots.
Skip thisDon’t over-thicken the border with glue; it dulls the crisp heart shape.
14. Pearl White Cloud Bunny
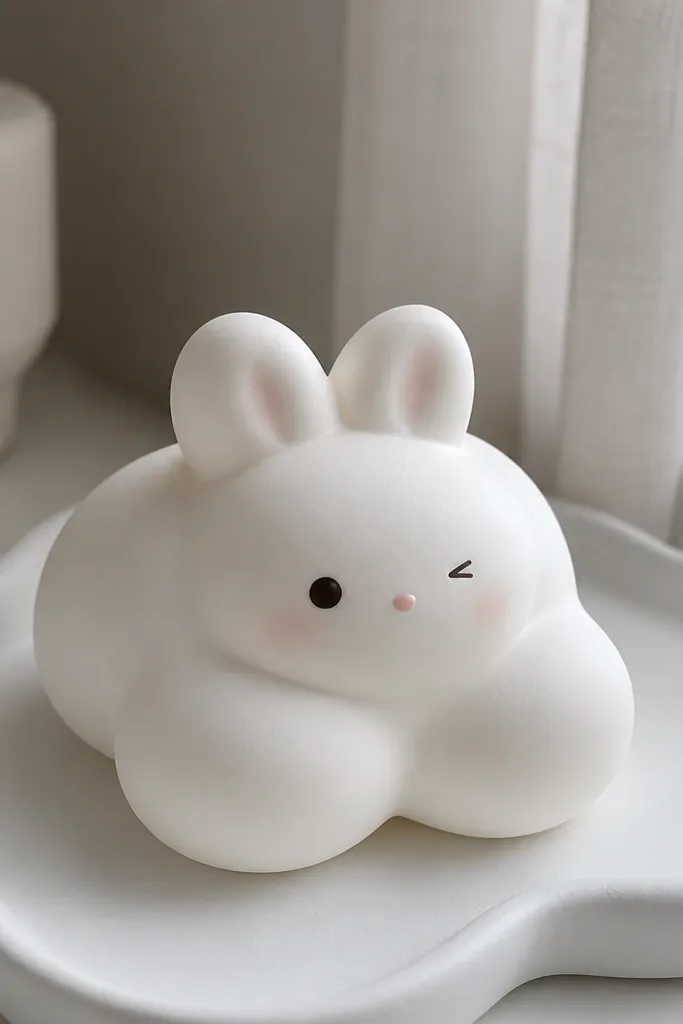
This one mixes soft shapes: a bunny face on a cloud body. The monochrome pearl white looks clean and aesthetic, which matters if you want your rainy-day crafts to match a desk theme. The squish stays even because the inner pad is rounded and centered. Add a tiny blush nose and one simple eye line — too many details make it look messy when compressed.
Cut two cloud-shaped bodies from pearl white cardstock. Cut two small ear pieces and glue them onto one half, then place a rounded foam pad in the center. Seal the body edges with glue, then draw the face after sealing: small dot eyes, a short mouth curve, and a pink nose using pastel pencil. Add blush marks on the cheeks with a very light pink pencil. If you want extra cute, add a small tail circle of tissue paper inside the seam edge.
Use pastel pencil for blush so it doesn’t crack when the paper flexes.
Avoid glossy paint on the face — it smears with squeezing.
15. Lavender Macaron Duo with Paper Filling
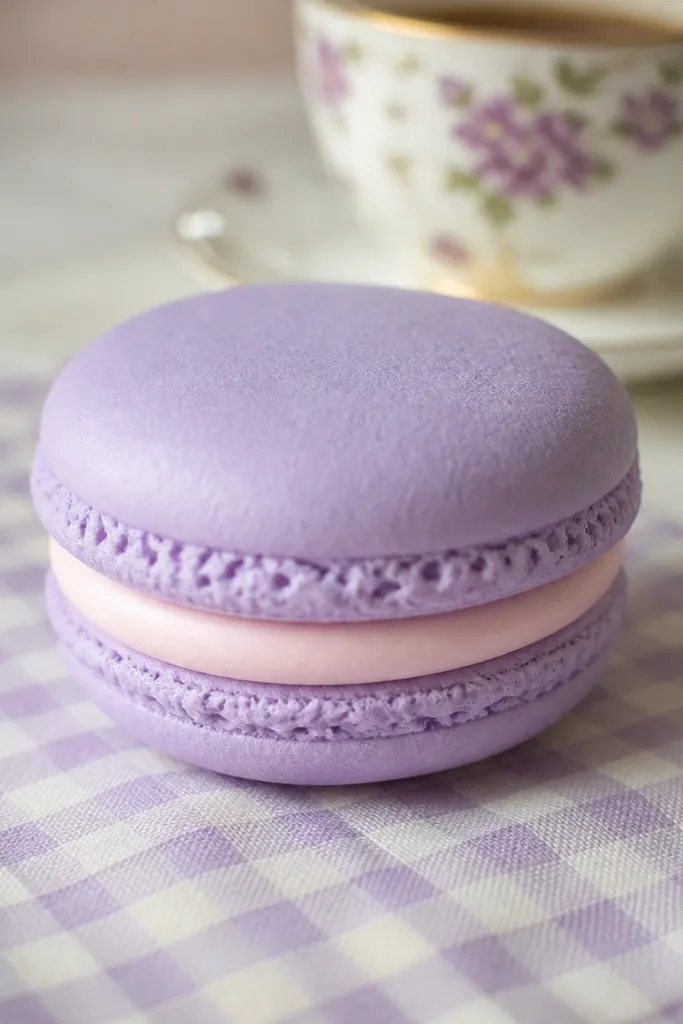
Macarons look expensive even when they’re simple. This version uses two shell layers and a filling strip to create that sandwich look. The squish is controlled by a thin inner pad so the shell edges stay crisp. Lavender plus a light pink filling reads beautifully on both white and pastel backgrounds.
Cut two identical circles for the top shell and two slightly smaller circles for the bottom shell, then cut a filling ring from light pink paper. Assemble one macaron by gluing the bottom shell, then the filling ring, then the top shell on one side. For squish, place a thin foam circle behind the assembled stack and glue a second shell stack behind it to form a sandwich. Outline the shell edges with a darker purple pencil to define the shape, then add a small highlight with white gel pen.
Use a coin as a template for consistent circle size.
Don’t add thick filling; it makes the macaron look swollen instead of squishy.
16. Rainbow Layer Cake Slice with Paper Ruffles
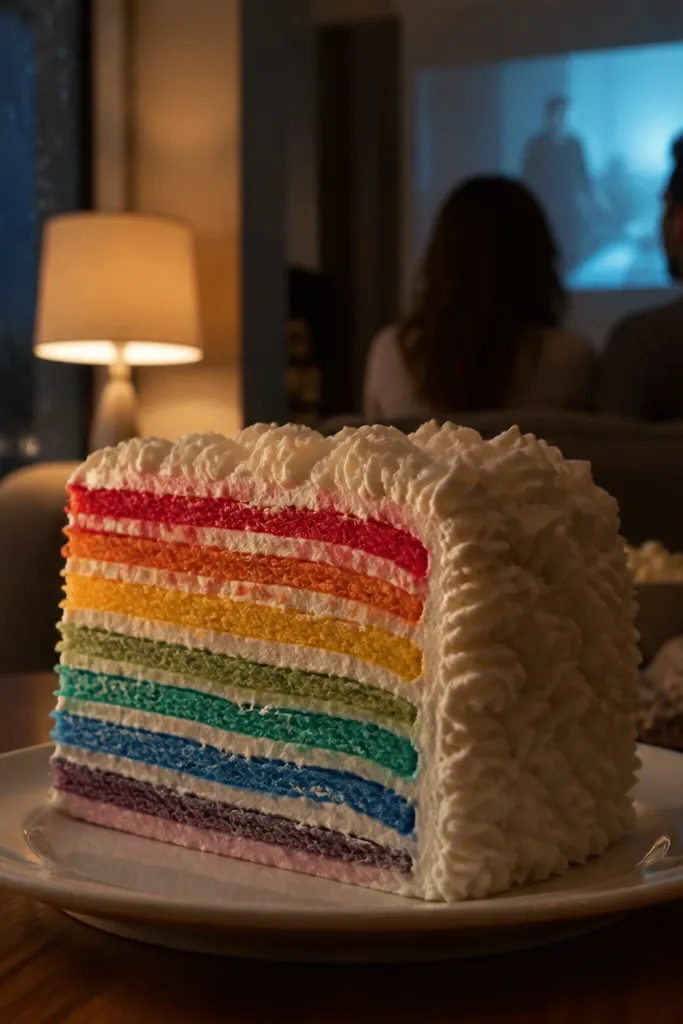
A cake slice is photogenic because it has clear horizontal layers and a dramatic color progression. The frosting edge is where it gets cute: you can create ruffles with thin paper strips so it looks like whipped cream. Keep the inner squish firm so the slice outline stays sharp and doesn’t curl. This is a great rainy-day craft for a shelf display because it holds its shape better than a round squishy.
Cut two identical cake slice silhouettes from cardstock. Make the rainbow layers by cutting thin strips of colored paper and gluing them horizontally onto one half. Add frosting by gluing a white paper strip across the top, then fringe it lightly with small snips to make ruffles. Place a thin foam insert under the colored layers and seal the edges. Shade layer edges with a pencil to add depth, then add a tiny glossy highlight on the frosting.
Editor's noteCut the frosting ruffle strips with the grain of the paper so they curl naturally.
Skip thisDon’t glue ruffles directly at the seam; they crush and tear during squeezing.
17. Chocolate Chip Cookie with Cracked Sugar Top
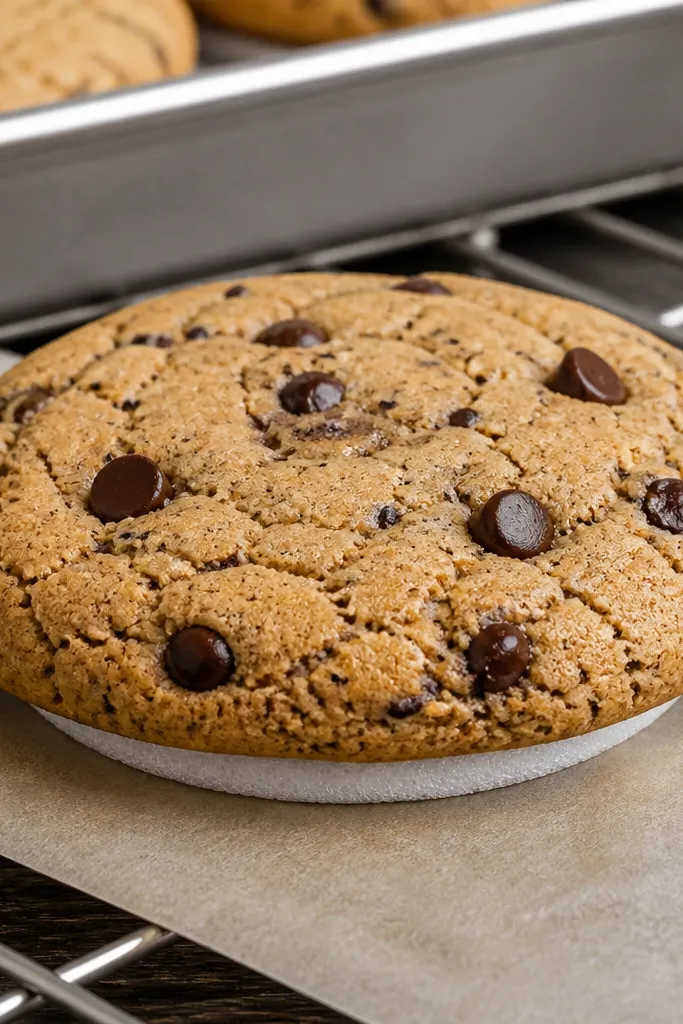
This cookie looks real because the surface has tiny contrast points: chips and a cracked sugar pattern. The squish should be slightly firm to keep the cookie round without turning into a pancake. Use a thin foam pad under the center and keep the edges sealed tight so chips don’t snag. A light brown base with darker speckles makes it pop in photos.
Cut two cookie circles from light brown cardstock. Punch or cut small dark brown circles for chips and glue them on one half near the center. For cracked sugar, draw thin branching lines with a darker brown pencil, then lightly color over them with a lighter tan. Place a thin foam disk in the center, seal with the second half, and reinforce the seam with clear tape. Add micro highlights to a few chips with white gel pen.
Editor's noteUse a toothpick to press tiny divots for the cracked pattern so it reads in close shots.
Skip thisSkip large glue spots — they show through the brown paper and harden the squish.
18. Cherry Blossom Mini Fan Tree
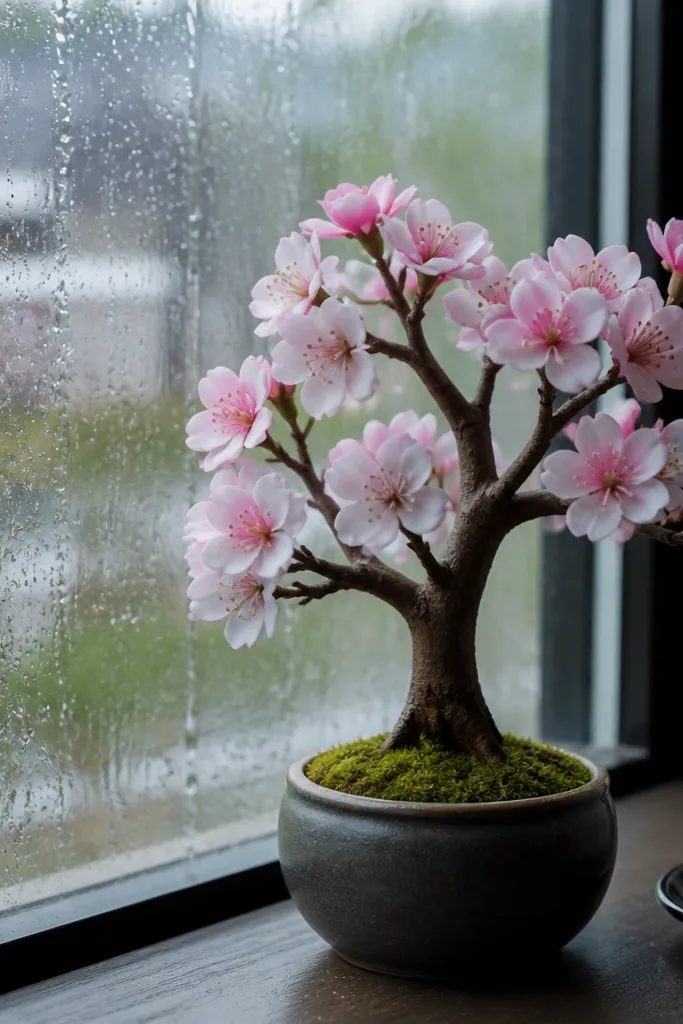
A mini cherry blossom branch looks delicate but still squishy. You get the aesthetic from petal clusters and a soft gradient pink, not from heavy texture. The build uses a small inner foam pad so the branch shape compresses without tearing petals. This one fits rainy days because it looks calm and pretty even if you’re not in the mood for bold colors.
Cut two branch outlines from brown cardstock. Add petal clusters by cutting small circles or teardrops from pink paper and gluing them in groups along the branch on one half. For squish, glue a thin foam pad under the central branch area only. Seal the two halves, then shade the branch with a darker brown pencil at the underside. Add a few tiny white gel highlights on petal edges to make the petals look layered.
Layer petals by gluing one slightly higher than the others so the clusters look dimensional.
Don’t use very thin paper for petals; it wrinkles when compressed.
19. Smiling Sushi Roll with Nori Stripe
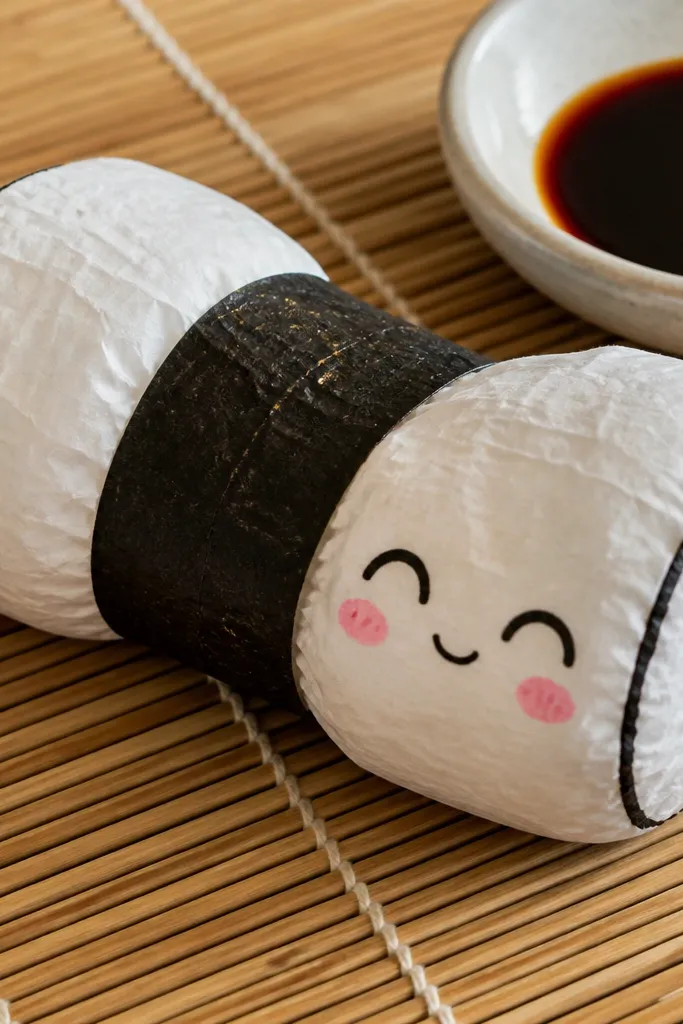
This sushi roll is playful because it has a face. The look stays clean by making the roll shape simple and using bold stripe contrast for nori. Squish is best with a narrow inner cushion so the roll compresses in the middle, keeping ends smooth. Add a tiny “rice” sparkle highlight with gel pen to make it pop against darker green.
Cut two rounded rectangles for the roll body. Glue a thin foam strip along the center between the halves. On the front, add a green nori stripe band and a smaller darker green stripe on top for texture. Draw a simple smiling face on the rice area using black marker, then add tiny rice dots with a light pencil. Seal edges and reinforce the seam with tape so the face doesn’t warp.
Editor's noteUse a template for the rounded corners so the roll stays symmetrical after sealing.
Skip thisDon’t place the foam too close to the edges; it makes the roll ends curl.
20. Puffy Taco with Lime Crema Drizzle
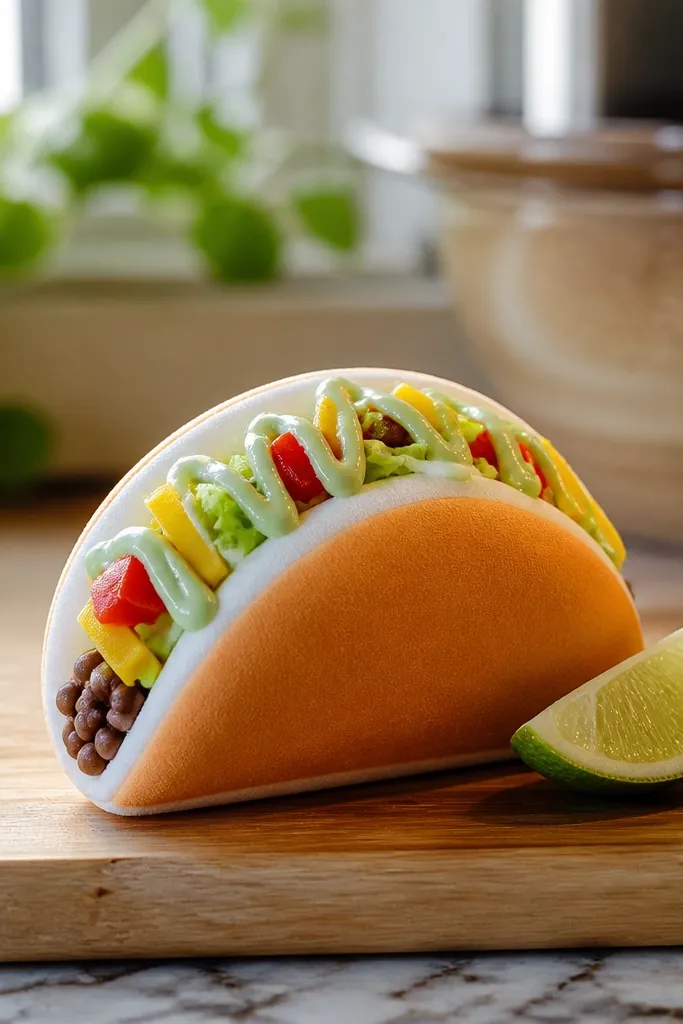
A taco squishy looks fun and graphic, which makes it great for rainy-day photos. The lime crema drizzle gives it a glossy, candy-like finish, while small filling dots keep it from looking flat. The squishy feel comes from a curved inner pad that matches the taco fold. Keep the taco shell thin enough to show the crease line.
Cut two taco outlines from cardstock, then score a center crease line so the taco fold reads clean. For the inner squish, cut a curved foam piece that fits inside the taco curve and glue it to one half. Add filling by gluing small strips of colored paper for lettuce and tiny beige bits for “meat.” Seal the taco by gluing edges, then add lime crema drizzle using a green gel pen or thin paint line with clear glue over it. Let it dry flat so the taco keeps its curve.
Editor's noteScore the fold with a dull butter knife so it creases without cracking.
Skip thisAvoid thick foam at the fold line; it makes the taco crease disappear.
21. Rainbow Star Puffy with Soft Glitter Paper
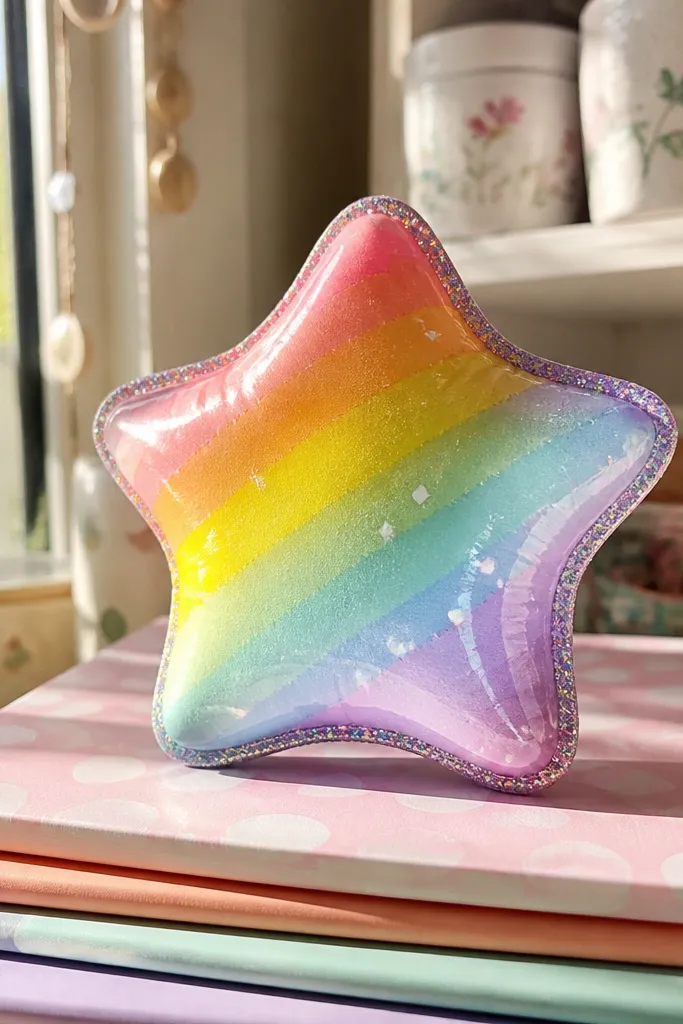
Stars read instantly, and the rainbow fill makes it feel like a rainy-day party. This build uses a soft inner pad for squish but keeps the star points intact by sealing the edges tightly. For the aesthetic, use glitter paper sparingly — only on the outer edge — so it doesn’t shed into glue. A white gel highlight on each ray makes the star look glossy.
Cut two five-point star shapes from cardstock. Glue a thin foam star to one half, then seal with the second half while keeping the star points aligned. Color rays with markers or colored pencil in a clear rainbow order. Add glitter paper only as a thin border ring by trimming a second glitter star smaller and gluing it around the edge. Finish with white gel highlights on the top edges of each ray.
Editor's noteTrim glitter paper with a sharp blade to avoid jagged edges.
Skip thisDon’t cover the whole star in glitter; it looks messy when the paper bends.
22. Pudding Cup with Jiggly Layer Bands
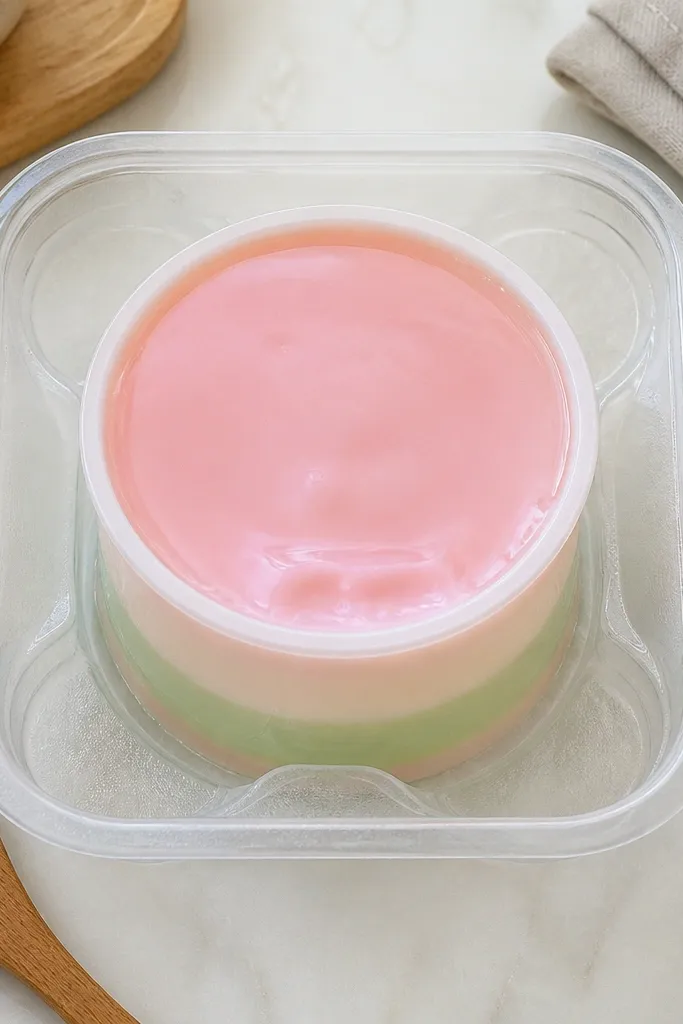
Pudding cups look great because layered colors create a “jiggly” illusion even with paper. This design keeps the squish in the cup base so the top looks smooth and clean. Use translucent-looking colors by coloring the paper lightly and adding a thin clear gloss finish. It’s also easy to make multiple versions by swapping the layer colors.
Cut two cup outlines with a wider top and narrower base from cardstock. Create layer bands by cutting thin strips of colored paper and gluing them vertically or horizontally on one half to form stacked puddings. Place a small foam pad at the base between the halves and seal edges. Color the cup rim with a slightly darker shade for definition. Add a glossy top layer by brushing clear glue mixed with a tiny drop of white paint, then add a single white highlight streak.
Editor's noteUse watercolor pencils lightly for translucent layers instead of thick marker fills.
Skip thisSkip fully covering the inside with glue — it makes the cup stiff and kills the jiggly feel.
23. Lemon Slice with Icy White Veins
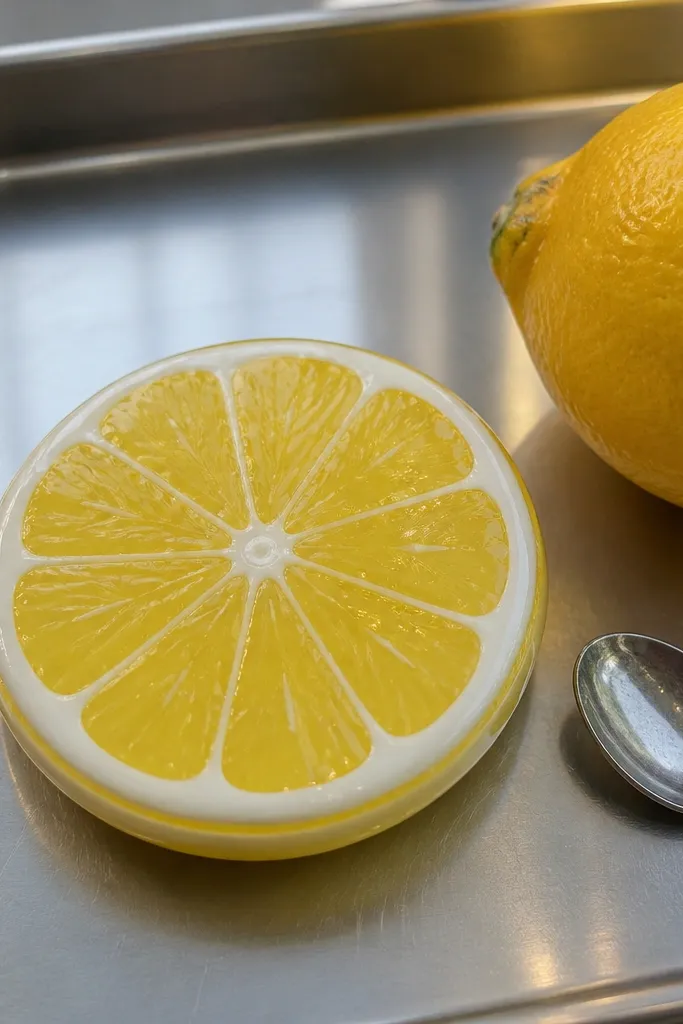
Lemon slices look bright even on gloomy days, and the segment lines make it feel realistic. The squishy shape is a simple circle with segments, so it’s easy to build and easy to photograph. White vein lines add a crisp look, and a tiny glossy spot makes it feel like it’s coated. Keep the inner pad centered so the slice compresses evenly.
Cut two lemon circles from yellow cardstock. Draw segment lines with pencil, then ink lightly with a darker yellow-brown marker. Cut a thin foam circle smaller than the outer edge and glue it to one half. Add “veins” by drawing thin white gel pen lines across the segments, then glue the second half on top. Seal edges with glue and tape to prevent peeling at the thin rim.
Editor's notePress the gel lines gently with a flat tool so they look smooth, not raised.
Skip thisDon’t use too much gel pen — thick lines crack when the lemon compresses.
24. Cute Turtle Shell with Patterned Scales
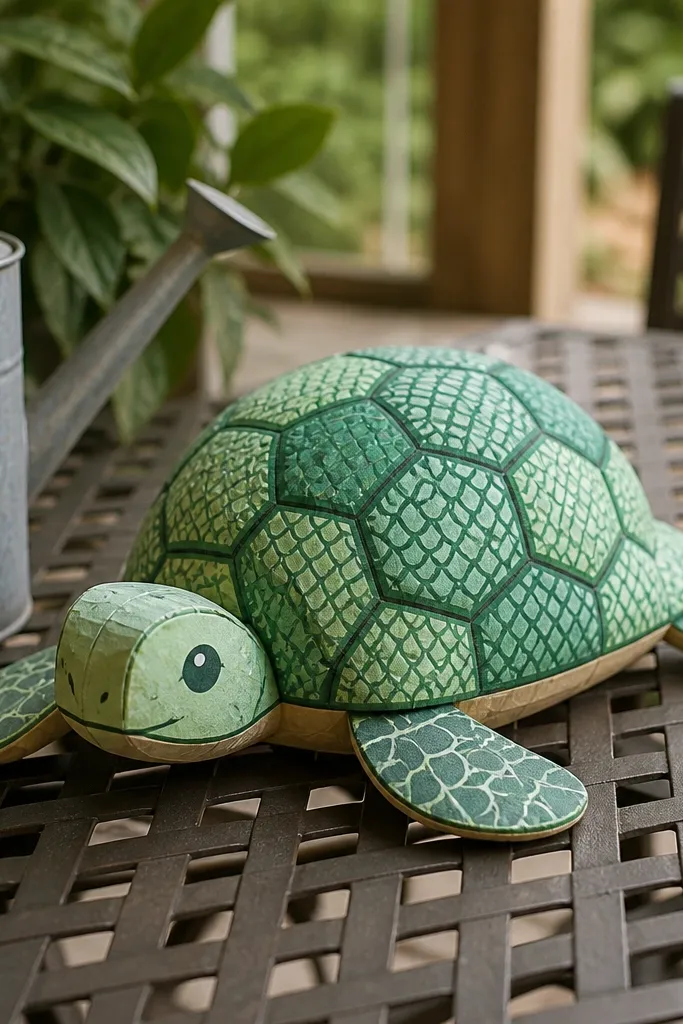
A turtle squishy looks complex, but you can keep it budget-friendly by using a repeatable scale pattern. The shell should be the squishy part, with the head and legs kept flatter so they don’t warp. The pattern gives you texture in photos, while the rounded shell gives you that satisfying press. Use green shades and outline each scale with a darker pencil for clarity.
Cut two turtle shell outlines from green cardstock and cut a separate head and four legs from darker green. Glue the head and legs to one shell half so they lie flat against the paper. Place a thin foam pad under the center of the shell, then seal with the second shell half and reinforce the seam. Draw scale shapes by tracing small ovals across the shell and outline them darker. Add a tiny white gel highlight on the center of the shell for a smooth look.
Editor's noteMake one scale stencil from scrap paper and reuse it for fast repeating patterns.
Skip thisAvoid tiny details smaller than a fingertip; they blur when squeezed.
25. Berry Ice Pop with Layered Paper Stripes
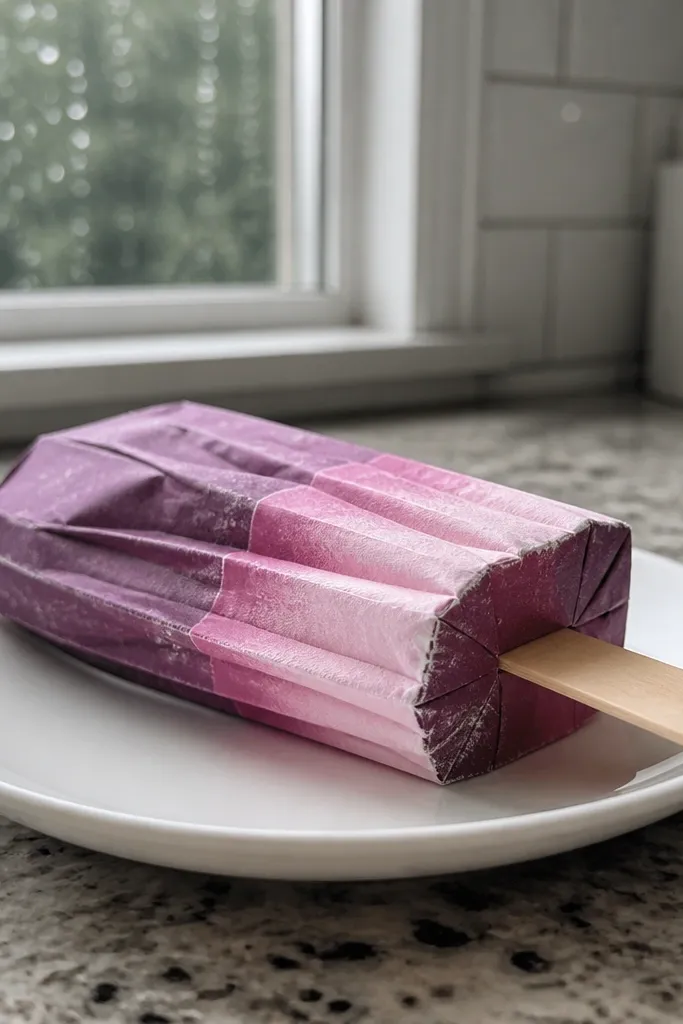
Ice pops photograph like candy, and the layered stripes make it feel frosty. This build is budget-friendly because you can do it with colored cardstock and a simple inner foam strip. The squish is concentrated in the body so the stick stays straight. Finish with a lightly glossy top edge so it looks cold and fresh.
Cut two ice pop shapes from cardstock and cut a thin foam insert that matches the body but leaves the stick area flat. Glue the foam to one half. Add layered stripes by cutting thin strips of pink and purple paper and gluing them onto the body area. Seal the two halves, then attach a paper stick by gluing it to the seam. Color the edges with a slightly darker berry tone and add a thin clear gloss line along the top.
Use a craft knife to cut stripes cleanly so the layers look crisp.
Don’t make the stick part squishy; it bends and makes the whole piece look sloppy.



