
1. Dark Denim + Brown Stitching Wallet
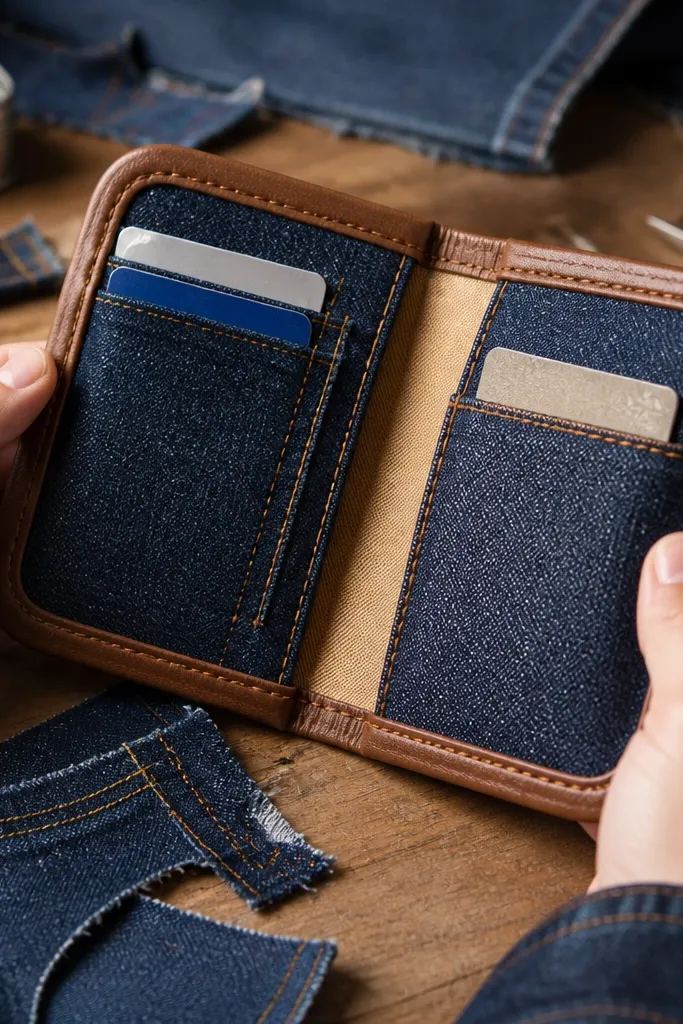
This one looks like a mini accessory from a clothing store because denim gives texture and brown stitching reads classic. Use a denim panel as the outer shell, then add a brown faux-leather strip around the edge to hide the seam. Inside, keep the lining light with tan cotton so cards contrast and photos pop. It’s a good choice if you want a sturdy wallet that still feels soft when you hold it.
Cut two outer panels: one for the tin base and one for the lid, leaving a 1/8 inch margin for folding. Glue the fabric to the tin with contact cement or a thin layer of tacky glue, then wrap the margin under the edge. For the “stitching” look, use a brown fabric marker to draw dashed lines 1/4 inch from the border, then go over with a thin fabric paint for opacity. Finally, line the inside with tan cotton and hot-glue the corners so it stays flat.
Press the fabric down with a clean cutting mat and a heavy book for 10 minutes before trimming.
Don’t make the denim too thick at the corners — extra bulk stops the lid from closing flat.
2. Matte Black Vinyl With Gold Stud Edge
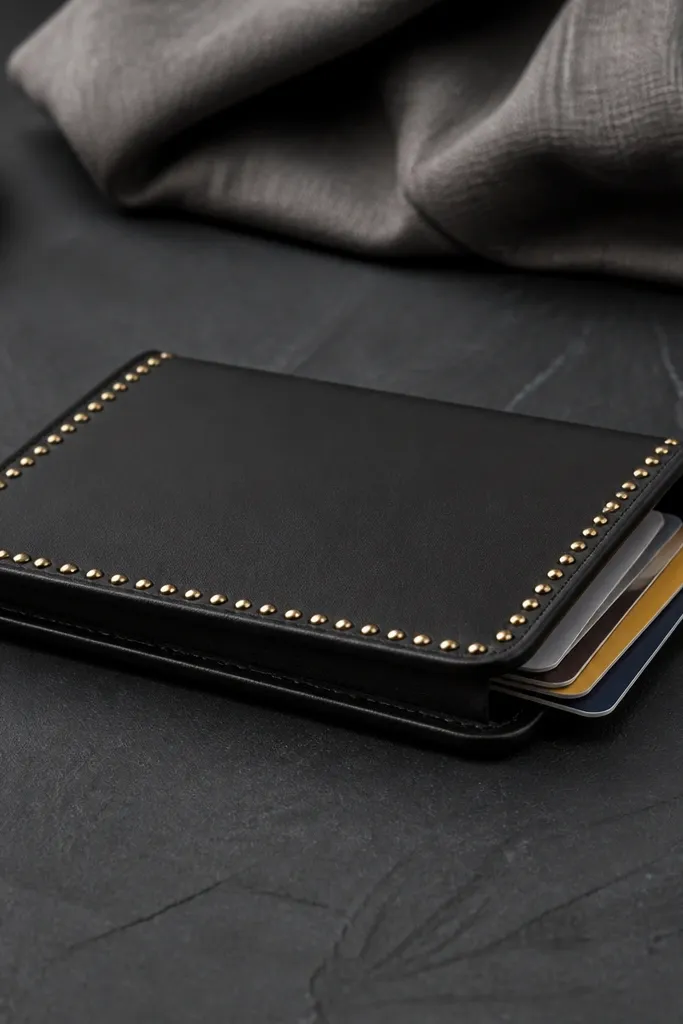
Cover the tin base and lid with matte black vinyl using contact cement so it bonds fast and stays even. After it dries, trim the vinyl so it sits just under the lip by about 1/16 inch. Mark a stud line around the perimeter with a ruler and punch tiny holes using an awl. Insert gold-tone snap studs and secure them according to the stud kit. Line the inside with black felt or microfiber so cards slide without catching.
Matte black vinyl plus gold studs looks sharp and modern, and the studs hide minor edge imperfections. The matte finish also hides glue shine, which is the biggest visual giveaway on cheap DIY wallets. You get a wallet that photographs cleanly even in low light. This build is best if you like a bold, graphic look and want the cover to feel smooth to the touch.
Skip thisSkip fabric glue for vinyl — it can wrinkle and lift when the tin flexes.
Editor's noteUse an awl through a scrap board so your holes stay round and centered.
3. Watercolor Paper Wrap + Clear Acrylic Seal
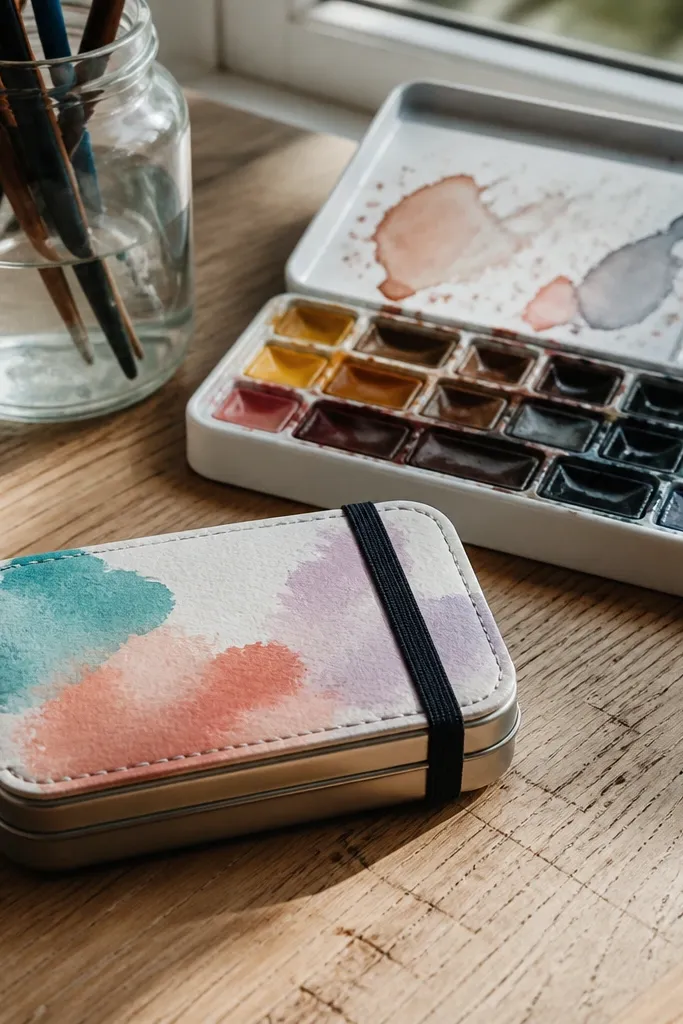
Cut paper panels for the base and lid, matching the tin shape and leaving 1/8 inch extra on the sides. Apply a thin coat of matte Mod Podge or acrylic gel medium to the tin, lay the paper, and smooth from center outward. Let it dry 30-45 minutes, then trim edges with a sharp craft knife. Seal the entire outside with 2-3 thin coats of clear acrylic medium, letting each coat dry before the next. Line the inside with a neutral cardstock pocket or thin felt to keep cards from rubbing the sealed paper.
If you want the wallet to look like custom stationery, this paper wrap finish delivers. Watercolor-style prints look expensive because the color fades naturally across the surface. The trick is sealing — without it, paper edges fray and the surface scuffs quickly. This is a great choice for desk-to-bag accessories and for people who like soft, artsy aesthetics.
Skip thisDon’t flood the paper with glue — it warps and creates ripples under the clear coat.
Editor's noteSpray a quick layer of clear acrylic on the trim edges after trimming to lock fibers down.
4. Quilted Cotton Cover With Piped Border
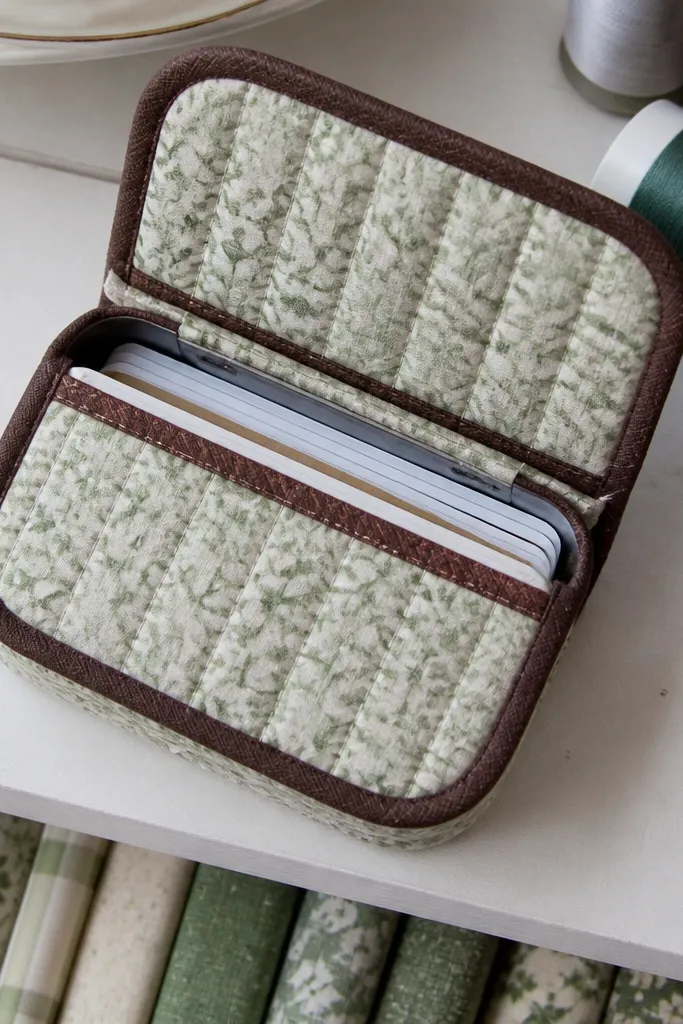
Cut two quilt outer pieces and fuse a thin batting layer to the wrong side using fabric adhesive spray. Sew or paint quilting lines: mark a grid 1 inch apart and stitch along the lines, then press flat. Glue the quilted outer to the tin base and lid, then wrap the extra under the lip. Add piping by measuring the perimeter and gluing piping cord to the top edge before pressing it into place. Line the inside with cotton and glue only at corners so it stays flexible.
Quilting makes this wallet look more complex than it is. Cotton quilt fabric plus piping gives a clean, tailored edge that reads “crafted,” not “covered.” Add a thin batting layer underneath so the quilted lines look padded in photos. This build fits anyone who likes cozy patterns, from florals to subtle stripes, without losing durability.
Skip thisDon’t skip trimming the batting — it makes the lid close stiff.
Editor's noteUse a walking foot or keep your stitches slow — quilt layers shift and ruin the straight lines.
5. Felt Patchwork With Heat-Set Labels
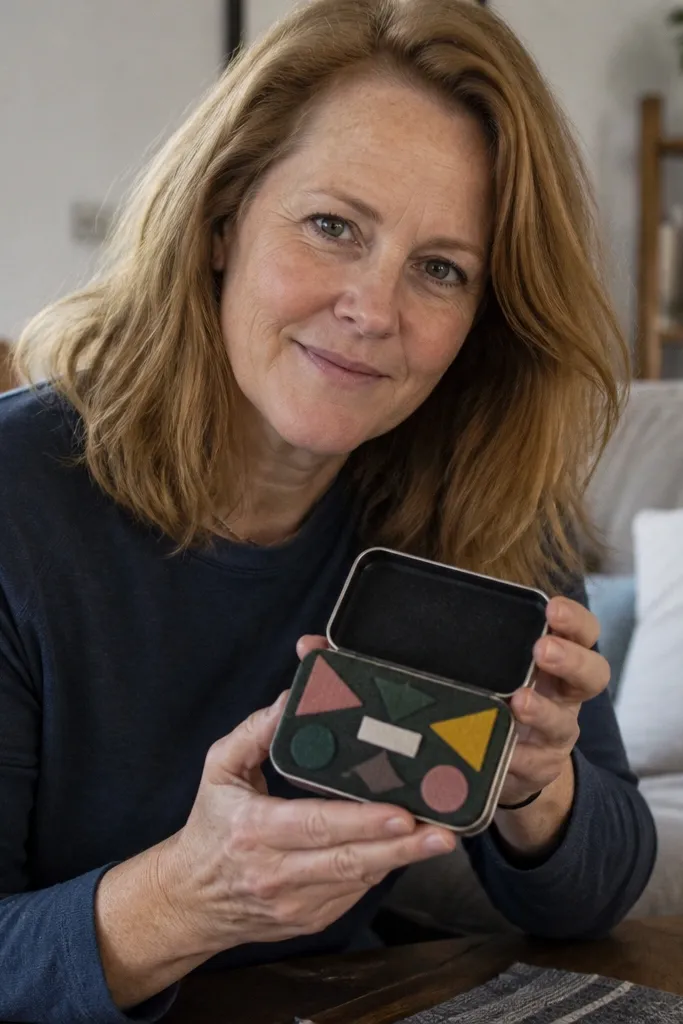
Cut felt pieces for the base and lid panels, then arrange them flat first to get a balanced layout. Glue patches in place with fabric glue or a hot-glue dab at corners, keeping the center smooth. Seal the outer with a thin brush layer of fabric glue diluted with a little water if you want a more uniform surface. Trim felt under the tin lip so it doesn’t snag when opening. Line the inside with a single piece of felt, then add a small fabric tab pocket for two to three cards.
Felt patchwork looks adorable and hides mistakes. You can mix small shapes — triangles, circles, or mini blocks — and the felt edges won’t fray, so it stays tidy. Heat-set labels or iron-on name tags add a “real product” vibe without complicated stamping. This build is excellent for gifts and for anyone who wants a soft, cutesy wallet that still holds cards.
Skip thisDon’t use too much hot glue — it creates bumps that show through felt.
Editor's noteUse small curved scissors — they cut felt cleanly and keep patch edges crisp.
6. Leather-Look Wrap With Edge Paint
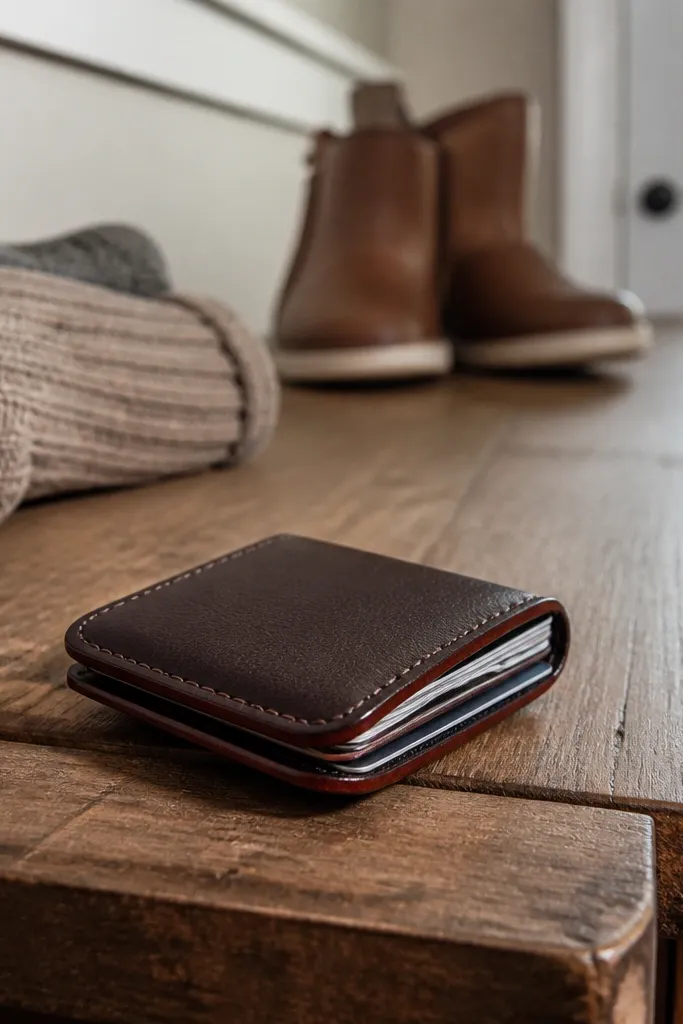
This is the “grown-up” version of an Altoids wallet. A leather-look wrap looks expensive when the edges are painted or burnished. Edge paint hides raw cut lines and makes the wallet look like it came in a box. It also holds up well because vinyl-based leather-look resists scuffs better than paper.
Cut leather-look panels for base and lid, then skive or trim edges so the seam stays thin. Glue the outer with contact cement for a flat finish. Fold the edges under the lip and press with a bone folder or the back of a spoon. Apply edge paint or acrylic paint mixed with a little water to create a smooth coat around the perimeter. Let it dry fully, then buff lightly with a soft cloth. Line the inside with suede-like fabric or microfiber.
Lightly sand the edge before paint — it makes the edge paint grip and look even.
Don’t stretch the material across corners — it will ripple when the tin flexes.
7. Glow-In-The-Dark Stars With Black Felt Lining
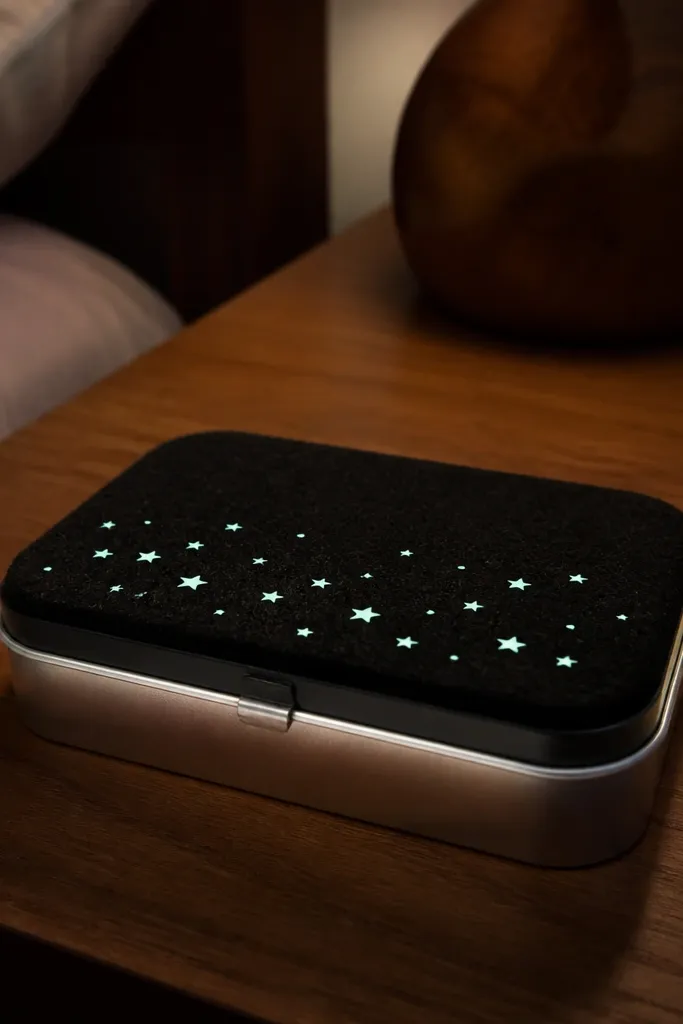
This looks like a tiny night-sky accessory. Glow-in-the-dark stars pop under flash and still feel subtle in daylight. Black felt lining makes the wallet look deep and hides interior glue. It’s also easy to make look clean: decals go on smooth felt with no fraying issues.
Cover the tin with black felt for the outer shell and glue it flat with contact cement. Cut a second layer of felt for the lid top so the seams don’t show. Apply star decals or glow paint dots using a stencil; press firmly and let cure fully. Add a thin strip of black faux leather around the perimeter if you want a sharper edge. For the inside, glue black felt and make a card slip pocket from felt strips glued only along one side.
Use a stencil brush with minimal paint so dots stay small and crisp.
Don’t seal glow paint with heavy clear coat — it can dull the glow.
8. Spray-Painted Speckle Marble Effect
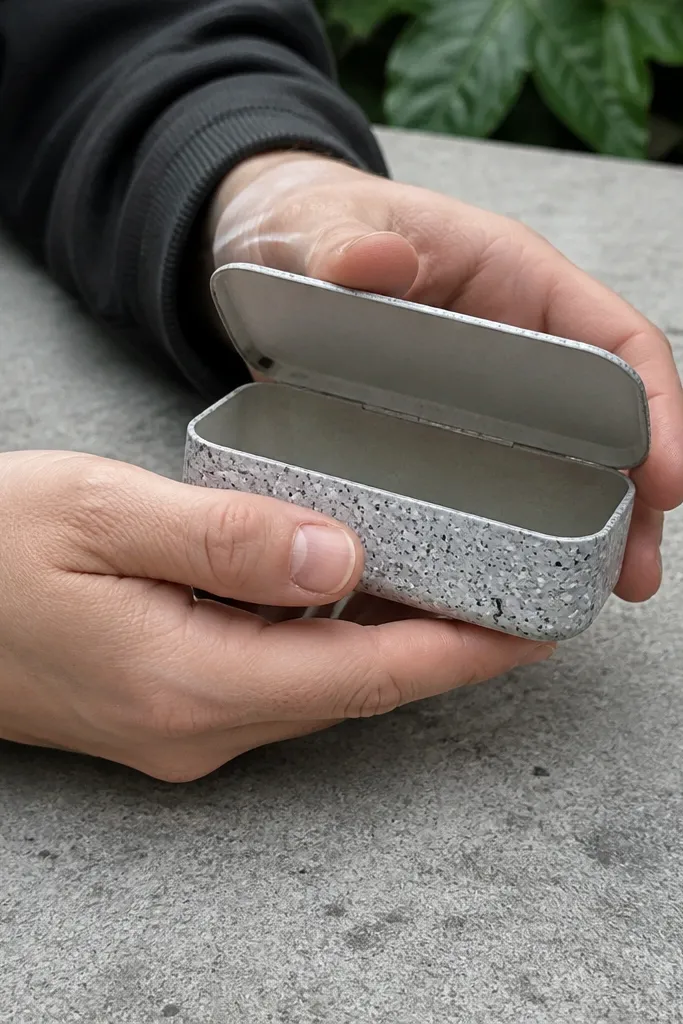
Marble is hard to fake, but the speckle method reads instantly. This build uses spray paint speckles over a base color to create a stone-like surface without complicated tools. It looks great in photos because the texture catches light. Keep the interior simple in beige or gray so the outside texture stays the star.
Prime the tin with spray primer and let it cure fully. Spray a solid base color (like off-white or charcoal) and wait 20-30 minutes. For speckle, dip a toothbrush into contrasting paint, then flick onto the surface from 8-10 inches away. Let it dry, then clear coat with a matte or satin clear spray to protect the finish. Line the inside with cardstock or felt and glue only at the edges so it stays flat.
Mask the hinge area before spraying so paint doesn’t gum up movement.
Don’t spray too close — large blobs look messy and cheap.
9. Vintage Map Cover With Brass-Tone Corners
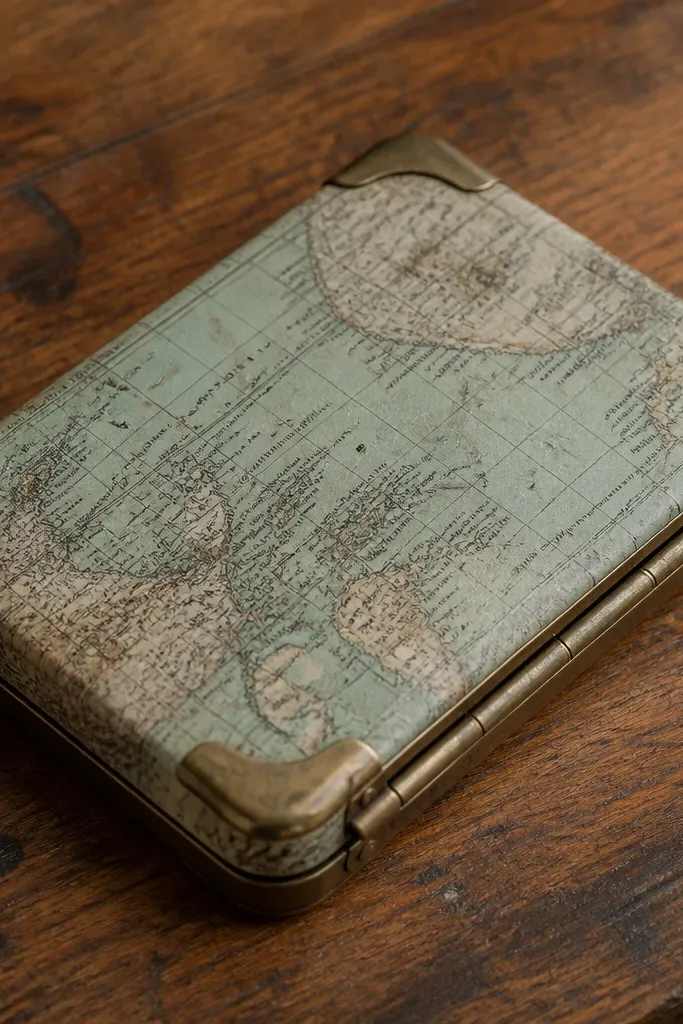
Cut map print panels for base and lid, then glue them using a thin acrylic gel medium. Smooth and let dry completely before trimming. Add corner caps by marking 4 corner positions on the lid and base, then attaching the caps with glue or fasteners from the kit. Seal the outer with 2 coats of clear acrylic medium so the paper doesn’t rub off. Line the inside with solid cream cardstock or felt and glue the pocket to the tin lid area.
A map cover looks instantly nostalgic, and brass-tone corner caps make it feel like a travel artifact. The corners also protect the fragile edges of paper, so the wallet survives regular use. This is a strong choice if you want a warm, storybook look without needing fabric or sewing.
Skip thisSkip sealing — unsealed map paper scuffs and curls at the edges.
Editor's noteChoose map sections with bold landmarks near the center — they make the design readable in photos.
10. Screen-Printed Pattern With Fabric Ink
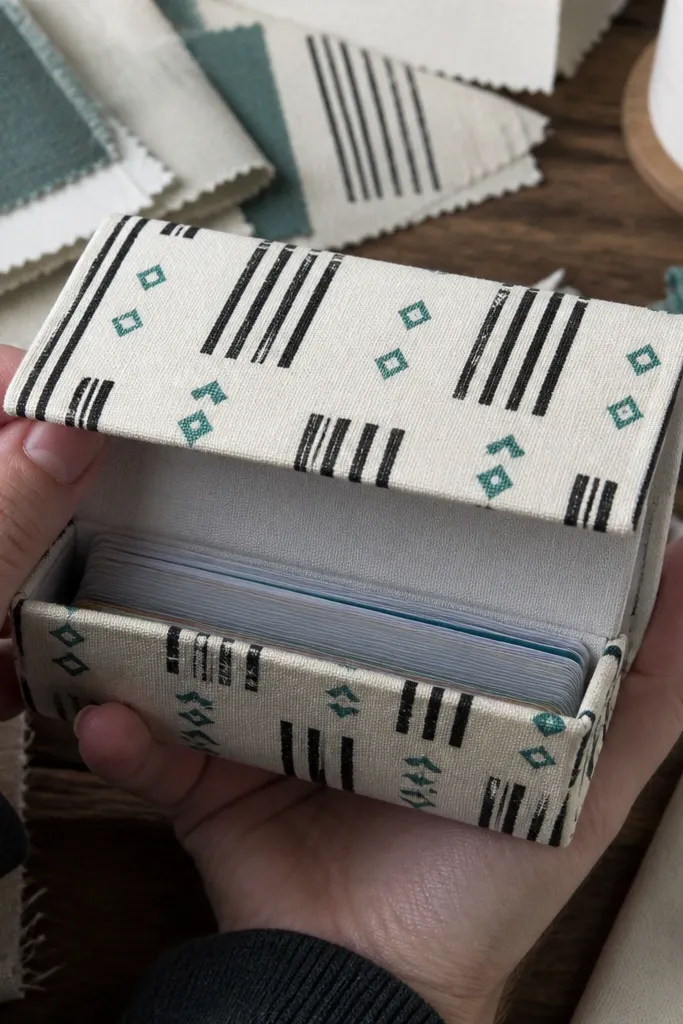
Cover the tin with a stretched cotton or canvas panel glued smoothly. Place a stencil or use a simple screen stencil on top, then tape it down tight. Apply fabric ink with a foam screen applicator, working in light passes. Remove the stencil carefully and let the ink cure according to the ink instructions. Add a clear fabric medium top coat if your ink requires heat-setting and you want extra durability. Line the inside with a matching solid fabric so the pattern stays the focus.
Screen-printed patterns look crisp and intentional, which is hard to get with hand-drawn designs. Use fabric ink on cotton or canvas so the pattern stays flexible and doesn’t crack. This build is best for geometric shapes, stripes, and simple icons. It’s also one of the easiest ways to make the wallet look “designed,” not decorated.
Skip thisDon’t over-wet the stencil — it bleeds and ruins the edges.
Editor's noteDo a quick test print on scrap fabric first so you know ink coverage before you commit.
11. Washed Canvas With Stenciled Coordinates
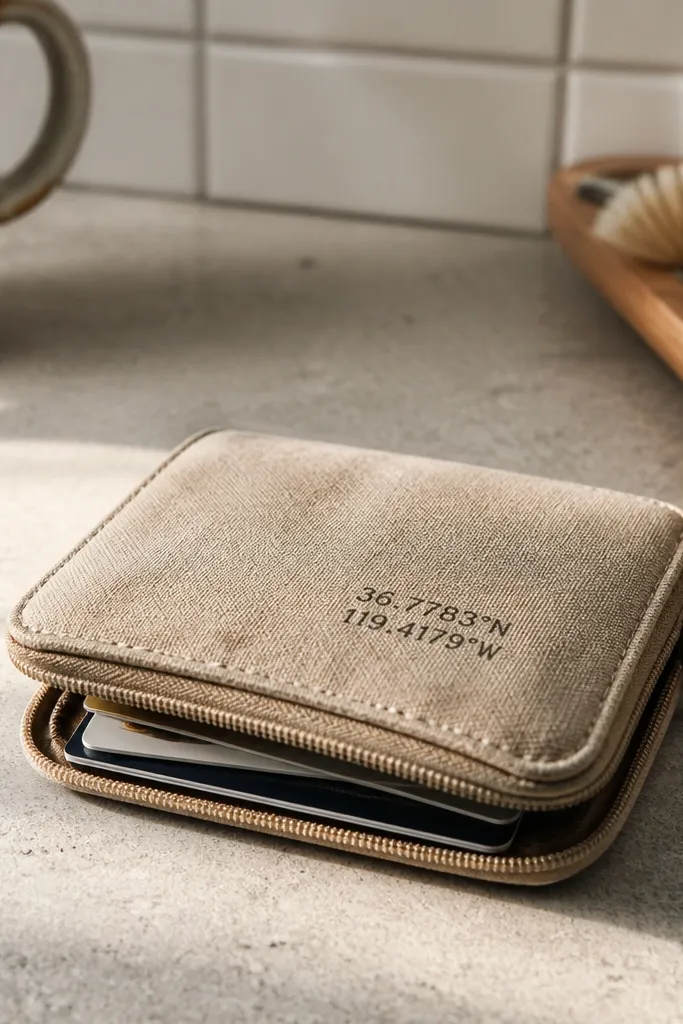
Washed canvas looks lived-in, and coordinate text gives it a cool, “found object” vibe. The design is small and graphic, so it reads well even when the wallet is closed. This is a great option if you want a clean aesthetic with minimal clutter. It also hides glue lines better than glossy materials.
Wrap the tin in washed canvas and glue it with a thin, even layer. Let it dry, then trim under the lip. Use a small stencil for numbers and letters; secure with tape so it doesn’t shift. Apply acrylic paint mixed with a little fabric medium and dab with a sponge brush for controlled coverage. Seal with matte clear acrylic spray to keep the numbers from scuffing. Line the inside with a single piece of canvas or cotton.
Use painter’s tape to mask the hinge line so paint doesn’t interfere with opening.
Don’t use thick paint — it will crack when the lid flexes.
12. Rainbow Gradient With Vinyl Layering
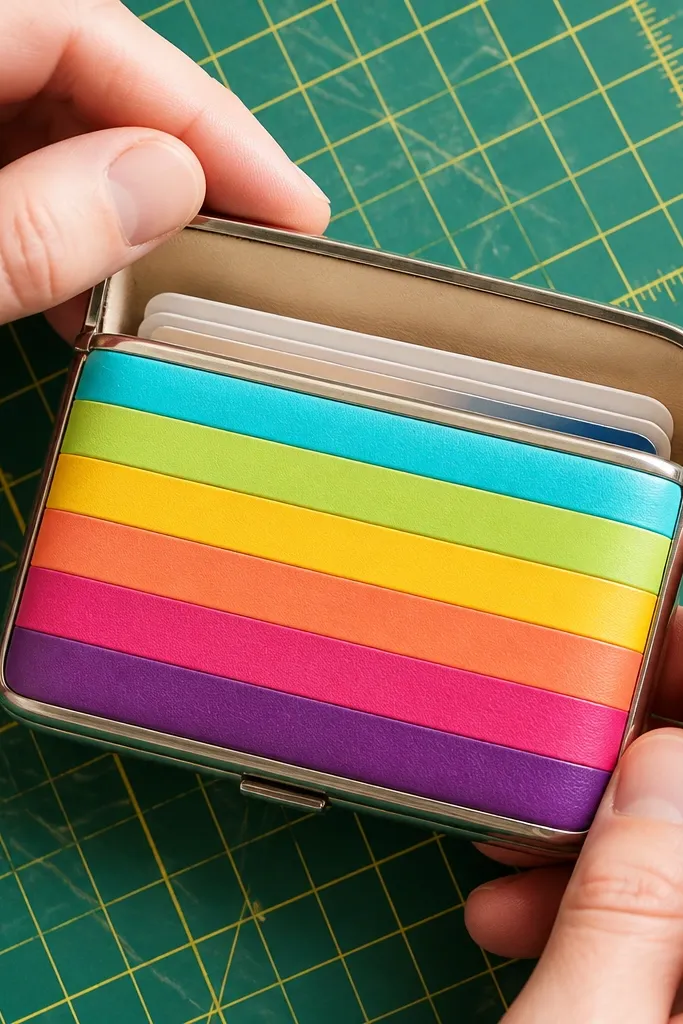
Layered vinyl gives a clean gradient look that photos love. Each color strip becomes a step, so it looks intentional instead of messy. This build is for people who like bright accessories and want a wallet that stands out without needing heavy decoration. It also works well because vinyl is smooth and hides seam lines when layered carefully.
Cut thin strips of vinyl in 5-7 colors and keep them all the same width, like 1/2 inch each. Cover the tin base and lid with a base color vinyl layer first. Glue the strips on in order from one edge to the other, aligning the top edge of each strip with a drawn guide line. Press down firmly and trim excess under the lip with a sharp knife. Line the inside with a solid neutral fabric so cards don’t fight the color.
Use a metal ruler and cut on a mat — uneven strip widths ruin the gradient.
Don’t stretch vinyl during gluing — it warps the transitions.
13. Monogram Patch With Heat Transfer Vinyl
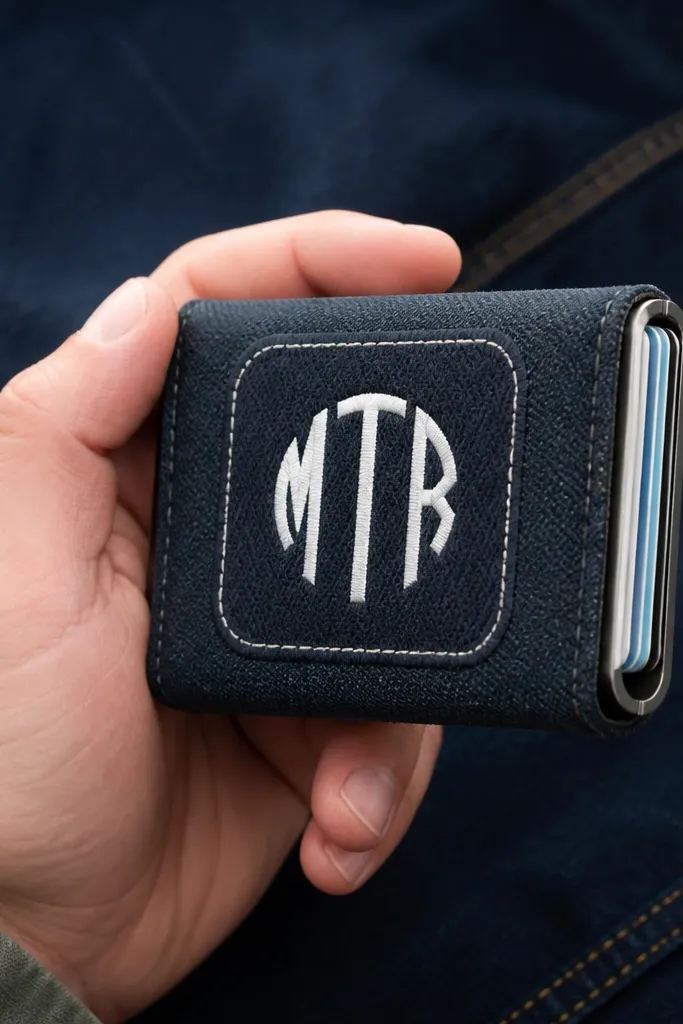
Cover the tin with a solid fabric panel, then trim it neatly under the lip. Cut a monogram from HTV using a cutting machine or stencil transfer template. Position the vinyl on the front panel and press with a heat press or household iron through parchment paper. Press for the recommended time for the HTV type, then let it cool before peeling. Add a border strip of coordinating fabric or faux leather around the edges. Line the inside with felt or microfiber for card friction.
A monogram patch is the fastest way to make an Altoids wallet look personal and polished. Heat transfer vinyl (HTV) lets you get crisp lettering with no painting mess. Pair it with a fabric background like navy denim or black felt for sharp contrast. This is a strong choice if you want a “giftable” look that still takes under two hours.
Skip thisDon’t skip parchment paper — HTV can stick to your iron.
Editor's noteMake your monogram slightly smaller than you think — it looks cleaner on the tin lid.
14. Pressed Flower Lamination Look
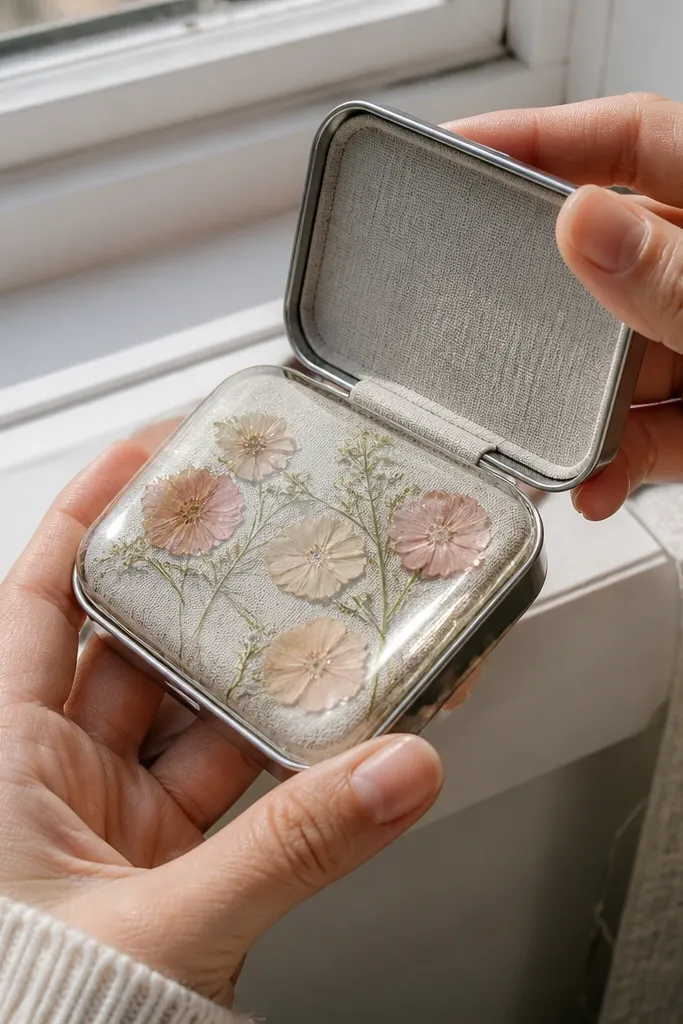
Pressed flowers look dreamy, but the real key is protection. When you seal them under a clear layer, they become a glossy mini art piece instead of fragile paper. This build looks great in bright daylight and still holds up when sealed correctly. Use flat flowers with thin stems so the surface stays smooth.
Choose flat pressed flowers and trim them to fit the tin lid area. Seal the tin lid with a thin layer of clear acrylic gel, then place flowers and brush another thin layer over them. Let it dry fully, then apply a second clear coat for depth. Cover the rest of the tin base with solid fabric or paper to keep it balanced. Trim edges and line the inside with felt to prevent rubbing. Seal the entire outside with one more clear coat to lock everything in.
Pick flowers with low height — if stems stick up, the clear layer will show bumps.
Don’t use thick glue near the hinge — it can stop the lid from closing.
15. Comic Panel Pop-Art Wallet
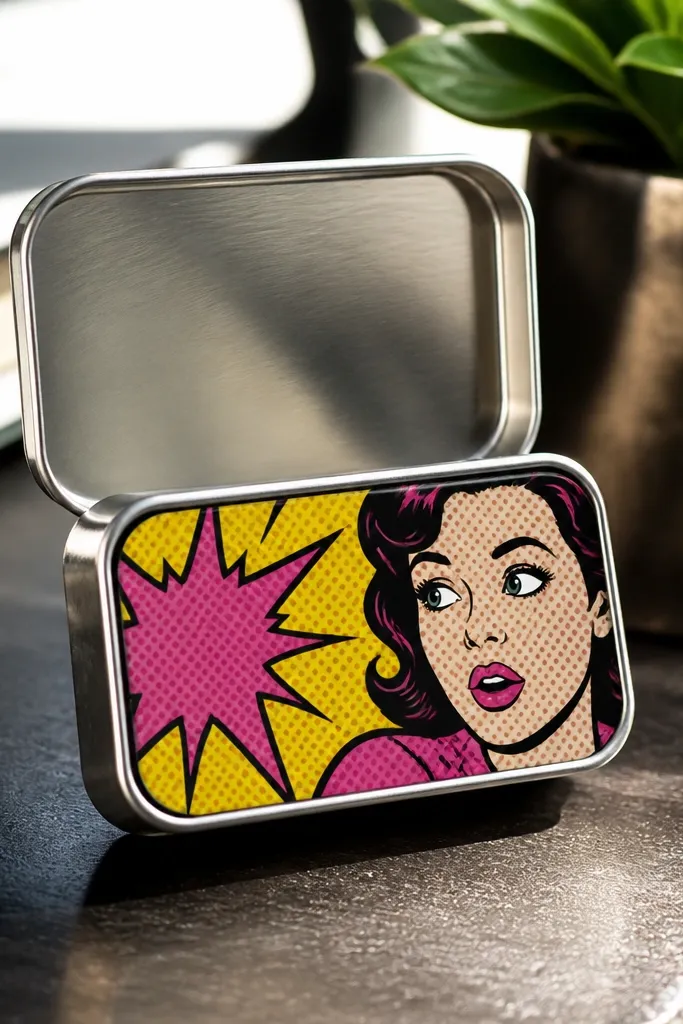
Pop-art is photogenic because the bold black outlines and halftone dots create instant contrast. This wallet looks like a mini collectible when you use a single comic panel design on the front and keep the back clean. It also hides small alignment mistakes because comic layouts forgive asymmetry. This is ideal for a bright, playful aesthetic.
Cover the tin with a bright base color, like white or light yellow. Print or draw halftone dot patterns and thick black outlines on paper, then cut shapes to panel size. Glue the panel pieces onto the tin lid using Mod Podge or acrylic gel medium, smoothing carefully. Seal with 2 coats of clear acrylic medium so ink doesn’t smear. Add simple interior pockets from black felt and glue them to the lid. Keep the back plain so the front art reads clearly.
Use a thin black marker on the sealed surface to clean any tiny edge gaps after the first coat dries.
Don’t overfill the lid with paper layers — it will bulge when closed.
16. Cork + Leather Strap Closure
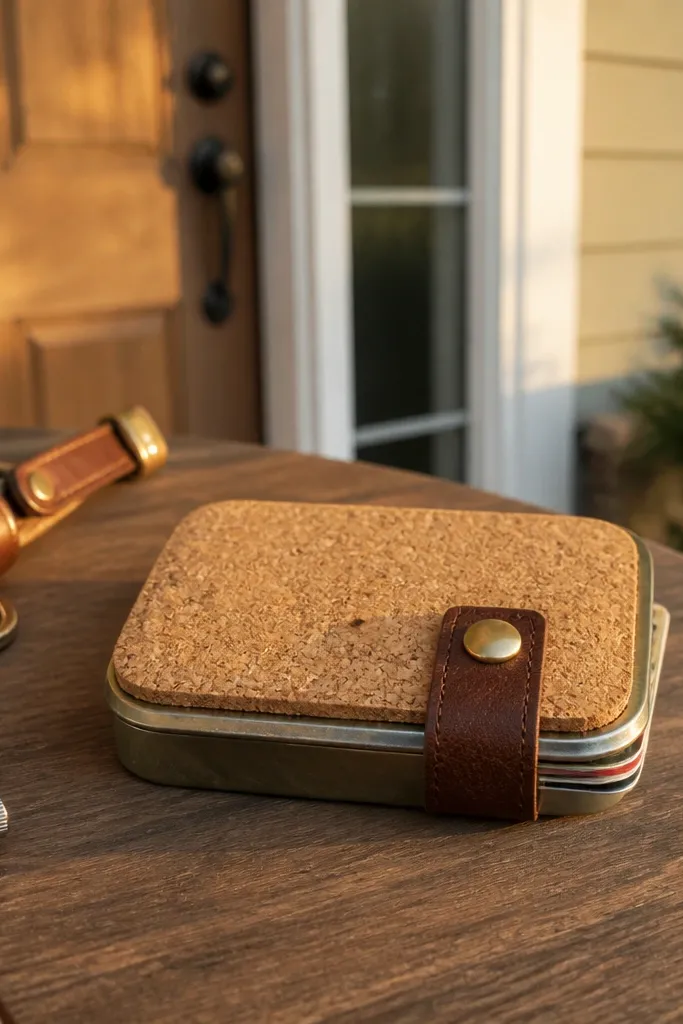
Cork looks premium and hides scuffs naturally, which makes it a smart “everyday” wallet cover. Adding a small leather strap closure makes it feel intentional and keeps the tin from popping open in your bag. The texture also looks great in photos because it catches light. This build is best if you want a more functional upgrade than just a cover.
Cut cork panels for base and lid, keeping thickness even. Glue cork to the tin with contact cement and press flat. For closure, attach a small leather strap on one side using rivets or strong glue, then add a button or magnetic snap on the opposite side. Make sure the strap length allows the lid to close without bending the tin lip. Line the inside with suede-like fabric so cards slide smoothly. Seal cork with a matte clear sealer spray if you want extra protection.
Use a scrap board under cork when punching holes so you don’t tear the material.
Don’t glue strap ends directly to the hinge area — it will restrict movement.
17. Beaded Fringe Keychain Wallet Front
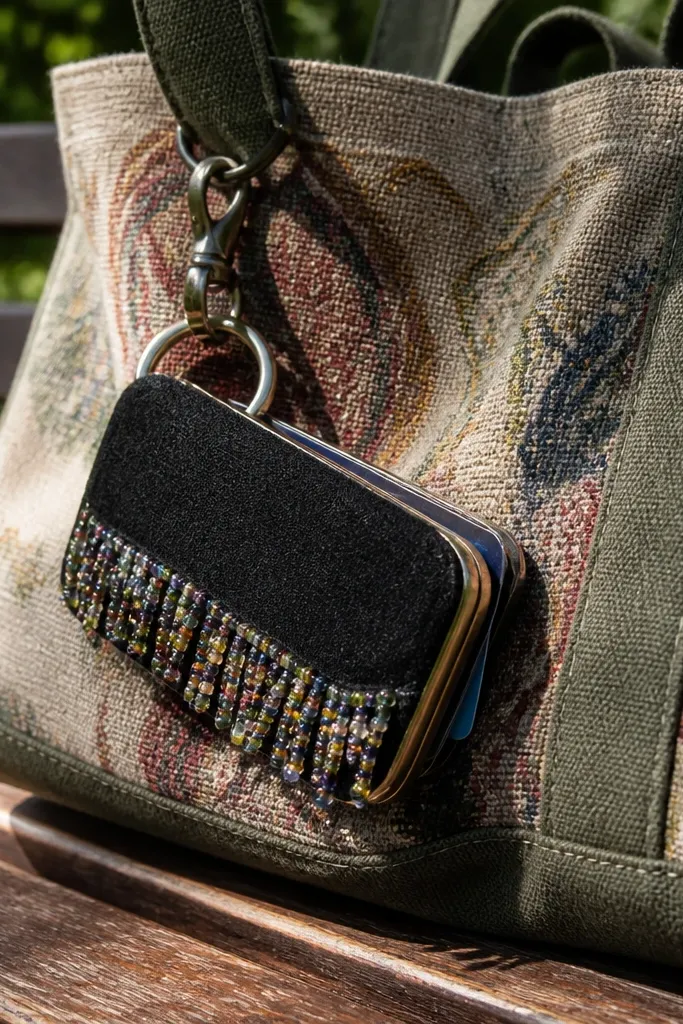
Fringe is instant drama, and the bead texture makes it sparkle in close-up photos. This idea turns the wallet into a mini accessory you’ll actually clip on. Keep the main cover simple and reserve the beads for the front edge so it doesn’t get bulky. It’s a fun build for parties, festival bags, and gifts.
Cover the tin with a solid fabric or faux leather so the beads have a clean base. Create a bead fringe by cutting lengths of thread or fishing line, then threading beads and tying knots at the base. Glue or sew the fringe along the front edge only, staying clear of the hinge line. Add a small keychain loop on the back by attaching a metal jump ring to a reinforced spot. Line the inside with felt to prevent bead snagging against cards.
Use fishing line for fringe — it hangs straighter than thread and looks cleaner.
Don’t attach beads too close to the hinge — the lid will catch and close poorly.
18. No-Sew Faux Leather Strip Weave
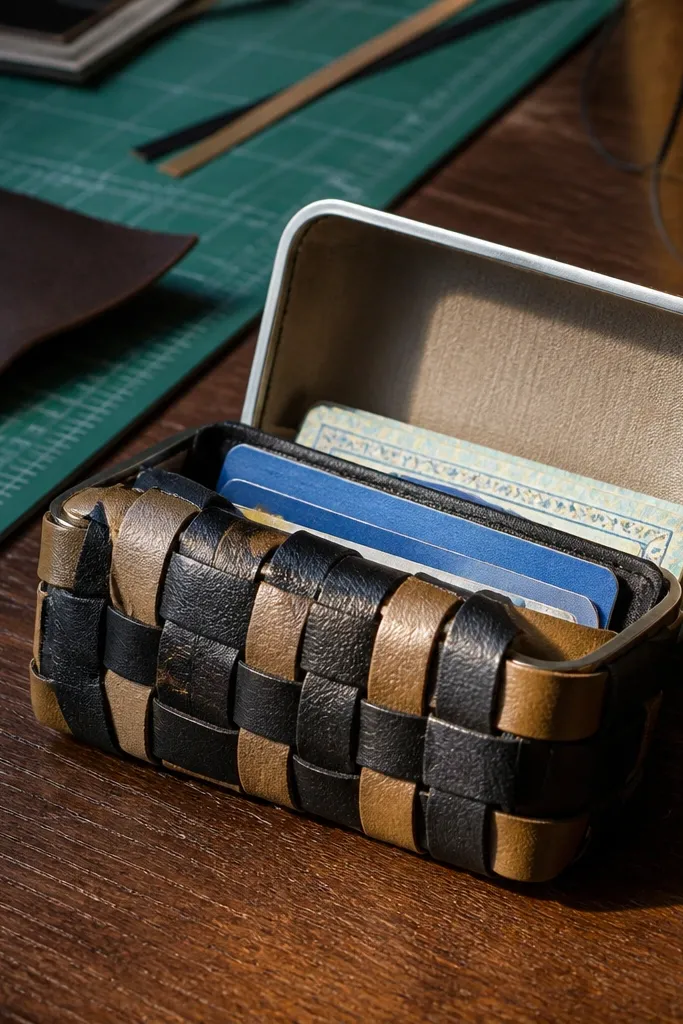
A strip weave looks like a woven wallet without needing real leather tooling. It’s photogenic because the crisscross pattern creates shadows and depth. Choose two faux leather colors that contrast — like black and tan — so the weave is readable. This is a good choice if you like texture and want something more interesting than a flat cover.
Cover the tin lid with a base layer of faux leather and trim to fit. Cut narrow strips, about 1/4 inch wide, from two matching faux leather colors. Arrange strips in a grid on the lid, then glue down alternating strips in small sections so they stay aligned. Repeat the opposite direction to complete the weave, then trim ends under the lip. Add a border strip around the perimeter to hide weave cut ends. Line the inside with microfiber or felt.
Tape the strips to a flat board while you lay out the weave — it keeps spacing even.
Don’t use thick glue under the strips — it makes the weave feel lumpy.
19. Minimal White Canvas With Red Snap Label
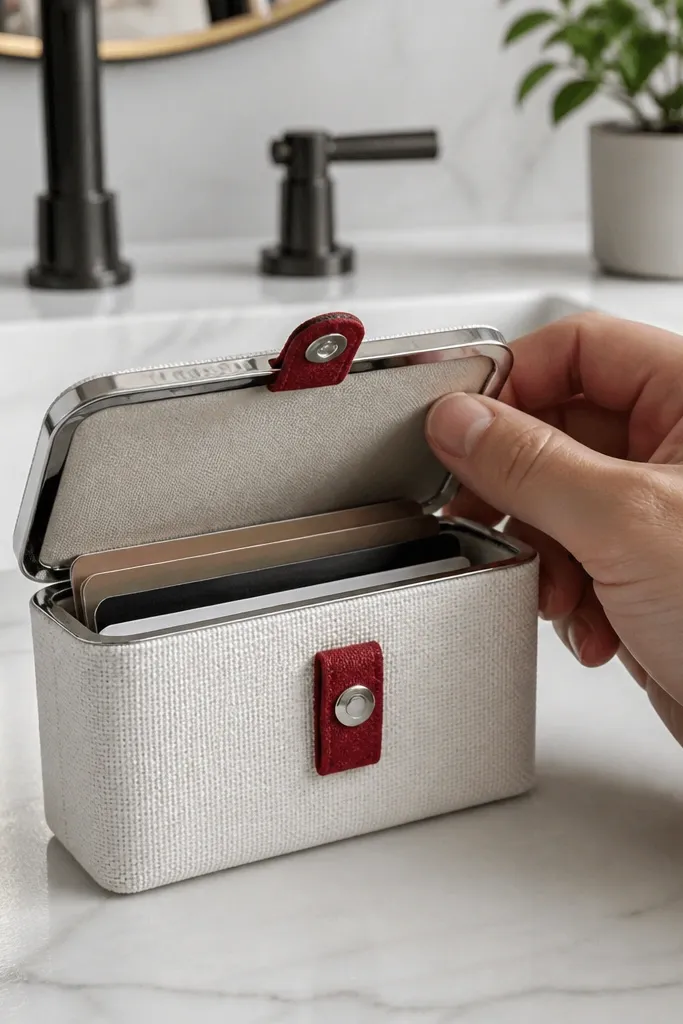
Wrap the tin with white canvas and glue smoothly, trimming under the lip. Create a small red label strip from faux leather or canvas and glue it centered on the front. Attach a snap button or magnetic snap so the label acts like a thumb tab. For the inside, glue a simple felt card pocket on the lid side and keep the base side flat. Seal the outside with a light coat of matte fabric sealer or clear acrylic spray to reduce scuffs.
Minimal designs look clean in photos and feel modern in hand. White canvas is the base, then a red label or snap tab makes it pop without clutter. The snap tab also helps you open the wallet fast. This build is great if you want a crisp look that still feels soft and forgiving.
Skip thisAvoid shiny clear coats on white — they create uneven glare.
Editor's noteUse a ruler to center the label — misalignment shows immediately.
20. Woodgrain Contact Paper With Faux Rivets
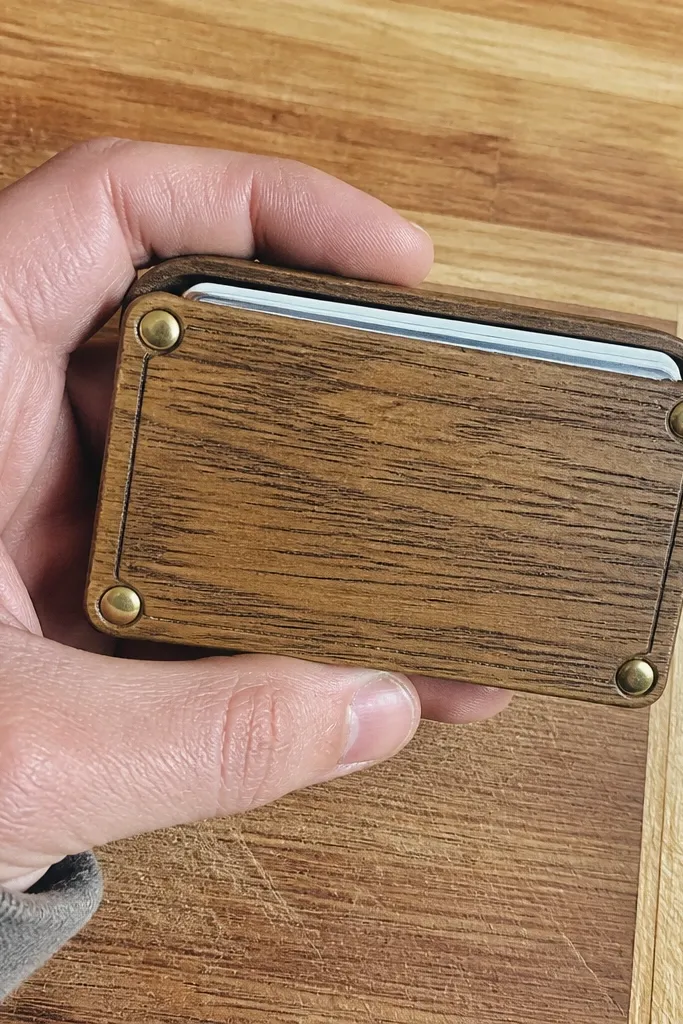
Woodgrain contact paper gives a DIY wallet a “small leather goods” vibe, especially when paired with faux rivets. The pattern looks complex but the build is simple, which is why it’s so effective for budget projects. Use corners and a border to make the design feel structured. This one is good if you want something that looks classy without sewing.
Clean the tin surface and cut woodgrain contact paper panels for base and lid. Apply contact paper carefully, smoothing from the center outward to prevent bubbles. Trim edges under the lip with a sharp knife. Add faux rivets by gluing small metal-look stud caps at the corners and along the border if you want. Seal the contact paper with a thin matte clear spray to protect it. Line the inside with gray felt so the wood exterior doesn’t look too loud.
Warm the contact paper slightly with your hands before applying — it smooths easier.
Don’t stretch contact paper — it distorts the woodgrain at edges.
21. Stitched Grid With Contrast Thread
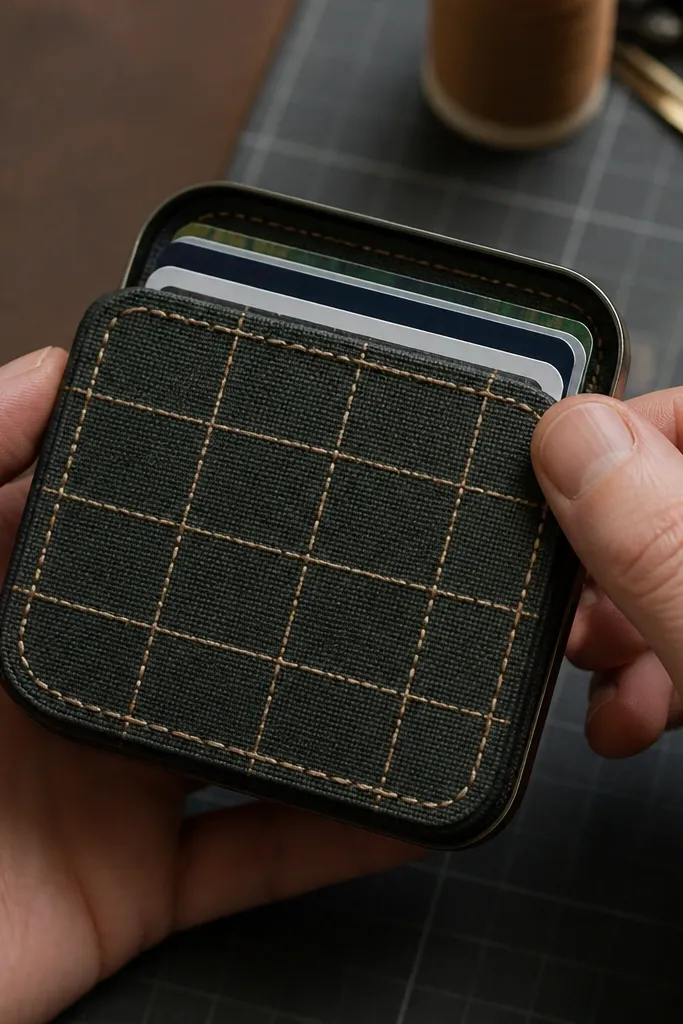
A stitched grid reads like a leather planner cover, even on a tiny tin. The contrast thread gives it that tailored look, and the grid helps the surface feel structured. Choose a sturdy fabric like canvas or denim so the stitching holds cleanly. This build is great for people who like pattern but want it controlled and neat.
Cover the tin base and lid with canvas and trim under the lip. Mark a grid with chalk or a fabric marker: lines 3/4 inch apart for a bold look. Stitch along the grid lines with contrast thread using a sewing machine or hand stitch for smaller projects. Glue a thin faux leather border strip around the perimeter to hide raw edges. Line the inside with solid cotton and glue only at corners so it stays flexible.
Use a longer stitch length on canvas to avoid puckering.
Don’t stitch through the hinge area — it restricts opening.
22. Sparkle Glitter Vinyl With Clear Top Coat
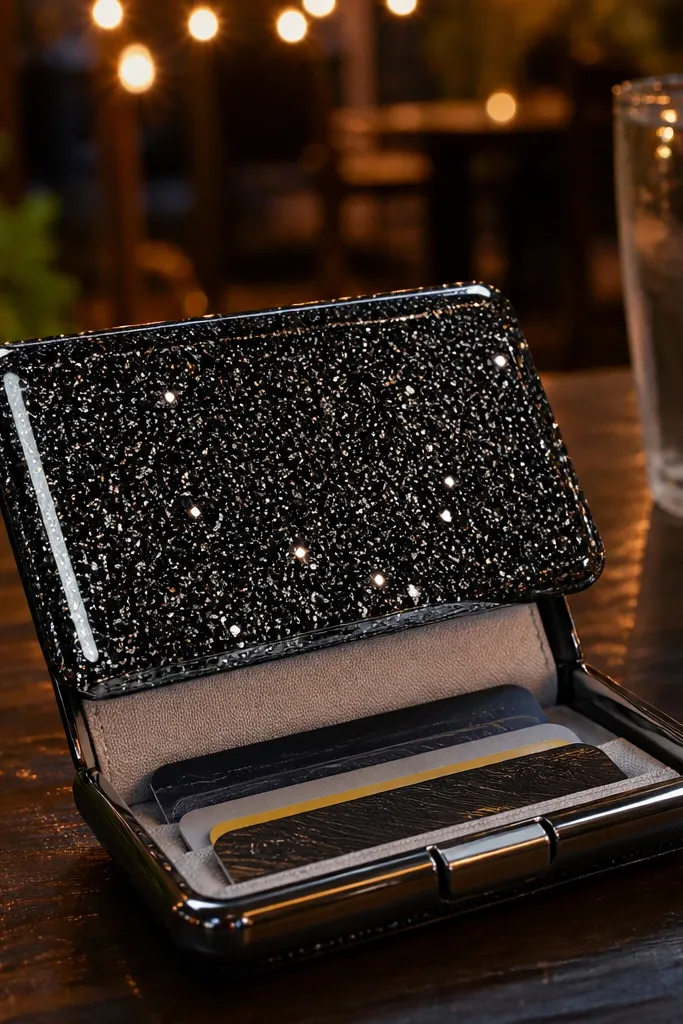
Glitter vinyl is instantly photogenic because it throws light back at the camera. The key is using a clear top coat so the glitter doesn’t shed and the surface stays smooth. Keep the design simple: mostly glitter on the outside, neutral lining inside. This is a great choice for nights out or gifts where you want the wallet to look fun and polished.
Wrap the tin with glitter vinyl using contact cement and press flat. Trim the vinyl under the lip so it doesn’t catch when opening. Apply a thin layer of clear acrylic medium over the glitter and brush lightly to avoid streaks. Let it dry, then add a second coat until the surface feels smooth to the touch. Line the inside with microfiber or felt and glue the pocket to the lid. Let cure fully before putting cards in.
Wear gloves when trimming glitter vinyl — it reduces messy fallout.
Don’t skip top coat — loose glitter transfers to your cards and pockets.
23. Pastel Marbled Polymer Clay Front Plaque
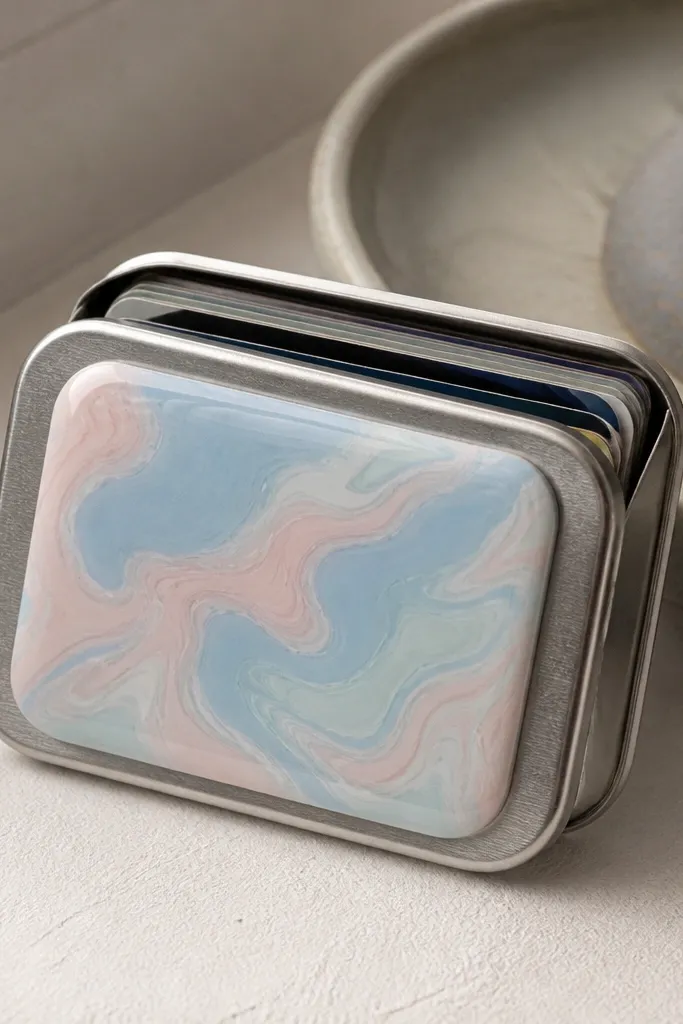
Cover the tin with a solid fabric or paper base, keeping the front smooth where the plaque will sit. Roll polymer clay into a thin slab, then marble by blending two or three pastel colors with a few folds and gentle rolling. Cut a plaque shape slightly smaller than the tin lid front. Bake according to your clay instructions, then cool fully. Glue the plaque to the lid with strong adhesive or two-part epoxy, then seal the plaque with a clear polymer clay finish if needed. Line the inside with felt to prevent friction.
A polymer clay plaque makes the wallet look like a designer piece because it has dimension, not just color. Marbling in pastels reads soft and pretty in photos, and the plaque gives you a focal point. This build is best if you’re okay waiting for curing time and want a more sculptural result than paper or fabric alone. It also hides the front seam by covering it with the plaque.
Skip thisDon’t make the plaque too thick — it will make the tin hard to close.
Editor's noteUse a biscuit cutter or template for clean plaque edges — uneven edges look DIY.
24. Monochrome Striped Washi Tape Shell
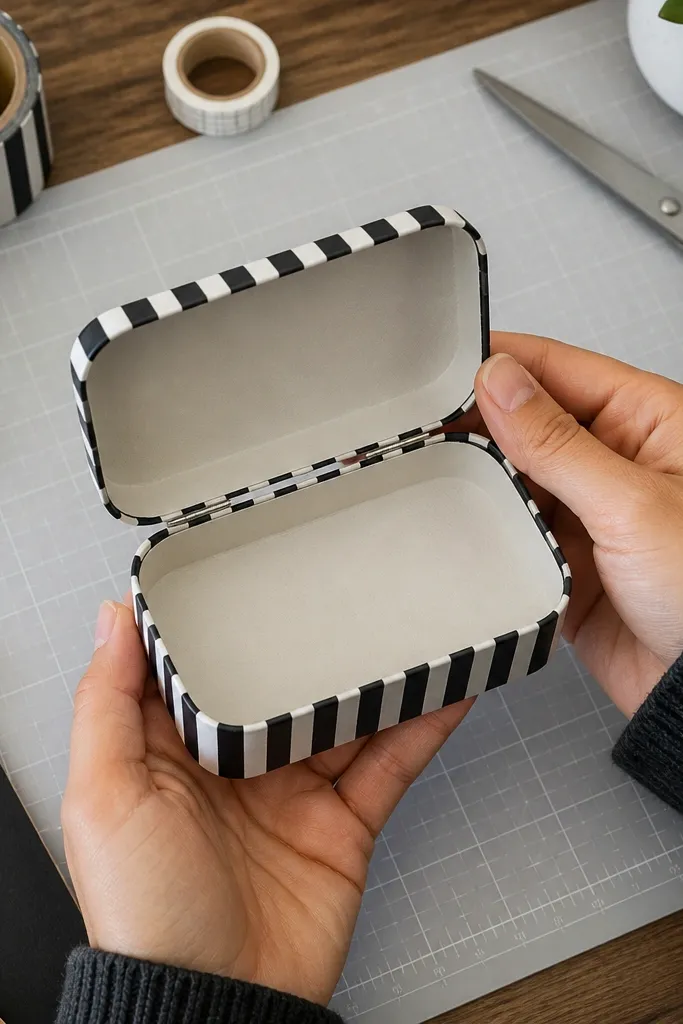
Washi tape can look surprisingly high-end when you treat it like a material, not a decoration. Monochrome stripes create a graphic, clean look that photographs well without clutter. Layering tape over the seam lines hides mistakes and makes the wallet look intentional. This is the fastest build on the list when you want something pretty tonight.
Clean the tin and wrap the base first with washi tape strips, aligning edges tightly. For the lid, cover the top panel and then wrap tape around the sides, keeping the seam line centered. Add stripes by switching tape widths: one narrow, one wide, alternating across the surface. Press each strip down firmly with a flat tool so edges don’t lift. Line the inside with cardstock or felt so the tape exterior doesn’t rub against cards.
Use a craft knife to trim tape flush along the lip — it makes the finish look sharp.
Don’t cover the hinge area with tape — it will gum up movement.
25. Gilded Tape Linework Wallet With Faux Enamel Windows
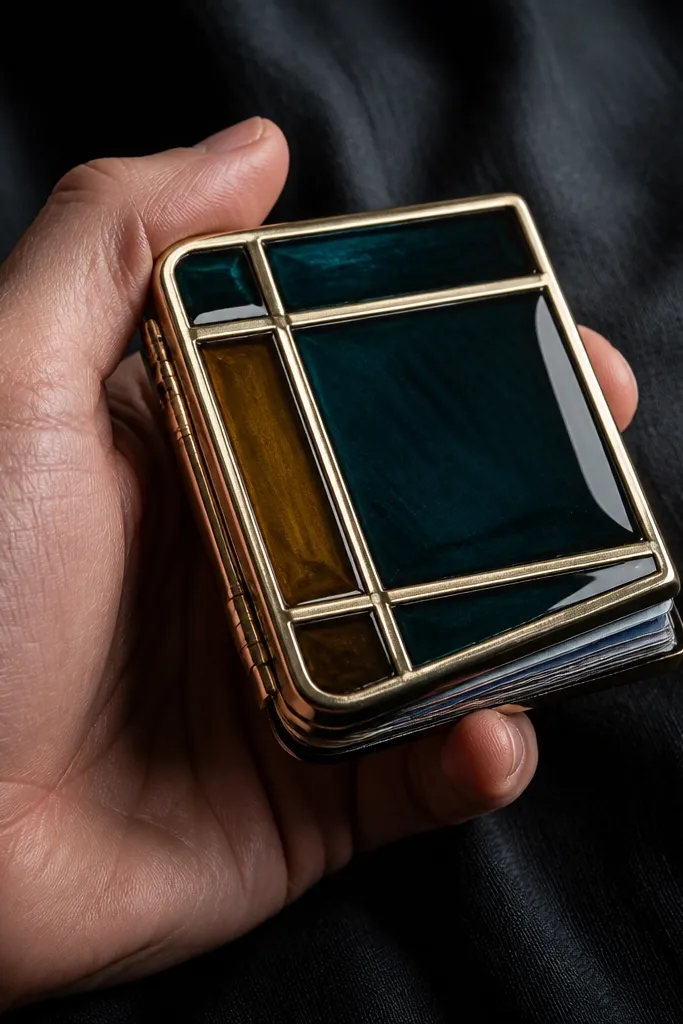
Cut a rectangle of clear craft film (like clear acetate sheet or clear packaging film) slightly smaller than the Altoids tin front window area. Use gold vinyl tape to map a simple design first — straight stripes, a chevron, or a frame — then press it down firmly so it sticks cleanly to the tin surface. Brush or sponge translucent craft paint onto the film inside the taped boundaries, then let it dry 10-15 minutes so it doesn’t smear. Seal the painted film side with a thin coat of clear gloss Mod Podge or clear acrylic medium, then slide it into place over the tin face and press the tape edges to lock it. Finish by adding one extra gold tape border around the edges of the tin front so the whole thing reads as a single framed piece.
This one looks way more expensive than it is because the gold tape gives you clean, graphic lines and the glossy “enamel” windows catch light like tiny stained glass. It fixes the usual Altoids-wallet problem where everything looks flat — here you get raised edges, shine, and color blocks that photograph well. You only need vinyl tape, clear adhesive film, and a couple of craft paints, so it’s a true budget build. It also hides the unevenness of the base because the tape does the structure and the glossy layer does the finish. It suits anyone who wants a crisp, modern look for a desk gift, stocking stuffer, or quick craft night project.
Skip thisDon’t paint directly on the tin — the paint will grab unevenly and the glossy window won’t look smooth.
Editor's notePress the gold tape with a plastic ruler edge, not your fingers — it keeps the line crisp and prevents air bubbles.



