
1. Classic Front-Facing Girl Doll with 6 Swap-Out Outfits
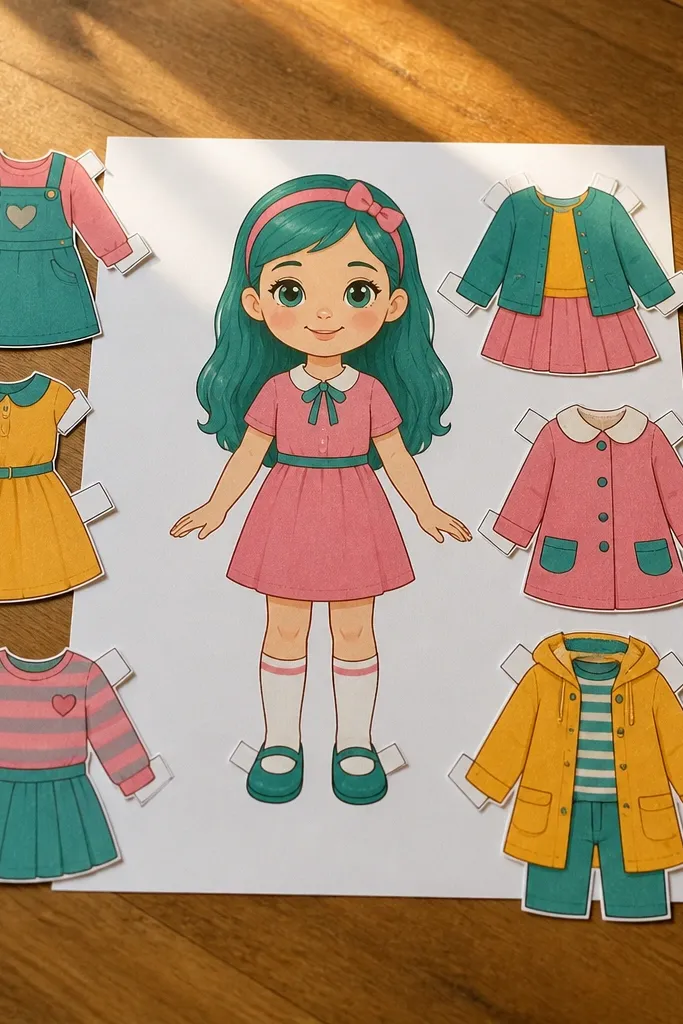
Start by printing on 160-200 gsm paper so the outlines stay crisp after cutting. Color the head and hair first, then color one outfit completely before you cut it out. Cut out the body and the clothing pieces, and use small tabs or slits where the outfit meets the torso if your template includes them. Finally, assemble one outfit and keep the rest in a labeled envelope so swapping stays easy.
This template is built for the “color, cut, change clothes” loop. The doll’s face and hair are simple shapes, so kids can color without getting stuck on tiny details. The six outfit options are spaced clearly around the main body, which makes the final page look organized and fun. It’s great for beginners because the cut lines stay straightforward and the outfit pieces are big enough for small hands.
Skip thisAvoid printing on thin printer paper; it warps and makes the clothes look sloppy.
Editor's noteUse a dark pencil to lightly trace the outermost cut line before kids cut — it makes the edges cleaner.
2. Classic Front-Facing Boy Doll with Sports and Streetwear Set
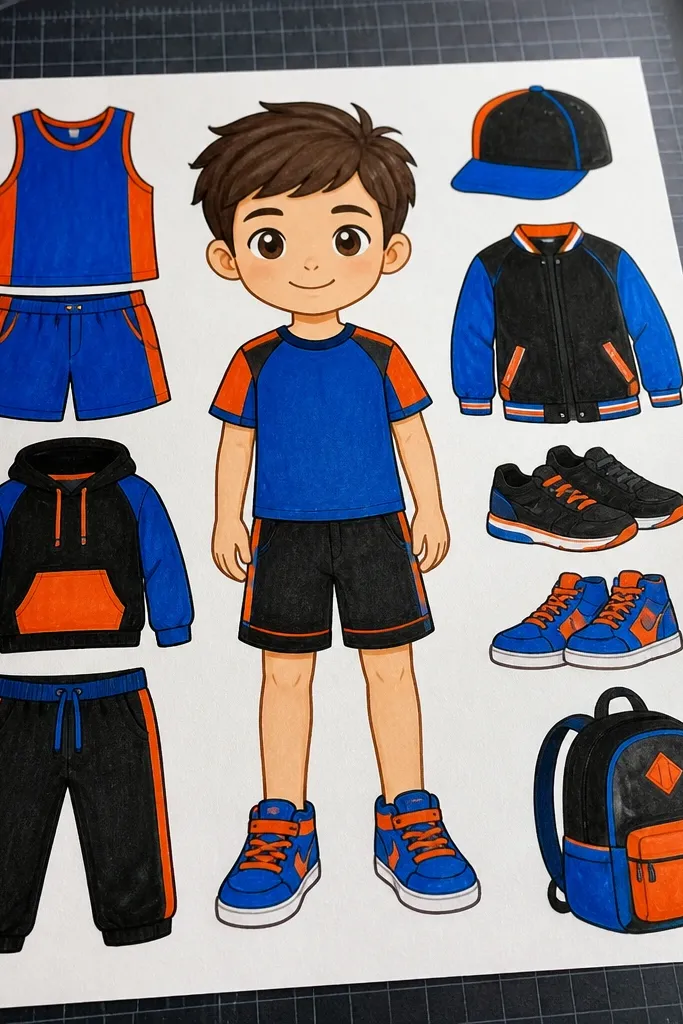
This is the template I’d choose for kids who love bold fashion choices. The clothing shapes are graphic — think jersey lines, hoodie blocks, and simple sneakers — so marker color looks strong instead of muddy. The set includes enough variety to keep attention, but it stays minimal so the cutting stays manageable. The end result photographs well because the outfits create clear silhouettes that stand out against a plain background.
Print the template and color the doll body and hair first so skin tones don’t get smudged by later coloring. Pick one theme outfit to assemble right away, then cut the other pieces and set them aside. When cutting, follow the printed outline slowly and leave the smallest amount of paper at any tab points so the clothing can slide on. Finish by mounting the doll body on a sheet of colored cardstock for a cleaner “gallery” look.
Color shoes and accessories with a darker shade than the main outfit so they pop in photos.
Don’t rush cutting the smallest accessory pieces; they tear more easily than the main outfits.
3. Princess-Style Doll with 8 Large Dress Panels
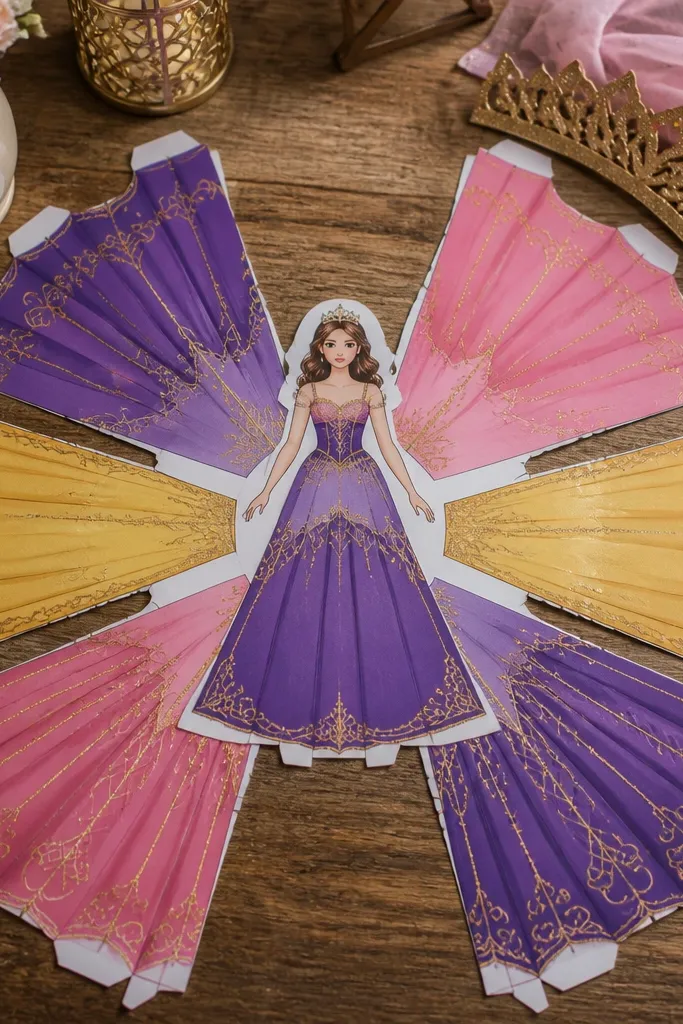
Print on thicker paper and color the face and hair first using crayons or colored pencils for smooth coverage. Color the dress panels one at a time, then cut each dress piece cleanly along the outline. Assemble the doll by attaching the base dress panel to the torso, then layer one accessory piece last. Mount the whole doll on a contrasting background sheet so the dress colors show up in photos.
If you want the finished doll to look like a fashion poster, pick this. The dresses are made of big, flowing panels that color cleanly and create a dramatic silhouette even with simple colors. Accessories are kept to a few standout shapes like a crown or tiara and a bracelet, so kids don’t get overwhelmed. It’s a great pick for marker users because the wide dress areas take color smoothly and look bright on the page.
Skip thisSkip super-fine glitter inside tiny details; it makes a messy texture and smears when kids handle the doll.
Editor's noteUse a light-to-dark coloring order on the dress, starting with the base color and adding a darker shade only at edges.
4. Space Explorer Doll with Helmet and 4 Planet Outfits
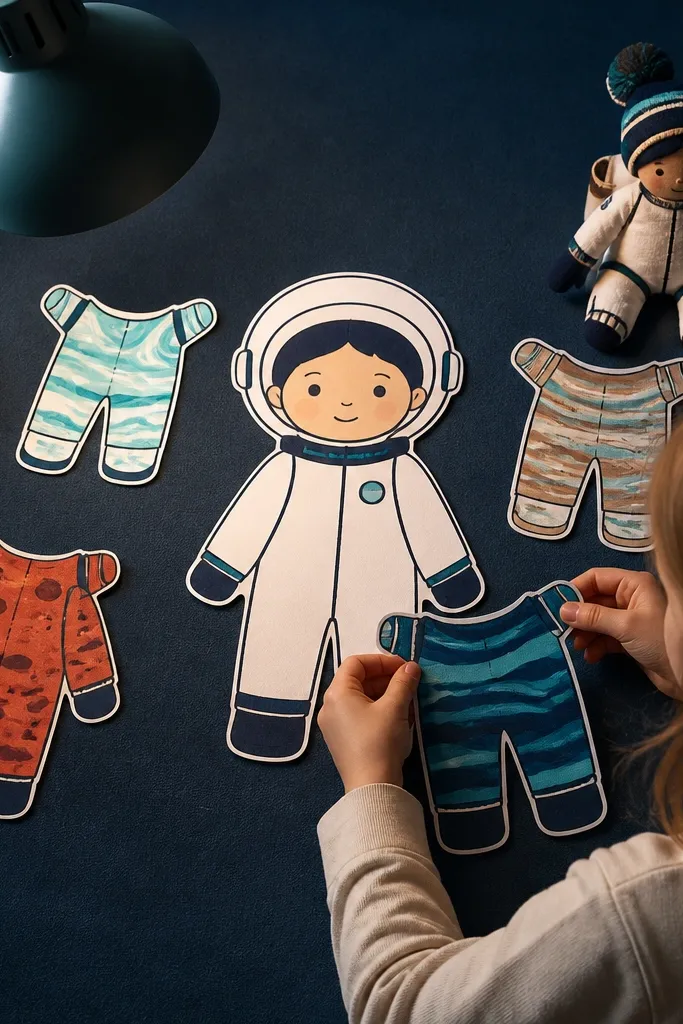
This template is for kids who like themes that feel instantly cool. The helmet shape gives a fun “wow” moment, and the outfits are themed around planets with clear, bold patterns kids can color without needing advanced skills. The outlines are thick enough for clean marker strokes, and the pieces are big enough to cut without frustration. It’s also easy to turn into wall art because the space theme looks good even with simple color choices.
Print and color the helmet first — it’s the largest piece and easiest to keep neat. Color each planet outfit separately, then cut the outfits and helmet pieces. Assemble the doll with the helmet on top, and attach one planet outfit for the final look. For extra polish, add a simple star background behind the doll using a white gel pen.
If you use metallic markers, apply them to helmet highlights and trim lines only — it keeps the look crisp.
Don’t color the helmet last; kids tend to accidentally smear around the face and hair.
5. Under-the-Sea Doll with Mermaid Tail Options (7 Pieces)
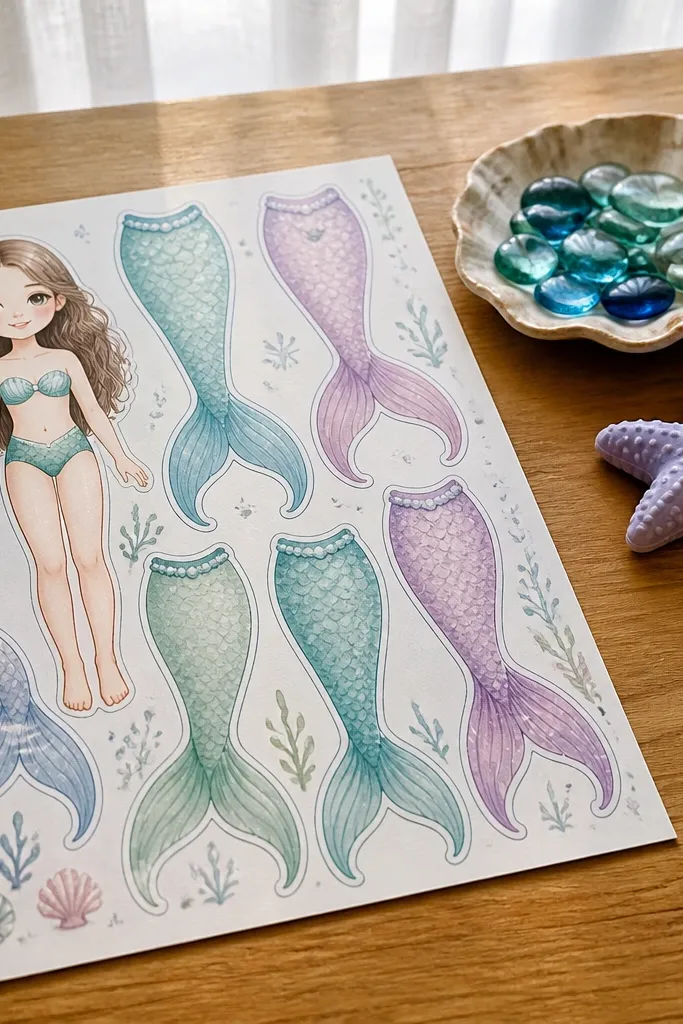
This set makes color look magical because the tail shapes are designed for scale-like patterns. Kids can color with a few colors and still get a clear “seashell meets mermaid” look. The accessories stay simple — shells, maybe a necklace — so the doll doesn’t get cluttered. It’s a strong choice for photogenic results because the tail silhouette reads clearly, even in a quick phone photo.
Print on heavier paper and start by coloring the tail patterns with 2-3 main colors. Cut the tail options and keep the doll body intact while you swap tails. Assemble by attaching the chosen tail piece to the torso area using the template’s tabs or alignment marks. Finish with shell accessories and mount on light blue or white cardstock.
Use a single dark line around each tail edge for definition — it makes the scales look intentional.
Avoid using too many colors in the tail; it turns into a muddy block instead of readable pattern.
6. Ballet Doll with 5 Tutu Styles and Simple Pose Lines
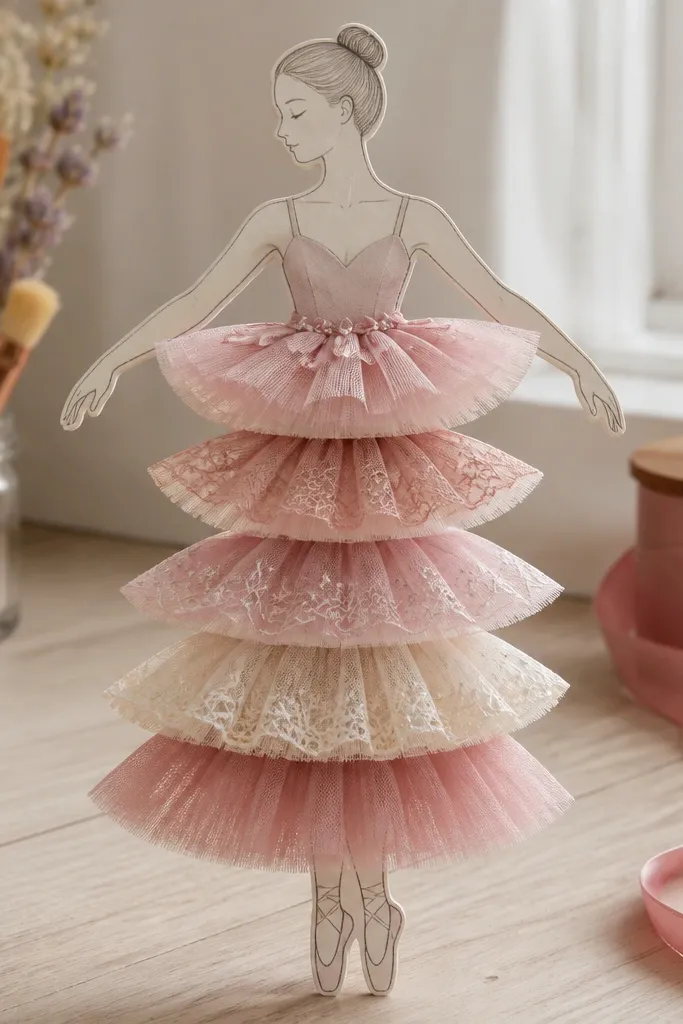
Print and color the skin and hair first, then move to the tutus. Cut the tutu pieces carefully along the outer outline, leaving tabs if the template includes them. Assemble one tutu on the doll and add shoes if included. Mount on white or pastel cardstock and add a simple dot border using a marker.
This template is for a soft, classy look that still stays kid-friendly. The ballet tutu pieces are large and layered, so coloring looks neat even with crayons. The pose lines are minimal, which helps kids focus on color and outfit design instead of tiny details. The final doll looks elegant on a plain background, and it’s easy to add a name label underneath for a personal touch.
Skip thisDon’t cut too close to the tabs; you need that tiny paper edge to keep the tutu from falling off.
Editor's noteColor tutu stripes from top to bottom with steady pressure so the banding looks even.
7. Jungle Explorer Doll with 6 Outfit Pieces and Leaf Accessories
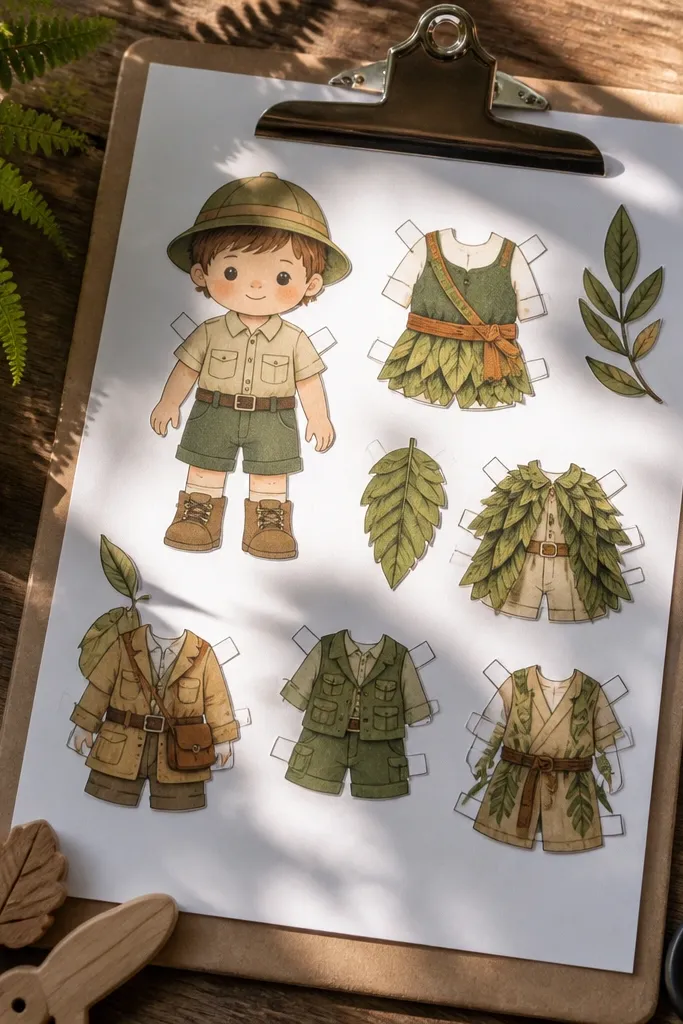
This one makes kids feel like they’re building a mini adventure. The outfits have clear shapes — shirt, pants, boots — and the accessories are leaves or simple gear pieces that color well. The template is structured so the doll stays easy to assemble, and the jungle theme gives kids lots of green-brown color options without needing fine detail work. It’s photogenic because the clothing silhouettes show up clearly against a light background.
Print on 160-200 gsm paper and color the background jungle pieces first if your template includes them. Color the doll outfit set you want, then cut out the body and clothing pieces. Assemble the outfit by aligning the torso and legs marks, then attach the boots last. Add leaf accessories around the doll on the background sheet before mounting.
Use two greens: one light for leaves and one darker for edges. The contrast makes it look designed.
Skip tiny shading inside every leaf; thick outlines are enough for a clean look.
8. Halloween Costume Doll with 10 Easy-to-Color Costume Blocks
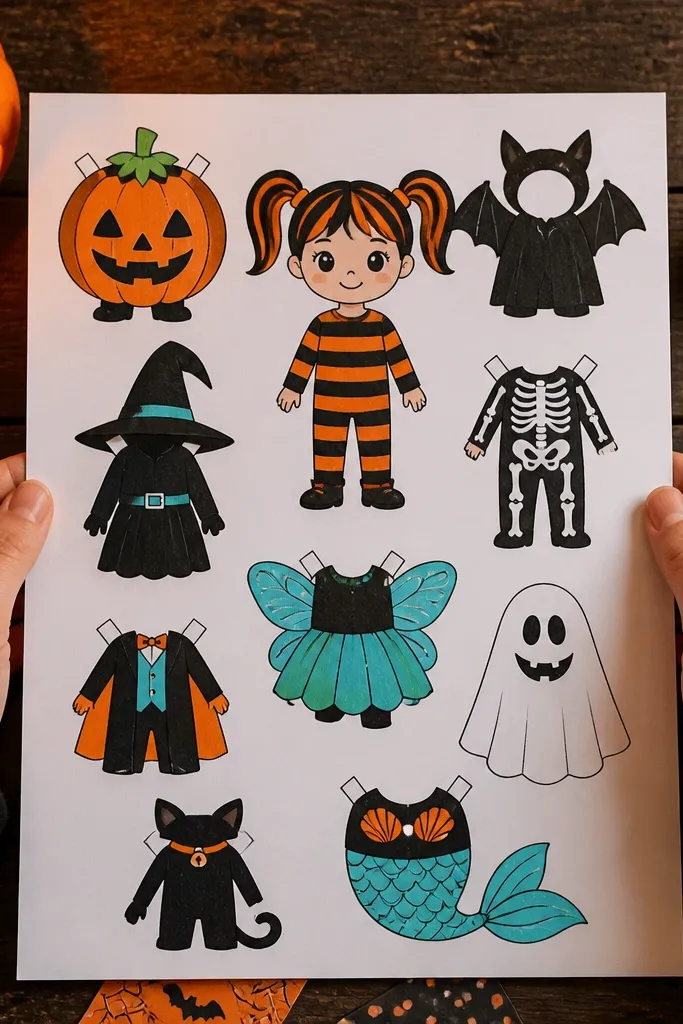
Print and choose a single costume to color first so you finish the assembly quickly. Color the mask or headpiece carefully around the face opening, then cut it out. Cut the rest of the costume pieces and assemble the full doll on a black or dark purple cardstock background. Add a small orange or lime border around the page for Halloween contrast.
This template is a crowd-pleaser because it gives a lot of costume choices without requiring advanced cutting. The costumes are built from big blocks like capes, masks, and simple dresses or suits. Kids can color fast with markers and still get a strong result because each costume has clear, separated shapes. The page looks great for group projects because each kid can pick a costume and you still get consistent, neat silhouettes.
Skip thisDon’t stack too many costume layers; use one main cape or one main headpiece for a clean silhouette.
Editor's noteIf you’re using felt-tip markers, color from the center outward to avoid streaks at the edges.
9. Rainy-Day Fashion Doll with 6 Outfits and Umbrella Piece
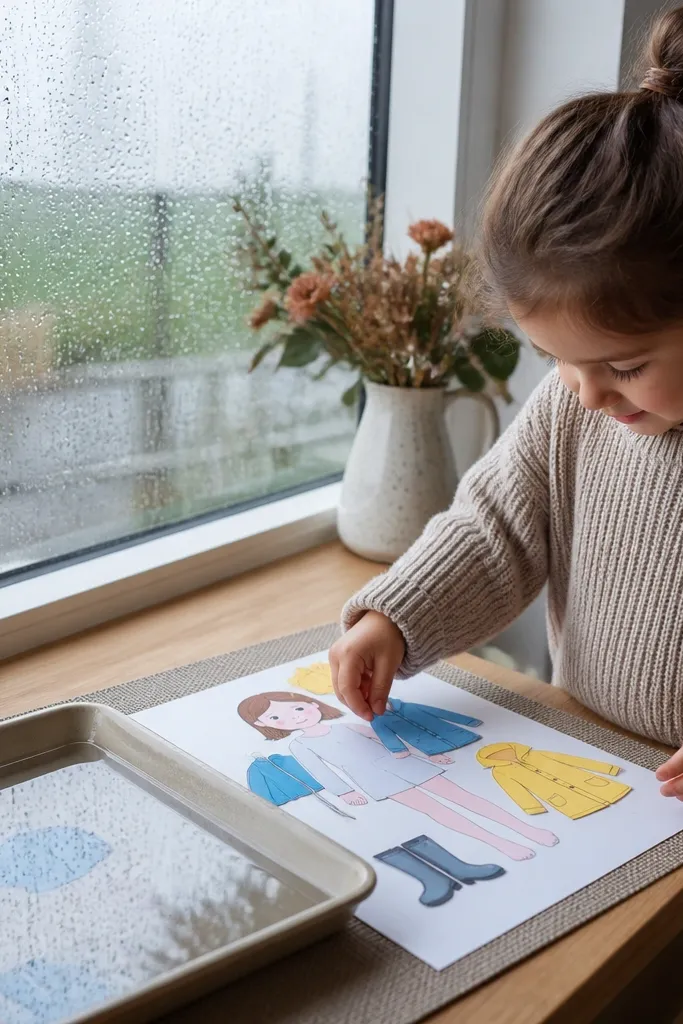
Print and color the face and hair first, then color the umbrella and one outfit. Cut the umbrella separately and set it aside so you can assemble it last without smudging. Attach the raincoat and boots to the doll torso and legs, then place the umbrella behind or beside the doll depending on the template layout. Mount on a light gray or sky-blue background for a clean “rainy day” vibe.
This is a template that looks cute even with simple colors. The umbrella piece adds instant story and makes the doll feel interactive, while the outfits are designed with clear raincoat lines and boots. It’s great for kids who like everyday fashion themes, not just costumes. The result photographs nicely because the umbrella creates a visual frame around the doll.
Skip thisAvoid coloring umbrella stripes too close together; they blur when kids handle the paper.
Editor's noteAdd small raindrop dots with a white gel pen on the background sheet, not on the umbrella — it stays cleaner.
10. Robot Kid Doll with 7 Parts and Switchable Accessories
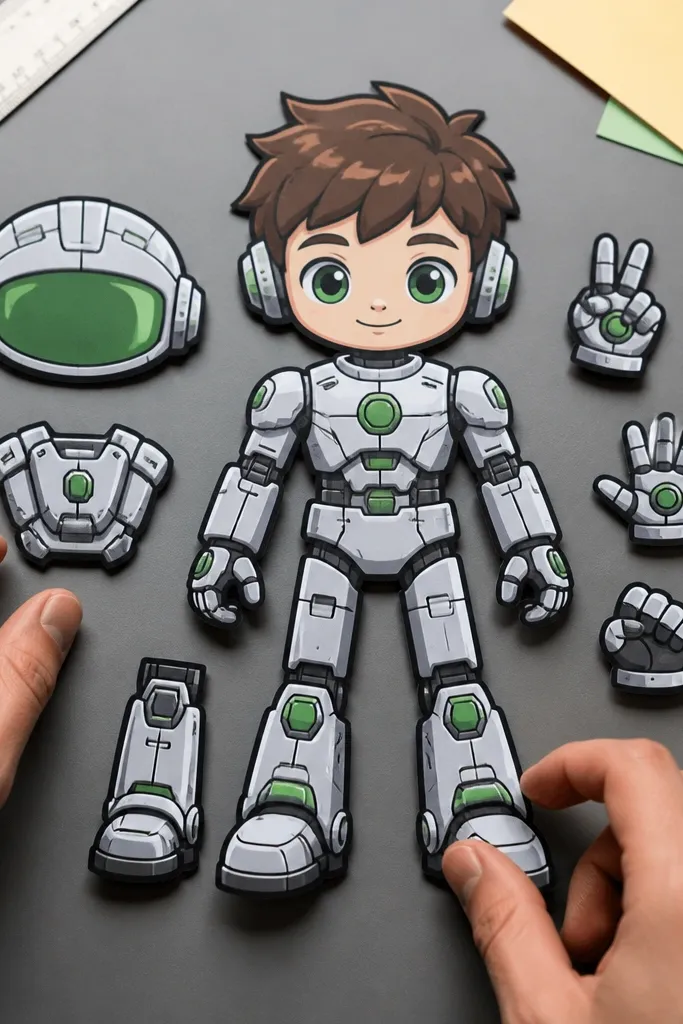
Print and color the robot body panels first, using 3-4 colors max so it stays readable. Cut out the head and body pieces, then attach the accessories one set at a time. If the template includes swap slots, assemble only one accessory set for the final display to keep it tidy. Mount the robot doll on a darker background sheet to make the colored panels pop.
This template is perfect for kids who love building. The robot design uses big panel shapes for the body and clear accessories like hands, antenna, and belt details. Coloring looks sharp because the outlines separate each panel, so kids can use different colors without bleeding into each other. It also looks techy in photos — the body blocks read clearly even when the background is simple.
Skip thisDon’t add too many tiny details with markers; it turns into a texture mess.
Editor's noteUse a darker color for panel edges so the robot looks outlined, not flat.
11. Witch and Wizard School Doll with 8 Robe Styles
This is the “storybook magic” option that still works for beginners. Robes are made from big, readable shapes, and the hat or wand pieces are simple enough to cut cleanly. Kids can color robe cuffs, belt areas, and patterns without fighting tiny lines. The final look is photogenic because the robe silhouette frames the doll’s body and makes the colors feel intentional.
Print on thicker paper and color the face and hair first. Color one robe style fully, then cut the robe and attach it to the torso. Add the hat and wand last, then cut out any star or charm accessories and place them around the doll on the background sheet. Mount on a warm cream or light brown cardstock so the magic theme feels cozy.
Use a single pattern idea per robe, like stripes or dots, and keep it consistent across the set.
Skip shading every fold line; the thick outlines already give the robe shape.
12. Fashion Designer Doll with 6 Blank Outfit Sketches and Labels
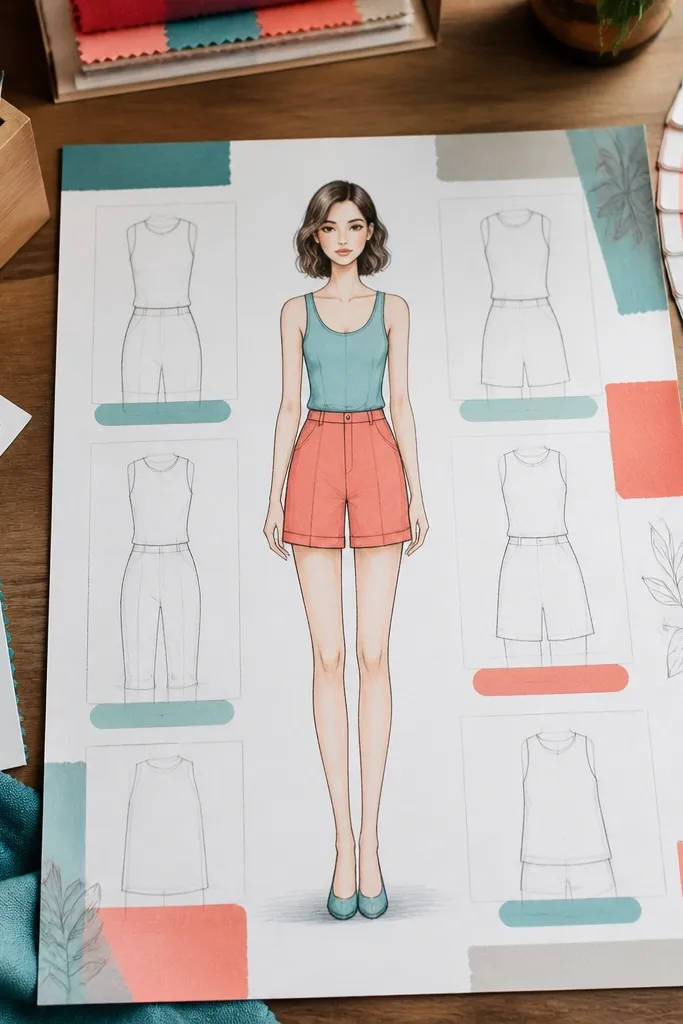
This template is for kids who like designing more than cutting. The outfits are laid out like sketches, with clear blank areas that invite coloring and pattern drawing. It’s also great if you want each kid to write small outfit names or color notes next to their designs. The doll still assembles cleanly, so you get both a design page and a finished character.
Print and color the doll body and base outfit first so you have a consistent “character” look. Then color the separate outfit sketches and add patterns like checks, stripes, or simple florals. Cut the assembled doll and mount it, and keep the designer sketches as a side display. If the template includes label boxes, fill them with marker text before cutting anything out.
Use a black gel pen for tiny pattern details; it makes the designs look sharper than marker alone.
Avoid filling the whole sketch area with heavy marker; leave some white space for clean pattern contrast.
13. Sports Star Doll with 9 Jersey Colors and Number Panel
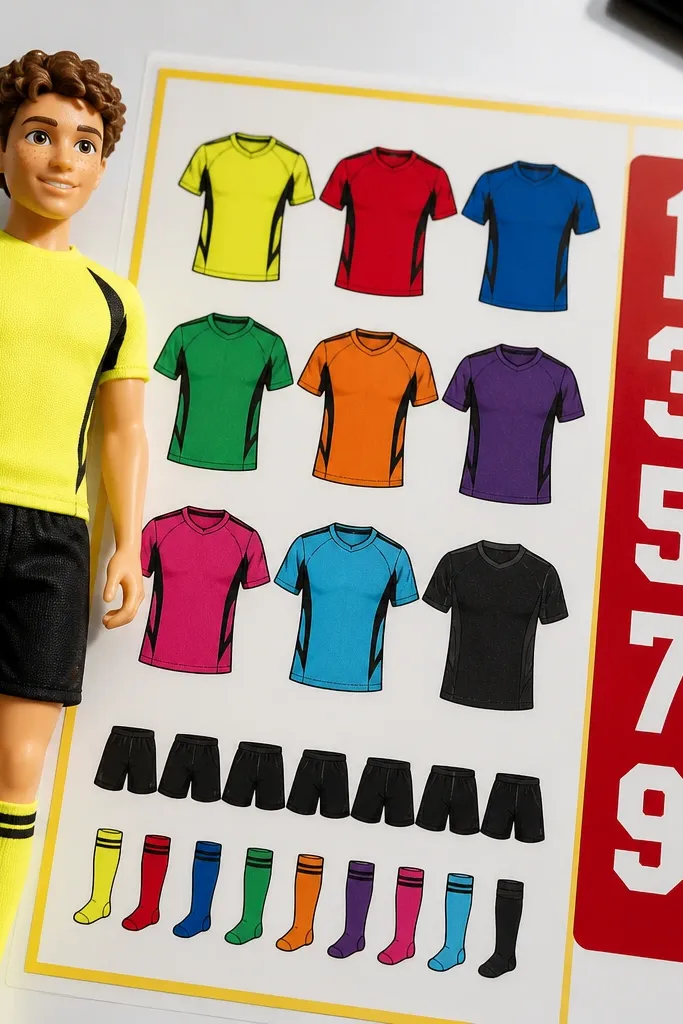
This one is designed for bold, high-contrast coloring. The jerseys are large enough to color fast, and the number panel gives kids a satisfying finish — it reads clearly in photos. The template includes multiple jersey options, so kids can pick their favorite color scheme without redoing the whole doll. It’s a strong choice for group settings because the results look consistent across different kids' choices.
Print and color the face and hair first, then choose one jersey color set to assemble. Cut out the jersey piece and number panel, and color the number with a marker that contrasts the jersey. Attach the jersey to the torso and add any simple shorts or socks pieces included. Mount on a bright background like light yellow or teal so the jersey pops.
Color the number last and use a ruler to keep the edges of the number panel straight if you’re drawing your own digits.
Don’t pick a jersey color and number color that are too close; it makes the number unreadable.
14. Arctic Explorer Doll with 5 Winter Gear Sets
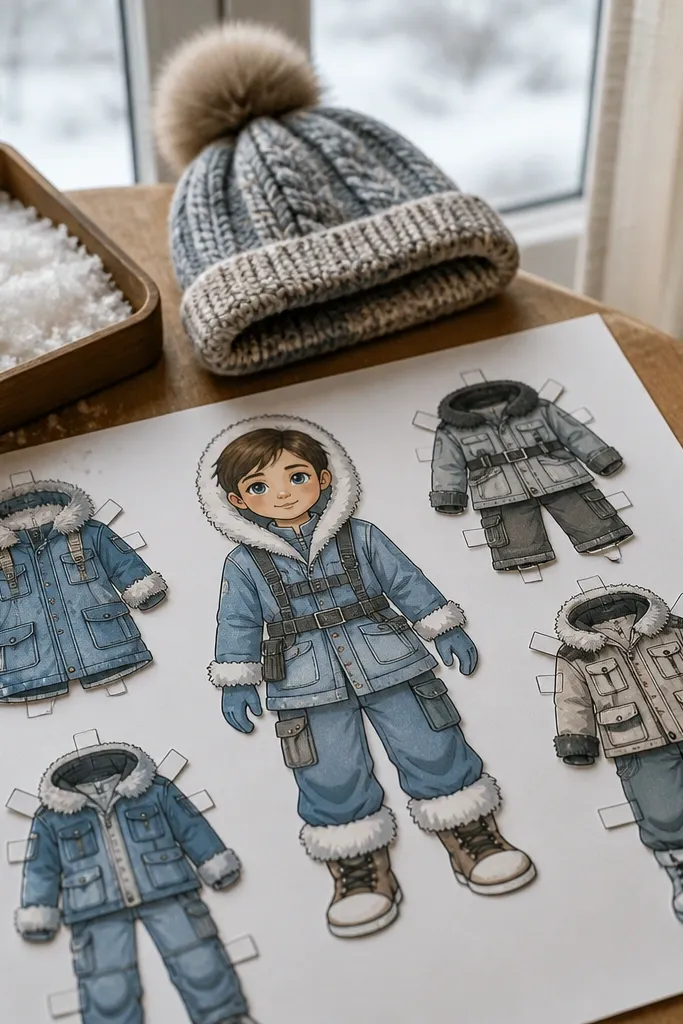
Winter gear templates look great because the clothing shapes are layered and easy to color in sections. This set gives kids multiple gear combinations like hats, coats, and boots, so they can build different looks without tiny accessories. The arctic theme also invites cool colors — blues, grays, and white — which photograph cleanly. It’s a good option for kids who want a calm, aesthetic project instead of a costume scramble.
Print on thicker paper and start by coloring the coat layers in order: base coat first, then trim and gloves. Cut the coat and hat pieces, then assemble the doll with the coat as the main layer. Attach gloves and boots last so the silhouette stays neat. For the background, use light blue or pale gray cardstock and add a few snow dots with a white gel pen.
Use a blue-gray pencil for coat shading; it looks softer than marker and blends nicely.
Avoid heavy dark coloring on the background; it makes the winter colors look dull.
15. Garden Party Doll with 7 Floral Outfit Pieces
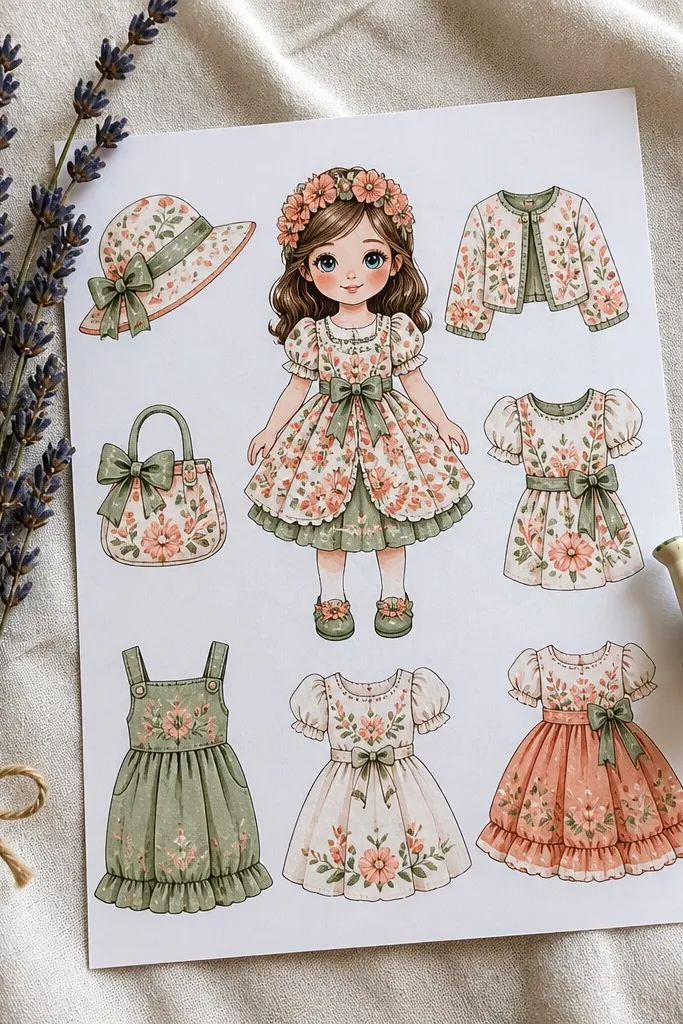
Print and choose a color palette first: 2 main colors plus 1 accent. Color the dress sections, then add simple flower patterns using dots or short strokes. Cut the dress and accessories, assemble the doll, and place the bouquet piece near the hand area if the template marks it. Mount on pale green or cream cardstock so the floral colors stand out.
This template is made for pretty color choices and clean outlines. Floral outfits are broken into larger sections, so kids can color petals and leaves without getting stuck on tiny linework. Accessories like a headband or small bouquet add a finished look without extra cutting stress. The final doll reads as “cute” even with a simple color palette, which makes it great for kids who want a pretty result fast.
Skip thisDon’t overload flowers with too many tiny details; it turns into a scribbly texture.
Editor's noteOutline flower petals with a darker pencil first, then fill — it stops the colors from looking flat.
16. Medieval Knight Doll with 6 Armor Layers
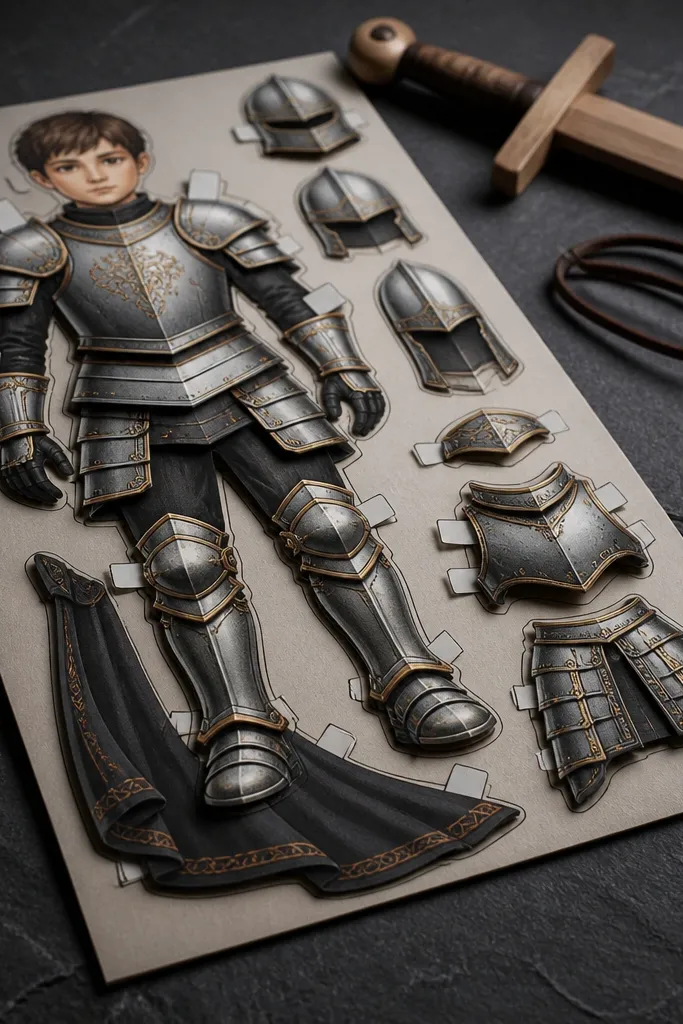
Print and color the helmet and chest plate first, using metallic-looking markers or gray pencil shading. Cut each armor layer and assemble from largest to smallest so alignment stays correct. Attach sword or accessory pieces last so they don’t get bent during assembly. Mount on dark navy or black cardstock and add a simple “castle stone” background using light gray dots.
Armor templates look strong because they create clear shapes and big color zones. This set includes multiple armor layers so kids can color a fully armored look or mix parts for a less serious style. The helmet and chest plate shapes are designed for clean coloring, so kids can use silver, gray, and gold accents without tiny details. It’s photogenic on dark backgrounds because the armor edges show clearly.
Skip thisAvoid layering too many armor pieces at once; the doll starts to look cluttered.
Editor's noteUse a gold marker only on belt and trim edges; it keeps the armor from looking uniformly shiny.
17. Cat-Themed Doll with 8 Blank Outfits and Tails
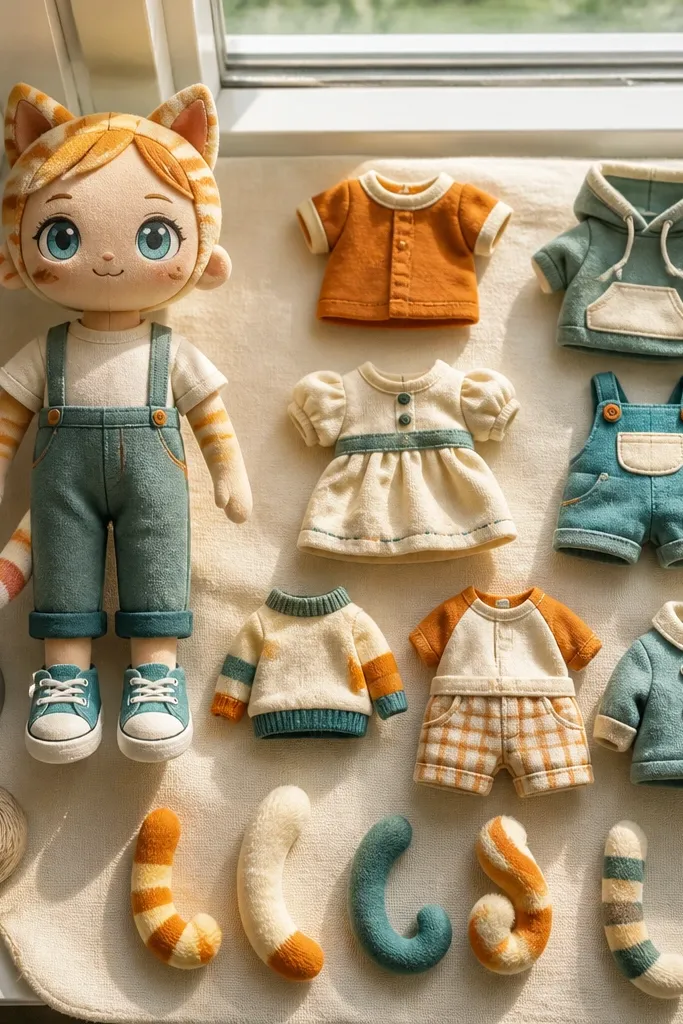
Print on thicker paper and color the face and hair first, then color the tail options you want. Cut the doll body and outfit pieces, then assemble one outfit and one tail piece using the template’s attachment points. Add simple cat accessories like ears or a collar if included. Mount on a light-colored background and add a few paw-print dots around the doll.
This template turns coloring into a character-building game. Outfits are simple and bold, while tail options add personality and let kids pick a “vibe” without needing advanced art skills. The cat details are separated into clear shapes, which makes marker coloring look crisp. It’s especially good for kids who love animals because the finished doll feels animated even when it’s flat on paper.
Skip thisDon’t cut the tail too small; if you remove the attachment edge, it won’t hold.
Editor's noteColor the tail tip a darker shade; it makes the tail read clearly from a distance.
18. Art Studio Doll with 6 Outfit Colors and Palette Accessories
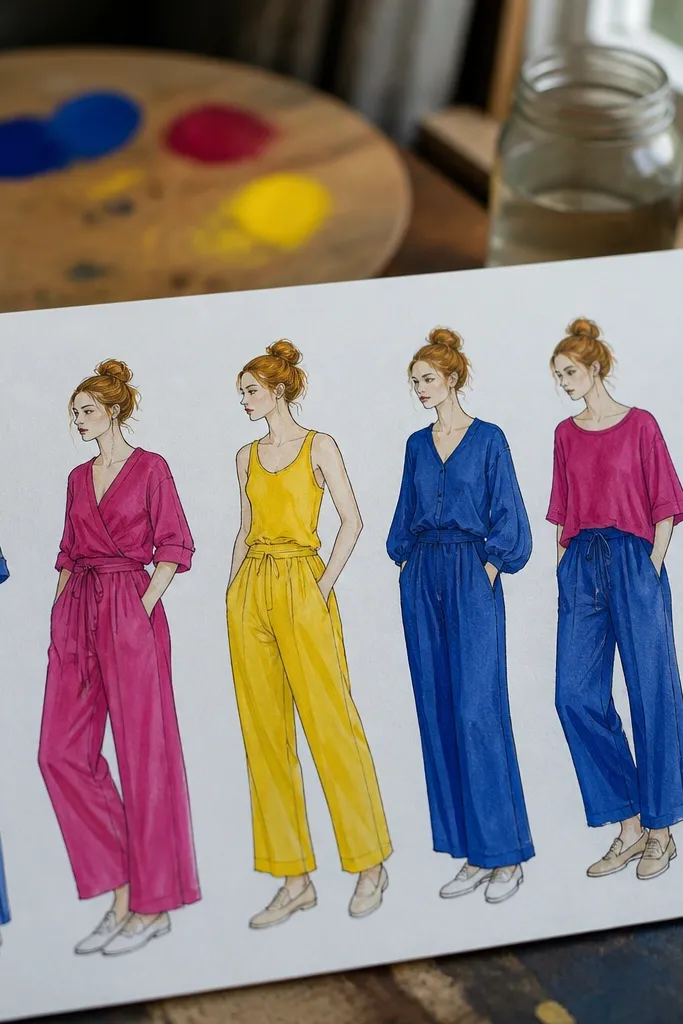
Print and color the doll body first, then color the outfits one by one. Cut out the palette accessories and any hand-held pieces, then assemble the doll last. Mount on white or light gray cardstock so the colored outfits look bright. Add a few scribble lines behind the doll using a thin marker to suggest motion and keep the page from looking empty.
This template looks like a mini art project and a fashion doll at the same time. The outfit pieces are large, with clean edges for crisp coloring, and the palette or art accessories add a clear theme. Kids can color using a few strong colors, then add simple details like stripes on shirts or dots on skirts. It’s a great fit for classrooms or rainy-day crafts because it stays fun without needing fancy supplies.
Skip thisAvoid using only one color across every outfit; the palette accessories look best with contrast.
Editor's noteUse two marker tips: a fine tip for outlines and a broader tip for filling large areas faster.
19. Beach Day Doll with 6 Swimwear Looks and Sunglasses
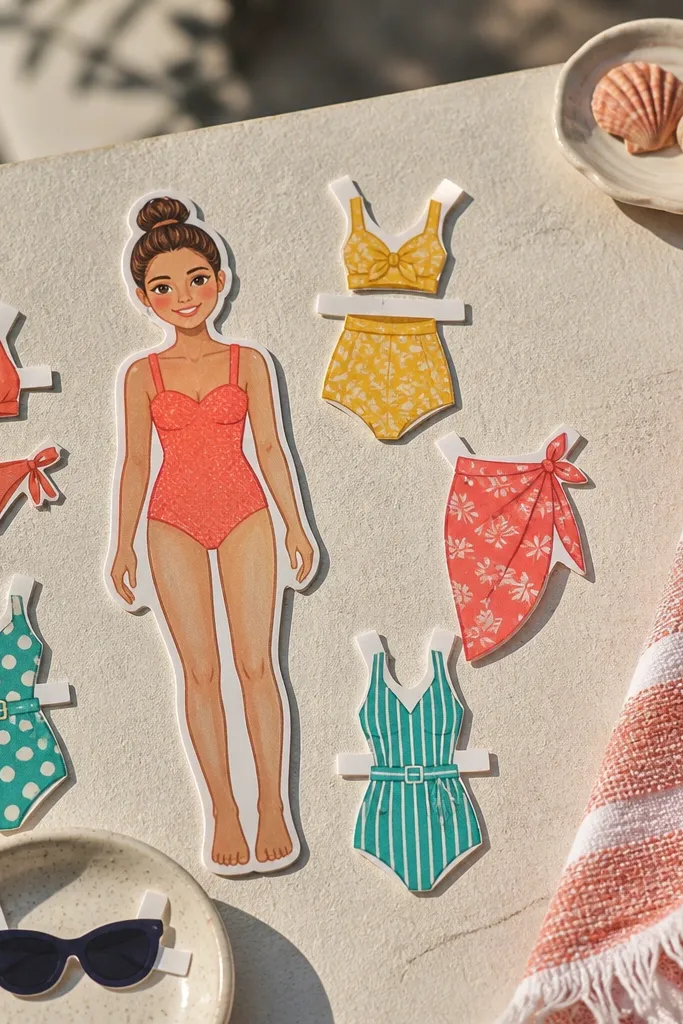
Print and color the face and hair first, then pick one swimwear option to assemble. Color sunglasses and any beach accessories last so they don’t smear while you work. Cut the outfit and accessory pieces, then attach the swimwear to the torso and place the sunglasses on the head. Mount on light tan or pale blue cardstock and add a few simple wave lines with a blue gel pen.
Beach templates are a cheat code for bright results. Swimwear pieces are usually simple in shape, and the sunglasses add a fun, instantly recognizable accessory. Kids can use bold colors like coral, turquoise, and yellow, and the outlines keep everything from looking messy. The final doll looks cheerful on a white or light sand-colored background, which makes it easy to photograph and share.
Skip thisDon’t use very dark blue for the background; it makes the beach colors look flat.
Editor's noteColor skin with a warm tone and add a tiny blush dot on the cheeks using a pink pencil for a clean, cute look.
20. Halloween Pumpkin Patch Doll with 5 Cute Costumes and Jack-O-Hat
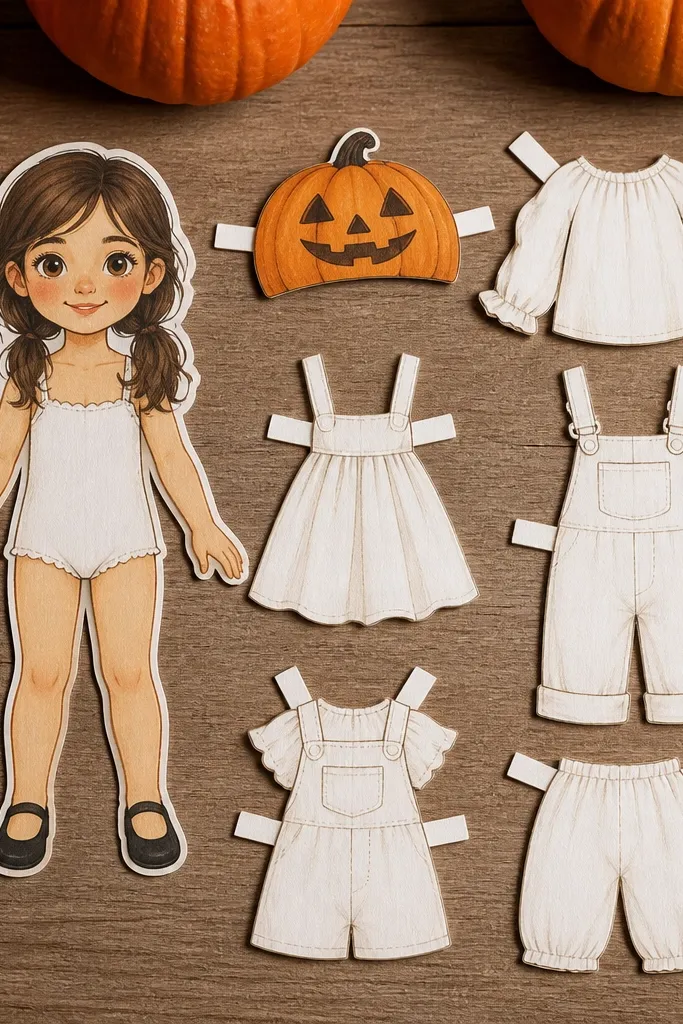
Print on thick paper and color the jack-o-hat first, then color the doll face and hair. Cut out the chosen costume pieces and assemble the doll with the hat last. Place the pumpkin-themed accessory near the doll’s hand or side if your template marks it. Add a simple border using orange and brown markers to frame the project.
This is a softer Halloween template than full spooky — it’s more cute than scary. The costumes are built from friendly shapes like capes, vests, and simple skirts or tunics, and the jack-o-hat piece gives the theme without overwhelming kids. Because the outlines are thick, marker coloring stays clean. The finished doll looks adorable on orange or cream cardstock and reads clearly even in a quick phone snapshot.
Skip thisAvoid tiny cutouts on the hat that require perfect scissors. If the template has very small holes, color them in instead of cutting every hole.
Editor's noteUse a dark brown marker for the jack-o-hat cutouts; it makes the face pattern readable.



