
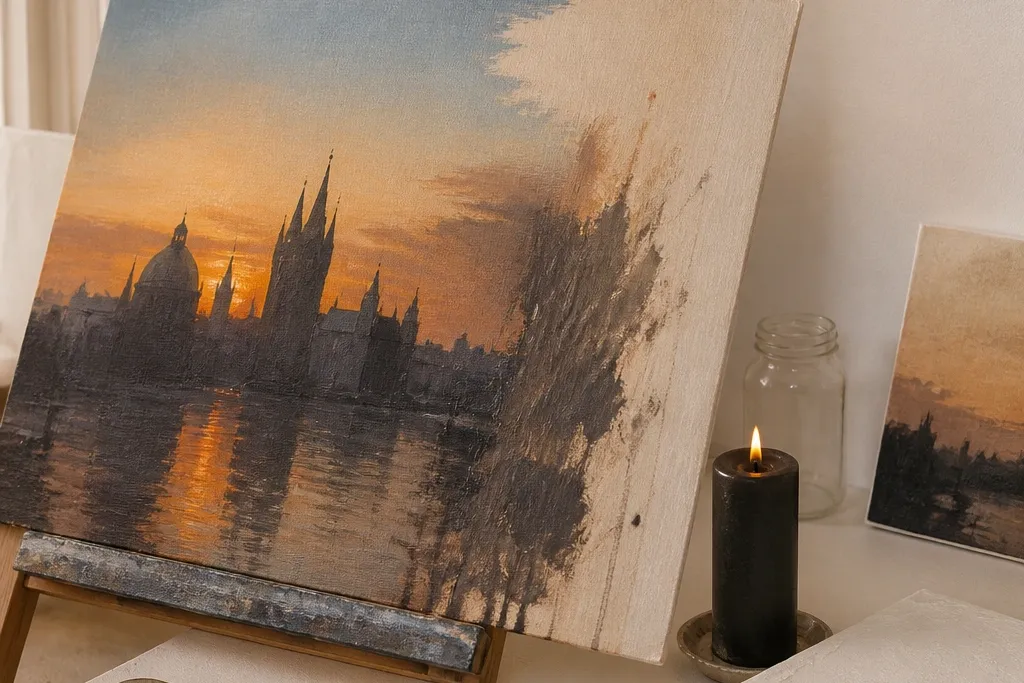
1. Sunset skyline with wax-resist neon edges
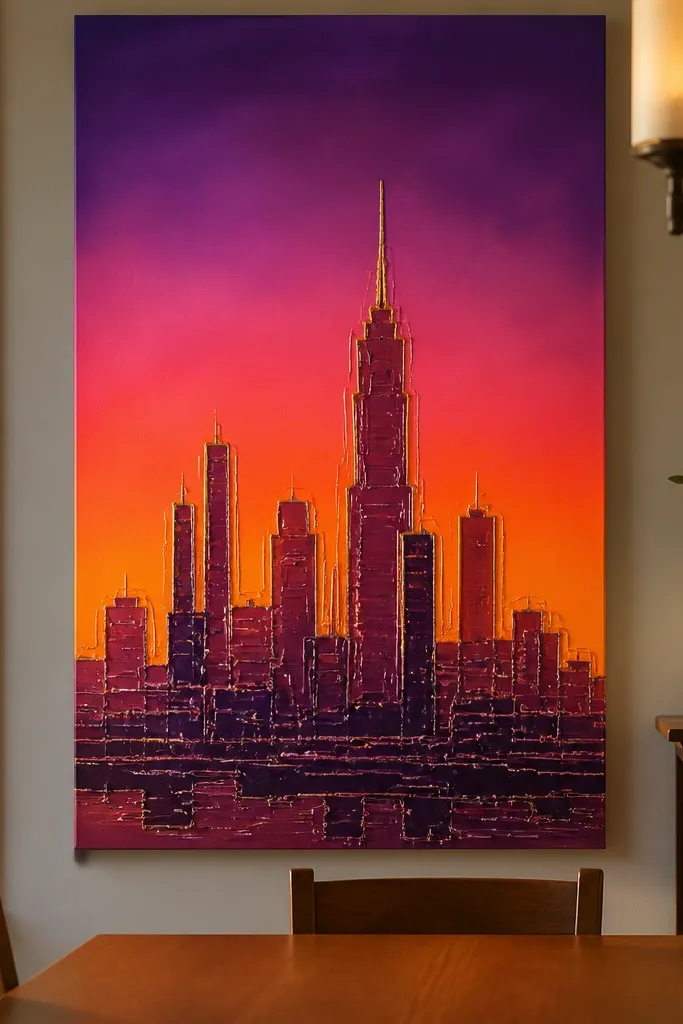
This one looks like stained-glass at arm’s length because the wax-resist lines stay bright while the paint fills the sky. The trick is to treat the skyline like a stencil: you draw the edges in wax so paint can’t cross them. Then you layer translucent sunset colors — orange near the horizon, rose mid-sky, and deep purple at the top. The wax lines catch light and make the whole thing feel crisp, even if your brushwork is imperfect. It fits living rooms, entryways, and any wall that needs a strong horizontal focal point.
1) Tape a primed board to the wall or work on a panel, then sketch the skyline lightly in pencil. Rub a candle along your skyline edges using steady pressure so the wax is even, not chunky. 2) Paint the sky in thin layers: orange first, then rose, then purple, letting each coat dry 10-15 minutes before the next. 3) When the paint is dry, gently buff the wax lines with a dry rag to clean any paint that drifted onto them.
Editor's noteUse a fan brush for the sky so your color gradients look intentional, not streaky.
Skip thisDon’t paint thick opaquely right over wax lines — you’ll bury the resist effect.
2. Single-line botanical branch with candle-scratch texture
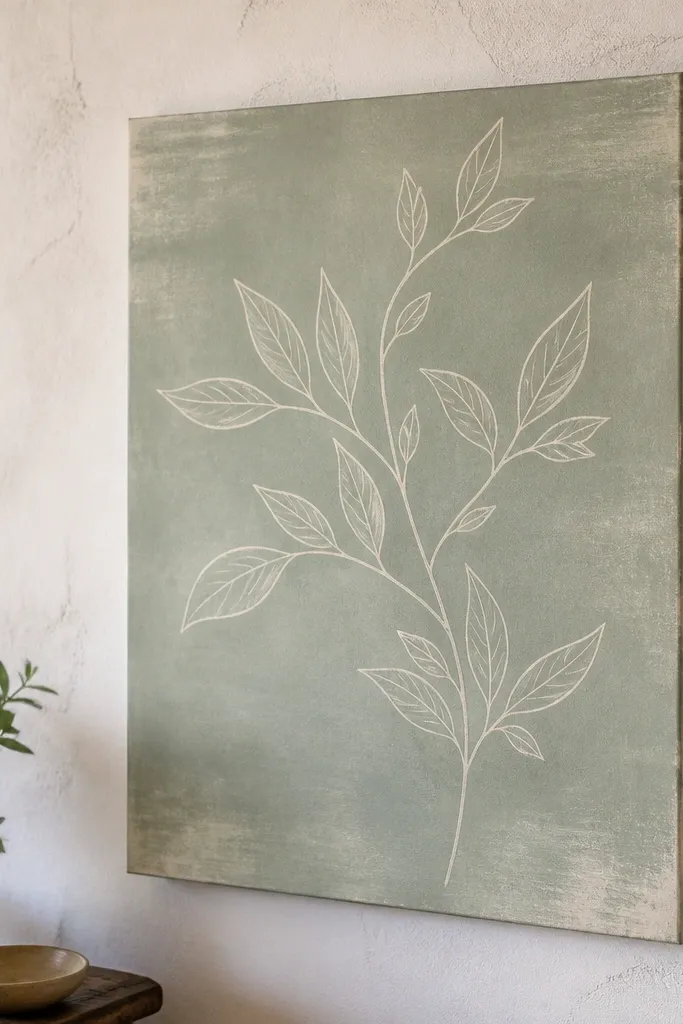
This is for people who like calm, gallery-style decor. The branch looks delicate because the wax-scratch marks create a subtle “vein” texture that reads as plant detail from a distance. You’ll get a clean outline with a handmade feel: the wax resists paint in the scratched grooves, so the background shows through as highlights. Choose muted greens and soft creams so the texture stays the star. It works great in kitchens, hallways, and above a desk where you want something soothing.
1) Prime a small panel and lightly sketch one branch that fills about 70% of the height. Use a candle tip and a metal embossing tool or the back of a butter knife to scratch thin lines into the wax where leaf veins and stems go. 2) Paint the background with a watered-down green wash, then add a second darker green layer at the edges for depth. 3) After drying, paint a few leaf shapes over the wax-resist areas with a lighter green to make the scratch marks pop.
Editor's noteKeep your wax lines narrow — thick wax makes the leaves look raised and messy instead of drawn.
Skip thisDon’t rush the paint over fresh wax; it smears and blunts your scratch texture.
3. Marbled wave panel using wax drip + drag
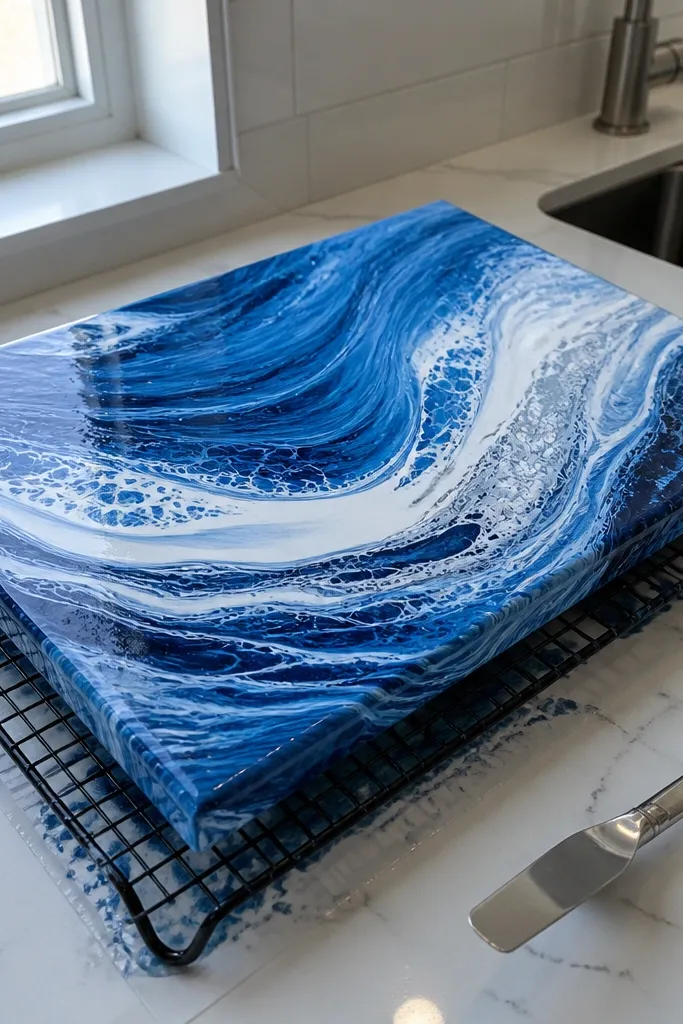
Marbling is the easiest way to make candle oil painting look expensive. Wax drips and dragging create organic swirls that feel like ocean foam without you having to paint every detail. The wax-resist makes “negative space” that reads as highlights, so your waves look layered. Use cool colors — navy, cerulean, and off-white — and keep the palette tight. This hangs beautifully in bathrooms, bedrooms, and anywhere you want movement without clutter.
1) Tape off the panel edges and prime it. Drip candle wax in a few rows horizontally, then immediately drag a damp brush handle or palette knife through the drips to create wave-like ribbons. 2) Paint over with your lightest color first, then add darker blues in bands. 3) Once dry, wipe the surface lightly with a dry cloth to remove any paint that sat on top of wax globs.
Editor's noteAim for uneven drips. Perfectly spaced lines look like a craft project instead of natural marbling.
Skip thisDon’t use too much wax — thick pools create hard ridges that ruin the smooth marbled look.
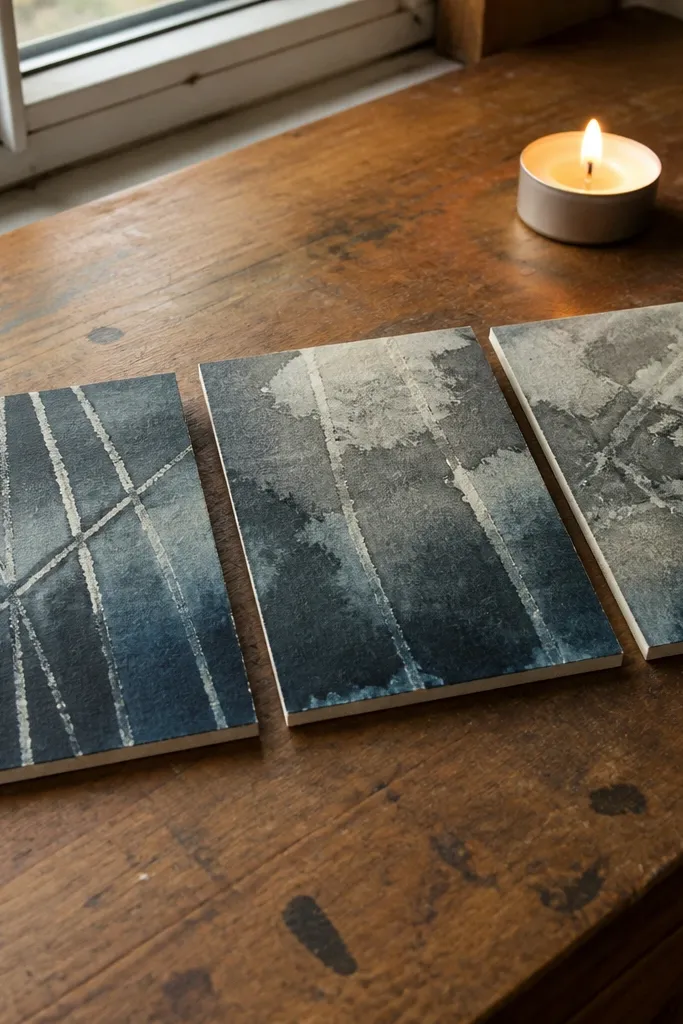
4. Geometric tiles with wax resist grid lines
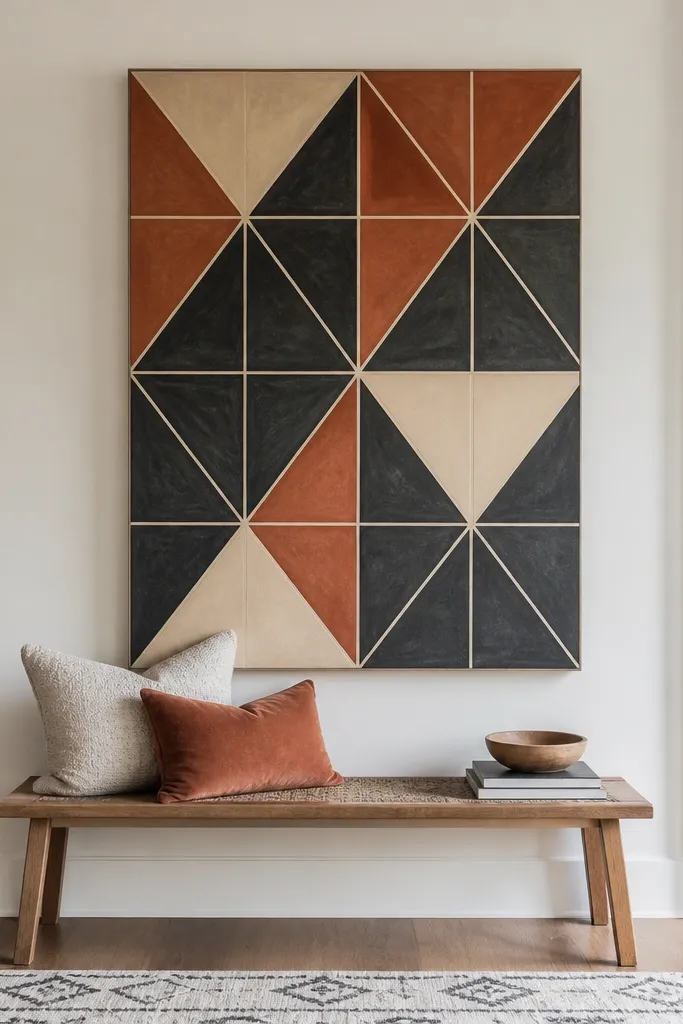
This is a modern wall piece that reads clean and intentional because you’re using wax to keep your geometry sharp. The wax resist grid creates thin light separators between colored “tiles,” so your lines stay crisp even if you’re painting by hand. Pick two or three colors plus black or charcoal to keep it graphic. Add a small “accent tile” in gold or warm cream so the eye has a landing spot. It’s ideal for a stairwell wall or a small living room where you need structure.
1) Draw your grid with pencil and measure so the tiles are consistent, like 2.5-inch squares on a 12x16-inch panel. Rub wax along every grid line with a steady hand. 2) Paint each tile one at a time, starting with the lightest. 3) After the final coat dries, wipe over the grid lines with a dry rag so the resist stays bright and thin.
Editor's noteUse painter’s tape only for the outer border. Wax is your interior line — it stays cleaner than tape edges.
Skip thisDon’t flood the wax lines; thick wax makes the separators look chunky.
5. Portrait-style face silhouette with wax highlight streaks
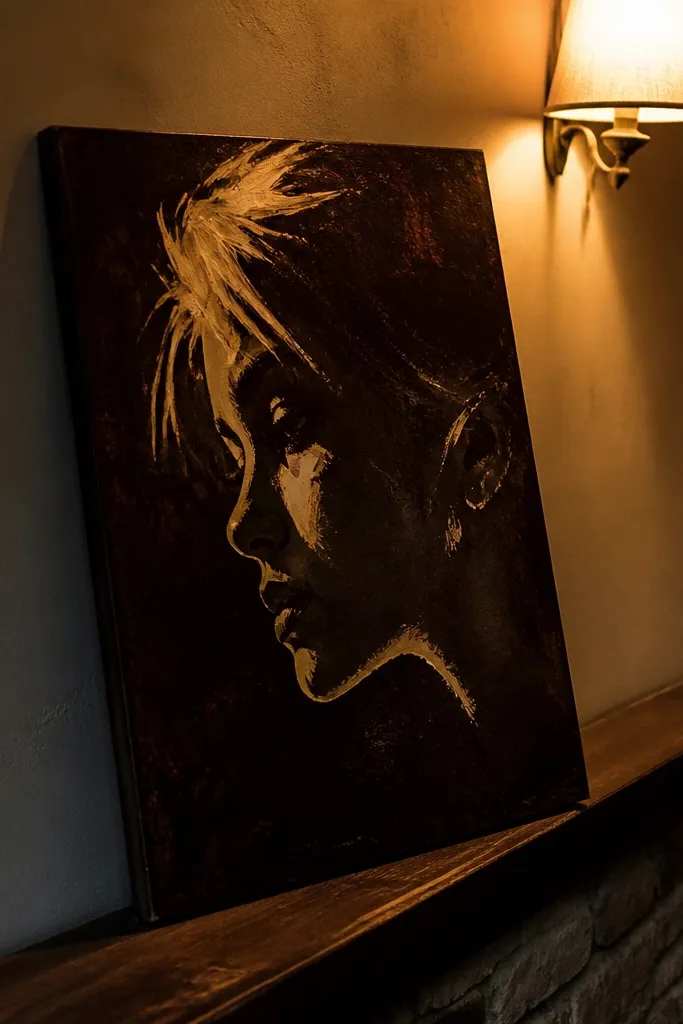
This idea looks bold because it’s graphic: a dark face silhouette with bright wax highlights that mimic hair shine and cheek reflections. The wax resist gives you “paint breaks” that feel like expressive brushstrokes without needing advanced drawing. Keep your palette tight: one dark base, one highlight color, and a mid-tone for depth. It suits bedrooms and modern offices because it reads like art, not decoration.
1) Transfer a simple face silhouette (eyes and nose suggested, not detailed) onto a primed panel. Rub wax on the areas you want to look shiny: hairline, cheek highlight, and a small nose highlight. 2) Paint the entire background dark, then cover the face silhouette area with the same dark for a strong block. 3) Paint a mid-tone around the silhouette for depth, then add a highlight wash that reveals the wax resist streaks.
Editor's noteUse a small round brush for highlight edges so the wax breaks look deliberate, not accidental.
Skip thisDon’t add too many highlights. Three to five wax streaks read clean; ten looks chaotic.
6. Butterfly wings with wax feathering and soft watercolor paint

Butterflies look stunning in candle oil painting because wax feathering creates layered wing “veins” that your eye reads as detail. The wax resist keeps fine lines bright, so even a light wash looks dimensional. Choose pastel pigments — blush pink, lilac, pale teal, and warm cream — and let the colors bleed slightly where the wax isn’t. This is a great wall piece for nurseries, craft rooms, and anywhere you want soft color with texture.
1) Sketch a butterfly centered on a primed panel, then outline the wing shapes with wax. 2) Use a candle tip to lightly feather short lines inside each wing section, following the direction of wing veins. 3) Paint in watercolor-thin layers, one color at a time, letting the paint pool gently between wax lines. 4) When dry, add a final thin glaze over the wings to unify the palette.
Editor's noteLet colors overlap slightly. The wax-resist lines keep the overlaps from turning muddy.
Skip thisDon’t use heavy, thick acrylic right over feathered wax or it will flatten the wing texture.
7. Clockwork gears with wax stipple for metal shine
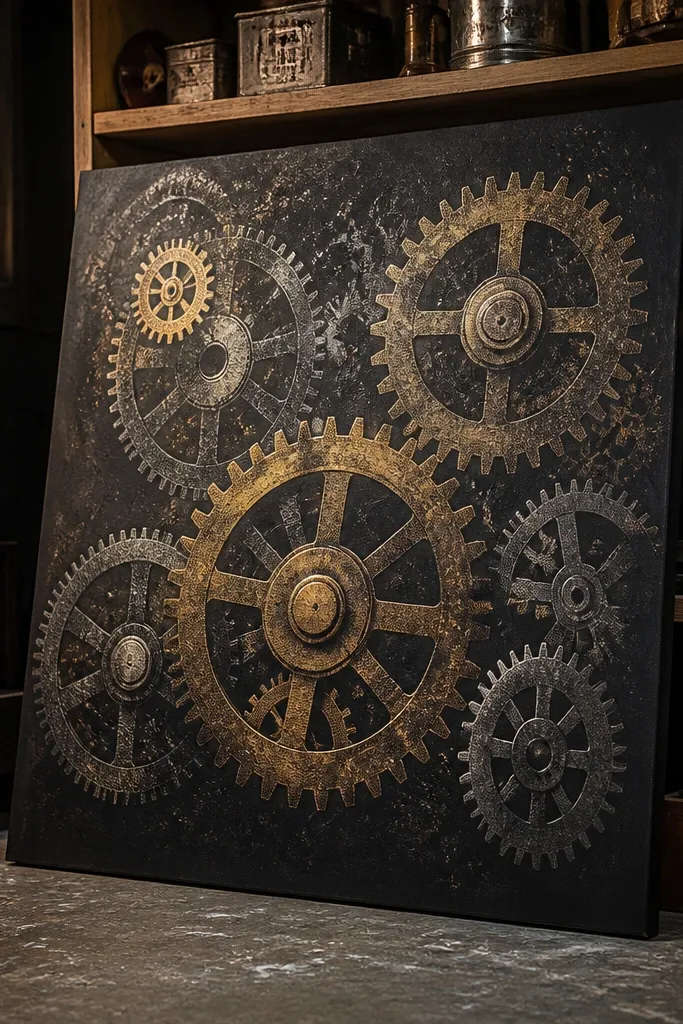
Gears look dramatic because they’re all about contrast. Wax stipple — little dots and dabs — creates “specular” highlights that imitate metal reflections. The background can stay dark and matte, while the wax-resist areas stay lighter and glossy after topcoat. Pick dark charcoal, graphite gray, and a muted brass tone for the highlights. This looks great in a workshop, entryway, or any room with industrial decor.
1) Draw two or three overlapping gear outlines on a primed panel. Rub wax over the gear teeth where you want shine, then tap a candle corner lightly to create stippled wax dots. 2) Paint the whole piece dark first. 3) Dry-brush a lighter gray over the panel so the wax-resist highlights show through around the stipples, then finish with a thin brass glaze.
Dry-brush from the top-left corner only. It makes the shine feel consistent instead of random.
Avoid full coverage wax on the whole gear — you need negative space so the metal reads.
8. Marigold still-life petals with wax petal edges
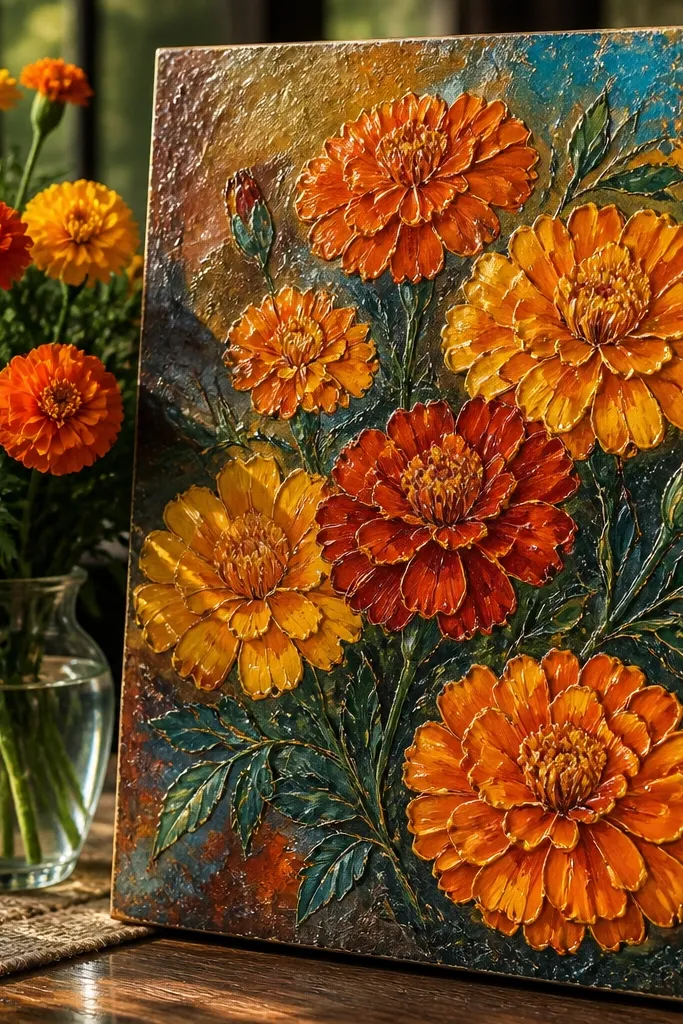
Still-life flowers look lifelike because wax petal edges create a boundary line that your brain reads as form. You’re not trying to paint every vein; you’re using wax to hold the highlights exactly where the petals fold. Warm yellows and orange-reds look extra rich once you add a clear topcoat. This piece works well in kitchens and dining areas because it feels bright without being loud.
1) Sketch a marigold head and a few petals on a primed panel. Rub wax along the outer petal edges and anywhere the petals overlap — think “fold lines.” 2) Paint the background with a neutral cream, then block in petals with light yellow first. 3) Add deeper orange and red at the centers, then glaze lightly until the wax edges look like natural highlights.
Editor's noteUse a paper towel to blot paint between petals. It keeps edges soft but not sloppy.
Skip thisDon’t outline the entire flower in wax — only the fold lines. Too many outlines look cartoonish.
9. Night garden path with wax trail highlights
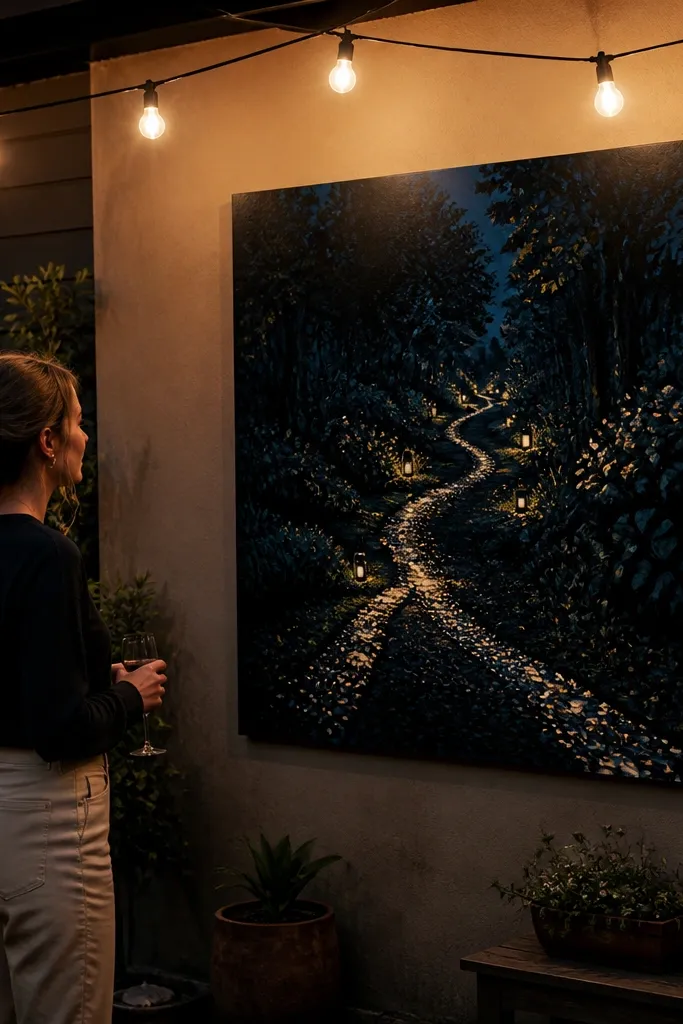
A receding path looks cinematic when wax creates a glowing trail. The wax-resist line acts like a light source, so the path feels deep instead of flat. You paint a dark background, then use wax to mark where the “light” hits the ground and leaves. Add a couple of small highlight clusters like lantern reflections. This is a great project for hallways because it pulls you forward visually.
1) Prime a panel and lightly sketch a path that narrows toward the top. Draw a wax line along the brightest edge of the path and add short wax dashes where light hits grass. 2) Paint the sky and background first in deep navy and black, leaving the wax areas bare. 3) Paint a lighter gray-blue over the path area, then blend with a damp brush outward from the wax trail.
Blend the path only outward from wax lines. That keeps the glow feeling controlled.
Don’t paint the path too bright right away — build color in layers or it flattens the depth.
10. Abstract stained-glass circles with wax crackle resist
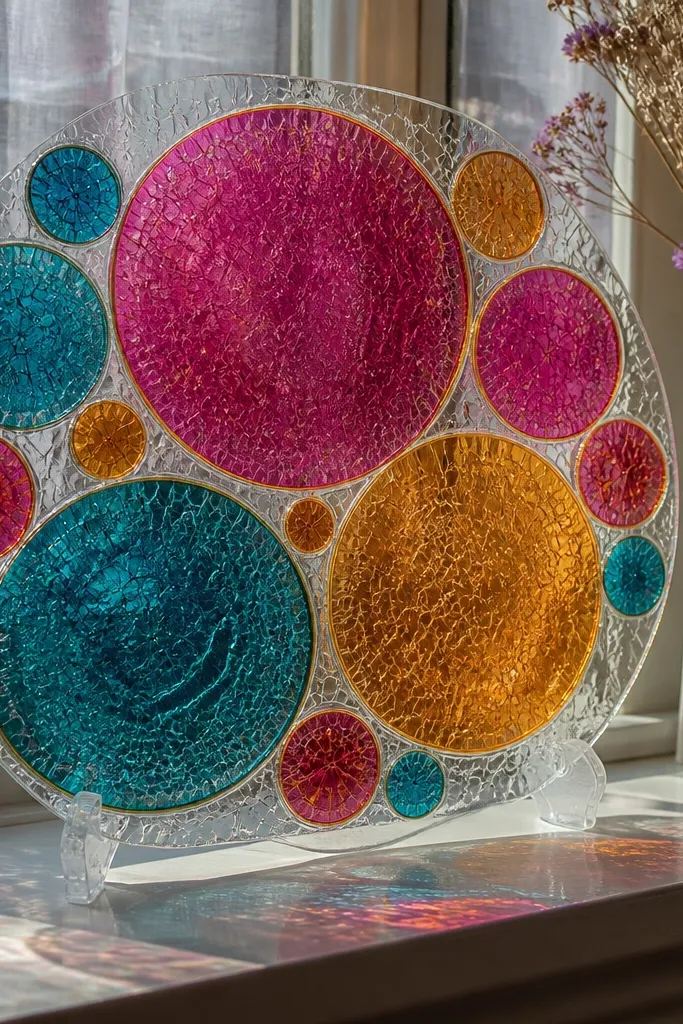
Crackle resist makes your circles look like real glass. You create thin wax lines that fracture slightly, then paint over them so the paint breaks around the cracks. The result is a shimmering stained-glass vibe without needing stained glass tools. Use bright but controlled colors: cyan, magenta, amber, and clear off-white for separation. Hang it in a spot where light hits — the topcoat makes the cracks look alive.
1) Draw 5-7 overlapping circles on a primed panel. Rub wax along circle borders, then add extra short wax “crackle” marks inside each circle. 2) Paint each circle section in translucent layers so the color feels like glass. 3) After drying, apply a clear matte or satin topcoat lightly, then check that the crack lines still read through.
Let each color layer dry fully before the next so the crack edges stay sharp.
Don’t use opaque paint for the glass look; it kills the stained-glass effect.
11. Coastal map lines with melted wax thread and brush wash
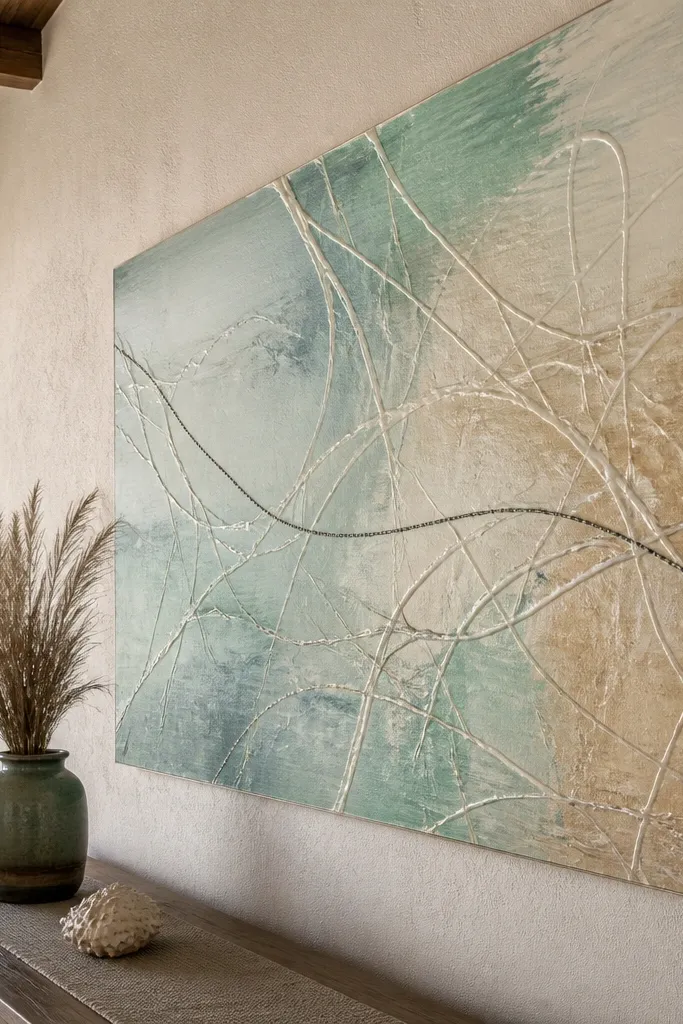
Map-style art looks great on walls because it has a built-in rhythm. Melted wax thread gives you delicate line work that looks like hand-drawn routes. You paint a soft seafoam wash behind it, then the wax lines pop as pale highlights. Add a few darker route marks for emphasis. This is a calm decor piece that still feels clever and handmade.
1) Prime a panel and sketch coast-like curves. Melt a little candle wax in a metal spoon over low heat and drizzle thin threads along your route lines. 2) Paint the background with a seafoam and a slightly darker teal band near the bottom. 3) Once dry, use a small brush to add tiny marker dots where you want “stops” on the map.
Editor's noteUse a spoon with a narrow lip so your wax thread stays thin.
Skip thisDon’t heat wax directly over open flame in a cluttered area; use a controlled heat source.
12. Monochrome marble portrait frame with wax veining
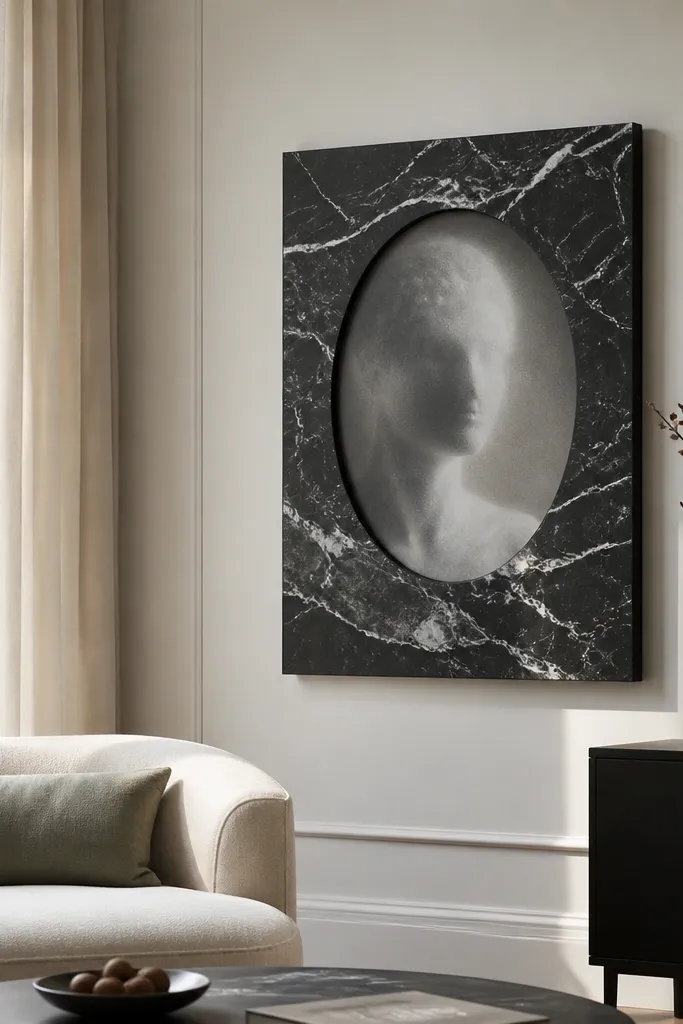
Marble veining makes the whole piece feel expensive because the texture reads as stone. Wax veining is the shortcut: you draw veins with wax, then paint over to create light streaks that look like natural mineral patterns. Keep it monochrome for a modern, gallery feel. The inner portrait shape can be an abstract oval or silhouette, so you get a framed look without complicated drawing.
1) Draw a rectangular frame and an inner oval on a primed panel. Rub wax along the frame edges for highlight veins, then add a few vein lines that curve inward. 2) Paint the frame area dark gray, then wipe lightly with a dry rag so wax-resist streaks show. 3) Fill the inner oval with a matte black or charcoal, leaving the marble frame as the star.
Wipe in one direction for veining so it looks like stone flow.
Don’t overwork the marble with too many colors; monochrome needs restraint.
13. Bold halo typography with wax outline and negative space fill

Typography is hard to make look “designed” by hand, so wax helps. Wax outlines keep letter edges clean, and the resist creates a halo effect when you paint the background. Use one big word or short phrase, and let the letter interior be solid while the outline stays bright. This looks striking on accent walls because it reads from across the room. It’s also a smart way to practice wax methods while producing something useful.
1) Choose a bold font shape and sketch it large on a primed panel. Rub wax carefully along the letter edges, then fill the background with a dark paint. 2) After the background dries, paint the letters with a lighter tone, leaving wax outlines visible. 3) Touch up any paint bleed with a small damp brush, then let dry fully.
Editor's noteUse wax on the letter edges only. Thick wax makes the halo wide and sloppy.
Skip thisDon’t use thin, watery paint for the background — it seeps and dulls the outline.
14. Watercolor clouds with wax cloud breaks
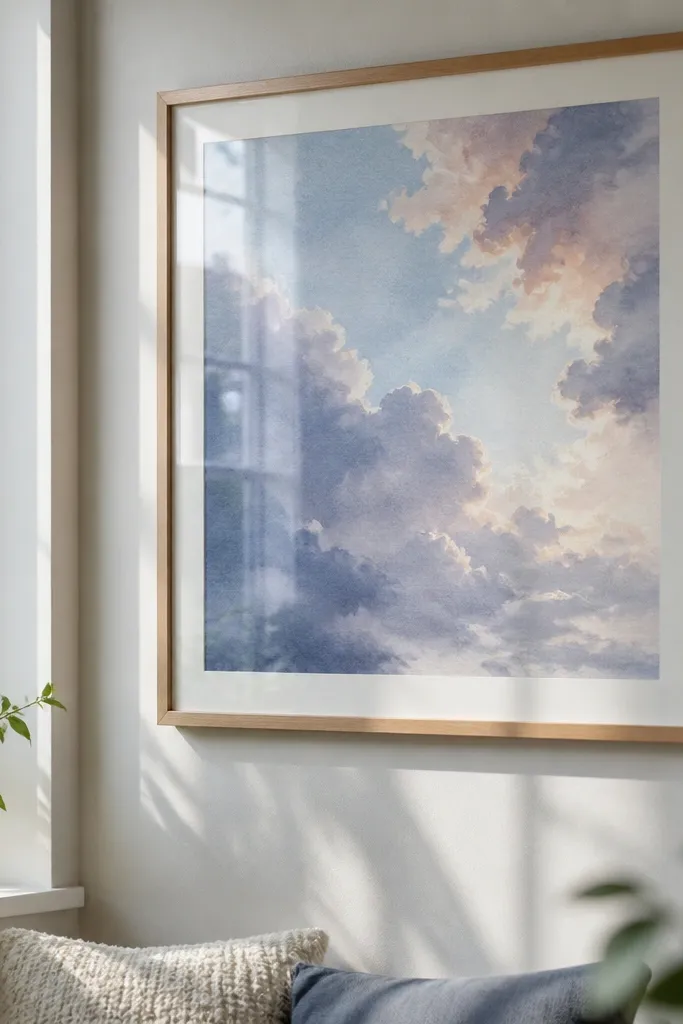
Clouds look airy when wax creates natural breaks where light hits. You’re essentially painting with resist — the wax protects small areas so they stay brighter and airy. Use a limited sky palette: pale blue, white, and a hint of lavender or peach. Add a couple of darker cloud shadows so the highlights aren’t the only contrast. This is a relaxing wall art idea that still looks polished and intentional.
1) Prime a panel and tint the whole surface pale blue with a thin wash. 2) Rub wax lightly in cloud shapes — not thick blobs, just irregular patches and wisps. 3) Paint over with slightly darker blue and a soft lavender shadow, then blend gently with a damp brush. 4) Let dry and wipe the wax areas lightly to keep the cloud breaks clean.
Editor's noteKeep your wax patches small. Small breaks make clouds look natural, not like stickers.
Skip thisDon’t press hard with the candle. Deep wax dents create hard edges that look unnatural.
15. Candle-paint stained leaves with wax vein skeleton
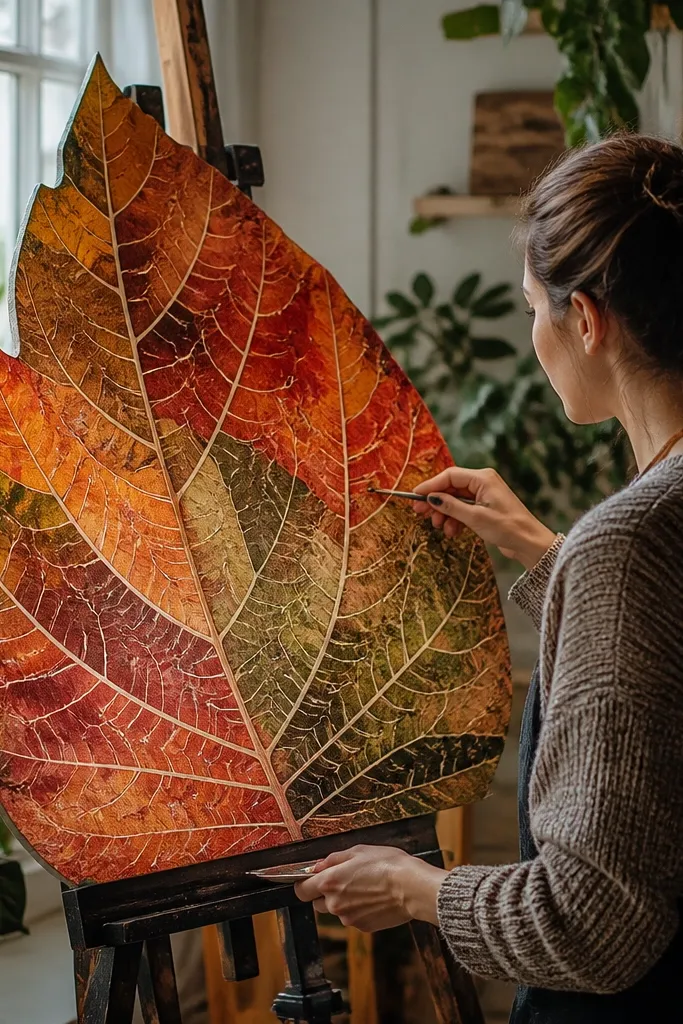
Leaf paintings turn out gorgeous because the wax vein skeleton gives you structure. You paint color layers over the resist, and the veins stay pale, so the leaf looks detailed even with simple fills. Pick one leaf shape and blow it up to fill most of the panel. Autumn colors work beautifully: burnt orange, rust red, and deep olive. It looks amazing in dining rooms and near windows where natural light makes the topcoat glow.
1) Trace a leaf silhouette onto a primed panel. Rub wax along the main veins and a few branching lines, keeping the veins thin. 2) Paint the leaf with a base color, like deep olive, then layer orange and rust toward the edges. 3) Add a thin glaze at the end and wipe the vein areas lightly so they stay bright.
Editor's noteUse a flat brush to spread base color, then switch to a smaller brush for vein-adjacent blending.
Skip thisDon’t outline the entire leaf thickly; the veins are the feature.
16. Abstract skyline rain with wax splatter highlights
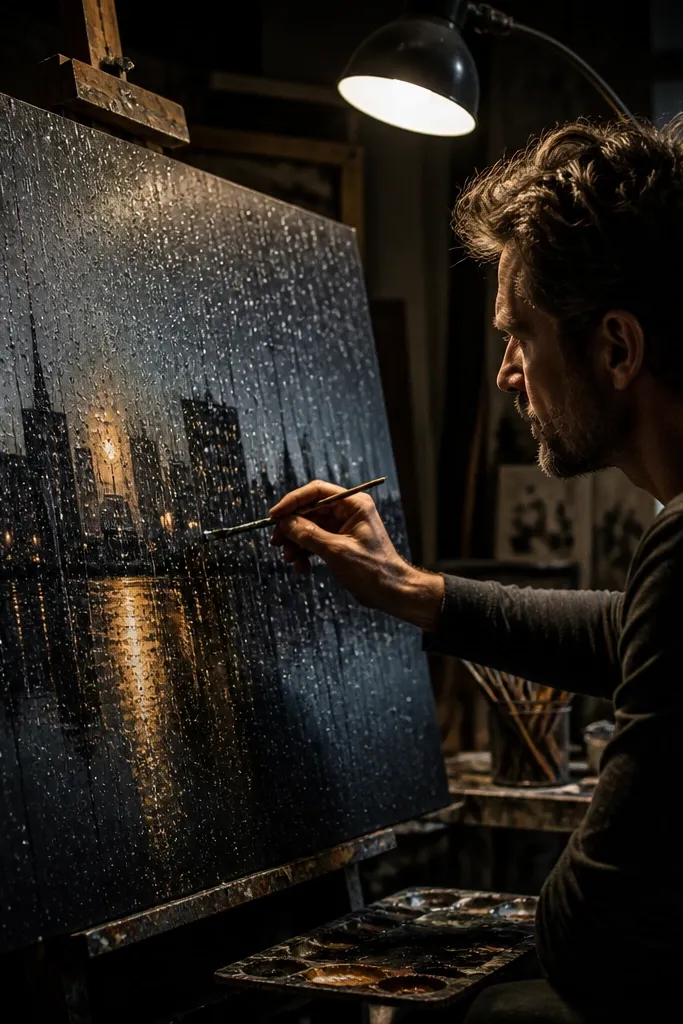
Rain art looks moody and modern because wax splatter turns into believable light-catching droplets. You paint a dark city silhouette, then add wax splatters where the street lights reflect. The resist keeps those highlights bright so the rain reads instantly. Use a limited palette: black, charcoal, deep blue, and one warm highlight color like amber. This works well in offices and entryways where you want something dramatic but not busy.
1) Sketch a simple skyline on a primed panel and block it in with dark paint, leaving the sky for later. 2) For rain, flick a candle stub wax onto the surface or drag a waxed brush for controlled streaks. 3) Paint a deep blue-gray wash over the sky, then add the amber street glow near the bottom. 4) After it dries, lightly wipe the wax highlights to keep them crisp.
Editor's noteKeep your rain direction consistent. It makes the effect look planned.
Skip thisDon’t cover the whole panel in splatter. Concentrate rain highlights around the light sources.
17. Wall-sized ombre stripes with wax edge crisping
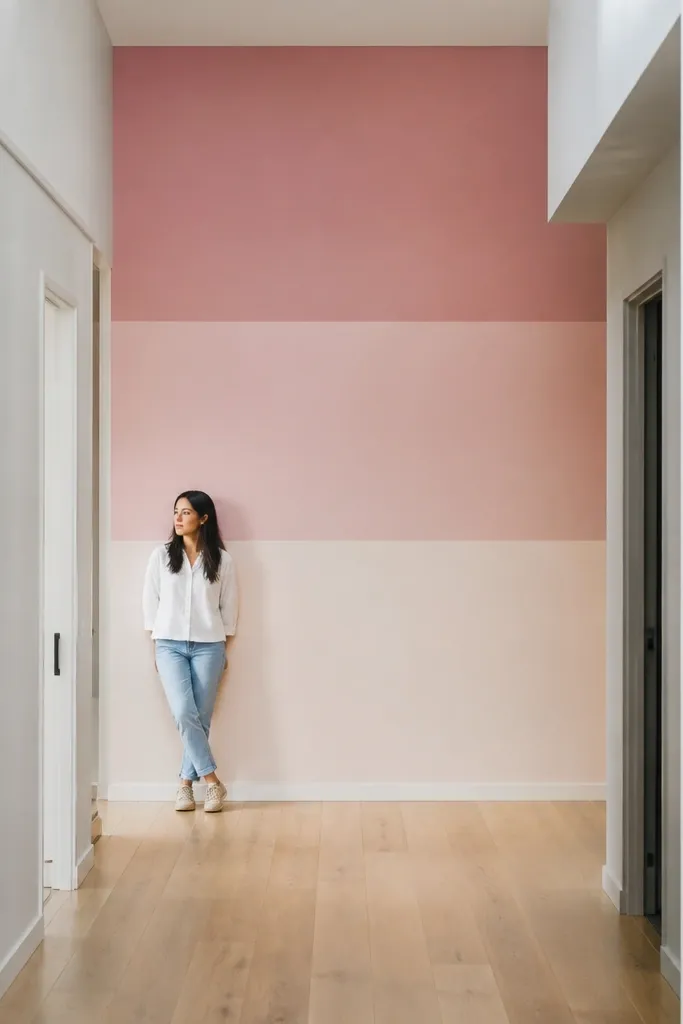
Ombre stripes look clean and architectural when the stripe edges stay razor-straight. Wax does the edge work: you rub wax along each stripe boundary so the paint stops at that line. The result is a high-end gradient look that doesn’t depend on perfect tape work. Choose two or three tones — like blush to cream, or teal to navy — and keep the background neutral. This is a strong choice for large wall spaces because it reads as design, not a small craft.
1) Mark stripe boundaries with a level and painter’s tape for the first pass, then rub wax along each boundary line where you want the crisp edge. Remove tape carefully so you don’t smear wax. 2) Paint stripes in thin, even coats from light to dark, letting each coat dry before the next. 3) Once everything is dry, buff the wax edges with a dry cloth and apply a clear topcoat over the whole piece.
Editor's noteUse a roller for the broad ombre base, then a brush only for the stripe edges.
Skip thisDon’t try to do all gradients in one heavy coat — you’ll get streaks at the boundaries.
18. Festive geometric ornaments with wax gold lines
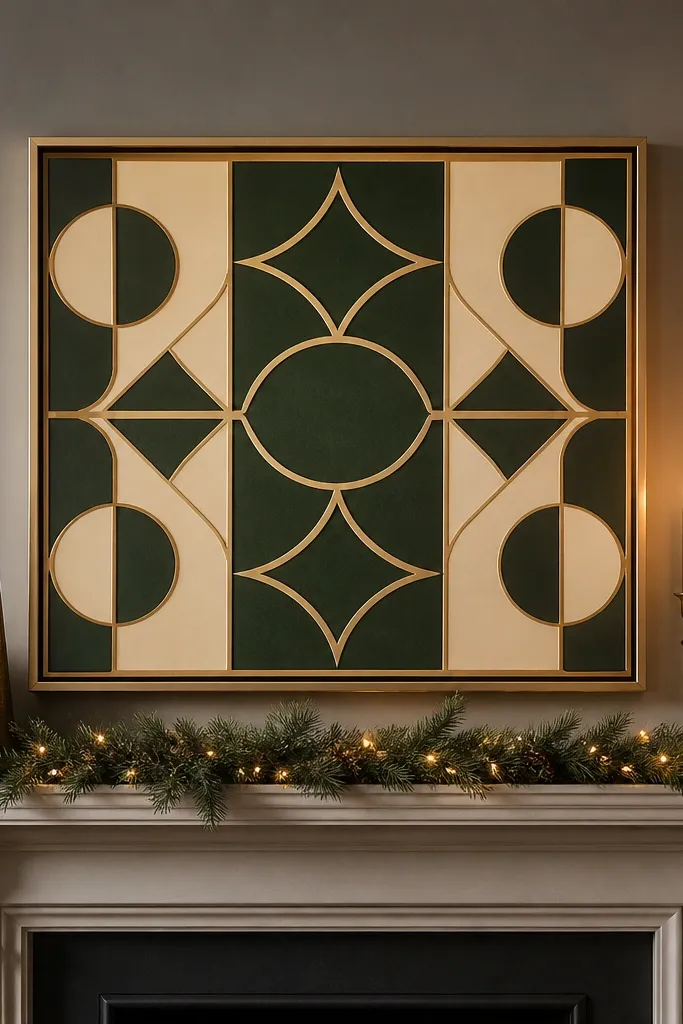
Ornaments look instantly festive because they’re symmetrical and graphic. Wax gold lines (using a gold candle or gold wax marker) create bright highlights that pop against deep greens and creams. You paint the background, then the wax lines stay as the “metal” detailing. This can be made into a single centerpiece or a set of small panels. It fits mantel decor and wall displays where you want something seasonal that still looks modern.
1) Draw a few ornament shapes — circles, ovals, and teardrops — on a primed panel. Rub wax along the decorative lines you want to look metallic, including inner borders and small star shapes. 2) Paint the background in deep green, leaving wax areas unpainted. 3) Add a cream wash behind the ornaments if you want a glow effect, then seal with clear topcoat.
Editor's noteKeep ornament details simple: 5-10 line segments read better than dense doodles.
Skip thisAvoid cheap metallic acrylic that flakes later; seal properly so the finish stays smooth.
19. Abstract night sky with wax constellations and star bursts

Constellations look clean and magical because wax gives you bright dots and connecting lines without the paint smearing. You’re painting a dark sky, then letting wax resist create star highlights. Star bursts look extra good when you add a few larger wax marks and paint around them with a soft gradient. Keep it minimal: a handful of constellations over a smooth night wash. It’s a perfect wall piece for bedrooms and kids rooms because it stays calming, not cluttered.
1) Prime and tint the panel deep navy. Use a candle to dot wax where stars should be, then draw thin line connections between them with candle wax. 2) Paint over with a slightly lighter navy gradient so the stars stay bright. 3) After drying, add a few white paint dots around the wax highlights to make the star cluster look dimensional.
For the cleanest constellations, use a fine brush only for the paint. Wax is for the lines and dots.
Don’t scrub the wax dots with a wet rag — you’ll smear paint into the resist.
20. Garden mural stripes with wax leaf stamp texture
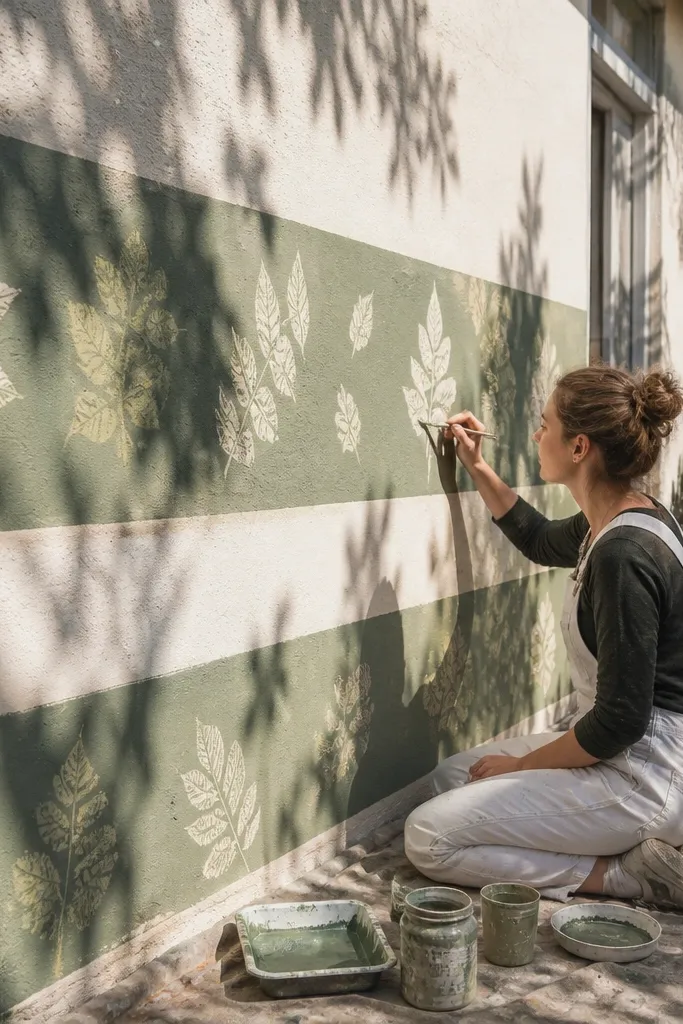
This one reads like a mural because it repeats texture across the surface. Wax leaf stamping gives you a pattern that looks hand-printed rather than randomly dabbed. You paint stripes behind it, then the wax-resist leaf textures stay lighter and crisp after topcoat. Pick a limited pattern: 2-3 leaf shapes, repeated at a gentle angle. It’s great for feature walls in craft rooms, mudrooms, and kids spaces.
1) Prime a panel and paint horizontal stripes in 2-3 green tones. 2) Press wax onto a leaf-shaped rubber stamp (or a leaf texture tool), then stamp onto the painted surface lightly where you want the resist pattern. 3) Once the wax marks are set, paint a darker glaze over everything, then wipe lightly so the leaf textures remain visible.
Editor's noteStamp on a slight diagonal. Straight rows look wallpaper-like and flatter.
Skip thisDon’t stamp too hard. Deep wax dents create raised bumps that snag dust.



