
1. Cream + Black Minimal Grid Board
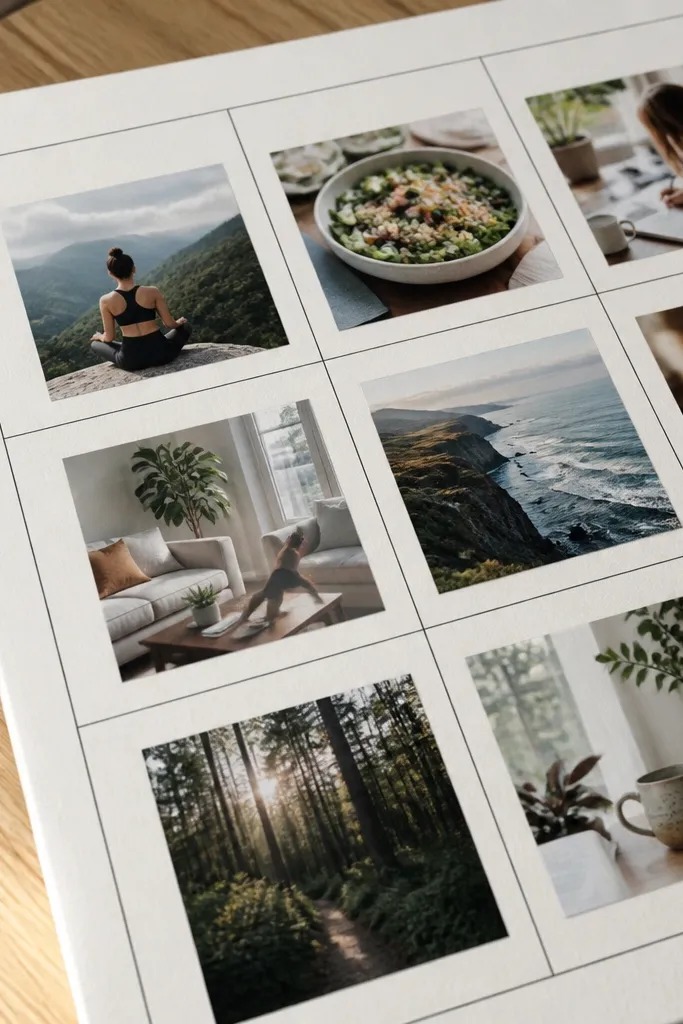
This layout looks sharp because it strips everything down to contrast. You get a board that feels organized, not chaotic, which is exactly what beginners need when they’re unsure how to arrange images. The cream background makes your photos pop, and the thin margins keep the whole sheet from looking crowded. It’s also easy to print because you’re repeating the same photo sizes across the page.
Editor's notePick photos that share lighting style (matte, not glossy) so the board doesn’t look mismatched.
Start with 8.5x11 inch cream cardstock. Print 8 photos in two sizes: four 2x3 inch rectangles and four 1.5x2 inch rectangles, all in black-and-white or consistent dark tones. Arrange them in a 4-column grid with equal gaps, then glue in place using a thin glue stick. Finish by trimming any overhang and adding a clear matte tape border along the edges.
Skip thisDon’t mix bright colors with black-and-white images in the same sheet.
2. Terracotta Anchor Photo Board
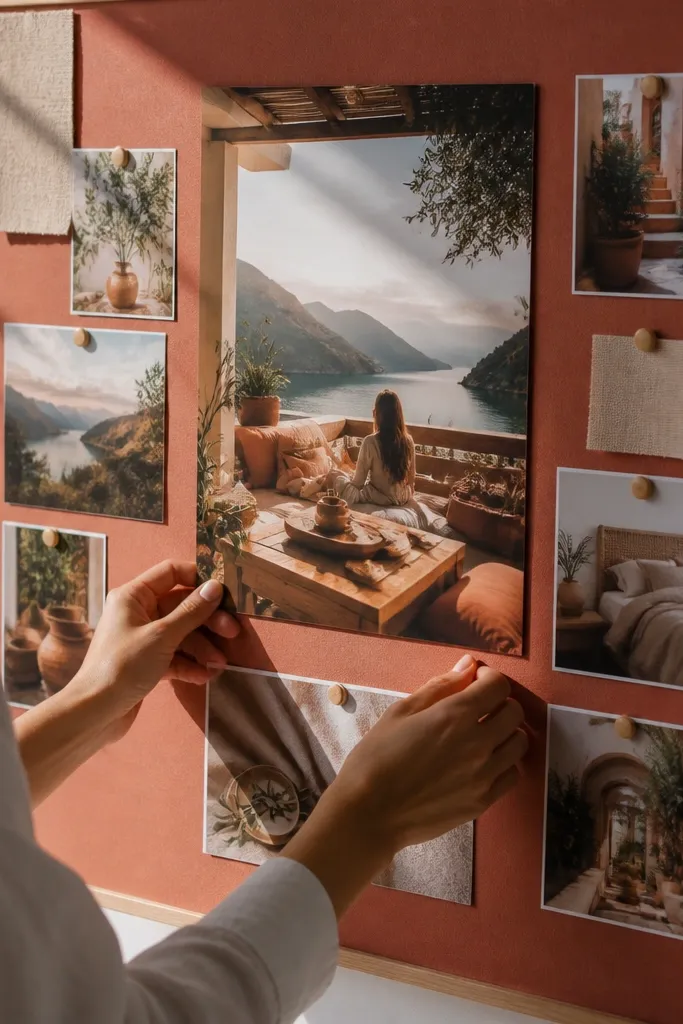
This is a strong beginner-friendly vision board ideas pictures option when you want one clear focus. The big center photo acts like a visual “anchor,” so your board reads in seconds. The terracotta background ties everything together and makes skin tones, warm decor, and lifestyle goals look cohesive. Smaller photos orbit the anchor with consistent spacing so the layout feels styled, not random.
Editor's noteChoose your anchor photo based on color — pick the one with the most terracotta tones inside it.
Use terracotta construction paper or colored cardstock at 8.5x11. Print one main photo at 5x7 inches scaled down to fit the center (about 4.5x6 inch on your sheet), and print six small photos at 2x2 inch squares. Place the center photo first, then distribute the squares evenly around it with 0.5 inch gaps. Glue from the center outward so the spacing stays even.
Skip thisAvoid using a center photo that has totally different lighting (like night neon) unless you edit it to match.
3. Sky Blue Sections With Label Tabs
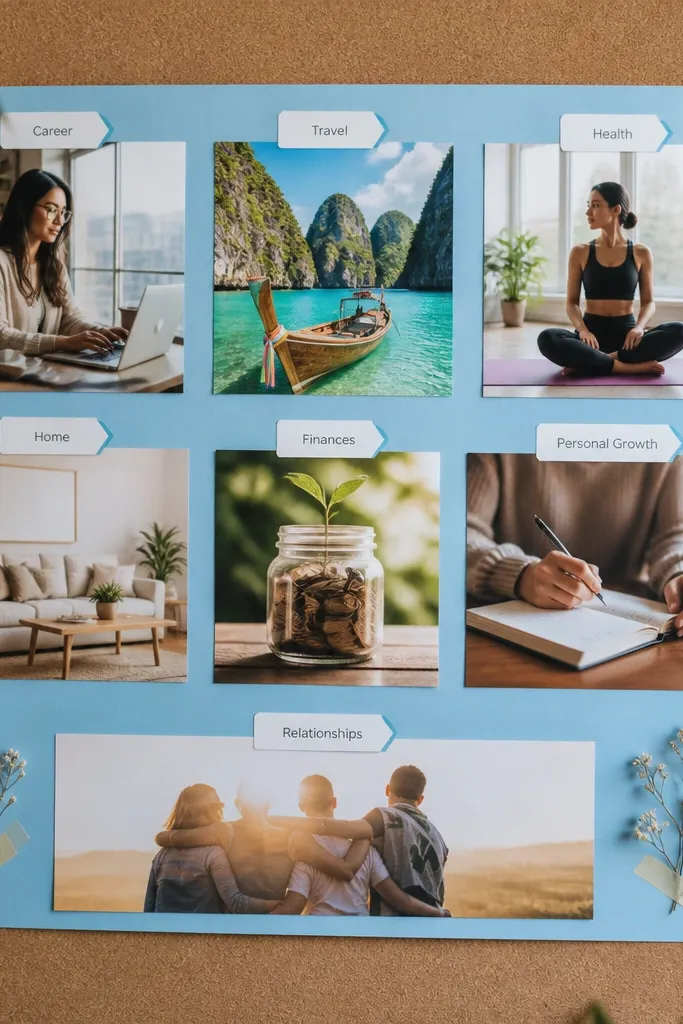
If your problem is that your goals feel messy, this layout fixes it with simple structure. You split the page into clear sections and add label tabs so each photo has a job. Sky blue makes the board feel airy and helps busy images still look light. It’s beginner-friendly because you don’t need fancy art — just clean cuts, straight lines, and readable labels.
Editor's noteUse a gel pen for labels — it stays opaque over colored paper.
Cut 8.5x11 sky blue cardstock and use a ruler to draw three horizontal sections. Print photos to fit each band: two 4x3 inch rectangles per section, then one small 2x2 inch image for the top section. Add white label tabs by cutting small rectangles (about 1.5x0.5 inches) and writing a short word like “Health” or “Home” in black marker. Glue photos first, then glue tabs on top so they sit crisp.
Skip thisDon’t use long sentences on the tabs; keep them to one or two words.
4. Polaroid-Style Stack With Corner Shadows
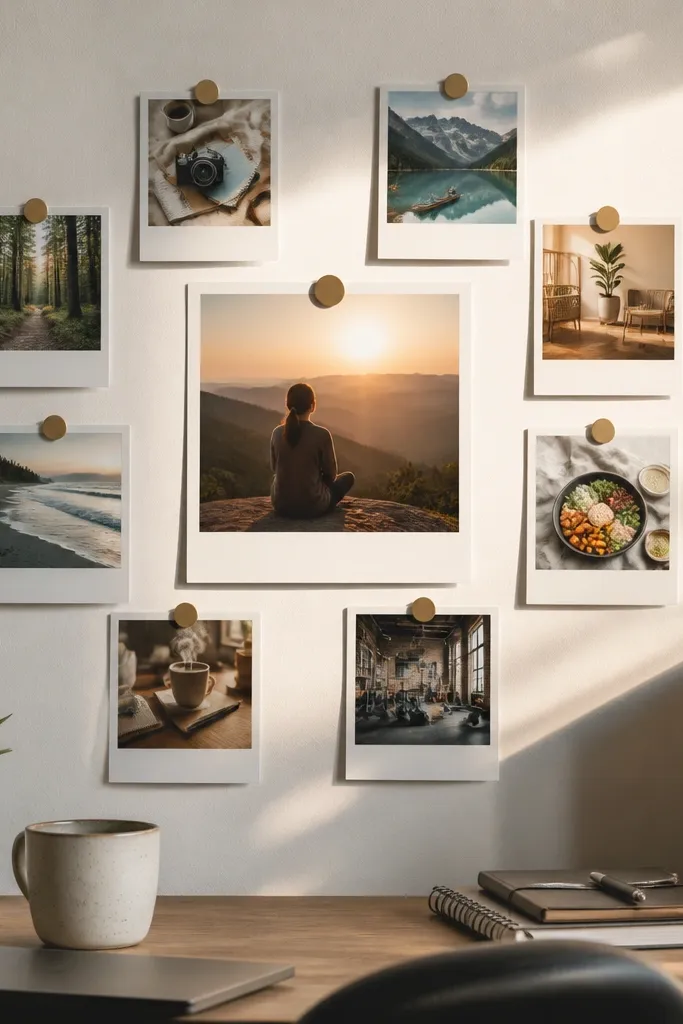
This board is photogenic because it looks like a real memory wall. The stacked “polaroid” shapes create depth without complicated design tools. It also works for beginners because you can place photos by eye and still keep it cohesive with one consistent frame style. White frames make the board readable even when your images have different colors.
Editor's noteUse double-sided tape instead of glue for the frames so corners don’t warp.
Print your photos and mount them onto white paper frames sized about 3x4 inches with a 0.25 inch border. Cut 8 frames and arrange 5 on the bottom layer and 3 on top, overlapping by 0.25-0.5 inch. Lightly sketch shadow corners with a gray pencil, then glue the frames using double-sided tape for clean edges. Finish by adding one small photo at the top right to balance the stack.
Skip thisAvoid uneven frame thickness; trim the white border to the same width across every photo.
5. Monochrome Texture Collage Board
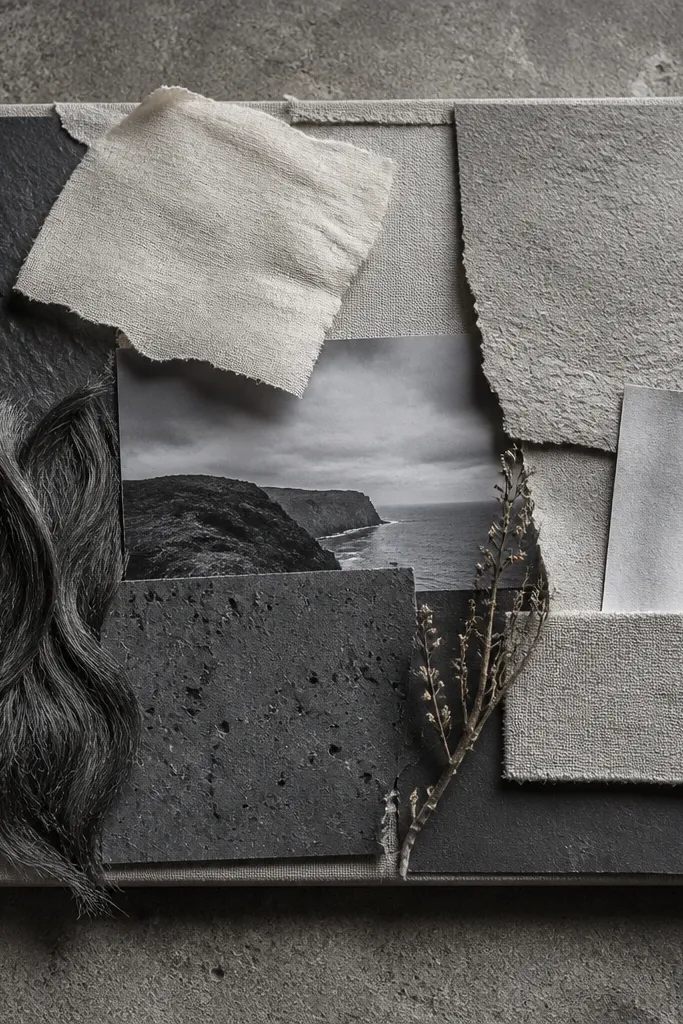
This one looks expensive because texture does the heavy lifting. You’re not relying on color variety; you’re relying on visual texture — stone, paper, linen, concrete, hair, fabric, and shadows. It’s perfect for goals that need calm focus. Beginners like it because you can use smaller image scraps and still end up with a cohesive look.
Editor's notePick textures with different “grain” — one smooth, one rough, one with pattern.
Choose a monochrome palette: black, gray, and off-white. Print 10-12 small texture photos (2x2 inch squares work great) and cut a few into narrow strips (about 1 inch wide). Lay everything on a gray background first to build a satisfying cluster around one larger texture photo. Glue the strips last on top so the layers read clearly.
6. Pastel Rainbow Stripe Board
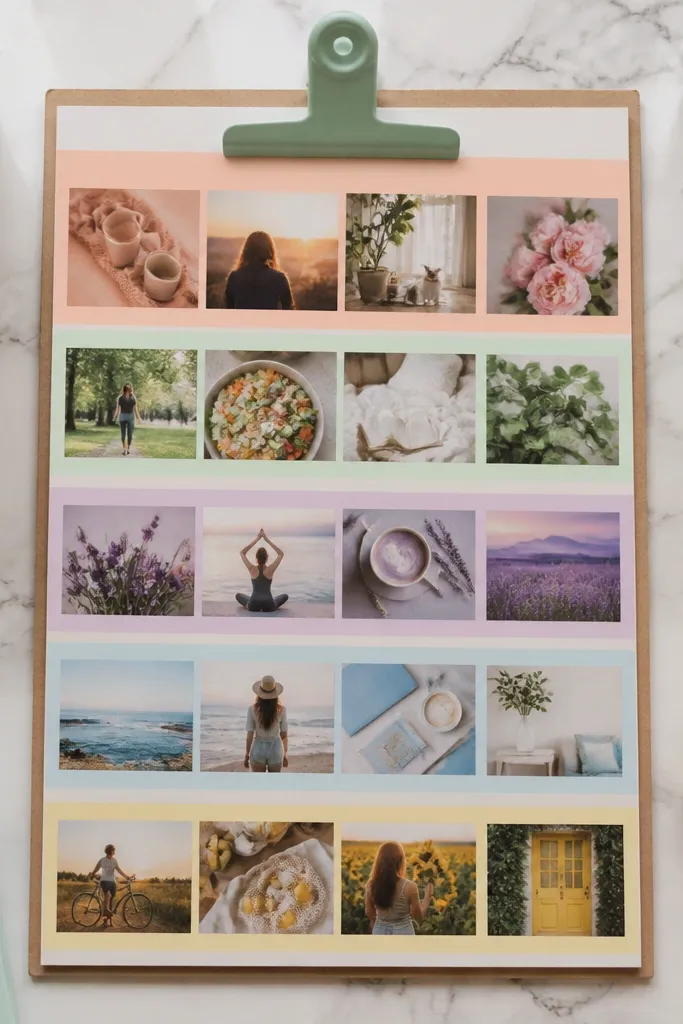
This layout is cheerful and still organized. The stripe bands give you built-in boundaries, so photos don’t spill into each other visually. It’s beginner-friendly because you don’t need a complex grid — the stripes do the dividing. Pick pastel tones and your board will look soft and aesthetic even with busy images.
Use 8.5x11 cardstock and draw five horizontal pastel stripes: peach, coral, mint, sky, and lavender. Print one photo per stripe at about 3x3 inches, then add one small supporting image at 2x2 inches in two of the stripes. Glue photos into the center of each band. Leave a 0.2 inch white line between stripes so it looks crisp.
Keep the photos consistent in brightness; don’t mix super dark images with super bright ones.
7. Black Background Glow Board
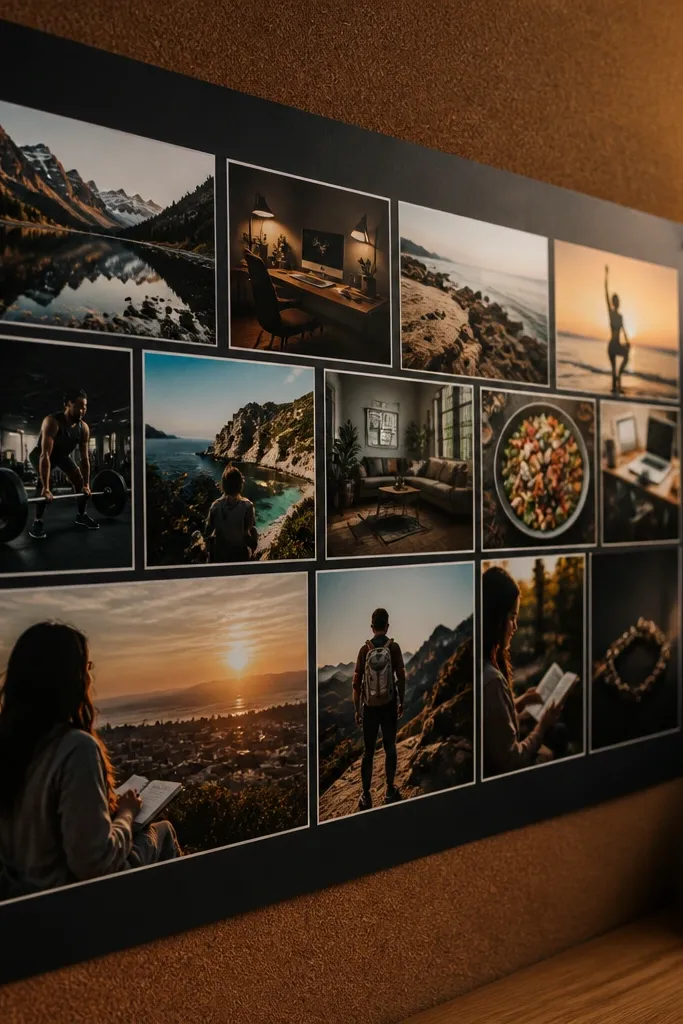
If you want your vision board to look like a poster, do this. Black background makes bright photos feel like they’re glowing, and the thin white dividers keep the chaos controlled. This is a bold look for goals tied to creativity, confidence, or a big “new chapter” feeling. Beginners can still pull it off because the design is basically: black + sections + pops of color.
Editor's noteUse matte black paper; glossy black makes glue lines look shiny.
Start with black cardstock at 8.5x11. Use a ruler to create a 3x3 grid with 0.3 inch white dividers (you can draw with a white gel pen). Print 9 photos and choose ones with one strong color each (red, turquoise, yellow, or magenta). Glue into each grid cell, then add a thin white border around the entire sheet.
8. Botanical Green Frame Board
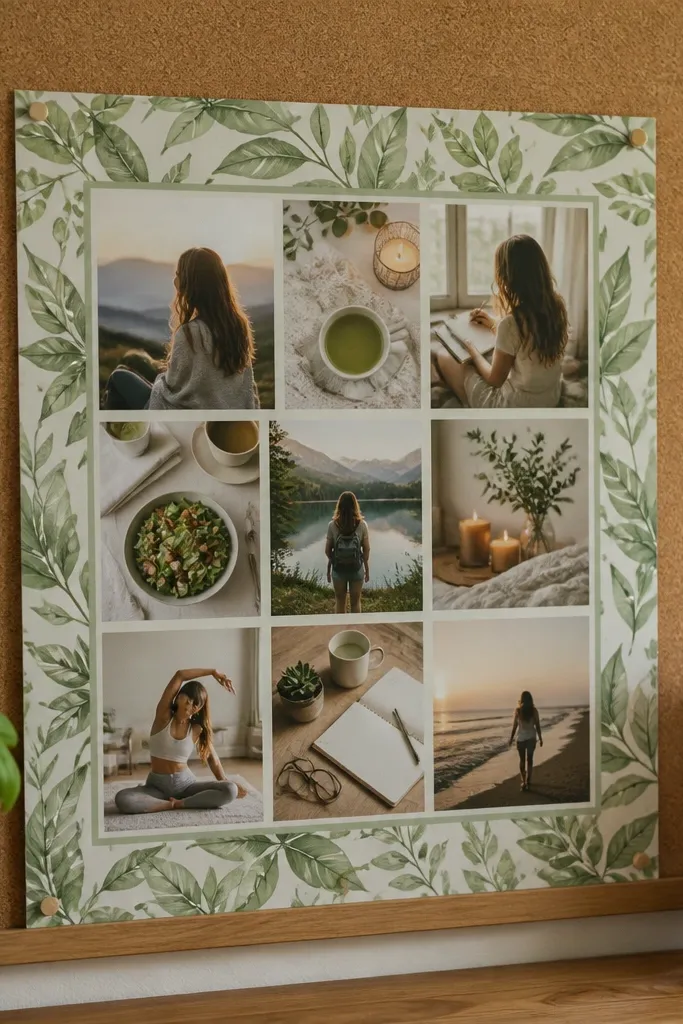
This board looks clean and calm because it uses a frame instead of a full collage. A botanical border gives you instant “decor” energy without needing lots of photos. It’s beginner-friendly because you can focus on one theme: plants, nature, self-care, and slow mornings. The inside can hold fewer images, which makes the layout less stressful.
Print or draw a thin leaf border around the edge of 8.5x11 white cardstock. Choose 6 interior photos (2x3 inch rectangles) that match the green palette — limes, sage, forest. Arrange the rectangles in two rows of three with consistent spacing. Glue everything down, then cover the border edges with clear matte tape for durability.
If you hand-draw the border, use a light pencil first and go over with green marker.
9. Gold Foil Accent Shapes Board
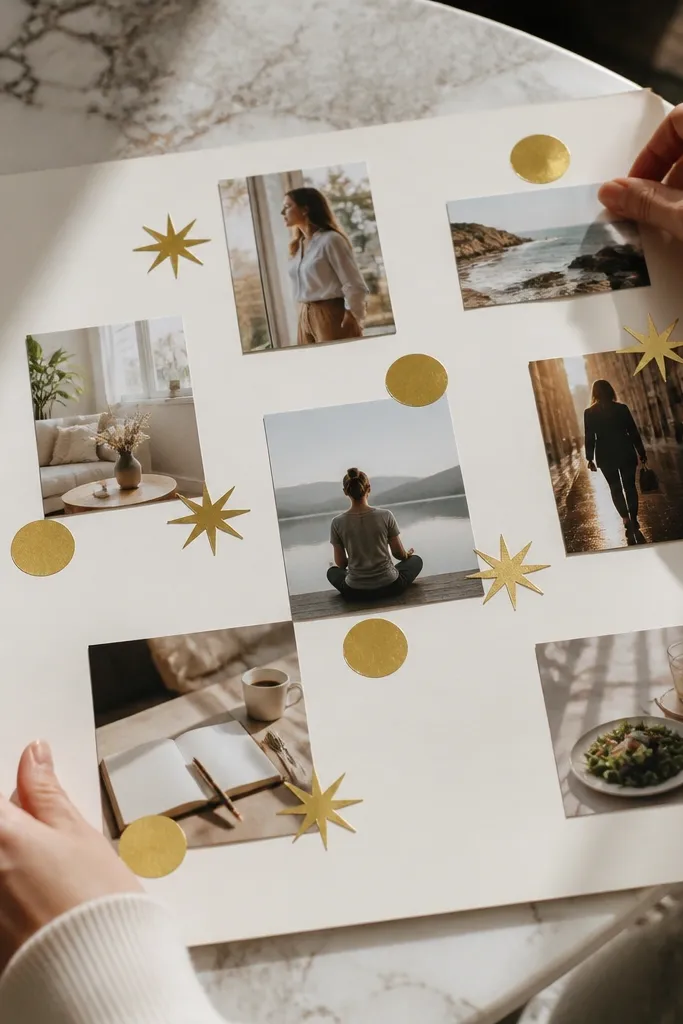
Gold accents make a beginner board look intentional even when the photo content varies. You’re using simple shapes — circles, stars, and small lines — to guide the eye. The board looks good in daylight because gold pops without needing heavy color. This layout works for goals around style, events, or “make it pretty” motivation.
Use ivory cardstock at 8.5x11. Print 8 photos in two sizes: four 2x3 inch and four 2x2 inch squares. Place photos in a loose grid, then add gold accents using gold foil stickers or self-adhesive gold shapes. Glue the gold shapes after the photos so the edges don’t get buried.
Limit gold accents to one corner or one side so it doesn’t look cluttered.
10. Seamless Magazine Cutout Board
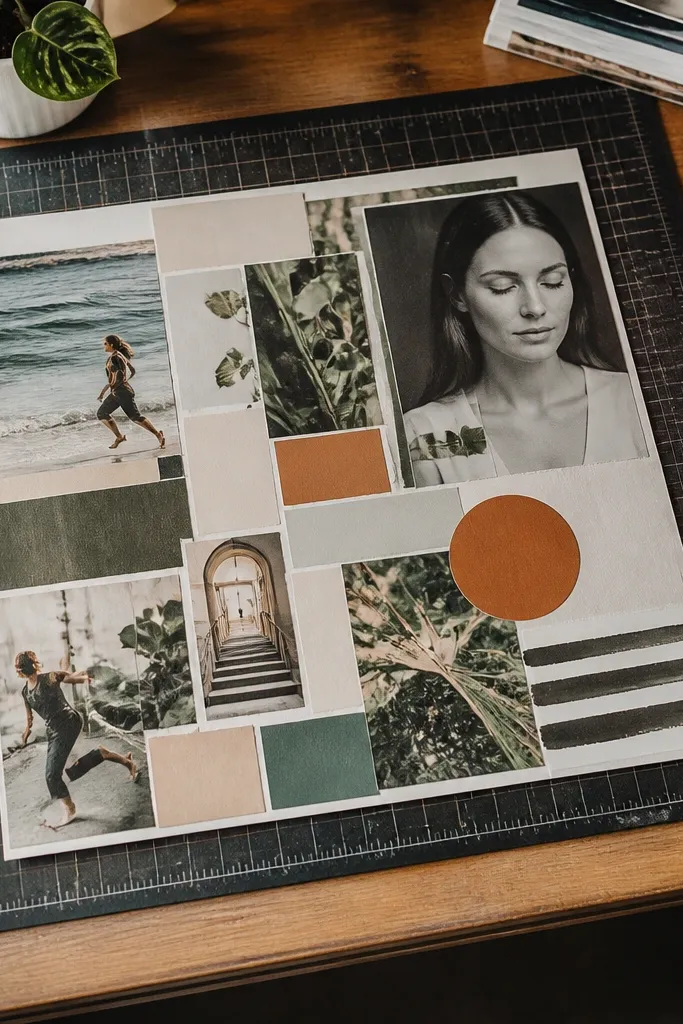
This is one of the best beginner-friendly vision board ideas pictures for people who like editorial style. Magazine cutouts look good because they already have design in the source material: typography blocks, color blocks, and photo crops. You’re borrowing that structure and arranging it into a single sheet. The result looks like a mini magazine page, not a craft project.
Editor's noteKeep cutout edges clean; rough edges look messy at this scale.
Pick a consistent magazine style source (same paper tone and photo saturation). Cut out 10-15 elements: three larger images, six medium rectangles, and two small text blocks. Arrange them on 8.5x11 white or off-white cardstock with equal spacing gaps. Glue down, then trim any uneven edges with a craft knife and ruler.
11. Color-Blocked Dream Home Board
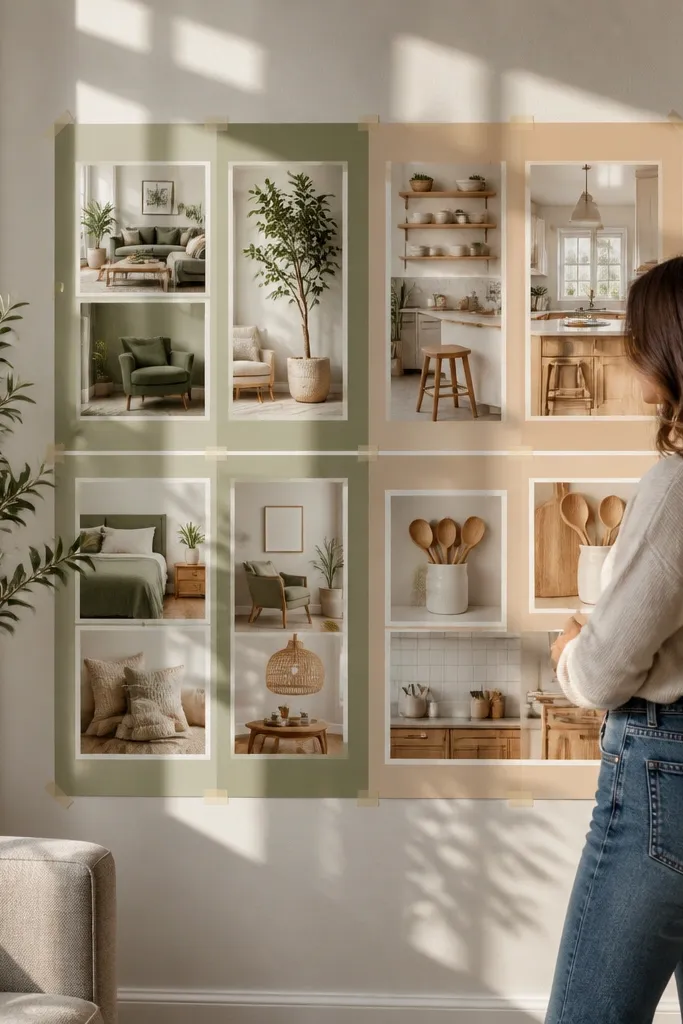
This layout is for home goals that need visual clarity. Color blocks separate “rooms” so the board reads like a floor plan for vibes. It looks aesthetic because each block has a distinct color and the photos are cropped consistently. Beginners can do it quickly because you’re drawing rectangles, not designing complex shapes.
Editor's noteUse one marker thickness across the entire page so lines don’t look uneven.
Use beige cardstock. Draw 6 rectangles with a ruler: two larger blocks at the top and four smaller blocks below. Use pastel paint or colored paper strips for the block backgrounds: blush, sage, light blue, and soft gray. Print interior photos and crop to fit each block, then glue into place and outline each block with a fine black marker.
12. Letter-First Typography Vision Board
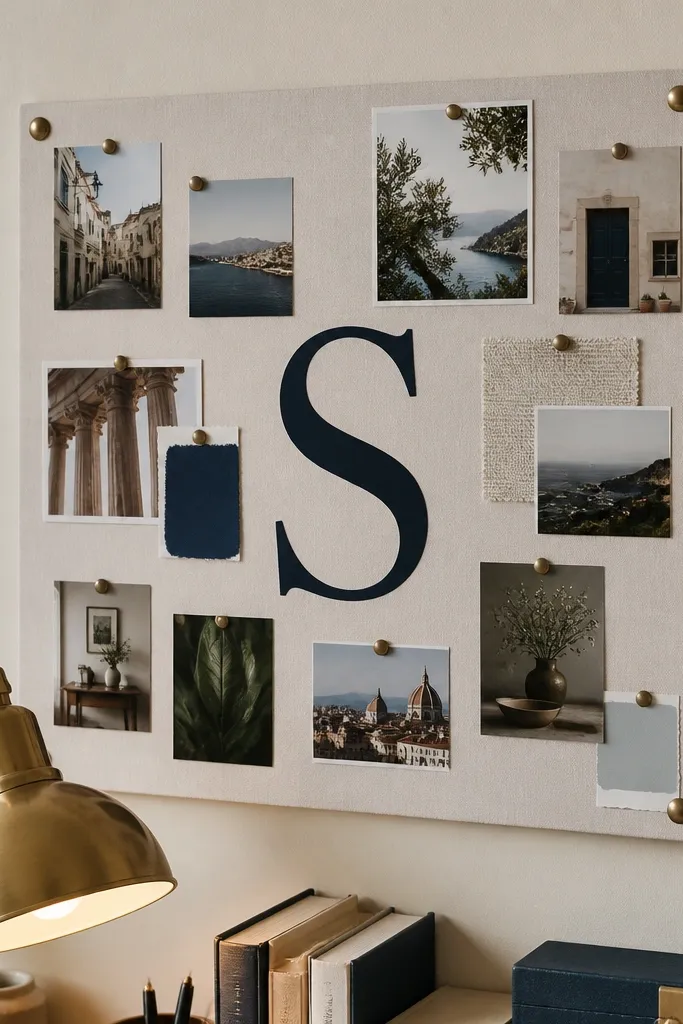
This board looks striking because the typography leads. You pick a single letter that matches your theme (like “H” for home, “S” for strength, “C” for calm) and arrange photos like decor around it. It’s beginner-friendly because you only need one big design element plus a few photos. The layout also helps you keep the board focused on one message.
Editor's noteUse a letter color that matches your most common photo tone (black, navy, or forest green).
Start with white cardstock at 8.5x11. Choose a letter at about 6 inches tall and print it in a bold font, or hand-letter it neatly. Place the letter in the center, then print 6 photos sized 2x3 inch and 2x2 inch squares around it. Glue photos first, then glue the letter on top so it feels layered.
13. Circle Orbit Board
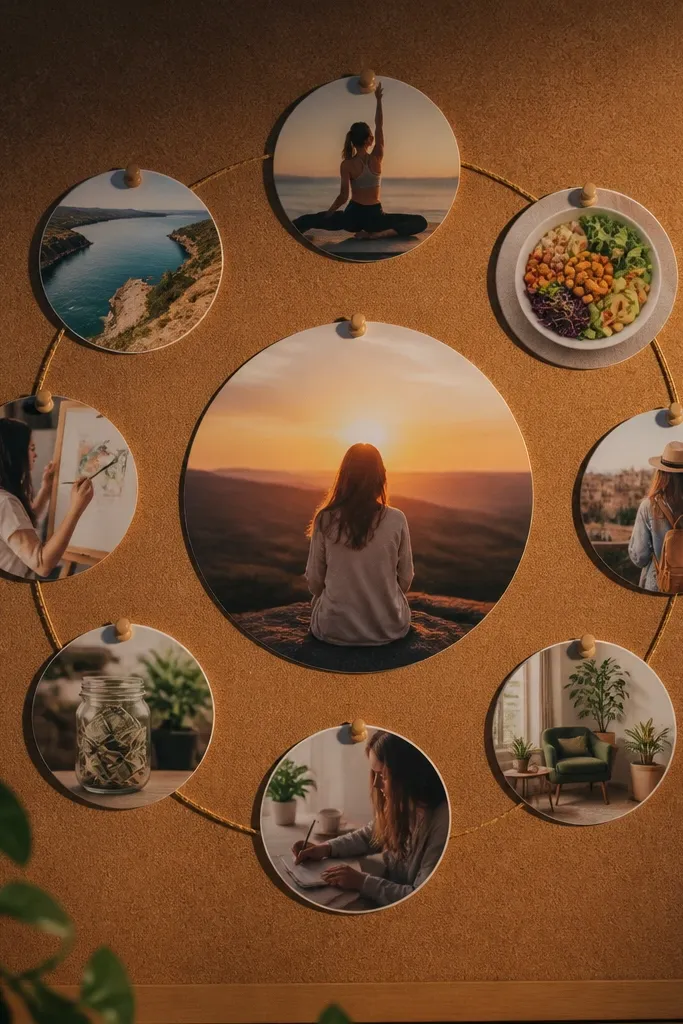
Orbit layouts look like design posters and they’re easy to build. The center image becomes the “goal,” and the circles around it create motion. It’s beginner-friendly vision board ideas pictures when you want a visual sense of progress without writing long plans. The circle shape also forces you to use consistent photo sizes.
Editor's noteKeep the orbit photos all in the same color temperature so the circle looks cohesive.
Use white cardstock and pick one center photo sized about 4x5 inches. Print 8 smaller photos sized 2x2 inches. Lightly trace a circle guide with a pencil using a bowl or plate as a stencil, then place the 8 photos along the orbit path. Glue the center photo first, then glue the orbit photos one by one along the circle line.
14. Grid With Tiny Quote Snippets
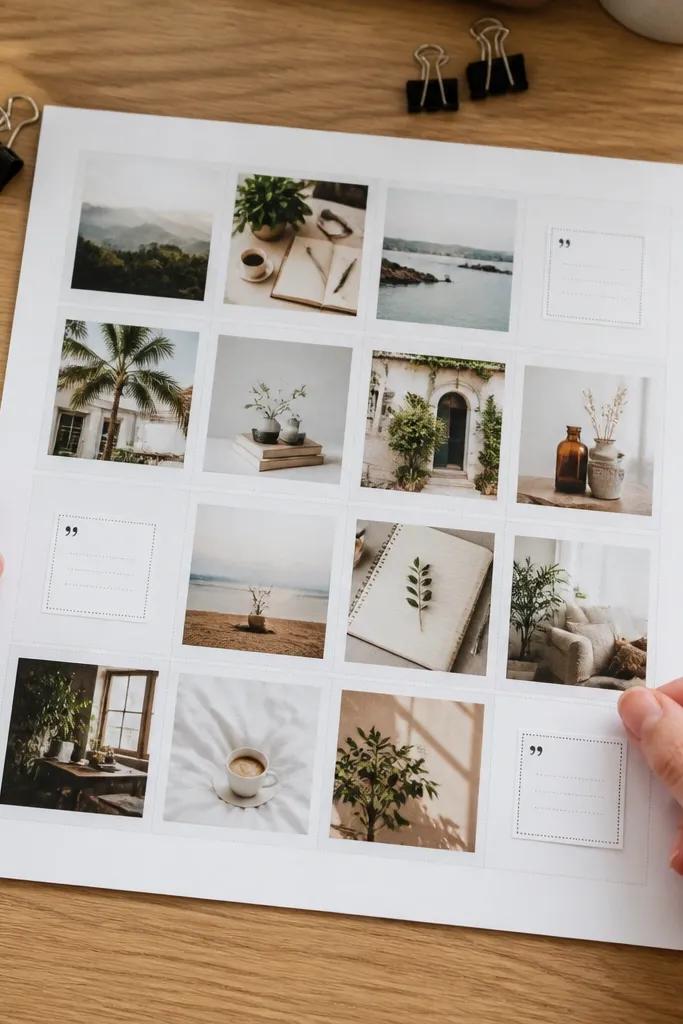
This layout works when you want the board to feel motivational but still clean. The grid keeps photos aligned, and the tiny quote boxes add meaning without turning into a wall of text. It’s beginner-friendly because you can limit yourself to short phrases. The look is aesthetic because typography is controlled: small boxes, consistent font size, and even spacing.
Use light gray cardstock at 8.5x11. Draw a 4x3 grid with 0.25 inch margins. Print 10 photos to fit grid cells, leaving two cells for quote boxes. Add quote boxes using white paper rectangles about 1x1.5 inches and write one short phrase per box in black marker, then glue everything down.
Use only one font style (all caps or all sentence case) so it looks designed.
15. Monochrome Photo Strip Timeline
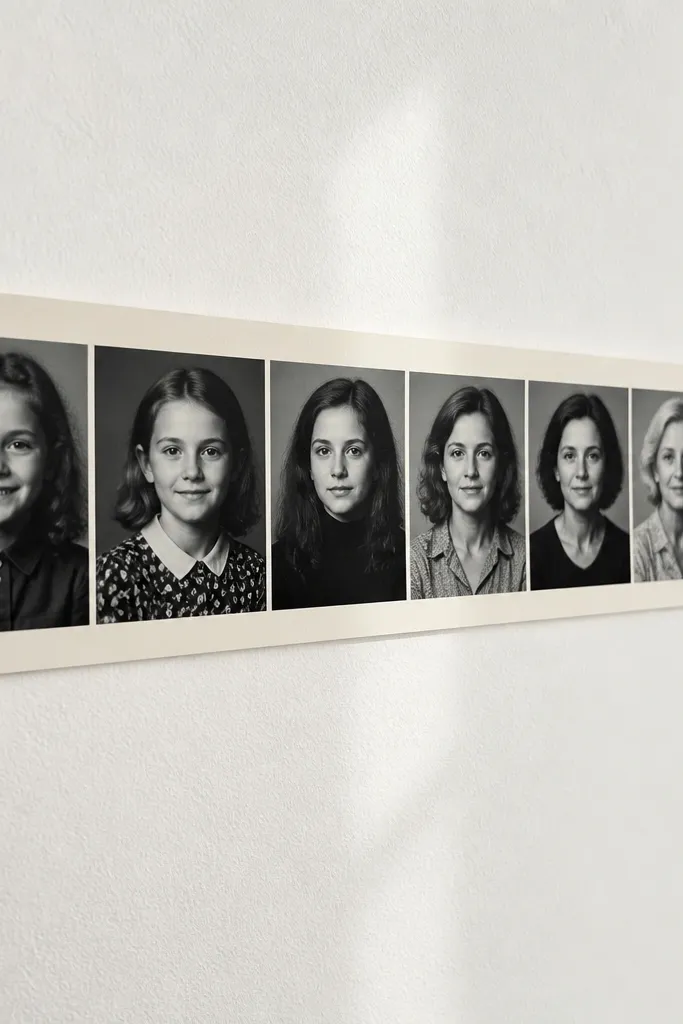
Timeline boards help you visualize “before to after” without needing words. The straight strip makes it look like a clean documentary layout. It’s beginner-friendly because there’s only one main row to place. Monochrome photos keep it cohesive and avoid color clashes.
Editor's notePick photos with similar contrast so the strip feels smooth, not jumpy.
Use a white or cream background. Print 7 photos in a consistent monochrome style and crop them as rectangles about 2.5x3.5 inches each. Arrange them in one horizontal strip across the page, leaving 0.3 inch gaps. Add small arrow markers between photos using a black marker, then glue down the strip and trim any uneven edges.
16. Navy Mat With White Photo Cutouts
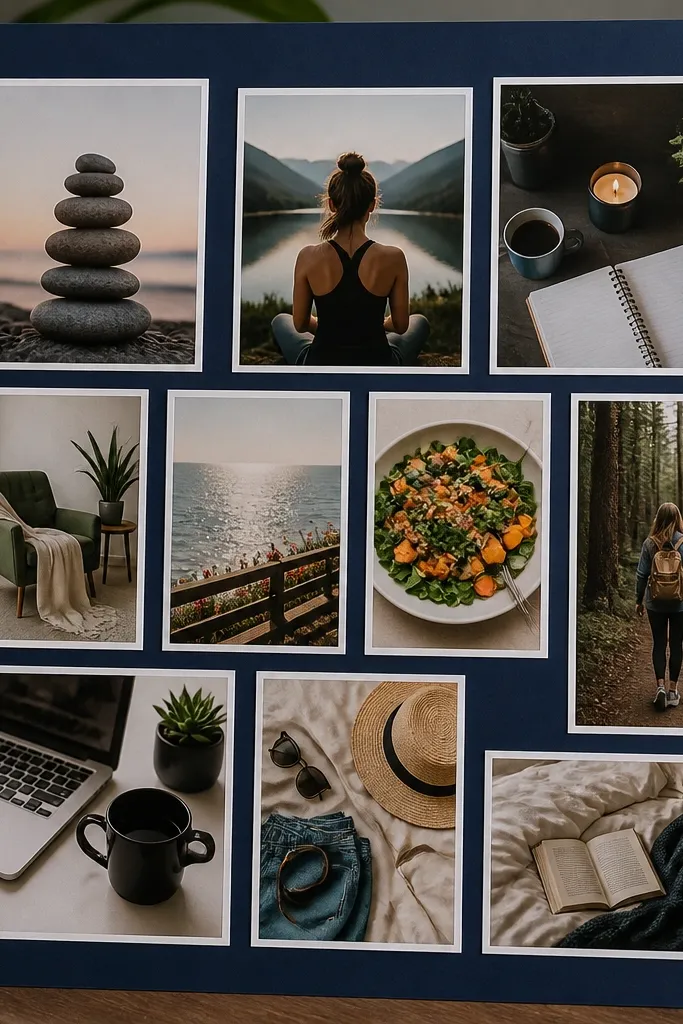
This board looks crisp because the navy mat creates a strong border for every photo. White borders make even different photos feel like they belong together. Beginners like it because it hides small alignment mistakes — the borders cover them. It’s also one of the easiest ways to get an aesthetic, “planner sticker” vibe on paper.
Editor's noteIf your photos have mixed brightness, add a simple brightness adjustment in your editor so they match.
Use navy cardstock at 8.5x11. Print 9 photos and mount each onto white paper frames sized slightly larger than the photo (add about 0.25 inch white border). Arrange the framed photos in a 3x3 grid with consistent spacing. Glue each frame down, then add a final thin white border around the entire sheet.
17. Peach Wash Background With Soft Edges
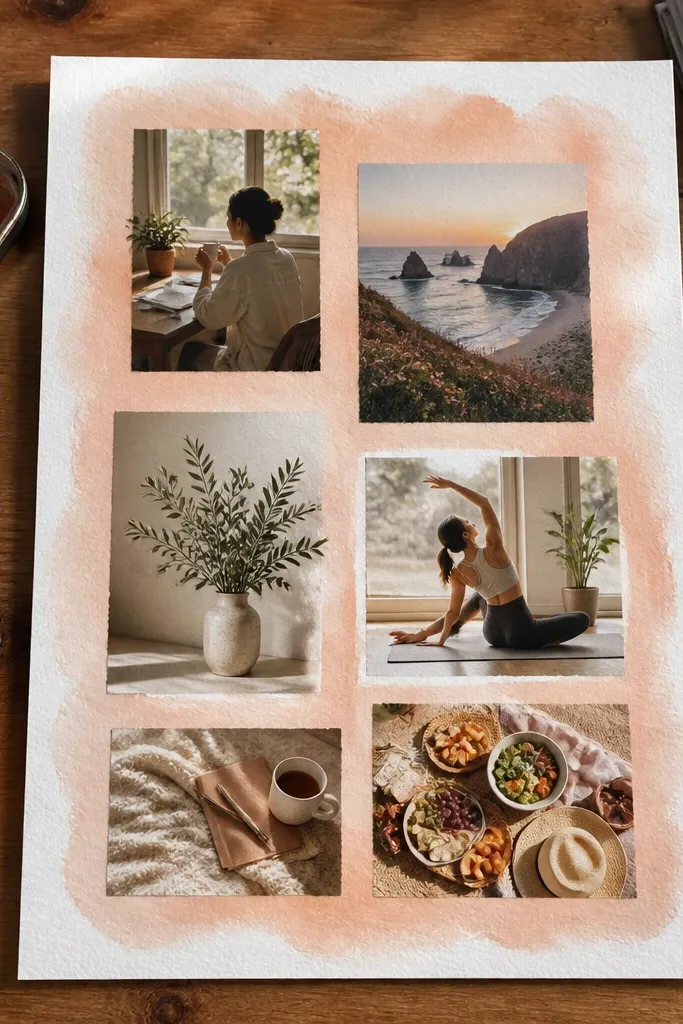
A watercolor wash makes the board feel handmade and warm without needing lots of decorative elements. The soft background edges let photos feel blended, which looks good even if your cuts aren’t razor-perfect. This layout is beginner-friendly because the design forgiving — you’re not relying on perfect straight lines. It’s best for goals about comfort, self-care, and lifestyle changes.
Editor's noteUse a hair dryer on low heat to speed drying so you don’t smear the wash.
Paint a light peach wash on 8.5x11 watercolor paper or cardstock using watered-down acrylic or watercolor. Let it dry completely. Print 6 photos and cut them into rounded rectangles using a corner-rounder or scissors with curved cuts. Arrange them in two columns with equal spacing, glue down, and add a thin white line around each rounded photo frame.
18. Black-and-White Photo + One Color Accent
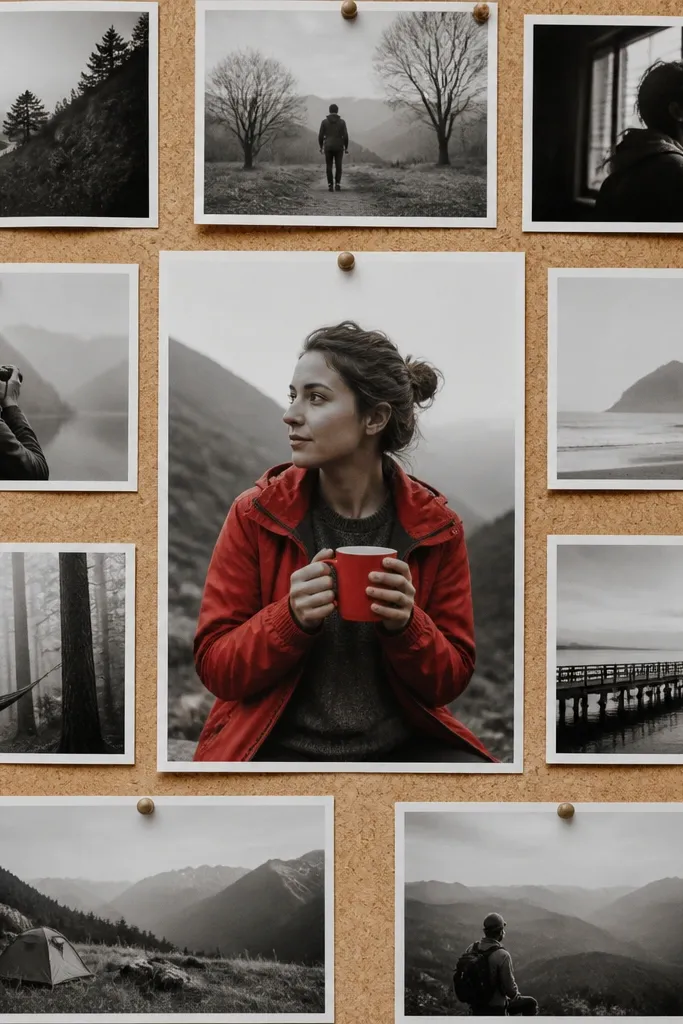
This is the cleanest way to make your board look “edited.” When most photos are black-and-white and only one image has color, your eye locks onto that one goal. It’s beginner-friendly vision board ideas pictures because it gives you a rule: pick one accent color and stick to it. The board looks aesthetic because the contrast is intentional, not accidental.
Print 8 photos in black-and-white and choose one photo to keep in color. Pick one accent color inside that colored photo (red, teal, mustard) and avoid other colored photos with different tones. Mount all photos with the same white border width. Arrange them in a 2x4 grid and place the colored photo in the center cell.
If your colored photo has multiple colors, edit it to saturate only the accent color and desaturate the rest.
19. Scrapbook Corner Frame Board
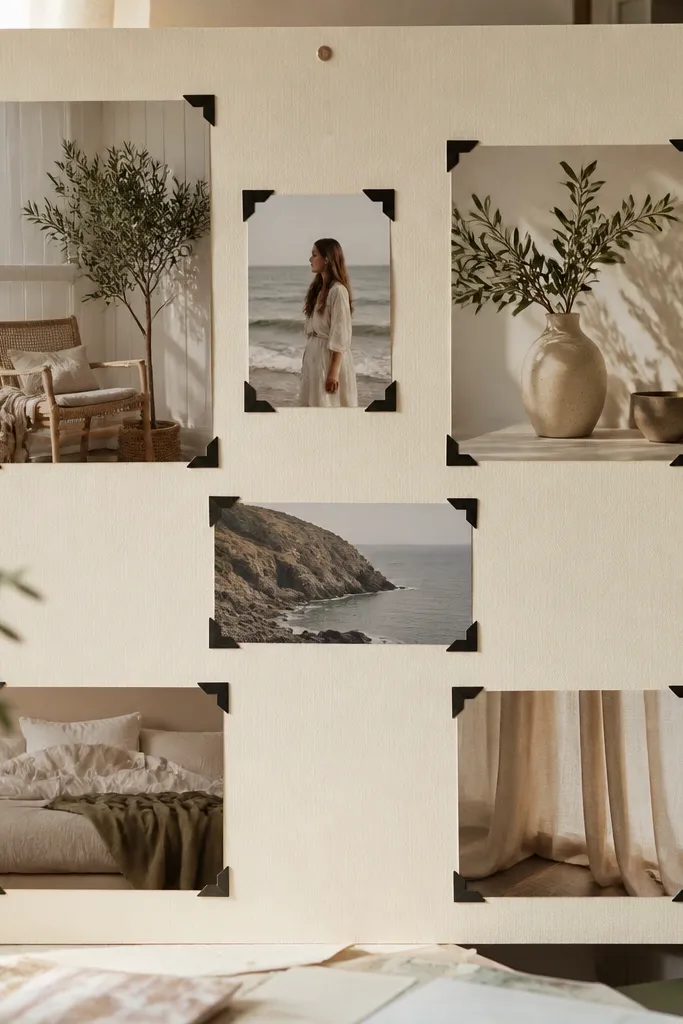
Corner frames make the board look like a scrapbook layout but still print-friendly. You get a structured look without cramming photos into every inch. This is beginner-friendly because you’re only building frames in four corners and placing a few images in each. The result looks aesthetic, clean, and easy to adjust if you swap photos later.
Editor's noteUse a ruler for corner placement; off-center corners show immediately.
Use 8.5x11 white cardstock. Cut four corner frame pieces from colored paper or print corner frame graphics, each about 2.5x2.5 inches. Print four photos to fit inside corners at about 2x2 inches and glue them into the corner frames. Add one larger center photo sized about 4x5 inches and glue it last so the center balances the corners.
20. Color Match Moodboard With Fabric Swatches
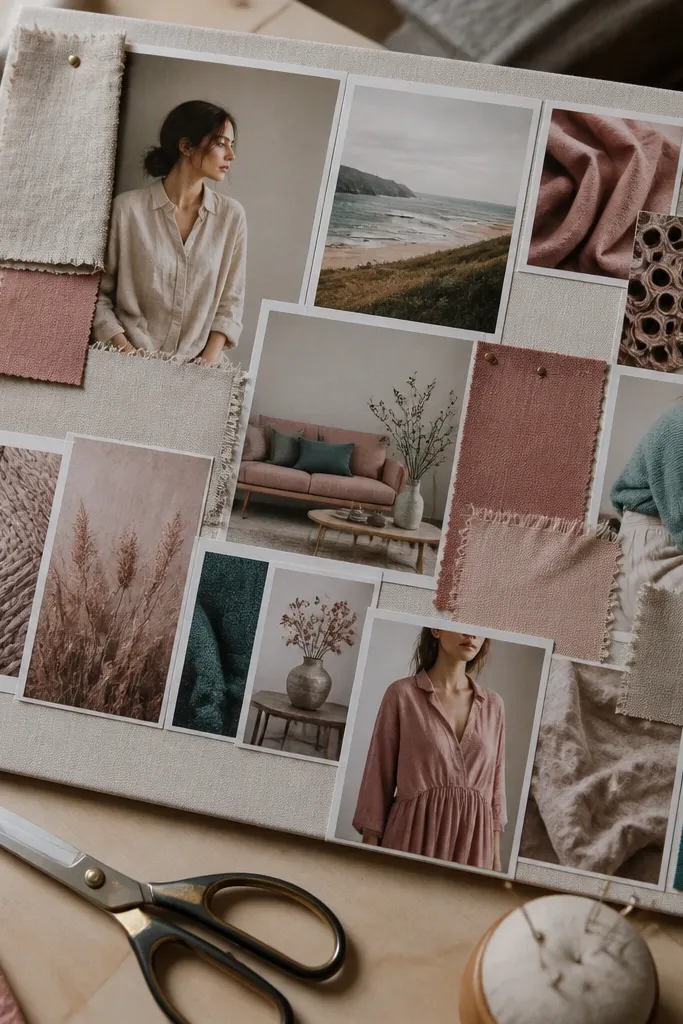
This one looks tactile and premium because it mixes photos with real fabric. It’s perfect for goals around fashion, home decor, or any “I want this vibe” theme. Beginners can do it because you’re not sewing — you’re just attaching swatches. The look is cohesive because you’re matching photo colors to the fabric palette.
Editor's noteUse fabric glue or double-sided tape designed for fabric so edges don’t lift.
Pick 4 fabric swatches in one palette: like oatmeal linen, olive cotton, black denim, and a gold accent. Cut swatches to about 2x2 inches each and glue them onto 8.5x11 cardstock in a row. Print 4 photos that match each swatch color and place one photo next to each fabric square. Add a thin label under each swatch with a short word like “Denim” or “Linen.”
21. Seasonal Four-Quadrant Board
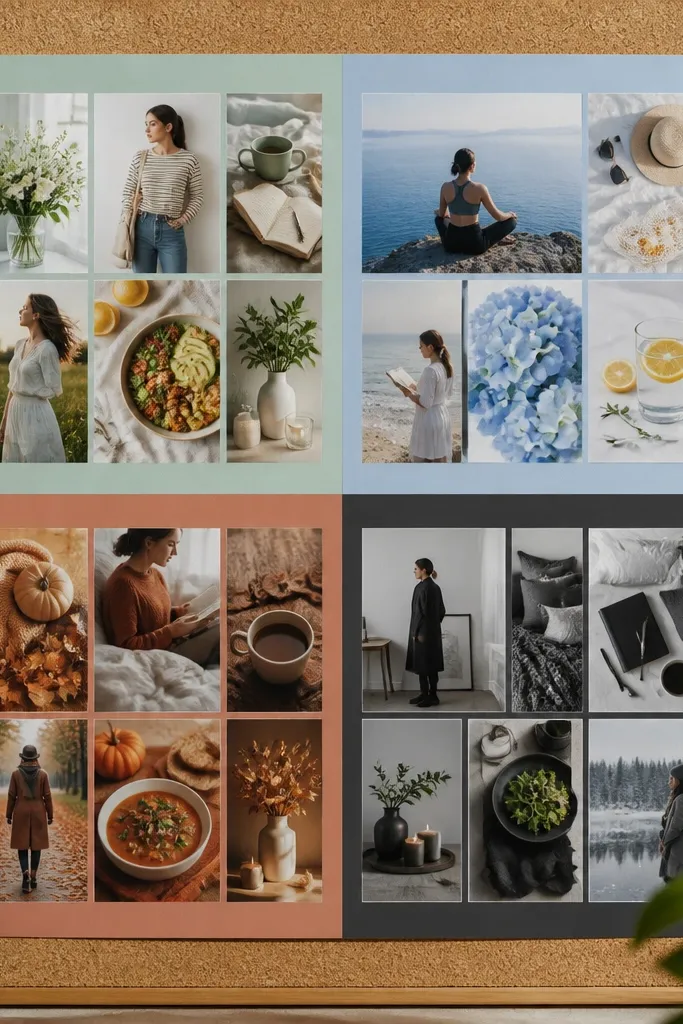
Quadrants keep your board organized and make it easy to rotate themes through the year. This layout looks aesthetic because each quadrant has a color identity and photo crop style. It’s beginner-friendly when you’re building a board for goals that change over time. You also get a built-in structure for printing: four sections, four photo sets.
Editor's noteChoose photos with similar saturation inside each quadrant so the colors feel intentional.
Use 12x12 or 8.5x11 cardstock. Draw a cross to create four equal sections and color each section: spring (mint), summer (sun yellow), fall (terracotta), winter (cool gray). Print 3-4 photos per quadrant sized to fit the section, then glue them in a tight cluster with even spacing. Add a small season label at the top of each quadrant and outline each section with a thin marker line.
22. Monogram Corner + Photo Center
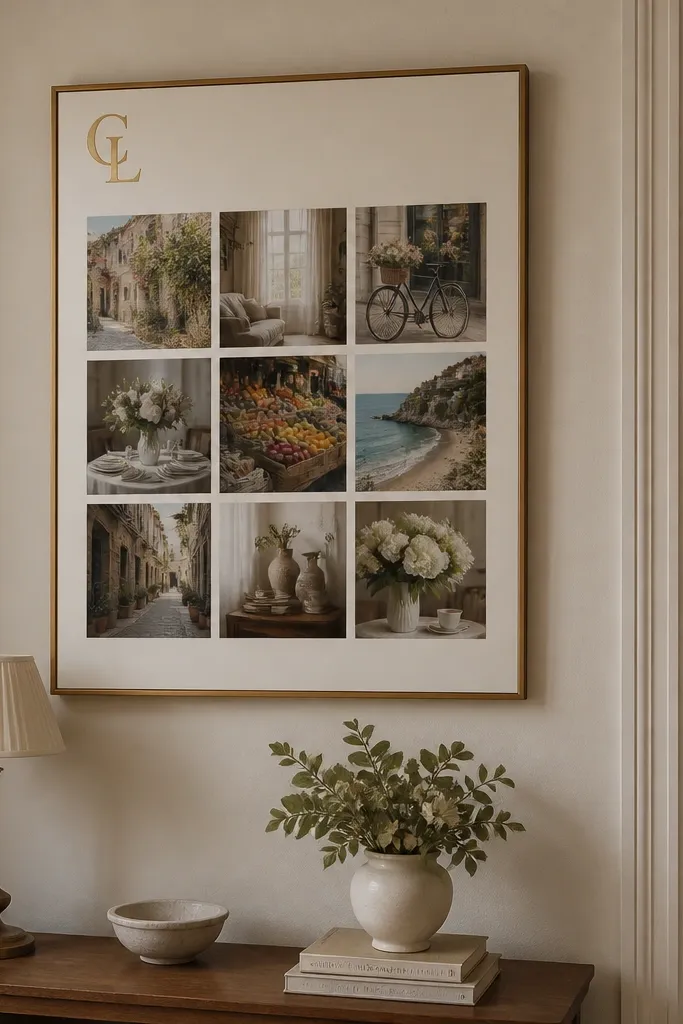
This layout looks polished because the monogram gives it a “stationery” feel. The center photo grid keeps it goal-focused, while the corner letter adds personality. It’s beginner-friendly vision board ideas pictures for people who want something that looks like a finished product, not a craft. It also works well for printing because you’re repeating the same photo sizes in the center.
Editor's noteKeep the monogram color to black or navy so it doesn’t compete with the photos.
Use cream cardstock. Place a monogram letter in the top-left corner about 2.5 inches tall using a printed letter cutout or marker. Print 6 photos sized to make a 2x3 grid in the center, leaving at least 1 inch margin around the grid. Glue the photos first, then glue the monogram on top so it stays crisp and readable.
23. Sticker-Style Cutout Icons Board
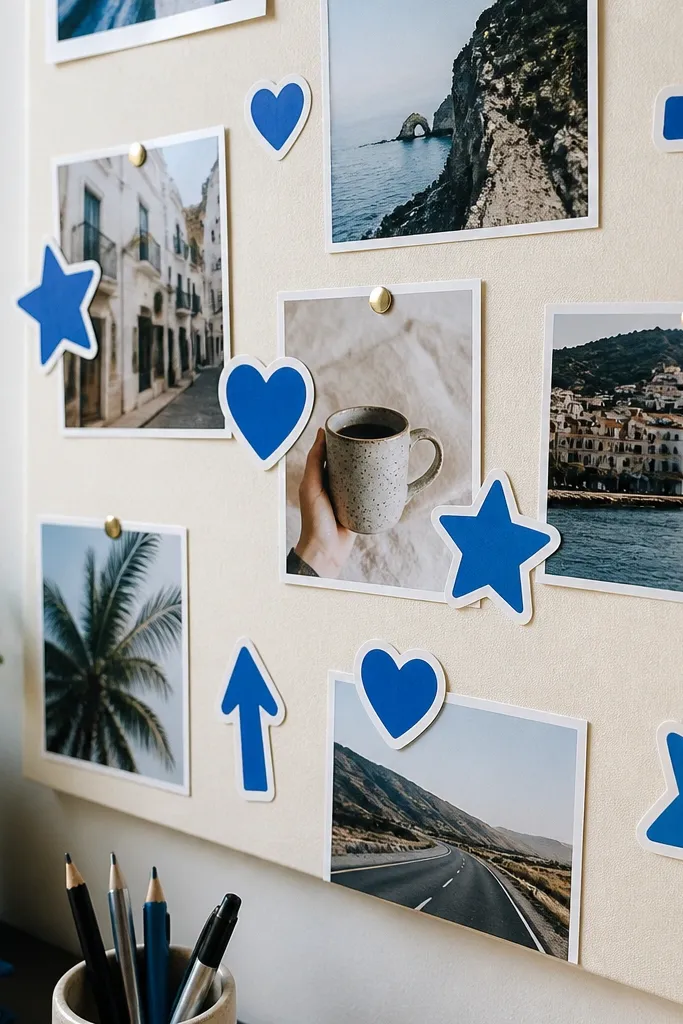
This board is cute and aesthetic because it uses icon accents instead of heavy layout design. You place icons like stars, hearts, arrows, and sparkles next to specific photos to show emphasis. It’s beginner-friendly because you’re using simple, repeatable shapes. The look stays cohesive when you limit icons to one color set — like gold and white.
Editor's noteLimit icons to one accent color so the board doesn’t feel busy.
Print 10 photos in two sizes (2x3 inch and 2x2 inch). Arrange them in a loose grid with consistent spacing. Add icon stickers or cut icons from gold paper and place them near the most important photos. Glue photos first, then place icons last so they overlap edges cleanly.
24. Diary Page With Photo Tape Look
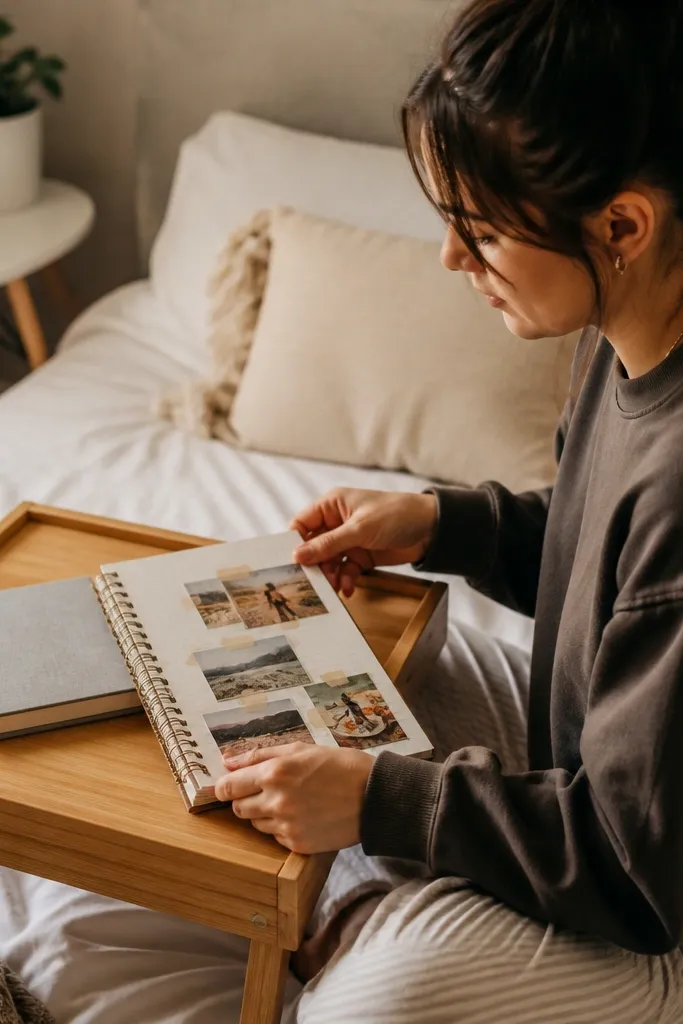
This layout feels personal and aesthetic because it mimics a diary page — lines, tape, and simple photo placement. It’s beginner-friendly vision board ideas pictures for goals tied to journaling, habits, and routines. The “tape” effect also hides tiny miscuts because the tape visually covers edges. You get a lived-in look without needing messy glue.
Editor's noteUse matte tape strips (paper) rather than shiny tape; shiny tape catches light and looks off.
Use dotted or lined paper cardstock. Print 6 photos and cut them into rectangles sized about 2x3 inches. Add faux tape strips by cutting thin beige paper strips and placing them across photo corners (about 0.5 inch wide). Glue photos down, then glue tape strips on top so edges look intentionally taped.
25. Minimal Circle Labels Board
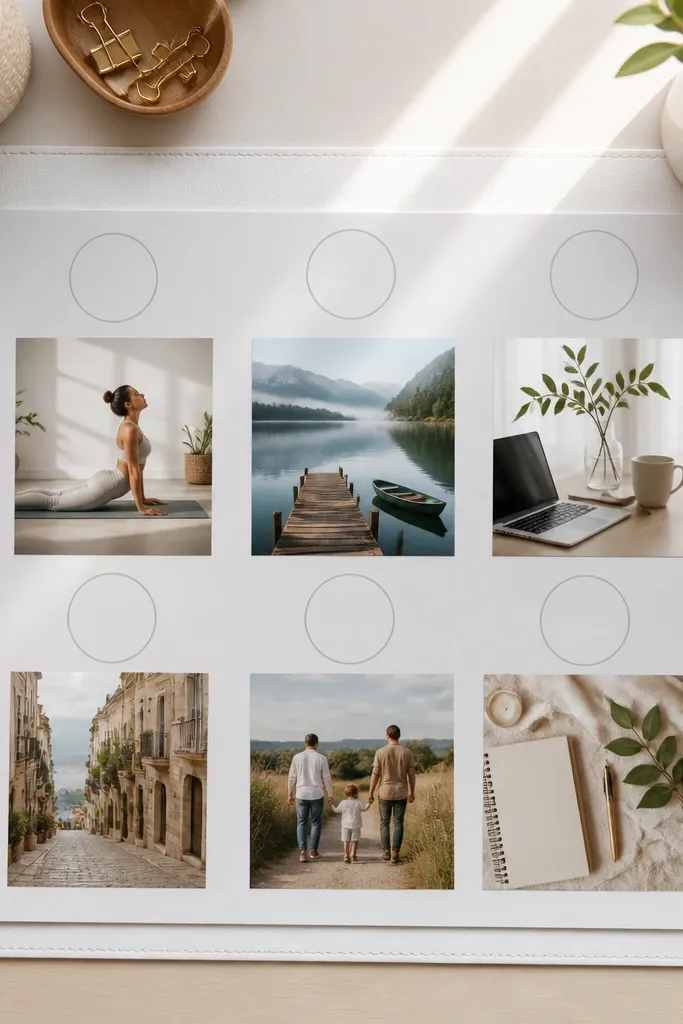
Circle labels make the board feel organized without turning into a spreadsheet. This layout is beginner-friendly because you place labels first, then match photos to each label. The circles also create visual rhythm, which makes the page look designed. It’s great for goals like fitness, learning, work, and home where categories matter.
Start with 8.5x11 white cardstock. Draw four circles about 2 inches wide in a simple arrangement (two top, two bottom). Print 8 photos sized 1.5x2 inch and glue two photos under each circle so they “belong” to the label. Write a one-word label inside each circle with a fine black marker.
Keep labels short. One word looks better than a sentence.
26. Gallery Wall Frame Board
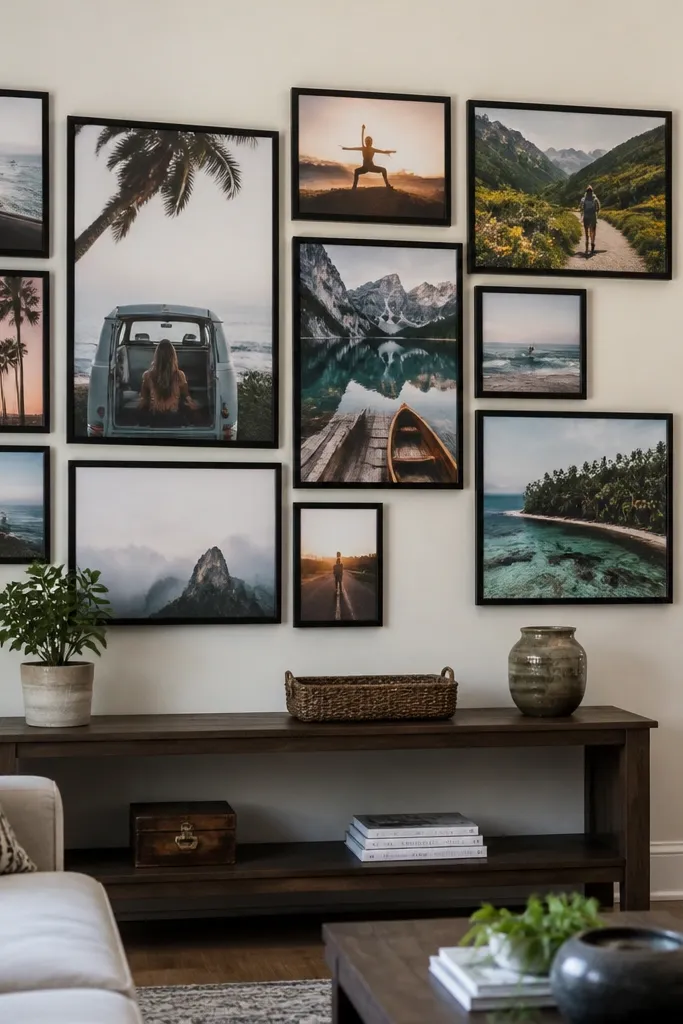
Gallery wall layouts look aesthetic because they’re asymmetrical but still balanced. You get variety without losing structure by using frames of consistent width. This is beginner-friendly vision board ideas pictures when you want a “home decor” look for your board itself. It also works great if you’re printing a mix of orientations — some portraits, some landscapes.
Editor's noteUse the same frame border width on every photo so it looks like a set.
Use beige cardstock and cut 10 thin white frame mats (about 0.25 inch border around each photo). Print photos in two sizes: portrait 3x4 inches and landscape 4x3 inches. Arrange frames like a gallery wall with slight overlaps of 0.1-0.2 inch, then glue starting from the center and working outward. Add one small arrow or star sticker pointing at the most important photo.
27. Soft Gray Gradient Fade Board
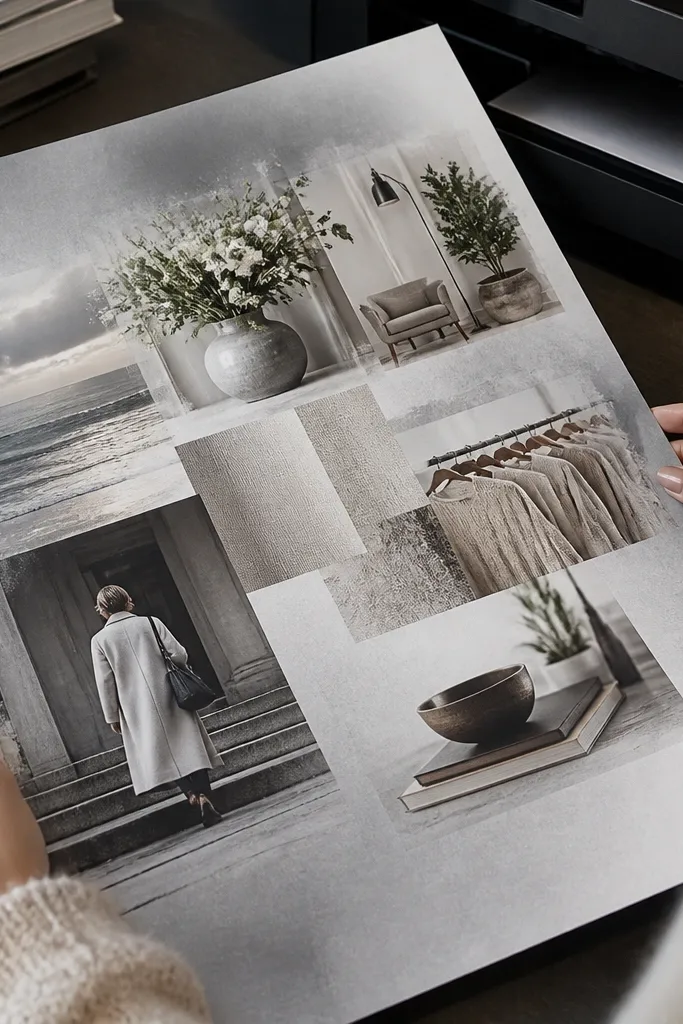
Gradient backgrounds make boards look modern and clean. The fade gives you a sense of “moving forward” without adding extra words. This layout is beginner-friendly because the background does most of the design work. You’ll still place photos, but the gradient makes them blend smoothly so small spacing mistakes don’t stand out.
Editor's noteLet the gradient dry flat before gluing so it doesn’t warp the page.
Paint a soft gray gradient on 8.5x11 cardstock using a sponge: darker gray at the top, lighter at the bottom. Print 8 photos and choose ones that match the gradient — darker photos near the top, brighter photos near the bottom. Arrange in two rows of four, then glue. Add a thin white border around the sheet to keep it looking finished.
28. Color-Coded Habit Icons Board
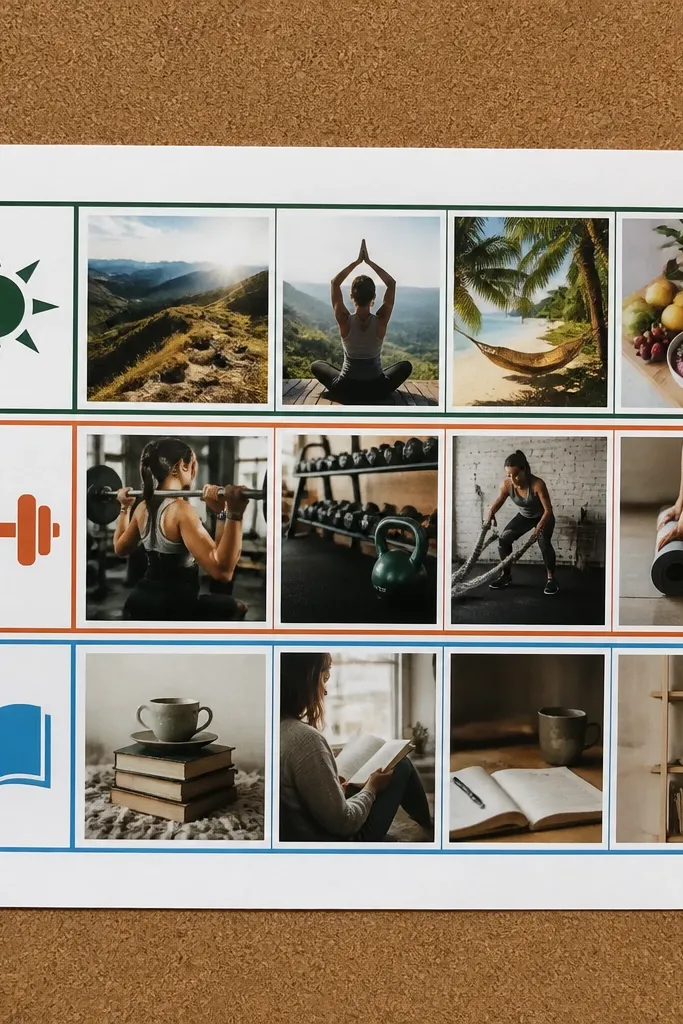
This is the best vision board layout when you want your board to feel actionable. You use habit icons as a visual system and match photos to each habit. The look is aesthetic because each habit has a consistent color and icon style. Beginners can do it without fancy typography — just clean icons and aligned photo rows.
Pick three habit colors: teal, coral, and mustard. Print 9 photos and choose 3 per habit. Draw three horizontal rows on 8.5x11 cardstock, then place one icon at the start of each row (like a water drop for hydration). Glue the three photos in each row in consistent sizes, about 2x3 inches, and write the habit name next to the icon.
Use the same icon style across the board, like all-line icons or all-solid stickers.
29. Nature Photo + Handwritten Lines Board
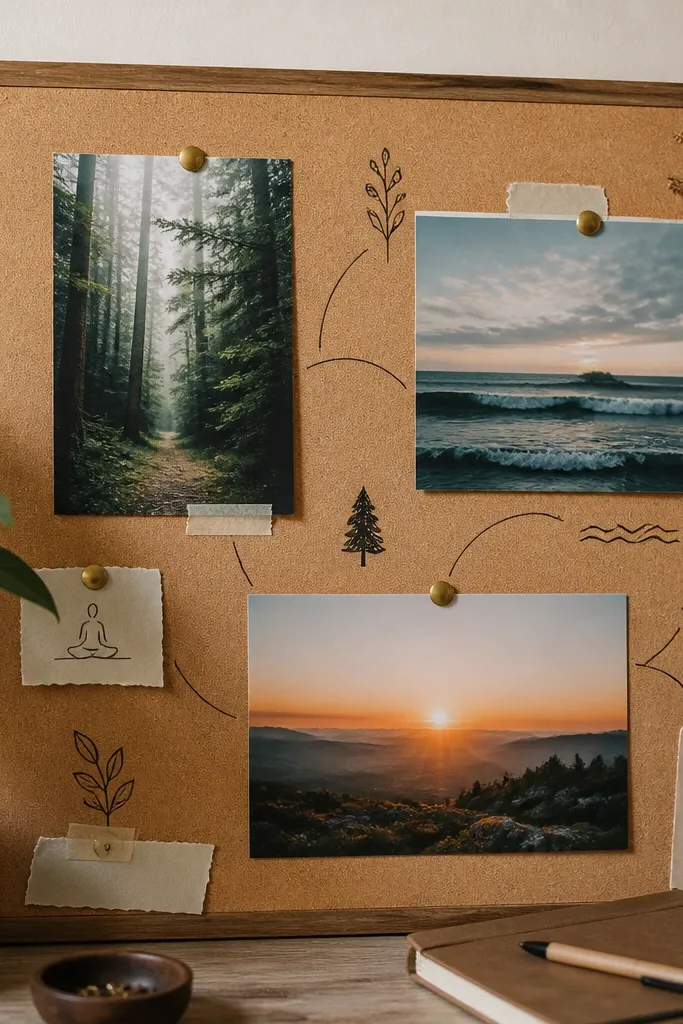
This layout looks personal and creative because it uses handwritten lines like a mind map, but kept clean. You place a few strong nature or lifestyle photos, then connect each one to a short goal word. It’s beginner-friendly because you only draw a few lines — no complicated diagrams. The aesthetic comes from thin handwriting, lots of white space, and consistent line direction.
Editor's notePractice one line on scrap paper so your fineliner doesn’t wobble.
Use white cardstock and print 5 photos sized about 3x4 inches. Place them in a loose cluster with clear gaps. Write one short goal word near each photo and draw thin lines from the word to the photo using a black fineliner. Glue photos first, then draw lines last so you don’t smudge ink on top of glue.
30. Teal + White Ribbon Divider Board
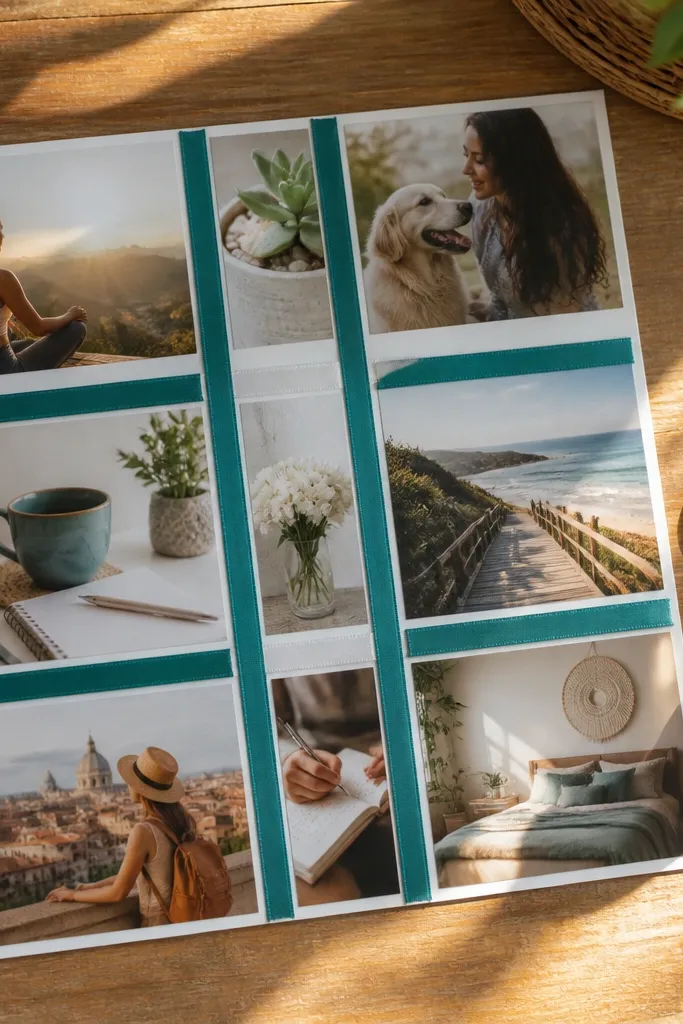
Ribbon dividers make a vision board look like a styled planner spread. The teal separators guide the eye and keep the page looking tidy even with multiple photos. It’s beginner-friendly because you’re essentially doing a simple “photo blocks + dividers” layout. The look is clean and aesthetic, especially if you use matte photos and keep the ribbon width consistent.
Use white cardstock at 8.5x11. Print 10 photos and cut them to fit into blocks sized about 2x3 inches. Add teal ribbon strips between blocks — ribbon width about 0.25 inch. Glue photos into the blocks, then glue ribbon strips on top of the gaps to hide any uneven edges.
Use fabric glue for ribbon so it stays flat and doesn’t peel.



