
1. Classic Denim Jacket + Graphic Tee Dress-Up Set
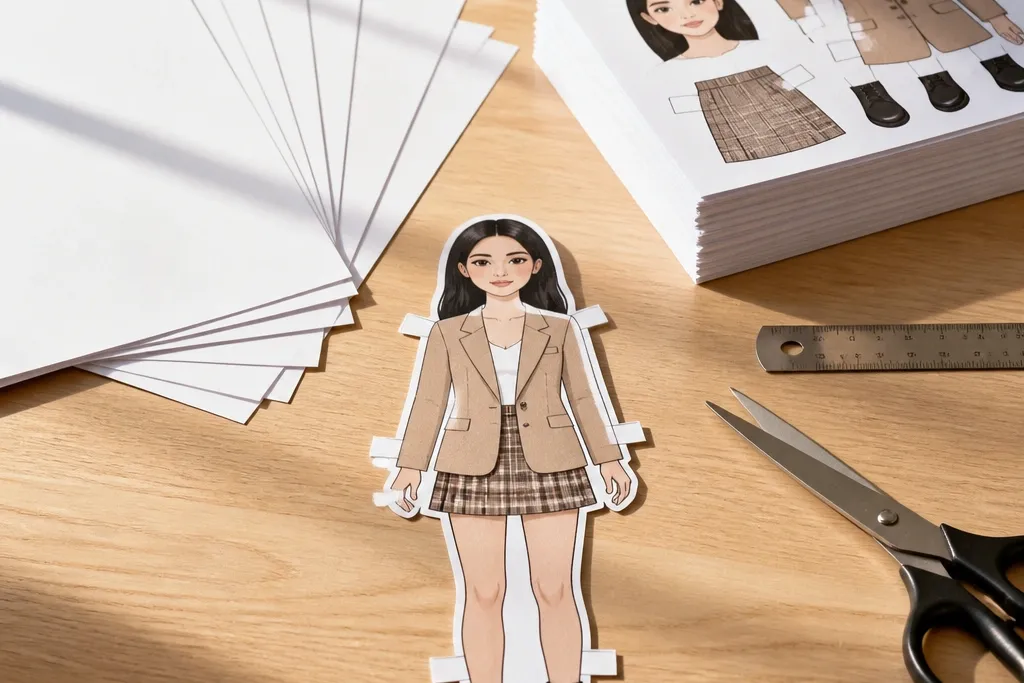
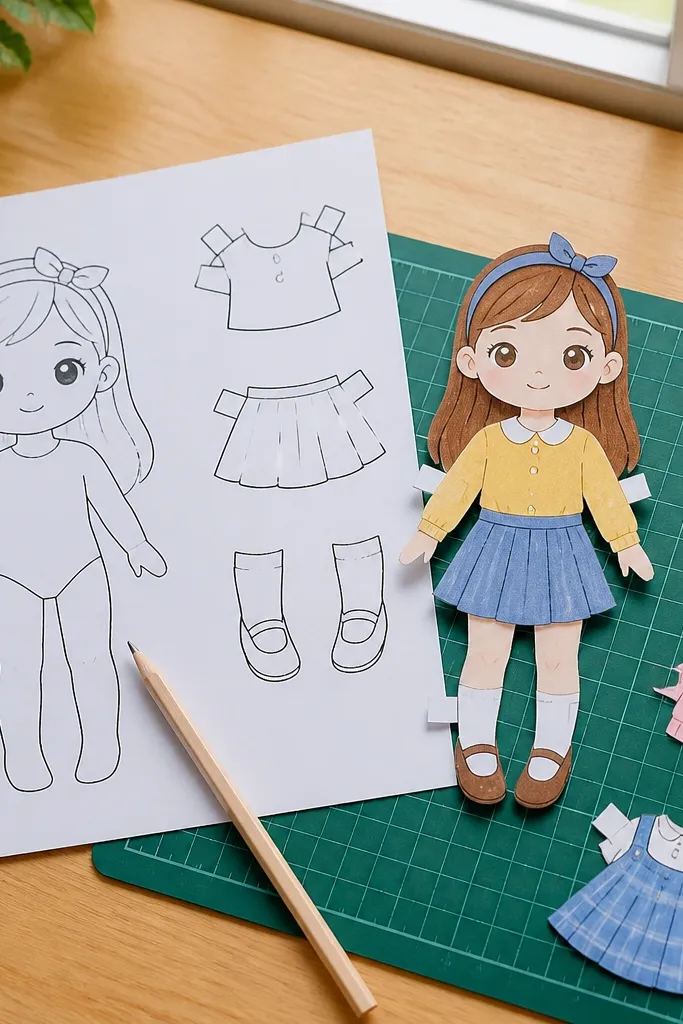
This set is built for that “instant cool” look: a denim jacket silhouette with a simple collar, plus a graphic tee that reads clearly even at small sizes. It’s beginner-friendly because the jacket edges are mostly straight lines and the sleeves attach with obvious fold tabs. The outfit pieces stack cleanly, so you don’t get that bulky overlap that ruins the shape. It’s great for a desk display because the blue tones hold up well against white paper backgrounds.
Print the template on 180-200 gsm cardstock. Cut out the doll body first, then cut the jacket and tee pieces, keeping the tabs attached. Fold tabs along the printed lines, then attach the jacket over the doll torso and slide the tee under it. Finish by pressing the folds flat with a bone folder or the back of a spoon.
Editor's noteUse a metal ruler for straight jacket edges — it keeps the silhouette sharp.
Skip thisDon’t fully separate tiny tabs; trim only what’s outside the attachment points.
2. Cozy Sweater Weather Outfit Pack
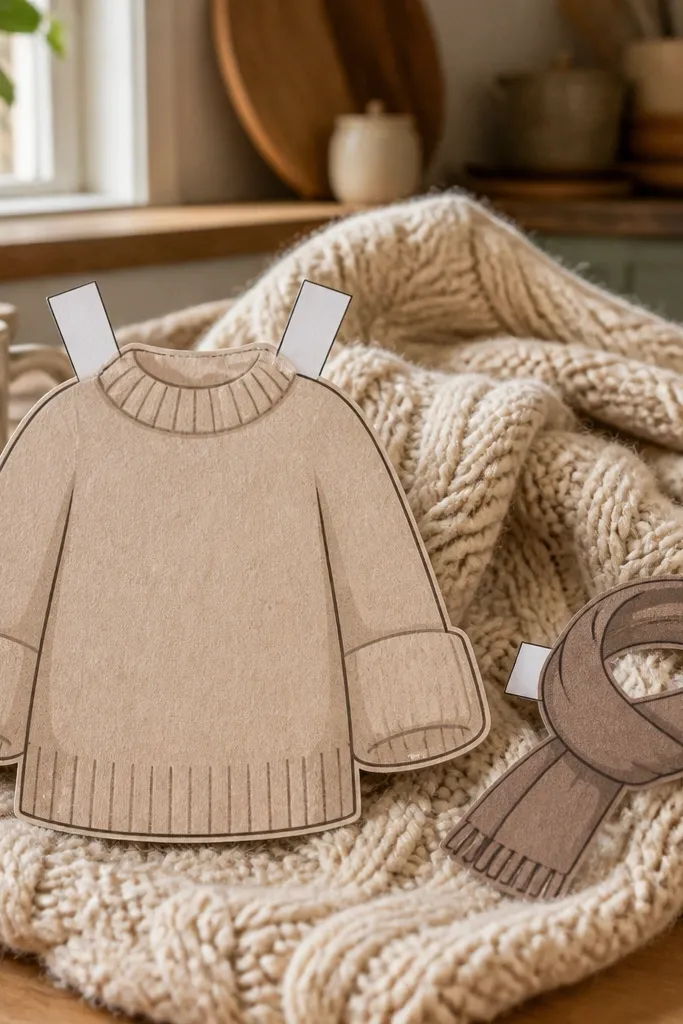
This template set leans into thick textures without requiring you to color much. The sweater shape is large and readable, with sleeve cuffs that give the outfit structure. The scarf piece adds a layered look while staying easy to attach because it uses a simple wrap fold. It looks warm and homey on camera because the sweater’s mass creates contrast against the doll’s slimmer body.
Print on 200-250 gsm cardstock so the sweater folds don’t curl. Cut the doll and sweater pieces, then fold the sweater hem and sleeve cuffs along the lines. Attach the sweater to the doll first, then add the scarf by folding the scarf strip into place. Press down gently at the fold lines so the scarf sits flat instead of sticking up.
Editor's noteIf you want richer color, print once, then color the sweater with colored pencils for even shading.
Skip thisAvoid using thin printer paper — it warps and makes cuffs look wavy.
3. Minimal Black Dress with Cardigan Swap
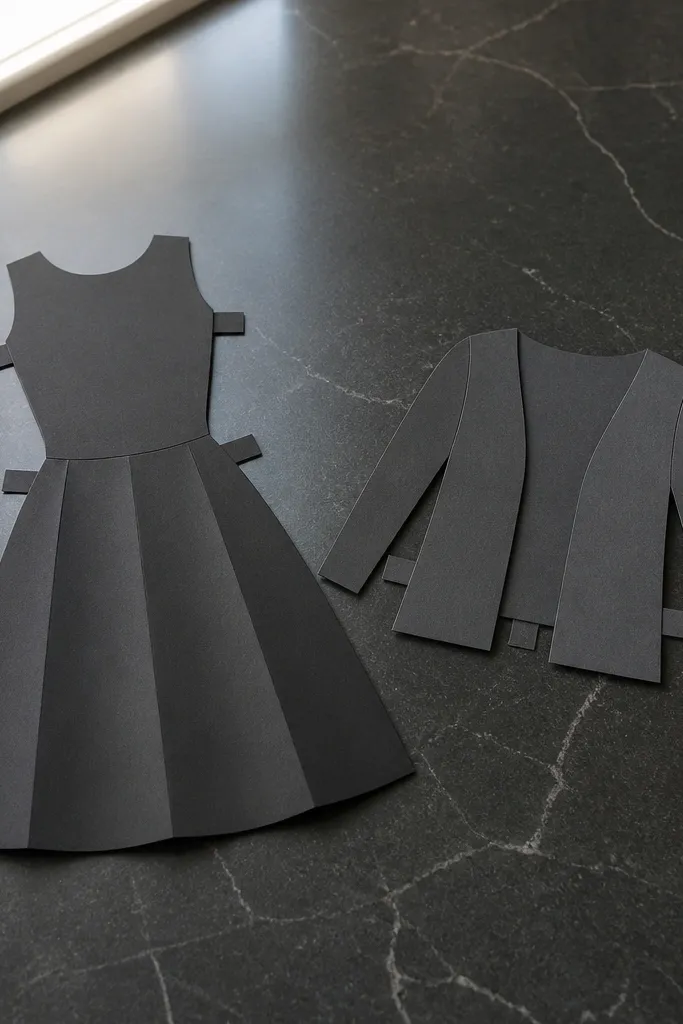
Minimal outfits are forgiving because you don’t need perfect tiny details to look good. The black dress silhouette is clean and the cardigan swaps in with simple tab points, so you can change the look fast without hunting for matching pieces. This template is ideal for beginners who want a polished aesthetic even with basic cutting skills. It also photographs well because the shapes stay strong against simple backgrounds.
Print the page and cut the dress and cardigan pieces, leaving tabs intact. Fold the cardigan along the center attachment line, then attach it to the doll torso. Place the dress on the doll body and align the neckline tabs before pressing. Once everything is set, fold the doll at its base line so the outfit sits straight.
Editor's noteUse a white or light gray background card so the black dress edges look crisp.
Skip thisDon’t glue the entire outfit — tab-only attachment keeps it flexible for swapping.
4. Pastel Rainbow Skirt + Crop Top Set
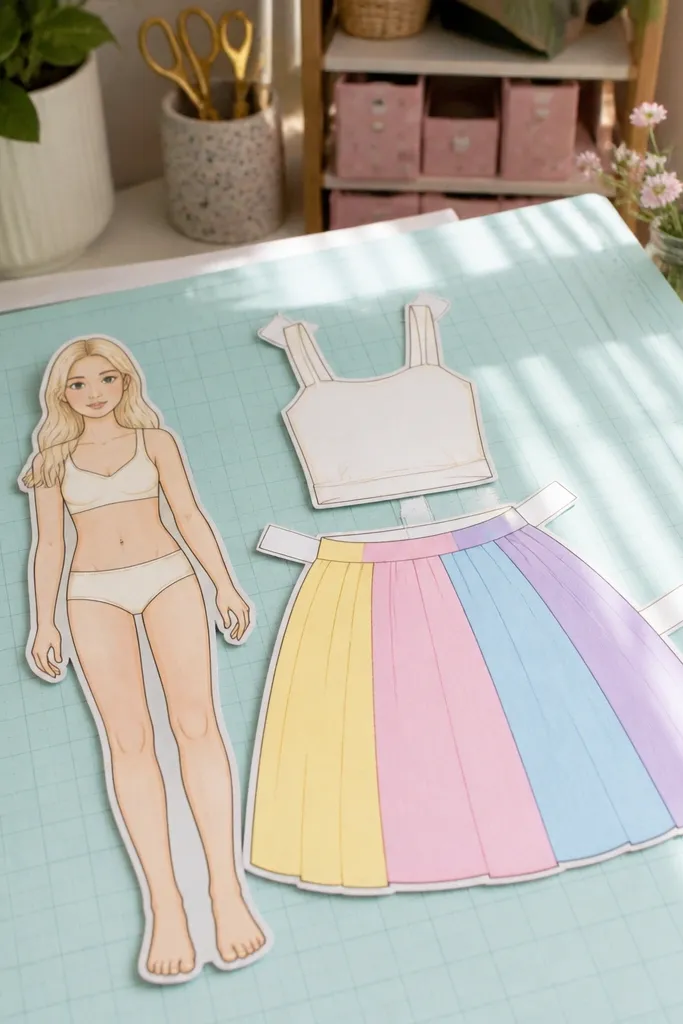
This set gives you a bright, photogenic outfit with big color blocks that don’t require precision coloring. The rainbow skirt uses banded sections that look great even if your cuts are slightly imperfect, because the color boundaries hide micro-uneven edges. The crop top is simple in shape and attaches at clear points, so beginners can assemble it quickly. It’s perfect for a spring desk display and looks fun in bright daylight.
Print on 160-200 gsm cardstock. Cut the skirt bands and top piece, then fold each skirt panel along its printed fold lines. Attach the skirt to the doll first, then align the crop top tabs at the shoulders. Press down firmly at the waistband area so the skirt holds its curve.
If your printer colors look pale, run a second print pass for the skirt only and glue it behind the original for thicker color.
Don’t trim too close to the band boundaries; leaving a hair of margin keeps stripes aligned.
5. Ballet Core Tutu + Ribbon Shoes
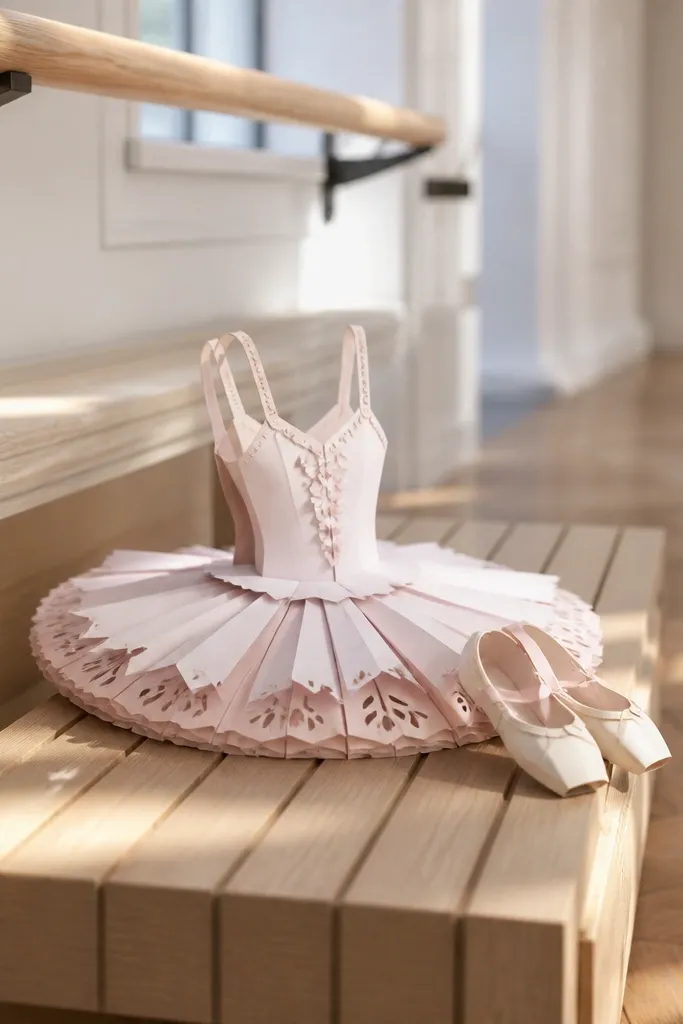
A tutu looks fancy, but this template keeps it beginner-friendly by using layered, pre-shaped sections instead of tiny frills. The skirt flares with a clean outline, and the ribbon shoe pieces add a delicate detail without requiring delicate cutting. This is one of those templates where the final photo looks “styled” because the outfit has clear, feminine lines. Use it for a pink or cream background to make the tutu pop.
Print on 200-250 gsm cardstock for the flare to hold. Cut the tutu layers and fold along the tabs so each layer sits slightly offset. Attach the tutu to the doll waist, then add the ribbon shoes to the feet tabs. Finish by bending the tutu gently outward so it looks airy rather than flat.
Editor's noteUse a craft punch or hole tool only if the template marks it — otherwise, skip extra holes to avoid misalignment.
Skip thisDon’t over-bend the tutu tabs; repeated bending makes them crease permanently.
6. Monochrome Suit Set with Tie Options
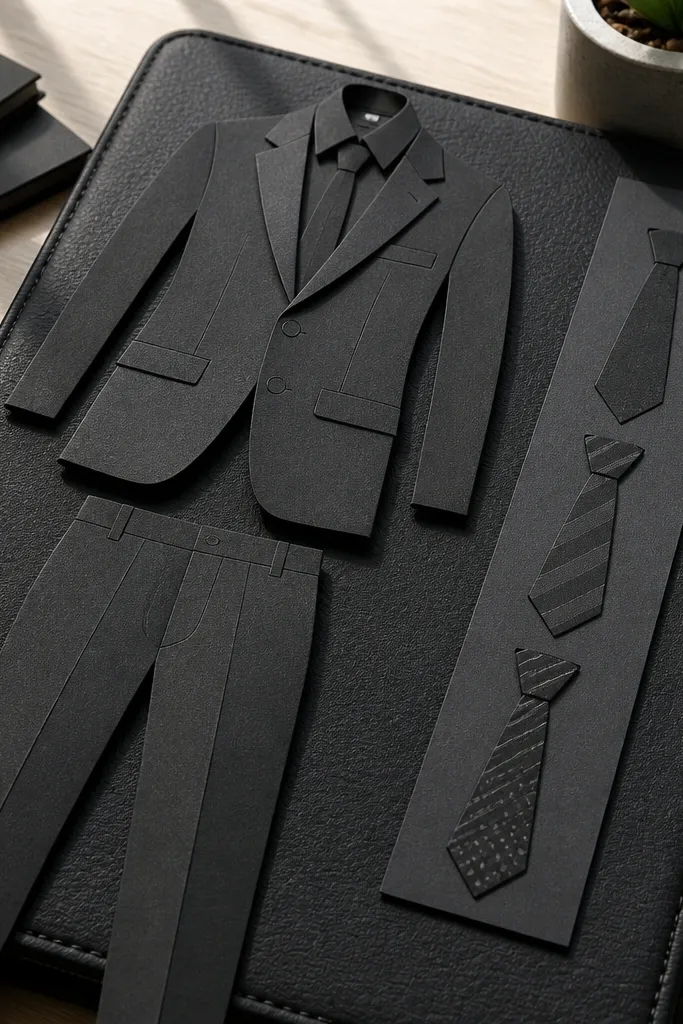
This template is all about sharp lines: a suit jacket with structured lapels and pants that line up cleanly. The tie options swap in quickly, so you get variety without extra cutting complexity. The monochrome palette is forgiving for beginners because small cut imperfections don’t show as much as they would on bright outfits. It also looks great on a dark background card where the white shirt and tie contrast hard.
Print on 180-200 gsm cardstock. Cut out the jacket and pants, then fold the jacket along the shoulder and waist tabs. Attach the shirt layer first if included, then slide the tie tabs into place. Press the lapels flat so the jacket shape looks crisp.
Editor's noteUse a glue stick only on tabs, then let it sit for 30-60 seconds before pressing everything together.
Skip thisAvoid liquid glue on thin tabs; it soaks the paper and makes edges curl.
7. Summer Stripes Dress with Sunhat
Stripes look amazing in paper form because they create instant movement and style. This set pairs a striped dress with a sunhat that adds height and visual interest, which makes your photo look “designed” even if you’re new. The hat attachment is usually a single tab point, so it stays beginner-friendly. It’s a strong choice if you want a bright, cheerful look for a shelf or wall display.
Print on 160-200 gsm cardstock. Cut the dress, then fold along the skirt base line to give it shape. Assemble the sunhat by folding the brim tabs inward, then attach the hat to the doll head tabs. Press carefully where the hat meets the head so it doesn’t tilt.
Color the underside of the hat brim with a light gray pencil so shadows look natural in photos.
Don’t fold the hat brim before cutting it out — the brim edges need clean separation.
8. Streetwear Hoodie with Zipper Detail
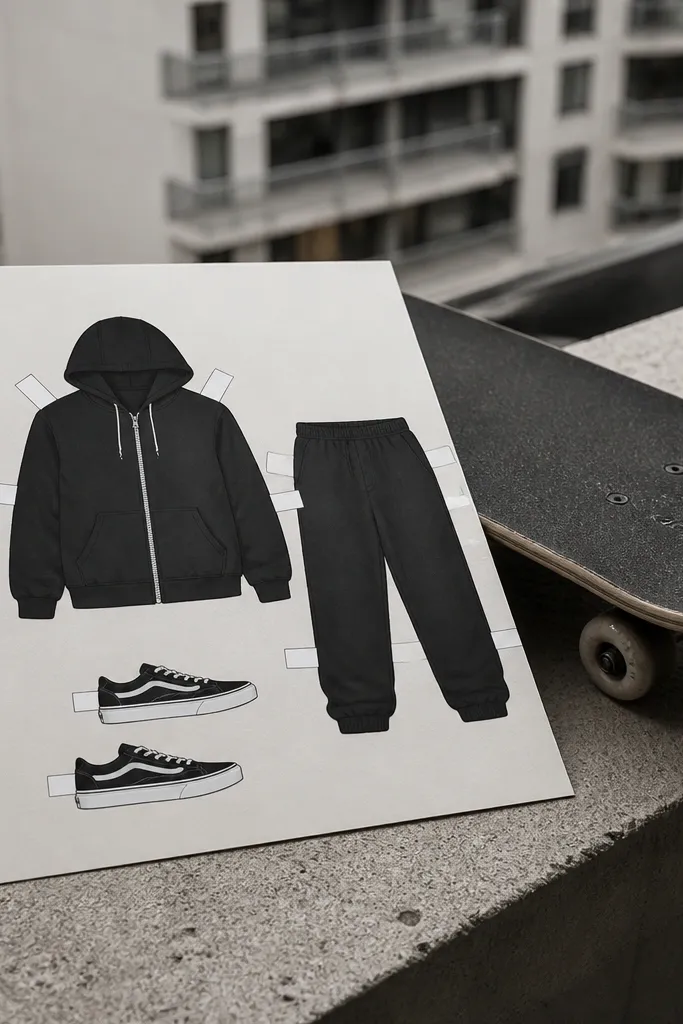
Streetwear templates look best when they have one strong detail, and this hoodie set gives you a zipper strip that makes the outfit look real. The hoodie silhouette uses clear hood lines so beginners can cut without chasing tiny shapes. You get a layered effect because the hoodie front piece attaches over the torso, which reads well in close-up photos. It’s a great option for a darker background because the hoodie outline pops.
Print on 180-200 gsm cardstock. Cut the hoodie front and back pieces separately, then fold the hood along the printed seam lines. Attach the back to the doll first, then overlay the front piece at the zipper tab area. Finish by folding the cuffs to give the sleeves a slight bend.
Editor's noteIf your printer smears, let the page dry flat for 10 minutes before cutting.
Skip thisSkip trimming the zipper strip too narrow; it needs width to hold the tab.
9. Office Blouse with Pencil Skirt Set
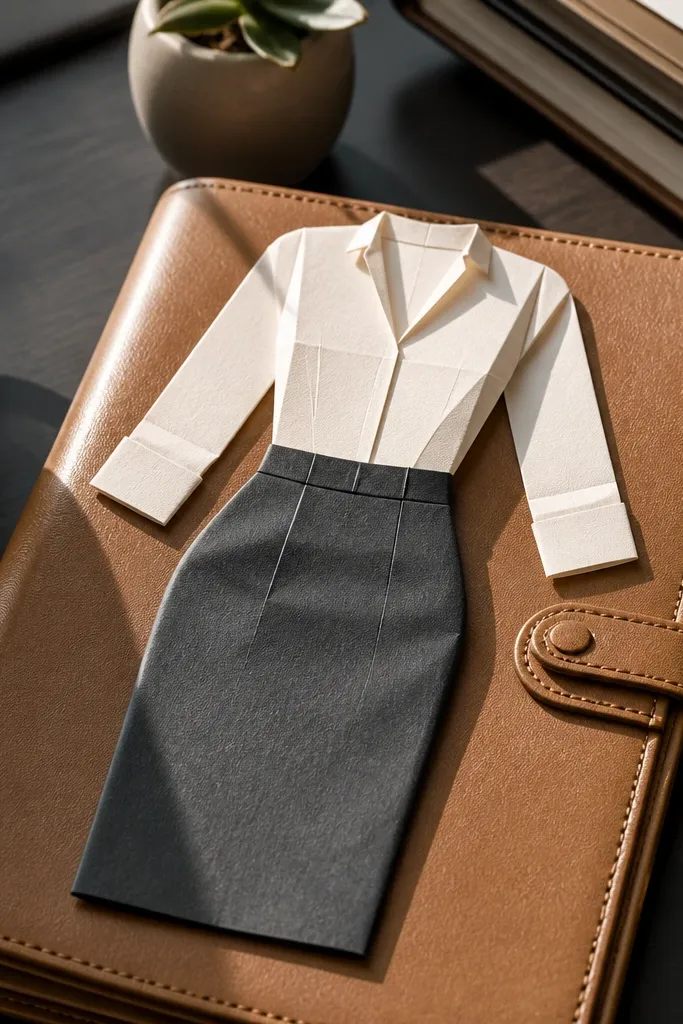
This template nails the “clean and put-together” look for paper dolls. The pencil skirt has a straight, structured outline that doesn’t require delicate cuts to look sharp. The blouse shape is simple, with fold lines that help you form a realistic drape at the waist and shoulders. It’s beginner-friendly because the pieces are bigger and the attachment points are obvious.
Print on 200 gsm cardstock for a smooth, non-floppy skirt. Cut the skirt and blouse, then fold the skirt along the waist line to create a slight curve. Attach the blouse to the torso first, then align the skirt tabs at the waist. Press tabs flat, then check that the skirt hangs centered before moving on.
Editor's noteUse a light gray background card so the skirt edge line stays visible in photos.
Skip thisDon’t glue past the waist tabs; glue squeeze-out makes a visible ridge.
10. Athleisure Leggings + Sneakers Outfit
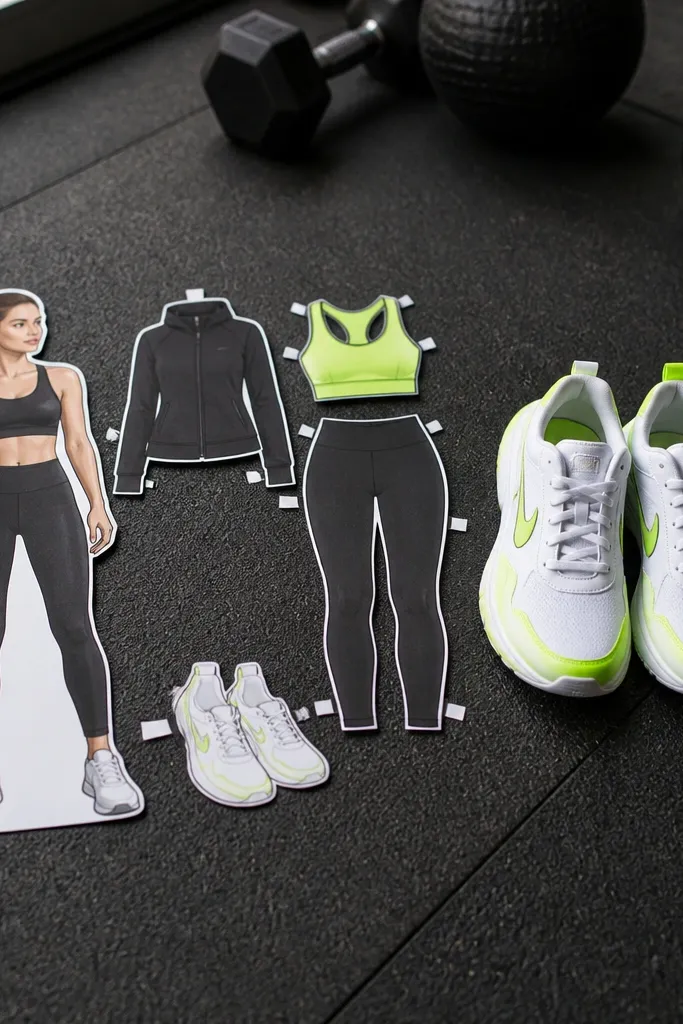
Athleisure outfits read instantly because leggings and sneakers have recognizable shapes at small sizes. This set is beginner-friendly due to larger sneaker shapes and simple shoe tab placement, so you don’t need tiny cut skills to get a good result. The leggings fit neatly over the doll legs, creating a continuous silhouette in photos. It’s a smart choice if you want something sporty without complicated accessories.
Print on 180-220 gsm cardstock. Cut out the leggings and sneakers, then fold the leggings at the knee and ankle lines if included. Attach leggings to the doll legs first, then place sneakers onto the foot tabs. Press flat around the ankle so shoes don’t lift and cast odd shadows.
Run the scissors along the edge slowly; sneakers look best when the outline is smooth.
Don’t cut out the shoe tabs too aggressively — they’re what keep alignment.
11. Autumn Plaid Shirt + Layered Vest
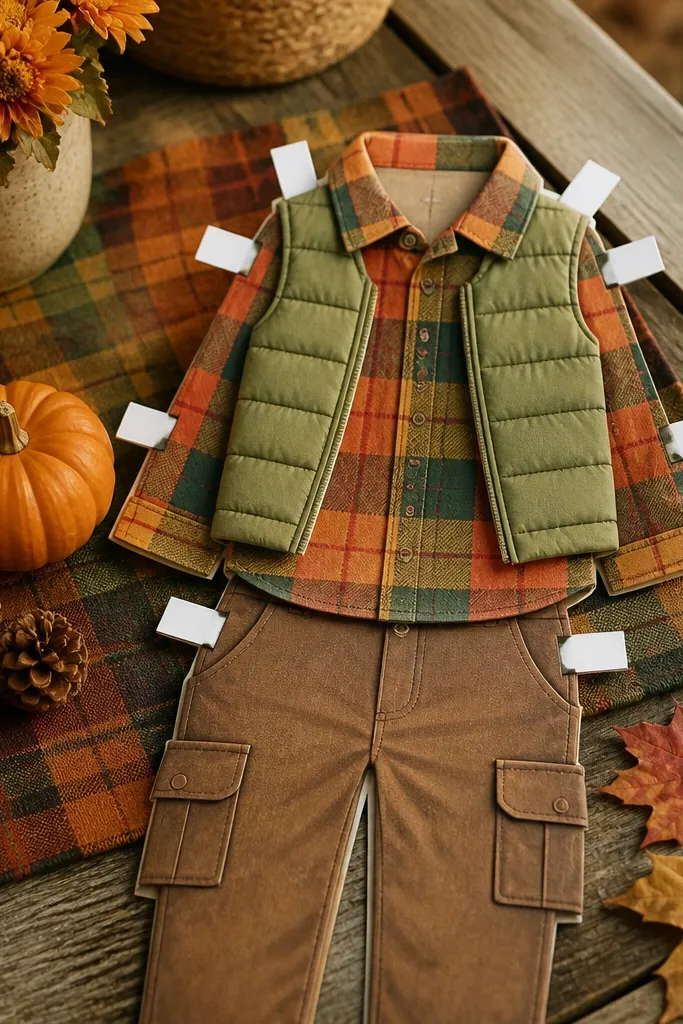
Plaid can look messy if the template is too busy, but this one uses bold plaid blocks and a simple vest overlay. The layers are what make it photogenic: you get depth without needing tiny accessories. The vest attaches with clear tabs so it stays beginner-friendly for first-time paper doll builders. Choose a warm background like light tan or muted orange to make the plaid feel seasonal.
Print on 200-250 gsm cardstock for better layer stability. Cut the vest and shirt pieces, then fold the vest along its attachment tabs. Attach the shirt to the doll torso, then add the vest over it, aligning the neckline and arm openings. Fold the shirt hem line so the plaid stays flat and doesn’t curl.
If plaid prints look faint, darken lines with a fine black marker just along the darkest plaid borders.
Don’t stack layers without checking arm openings; misalignment makes sleeves look twisted.
12. Gingham Picnic Set with Apron
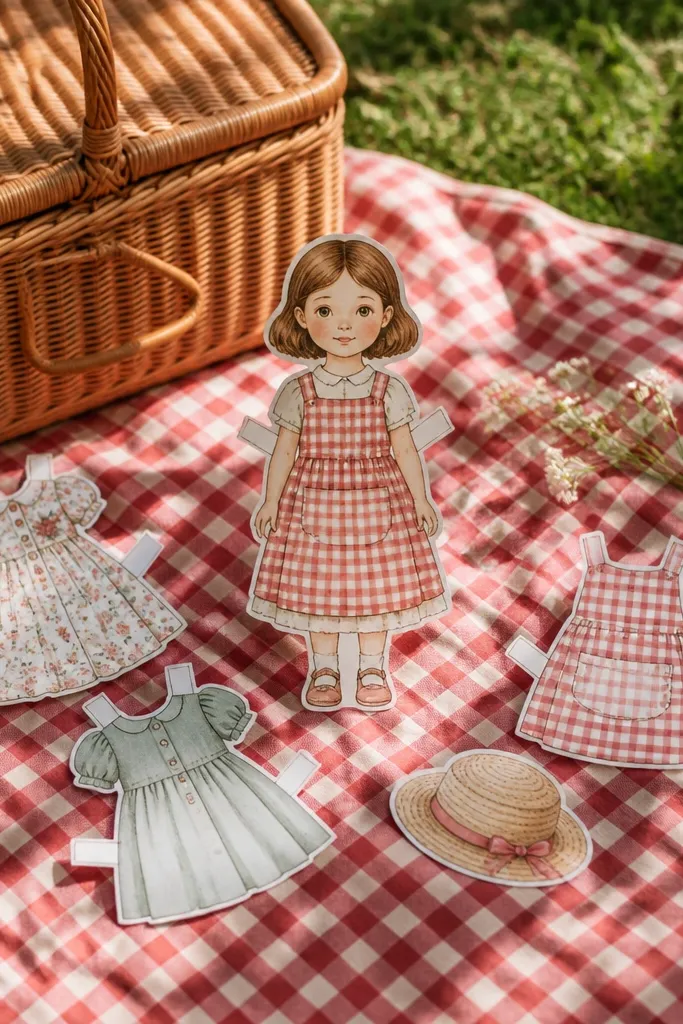
This set is cute and photo-friendly because gingham patterns create a strong grid that reads well in print. The apron gives you a second layer with simple attachment tabs, so the outfit looks styled without complicated construction. It’s beginner-friendly because the dress silhouette is uncomplicated and the apron edges are broad. This one looks great against a light wood background or a cream card.
Print on 160-200 gsm cardstock. Cut the dress and apron pieces, then fold the apron along its top tab line to sit over the waist. Attach the dress to the doll body, then place the apron so its top edge aligns with the dress waist. Press the apron tabs gently and flatten the folds with a bone folder.
Use a glue stick for the apron tabs only; it dries matte and avoids shine in photos.
Avoid glossy paper — gingham highlights glare and makes details harder to see.
13. Winter Coat with Faux Fur Collar
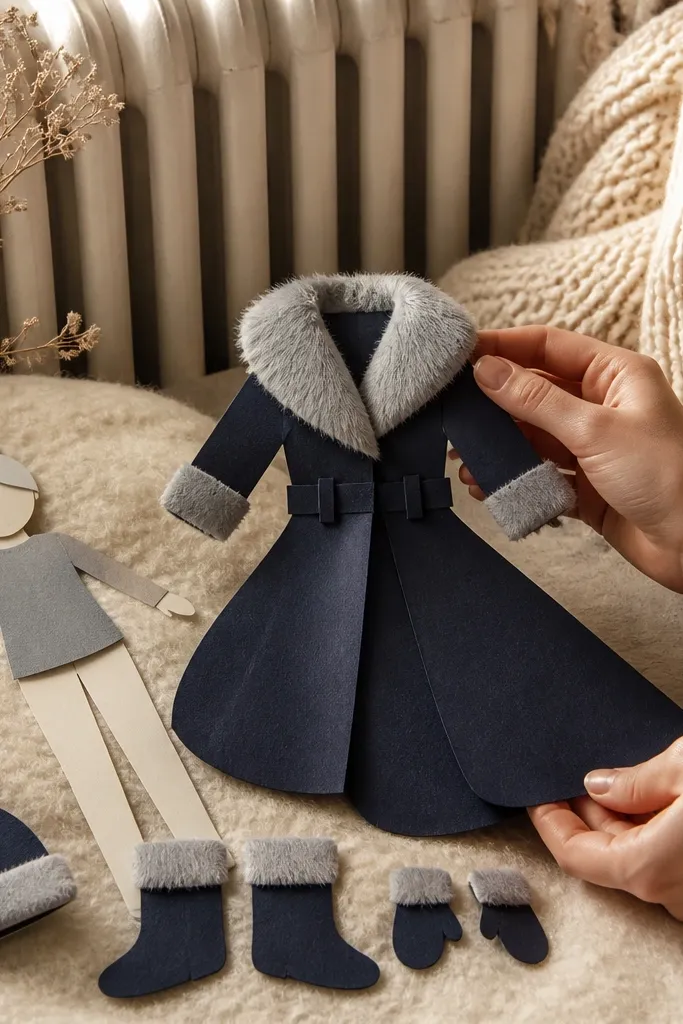
A winter coat is dramatic in paper form because it creates a big silhouette, and this template uses that advantage. The fur collar piece adds texture without requiring you to cut tiny fur shapes — it’s usually one bold outline. Beginner-friendly Paper Doll Printable Templates like this one keep the collar attachment simple so your coat stays centered. It looks best with high contrast backgrounds so the collar outline stands out.
Print on 200-250 gsm cardstock. Cut the coat body and collar pieces, then fold the collar along the tab lines. Attach the coat first, then slide the collar tab behind or onto the neckline area depending on the template. Press and hold for 20-30 seconds so the collar doesn’t pop up.
Shade the collar edge with a darker pencil tone so the outline reads even when lighting is uneven.
Don’t use tape on the fur collar; it can show a shiny line and lift edges.
14. Sci-Fi Jumpsuit with Helmet Headpiece
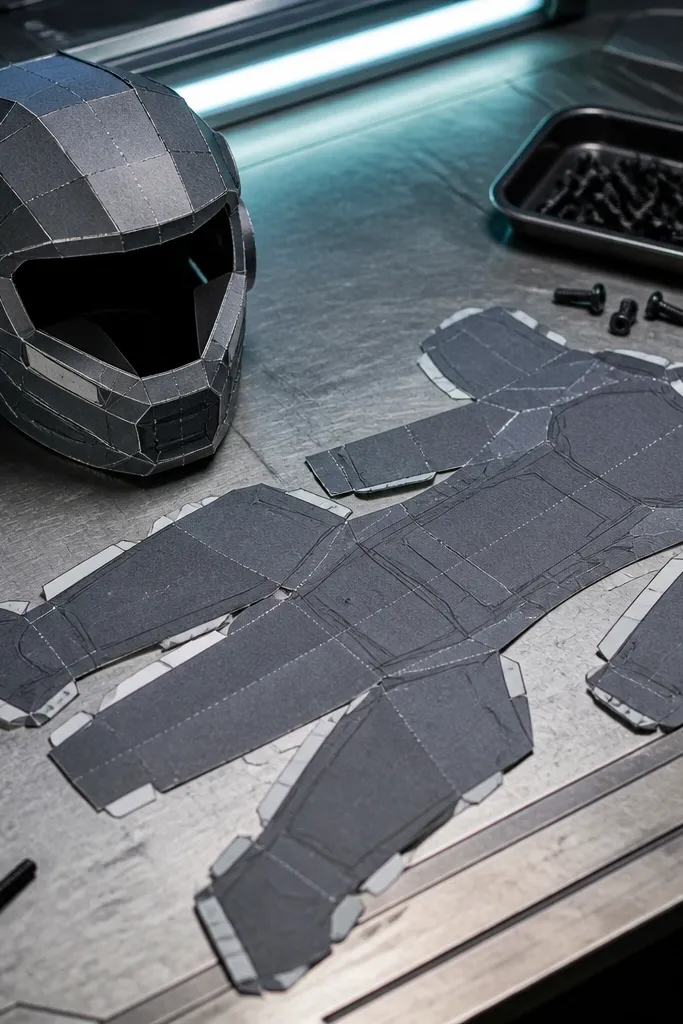
If you want something that looks futuristic and still beginner-friendly, this jumpsuit + helmet set is a strong pick. The jumpsuit has panel lines that create detail even if your cuts aren’t perfect, and the helmet is usually one sturdy piece with clear fold lines. It photographs well because the helmet creates a clear shape at the top of the frame. Great for a black or dark blue background.
Print on 180-220 gsm cardstock. Cut the jumpsuit pieces and fold along any panel or belt lines. Attach the jumpsuit to the doll torso, then add the helmet by aligning the side tabs at the head. Press around the forehead and chin areas so the helmet sits flush.
Use a silver gel pen on the helmet panel lines for instant “metal” contrast.
Don’t cut away panel tabs — they keep the suit from curling when assembled.
15. Boho Maxi Dress with Layered Shawl
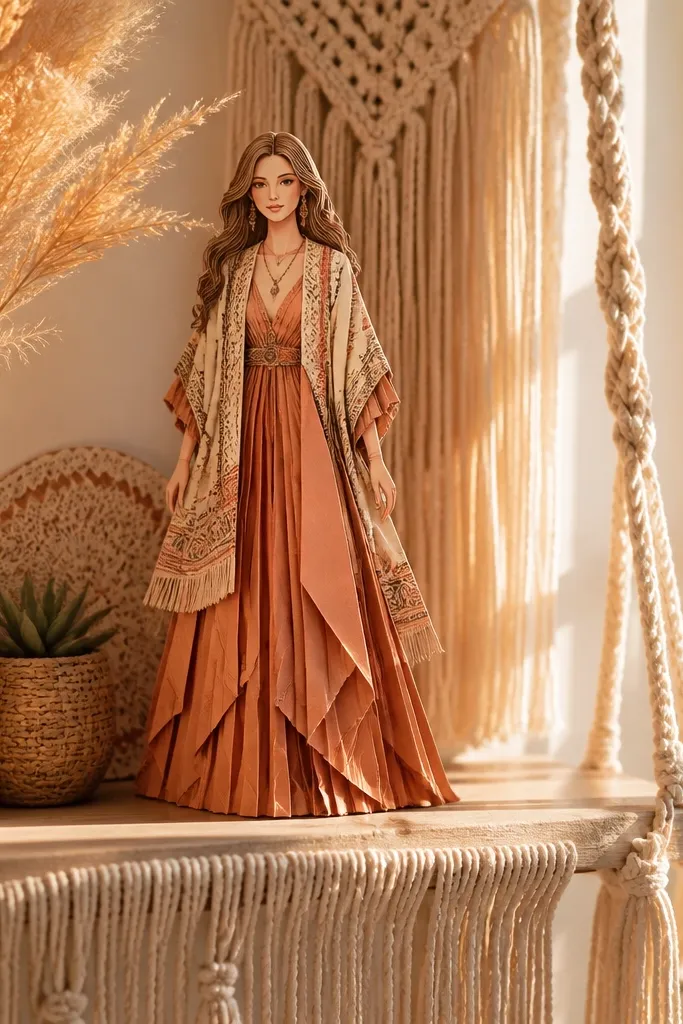
Boho styles look best when the template gives you flow, and this maxi dress does. The shawl layer adds movement while staying beginner-friendly because it folds along a few clear lines instead of requiring dozens of small cuts. The dress silhouette is long and dramatic, which makes it a great centerpiece on a shelf. Use a textured-looking background card in light beige so the dress pattern looks intentional.
Print on 200-250 gsm cardstock. Cut the dress and shawl pieces, then fold the shawl along its center and side tabs. Attach the dress to the doll body first, then place the shawl over the shoulders with the attachment points aligned. Flatten the folds so the shawl doesn’t curl at the edges.
Editor's noteColor the shawl edges with a slightly darker pencil shade so it reads as a layer in photos.
Skip thisDon’t over-trim the shawl edges; you need the full outline for that draped look.
16. Kids Playroom Pajamas with Stars
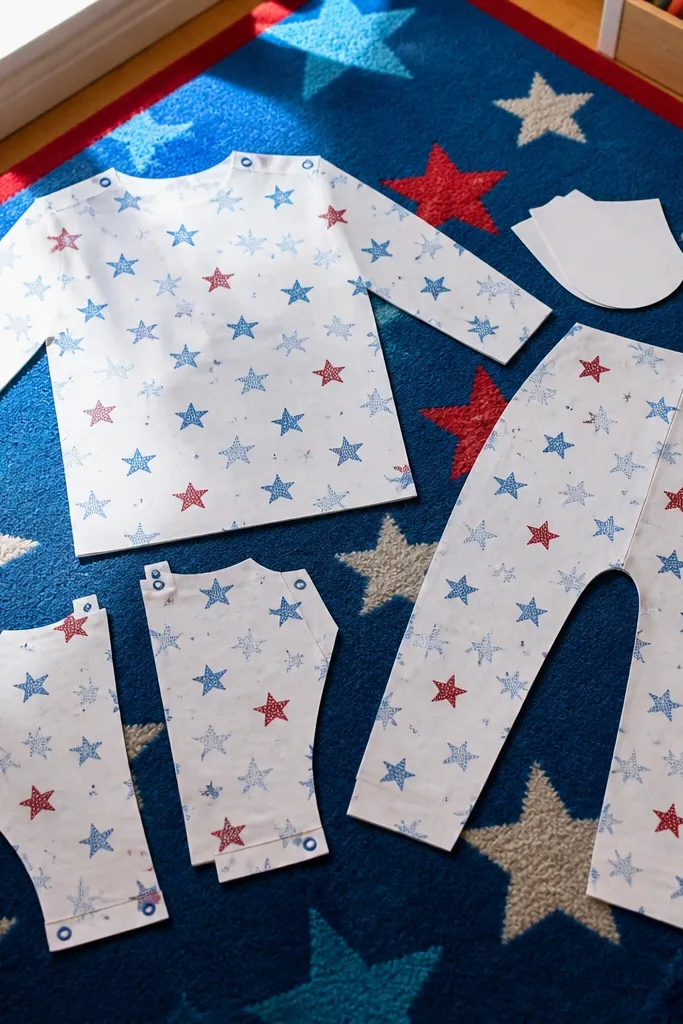
This one is gentle for beginners because pajamas have forgiving shapes and fewer sharp angles. The star pattern is bold and spreads across the fabric, so tiny imperfections don’t ruin the look. The pieces usually attach with simple tabs at the waist and shoulders, which makes assembly fast. It’s perfect for a playful shelf setup because it reads like “fun bedtime outfit” instantly.
Print on 160-200 gsm cardstock. Cut the pajama top and bottom pieces, then fold along the waistband and sleeve cuffs lines. Attach the top to the torso, then connect the bottoms at the waist tabs. Press flat and check that the legs sit evenly before moving on to the extra accessories if included.
Editor's noteIf your stars look washed out, reprint only the pajama page on thicker paper and glue it behind the original.
Skip thisAvoid cutting around the stars too aggressively; keep a small border so the pattern stays crisp.
17. Goth Black Lace Dress with Choker
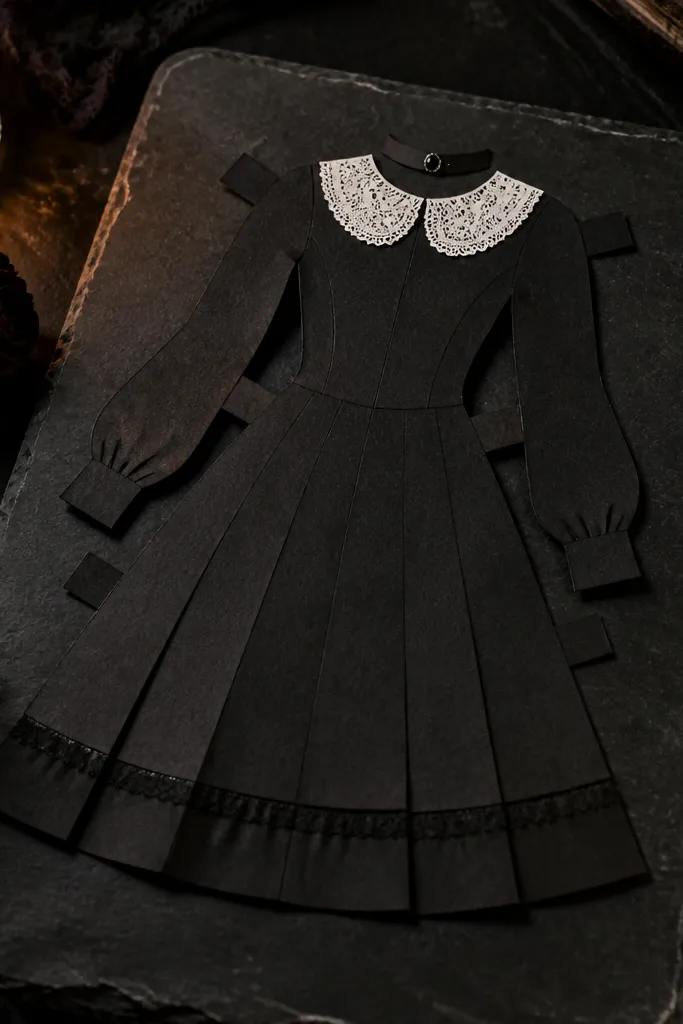
Goth outfits are photogenic because they rely on contrast, and this template gives you high-contrast lace lines plus a choker detail. The dress outline is bold, and the choker piece attaches with a small tab so you don’t have to glue tiny areas. Beginner-friendly Paper Doll Printable Templates like this keep the construction straightforward while still looking dramatic. It looks best on a dark gray or black background card so the lace lines pop.
Print on 200 gsm cardstock for clean lace edges. Cut the dress and choker pieces, then fold the dress at the waist and any tab points. Attach the dress to the doll body first, then position the choker at the neck tab area. Press lightly and let the glue dry fully before handling so the choker doesn’t shift.
Editor's noteUse a matte black marker to deepen the dress base areas for stronger lace contrast.
Skip thisDon’t use glossy tape on the choker tab; it catches light and ruins the look.
18. Garden Party Dress with Flower Crown
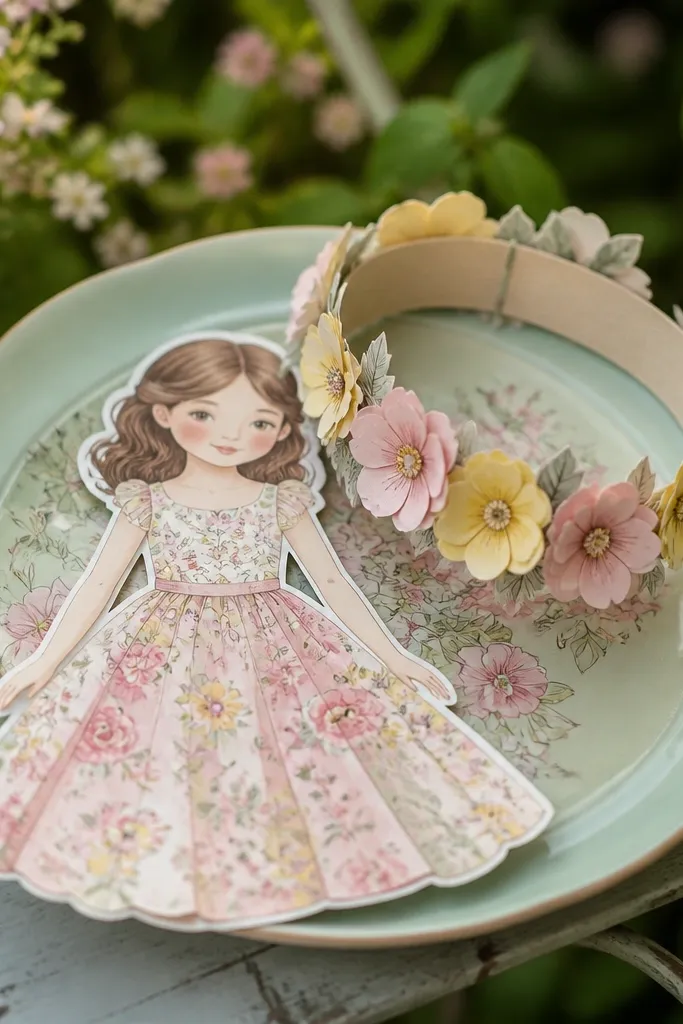
This template is a visual winner because it combines a soft dress silhouette with a crown that frames the doll’s face area. The flower crown piece uses a simple band shape so it stays beginner-friendly instead of turning into a million tiny petals. The dress usually has a clear waistline and skirt outline that looks good from across a room. Pair it with a pastel background for a fresh, airy look.
Print on 180-200 gsm cardstock. Cut the dress and crown pieces, then fold the crown band along its curved tab lines. Attach the dress to the torso, then line up the crown tabs with the doll head. Press and hold at the sides so the crown sits centered instead of sliding.
Color the crown underside slightly darker so it has depth even in flat lighting.
Avoid bending the crown band back and forth; it weakens the tabs and causes gaps.
19. Royal Cape with Layered Robe
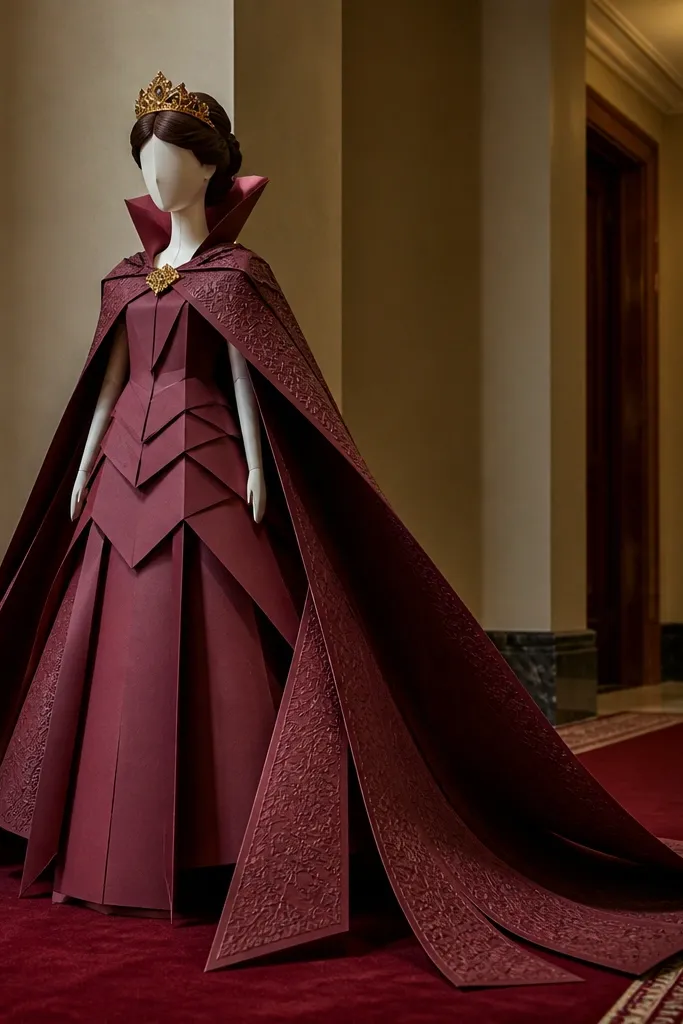
A cape is one of the easiest ways to make a paper doll look “made,” because it adds motion and height. This template keeps the cape beginner-friendly by using a few large fold lines rather than tiny fringe cuts. The robe layer gives you a structured base so the cape doesn’t look like a floating rectangle. It photographs well against a plain wall or a single-color card.
Print on 200-250 gsm cardstock so the cape holds shape. Cut the robe and cape pieces, then fold the robe along the waist and shoulder tabs. Attach the robe to the doll first, then slide the cape tabs into place at the neck/shoulder area. Flatten the cape folds and gently curve the cape edge outward for a natural drape.
Editor's noteUse a bone folder on the cape folds — it keeps creases crisp without tearing fibers.
Skip thisDon’t glue the cape to the front only; if the template has back tabs, use them so it sits flat.
20. Country Cowgirl Set with Belt and Boots
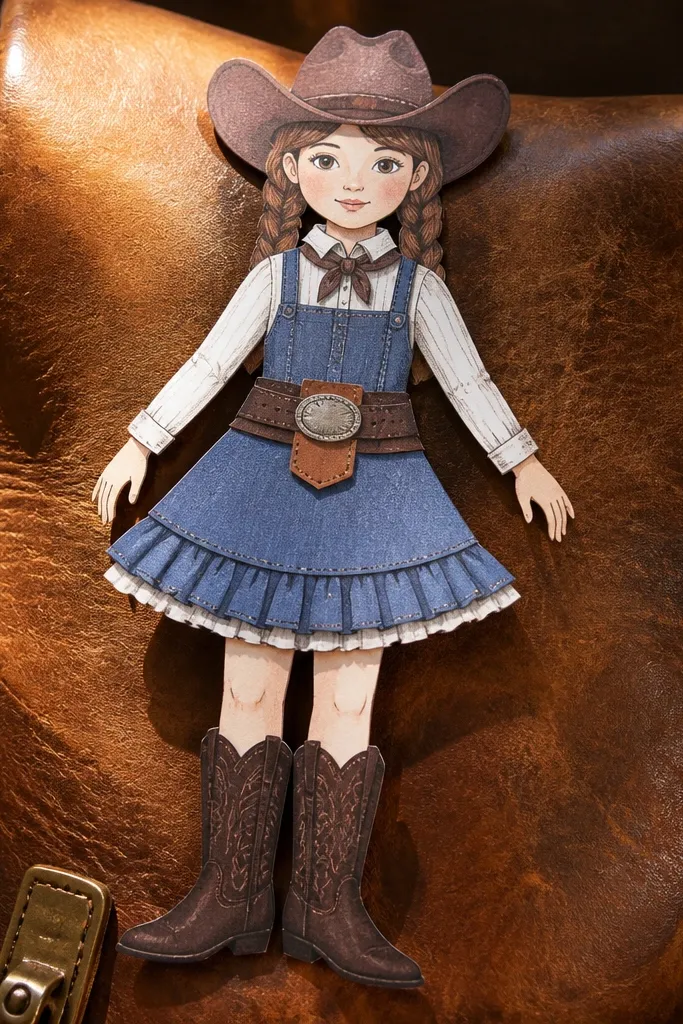
Cowgirl outfits look great because boots and belts create strong horizontal and vertical lines. This set is beginner-friendly because the belt piece usually attaches with a single tab and the boots are shaped as one unit. You get a distinct silhouette without needing delicate accessories. It’s a solid choice if you want a western look that still feels clean and modern on paper.
Print on 180-220 gsm cardstock. Cut the belt, boots, and outfit top/bottom pieces, then fold the belt along its attachment line. Attach the outfit to the doll body, then connect the belt at the waist tabs. Finally, place the boots onto the foot tabs and press until the edges sit flat.
Editor's noteColor the belt buckle area with a metallic gold pencil for a small detail that reads well on camera.
Skip thisAvoid leaving boots unpressed at the ankle; lifted corners show in close-up photos.
21. Tropical Shirt + Linen Shorts Outfit
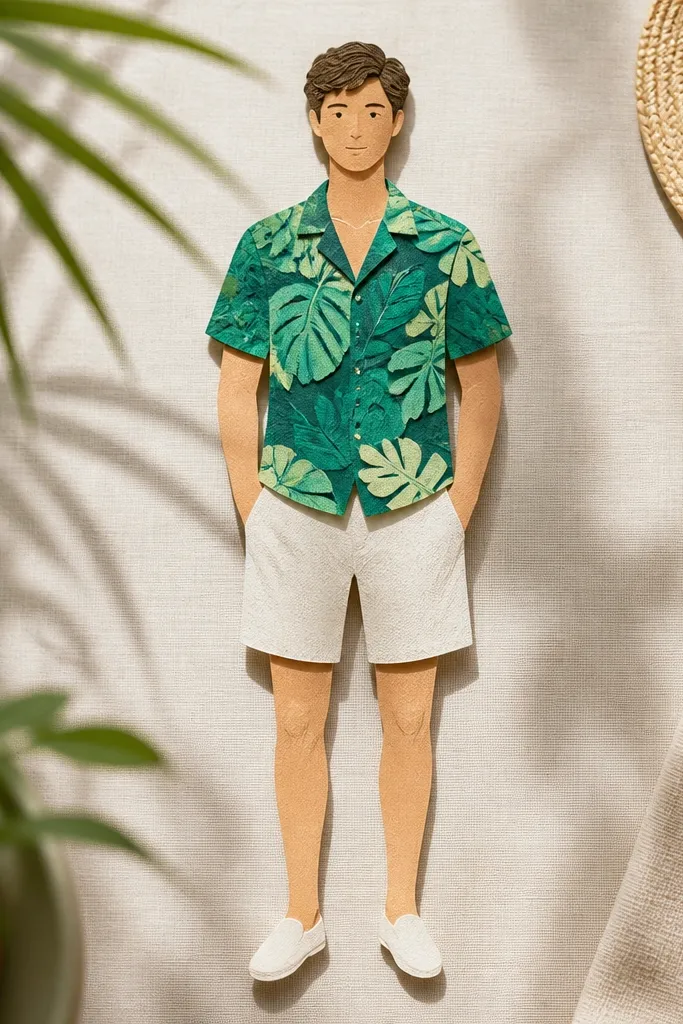
Tropical prints can be loud, but this template keeps it structured with large leaf shapes and clear shirt seams. The shorts are simple and align with the doll legs without tricky folds. Beginner-friendly Paper Doll Printable Templates like this one are perfect for a quick “vacation outfit” that still looks designed. It’s especially photogenic on bright backgrounds because the colors stay bold.
Print on 160-200 gsm cardstock. Cut the shirt and shorts pieces, then fold the shirt at the waist and sleeves if fold lines are included. Attach the shorts first at the waist tabs, then place the shirt over the torso. Press along the seam lines so the layers don’t separate.
Editor's noteIf the tropical print looks too busy, color the shirt seams with a muted brown pencil to make the outline clearer.
Skip thisDon’t glue the shirt collar fully; keep it tab-only so it can sit naturally.
22. Art Class Smock with Paint Palette Accessories
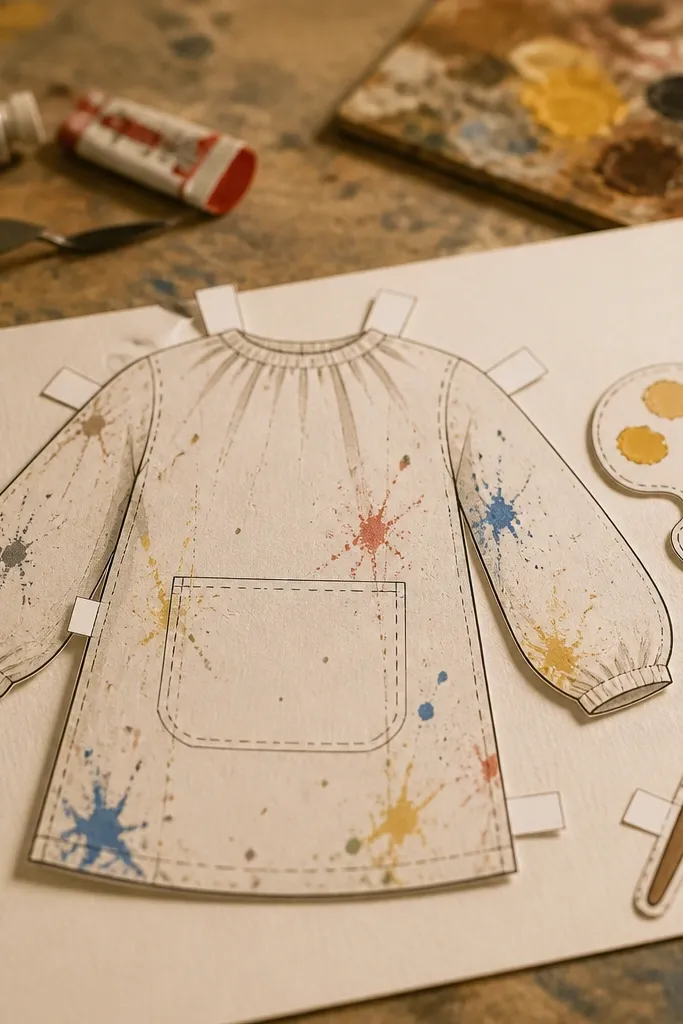
This set is great for decorating because it adds personality without complicated clothing construction. The smock shape is roomy and forgiving, so beginners don’t need super precise cutting for sleeves and hem. The paint palette and brush accessories give you that “craft room” vibe, and they attach with clear points so they stay in place. It looks adorable on a desk display next to real art supplies.
Print on 180-200 gsm cardstock. Cut the smock and accessory pieces, then fold the smock along the waist and sleeve lines. Attach the smock to the doll torso, then add the palette to the hand tab area and the brush if included. Press each accessory tab for 20-30 seconds so it grips cleanly.
Editor's noteUse a single thin layer of glue stick on accessory tabs to avoid bumps.
Skip thisAvoid liquid glue on tiny palette tabs; it spreads and makes paper fibers curl.
23. Victorian Mourning Dress + Cameo Jewelry Set
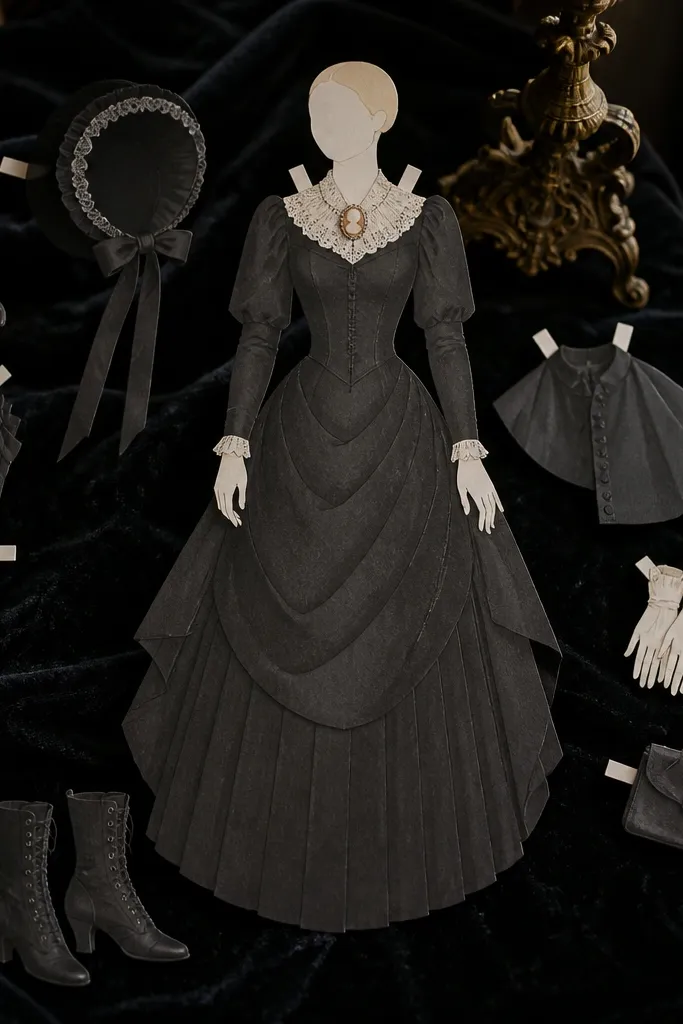
This set is a strong pick for beginner-friendly Paper Doll Printable Templates because it looks dramatic with simple shapes: a long bodice, a high lace collar, and a cameo brooch that instantly reads as “Victorian mourning.” The contrast is the whole point — matte black paper for the dress and crisp white accents for lace and jewelry. It also fixes a common printable problem: tiny accessories that fall off or look messy when cut, because the cameo and earrings are designed as large, easy-to-handle pieces. You get a clean, museum-card vibe that photographs well on a dark background. Plan about 45-60 minutes for printing, cutting, and assembling the outfit pieces, and it fits best for a quiet craft corner or a themed display shelf.
Print the template on 200-250 gsm cardstock so the black dress stays opaque and doesn’t look gray. Cut the dress front and back panels, then fold along the marked center lines to create a slight 3D shape at the waist and sleeves. Add the lace collar by gluing only the narrow base strip so the collar edge stays flat and crisp. Attach the cameo brooch to the chest area with a small dot of glue at the back center, then add the matching earrings using the pre-sized tabs. Finish by sealing only the wearable paper pieces with a light spray of clear acrylic (hold 12-14 inches away) and let it dry flat to prevent warping.
Editor's noteUse a craft knife for the collar and cameo edges, not scissors. Cleaner edges make the whole Victorian look read instantly.
Skip thisDon’t glue the full back of the cameo — glue just the center tab so it doesn’t look bulky.
24. Art Deco Evening Gown + Fan-Card Accessory Set
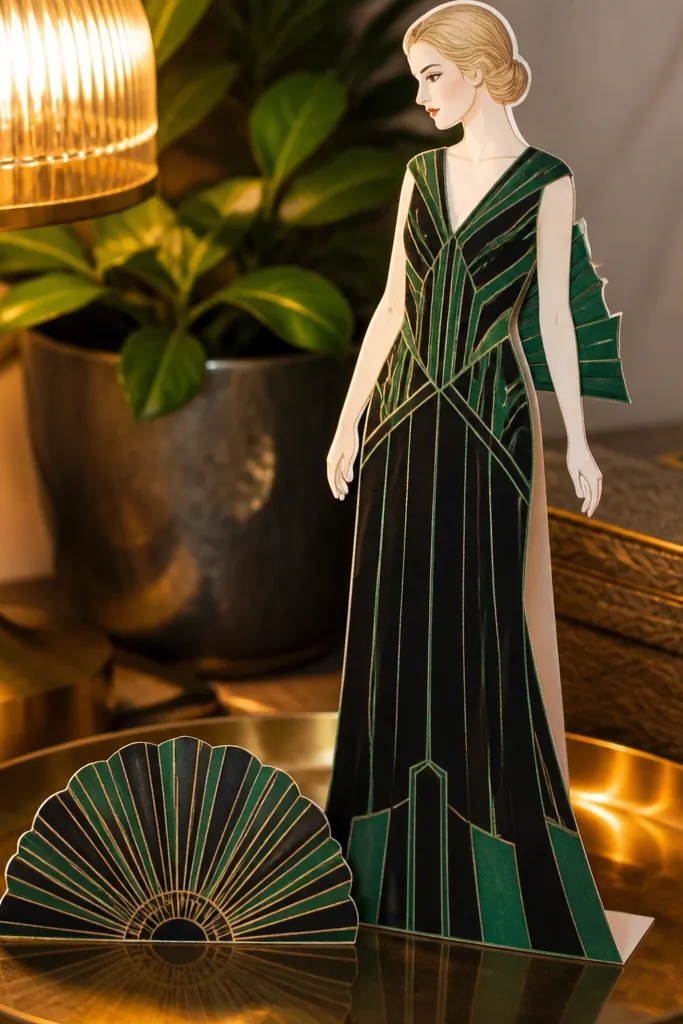
This template set is visually loud in the best way because Art Deco is all geometry: sharp borders, repeating lines, and a fan accessory that reads clearly even in small scale. It’s beginner-friendly because the gown pieces use straightforward layering — one main dress layer plus two trim strips that align with guide marks. The gold accents make it pop on camera without needing fancy paints; you can use printed gold foil paper or metallic marker over the template guides. It also solves a “flat print” issue — the fan and trim are designed to add movement, so your paper doll doesn’t look like a sticker. Expect 50-70 minutes for cutting, layering, and assembling the fan and jewelry. It works great for a desk display, holiday party theme, or any craft table where you want a bold, graphic look.
Print on heavyweight cardstock, then print the gold trim on metallic paper or plain paper if you’ll color it with a metallic pen. Cut the gown base first, then layer the vertical trim strips so the geometric pattern lines up down the center. Fold the fan accessory along its dotted guide so it opens slightly, then glue the fan’s base tab to the doll’s hand slot. Add the bracelet and necklace pieces as separate thin layers, gluing only the tab areas so they don’t curl. Seal the gown with a matte clear coat to keep the black from looking shiny, then let everything dry under a flat book for 10 minutes.
If your metallic paper sheds, rub the cut edges lightly with a fingertip to smooth fibers before gluing.
Don’t skip test-fitting the hand slot before gluing the fan — once it’s glued, the angle is hard to fix.
25. Japanese Kokeshi Doll Outfit + Cherry Blossom Wand
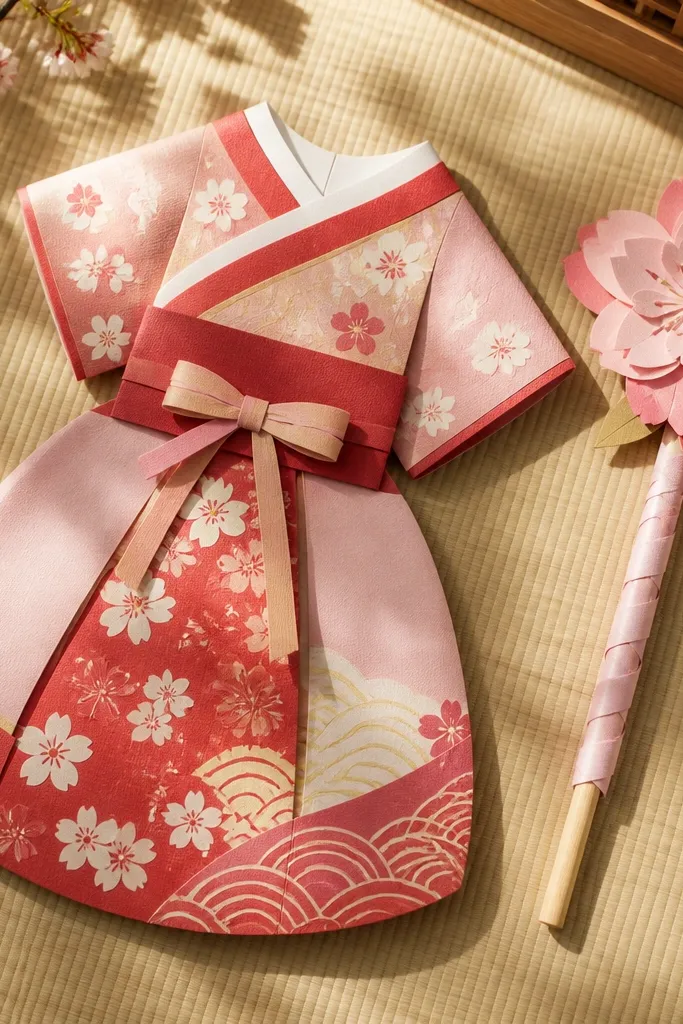
This is a sweet, photogenic option that still stays beginner-friendly because it relies on bold pattern blocks instead of tiny details. The outfit reads like a kokeshi-inspired doll dress: a rounded silhouette, simple sleeve shapes, and a patterned wrap panel that looks cute with minimal cutting. The cherry blossom wand is the star — it frames the doll and makes the photo feel “complete” even if you only swap one outfit layer. It fixes the usual paper doll frustration where accessories look too small to handle; this wand is sized with a comfortable grip area and big blossom pieces. Plan about 40-55 minutes total, and it fits well for a bright windowsill setup or a spring-themed craft night.
Print the kimono outfit pieces on 220-250 gsm cardstock and the blossom shapes on lighter paper so they stay flexible. Cut the main body and wrap panel, then glue the wrap panel to the front using the alignment marks so the pattern stays centered. Assemble the sleeves by gluing the inner seam tabs first, then attach them to the body so the sleeve edges line up evenly. Build the wand by stacking the blossom cutouts on a thin strip base, then glue the base strip to a straight wand handle piece. Finish by pressing the wand flat under a book for 5 minutes so the blossoms don’t curl, then lightly seal only the wand handle area to prevent stiffness.
Use glue stick for the blossoms, not liquid glue. It dries faster and keeps the paper from puckering.
Don’t fold the wand too sharply — a gentle curve looks better and prevents cracks at the glue line.



