

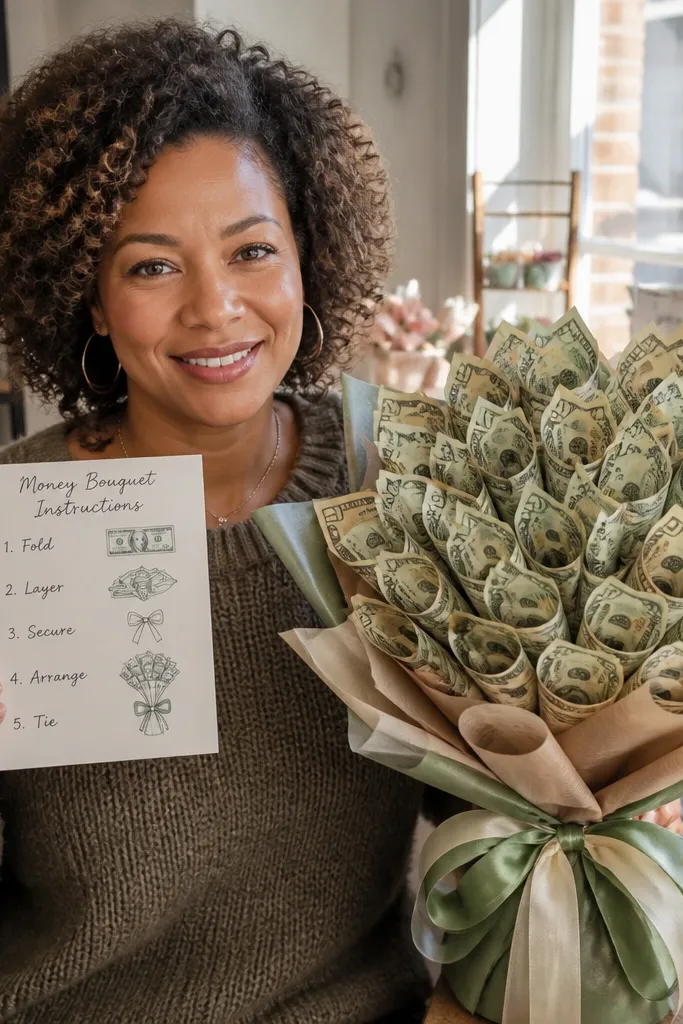
1. Champagne Rose Money Bouquet
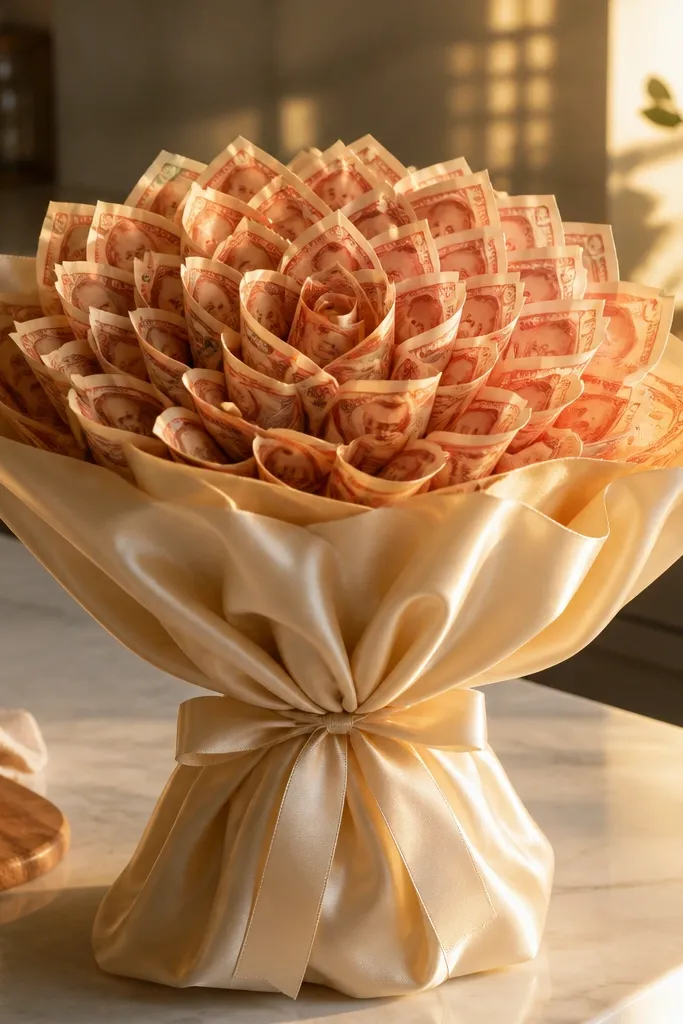
Start by cutting 24-30 small strips of thin craft paper or parchment to back each money petal so edges look clean. Roll each bill strip around a pencil for tight curls, then release and secure with a tiny dot of hot glue at the base. Build each rose by gluing 5-7 petals in a spiral pattern around a center roll. Bundle the stems, then cover the base with a strip of floral tape. Wrap the stems with cream satin ribbon starting at the collar and spiraling down, finishing with a neat bow at the top.
This one is built to read like a real rose arrangement. You curl individual bills into petal-like rolls, then stack them from small to larger around a center roll. The money texture shows through, but the overall look stays smooth because the petals are consistent and layered tightly. Wrap the stems in cream satin and add a thin champagne tulle layer behind the petals so the bouquet looks full even if you’re using a modest number of bills. It’s beginner-friendly because the motion is simple and repeatable: roll, glue, stack.
Skip thisDon’t glue the money all the way across the petal; glue only the base so the curl stays springy.
Editor's noteUse a slightly wider center roll than you think — it makes the rose look “designed” instead of flat.
2. Black Tie Bow Money Bouquet
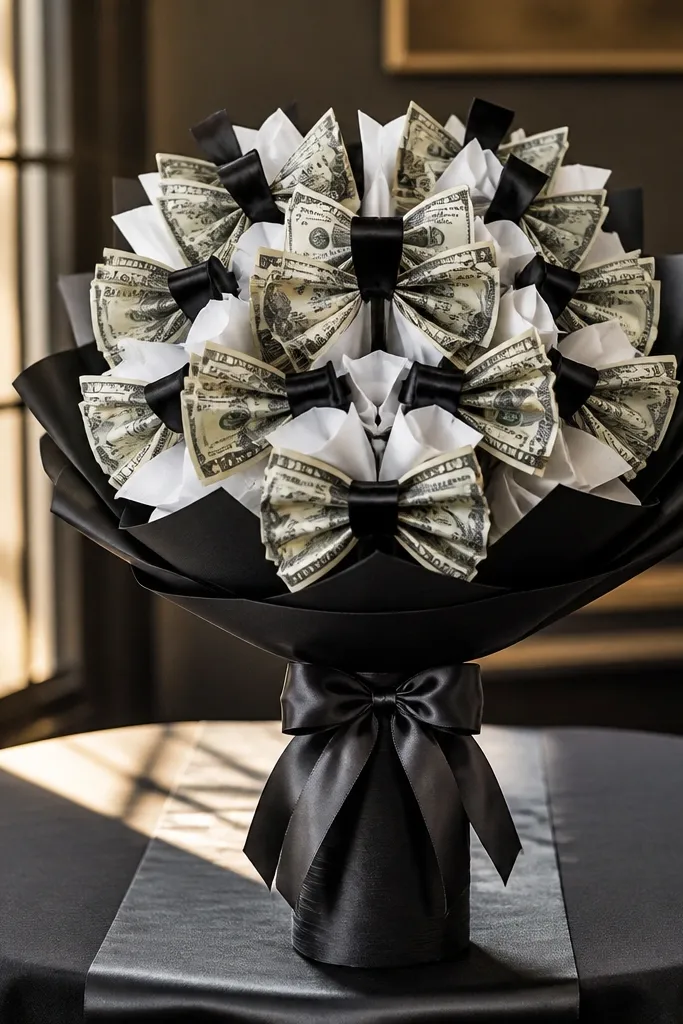
Cut 20-24 thin rectangles of cardstock (about the size of a bill’s visible front) to act as stiff backing for each bow. Fold each bill into a bow by creasing two vertical sections inward, then pinching the center to form the knot area; secure with a small dot of glue at the pinch. Attach each bow to a short floral pick using hot glue at the back. Bundle all stems and wrap the base with black floral tape. Finish by tying a wide black satin ribbon around the stem collar, then add two short white ribbon tails for balance.
This style looks expensive because it’s graphic and symmetrical. Each money piece is folded into a bow shape, then mounted so the “loops” face outward. The contrast of black ribbon and crisp white accents makes the bouquet look like a gift display, not a DIY project. Keep the number of bow pieces consistent across the bouquet for a clean silhouette. This is a great option if your bills are slightly wrinkled because bow folds hide minor creases.
Skip thisAvoid lopsided bow centers; if the pinch point isn’t centered, the bouquet reads messy in photos.
Editor's notePress each fold with a ruler edge for sharper bow lines.
3. Dusty Pink Tulle Wrapped Money Bouquet
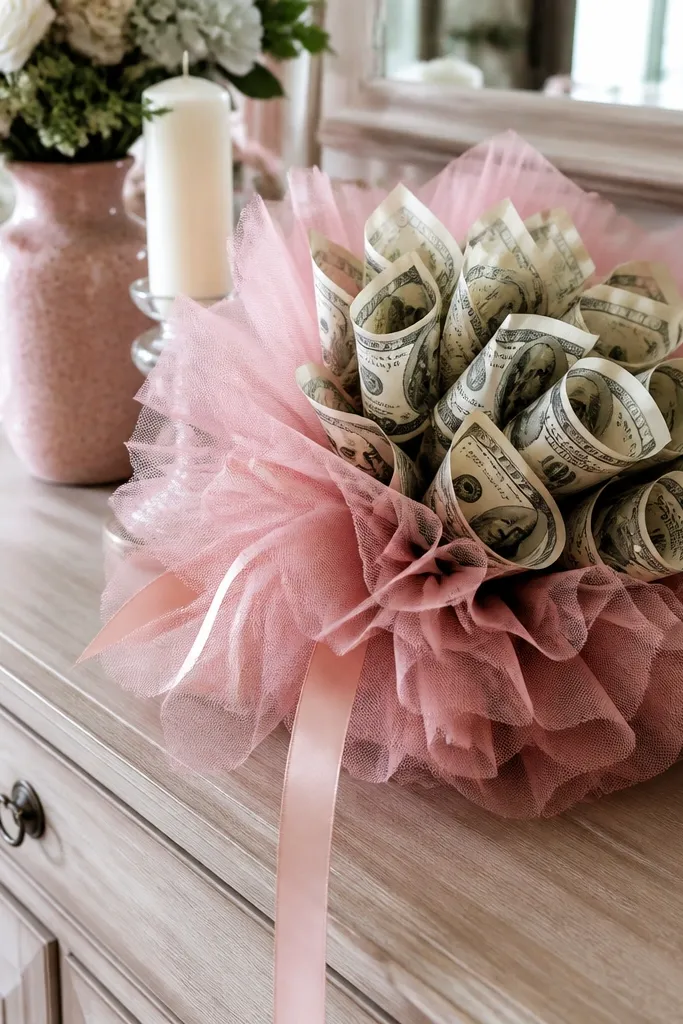
If you want “expensive” but you’re worried about your finishing, this is the safest pick. The tulle makes the money pieces look like part of a luxury floral arrangement, and it hides any glue seams at the stem base. Use curled money petals as your focal texture, then let tulle volume do the rest. Dusty pink keeps it soft and romantic in photos, and it’s forgiving if your bills aren’t perfectly uniform.
Curl your money petals by rolling bills around a dowel, then securing the base with glue. Create 18-22 petals and attach each to a floral pick. Assemble petals into a loose cluster so tulle can fill gaps — don’t pack them so tight that the bouquet looks stiff. Wrap the stems with a strip of floral tape, then drape dusty pink tulle around the bouquet in two layers, cutting the tulle tails to stagger lengths. Finish with a light blush ribbon collar to cover the taped stem area.
Tulle looks best when it’s slightly gathered; pull it gently before tying the collar.
Don’t use thick tulle that won’t drape; it makes the bouquet look bulky instead of soft.
4. Monochrome Silver Money Calla Stems
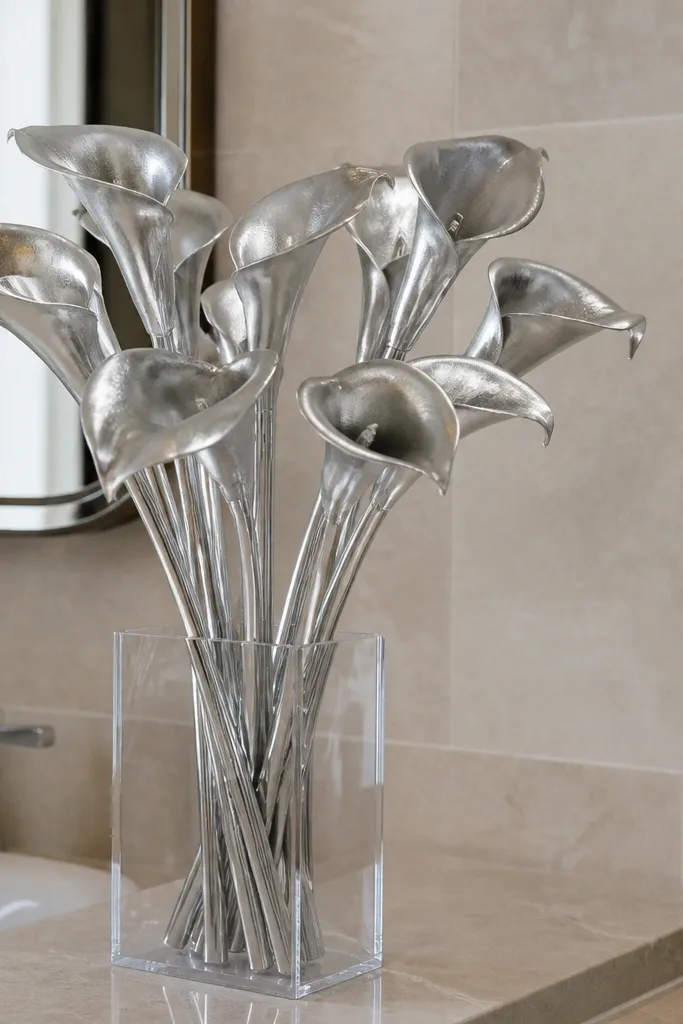
Cut 12-16 thin strips of white craft foam or cardstock into long ovals that will sit behind the money tube. Roll each bill into a tight tube around a marker, then glue the seam at the back. Slide the tube over the form piece and secure with a tiny dot of glue where the tube meets the form. Attach each finished calla to a floral pick. Wrap the stems with white satin ribbon, then add a single band of silver ribbon at the collar.
Calla-style money stems look upscale because the shape is long, minimal, and intentional. You build each stem with a single money “tube” wrapped around a form, then add a smooth outer layer so it reads like a flower petal. This design is photogenic from the side, not just the front. Keep the palette monochrome (silver/gray bills or silver paper accents) and the bouquet instantly looks more expensive than mixed-color builds.
Skip thisDon’t over-puff the tube; too much volume makes it look like a paper roll, not a calla.
Editor's noteMake the tube seam face backward so the front looks smooth in photos.
5. Teal Crepe Paper Fan Money Bouquet
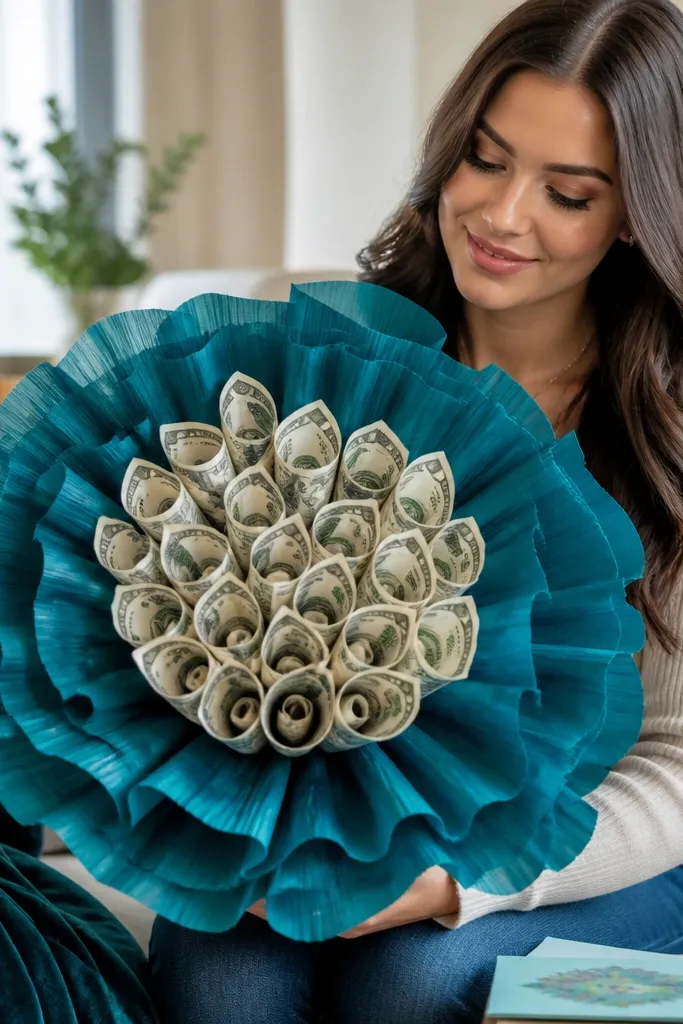
Cut crepe paper into fan rectangles (about 10 inches long by 3 inches wide). Fold each rectangle accordion-style, then glue the folded base to a floral pick. Create 16-20 curled money petals and glue them to the front edge of the fan picks. Arrange the fans into a bouquet with taller picks in the center. Wrap stems with teal floral tape, then cover with satin ribbon in a tighter spiral from collar to bottom of the bouquet.
This bouquet looks expensive because the background has movement and depth. Crepe paper fans create a soft, wave-like texture behind the money pieces, which makes the money look intentional instead of floating. Teal reads modern and polished, and it’s a great choice for a birthday or anniversary gift. The build is beginner-friendly because you’re repeating a fan shape and mounting money in the same spots each time.
Skip thisDon’t glue money directly onto crepe without a backing — it can tear or sag.
Editor's noteUse two lengths of crepe fans so the bouquet has a natural tiered look.
6. Rust & Ivory Paper Lollipop Money Bouquet
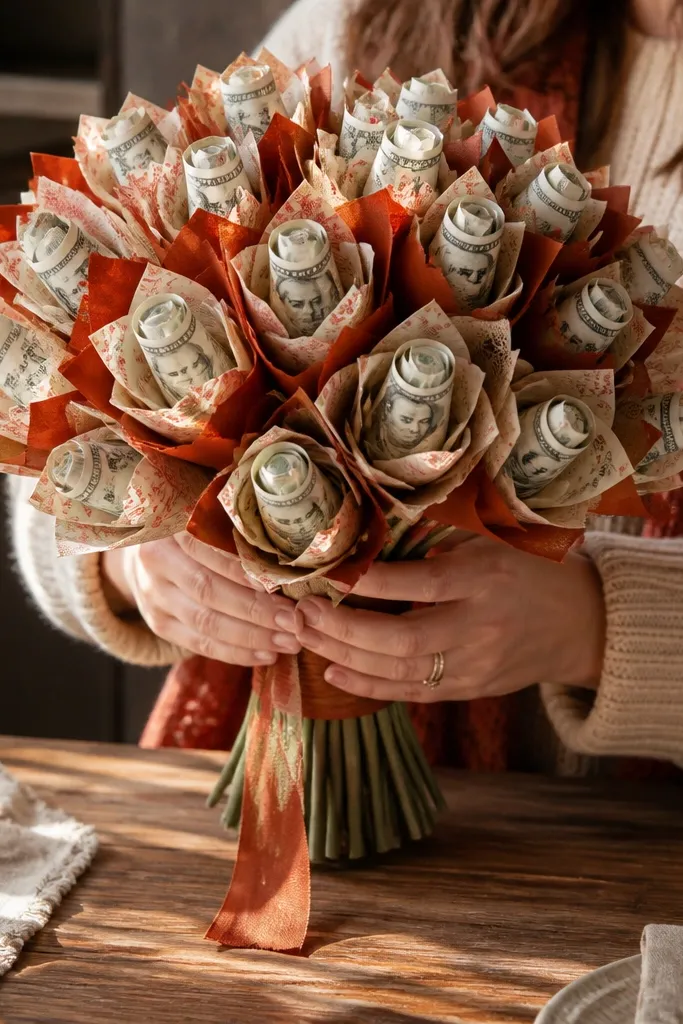
This is a fun, high-contrast look that still photographs like a luxury gift. Each money piece is mounted like a lollipop bud, then layered with paper “petals” in rust and ivory. The result is chunky texture — the kind that looks expensive because it has dimension and color blocking. It’s also forgiving: if one money piece isn’t perfect, the paper layer hides it.
Cut small circles and teardrops from cardstock in rust and ivory (aim for 14-18 money buds). Roll each bill into a tight cone, then glue the cone seam at the back. Stick each cone onto a floral pick, then layer cardstock teardrops around the cone base like a flower collar. Make sure each bud has 4-6 paper petals for a full look. Bundle picks, wrap the stems with floral tape, then add a wide ivory ribbon wrap at the collar.
Stiffen cardstock by brushing a thin layer of glue stick on the back before layering.
Avoid using too thin paper — it collapses under the cone weight.
7. Cream Lace Collar Money Bouquet
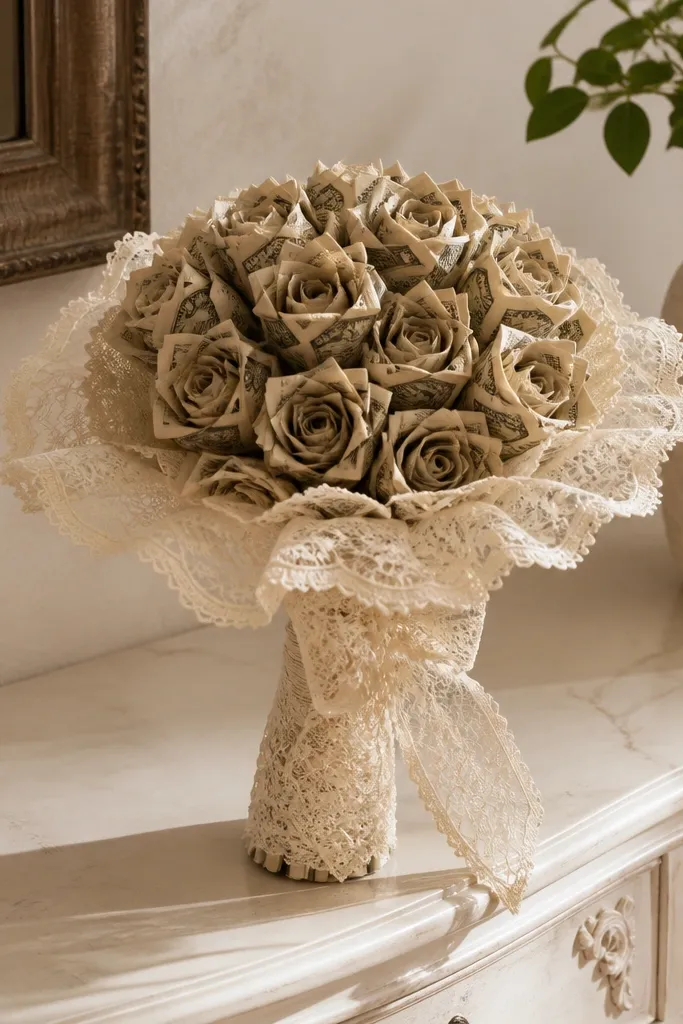
Make 18-24 simple money petals by folding each bill into a fan shape and pinching the center, then gluing the pinch to a floral pick. Arrange petals into 6-8 mini clusters so the bouquet has fullness without a ton of bills. Wrap stems with beige floral tape. Cut a strip of cream lace long enough to wrap around the collar area and overlap slightly; glue the ends down with hot glue. Add a satin ribbon band over the lace overlap to hide the seam.
This one looks expensive because the collar is the star. You build a simple money-flower cluster, then upgrade the stem base with a cream lace wrap that covers tape and glue. Lace makes the bouquet look like it came from a boutique florist, even if the money petals are basic. Use a neutral palette (cream, beige, soft gold accents) so the lace shows clearly.
Skip thisDon’t glue lace directly onto the money petals; keep lace only on the collar so it stays clean.
Editor's noteCut lace with pinking shears so edges don’t fray as fast.
8. Emerald Velvet Ribbon Money Bouquet
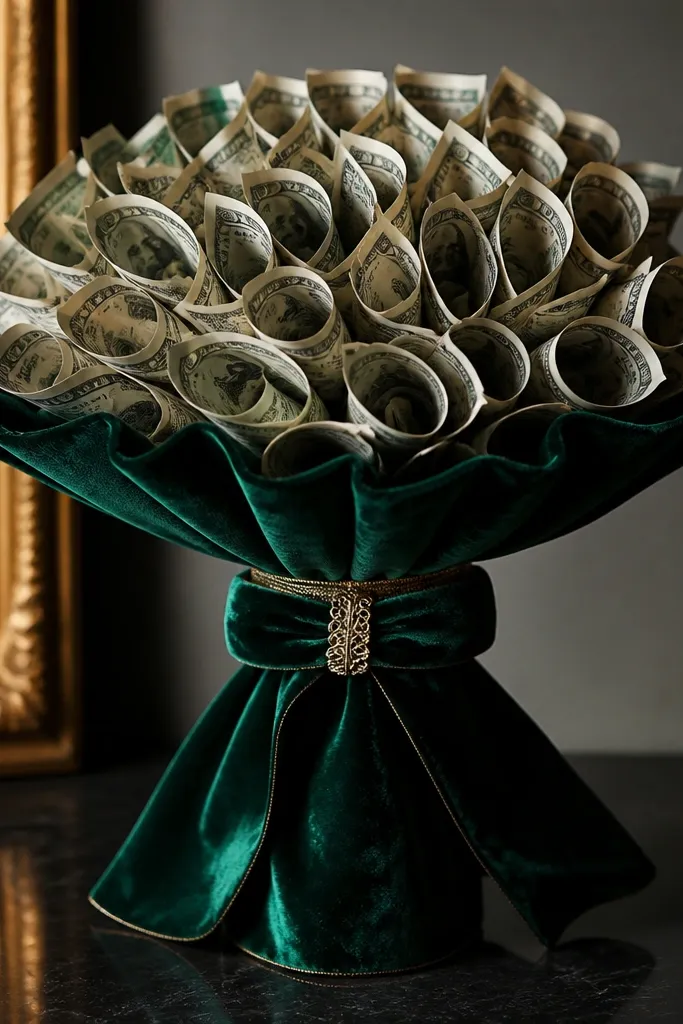
If you want that “expensive wrapping paper” effect, velvet ribbon does it. This bouquet uses tight money curls as the petals, but the velvet wrap around the stems is what makes it look high-end. Emerald is dramatic in photos, and gold accents keep it from looking costume-y. It’s a strong beginner option because the money curls are straightforward and the ribbon hides small stem imperfections.
Roll bills into tight curls around a pen, then secure each curl base with a small hot glue dot. Attach 20-26 curls to floral picks at the back so the curl faces outward. Build a bouquet with 3 clusters — center slightly higher, two side clusters lower. Wrap stems with floral tape, then apply emerald velvet ribbon in an even spiral up to the collar. Finish with a thin gold ribbon band and a small gold bow at the top of the collar.
Use a satin ribbon under the velvet so the velvet doesn’t snag on tape edges.
Avoid tying the bow too tight; it crushes ribbon texture and looks cheap.
9. Blush Paper Hydrangea Money Bouquet
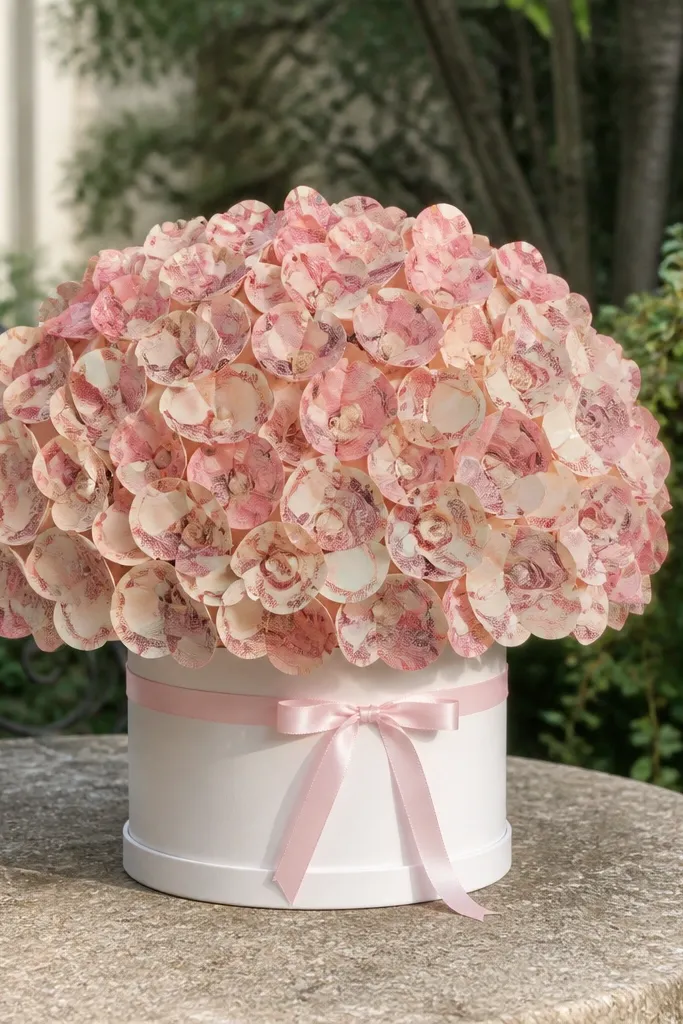
Cut 30-40 small circles of cardstock (about 1.5 inches wide) in blush or white to back each money piece. Fold each bill into a small coin-like puck: fold corners inward, then pinch and glue the edges on the back. Glue one puck onto each cardstock circle. Attach circles to floral picks and group them tightly around a central bundle. Wrap stems with blush floral tape, then cover with a satin ribbon wrap and a simple bow.
Hydrangea looks expensive because it’s dense and cloud-like. You get that same effect by making lots of small, rounded money pieces and planting them close together. Blush keeps it soft and photogenic, and the “many dots” pattern hides unevenness. This is a beginner-friendly build if you’re okay with repetition — each piece is quick, and the final look is worth it.
Skip thisDon’t space pieces too far apart — hydrangea needs crowding to look premium.
Editor's noteKeep puck sizes consistent; small differences show up in a dense flower.
10. Gold Foil Edge Money Petal Bouquet
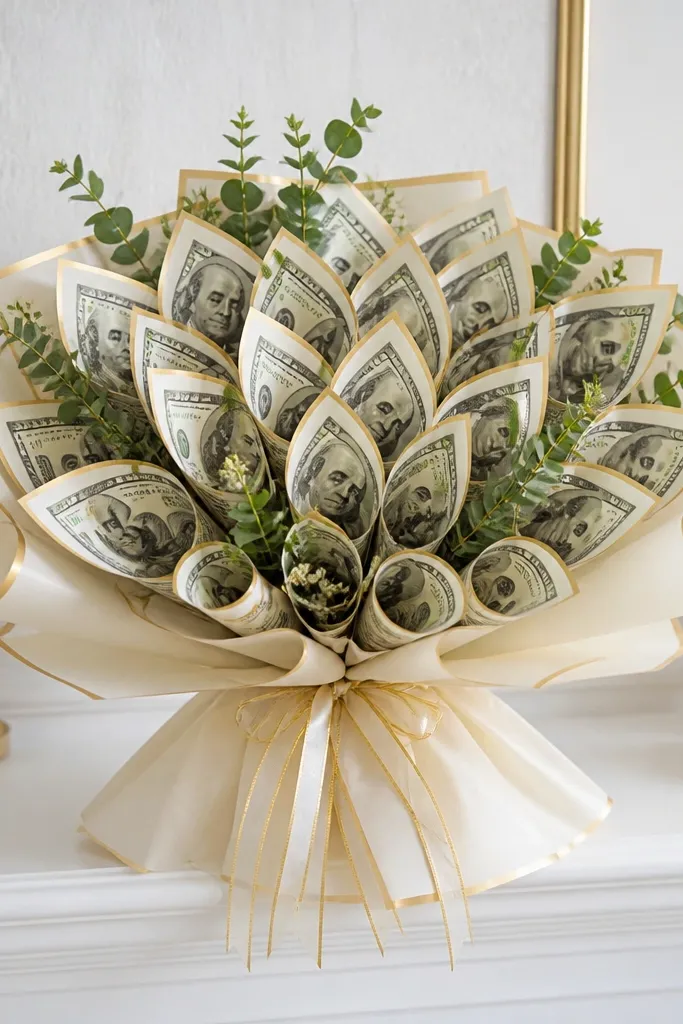
Cut cardstock frames for each petal, about 2 inches tall by 1 inch wide, leaving a window so the money shows. Add gold foil tape along the outer edge of each frame. Roll bills into petal curls, then glue the curled bill to the back of the frame so the gold edge stays visible. Attach each finished petal to a floral pick. Arrange petals into a bouquet with a top-heavy silhouette, then wrap stems with gold ribbon at the collar and a neutral satin below.
This design looks expensive because it adds a metallic edge line that reads like premium floral wrapping. You mount money petals onto cardstock frames with gold foil trim, so the petals pop and look finished. The gold border also makes the bouquet look intentional even if the bills have different shades. It’s a good choice for people who want a clean, polished look without heavy tulle or complicated folds.
Skip thisSkip messy glue blobs behind the frame — they show through on the gold edge.
Editor's noteUse thin gold foil tape, not wide ribbon, so the edge line stays crisp.
11. White Organza Layered Money Bouquet
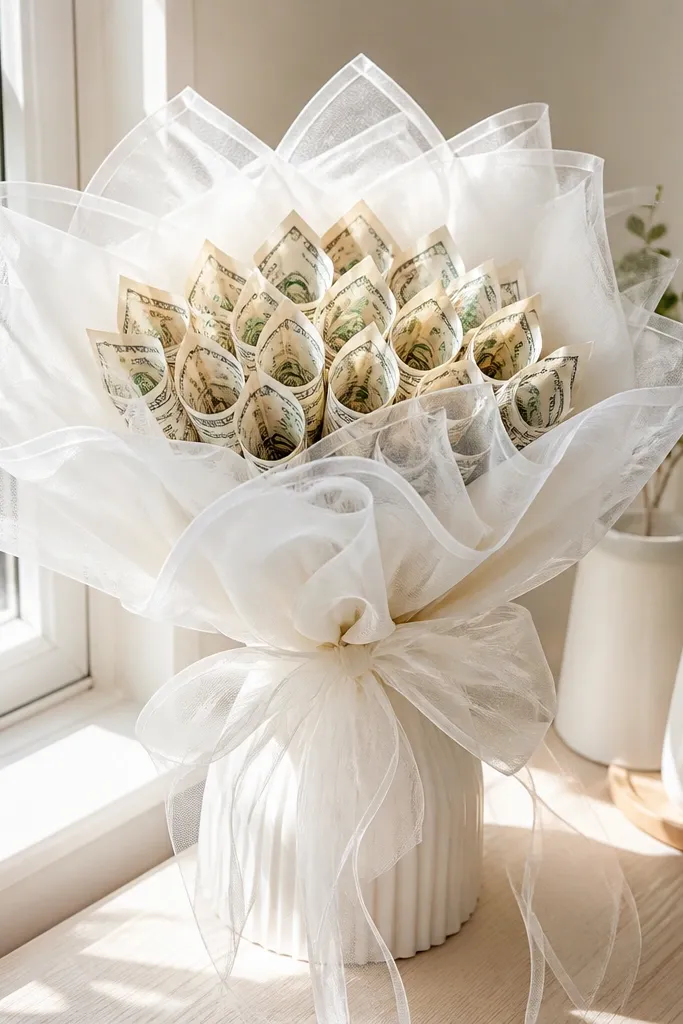
Organza gives you that airy, high-end look because it holds shape slightly and catches light. This bouquet uses curled money petals as the texture, then frames them with organza layers that look like a boutique wrap. White keeps it clean and makes the money texture stand out. It’s beginner-friendly because organza hides small gaps between petals and makes the bouquet look fuller quickly.
Curl bills into petal rolls and secure bases with small glue dots. Make 18-24 petals and attach to floral picks. Assemble picks into a bouquet, leaving small spaces for organza to fill. Wrap stems with floral tape, then cut organza rectangles and drape them around the bouquet in two layers, tying at the collar. Add a satin ribbon band over the knot so the organza looks intentionally gathered.
Cut organza slightly longer than you think — trimming after tying gives cleaner edges.
Don’t use organza that’s too stiff; it will stand off instead of draping.
12. Black & Gold Geometric Money Bouquet

Cut black cardstock shapes like triangles or angular tabs (about 2 inches across). Fold each bill into a sharp fan by creasing along the center and folding edges inward, then glue the back fold to hold the shape. Attach the folded money to the geometric cardstock tab. Stick each tab to a floral pick. Arrange picks into a bouquet with alternating angles so the geometry shows. Wrap stems with black ribbon, then add a thin gold ribbon stripe at the collar.
Geometric builds look expensive because they’re structured and modern. Instead of relying on lots of fluff, you create sharp money “fold points” and back them with black geometric paper shapes. The gold accents make it pop, and the straight lines read clean in photos. This is a strong choice for a masculine gift vibe or any time you want something that doesn’t look like a traditional flower bouquet.
Skip thisDon’t hide the geometry under heavy tulle; the whole point is the clean pattern.
Editor's noteKeep the tab angles consistent; mixed angles make it look accidental.
13. Pastel Rainbow Ribbon Money Bouquet
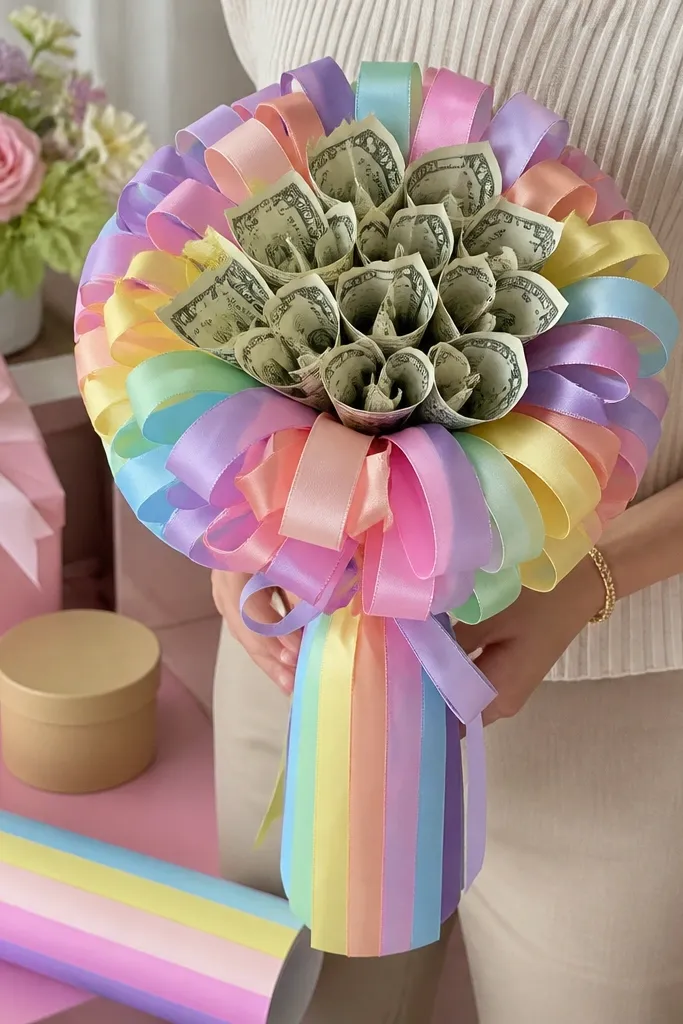
Curl bills into petals and attach to floral picks (aim for 20-24 petals). Assemble petals into a bouquet with a tight center. Wrap stems with floral tape, then cover with a base satin ribbon in a neutral color. Add pastel ribbon bands: cut 3-4 inch strips of each pastel, glue them around the stem collar area, and overlap slightly. Finish with a neat bow using the lightest pastel for contrast.
This idea looks expensive because the money petals are restrained, while the ribbon does the color work. Use a single color for the money pieces (or keep the bill colors grouped), then wrap the stems with pastel rainbow ribbon in clean vertical bands. The ribbon layering creates a boutique gift feel without needing complicated money folds. It’s beginner-friendly because you can build a standard curled-petal bouquet and focus your effort on the ribbon wrap.
Skip thisAvoid mixing too many ribbon widths; stick to one width so it looks designed.
Editor's noteGlue ribbon ends on the back of the stems so the front stays clean.
14. Rose-Quartz Paper Bloom Money Bouquet
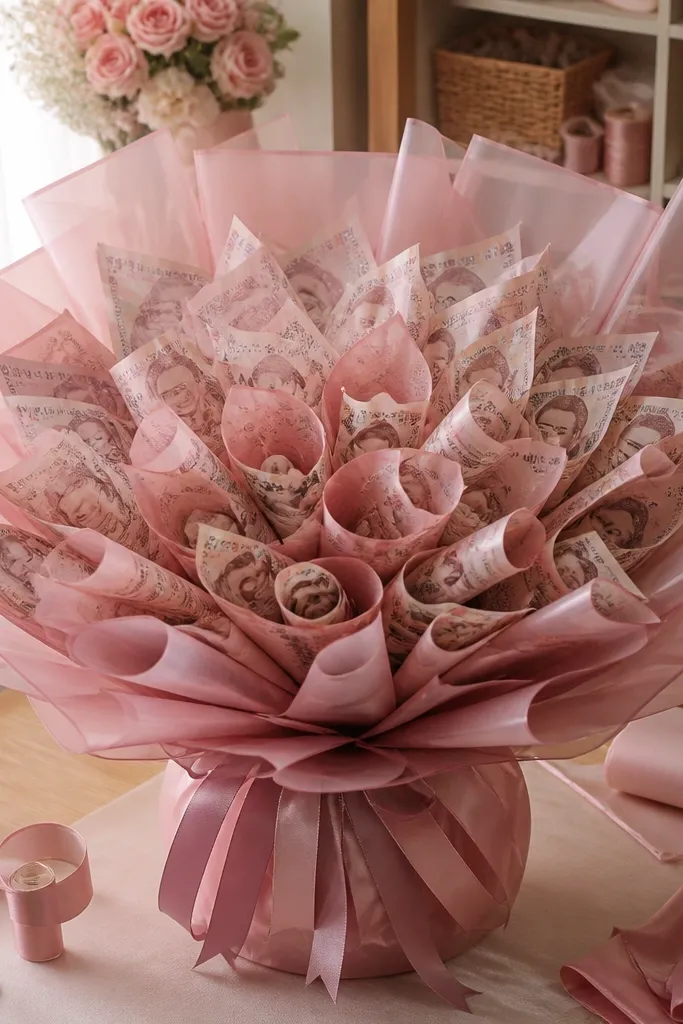
This bouquet looks pricey because it uses translucent texture like a luxury floral wrap. You create money petals, then layer them over translucent pink paper or vellum so they glow softly. The money texture stays visible, but the translucent layer smooths out the look. It’s a nice beginner-friendly build when you want the bouquet to feel delicate without fragile construction.
Cut translucent vellum or translucent craft paper into petal backings (about 2 inches wide). Curl bills into petals and glue them to the backings. Attach each petal to a floral pick. Arrange petals into 6 clusters around a central stem bundle, keeping the top wider than the base. Wrap stems with light pink floral tape, then cover with satin ribbon and add a thin rose-gold ribbon at the collar.
Use a matte glue stick on vellum edges first, then hot glue only at the stem attachment point.
Don’t saturate vellum with hot glue; it warps and shows shiny spots.
15. Navy Velvet Wrap Money Bouquet with Pearl Dots
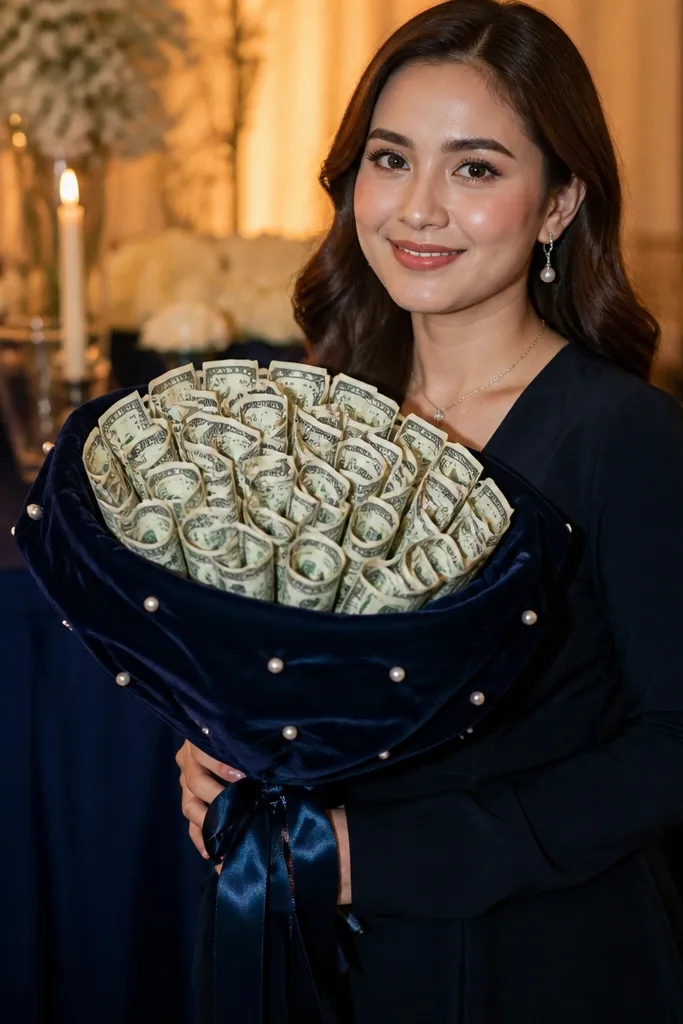
Roll bills into petal curls and glue bases to floral picks (make 18-24 petals). Assemble into a bouquet with 1 center cluster and 2 side clusters. Wrap stems with floral tape, then apply navy velvet ribbon in a tight spiral to the collar. Add pearl-like bead dots: glue small pearl beads or pearl stickers around the ribbon collar and a few spots between clusters. Finish with a navy bow using double-layer ribbon for volume.
This is an “expensive gift box” look: navy velvet ribbon plus tiny pearl dots makes the whole bouquet feel formal. The money petals stay classic and clean, while the pearl accents add a jewelry-like finish. It’s great for weddings, graduation, or any occasion where you want the bouquet to look polished and not too playful. Beginner-friendly because the build focuses on repeating a single money petal shape and then adding the pearl dots consistently.
Skip thisAvoid placing pearls on the money faces; keep them on the ribbon and collar so money stays the focal texture.
Editor's noteUse fewer pearl dots than you think — spacing matters more than quantity.
16. Rose Gold Foil Ribbon Money Bouquet
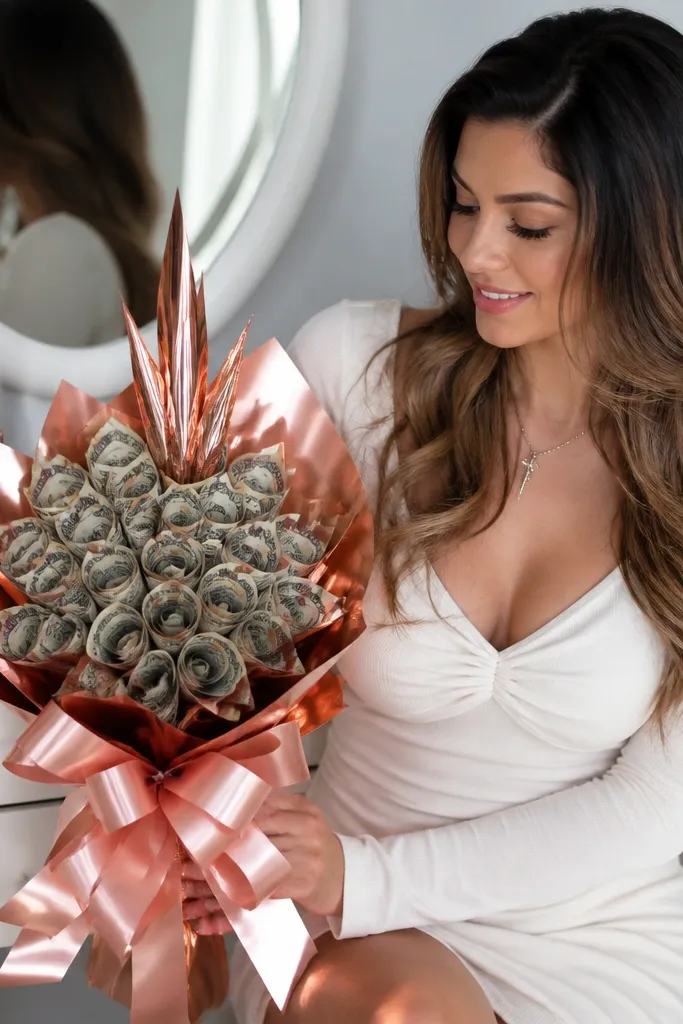
Rose gold makes money crafts look instantly more polished because it turns the bouquet into a “metallic gift” theme. Keep the money petals simple: curled rolls with neat bases. Then let rose gold ribbon and a foil accent strip do the expensive-looking work. This is a reliable beginner-friendly build because you’re not relying on complicated folds, just consistent curls and a clean ribbon collar.
Curl bills into uniform petal rolls and attach to floral picks (20-26 petals). Bundle stems and wrap the base with floral tape. Cover stems with satin ribbon in a neutral tone, then wrap with rose gold ribbon in a spiral from mid-stem to the collar. Add one thin rose gold foil tape strip around the collar to create a crisp band. Tie a small bow and trim ribbon tails to equal length with angled cuts.
Cut ribbon tails with diagonal snips so they catch light instead of looking blunt.
Don’t use matte ribbon and foil tape together in the same area; it looks patchy. Pick one finish for the collar band.
17. Terracotta Paper Rose Stack Money Bouquet

Cut terracotta paper backing circles and slightly larger cream circles (about 1.5 inches and 2 inches). Curl bills into petals and glue each petal to a terracotta circle, then layer a cream circle behind it. Attach the finished rose to floral picks. Build 7-9 roses and cluster them tightly for a full top. Wrap stems with cream satin ribbon and add a terracotta ribbon band at the collar.
Stacked roses look expensive when the layers are visible and the color palette is tight. Terracotta plus cream makes the bouquet feel warm and designed. Build your money roses by making multiple petal curls and stacking them like a layered paper rose. The terracotta accent paper frames make the money look like it belongs in the design, not taped on.
Skip thisDon’t glue petals flat onto the backing circle — the rose loses dimension.
Editor's noteMake the petals slightly tighter at the center; it makes the rose look more realistic.
18. Green Leaf Frame Money Bouquet
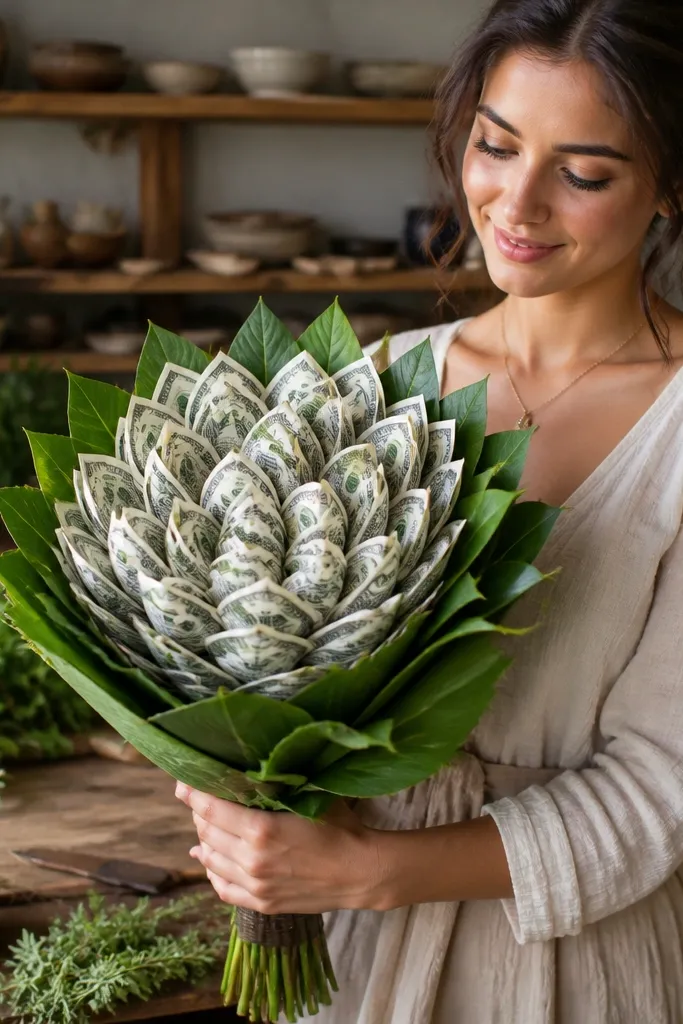
Curl bills into petals and attach to floral picks (18-24 petals). Insert faux leaves around the perimeter: cut leaf sprigs or use pre-made leaf picks and tuck them between money picks. Build a bouquet where leaves form a U-shape around the money clusters. Wrap stems with floral tape, then cover with a neutral satin ribbon at the collar. Add a simple ribbon bow and trim tails to match the leaf height.
Framing money petals with leaf shapes makes the bouquet look more like real floral styling. The leaves create depth and hide stem joints, which is where beginner bouquets usually look homemade. This is a great option if you want a natural, expensive look without tulle. Choose two shades of green so it looks dimensional, then keep money pieces consistent so the frame doesn’t steal attention.
Skip thisAvoid using only one leaf shade; it flattens the bouquet in photos.
Editor's noteKeep leaf tips slightly higher than the money tips for a florist-like silhouette.
19. White Minimalist Money Bouquet with Satin Lines

Curl 16-20 money petals and attach each to floral picks. Arrange them in a spiral pattern around the center stem bundle, spacing each pick so you can see negative space. Wrap stems with floral tape, then cover with white satin ribbon in a single smooth spiral to the collar. Add one thin white ribbon band and tie a small bow. Trim petal lengths so the front row looks even.
Minimalism looks expensive when spacing is controlled. This bouquet uses fewer money pieces but places them with intentional gaps, then uses crisp white satin ribbon to keep everything clean. The money petals are curled and mounted so they face the same direction, which makes the bouquet read as a design object. It’s beginner-friendly because you can stop after you reach a balanced look and you won’t need extra filler decorations.
Skip thisDon’t overcrowd; too many petals in a minimalist style looks messy, not luxurious.
Editor's noteUse a ruler or straight edge to check spacing; symmetry matters more than more pieces.
20. Peach Crepe Wrap Money Bouquet
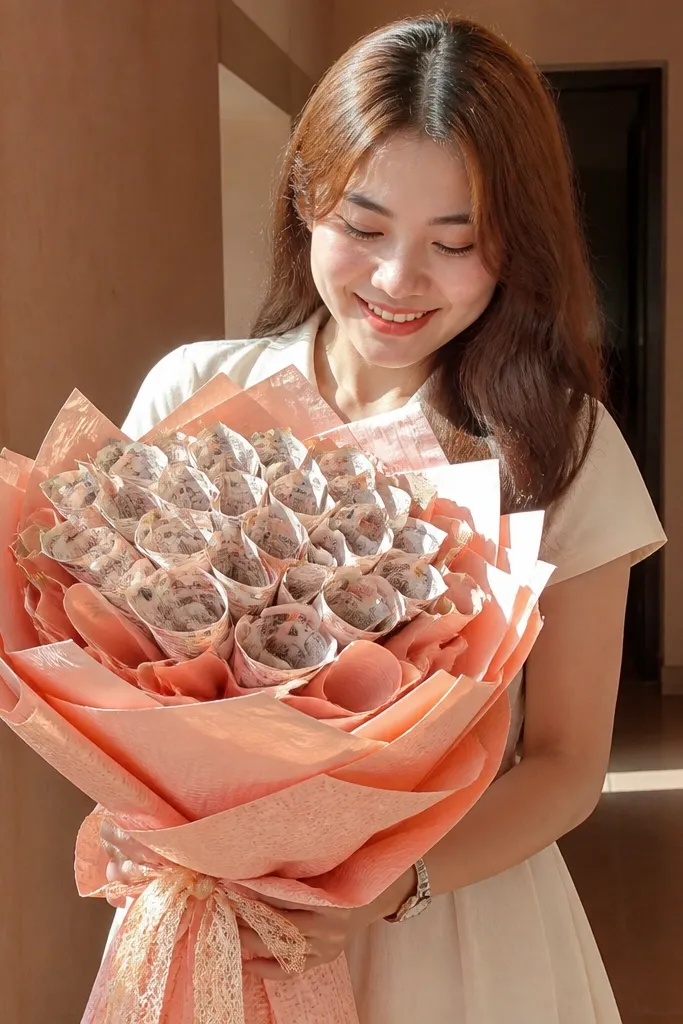
Crepe paper wrap gives a soft, upscale texture that hides stem tape and makes the bouquet look finished. Peach is flattering and makes the money look warm and gift-ready. Use curled money petals as the focal texture, then wrap stems with peach crepe in a way that looks like layered floral wrap. This is beginner-friendly because crepe paper forgives small bumps under the wrap.
Curl bills into petal rolls and attach to floral picks (20-24 petals). Assemble bouquet with a slightly rounded shape. Wrap stems with floral tape, then tear peach crepe paper strips and wrap them around the stem base in overlapping layers. Glue the crepe ends at the back of the stems so the front stays clean. Finish with a satin ribbon collar in cream or light peach to cover the transition line.
Tear crepe paper instead of cutting for a softer edge that looks more natural.
Don’t wrap crepe too tight; it puckers and shows ridges.
21. Lavender Organza Bow Money Bouquet

This bouquet looks expensive because it has a clear focal bow and a soft organza frame. You mount money pieces into a bow-like cluster shape, then add organza tails that flow down the sides. Lavender reads elegant in photos and works well with silver-toned accents. It’s beginner-friendly because you’re repeating the same placement pattern and the organza tails hide minor stem unevenness.
Fold bills into small bow loops: crease the bill into two inward folds, pinch the center, and glue the back pinch. Attach each bow loop to floral picks. Arrange 14-18 bow loops into a wide cluster so the loops face outward, with 4-6 loops slightly taller for a tiered look. Wrap stems with floral tape and lavender satin ribbon. Add organza tails by tying two organza strips at the collar and trimming them into a gentle V shape.
Choose organza strips that are 1.5-2 inches wide so they look like bow tails, not fabric scraps.
Avoid uneven tail lengths; the bouquet looks sloppy when the organza drops at different heights.
22. Gold Sunburst Money Bouquet
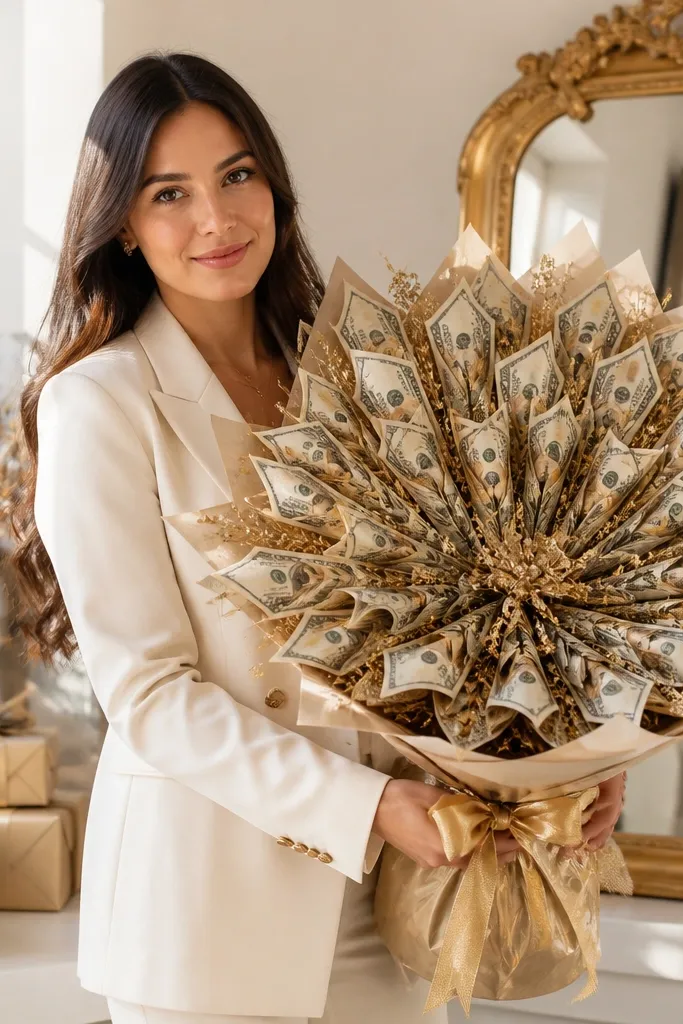
Curl bills into petal rolls and attach each to floral picks at an angle using hot glue at the back. Build a sunburst by placing shorter petals around the center and longer petals on the outer ring. Use 24-30 petals to get that full radiating look. Wrap stems with gold floral tape first, then cover with a neutral satin ribbon. Finish with a thin gold ribbon bow at the collar and add one gold star pick on the center stem.
Sunburst bouquets look like luxury gift displays because the structure radiates outward. You create money petals that point in different directions but keep the same length, so the bouquet reads as a single shape. Gold accents add a premium feel without needing lots of decoration. This is beginner-friendly because you can build it like a simple fan arrangement: make petals, attach to stems, and keep the angles consistent.
Skip thisDon’t mix random petal lengths; the sunburst loses its “designed” silhouette.
Editor's noteUse the same curl size for outer petals; it keeps the sunburst edge clean.
23. Pink Peony Money Bouquet with Tissue Pom Layers
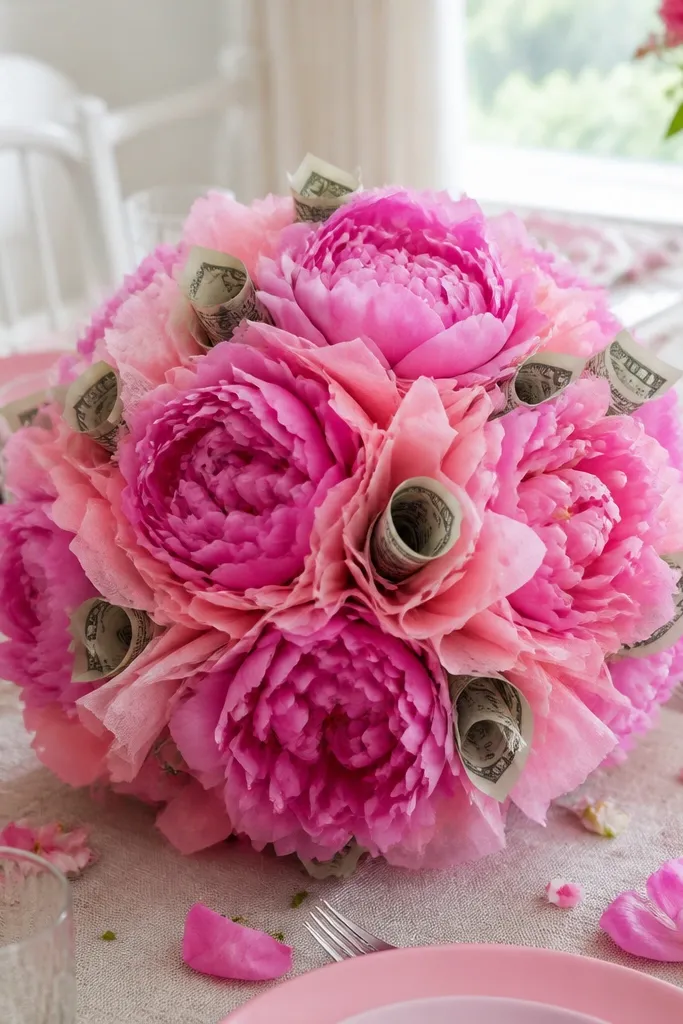
Make 18-22 curled money petals and attach to floral picks. Create two tissue pom layers: fold tissue paper into accordion stacks, pinch the center, then spread into a pom; tie each pom to a floral pick base. Arrange the pom layers in the center and attach money picks around the outer edge. Wrap stems with floral tape, then cover with pink satin ribbon. Tie a bow and trim pom edges so the bouquet looks rounded.
Peony-style bouquets look expensive because they’re full and layered. Tissue pom layers create that fluffy volume, while money petals give the “money bouquet” identity. Pink peony tones are soft and photogenic, and the fluffy layers hide gaps between money pieces. Beginner-friendly because you don’t need perfect money folds everywhere — the tissue does the heavy lifting for fullness.
Skip thisAvoid using wet glue on tissue; it will wrinkle and discolor.
Editor's noteTrim tissue pom edges after hanging the bouquet — it settles into its final shape.
24. Chocolate Brown Leather-Look Wrap Money Bouquet
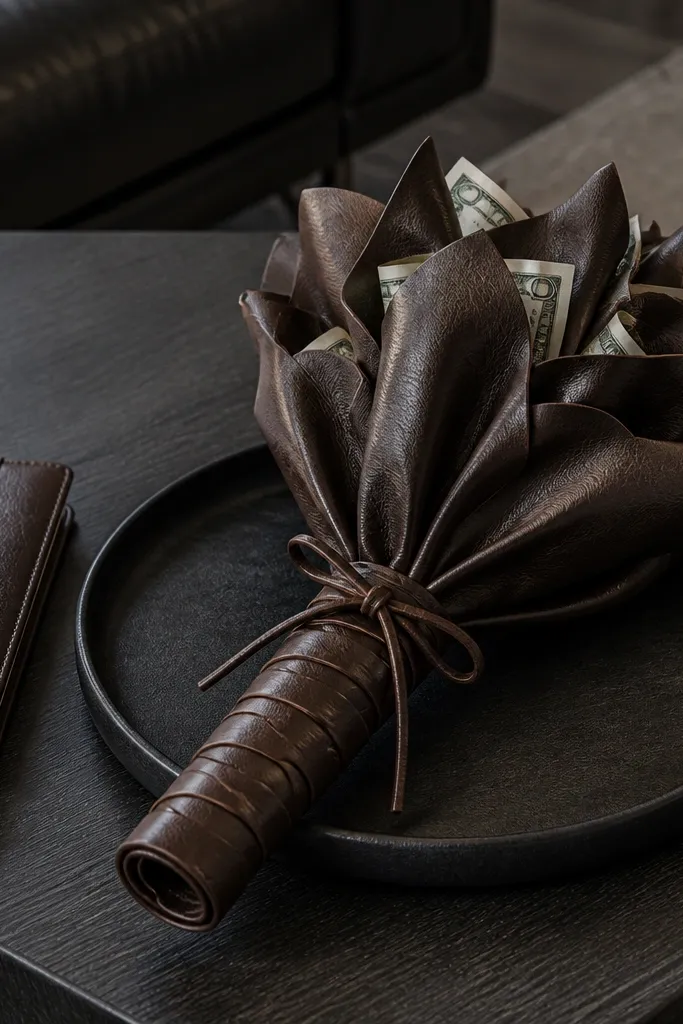
Curl money petals and attach to floral picks (20-26 petals). Assemble into a rounded bouquet shape, then wrap stems with floral tape. Cut faux leather-look strip (or faux suede) about 1 inch wide and wrap it around the stem base in tight turns, gluing the ends at the back. Add a cream satin ribbon collar on top of the faux leather seam. Finish with a small cream bow and trim tails evenly.
Leather-look wrap makes a money bouquet feel modern and expensive, especially when paired with neutral money tones. This style uses a simple curled-petal bouquet, but the stem presentation is the upgrade: a faux leather strip wrapped tightly and finished with a clean knot or snap-style tie. It photographs well because the wrap looks like product packaging. It’s beginner-friendly because you can keep the money build basic and still get the premium look.
Skip thisDon’t use glossy leather-look material; it creates harsh highlights and looks cheap under indoor lighting.
Editor's noteUse a matte finish faux leather so glare doesn’t blow out photos.
25. Seafoam Lace Tulle Money Bouquet
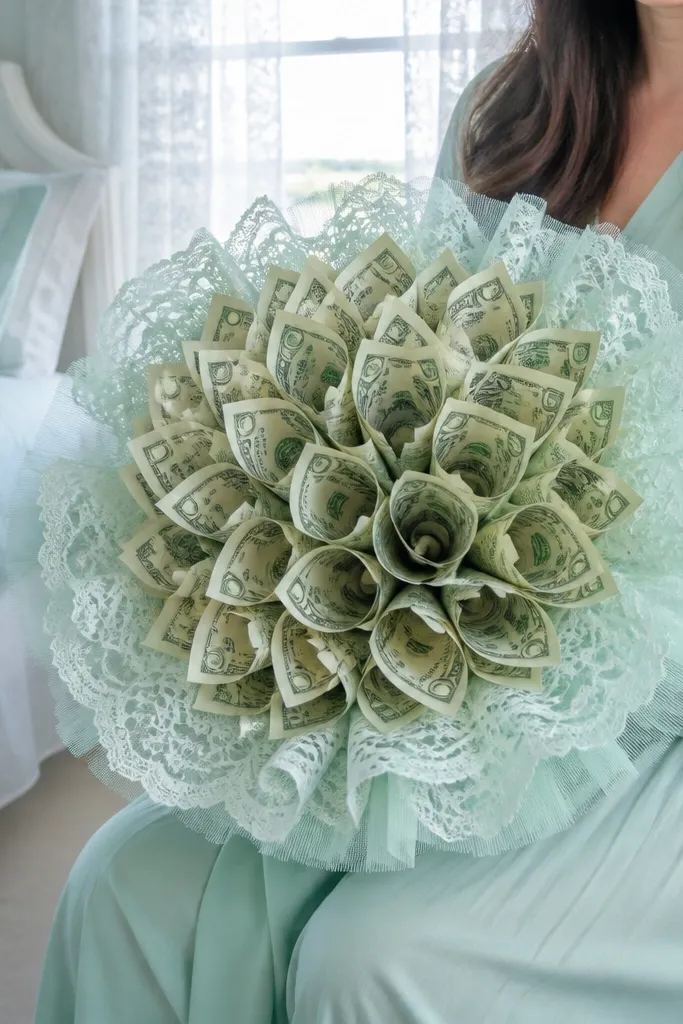
Seafoam is a clean, modern color that looks expensive when paired with lace and airy tulle. You build a money bouquet with curled petals, then layer lace trim around the collar and tulle around the perimeter. The combo makes the bouquet look like a themed bridal gift without needing a complicated build. Beginner-friendly because lace and tulle hide small spacing issues between money pieces.
Curl bills into petal rolls and attach to floral picks (18-24 petals). Bundle picks and wrap stems with floral tape. Drape seafoam tulle around the bouquet in one or two layers, tying at the collar. Add lace trim by wrapping a lace strip around the collar area and gluing the overlap on the back. Finish with a seafoam satin ribbon bow and trim tails to match the tulle length.
Gather tulle lightly before tying so it looks layered, not flat.
Don’t put lace all over the money petals; keep it at the collar for a clean expensive look.



