
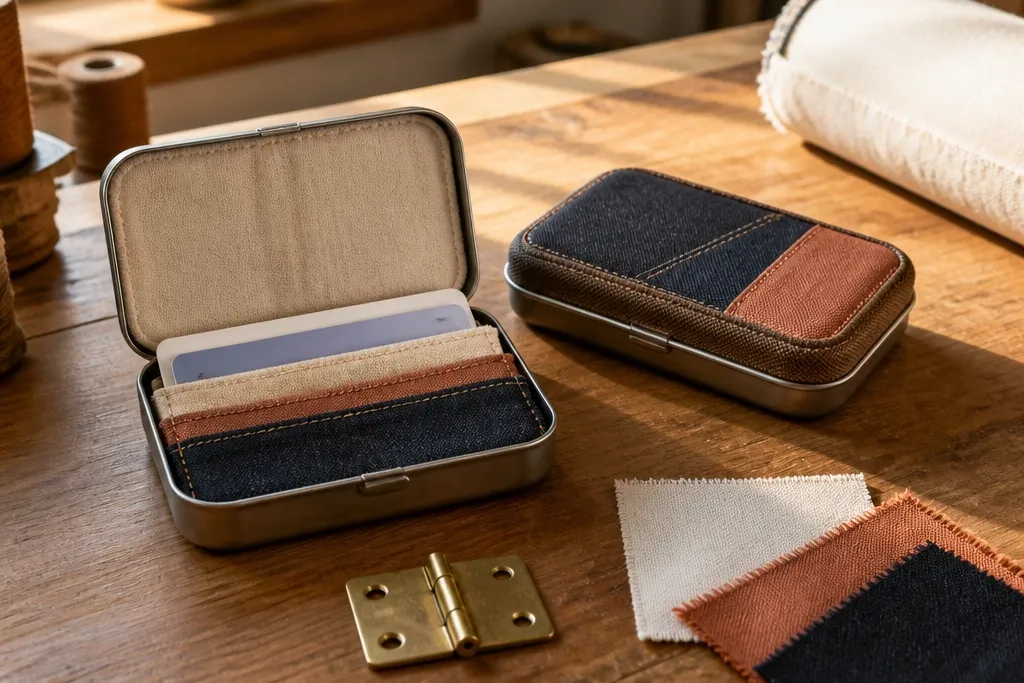
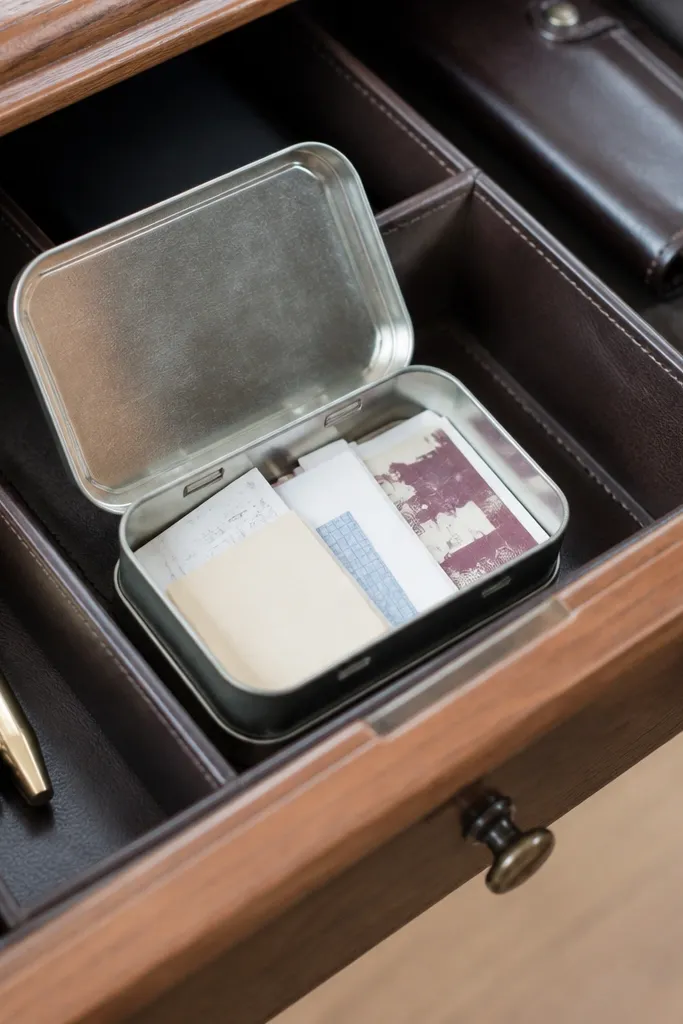
1. Black Denim + Tan Saddle Stitch Front
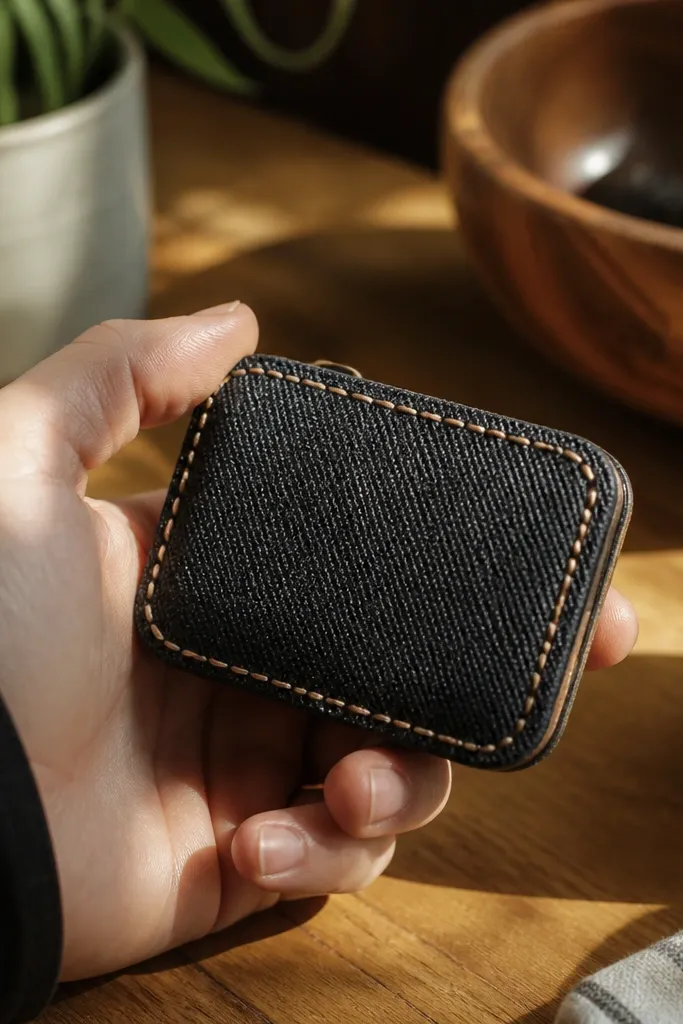
Cut a denim cover panel sized to wrap the tin lid face and overlap the edges by 1/2 inch. Glue the panel to the front first, then fold and glue the overlap on the back of the lid. Add a row of evenly spaced stitch holes (about 1/8 inch apart) using a fine awl, then stitch with tan waxed thread. For the closure, attach a snap set to the front panel and the base so the lid closes flush, not bowed. Finally, press the whole thing under a book for 20 minutes to set the glue.
This one looks good because denim holds shape and the tan stitching creates a clear focal line across the front. You’re turning the wallet into a mini “workwear” piece with contrast that reads instantly in photos. The outside stays textured and forgiving, so small alignment errors look intentional. It’s beginner-friendly because you can mark holes with a fabric pen and stitch slowly without needing perfect symmetry. Plan for a simple closure using a brass snap or a hidden magnet so the front stays flat.
Skip thisDon’t glue the fabric too thickly — lumps telegraph through denim and ruin the clean front line.
Editor's noteMark stitch points with a ruler and fabric chalk, then prick each hole before threading to keep spacing even.
2. Faux Leather Wrap with Brass Corner Rivets
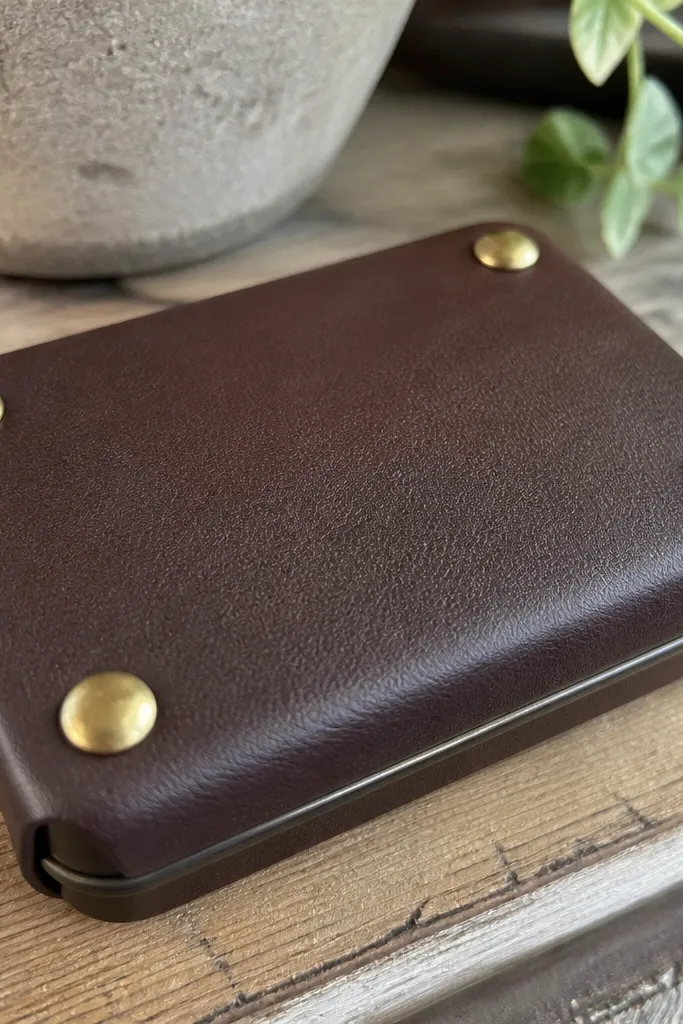
Faux leather gives you that polished, “leather goods” look without the cost. Rivets at the corners make it look engineered, like a tiny wallet from a craft store, not a hacked tin. The material hides small edge frays and resists wrinkling, so your finish stays smooth. It’s also a great starter because you can keep the design simple: one wrap, one closure, and hardware that does the styling. Choose a warm brown or oxblood so the brass looks rich.
Cut faux leather strips for the lid face and the sides, keeping each piece slightly oversized so you can trim after gluing. Glue the lid face panel down first, then fold side strips over the edges and press firmly with a flat tool. Mark and punch four rivet holes near the corners, staying about 1/4 inch from the edges. Set rivets with a hand rivet setter and hammer, then add a magnet closure centered on the front and base. Trim any excess leather with sharp scissors or a craft knife so edges stay straight.
Use a craft knife with a new blade for leather — dull blades stretch the material and leave ragged edges.
Avoid using fabric glue that stays rubbery — it can grab unevenly and create a wavy finish.
3. Clear Tape Window + Printed Pattern Reveal
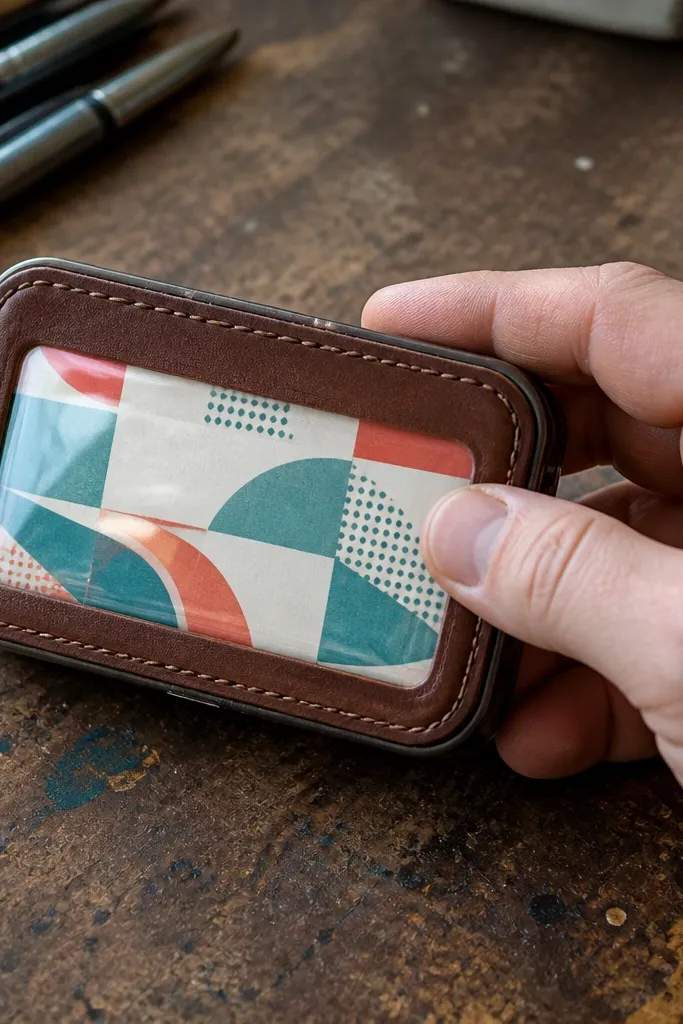
This design looks genius because it turns the wallet into a mini display. The clear window shows whatever paper pattern you choose, so it reads like a collectible card case. It’s photogenic because color pops through the transparent panel. The build is beginner-friendly if you use thin paper and seal edges so they don’t lift. Keep the window centered and symmetrical; that’s what makes it look intentional.
Cut a rectangle window opening on the lid face cover, leaving a 1/8 inch border around the cut. Glue printed paper behind the opening and trim it to fit neatly inside the border. Cover the opening with clear packing tape or clear book tape, smoothing from the center outward to avoid bubbles. Seal the tape edges with a thin coat of Mod Podge or clear craft sealer so it doesn’t peel. Add a small magnet closure on the front and base so the window panel stays flush when closed.
If your paper curls, press it flat under a book for 10 minutes before gluing.
Don’t let the paper touch the hinge area — friction will scrape it and cloud the window.
4. Quilted Fabric Front with Channel Stitch Lines
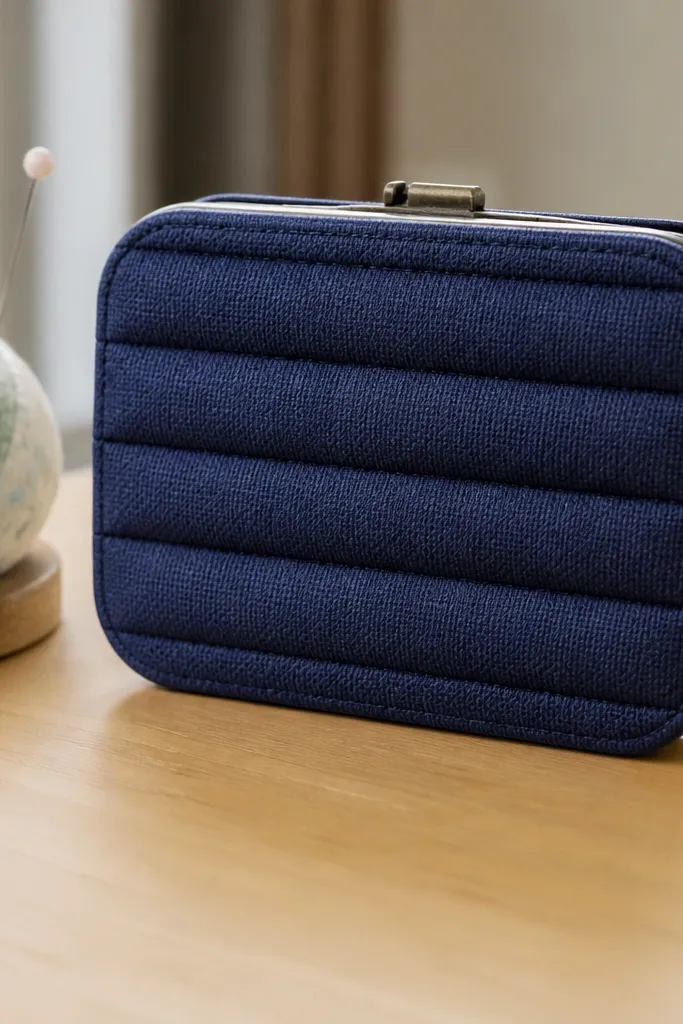
A quilted front instantly makes an Altoids Wallet look like a mini luxury accessory. The channel stitch lines create depth even if you don’t have fancy hardware. This works best with thicker cotton like quilting cotton or sturdy canvas so it doesn’t collapse. The project is beginner-friendly because you can create the “quilt” look with simple stitched channels over a thin batting layer. It also hides minor imperfections since the fabric texture distracts the eye.
Cut a fabric panel for the lid face, then add a thin batting layer (about 1/8 inch thick) between fabric and a backing like cotton. Glue the backing to the lid first, then wrap and glue the fabric/batting panel over the top. Mark 3-4 parallel channel lines using a ruler, spaced about 1/2 inch apart. Sew along the lines with a straight stitch and matching thread, then trim any extra fabric at the edges. Finish with a snap or magnet closure placed so the front sits flat.
Use a walking foot if you have one — it makes quilting channels feed evenly on textured fabric.
Don’t skip trimming the batting — extra bulk makes the lid close tight and distorts the front.
5. Monochrome Marble Look with White Acrylic + Black Pen Veins
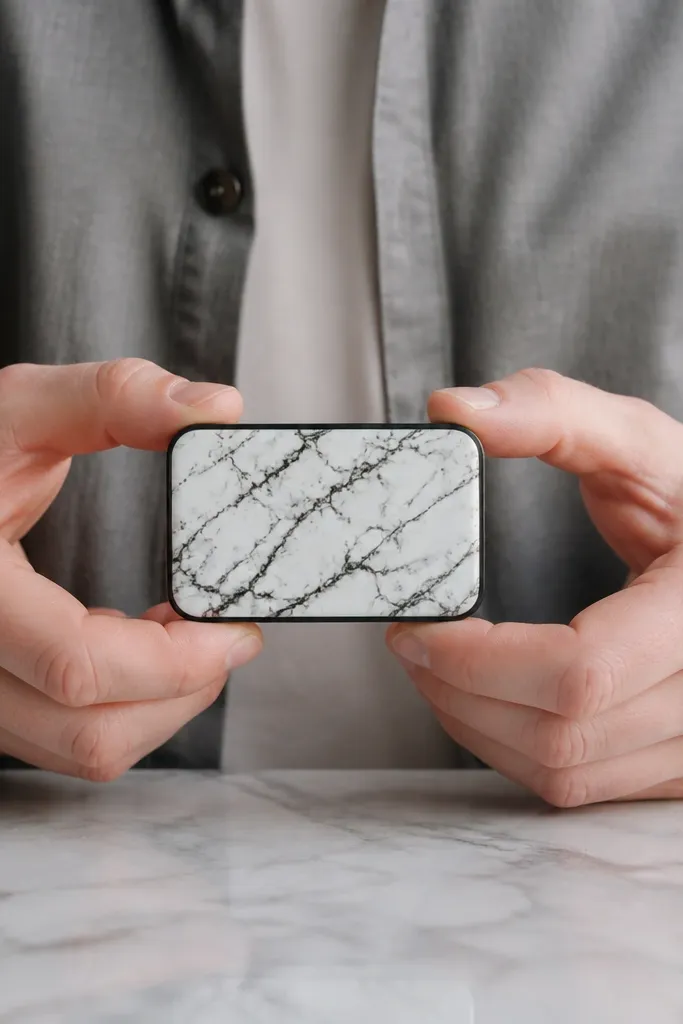
Sand the tin lid lightly so paint grips, then wipe clean with rubbing alcohol. Paint the lid front with a grey base coat, then add white acrylic swirls while the paint is still slightly tacky. Use a fine black paint pen to draw a few thin veins, then lightly drag them with a toothpick for feathered edges. Let it dry fully, then seal with 2-3 thin coats of clear acrylic sealer. Attach a magnet closure so the painted surface stays protected when closed.
Marble looks expensive because the pattern is organic and high-contrast. You’ll get that look by painting a base and dragging a few controlled “veins,” not by printing anything. The front reads crisp in photos because you keep it monochrome and let the tin frame define the edges. This is beginner-friendly because acrylic dries fast and you can wipe mistakes while wet. Use a clear topcoat so the surface doesn’t scuff.
Skip thisDon’t use thick paint layers; they crack when the lid flexes.
Editor's noteDo your veins last — they’re where the “marble” illusion happens.
6. Corduroy Side Stripes with Matching Button Closure
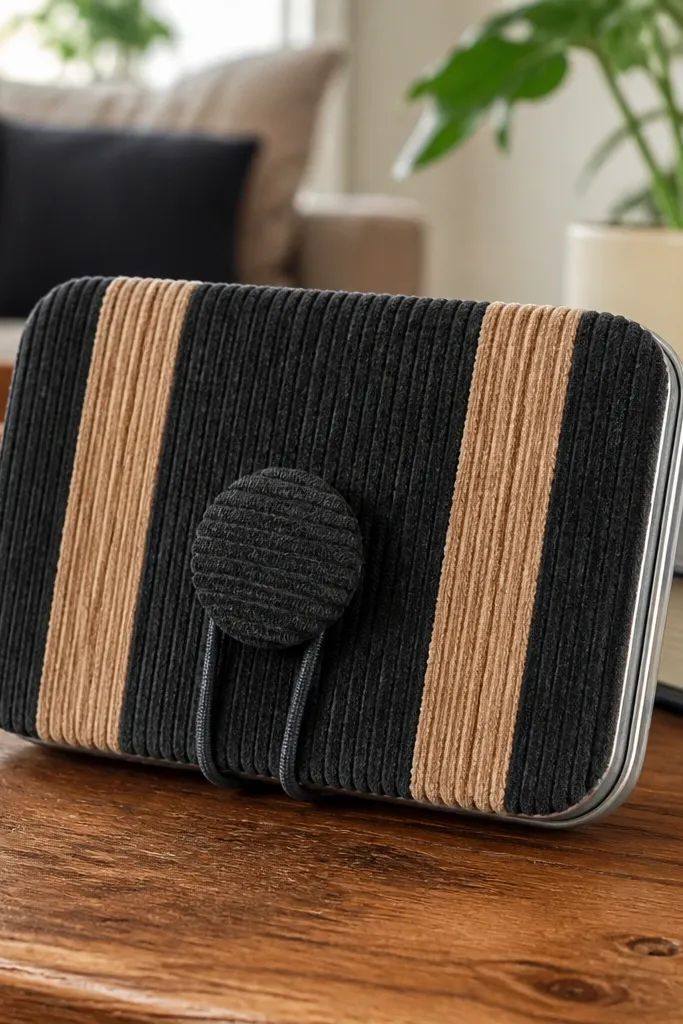
Corduroy adds a soft, old-school texture that makes a plain tin look like a real accessory. Side stripes create structure and make the wallet look taller and more designed. This is beginner-friendly because stripes hide uneven cutting better than full-face coverings. Use a fabric-covered button or a snap for closure so it looks like clothing details. Keep the stripe width consistent (about 3/4 inch) for a clean look.
Cover the lid front with a smooth base fabric like cotton or canvas, then cut two corduroy strips sized to wrap the sides. Glue the strips to the lid and base edges so they line up when closed. Add a fabric-covered button to the front and a small loop or snap counterpart on the base. If you want extra neatness, trim the fabric edges with pinking shears or a thin binding strip. Press under a book until the glue sets, then test the closure for smooth opening.
Use a fabric spacer or ruler to keep both stripes the same distance from the edge.
Avoid stretchy fabric for stripes — it twists the lines when the lid closes.
7. Star Map Paper + Burnt Edges with Ink Wash
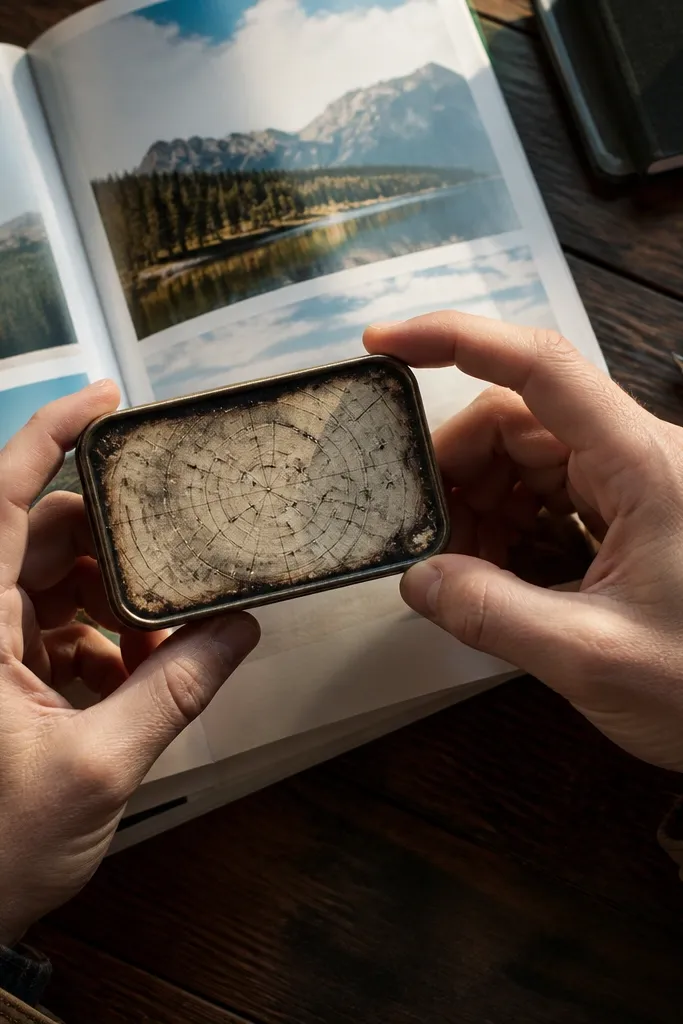
This reads as “mysterious travel journal” without being cheesy. Star map paper under a sealed finish looks crisp, and burnt edges add depth and contrast. It’s photogenic because the dark edge shading frames the lighter paper. Beginner-friendly comes from using pre-printed paper and sealing it so it stays flat. You get a clean, old-paper aesthetic that still looks sharp.
Choose a star map print and cut a lid-face panel to the exact size of the inner tin lid area. Seal the paper with a thin layer of Mod Podge, then press flat to dry. For burnt edges, lightly singe the paper edge with a candle flame for a second, then immediately press it flat to stop over-burning. Add a black ink wash around the edges for a controlled vignette. Seal again with a clear topcoat, then install a magnet closure centered to keep the paper protected.
Practice the singe on a scrap piece first so you get a dark edge without tearing the paper.
Don’t overheat the paper — char dust makes a messy finish and smears under sealer.
8. Rainbow Candy Stripe Tape Wrap
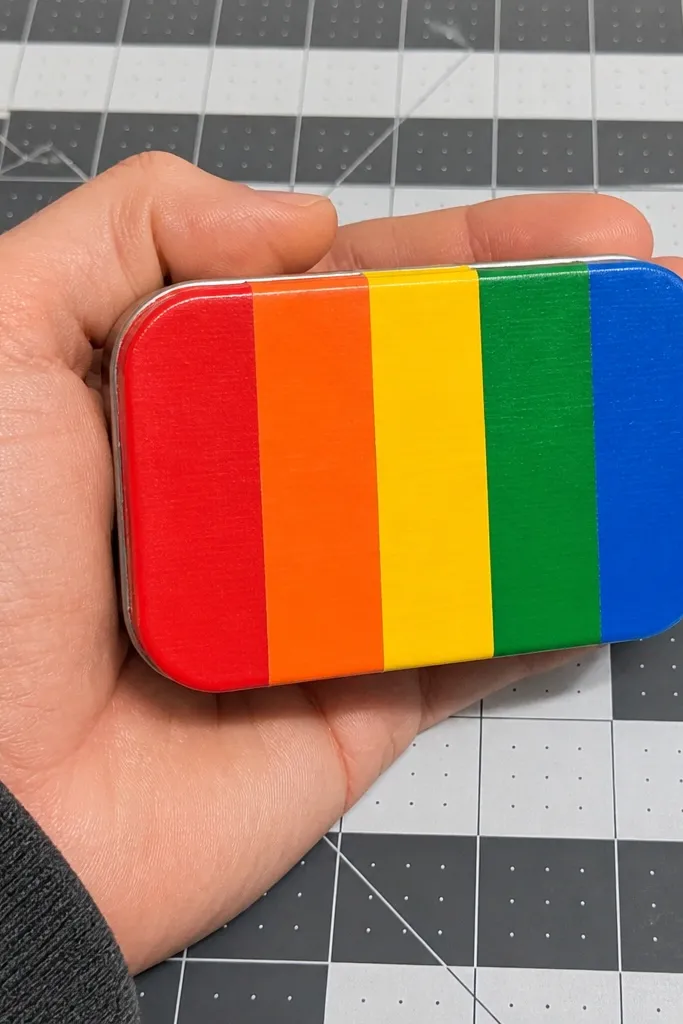
Candy stripes look fun and graphic, which makes them perfect for an aesthetic wallet photo. The trick is using tape as clean “panels,” not messy collage. This is beginner-friendly because tape is forgiving: you can reposition before pressing down. Pick a limited palette (like 5 colors) so the design looks intentional. Finish with a smooth topcoat or clear tape overlay to keep stripes crisp.
Clean the tin surface with alcohol so tape sticks. Plan a layout with 5 vertical stripes, each about 1/2 inch wide, and lightly mark the tin with pencil. Apply tape strips in straight lines, pressing each down firmly with a ruler. Trim edges with a craft knife after applying to keep them sharp. Seal the whole outside with clear packing tape or a thin clear sealer, then add two small magnets for closure.
Use painter’s tape to mask a straight guideline before you place the first stripe.
Don’t stretch tape — stretched stripes look wavy once the tin flexes.
9. Scrapbook Fabric Appliqué Monogram
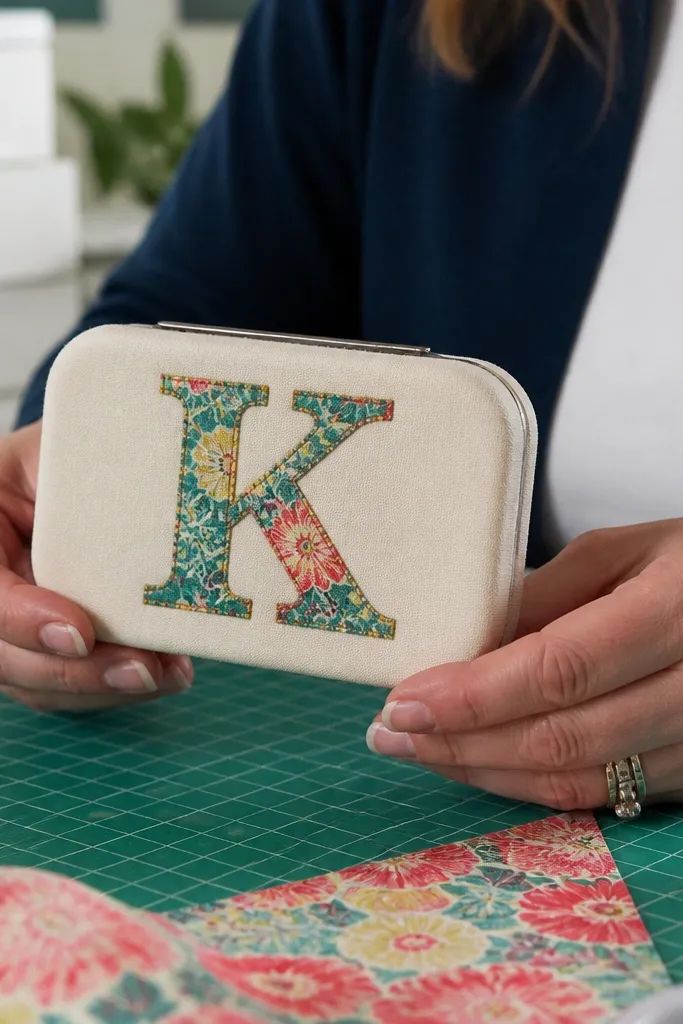
Cover the lid front with a solid fabric panel and let glue cure flat. Cut a monogram letter from a contrasting fabric and reinforce it with fusible web or iron-on interfacing. Fuse the letter to the lid using a hot iron and press cloth, then stitch around the edges with a simple straight stitch. Add a small magnet closure so the appliqué area stays smooth. Seal the stitched letter with a thin fabric sealant if you want extra durability.
A monogram makes the wallet feel personal and high-end because it looks like a garment label. Fabric appliqué is beginner-friendly when you keep the shape simple and use heat-bonding or glue backing. The key is contrast: choose a solid background fabric and a different texture for the letter. This design is also tidy because appliqué sits on top of your base panel instead of requiring full re-covering.
Skip thisDon’t use super-fraying fabric for the letter edges — it makes stitching uneven.
Editor's noteTrace the letter onto paper first, then use that template to cut fabric cleanly.
10. Navy + White Rope Border Frame
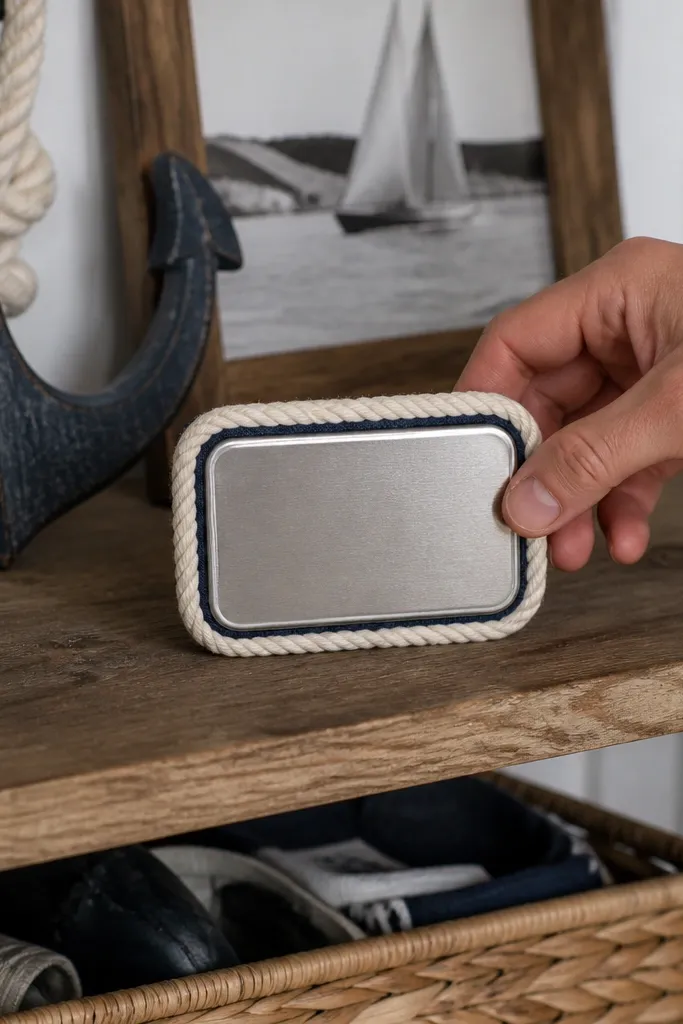
Rope borders look like nautical leather goods, and they frame the tin face like a picture. The contrast between navy and white makes it pop in photos. You’re not covering the whole tin with rope; you’re outlining the edges so it stays manageable for beginners. This build is beginner-friendly because rope can be glued in a continuous line with patience and a steady hand. It also hides edge seams, which is where most DIY wallets look rough.
Cover the lid front in navy fabric or faux leather, keeping the surface smooth. Cut rope pieces to form a rectangle border around the lid face, leaving an even margin (about 1/4 inch). Glue the rope border with contact cement and press in place, one section at a time. Fill any tiny gaps with a thin paint pen or extra glue and trim. Add a snap closure centered so the border stays aligned when closed.
Use clothespins or painter’s tape to hold the rope while glue sets so it doesn’t shift.
Avoid thick glue under rope — it creates lumps that show through the border.
11. Watercolor Wash + Gold Leaf Specks
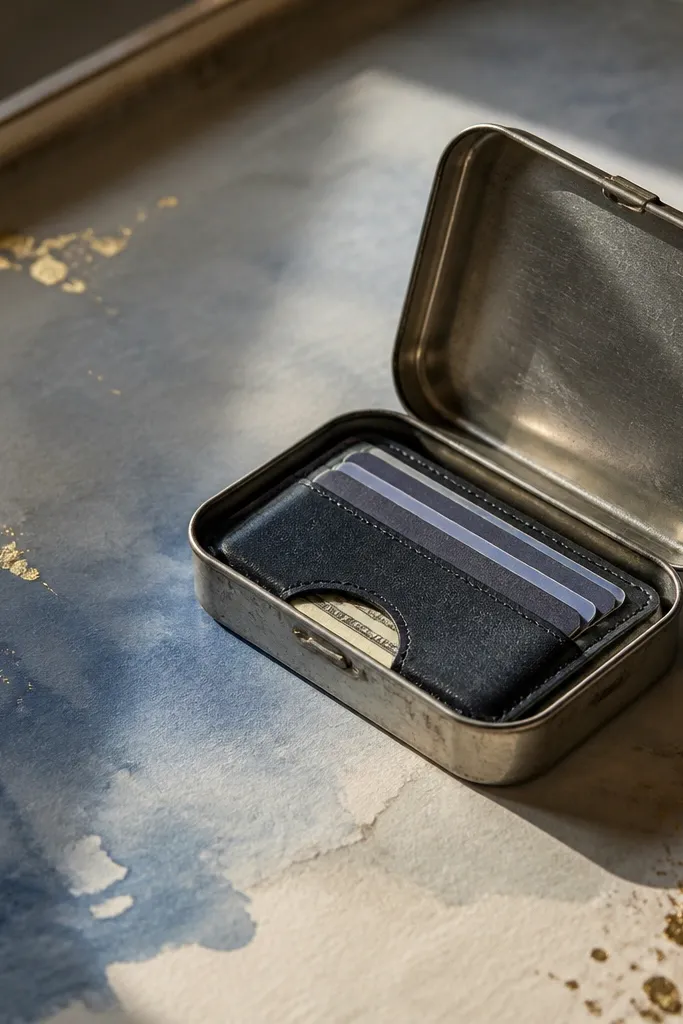
Sand the tin lid lightly and wipe clean. Paint a watercolor wash across the lid face using 2-3 diluted colors, then let it dry completely. Flick gold leaf flakes or metallic gold paint with a stiff brush to create small specks. Seal with clear acrylic spray in thin coats, drying fully between coats. Add magnet closure so the sealed art stays protected when the wallet closes.
Watercolor washes look airy and modern, and gold specks add instant “decor” energy. This design works because the gold is sparse and the tin edges frame the art. It’s beginner-friendly because you can layer watercolor and stop when you like the look. Use gold leaf flakes or metallic paint flecks for specks so you don’t need expensive materials. Seal it so the surface doesn’t rub off.
Skip thisDon’t rush the seal — sealing too early traps moisture and can leave cloudy spots.
Editor's noteMask the hinge area with painter’s tape before spraying clear coats to prevent buildup.
12. Printed Comic Panel Pop-Art Front
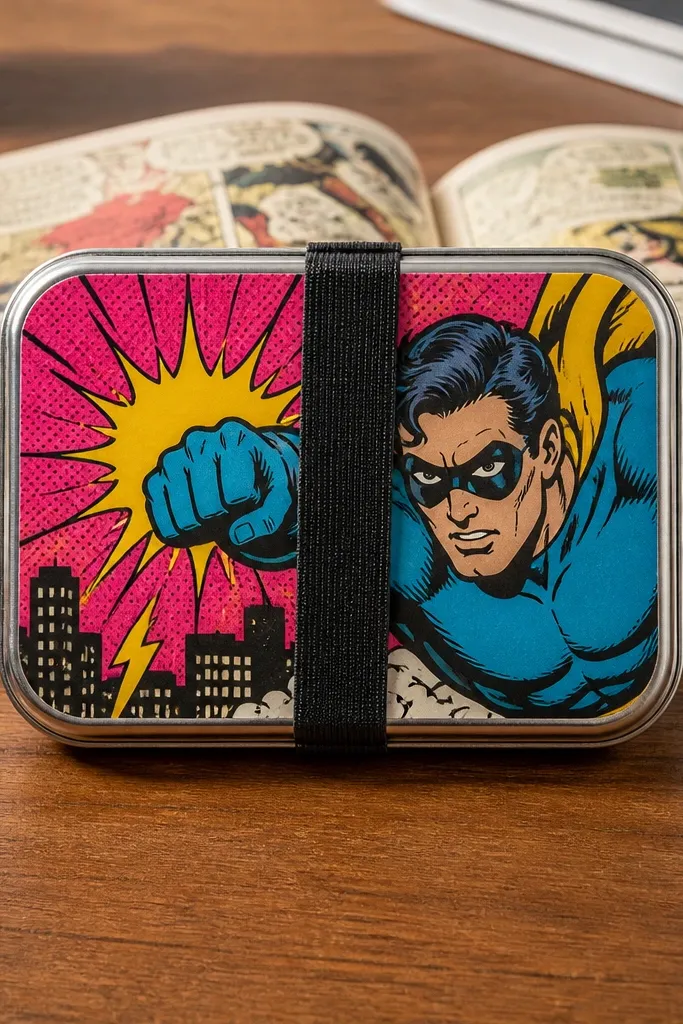
Pop-art looks bold and photo-friendly because the black outlines and bright shapes read from a distance. You get that effect by using a single printed comic panel and framing it cleanly. This is beginner-friendly because the “art” is pre-made; your job is alignment and finishing. The wallet looks genius when the panel sits perfectly centered and the closure hardware matches the black theme. Keep it to one main print so it doesn’t turn into clutter.
Choose a comic print and cut a panel sized for the lid face with a small border margin. Glue the panel to a thin backing like cardstock so it stays flat, then seal with Mod Podge. Add a black outline frame using black craft paint or black fabric tape around the panel edges. Seal again so the print doesn’t scuff. Mount a black snap or magnet closure centered on the front and base.
If your print has tiny text, seal it with 2 coats so the ink doesn’t smear under handling.
Don’t cover the whole tin with multiple prints — it looks chaotic fast.
13. Beaded Fringe Keychain Wallet Charm
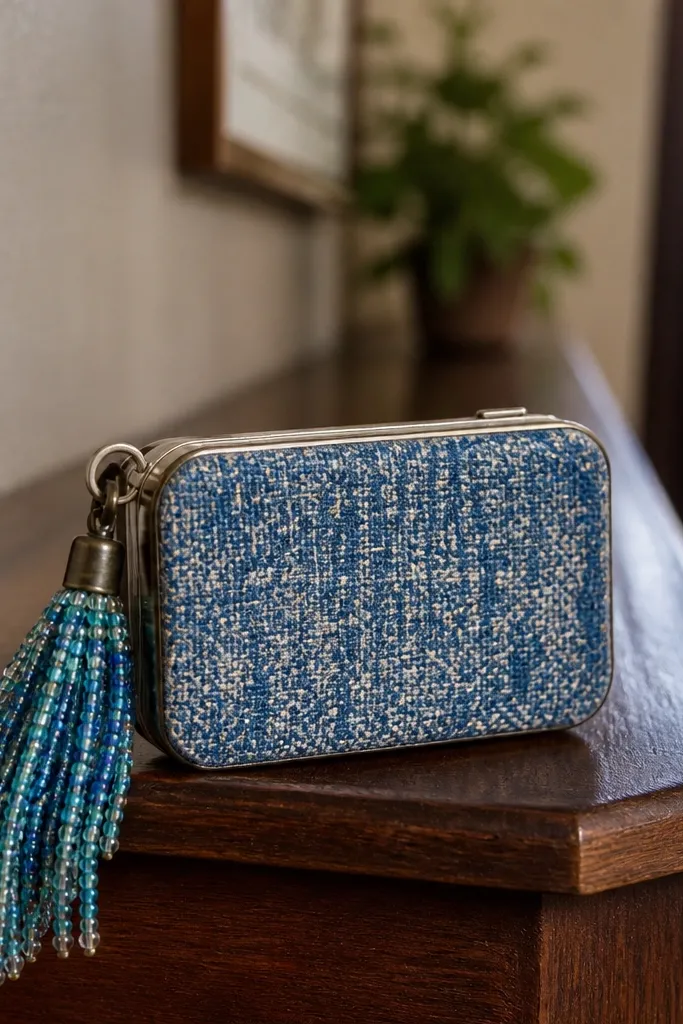
A beaded fringe charm makes the wallet look like a styled accessory, not a craft project. The fringe moves slightly in photos, which adds life without changing the core wallet build. Beginner-friendly comes from attaching the charm after your wallet cover is finished — you’re not weaving beads into fabric while the glue is setting. Use small seed beads and a simple chain so it stays light. This works best for plain base covers (solid fabric or leather) where the charm becomes the focal point.
Finish your Altoids Wallet cover first with a smooth solid fabric or faux leather so it looks clean. Attach a small keyring or jump ring to the wallet base using a metal eyelet or a glued-in ribbon loop reinforced with thread. Thread seed beads onto a thin wire or beading thread to create a fringe strand about 2-3 inches long. Tie a knot and secure with a drop of clear glue, then attach the fringe to the keyring. Test opening and closing to ensure the charm doesn’t snag the hinge.
Use a larger jump ring than you think — it lets the fringe swing instead of twisting tight.
Avoid heavy charms — too much weight makes the lid sit crooked and can bend the tin.
14. Geometric Faux Leather Cutouts with Negative Space
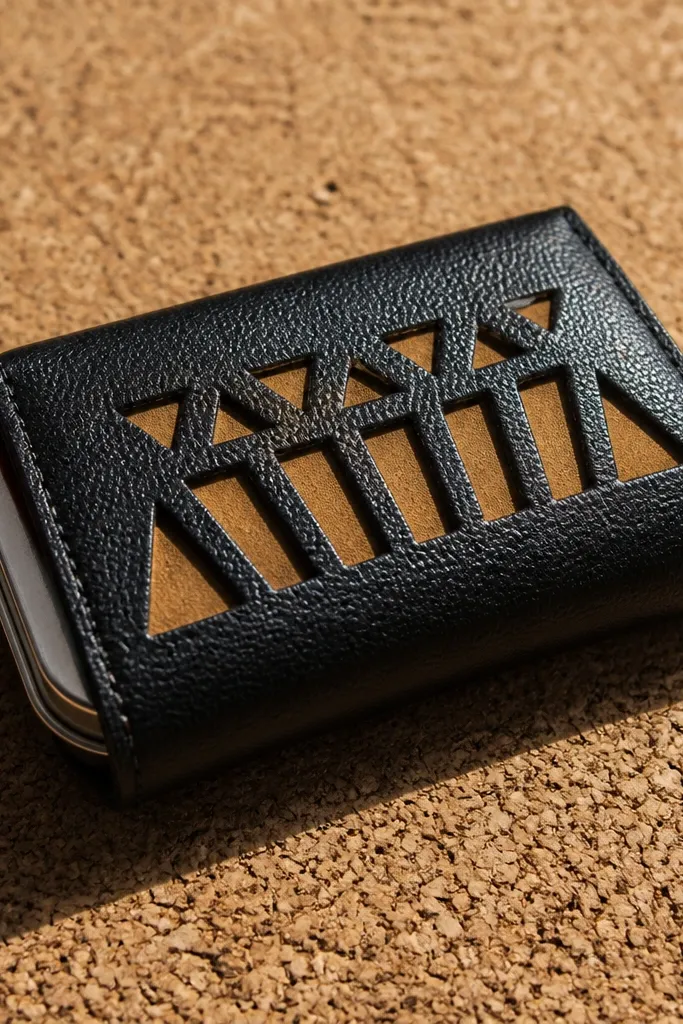
Cover the lid face with a base material (canvas or faux leather) and let glue cure. Make paper templates for 2-3 geometric shapes and trace them onto thin faux leather. Cut shapes carefully with a craft knife and remove them to create cutout pieces. Glue the cutout pieces onto the lid face in your chosen layout, leaving the negative space exposed as part of the design. Seal edges lightly with fabric sealant and add a magnet closure so the front stays flat.
Negative space makes geometric designs look crisp and modern. You’ll get a graphic, fashion-forward look because the cutout shapes are clean and the base material shows through. This is beginner-friendly if you keep shapes simple: rectangles, triangles, and a single diagonal. The tin frame helps you line everything up if you use a paper template. Choose two materials that contrast — like black faux leather on tan canvas.
Skip thisDon’t use thick, stiff leather for tiny shapes — it lifts and creates shadows that look messy.
Editor's noteCut on a glass or cutting mat and press the knife straight down for cleaner edges.
15. Embossed Canvas with Heat-Tool Doodles
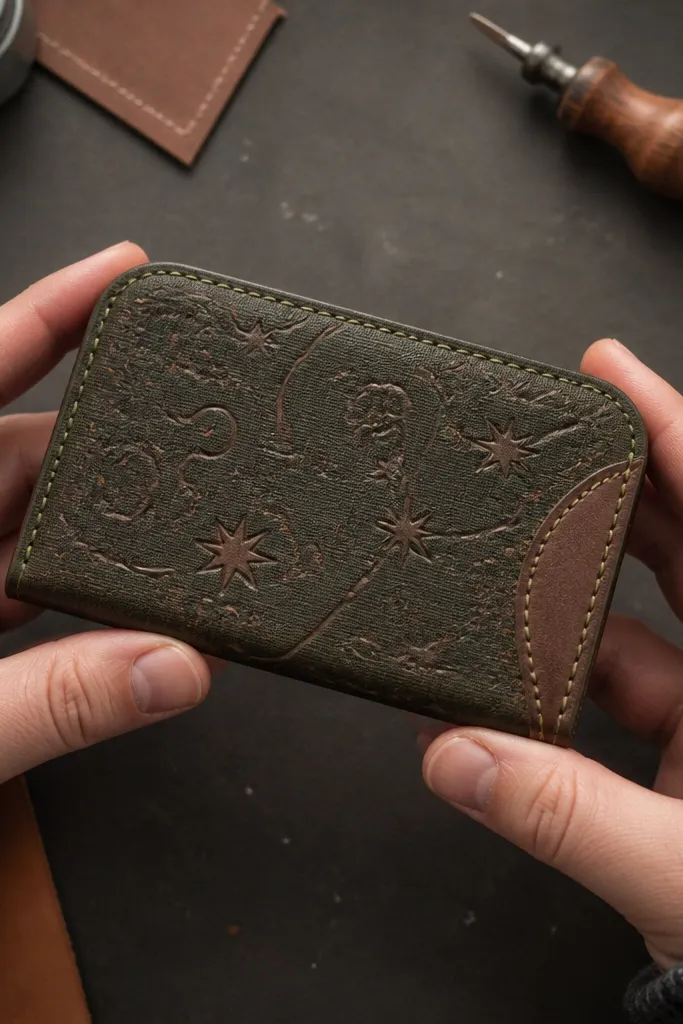
Embossed canvas looks premium because it has depth you can feel, not just see. Heat-tool doodles add personality and make the wallet look like custom art. Beginner-friendly because you’re working on one flat panel and the doodles can be simple lines — stars, squiggles, or tiny hearts. Use a heat embossing tool lightly so you don’t scorch the fabric. Seal it so the texture doesn’t flatten with handling.
Cover the lid face with sturdy canvas and let glue cure flat. Place a thin sheet of craft foam or a heat-safe pad underneath so the heat creates a raised pattern. Use a low heat tool to trace your doodles, pressing lightly to emboss without burning. After embossing, wipe off dust and seal with a thin fabric sealer or Mod Podge matte medium. Install a snap or magnet closure and press under a book for a smooth finish.
Practice on a scrap of the same canvas first so you get the right heat level.
Don’t overheat — scorched fabric turns shiny and looks uneven in photos.
16. Gold Foil Tape Border + Monochrome Photo Strip
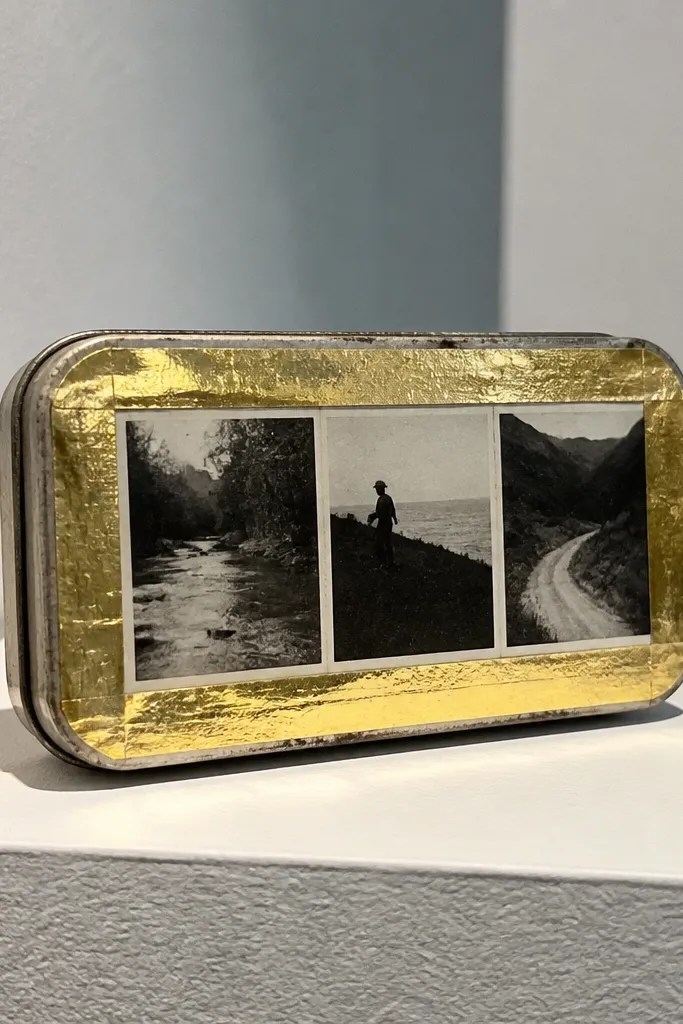
Cover the lid front with matte black, cream, or charcoal fabric. Cut a photo strip from printed black-and-white images and glue it to the center area, then seal with Mod Podge. Apply gold foil tape as a rectangle border around the photo strip, leaving a consistent gap (about 1/4 inch). Trim tape edges with a craft knife for sharp corners. Add a magnet closure and a small gold-toned charm loop if you want extra styling.
Gold foil tape instantly makes a small wallet feel designed. Pair it with a monochrome photo strip (3 small frames) for a clean, gallery look. This is beginner-friendly because tape placement is the main skill, and photo strips are easy to align if you measure. The gold border frames the center so the wallet reads as one cohesive piece. Use matte background fabric so the gold stands out without glare.
Skip thisAvoid glossy background fabric — it reflects light and makes the photo look washed out.
Editor's notePress foil tape with a ruler edge for a crisp seal.
17. Two-Tone Felt Landscape Panel with Zigzag Edge
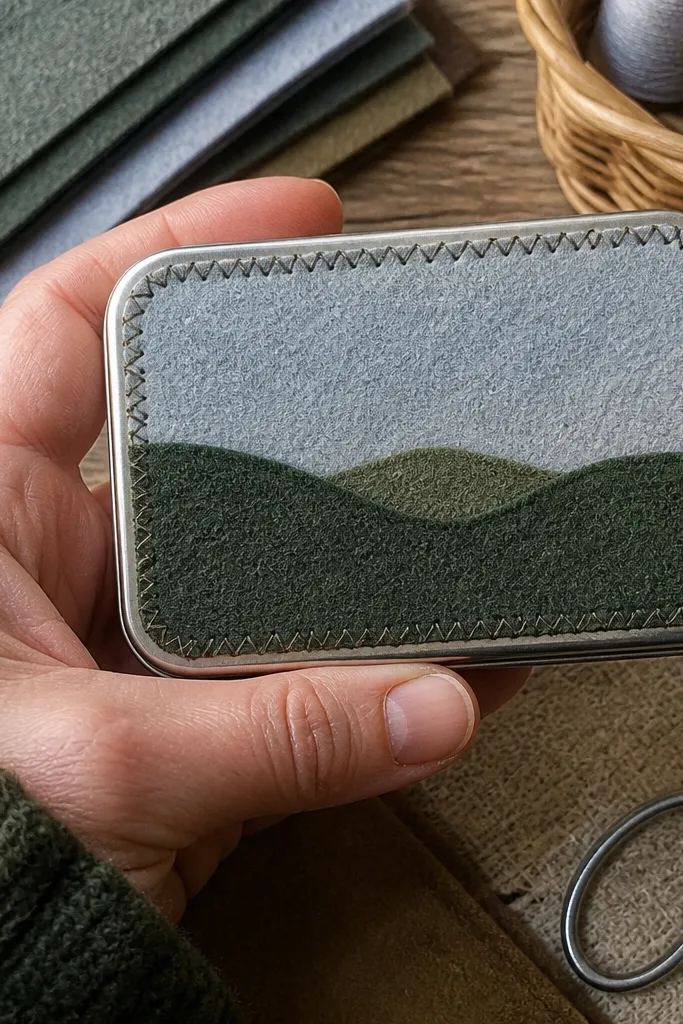
Cut and glue a base felt panel to the lid front. Cut layered felt shapes for the scene (horizon, hill, sun) and glue them on, then stitch around the top layer with a contrasting thread using a zigzag stitch. Add a zigzag stitch along the outer edge of the felt panel for a finished frame. Seal lightly with fabric sealant so the layers stay flat. Finish with a magnet closure and press flat under a book.
Layered felt looks clean and handmade in a good way. This idea uses two-tone felt shapes to create a landscape scene on the lid, with zigzag stitching that looks intentional and decorative. It’s beginner-friendly because felt doesn’t fray, and you can cut shapes without worrying about edges. The zigzag line is also forgiving — even if your line isn’t perfect, it still looks like a design choice. Keep the scene simple: one horizon line, a small hill, and a tiny sun or triangle trees.
Skip thisDon’t stack too many layers — thick felt makes the lid close tight.
Editor's noteUse a slightly thicker thread for the zigzag so the stitching stands out in photos.
18. Canvas + Leather Tab Label Holder
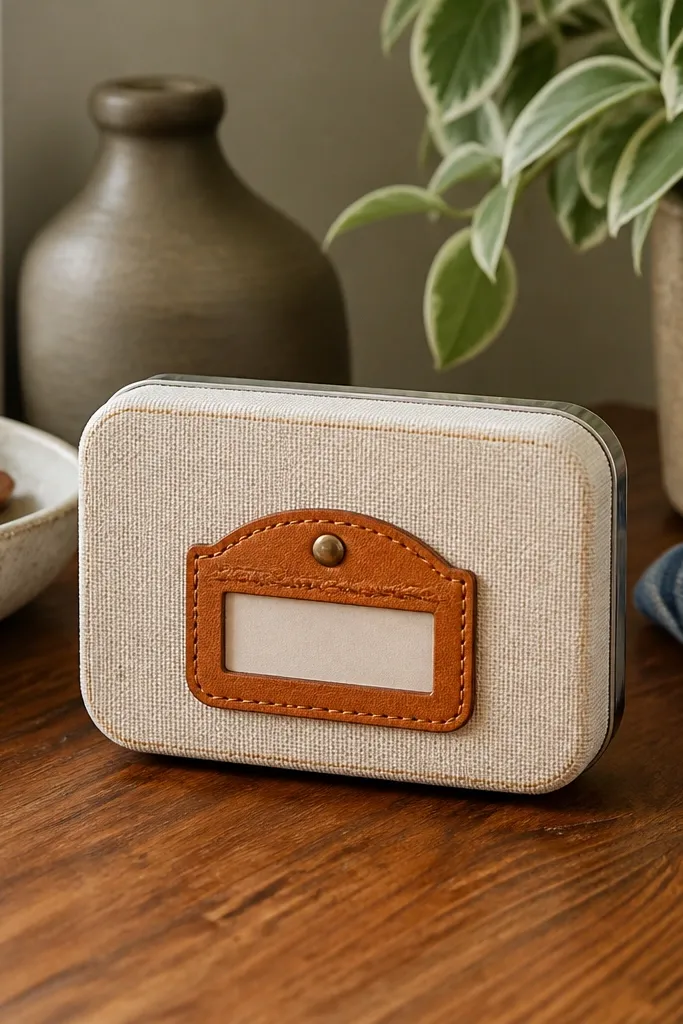
This design makes the wallet look like a tiny organizer with a label system. A leather tab on the front gives you that product-design feel. Beginner-friendly because the tab is a small piece; your main cover can be simple canvas. The look is clean if you keep typography minimal and spacing consistent. It also makes the wallet functional: you can swap label cards for different purposes.
Cover the lid front with canvas and let glue cure flat. Cut a small leather tab sized about 1 inch wide by 2 inches tall and glue it to the front center. Create a label card from cardstock and insert it into a pocket made from a thin strip of clear vinyl or folded paper secured behind the tab. Add a simple closure with a small magnet, then stitch along the tab edges if you want a stronger finish. Trim label edges so they slide in smoothly without catching the hinge.
Use clear vinyl for the pocket so the label text stays visible without extra openings.
Don’t glue the pocket too thick — it prevents smooth insertion.
19. Metallic Spray Gradient + Clear Gloss Topcoat
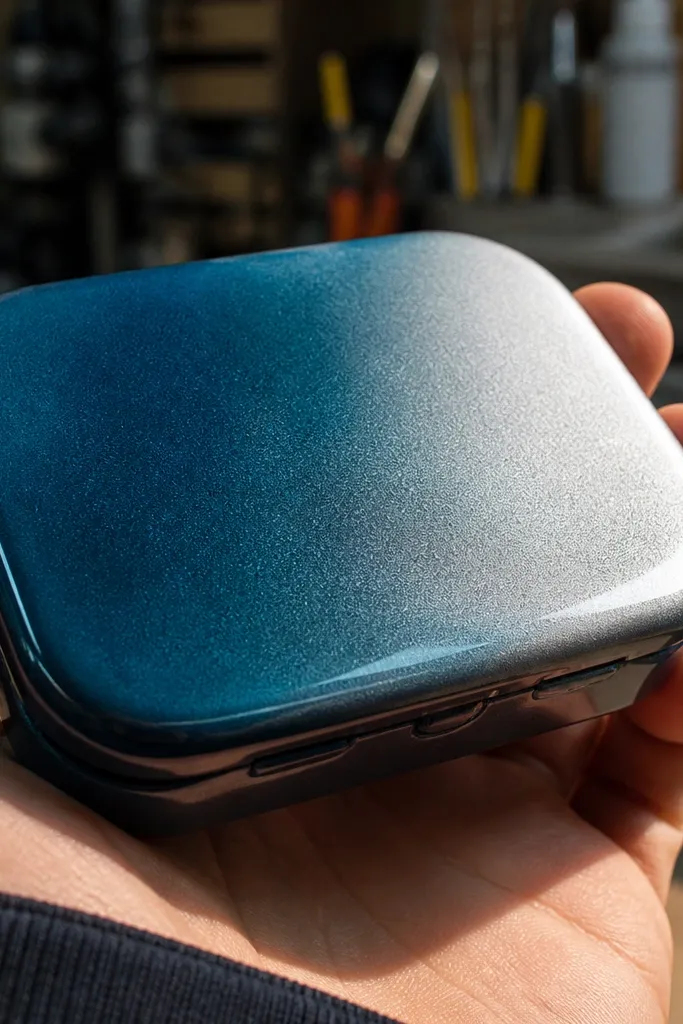
Metallic gradients look “store shelf” because they catch light differently as the wallet moves. The clear gloss topcoat makes it look like a finished product, not craft paint. This is beginner-friendly if you use spray paint in thin coats and tape off edges carefully. Keep the gradient simple: one color fades into another across the lid. A magnet closure keeps the design clean and protects the glossy finish.
Sand the tin lid and wipe clean. Tape off the hinge area and edges you don’t want painted. Spray a base coat, then spray a second metallic color from one side while fading the spray distance. Do 3-4 thin coats, letting each dry before the next. Finish with a high-gloss clear coat in 2 thin layers, then add magnets to the front and base.
Mist the final coat from farther away — it smooths the gradient without creating drips.
Don’t spray heavy — thick metallic layers crack and look like orange peel.
20. Patterned Washi Tape Hinged Spine Detail
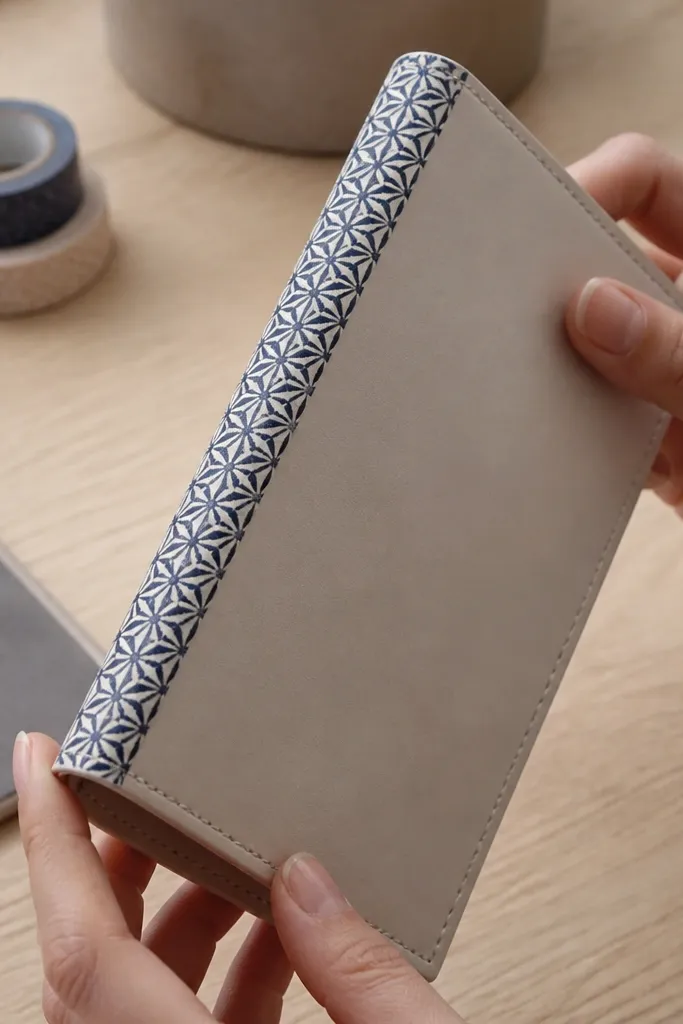
Washi tape is great for a beginner-friendly “designer detail” because it lets you add pattern in one controlled strip. This design keeps the front clean and uses the spine area as the visual interest. It looks genius in photos because you get a crisp band of pattern where the eye naturally follows the opening. Choose one bold pattern and one neutral solid base so it doesn’t look busy. Finish with a clear tape layer so the washi edges don’t peel.
Cover the lid front and base with a solid fabric or faux leather. Apply a patterned washi tape strip along the spine where the lid opens, aligning the strip with the hinge line. Press the tape down firmly and trim the ends neatly using a craft knife. Seal the washi with a thin clear tape overlay or a quick Mod Podge matte seal. Add a snap or magnet closure so the front stays aligned.
Use a ruler to press the tape edges — it prevents lifting and frayed corners.
Don’t place washi over moving hinge metal — friction will peel it fast.
21. Color Block Felt Panels with Tiny Contrast Stitch
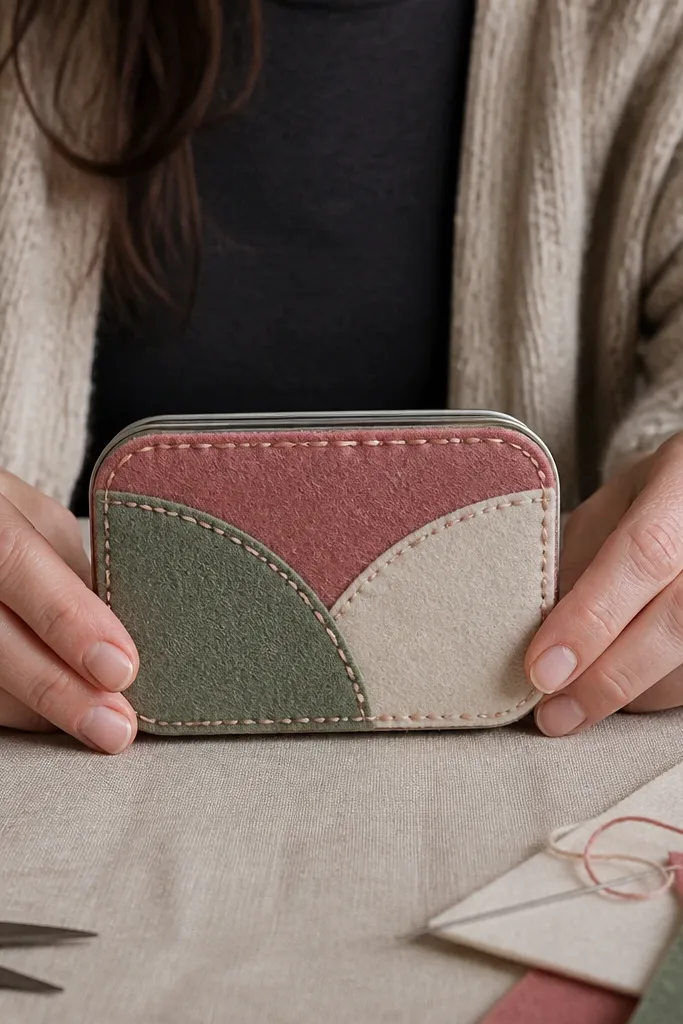
Cut a base felt panel and glue it to the lid front. Cut two additional felt rectangles for the top and side blocks and glue them with even margins. Stitch around the edges of each block with a thin needle and contrasting thread using a simple straight stitch. Add a border stitch along the outer edge of the whole panel to frame it. Install magnets for closure and press flat under a book until set.
Color blocking makes the wallet look like a mini brand product. Felt keeps edges clean and gives you a soft, modern look that photographs well. The tiny contrast stitch adds a “tailor” feel without making it complicated. This is beginner-friendly because you cut simple rectangles and glue them down. Keep the color count to three so it stays sharp and not chaotic.
Skip thisAvoid slippery felt — it shifts while you glue and the blocks end up uneven.
Editor's noteUse a ruler and keep your margins the same on every side; that’s what makes color blocking look designed.
22. Embroidery Hoop Look with Framed Fabric Center
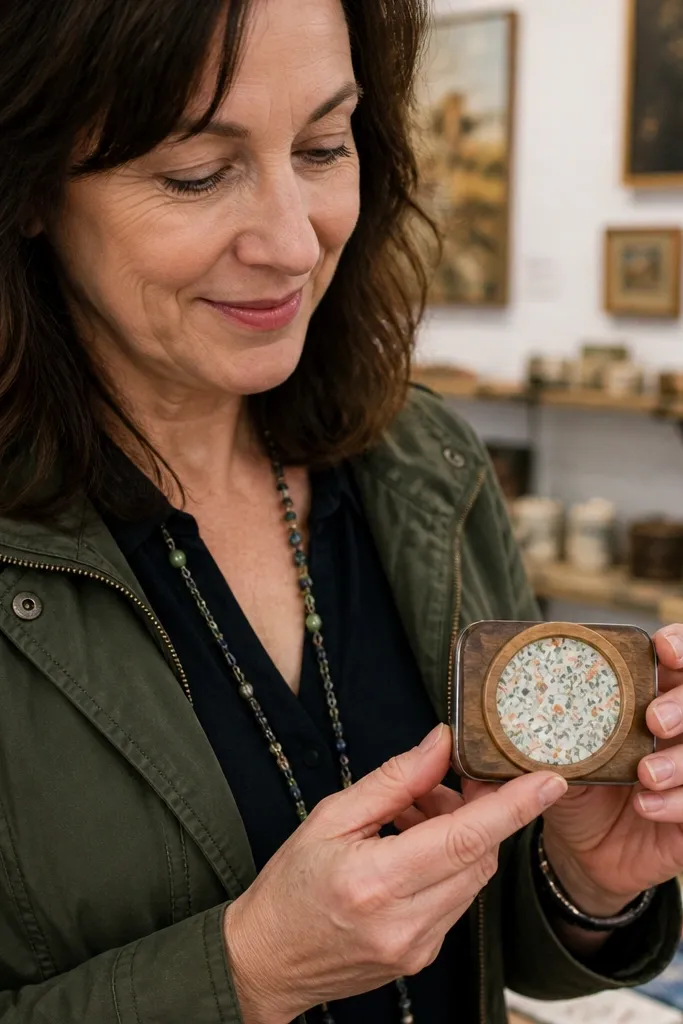
Cover the lid front with a neutral base fabric. Cut a fabric insert for the center and glue it down, then build a frame border using thin ribbon or faux leather strips cut to a rectangle. Glue the frame strips around the insert, keeping consistent thickness on all sides. Stitch around the insert edge with embroidery thread using a backstitch. Add a magnet closure and press flat under a book to keep the frame crisp.
This makes the wallet look like it belongs in a craft gallery. The “frame” effect draws attention to a neat fabric center panel, and the border gives the tin a finished edge. Beginner-friendly because you’re essentially building a frame around a flat fabric insert. It’s also photogenic because the framed center looks like a mini artwork. Use a simple stitched border with embroidery thread for extra definition.
Skip thisDon’t skip trimming the insert — any overhang creates bumps under the frame.
Editor's noteIf your frame strips curl, hold them flat with painter’s tape until the glue sets.
23. Mini Zipper Pull Wallet with Faux Leather Pouch Face
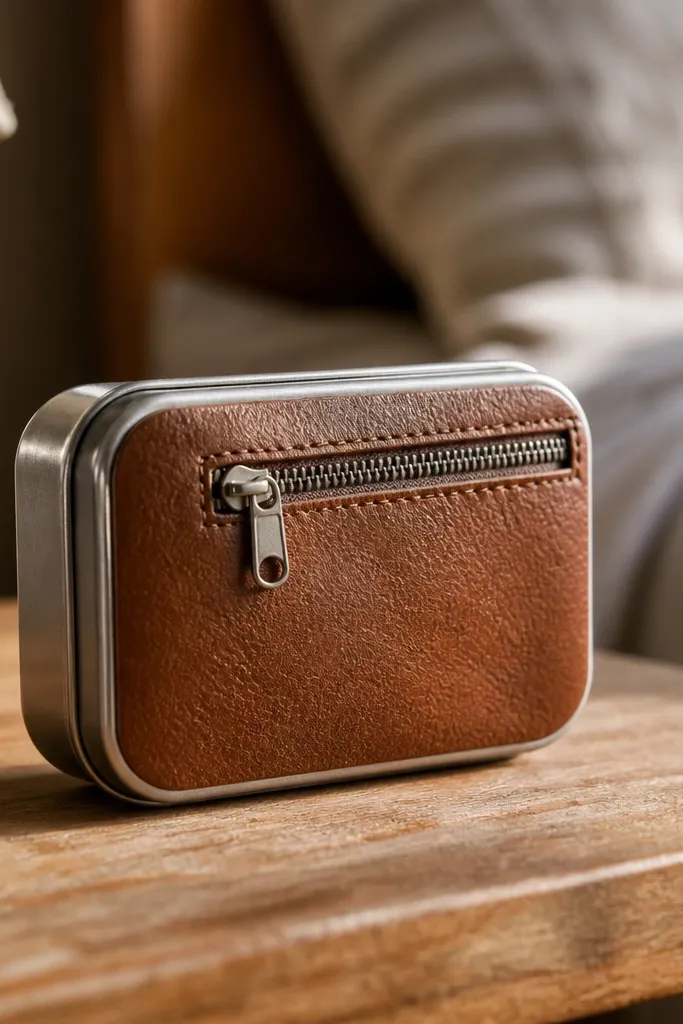
Cover the lid front with faux leather, then cut a pocket panel that sits inside the lid opening space. Sew or glue a short zipper strip to the pocket opening edges, leaving the zipper pull centered. Attach the pocket panel to the lid so it sits flat when closed. Install magnets on the base and lid so the pocket doesn’t pop open. Test the zipper clearance around the hinge before sealing everything.
A tiny zipper pull makes the Altoids Wallet look like a real mini pouch, not just a tin cover. This works especially well if you add a faux leather pocket face on the lid that holds a small card or cash. Beginner-friendly because you can use a short zipper strip sewn to fabric and glued in place, without making a full zipper pouch from scratch. The look is clean and structured — zippers demand neatness, which forces a better result.
Skip thisDon’t glue the zipper directly to raw tin metal without sealing — it can snag or rust.
Editor's noteUse a zipper with a metal or hard pull — it stays visible in photos and doesn’t get buried by fabric.
24. Satin Ribbon Bow Front with Hidden Magnet Closure
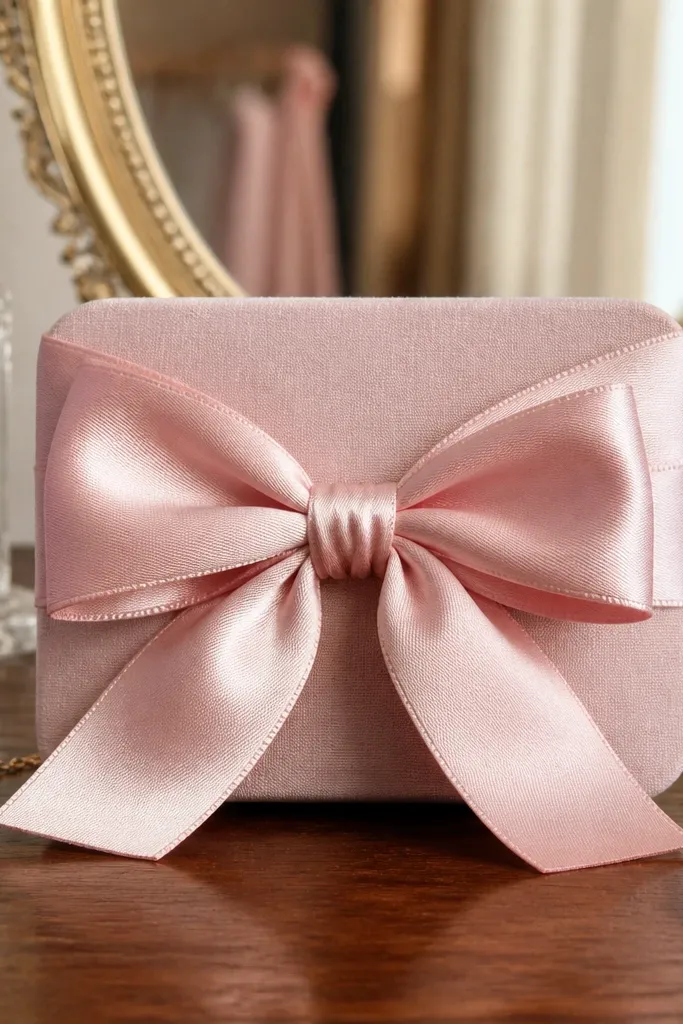
Cover the lid front with a solid fabric panel and let it cure flat. Add a hidden magnet closure by attaching magnets to the lid and base edges, then cover the magnets with a thin fabric patch. Tie a satin bow using a ribbon length about 12-14 inches and secure the center with thread or a zip tie trimmed small. Glue the bow to the center of the lid face, then add a small backing patch so the bow sits flat. Press under a book to prevent bow glue strings from shifting.
A satin bow turns a small wallet into a cute accessory instantly. The key is hiding the closure so the bow stays the focus and the front looks smooth. This is beginner-friendly because the bow is separate from the closure, so you can adjust it after the wallet is built. Choose a single ribbon color and keep the base simple — solid fabric or faux leather. The result looks sweet and styled without needing complex sewing.
Skip thisDon’t use too much hot glue on ribbon — it can soak through and make glossy spots.
Editor's noteCut ribbon ends at an angle and seal with a quick flame pass for clean edges.
25. Leather-Look Stitch Wallet with Contrast Thread Outline
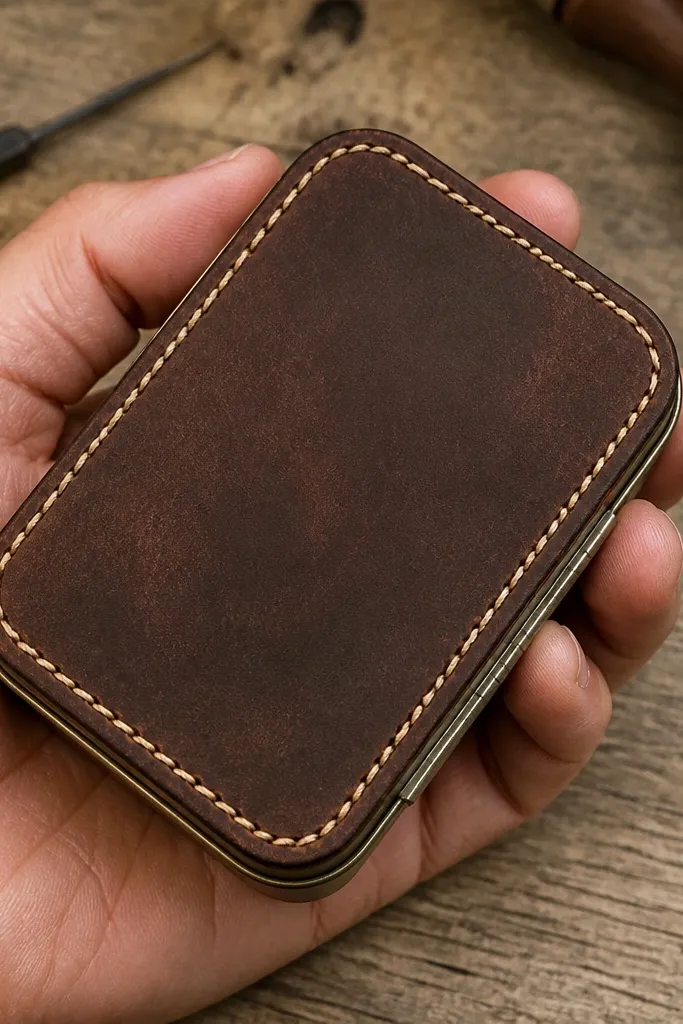
Contrast outline stitching makes a wallet look like real leather goods. You’re using a simple stitched border around the lid face to create structure and make the design look intentional. This is beginner-friendly because the border is one shape — a rectangle — and you can measure the spacing from the edge. Pick faux leather and a bright thread color like tan on black or white on navy. It photographs sharply because the thread catches light.
Cover the lid front with faux leather and glue it smoothly to avoid wrinkles. Mark a border rectangle about 1/4 inch from the edge using a ruler. Punch small stitch holes along the border with an awl, spaced about 1/8 inch apart. Stitch around the border with waxed thread, pulling evenly and knotting neatly at the back. Add a snap or magnet closure and press under a book to keep everything flat.
Use a straightedge to keep the border corners square — that’s the difference between cute and “crafty.”
Avoid loose thread tension — slack stitching looks uneven and messy.
26. Monochrome Floral Vinyl Decal with Matte Background
Monochrome floral looks classy and reads well in photos because it has contrast without loud color. Vinyl decals also stay smooth and wipe clean, which makes the wallet look newer longer. This is beginner-friendly if you use pre-cut vinyl or print-and-laminate style decals. The matte background reduces glare and makes the floral lines stand out. Add a neat border so the decal doesn’t look like it’s just stuck on.
Cover the lid front with matte fabric or matte faux leather. Apply a monochrome floral vinyl decal sized to the center panel, pressing from the center outward to avoid bubbles. Seal the edges with thin clear sealant so it doesn’t lift at the corners. Add a thin faux leather border or fabric tape border around the decal for a framed look. Install magnets for closure and press flat while glue sets.
If vinyl has bubbles, prick them gently with a pin and press the air out toward the edges.
Don’t place vinyl too close to the hinge — repeated flexing can peel it.
27. Painted Tile Look with Grout Lines (No Ceramic Needed)
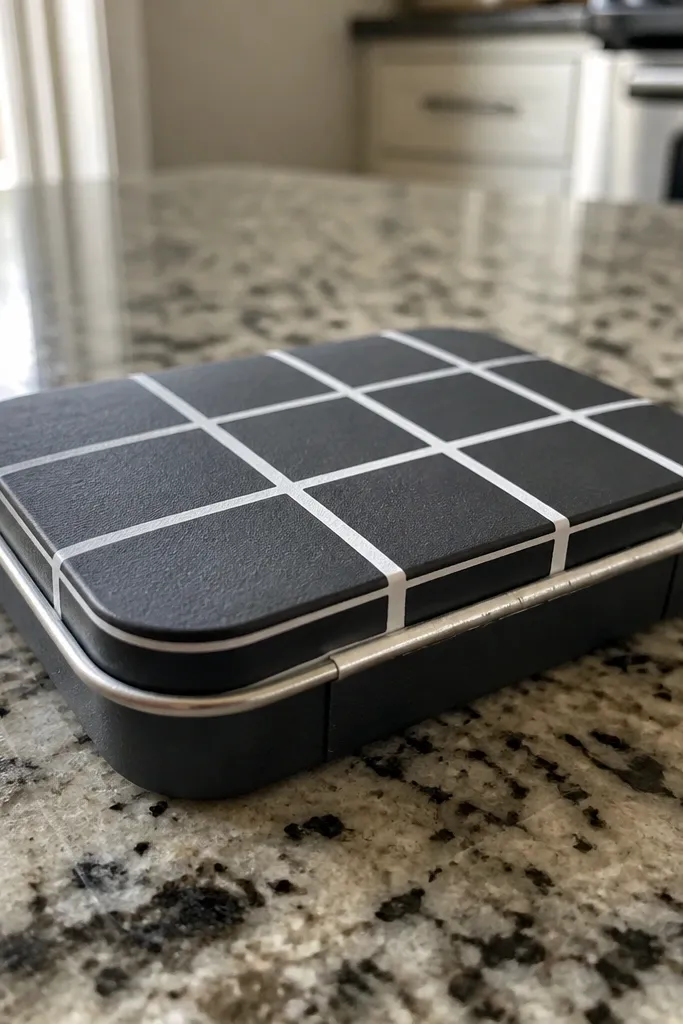
Paint the lid front a base color and let it dry. Use painter’s tape to mask a grid of small squares, leaving thin gaps for grout lines. Paint grout lines in white acrylic, then remove tape carefully while paint is still slightly tacky. Paint or decorate each tile square with a simple color block or small dot pattern. Seal with clear acrylic and add a magnet closure so the surface stays protected.
Tile patterns look genius because they look like miniature architecture. You get that effect by painting a grid with grout-like lines so the tin becomes a tiny floor. Beginner-friendly because you can do it with acrylic and painter’s tape. Keep the palette tight: dark base and white grout lines, or pastel tiles with a cream grid. Finish with a clear coat so it looks glossy and intentional.
Skip thisDon’t paint grout too thick — it chips when the lid flexes.
Editor's noteUse thin painter’s tape for narrow grout lines; wide lines make it look like a child’s craft.
28. Fabric Rosette Cluster on Front Center
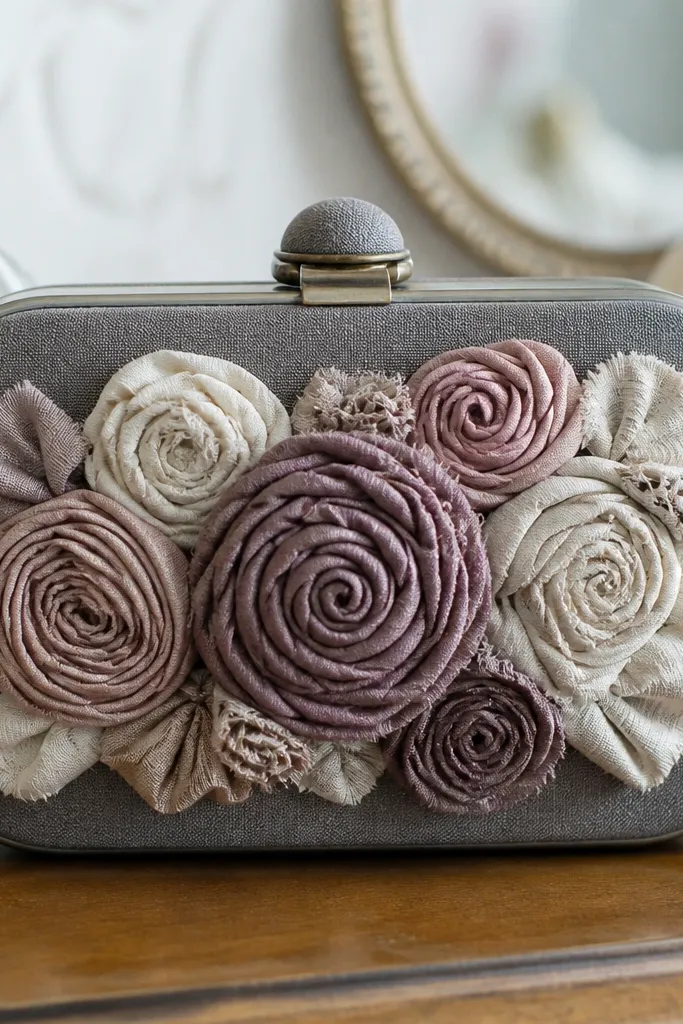
Cover the lid front with a solid base fabric and let it cure flat. Make or cut 3-5 fabric rosettes in coordinating colors and sizes (small, medium, small) so the cluster has shape. Glue the rosettes to the center of the lid face and hold in place with gentle tape while drying. Add a thin backing patch under the rosettes if you need extra stability. Install a magnet closure on the lid and base edges, then press flat under a book.
Fabric rosettes look like a handmade corsage, which makes a tiny wallet feel special. You’re using texture and layers, not prints, so it still looks good even if the fabric is plain. Beginner-friendly because you can buy or pre-make rosette shapes from fabric strips, then glue them onto a solid base. Keep the cluster small and centered so it doesn’t overwhelm the tin. Add a hidden magnet closure so the front stays smooth under the rosettes.
Skip thisDon’t stack rosettes too high — thick clusters keep the lid from closing flat.
Editor's noteUse fabric hot glue sparingly and press with a scrap cloth to prevent shine spots on the fabric.
29. Lined Card Slot Insert with Label Window
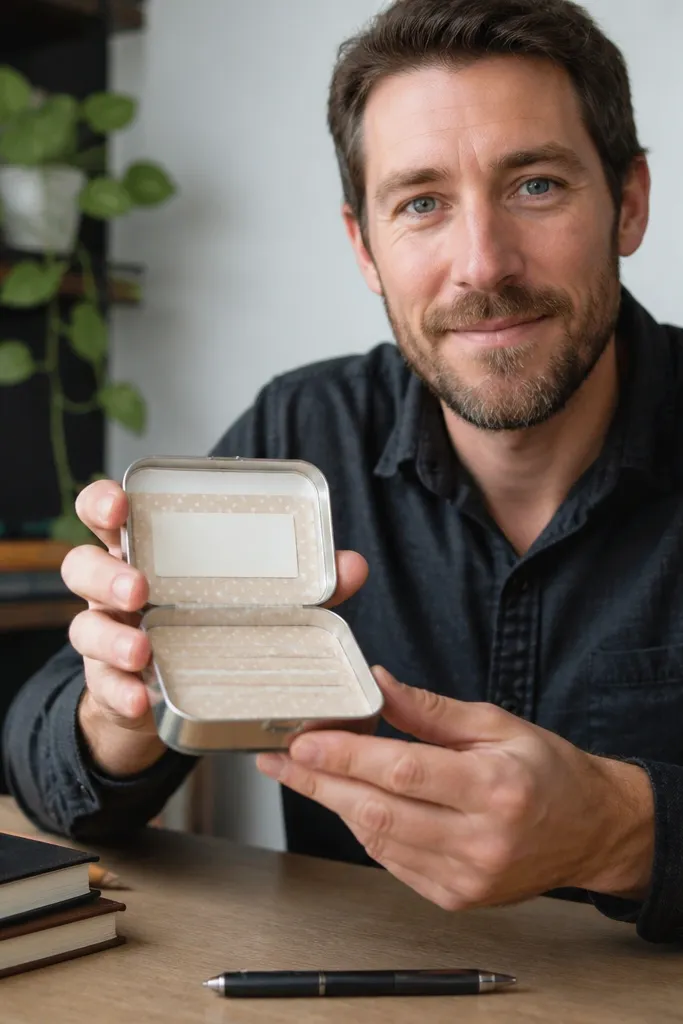
This is the functional aesthetic: it looks neat because the inside has a structured slot and the label stays visible. The outside can be simple, but the inside detail makes the whole wallet feel designed. Beginner-friendly because you’re building one pocket insert with straight folds and clean edges. The clear label window adds a crisp, “product” feel, and it’s easy to swap. It also helps you organize cards or notes without bulky bulk.
Cover the lid front with a simple fabric or faux leather base. Cut an insert panel from thin cardstock or craft foam covered with fabric lining, sized to fit inside the lid area. Create a pocket opening by folding the fabric-lined panel and gluing the sides only, leaving the top open. Add a small clear window by gluing clear vinyl to the front of the insert area. Finish with magnet closure so the slot stays aligned when closed.
Use thin craft foam for the insert so it holds shape but still flexes with the lid.
Avoid thick layers inside — they force the lid to close tight and scuff the label window.
30. Glow-in-the-Dark Constellation Dot Pattern
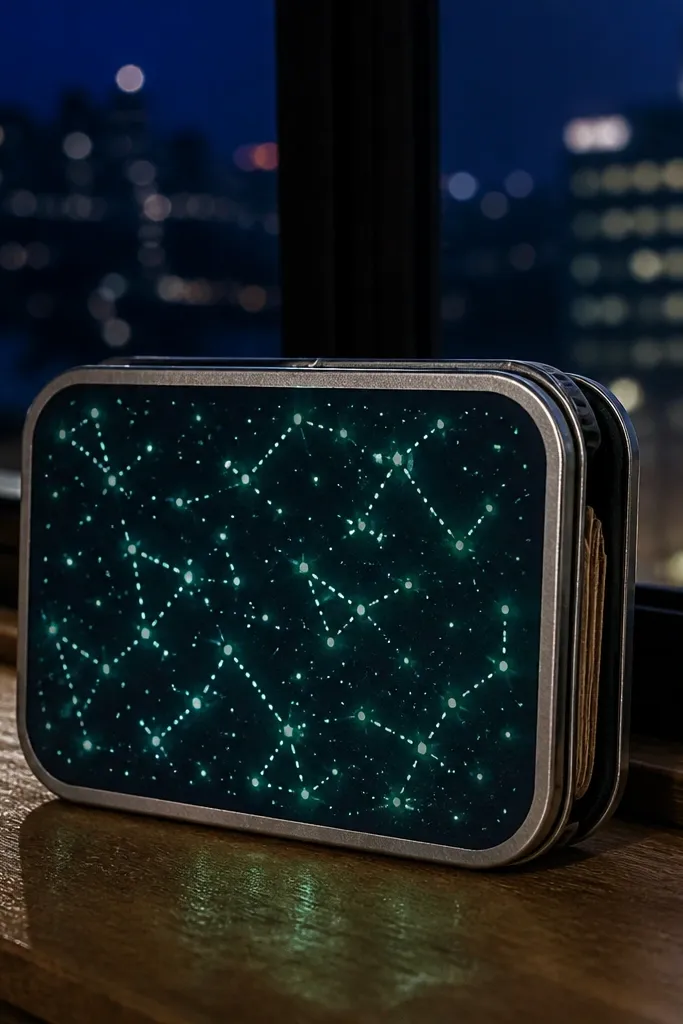
Cover the lid front with dark fabric and let glue cure flat. Use a stencil or printed constellation layout to mark dot spots with a fine pen. Apply glow paint dots using a paint pen, keeping dot sizes consistent (about 1/8 inch). Let it dry fully, then add a thin clear sealer so the dots stay protected. Install magnets for closure and press under a book to keep the lid flat.
Glow dot constellations look cool in daylight too because the dots are crisp and spaced like a map. In photos, it reads as dark-sky decor, and the glow makes it feel like a fun secret. Beginner-friendly because you can stencil dot positions and use glow paint pens. Choose a dark base like black or navy so the dots pop. Seal the paint once dry so it doesn’t rub off.
Skip thisDon’t apply sealer too soon — it can smear the glow paint while it cures.
Editor's noteCharge the glow dots with a flashlight before sealing if you want to test intensity early.



