
1. Pastel Strawberry Squishy with Seed Confetti
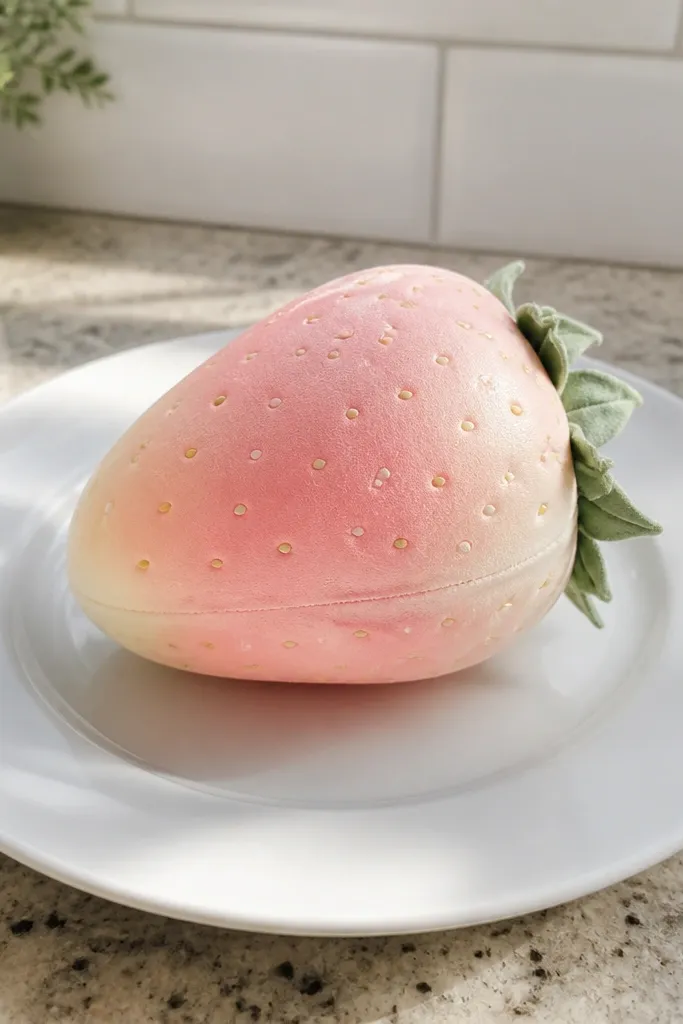
This one looks good because the strawberry body uses a smooth rounded outline and a color gradient that reads “soft” even in flat lighting. The seed confetti pattern adds texture without needing actual fabric, so your squishy still looks detailed when you squeeze it. It’s a great starter because the seam line sits along the curved side, which hides minor glue bumps. Make it for a desk buddy or a shelf accent where it will be seen from front-on most of the time. Skill level is beginner — the only tricky part is cutting the leaf shape cleanly.
Print the strawberry template on thick cardstock, then cut the two mirrored halves and the leaf piece. Score the fold lines with a dull butter knife so the curves stay smooth. Glue the glue tabs on one half, place a thin paper liner inside if your fill sheds, then add fiberfill until the strawberry feels firm when pressed. Close the second half, press the seam for 30 seconds, and let it dry flat before you add any final seed dot coloring.
Color the seeds with a fine black marker before assembly so ink doesn’t bleed into the seam.
Don’t overfill — a stuffed strawberry will bulge and the printed seeds will look warped.
2. Cream Puff Squishy with Blown-Sugar Sprinkle Band
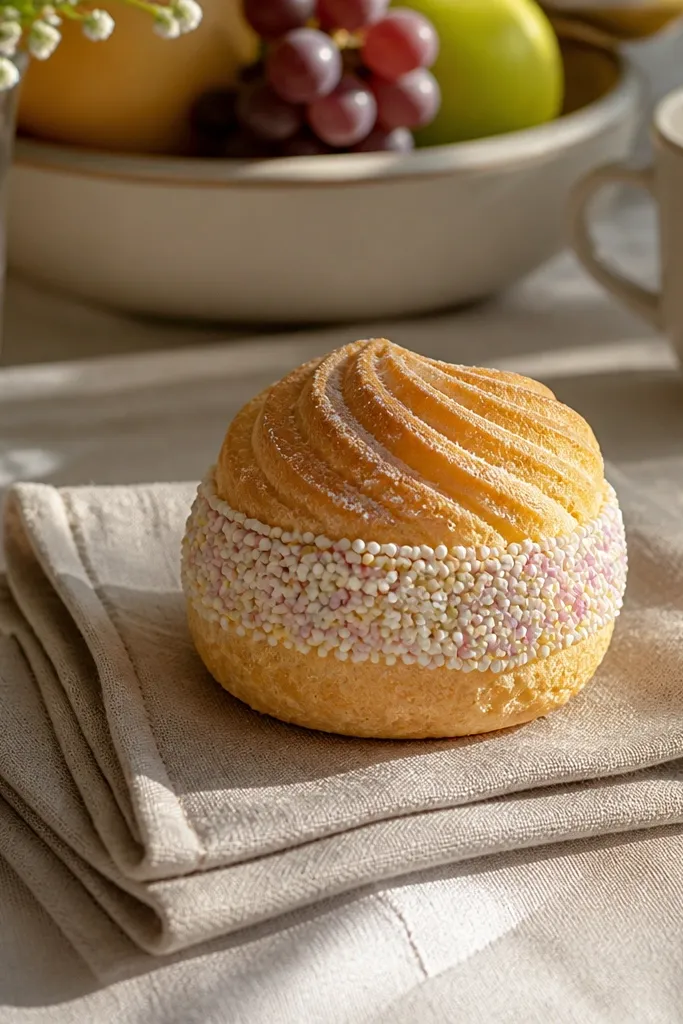
This squishy is aesthetic because the template uses layered shapes that mimic a real cream puff: a domed top, a band, and a soft swirl. The sprinkle band gives you a photo-friendly pop of color even if your lighting is plain. It also holds up well because the body is rounded and symmetrical, so small seam differences don’t stand out. Put it in a kitchen corner, on a baking-themed wall shelf, or next to your planner. It’s a medium-easy build where the main job is clean layering and even filling.
Print the puff base and the band pieces on cardstock in warm cream and light beige. Cut everything, then score along the fold lines so the domed top keeps its curve. Assemble the main dome first, fill with polyester fiberfill, then close and press the seam firmly. Next, glue the band around the middle using a thin layer of glue stick and align the swirl points before it sets.
Use two colors for the sprinkles: light pink and pale gold, so the band reads dimensional.
Skip thick liquid glue for the band — it can soak the paper and create dark spots.
3. Matcha Cup Squishy with Glossy Rim Effect
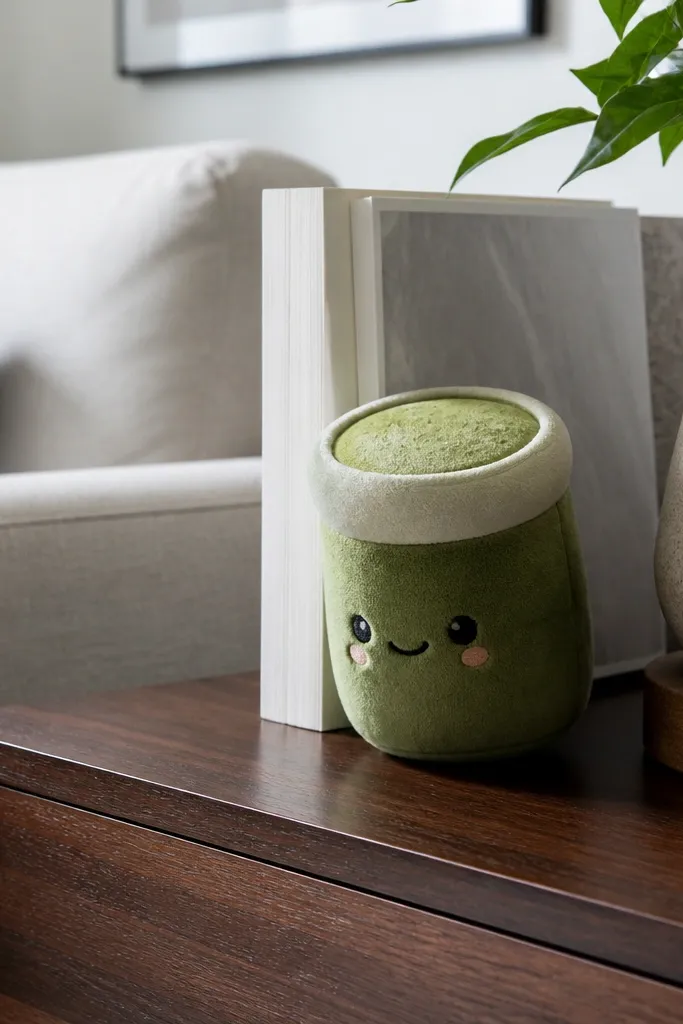
A matcha cup looks expensive when the rim reads clean and the top surface has tiny texture dots. This template does that by separating the cup body from the lid/top, so you get a crisp edge instead of a smudgy print. The green is the star — add depth with a darker green around the lower cup and keep the rim pale so it looks glossy. It’s great for desk decor because it’s squat and sturdy-looking in photos. Expect a slightly longer build since you’re aligning the lid/top piece precisely.
Print the cup body and lid on cardstock; use matte paper if you want less glare. Cut the pieces and score the fold lines. Assemble the cup body into a cylinder-ish shape, fill lightly with fiberfill, then close the seam. Glue the lid/top piece on last, pressing only around the edges so the center stays slightly springy.
Editor's noteAdd a thin highlight line on the rim with a white gel pen after drying for a “gloss” look.
Skip thisDon’t glue the lid all the way through the center — you’ll kill the squish.
4. Midnight Cat Squishy with Moonlit Eyes
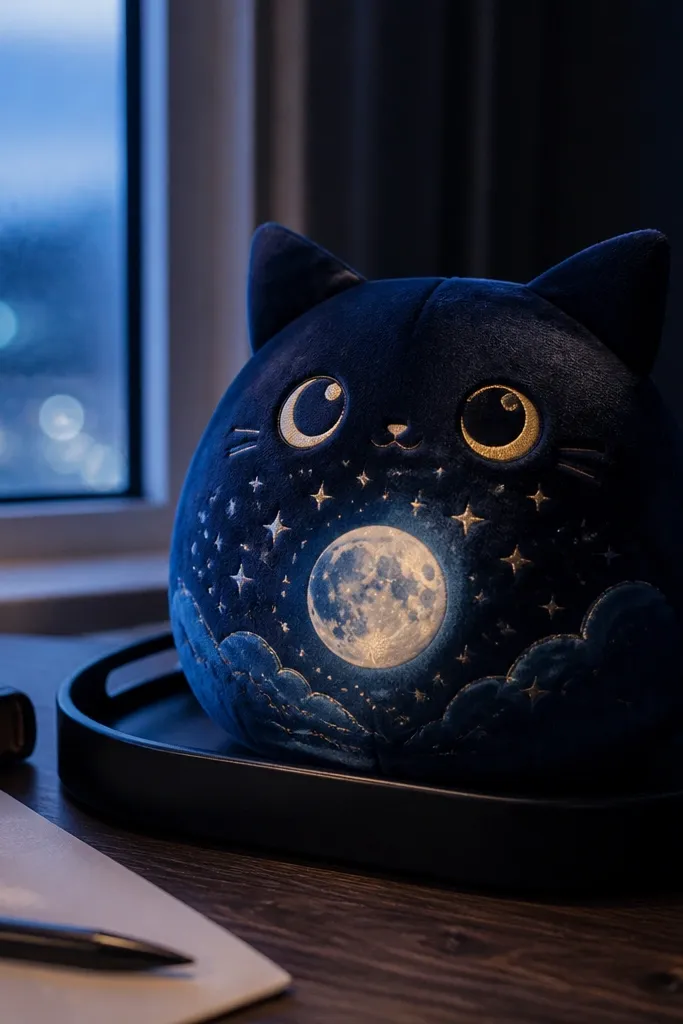
This squishy is aesthetic because the template uses high-contrast features: bright eyes against a deep navy body. The moon graphic adds a calm, night-sky vibe without clutter. The template is also designed so the face sits on the front panel, which keeps expression readable even when the squishy compresses. This is the one to make if you want something that looks good from arm’s length, not just close-up. It’s medium difficulty due to the ear shapes and the need to keep the face aligned.
Print on thick cardstock, then cut the cat halves and the ear pieces. Score fold lines and assemble one half with glue tabs, leaving the face panel oriented correctly. Fill with foam beads inside a thin paper liner so the beads don’t poke through. Close the second half and press the ears gently so they keep their silhouette; let it dry under a flat book for 10 minutes.
Color the eye shine with a tiny white gel dot — it makes the whole squishy look sharper in photos.
Don’t use watery glue — it can warp dark printed areas into a wavy face.
5. Lavender Bunny Squishy with Fluffy Tail Puff
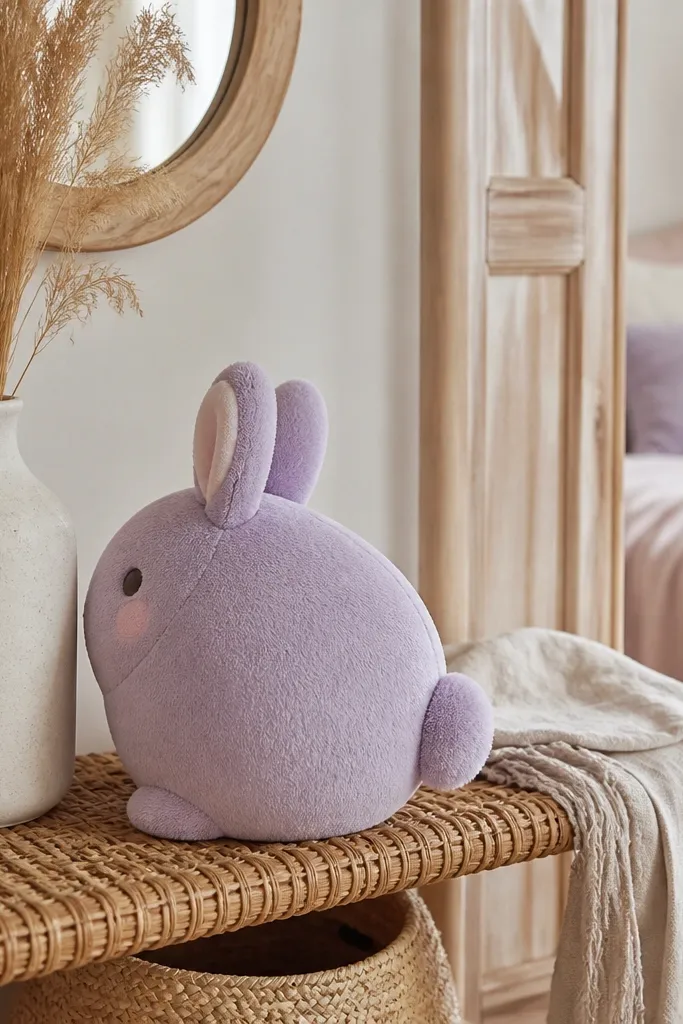
Bunnies look best when they have a rounded body and a tail that reads like a soft puff. This printable is built with a tail section that sits slightly proud of the back, so your squishy has depth even though it’s paper. The lavender palette stays calm in any lighting, which makes it easy to style with neutral decor. It’s also forgiving — if your seam line isn’t perfect, the tail shape and body curve hide it. Build time is short, and the assembly is beginner-friendly.
Print the bunny template on lavender cardstock and cut both body halves. Score the folds, assemble one side, then fill with fiberfill until the bunny holds a gentle dome. Glue the second half and press the seam flat. Finally, attach the tail piece on the back with small glue tabs so it has lift instead of flattening into the body.
Editor's noteUse a slightly darker purple marker around the tail edge for a shadow that makes it look 3D.
Skip thisDon’t skip scoring — unscored folds on rounded animals look creased after squeezing.
6. Rosy Hearts Squishy with Stitched Outline
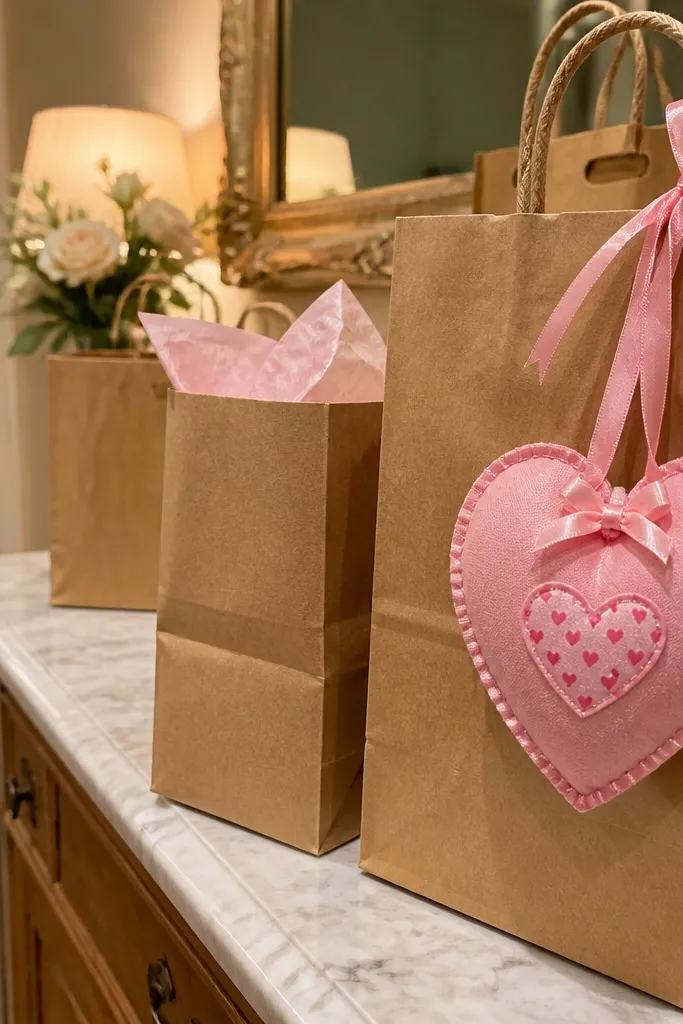
This is an aesthetic Paper Squishy because the template looks like stitched fabric, not just printed heart art. The stitched outline gives you a crisp border that stays visible even when the heart compresses. The bow or small detail keeps it cute without turning it into a cluttered Valentine blob. Make it for gift bags, desk decor, or as an extra-tactile charm on a keychain clip. It’s an easy build with a clean shape and minimal seam visibility.
Print on medium-weight pink cardstock and cut both heart halves. Score fold lines lightly, then assemble one half with glue tabs. Add fiberfill in small pinches so the heart edges stay smooth; close the second half and clamp or press the seam for 20 to 30 seconds. If the template includes a bow, glue it on after the main seam is fully dry.
Use a fine black marker to thicken the stitched outline slightly — it reads better in photos than thin printed lines.
Don’t overfill a heart — the pointy top will deform and the stitched outline will look stretched.
7. Citrus Slice Squishy with Segmented Wedge Lines
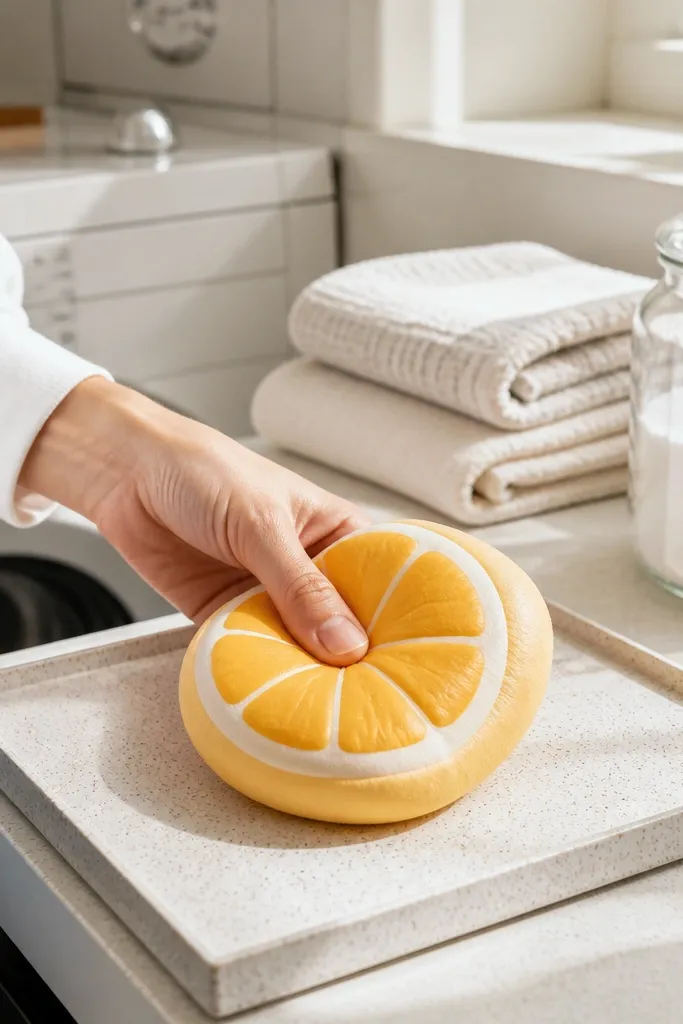
Citrus slices are photogenic because the template uses segmented wedge lines that look like real peel and pulp. Even when you squeeze it, the segments stay readable, which is the whole point for aesthetic Paper Squishy ideas. The rind edge is a simple design trick — a pale outline makes the whole piece look cleaner and more “real food.” It’s also a great choice if you want a squishy that looks good on a tray or in a fruit-themed corner. Difficulty is beginner to medium.
Print the citrus slice template on cardstock in orange and pale yellow for the rind. Cut both halves and score the fold lines so the slice keeps its round thickness. Assemble one half, fill with foam beads inside a liner for even squish, then close and press the seam. Add any pulp wedge accents by coloring the printed lines darker before final drying if the template is blank.
Editor's noteLightly sand the seam edge after drying with a nail buffer for a smoother outer look.
Skip thisAvoid bulky foam — it creates flat spots that ruin the segmented look.
8. Ocean Wave Squishy with Gradient Blue Roll
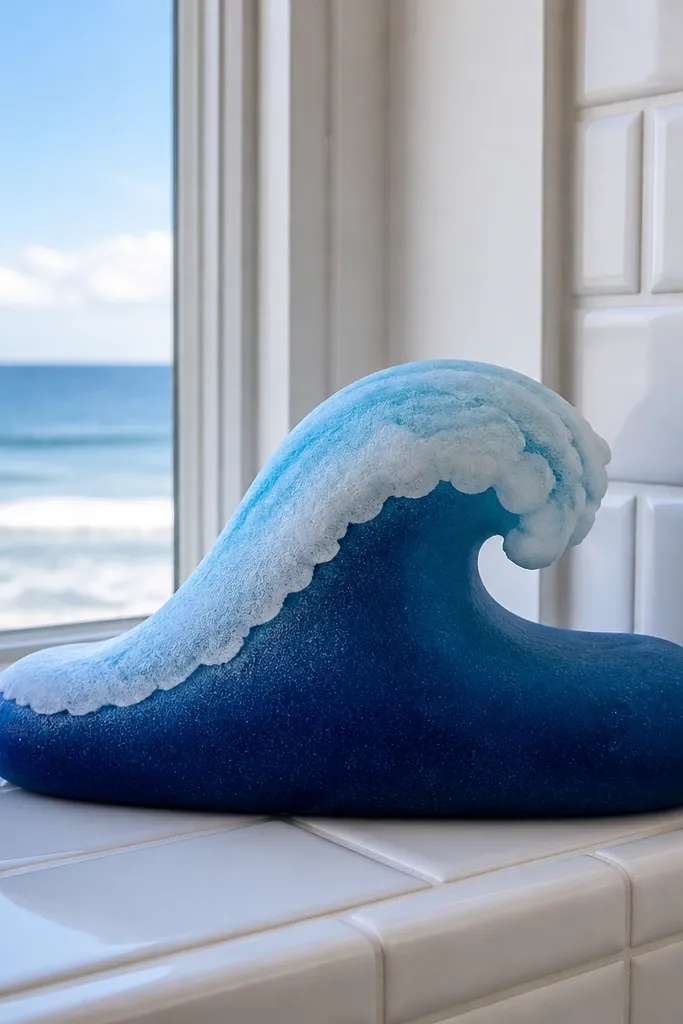
This one is aesthetic because the gradient and crest work like a real wave: darker blue body, lighter foam edge, and a crest line that stays sharp. The printable uses a wave-shaped outer edge, which makes the squishy look dynamic even before it’s squeezed. It also hides small assembly errors because the foam crest line breaks up the seam visually. This is a top pick for bathroom shelves, beach decor, or just a calming desk vibe. Plan for medium difficulty due to the wave contour.
Print the wave base and crest layers on cardstock; use thicker paper for smoother gradients. Cut and score fold lines, then assemble one half with tabs. Fill with fiberfill, but keep it slightly under-full so the wave edge doesn’t puff out. Close the second half, then glue the crest piece on top after the main seam is set.
Editor's noteColor the crest foam with a white gel pen along the template line so it pops in overhead light.
Skip thisDon’t use glossy paper — gradients reflect and look patchy in photos.
9. Galaxy Donut Squishy with Star Sprinkle Outer
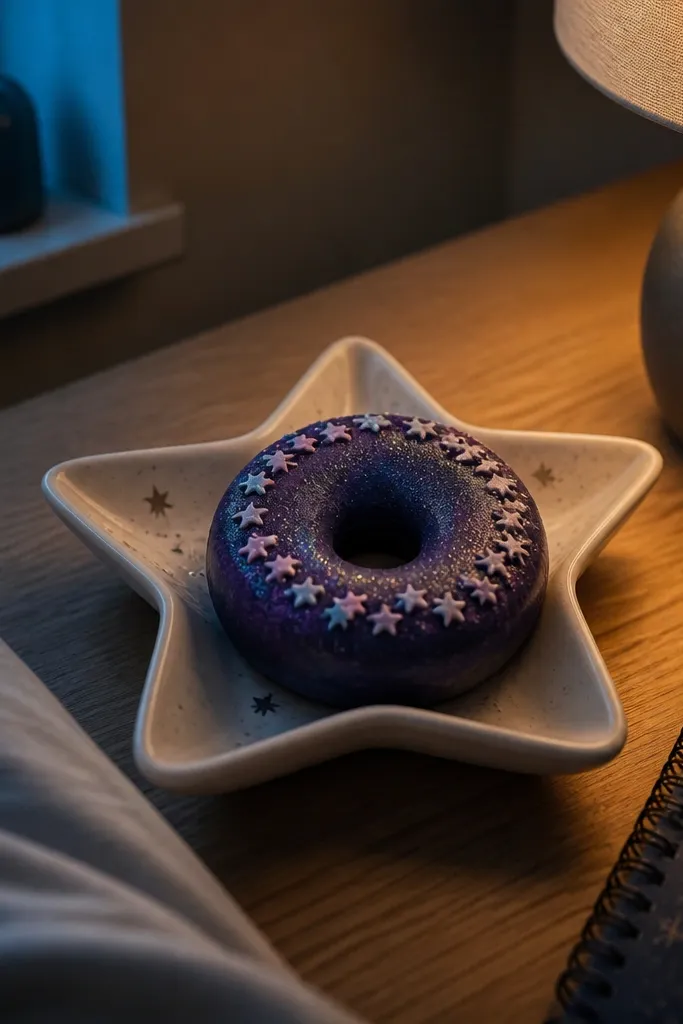
A galaxy donut reads instantly because of the ring shape and the star sprinkle band. The printable is designed with a donut outline that keeps the donut hole defined, so the squishy still looks like a donut when you squeeze it. The purple and black contrast also makes the seam less noticeable — it blends into the darker glaze. This is a fun one for teens and anyone who wants decor that looks like “cosmic candy.” Difficulty is medium because the donut ring needs careful alignment.
Print on cardstock and cut out the donut halves and the sprinkle ring band. Score folds, assemble the first half, then fill with foam beads for a bouncy feel without heavy sag. Close the second half and press the ring edges. Glue the sprinkle ring band around the outer edge last, aligning the star positions before the glue sets.
Editor's noteUse a metallic silver gel pen on a few stars only — too much makes it look messy.
Skip thisDon’t fill the donut hole — keep it empty so the center stays donut-shaped.
10. Choco Brownie Squishy with Cocoa Sprinkle Top
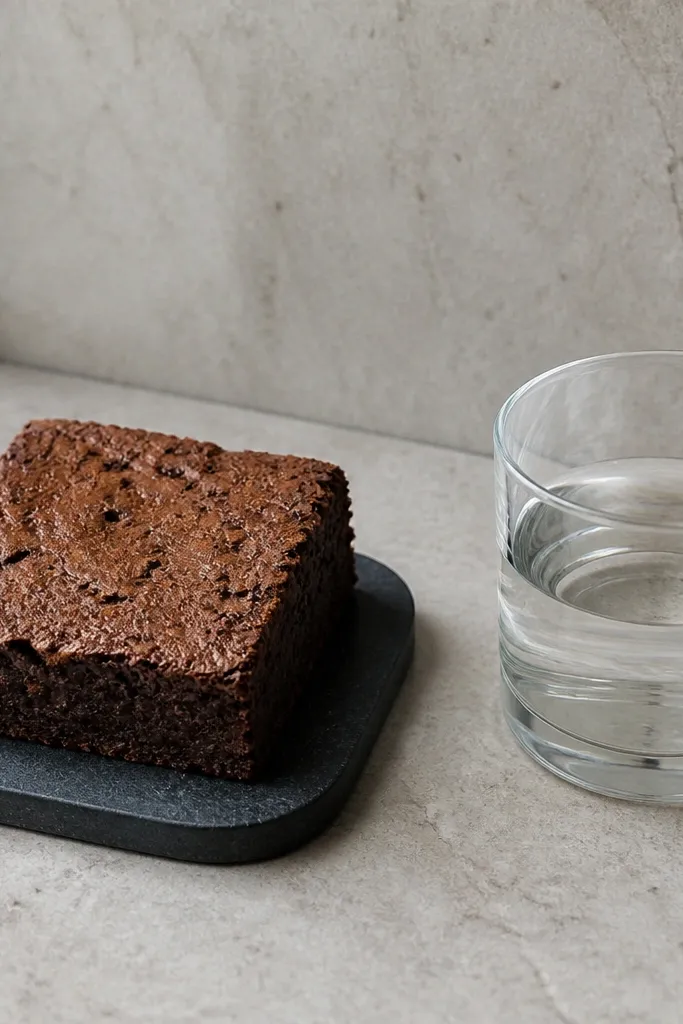
Brownie squishies look good because the template can use simple color blocking: darker edges, lighter center, and a sprinkle top that reads like texture. This one is aesthetic because the top surface has a sprinkle pattern that stays visible when pressed. The shape is also practical — a square-ish squishy sits flat enough to display without rolling away. It’s a great pick if you want something that looks like a real dessert but doesn’t require complex assembly. Skill level is beginner.
Print brownie template pieces on thick cardstock in two browns. Cut and score fold lines, then assemble one half with glue tabs. Fill with fiberfill lightly, close the seam, and press until dry so the corners stay crisp. If the template includes a separate sprinkle top, glue it on after the main body sets.
Shade the corners with a dark brown pencil so the edges look baked, not flat.
Skip heavy stuffing — corners lose their crisp look when the fill is too dense.
11. Peach Macaron Squishy with Two-Tone Fill
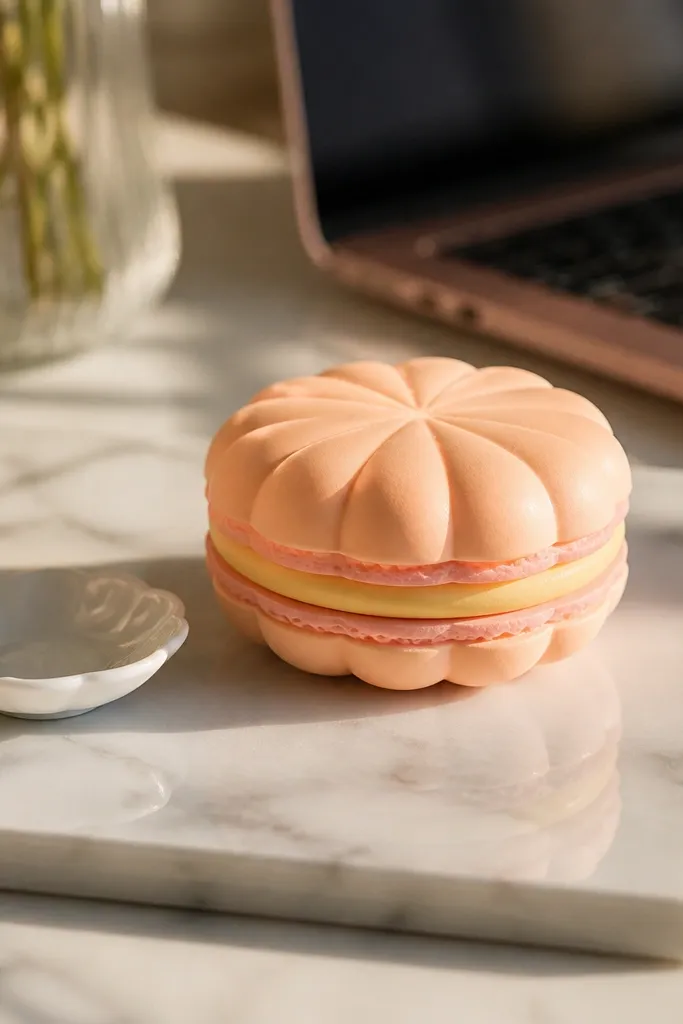
Macarons are aesthetic because their scalloped edges look delicate even when made from paper. This template uses a two-tone design so the outer shell and inner filling contrast clearly. That contrast makes the squishy look like a real treat in photos, even from a slight angle. The scalloped edge also hides tiny seam shifts because the pattern breaks up straight lines. It’s a medium-easy build with a couple of layered pieces.
Print the macaron shell halves and the inner layer on cardstock. Cut cleanly around the scallops and score fold lines so the shell stays rounded. Assemble one shell half, fill with fiberfill to a firm but compressible feel, then close. Glue the inner layer on last, centering it so the filling ring shows evenly all around.
Editor's noteRun a thin pencil line around each scallop edge to define it before gluing layers.
Skip thisDon’t glue the shells while the paper is still folded tight — it can cause permanent creases.
12. Mint Ice Cream Cone Squishy with Drip Lines
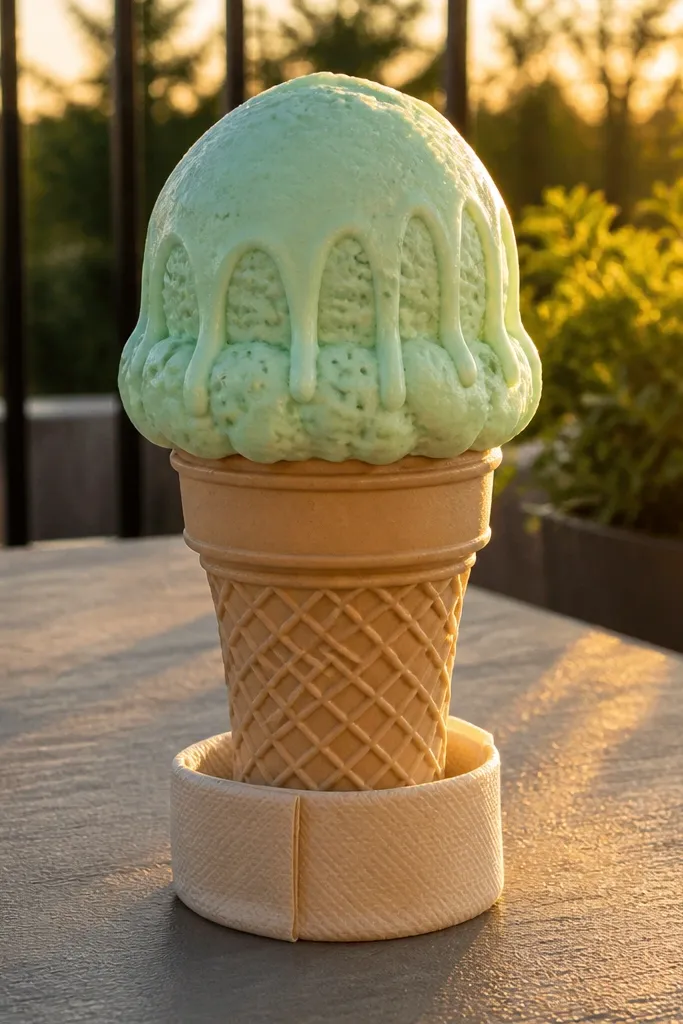
This squishy looks like it belongs in a cute dessert photo because the template separates the mint scoop, the drip lines, and the cone texture. The drip lines add a “real” look without needing actual liquid — they’re printed or layered so they stay sharp. The cone base also gives it a stable front-facing shape on a desk or shelf. Build it if you want a recognizable food item with a clean aesthetic. Difficulty is medium because the cone texture needs careful cutting.
Print the cone pieces and scoop pieces on cardstock; keep the cone a slightly darker brown than the drip for contrast. Cut and score fold lines, then assemble the cone first, fill lightly, and close. Assemble the scoop separately, fill it a bit heavier than the cone, then close. Glue the scoop onto the cone top, aligning the drip lines so they look centered and even.
Use a dry brush of darker brown around the cone folds for a subtle baked shading effect.
Avoid soaking the cone texture with glue — it blurs the waffle lines.
13. Boba Tea Cup Squishy with Pearl Bead Accent
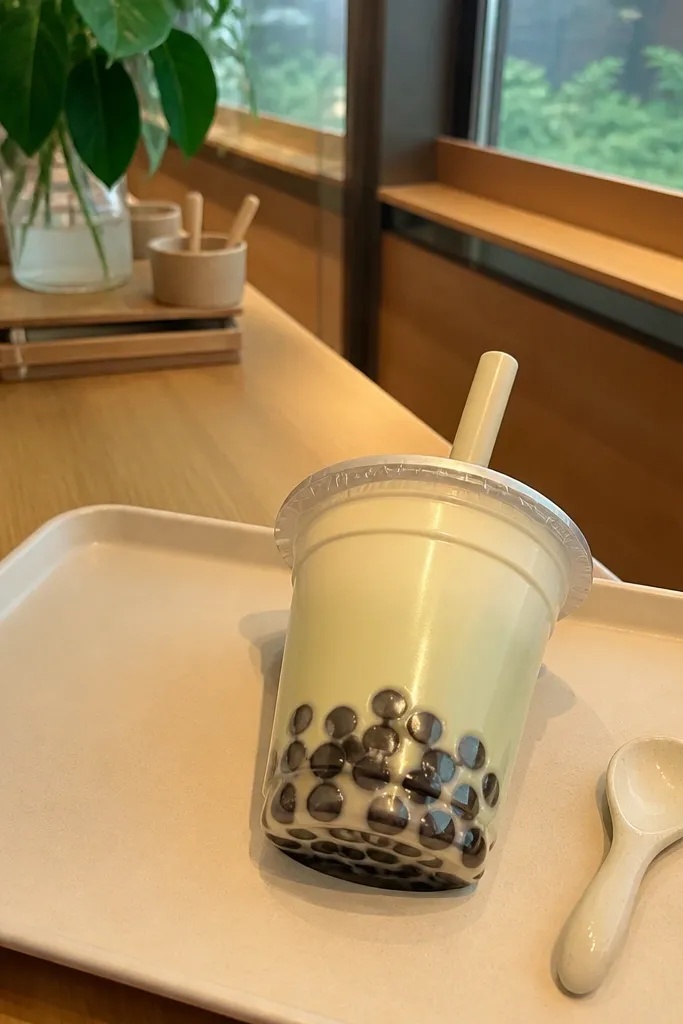
This one is aesthetic because it uses a transparent-look cup shape with a pearl accent that reads like boba. The template typically includes a straw and a pearl cluster, which makes it instantly recognizable in photos. The cup shape also keeps the seam mostly hidden behind the pearl and straw elements. It’s a great project for anyone who wants a food squishy that still looks tidy and cute. Difficulty is medium — the straw piece takes patience.
Print on cardstock with a cup outline in light brown or muted tan. Cut the cup halves, fold lines, and the straw piece. Assemble one half, add fiberfill, then close and press. For the pearls, glue a small cluster of foam beads or paper-cut circles on the front where the template marks the boba area, then add the straw last.
Editor's noteUse a toothpick to spread glue only where the straw touches so it doesn’t smear across the cup.
Skip thisDon’t place pearls inside the fill — they can shift and create uneven bulges.
14. Cherry Blossom Cloud Squishy with Petal Scatter
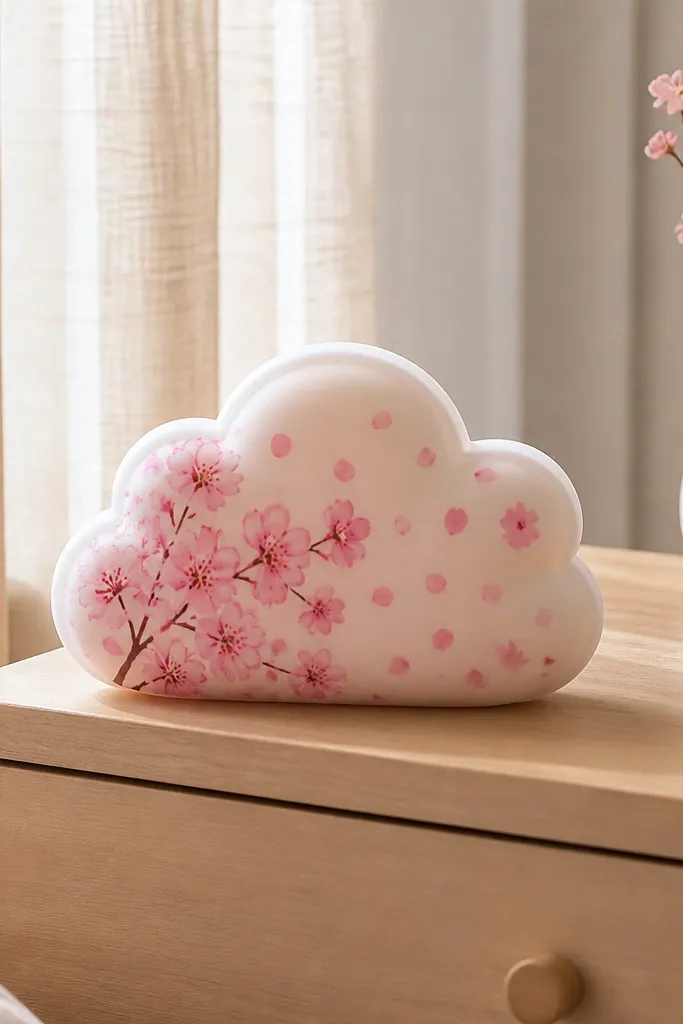
This squishy works because the cloud shape is forgiving and the petals add a gentle, airy look. The template usually includes a white outline or light border that makes the pink petals stand out without needing heavy contrast. It’s aesthetic in a bedroom, entryway, or anywhere you want a soft, calm decor piece. The seam line is often placed on the underside or hidden by petal placement, so the front stays clean. Skill level is beginner — just handle the petals carefully.
Print the cloud body and petal pieces on pale pink and off-white cardstock. Cut everything, score fold lines, then assemble one cloud half. Add fiberfill so the cloud stays puffy but doesn’t over-expand at the edges. Close the second half, then glue the petal scatter on top while the squishy is lying flat.
Layer petals in two sizes — small on top, bigger underneath — it reads fuller in photos.
Don’t glue all petals at once — place, step back, then adjust spacing so it doesn’t look crowded.
15. Neon Soda Can Squishy with Lime Label
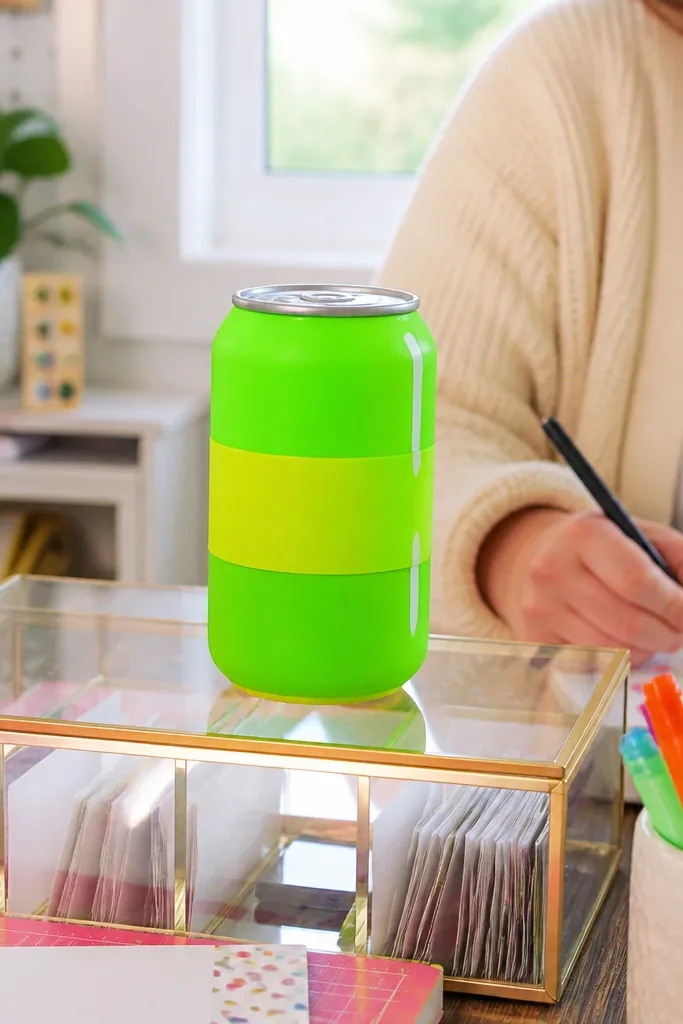
Neon soda looks aesthetic because it uses bold color blocks and a cylindrical shape that reads like a real can. The template usually includes label strips and small highlight lines, which make the can look shiny even though it’s paper. This squishy is a strong choice for bright rooms because it pops without needing extra decor. It also hides seams well since the can design includes vertical lines. Difficulty is medium because you need to keep the cylinder alignment straight.
Print the can body wrap and label pieces on cardstock; pick a bright lime and a matching darker green. Cut and score fold lines, then glue the body wrap into a cylinder shape. Fill with foam beads for a springy feel, then close the seam and press. Glue the label strips and highlight pieces on last, aligning the vertical edges so the design doesn’t twist.
Editor's noteUse a white gel pen for highlight lines only — it looks more realistic than plain white paint.
Skip thisAvoid overfilling — the cylinder will stretch at the seam and the label will look skewed.
16. Cherry Red Letter Heart Squishy
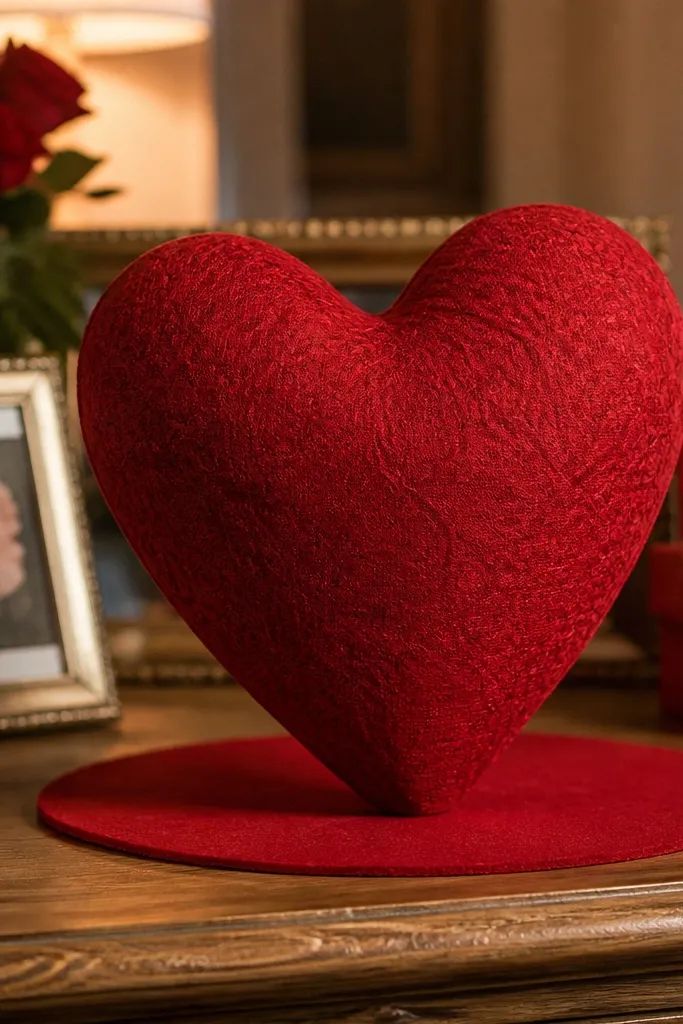
This squishy is aesthetic because it combines a bold heart silhouette with a patterned surface that reads like typography or fabric. The template often uses a subtle texture layer so the heart doesn’t look flat. The red palette is also forgiving — small seam differences blend into the color. It’s a good choice for gifting because it looks intentional even without extra embellishment. Build time is short, and the shape is simple for clean results. Difficulty is beginner.
Print the heart halves on thick cardstock in cherry red and cut along the template edges. Score fold lines so the heart stays rounded and doesn’t crease. Assemble one half, add fiberfill lightly, then close and press the seam. If there’s a separate texture/pattern layer, glue it on after the squishy dries so the pattern sits flat and crisp.
Editor's noteUse a pencil to lightly mark where the pattern layer aligns before gluing.
Skip thisSkip extra glitter glue on the pattern — it can smear and dull the printed look.
17. Blueberry Muffin Squishy with Crumb Top
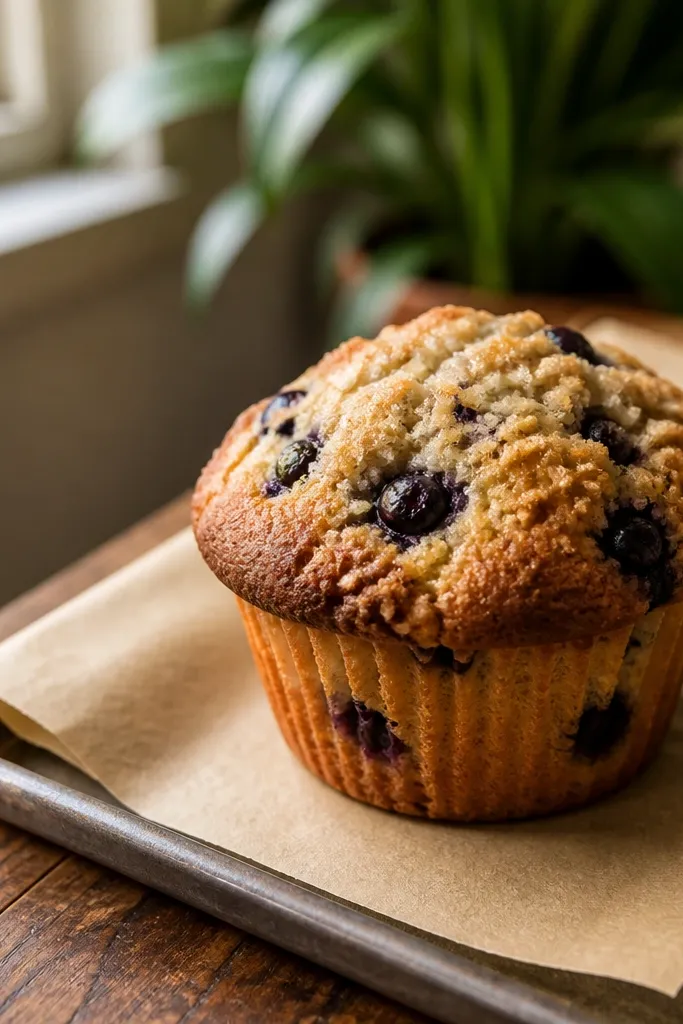
Muffins look great as Paper Squishy because the template can mimic crumb texture with tiny dots and irregular shapes. The blueberry accents add color pops that stay visible even when the squishy compresses. This project is aesthetic because it’s designed to look “baked” with a darker edge and a lighter top. It also sits upright on a desk if you choose the template that has a stable base panel. Difficulty is medium if the template includes a separate crumb layer.
Print the muffin base and crumb top layers on cardstock in warm beige and deep golden brown. Cut the halves and score fold lines, then assemble one half and fill with fiberfill. Close the second half and press until the seam is set. Glue the crumb top layer on last, centering it so the crumb texture frames the berries evenly.
Editor's noteColor the berry dots with a darker blue marker, then add a tiny white highlight dot for realism.
Skip thisDon’t press the crumb layer too hard — it can flatten the texture and make it look muddy.
18. Sunflower Squishy with Layered Petal Rings
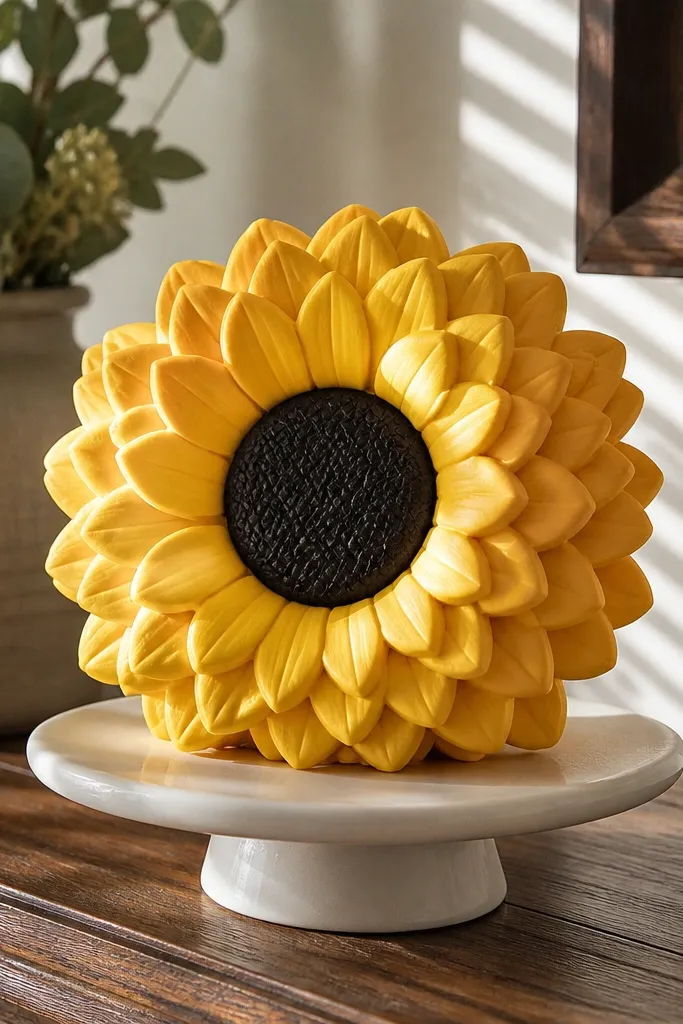
Sunflowers are a standout aesthetic Paper Squishy because the petal rings create real visual depth. This template usually has separate petal layers or printed petal bands that create a dimensional look without extra bulk. The dark center also frames the seam area so it doesn’t draw the eye. It’s a great decor pick for bright spaces and photos with warm tones. Difficulty is medium because you’re aligning layers and keeping the center centered.
Print the sunflower body halves and petal ring pieces on thick cardstock. Cut and score fold lines, then assemble one half and fill with fiberfill until the round shape holds. Close the seam and let it dry flat. Glue the petal ring layers around the outside in order from inner to outer, aligning the petal gaps so they don’t shift.
Editor's noteUse darker yellow cardstock for the outer ring so the petals look shaded, not flat.
Skip thisAvoid gluing all rings at once — place one ring, check alignment, then move on.
19. Grapefruit Slice Squishy with Pale Pink Segments
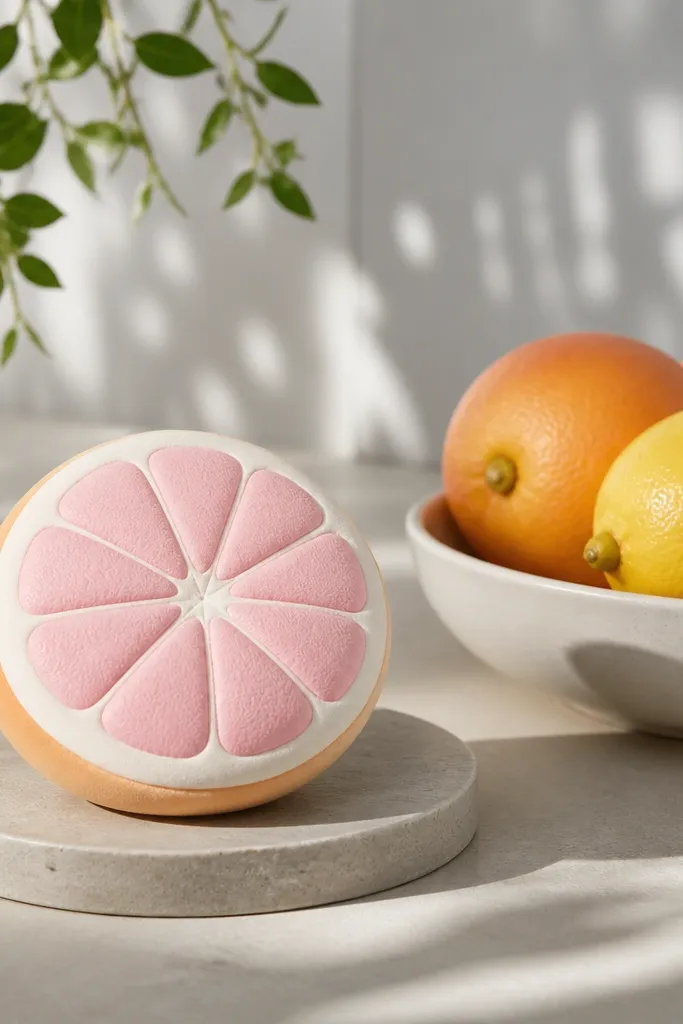
Grapefruit slice squishies look clean and aesthetic because the template uses pale rind lines and segmented interior shading. The pale pink segments keep the piece airy, and the thin rind outline makes it look like a real cut fruit. It’s also a good choice if you want something that pairs with spring decor — it doesn’t look heavy like red fruit squishies. The shape is usually flat-ish on the outside, which makes the seam easier to hide. Difficulty is beginner to medium.
Print the grapefruit template on cardstock using pale pink for the interior and off-white for the rind. Cut both halves, score the fold lines, then assemble one half with tabs. Fill with foam beads or fiberfill lightly so the slice keeps its curved edges. Close the seam, then add any extra segment lines with colored pencil to sharpen the borders.
Editor's noteSharpen segment borders with a fine colored pencil instead of marker — it stays subtle and photo-friendly.
Skip thisDon’t use too-dark pink — it turns the slice into a cherry look and loses the airy grapefruit vibe.
20. Warm Cinnamon Roll Squishy with Swirl Line Art
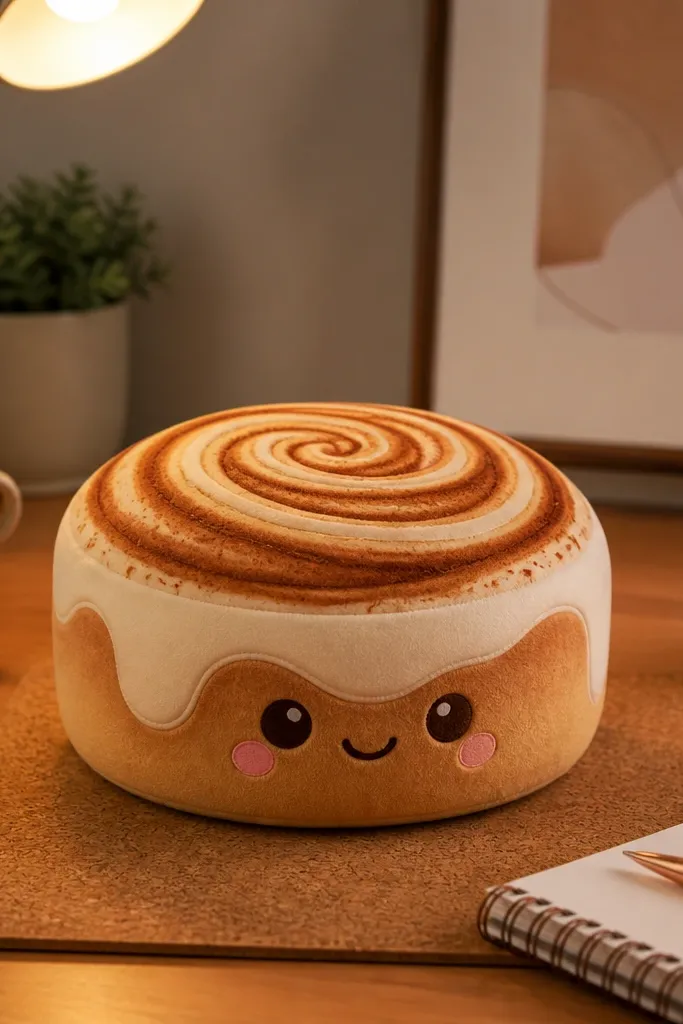
A cinnamon roll is aesthetic Paper Squishy territory because the swirl pattern gives you structure and motion. This template keeps the swirl lines crisp so they don’t blur when the squishy compresses. The glaze edge adds a light border that makes the brown look richer without being too dark. It’s a cozy decor piece for kitchens, dorm rooms, and desk setups that feel warm. Difficulty is medium because swirl alignment matters — you want the pattern to line up across the seam.
Print the cinnamon roll template on thick cardstock in two browns plus a pale glaze color. Cut halves and score folds carefully along the outer curve. Assemble one half, fill with fiberfill, then close while aligning swirl start/end points. After drying, glue the glaze layer on top, keeping it centered so the swirl edges show evenly.
Use a ruler to align swirl lines on both halves before you glue — it prevents a twisted pattern.
Don’t glue the halves and then try to re-align — you’ll stretch the paper and the seam will show.
21. Peacock Feather Squishy with Teal Eye Center
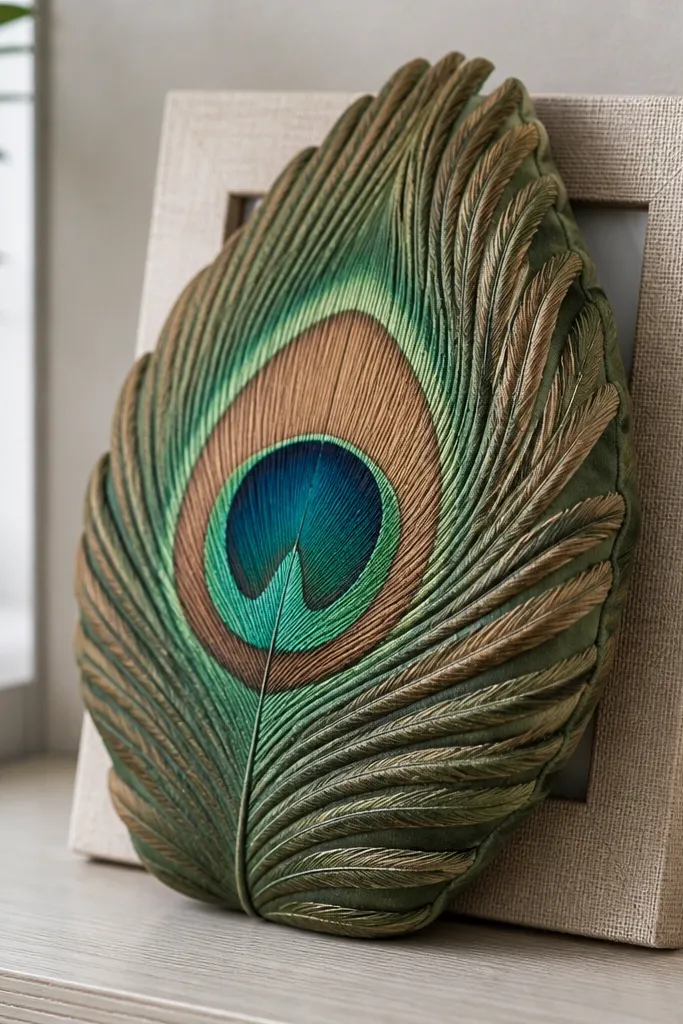
This squishy reads premium because the template mimics a peacock feather with layered edges and a clear “eye” focal point. The teal center gives you a strong spot for photos, and the feather shape makes it look elegant without needing fancy materials. It’s also designed to keep the seam out of the eye area, so the most important part stays clean. Great for a colorful shelf or a craft room theme. Difficulty is medium because the feather shape has a lot of edges to cut cleanly.
Print feather halves and the eye detail pieces on cardstock in teal, blue, and dark green. Cut precisely, score fold lines, then assemble one half and fill with fiberfill just enough to hold the feather’s curve. Close the second half and press the seam along the body, not across the eye. Glue the eye detail piece on last so it sits flat and doesn’t interfere with squeezing.
Cut feather edges slowly — a rushed cut makes the feather look jagged in close photos.
Avoid heavy foam — it makes the feather body bow and the eye looks off-center.
22. Candy Cane Stripe Squishy with White Twist
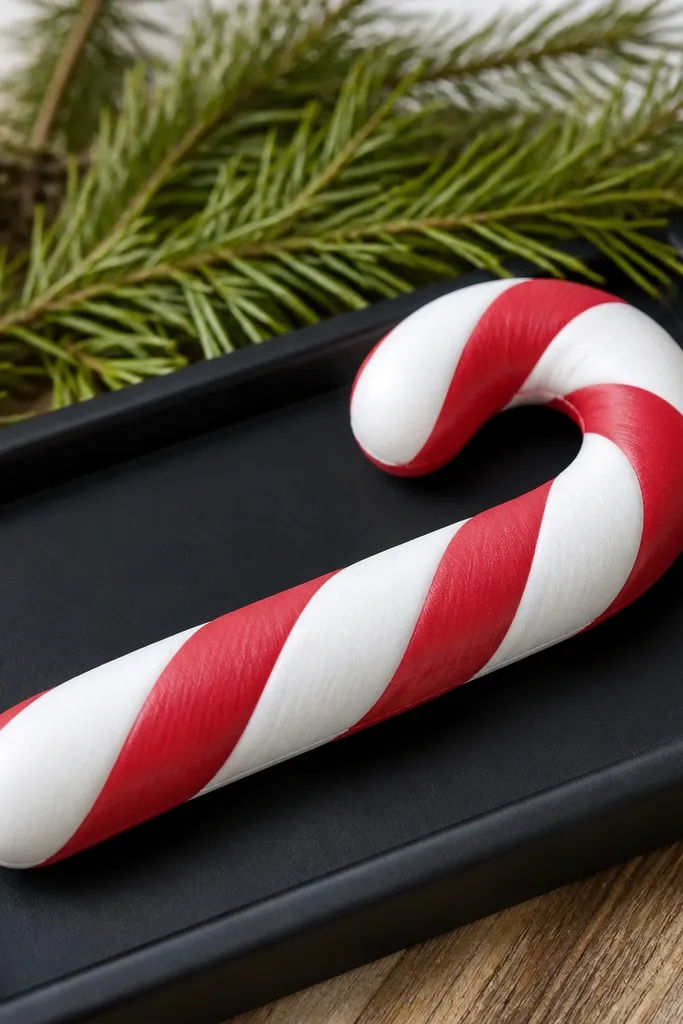
Candy cane squishies are aesthetic because the diagonal stripes create instant motion, and the white twist gives a crisp edge that frames the seam. The printable shape helps hide mistakes because the curve naturally breaks up straight lines. This one looks great in holiday stacks, on a desk tray, or as a cute ornament that you can still squeeze. The build is straightforward and works well for beginners who want a clean result. Difficulty is beginner.
Print the candy cane template on cardstock with red stripe and white sections separated if the printable allows. Cut both halves, score fold lines, then assemble one half with tabs. Fill lightly with fiberfill so the cane keeps its curve but doesn’t bulge at the bend. Close the second half and press the seam, then let it dry while curved on a rolled paper tube.
Editor's noteDry it around a foam pool noodle or rolled cardstock so the curve stays perfect.
Skip thisDon’t flatten it to dry — straight drying makes the cane look wrong when you pick it up.
23. Cloudy Vanilla Marshmallow Squishy with Soft Edges
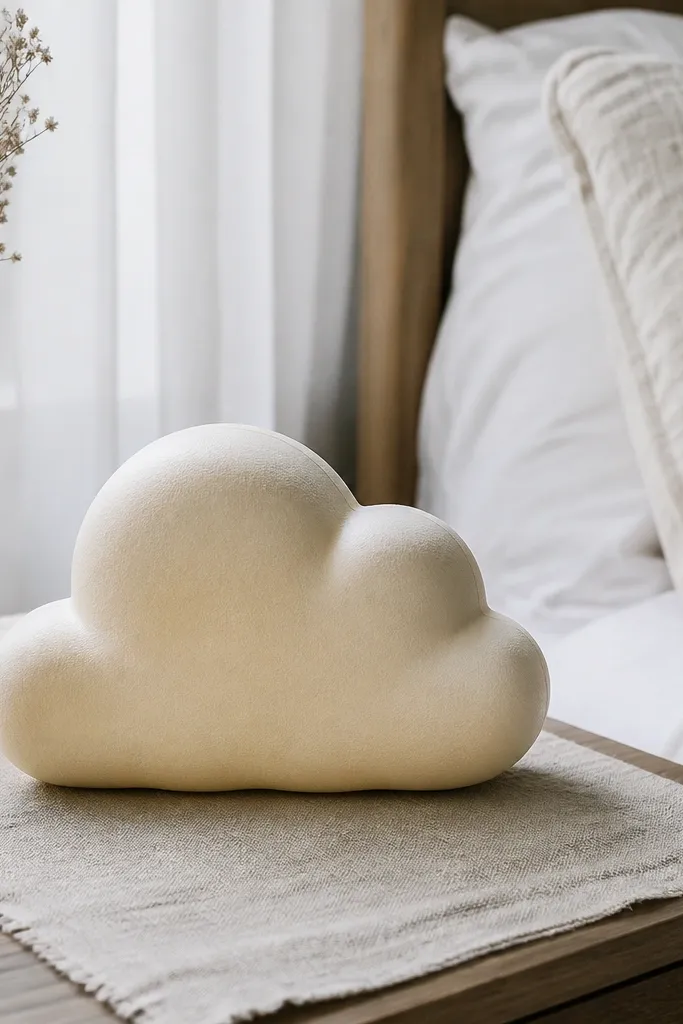
This is aesthetic because it leans into softness: pale vanilla color, rounded cloud shape, and simple outline that reads clean. The template usually has minimal patterns, which is exactly why it looks good — the silhouette does the work. It’s also a good project for practicing perfect seams because the finish is clean and you’ll notice every wobble. Great for nursery decor, a calm desk theme, or as a neutral squishy in a mixed set. Difficulty is beginner with a focus on careful scoring.
Print on off-white or pale cream cardstock, then cut the two marshmallow halves. Score the fold lines so the shape stays puffed and doesn’t crease. Assemble one half, fill with fiberfill, and close the seam. If your template includes an optional outline or blush layer, glue it after drying so the color stays crisp.
Add a tiny blush gradient with watered-down pink pencil — keep it light so it doesn’t look smeared.
Avoid glitter — it catches light unevenly and makes the pale color look dirty.
24. Gummy Bear Squishy with Glossy Edge Lines
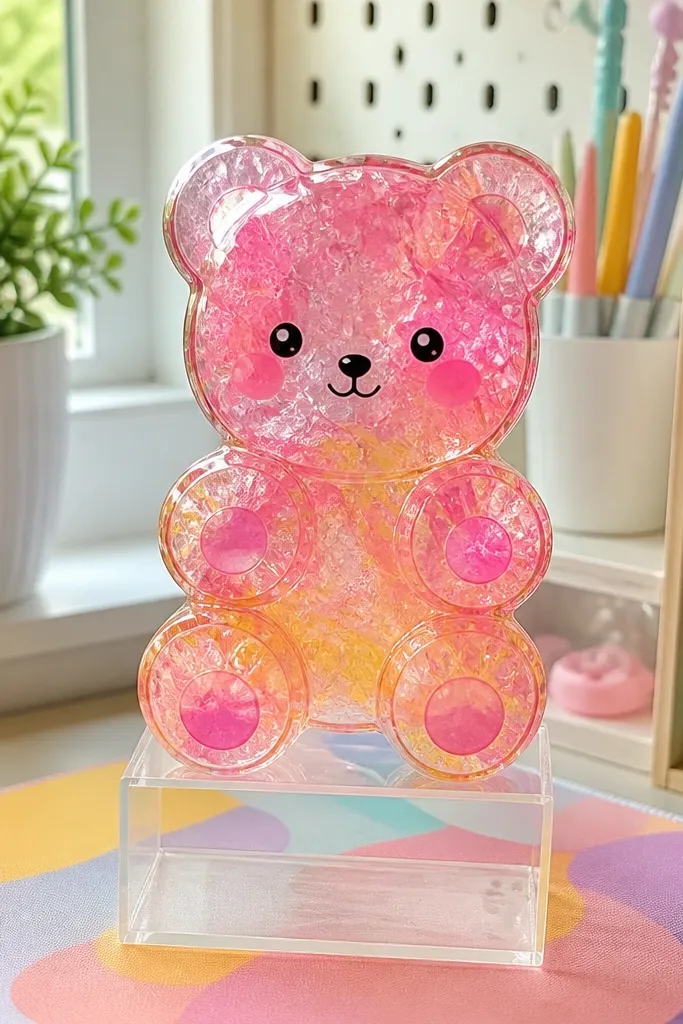
A gummy bear squishy looks aesthetic because the printable includes glossy edge lines and a clear face placement. The bear shape also hides seams better than a flat heart because the body has natural curves. The template’s color choices make it pop in photos, especially if you use a slightly translucent paper or add a gloss effect with gel pen highlights. This is a fun decor piece for playful rooms and desk setups. Difficulty is medium because the bear face needs clean placement.
Print on colored cardstock and cut bear halves carefully along the paws and ears. Score folds so the bear doesn’t kink at the shoulders. Assemble one half, fill with foam beads or fiberfill for squish, then close. Add the face details and glossy edge lines after drying so the highlights stay crisp and don’t get covered by glue.
Editor's noteUse a clear gel pen for gloss lines if your printable doesn’t already include them.
Skip thisDon’t over-glue the face tabs — glue squeeze-out makes the highlight lines look dull.
25. Mini Panda Bamboo Squishy with Tiny Bamboo Sticks
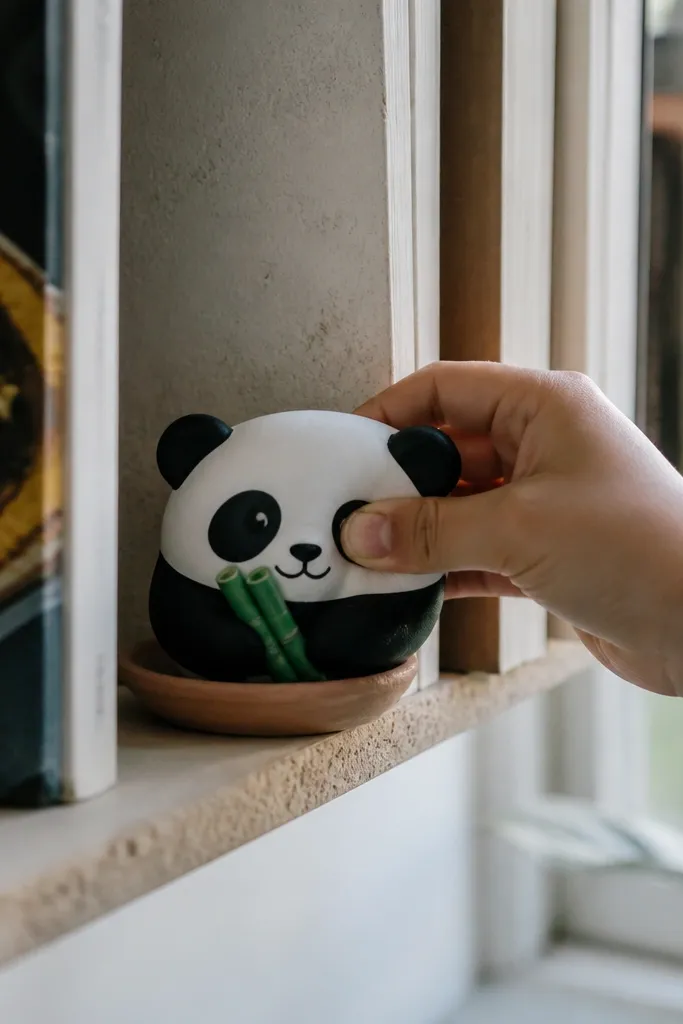
This squishy is aesthetic because the panda pattern is bold and the bamboo accent adds a pop of green without clutter. The panda face is usually printed on a front panel, which keeps the expression readable even when the squishy compresses. The template often includes small separate pieces for the bamboo sticks, letting you place them like accessories rather than flattening everything onto the body. It’s a great choice if you want a cute set — panda and bamboo looks good together on a shelf. Difficulty is medium due to the small bamboo parts.
Print panda base and bamboo stick pieces on cardstock in white/black and muted green. Cut and score fold lines on the panda halves, then assemble one half and fill with fiberfill. Close the seam and press gently so the panda patches stay aligned. Glue the bamboo sticks onto the back or side using small tabs, then add any extra face details last.
Editor's noteUse tweezers to place tiny bamboo tabs — it keeps the angle clean.
Skip thisDon’t glue bamboo pieces on before the seam fully dries — the squishy shape shifts slightly while curing.



