

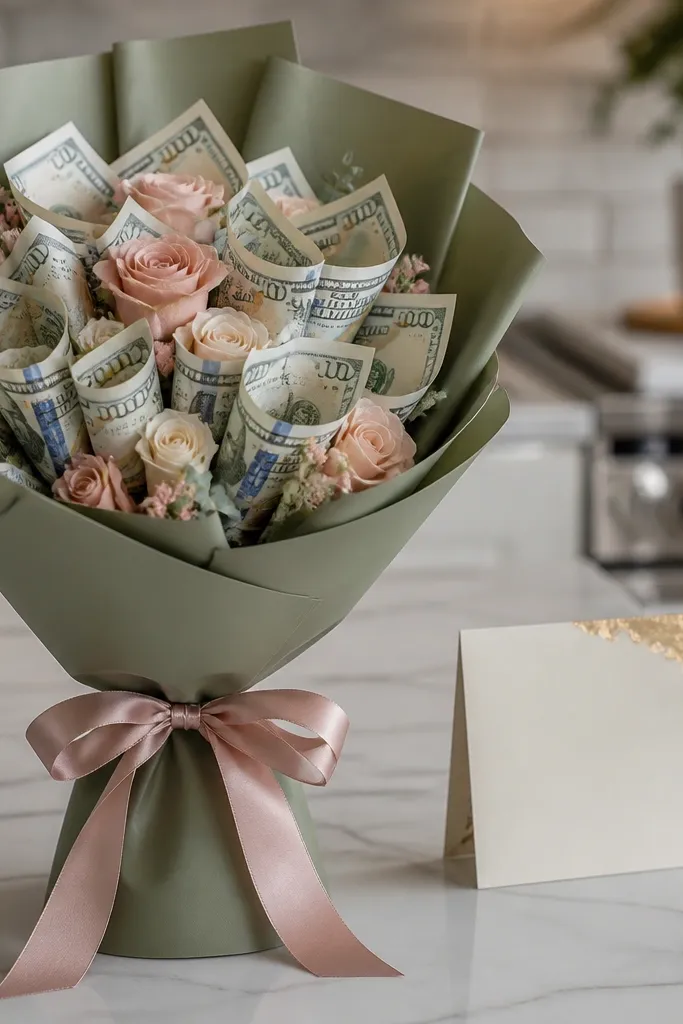
1. Crisp Paper-Rose Money Bouquet with Cardstock Petals
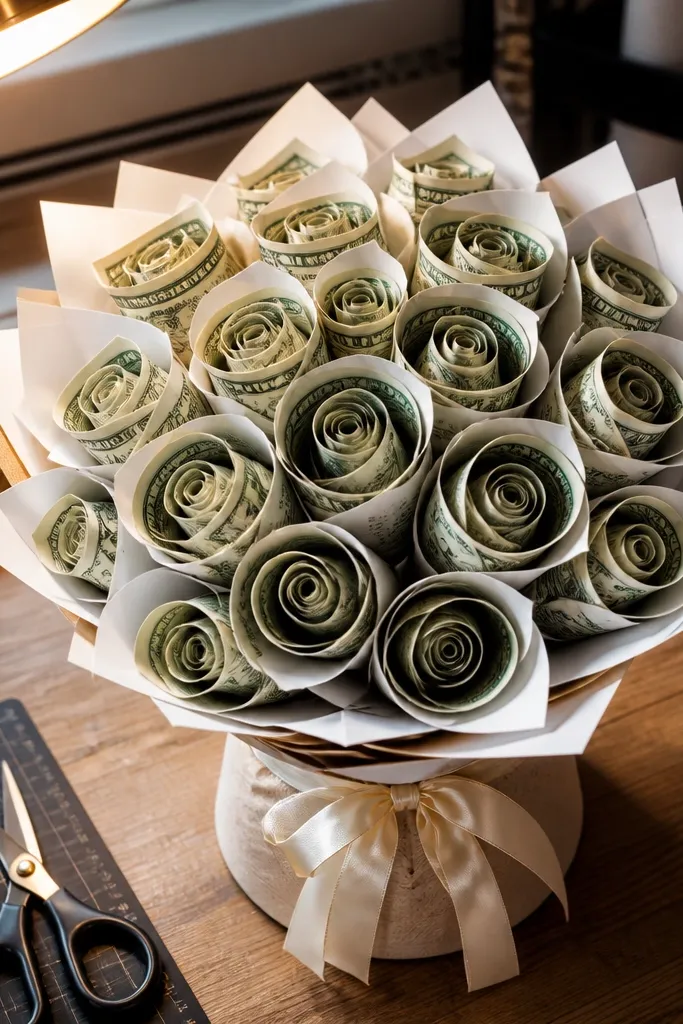
This one looks like real paper roses, but it’s built from money so the “petals” have texture and shine. The big win is the cardstock backing: it keeps each petal curved instead of drooping, which is what usually makes money bouquets look sloppy. Use a tight spiral for the center and a slightly looser spiral for the outer ring, so the shape reads clearly in photos. It’s best for people who want a romantic bouquet vibe without bulky envelope pockets.
Start by cutting 2.5 inch x 4 inch cardstock strips in your accent color, then glue a folded bill to each strip as a petal face. Roll one petal tight for the center, then add petals around it in a spiral, using hot glue at the base only. When the bloom is full, cover the base with a circle of floral tape and attach it to a wrapped handle made from a dowel or thick cardboard tube.
Editor's notePress each petal crease with a metal ruler for sharp folds before gluing.
Skip thisDon’t glue the bill across the whole petal — glue at the base only so it still curves.
2. Envelope-Flower Money Bouquet with Mini Flaps
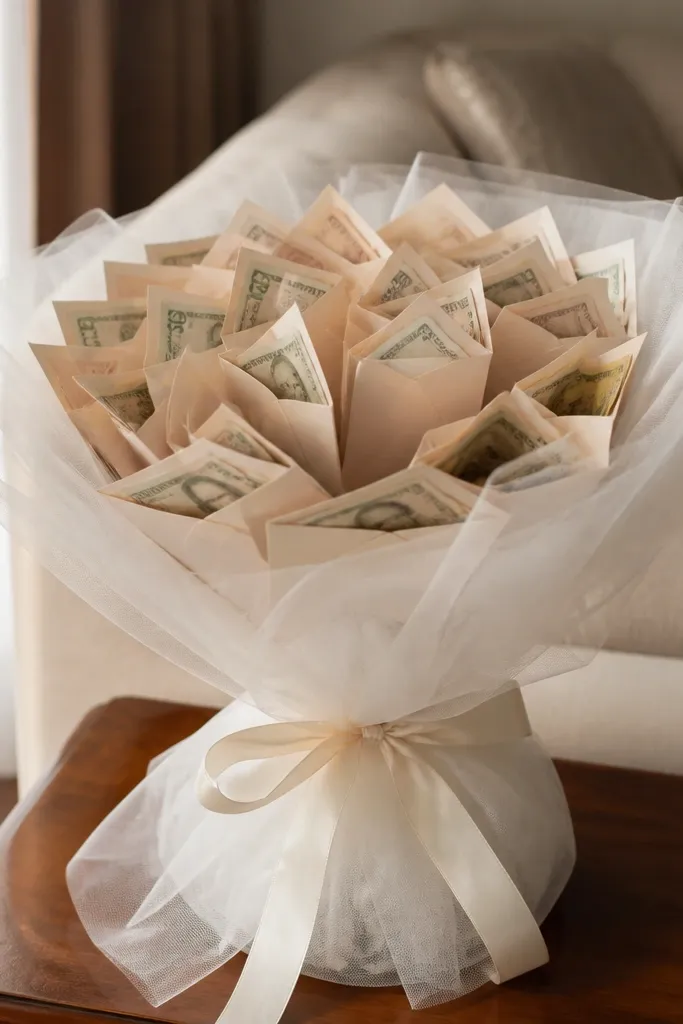
Envelope flowers look clean and graphic, and they’re one of the easiest ways to make money feel intentional instead of random. Each “petal” is a mini envelope made from a bill, so you get a crisp front and a visible pocket edge. In photos, the pocket flap catches light and makes the bouquet look dimensional. This style suits modern decor rooms where you want something structured and not too soft.
Fold each bill into a small envelope shape with a defined front rectangle and a flap that tucks in. Create five or six envelope petals per flower head, then arrange them around a center bud made from a rolled bill and a small circle of cardstock. Attach the flower head to stems made from floral wire, then wrap the bundle with ribbon and floral tape.
Use double-sided tape on the flap edge so the envelope stays closed without messy glue lines.
Avoid uneven flap sizes — if one petal flap is longer, the bloom looks off-balance.
3. Dollar Bill Sunflower Bouquet with Black Center Clip
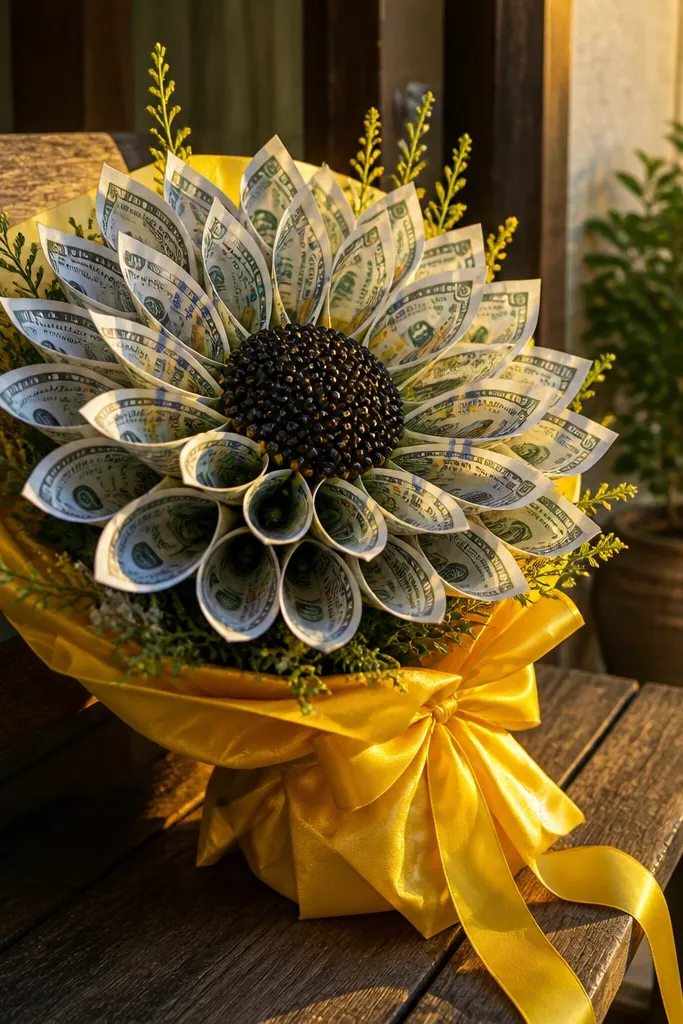
Sunflowers are photogenic because they have a bold center and a clear outer petal ring. The money method here uses multiple bill strips clipped into petal shapes, so you get lots of repeat texture without heavy bulk. A black or dark brown center clip makes the center look like seeds, and the contrast makes the whole bouquet pop. This is a great pick for bright rooms and cheerful color palettes.
Cut long bill strips by folding each bill into thirds and pressing hard, then open slightly to form a petal curve. Clip the curved bills into a ring using small binder clips, keeping the clips hidden under ribbon layers. Build the center from a rolled bill circle wrapped in black cardstock, then glue it in place and secure the whole head to floral wire stems.
Editor's notePaint the clip jaw area with a matte black marker so it disappears on camera.
Skip thisDon’t skip the center — without the dark focal point, the ring reads like loose cash.
4. Origami Crane Money Bouquet with Wire-Stem Buds
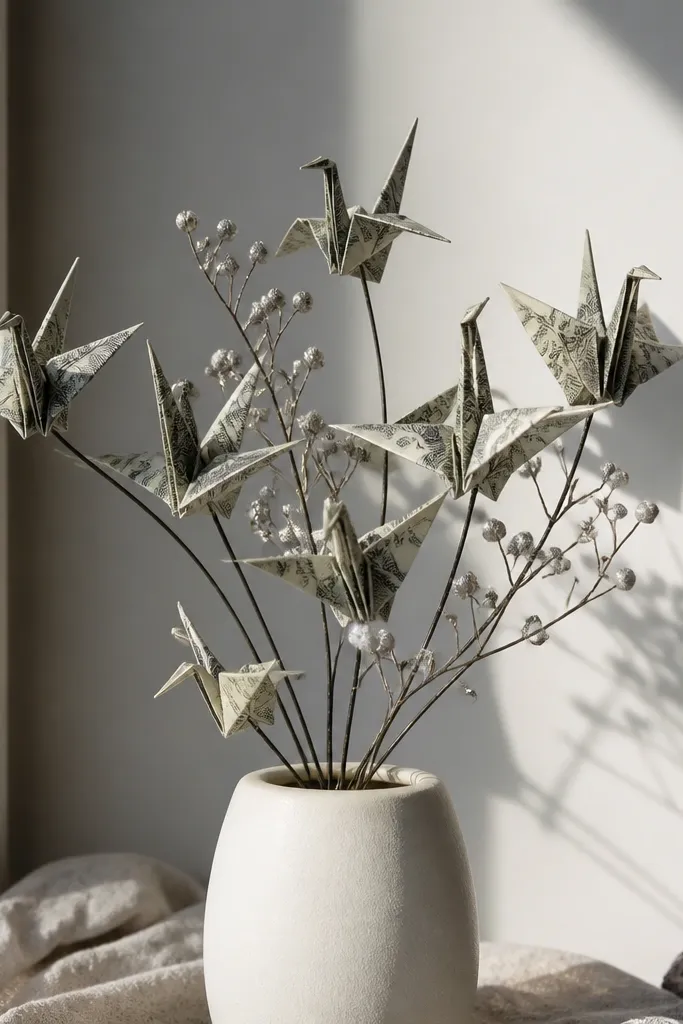
This is the money bouquet idea for people who want movement and drama in a photo. Crane folds create strong angles that read instantly from a distance, so even a small cluster looks like art. Instead of a single big head, you make multiple cranes as “flowers,” each on its own wire stem. It suits minimalist decor where you want clean lines more than a round floral ball.
Fold each bill into a crane using straight, tight creases, then trim nothing — keep the bill edges crisp. Attach each crane to floral wire with a tiny loop at the base, then twist the wire to angle the crane upward. Bundle the stems around a wrapped handle and secure with zip ties under floral tape.
Mist the crane folds lightly with a tiny amount of water and let dry flat if your creases soften.
Don’t use stretchy ribbon as the main tie — it loosens and cranes start to droop.
5. Rolled-Bill Peony Bouquet with Blush Ribbon Wrap
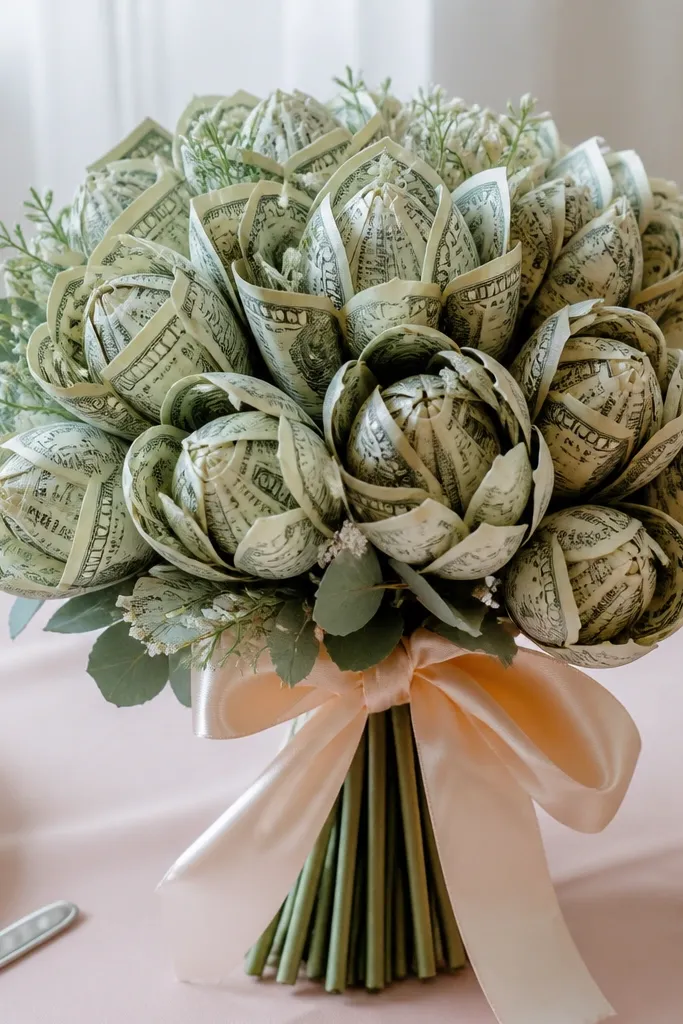
Peonies look lush because they stack layered petals. Rolled-bill “petals” mimic that softness while still showing the money pattern. The blush ribbon wrap makes the bouquet look like a real flower arrangement, not a craft made from cash scraps. This is best for pastel weddings, baby showers, or any event where you want a full, romantic silhouette.
Roll each bill into a tight cylinder, then pinch one end slightly to create a petal shape. Make a cluster of 12-18 rolled petals, then glue them into a spiral on a foam or cardstock circle base. Cover the base with tissue paper or thin organza in a matching blush color, then attach to a wrapped handle with floral tape.
Editor's noteRoll on a wooden dowel so every petal has the same diameter.
Skip thisDon’t overfill the center — if all rolls are the same height, the peony loses depth.
6. Money Calla Lily Bouquet with Sleek Bill Sleeves
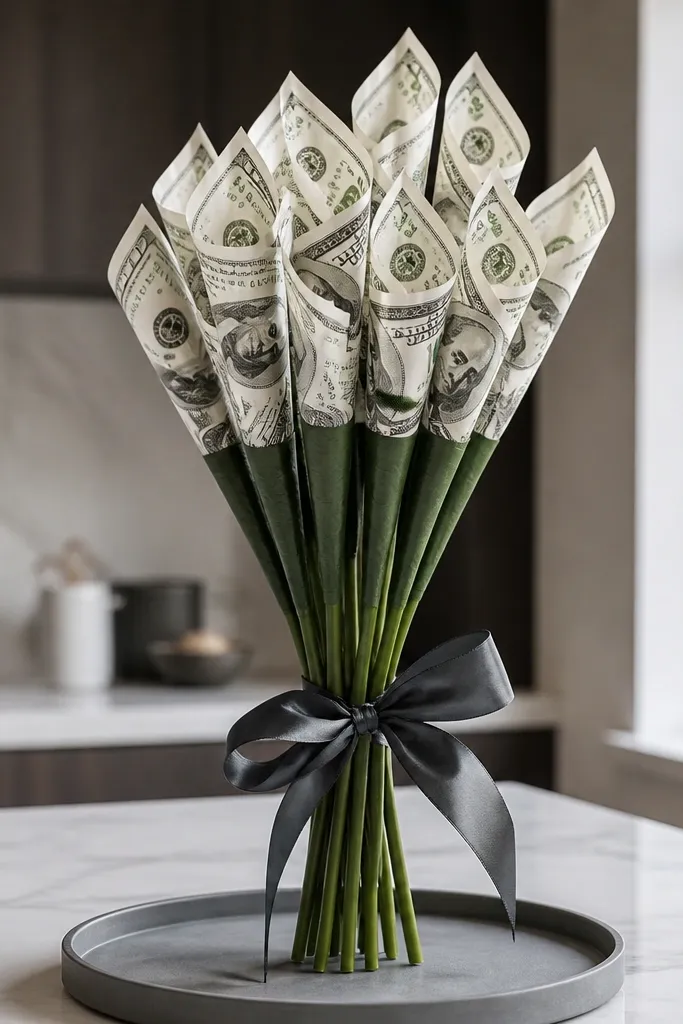
Calla lilies look elegant because they have a smooth, elongated shape. Using money in a sleeve gives you that clean surface and keeps the bill from flaring. This style is photogenic because the silhouette is simple: one tall bloom per stem with a neat base wrap. It fits modern spaces and works well when you want a tall bouquet without a big foam ball.
Cut thin cardstock sleeves that fit around a folded bill, then glue the bill to the sleeve so it forms a smooth curve. Wrap floral wire stems, then slide the sleeve over the top and secure with hot glue at the base. Add a ribbon band at the stem base and repeat for 5-7 lilies in one bundle.
Editor's noteUse matte ribbon for the stem wrap so shiny money doesn’t clash with a glossy band.
Skip thisDon’t let the sleeve gap at the back — the calla shape looks wrong if the bill shows a split seam.
7. Tea Rose Money Bouquet with Lace-Edge Bill Petals
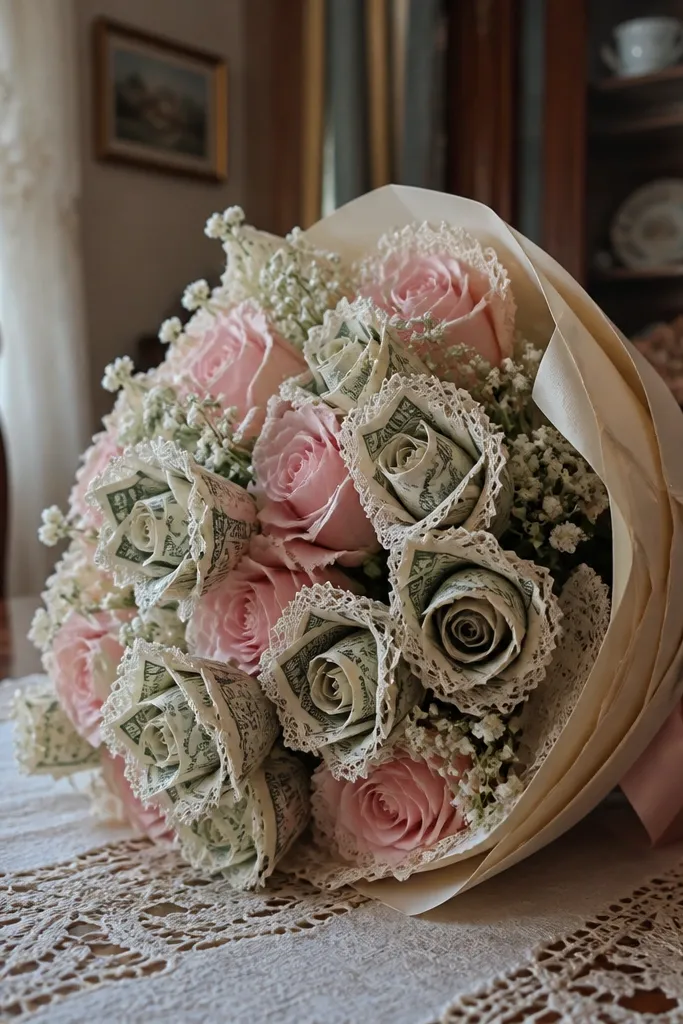
Tea roses read delicate in photos, and lace-edge petals add a soft border that makes money look less harsh. The money petals are folded, then trimmed with lace so the outer edge looks like fabric. This is a good choice if you want vintage styling without heavy decorations everywhere. You get a sweet, airy look while still keeping the bouquet clearly “money.”
Fold bills into petal shapes (small rectangles with a curved crease) and glue them onto thin circles of cardstock. Cut lace strips and glue them along the outer edge of each petal backing so the lace frames the bill. Assemble petals around a rolled bill center, then attach to a handle wrapped in lace ribbon and floral tape.
Trim lace ends at an angle so corners don’t look blunt on camera.
Avoid lace that’s too wide — it hides the bill details that make the bouquet read as money.
8. Geometric Money Bouquet with Folded Dollar Triangles
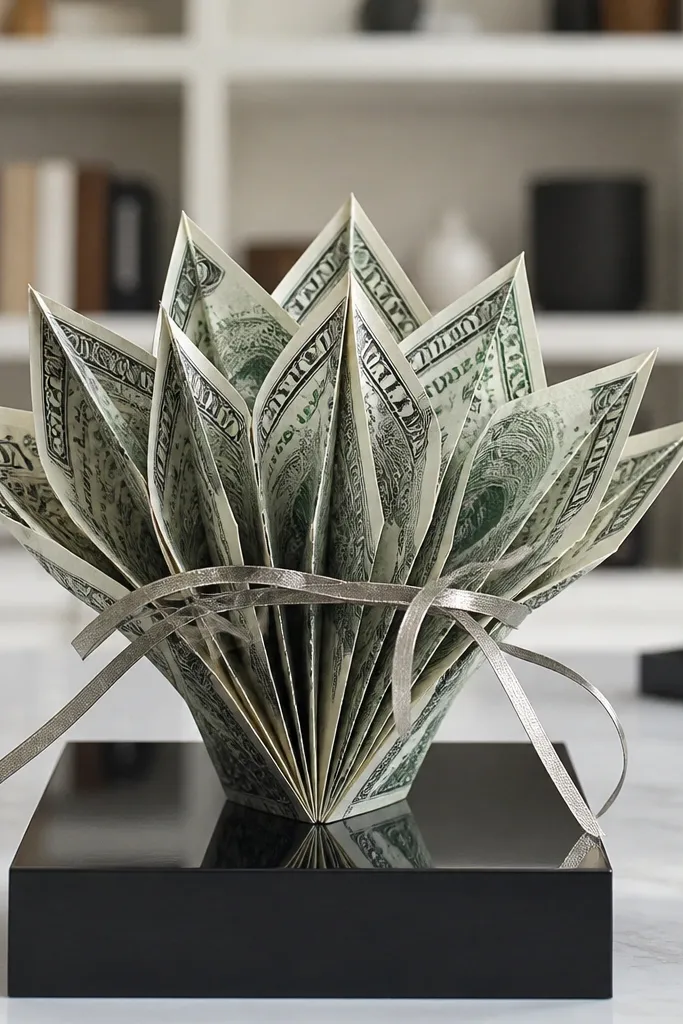
Geometric bouquets look sharp because the shapes are repeatable and the angles catch light. Folded bill triangles act like modern petals, and you can arrange them in an outward fan pattern for a clean, structured look. This style is less “flower” and more “design object,” which makes it stand out in photos. It works great for black, white, and gold color themes.
Fold each bill into a triangle by bringing corners to a center crease, then press hard and keep the folds tight. Make a cluster of 18-24 triangles and glue them onto a foam or cardboard dome in rows, starting with the outer ring. Wrap the handle with metallic ribbon and add a gold tulle layer behind the triangle cluster for depth.
Use a glue gun with a fine nozzle so glue lines stay small and don’t show through the money.
Don’t mix triangle sizes — one oversized triangle creates a lopsided look fast.
9. Ribbon-Painted Money Bouquet with Ombre Stem Wrap

This idea uses money flower heads but makes the stems do the heavy lifting visually. Ombre ribbon wrap turns a simple bouquet into something that reads “styled,” even if the money elements are straightforward. The money stays the focal point while the stems add color motion in photos. It fits birthday gifts, bridal showers, and any event where you want a gentle gradient look.
Choose two ribbon shades that blend (for example, dusty pink and rose). Make your money flower heads using folded bill petals on a small circular base, then attach to floral wire stems. Wrap each stem in the lighter ribbon first, then overlap the darker ribbon from mid-stem downward, securing every 1-2 inches with floral tape.
Cut ribbon ends at an angle and tuck them under the wrap so seams don’t show.
Don’t wrap too thick — thick ribbon bulks up the stems and makes the bouquet look heavy.
10. Mini Pocket-Bouquet with Stacked Bill Layers
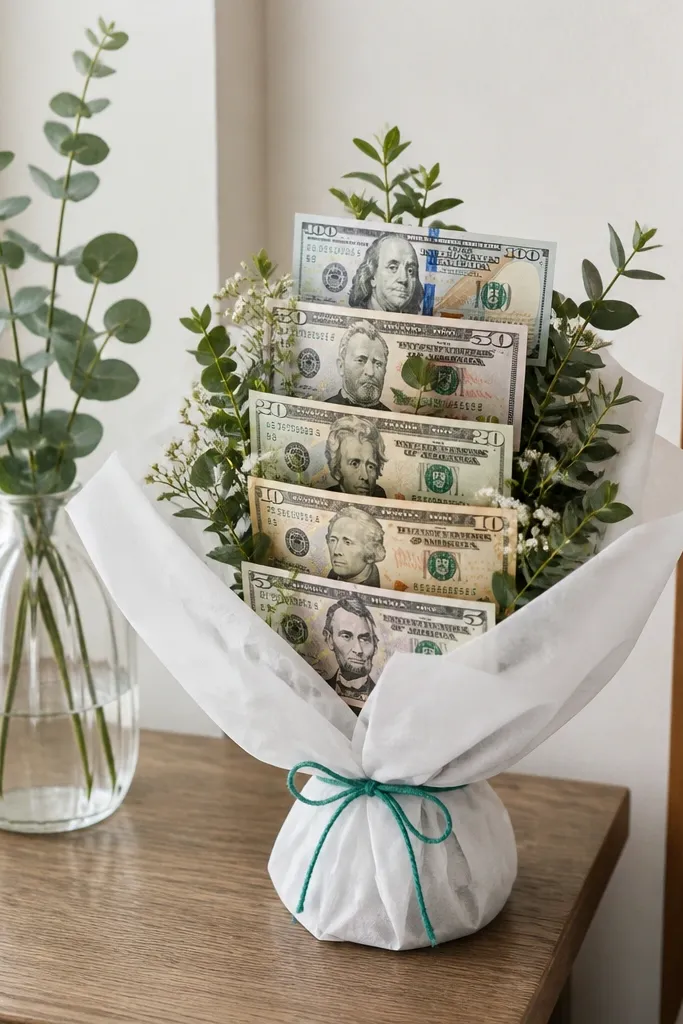
Pocket-bouquets look intentional because each bill has a defined layer. Stacking layers makes the bouquet feel fuller without adding a huge foam ball. This approach also hides mess: tape and glue sit behind the layered fronts. It’s a great choice if you want a compact bouquet that still looks expensive in photos.
Cut cardstock squares slightly smaller than your bill width, then glue each bill to a cardstock square and fold the corners to form pocket fronts. Stack 10-14 pocket fronts around a center circle, gluing only the back edges so the fronts sit flat and readable. Build a tight wire bouquet around the center and wrap the base with ribbon to cover the stacking seam.
Editor's noteUse the same pocket fold direction for every layer so the bouquet looks uniform.
Skip thisAvoid random pocket heights — keep each layer the same distance from the center base.
11. Gilded Money Bouquet with Foil-Accent Bill Corners
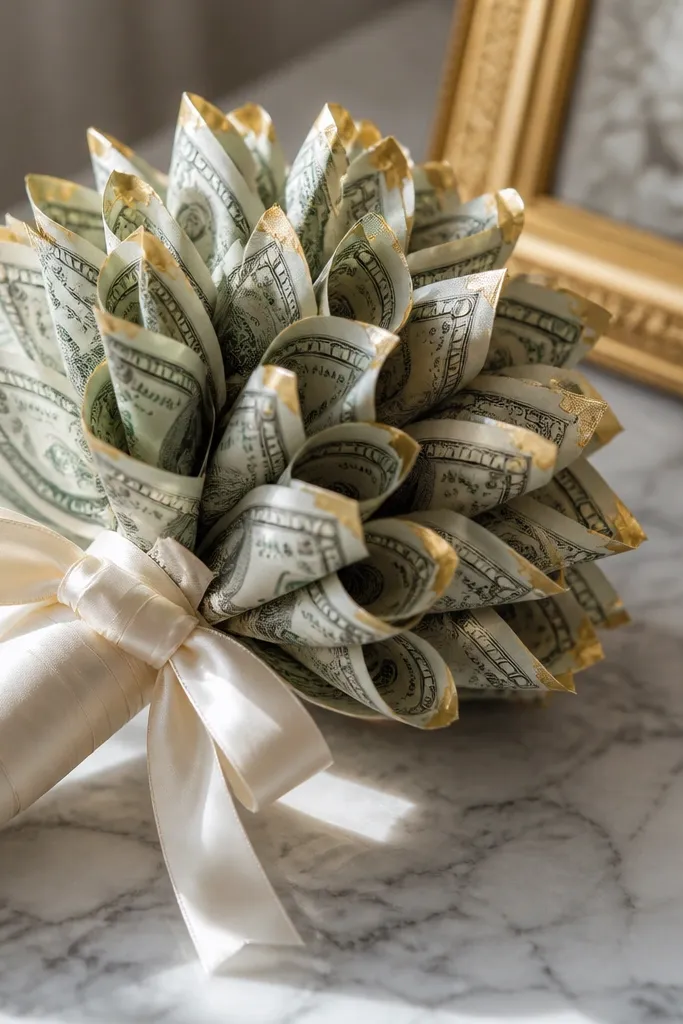
Gold accents make money look like decor instead of plain cash. Here, you fold bills into petal-like shapes, then add tiny foil corner highlights so the bouquet sparkles without being covered in glitter. The result is upscale-looking and very camera-friendly because highlights land on the angles. This style suits weddings and holiday gifting where gold belongs.
Fold bills into petal shapes and glue them to thin cardstock cutouts for stability. Apply gold leaf or metallic foil tape only at the outer corners of each petal, keeping it small so you don’t cover the bill design. Assemble petals around a center roll, then add a gold ribbon wrap on the handle and a thin gold mesh behind the bloom.
Editor's noteStick foil tape with a tweezers grip so you place it exactly at the corner crease.
Skip thisDon’t overdo foil — too much coverage kills the money look and reads like craft glitter.
12. Monochrome Black-and-White Money Bouquet with Matte Bills
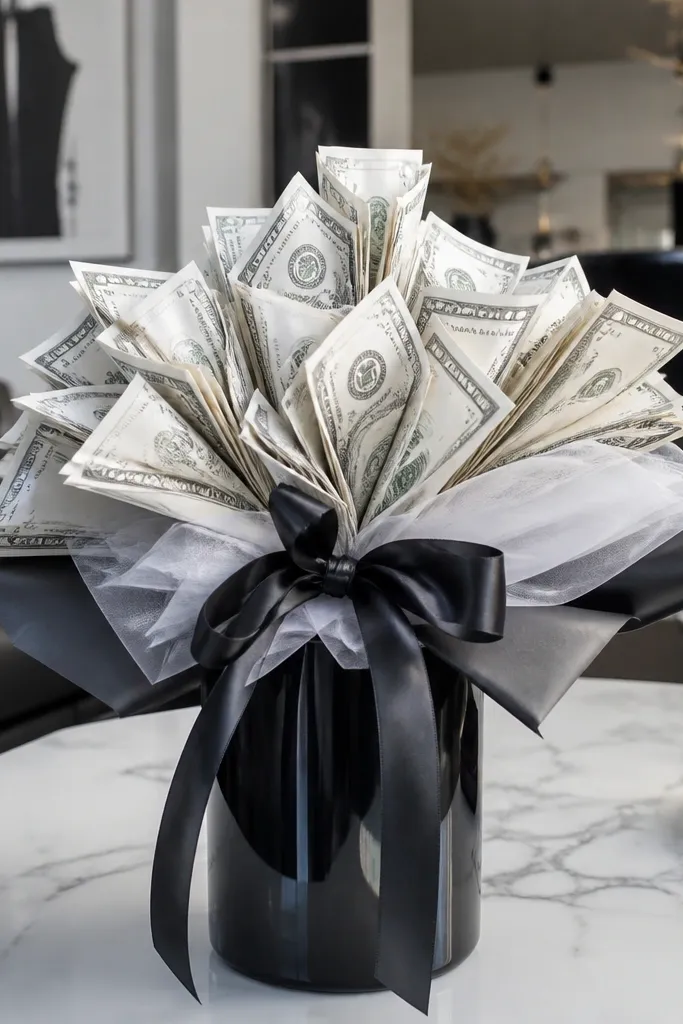
Monochrome makes the money folds look crisp, especially in indoor photos. The key is pairing the money with matte textures: black ribbon, white tulle, and flat cardstock backings. This bouquet looks intentional because every element has the same visual weight and none of the decorations fight the bills. It suits modern apartments and simple event styling.
Wrap each bill in a very light coat of matte medium (or use matte clear tape on the back) so it doesn’t glare. Fold bills into consistent petal shapes and glue to cardstock circles, then layer the circles like a flower head. Cover the base with white tulle, then wrap stems in black satin ribbon and secure with floral tape.
Test a single folded bill under your phone camera — if it glares, add one more thin matte layer.
Don’t mix glossy and matte in the same area — it creates distracting shine differences.
13. Pastel Candy-Stripe Money Bouquet with Twisted Bill Spirals
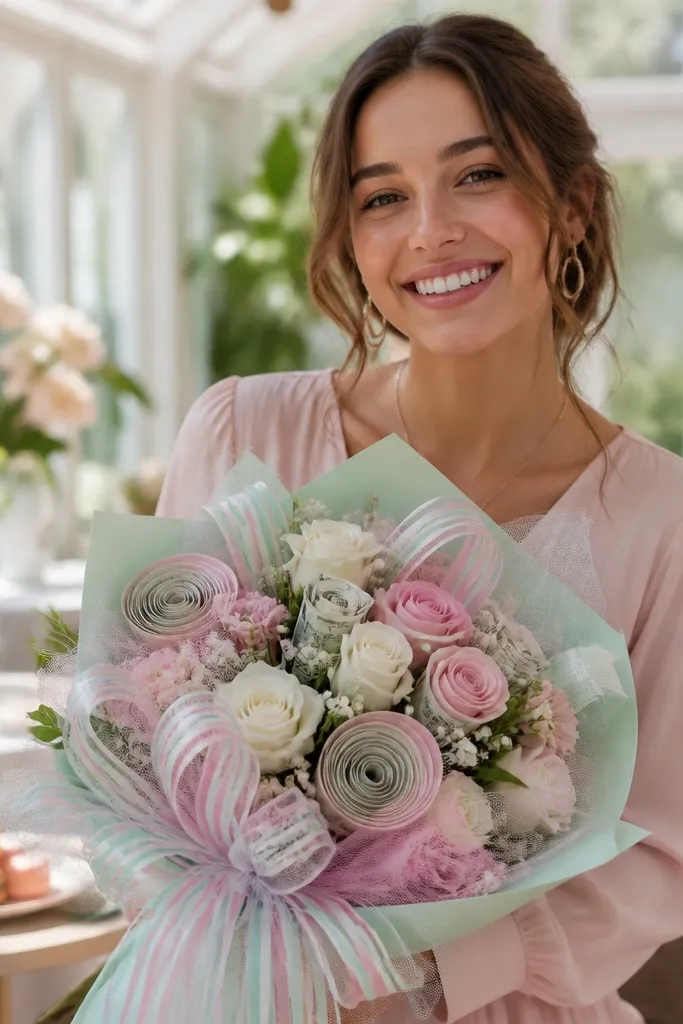
Twisted money spirals look playful and candy-like, and they photograph well because spirals create highlights along the twist. The pastel twist comes from ribbon and tulle, not from repainting money. Use a light color palette and keep the spiral sizes consistent so the bouquet reads as one design. This style fits birthdays and spring events where you want fun energy.
Fold bills into narrow strips, then twist each strip around a skewer or pencil to create a spiral. Glue the spiral base to a cardstock backing and build 12-16 spirals into a circular bouquet head. Add a pastel ribbon wrap on stems and tuck pastel tulle around the base to create a soft halo.
Editor's noteUse a skewer with the same diameter for every spiral so they match in size.
Skip thisAvoid loose twisting — loose spirals look like messy cash instead of crafted petals.
14. Single-Stem Giant Money Bloom Bouquet
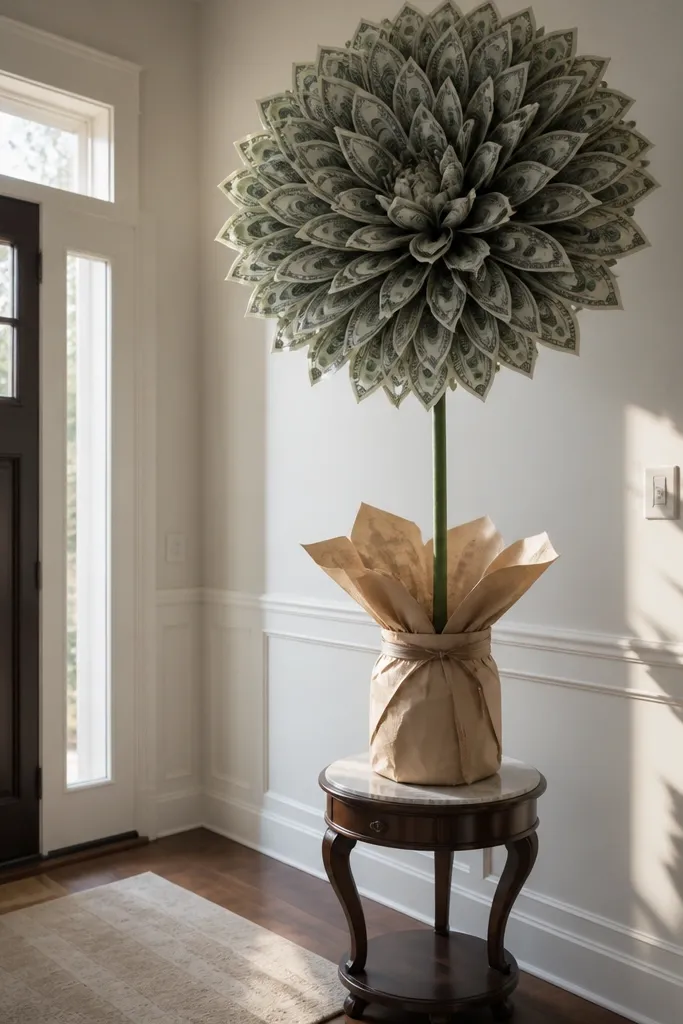
If you want maximum impact with minimal build, do one giant bloom. A single-stem bouquet looks styled because it has one clear focal point, and the height makes it easy to frame in photos. This idea uses a large layered circle of folded bill petals, so you get fullness without multiple heads. It’s a strong choice for gifts at front doors, photo tables, or small spaces.
Cut a foam disc or thick cardboard circle as the base, then create a layered petal ring using folded bills glued around the disc edge. Add a second inner ring with smaller folds so the center looks tight and flower-like. Attach the base to a tall dowel handle, wrap the dowel in ribbon, and finish with a ribbon bow at the top.
Editor's noteGlue petals in a clockwise pattern, pressing each one for 10 seconds so the ring stays even.
Skip thisDon’t start with the center — build from the outer ring inward so you keep a perfect circle.
15. Money Orchid Bouquet with Hanging Bill Strips
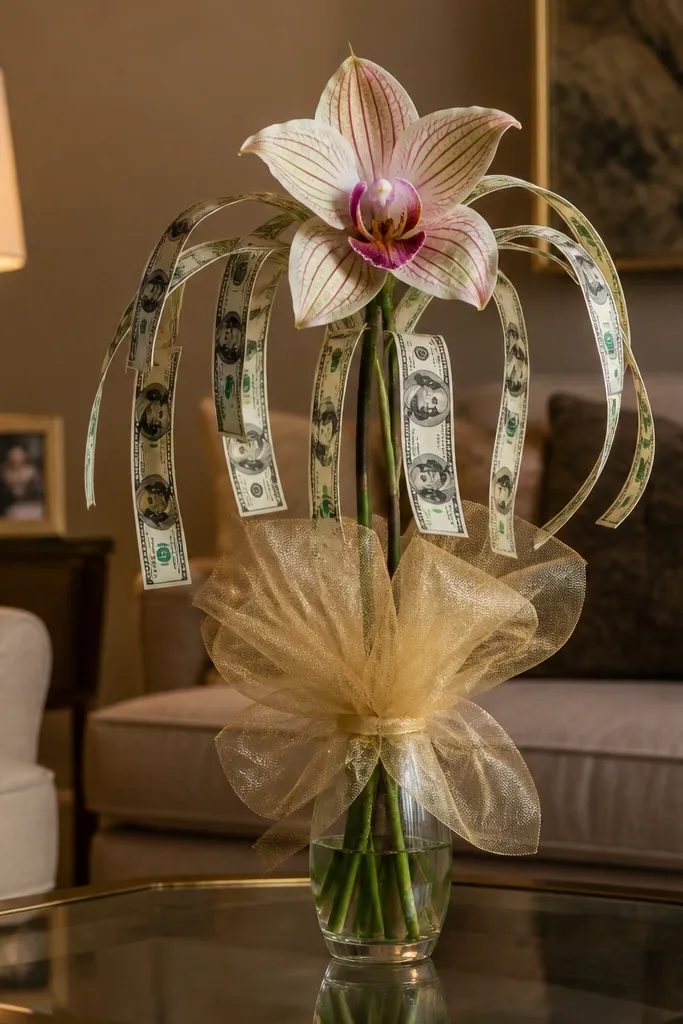
Orchids look delicate and intentional because they have a main bloom plus hanging elements. Use money strips as “hanging petals” so the bouquet moves slightly when carried, which looks great in photos. This style is photogenic even with fewer flowers because the shape is distinctive. It suits refined color palettes like cream, blush, and champagne.
Build orchid heads using three larger folded bill petals and two smaller ones, glued onto a small base circle. Add hanging bill strips by threading the bill through a loop of floral wire and gluing the wire to the base so the strips dangle naturally. Bundle the stems and wrap the handle with ribbon, then add a small cluster of tulle near each orchid base.
Trim hanging strips to stagger lengths by 1/2 inch for a natural orchid droop.
Avoid long strips that touch the handle — they tangle and ruin the clean silhouette.
16. Confetti Money Bouquet with Hidden Bill Springs

Confetti looks fun, but it can also look chaotic unless you control the height. This version uses bill pieces attached to small springy loops so they rise into a cluster, creating a “floating confetti” look. It’s a great way to use smaller bills without making a heavy bouquet head. Photos love this because the upward motion reads as texture, not mess.
Cut bills into small rectangles, then fold each into a tiny accordion and glue the base to a short loop of floral wire. Bend the wire loop so the bill piece sits upward at a consistent angle. Arrange the wire loops into a foam block or dense cardboard sphere, then wrap the base and cover everything with a thin layer of matching tulle.
Editor's noteUse a foam block and push loops in at different depths so the tallest pieces don’t all peak at the same height.
Skip thisDon’t rely on glue alone for the spring — anchor the wire loop into the base so pieces don’t fall.
17. Rosebud Bouquet with Bill Origami Buds on Greenery
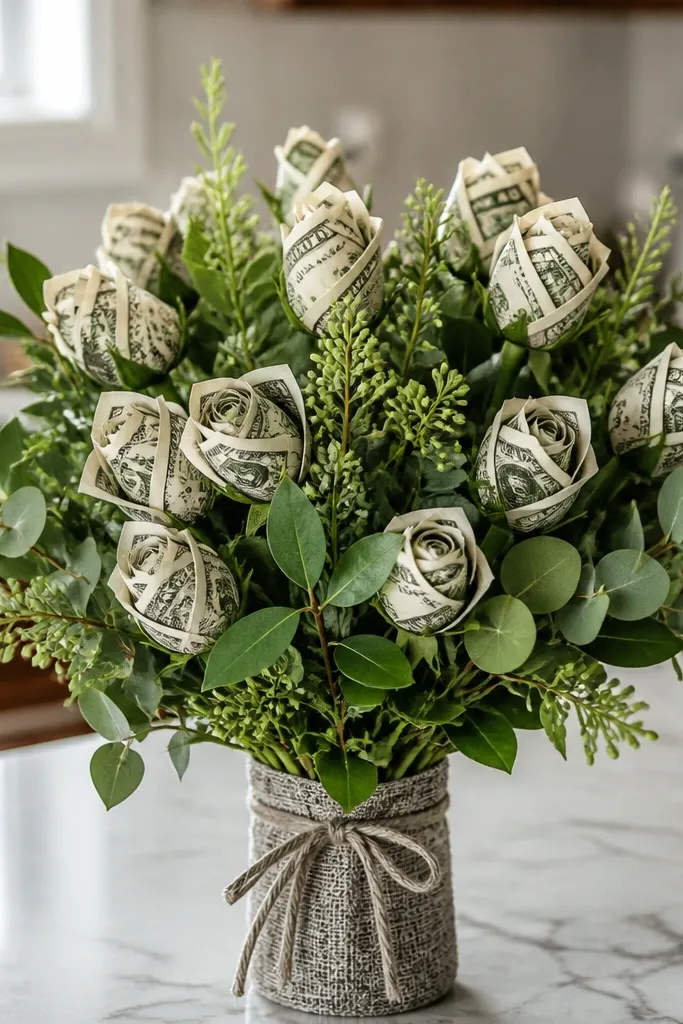
Rosebud bouquets look realistic because buds are small and layered with greenery. Money buds work well when you keep them compact and cover the base with green accents that hide wiring. This style is best for people who don’t want a giant foam sphere and prefer something that looks like a florist arrangement. It also gives you an easy way to scale: add more buds for fullness.
Fold bills into small rosebud shapes by rolling one bill corner inward, then tucking the edges to form a tight bud. Secure each bud to a short floral wire stem and wrap the base with green floral tape. Bundle 8-14 buds with greenery picks, then wrap the handle with ribbon and add a final layer of leaf sprigs around the bouquet head.
Keep bud size within 1/4 inch of each other — tiny differences show up fast in photos.
Avoid bare stems — if you can see wiring, the bouquet reads handmade in a messy way.
18. Lemon-Gold Money Bouquet with Rolled Bill Honeycomb Center
A honeycomb center looks fancy because it has a pattern, and patterns are what make crafts look high-end on camera. The outer petals can be simpler, but the center needs structure. Rolled bill “cells” create that honeycomb texture while still showing money clearly. This works especially well for yellow-themed decor, summer birthdays, and warm color schemes.
Roll small bill segments into tight cylinders, then glue them into a hex-like grid on a round base. Build outer petals using fewer, larger folded bill shapes so the center pattern remains the star. Cover the base with lemon-yellow tissue or tulle and attach the bouquet head to a wire stem bundle wrapped with gold ribbon.
Editor's noteUse a grid template under your base so the cylinder spacing stays consistent.
Skip thisDon’t make the outer petals too dense — it competes with the honeycomb center.
19. Marble-Style Money Bouquet with White Acrylic Accent
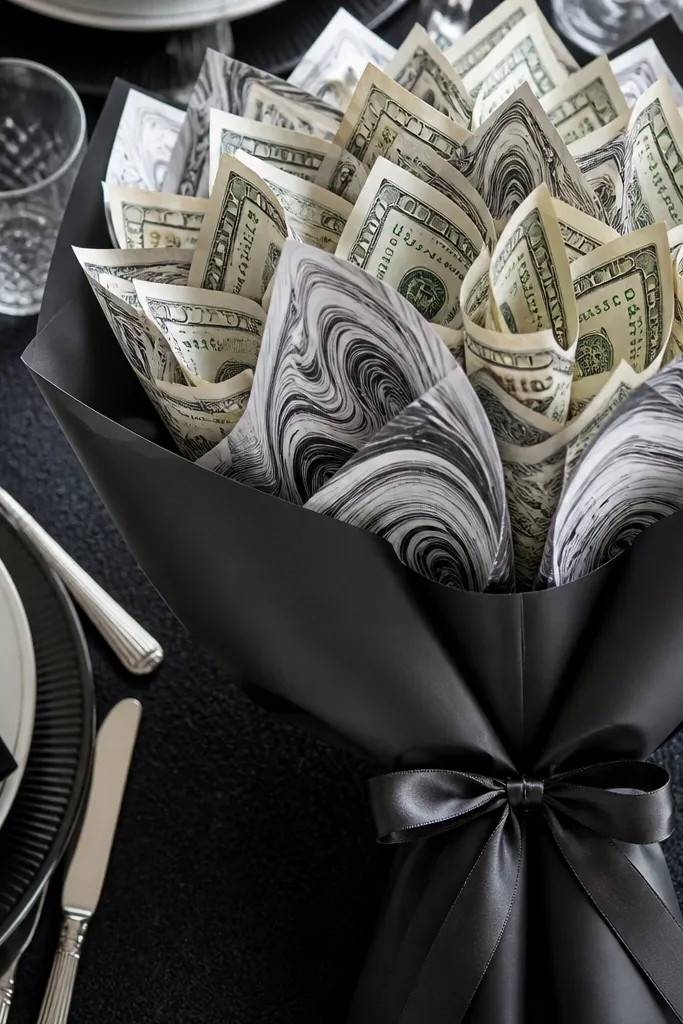
Marble style looks expensive because it has contrast and clean swirls. You can’t marble the money itself, but you can frame it with white acrylic paint accents on cardstock petals so the overall bouquet looks like a design piece. This is a strong pick for black-tie events, minimalist tables, and anyone who wants a neutral aesthetic. The money folds stay readable because the marble pattern sits behind or along edges.
Cut petal backers from cardstock and paint thin gray swirls with white acrylic, then let fully dry. Glue folded money petals to the painted backers so the marble shows around the edges like a frame. Assemble petals in a layered circle, then wrap the handle in white ribbon and add a small gray tulle layer under the bloom.
Seal painted backers with a matte clear coat so acrylic doesn’t smudge when you handle the bouquet.
Avoid thick paint blobs — they crack and look lumpy in close-up photos.
20. Black Dahlia Money Bouquet with Velvet Ribbon and Folded Petals
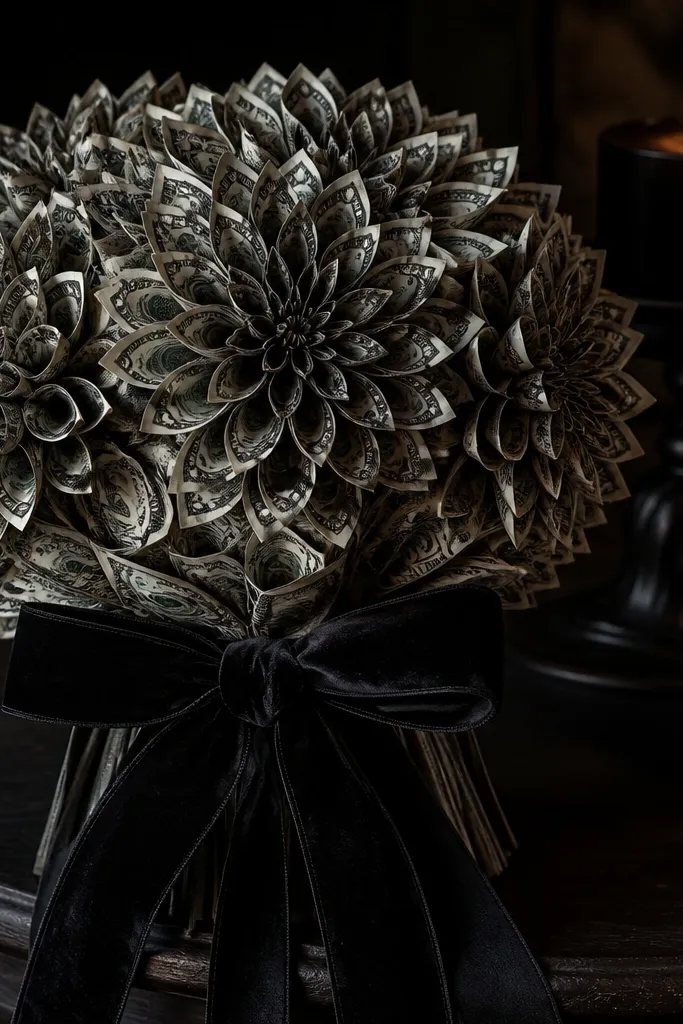
Black dahlia bouquets look dramatic because the petals layer deeply and the contrast is strong. Money petals folded into layered shapes create the same dark flower volume, and velvet ribbon adds a photo-friendly texture that makes the bouquet feel intentional. This is a great choice for Halloween, gothic weddings, or any event with a black-and-white theme. It’s also a good way to make regular bills look “dressed up.”
Fold bills into narrow petal strips, then glue them in overlapping rows on a foam disc, starting with the outer ring. Use black velvet ribbon to cover the foam disc edges and add a dark tulle base under the bloom. Wrap the handle in velvet ribbon and secure with floral tape so it stays tight and doesn’t twist.
Cut the velvet ribbon ends with fabric glue so it doesn’t fray and look messy at the seam.
Don’t use shiny satin — it reflects light and makes black petals look washed out.
21. Rose Quartz Money Bouquet with Blush Tulle Base

Rose quartz styling is all about soft layers and gentle color diffusion. A blush tulle base makes the money look smoother and more delicate, even if your bill folds aren’t perfect. This bouquet reads romantic in photos because the tulle creates a light “cloud” behind the money petals. It’s a solid pick for bridal showers and Valentine-style gifts.
Fold bills into medium petal shapes and glue them onto a small circular base. Cover the base with a gathered blush tulle circle that extends 2-3 inches beyond the petals. Attach the flower head to a handle wrapped in satin ribbon, then add tiny filler greenery or pearl picks around the tulle edge.
Gather tulle with a long basting stitch so the puff stays even around the circle.
Avoid overstuffing the tulle — if it’s too thick, the money disappears.
22. Gold Frame Money Bouquet with Picture-Mat Backing
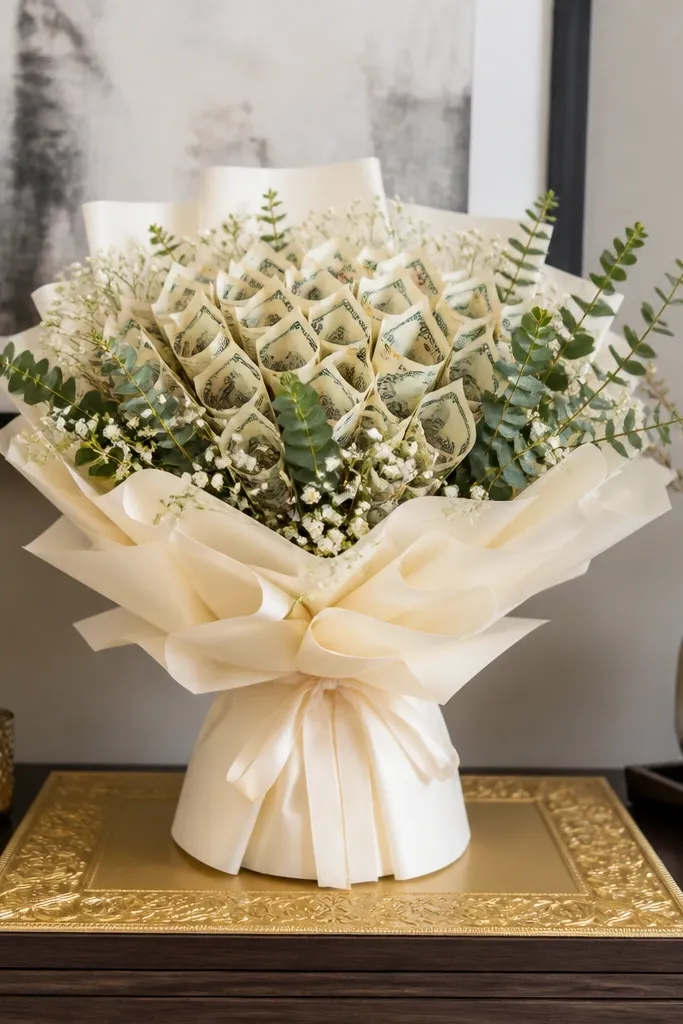
This concept gives you a framed look, which photography loves. You build money petals on top of a gold picture-mat style backing so the bouquet has a structured border like a display piece. It makes the money feel organized and prevents the “random cash” look. Choose this when you want a clean, gallery-style aesthetic rather than a messy bouquet ball.
Cut a round backing from thick cardstock, then cover the edge with metallic gold tape for a frame effect. Glue folded bill petals onto the backing in a layered ring pattern, then add a rolled bill center. Attach the backing to a handle using a dowel inserted behind the card and cover the seam with ribbon and floral tape.
Editor's noteUse a thin craft foam sheet between backing and handle so the bloom doesn’t wobble.
Skip thisDon’t skip a thick backing — a thin circle warps and the petals don’t sit flat.
23. Tropical Palm Money Bouquet with Leafy Bill Fans
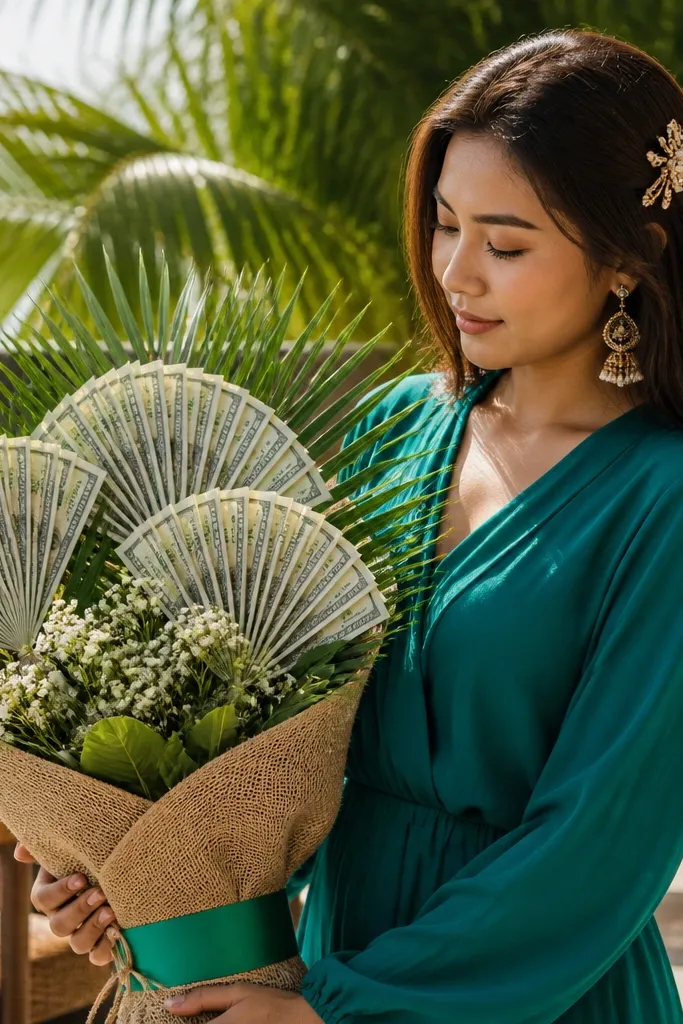
Palm-leaf shapes give you instant tropical vibes, and money fans add movement and texture. The look is bold because the leaf silhouette is large and clear, and the money lines inside the leaves catch light. This is a strong choice for summer parties and beachy decor where you want the bouquet to feel like part of the theme. It also uses fewer materials than a traditional foam bouquet.
Fold bills into fan pleats, then glue the pleats onto leaf-shaped cardstock cutouts. Add a vein line using a marker or thin gold paint to make leaves look more realistic. Attach each leaf to floral wire stems, then bundle 7-10 stems with bright green ribbon and a few real-looking greenery picks.
Make leaf veins with a ruler and light pressure so you get clean lines without tearing paper.
Avoid flat fans with no curve — add a slight bend at the leaf base so the fan reads dimensional.
24. Champagne Spark Money Bouquet with Clear Rhinestone Drops
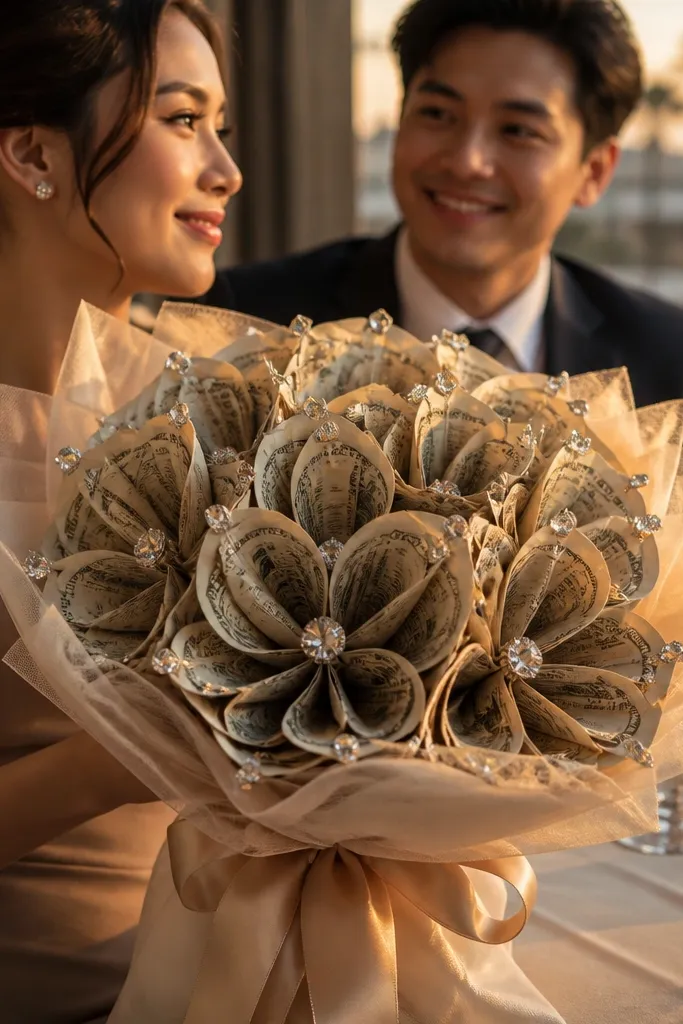
Sparkle makes money look celebratory, but the placement matters. Clear rhinestone drops at petal edges and at the center create a “champagne” glow without turning the whole bouquet into glittery chaos. This is a photo-friendly approach because rhinestones catch highlights at angles. It suits anniversaries, birthdays, and any gift that needs a formal look.
Fold bills into petal shapes and glue them onto cardstock backers. Add rhinestones with craft glue only at the outer edge points and a few in the center, then let dry flat. Assemble petals into a bloom and wrap the handle in champagne ribbon, adding a small bow at the base of the handle.
Editor's notePlace rhinestones after assembly so you can adjust spacing based on how the petals overlap.
Skip thisDon’t glue rhinestones directly to folded creases — they pop off when the paper flexes.
25. Spiral-Wallet Money Bouquet with Leather-Loop Buds
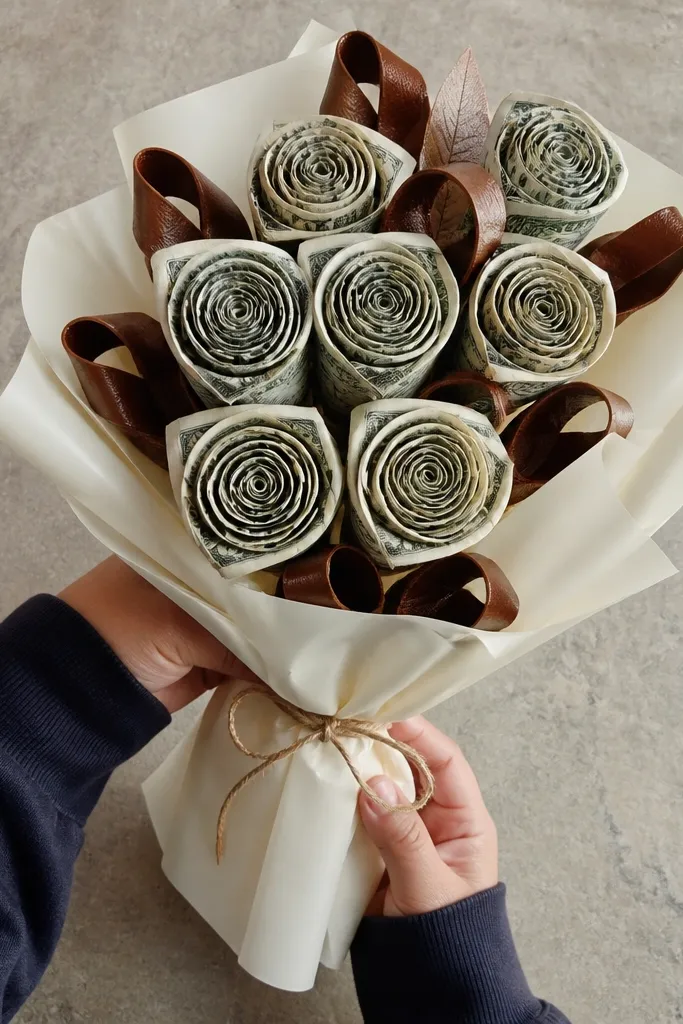
This one looks expensive because it mimics a boutique wrapped bouquet, but it’s built from paper you already have. The money forms tight spirals like mini rosettes, and the leather-look loops add that “real accessory” feel instead of the usual paper-only look. It solves the biggest money-bouquet problem — bills look flat and stiff unless you shape them — these spirals stay sculptural even in photos. You’ll need a little patience for the winding, but the build is straightforward and the result looks clean from every angle. It fits gift tables, desks, and small shelves where you want something that reads as style, not just craft.
Cut 10-14 strips of cardstock, 3/4 in wide and 8 in long. Wrap each strip around a 1/4 in dowel (or a chopstick handle) with the long edge slightly overhanging, then glue the overlap so it stays a tight spiral form. Wind a folded bill strip around the cardstock spiral, starting at the center and working outward, and glue the last 1/2 in to the back so the spiral doesn’t loosen. Slide a small leather-look loop over the finished spiral (use faux leather strips about 1/4 in wide, tied into a tight circle) and glue the loop at the base. Repeat for each bud, then wire them into a bouquet using 22-gauge craft wire and a short floral tape wrap at the top; finish by wrapping the stems with twine or leather-look ribbon.
Use a thin craft glue like tacky glue and apply it with a toothpick — it keeps the spiral glossy and prevents lumps that show in close-up photos.
Avoid winding the bills too loosely or you’ll end up with floppy rosettes that look crumpled instead of sculpted.



