

1. Single Heart Accent

One small heart tucked by the handle is the gentlest way to make a mug cute, and it takes two minutes. Placing it where your thumb lands makes it feel like a little secret. A single heart in a soft color reads sweeter and more grown-up than a scatter of them.
Degrease the mug with rubbing alcohol and mark a small heart in pencil beside the handle. Fill it with two thin coats of blush porcelain paint using a fine round brush, working from the outline inward. Wipe stray pencil with an alcohol swab, then air-dry 24 hours and bake in a cold oven at 300F/150C for 30-35 minutes, cooling inside.
Draw the heart as two small circles with a V beneath, then fill the gaps so it comes out even every time.
Don’t center a big heart on the front; an oversized heart looks childish where a small tucked one looks intentional.
2. Simple Smiley Face

A classic smiley is the friendliest motif there is and it is just three marks. Two dot eyes and one curved smile turn a plain mug into a mood-lifter. It suits anyone and works in any single color, though black keeps it clean and modern.
Degrease the mug and pencil the face lightly to set spacing. With a fine oil-based porcelain paint pen, add two dot eyes and one confident curved smile, keeping it on the front and below the rim. Let it sit undisturbed, air-dry 24 hours, then oven-cure at 300F/150C for 30-35 minutes in a cold oven and cool inside.
Editor's noteDraw the smile in one quick sweep rather than tracing it slowly; a fast line looks cheerful, a slow one looks nervous.
Skip thisDon’t overthink proportions; spacing the eyes too far apart is the one thing that makes a smiley look odd.
3. Rosy-Cheek Happy Face

Adding two blush cheeks to a smiley instantly makes it kawaii and warm. The cheeks do all the charm work, so the rest can stay minimal. It is a great step up from a plain smiley without needing any new skill.
Degrease the mug and pencil the face. Ink two dot eyes and a small smile with a fine porcelain pen, then stamp two round cheeks below the eyes using a pencil eraser dipped in blush porcelain paint. Keep the cheeks small and even, air-dry 24 hours, then bake in a cold oven at 300F/150C for 30-35 minutes and cool inside.
Place the cheeks slightly below and outside the eyes, not beside them, so the face reads happy rather than surprised.
Don’t make the cheeks large or bright red; small soft blush circles are what make it cute instead of clownish.
4. Sleepy Closed-Eyes Face

Swapping dot eyes for two little downward curves gives you a peaceful, sleepy face that feels perfect on a morning coffee mug. It reads relaxed and cozy. The whole design is three curved lines, so it stays beginner-friendly.
Degrease the mug and lightly pencil the placement. With a fine porcelain paint pen, draw two gentle downward-arc closed eyes and a small curved smile below them. Keep the arcs matching in size and on the front, air-dry 24 hours, then oven-cure at 300F/150C for 30-35 minutes in a cold oven and cool inside.
Editor's noteMake both eye-arcs in the same direction and height; mismatched curves are what break the calm sleepy look.
Skip thisDon’t add eyelashes or eyebrows; the charm is the simplicity, and extra lines make it fussy.
5. Little Cat Face

A simple cat is just two triangle ears, dot eyes, and a few whisker lines. It reads instantly as a cat without any real drawing. Cat lovers adore these, and the design leaves the rest of the mug clean.
Degrease the mug and pencil two small triangle ears with a face below, kept well under the rim. Ink the ears, two dot eyes, a tiny nose, and three whisker lines per side with a fine porcelain pen, filling the ears solid with a small brush. Air-dry 24 hours, then bake in a cold oven at 300F/150C for 30-35 minutes and cool inside.
Keep the two ears the same size and angle; lopsided ears are the giveaway of a rushed cat.
Don’t run the ears up to the rim; keep the whole face a half-inch below the lip so no paint meets the mouth.
6. Cozy Bear Face

A bear is a round face with two little rounded ears and an oval snout. It looks huggable and works beautifully in warm brown or caramel. It is a touch more involved than a smiley but still made of simple shapes.
Degrease the mug and pencil a round face with two half-circle ears on top. Fill the ears and a small oval snout with brown porcelain paint using a small brush, then add dot eyes and a tiny nose with a fine pen. Air-dry 24 hours, then oven-cure at 300F/150C for 30-35 minutes in a cold oven and cool inside.
Editor's noteAdd two tiny lighter dots inside the ears; that small inner-ear detail makes the bear read as intentional, not blobby.
Skip thisDon’t overfill the snout area; a small oval keeps the face cute, while a big muzzle makes it look like a dog.
7. Floppy-Ear Bunny
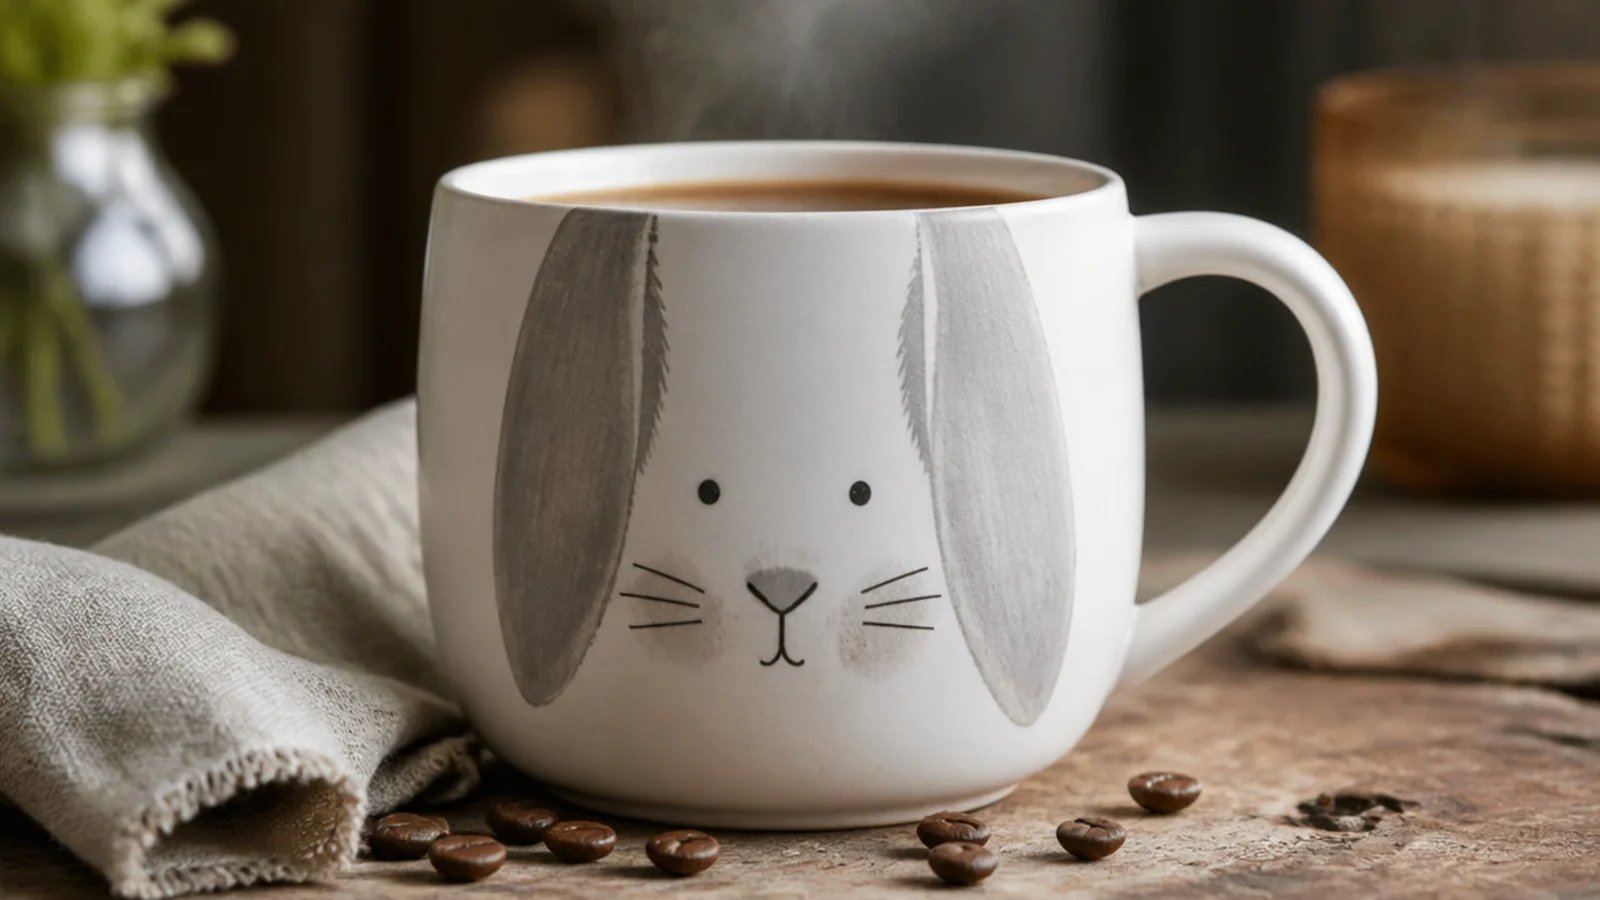
A bunny with two long floppy ears is sweet and a little different from the usual round-eared animals. The draping ears add movement and take up pleasant space on the mug. Soft grey or blush keeps it gentle.
Degrease the mug and pencil a small face with two long ears folding down beside it. Fill the ears in soft grey porcelain paint with a small brush, adding a pale pink inner line, then add dot eyes, a small X-nose, and a tiny mouth with a fine pen. Air-dry 24 hours, then bake in a cold oven at 300F/150C for 30-35 minutes and cool inside.
Let the two ears drape at slightly different angles for a natural floppy look rather than a stiff mirror image.
Don’t paint the ears standing straight up if you want floppy; upright ears change the whole character.
8. Panda Face

A panda uses the white of the mug as the face, so you only paint the black parts. Two rounded ears, two oval eye patches, and a nose read instantly as a panda. It is a clever, high-impact design that is mostly negative space.
Degrease the mug and pencil two rounded ears, two angled eye patches, and a nose. Fill the ears and eye patches with black porcelain paint using a small brush, then add a white dot in each patch with a fine pen once dry, plus a small nose and mouth line. Air-dry 24 hours, then oven-cure at 300F/150C for 30-35 minutes in a cold oven and cool inside.
Angle the two eye patches inward slightly; tilted patches give the panda expression instead of a blank stare.
Don’t outline a whole face circle; the panda works because the white mug is the face — an outline ruins the effect.
9. Cheerful Frog Face

A frog is two round eyes sitting high with a wide happy smile beneath. On a green mug it is especially fun. The bulging eyes give it personality and it is genuinely simple shapes.
Degrease a green mug or base-coat a white one in sage and let it dry. Paint two white circles high on the front for eyes, add black dot pupils and a wide curved smile with a fine pen, and a small blush cheek each side. Air-dry 24 hours, then bake in a cold oven at 300F/150C for 30-35 minutes and cool inside.
Editor's noteSet the two eyes touching or nearly touching at the top; froggy eyes read best close together and high on the face.
Skip thisDon’t shrink the smile; a small mouth makes the frog look grumpy, while a wide curve makes it cheerful.
10. Little Honeybee
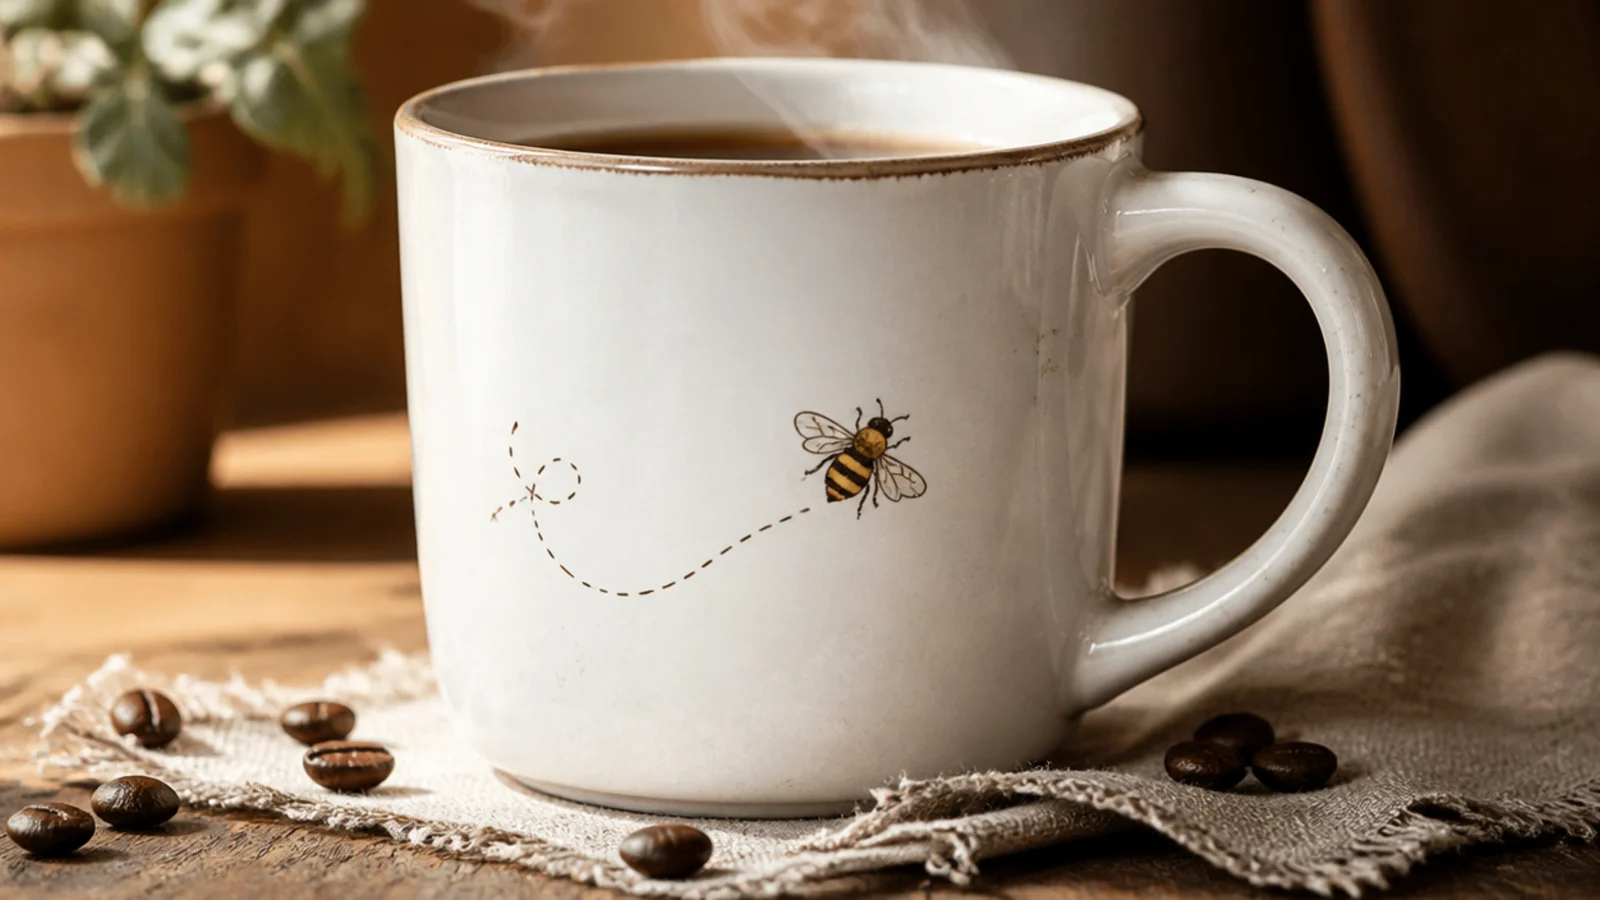
A tiny bee with a dashed flight line looping behind it is a classic cute motif. The little dashes suggest movement and take up space charmingly. It is small, quick, and reads instantly.
Degrease the mug and pencil a small oval body with a curved dashed line trailing from it. Fill the body yellow with a small brush, add black stripes and two small wings with a fine pen, then dot the dashed flight path. Air-dry 24 hours, then oven-cure at 300F/150C for 30-35 minutes in a cold oven and cool inside.
Editor's noteMake the flight line a loose loop rather than a straight dash; a curving path feels playful and fills the space better.
Skip thisDon’t overpaint the wings; two small clear ovals read as wings, while big detailed wings overwhelm the little body.
11. Tiny Ladybug
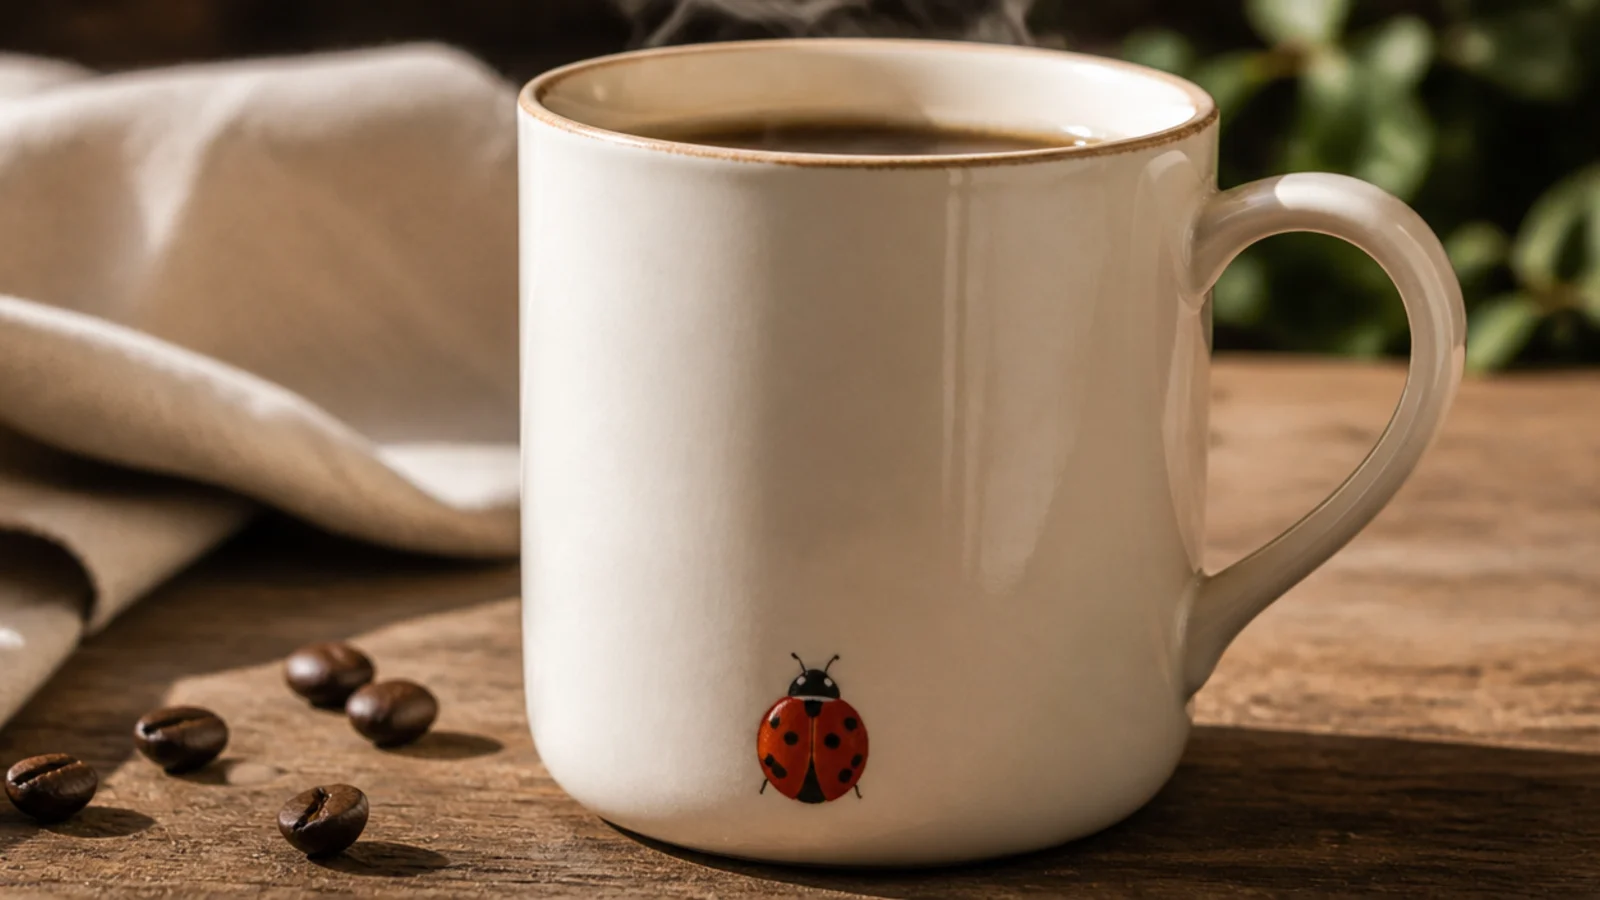
A little red ladybug is cheerful, quick, and unmistakable. Its round body and few black spots are forgiving to paint. One or two ladybugs near the base look like they wandered onto the mug.
Degrease the mug and pencil a small round body with a head at one end. Fill the body red and the head black with a small brush, add a center line and a few dot spots with a fine pen once dry. Air-dry 24 hours, then bake in a cold oven at 300F/150C for 30-35 minutes and cool inside.
Editor's noteKeep the spots even in size and spaced apart; a few tidy dots look better than many crowded ones.
Skip thisDon’t add tiny legs and antennae at this scale; they blob together and muddy the clean little shape.
12. Sweet Strawberry
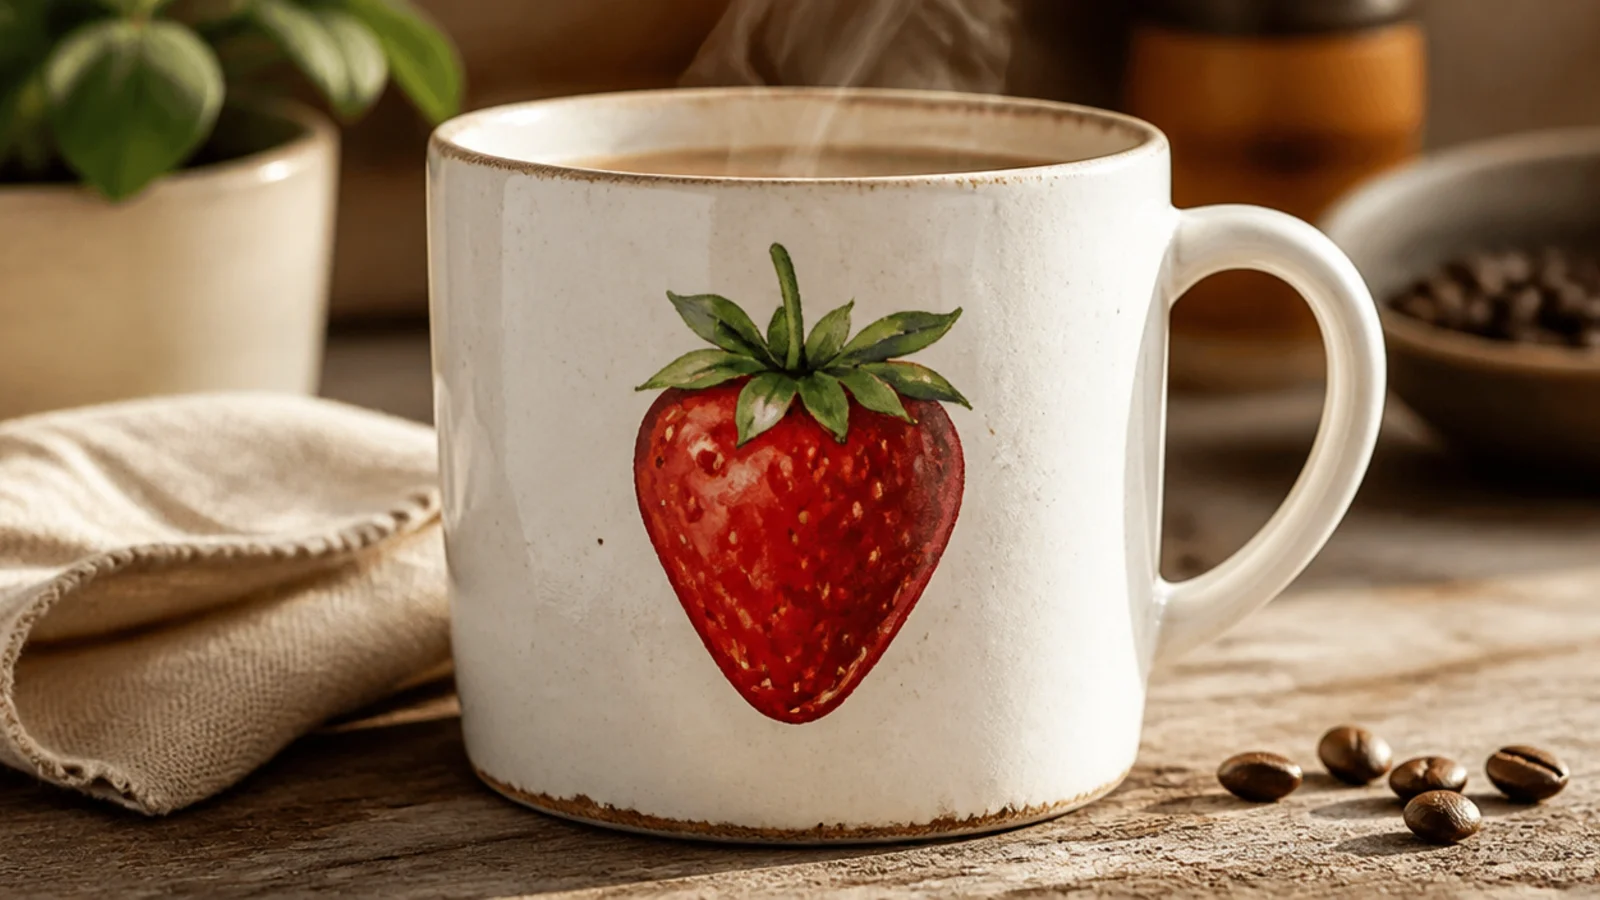
A single strawberry is bright, summery, and beloved for cottagecore mugs. Its heart-ish body and green top are simple shapes. Tiny seed dots add the finishing charm without much effort.
Degrease the mug and pencil a rounded berry shape with a leafy crown. Fill the body red and the crown green with a small brush, then dot pale yellow seeds across the body with a fine pen once dry. Air-dry 24 hours, then oven-cure at 300F/150C for 30-35 minutes in a cold oven and cool inside.
Scatter the seed dots in gentle rows following the berry’s curve so it looks like a real strawberry, not random specks.
Don’t make the berry too pointy; a soft rounded shape reads sweeter than a sharp triangle.
13. Bright Lemon Slice

A lemon slice is fresh and sunny and just a circle divided into wedges. It works alone or paired with a whole lemon. The bright yellow lifts a plain white mug instantly.
Degrease the mug and pencil a circle with a slightly smaller inner circle for the rind. Fill the inner circle yellow with a small brush, then draw wedge lines and a thin rind outline with a fine white or green pen once dry. Air-dry 24 hours, then bake in a cold oven at 300F/150C for 30-35 minutes and cool inside.
Editor's noteLeave a thin white gap between each wedge so the segments read clearly instead of blending into one yellow disc.
Skip thisDon’t crowd in too many wedges; five or six clean segments look right, a dozen thin ones look muddled.
14. Cherry Pair
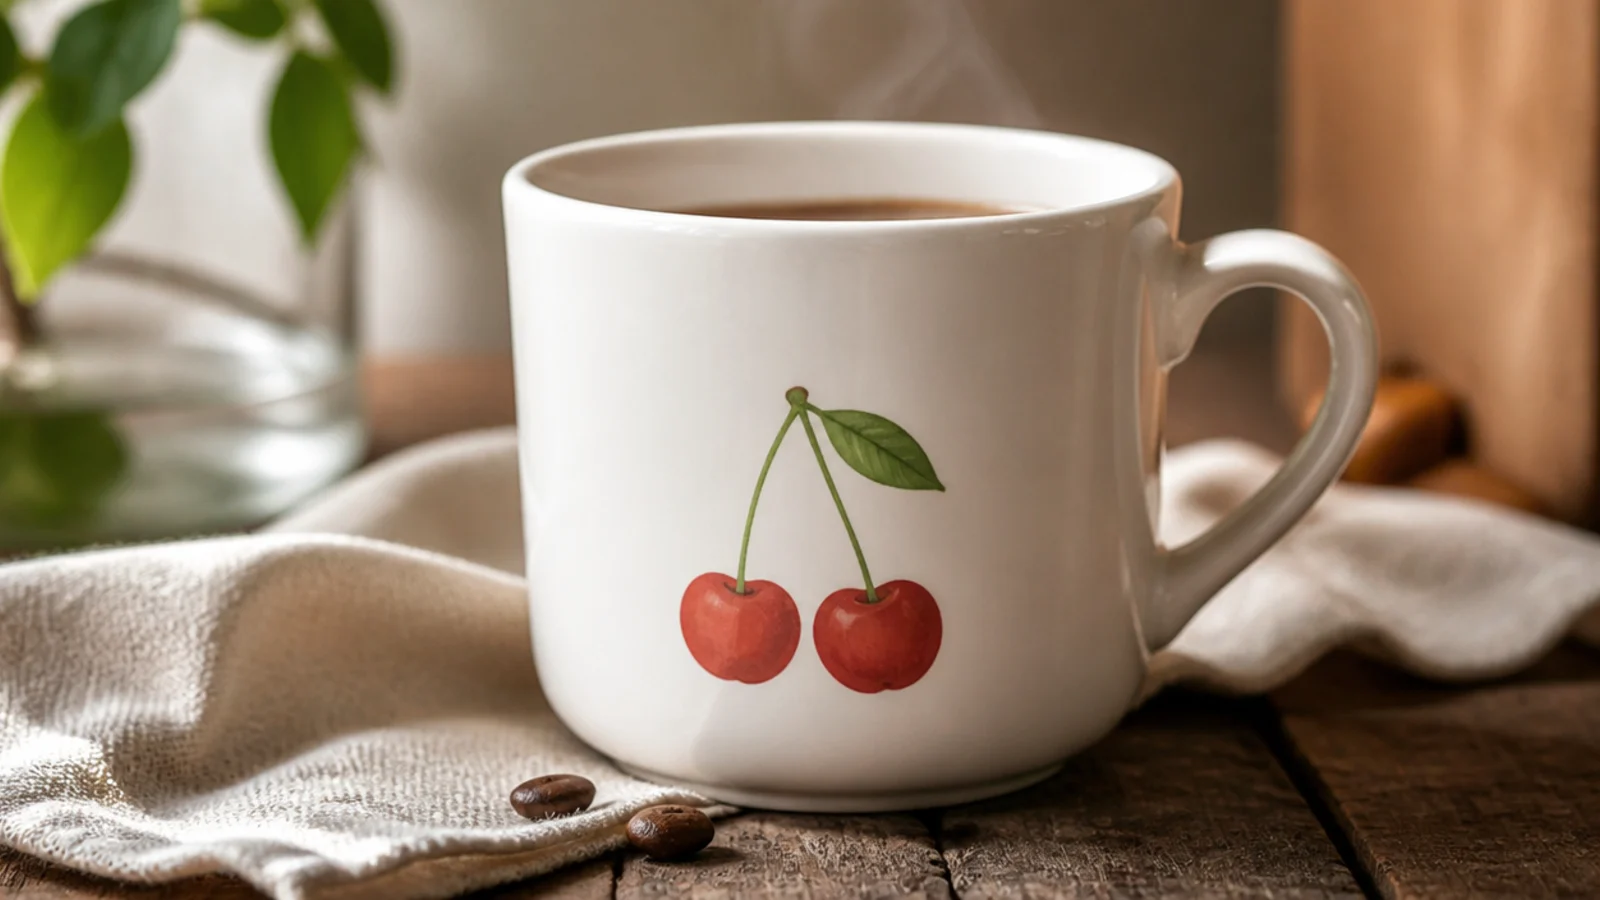
Two cherries on a joined stem are a retro-cute icon that reads instantly. The design is two circles, two stems, and a leaf. It is small, tidy, and very giftable.
Degrease the mug and pencil two small circles with stems meeting at a point above. Fill the circles red with a small brush, then draw the green stems and a small leaf with a fine pen. Add a tiny white highlight dot on each cherry once dry, air-dry 24 hours, then oven-cure at 300F/150C for 30-35 minutes in a cold oven and cool inside.
Editor's noteAdd one small white highlight dot to each cherry; that single shine mark makes them look glossy and finished.
Skip thisDon’t let the stems droop unevenly; a clean matching curve keeps the pair looking deliberate.
15. Rainbow Polka Dots
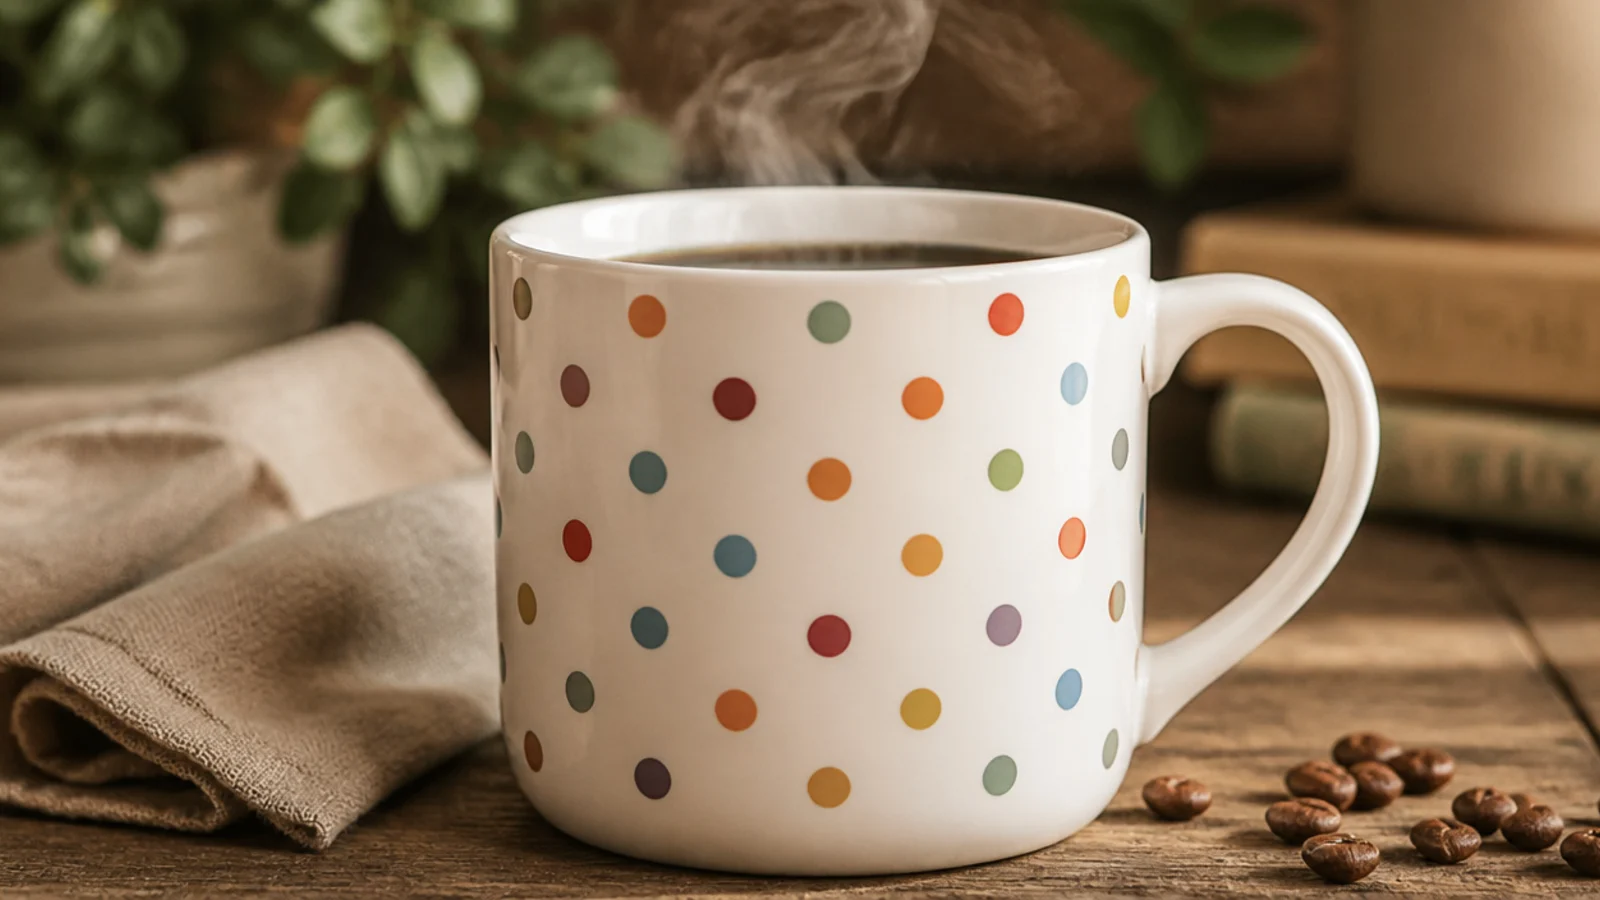
A confetti of pastel rainbow dots is joyful and completely beginner-proof because you stamp them. Using muted rainbow shades keeps it cute rather than loud. It is a great pattern when you want color without a picture.
Degrease the mug and let it dry. Dip a pencil eraser in one porcelain color, stamp evenly spaced dots, then rinse and repeat with the next color, filling gaps so the colors mix throughout. Re-dip for each dot. Air-dry 24 hours, then bake in a cold oven at 300F/150C for 30-35 minutes and cool inside.
Editor's noteSpread each color across the whole mug rather than clustering by color, so the rainbow reads as cheerful confetti.
Skip thisDon’t use bright primary tones if you want it cute; soft muted rainbow shades look far more charming.
16. Cloud with Rainbow
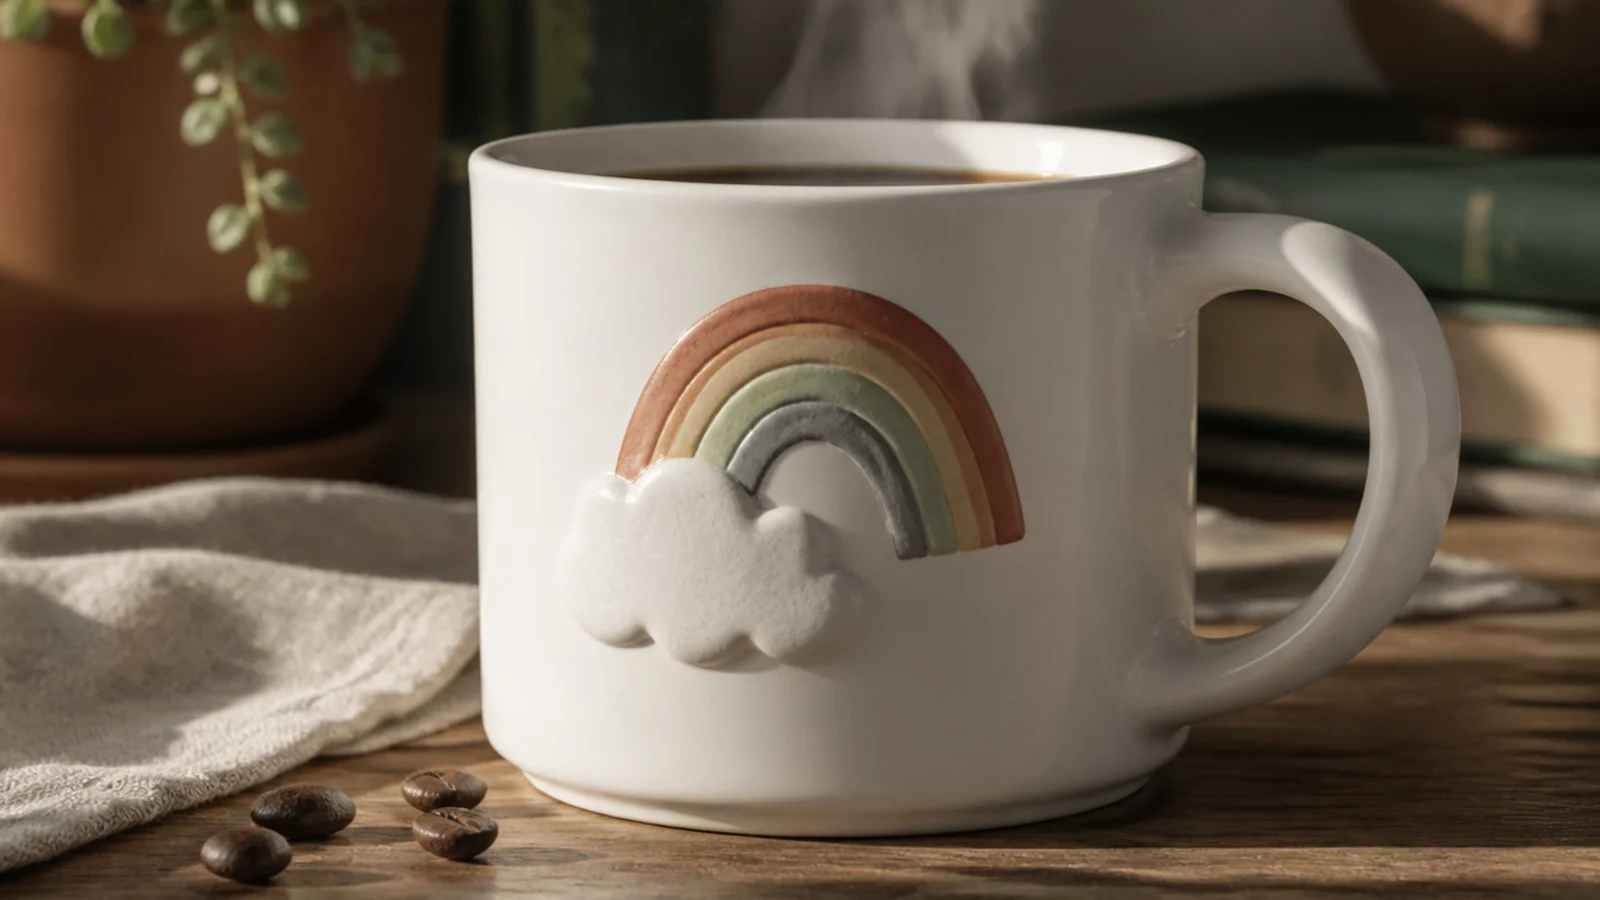
A little cloud with a rainbow peeking out is pure cheer and reads as cute at a glance. The cloud is a bumpy oval and the rainbow is a few nested arcs. It suits kids' mugs and adults who like a bit of whimsy.
Degrease the mug and pencil a bumpy cloud with short rainbow arcs rising from one side. Outline and lightly fill the cloud in pale grey, then paint the arcs in muted rainbow porcelain colors with a small brush. Air-dry 24 hours, then oven-cure at 300F/150C for 30-35 minutes in a cold oven and cool inside.
Editor's noteKeep the rainbow arcs short and only on one side of the cloud; a full arch competes with the cloud for attention.
Skip thisDon’t outline the cloud in a hard dark line; a soft grey edge keeps it fluffy instead of cartoonish.
17. Little Star Sprinkle
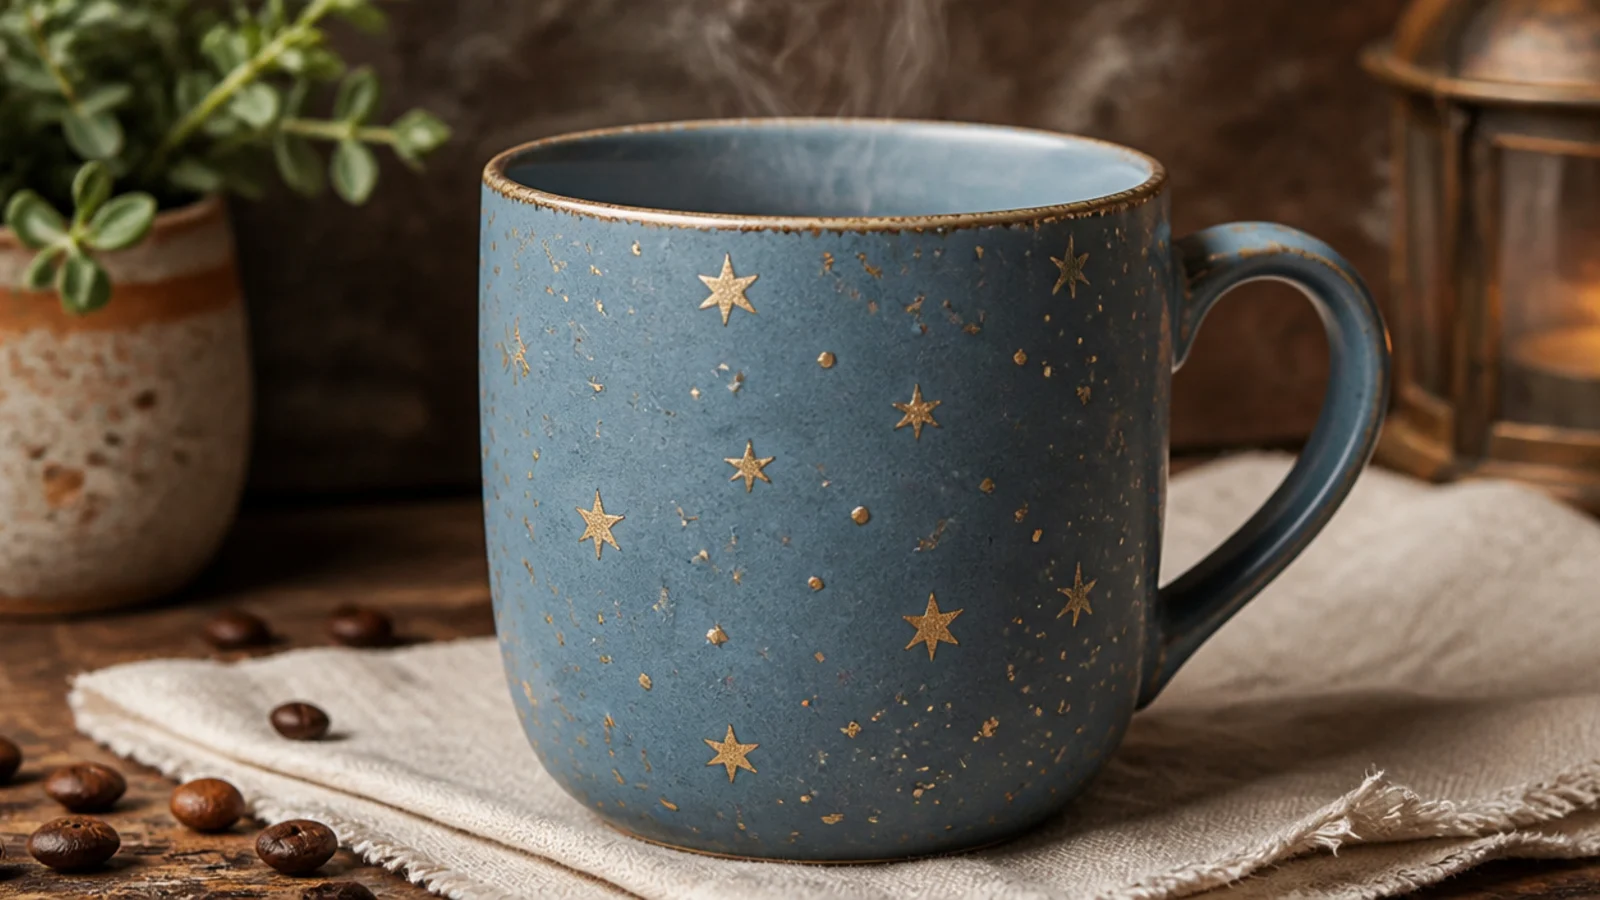
A sprinkle of small stars turns a soft-colored mug into a dreamy little piece. Simple stars plus tiny dots feel magical without being fussy. Gold on dusty blue or blush is especially pretty.
Degrease and base-coat the mug in a soft color, letting it dry. With a fine gold porcelain paint pen, dot small stars and tiny points loosely across the surface, varying the sizes. Keep them scattered, not in rows, air-dry 24 hours, then bake in a cold oven at 300F/150C for 30-35 minutes and cool inside.
Editor's noteCluster a few stars together and leave open space elsewhere; an even spread looks mechanical, a loose sprinkle looks magical.
Skip thisDon’t make every star large; mixing a few big stars with many tiny dots gives that twinkly depth.
18. Scattered Mini Hearts
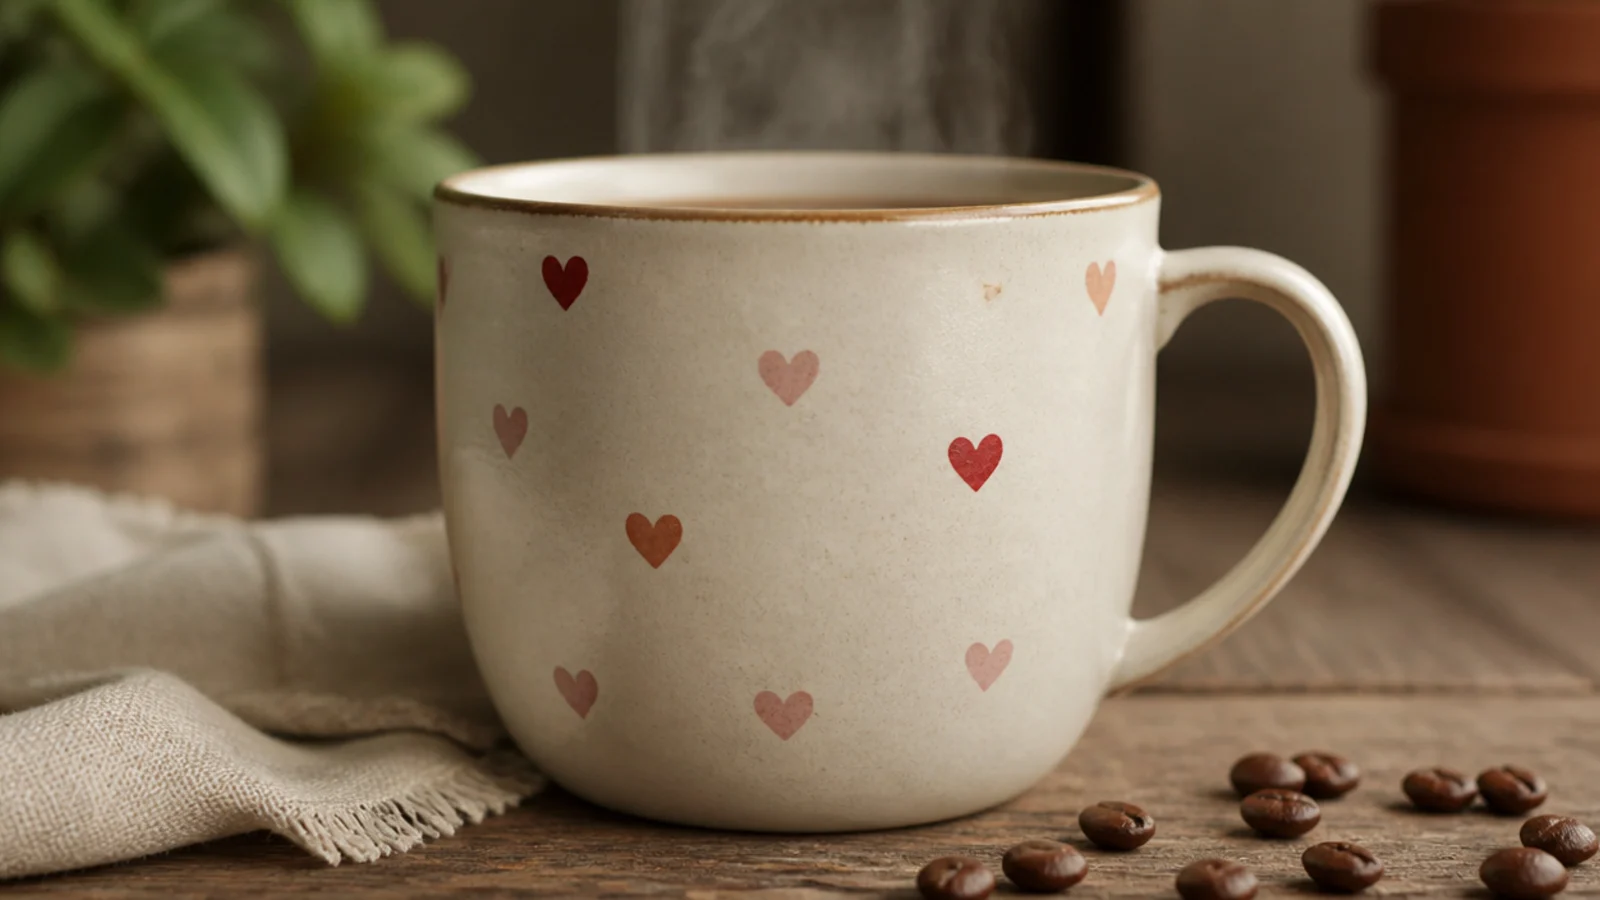
A light scatter of tiny hearts is romantic and sweet, ideal for a Valentine’s or anniversary gift. Keeping them small and spaced makes it elegant rather than loud. Two soft tones read prettier than one flat red.
Degrease the mug and lightly plan heart placement in pencil. Paint small hearts with a fine round brush or pen in blush and muted red, keeping them evenly scattered and below the rim. Air-dry 24 hours, then oven-cure at 300F/150C for 30-35 minutes in a cold oven and cool inside.
Editor's noteVary the heart sizes slightly and tilt a few; perfectly upright identical hearts look stamped, tilted ones look tossed.
Skip thisDon’t crowd the hearts into a solid cluster; generous spacing is what keeps the scatter looking dainty.
19. Daisy Chain
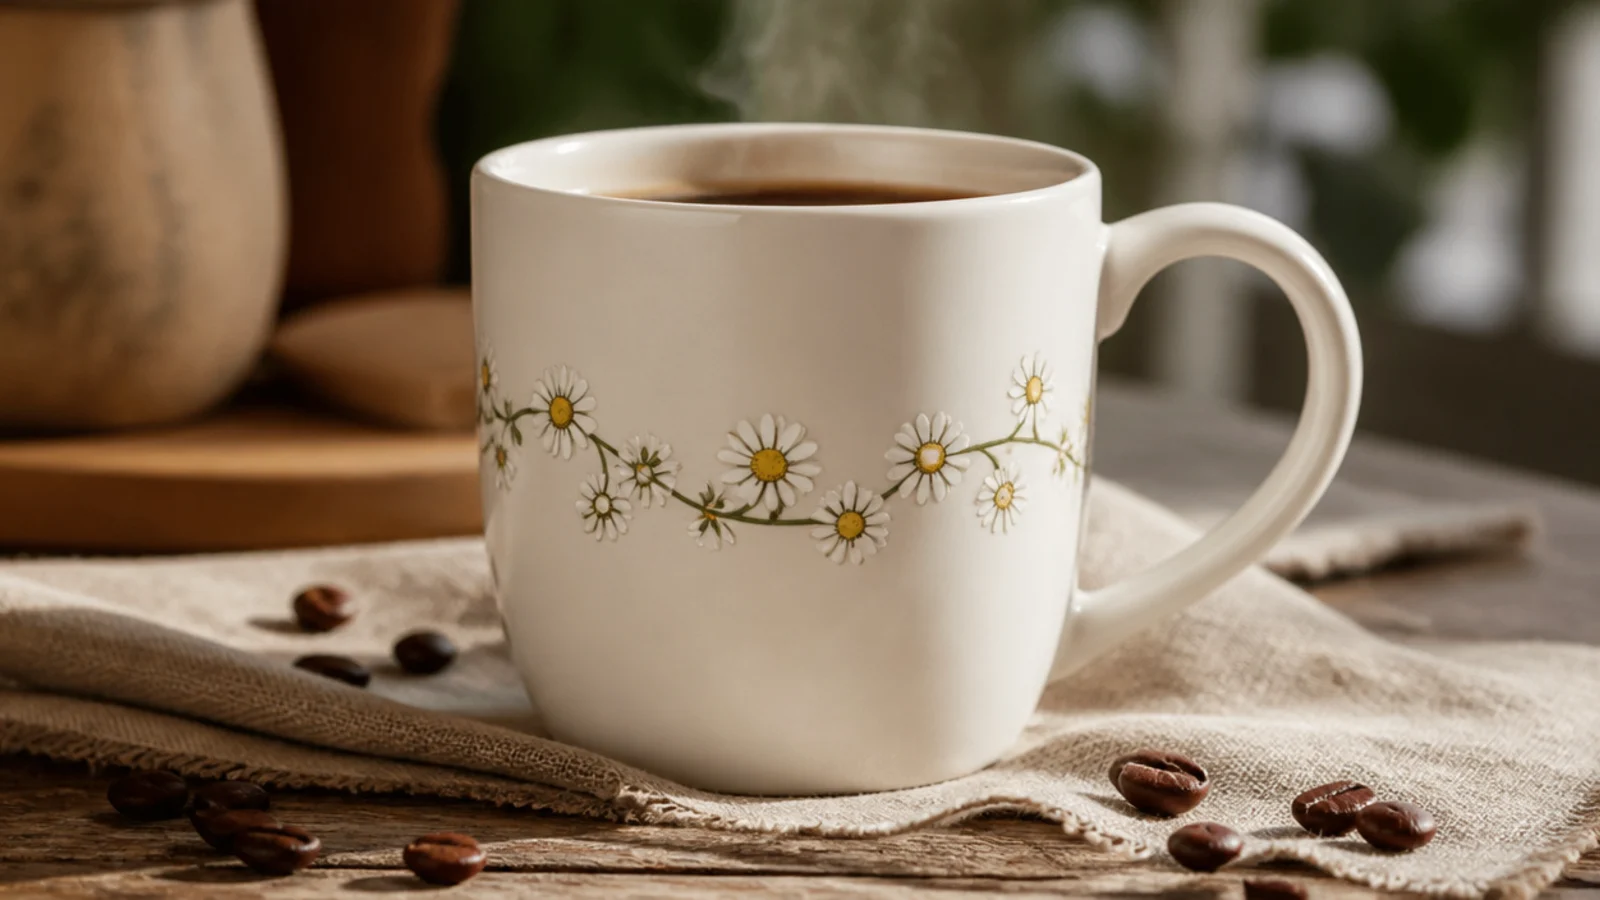
A ring of little daisies linked by a vine wraps the mug in a cheerful band. Each flower is five petal dots around a center, joined by a simple line. It looks like a garland and is more forgiving than a single big flower.
Degrease the mug and pencil a wavy vine line around the body below the rim. Paint the green vine with a fine brush, then add daisies along it — five white petal dots around a yellow center — spacing them evenly. Air-dry 24 hours, then bake in a cold oven at 300F/150C for 30-35 minutes and cool inside.
Add the yellow centers last so you can adjust the petals first; the center pulls each flower together.
Don’t space the daisies unevenly; a wandering gap breaks the garland rhythm and looks unfinished.
20. Wildflower Sprigs
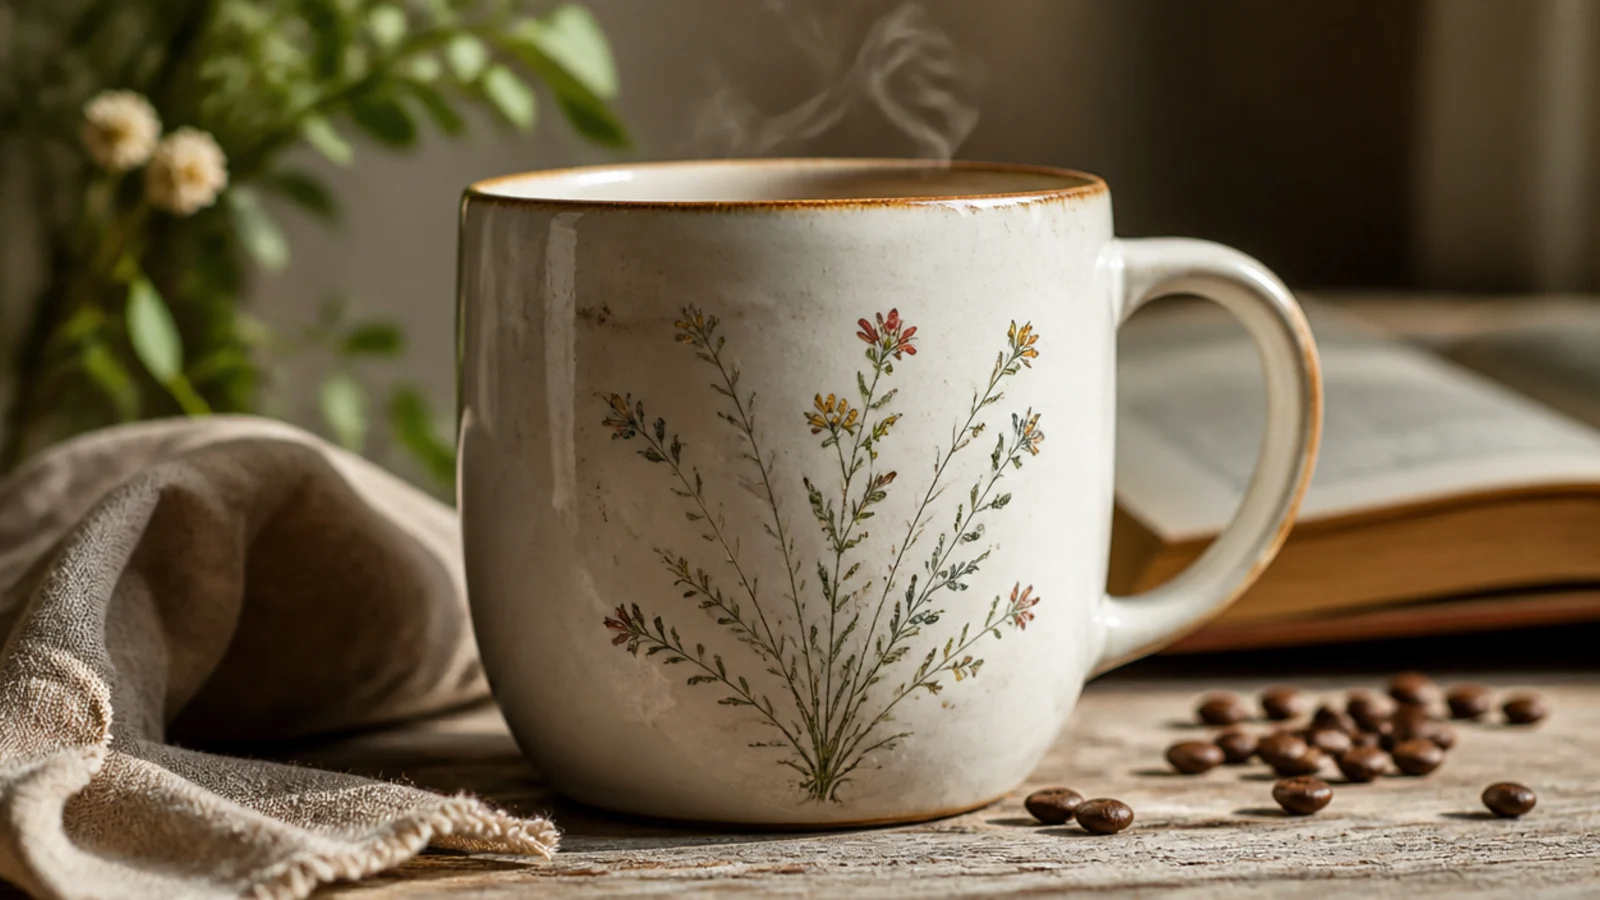
A few slender wildflower sprigs feel fresh and a little more sophisticated than cartoon flowers. Thin stems with tiny dot buds read as meadow flowers. It suits someone who likes cute but understated.
Degrease the mug and pencil two or three thin stems rising from near the base. Paint the stems olive with a fine brush, then add small leaf strokes and tiny bud dots in blush, lavender, and butter yellow. Air-dry 24 hours, then oven-cure at 300F/150C for 30-35 minutes in a cold oven and cool inside.
Editor's noteVary the stem heights and let them lean slightly apart; a fanned spray looks natural, a stiff bunch looks pasted on.
Skip thisDon’t paint big detailed blooms; tiny dot-and-dash buds are what give the delicate wildflower feel.
21. Little Toadstool
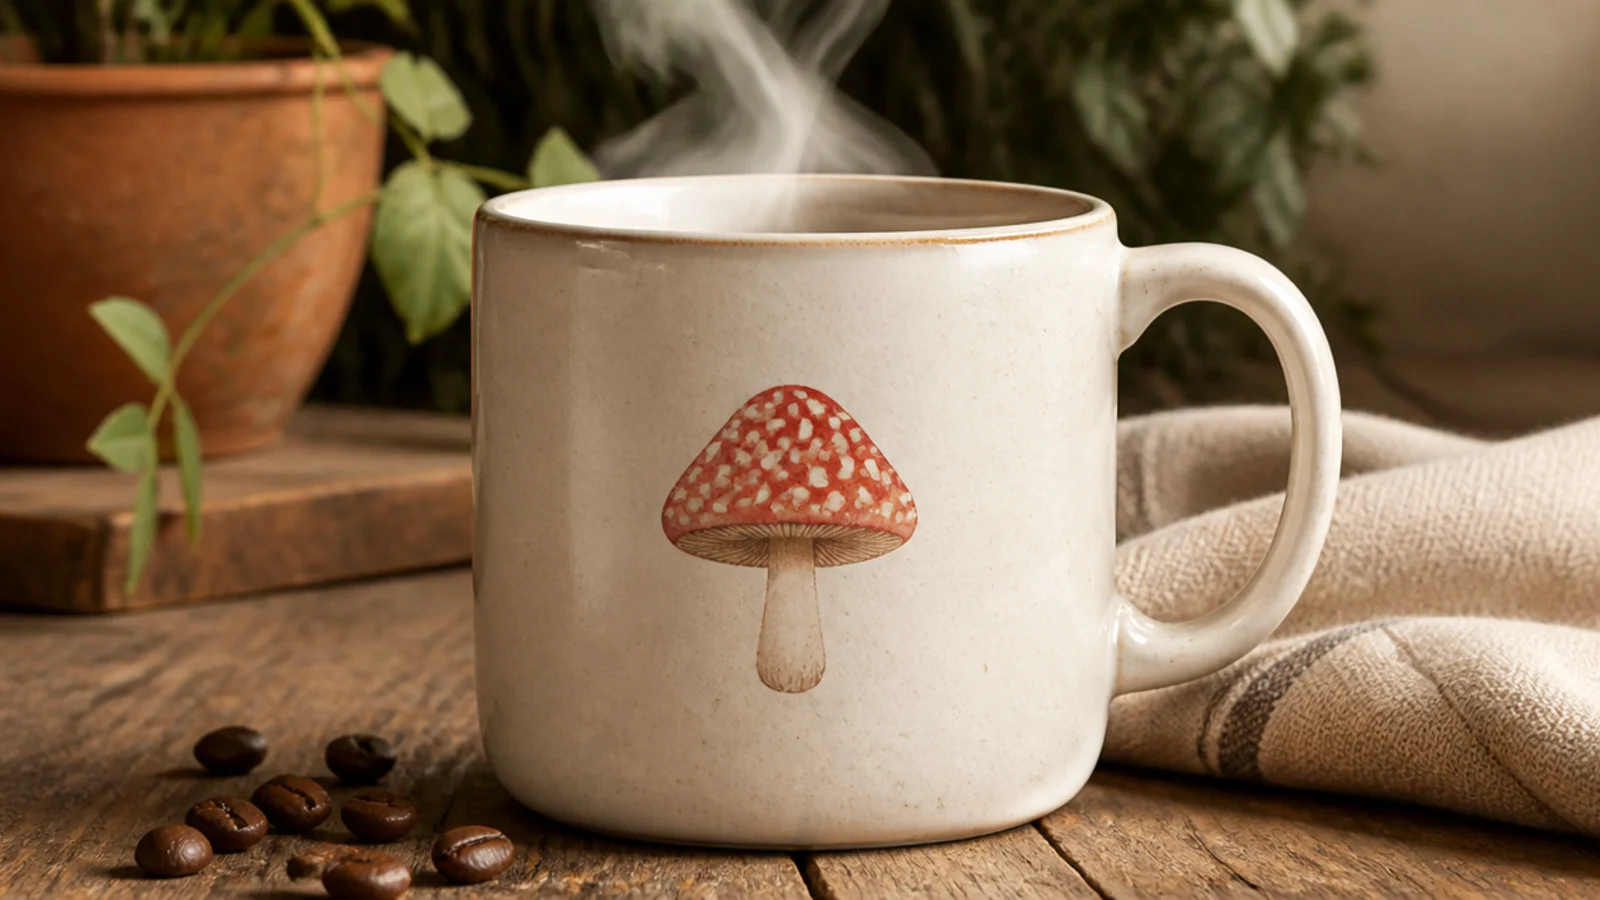
A classic red-and-white toadstool is a cottagecore favorite and instantly cute. The domed red cap with white dots and a little stem is simple to shape. One mushroom is charming; a tiny cluster is even better.
Degrease the mug and pencil a domed cap over a short stem. Fill the cap red and the stem cream with a small brush, then add white dots on the cap and a small collar line with a fine pen once dry. Air-dry 24 hours, then bake in a cold oven at 300F/150C for 30-35 minutes and cool inside.
Editor's noteAdd one tiny blade of grass at the base; that small ground detail settles the mushroom instead of leaving it floating.
Skip thisDon’t overcrowd the cap with dots; a handful of well-spaced white spots looks classic, many tiny ones look speckled.
22. Pastel Checkerboard Band
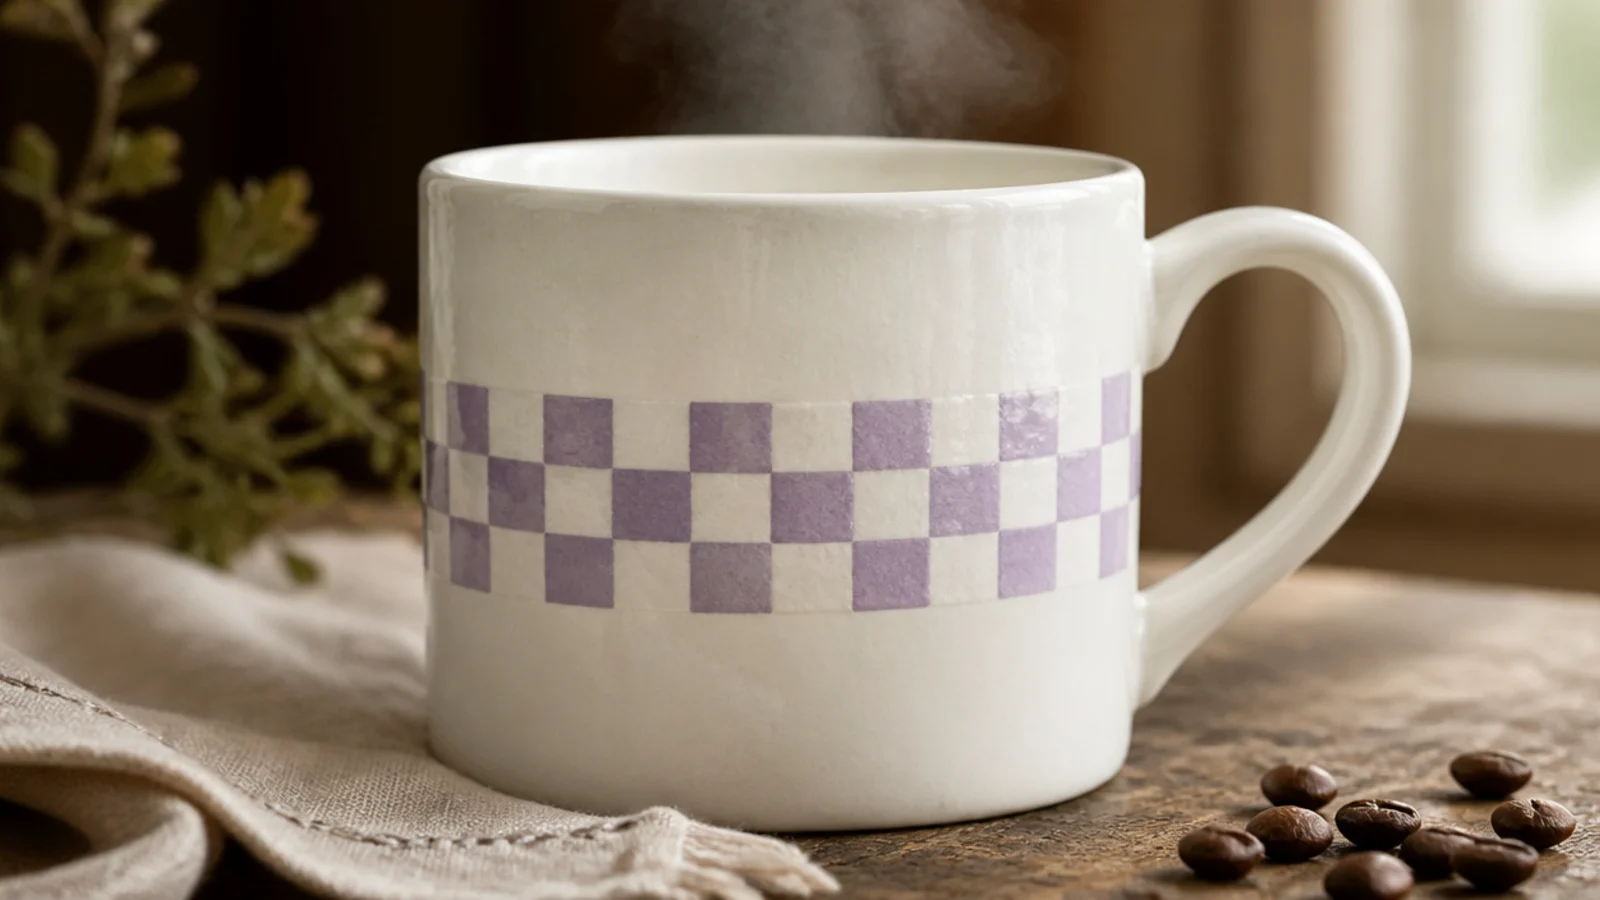
A checkerboard band in a soft pastel reads cute and current, and the grid hides small wobbles. Keeping it to one band around the middle stays clean and playful. Lavender, sage, or blush against white all look sweet.
Degrease the mug and lightly pencil a grid for one horizontal band. Fill alternating squares with a small flat brush in a pastel porcelain color, following the grid, using two thin coats. Erase visible pencil, air-dry 24 hours, then oven-cure at 300F/150C for 30-35 minutes in a cold oven and cool inside.
Editor's noteA small flat brush matches the square edges, so each check fills with fewer, cleaner strokes than a round brush.
Skip thisDon’t checker the whole mug; a single pastel band is faster, cuter, and easier to keep even.
23. Pastel Wavy Squiggles
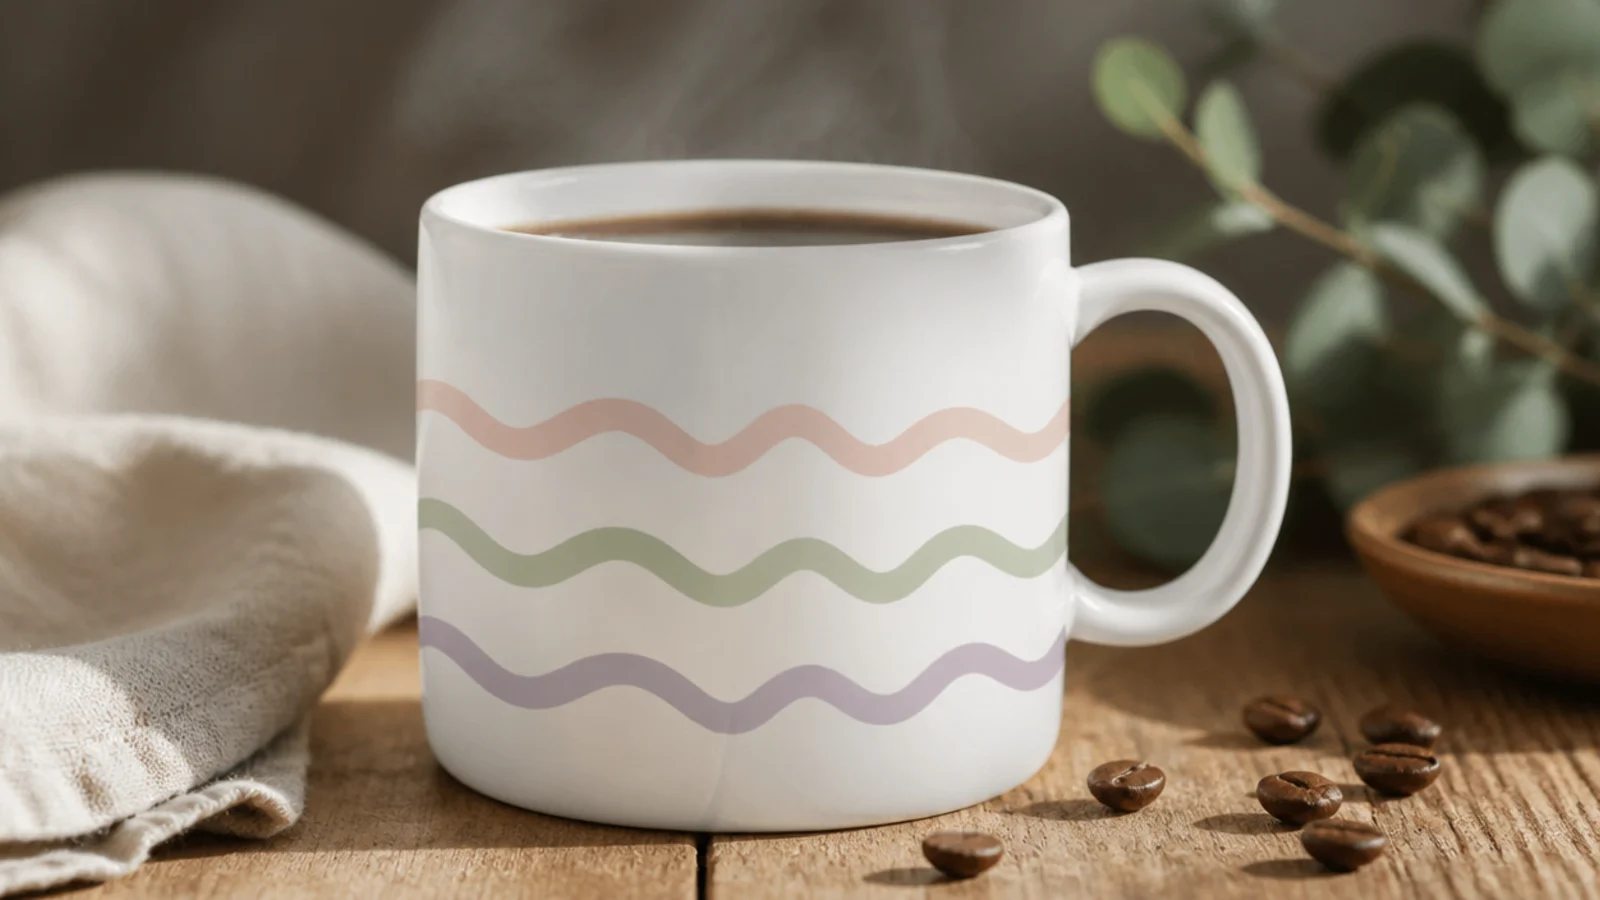
Loose wavy lines in soft colors are playful and modern, and imperfection is the point, so shaky hands help. Two or three colored waves wrapping the mug feel cheerful and calm at once. It is the most forgiving cute pattern.
Degrease the mug and, with fine porcelain paint pens, draw a relaxed wavy line around the body in blush, another in sage below it, and a third in lavender. Rotate the mug as you draw rather than twisting your wrist. Air-dry 24 hours, then bake in a cold oven at 300F/150C for 30-35 minutes and cool inside.
Keep the three waves roughly parallel so they feel like a set rather than three unrelated scribbles.
Don’t let the waves collide; leave a little space between colors or the pattern reads as a smudge.
24. Scalloped Rim Border
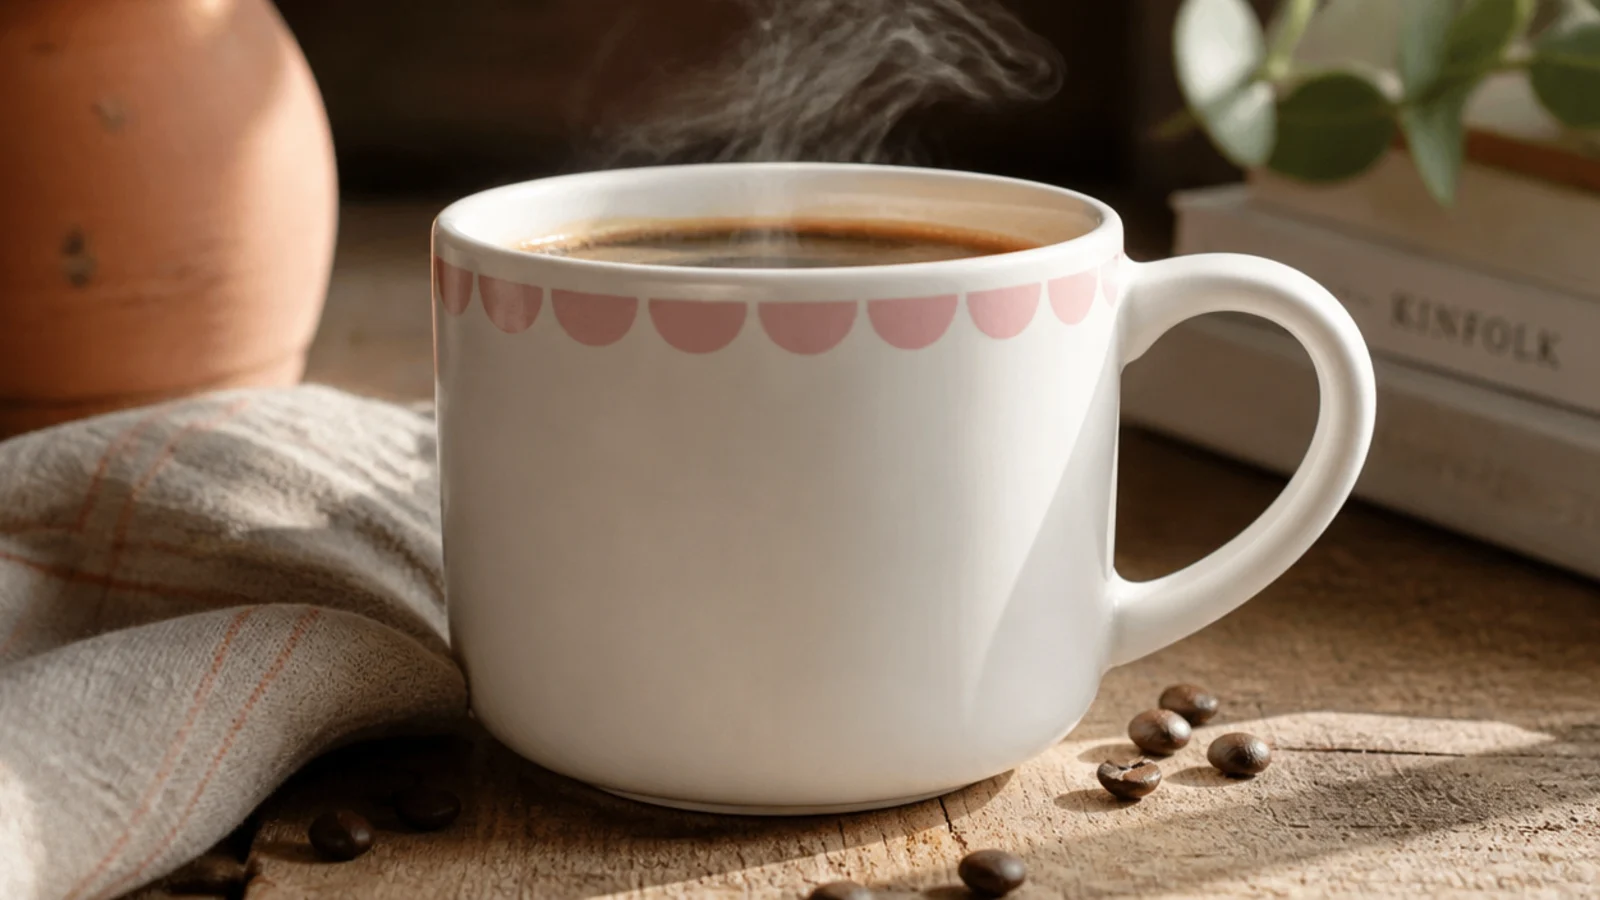
A row of little scallops below the rim looks like a sweet ceramic detail and frames the mug. It is just a line of half circles kept a safe distance from the lip. One soft color is enough to make it charming.
Degrease the mug and lightly mark even sections a half-inch below the rim. Paint small connected half-circle scallops in blush porcelain paint with a fine brush, keeping them uniform. Air-dry 24 hours, then oven-cure at 300F/150C for 30-35 minutes in a cold oven and cool inside.
Editor's noteDivide the rim into equal marks first so the last scallop meets the first cleanly instead of leaving an awkward gap.
Skip thisDon’t paint scallops right at the lip; keep them a half-inch down so no paint touches the mouth.
25. Handwritten Cute Word

A tiny cheerful word like hi, hey, or hello in bubbly lettering is friendly and quick. The rounded letters feel warm and casual. It is a nice cute option for anyone who prefers words to pictures.
Degrease the mug and pencil the word in a straight line on the front to set spacing. Trace it with a fine porcelain paint pen using rounded, chunky letters, then thicken the strokes with a second pass. Erase pencil with an alcohol swab once dry to the touch, air-dry 24 hours, then bake in a cold oven at 300F/150C for 30-35 minutes and cool inside.
Editor's noteKeep the letters rounded and slightly uneven; bubbly imperfect letters feel cute, while stiff even ones feel formal.
Skip thisDon’t attempt a long phrase; a short two-to-five letter word stays cute and legible on the small curved surface.



