

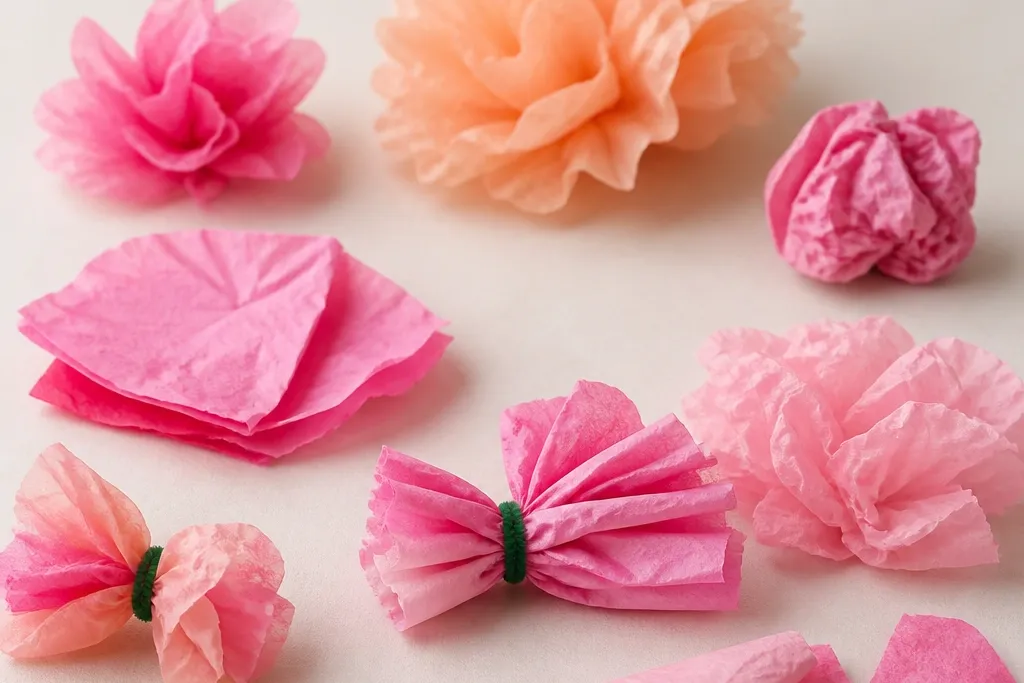
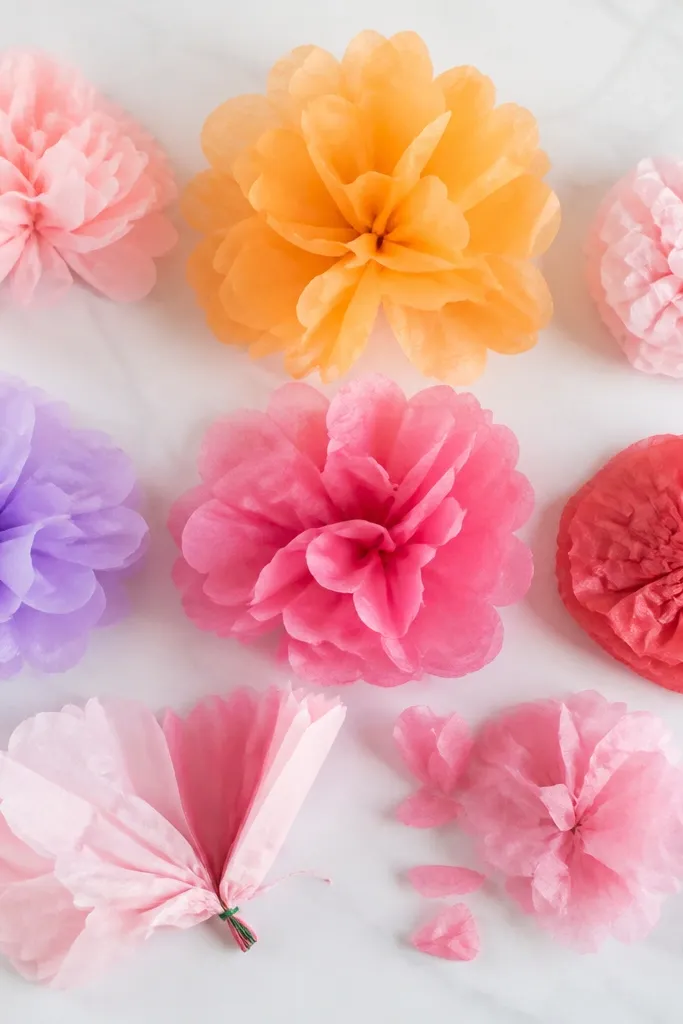
1. Crisp 8-Inch Ruffled Rose
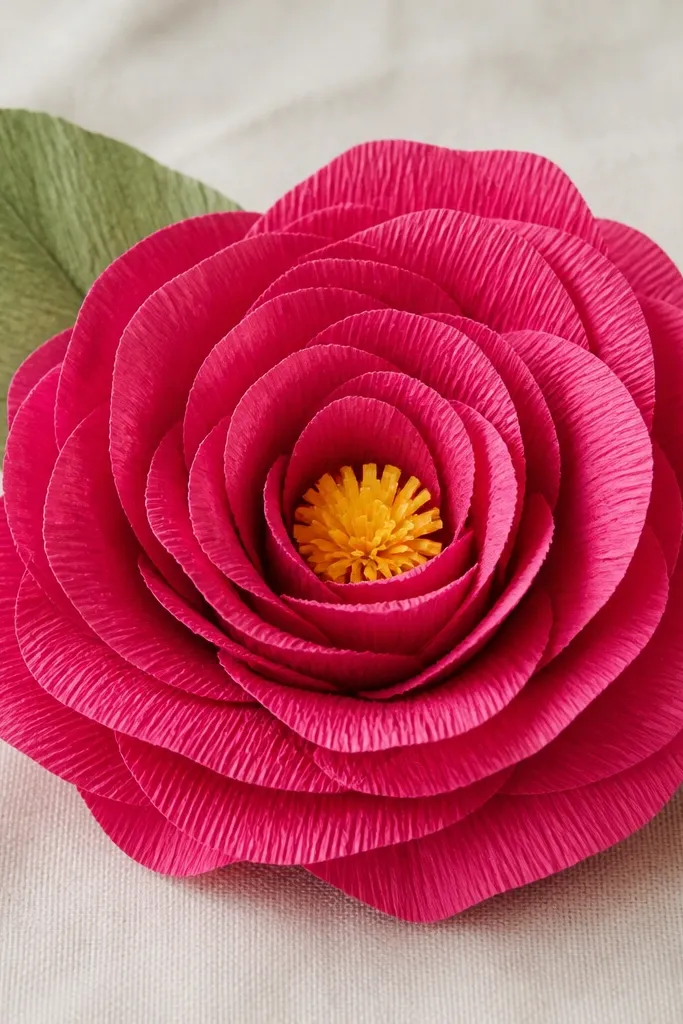
This is the rose look I reach for when I want tissue flowers to photograph cleanly. I use 2 to 3 layers of rose-pink tissue cut into rounded rectangles, then pleat each strip in the same direction so the folds catch light instead of looking wrinkled. The center stays bright because I roll a small strip tightly and glue it only at the very base. This shape flatters most setups because it reads as “full” from straight-on and angled views.
Start by stacking 6 sheets of rose-pink tissue and cutting them into 8 by 6 inch rectangles. Pleat each rectangle like an accordion — keep the folds about 1/4 inch wide — then pinch the middle hard with floral wire. Cut the outer edge into a soft scallop pattern, leaving the center uncut. Finally, fan the pleated bundle outward and glue the base of each layer to a tight rolled yellow center roll.
If your petals open unevenly, rotate the whole flower 90 degrees and re-glue only the first contact point. That fixes tilt without reopening the entire flower.
Avoid using one thick blob of glue in the center, because it soaks the tissue and makes petals droop.
2. Sunburst Tissue Dahlia
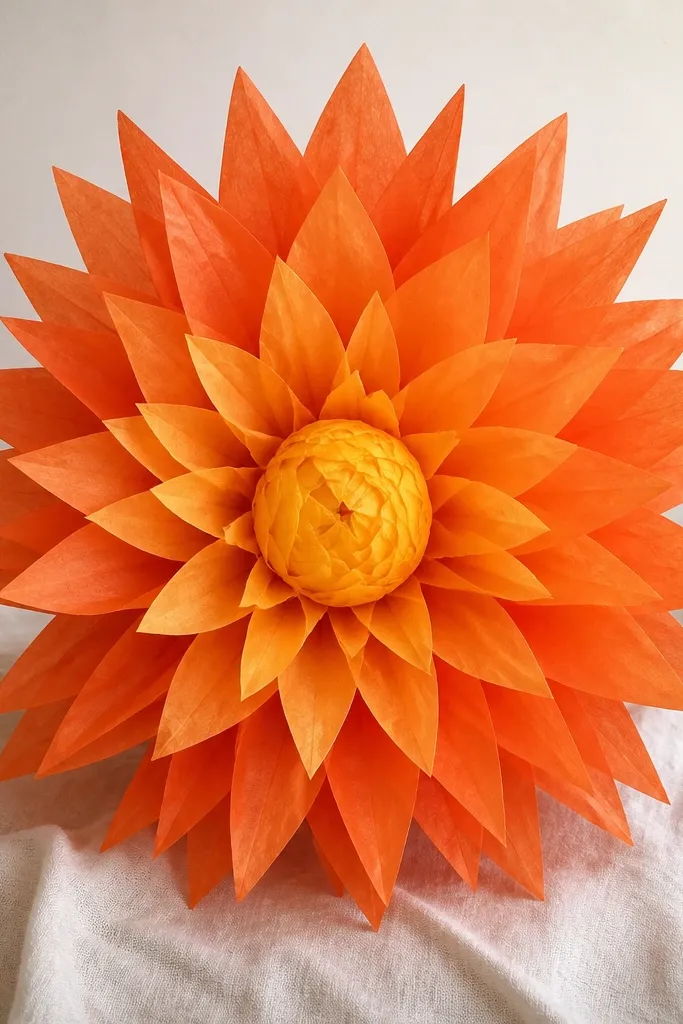
Dahlias hide imperfections better than roses because the spiky tips create visual structure. I make this with alternating orange and yellow tissue layers, so the flower looks like it has depth even if your cuts aren’t perfectly identical. The center is a small tissue ball wrapped tighter than you think — that tightness keeps the whole flower from collapsing. This look works great for parties and spring decor because the color contrast reads cheerful from across a room.
Cut 10 to 14 petal strips from orange tissue at 2 inches wide by 10 inches long, and pleat each strip into a flat accordion fold. Do the same with 6 to 8 yellow strips, but keep them slightly shorter at 8 inches. Wrap all pleated strips around a tight center ball made from crumpled yellow tissue and held with tape. Then glue the base of each strip to the center ball, starting with the longest orange pieces and finishing with the shorter yellow ones on top.
To get uniform spikes, trim only after pleating. If you cut before pleating, the spike tips drift.
Avoid leaving the center loose — a floppy center makes every spike collapse downward.
3. Two-Tone Peony with Layered Blush
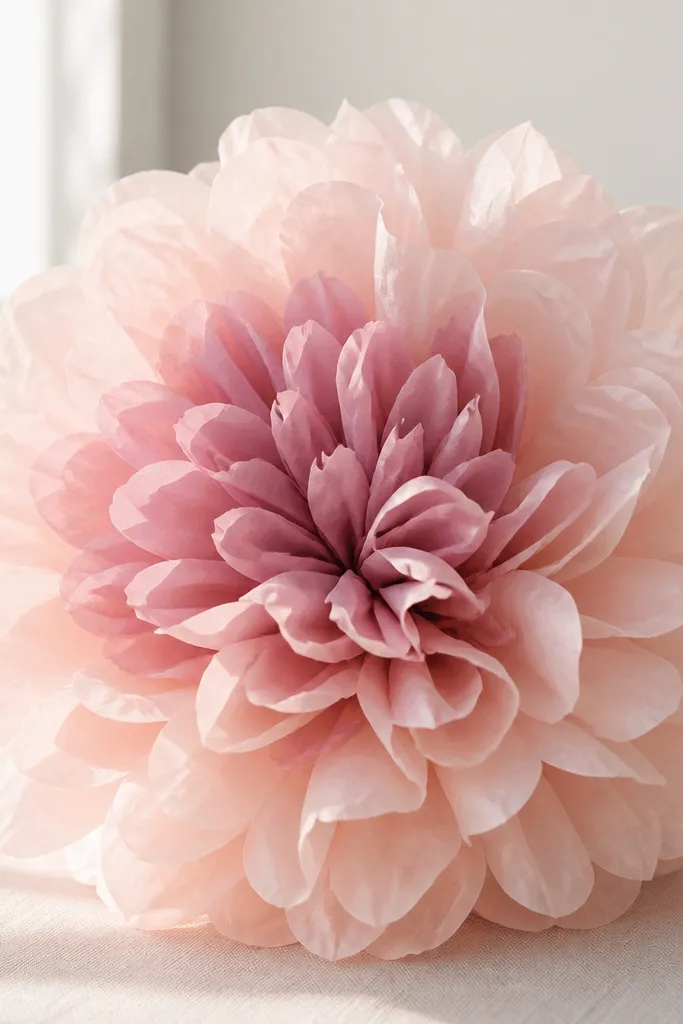
Stack 4 sheets of blush tissue and cut into 5-inch squares, then cut each square into a rounded petal shape. Pleat each petal slightly by folding it in half and then pinching the base. Repeat with 2 sheets of mauve tissue and smaller 4-inch squares for the inner petals. Build the flower by gluing blush petals first in a circle around a tight foam-free tissue center, then layer mauve petals into the gaps.
This peony style looks expensive because the layers blend, not because the petals are fancy. I use blush-pink for the outer ring and mauve for the middle ring, then I keep each petal rounded at the tips so it looks fluffy. The trick is to vary petal widths: outer petals are wider, inner petals are narrower, which creates the bubble shape peonies are known for. This flatters warm skin tones and looks great in beige, cream, and light wood interiors.
Skip thisAvoid making every petal the same size. It kills the peony shape and makes it look like a cookie-cutter craft.
Editor's noteIf your peony looks flat, add a second blush ring before the mauve ring. Extra outer volume fixes the “sticker flower” look.
4. Paper-Moon Tissue Flowers for Backdrops
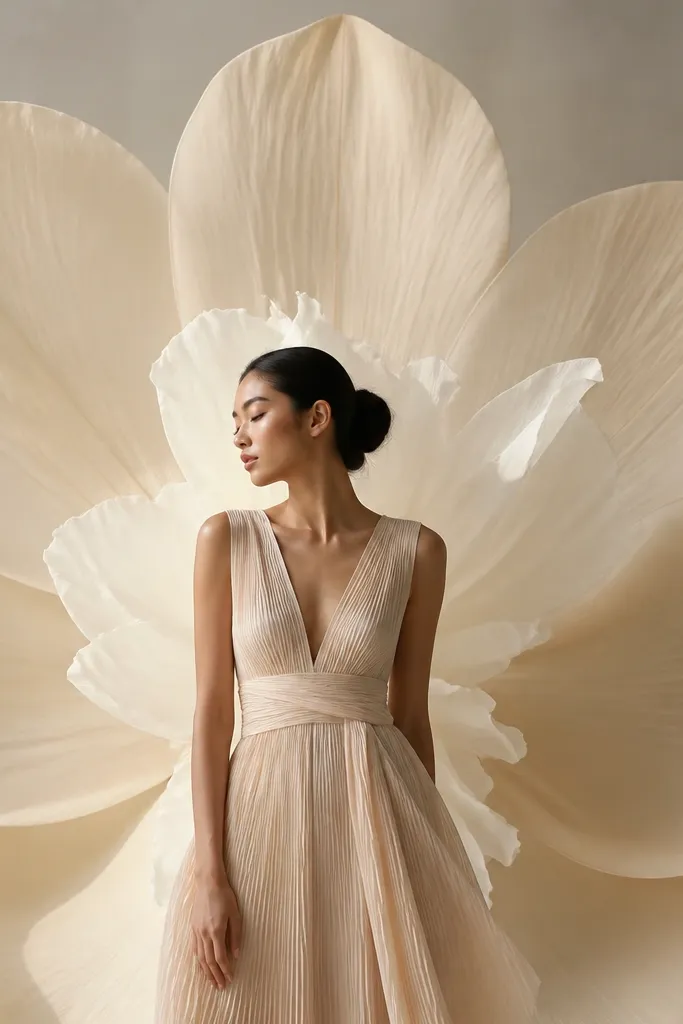
Cut cream tissue into 12 by 8 inch rectangles and pleat into a wide accordion fold with 3/4 inch folds. Pinch the center with a wire and cut the pleated edge into long rounded tabs. For the inner ring, cut white tissue into 10 by 7 inch rectangles with 1/2 inch pleats and shorter tabs. Glue the inner ring first on the center, then glue the cream outer ring so each pleat sits over a gap.
Backdrop flowers need open petals so they read from far away. This “paper-moon” shape is wide at the top and not too tight at the center, which makes it look airy on camera. I use cream tissue for the outer layer and white tissue for a thinner inner ring, so the center glows without looking messy. If you’re styling a wall for photos, this is the one that fills space without looking heavy.
Skip thisAvoid tiny folds on huge flowers. Small pleats make the center too dense and the outer petals collapse.
Editor's noteHang your flowers by testing one first. If it curls toward the wall, use slightly wider pleats for the next batch.
5. Tiny 3-Inch Tissue Flower Buds for Table Clusters
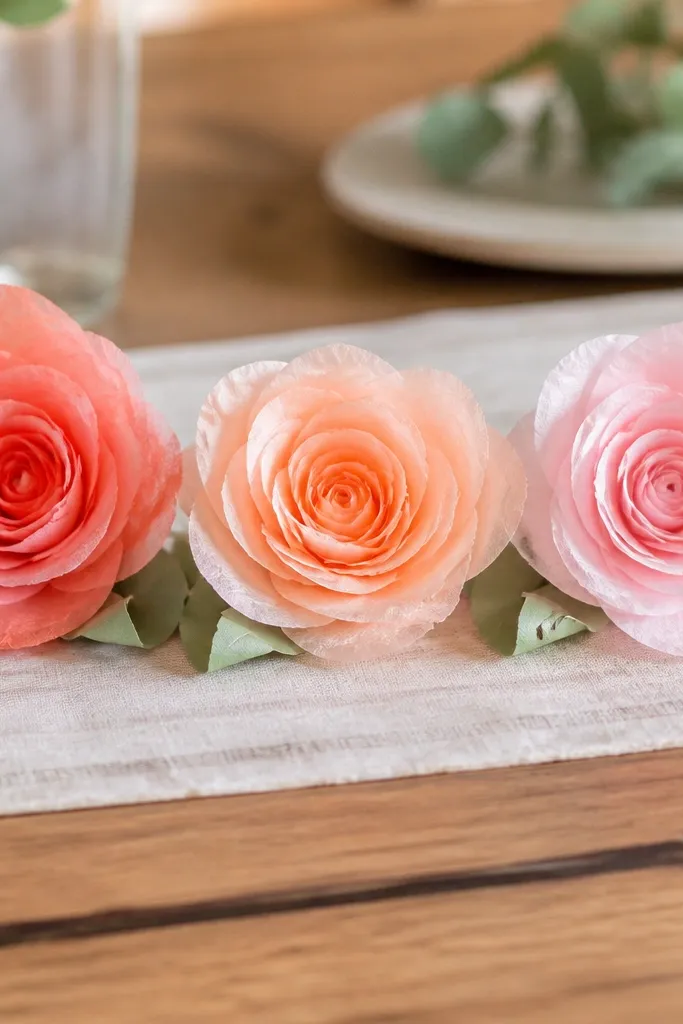
Cut tissue into 6 by 4 inch rectangles for petals, stack 3 sheets at a time, and pleat with 1/4 inch folds. Pinch the center with floral wire and tie a short piece of green floral tape around the base. Trim the pleated edge into rounded “petal cups” and fan them slightly outward. For leaves, cut two tiny oval shapes from green tissue and glue them under the wire base, then place buds into a foam-free vase using fishing line or floral wire.
Small buds are the easiest way to make a table look styled without building big flowers. I make buds with fewer pleats and shorter petals, so they look like real blossoms instead of miniature versions of huge flowers. The tight center makes them look intentional even when they’re only a few inches wide. This is flattering in centerpieces because it adds height without blocking plates or candles.
Skip thisAvoid over-fanning tiny buds. Too much spread makes them look like tissue confetti.
Editor's noteUse a darker center color than you think (like tangerine or deep peach). It makes tiny flowers pop in low light.
6. Rainbow Tissue Flower Garland with Spacing Control
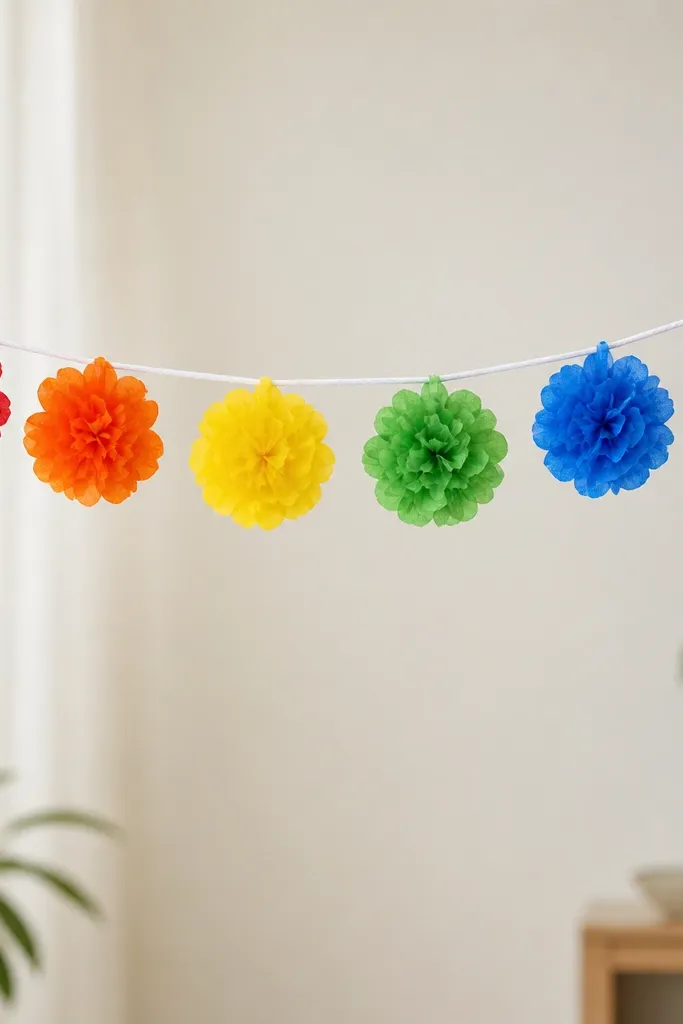
Make 12 to 18 small flowers using 4 sheets per flower for strength, each about 4 inches wide. Thread a needle with strong clear monofilament or thin fishing line and tie each flower base using the wire pinch point you already made. Keep 6 to 7 inches between flowers for a clean hang. When you attach to the wall, use removable hooks so the line stays taut — slack line makes flowers drift and overlap.
Garlands look good when the spacing is controlled, not when every flower is identical. I use smaller flowers with consistent centers, then I vary petal colors to create a rhythm. The key is to keep the flower base light so it doesn’t twist the string. This looks great for birthdays and kid rooms because the bright colors read playful without needing extra decorations.
Skip thisAvoid gluing flowers directly to the string. Hot glue adds bulk and makes the line twist.
Editor's noteBefore hanging, lay the garland on the floor and check the gaps from eye level. Fix one spacing at a time before you mount it.
7. Black Velvet Tissue Flower with Gold Center
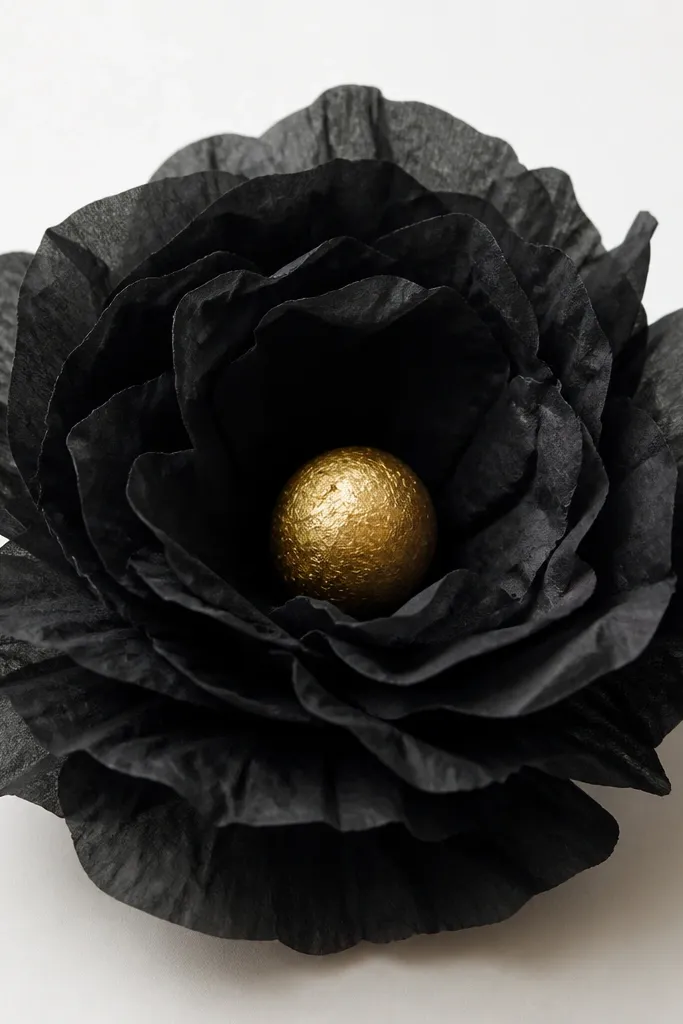
Dark tissue flowers look stunning when the center has shine. I use black tissue for petals and metallic gold tissue for the center roll, then I keep the petal edges slightly darker by cutting with clean scissors. The gold center makes the flower look intentional instead of flat. This works especially well for weddings and evening events because black tissue can look dull unless you add contrast.
Cut black tissue into petal strips about 2.5 by 9 inches, pleat with 1/2 inch folds, and pinch with floral wire. Cut the pleated edge with gentle V-cuts so the petals look layered and pointed. For the center, crumple gold metallic tissue into a tight ball and secure with tape at the base. Glue only the base of the pleated petals to the center ball, then fluff outward in small sections so the black stays dense.
Use a matte black tissue for petals but a metallic gold for the center. The mix stops it from looking like plain craft paper.
Avoid using glitter everywhere. It sheds and makes the petals look messy under lights.
8. White Tissue Flower with Soft Green Veins
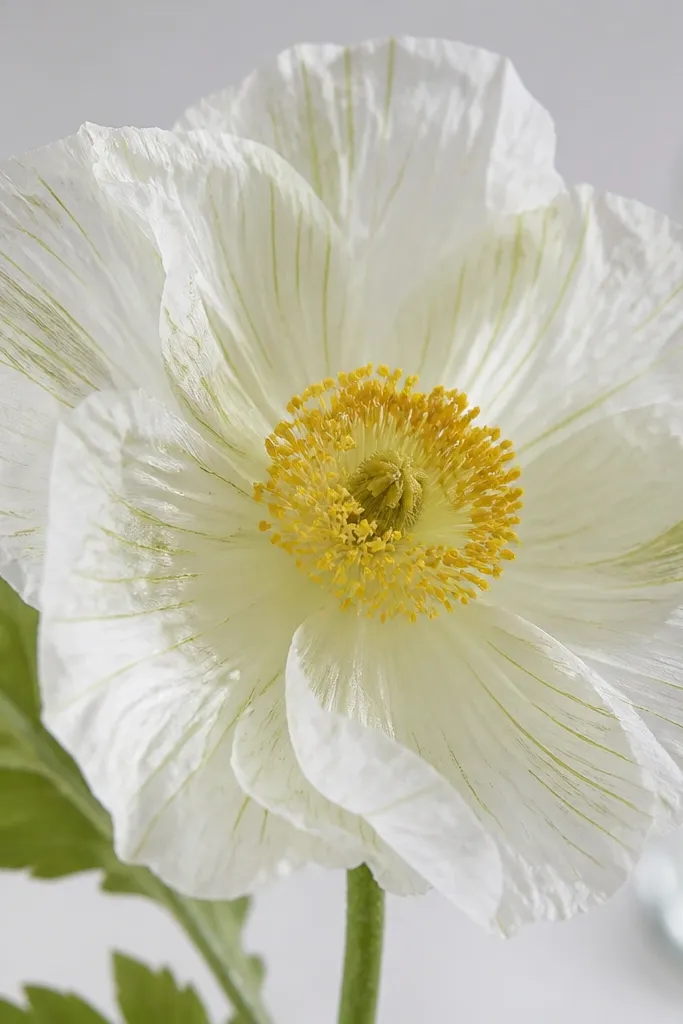
Pleat 6 to 8 white tissue rectangles with 1/2 inch folds and pinch the center. Lay the pleated bundle flat and paint 2 to 4 thin green lines on each pleat using a fine brush, keeping paint mostly near the outer edge. Let it dry completely — I wait 10 to 15 minutes with a fan. Then cut the outer edge into rounded petals and glue each petal layer around a tight yellow center roll.
You can make plain white tissue look dimensional by adding thin color lines. I use watered-down green acrylic paint and a fine brush to paint streaks on the petal tips after pleating but before fully fanning. The green lines catch light and make the petals look like they have veins. This is a good choice for bridesmaid decor, baby showers, and any setup that needs “clean” without looking boring.
Skip thisAvoid soaking the tissue with paint. Wet tissue tears when you fan it.
Editor's notePaint on the pleats, not after assembly. It prevents smearing and keeps the veins crisp.
9. Pastel Ombre Tissue Flower Rings
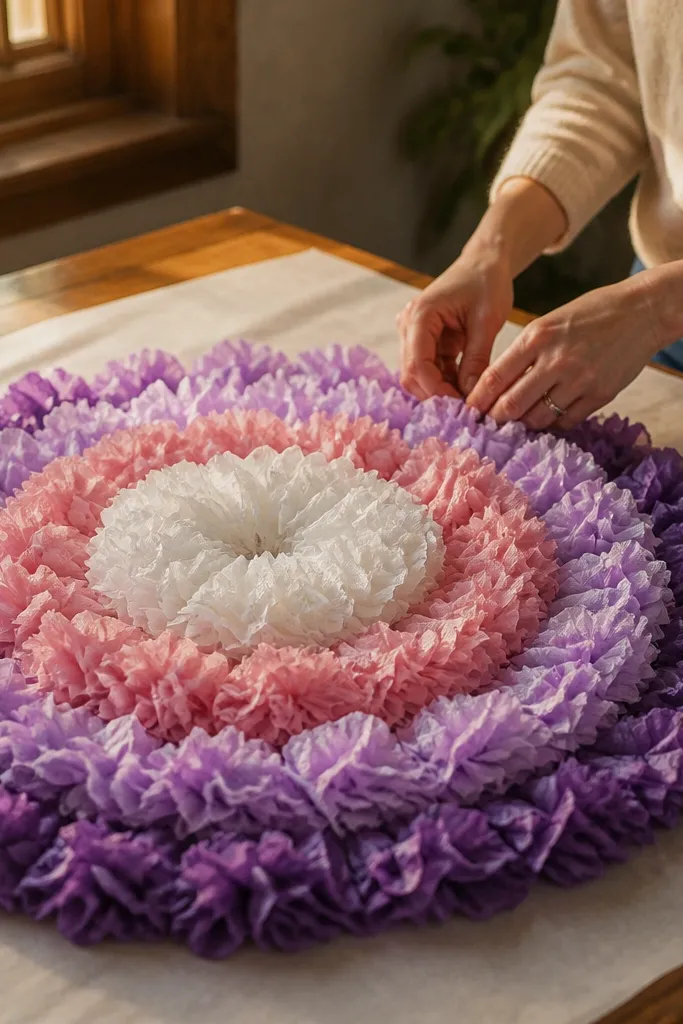
Stack tissue sheets by color and cut identical petal rectangles for each ring. Pleat each ring with consistent fold width, then cut rounded tips. Make the lavender ring slightly larger than the pink ring by about 1 inch in width. Assemble from outside to inside: glue lavender ring to the center base first, then press the next ring into the gaps. Finish with a white rolled center so the gradient stops smoothly.
Ombre tissue flowers look layered because each ring changes color gradually. I build this with 4 rings: lavender outer, light purple next, dusty pink inner, and white center. The rings create a gradient that reads “hand-painted” even though it’s just tissue. This flatters cool-toned palettes and looks great next to silver decor and glass vases.
Skip thisAvoid mixing colors in the same ring. Separate rings keep the gradient clean.
Editor's noteIf your ombre looks harsh, overlap rings by a few millimeters more. The overlap blends color visually.
10. Marigold-Style Tissue Flower with Paper Frills
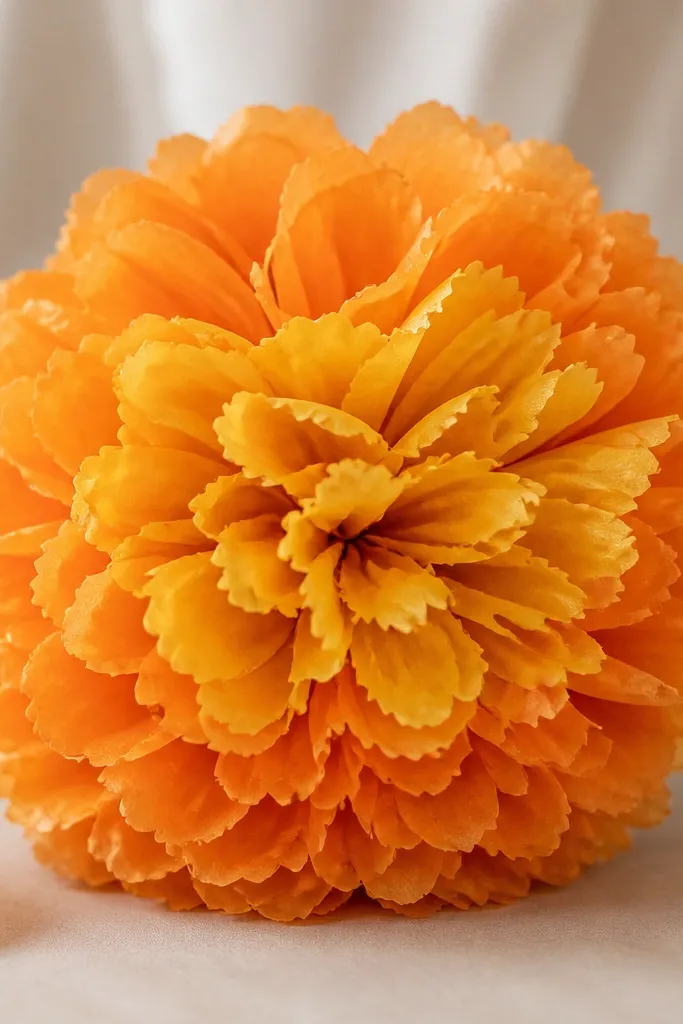
Cut yellow tissue into 2-inch by 10-inch strips and pleat with 3/8 inch folds. Trim the outer edge into small fringe cuts — about 1/8 inch deep — but leave the center intact. Repeat for orange petals, but make them 9 inches long and fringe them slightly less. Glue orange petals first around a tight center ball, then glue yellow petals on top so the fringe layers show.
Marigold texture comes from cutting the petal edges into tiny fringes. I make this with yellow outer petals and orange inner petals, then I snip small notches along the edges after pleating. The frills create a “fuzzy” look without needing extra materials. This style works for fall decor, but it also looks great in bold birthday themes because the texture is what people notice.
Skip thisAvoid skipping the fringe. A plain edge marigold reads like a generic flower.
Editor's noteUse a sharp craft knife for fringe cuts. Scissors crush the pleats and flatten the frill.
11. Tissue Paper Chrysanthemum with Tight Ball Center
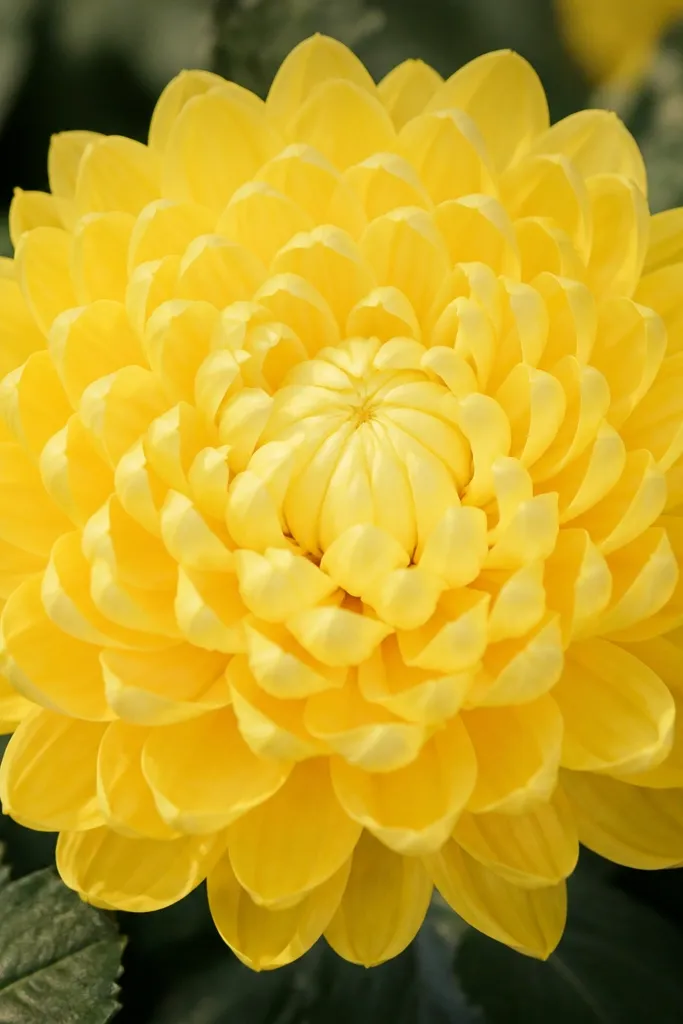
Cut yellow tissue squares and stack 3 to 4 sheets at a time. Cut each stack into rounded petal shapes about 3 inches wide, then pleat each petal base by folding and pinching. Roll a small ball from tissue and secure it with tape, leaving a short stem wire attached. Glue petals starting from the outer ring, working inward, and overlap each petal slightly so you don’t see gaps.
Chrysanthemums look right when the center is a true ball. I see people flatten the center and then wonder why petals don’t sit in layers. This flower is all about repeating small petal units around a tight foundation. Because the petals are rounded, it looks soft and friendly. It’s also forgiving if your cuts aren’t perfectly identical, as long as the center stays tight.
Skip thisAvoid a flat center made from a single circle of tissue. It collapses and makes the flower look like a rosette.
Editor's notePress petals onto the center for 10 seconds each. Quick release glue gives you gaps later.
12. Layered Teal Flower with Staggered Petal Heights
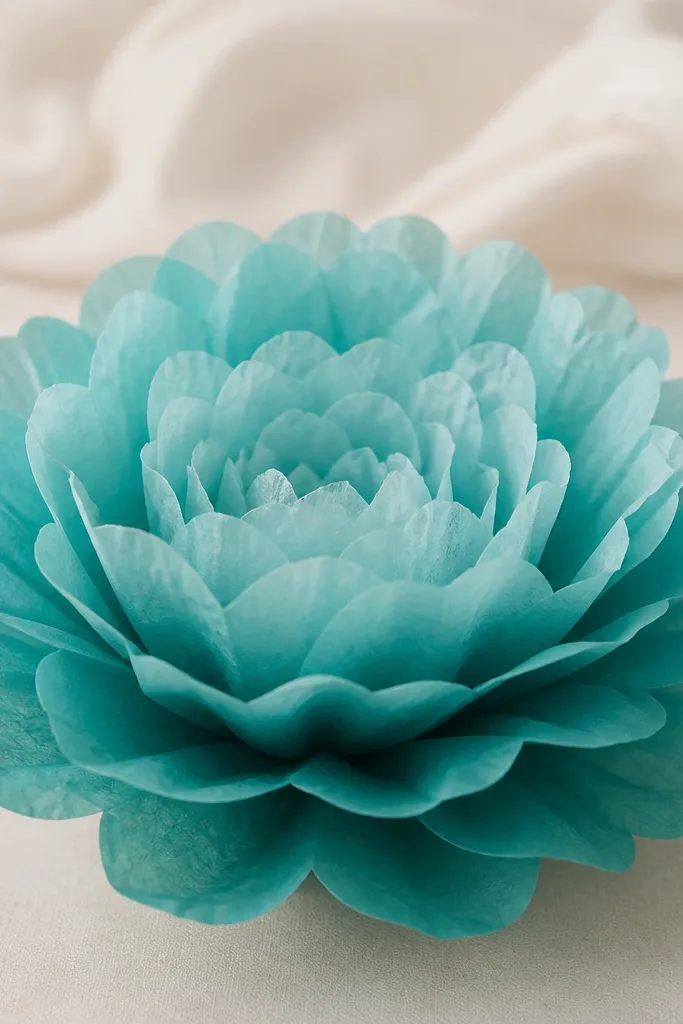
Staggered heights make tissue flowers look dimensional instead of stacked. I use one teal shade in three layers, but I change petal size and fan angle so the outer ring lifts higher. The result looks like it has depth, even though it’s tissue. This is a great look if you’re decorating a mantel or shelves, because the shadows from the staggered petals add shape.
Cut outer petals from teal tissue into 5-inch rounded rectangles, pleat with 1/2 inch folds, and glue them to a wire center at a wider fan angle. Cut middle petals slightly smaller, around 4 inches, and glue them closer to the center with a tighter fan angle. Cut inner petals at 3 inches and glue them last so they sit higher and cover the base. Make sure each layer’s petal base points are glued at contact points only.
Use a toothpick to nudge petal bases into place while glue sets. It keeps layers from sliding.
Avoid gluing all layers flat to the center. Flat layers make the flower read as one lump.
13. Tissue Blossom with Stems Wrapped in Green Tape
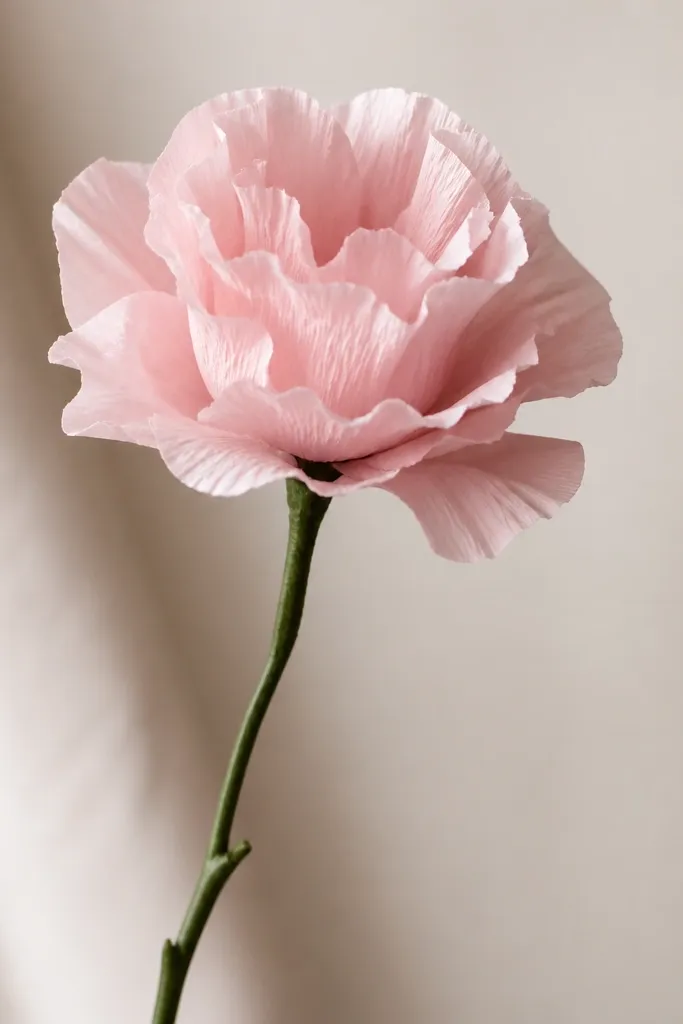
A tissue flower looks more believable when the stem looks finished. I wrap my wire stem with green floral tape before I attach the petals, so there are no exposed metal bits. The tape grips the paper base and helps hold the flower’s center tension. If you’re making a bouquet or placing flowers in vases, stem realism changes the whole vibe. It also helps the flower stand upright instead of leaning.
Cut floral wire into a 10 to 12 inch stem, then twist the top into a small loop for attachment. Wrap the wire with floral tape from bottom to top, stretching slightly so it sticks. Attach a tight tissue center ball to the loop with tape, then glue pleated petals around the ball. After the glue dries, wrap one more small section of tape at the base of the petals to seal the center.
Wrap tape in short sections and pull it snug. Loose tape makes stems look fuzzy and cheap.
Avoid leaving the wire loop exposed. It shows through and ruins the illusion.
14. Giant Tissue Flower with Stiffened Petal Edges
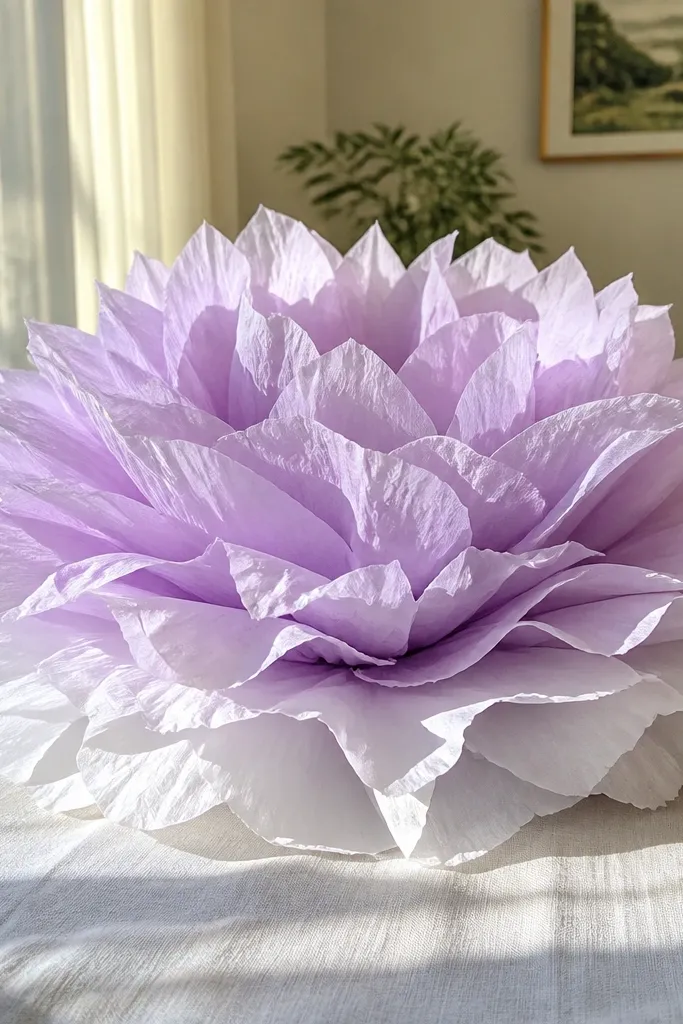
Big flowers need structure at the edges or they curl and collapse. I stiffen petal edges by brushing a tiny amount of watered white glue along the outer fold line, then letting it dry before assembly. That creates a subtle “crisp” feel and keeps the flower from drooping over time. Lavender on white reads calm and modern, especially for event backdrops. It also looks good when you hang it from above because the petals stay open.
Cut lavender tissue into 14 by 10 inch rectangles and pleat with 1 inch folds. Brush a thin line of diluted white glue along the outermost fold edge only, then press lightly and let it dry. Cut rounded petal shapes, leaving the center intact. Assemble around a tight white tissue center ball on a support ring, gluing only the bases so petals can remain crisp and open.
Use a cheap foam brush and less glue than you think. Too much glue makes tissue stiff and glossy.
Avoid stiffening the whole petal. It turns it into a crust instead of a flower.
15. Geometric Tissue Flower with Square Petals
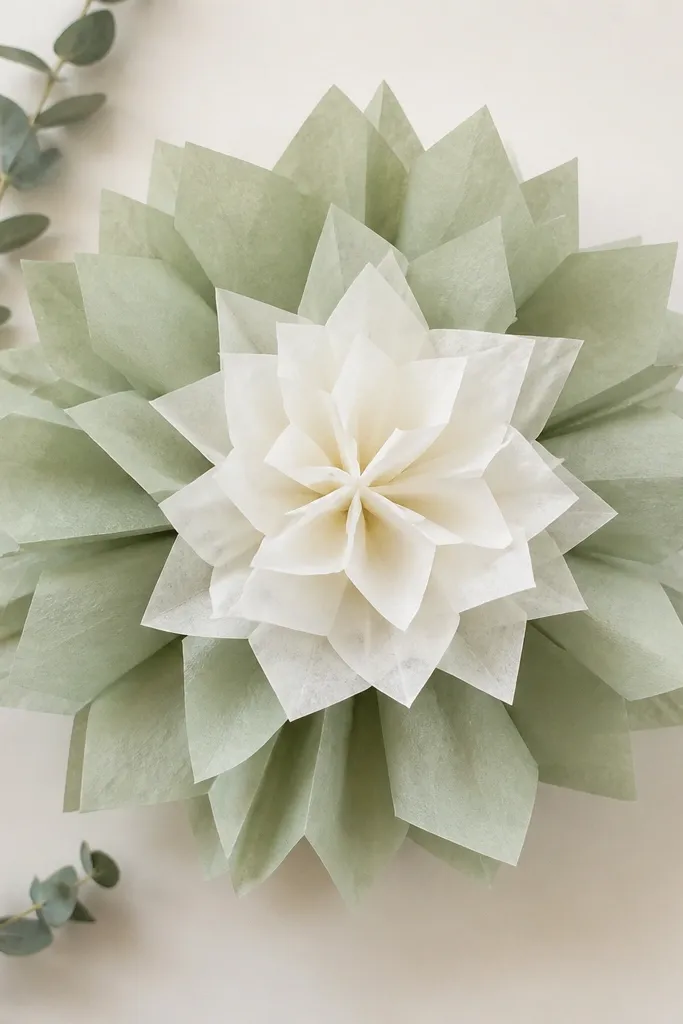
Square-ish petals make tissue flowers feel more modern and less “party craft.” I use sage green tissue and cut the petal tips into slight corners, then I pleat tightly so the shape stays sharp. This style looks good with minimalist decor because the edges read intentional. It also works for neutral skin tone photo styling because the soft green doesn’t overpower.
Stack 3 sheets of sage tissue and cut into 6 by 6 inch squares. Pleat each square into an accordion with 1/4 inch folds, then trim the outer edge into a shallow square cut, not a circle. Pinch and secure the center with wire. Glue petals in a star-like circle so the corners alternate directions, then top with a small white rolled center to cover the wire base.
Mark your cut corners with a pencil guide before trimming. It keeps the geometric look sharp across a batch.
Avoid rounded cuts on this style. Rounded edges turn it back into a generic tissue bloom.
16. Single-Color Tissue Flower with Hidden Center Layers
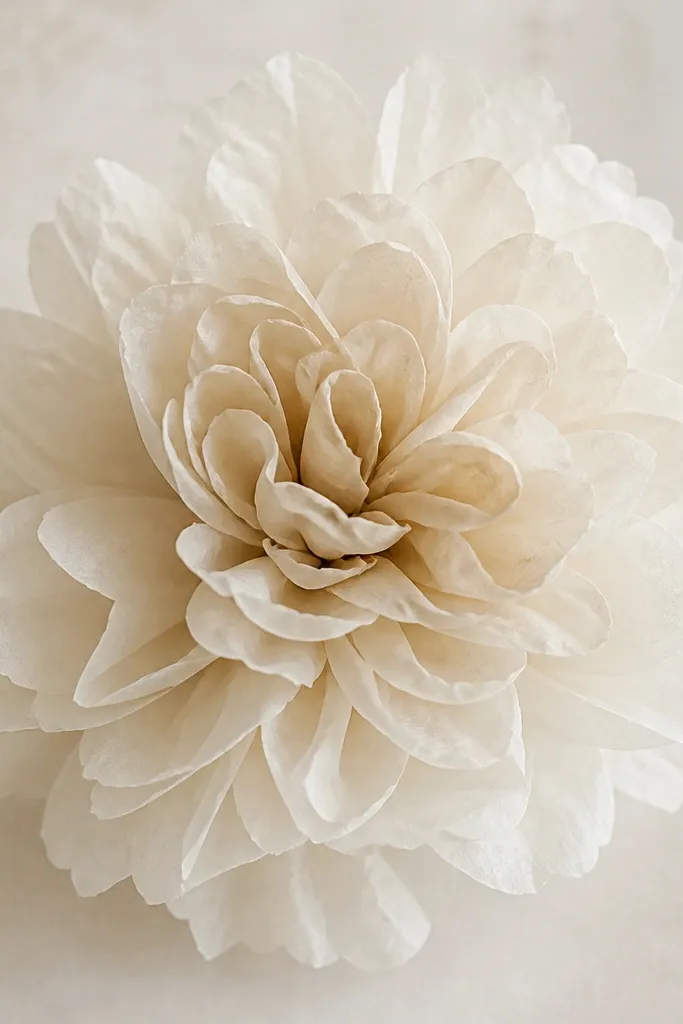
Cut outer petals from warm cream tissue into 5-inch rounded rectangles, pleat with 1/2 inch folds. Cut inner petals from slightly darker eggshell tissue into 4-inch rectangles and pleat with the same fold width. Make a tight center ball from a mix of both tones, then glue inner petals first so they sit higher than the outer bases. Finish by gluing outer petals last, fanning them outward just enough to show the darker center ring.
Monochrome flowers can look boring unless you create contrast in the center. I use the same color family but shift tone: outer petals are warm cream, inner petals are slightly darker eggshell. The center is layered so it looks like a flower within a flower. This looks clean on neutral tables and pairs well with gold cutlery and white linens. It also photographs well because the shadowing comes from the layered center, not from multiple colors.
Skip thisAvoid using one exact shade for every layer. Your flower loses depth and reads flat.
Editor's noteKeep the inner petals slightly shorter and glue them tighter to the center. That makes the center look “hidden” instead of flat.
17. Two-Minute Tissue Flower for Kids' Crafts (That Still Looks Good)
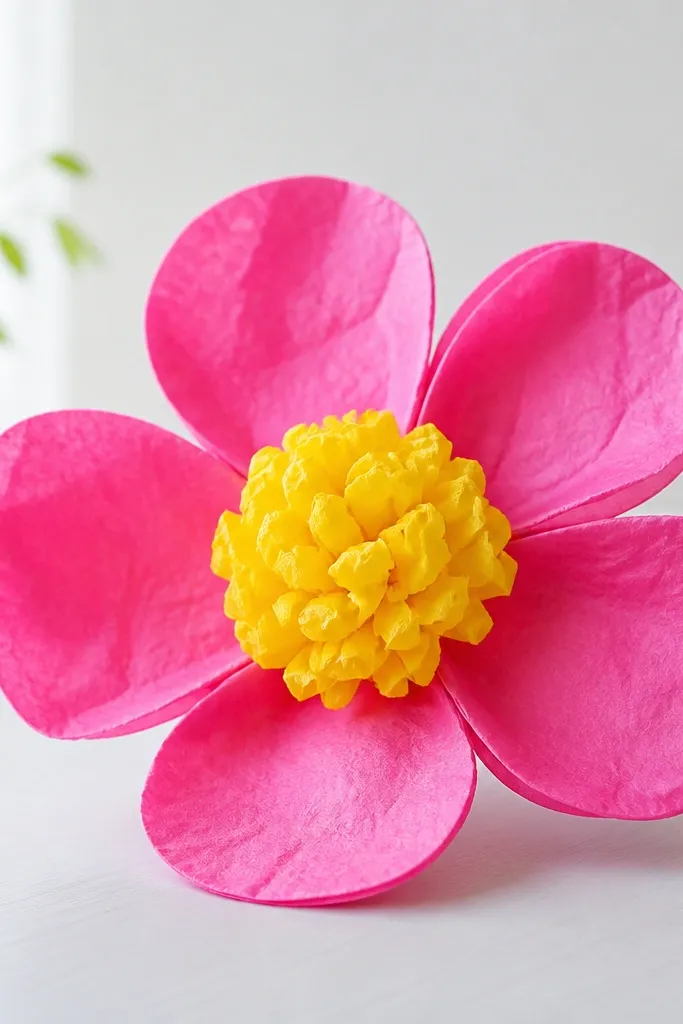
Stack 4 sheets of tissue and cut into 6 by 6 inch squares. Fold each square in half, then in half again, and pinch a small center point. Trim the outer edges into simple rounded petal shapes, then open the stack. Glue the petal stack around a crumpled tissue center ball, and secure with tape at the base so it doesn’t fall off.
This is the quick flower I make when I’m helping someone who gets frustrated with tiny pleats, and it still looks like a real bloom. I use fewer petals and thicker tissue stacks so the flower holds shape without advanced folding. The center is a crumpled pom-pom, which hides glue gaps and uneven edges. The look is cheerful and forgiving, perfect for classroom displays and quick party accents.
Skip thisAvoid trying to make this with very thin tissue. Thin sheets tear when kids open the petals.
Editor's noteUse pre-cut tissue squares from a craft store when time is short. It keeps the sizes consistent across a group.
18. Textured Tissue Flower with Paper-Twist Petals
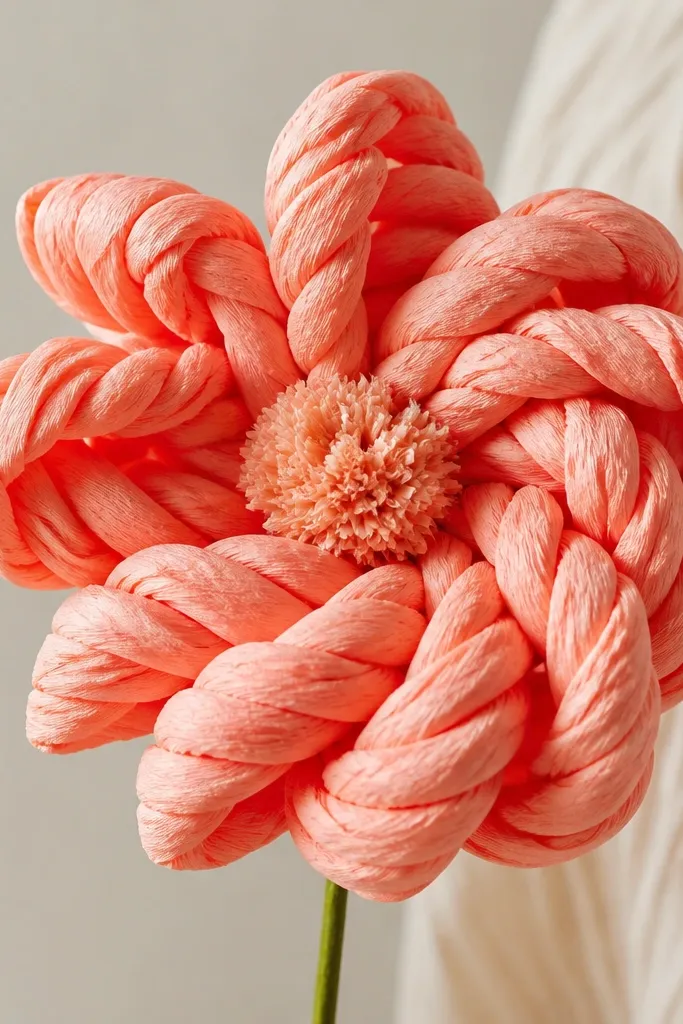
Twisted petals look fancy because they create texture, not because they’re hard. I cut strips, pleat lightly, then twist the strip around itself before gluing to the center. That twist catches light and makes the petals look dimensional even if your color is simple. Coral with a warm gold center looks especially good, and it makes the flower feel more “designed” than standard accordion petals.
Cut coral tissue into 1.5 by 10 inch strips and pleat once across the width — 1/4 inch folds — just enough to give the twist grip. Twist each strip gently from one end to the other, then pinch at the base. Roll a gold tissue center ball and secure with tape. Glue the twisted bases around the center ball, working in a spiral so the twists alternate direction for fullness.
Twist the strip only halfway, then stop. Full twists make petals spring back and loosen.
Avoid skipping the base pinch. Without it, the twist unravels after the glue sets.
19. Tissue Flower with Satin Ribbon Bow Collar
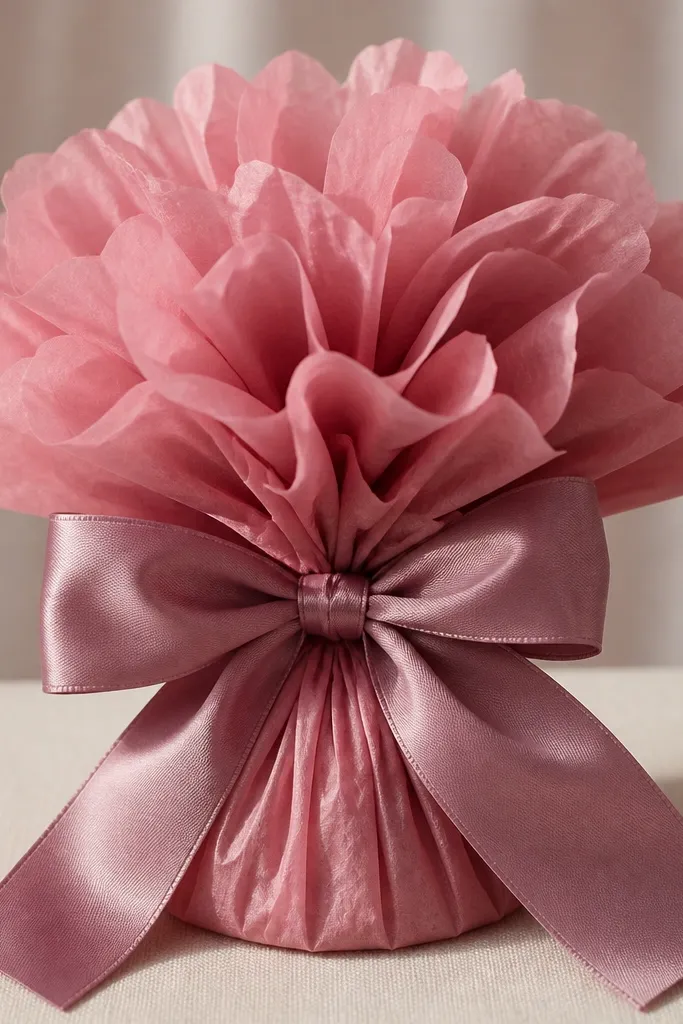
If your tissue flower looks like it needs “something,” add a ribbon collar at the base. The ribbon hides the glue seam and also makes the flower look dressed up, like it belongs on a gift or wedding table. I use satin ribbon because it reflects light smoothly without looking glittery. Dusty rose petals with a mauve ribbon reads romantic without being loud. This also helps the flower sit flat on a table because the collar creates a base weight.
Make a standard pleated tissue flower with dusty rose petals and a tight center ball. Before the last petal ring sets, tie a small bow from 3/8 inch satin ribbon and keep the knot tight. Place the ribbon collar around the flower base where the petals meet the center. Glue the ribbon ends to the base with a tiny dot of hot glue, then press the collar down while the glue cools.
Cut ribbon tails at an angle and seal the ends with a quick pass of heat or clear tape. It prevents fraying and keeps the bow tidy.
Avoid placing the bow on top of petals. It flattens the flower and makes the petals look secondary.
20. Stained-Glass Tissue Flower with Rolled Petal Windows
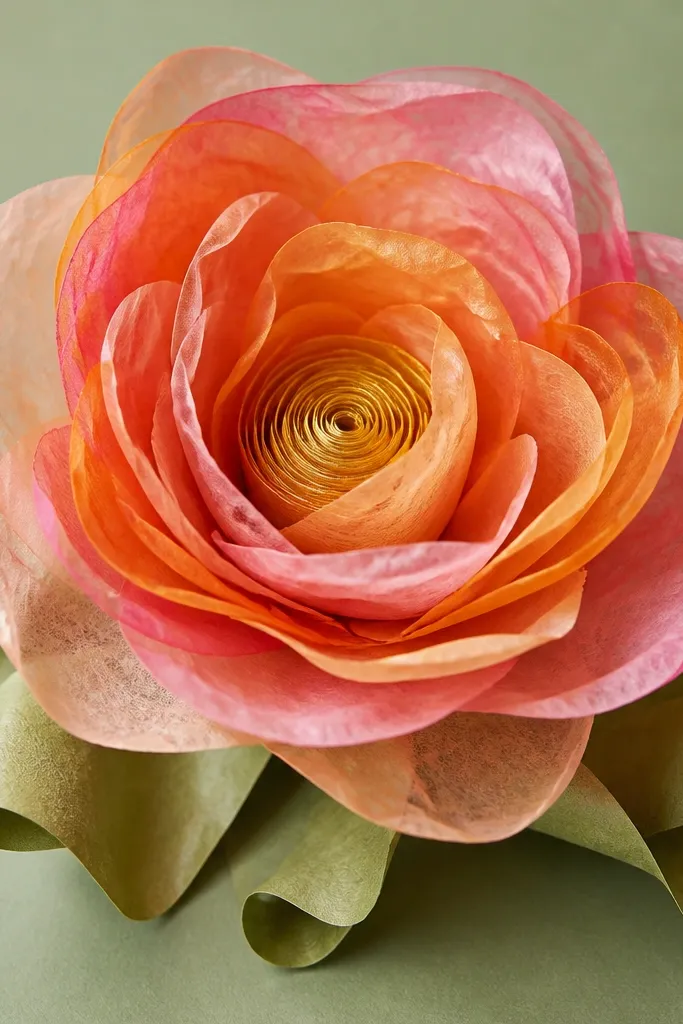
Cut 6 petal shapes from tissue sheets stacked together. Use one base color for each petal set, then add a second and third tissue layer that are slightly different shades (for example amber + peach + blush). Cut each petal so the bottom is wider than the top, then stack the layers and pinch the center point so nothing shifts. Roll only the outer edge of each petal inward — I roll about 1/8 inch and stop before the tip. Use a bone folder or the back of a spoon to press the roll tight, so the layers separate like stained glass panes. Make the center from a 6 x 8 inch strip of gold tissue. Fringe one long edge about 1/4 inch deep, roll from the unfringed edge, and glue the tip so the center stays tight. Assemble by gluing petal centers to a small tissue “hub” (a 2-inch circle scrunched into a ball). Put the biggest petals first, then overlap smaller ones, keeping the rolled edges facing outward so the color windows show.
This one looks fancier than it is because the petals have a “window” effect — the tissue layers overlap, then you roll the edges so the color reads through like stained glass. I made this for a birthday table and got compliments on the color depth, not the craftiness. The secret is using two or three tissue colors in the same petal, then cutting petal shapes before you roll anything. It holds its shape better than a single-layer petal because the rolled edge stiffens the silhouette.
Skip thisSkip using only one tissue color per petal — it makes the flower look flat instead of dimensional.
Editor's noteIf your rolled edges unroll, mist the rolled rim with a single light spray of water on the back side only, then press flat for 30 seconds.



