

1. Foam Board Garden Wall (8 ft photo zone)
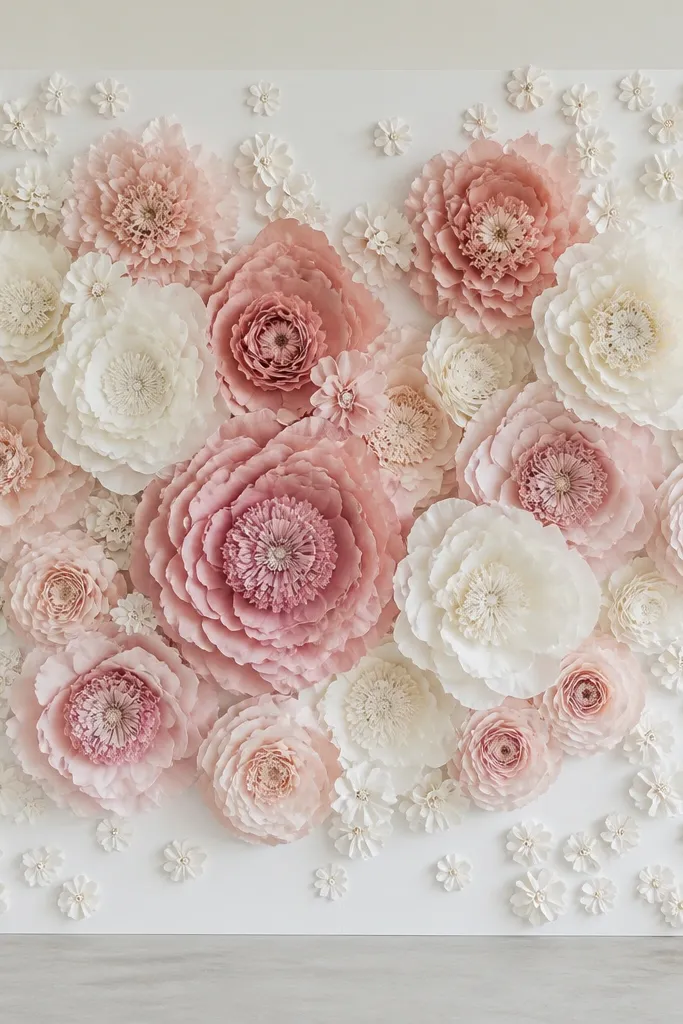
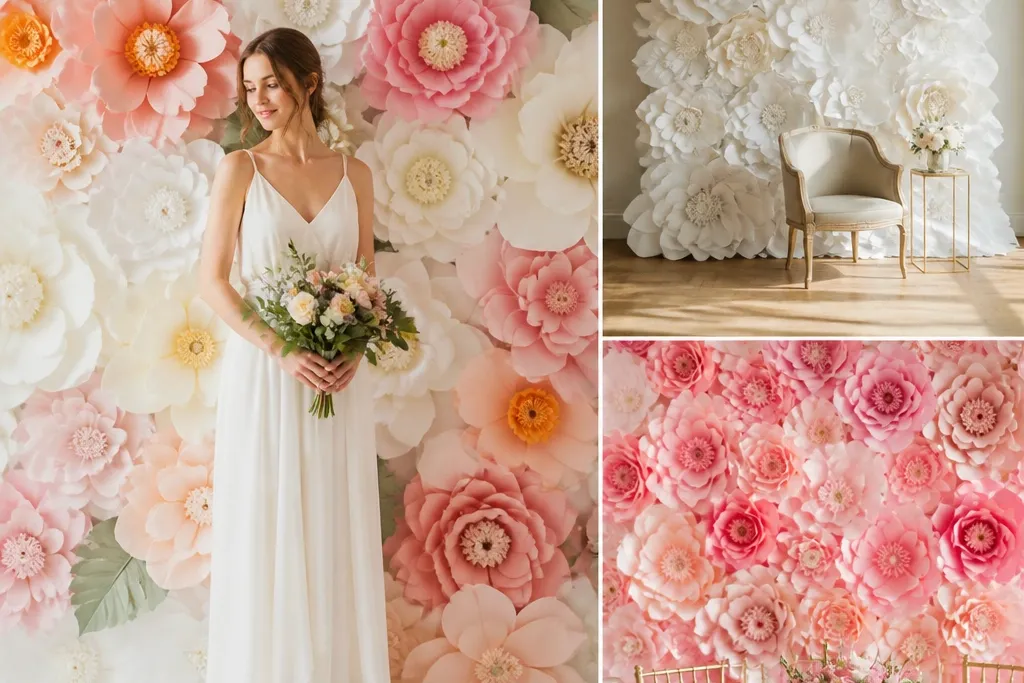
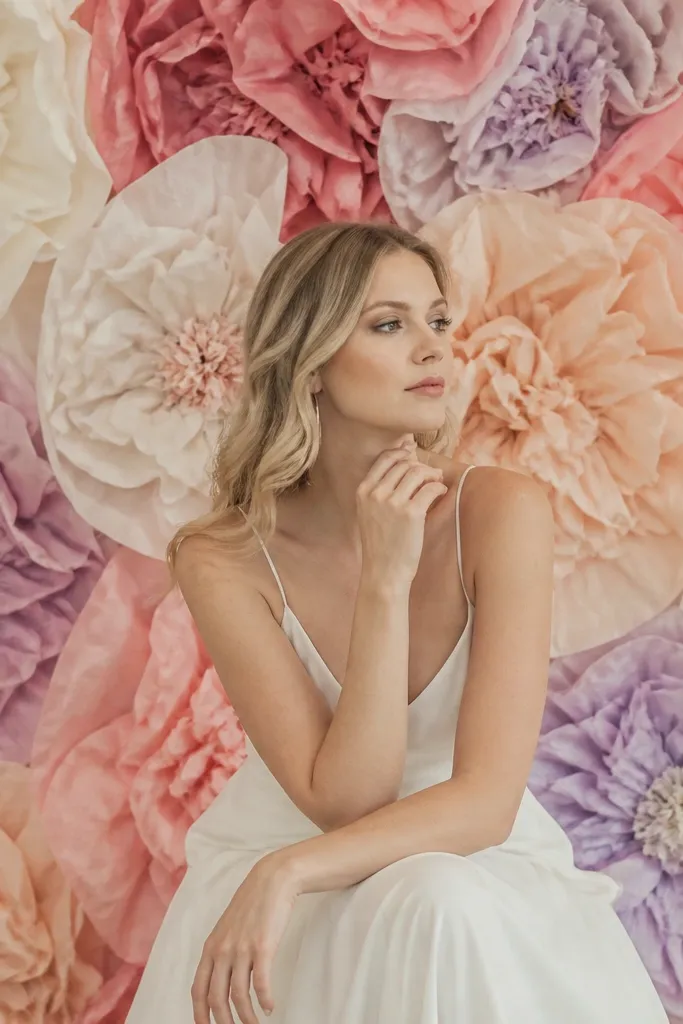
This is the backdrop I use when I want the photo to look like a real flower wall instead of craft paper stuck to drywall. White foam board gives you a smooth surface that tissue petals can sit against without the wall pattern showing through. I build it in warm tones — cream, blush, and dusty rose — because those colors flatter a wide range of skin tones and look good in indoor lighting. The flowers also pop without needing heavy outlines because the foam board stays bright and clean.
Start by taping three to four foam boards together to reach about 8 feet wide and 4 feet tall, depending on your flowers. Mark a grid with painter’s tape: 12-inch squares for the top half and 10-inch squares for the bottom half. Attach the largest tissue flowers first at the center squares, then add medium flowers in the surrounding grid points so crowns overlap by about 1 to 2 inches. Finish with small blossoms and a few tissue “leaf” pieces along the bottom edge to cover any gaps where the foam board meets the wall. If your foam board bows, press it flat under heavy books for an hour before you start.
Use hot glue only for the base attachment points, then tape the flower stems to the foam board so the glue doesn’t show through petals.
Don’t attach tissue flowers directly to textured paint — the wall texture telegraphs through and makes the backdrop look messy.
2. Draped Muslin Curtain Backdrop with Flower Clusters
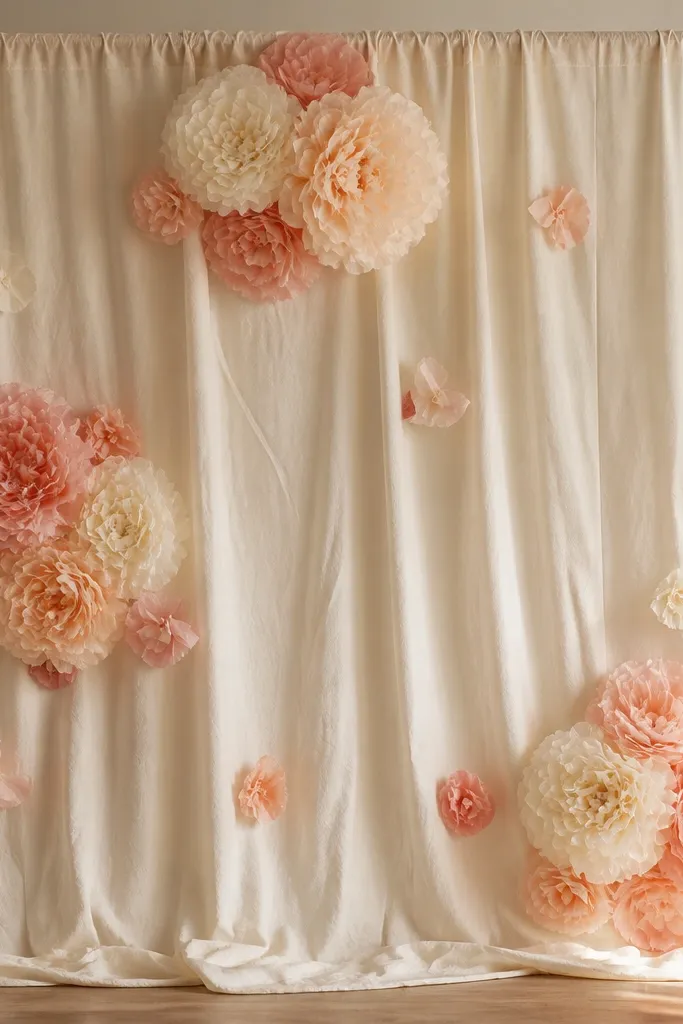
A muslin curtain makes the backdrop look styled even when your flowers aren’t perfectly symmetrical. Fabric folds create natural depth, so tissue petals don’t look flat, and you get flattering shadows behind faces. I like this for outdoor receptions and spring birthdays because warm ivory and blush tissue flowers blend with the fabric’s neutral tone. It also flatters people in photos because the background stays soft and doesn’t pull attention away from skin.
Hang muslin on a tension rod so it’s about 2 to 3 inches off the wall, then let it fall in loose folds. Build your flower clusters on the floor first so you know the size mix you want. Attach flowers by tucking the stems into the fabric folds and securing with a small strip of double-sided tape on the back side of the muslin. Place the first cluster at eye level (about 60 inches from the floor), then add two more clusters diagonally to balance the frame. Finish by sliding tiny flowers into the fold lines so the backdrop looks full without adding extra bulk.
Iron the muslin lightly before hanging so the folds look intentional, not wrinkled from shipping.
Don’t use shiny satin fabric — it reflects light and makes your tissue petals look dull and uneven.
3. Hanging Grid Frame with Tissue Petal Corners
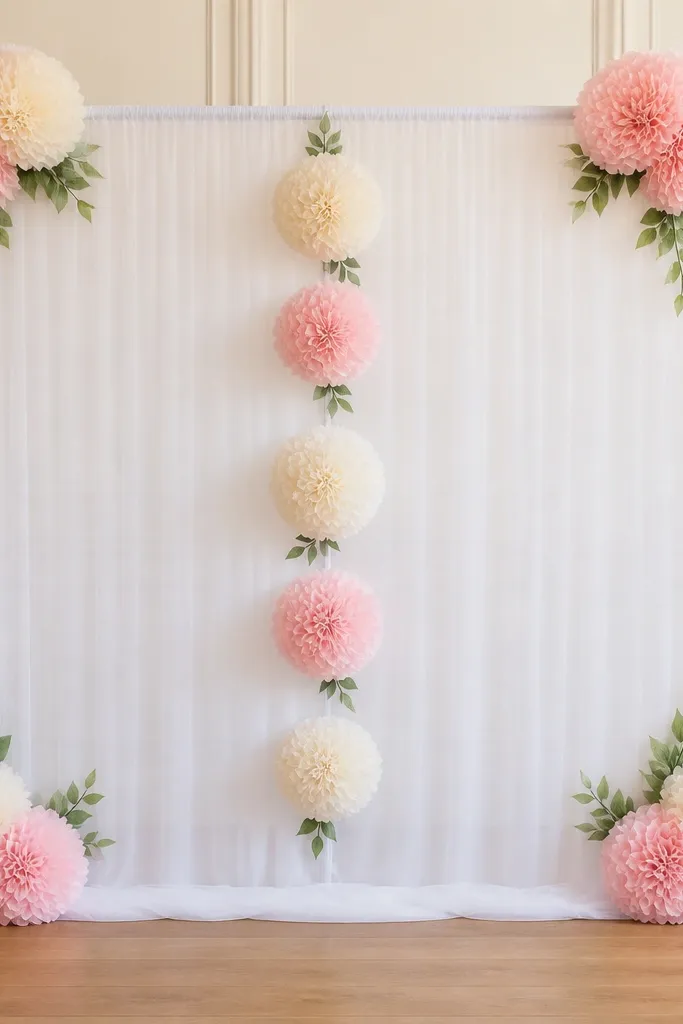
Build a rectangle frame from PVC pipe or wood strips, then staple or tape a sheer white fabric panel across it. Suspend the frame using picture wire so the bottom sits about 12 to 18 inches above the floor. Mark the grid on the fabric with a washable fabric marker: 8-inch squares for the center strip and 10-inch squares near the edges. Attach flowers starting with the center vertical column, then place corner clusters last so the frame looks balanced. Add small petal bunches in the grid corners to hide staple lines.
This one looks “designed” because the grid keeps everything aligned, even if you’re working alone. The sheer backing hides the wall while still letting light through, so your flowers have a soft glow instead of harsh shadows. I use it for parties where multiple people stand in front of the backdrop, since the flowers stay in the same positions across the whole width. The neutral grid also makes bold colors like coral and magenta look intentional rather than chaotic.
Skip thisDon’t skip the grid marking — eyeballing spacing makes the backdrop look uneven in wide shots.
Editor's noteUse thumbtacks along the frame edges instead of tape so you can adjust flower placement without tearing the fabric.
4. Kraft Paper Backdrop with Warm Amber Blossoms
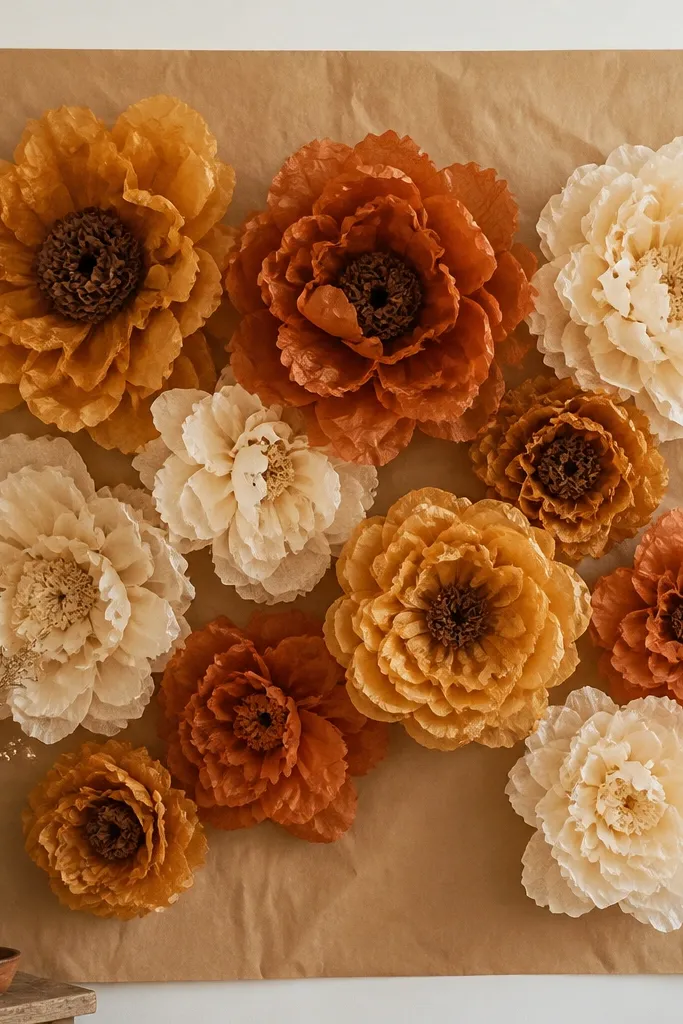
Tape kraft paper to the wall so it’s smooth — pull it tight and overlap seams by 1 inch. Cover the bottom edge with painter’s tape to stop curling. Arrange your biggest flowers first in a loose V shape, starting near the upper corners and aiming toward the center. Layer medium flowers to fill the negative space, then tuck small blossoms at the bottom edge so the kraft paper doesn’t show in the lower center. Finish by placing a few darker tissue circles behind the centers to deepen the look.
Kraft paper gives you a warm, textured background that makes tissue flowers look more grounded. The brown base adds contrast so cream and amber blossoms look richer, especially under warm bulbs. I use this for fall birthdays and harvest-themed photos because it flatters most skin tones and looks great with gold accessories. The tissue petals still look light, but the background stops them from floating in an empty frame.
Skip thisDon’t use bright neon tissue on kraft paper — it looks harsh and makes the whole backdrop feel off-tone.
Editor's noteAdd a thin layer of tissue “smoke” — crumple a small piece of brown tissue and tape it behind one cluster to create a soft vignette.
5. White Fringe Garland Backdrop with Tissue Flowers
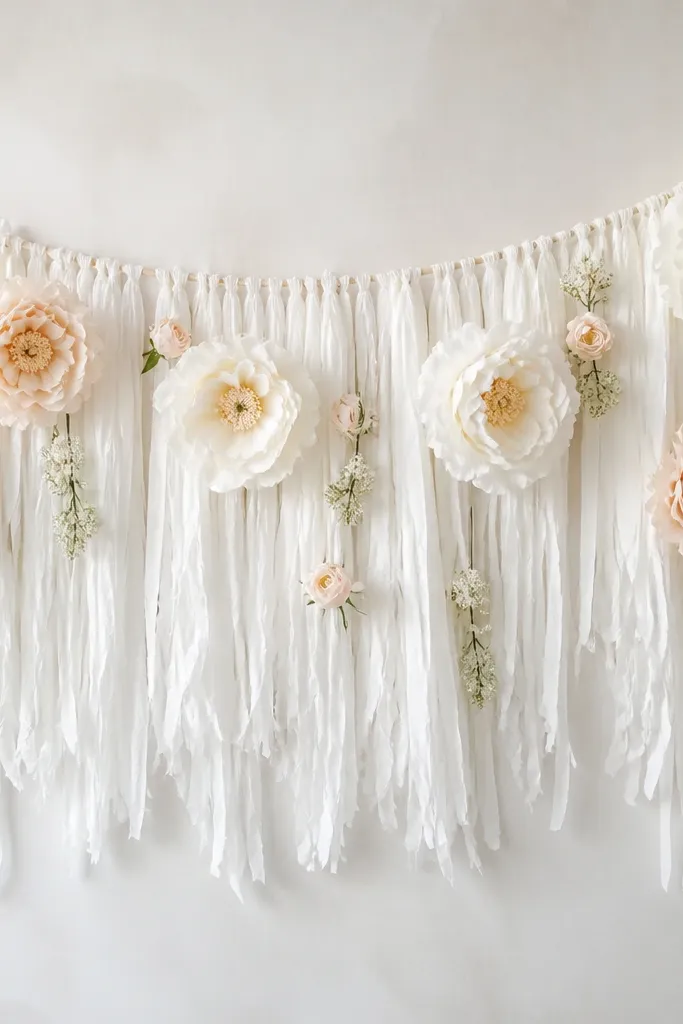
Hang a lightweight backdrop line or fishing line horizontally so you can attach fringe evenly. Cut tissue paper strips into 2-inch widths, then fringe them by cutting 1/4-inch intervals while keeping the top edge intact. Tie or tape the fringe to the line in rows spaced about 6 inches apart. Attach large tissue flowers at the points where the rows overlap, then fill with medium flowers between them. Tuck small blossoms into the fringe so petals peek out from behind the strands.
Fringe garlands make the backdrop feel airy, and they’re forgiving when your spacing isn’t perfect. The dangling strips cover small gaps and hide tape spots that would otherwise show up in close photos. I use this when I want the flowers to look like they’re floating in a soft cloud. White and off-white tissue fringe works with almost any flower color, and it flatters faces because it doesn’t compete with skin tones.
Skip thisDon’t make all fringe strips the same length — flat fringe reads like a party decoration instead of a backdrop.
Editor's noteUse two different lengths of fringe strips — 10 inches and 14 inches — so the background looks dimensional in photos.
6. Balloon Arch-Style Backdrop with Tissue Flower Anchors
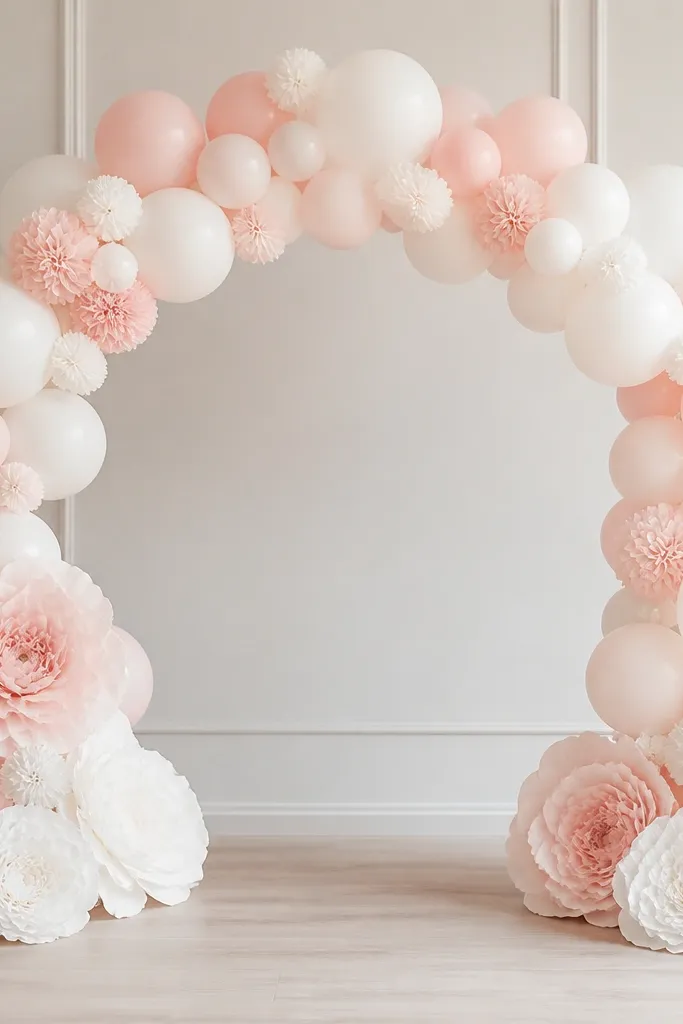
Create a half-arch using balloon strips or a frame of flexible wire, then secure it to two stands or a wall mount. Tie a few tissue pom-poms and small flowers along the arch curve first so you set the rhythm. Attach larger tissue flowers at three anchor points: left, center, and right at about chest height. Use zip ties or strong tape behind the balloons to attach flower bases — tissue alone won’t hold weight. Fill the remaining arch spaces with smaller tissue buds so the negative gaps don’t show through.
Even if you’re skipping real balloon decor, the arch silhouette makes photos feel complete. Tissue flowers anchored to a balloon-like frame look intentional because the arch gives your eye a shape to follow. I like using this when the event has a lot of people moving in and out; the tissue flowers stay visible from different angles. Warm blush and cream tissue flowers look especially flattering against white balloons and keep the background from looking too busy.
Skip thisDon’t place the biggest flowers too high — if they sit above eye level, faces get swallowed by the backdrop.
Editor's noteIf you’re using a wire frame, wrap it with cotton batting or tissue so it doesn’t cast a harsh line in photos.
7. Color Block Panels with Vertical Tissue Flower Columns
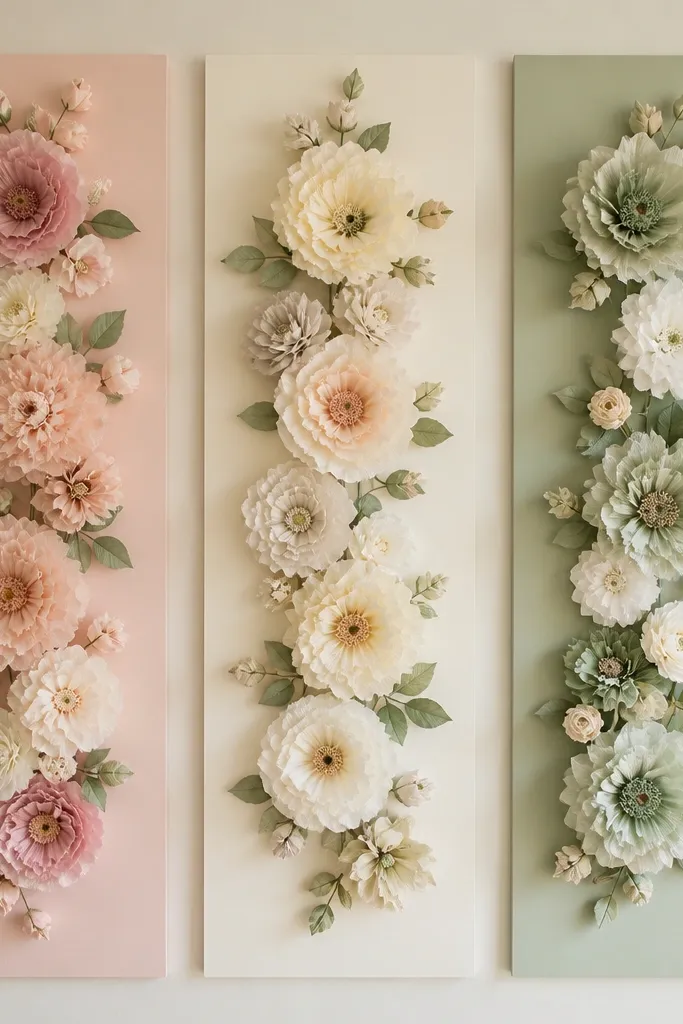
Cover three sections of a wall or board with colored cardstock or painted foam panels, keeping edges straight with painter’s tape. Mark flower placement points in a vertical line about every 10 to 12 inches. Build one column per panel: start with a large flower near the top edge, then medium flowers mid-panel, then small flowers near the bottom. Attach flower bases with hot glue to the panel and add a second strip of tape for extra hold. Finish by adding tissue leaf strips between columns so you don’t see panel seams where the camera catches them.
Color-block panels make tissue flowers look modern and controlled, not random. The straight vertical lines also help your photos look crisp, especially if you’re shooting in front of a doorway or corner. I use a three-color palette: cream base, a soft blush or terracotta panel, and a muted green for contrast. This combination flatters many skin tones because it avoids harsh primary colors and keeps the background gentle.
Skip thisDon’t choose three colors with equal brightness — one needs to be the quiet background or the whole thing looks loud.
Editor's noteUse matte tissue paper for the flowers — glossy tissue makes panel colors look muddy under flash.
8. Paper Fan Wall with Tissue Flower Overlays
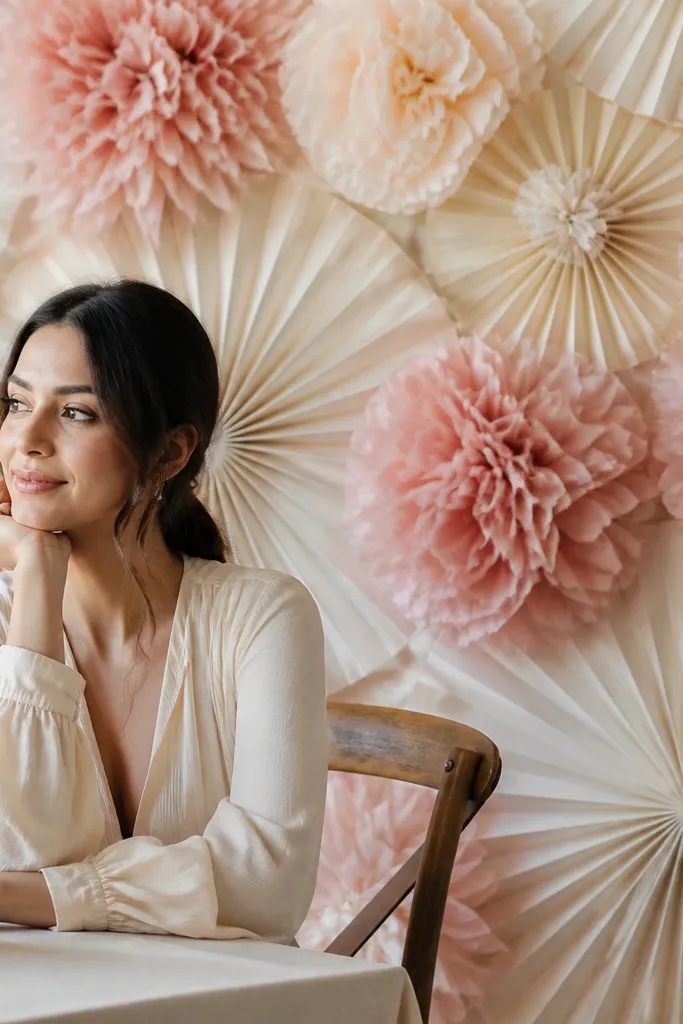
Make or buy accordion paper fans in two sizes, then tape them to the wall in rows with slight overlap. Start with the biggest fans at the center and work outward so edges don’t look chopped. Once the fan grid is up, place your largest tissue flowers directly over fan seams so they hide tape lines. Attach with hot glue to the fan base ribs, then add a thin strip of tape around the sides of the flower base for stability. Finish by putting small flowers at the top corners and bottom center to balance the composition.
Paper fans add texture that tissue flowers love, because the petals get a “shadow” effect from the fan ridges. This is one of the best backdrops when you want the flowers to look detailed without making every flower huge. I use off-white and pale pink fans behind cream and blush blossoms, which keeps the whole image soft and photo-friendly. It also flatters because the background texture is spread out, so it doesn’t concentrate attention on one harsh spot behind a face.
Skip thisDon’t leave bare wall strips between fans — the gaps show as gray rectangles in photos.
Editor's noteAngle the fans slightly upward by 5 to 10 degrees so the ridges catch light and look dimensional.
9. Monochrome Black Backdrop with White Tissue Roses
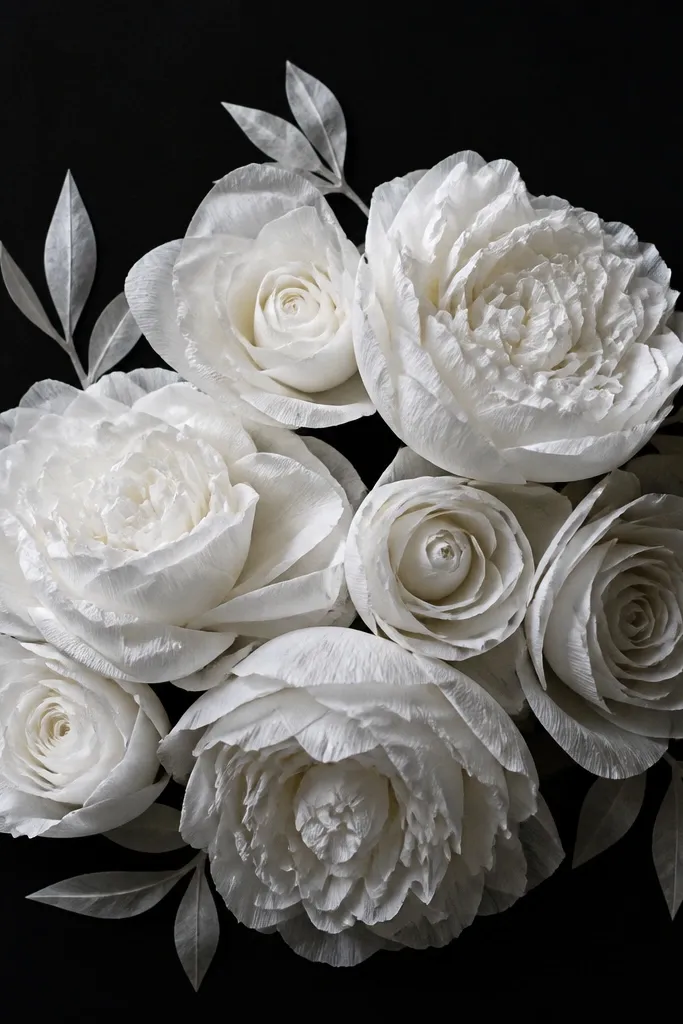
Cover your wall section with matte black felt or black foam board, then smooth it tight. Mark a center point at about 64 inches from the floor — that’s where your largest white flower goes. Build a cluster: one large rose in the center, two medium roses on each side, then small flowers filling the bottom corners. Use hot glue to attach flower bases, then add a small paper backing circle behind each flower center to hide any glue shine. Keep tissue leaves minimal — 3 to 5 leaf clusters is enough so the black doesn’t look cluttered.
Black changes everything. White tissue roses look crisp and high-contrast, and the petals look fuller because the background absorbs light instead of reflecting it. I use matte black board or black felt because shiny surfaces create hotspots that ruin the photo. This backdrop flatters people in darker outfits and looks striking for evening parties, but it also works for skin tones because the contrast outlines faces clearly.
Skip thisDon’t use glossy black vinyl — it reflects phone flash and makes the backdrop look grainy.
Editor's noteTest under your event lighting. If overhead lights are warm, add a few cool white accents to keep the roses from looking yellow.
10. Pastel Ombre Shelf-Style Backdrop (Ladder Look)
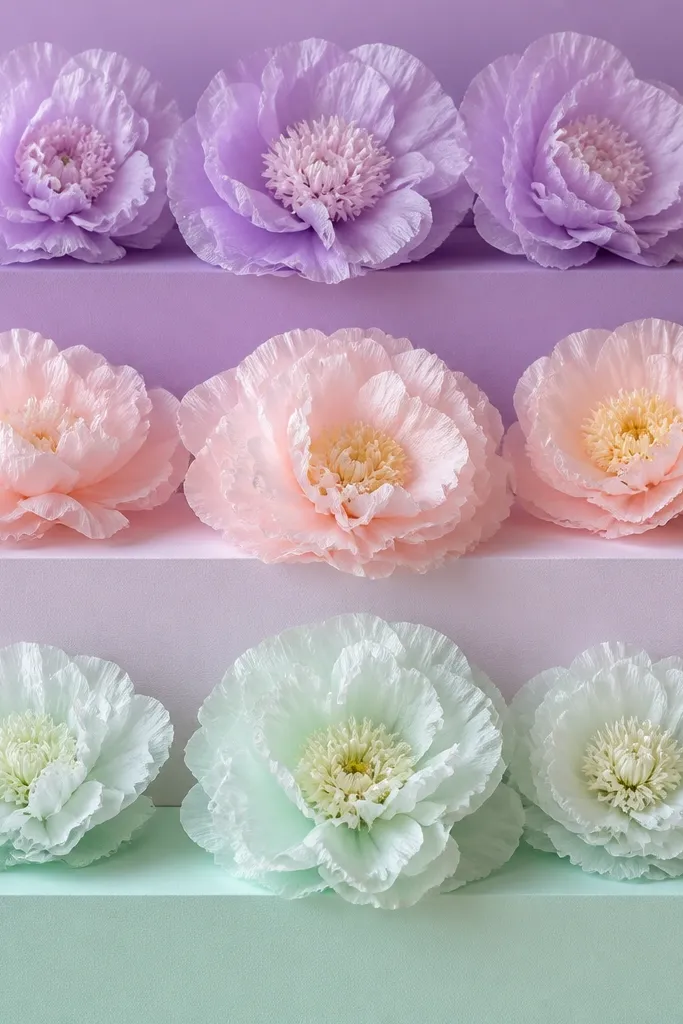
Create three horizontal shelves using foam board strips or cardboard, each about 4 to 6 inches deep, spaced 10 to 12 inches apart. Cover each shelf with tissue paper sheets or colored cardstock so the colors fade from top to bottom. Place the largest flowers on the middle shelf at eye level, then medium flowers on the top shelf and small flowers on the bottom shelf. Attach flowers to the shelf surfaces, not the air between them, so nothing droops. Add tiny buds only where the shelf edges meet, since that’s where the camera catches seams.
Ombre tiers make tissue flowers look like part of a larger design instead of separate pieces. The tier shape also controls the “fall” of the backdrop so it stays photogenic from the side. I build this in soft pastels — lavender, pale pink, and mint — and then add one warm accent color like cream to keep it from feeling too cold. This style flatters lighter outfits and also looks great behind people with warm undertones because cream and pale pink soften the contrast.
Skip thisDon’t make the tiers too deep — deep shelves cast shadows that make pastel tissue look muddy.
Editor's noteUse different flower sizes per tier: 3 large, 6 medium, and a cluster of smalls on the bottom. It keeps the composition from looking lopsided.
11. Tissue Flower Fringe Border with Center Bouquet
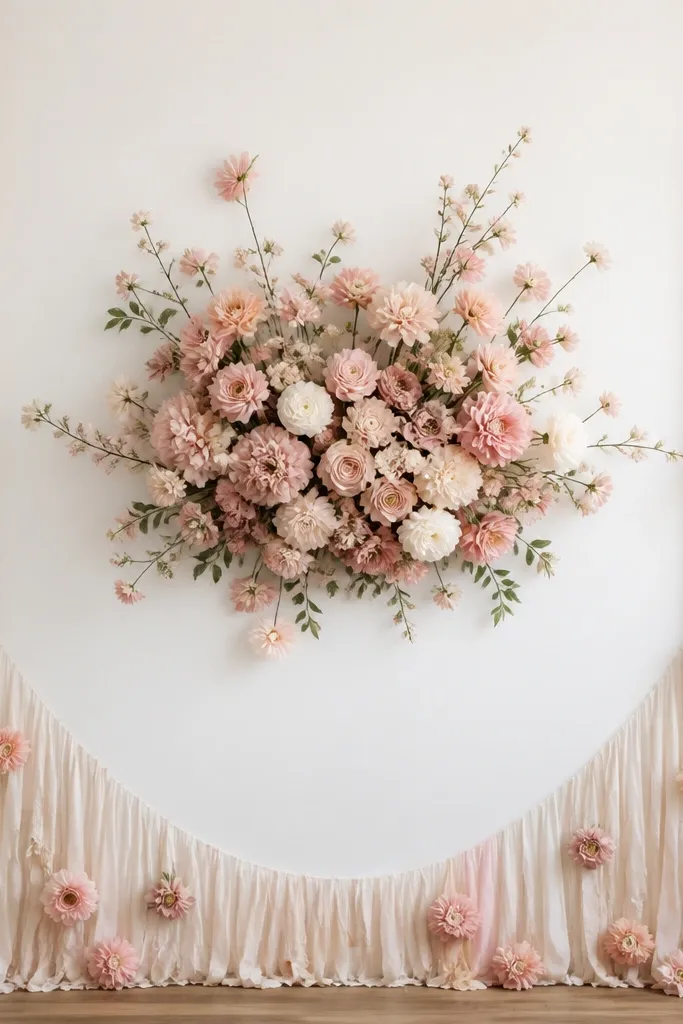
Tape a strip of painter’s tape along the bottom and sides of your target area to mark the fringe border. Create fringe strips from tissue paper about 2 inches wide, cut into 1/4-inch intervals, then attach them along the taped line with double-sided tape. Build your center bouquet first: place one large flower in the middle, then medium flowers in a loose circle around it. Add small flowers sparingly between fringe clusters so you don’t create a busy pattern. Keep the top area mostly clean so the backdrop reads as a frame, not a blanket.
This is the backdrop I recommend when you want a clean look but your wall is already decent. The fringe border frames the flowers and hides messy edges where tape might show, while the center bouquet does the heavy lifting for photo impact. I like blush and cream because they read soft and flattering in daylight and warm indoor light. It also works for people who don’t want a full wall covered — you still get that “wow” photo without making the entire room look like a craft project.
Skip thisDon’t extend fringe all the way to the top — it makes the backdrop look heavy and can distract from faces.
Editor's noteTrim the fringe ends with scissors after everything is attached so the border looks even across the whole frame.
12. Tissue Peony Arch Over a Signboard
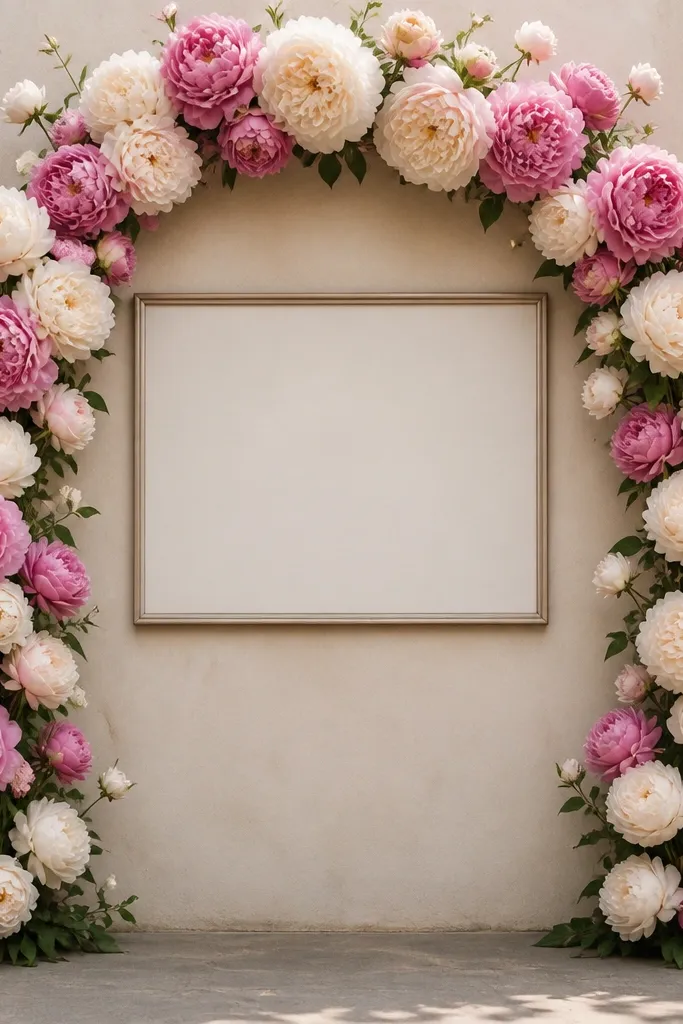
Hang your signboard first at about 60 inches from the floor so it sits around eye level when people stand in front. Then build an arch using two vertical “rails” of flowers: place medium flowers along the left and right edges at 10-inch intervals. Connect the rails with large peonies across the top, spacing them so petals overlap slightly. Use smaller blossoms to fill the lower arch corners and keep the arch shape consistent. Add a few tissue leaf strips behind the peonies so the arch looks fuller even when some petals overlap.
If you’re doing a photo moment with a name sign or welcome board, this arch style keeps the whole setup readable. The flowers form a doorway shape, so your camera framing naturally centers the sign without you wrestling with placement. I use cream and rose tissue peonies because they look romantic without turning into a single-color blob. This backdrop flatters faces because it frames the head area and keeps the background from swallowing the sign text.
Skip thisDon’t cover the signboard completely — if the text disappears, you lose the whole point of the arch.
Editor's noteCut a tiny notch in the flower base so it sits flush against the signboard edge without wobbling.
13. Mirror-Ready White Tulle Backdrop with Tissue Centers
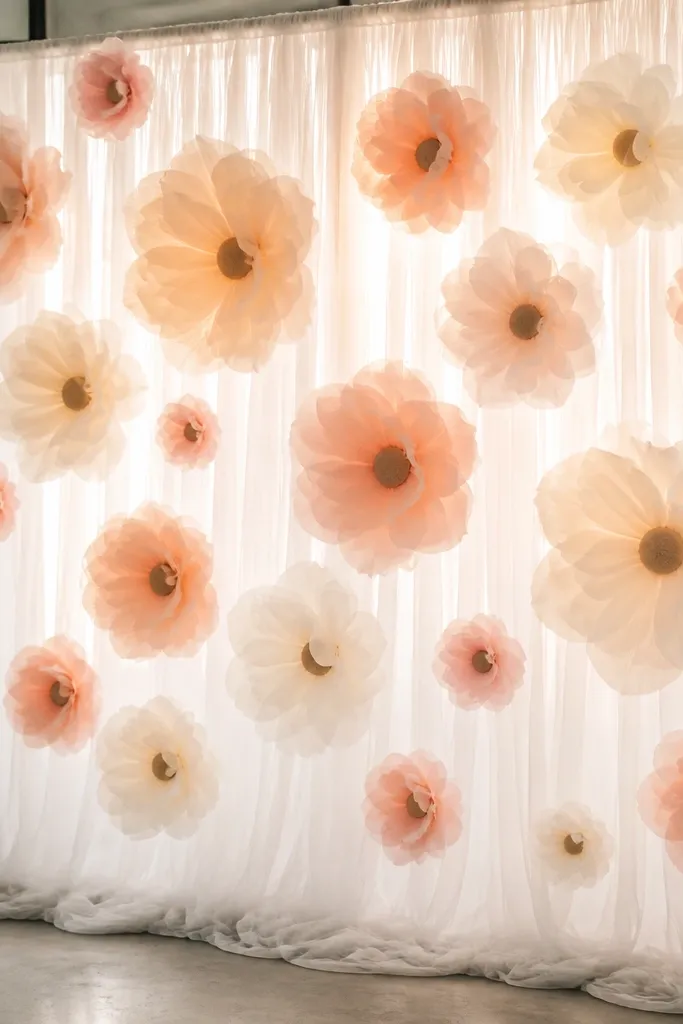
Tulle makes tissue flowers look layered because the fabric adds a translucent depth behind petals. It also helps hide uneven wall texture, which is a lifesaver when you’re working in a rented space. I use this for indoor photo sessions because the tulle catches light and softens harsh shadows. Keep your flower palette light — ivory, blush, and pale peach — so the glow doesn’t turn gray in photos.
Hang tulle on a frame or tension rod so it drapes and the bottom edge hangs 6 to 10 inches above the floor. If you can, place a small warm lamp or fairy lights behind the tulle, not in front, so the glow comes from behind. Attach tissue flower centers first using hot glue to a small scrap of cardstock, then tape that scrap onto the tulle. Add petals in front of the center with a second tape point so the flower doesn’t sag. Place clusters at three points: upper center, mid left, and lower center, then fill with small buds only at the cluster edges.
Use matte glue dots or a small glue smear — hot glue strings show through tulle if you use too much.
Don’t use thick satin ribbon behind the flowers — it creates shiny lines that ruin the soft look.
14. Wall-to-Floor Staircase Backdrop (3D Depth)
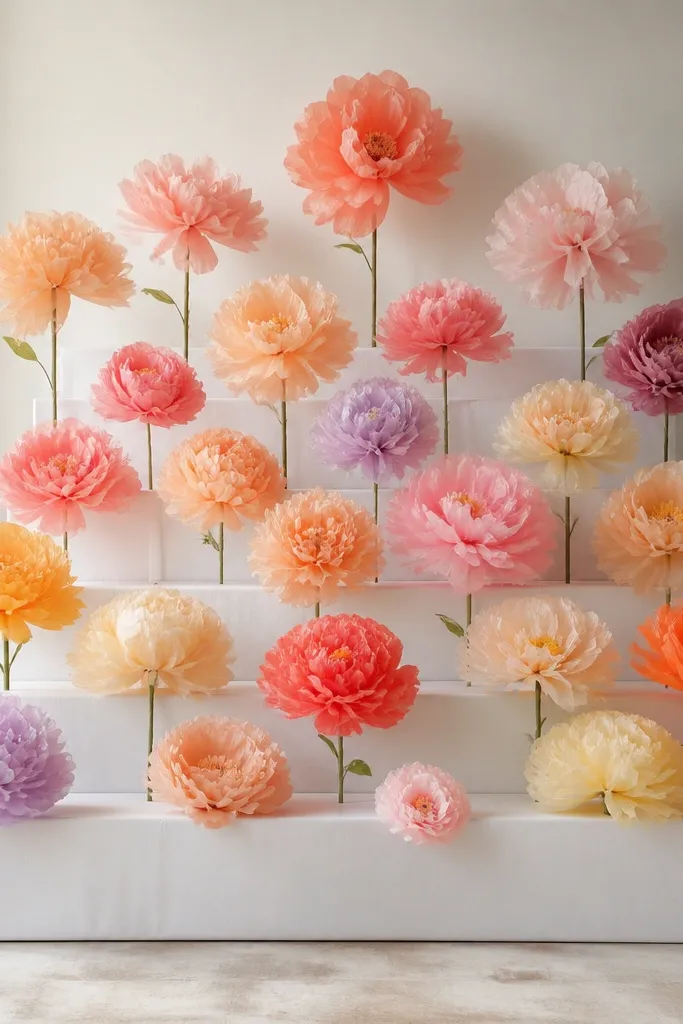
Build three steps using cardboard boxes, each about 12 inches tall and 24 inches wide, stacking them so the front step sits closest to the camera. Cover each step with white paper so the surface is clean and consistent. Start by placing the tallest flowers on the back step, medium flowers on the middle step, and small flowers on the front step. Attach flowers with hot glue to the covered surface, then add a strip of tape across the base edge for extra grip. Fill the step corners with tiny buds so you don’t see box seams where the camera angle hits.
A staircase backdrop adds real depth, so your photos look dimensional even if you’re using small tissue flowers. The wall-to-floor angle also makes it easier to cover awkward corners and uneven floors. I do this when the room has a busy background behind the person, like a doorway or window — the steps block it. White tissue flowers with blush centers look gorgeous here because the steps create shadows that make petals look fuller.
Skip thisDon’t stack steps too close together — if the gap is small, flowers overlap and look like a single flat mass.
Editor's noteHold the camera at chest height when you test — staircase depth shows up best at that angle.
15. Tissue Flower Confetti Strip Backdrop (Minimal but Photo-Heavy)
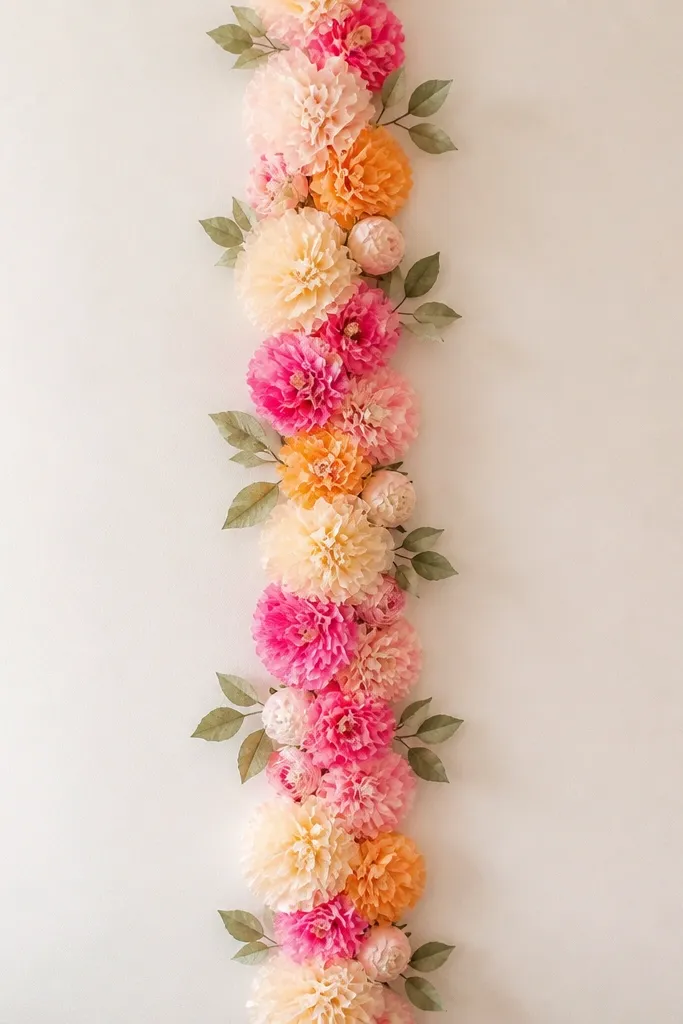
Tape a vertical line down the center of your wall at the height where people will stand, usually about 56 to 64 inches from the floor to the top of the flowers. Build a column using large flowers first, then medium, then small buds to fill the gaps. Keep the strip width to about 18 inches so it reads as a design element, not a full wall. Attach the flower bases directly to a thin foam board strip mounted to the wall, so the tissue has something firm to grab. Add a few leaf clusters that spread left and right by 4 to 6 inches to soften the edges.
This is the style I use when I’m short on time and I still need the “big photo moment.” The strip makes the composition feel intentional, and the clean background keeps attention on the person. I pick a tight color family — like cream, blush, and pale pink — so the strip looks cohesive instead of scattered. It’s also flattering because the background doesn’t compete with facial features; it frames the center where most photos focus.
Skip thisDon’t spread the strip too wide — once it hits 30 inches, it starts looking like you ran out of space.
Editor's noteUse the camera’s portrait mode or stand 6 feet back — the strip will read as a full backdrop from a normal photo distance.



