



1. Haircut before/after photo with barber receipt strip
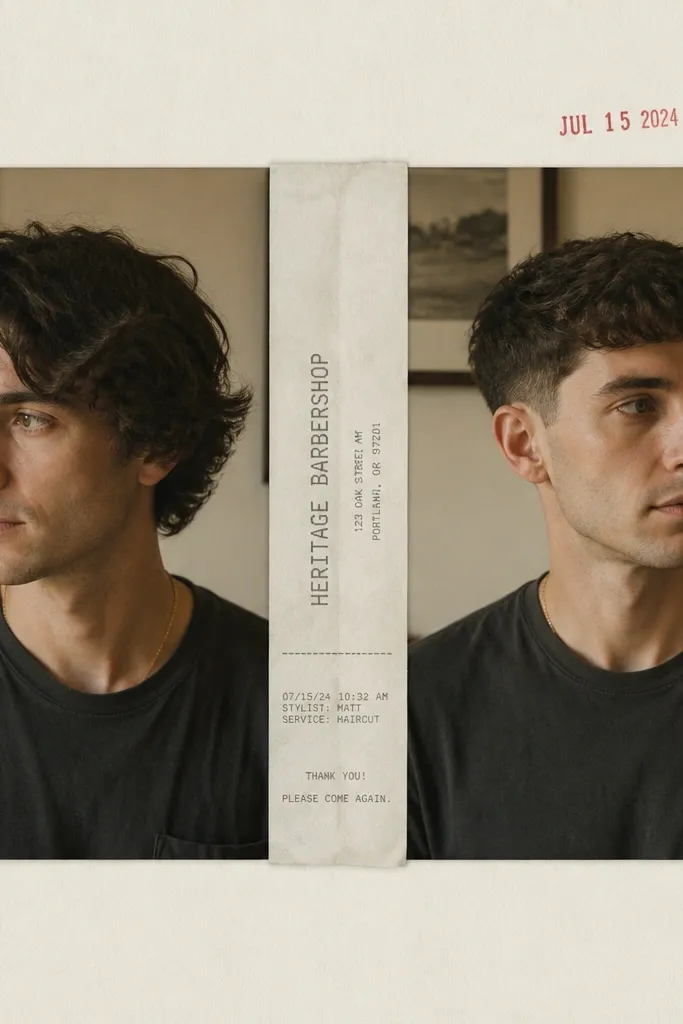
This one works because hair changes are obvious even to someone who wasn’t there, and receipts add a real-world timestamp. Use a before photo with softer lighting (darker background, casual angle) and an after photo where he’s facing the camera with cleaner light. Pick a frame style that matches the vibe — I like black cardstock mats for neutral haircuts and kraft paper mats for warmer tones. The journaling should be short and specific, like “Day 1: asked for less bulk in the back” and “After: cleaned up the neckline.” It flatters most scrapbook styles because the page reads like a story, not a collage.
Start by printing the two photos at the same width (I use 4x6 prints trimmed to 4 inches wide). Cut two rectangles of cardstock mats, each 4.25 inches wide, and leave a 1/8-inch border. Place the before photo on the left, then add a receipt strip (trim it to about 0.75 inches wide) centered between the photos. Tape the receipt strip with double-sided photo tape so it sits flat, then place the after photo on the right. Finish by writing the date in black fine-tip pen on a small label sticker and tucking it at the top corner of the after photo.
If the receipt text is too small, photocopy it larger first, then cut the strip — it looks crisp instead of blurry.
Avoid glossy receipt paper or shiny stickers over the receipt — glare makes the text look messy.
2. Gym progress before/after with weight plate numbers
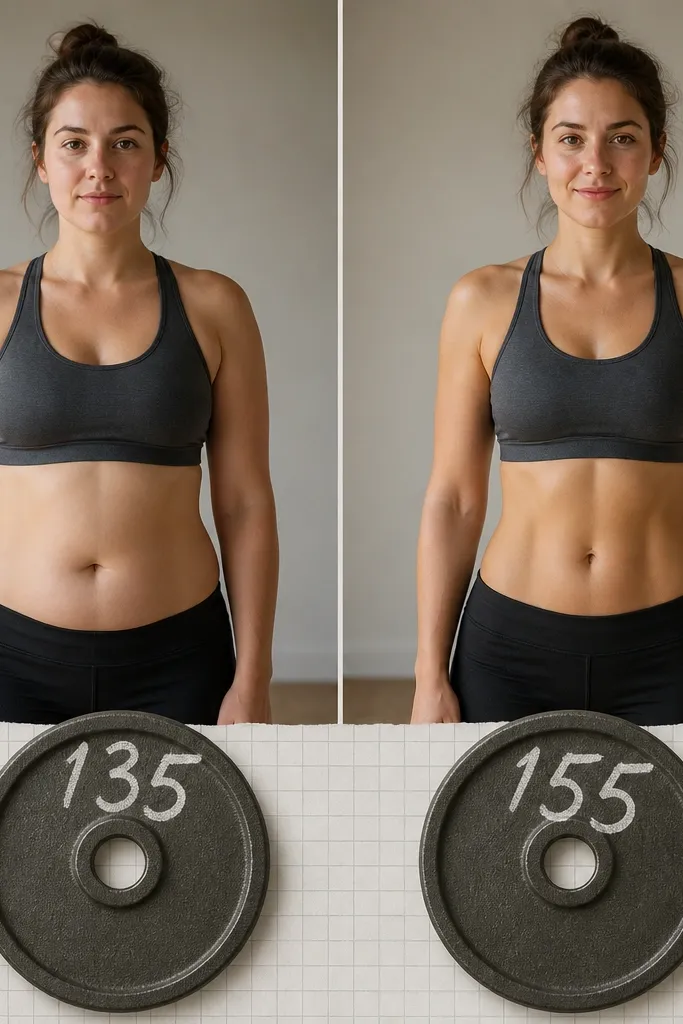
A before/after gym page feels satisfying because the change is measurable. I’ve done this with bench press photos and also with “first month of lifting” progress shots where his posture improves. Use a before photo where he looks slightly tense and an after photo where he’s steadier — that visual shift makes your journaling believable. Add weight plate shapes in matte gray or silver cardstock so the page feels like a workout log. This flatters anyone because the layout doesn’t depend on body type; it depends on clear comparison and clean numbers.
Print the before photo and after photo at 3.5 inches wide each and mount them side-by-side with a narrow white mat. Cut two circles from gray cardstock (about 2.5 inches diameter) and draw a faint ring with a pencil so it looks like a plate. Write the lifted amount or reps in a bold marker in the center. Layer graph paper behind the plates by cutting it to the same width as the photo pair, then tape it down first. Place the plates below the photos and add journaling on a 1-inch-wide strip that says the exact dates and the exercise name.
Editor's noteUse matte gray cardstock for the plates and a gel pen for the numbers — the ink stays readable under different lighting.
Skip thisDon’t write long paragraphs about motivation; keep it to dates, numbers, and one sentence about form.
3. First-date outfit before/after with fabric swatches

Outfit transformations are romantic without needing fancy words. I’ve used this when he went from “I grabbed whatever was clean” to “he planned his outfit” after months of dating. The before photo should show him in a casual, slightly wrinkled shirt; the after photo should show sharper lines, like a fitted tee or a button-down. Fabric swatches make the page tactile, and they also help people remember the exact colors. This works well for boyfriends because the page feels personal and practical — you’re showing what it looked like, not just saying it.
Print the before and after outfit photos at 2.75 inches wide and mount them on a single sheet with a 0.25-inch gap between. Cut small fabric squares (about 1.25x1.25 inches) from scraps: one from the shirt color, one from pants or jacket lining. If you don’t have real fabric, use fabric from a thrifted item you can match closely and label it with date and where it came from. Tape each swatch under its corresponding photo using photo-safe tape at the corners only. Add a tiny stitched border by running a straight line of thread with a hand needle along the edge of one swatch so it looks intentional.
Write the outfit details in a tiny font on a label sticker: color + item + where you went.
Avoid using thick, fuzzy fabrics that shed — they snag and shed lint onto the page.
4. Move day before/after with street map corners
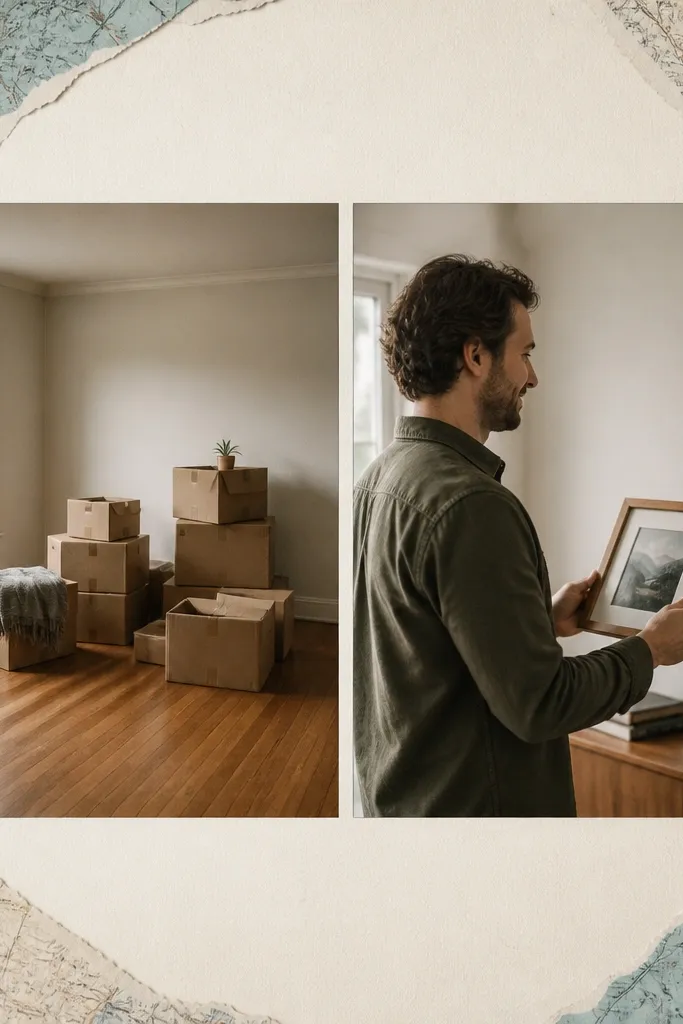
Moving is a real transformation, and maps give it a grounded, specific feel. Use the before photo from the first day — messy boxes, bare walls, his face half-lit by a lamp. Use the after photo from a later day when something is clearly set up: a couch, a framed print, or him smiling in the new light. Map corners in muted blue and cream look good with almost any scrapbook color palette. This flatters mixed photo styles because the map adds a consistent visual texture across both images.
Print the before and after photos at 3.75 inches wide and place them in a vertical stack so the story reads top to bottom. Cut two map corners using scissors, leaving an uneven torn edge, and tape them behind the corners of the photos. Use a strip of kraft paper as the journaling line under the after photo, about 1 inch tall. Write the street name and the move date in black pen. Finish by adding small arrow doodles in light gray around the journaling strip to point the eye.
Use a black-and-white copy of the map if your original map has loud colors that fight the photos.
Don’t glue full map sheets — they curl. Cut small corners so they stay flat.
5. Cooking experiment before/after with spice card labels
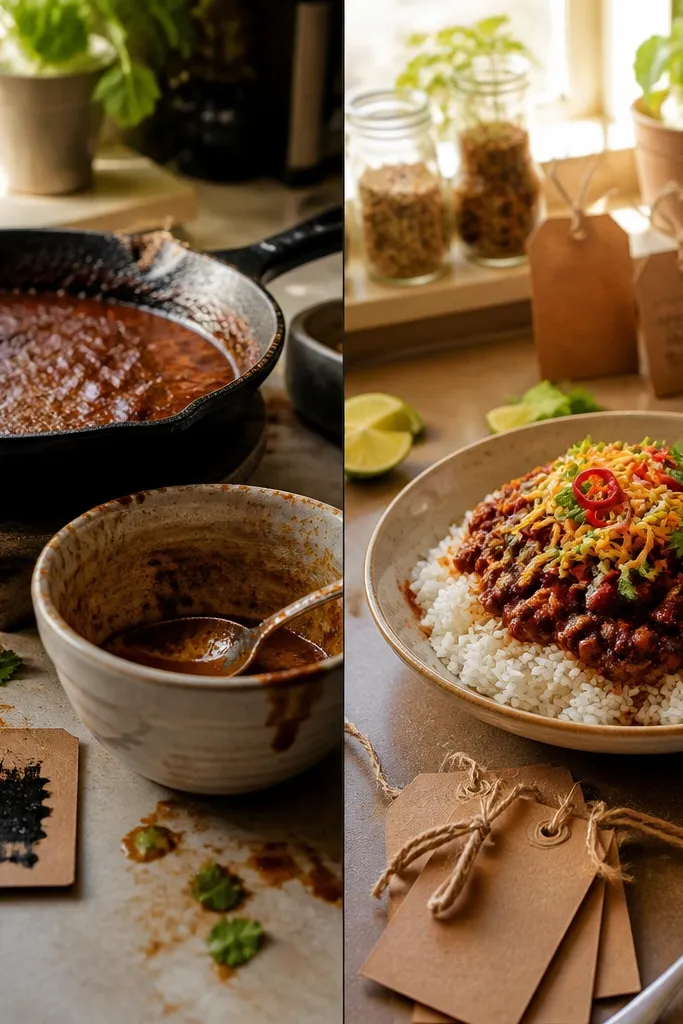
Food changes are easy to compare, and they feel like a shared hobby. I used this for a boyfriend who burned the first batch of chili and then nailed it the next week. The before photo should show the food in a bowl or pan, slightly chaotic. The after photo should show plating — even if it’s simple, like rice plus toppings. Spice card labels make the page look organized and help you recreate it later. This works for any skin tone or body type because the focus is the food and the process, not the person.
Print the before and after photos at 4 inches wide and mount them on a patterned paper background that has small dots or subtle stripes. Cut three to five small label cards from white cardstock, about 1.5x2 inches each. Write the spice names in black marker and add one tiny color dot next to each (red for paprika, yellow for turmeric). Place the cards under the after photo in a straight row. Add a journaling strip beside the cards with the date and “what changed” in one sentence.
Take a photo of the measuring spoon too — it makes the page feel like a real cooking log.
Avoid using greasy hand-written notes on the page; it smears and stains over time.
6. Game night before/after with mini scoreboard stickers

Game nights turn into a scrapbook goldmine because the “after” is usually happier and more interactive. I like using a before photo where he’s concentrating and an after photo where he’s clearly winning or celebrating. Scoreboard stickers add structure, and the dice icon gives it a playful vibe without clutter. If your boyfriend likes sports games, write the score and include the console or the mode. This flatters every style because the scoreboard pulls focus even if the photos are different lighting.
Print the before and after photos as 3x4 inch rectangles and mount them with a consistent 1/8-inch white mat border. Create a scoreboard piece by drawing a rectangle on cardstock, about 4 inches wide, and dividing it into two sections with a ruler. Write the date and game name at the top, then the before score and after score in the two sections. Place the scoreboard between the photos, centered, with photo tape. Add a small journaling strip under the scoreboard that says the exact moment, like “first win after the comeback.”
Use a ruler for the scoreboard lines. Uneven lines make it look like a rushed craft.
Don’t cover the scoreboard with too many stickers — it turns into visual noise fast.
7. Tattoo appointment before/after with stencil photo and wax seal
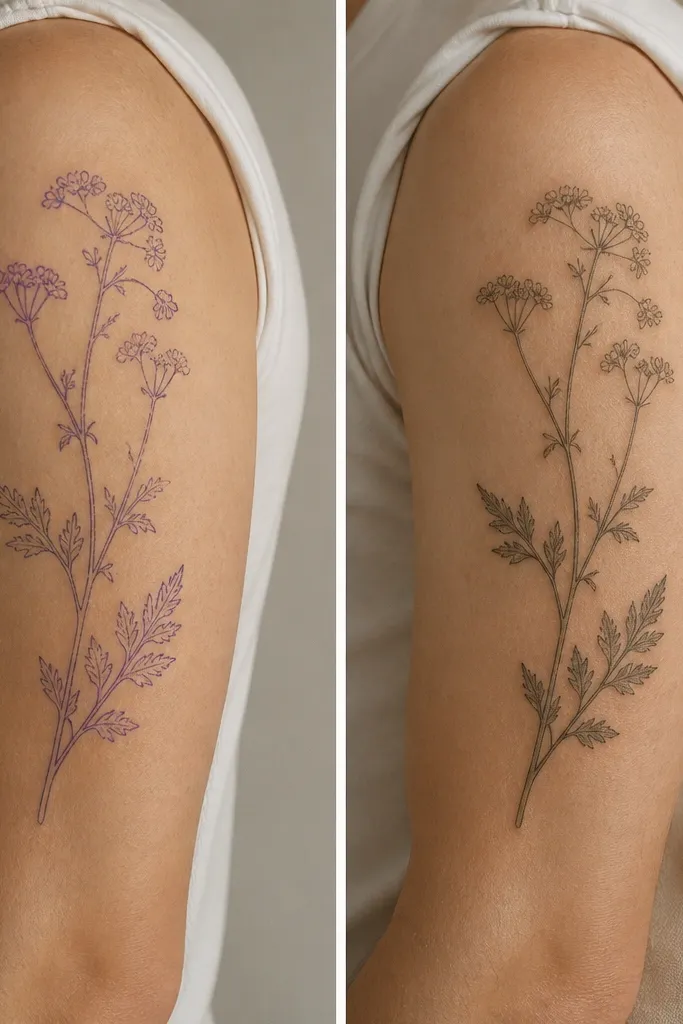
A tattoo transformation is private but scrapbook-friendly when you keep the page respectful and clean. The before photo should show the stencil clearly, and the after photo should show the finished piece in good light — even if it’s slightly healed. I like using a circular wax-seal sticker in a deep red or black because it feels like a “letter” moment. Keep the page color palette tight: black, cream, and one accent color pulled from the tattoo ink. This flatters the page because it frames the moment without needing lots of text.
Print the before and after tattoo photos at 3.5 inches wide and mount them vertically with a small gap. Cut a thin rectangle of cream cardstock as a journaling backdrop, about 3.5x1 inch, and place it under the after photo. Add the wax-seal sticker on the top corner of the after photo, not on the center. Write the appointment date and one phrase about how he felt in black pen on the cream strip. If the stencil photo has a lot of background, crop tighter so the tattoo area fills most of the frame.
Editor's noteUse a matte photo finish or print on matte paper to reduce glare on skin.
Skip thisAvoid adding heavy embellishments over the stencil image; it makes the page look messy.
8. Road trip before/after with gas receipt and rest stop photo
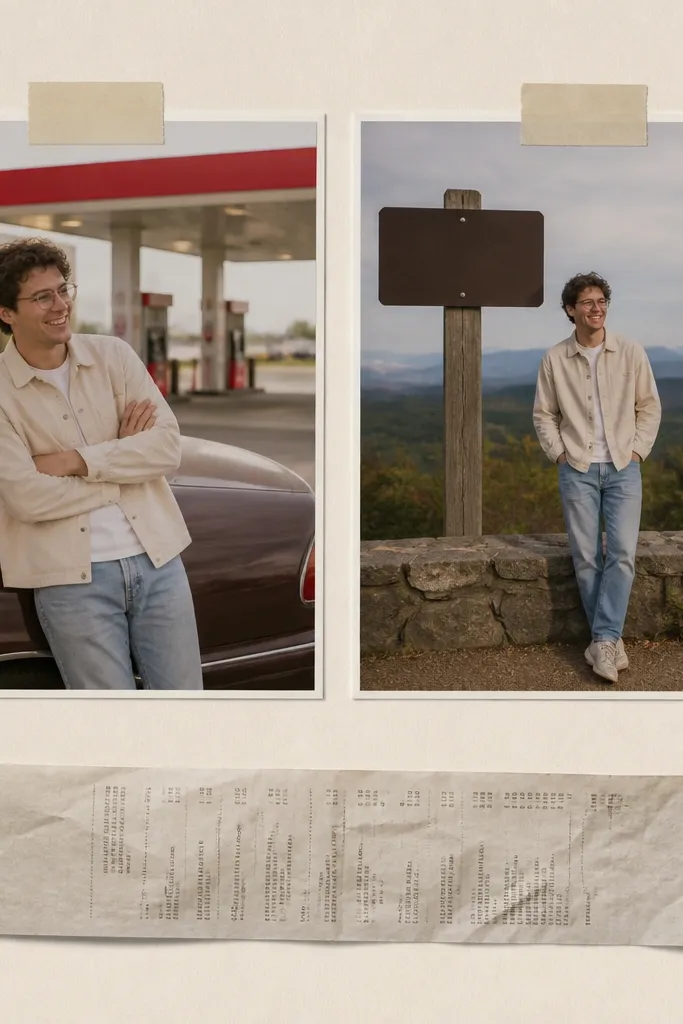
Road trips have built-in transformation because the mood shifts from “getting there” to “arriving.” Use a before photo that shows the car and his face lit by dashboard glow, and an after photo where he’s standing still at a sign or viewpoint. Gas receipts add a real travel detail and give the page a horizontal rhythm. Pick receipt paper that matches your scrapbook base color — warm tan looks best with cream cardstock. This works for any boy because it doesn’t depend on his style; it depends on the journey.
Print the before and after photos at 3.25 inches wide and mount them on a page with a subtle blue or road-map patterned paper background. Tape the before photo on the left, then tape the after photo on the right. Lay a gas receipt strip across the bottom edge of the right photo, trim it to about 3.5 inches wide. Add a journaling strip above the receipt with the miles or the route nickname you both used. Finish by adding one small sticker of a gas pump icon in the corner.
If you don’t have a receipt, print a fake-style receipt template on plain paper and write the numbers by hand.
Avoid writing over the receipt text with thick markers; it bleeds and ruins the look.
9. Romantic letter before/after with folded note and stamped date
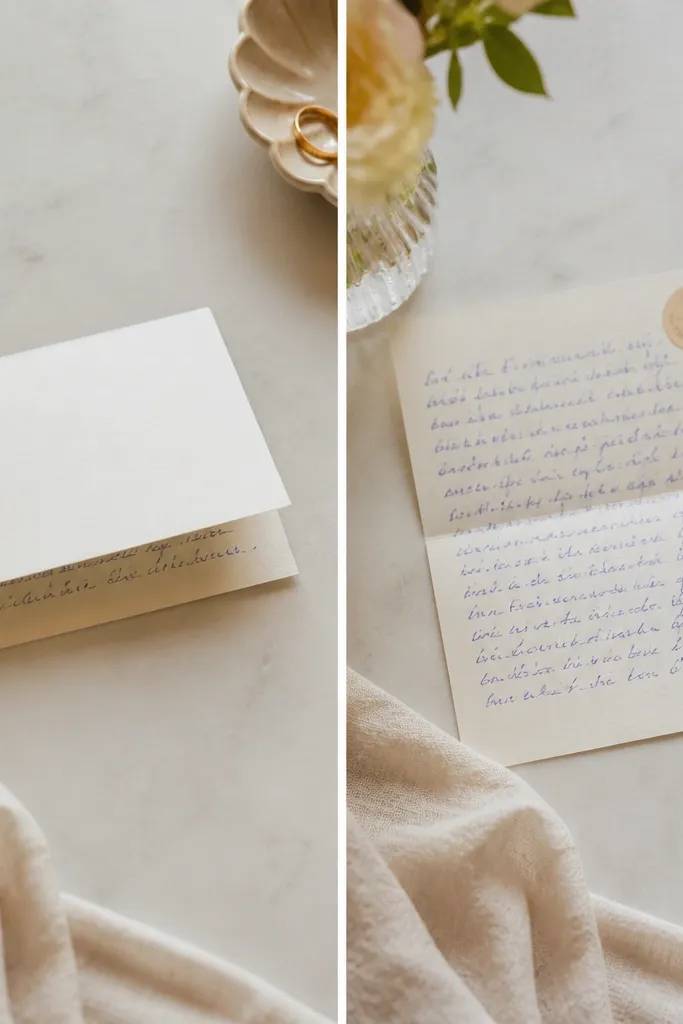
This is a transformation that’s quiet but powerful: the same message changes from private to shared. Use a before photo of the note still folded or tucked into an envelope. Use an after photo of the note laid flat, with the handwriting visible and readable. A stamped date sticker in black ink makes it feel like an archive item. The page looks romantic without turning into fluff because the handwriting is the centerpiece. It flatters anyone because the focus is the words and the physical paper texture.
Cut a pocket from clear cardstock or a page protector sleeve and mount it on the scrapbook page. Place the folded note inside the pocket as the “before” item, then print a second photo of the note opened as the after. Mount the after photo above the pocket and trim it so the handwriting fills the frame. Add the stamped date sticker on the corner of the after photo, not on the note itself. Write a short journaling line under the photo about what was happening that day and sign it with the first initial of your name.
Use a thin black stamp and test it on scrap paper first so it doesn’t smear on textured cardstock.
Avoid thick glitter glue on handwriting pages; it makes the ink look dull and messy.
10. Birthday candle before/after with melted wax texture strip
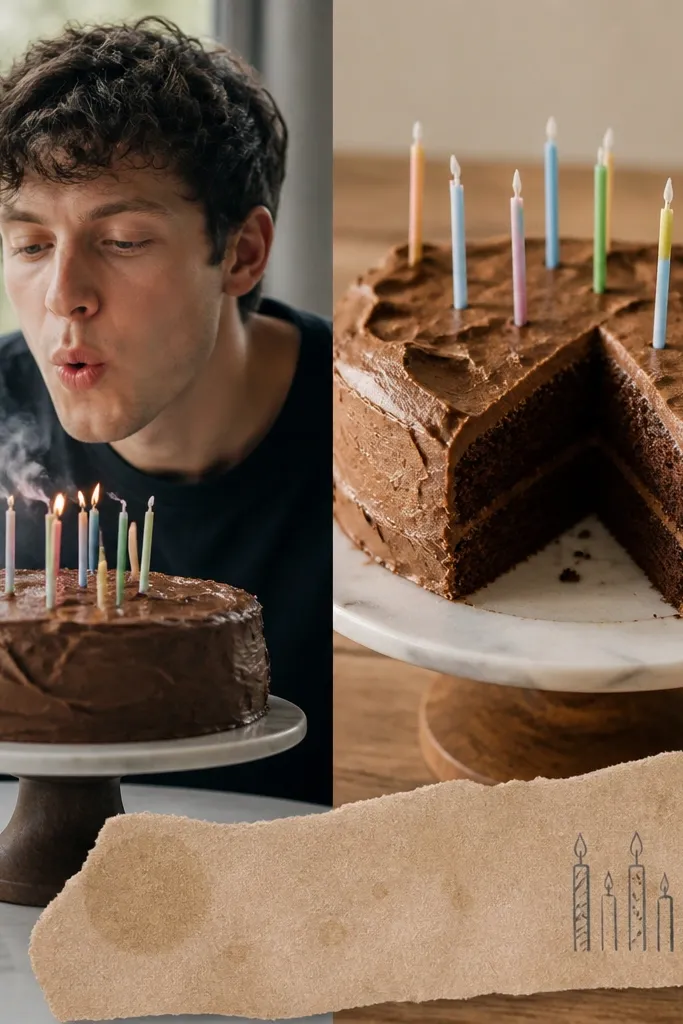
Birthday pages look best when you show the moment and the aftermath. The before photo is the chaotic action: candles, his face close, maybe frosting on his fingers. The after photo is calmer: cake slice, plate, or him holding a fork. Add a waxy-looking strip by using light kraft paper and rubbing it lightly with a wax crayon so it has that candle residue feel. This gives the page texture without needing real melted wax, which is messy and stains. It flatters the scrapbook because it keeps the page tactile and cohesive.
Print the before and after birthday photos at 3.5 inches wide and place them diagonally so the page feels energetic. Tear a strip of kraft paper about 1 inch wide and rub a light brown or caramel wax crayon along it, then smudge gently with your fingertip. Tape the wax strip under the after photo, centered. Add tiny candle doodles on the wax strip using a brown marker. Write the age and date on a small label sticker and place it near the top corner of the before photo.
Editor's noteUse a white gel pen to draw a few highlights on the wax strip so it reads like candle shine.
Skip thisAvoid real candle wax blobs — they harden unevenly and can lift the paper.
11. Hiking before/after with trail elevation card
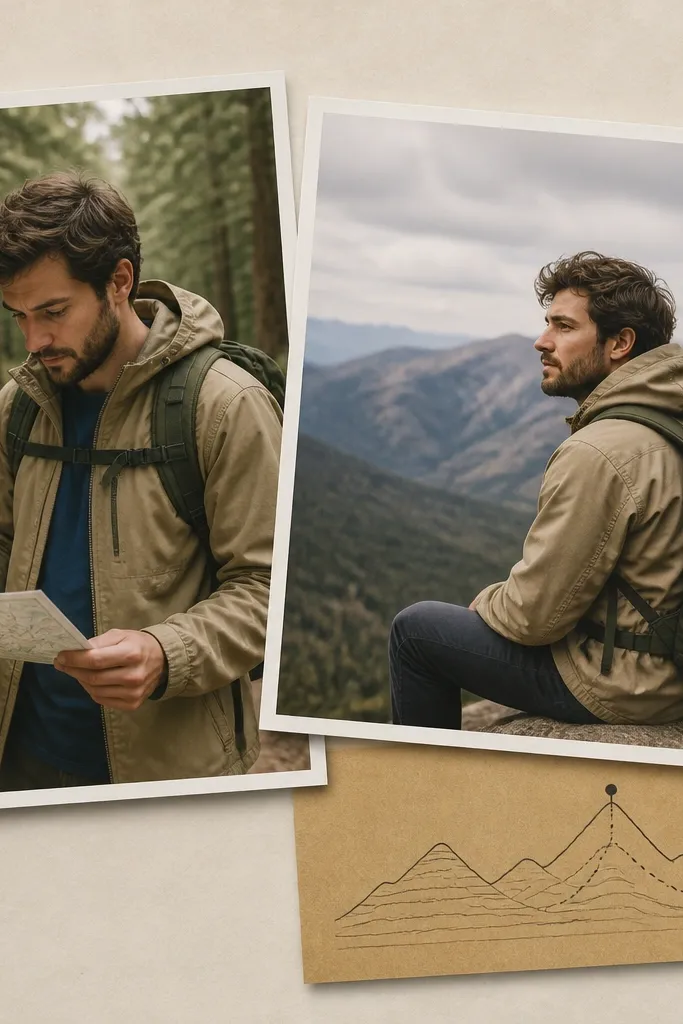
Hiking transformations are easy to read because the background changes and his posture changes. Use a before photo at the trailhead — backpacks on, he’s looking at the map or trail sign. Use an after photo where you can see a viewpoint or skyline, and he’s relaxed, slightly sweaty, smiling. The elevation card makes it feel like a mini logbook, and you can match the colors to your photos: green card with tan lines for forest hikes, gray card with blue lines for colder weather. This flatters the page because it adds a graphic element that isn’t another photo.
Print the before and after photos at 3.25 inches wide and mount them on opposite sides of the page so the trail feels like it moves. Create an elevation card from cardstock sized about 3.5x2 inches. Draw a simple line graph with a peak dot using a pencil first, then trace with a blue or green marker. Put the elevation card under the after photo and tape it at the top corners only. Add journaling on a narrow strip that lists the trail name, distance, and your best moment.
If you know the elevation gain, write it as a single number (like “1,200 ft gain”) so it reads fast.
Avoid cramming too much text on the elevation card — keep it to trail name plus one number.
12. Home decor before/after with paint chip labels
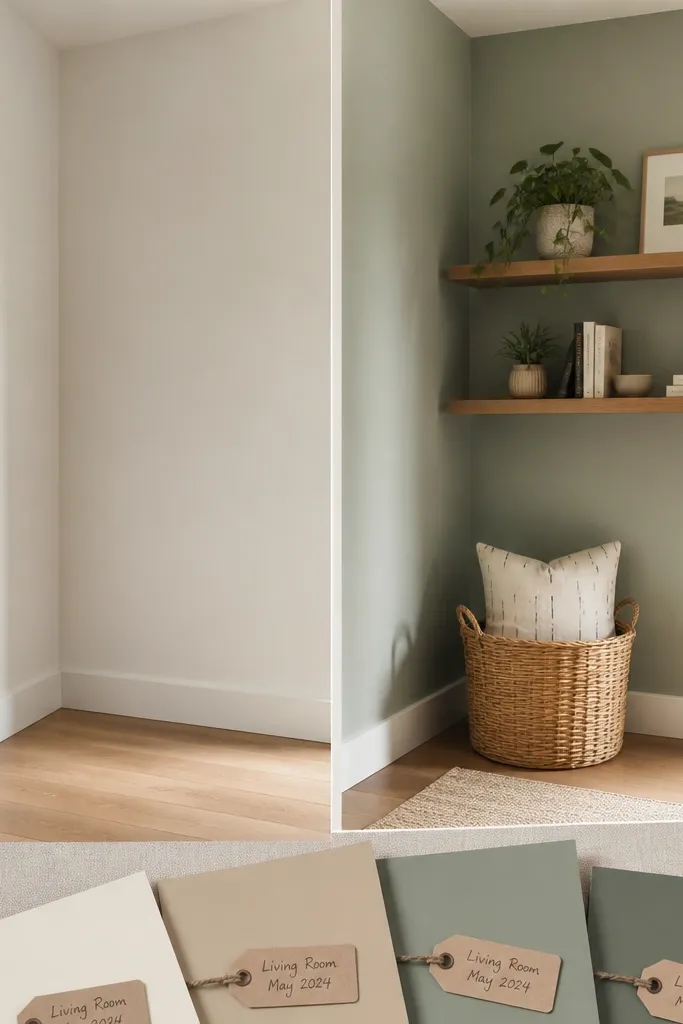
This page makes your scrapbooking look like a real project because paint chips are literal. The before photo is the empty corner, maybe with the old color still visible. The after photo shows the same spot with a new color, shelves, or a framed print. Use paint chips from a hardware store — the colors are already matched, and they look clean next to photos. Label each chip with room name and date in black pen. It flatters any boyfriend because it focuses on the work you did together, not on physical appearance.
Print the before and after photos at 4 inches wide and align them so the corners match. Tape the before photo on the left, then the after photo on the right, leaving a narrow gap. Cut three paint chip rectangles about 1 inch wide and 2 inches tall. Write the color name and date on each chip’s plain strip area. Place the paint chips in a vertical stack under the after photo and tape them down with double-sided tape. Add a journaling strip under the chips with the reason for the change in one sentence.
Editor's noteTrim paint chips with a craft knife for straight edges — scissors make them look ragged.
Skip thisAvoid using paint-chip samples with heavy glare coating; matte ones photograph better.
13. Coffee order before/after with menu cutouts
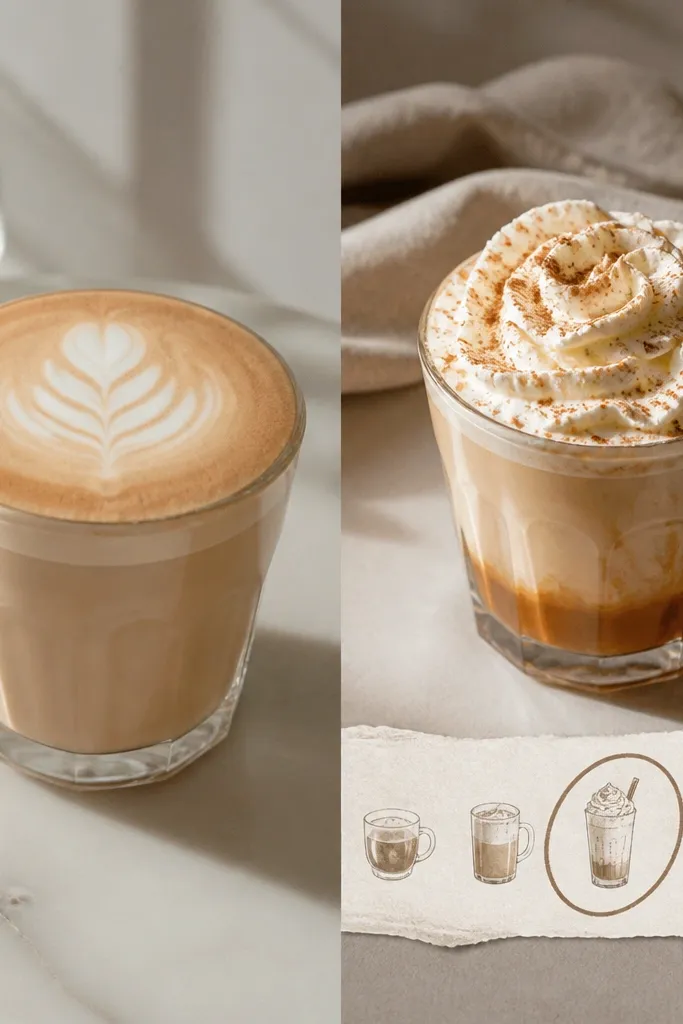
Coffee transformations are perfect for scrapbooks because they’re small, repeatable, and personal. Use a before photo from the first time you got coffee together — his drink looks simple and the cup has a plain label. Use an after photo where he has a named order, like “oat milk, extra shot, cinnamon.” Menu cutouts add proof and make the page feel like a memory, not a guess. This flatters the page because the menu design gives structure even if your photos vary in lighting.
Print the before and after coffee photos at 3.5 inches wide and mount them with a light cream mat. Cut a strip of menu paper about 4 inches wide and 1.5 inches tall, then circle his order with a dark pen. Place the menu strip under the after photo, centered, with tape at the corners. Add a journaling line beside the circle with the exact date and “what he changed” in one sentence. Finish by adding a small cutout of the cup sleeve color or pattern if you saved one.
If the menu text is hard to read, take a quick phone photo of the menu and print it — it stays legible.
Avoid writing over the menu with thick paint markers; it hides the original print.
14. Clothing thrift before/after with hanger tags
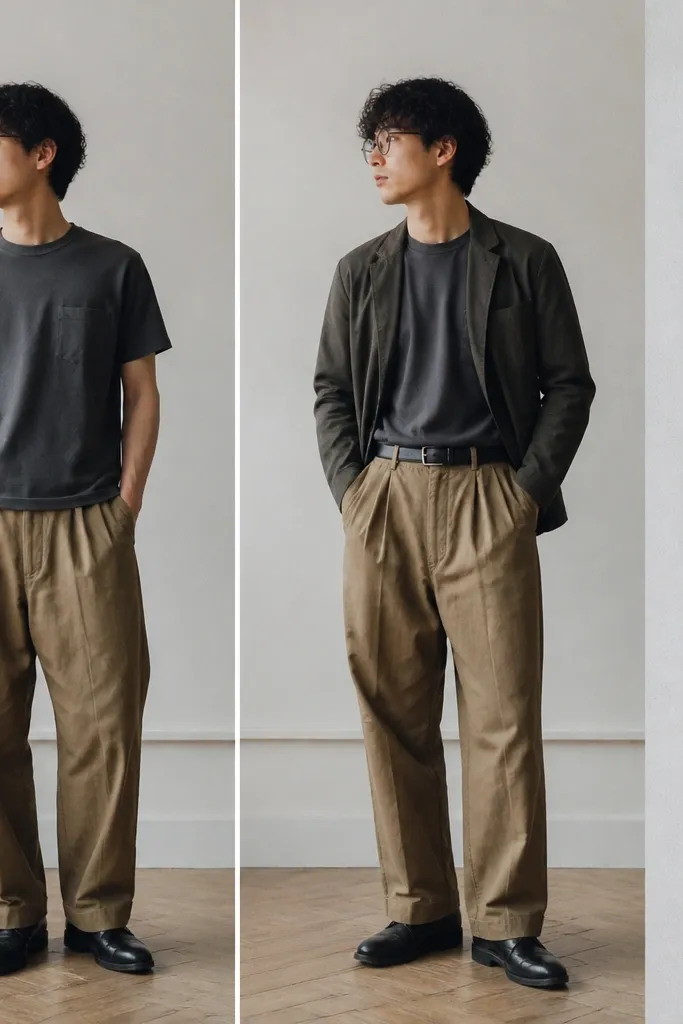
Thrift transformations look amazing because the “after” usually includes styling choices you made together. Use the before photo where the outfit is a bit too big or plain. Use the after photo where you added one clear upgrade — a belt, a fitted layer, or a cleaner shoe. Hanger tags make it feel like a clothing label and add a professional touch. This flatters most body types because it’s about fit changes and styling decisions, not trying to force a trend. The page reads like a makeover without being dramatic.
Print the before and after photos at 3 inches wide each and mount them in a two-column layout. Cut two hanger tags from cardstock, about 2x3 inches, and punch a small hole at the top with a hole punch. Write the thrift store name, date, and size on the tag. Tie each tag to the layout using thin twine or ribbon and tape the bottom end so it stays flat. Place the after photo under the after tag and add a journaling strip that lists what you changed (belt, jacket, shoe).
Editor's noteUse the same ribbon color for both tags so the page looks coordinated.
Skip thisAvoid tying ribbon too tight — it pulls the cardstock and makes the page buckle.
15. Scrapbook page corner with map coordinates before/after
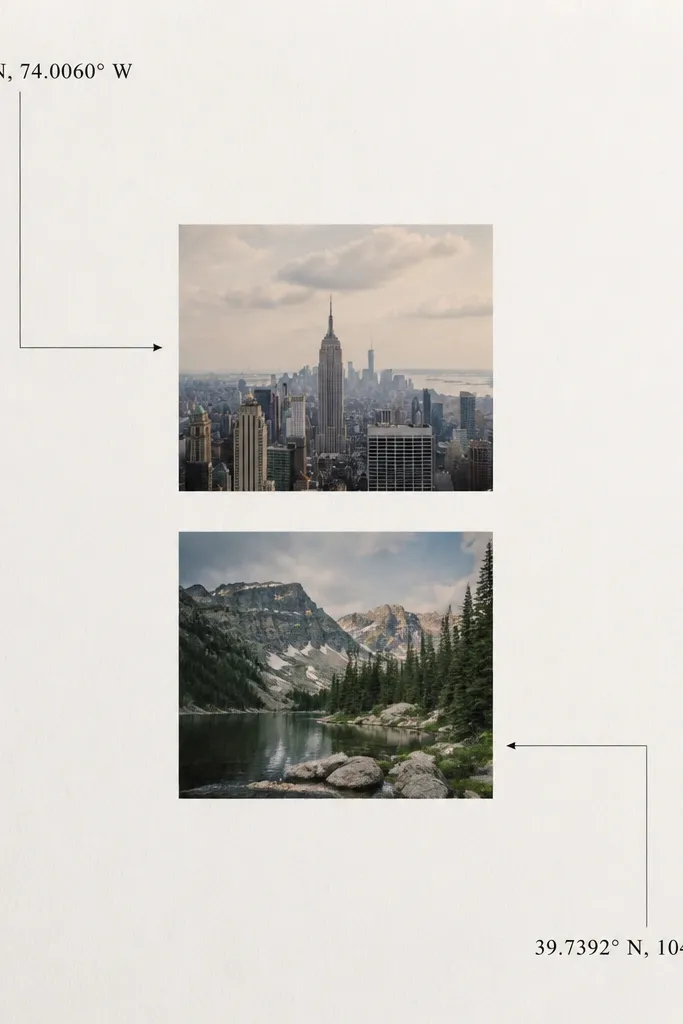
Coordinates work because they turn a place into a collectible detail. Use the before photo from when you arrived at a landmark and the after photo from when you returned or stayed longer. Put the coordinates near the edges so the center stays clean for photos. The thin line and arrow make it feel like a guided map. This flatters your scrapbook because it adds a graphic element that doesn’t compete with the images. It also works for casual trips, not just big vacations.
Print the before and after photos at 3.25 inches wide and mount them in the middle of the page. Choose one place you visited twice and get the coordinates from your phone maps, then print the coordinates on small strips of white paper. Cut the strips into 1-inch labels and place them in two opposite corners. Draw thin lines with a fineliner from each label to the matching photo, ending with a tiny arrow. Add journaling under one photo that says what you did at that exact spot and the date.
Write the coordinates in a consistent format like 12.3456, -78.9012 so it looks neat.
Avoid handwriting coordinates in tiny cramped letters — it looks like a scribble.
16. Service project before/after with volunteer badge tags
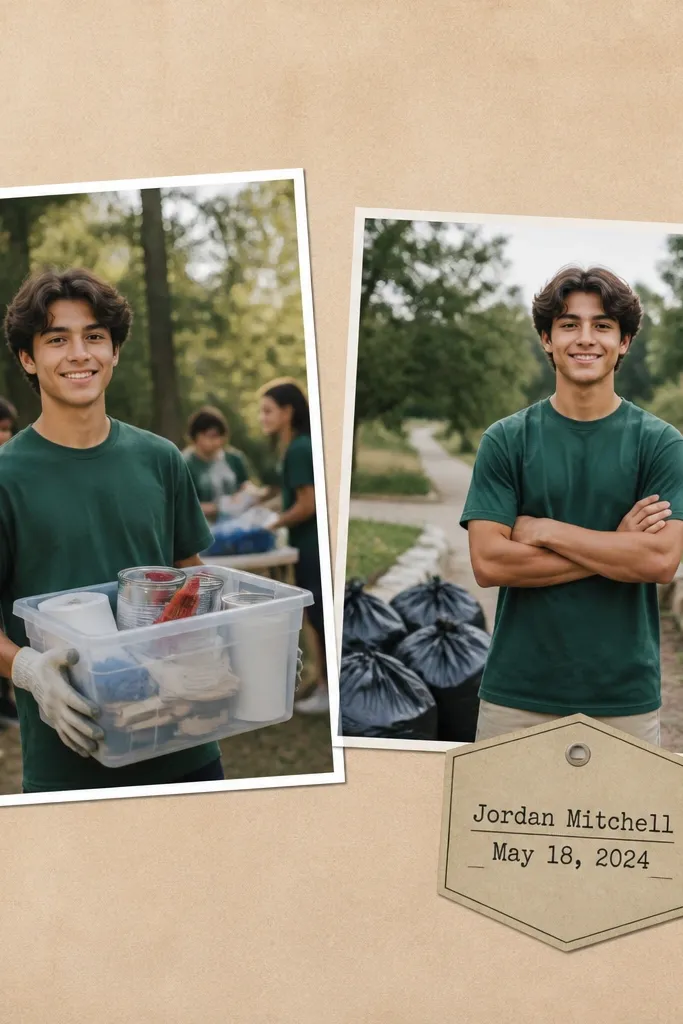
If your boyfriend volunteers, this is the page that makes your scrapbook feel real. Use a before photo that shows the setup — him with gloves, boxes, or tools. Use an after photo that shows the result — organized shelves, cleaned space, or a finished item. Volunteer badge tags add structure and make the page look like it came from an event booklet. I like badge shapes because they break up the page and look good with both casual and formal photos. This flatters the page because it focuses on action and outcome.
Print the before and after photos at 3.75 inches wide and mount them side-by-side with a 1/4-inch gap. Cut a badge shape from cardstock using a simple die or template, about 2.75 inches wide. Write the event name and date on the badge in black ink, then add a small “volunteer” label strip at the bottom. Place the badge under the after photo and tape it down. Add a journaling strip that says one specific thing he did, like “helped pack 40 snack bags.”
Use a slightly raised badge by adding a thin foam square under the badge edges so it pops without bulk.
Avoid using random clipart badges; draw a simple border with a fineliner instead.
17. First car before/after with key fob photo frame

Car moments are full of emotion, and the before/after format makes it obvious how far he’s come. Use the before photo from the first time he talked about getting a car, even if it’s him by a friend’s vehicle. Use the after photo where he’s actually proud — standing in front of the car, hand on the door. A key fob frame is a clever physical detail because it’s small and instantly recognizable. It flatters the page because it adds a techy element that balances a large photo.
Print the before and after car photos at 4 inches wide and mount them left and right. Create a key fob frame by printing a key fob image (or drawing one) and placing it in a small rounded rectangle frame cut from cardstock. The frame should be about 2.25x1.5 inches. Tape the rounded rectangle near the after photo, slightly overlapping the photo border. Add a journaling strip under the after photo that lists the car year/model and the date you took delivery. Finish by writing “first key” in a small label sticker and placing it on the key fob frame corner.
Use a matte black frame so it looks like a real key fob, not a sticker.
Avoid adding too many car icons — one key detail is enough.
18. Dance class before/after with music ticket strip
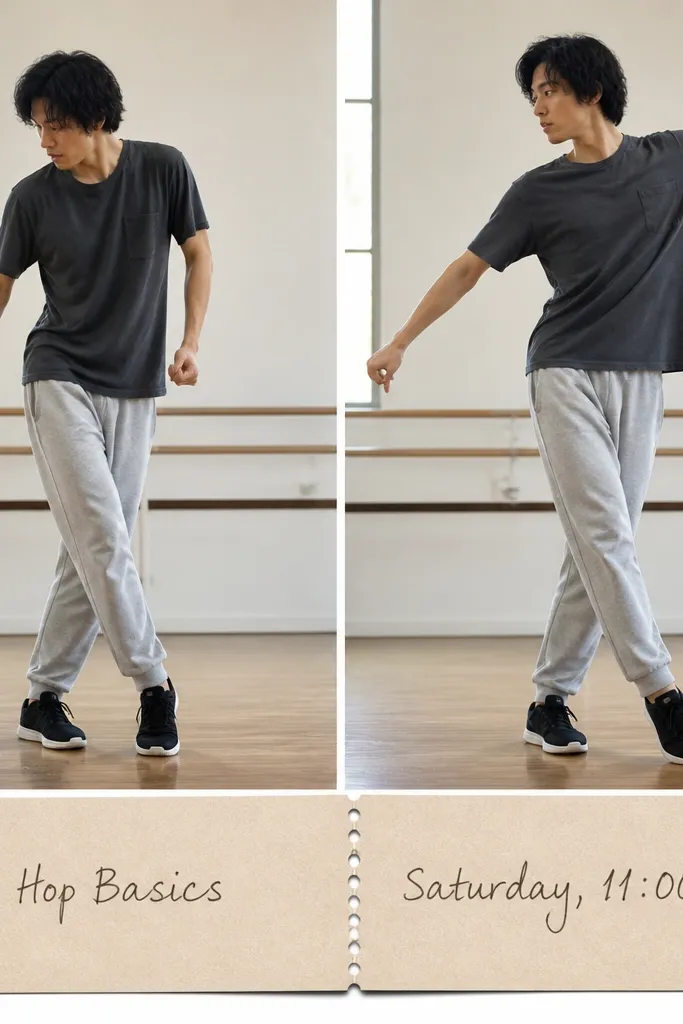
Dance transformations are fun because they show improvement in body lines, not just a finished result. Use the before photo when his feet are off or his arms are tense. Use the after photo when he’s hitting a pose with clear posture and a confident face. A music ticket strip adds a stage vibe, even if you didn’t get actual tickets; you can save the class schedule or print it. This flatters the page because the ticket strip gives movement and keeps the bottom of the layout from feeling empty.
Print the before and after photos at 3.5 inches wide and mount them with a slight angle — I tilt the before photo 2 degrees and keep the after straight. Cut a ticket strip from cardstock, about 7 inches long and 1 inch tall, and make perforation lines with a pen so it looks like a real tear. Write the class name, studio, and time on the strip. Tape the ticket strip under the photos, centered, with tape on both ends only so it stays flat. Add a journaling line on the right edge of the ticket that says one move he finally got right.
Use a fine black pen for handwriting and a different color for the date so it stands out.
Avoid thick markers on small ticket strips — they bleed and look amateur.
19. Hobby start before/after with printed project receipts
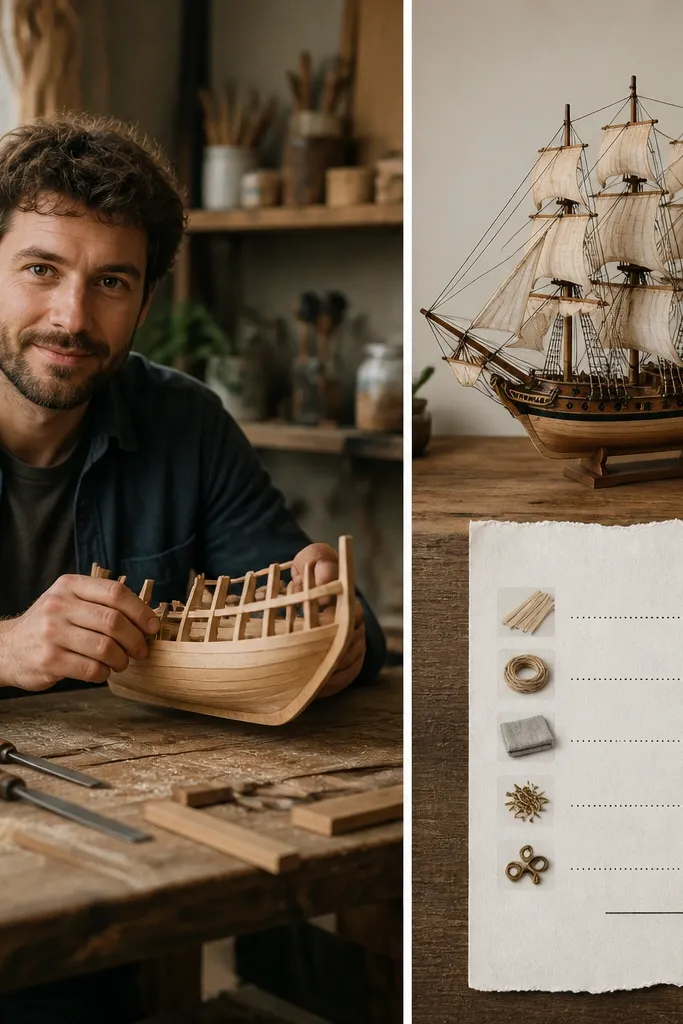
When a boyfriend starts a new hobby, the before/after gap is usually huge — messy tools first, clean final product later. I’ve used this for woodworking, miniature painting, and even learning to bake bread. The before photo should show the rough stage, with materials visible. The after photo shows the finished item in good light, with sharp edges or neat paint. Receipt-style material lists make the transformation feel grounded. It flatters your scrapbook because it turns “we did a thing” into “we made a specific thing.”
Print the before and after photos at 4 inches wide and mount them in a top-bottom layout. Create a receipt strip by typing a simple list on paper: item, quantity, and cost, then print it and cut it into a long rectangle. Place the receipt under the after photo, centered, and tape it down with double-sided tape. Add a small “materials” label sticker at the top left of the receipt. Write one sentence journaling under the receipt about what he learned during the process.
Use matte photo paper for the receipt so it doesn’t glare next to your photos.
Avoid handwritten receipts that are uneven and too small; print them for crisp alignment.
20. Beach day before/after with sand-texture paper

Beach transformations have a built-in visual change: wet to dry, shadow to sun, relaxed to salty. Use the before photo when he looks freshly arrived — damp hair, towel visible, a little wind-blown. Use the after photo when he’s walking or posing in full daylight. Sand-texture paper adds a tactile layer that matches the theme without smearing. I make it by using textured cardstock or by lightly dusting craft glue and sand on scrap paper, then sealing with matte clear spray. This flatters the page because it frames the photos and makes the whole layout feel like the same day.
Print the before and after photos at 3.25 inches wide and mount them with a cream mat to mimic sand. Tear small sand-texture strips (about 3/4 inch wide) and place them around the outer edges of the page, not on top of the photos. If you’re making texture paper, let the glue-sand layer dry fully overnight, then trim it after it sets. Tape the textured strips with thin double-sided tape so no glue shows. Add journaling on a small label sticker that includes one detail like “salt on his lips” or “we found that shell.”
Seal textured paper with matte spray so the sand doesn’t shed onto your album pages.
Avoid using loose sand without sealing; it transfers and makes the page look dirty.
21. Graduation before/after with school transcript tabs

Graduations are obvious transformations, but you don’t need to rely on big speeches or long captions. Use the before photo where he looks like he’s waiting for the moment and the after photo where he’s holding the diploma and smiling. Transcript tabs add credibility and a “real document” feel. Keep the tab text short: a course name, a major, and a graduation date. This flatters every scrapbook style because the tabs create a neat grid and stop the page from looking too celebratory.
Print the before and after photos at 3.75 inches wide and mount them vertically. Create two transcript tabs by cutting cardstock into shapes like small file folders, about 2.5 inches tall. Type or print course names and the date on those tabs, then tape the tabs under the after photo with the top edges peeking out. Add a thin ribbon or twine piece in school colors (I use navy and gold) across the top of the after photo as a small accent. Write a journaling strip under the ribbon that says what he overcame during the program in one sentence.
Use a black date stamp on the tabs so it looks like an official record.
Avoid copying full transcript pages; too much text makes it unreadable.
22. Relationship milestone before/after with shared playlist screenshots
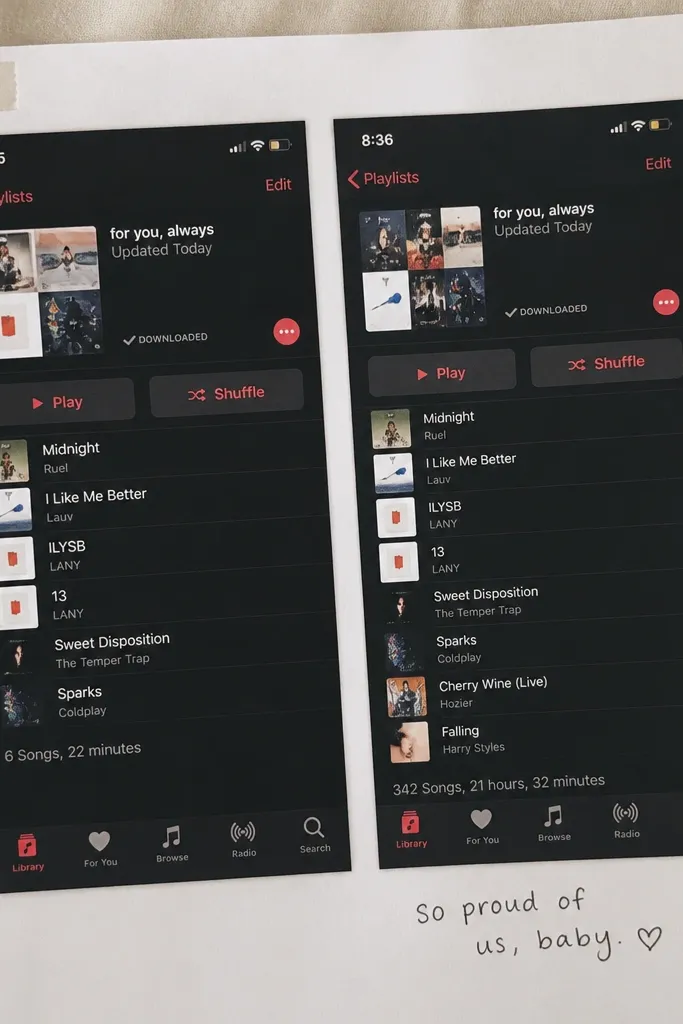
Music milestones are the kind of transformation that makes sense only to you, and that’s exactly why they belong in a boyfriend scrapbook. Use a before screenshot from your first shared playlist — fewer tracks, simpler cover. Use an after screenshot from a later date — more songs, maybe a new playlist name. Print screenshots on matte paper so the text doesn’t glare. Add a label sticker with the date and a short line about the song that became your “thing.” This flatters the page because it turns a digital memory into a physical keepsake.
Print the before and after playlist screenshots at 3x5 inches each, cropped so the track count is visible. Mount them side-by-side with a white mat border 1/8 inch thick. Place the date label sticker above the after screenshot corner. Add a journaling strip under the after screenshot that lists one track name and what it reminds you of. Finish by placing a small paper clip charm sticker near the bottom edge of the before screenshot to imply it’s a saved list.
If the screenshot has a lot of UI you hate, crop tighter and keep only the playlist title and track count.
Avoid glossy photo prints for screenshots; glare makes the text look cheap.
23. Snow day before/after with mitten prints and temperature label
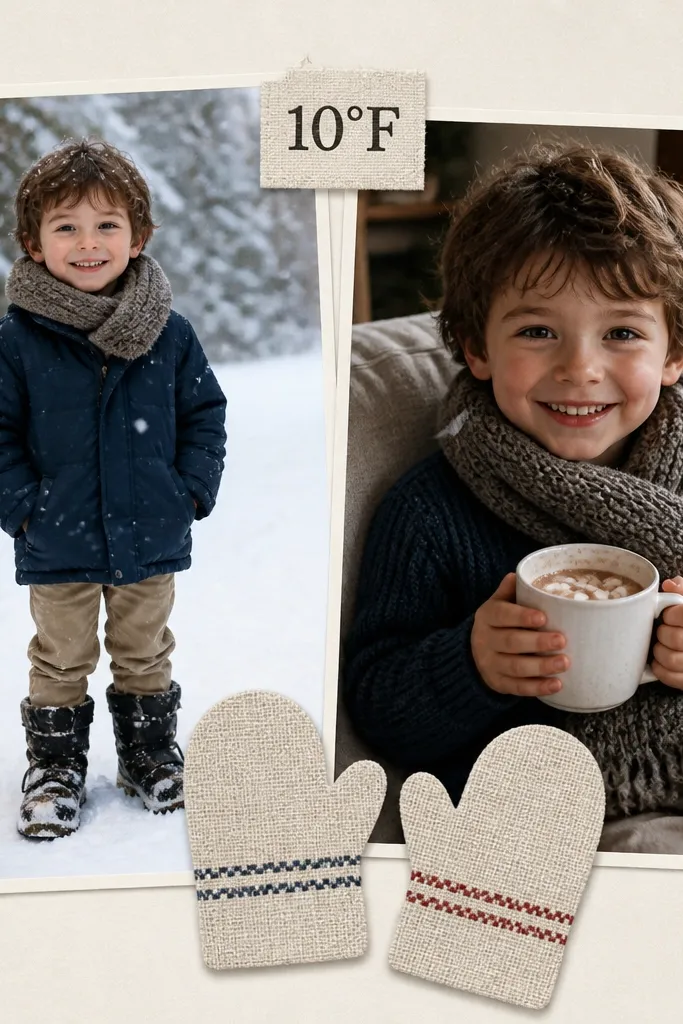
Snow days feel like a transformation because the mood goes from cold and bundled to cozy and warm. Use the before photo outside with visible snow on his boots or jacket. Use the after photo inside with warm lighting and a relaxed pose. Mitten prints add a playful texture, and a temperature label makes it specific. I’ve done this with simple mitten cutouts traced from a real glove, then lightly stamping fabric ink so it looks like a real pattern. This flatters the scrapbook because it adds handmade texture without covering the photos.
Print the before and after photos at 3.5 inches wide and place them in a vertical stack. Cut mitten shapes from craft foam or cardstock, about 2 inches tall, and lightly stamp fabric ink onto them using a sponge. If you don’t have fabric ink, use a gray paint marker and dab it lightly so it doesn’t look solid. Add a temperature label sticker under the after photo, written in neat black pen. Tape the mitten shapes in a small cluster at the bottom corner, so they don’t compete with the journaling.
Editor's noteUse a gray ink or marker for the mitten stamp — it matches cold tones and doesn’t overpower the page.
Skip thisAvoid bright neon colors for snow pages; it looks off next to winter photos.
24. Graduation cap before/after with photo of the same spot in different years

This is a transformation page that hits because it uses the same location twice. Use a before photo in the earlier year where he looks younger or less confident. Use an after photo where he’s older and dressed sharper, ideally with the same background in frame. Film-style borders make it feel like a documented timeline. I like adding a small strip of “year” tags so you can see the progression instantly. This flatters the page because it keeps the background consistent and makes the change in him the only variable.
Print both photos as 3x4 inch rectangles and crop them so the background matches as much as possible. Create a film strip border by cutting a long rectangle of black cardstock and punching tiny holes along the edges, then trim to fit the photo width. Mount the before photo inside the film strip on the left and the after photo on the right. Add two small year label stickers at the top corners. Write a journaling line in the center bottom that says what changed in one area: confidence, job path, or future plan.
Editor's noteIf the backgrounds don’t match perfectly, crop until the horizon line matches. It makes the page feel intentional.
Skip thisAvoid random sticker bursts around the film border; it makes the timeline look cluttered.
25. Weather Log Before/After With Textured Forecast Cards
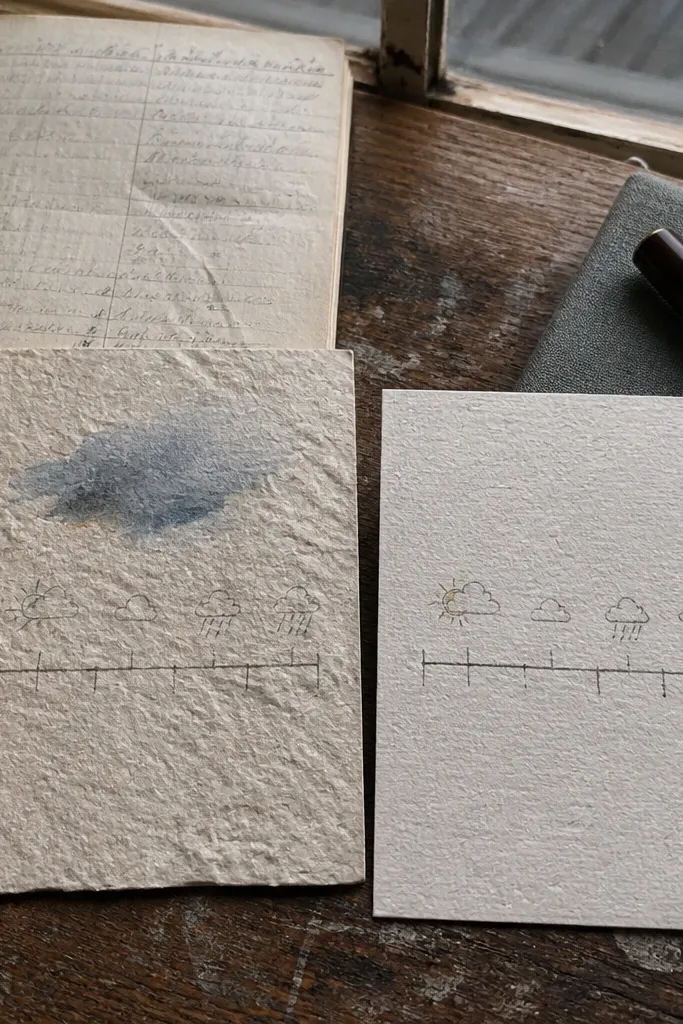
This one works because weather is a real, everyday timeline you can both remember. I’ve used it when we were in a “busy week” stretch and couldn’t line up a big event — the sky still gave us something to point to. Put a Before card for the day things felt off, and an After card for the day things felt better. The texture part matters: if you add a little tactile element like a fabric swatch or a dab of water-based paint, it stops looking like generic printing and starts looking like a lived-in record. It also matches the “before after transformation things to put in a boyfriend scrapbook” angle without needing a dramatic story every time.
Print or screenshot the weather forecast for the Before day and the After day, then trim each to about 2.5 x 4 inches so it fits cleanly in a pocket. Add one tactile clue per card: tape a tiny fabric scrap (2 x 2 inches) from the outfit he wore, or press a small piece of sand-texture paper onto glue and let it dry. Write two short lines under each forecast: one about the temperature and one about how the day felt (one sentence each, no essays). Place the Before card in the left pocket and the After card in the right pocket, then add a thin strip of washi tape across the top edge so the cards look anchored. If you want it to feel extra personal, stamp the date using a small ink stamp and a matching ink color to the weather icon.
Editor's noteUse the same ink color for both cards (I like dark blue) and highlight only one detail with gel pen, like “92F” or “wind 18 mph,” so it reads fast.
Skip thisDon’t use weather cards with tiny text that you can’t read without leaning in — trim and reprint until the numbers are big.



