

1. Pocket Photo Keychain with Leather Cord and Matte Print
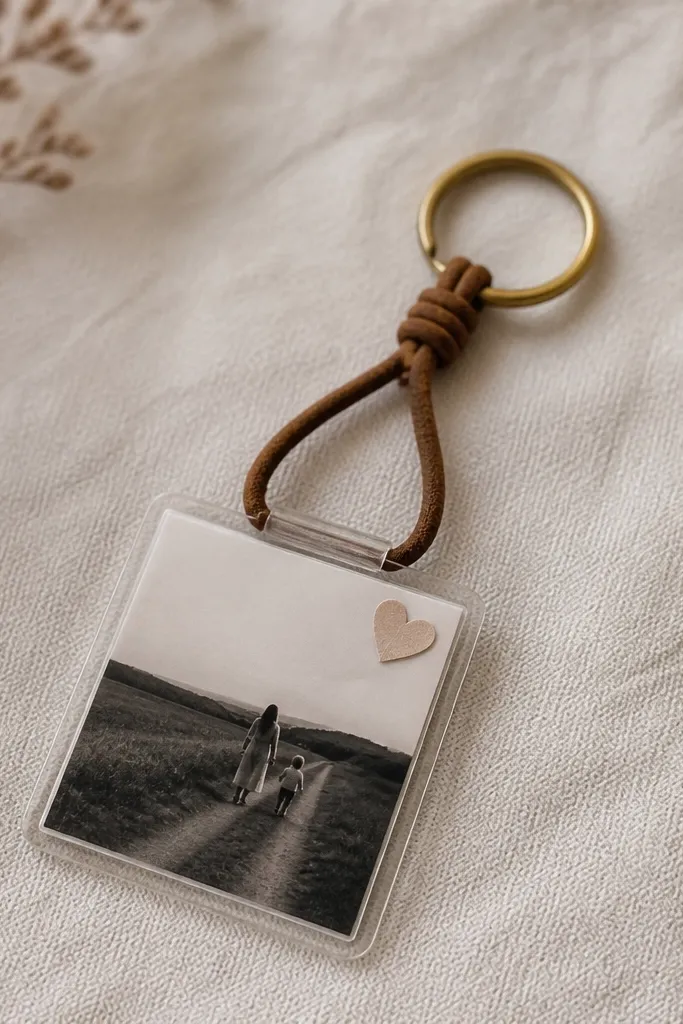
This gift is small enough to live on keys or a bag without bulking up his life, and it still feels personal. I use a printed photo that’s matte (not glossy) because glossy catches light and makes fingerprints show fast. The photo sits in a clear sleeve so it looks clean from every angle, and the leather cord gives it that “bought it” vibe. It flatters anyone’s style because you can match the cord color to his everyday items — black for minimal, tan for warm, or oxblood for moody. It also works for darker skin tones and lighter skin tones equally since matte prints reduce harsh contrast.
Start by trimming a matte photo print to about 1.5 x 2.25 inches so it fits inside a small clear photo sleeve. Punch a hole near the top of the sleeve edge (or use a sleeve with a pre-made hole), then thread 1/8-inch leather cord through and tie a tight overhand knot. Add a drop of super glue to the knot and let it set for 10 minutes so it doesn’t slip. Finally, attach a brass split ring and keychain clip, and use a tiny bit of painter’s tape to keep the sleeve aligned while you glue the cord ends.
If you want it to look extra neat, run a thin line of clear nail polish along the cut photo edge to stop fraying.
Avoid glossy prints — they make the photo look cheap and show smudges immediately.
2. Drawer Tray for Coins and EDC with Painted Wood Slice
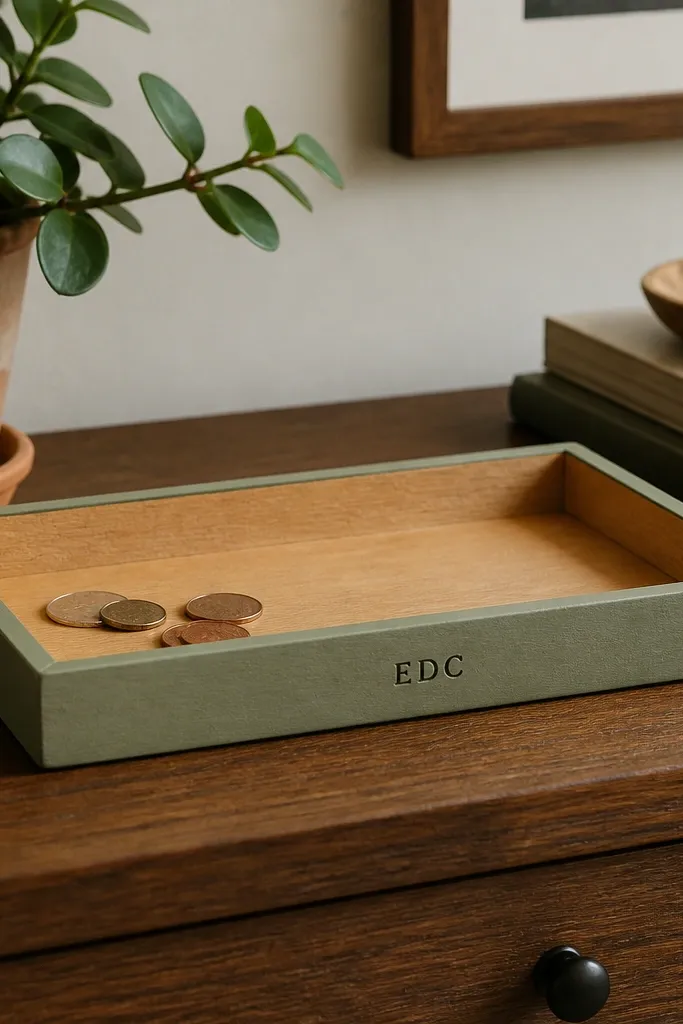
Start with a shallow wood slice or small jewelry tray base about 6-8 inches wide. Lightly sand the surface, wipe with a damp paper towel, then dry fully. Tape off the center, paint only the rim with matte acrylic, and let it dry 30-45 minutes. Once dry, seal with a clear matte varnish (two thin coats), and add a small stamped label or vinyl letters on the front after the first coat.
A small space DIY gift that actually gets used is a tray for coins, earbuds, and random daily stuff. This one has a crisp edge because the rim is painted, while the base stays warm wood. I like muted sage or charcoal for the rim because it hides scratches and still looks modern. It works especially well if he keeps his keys loose in a drawer — you’ll see the difference within a day. The wood tone also pairs with most skin tones and clothing colors, so the gift feels like it belongs in his space.
Skip thisSkip thick paint layers — they look uneven and take forever to cure.
Editor's noteUse painter’s tape pulled back slowly at a 45-degree angle so the rim line stays razor sharp.
3. Felt Desk Organizer with Stitched Color Blocks
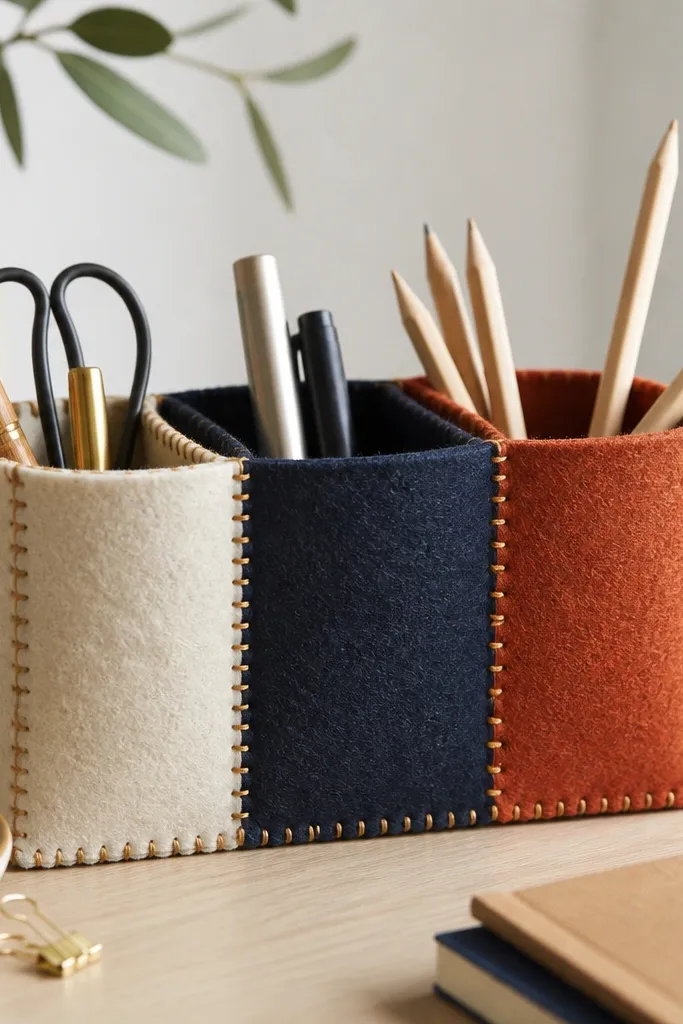
If he works at a desk, a felt organizer is one of the best small space DIY gift options because it turns clutter into something tidy. I build mine with thick felt so it holds shape without a frame. The color blocks look intentional when you keep the palette tight: cream + navy + rust is my go-to. Hand stitching makes it look like a maker piece, not a craft store kit. It’s also gentle on devices — felt won’t scratch screens and it absorbs minor noise from keys and pens.
Start by cutting three felt rectangles for compartments, each about 6 inches tall and 3-4 inches wide depending on what you want to store. Stitch the edges with a simple whip stitch using embroidery floss — I use two strands for a bold line. Assemble the compartments by gluing the back edges to a felt base panel, then stitch along the seams to lock everything in. Finally, add a flap pocket on the front for sticky notes or a small notebook, and trim the sides so the organizer sits flat.
Mark stitching lines with a pencil lightly, then remove with a dry eraser so you don’t leave marks.
Don’t use thin craft felt — it collapses and looks flimsy after two weeks.
4. Matchbook Style Candle Wrap for a Tiny Jar
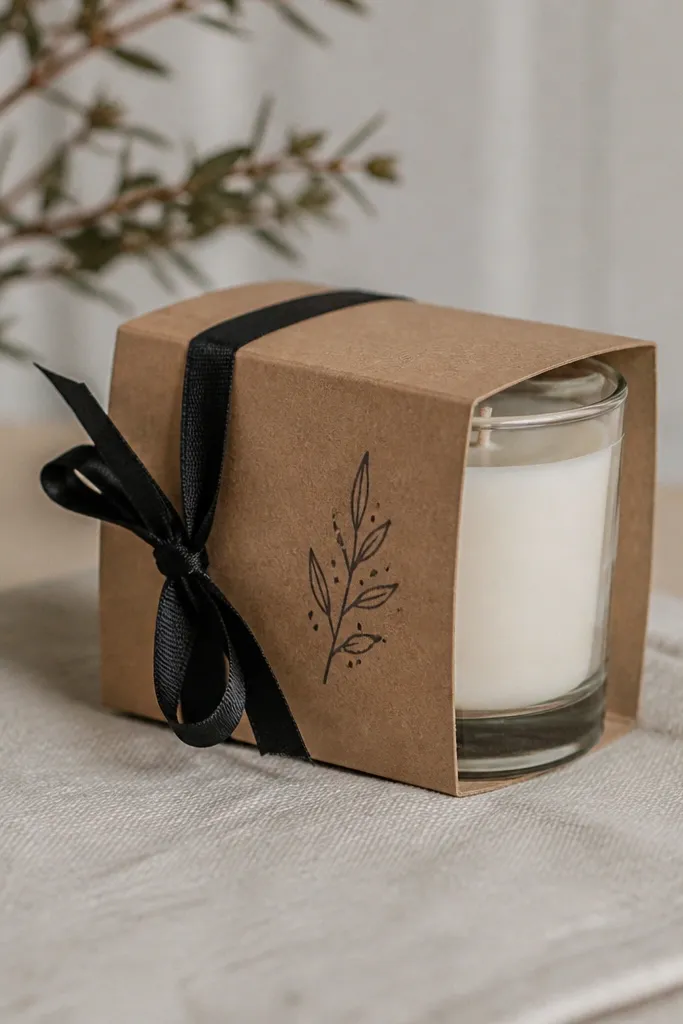
Start with a small 4-6 ounce jar candle and measure its height and diameter. Cut kraft cardstock into a sleeve that wraps around with a 1/4-inch overlap, and fold it so it opens like a book. Seal the edges with glue stick, then stamp or write a short message on the front (date, inside joke, or a simple “For you”). Add a ribbon tie by punching two small holes near the top and threading the ribbon through.
This is a small space DIY gift that feels romantic without taking up much room. You wrap a tiny jar candle with a paper sleeve that opens like a matchbook, so the jar looks like part of the design. Kraft paper + black stamped text looks sharp in any apartment, and the ribbon tie keeps it tidy. The sleeve protects the jar from scuffs and makes the gift feel like packaging, not just a candle. It’s great for boyfriends who like simple decor — no clutter, just a clean object he’ll actually use.
Skip thisAvoid watercolor splashes on the sleeve — they smear when the candle gets warm.
Editor's noteUse a glue stick for the paper seam — it dries fast and keeps edges from buckling like liquid glue can.
5. Mini Wall Hanging with Embroidery Hoop and Maps
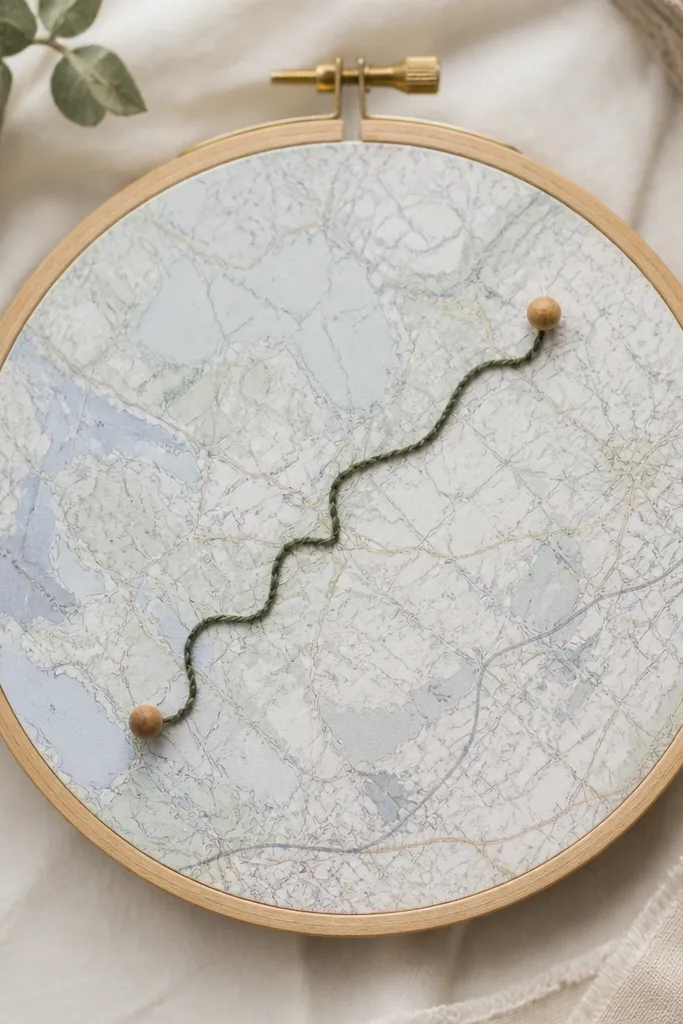
Start by choosing a hoop size around 5 inches and removing the inner ring. Cut a piece of map paper to fit with about 1 inch extra for folding, then wrap it over the backing and trim. Stitch a simple curved line across the map using embroidery floss, starting and ending at two points. Hot glue the beads at the endpoints, then reassemble the hoop and add a small sawtooth hook or a loop of twine for hanging.
A tiny hoop on the wall is a small space DIY gift that instantly makes a room feel “done.” I love using a map print because it looks personal even if your inside joke is hard to translate into craft form. The trick is to keep the design minimal: one stitched route line and two bead anchors. The hoop size matters here — 4 to 6 inches looks intentional, not like a craft you made for a school project. It also works for different skin tones because the design is mostly paper and thread, so the visual focus stays on the hoop.
Skip thisDon’t use too many colors — three floss colors max keeps it looking clean.
Editor's noteIf the paper wrinkles, mist it lightly with water and press it under a book for 10 minutes before hooping.
6. Vinyl Sticker Nameplate on a Cutting Board
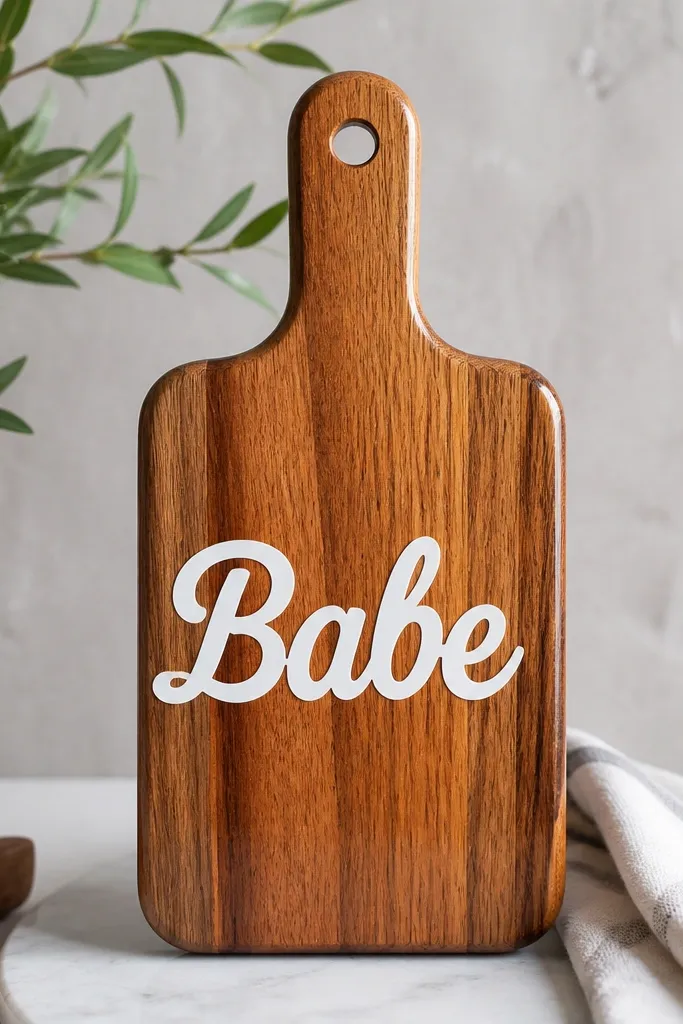
Start with a small cutting board (about 8x10 inches) and sand it lightly so vinyl sticks. Clean the surface with rubbing alcohol and let it dry. Apply vinyl lettering in the center using transfer tape, burnish the letters with a plastic card, then remove the transfer carefully. Seal with mineral oil, let it soak for 30 minutes, wipe off excess, and buff lightly with a clean cloth after 12 hours.
This is a practical small space DIY gift that also looks like decor. A cutting board with a simple label makes him think of you every time he makes food, and it doesn’t take up extra space because it’s already a kitchen item. I use white or cream vinyl on darker wood for crisp contrast. The finish matters: I seal it with food-safe mineral oil plus a top coat of board wax so it looks smooth and doesn’t peel. It’s a good choice if he’s more into function than sentimental trinkets.
Skip thisSkip painting — paint chips fast on boards and makes the gift look worn immediately.
Editor's noteUse a lower-stick vinyl for easier removal during placement — you want crisp edges without tearing the letters.
7. Concrete-Look Desk Paperweight with Paint Chips
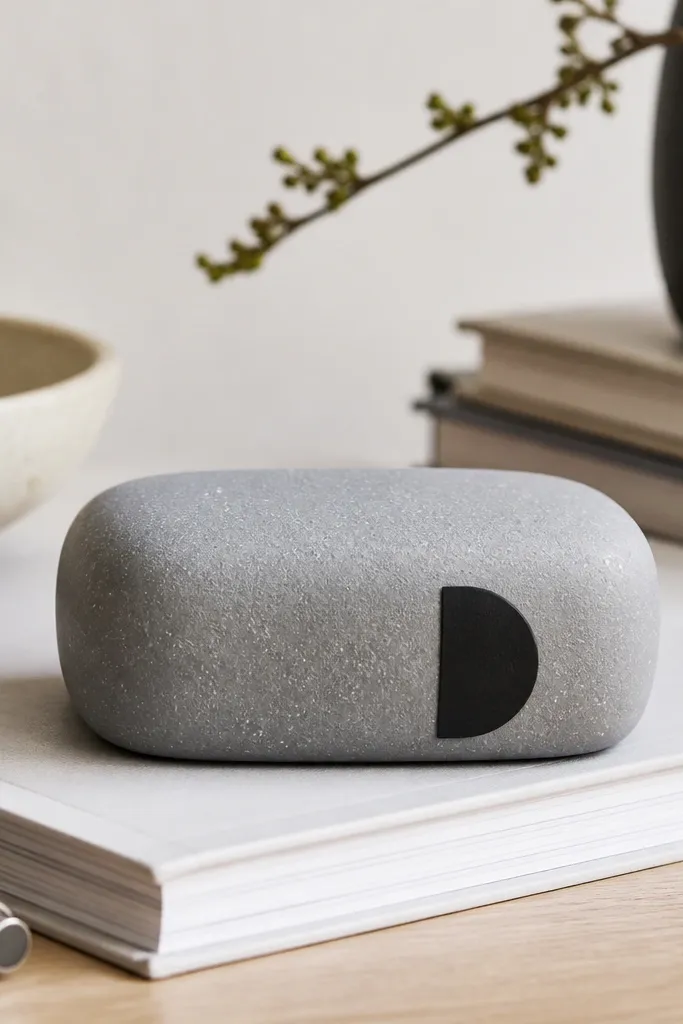
Start with a small resin or foam mold paperweight blank (about 3x2 inches) or use a cheap block and sand it smooth. Base coat in matte gray, then tap lighter gray paint with an old toothbrush for speckles. Let it dry fully, then apply a matte black vinyl letter sticker on one face. Seal with matte clear spray in two light coats and let it cure overnight before using.
A paperweight is one of those small space DIY gift ideas that looks stylish and doesn’t need a lot of space. I make mine with a concrete-look finish using gray acrylic and a speckle technique, then add a single letter or short word sticker. The speckle hides tiny imperfections and makes it feel like a store-bought object. I like it for boyfriends who have a stack of mail or a messy desk — it fixes the problem visually. It also pairs well with metal watches and dark keyboards because the matte finish doesn’t reflect harsh glare.
Skip thisAvoid glossy clear coat — it turns the concrete look into a plastic look.
Editor's noteDo the speckle on a scrap sheet first so you control the dot size and density.
8. Socks-to-Scarf Wrap with No-Sew Folded Edge
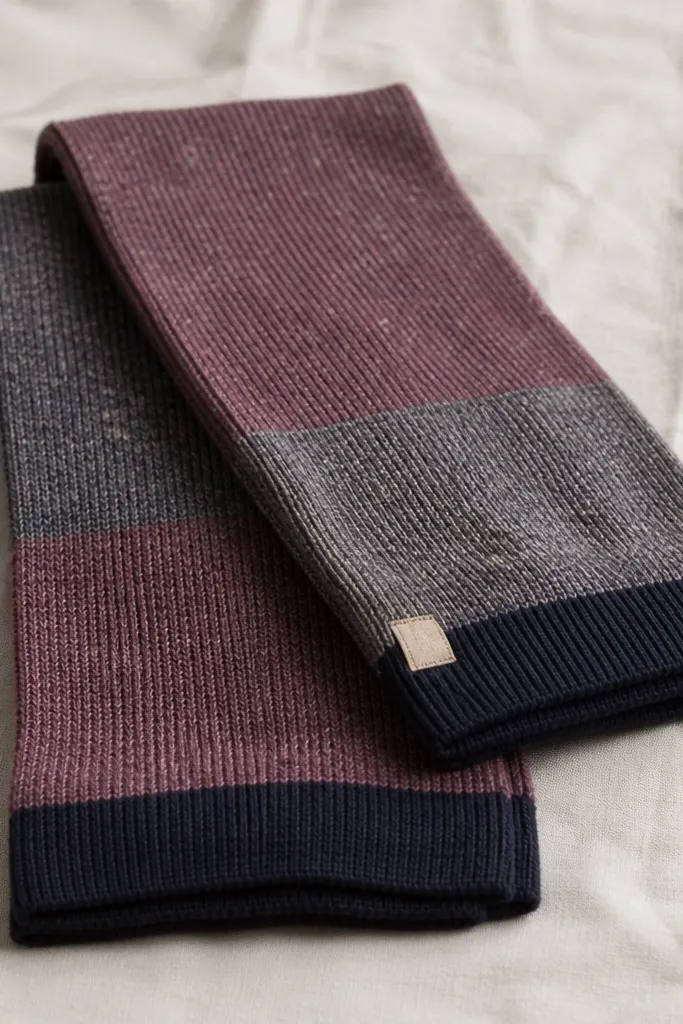
Start by picking two socks with matching colors and trimming the toe sections off so you have two long tubes. Turn one tube inside out, then nest it inside the other so the knit layers sit together. Fold the ends inward about 1 inch and tack them with a few hand stitches or fabric glue dots at the corners. Finally, add a small fabric tag on one end using hand stitching, and steam lightly so the fold relaxes and lays flat.
If you want a small space DIY gift that feels cozy and doesn’t require a sewing machine, this is it. You turn two pairs of socks into a scarf-like wrap by stacking and folding the knit layers so it holds warmth. The sock knit has natural stretch, so it drapes around his neck without bunching. I’ve done this for boyfriends who wear plain hoodies and it still looks good because the knit texture adds interest. Choose sock colors that match his daily wardrobe — charcoal, navy, or heather gray always work.
Skip thisSkip mismatched sock thickness — thin socks bunch and feel uneven.
Editor's noteUse fabric glue sparingly — too much glue makes stiff spots that feel scratchy.
9. Beer-Can Planter with Two-Color Paint and Drain Holes
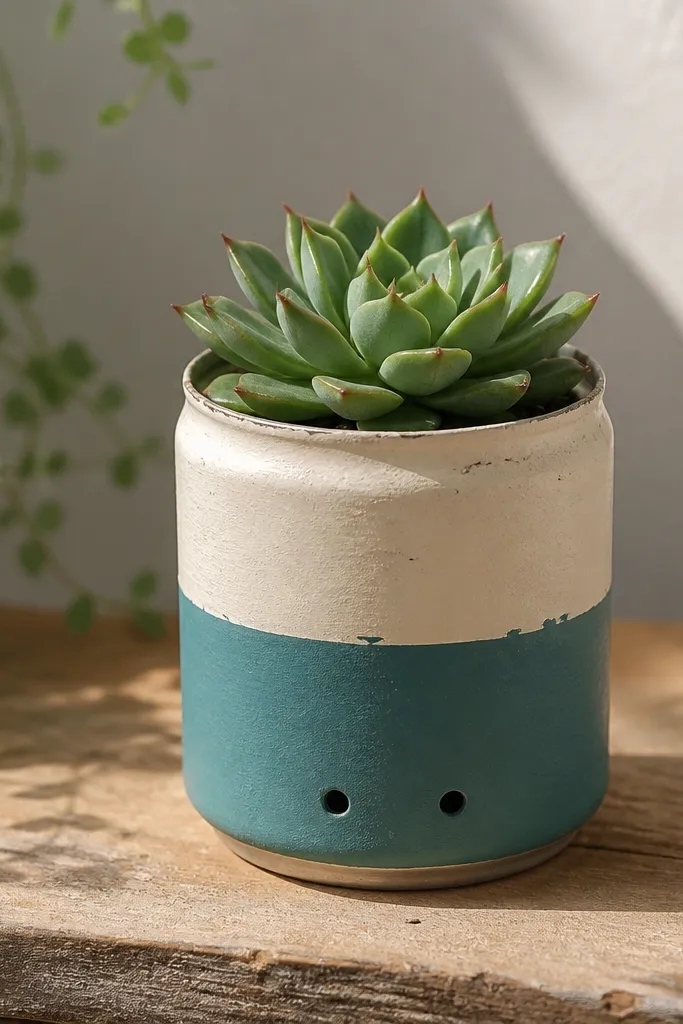
Start by marking a line around the can about 2.5 inches up from the bottom and carefully cut the top off with a can opener or tin snips. Punch 6-8 drainage holes in the bottom using a nail and hammer. Clean the can with soap, dry, then tape a straight line for the two-tone paint. Spray or brush matte acrylic, remove tape after the first coat, and let it dry fully. Add a small plastic liner or a layer of gravel, then pot your succulent and water lightly.
This is a small space DIY gift that’s fun and still useful because it holds a real plant. I’ve made these in tiny apartments where sunlight is limited, and succulents do fine on a windowsill. The two-color paint pattern looks clean and intentional, especially when you keep the line straight. It’s a good pick if he likes beer or has a sense of humor, but the final piece still looks like decor. The matte paint hides dents, and the plant softens the whole thing.
Skip thisDon’t skip drainage holes — plants rot fast and the gift turns gross.
Editor's noteSand the cut rim with fine sandpaper so it feels smooth when you handle it.
10. Custom Bottle Opener Key Hook with Stencil Lettering
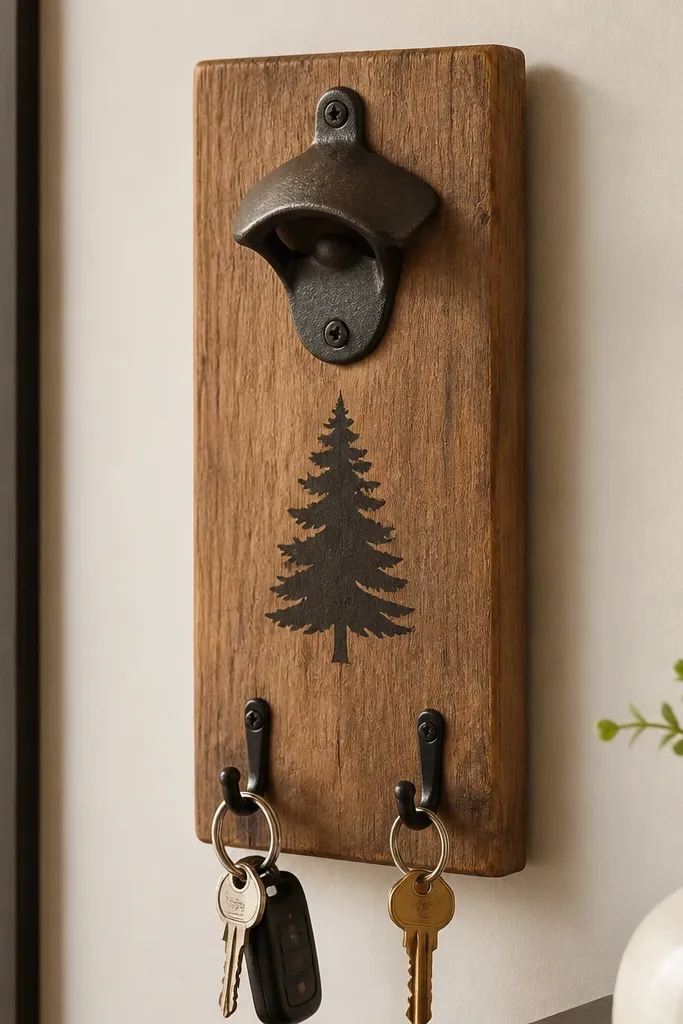
This is a small space DIY gift that solves a real daily annoyance: keys on the counter. You mount a bottle opener and key hooks on a small board so he gets both a use and a conversation piece. The stencil lettering keeps it sharp, and the wooden backing keeps it warm instead of industrial. I like this for boyfriends who host or who keep a bottle opener in a drawer. The wood grain adds character, and the black stencil reads clearly from across a room.
Start with a 10x6 inch wood board and sand it smooth. Tape a stencil onto the board and paint over it with matte black craft paint, then remove the stencil while the paint is slightly tacky. Screw the bottle opener hardware to the top edge, then add two small metal hooks below spaced about 2 inches apart. Pre-drill screw holes so you don’t split the board. Finish with a clear matte seal so the paint doesn’t scuff.
Hold the board up to the wall and mark screw locations with painter’s tape before drilling.
Avoid freehand lettering — it looks shaky and cheap fast.
11. No-Sew Hanging Towel with Heat-Transfer Vinyl Edge
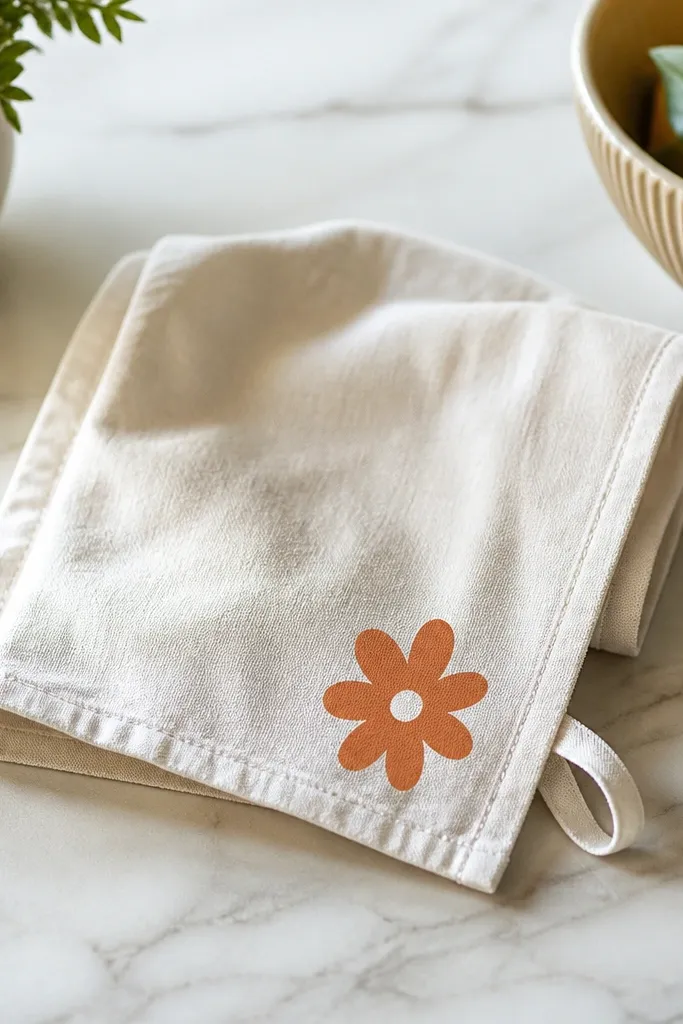
A hanging towel is one of the most practical small space DIY gift ideas because it uses an existing kitchen object and upgrades it. I make it with a loop at the top and a simple label on one corner, so it looks intentional. Heat-transfer vinyl gives you crisp lettering without sewing. It’s perfect for boyfriends who cook or who always forget to label things — the towel becomes a clear “this is yours” item. Choose a fabric blend towel in white or light gray so the vinyl stands out.
Start by buying a plain kitchen towel around 16x26 inches. Fold the top edge down about 1.25 inches to create a hanging loop and press with a hot iron. Apply heat-transfer vinyl to the lower corner using your iron’s heat setting and time for the vinyl brand, then press firmly. Seal the edges by folding the sides inward and using iron-on hem tape inside the fold, then press. Finish by trimming loose threads and washing once to set the vinyl.
Use a pressing cloth between the iron and towel to prevent shine marks.
Skip skipping the pre-press wash — sizing on new towels can make vinyl lift.
12. Cuff Bracelet from Paracord with Magnetic Clasp
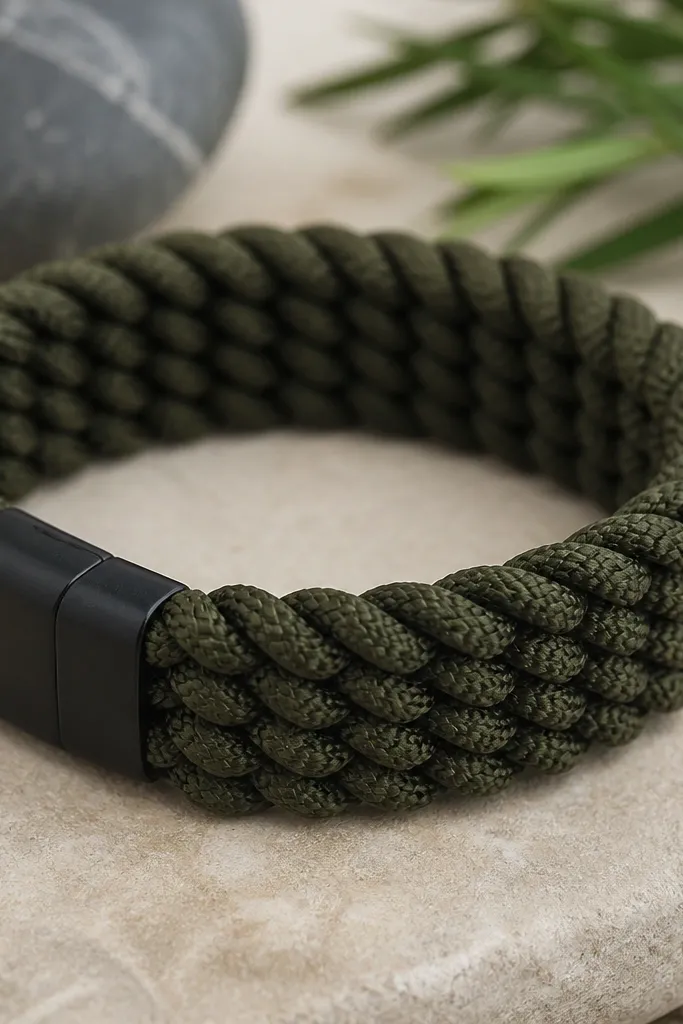
This one looks tough but it’s lightweight, so it fits the “small space” rule without feeling bulky. I use paracord because it’s structured and holds a clean braid, and the magnetic clasp makes it easy to put on. The design works for boyfriends who wear watches and dark denim because black, olive, or navy paracord fits right in. It also feels personal when you pick a color that matches his favorite jacket. The braid texture catches light subtly, so it looks good in photos.
Start by cutting two lengths of paracord about 36 inches each so you have extra for the braid and trimming. Clamp the cords to a clipboard or tape them to a table at one end. Braid tightly using a basic 3-strand braid, then wrap the braid around his wrist to measure length and trim. Sew the ends down with a few tight stitches or hot glue the ends after melting lightly with a lighter. Attach the magnetic clasp ends to the stitched cord ends and stitch around them for strength.
If the bracelet slides, add a thin layer of friction tape inside where it sits on skin.
Avoid loose braids — they look messy and the clasp ends won’t align.
13. Mini Chalkboard Jar for "Grocery Date Night" Lists
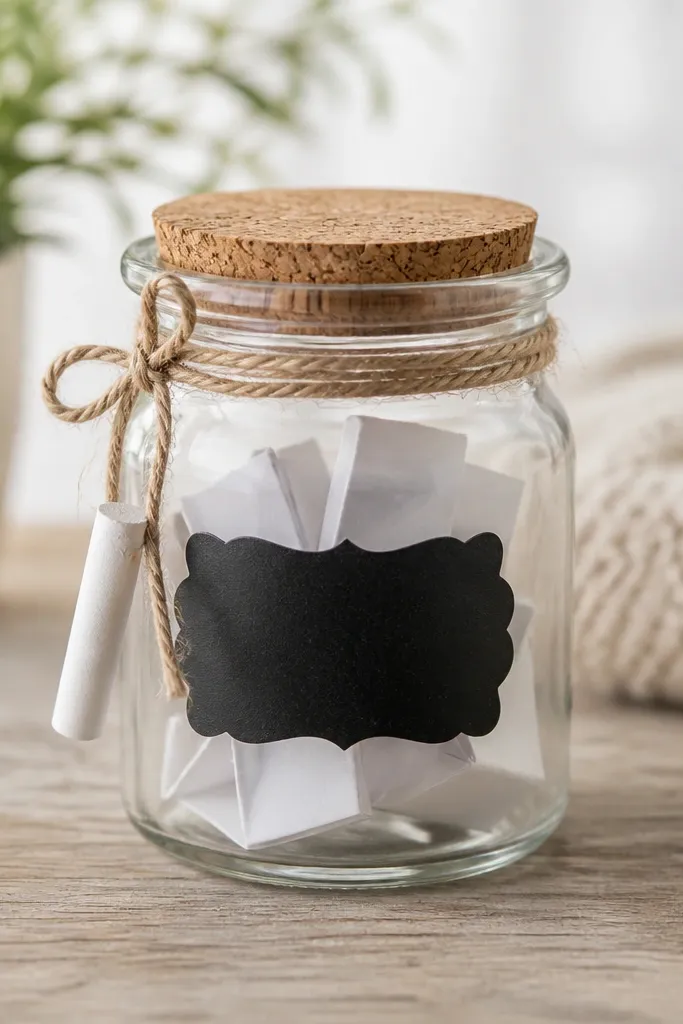
Start with a small glass jar and clean it with rubbing alcohol. Cut a chalkboard vinyl label panel about 2.5 inches tall and wrap it around the jar, smoothing with a plastic card. Press the vinyl edges firmly and trim off excess with a craft knife. Add a small hole in the lid for a short piece of twine, then tie chalk to the twine or glue it in a small loop. Fill with folded paper slips and include a tiny pencil stub if he doesn’t keep one handy.
This is a small space DIY gift that keeps giving because it turns planning into something he can do in seconds. I use a glass jar with a chalkboard label so he can write a grocery list or date-night ideas directly on the gift. Chalkboard vinyl is easy to apply and looks clean when the edges are sharp. The jar also stores the paper slips, so the whole thing stays contained. It’s perfect for boyfriends who like routines or who always run out of something and have no system.
Skip thisDon’t rush the cure time on chalkboard vinyl — it smears sooner if you write on it immediately.
Editor's noteUse a hair dryer on low for 20-30 seconds to help vinyl conform to glass curves.
14. Wood Photo Clip String with Clothespins and One Quote
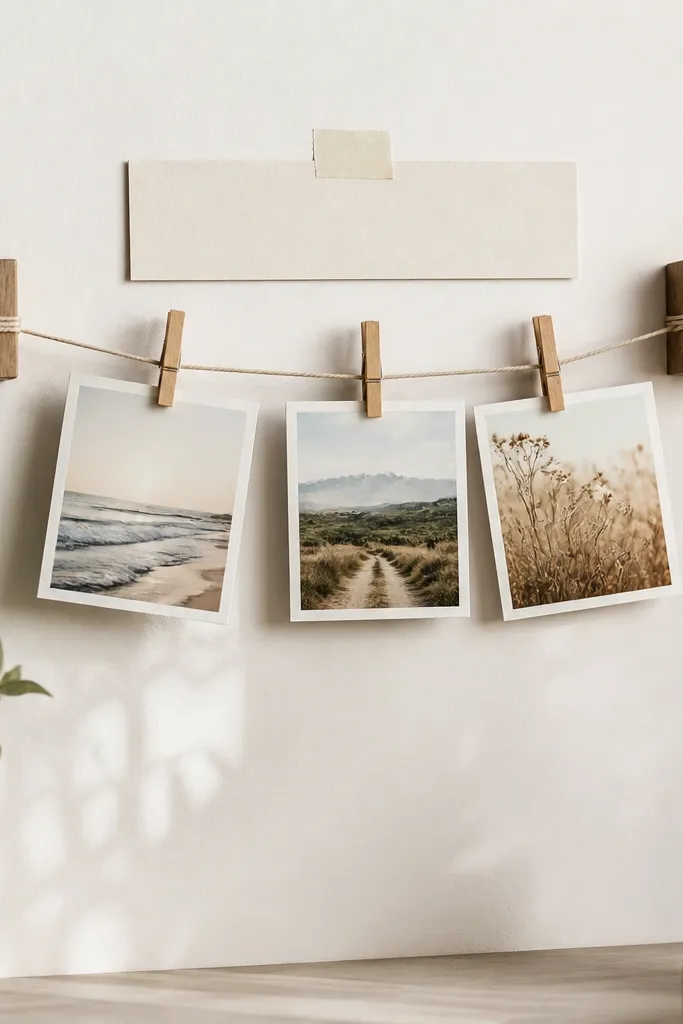
This is a small space DIY gift that looks airy instead of cluttered because photos hang on a vertical line. The trick is restraint: use three to five photos and one short quote strip, not a pile. I mount it on a small board so it’s stable on a wall or door. Clothespins add a handmade touch, and the wood blocks make it look intentional. It works for boyfriends who like minimal decor because the line stays thin and the photos do the work.
Start with two small wood blocks (about 2x2 inches) and sand them lightly. Drill a tiny hole in the center of each block and thread a thin jute twine line through, tying tight knots on the backside. Paint or stain the blocks matte and let them dry. Attach the blocks to the wall with small screws or command strips rated for the weight. Clip photos with mini clothespins, then add a typed quote strip taped to the top between the blocks.
Use command strips if you’re renting — it keeps the gift from turning into a landlord problem.
Avoid too many photos — it turns into a crowded bulletin board fast.
15. Thermos Cozy Sleeve with Canvas and Velcro Strap
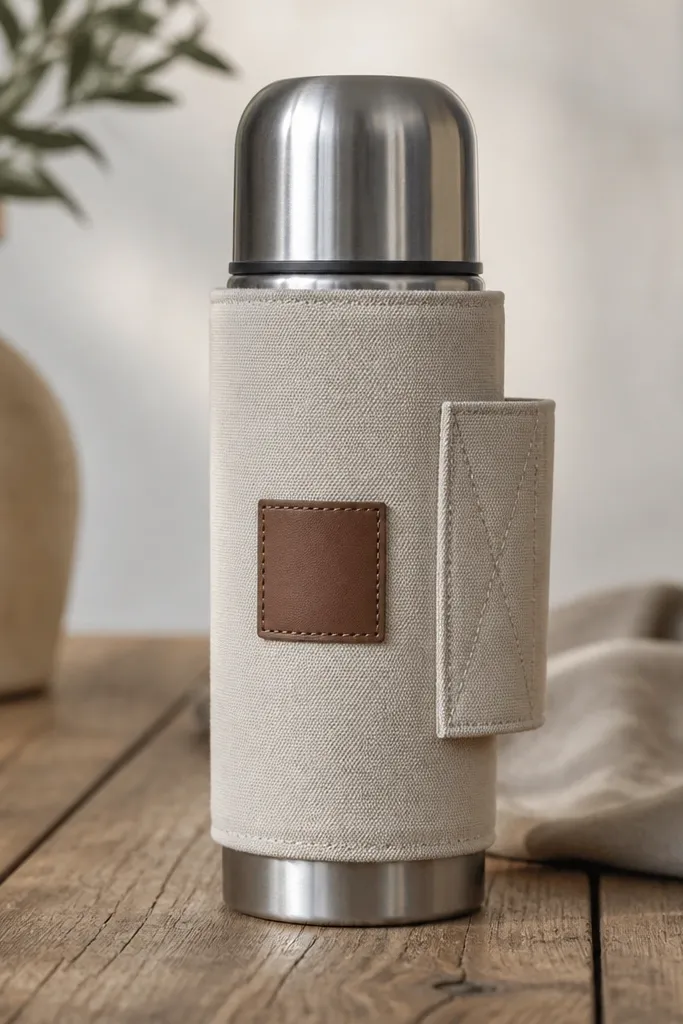
This one is for the boyfriend who takes coffee everywhere and always burns his hand. A cozy sleeve is a small space DIY gift because it folds flat when not in use, and it protects his grip. I use canvas for the outside and a thin layer of fleece inside so it feels soft but doesn’t trap too much heat. The velcro strap makes it easy to wrap and unwrap, even with one hand. A small leather patch adds a clean detail that looks better than printed logos. It suits any style, especially if you choose canvas in natural tan or washed black.
Start by measuring his thermos circumference and height, then cut canvas to size with 1/2-inch seam allowance. Cut a matching fleece piece the same size. Layer fleece inside canvas, then fold and sew or glue the side seams, leaving the top open. Wrap around the thermos and mark where velcro should land; sew velcro squares at the overlaps. Add a small leather patch on the front using stitch or heavy-duty fabric glue.
If you don’t sew, use fusible hem tape to bond the seams, then reinforce with a few hand stitches at stress points.
Don’t use slippery satin fabric — it bunches and twists on contact.
16. Personalized Coaster Set with Tile and Photo Transfer
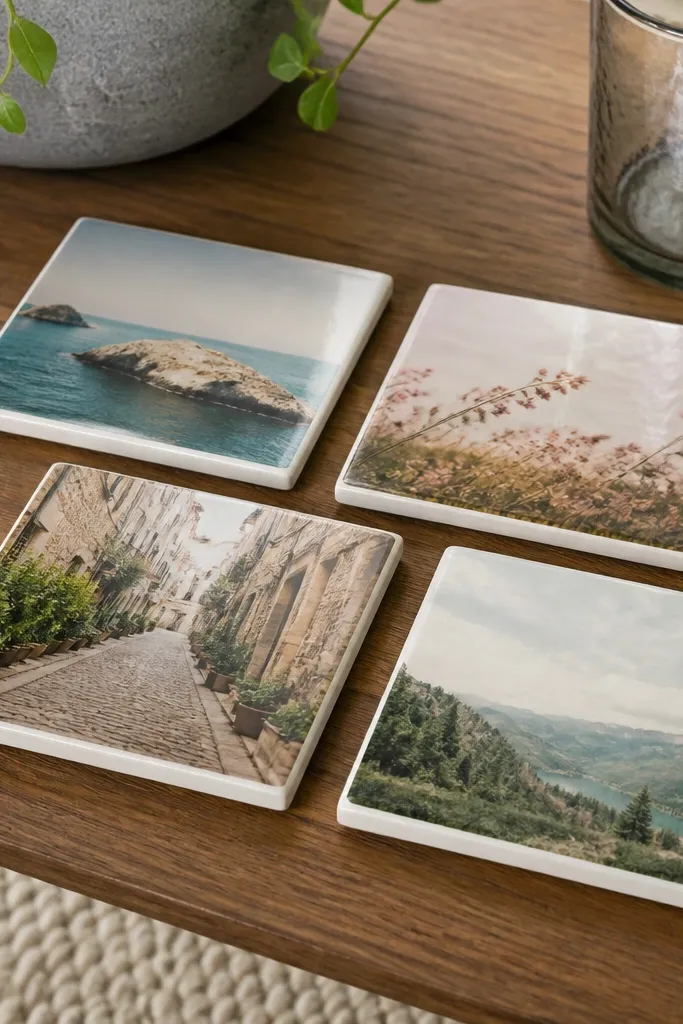
Start with four ceramic tiles about 4x4 inches, and clean them well. Print your photos in black-and-white or one color, then use photo transfer medium following the bottle directions. Let transfers dry fully, then seal with two to three coats of clear sealer, letting each coat dry between. Add a felt pad to the bottom of each tile so it doesn’t scratch furniture. Arrange them in a grid or wrap with a ribbon for gifting.
Coasters are a small space DIY gift that looks grown-up and solves a real mess problem. I make these with ceramic tiles because they’re flat, durable, and easy to wipe. The photo transfer makes it personal without needing a big frame. I seal with clear water-based sealer so the images don’t smear when drinks hit them. This works for boyfriends who like beer, coffee, or whiskey — the tiles handle condensation without warping. The tile base also looks good on almost any decor because it’s neutral and clean.
Skip thisAvoid skipping the felt pads — tiles scrape and ruin tabletops.
Editor's noteChoose photos with high contrast — pale images fade faster after sealing.
17. Mini "Movie Night" Scratch Card on Recycled Cardstock
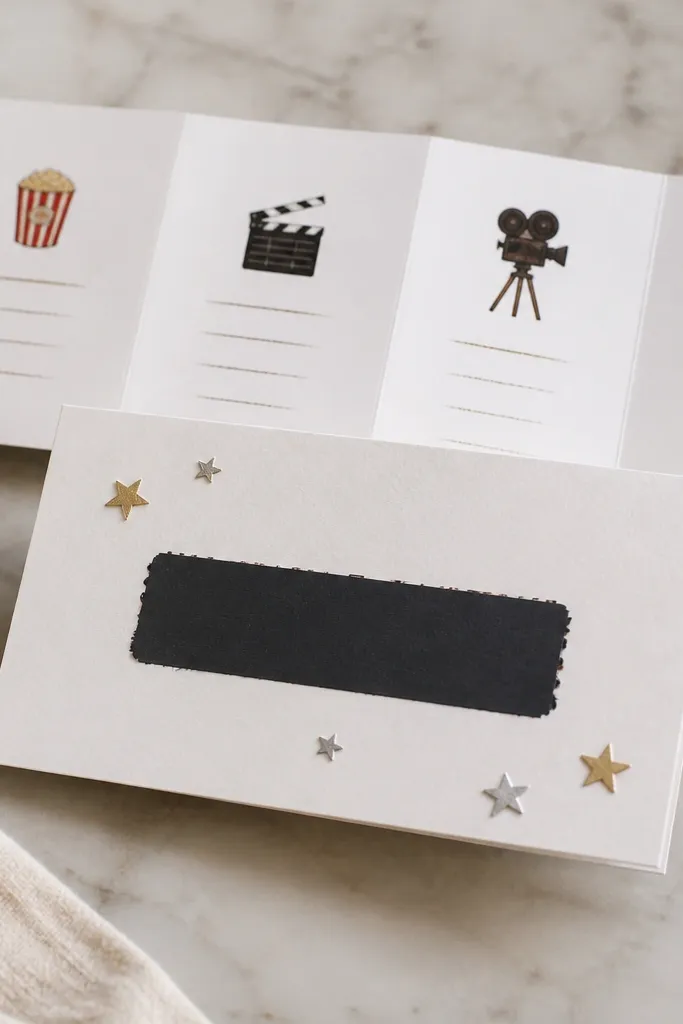
This is a small space DIY gift that feels playful and doesn’t require buying anything big. I use recycled cardstock, print a short list of movie nights, then cover the options with scratch-off material so he reveals the plan. The scratch-off layer makes it interactive, and matte black looks clean and modern. It’s great for boyfriends who like spontaneity or who always forget to pick a plan. The format also works for different budgets because you can keep the list to three nights and still feel intentional.
Start by cutting cardstock into 4x6 inch cards. Print or hand-write three movie night prompts on the card in a neat column. Paint or apply scratch-off coating over each option area, leaving the text under it covered. Let the scratch layer dry completely, then test one scratch with a coin to confirm it reveals cleanly. Attach a small folded note with a snack suggestion on the back using a tiny brad or tape strip.
Use a craft knife to score straight lines for the scratch sections so the reveal looks even.
Don’t use glossy paper — scratch-off coatings look messy on shine.
18. Reversible Bandana Coaster Holder with Button Closure
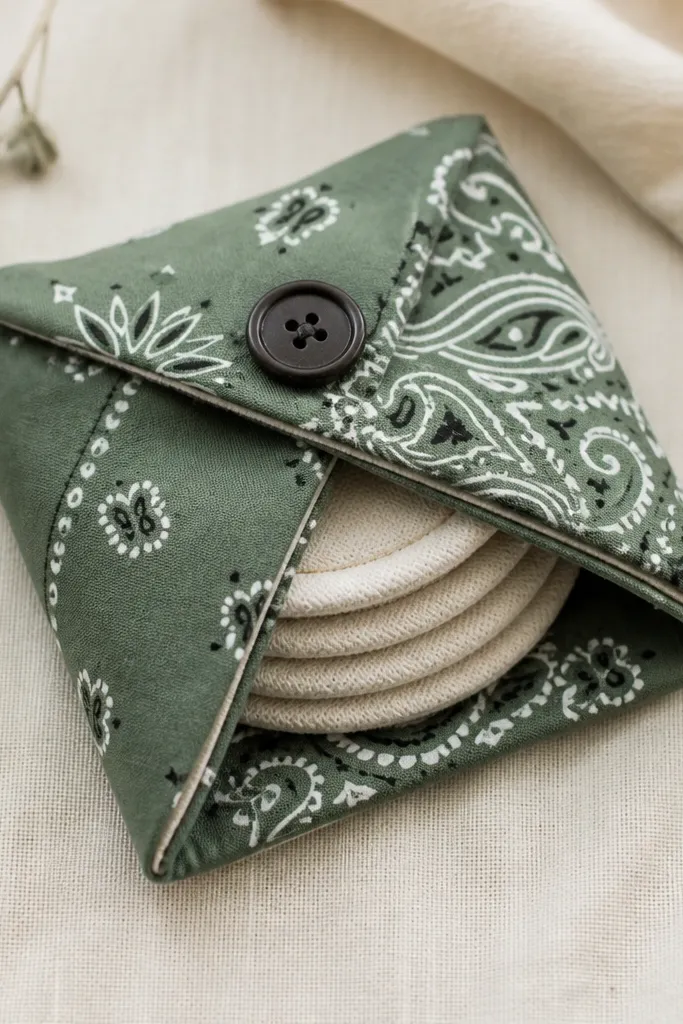
This gift is small space DIY gift gold because it stores coasters in a way that looks like a prop, not clutter. I use a bandana because it has a bold pattern and hides small stains from everyday use. The reversible part matters: one side is loud, the other side is calmer, so he can choose the vibe. A simple button closure keeps it closed in a drawer or on a table. It’s also soft-touch, so it won’t scratch his hands or phone if it gets moved around.
Start by cutting two fabric rectangles from bandanas — about 7x10 inches each. Place right sides together, sew around the edges leaving a small opening for turning, then turn and press flat. Fold the top down to create a flap, and sew a small button loop on one side and a button on the other. Insert four cork or felt-backed coasters, then close the flap so they sit snug. Add a small label tag inside so he knows which side is the “front” without thinking.
Press the folded flap with steam so the button closure sits flat and doesn’t gap.
Avoid thin coasters — they slip inside the pouch and look sloppy.
19. Necklace Holder from Picture Frame Backing and Pegs
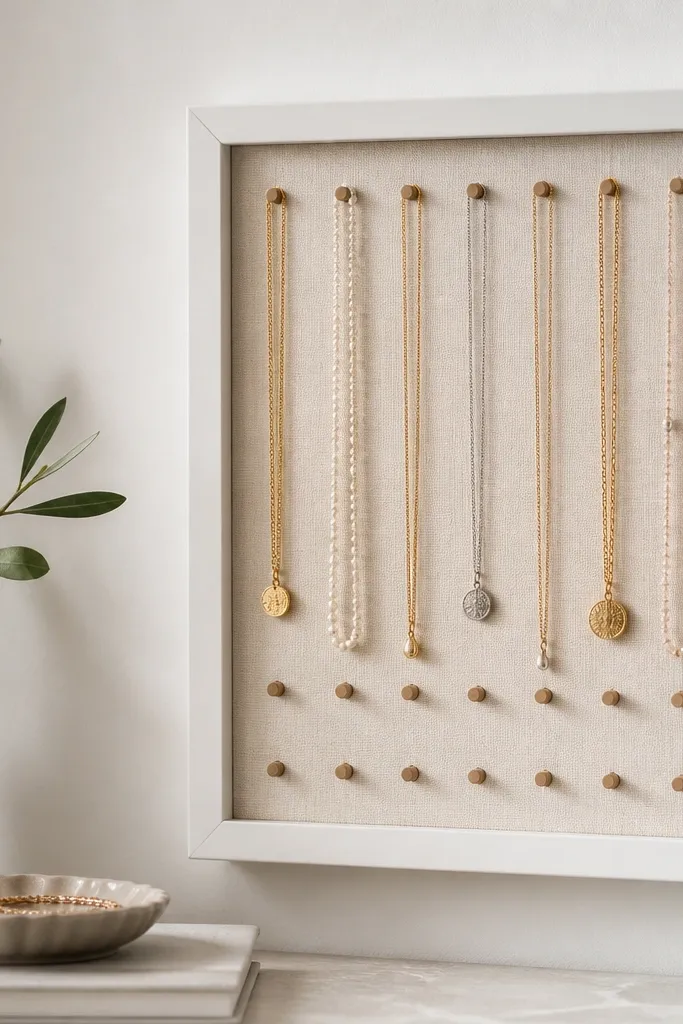
Even if he doesn’t wear necklaces, this rack works for chains, key rings, and watches that he tosses on the desk. It’s a small space DIY gift that keeps things off surfaces, and the frame makes it look like decor. I build it from a cheap picture frame backing board and screw in short wooden pegs so chains hang without tangling. Matte paint on the frame keeps the look clean, and the pegs create a tidy vertical pattern. It’s a good option if he has a lot of small items and hates clutter on his dresser.
Start with a small picture frame, remove the glass and backing, and sand the backing board lightly. Paint the frame and backing matte (white, black, or warm gray). Screw in 8-12 short wooden pegs, spaced about 1 inch apart, then hang chains to test spacing. Reattach the backing and add a hanging wire or wall hook to the frame. Finish by adding a small vinyl label at the bottom like “Rings” or “EDC” so it’s obvious what goes where.
Use a scrap cardboard template to mark peg holes so your spacing stays even.
Avoid super long pegs — they make chains droop and look messy.
20. Hand-Painted Mug with Subtle Galaxy Dot Fade
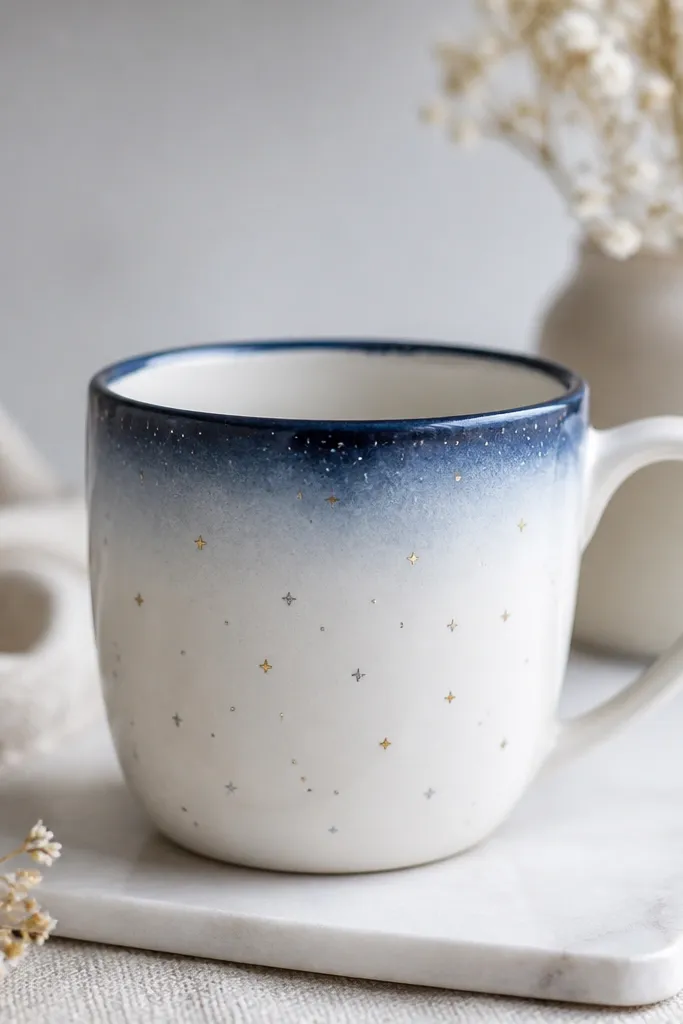
Start with a plain white mug and degrease it with rubbing alcohol. Paint a soft gradient at the top third using a sponge brush and deep navy ceramic paint, keeping the edge feathered. Add star dots with a fine brush or a paint pen, using gold and silver in small clusters. Let it dry, then cure it in the oven based on the paint brand instructions. After cooling, wash gently by hand for the first week before regular use.
A painted mug is a classic gift, but the way you paint it decides whether it looks handmade or hobby-grade. I do a subtle galaxy dot fade that starts at the rim and fades down, so the mug looks intentional even if the dots aren’t perfect. Use ceramic paint made for glass or ceramics, then bake it to cure so it lasts. The gold and silver dots catch light and look like tiny stars without looking childish. This works for any boyfriend because coffee mugs match his daily routine, and the color palette can be adjusted to match his decor — deep navy for moody, teal for fresh.
Skip thisAvoid regular acrylic paint — it chips off after a few washes.
Editor's notePractice your dot size on paper first so your stars match across the mug.



