


1. Two-Photo Timeline Page with Date Strip
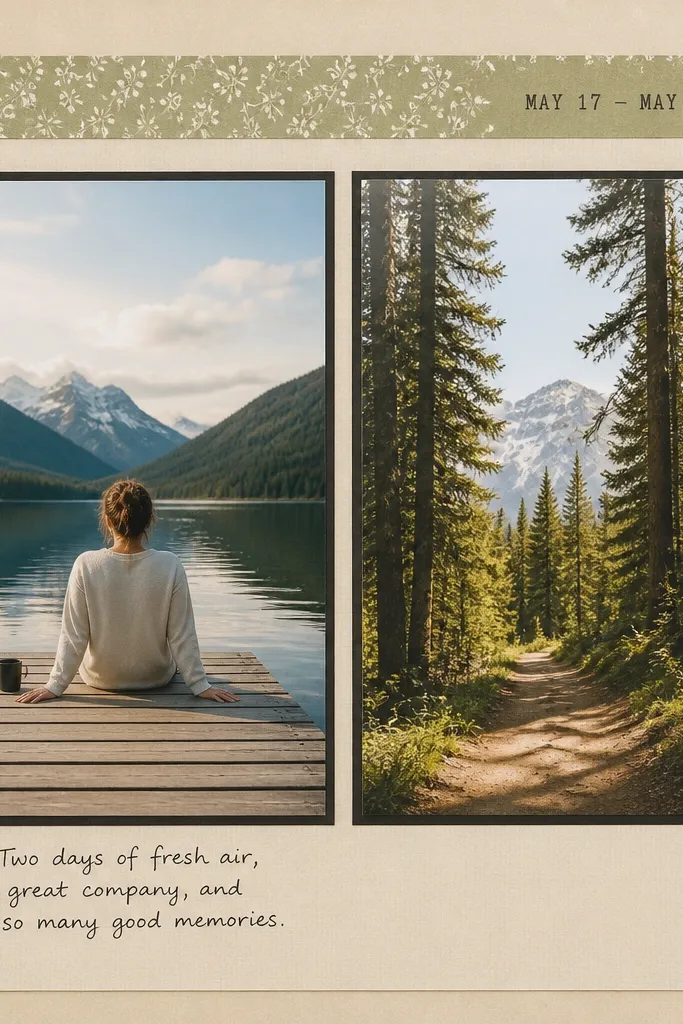
This layout works when you want to show progress without writing a whole essay. Use two photos that mark a before-and-after moment — like your first meet and a later date — and give each photo a neat border so they look intentional. I like black or dark navy photo mats because they make skin tones look warmer and cleaner. Keep the date strip simple: one line per date, same font style, same strip width. It flatters anyone’s memories because it turns “we hung out” into a clear story beat.
Start by trimming two photos to the same height, aiming for about 4.5 inches tall on an 8.5x11 page. Cut two photo mats from cardstock that are 0.25 inch larger on each side, then glue the mats to the page first. Add a 0.75-inch tall strip of patterned paper across the top, then write dates with a fine-tip pen and small ruler lines. Place the left caption under the left photo and keep it to one sentence. Finish with a tiny doodle (a star or heart) in the corner using a white gel pen for contrast.
Editor's noteUse a label maker for the date strip and handwrite only the memory line — it makes the page look polished fast.
Skip thisDon’t use different border widths on the two photos or the page starts looking cut-and-paste.
2. Ticket Stub Pocket for Your Best Date
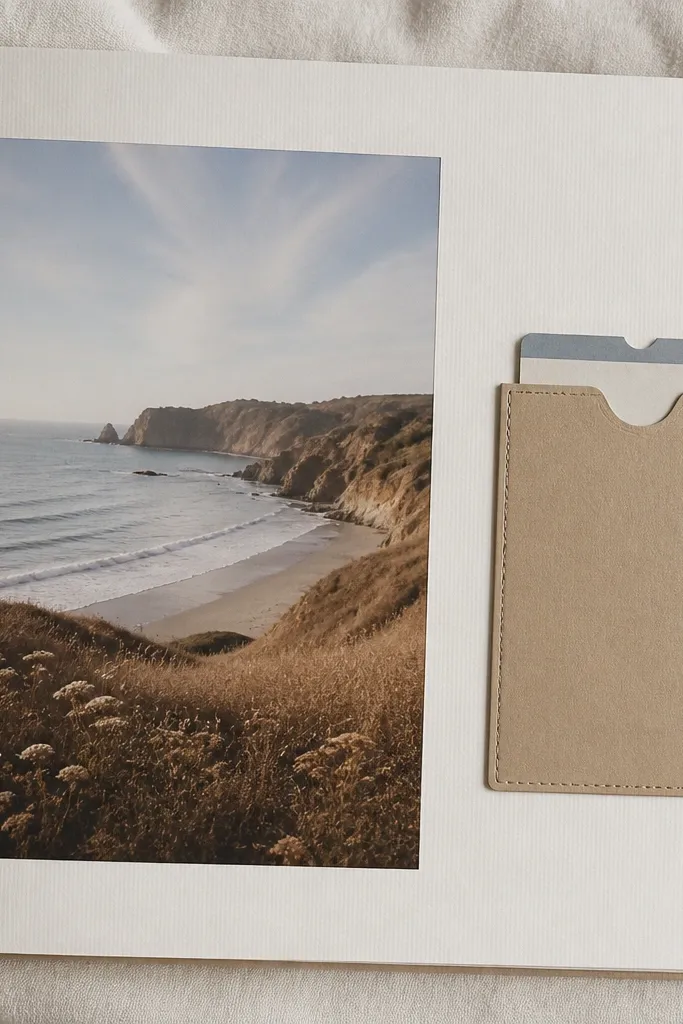
This is the page he’ll actually pull out and re-read. The pocket makes the scrapbook feel interactive, and the ticket stub detail gives it a real-world texture that printed photos can’t match. I’ve done this with movie stubs, concert wristbands cut into strips, and even a parking receipt folded into a mini note. For color, match the pocket paper to the dominant photo color — warm browns for street photos, cool grays for night shots. It works for any relationship stage because the “object” anchors the memory.
Start by cutting a pocket from cardstock that’s about 4 inches wide and 5 inches tall, leaving a 0.5-inch top opening. Score a 0.25-inch fold at the top edge, then glue the pocket sides and bottom to the page using double-sided tape for clean edges. Place a title like “Our Night Out” above the pocket and add one photo to the left sized around 4x6 inches. Slide a ticket stub into the pocket and trim a journaling card to fit behind it. Write one specific detail on the journaling card — the snack you shared, the song you heard, or what you joked about.
Editor's noteLaminate or tape the ticket stub to a plain journaling card so it doesn’t curl over time.
Skip thisDon’t glue the pocket shut — leave a readable top opening or it defeats the point.
3. Fold-Out Map of Where You Went
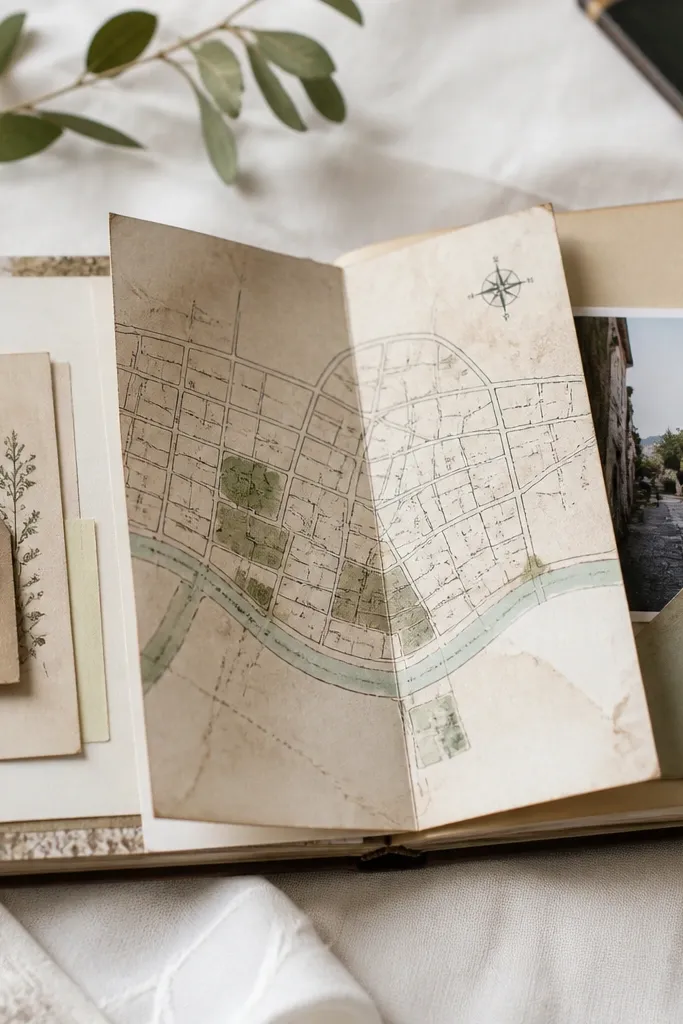
If your boyfriend likes places — even just the route to get there — this layout hits. A simple map fold makes the page feel like a keepsake, not a collage. Use a plain line-map style (printed or hand-drawn) and add one photo where you stood or sat. I like muted greens and warm beige for the map base because they don’t fight with skin tones. This works especially well for road trips, first-date neighborhoods, and weekend drives where the “where” mattered as much as the “what.”
Start by printing or sketching a simple map on a 5x7 sheet, then fold it in half like a book. Glue only the left fold edge to the scrapbook page so it opens freely. Add a small photo on the right side of the open map, sized to about 3x4 inches. Write street names or neighborhood nicknames in dark ink with a ruler so it looks tidy. Finish with a tiny “memory pin” — a circle sticker or cut-out dot — placed near the location you loved most.
Use a gel pen for the street names so the lines stay crisp and readable.
Don’t cram the map with tiny labels; one to three labels is enough.
4. Sports Jersey Number Frame
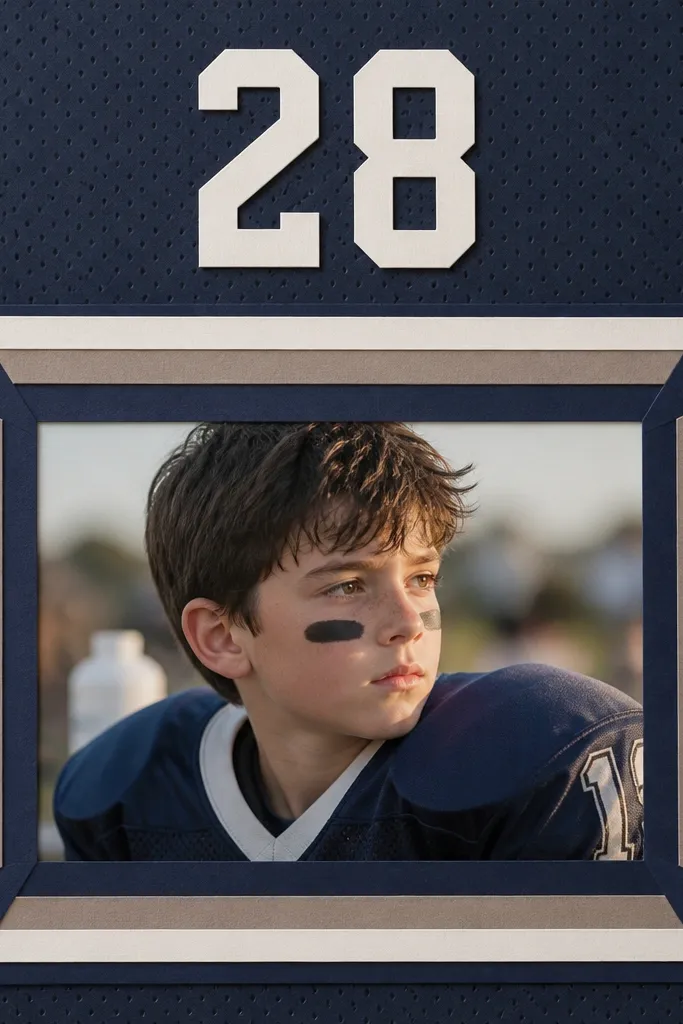
This is for the boyfriend who wears team gear or loves sports stats. Framing a photo with jersey-like stripes makes the page feel themed without needing complicated crafting. Choose two team colors and stick to them: one for the background paper and one for the strip frame. I’ve seen this work best with a single strong portrait photo — his face, or both of you at a game. The bold number adds personality and makes the page look like it belongs in a sports scrapbook, not a generic photo album.
Start by picking a background cardstock in one team color and glue it to the page. Cut four thin strips of the second color, alternating directions to mimic jersey seams, then frame your photo. Add a number above the photo using thick cardstock or printed vinyl label, sized around 1.5 to 2 inches tall. Write one short line under the photo like “#7 — our seats” or “Final score: ____” and leave space for a handwritten score. Finish by adding a faux “stitch” line along the frame edges with a white pen.
Editor's noteUse a foam tape under the number so it pops off the page.
Skip thisDon’t use more than two colors or the jersey effect turns messy.
5. Game Controller Buttons Page
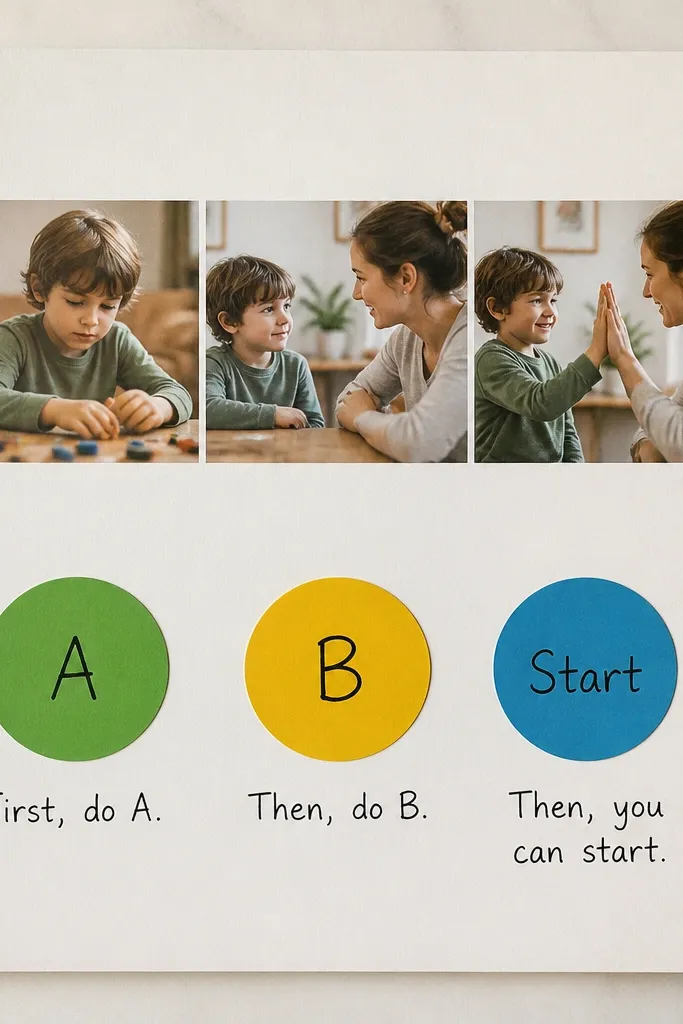
This fits boyfriends who play games or just love that techy aesthetic. The button circles give you built-in “sections,” so you don’t have to figure out where to put text. Use a photo of you two gaming, or a photo of him holding the controller, then add three colored circles labeled with game button names. Keep the colors bright but limited — red, blue, and green — so it stays clean. The page looks fun and personal because it turns memories into something he recognizes.
Start with a 8.5x11 page base in a dark color like charcoal or navy. Glue a long photo strip across the top sized around 8 inches wide and 1.5 inches tall. Cut three circles from colored paper (about 2.25 inches each) and place them in a row on the lower half. Add labels with a marker: A, B, and Start, then write one short caption under each circle. To finish, add a small “Press to remember” text in the corner using a white gel pen.
Editor's noteOutline the circles with a black marker so they look like stickers instead of cut paper.
Skip thisDon’t use tiny handwriting under the circles — it looks cramped and cheap.
6. Polaroid-Style Photo Cluster with Caption Tags
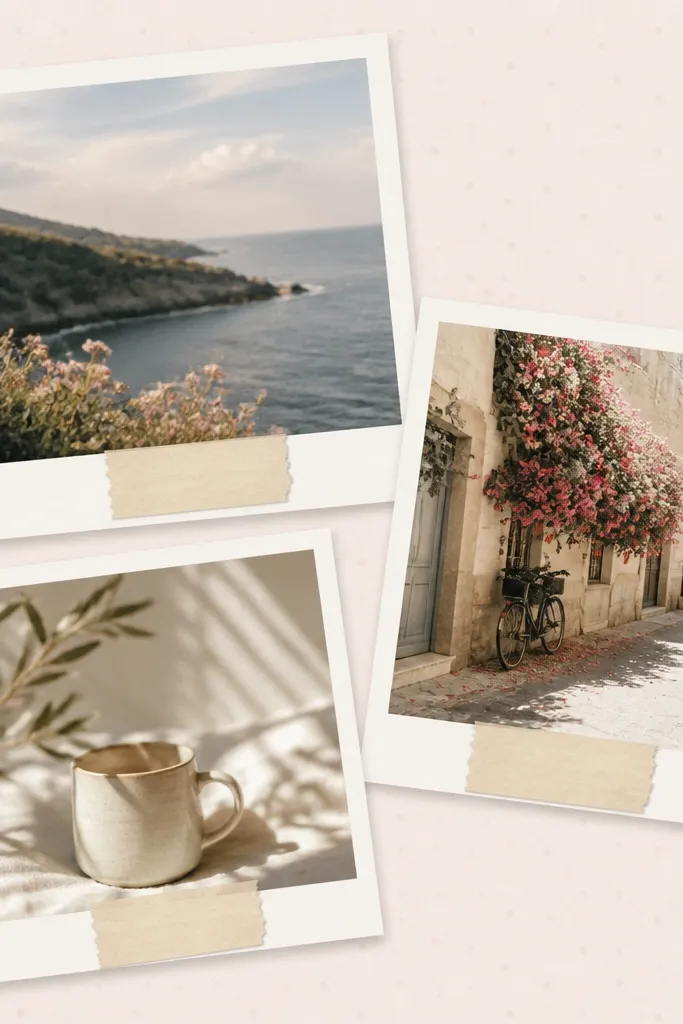
This one works when you want the scrapbook to feel casual and sweet. Polaroid-style borders make phone photos look like printed memories, and the caption tags turn the page into a mini story. I use a light neutral background because it keeps faces from getting washed out. It flatters almost every skin tone, especially warm undertones, because the white borders create a clean frame. If your boyfriend loves nostalgia, this style lands because it looks like a stack of real prints.
Start by printing or cropping three photos and trimming them so they’re the same width, around 2.5 inches wide. Cut white cardstock frames slightly larger than each photo, leaving a 0.25 to 0.35 inch border. Add a small caption tag under each photo — cut a thin rectangle about 1.5 inches wide and 0.75 inches tall. Tape the tags with a tiny strip of double-sided tape so they hang slightly. Arrange the cluster with small gaps, then glue the whole cluster to the page with a thin glue line around the edges.
Editor's noteWrite captions on the tags in pencil first, then trace with a fine black pen once you’re happy.
Skip thisDon’t center every frame perfectly; slight angles make it look real.
7. Black-and-White Photo with One Color Accent

This layout looks clean and “designed” even with minimal effort. Turning the photo black-and-white makes the page feel timeless, and adding one accent color keeps it from looking sterile. I usually use red or teal because they pop against off-white and don’t overpower skin tones. Put the color element in only one place — a heart sticker, a ribbon strip, or a small banner — so the eye has a focal point. This works for formal dinners, portraits, and even casual selfies if your photo has good lighting.
Start with an off-white page base and print your main photo in black-and-white. Add a thin black cardstock mat around the photo, leaving a 0.2 to 0.3 inch border. Cut a small banner from your accent color paper, about 3 inches long and 0.75 inch tall, and glue it to the top corner. Write a short title on the banner using a white pen or marker. Finish by adding the matching accent (heart sticker, tiny star, or ribbon loop) somewhere else only once.
Choose one accent color and stick to it across multiple pages so the whole scrapbook looks intentional.
Don’t sprinkle the accent color everywhere; it makes the page look chaotic.
8. Handwritten Love Letter Cutout Window
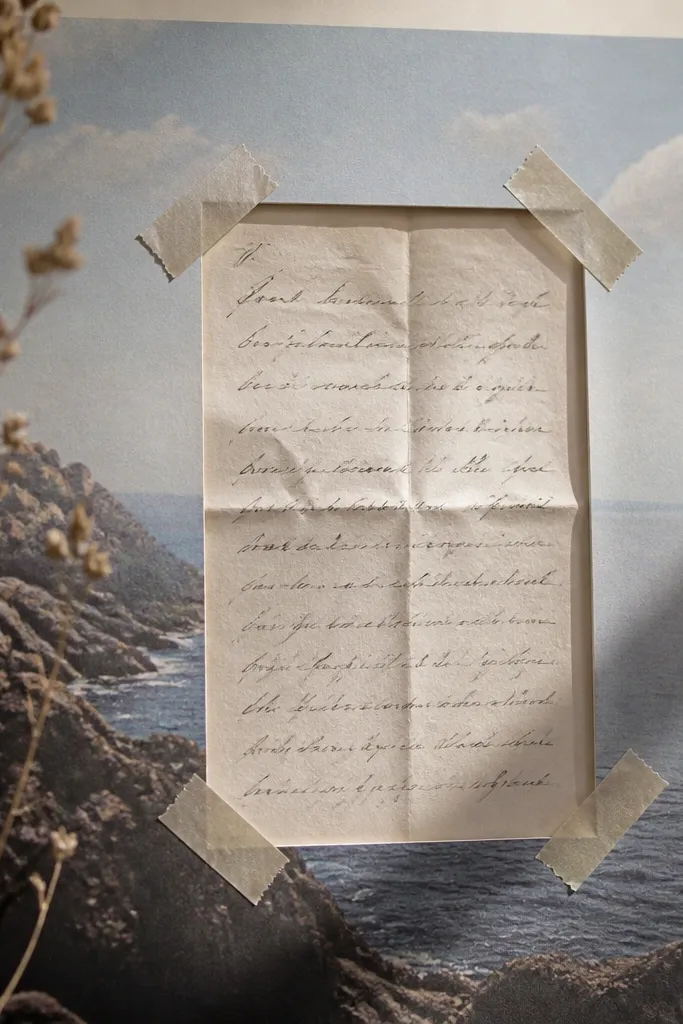
This gives you the “moment” feeling without needing fancy printing. A window cutout makes the page interactive, and handwritten text looks personal even if your handwriting isn’t perfect. Use a photo with a softer background so the letter behind it stays readable. I like using a dark photo mat and a light paper window so the letter stands out. This works best for anniversaries and long-distance updates because the letter turns the page into something he can reread.
Start by gluing a full-bleed photo background to the page (or a photo sized to cover most of it). Cut a rectangle window in the top layer cardstock about 4 inches wide and 3 inches tall. Fold a short letter on a piece of thin paper, then tape it behind the window with small strips of washi tape on the sides only. Add a photo corner decoration around the window — a small star or printed label like “Open when you miss me.” Place a short handwritten caption under the window to guide him.
Use a ruler to cut the window cleanly; a straight edge makes it look store-bought.
Don’t use thick cardboard for the window if your letter needs to slide — it will catch.
9. Sticker Bomb Border with Polite Center
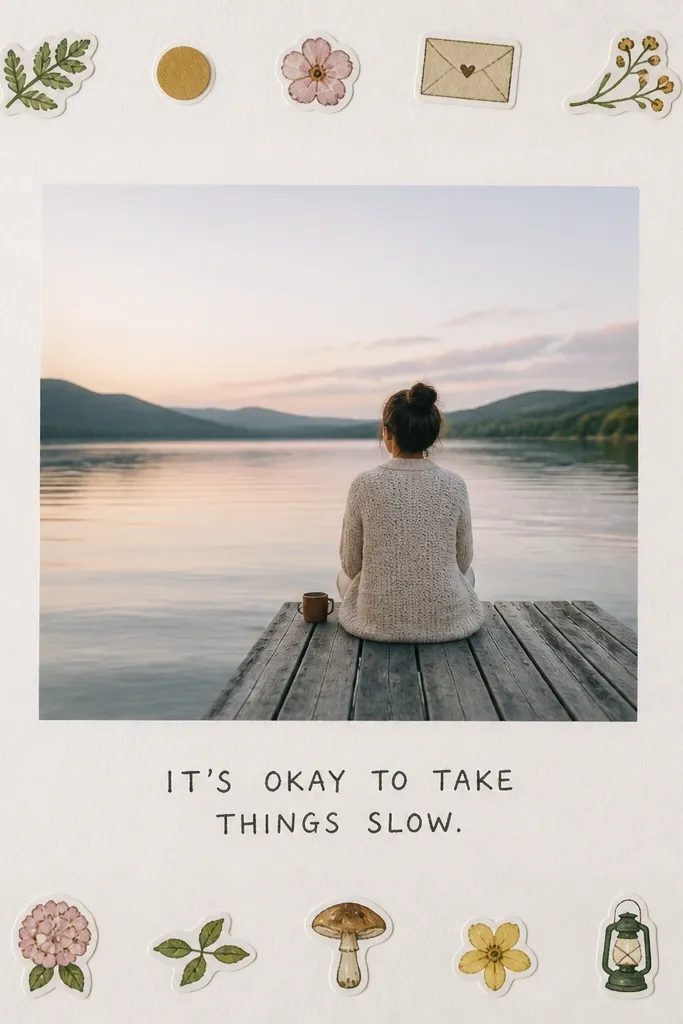
This one is for when your supplies are random and you want a way to use them without making a mess. A sticker border keeps the energy around the edges, while the center stays clean so the photo still leads. I’ve done this with travel stickers, tiny stars, and themed icons like pizza slices or game controllers. Use one theme for the border so it feels coordinated — travel + coffee, or sports + stadium. It flatters any photo because the center is untouched and readable.
Start by choosing one hero photo and mat it with a simple white or cream cardstock rectangle. Glue the photo in the center with even margins. Create the border by placing small stickers all around the edges, leaving about 0.25 inch gap between sticker and photo mat. Add one title line under the photo using a single sticker label or handwriting. Seal the border with a light layer of clear glue only on the stickers if they lift at the edges.
Keep the center caption to one sentence; two sentences makes the page feel crowded fast.
Don’t cover the photo with stickers — it turns the page into clutter.
10. Five-Photo Grid with One Big Meaning Caption
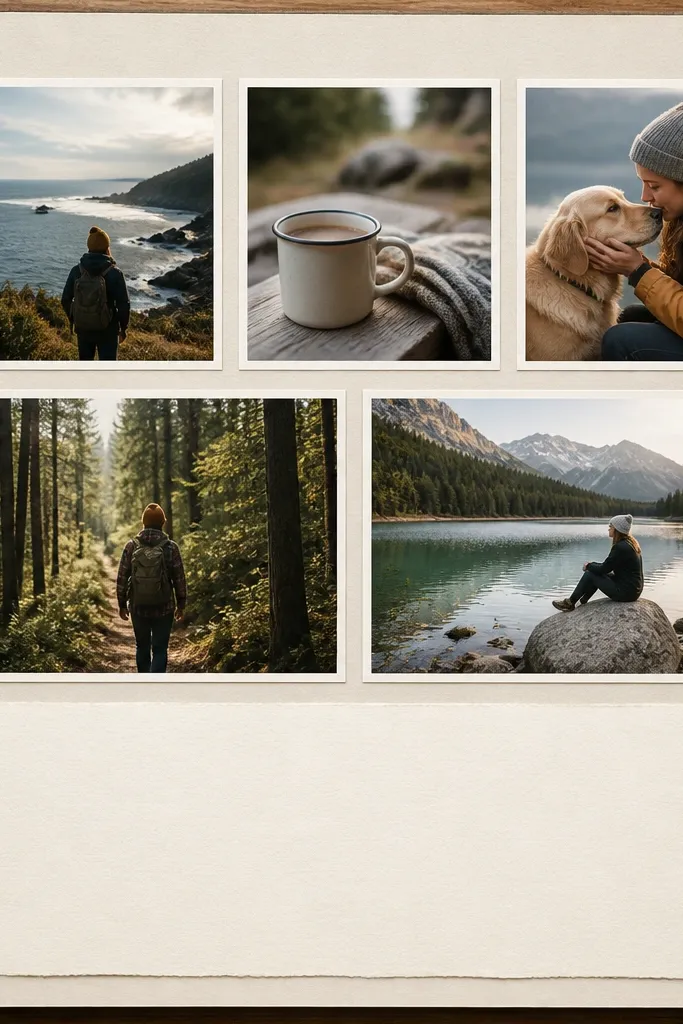
Grids are the fastest way to make a scrapbook look neat. This style works when you have lots of small moments from one day and you want them all without writing much. Use five photos that share a theme — a birthday day, a beach trip, a weekend hang. The caption block at the bottom gives you one emotional anchor, so the page doesn’t feel like a photo dump. It’s flattering to busy backgrounds because the photos are small and the mats separate them.
Start by picking a page size and dividing the space into a grid. For 8.5x11, use five photos each about 2.5x2.5 inches with 0.25 inch spacing between. Mat each photo with white cardstock and glue them into the grid first. Leave the bottom 2 inches for a caption block, then cut a rectangle of solid paper for it. Write one strong caption like “My favorite part was laughing until we forgot the time.” Add a small underline line with a ruler.
Use the same mat color for all photos even if the photos vary — it ties everything together.
Don’t rotate multiple photos randomly; one slight angle is fine, five angles looks sloppy.
11. Color-Matched Corner Fold for a Photo Pocket
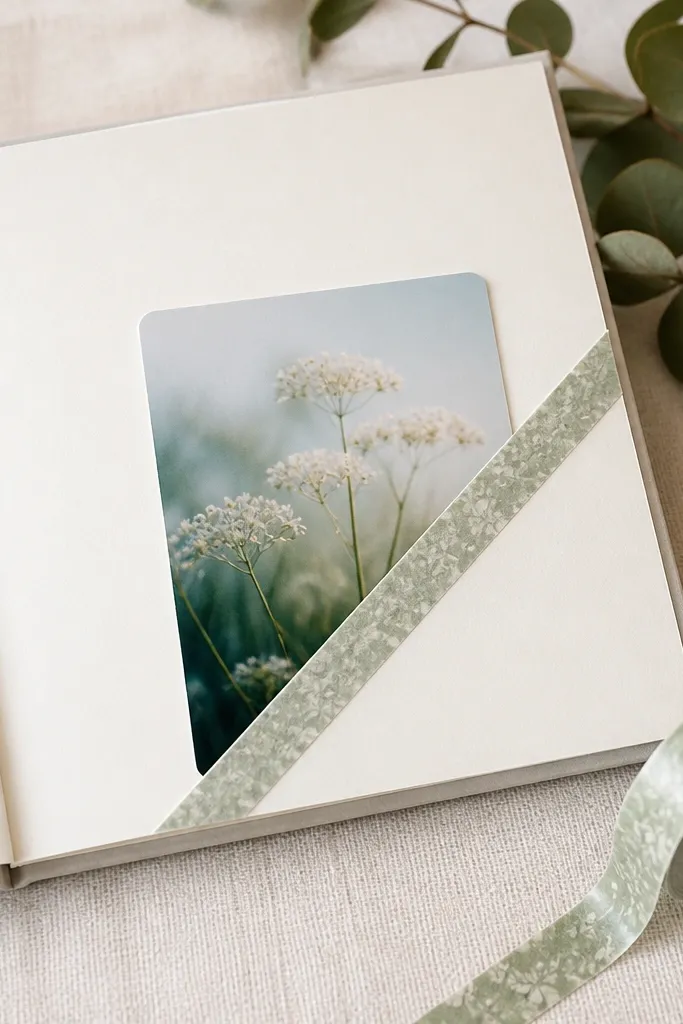
This is a clever way to add storage without cutting a big pocket. A corner fold looks tidy, and it hides a surprise photo or note he can pull out later. I like using a pocket card size around 3x4 inches because it fits most printed photos without bending. Match the washi tape color to one detail in the photo — like a blue hoodie or green street sign. This works for birthdays, holidays, and “just because” gifts where you want a small surprise.
Start by trimming a photo card to 3x4 inches and rounding the corners slightly with scissors. Cut a triangle fold from cardstock on the page corner so the pocket opens toward the center. Glue only the triangle base edges, leaving the top opening accessible. Add washi tape along the fold seam so it looks finished and holds flat. Slide the photo card in, then write a short title near the pocket like “Pull this.” Add a tiny arrow drawn next to it.
Editor's noteRound the pocket card corners so it slides in smoothly and doesn’t catch on the fold.
Skip thisDon’t make the pocket too tight — if it scrapes, it will get bent.
12. Receipt Strip Journal with Date Stamp
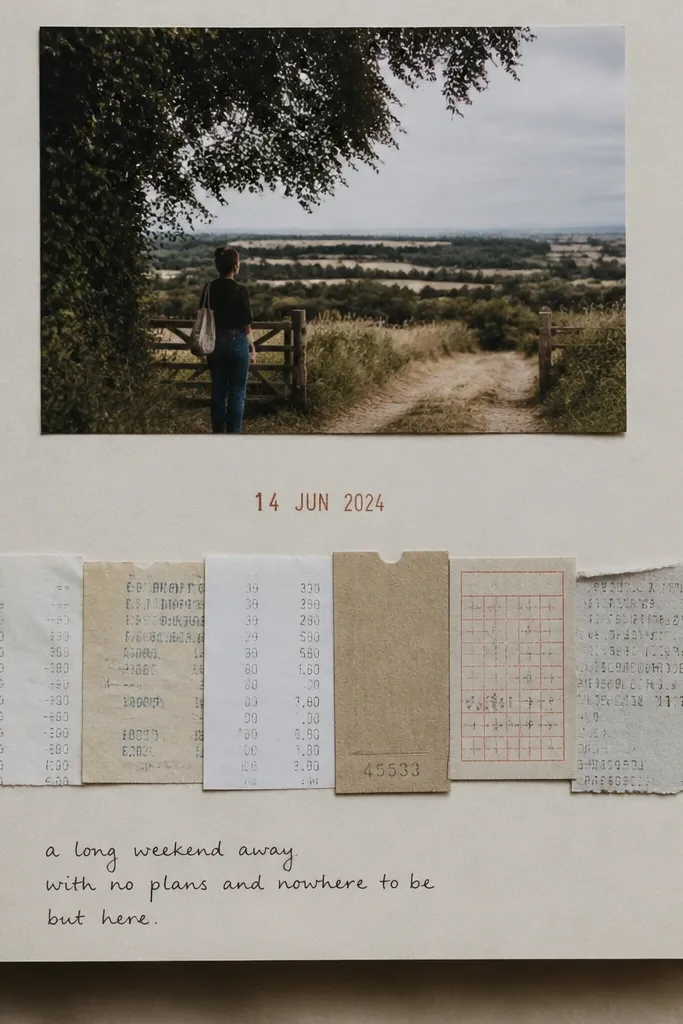
Receipts are secret scrapbook gold. They add texture, show real spending details, and make the memory feel grounded in something you actually kept. This layout works when your relationship has a “routine” — coffee runs, late-night snacks, or a weekly market. Use a clean photo above, then let the receipt strip carry the story. It flatters the page because the strip creates a visual line that guides the eye.
Start by tearing or trimming a few receipts into a long strip about 8 inches wide. Arrange them on the page bottom and overlap slightly so there are no gaps. Place a small photo above the strip sized around 5x7 inches, leaving margins. Add a date label above the receipts with a sticker or printed label. Write a short note along the top edge of the receipts with a pen, keeping it to one or two sentences. Glue the receipts down with a thin glue layer so they don’t wrinkle.
Editor's noteIf receipts are glossy, wipe them with a dry paper towel first so glue grabs better.
Skip thisDon’t use receipts with readable personal info unless you cover it with a marker.
13. Monogram Title Page with Photo Corner
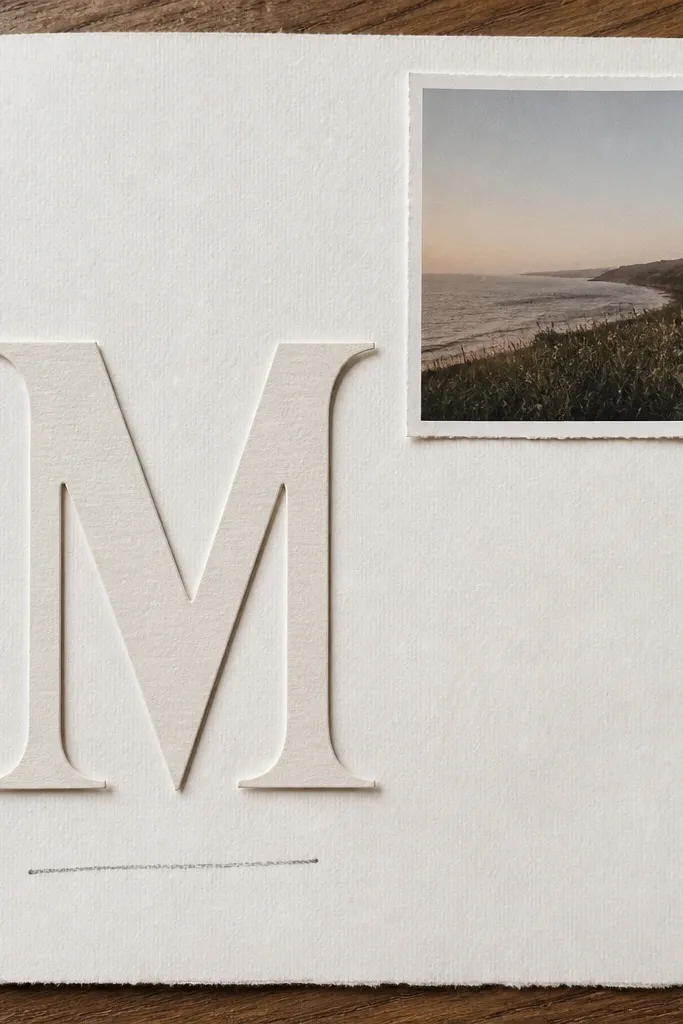
Monograms make the whole scrapbook feel intentional, especially when you’re using simple supplies. You put the letter first, then tuck a photo in a corner so the page stays clean. I like using one bold letter in a matte cardstock and a small photo with rounded corners. Choose a letter color that matches his style — black, forest green, or navy look sharp. This works for covers, chapters, and “first year” pages because it gives structure.
Start by cutting a large monogram letter from thick cardstock, about 5 inches tall. Glue it to the page slightly off-center to the left. Add a small photo in the top right corner, sized about 3x3.5 inches, and round its corners with scissors. Write a short title under the monogram using a neat handwriting style and a ruler guide. Finish by adding one tiny decorative element near the title, like a single star sticker or a thin washi line.
Editor's noteUse a pencil to lightly mark where the monogram goes before gluing — centering by eye can drift.
Skip thisDon’t pick super shiny paper for the monogram or the letter catches light and looks cheap.
14. Before/After Glow-Up Page
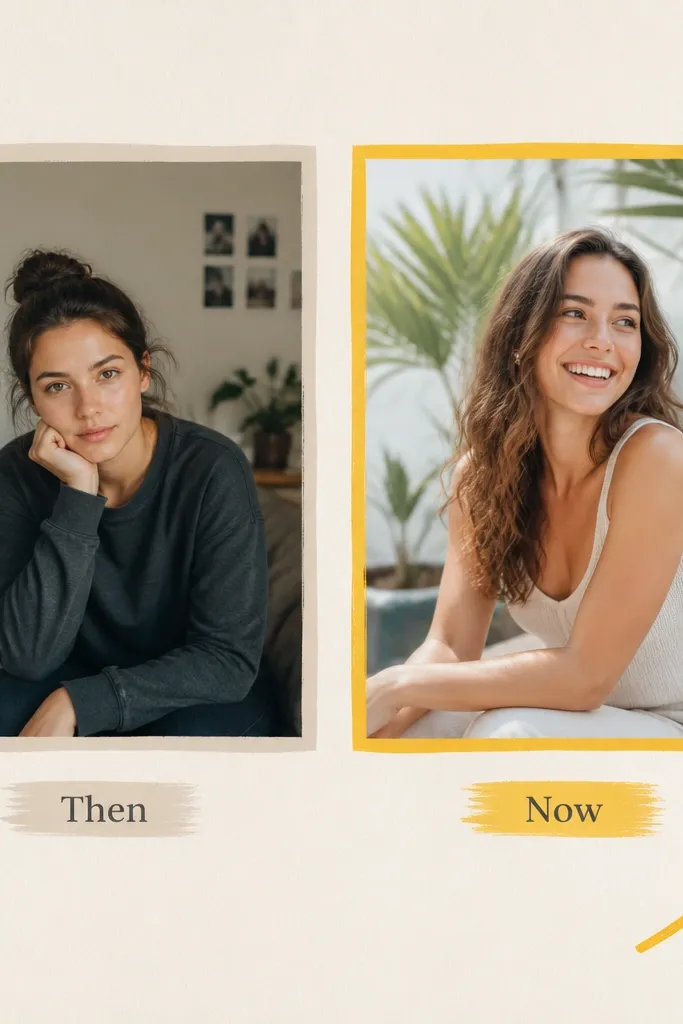
This is the page for growth, healing, and “we changed together.” Keep it simple: one older photo and one recent photo, plus one caption that explains what improved. The labels “Then” and “Now” make it readable even if the rest of the scrapbook is messy. I use light pastel label blocks because they look friendly, not harsh. This layout flatters anyone because it focuses attention on the difference instead of the exact pose.
Start by selecting two photos that share a similar framing — same angle if possible, or at least same vibe. Cut two photo mats and label blocks, each about 1.25 inches tall. Glue the “Then” photo on the left and the “Now” photo on the right. Add a hand-drawn arrow between them pointing upward, using the same color as the “Now” label. Write one sentence under the photos describing what you loved about the change. Keep the background plain so the photos stay the focus.
Use a slightly thicker mat on the “Now” photo so it visually feels newer.
Don’t add confetti around the page; just one arrow and one label look intentional.
15. Date Night Menu Page
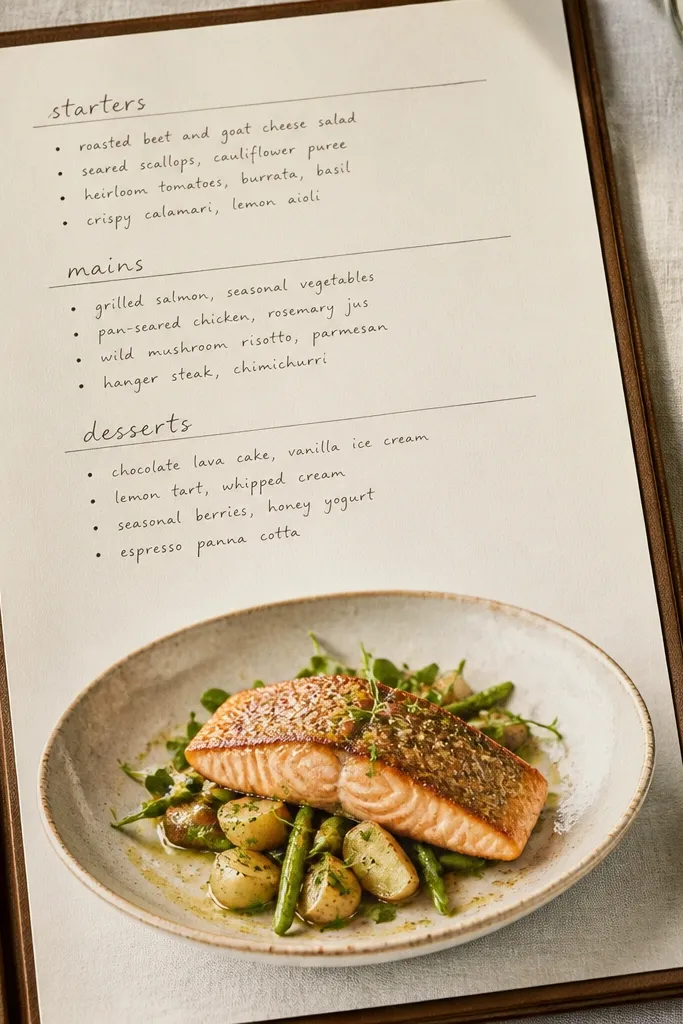
If your boyfriend loves food, this is a sure win. A menu format turns your memory into a little script he can read like a joke. The structure is built in: category headings, then your “orders” and one sentence about why that meal mattered. I like using a cream cardstock base with black handwriting so it feels like a real menu. This works for anniversaries, holidays, and any night you tried a new place together.
Start by cutting a 8x10 cream cardstock and glue it to the page. Write menu headings at the top like “Tonight’s Specials” or “Our Orders” using a black fine pen. Add two or three “items” lines with what you ate, then write one short memory sentence under the list. Glue a photo of the meal or the table sized around 4x5 inches below the menu text. Finish with a small “chef’s kiss” doodle in the bottom corner using a red marker.
Editor's noteUse a ruler for the list lines — menus look best when the spacing is tight.
Skip thisDon’t use a rainbow of pens; two ink colors max looks clean.
16. Hobby Supply Wrap Photo Layer
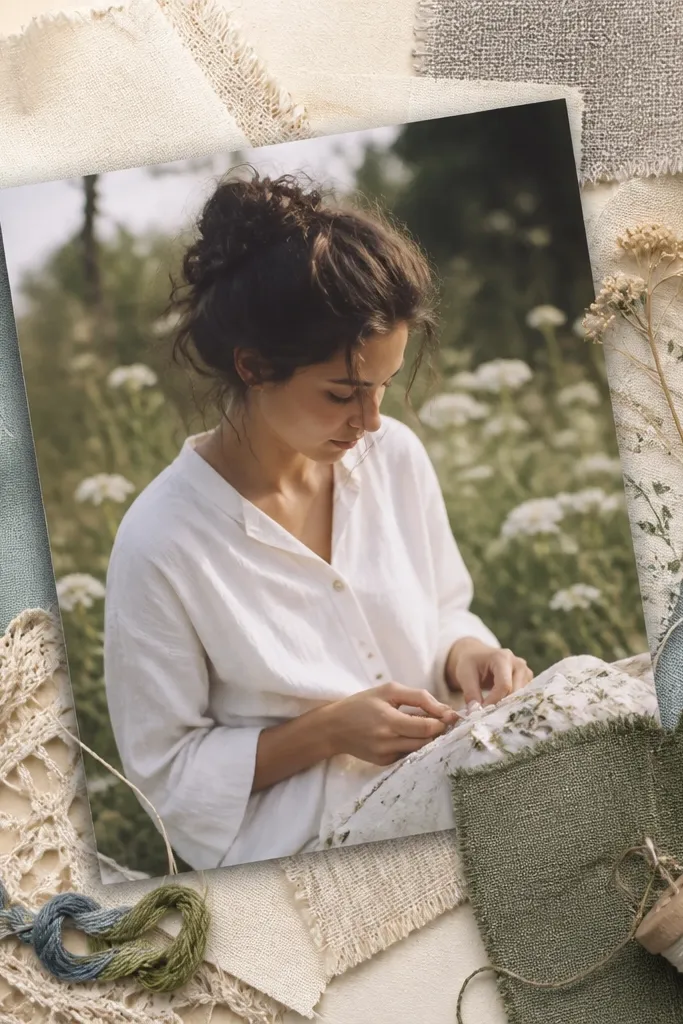
This is for boyfriends with a clear hobby — woodworking, gym life, cooking, art, gaming. You use real materials in tiny amounts around the photo so the page feels tactile. I’ve used a thin strip of ribbon for cooking, a small piece of sandpaper texture behind a photo, and fabric thread tied in a little bow. Keep it subtle and controlled so the page doesn’t become a junk pile. It flatters the memory because it adds sensory detail beyond what the camera captured.
Start by selecting one hero photo and trimming it to about 4x6 inches. Choose one hobby material — a ribbon, a thread bundle, a small fabric swatch, or a thin paper strip — and cut it into 0.5 to 1 inch pieces. Glue the hobby pieces around the photo edges first, keeping them mostly on the sides. Then glue the photo on top using a glue stick so the materials stay visible. Add a title strip at the top that says the hobby name and one handwritten caption about what you did together.
Editor's noteUse a glue stick for most pieces and press with a book for 10 minutes so everything dries flat.
Skip thisDon’t pile materials higher than the photo mat or the page will look lumpy in the binder.
17. Star Map Page with Coordinates
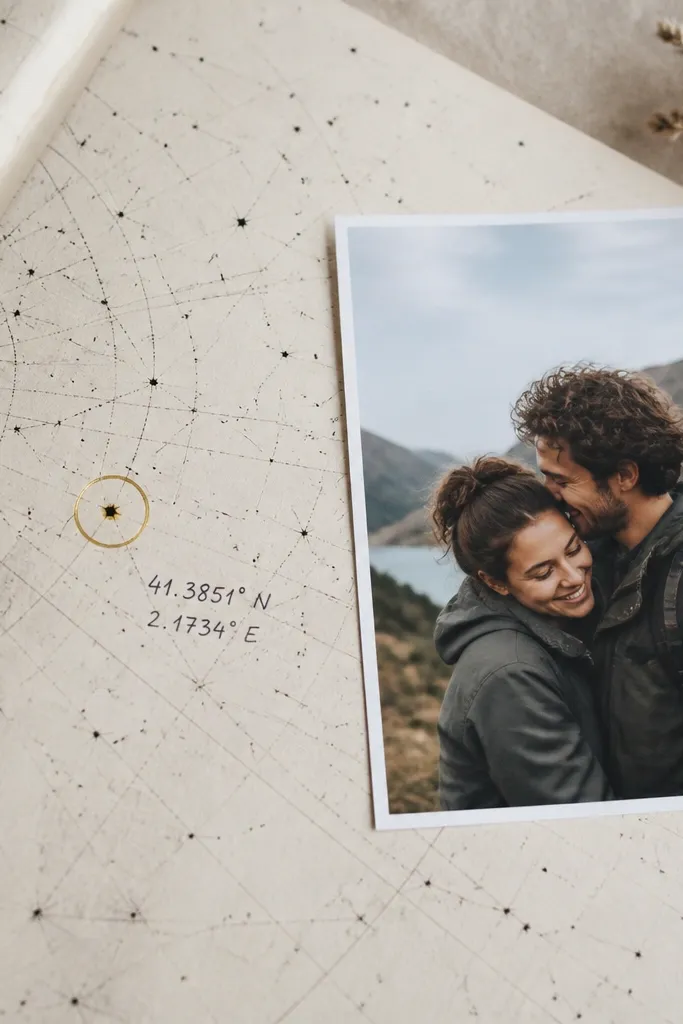
This one fits late-night memories and “we watched the sky” moments. A star map background gives instant atmosphere without needing fancy drawing skills. The highlighted circle and coordinates make it feel specific, not generic. I like using dark blue cardstock and white gel pen for the handwriting so it reads clearly. It flatters photos taken outdoors because the night tones match, and it makes the whole page feel calm and romantic.
Start by printing a star map for the date you want, or use a simple star pattern print. Glue the star map as the background on a dark blue cardstock page. Place a photo of you two outdoors in the bottom right, sized about 3.5x4.5 inches. Add a highlighted circle on the star map using a sticker or cut paper ring around a spot. Write coordinates or a location note on the left with a ruler, keeping the text block to two to three lines.
Editor's noteUse a white gel pen for the coordinates so it stays readable against the dark background.
Skip thisDon’t put the photo in the center; it fights with the star focus.
18. Year-in-Quotes Page with Single Line Blocks
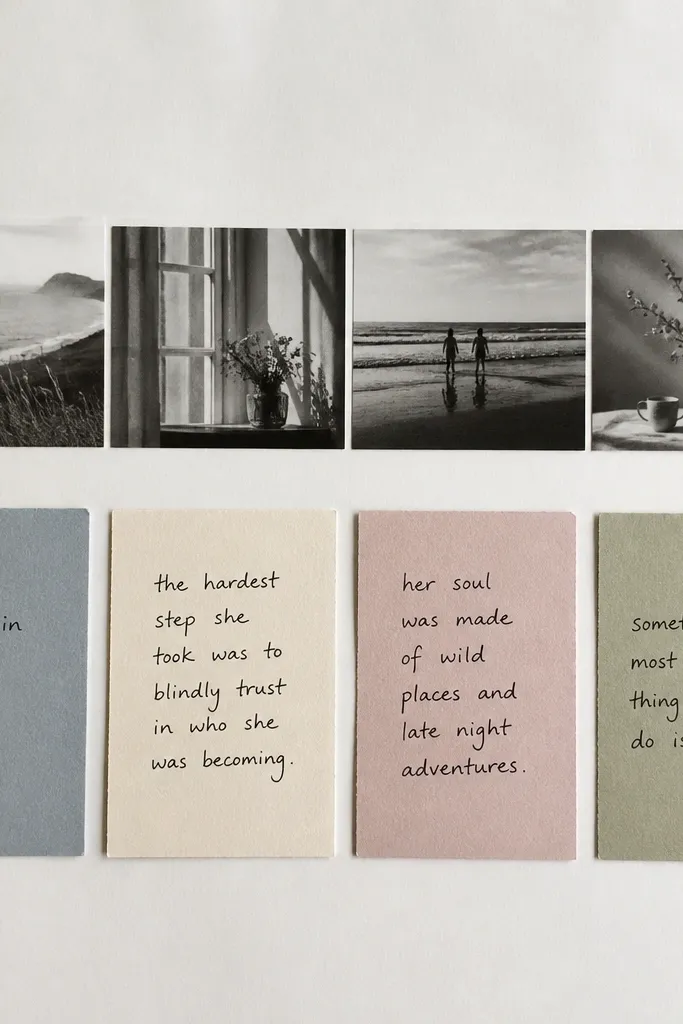
This is for boyfriends who love lines, sayings, or inside jokes you repeat. Quote blocks keep the page from looking like a random collage and make the scrapbook feel like a mini zine. Use quotes that are short enough to fit on one line so you don’t end up with tiny unreadable text. I like using two cardstock colors and alternating them for the blocks. It flatters the page because the blocks create rhythm and your photo stays secondary.
Start by printing or trimming a small photo strip of two images and glue it across the top. Cut four equal rectangles from cardstock, about 2 inches wide and 1.25 inches tall, with 0.25 inch gaps. Alternate the colors and glue them in a straight row. Write one quote per block in black ink with a consistent pen pressure. Place one small heart doodle or star between blocks if you need a little decoration. Finish with a title under the blocks like “Our Lines” using a simple label.
Editor's noteWrite quotes with a ruler under your hand so the baseline stays straight.
Skip thisDon’t use quotes longer than one line or the page turns cramped.
19. Photo Strip Bookmark Page
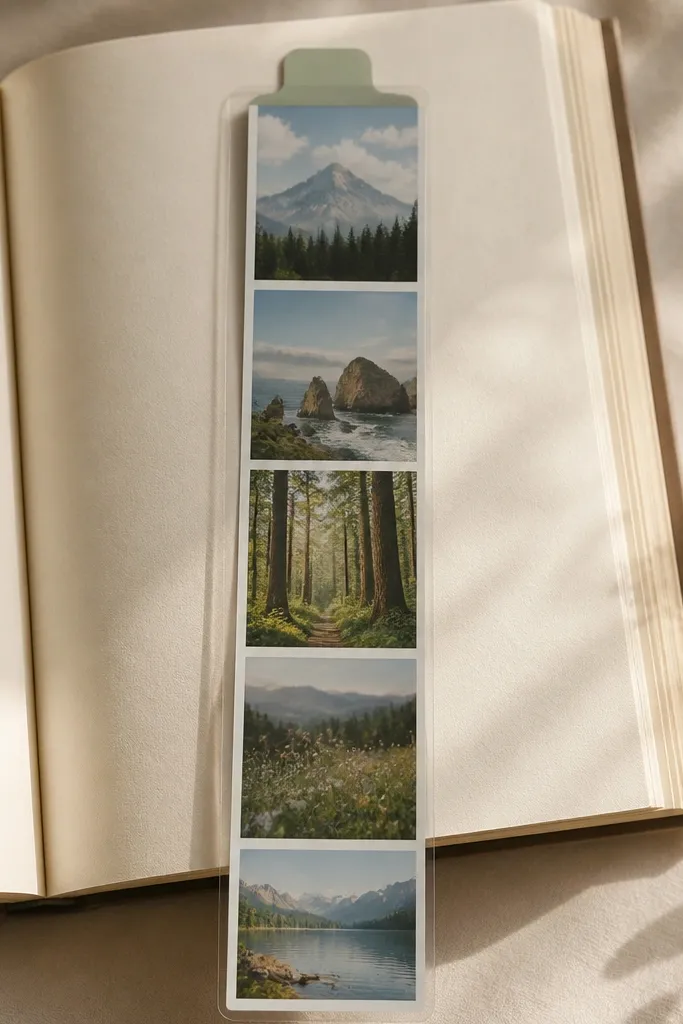
This is a practical scrapbook page — it gives him something he can use daily. A bookmark-style photo strip looks cute and keeps the memory close, especially if he reads books or carries a planner. Use a vertical strip so it fits most pages and doesn’t cover the whole scrapbook spread. I’ve made these with matte photo paper so the handwriting on top doesn’t smear. It works for any occasion because it turns a memory into a tool he uses.
Start by trimming a photo strip to about 2 inches wide and 6.5 inches tall. Glue the strip to a matching cardstock backing piece slightly larger, leaving a 0.1 to 0.2 inch border. Add a title label at the top — about 1 inch tall — and write a short note under it. If you want it sturdier, coat it with clear matte tape or laminate the backing. Glue the bookmark strip to the scrapbook page on one side only, leaving it free so he can slide it out.
Editor's noteUse matte tape over glossy photos so the surface takes pen marks cleanly.
Skip thisDon’t glue the whole backing down or you lose the bookmark function.
20. Receipt + Photo Corner Tuck
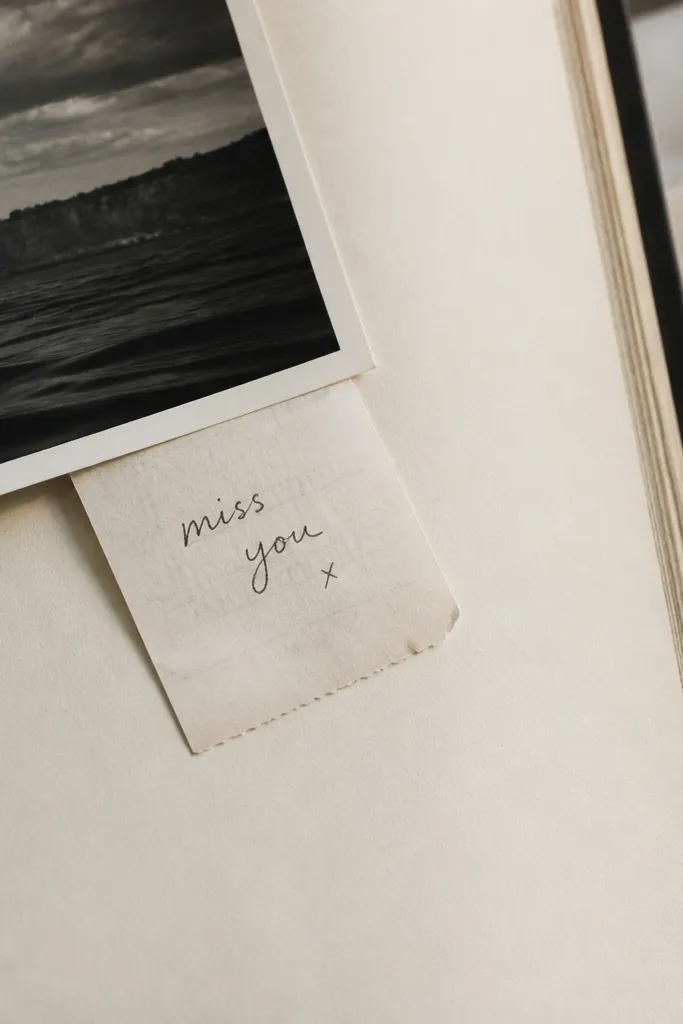
This gives you that “found in the book” feeling. A receipt tucked under a photo edge looks like a secret note and adds real texture without taking much space. I like pairing it with a photo that has a clear corner — like a table shot or a street corner — so the tuck looks natural. Keep the receipt note short so it reads quickly. It works great when you don’t have time for a full interactive pocket.
Start by gluing a photo on the page corner, leaving the photo edge slightly lifted by 0.25 inch. Trim a receipt into a small rectangle, about 2.5x3 inches, and write a short note on it. Slide the receipt under the photo edge and glue only the bottom part of the receipt so it tucks securely. Add a tiny title label next to the photo like “Little proof.” Finish with one small decorative line in matching ink to make the tuck look intentional.
Editor's noteCut the receipt straight with a paper cutter so the edges look crisp under the photo.
Skip thisDon’t tuck a bulky receipt — it will wrinkle and lift the photo.



